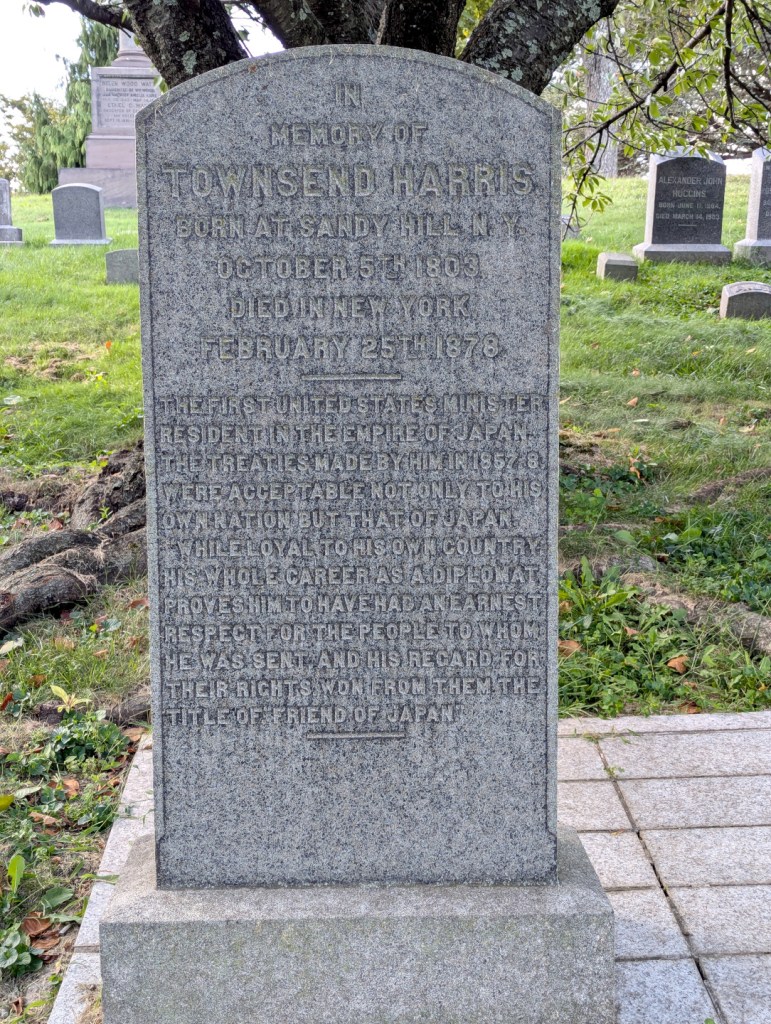
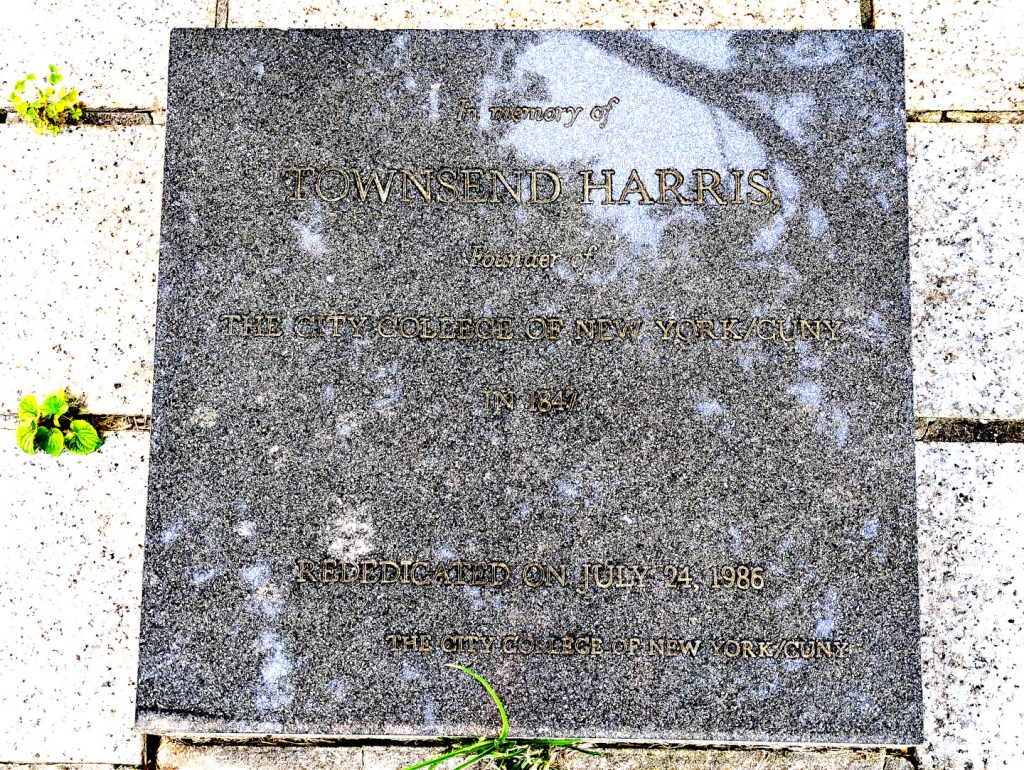
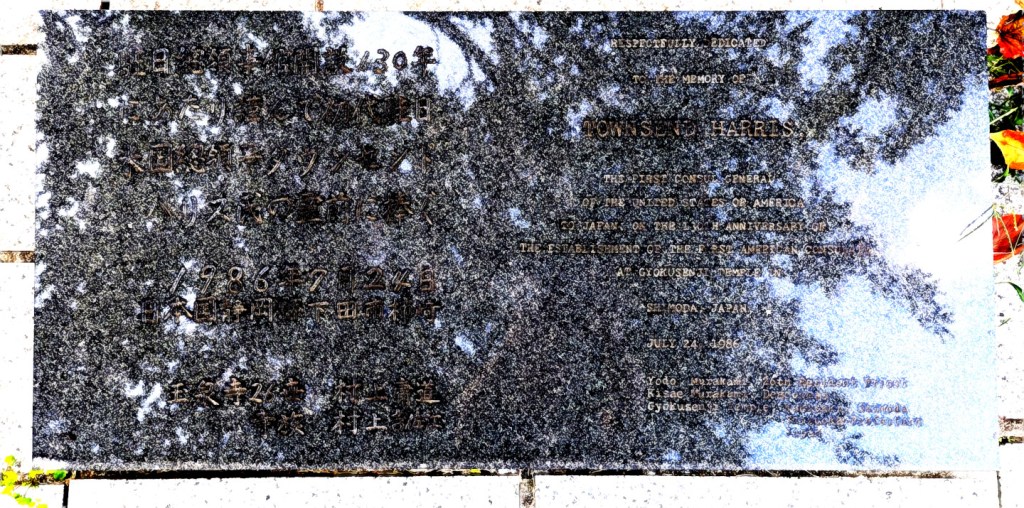
Yesterday, Y and I visited Townsend Harris‘ grave in Green-Wood Cemetery yesterday. The tree behind it stretched out its branches to shade it from the crisp mid-afternoon sunlight. Harris is known for being the first Consul General from the United States to the Empire of Japan and he founded the school that would become the City College of New York and the cornerstone of the City University of New York (CUNY). His gravesite was renovated in 1986 by Japan and it retains the evident care that went into its design and construction. It’s a short walk from the Prospect Park West entrance on the south/southeast-facing hillside between Atlantic Ave and Ocean Ave.
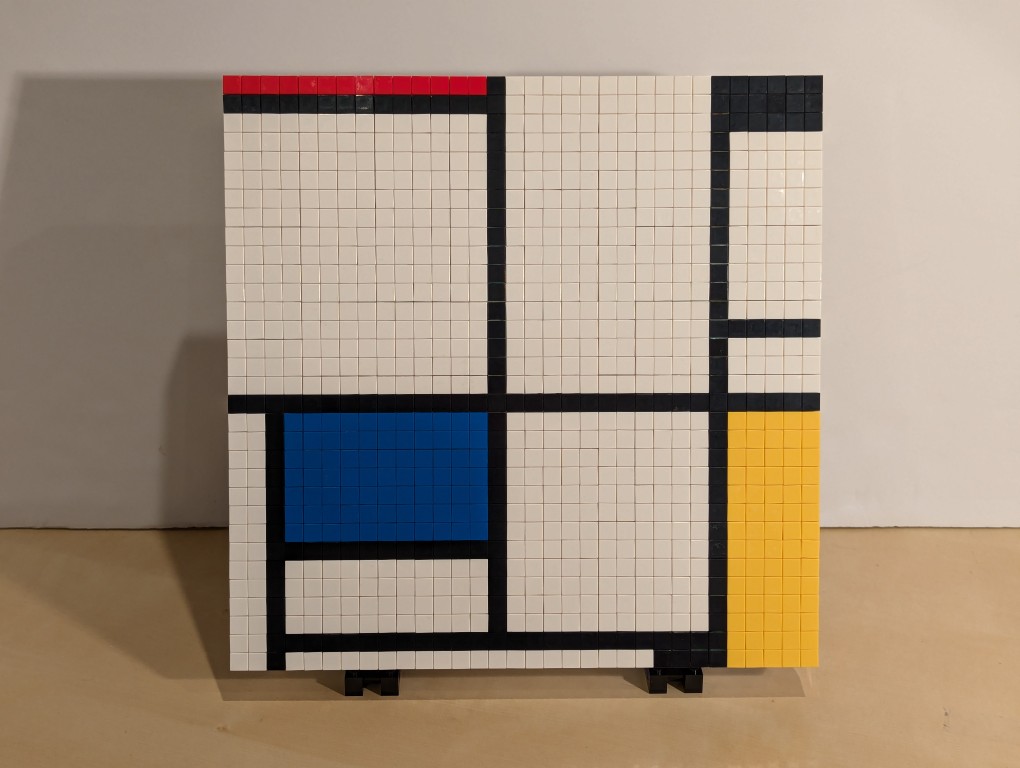
I have appreciated Piet Mondrian’s neoplasticism artwork for many years. As I wrote about here, I was glad to see his work shown in Lt. Cmd. Data’s quarters on Star Trek: The Next Generation. Then, after seeing some of his works in person at the Museum of Modern Art in Manhattan, I hatched a plan to copy his the painting from Data’s quarters–Mondrian’s Tableau I (1921) on display at the Kunstmuseum Den Haag–using a different medium: LEGO.
Planning with GIMP
Before creating a planning image using GIMP, I had to decide what size I wanted (and could afford) my build to be. I had already decided to use LEGO 1×1 flat tiles as the “painting medium.” Using LEGO’s Pick-a-Brick service online, these bricks cost $0.05 each in a variety of colors. If I went with a 32×32 stud “canvas,” that would give a surface area of 1,024 studs and therefore a need of 1,024 flat tiles to cover all of those studs. This would cost $51.20 for enough tiles to cover a 32×32 surface. Other options that I considered was enlarging each dimension by 1.5 to 48×48 for 2,304 studs and a cost of $115.20 for enough tiles or enlarging by 2 to 64×64 for 4,096 studs and a cost of $204.80 for enough tiles. Even using bricks that I already owned to create the canvas and stand, it was hard to spend more than the $51.20 for enough tiles to cover a 32×32 canvas and essentially fill the volume of your hands cupped together.
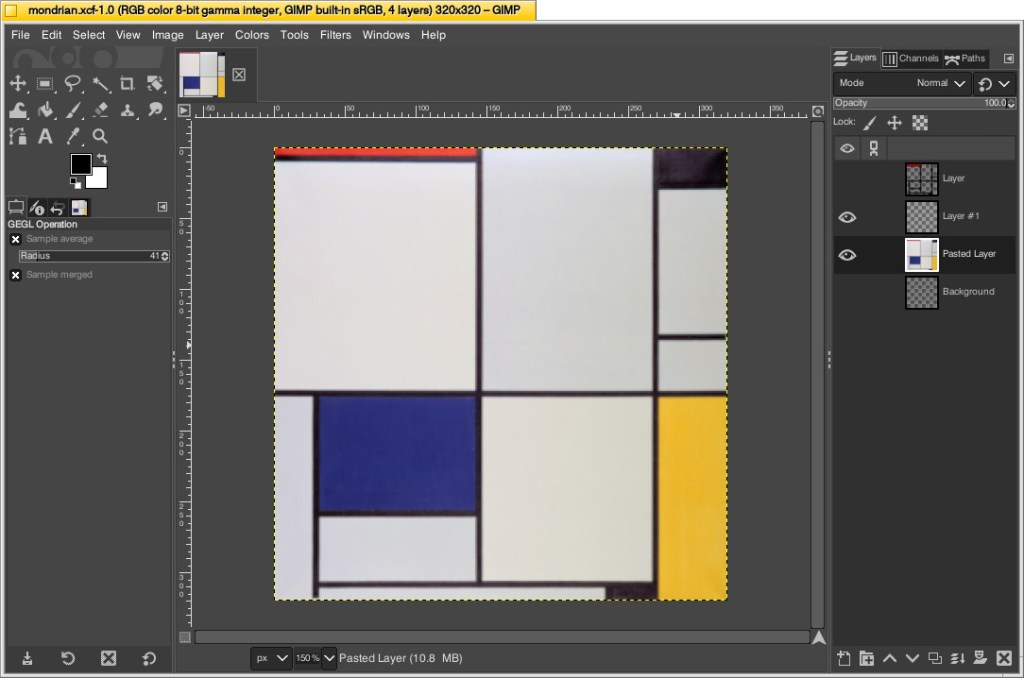
With that decision made, I could begin working in GIMP. First, I opened an image of Mondrian’s Tableau I (1921). The original is painted on a 103cm x 100cm canvas. Since I am creating a perfect square, I needed to square this image and resize it to match my calculations. To do this, I simply selected Image > Scale Image > unlinked the horizontal and vertical resolution > entered 320 for X and Y > clicked Scale. This made the image a perfect square with a resolution of 320 by 320.
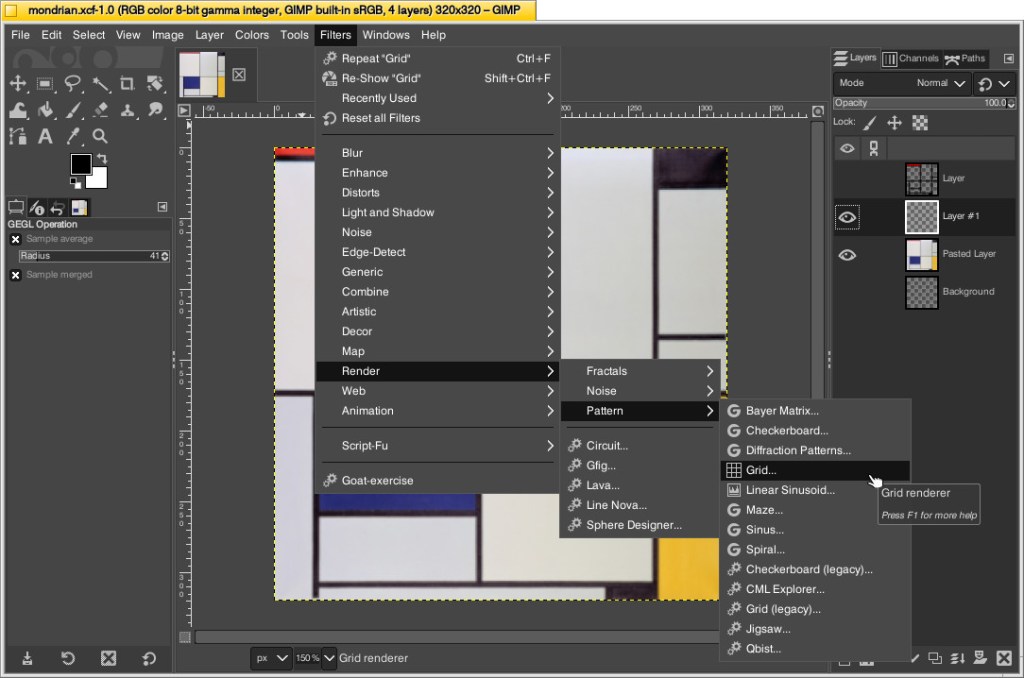
Next, I needed to make the image look more LEGO-like to calculate how many flat tiles I would need of each color. To do this, I added a new layer over the original image and then clicked Filters > Render > Pattern > Grid.
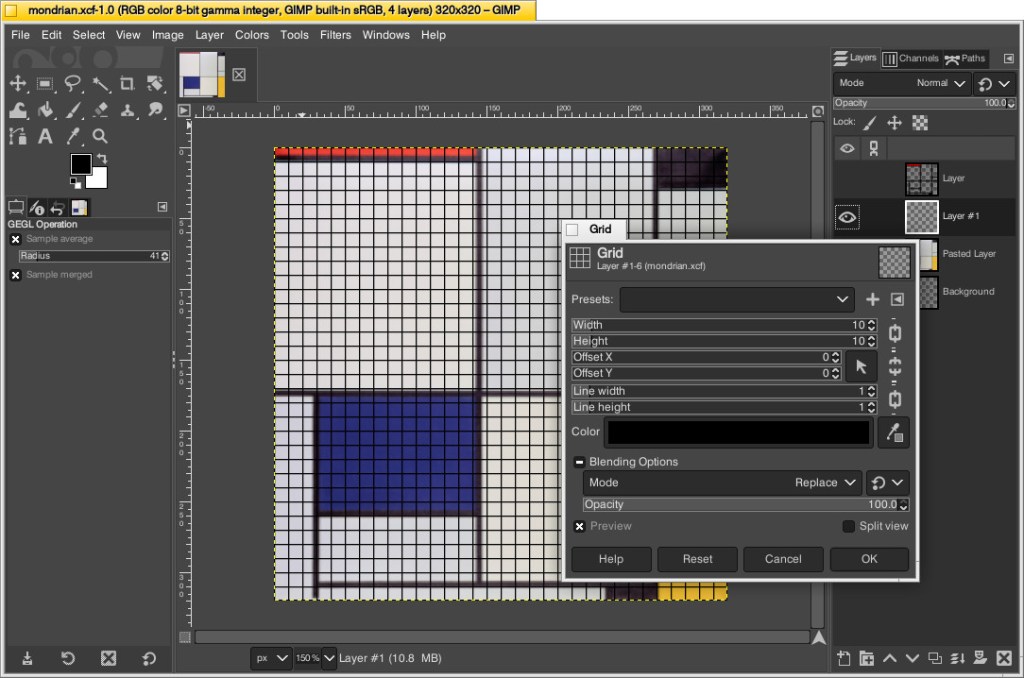
On the Grid pop-up window, I changed the Width and Height to 10–meaning that there would be a grid line every 10 pixels on the X and Y axes. Since I had already scaled the image to 320 pixels on each side, this grid would perfectly approximate the 32 x 32 grid of my LEGO canvas. Also, I set the line width and height to 1 pixel each so that it wouldn’t be too large and obscure the next step. After clicking OK, the grid appears over the image.
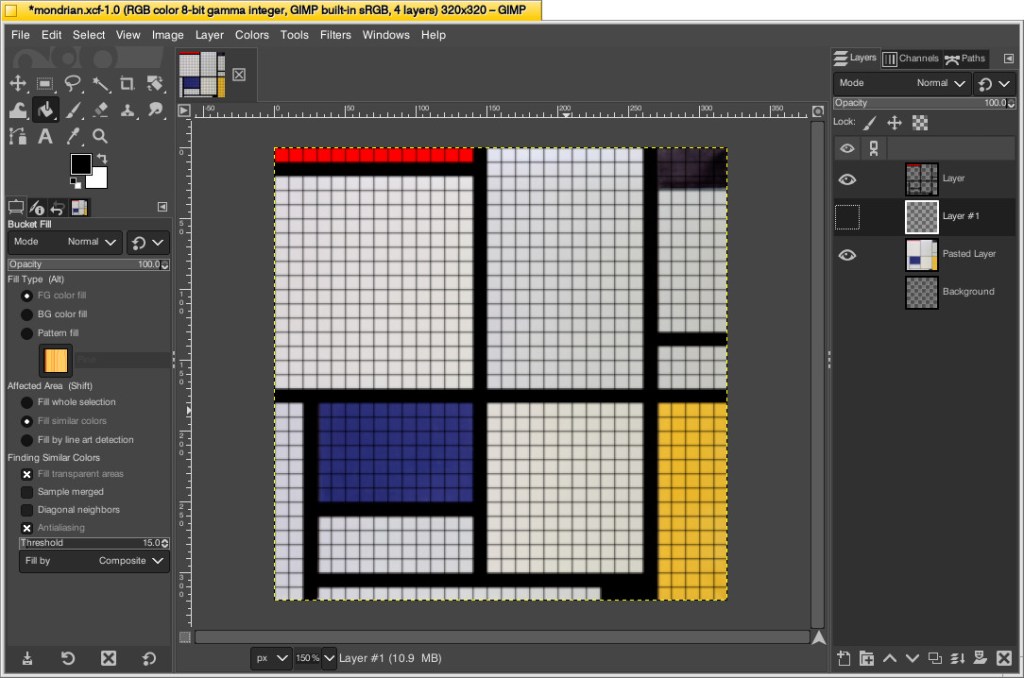
While remaining on the layer with the grid, I selected the paint bucket tool, selected the color of the target areas–black, blue, red, and yellow–in turn, and filled the appropriate squares to match the original painting underneath. I did this to make sure I was making the tile count as accurate as possible. If I hadn’t done this, the black lines would be less noticeable and what I might count as a colored square versus a black line might become confused. At a LEGO resolution of 32×32 studs, it was impossible for me to make it as accurate as the original, so this technique helped me approximate the original with a high degree of accuracy.
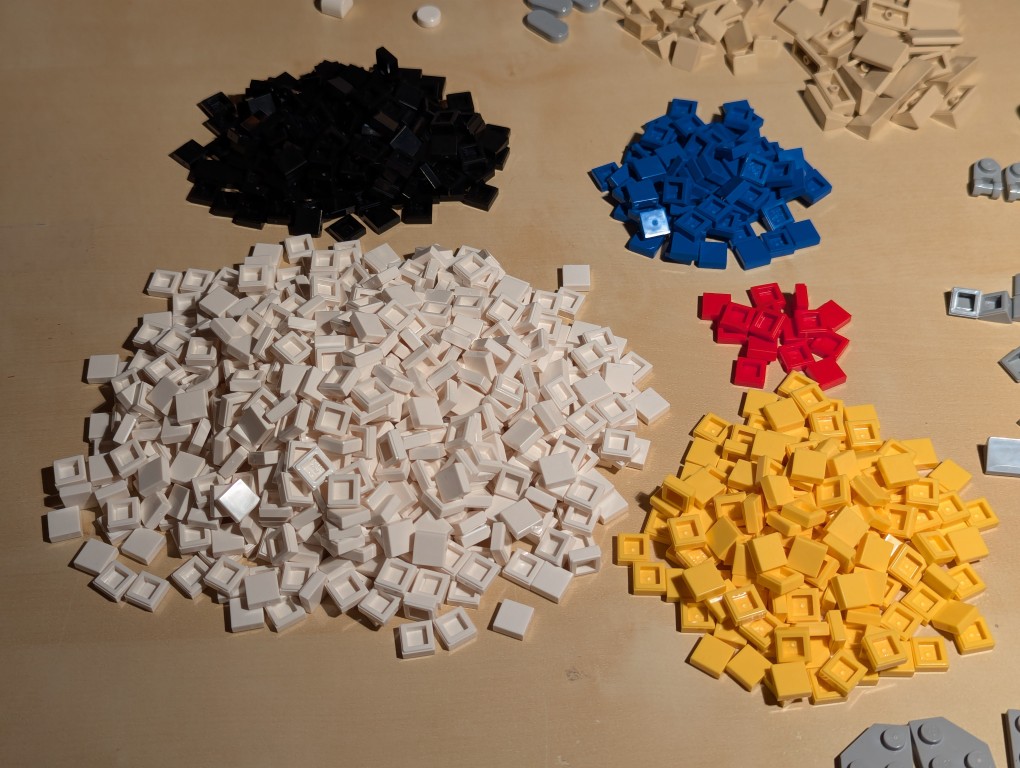
Then, I counted the squares of each color to make my LEGO order: 686 white, 177 black, 77 blue, 70 yellow, and 14 red. I ordered a extra flat tiles of each color in case my counting was incorrect.
Building the Canvas
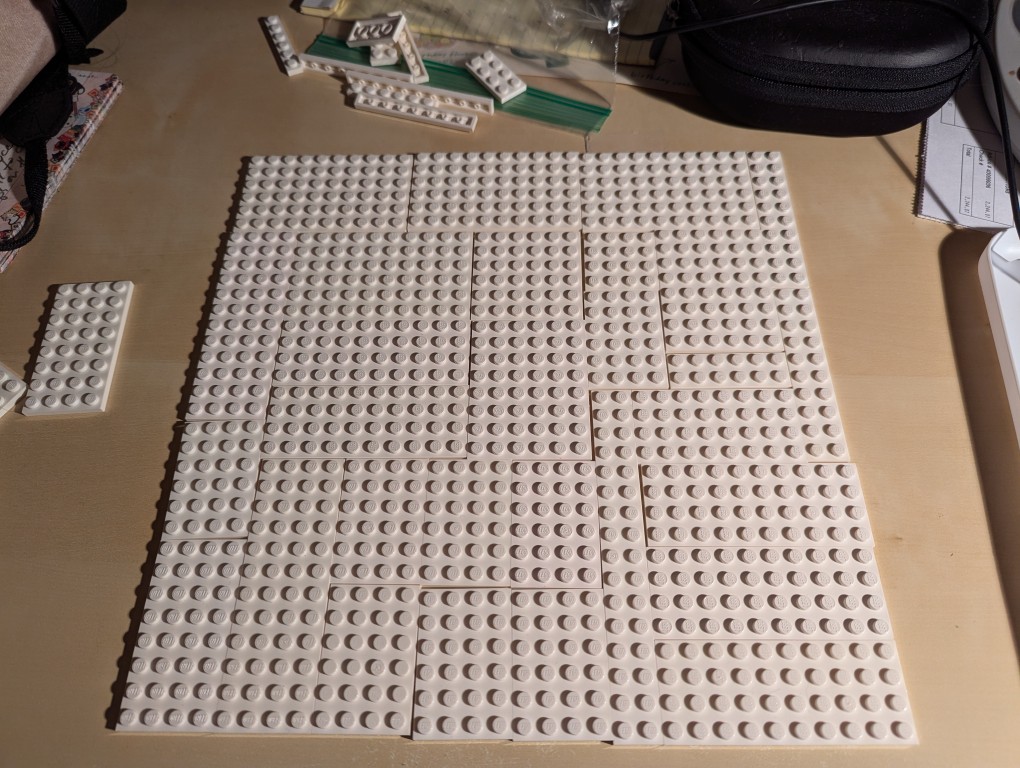
I wanted to build a substantial canvas for the Mondrian instead of using a 32×32 base plate. Also, I wanted to build with as many white bricks and plates as I could to reduce how much I had stored in plastic bins under my desk.
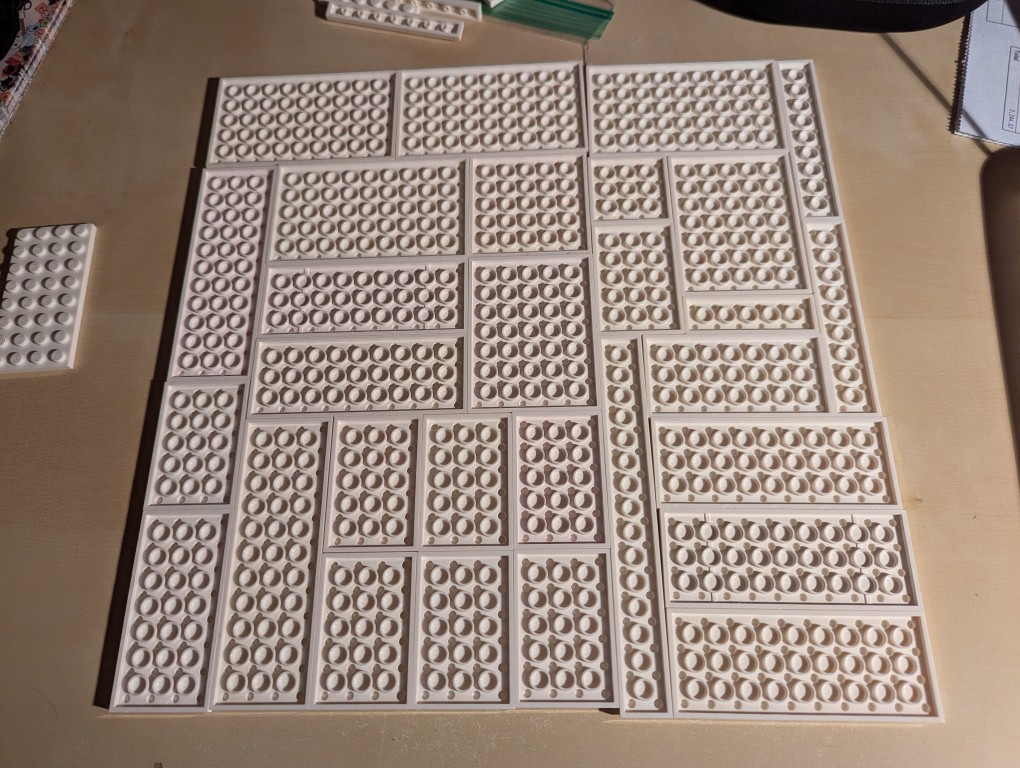
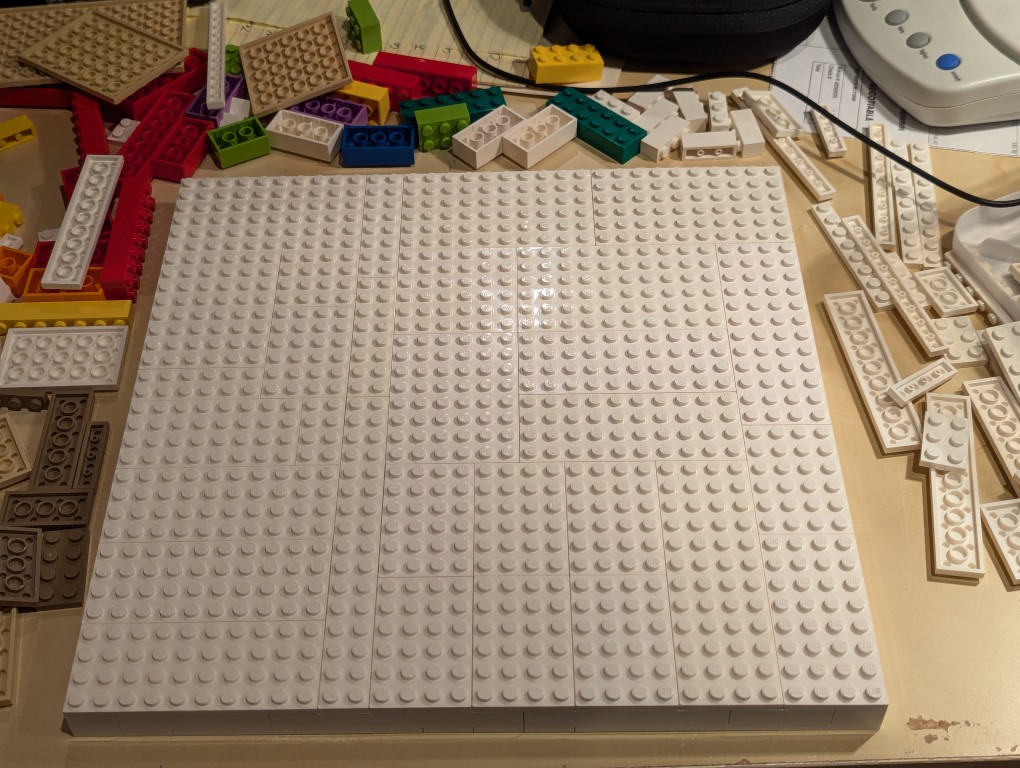
To begin, I laid out a 32×32 grid of plates. I didn’t have a large number of similar types of white plates, so I had to try different configurations before settling on one. If I had to do over again, I would have tried configuring it for more staggered stepping instead of long break lines as I did.
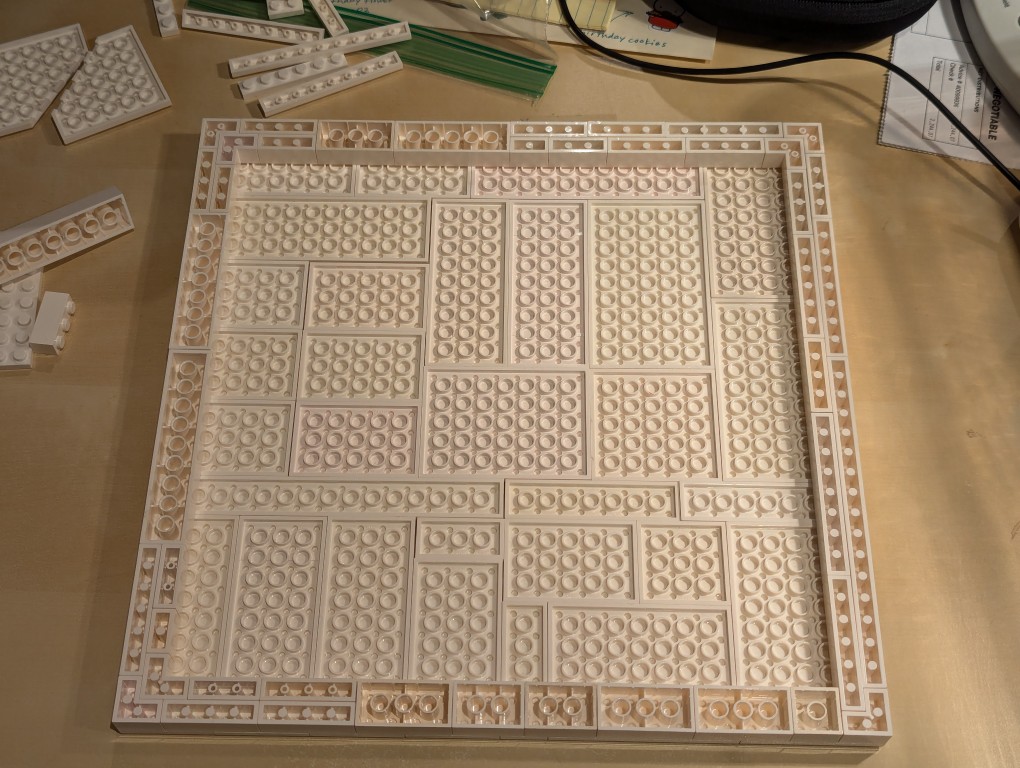
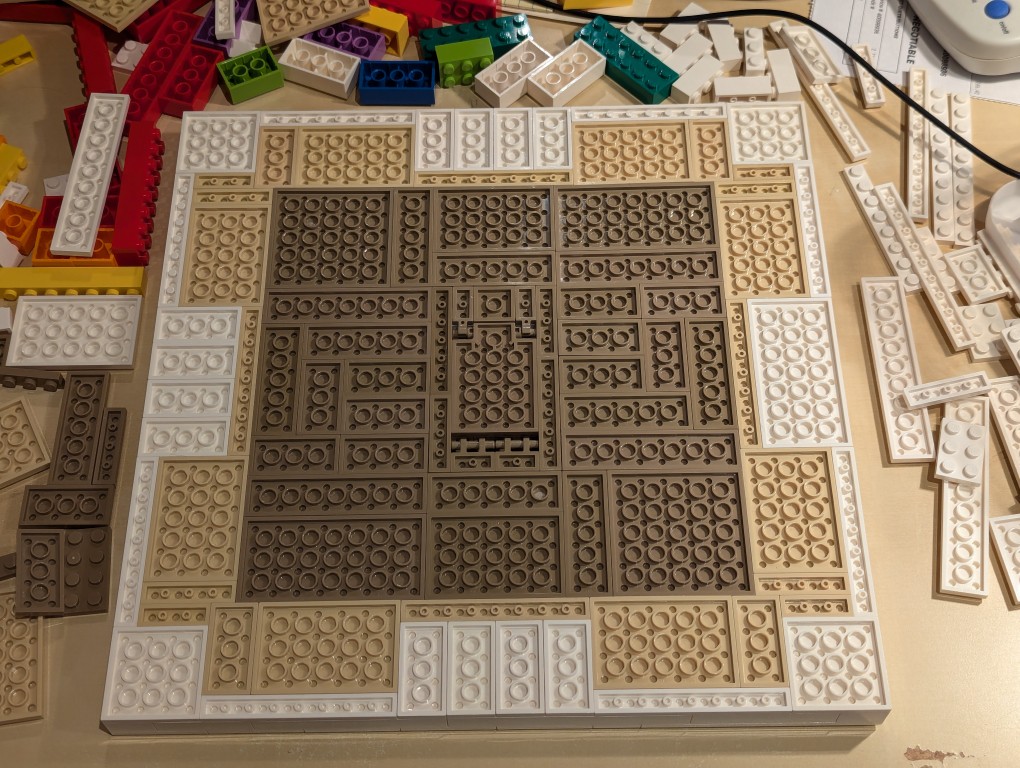
I flipped over the plates to begin building the support frame for the canvas using bricks.
I wanted the canvas to appear stretched, so I continued the color white from the canvas’ plates to the border.
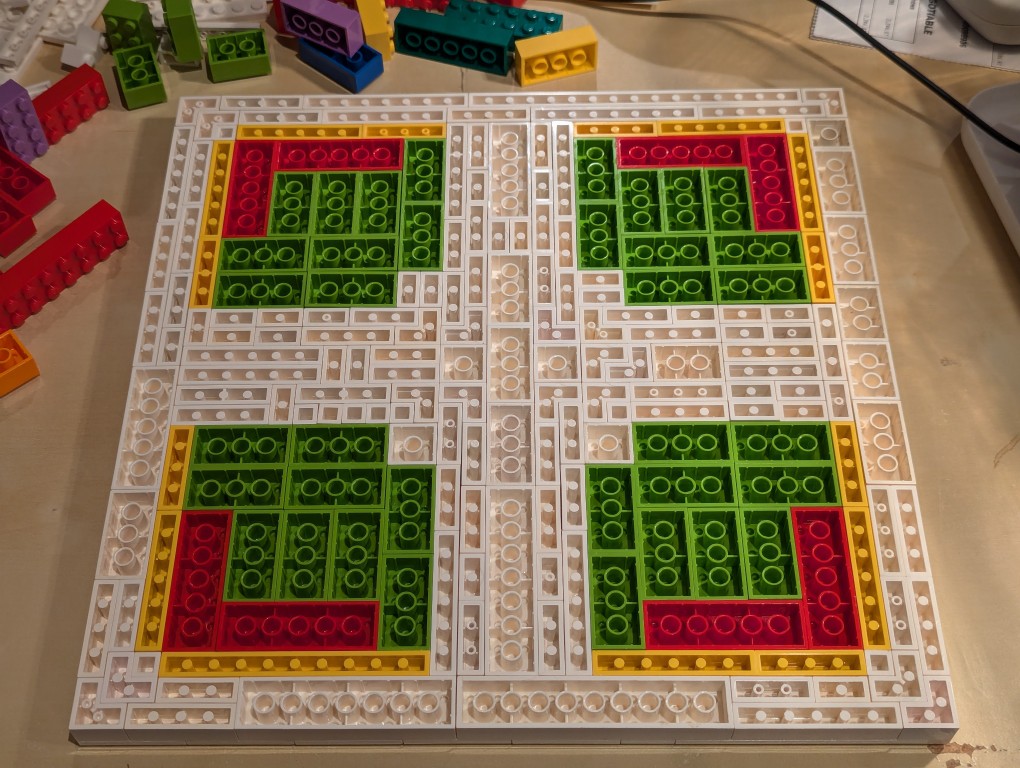
Knowing these other colors would be hidden, I used filler bricks in a mirrored pattern (I would know what it was like underneath even though no one else would).
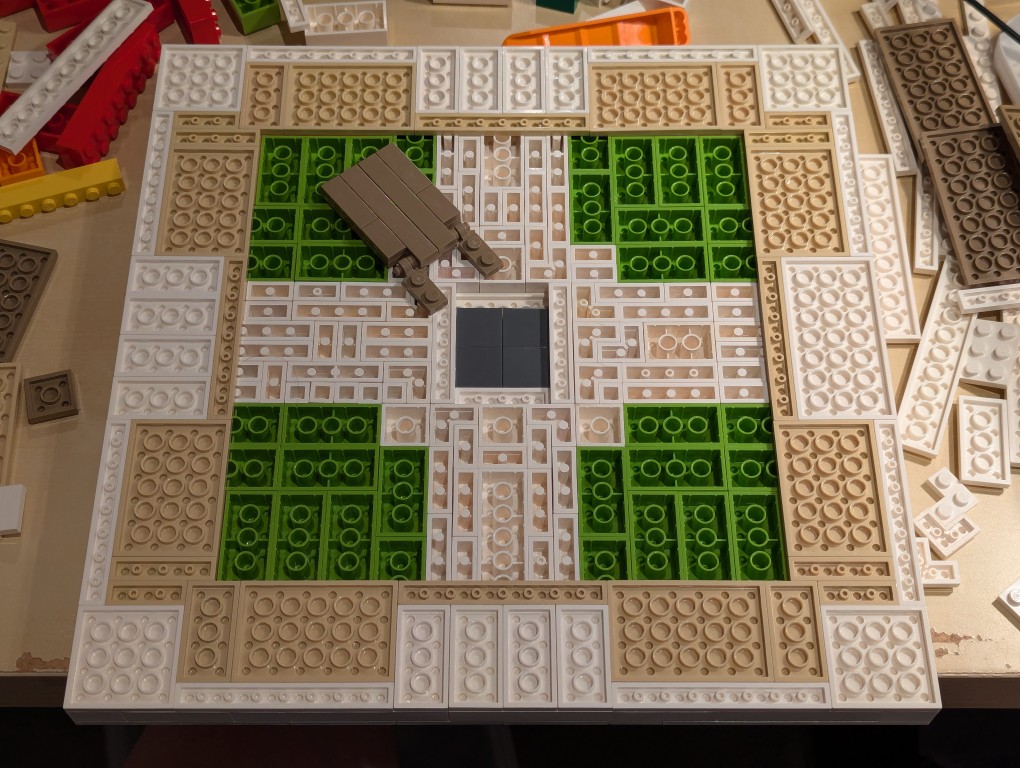
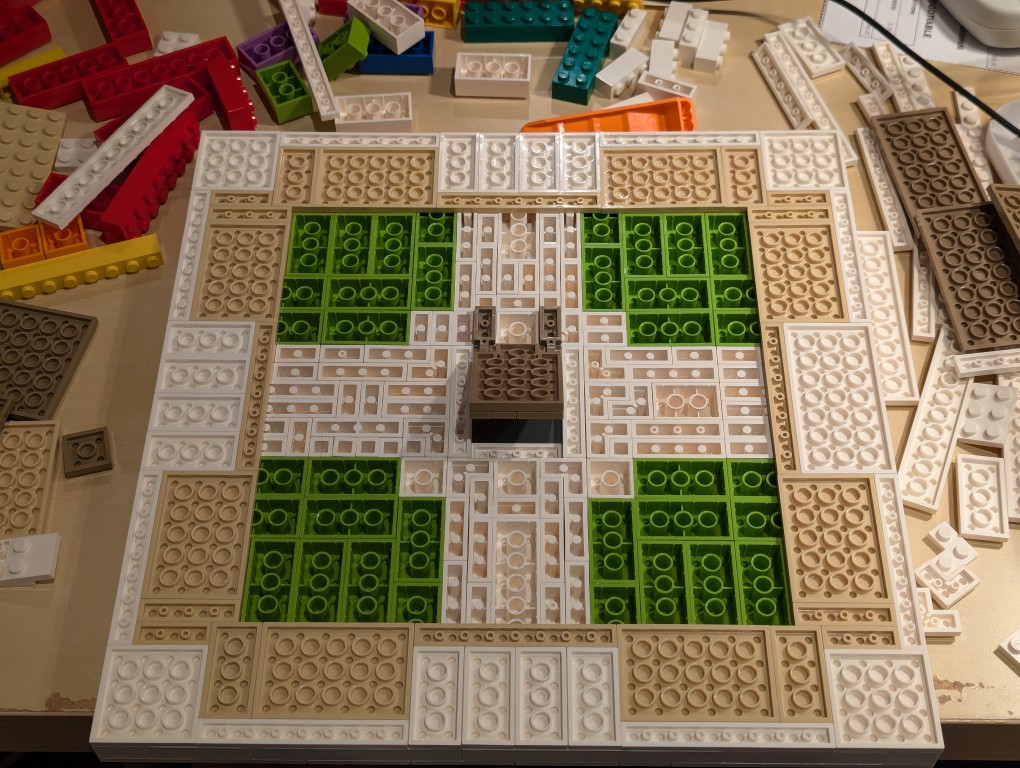
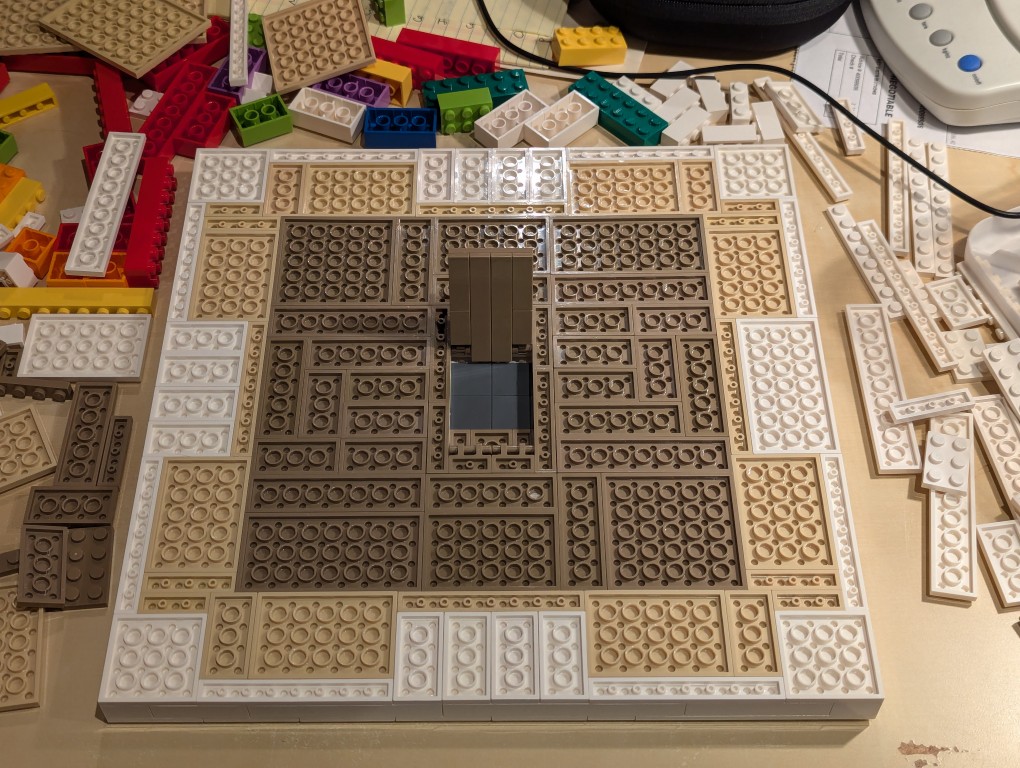
After beginning to cover the filler bricks with white plates (stretched canvas) and sand plates (wood frame), I thought that it would be cool to build a hidden compartment to hold a written statement about the artwork. So, I pulled out some central bricks, filled the center with inverted 2×2 flat tiles.
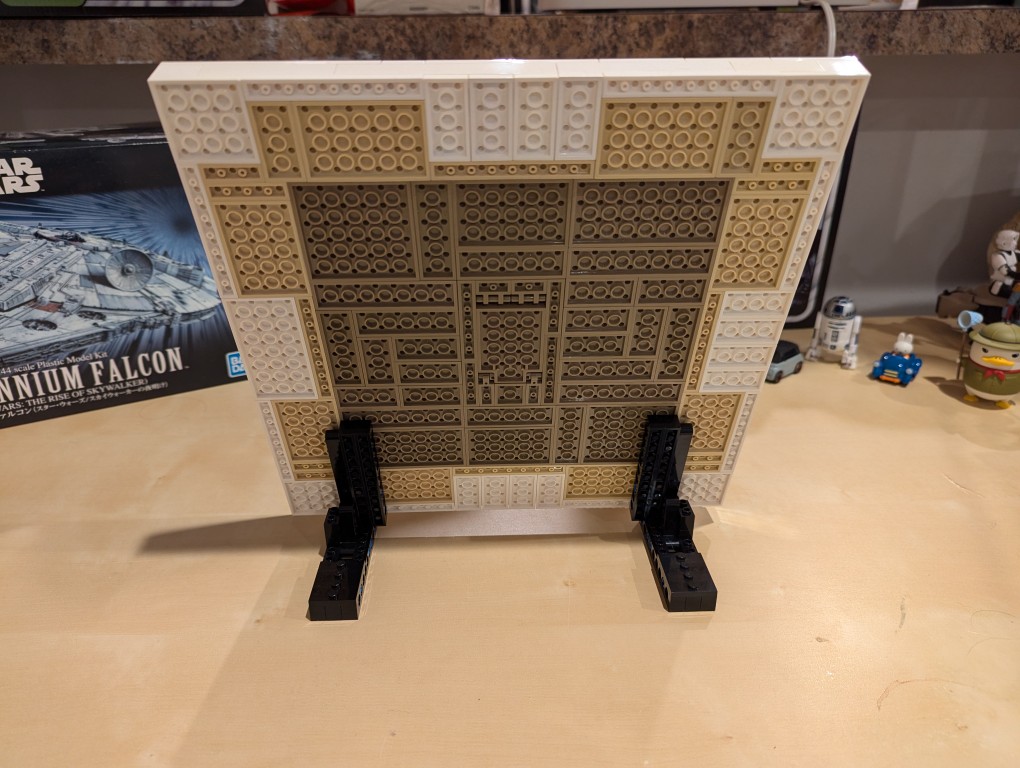
I constructed a compartment door on hinges in the middle of the back of the canvas and filled the rest of the space with dark sand plates (paper backing protecting the canvas).
Here is the hidden compartment door open.
Flipped back over, the canvas is primed and ready for the “paint.”
Constructing Display Stands for the Canvas
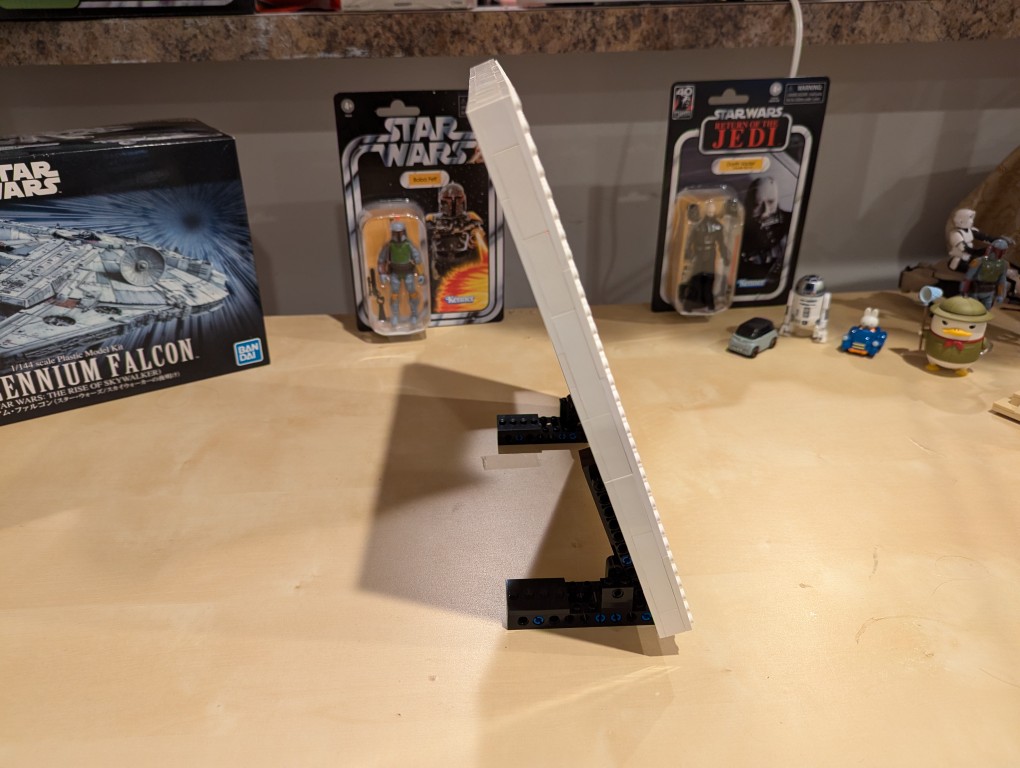
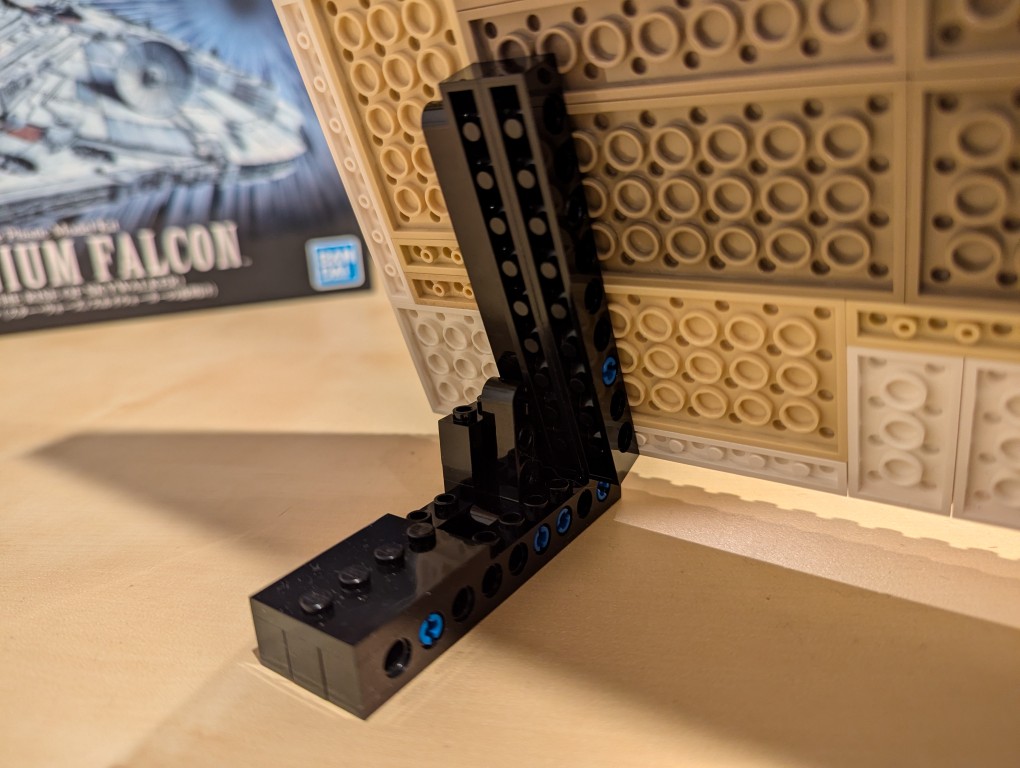
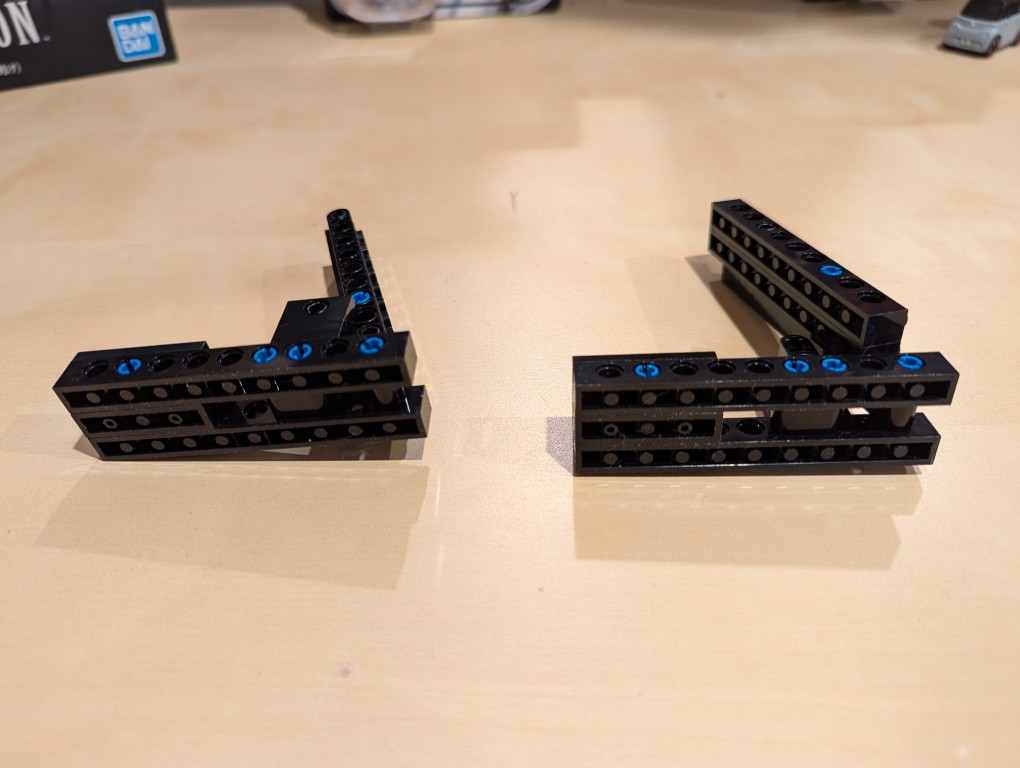
I used LEGO Technic bricks to build two stands for the canvas so that it was held at a stable angle.
It’s about 70 degrees from horizontal.
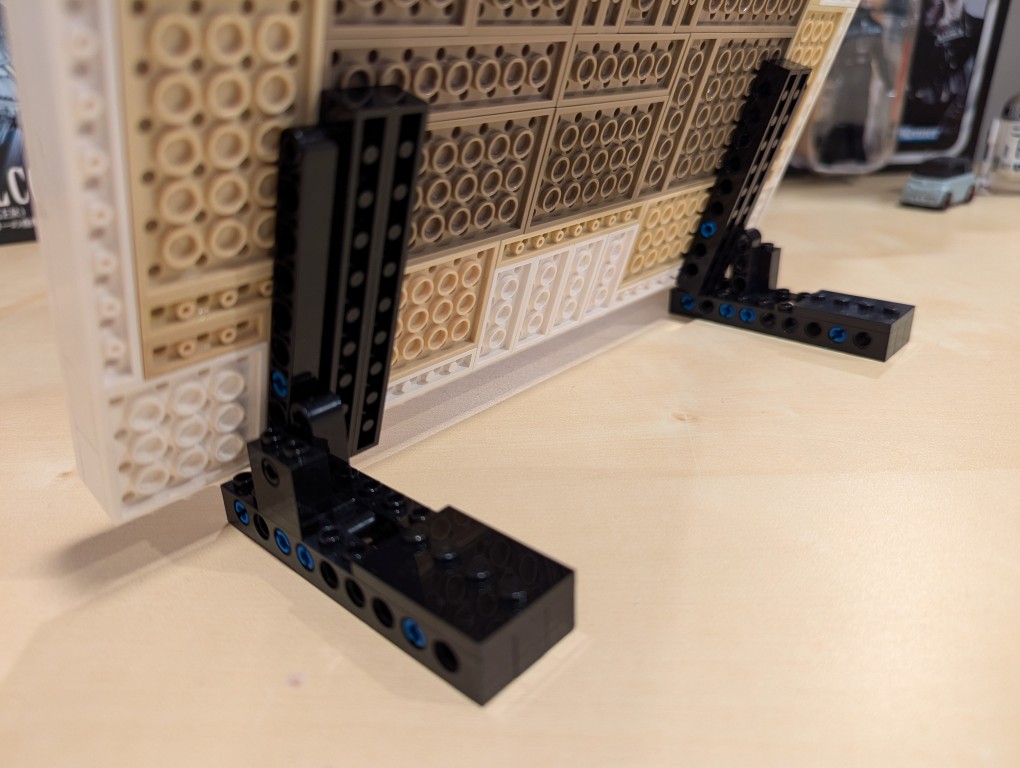
I beefed up the friction connection between the stands and the canvas by using two 1×10 Technic bricks that attach to the canvas.
From the blue color, you can see that I used a number of 3 brick width pins.
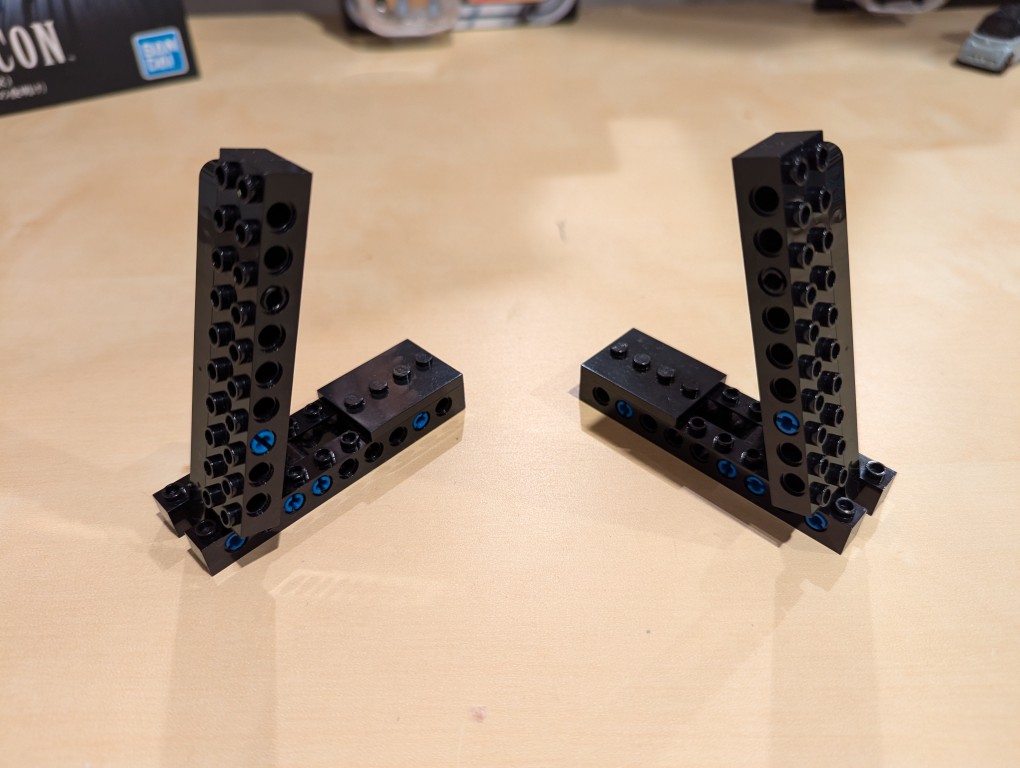
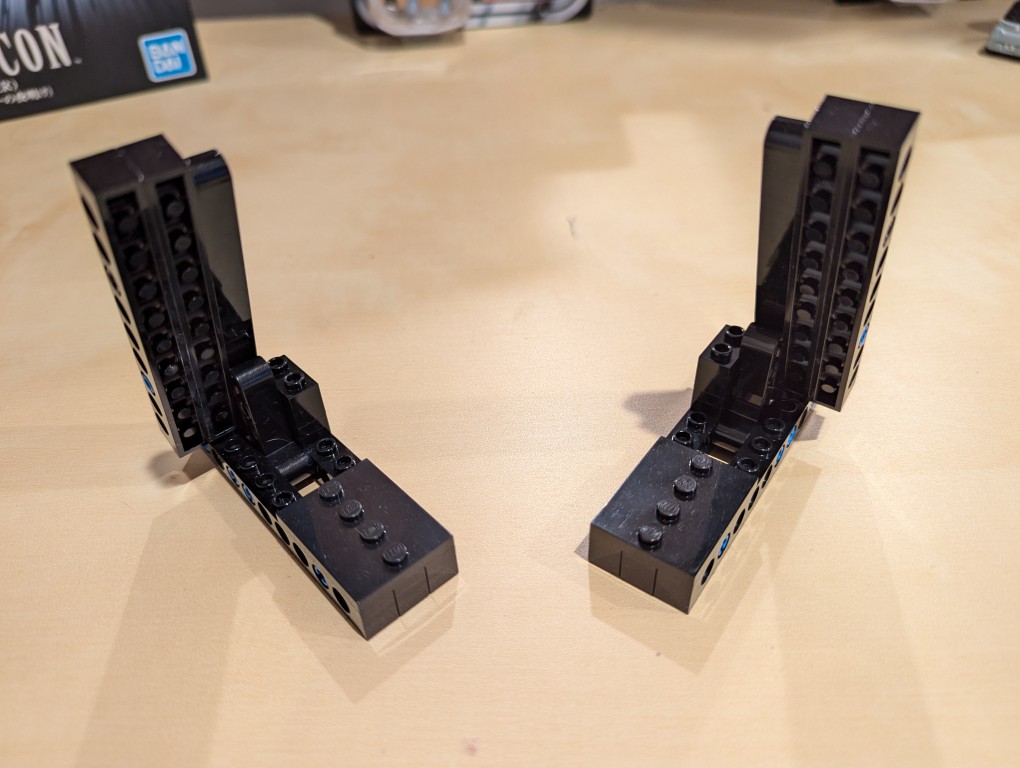
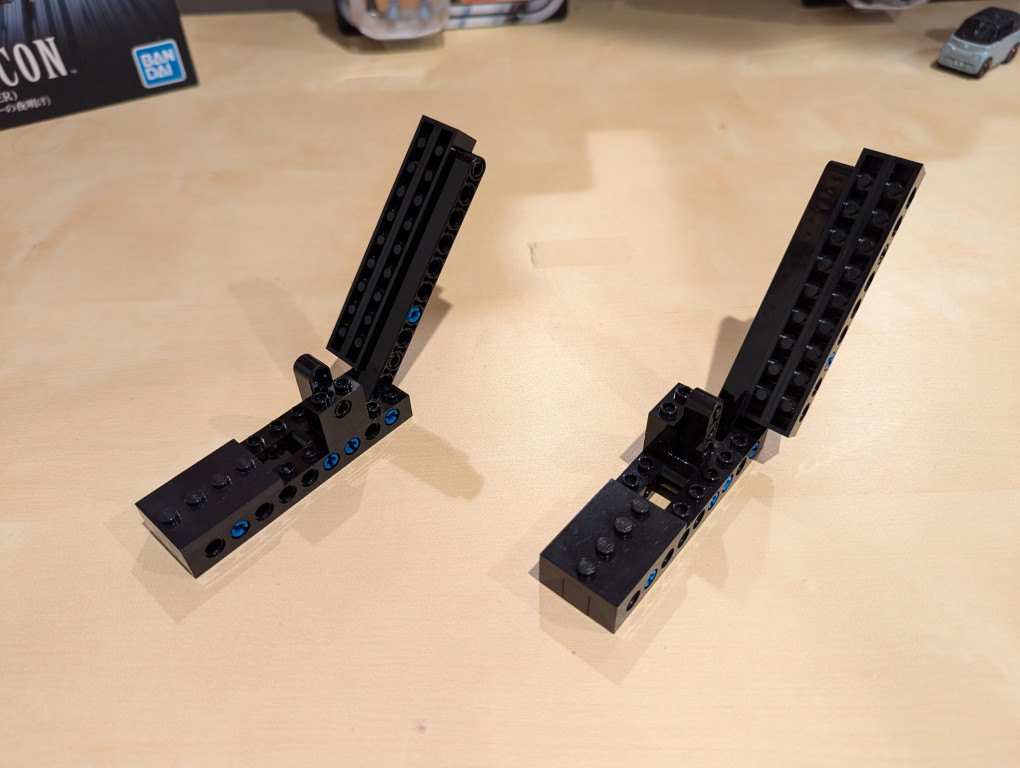
These photos show the stands in more detail detached from the canvas.
Note that the angle is achieved by having the long arm simply rest against a smaller L-shaped Technic support arm. Gravity holds things in place.
I added extra Technic bricks to the stand’s bottom support legs for extra strength.
Assembling Mondrian’s Tableau I (1921)
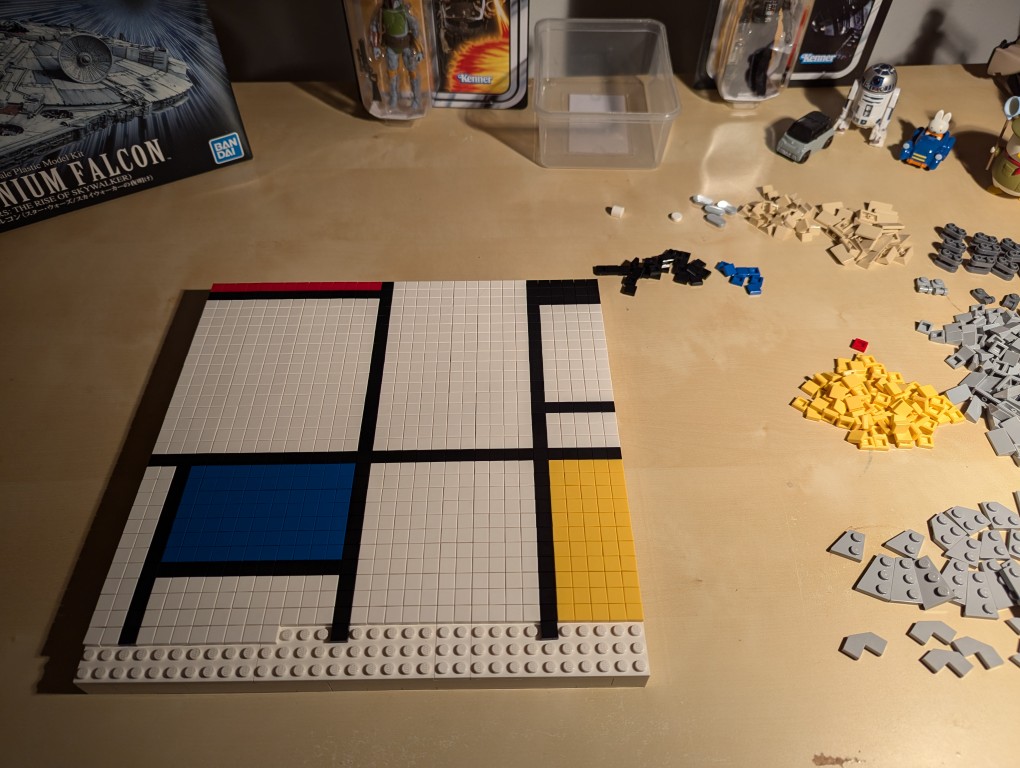
After placing my LEGO Pick-a-Brick order for the “painting” 1×1 flat tiles, it took about a week-and-a-half to arrive.
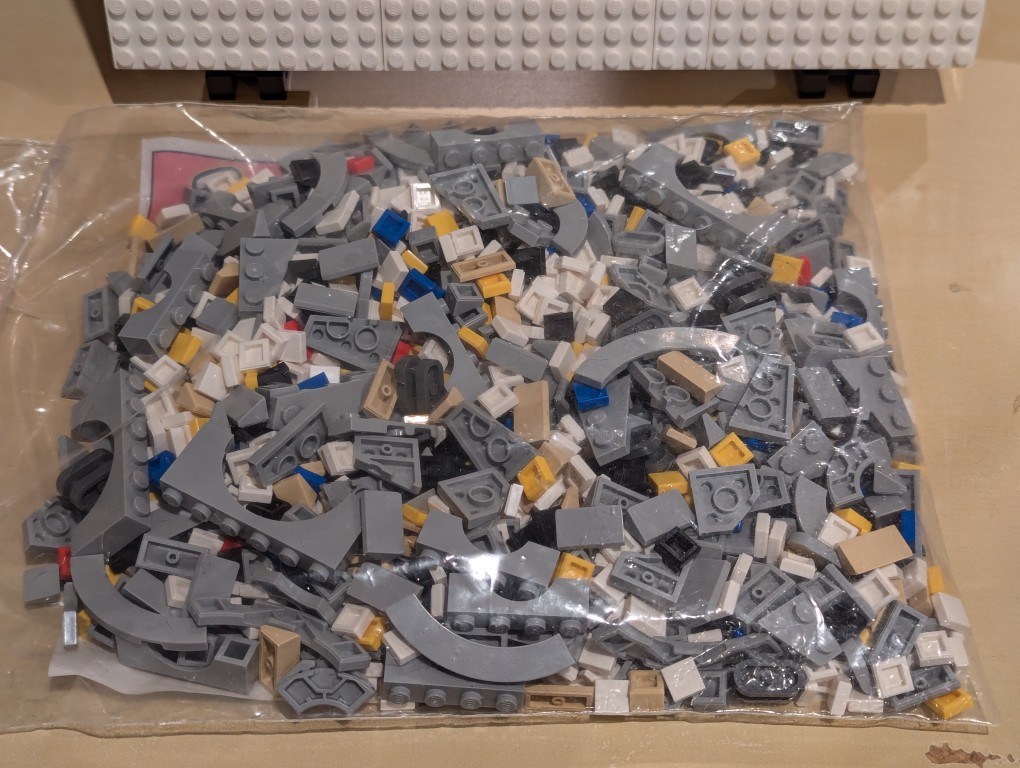
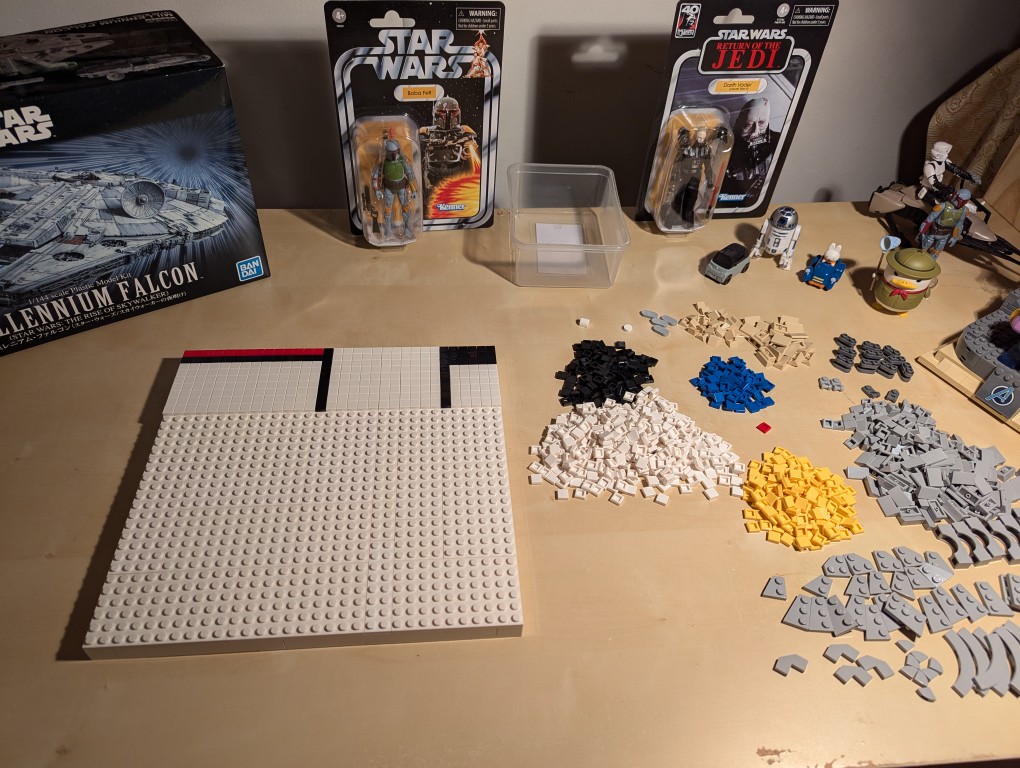
I ordered bricks for a custom Millennium Falcon that I am currently also working on, so I needed to sort everything out.
Here I am sorting the LEGO bricks.
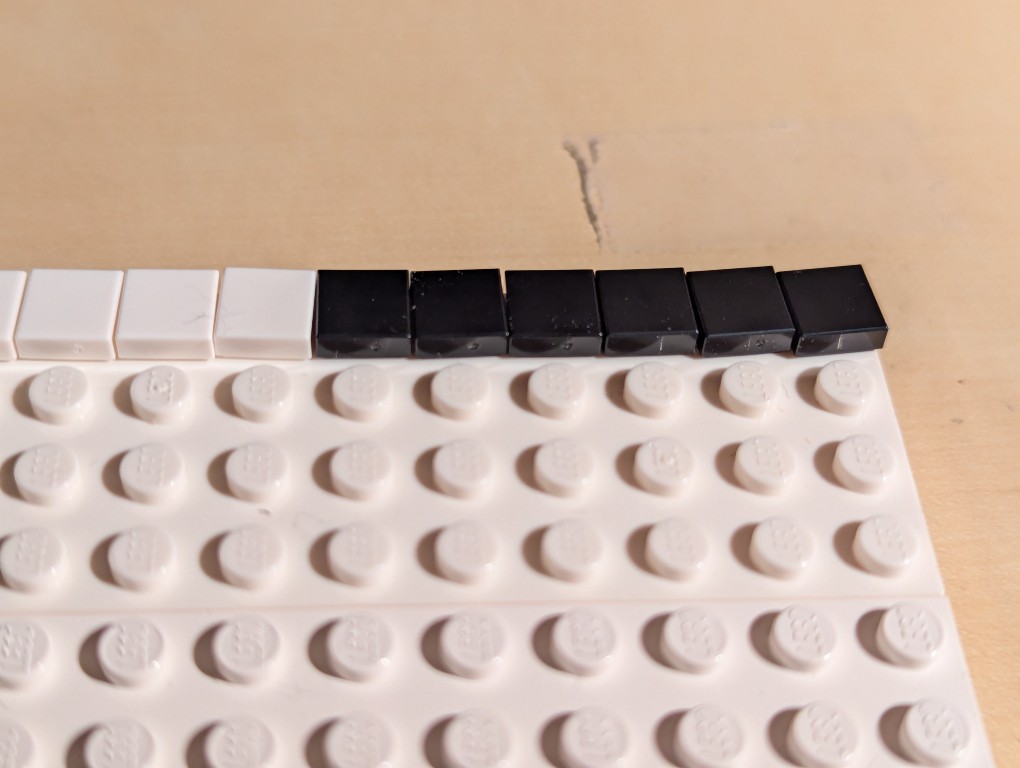
With the bricks sorted, I began to paint my recreation of Mondrian’s Tableau I (1921).
I began at the top horizontal line and created one line at a time–kind of like a CRT drawing a line of pixels across the screen one-at-a-time.
The problem with LEGO flat tiles is that they are difficult to align just by placing them on a stud.
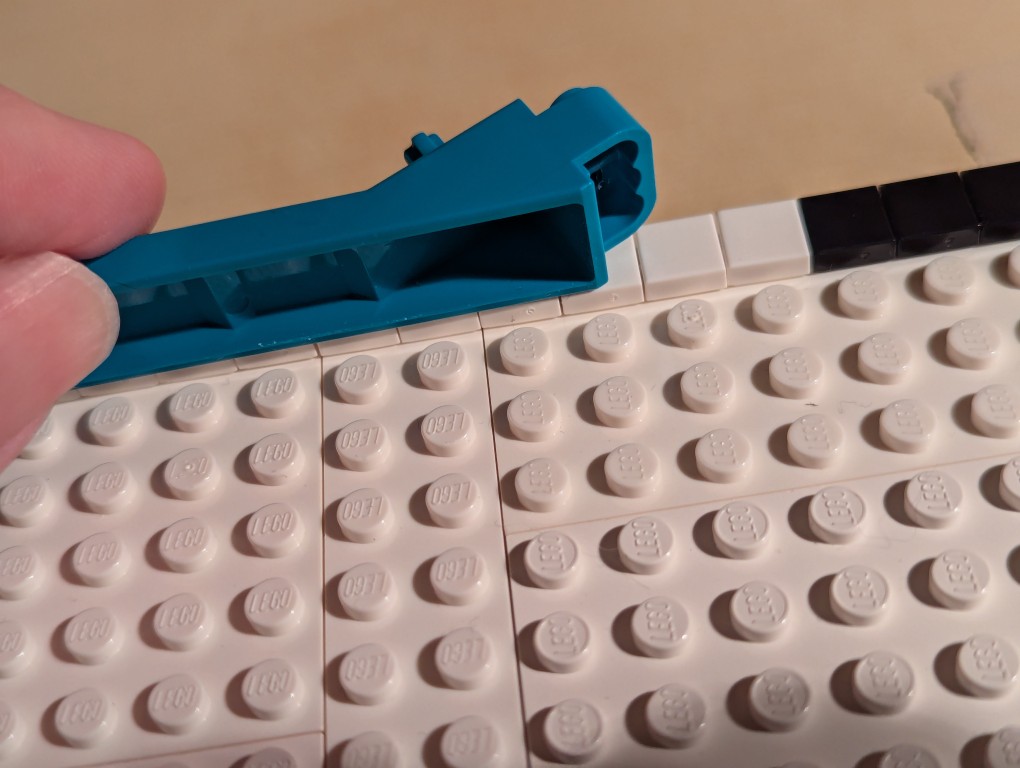
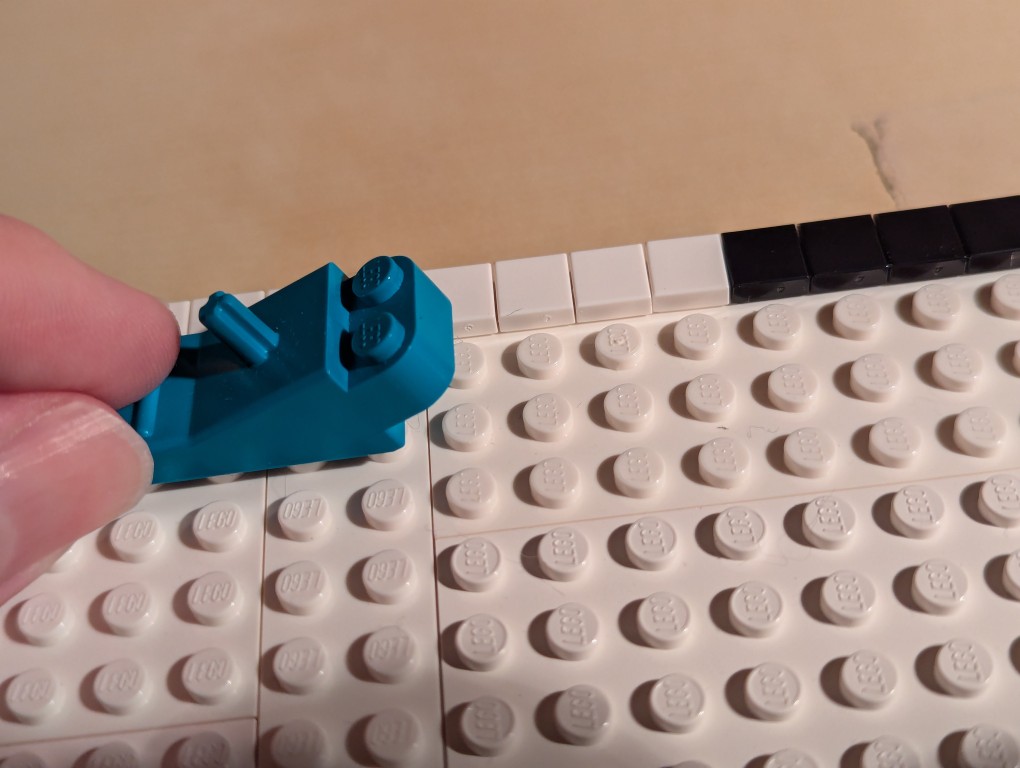
To align each line of flat tiles, you can take a brick separator, place it edge-wise along the flat tiles, and pull it back-and-forth lightly–hard enough to press against the flat tiles’ edges but not so hard as to keep it from moving above the adjacent studs as in the picture above.
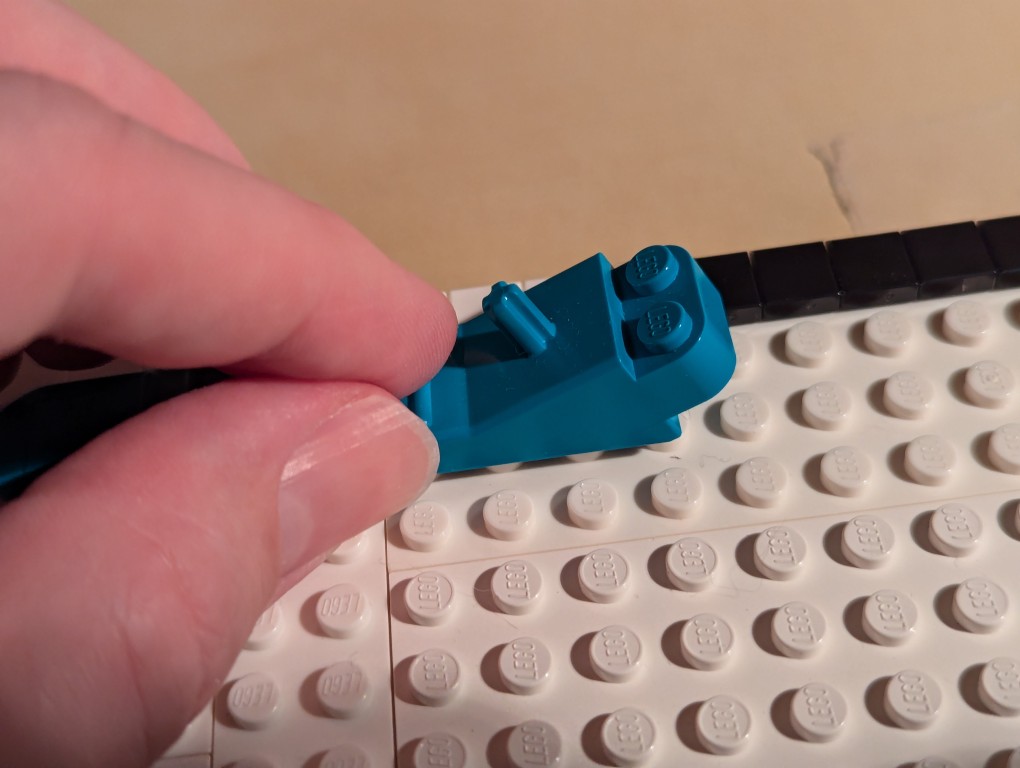
As you can see, the flat tiles are now aligned better. I did this trick for each line of flat tiles as I worked down the canvas.
Nearing the end of the build, I discovered that I didn’t have enough flat tiles in white and black. I recounted and recalculated. My count was correct, but LEGO short changed me about 70 elements from my order and gave me 70 extra yellow tile that I didn’t order. I called their customer service the next day and asked that they correct the order. I received the missing parts after another week-and-a-half. I continued “painting.”
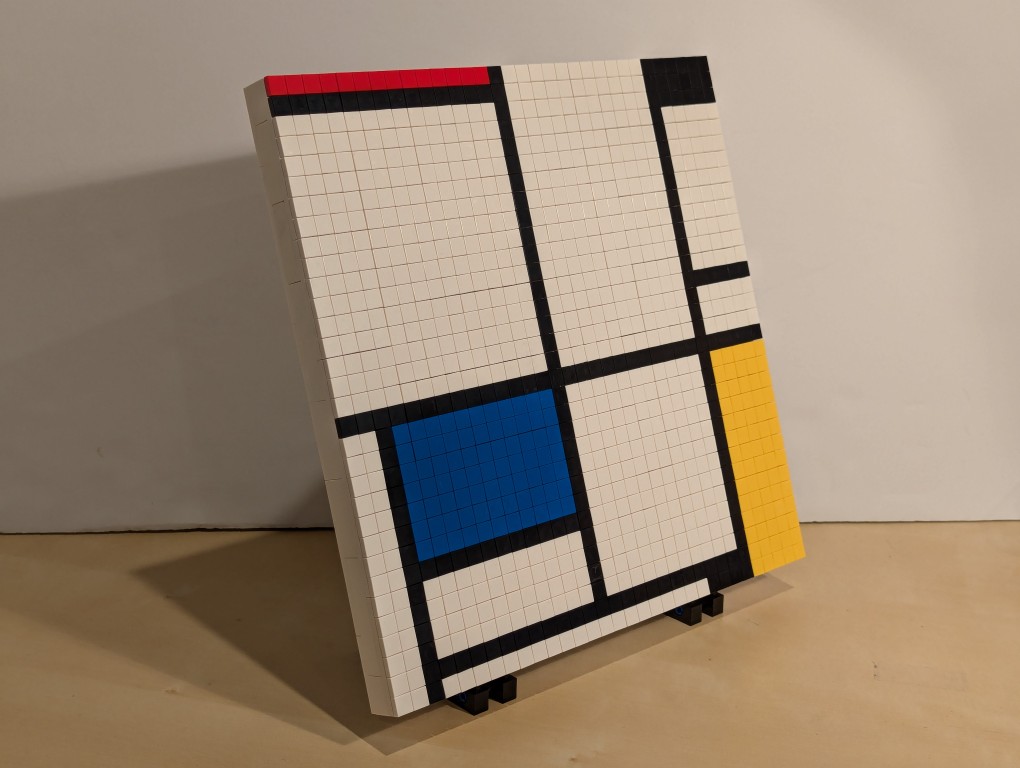
After several weeks, I had completed my copy of Mondrian’s Tableau I (1921) using LEGO!
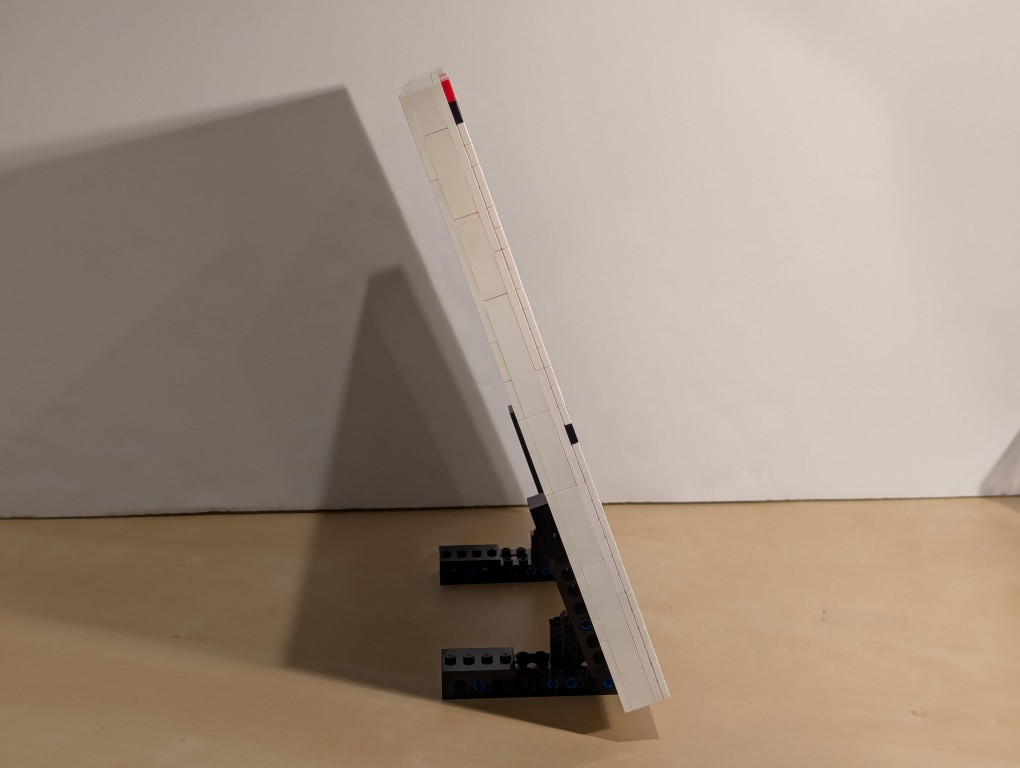
The side view reveals hints of the “paint” of the lines of 1×1 flat tiles.
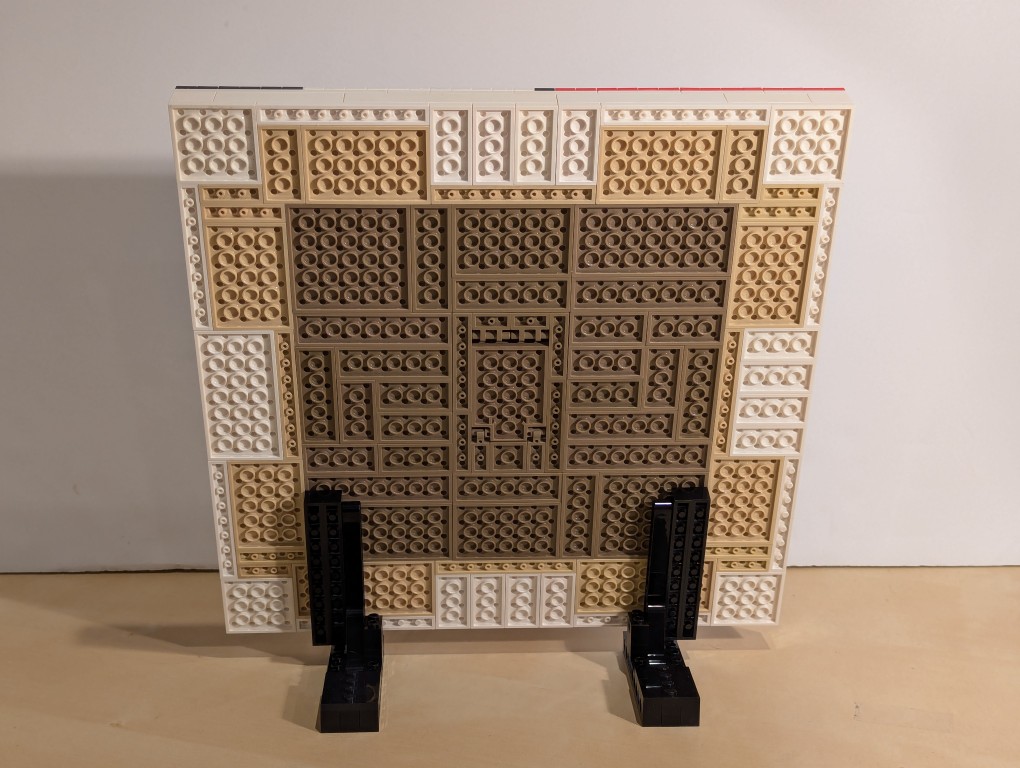
The back of the canvas mounted on the display stands has its hidden compartment in the back center of the canvas.
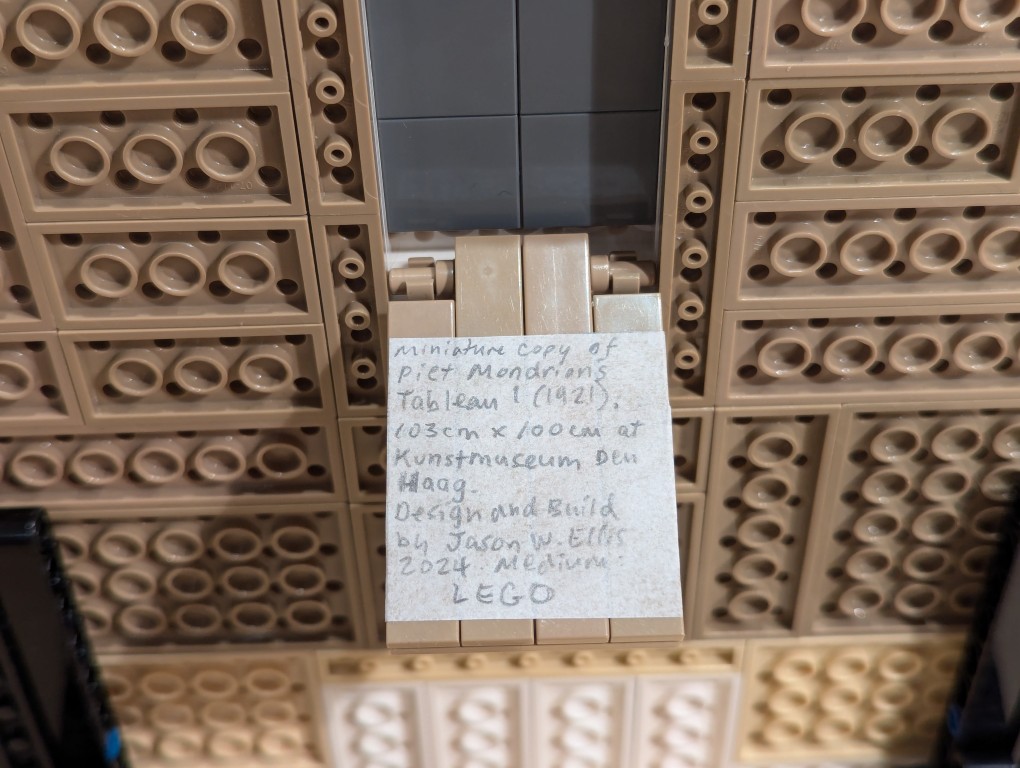
For the hidden artist statement, I cut out a 4×4 square and wrote in pencil, “Miniature copy of Piet Mondrian’s Tableau I (1921), 103cm x 100cm at Kunstmueum Den Haag. Design and Build by Jason W. Ellis 2024. Medium: LEGO.” I pasted it on the flat tiles inside the lid of the hidden compartment.
Fall 2024 classes begin on Wednesday, August 28. Originally, I was hoping to teach City Tech’s ENG2420, Science Fiction course in person this semester, but the in-person section had too few students to run. Thankfully, after the administration switched the class to being online, asynchronous and sending a message blast to prospective students, the new online class quickly filled up. Since City Tech recently switched to a new learning management system (LMS) called Brightspace, I’m going to experiment teaching the class on it instead of using our open learning system, OpenLab. However, I will still create my video lectures as YouTube videos, so they will be public facing for anyone interested in following along or using them in their own classes. Also, this will be my first time teaching the class using my open educational resource (OER) Yet Another Science Fiction Textbook. Here’s to a positive and productive semester!
Earlier this year, Y and I found this Wage Uglydoll lying on the ground and covered in mud where three paths converge by a tree in Green-Wood Cemetery. It was the day after a windy thunderstorm. We we weren’t sure if he had been blown off a headstone or dropped by a cemetery visitor, so we propped him up in this tree so he’s be easy to see by anyone passing by in case they had lost him. Or, if he had been left on a grave, at least he would be within eye-shot.
It has been months since we last saw Wage in the cemetery, because the weather has been too oppressive to go for a walk there. Thankfully, it was in the 70s yesterday, so we ventured out to the cemetery for a long walk. Wage was right where we left him keeping watch over the comings and goings in his corner of the graveyard.
Considering his namesake, he has escaped the trappings of wage-earning by leaving capitalism behind. His life is now living up a tree in the sun amongst a little bit of nature in the heart of the big city.
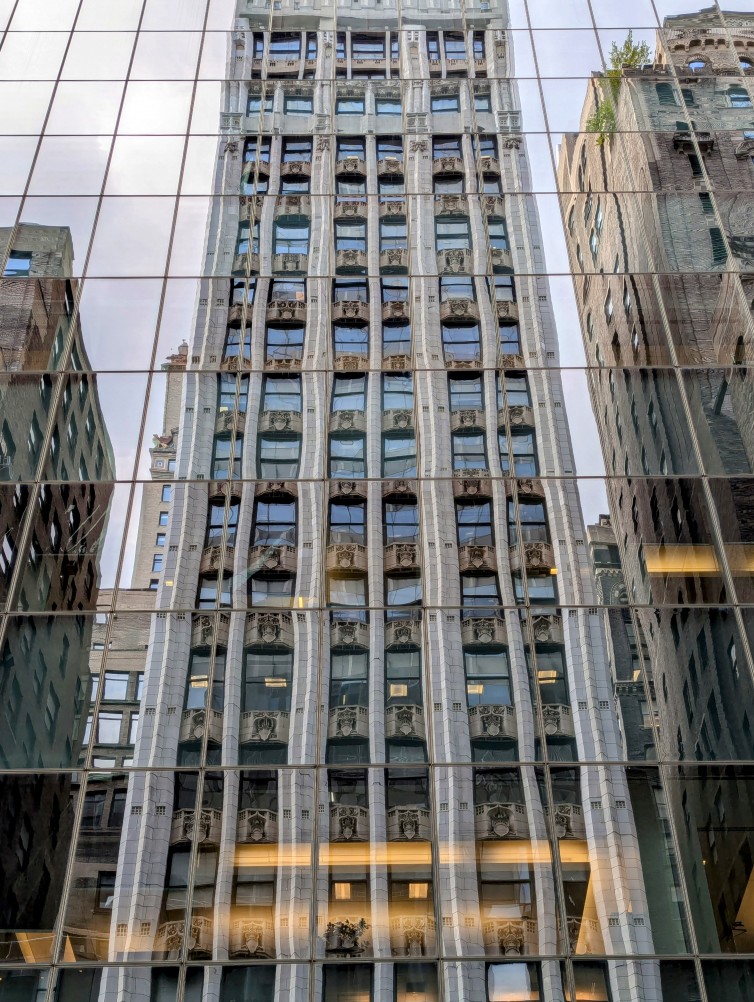
Standing on E 41st St between 5th Ave. and Madison Ave. in Manhattan, I liked how buildings on one side of the street created these slightly distorted reflections of the buildings on the side of the street where I was standing. The reflected images seem like the wobbly straight lines in images generated by Stable Diffusion–kind of like seeing the thing reflected in a mirror with slight imperfections–not quite a fun house mirror but going in that direction.