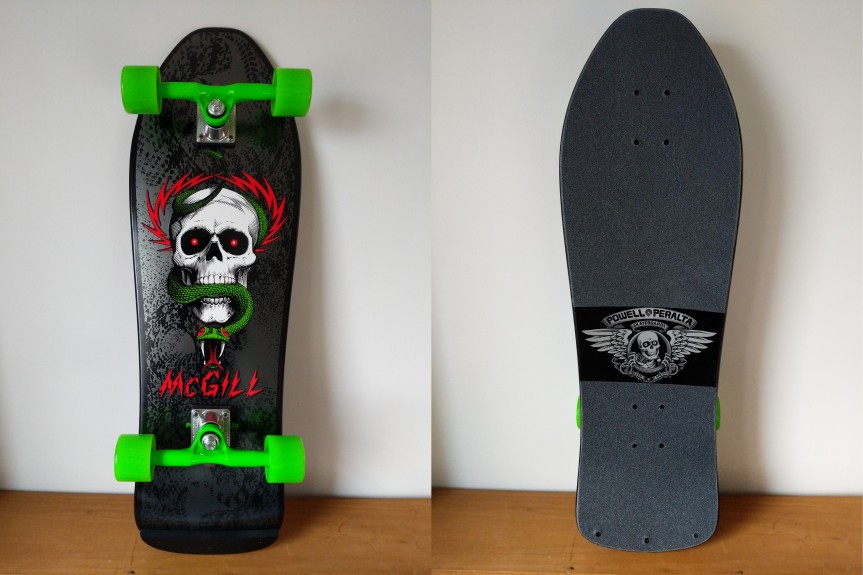
This is a long read that combines autobiography, nostalgia, memory, and instructions. Visitors here might find it interesting and informative. My students might use it as a model for some of their own multimodal writing about memory, processes, instructions, and reflection.
While it has been over 25 years since I last rode a skateboard with my hometown friends, I recently felt drawn to the 7-ply deck once again and decided to assemble a board similar to my second skateboard–a 1990 Powell-Peralta Mike McGill pro board with VCJ’s Skull & Snake graphics, fish shape, nose and tail kicks, natural wood grain with Gullwing Pro III trucks (red), and Powell-Peralta Rat Bones wheels (neon green).
Before I got my original McGill deck, I learned to skateboard on a Teenage Mutant Ninja Turtles complete skateboard that my grandparents–Wilma and Papa Gerald–bought for me from the Wal-Mart on Altama Avenue in Brunswick, Georgia (since replaced by a Supercenter about a mile away, and then the original site re-built as a Neighborhood Market a few years ago).
With the TMNT skateboard, I learned how to balance, turn, and ride on my grandparent’s back car port. At first, I held on to a broom handle to steady myself until I felt confident enough to ride without this support. I don’t think I had a helmet, but I did have pads and wrist guards–the former store bought neon green plastic over black, and the latter used, red, gifted or traded for–I can’t remember.
I rode and shared the TMNT skateboard with my friends who I paled around with when I stayed at my grandparents. However, I wanted to learn how to ollie and do tricks, but I found this to be next to impossible on the heavy, tank-like TMNT board. This is what began my search for a better board, relying heavily on the photo stories and advertising in magazines such as Transworld Skateboarding and Thrasher, and eventually led to me mail ordering the McGill deck and new hardware (was this a Christmas gift from my grandparents or my folks–again, my memory falters).
With the new McGill, I continued skating through the beginning of high school, but I drifted away from the sport when I got more interested in books (physics first, science fiction second), computers (Amiga, IBM-compatible PCs, and eventually, Macintosh), and cars (my first being a 1965 Ford Mustang, but always having a soft spot for the small Toyota pickup trucks that I used to deliver auto parts from my family’s business).
I don’t remember what became of my McGill. I suspect that I gave it to a friend before going to college where I really got into Rollerblading, but my memory fails completely on this point. I hope that I can remember what happened to my old McGill skateboard, not because I want it back, but instead simply to recall that moment in my life’s narrative. Related to this is the fact that I don’t seem to have any photos of me with my skateboard (though I do have a photo of me holding my Rat Bones wheels on Christmas Day). It’s an odd omission in the photographic record of my life of something I considered important to me at that early time in my life.

My re-interest in skateboarding began when I was watching the film Hackers (1995) in HD. I don’t think it registered with me when I first saw it when it was originally released that the film’s villain, The Plague (Fisher Stevens), rides into his company’s NOC (network operations center) on a McGill skateboard (see above).
Then, I caught up with my oldest best friend Bert over the phone. He lives in Seattle now, but back in the day, we used to skateboard in his neighborhood. Bert was a much better skater than me. Our conversation drifted back to skateboarding, including the time that he and I were stopped by a cop on our way back from a Hampton Inn construction site. The obese, good ol’ boy police officer asked us questions about what we had been doing and he stopped when he pointed his flashlight on our boards. Bert skated Vision, and I skated Powell-Peralta. The cop took a breath through his teeth and said, “now boys, I’ve done heard things about that POW-ell Per-AL-ta. They’s devil worshipers!” Bert and I smiled and nodded until he let us go on our way back to his house, but it’s a strange encounter that’s stuck with me.
Our phone conversation encouraged me to begin searching the web for information about my old skateboard. This led me to the Bones Brigade video The Search for Animal Chin (1987), which I shared with Bert via text message. By this point, I was thinking and spending more free time learning more about skating history and its evolution after I had left the sport.
While I was already burdened by a big research project on computers in science fiction from 1975-1995, which I’m continuing to work on, and the Third Annual City Tech Science Fiction Symposium, which I was organizing, I wanted to give myself something on the horizon to look forward to as a reward for this work. I decided to get the parts to build a new, complete skateboard similar to one that I had to before without breaking the bank, so I turned to eBay after striking out with the major skateboard online retailers and local shops, such as Uncle Funky’s Boards.
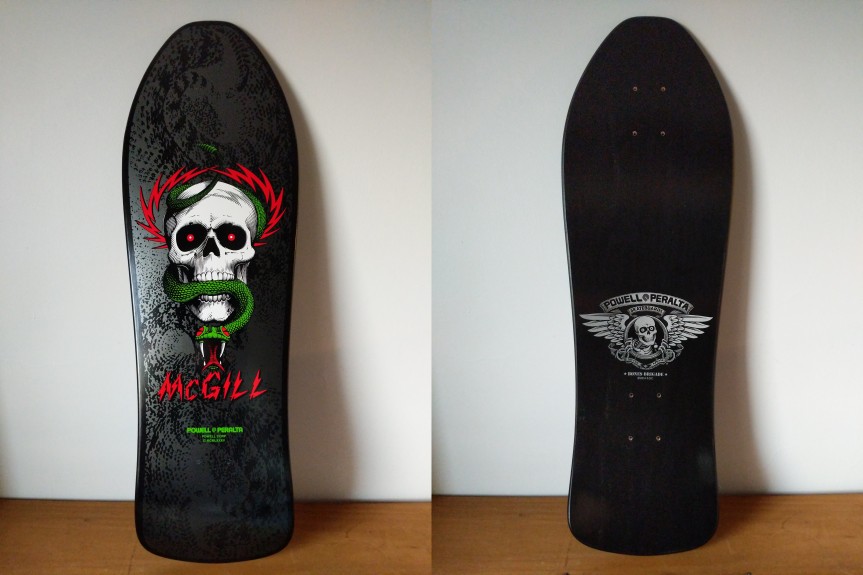
While I couldn’t find my original McGill with a natural finish, I did find this brand new, black dipped, Series #5 re-issue on offer by a seller in Puerto Rico. We negotiated a best offer price, and I received it before anything else.
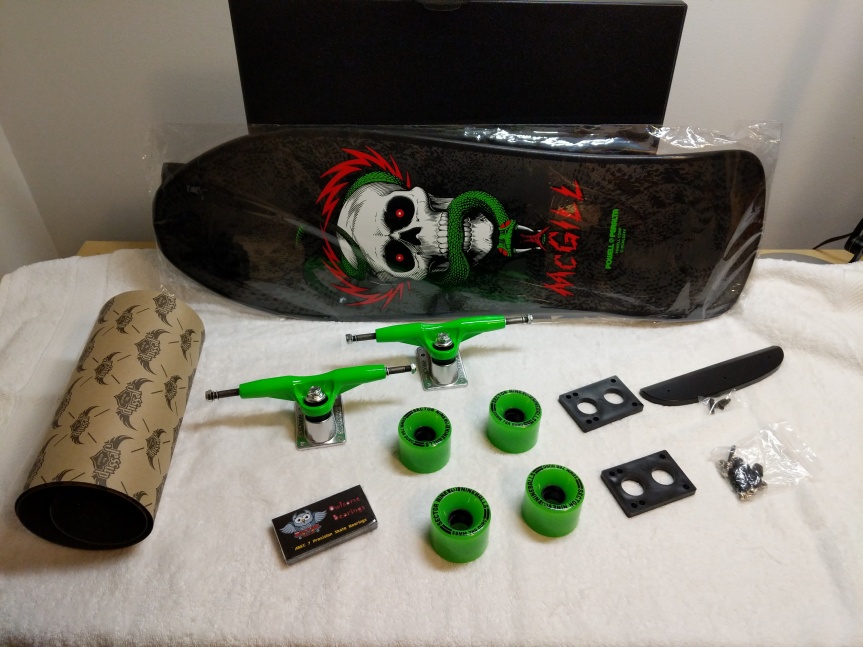
I picked up a Gullwing Pro III trucks, wheels, bearings, risers, hardware combo from Raptorunner in Riverside, CA, and I ordered a Powell Peralta Tailbone and Jessup grip tape (and a helmet and pads) from TGM Skateboards in Mount Clemens, MI.
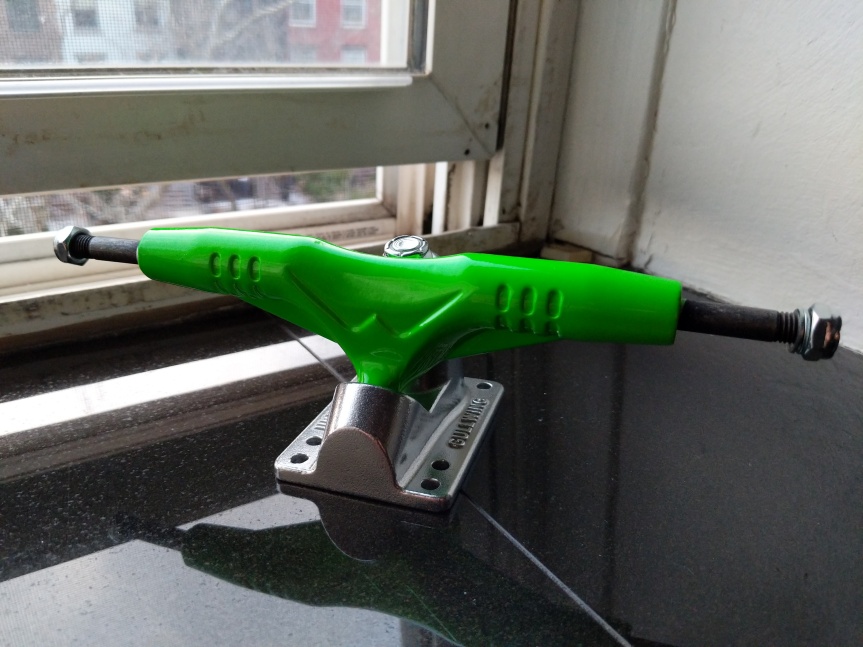
My original Gullwing Pro III trucks were cherry red and stood out well against the natural grain of the board. I liked these new 9″, 155mm neon green ones, because they stand out against the black background on the new, black McGill deck. Also, my re-issued McGill deck uses the old truck bolt pattern, so I chose between these (note that the base plate has six bolt holes instead of four–to accommodate both old and new bolt patterns) and Independent Stage 11 169mm trucks. Ultimately, I opted for the Gullwings since I skated with them before.
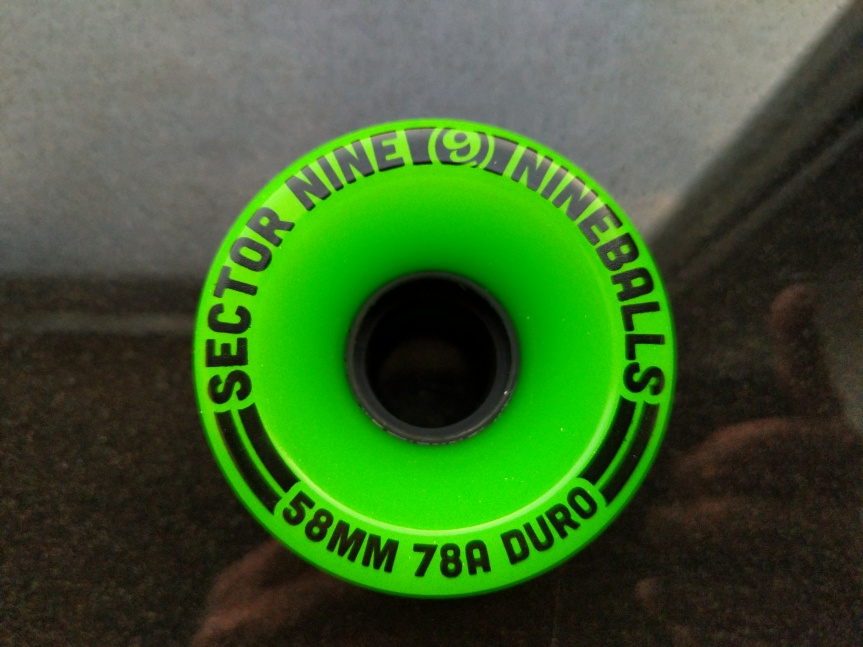
Raptorunner had several different truck, wheel, and hardware bundles. I chose this one, because it had these Sector Nine Nineballs wheels. They aren’t too big (I would have preferred 56mm) and they are real soft (78a), which will be good for the street crusing that I intend to use the skateboard for.
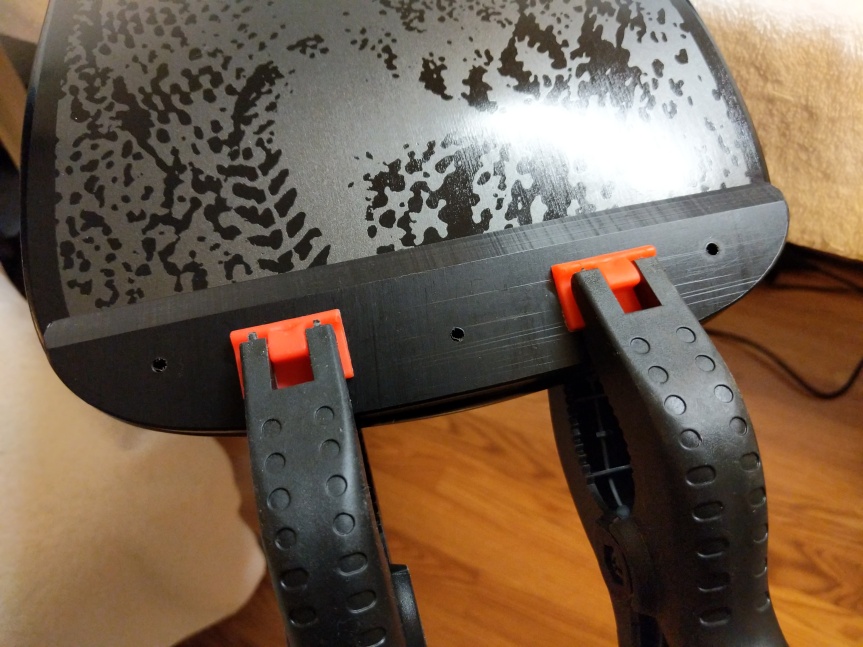
To begin my skateboard’s assembly, I began with the Tailbone before applying the grip tape. I clamped the tail guard to the bottom of the deck’s tail and measured to ensure it was centered.
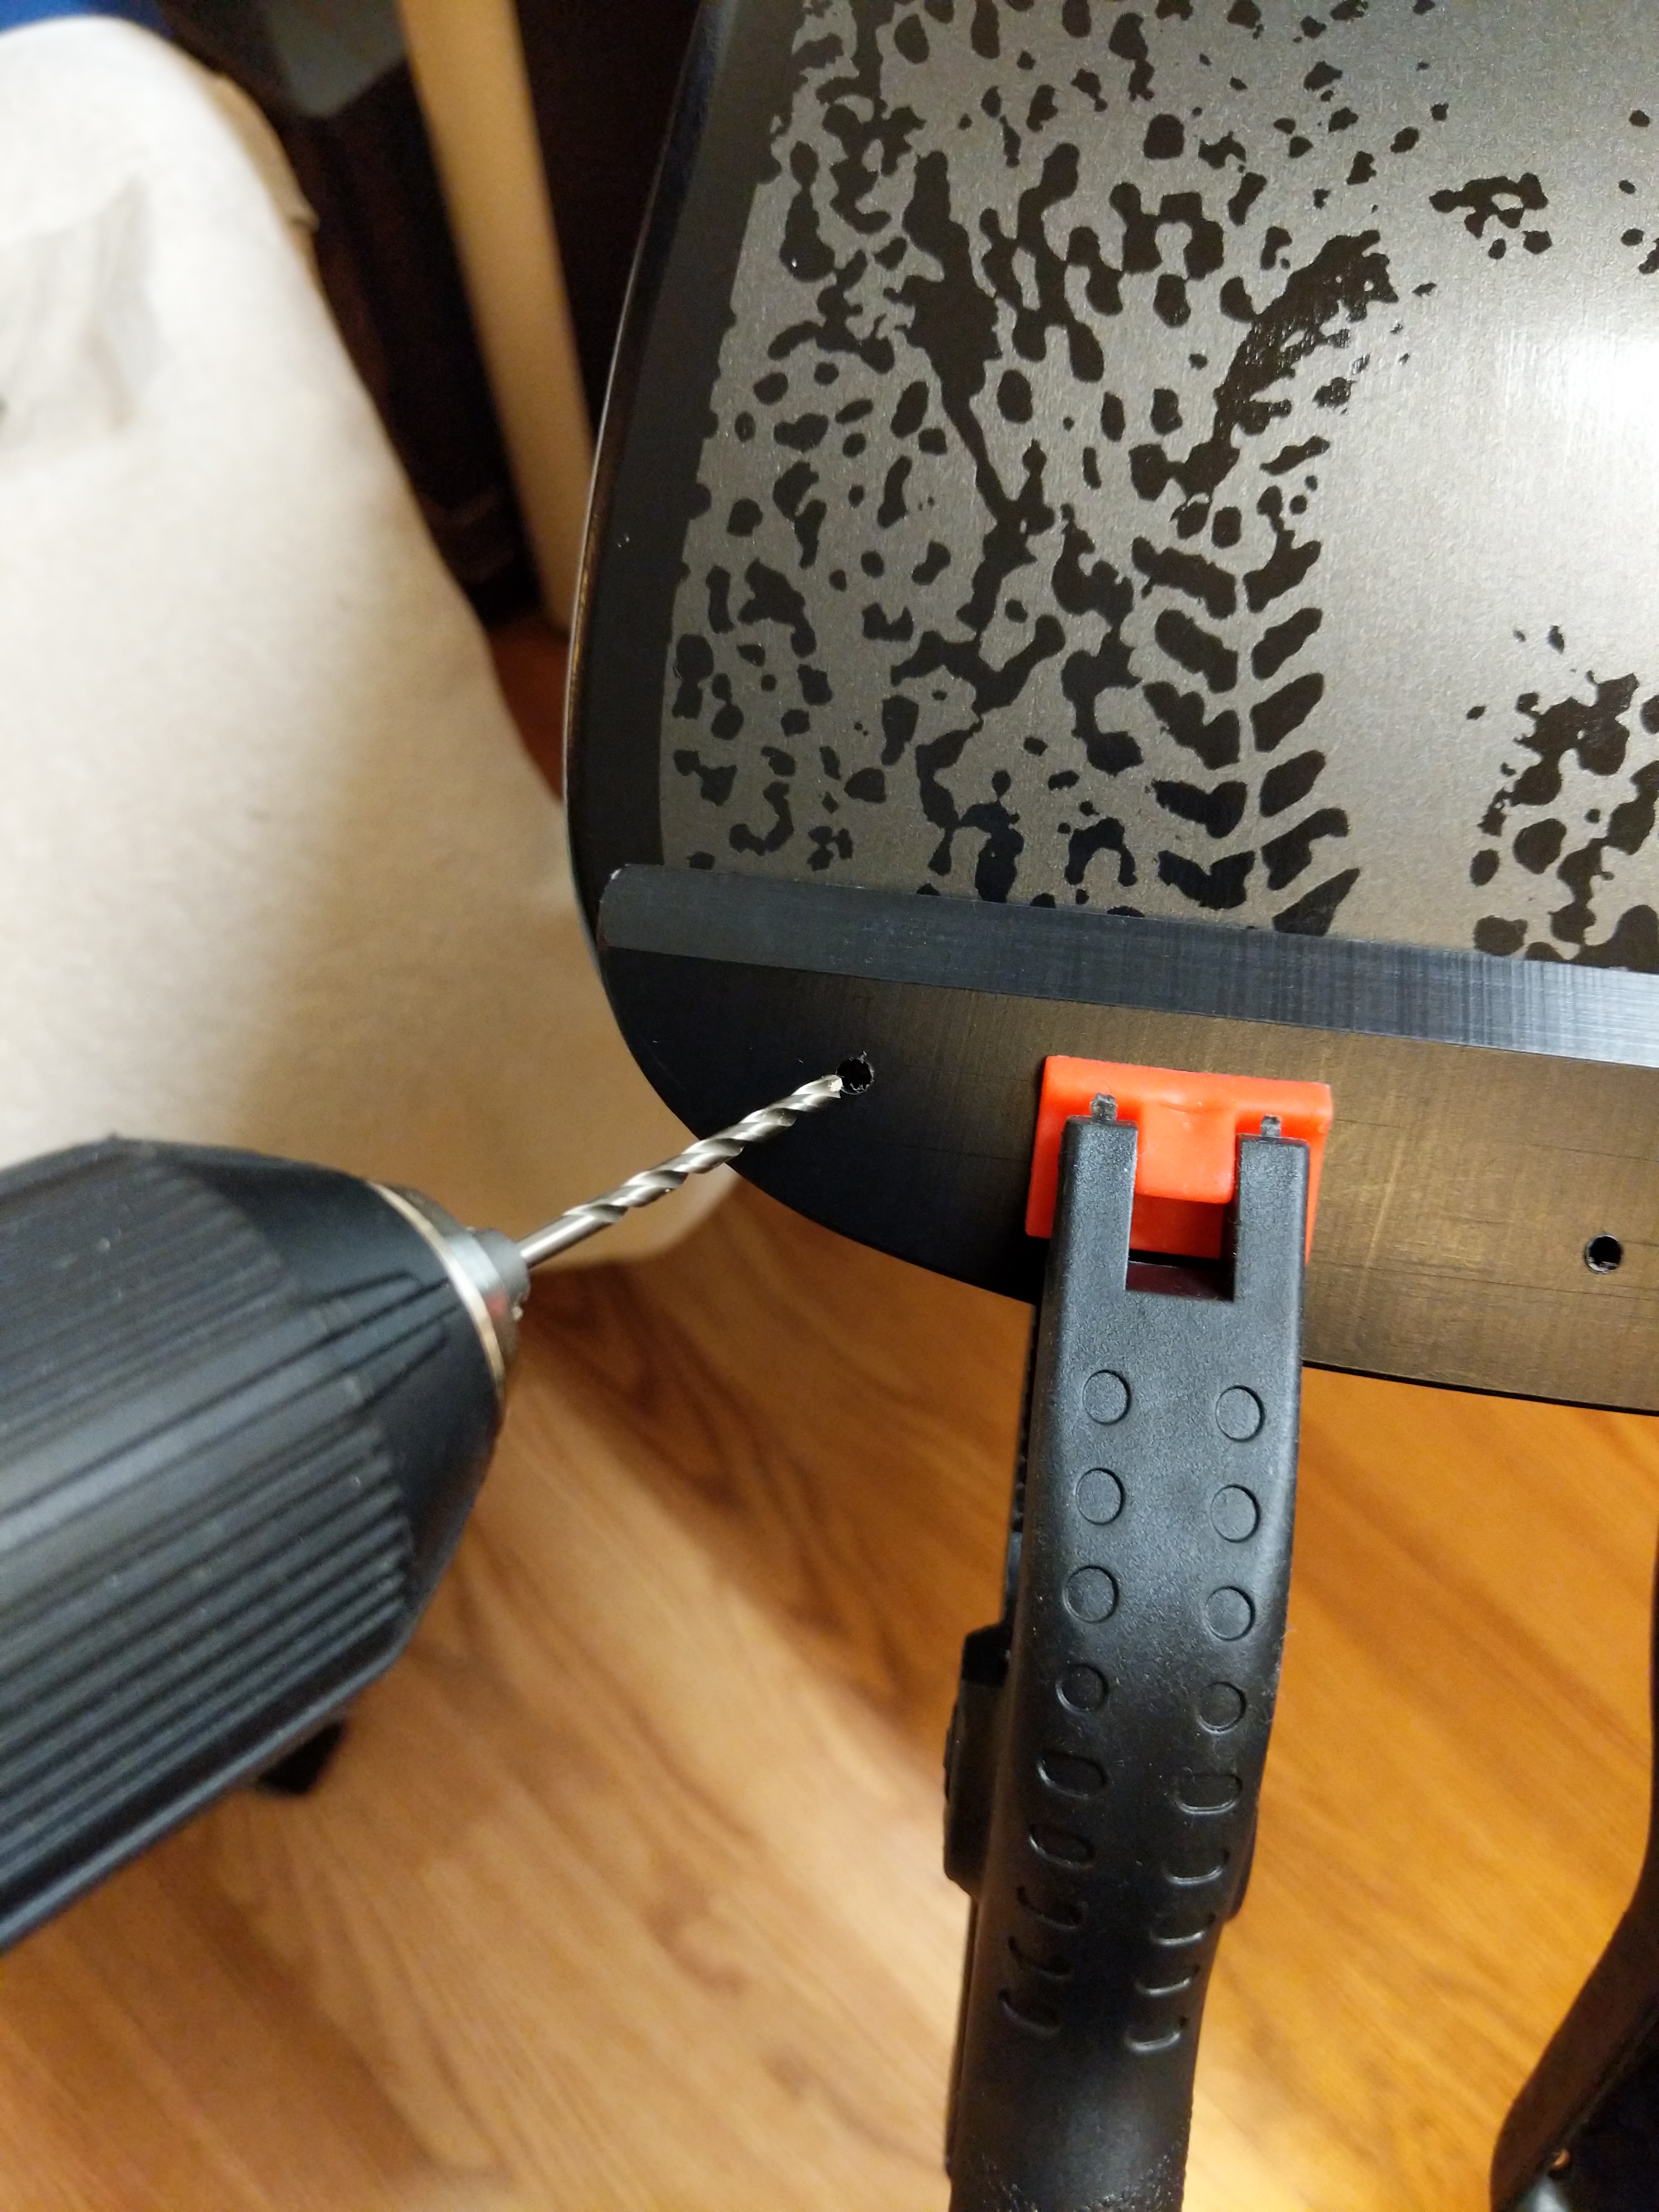
Then, I used a small drill bit to lightly mark where I should drill the larger holes for the wood screws that will go through the top of the board into the Tailbone.
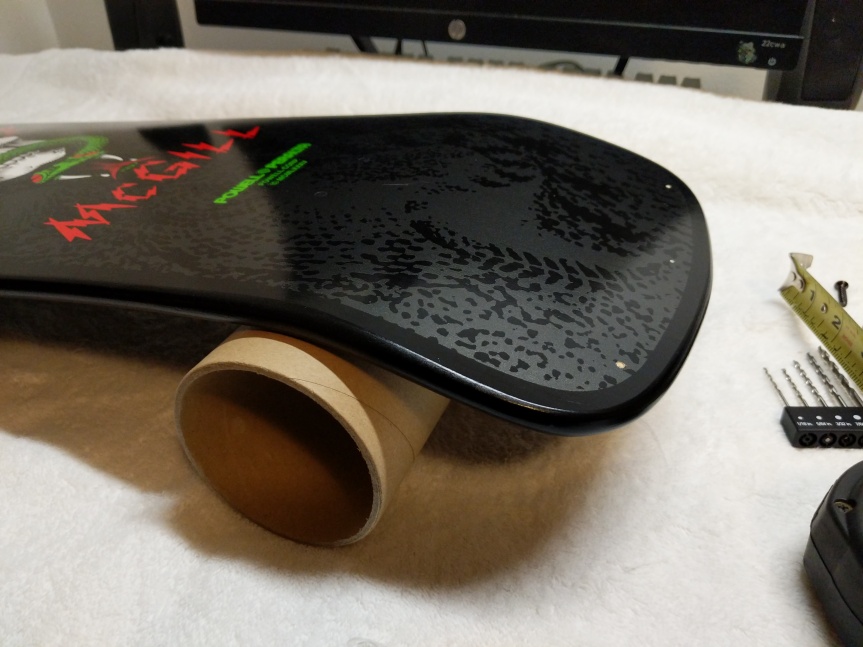
I used the grip tape shipping tube to support the deck while I was drilling.
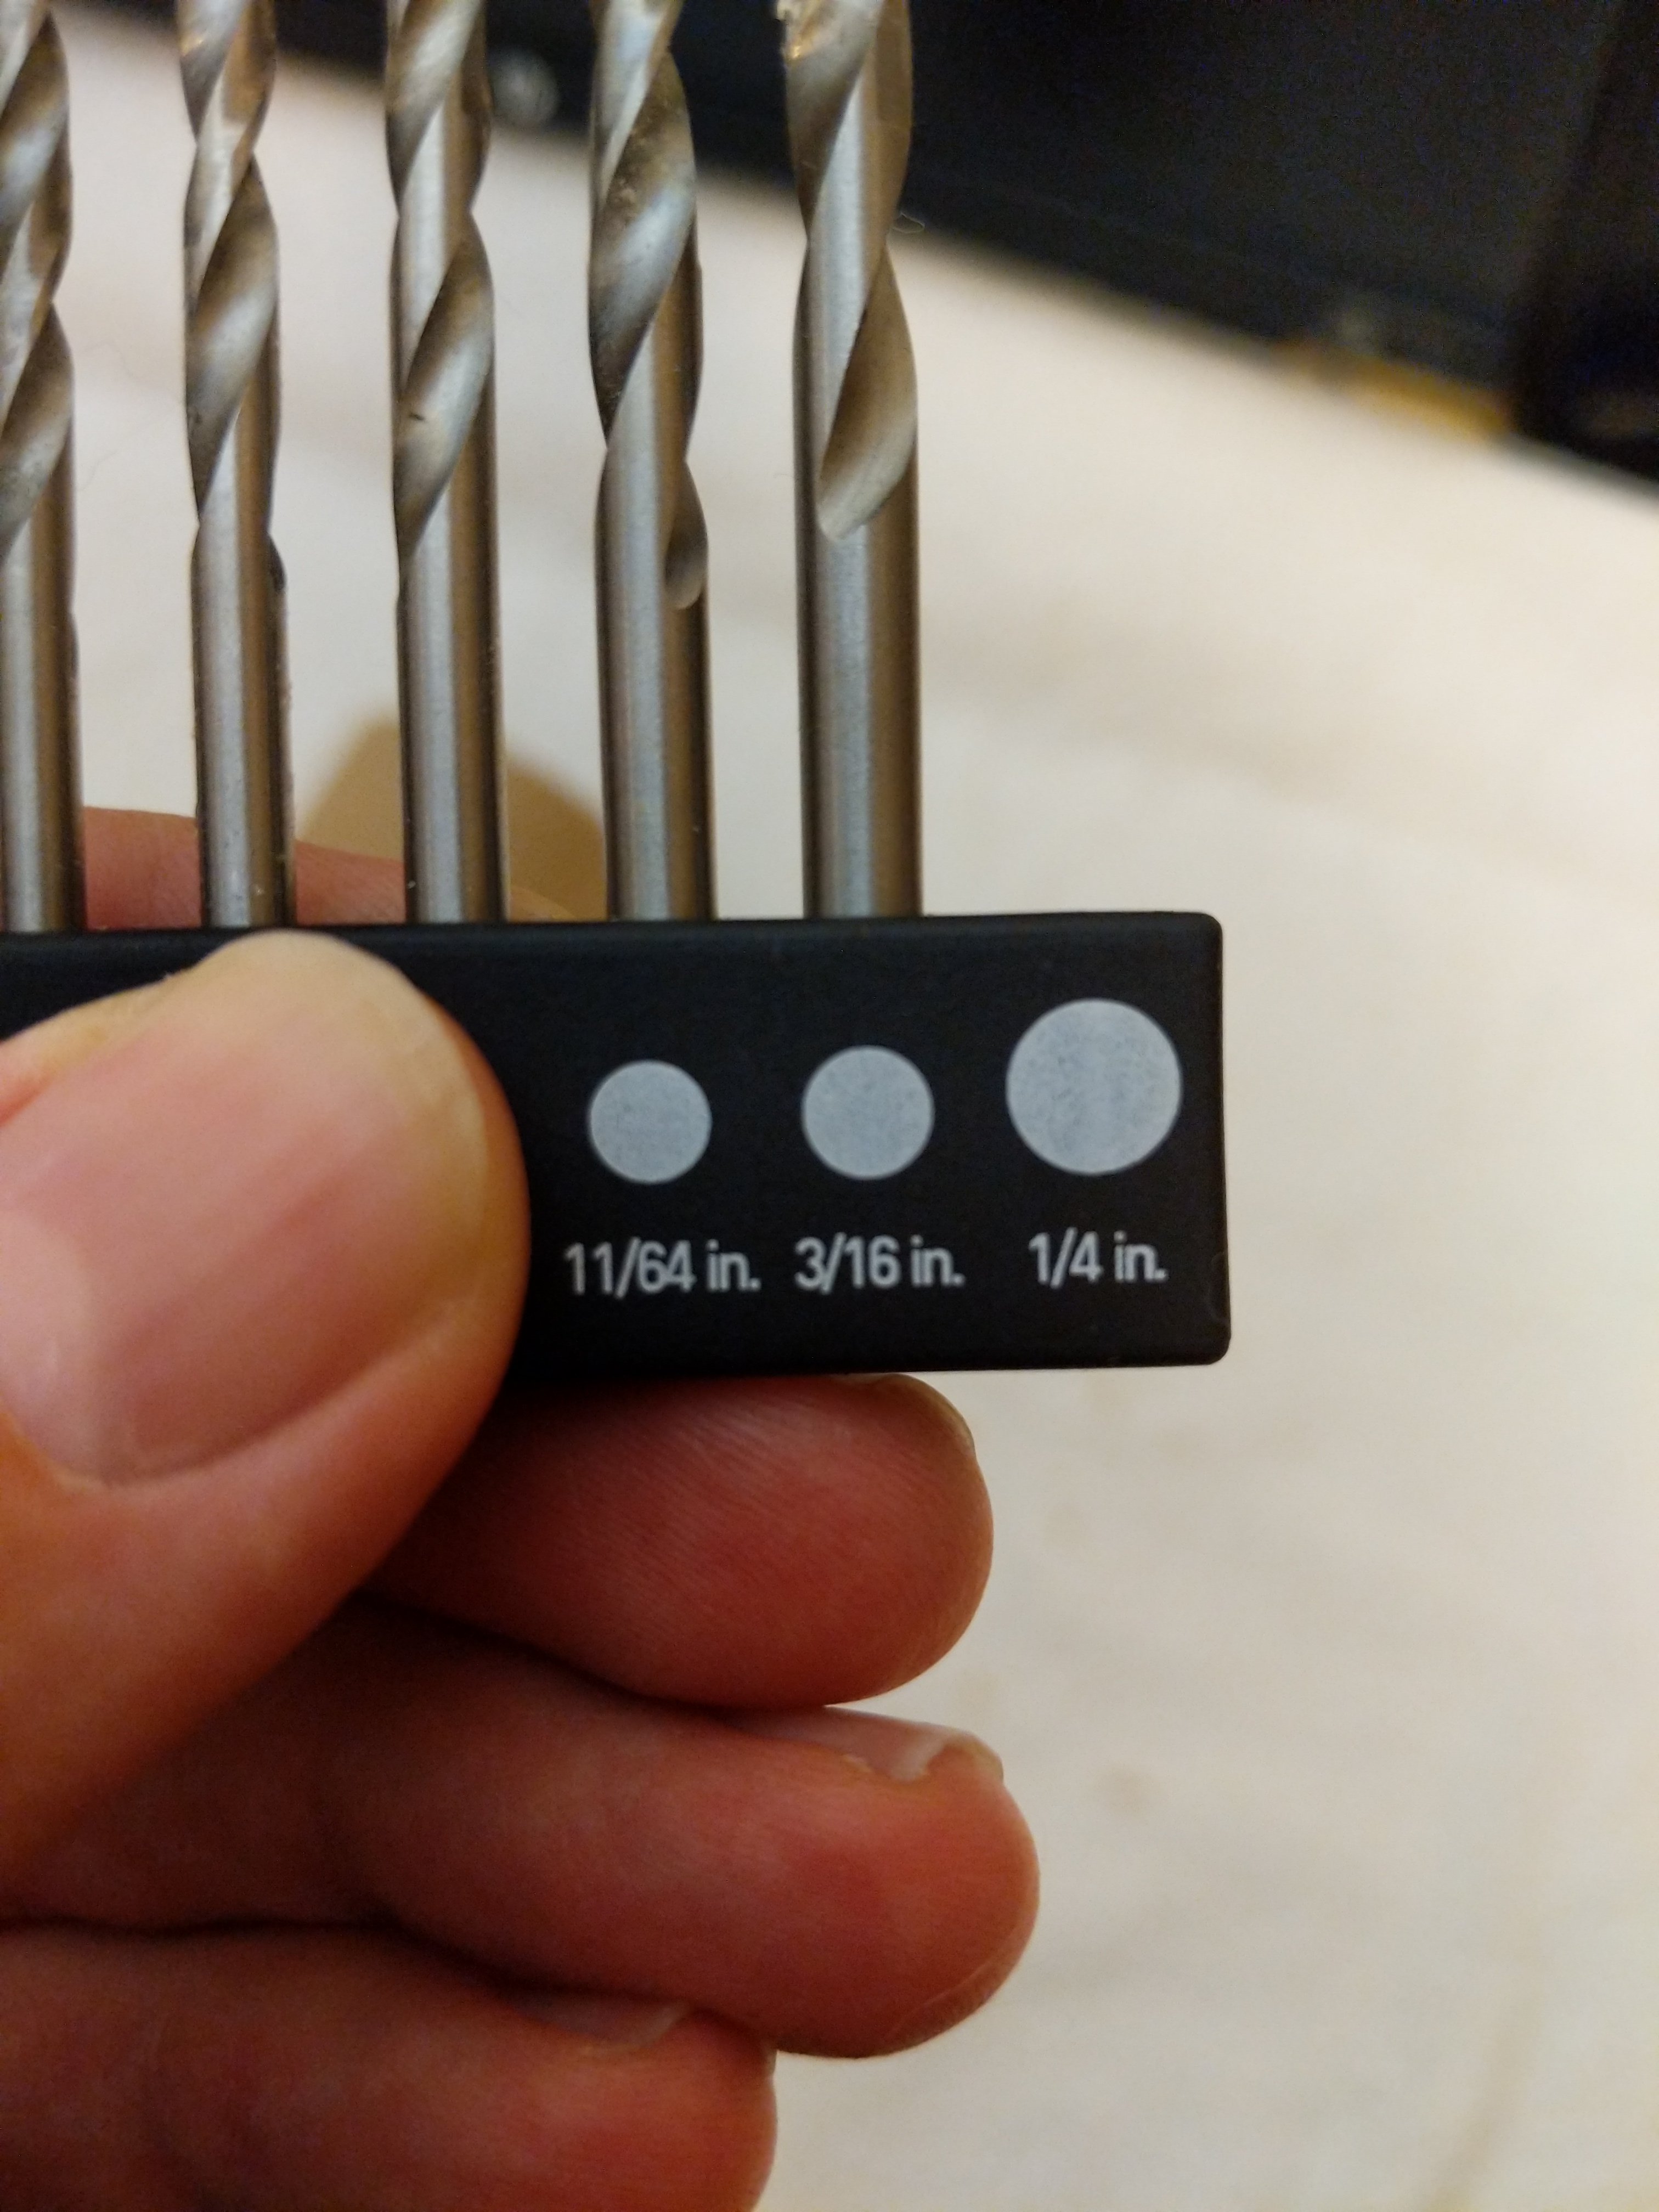
Powell-Peralta’s instructions for the Tailbone call for a 7/32″ drill bit. Unfortunately, I didn’t have one in this size. I didn’t want to go with a larger hole (1/4″), so I tried the 3/16″ bit. Luckily, this was more than enough room for the wood screws to pass through the board without biting and then go into the Tailbone.
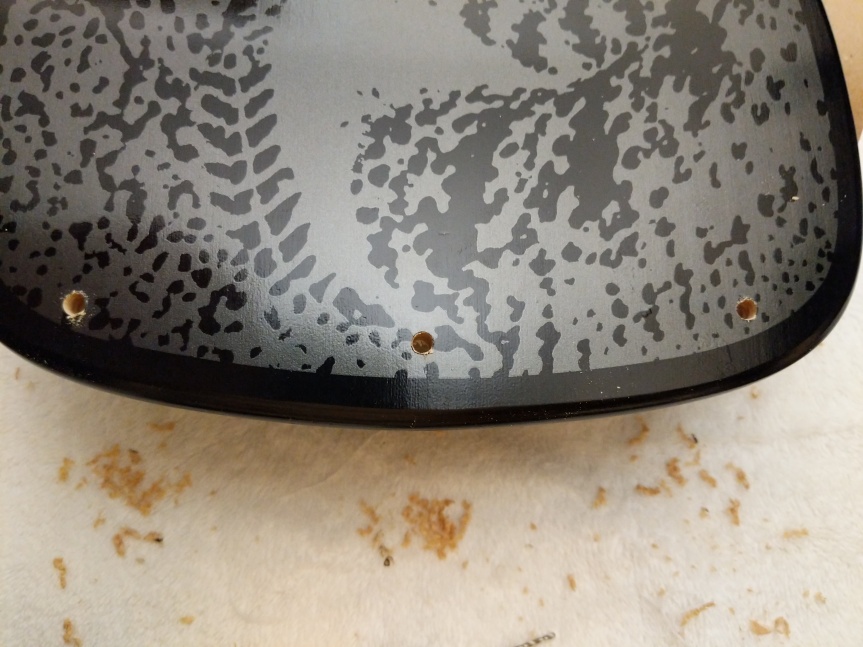
Using my earlier marks, I drilled three holes through the deck’s tail. These will be used later for mounting the Tailbone.
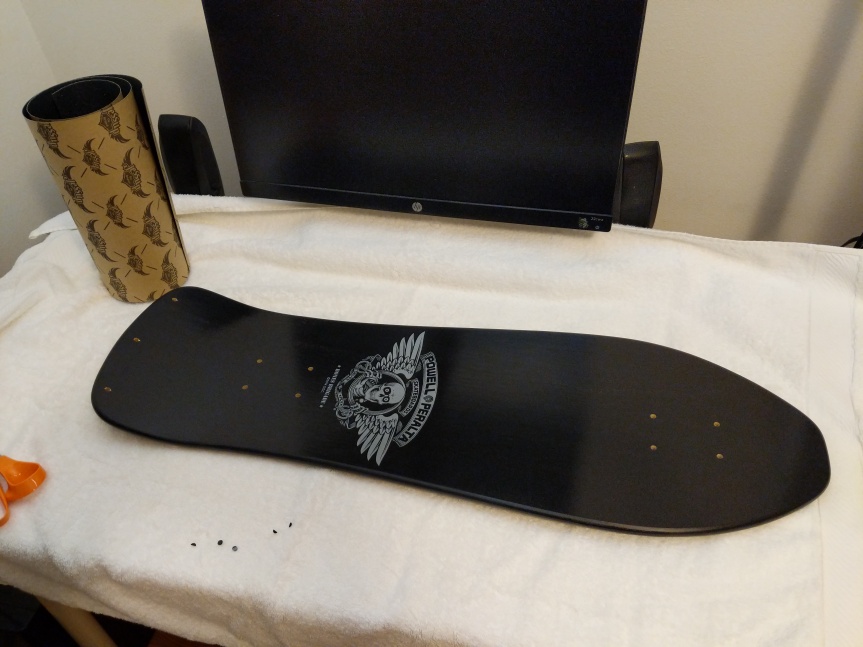
Before mounting the Tailbone, I applied the Jessup grip tape. I bought 10″ wide grip tape, which is just barely wide enough to give some room for error with the front of the deck. If I had to do over again, I would have opted for the 11″ wide grip tape.
I wanted the Bones Brigade logo to appear on the top of the deck, so I needed to apply two sections of grip tape–one above it towards the nose and one below it towards the tail. I measured these lengths twice and cut the length of grip tape into two sections allowing some room for error in terms of length. I used the pre-cut edges as the beginning of application above or below the Bones Brigade logo. I slowly lowered and pressed the grip tape to the deck so as to avoid any air bubbles under the tape.
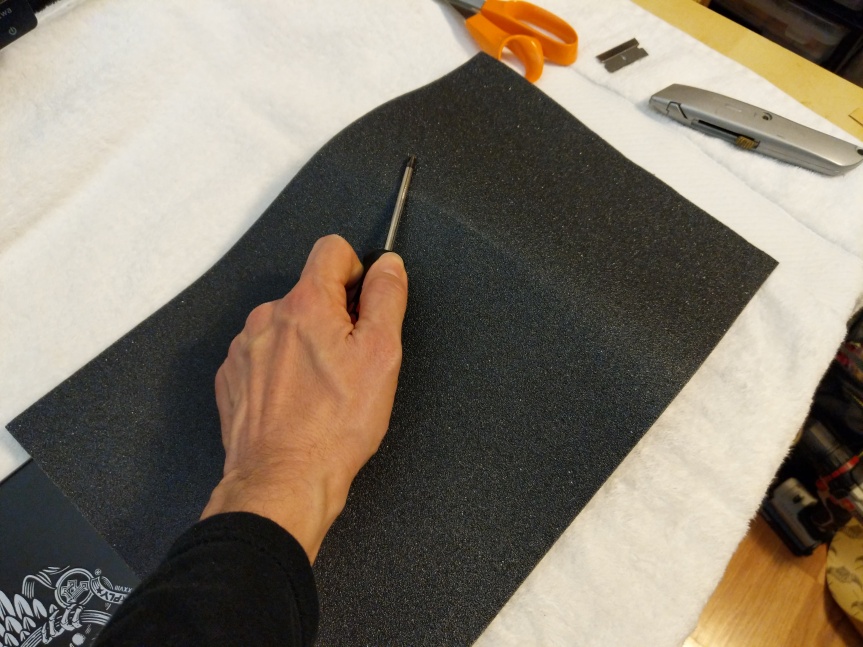
With the tape applied, I used the barrel’s edge of a screw driver to draw a scoring line around the edge of the skateboard deck.
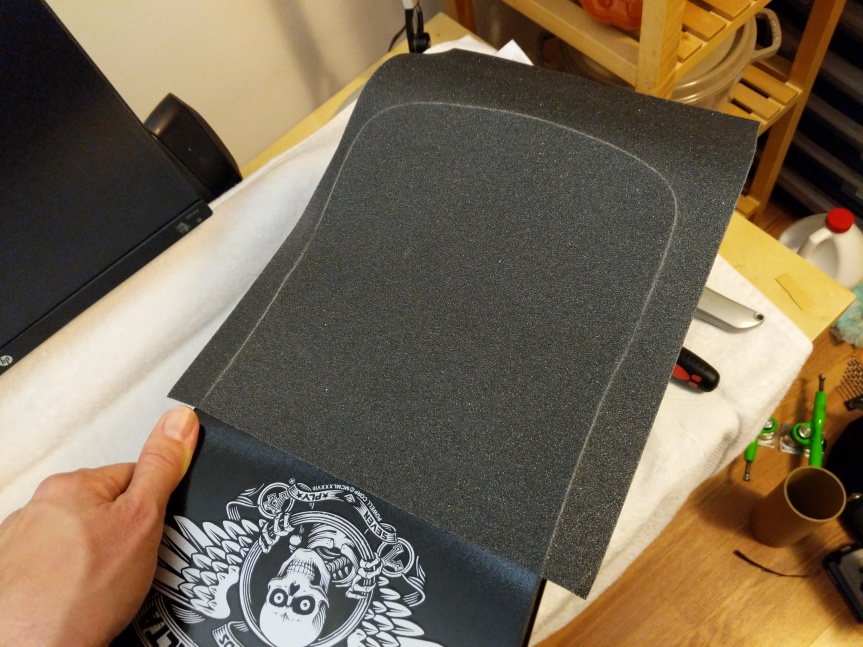
Then, I used a razor blade held from underneath the board to follow the edge of the board and cut the excess grip tape off along the scoring line.
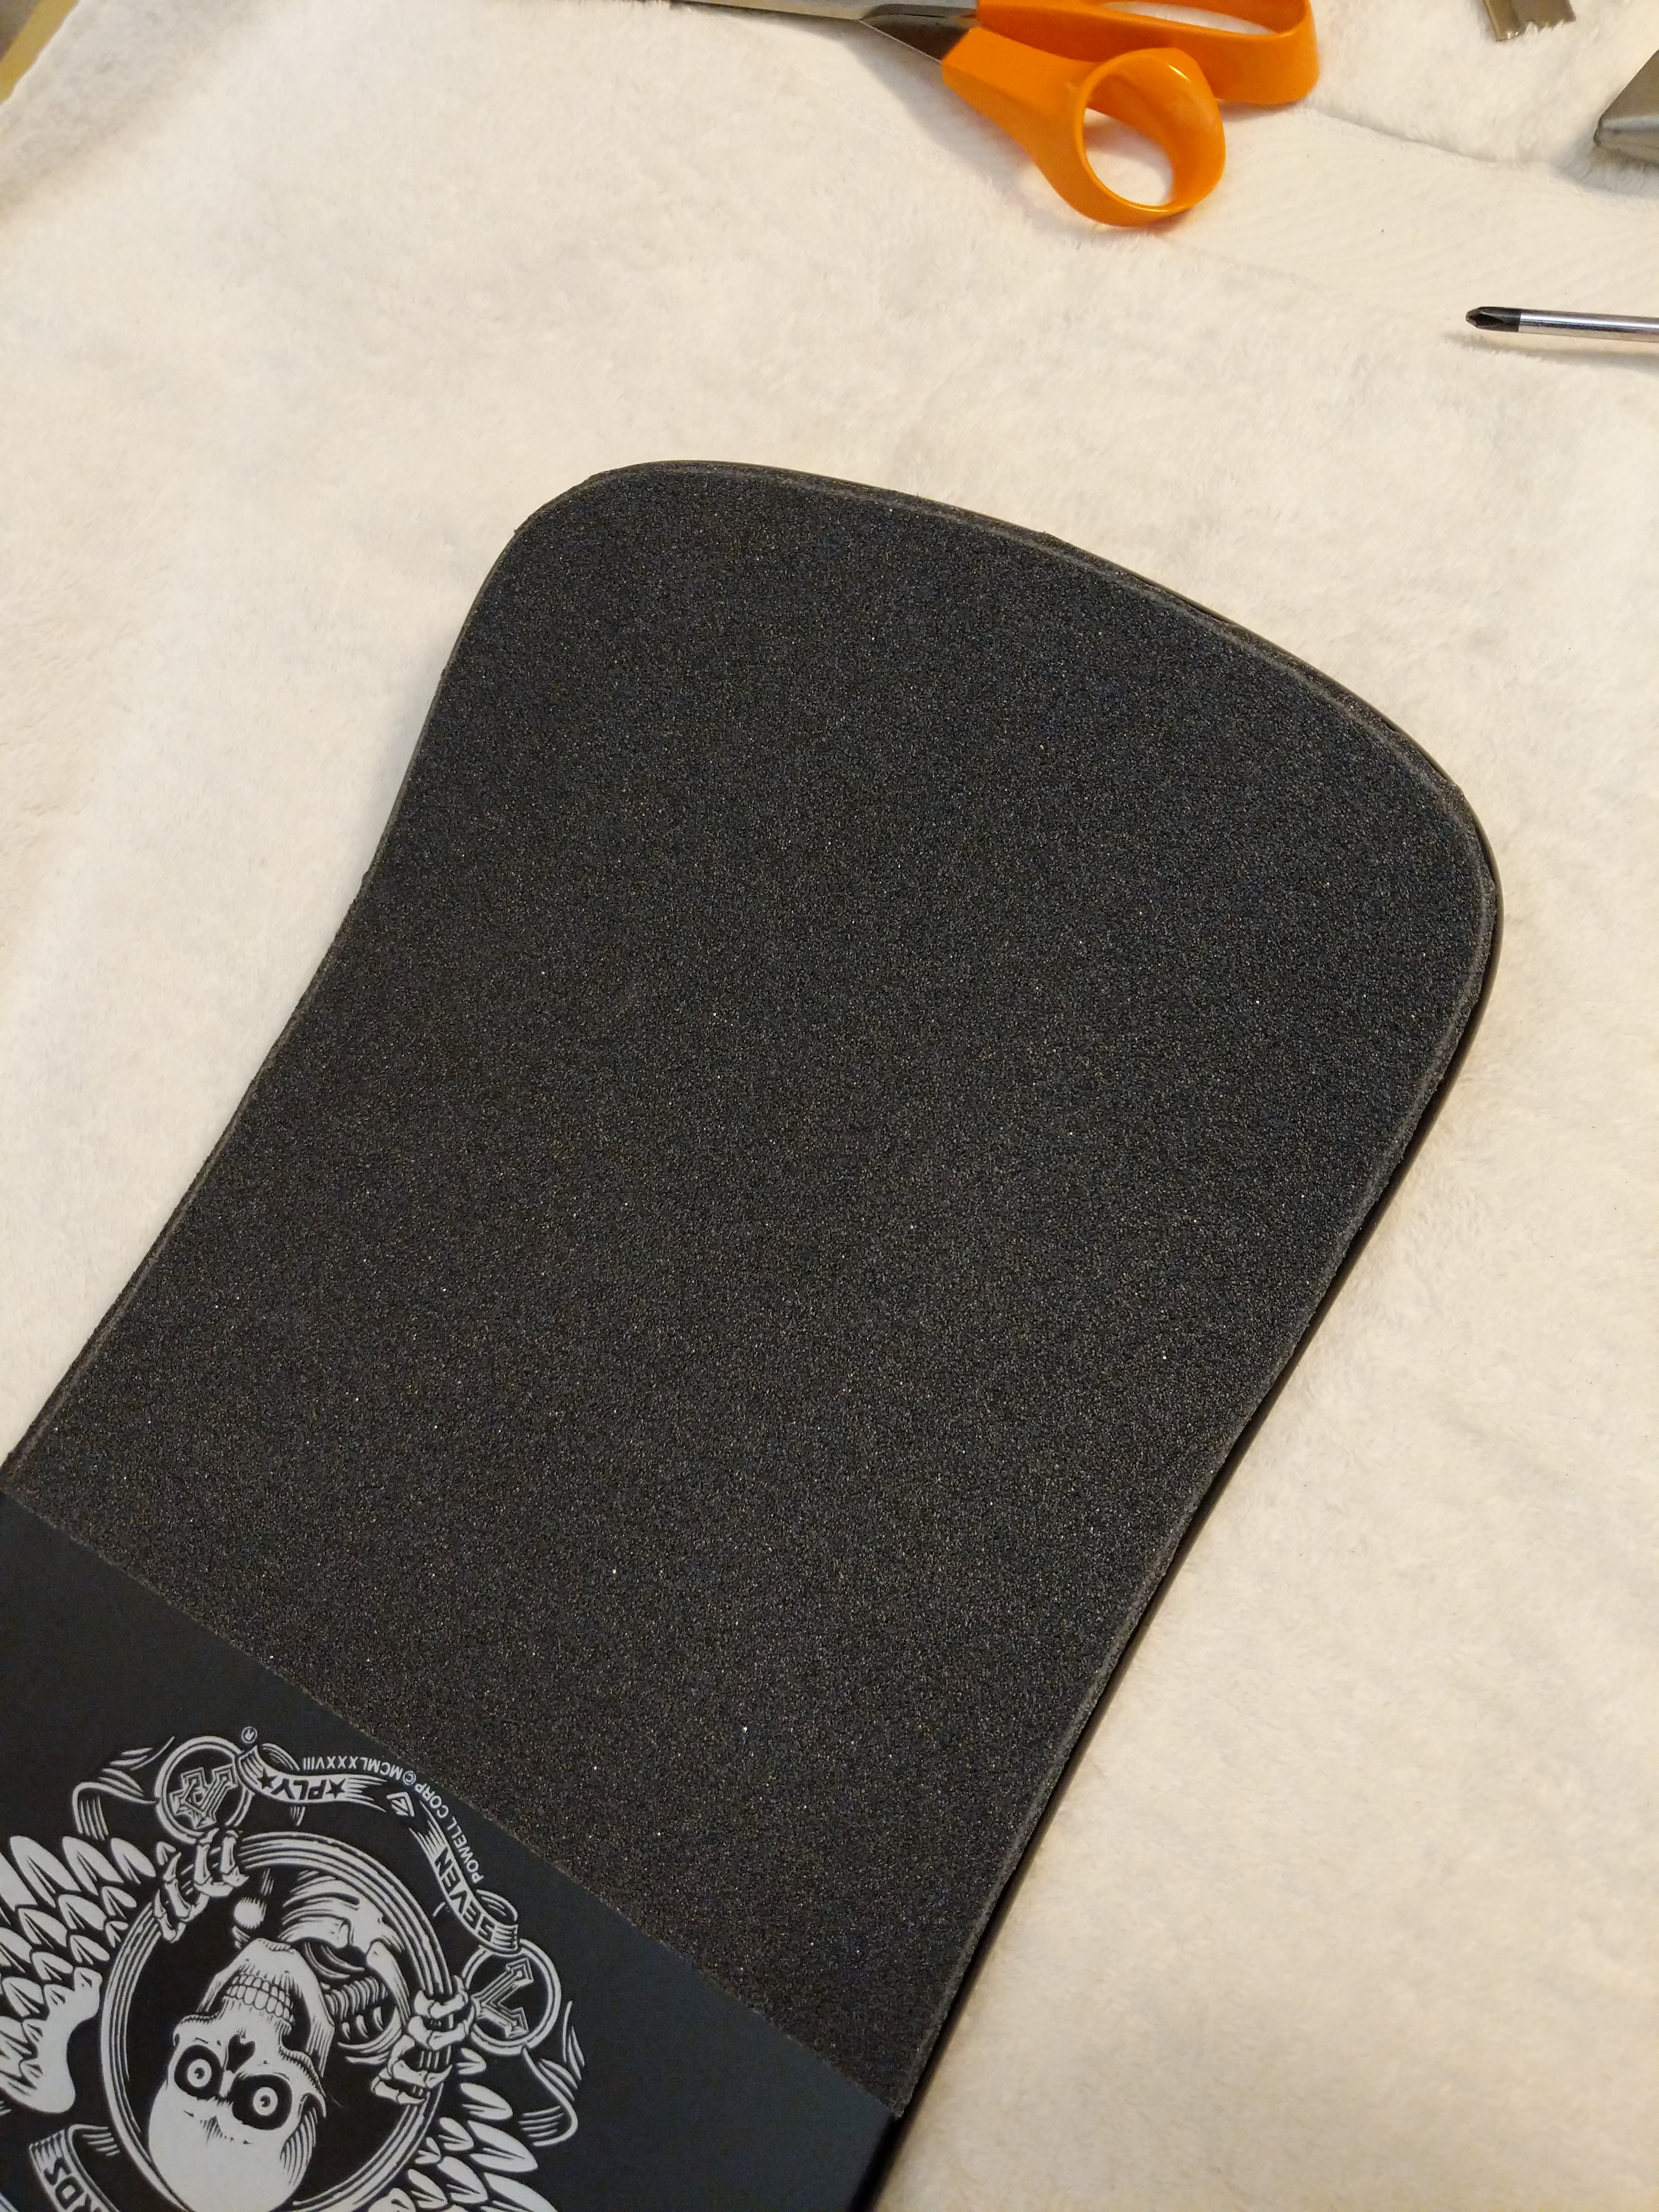
Next, I pressed the grip tape down around the edges of the deck.
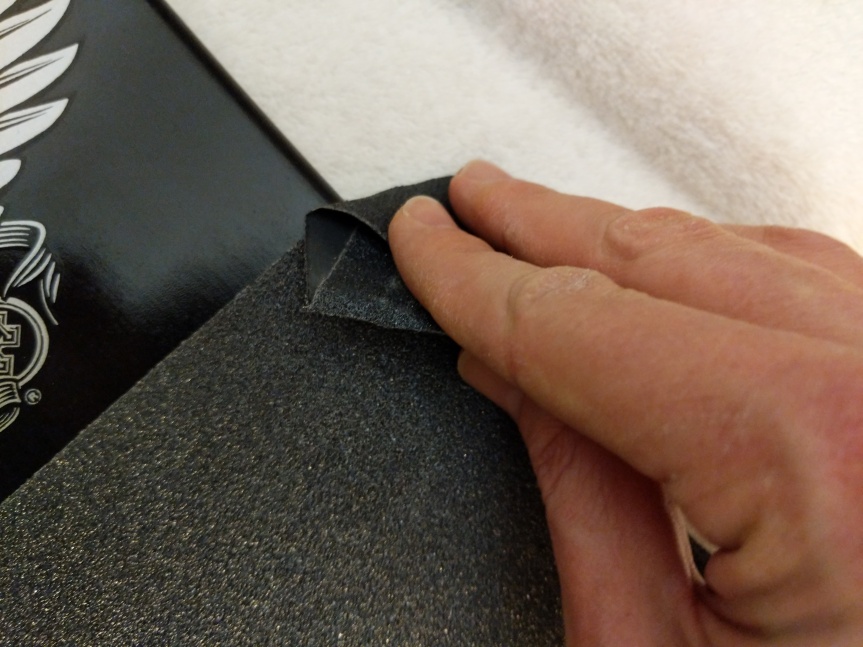
I ran a rolled up piece of excess grip tape around the edge of the deck to give the grip tape a clean edge all away around.
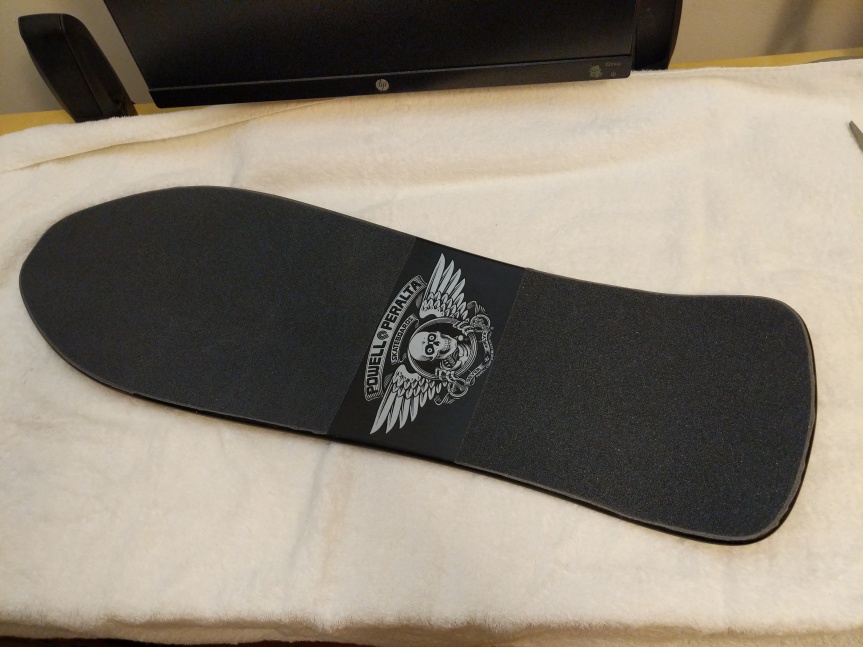
With the grip tape applied, I used a screw driver to punch through all of the holes in the deck for the trucks and Tailbone.
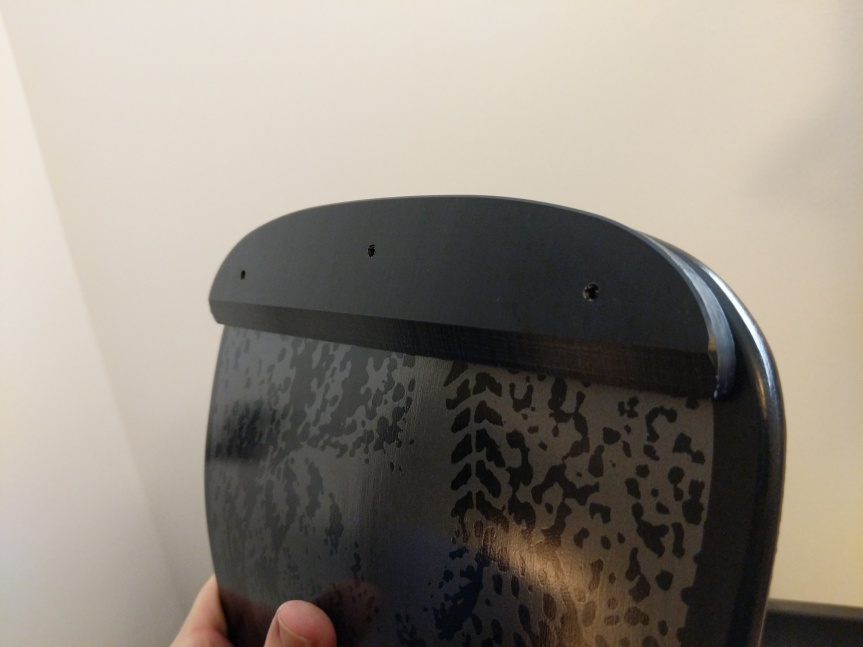
Next, I installed the tailbone by pushing through wood screws and matching them to the holes in the Tailbone.
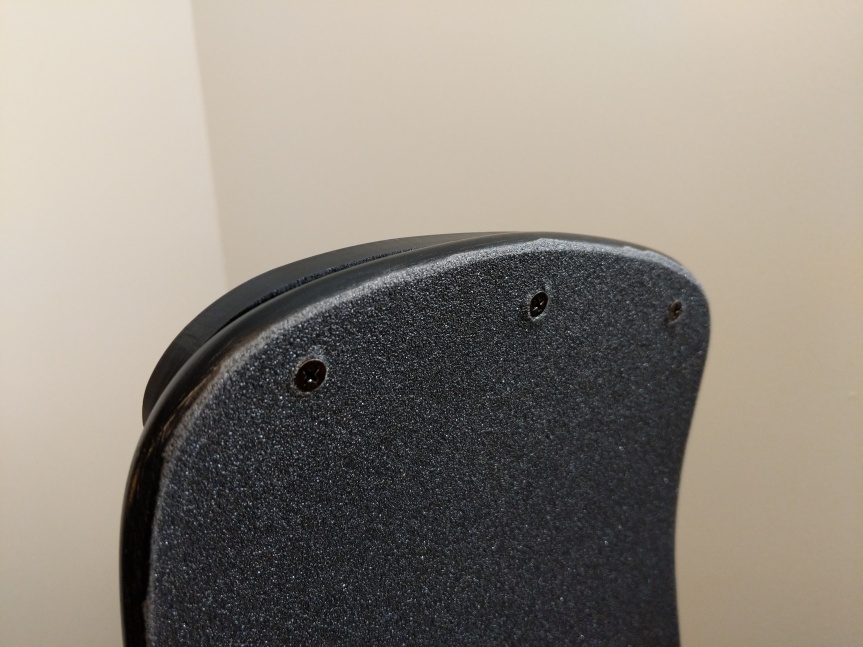
While I had a cordless drill on-hand, I preferred to install these screws by hand. I was afraid of over torquing the screws and losing grip in the Tailbone’s plastic. Installing the screws by hand allows me to feel them dig into the plastic and maintain a secure hold on the Tailbone through the deck without stripping out plastic.
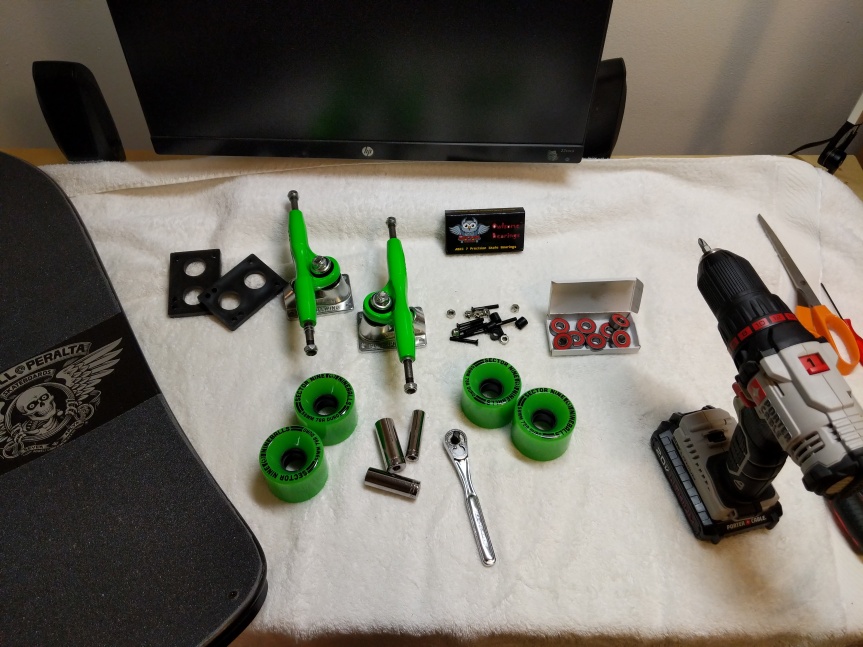
The final stage of the assembly involves the trucks, wheels, bearings, and 1/4″ risers. I laid all of these parts out to make the assembly quicker. For some of the assembly, I used the cordless drill with a Philips head driver, and I had my 1/4″ drive tall sockets in 3/8″ (for the truck mounting bolts) and 1/2″ (for the truck’s axle bolts).
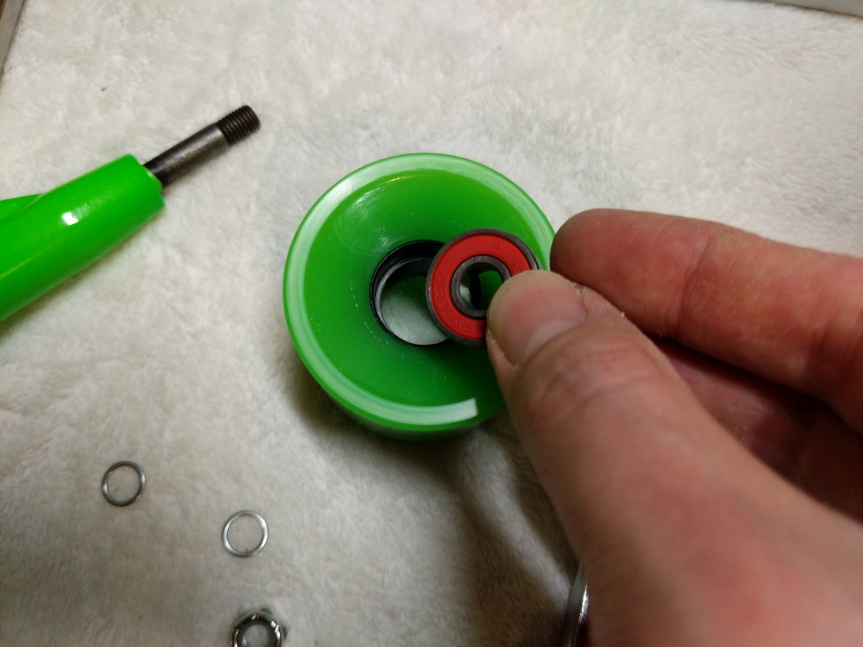
The first task was to install bearings and spacers in each wheel. I placed an Owlsome Precision ABEC 7 bearing assembly into the back of a wheel.
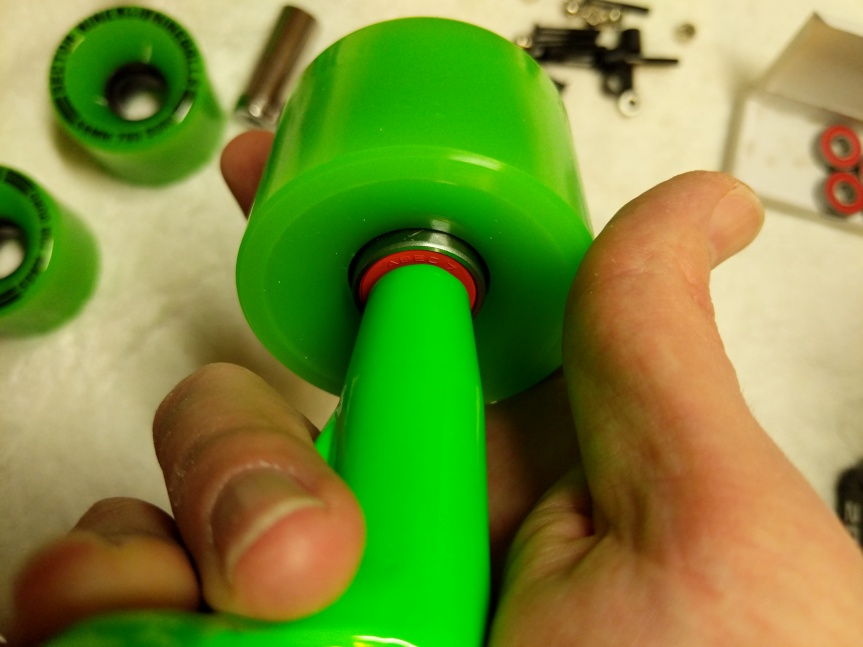
Then, I used one of the trucks to help me press the bearing completely into the wheel so that it is flush with the wheel.
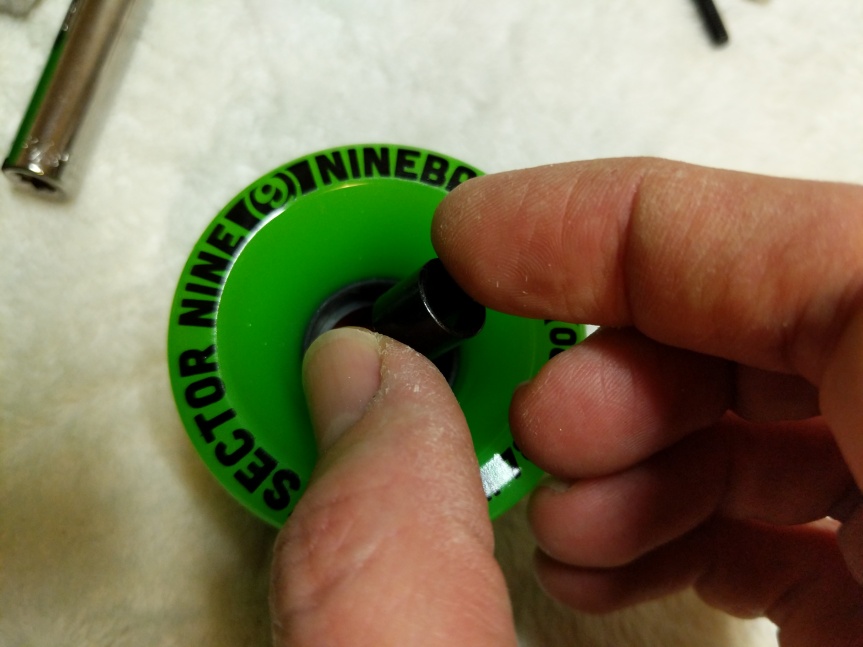
Turning the wheel over, I dropped a spacer on top of the inserted bearing.
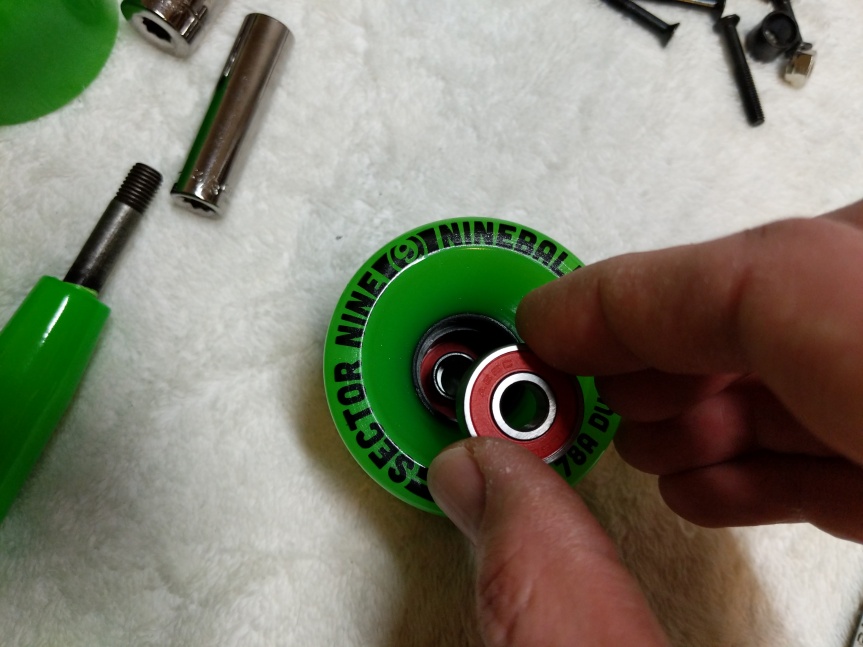
Then, I placed another bearing into the front of the front of the wheel over the spacer, and again, used the trucks to help me press the bearing assembly completely into the wheel.
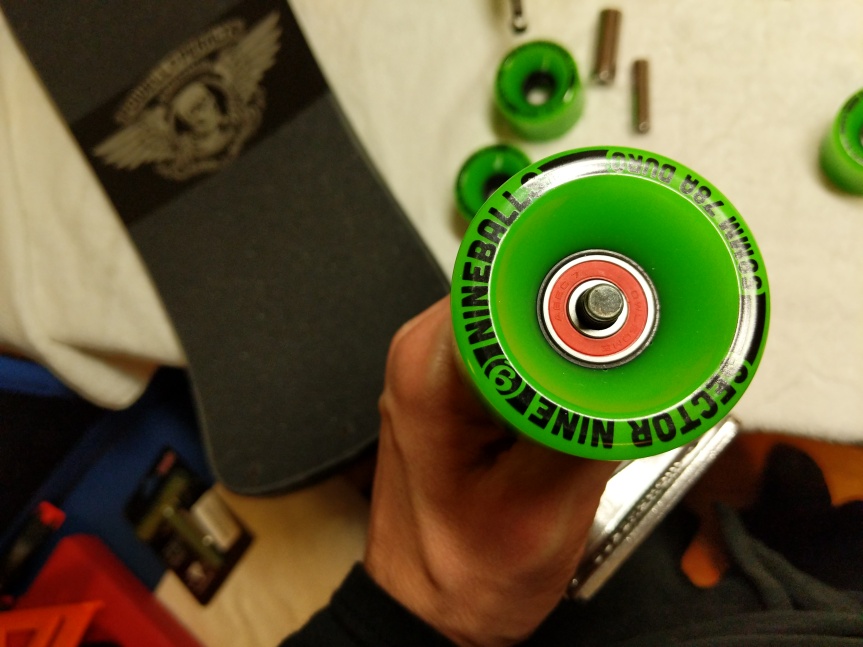
Then, I pulled the wheel off, placed a washer on the axle, followed by the wheel with the front facing outward, another washer, and then the axle nut. I tightened the axle nut by hand with the 1/2″ socket. I left a very slight bit of play for the wheel on the axle.
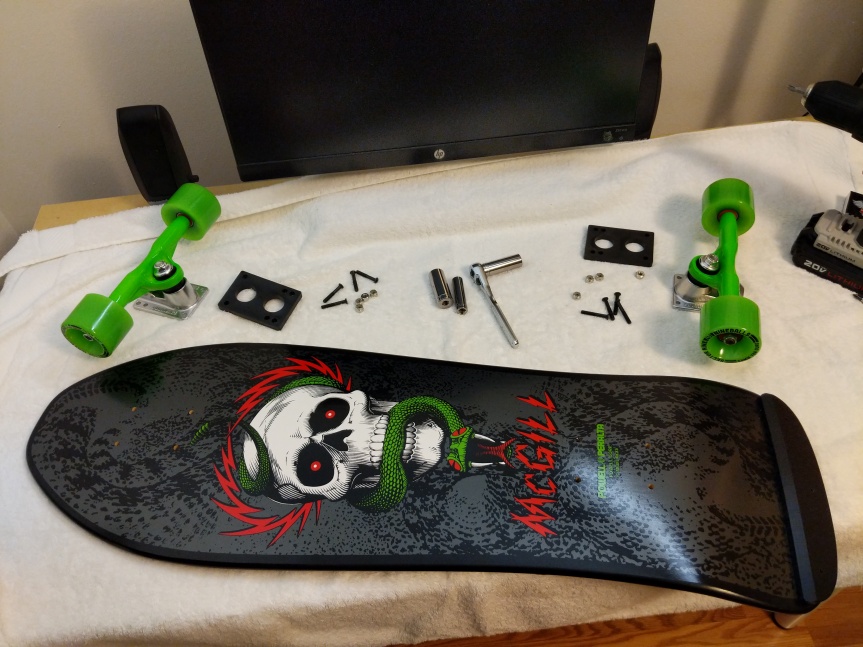
With all of the wheels assembled with bearings and spacers and these installed on the trucks, I was ready to complete assembly of the skateboard by mounting the risers and trucks to the skateboard deck.
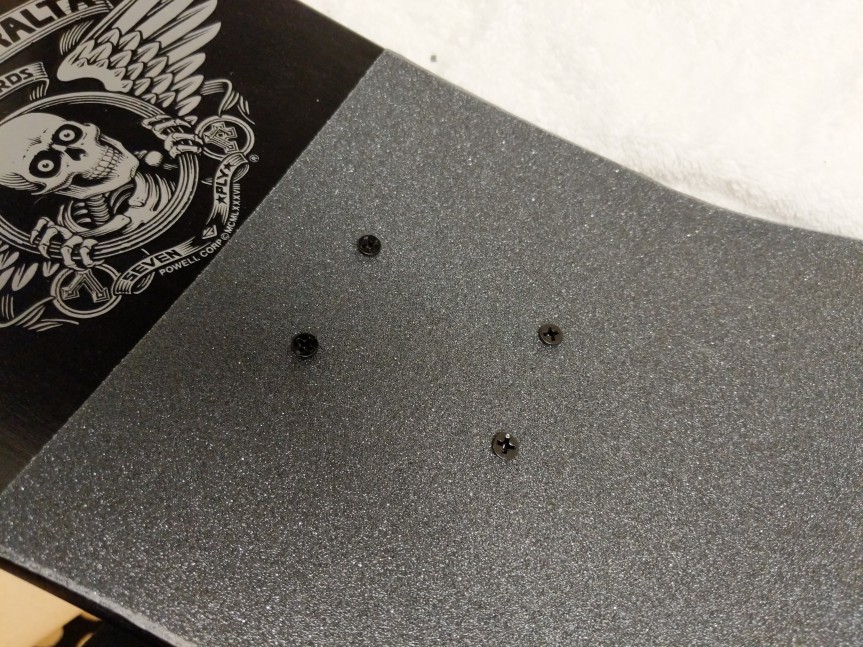
First, I pushed the 1 1/4″ truck mounting bolts through the skateboard deck.
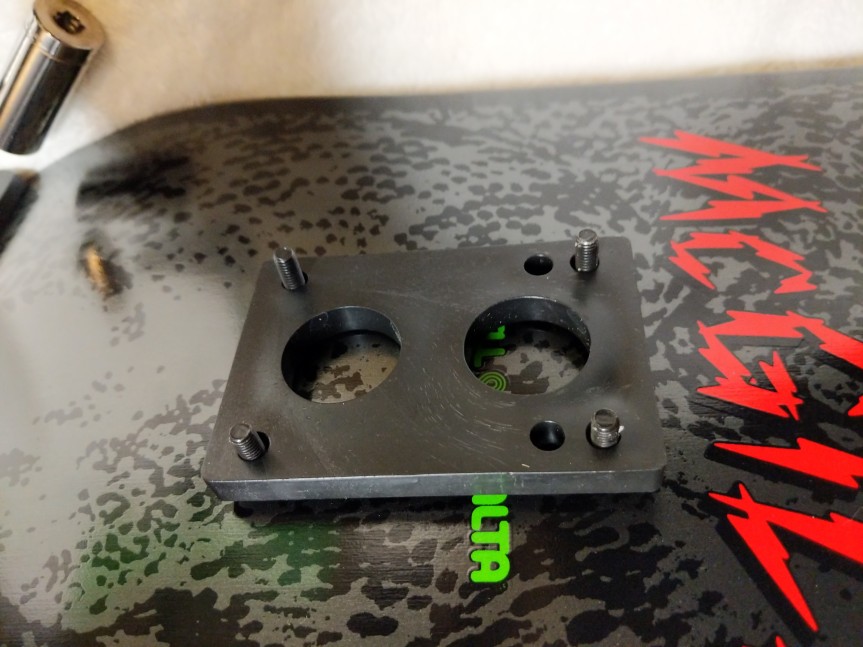
Then, I mounted the 1/4″ riser through the bolts on the underside of the skateboard deck.
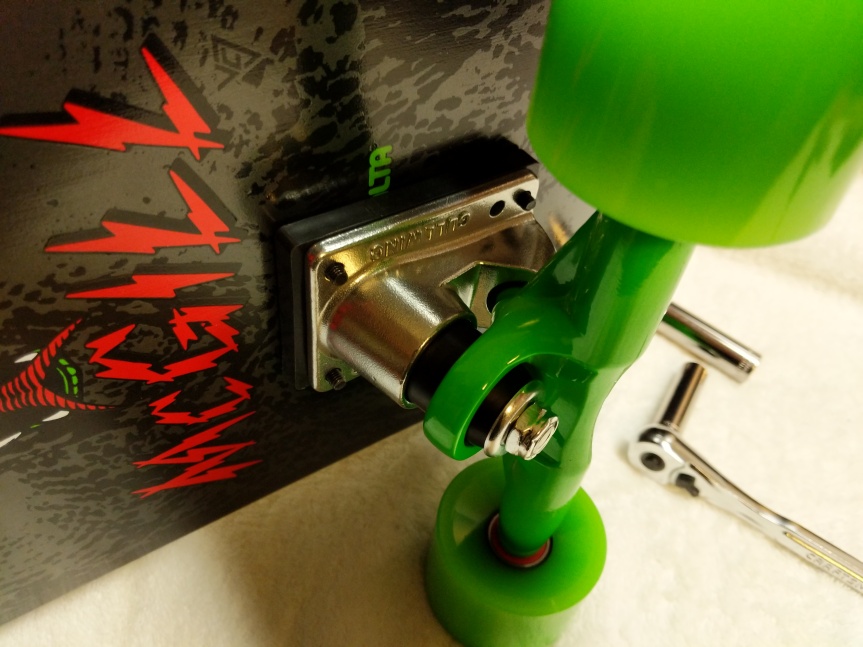
Next, I turned the skateboard on its side and mounted the trucks.
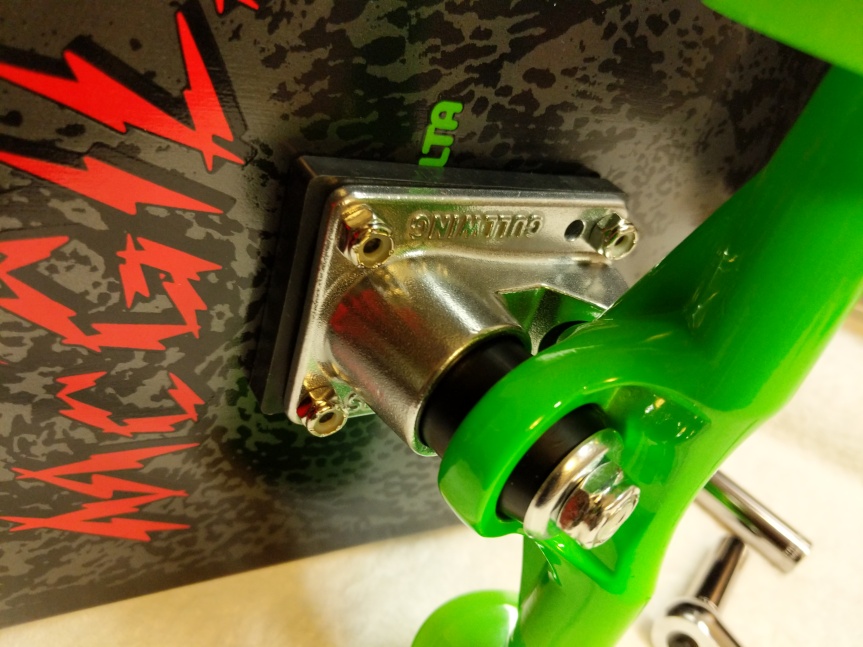
I hand threaded the four hardware nuts on each mounting bolt for each truck.
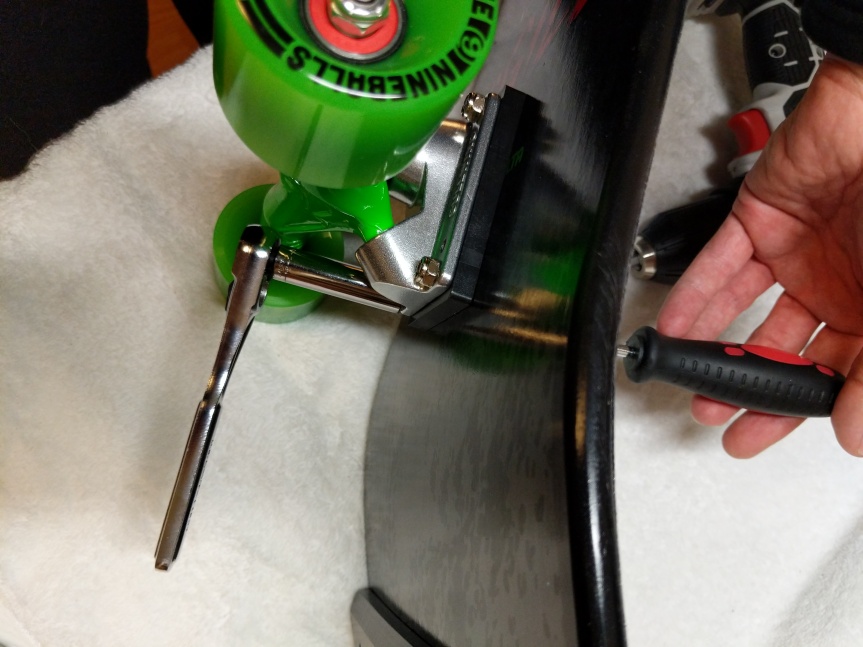
After confirming each nut was threaded correctly, I used the cordless drill to snug each bolt down to the nut and then hand tightened each bolt in an X-pattern until I was confident in each truck’s mounting to the skateboard deck.
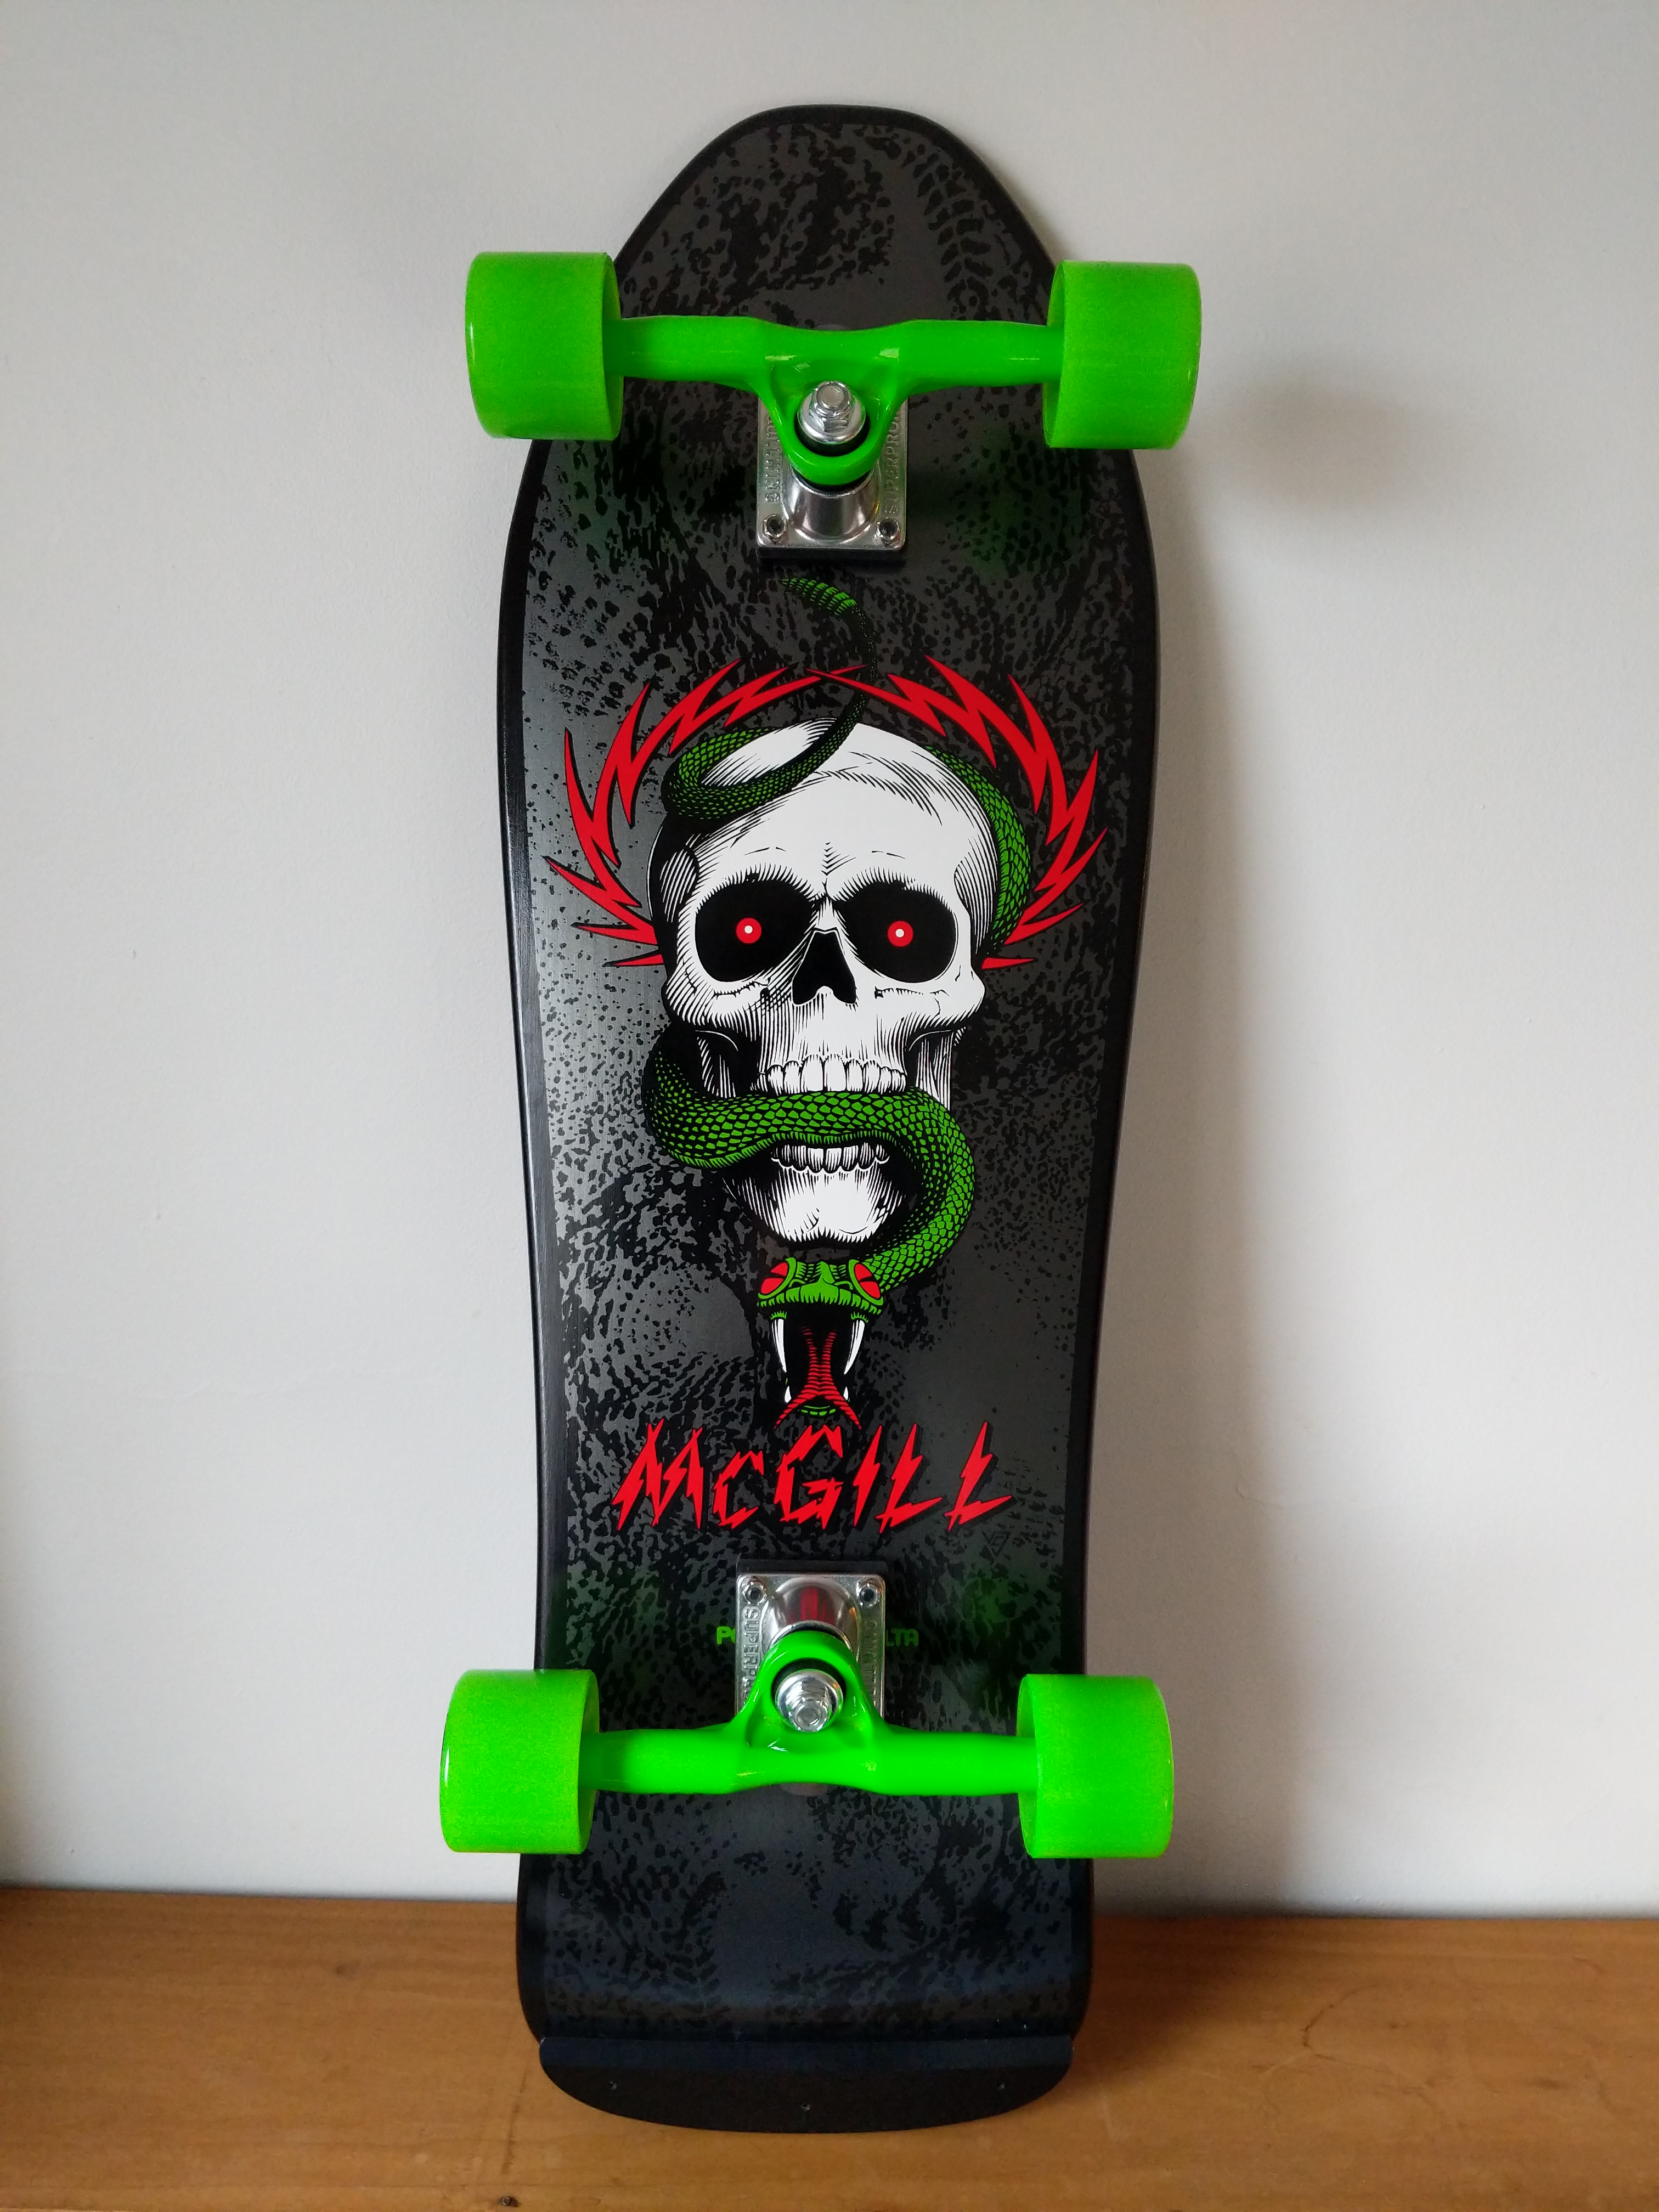
With the trucks mounted, I have a complete skateboard ready to take out and hit the streets with. The soft, larger wheels should be great for riding in my neighborhood. However, I have been looking at Powell-Peralta’s G-Slides, which I might get later.
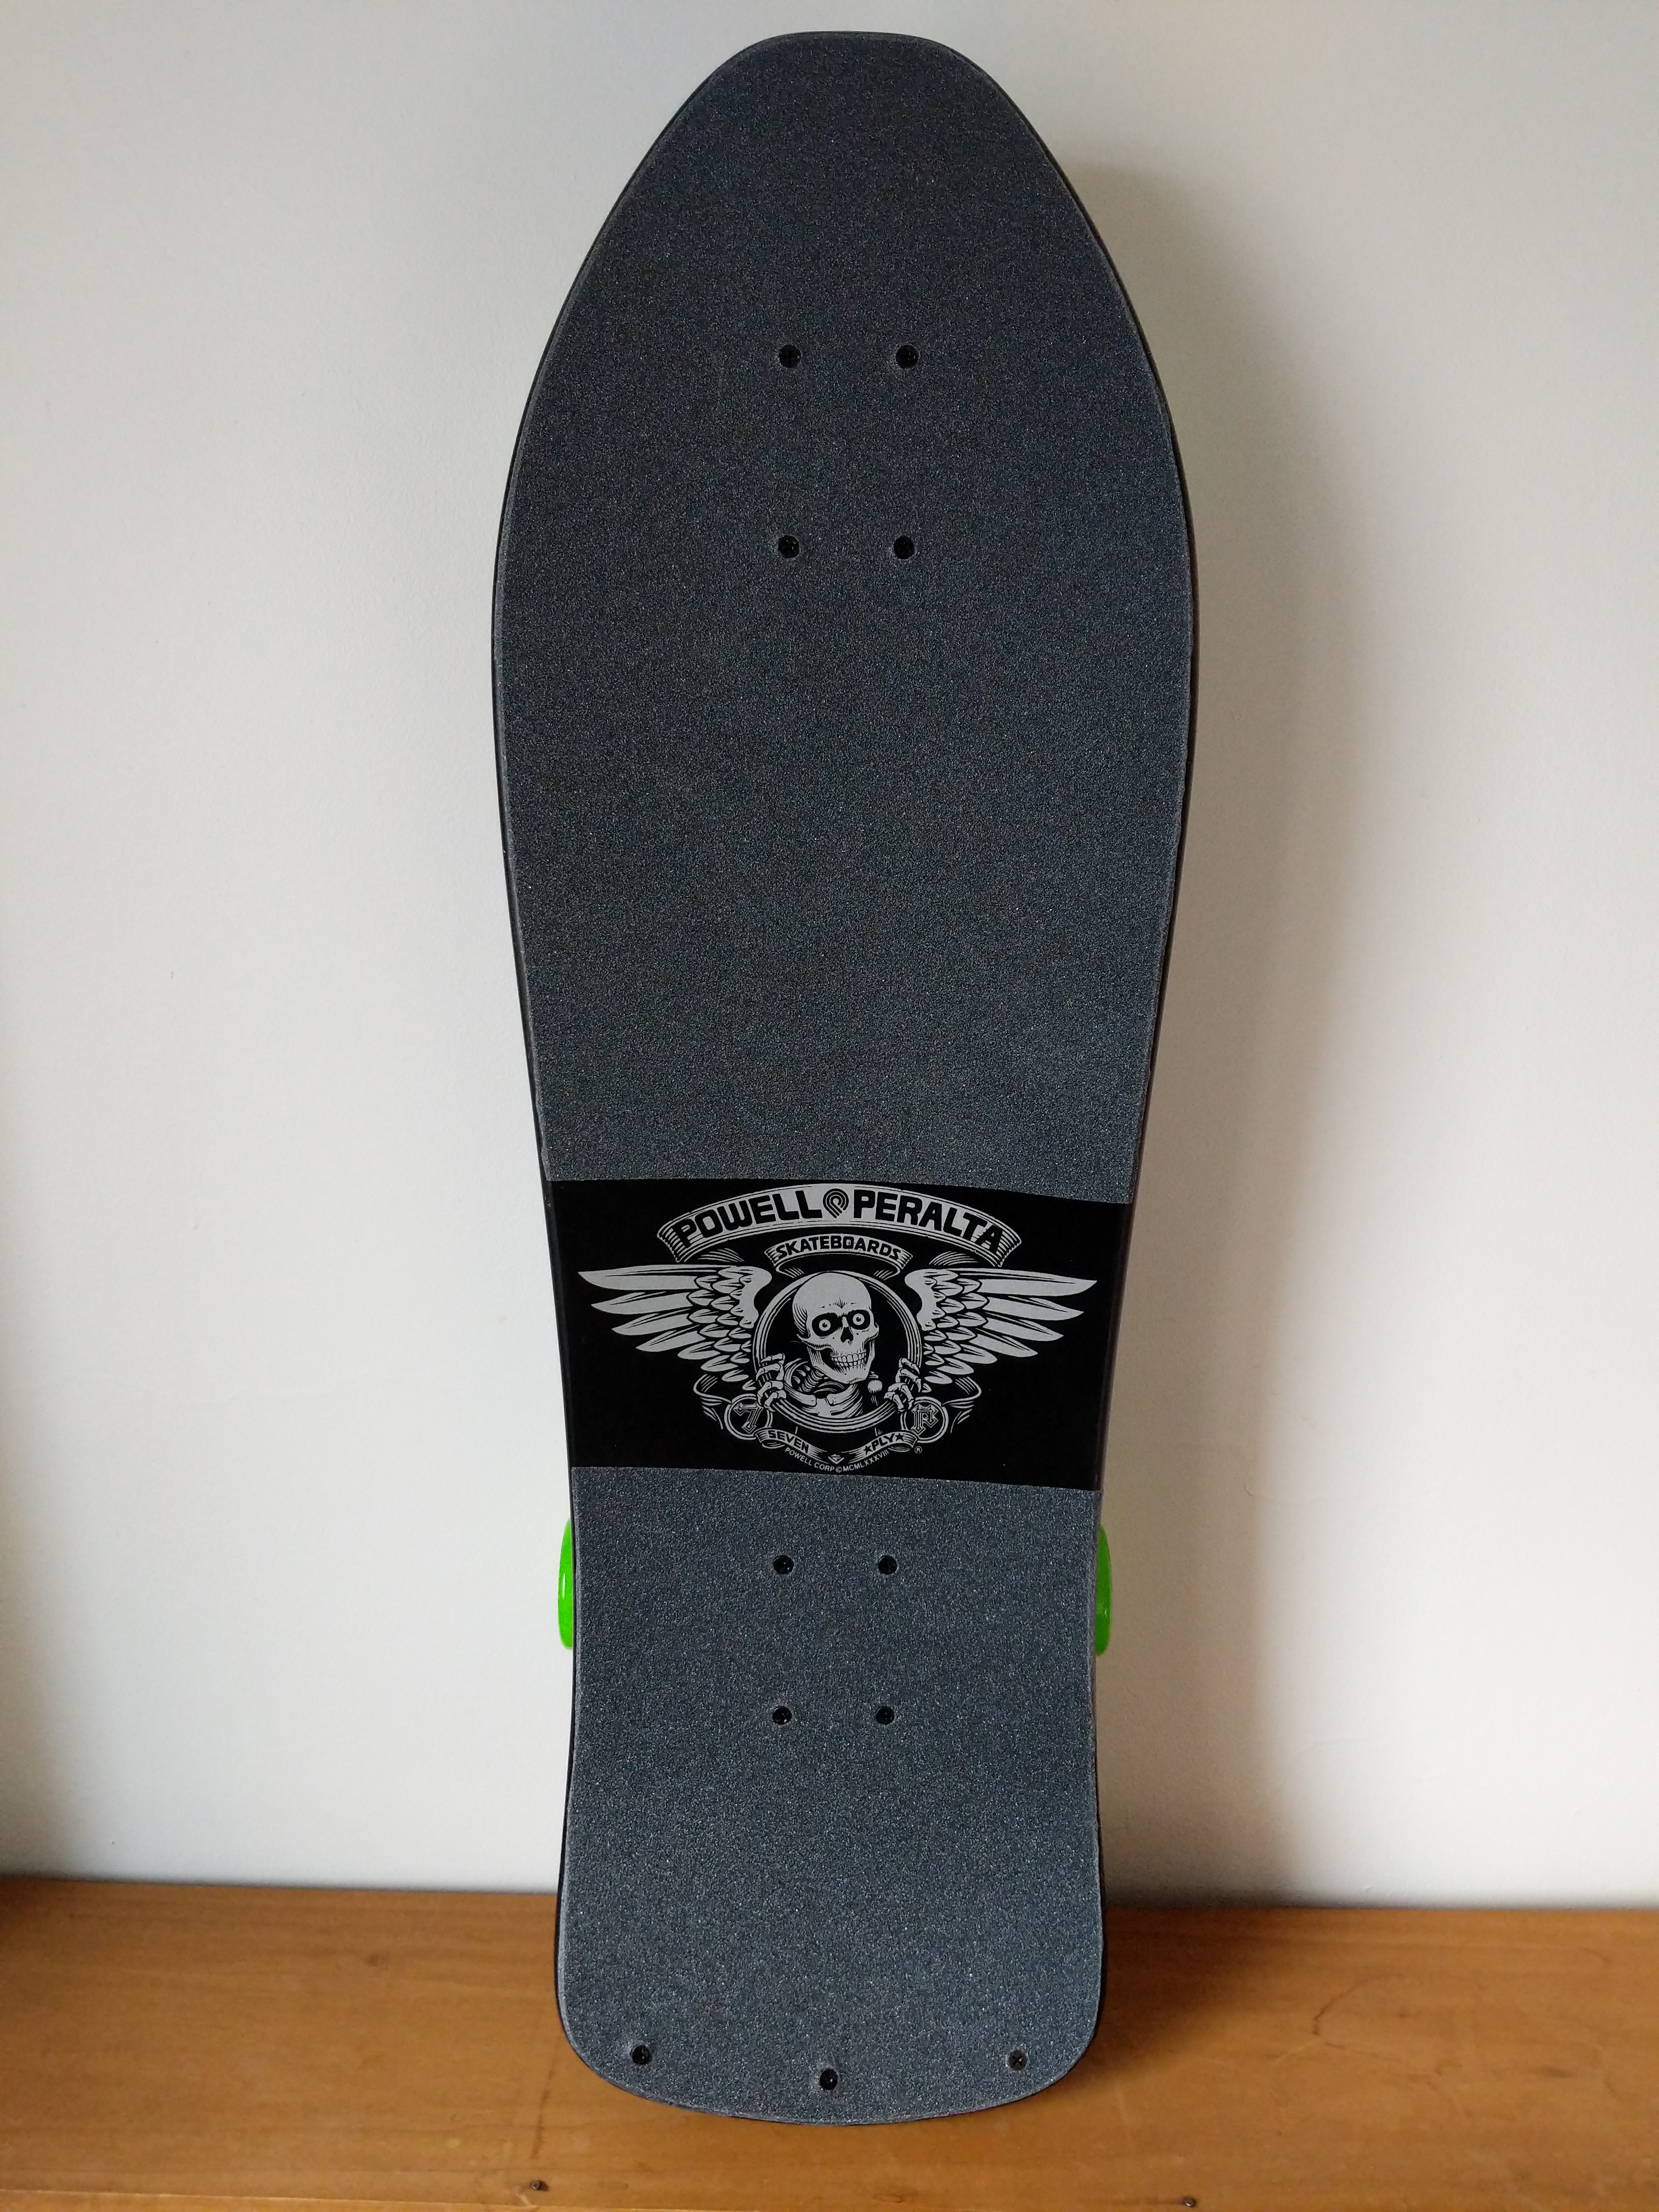
I opted to cover the “Bones Brigade” name beneath the logo, because I wanted a little more grip on the tail section of the deck.
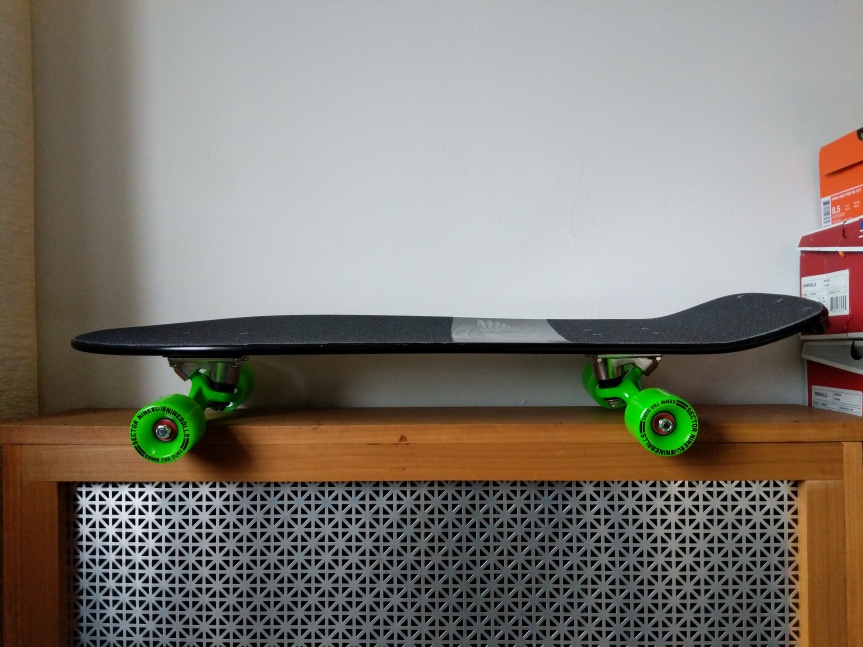
My original McGill had a nose kick while this late-80s re-issue does not. Nevertheless, I think this will be a fun skateboard to ride. Y asked me to wait until she returned from her trip to see her parents before I rode it in case I hurt myself. She’s back, but the weather isn’t superb, so I might content myself with daydreaming about riding my new skateboard until we can take it out together.
In all honesty, I have to remind myself that I can’t necessarily do the things I did when I was younger, or put another way, I can try to do the things that I used to do, but there will likely be more serious consequences. C’est la vie!
