Category: Artificial Intelligence

  • Electric Poet 1.6, a Macintosh Poetry Generator Program

    Electric Poet 1.6 for Macintosh, Icon Group

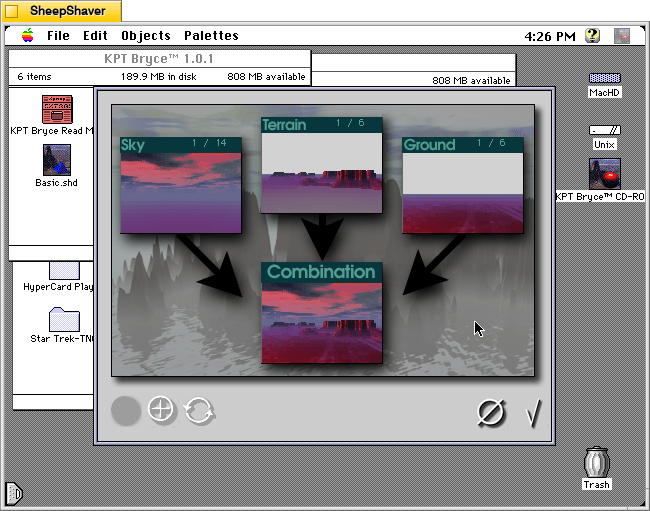
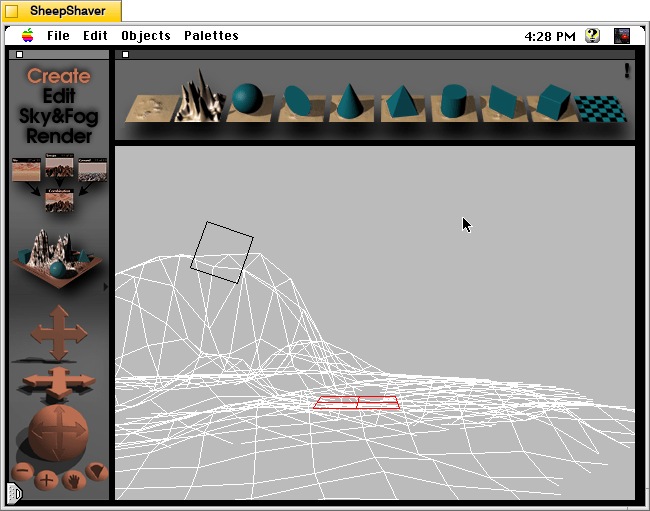
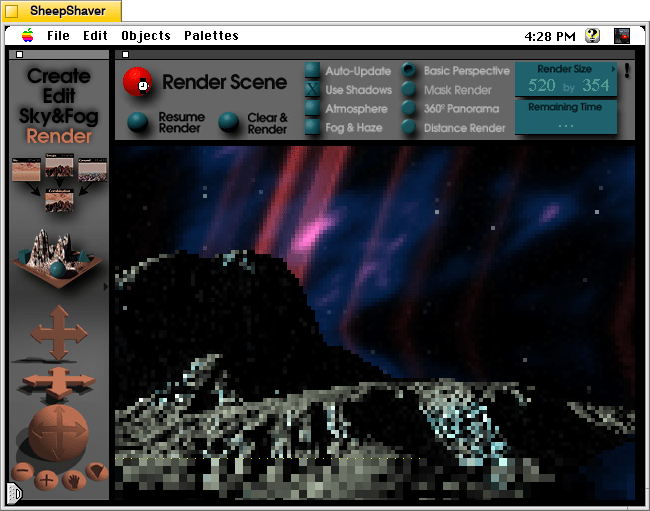
    Like I’ve written before about image generation software such as KPT Bryce and Evolvotron, which employ fractals instead of artificial intelligence (AI) to generate landscapes and abstract images respectively, there are also text generating programs that use a variety of coding tricks to string words together in a far less complex manner than those used by large language model (LLM) AI systems today. Nevertheless, these precursors to generative AI deserve our attention to explore how they work and what they might have been and still used for.

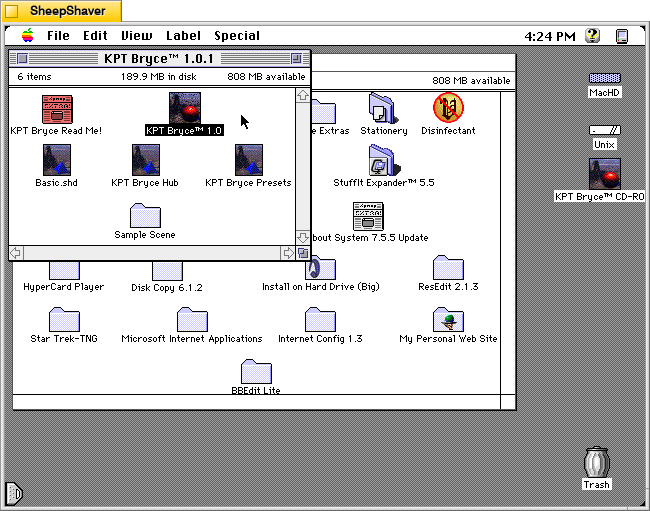
    One such text generating program is Electric Poet 1.6 by Niklas Frykholm. It is a program that is only 48K in size, uses 600K of RAM, and is built to run on 68K-based Macintosh computers. For testing and creating the screenshots below, I used SheepShaver running System Software 7.5.5.

    In his abstract for the Info-Mac Archive (available in a viewable format here or as a part of the entire Info-Mac archive here), Frykholm writes, “Electric Poet can use an ordinary text file as a mould for creating its own litterary [sic] works. This works best with abstract poetry where it’s sometimes hard to tell real from bogus.”

    On 28 Sept. 1996 on his personal website, he writes, “Electric Poet is a fusion between my interest in computers and my interest in poetry. It is an attempt to write a program, capable of creating its own literary works. The Electric Poet takes the works of a biologic poet (as a TEXT-file) and rearranges them in a random but controlled manner. Heres a poem written by the program:

    often
    and closer to the chasm
    until you still have been squeezed by the mysterious event
    it showed clearly for the trouble
    and the progress
    about my desktop”

    And according to Frykholm’s “Technical Notes” on the program’s About window, “The method the computer uses for generating text is simple and requires little or no intelligence. When the computer converts a text to a library it creates for each word in the text a list of the words that (at different places in the text) follow that word.”

    “When the text is to be created, the computer starts with a certain word. It then chooses a word at random from the list of words that could follow the world. After that it chooses a word at random from the list of words following that word, and so on . . .”

    Essentially, Electric Poet is a clever piece of software that uses word relationships within a given text to create text based on random selections within that set of relationships.

    Electric Poet 1.6 for Macintosh, Program's "The Poetry" window

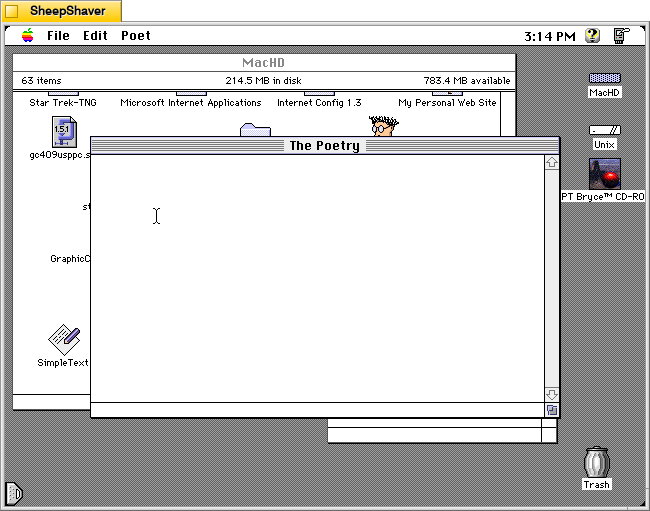
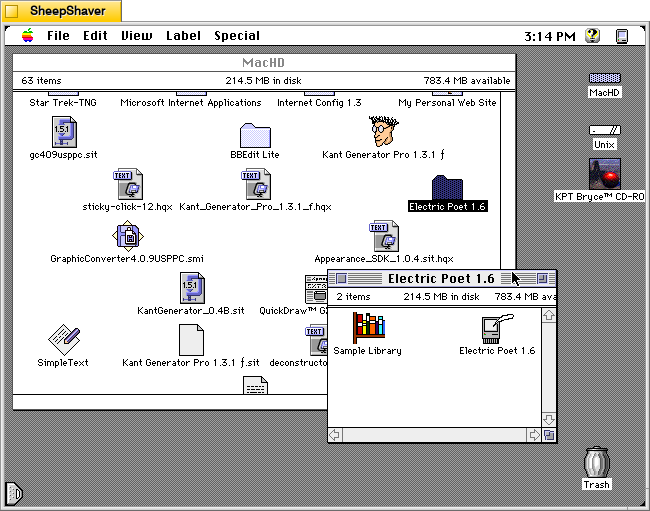
    After double clicking on Electric Poet 1.6 in the icon group shown at the top of the page, the program presents “The Poetry” window with a blinking cursor. To have the program generate poetry, the user needs to open a Library from the File menu and then choose “Generate Text” from the Poet menu.

    Electric Poet 1.6 for Macintosh, About Window > Credits

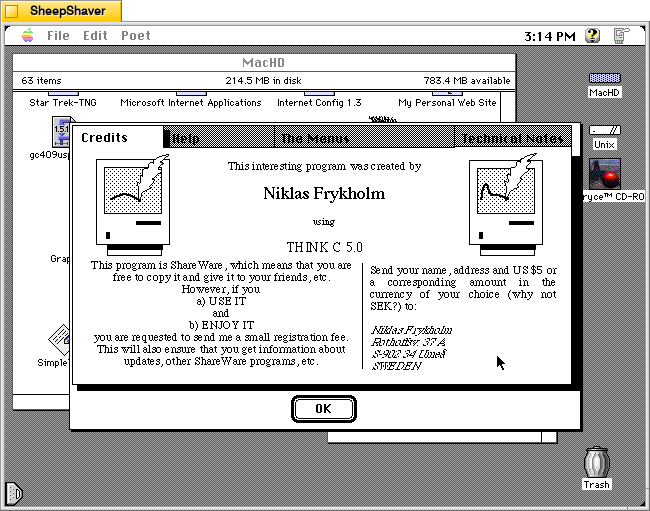
    Opening the “About Electric Poet” from the Apple menu gives the user a super helpful set of tabs that gives you information for registering the shareware program, help using the software, an explanation of the menu items, and technical notes about how the program works to generate text.

    Electric Poet 1.6 for Macintosh, About Window > Help

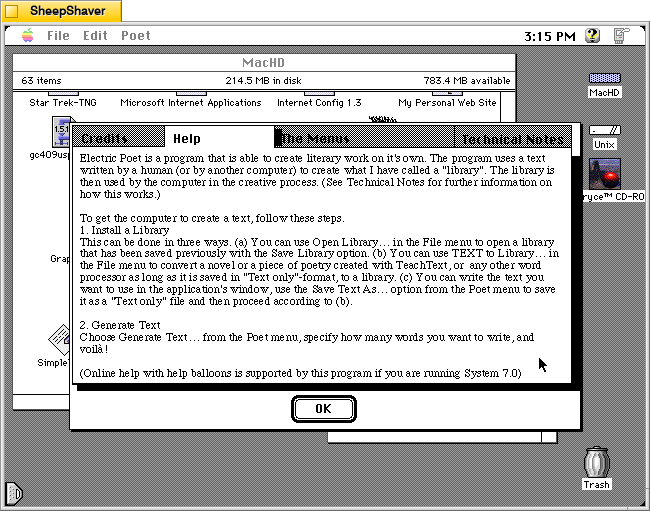
    The About Electric Poet’s Help tab breaks down what the user needs to do so that the program generates text. The first step is to “install” or open a Library. While Electric Poet comes with a sample Library based on the script for the film Star Wars, most users would probably want to create their own Library, which is easy enough to do. Once the Library is created and loaded, Electric Poet can then generate text from the Poet menu.

    Electric Poet 1.6 for Macintosh, About Window > The Menus

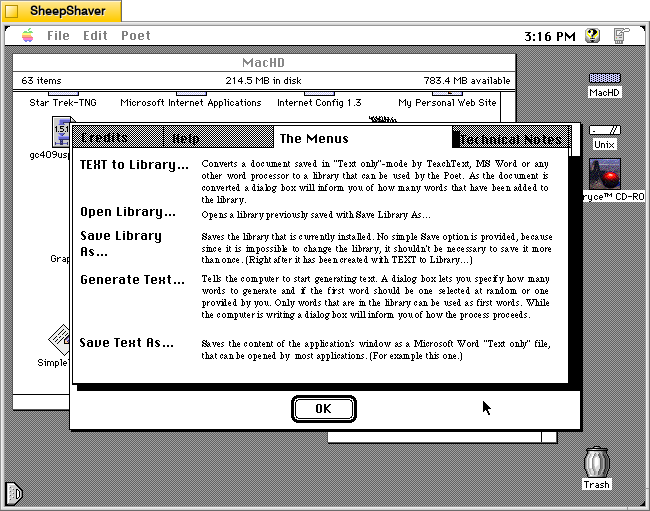
    The About Electric Poet’s The Menu tab gives further explanation about what each menu option does in the program.

    Electric Poet 1.6 for Macintosh, About Window > Technical Notes

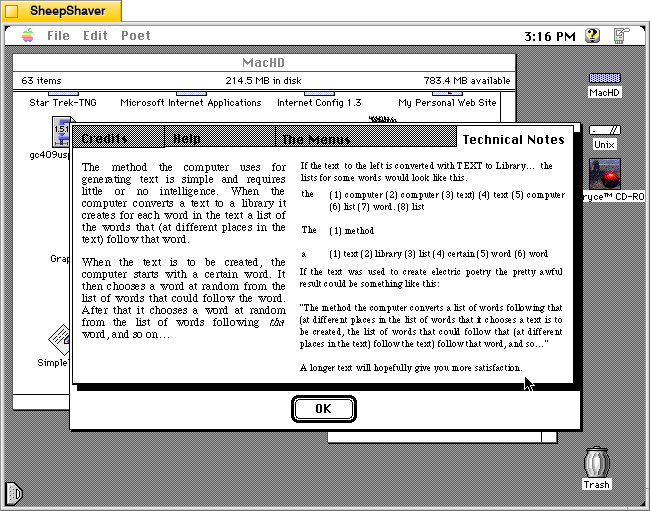
    The About Electric Poet’s Technical Notes provides details about how it uses lists of words and the words that follow immediately after those words as a corpus of random selections linked to adjacent words. This is the magic that makes this program generate text. It uses lists of adjacent words and random selection to thread together sentences and phrases.

    Electric Poet 1.6 for Macintosh, File menu options

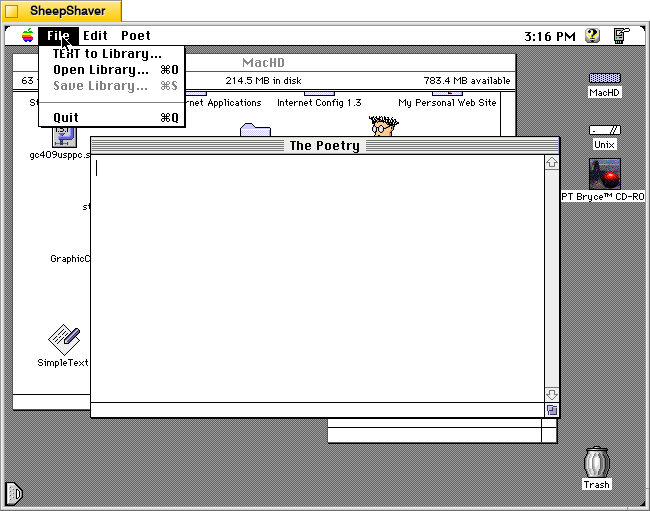
    To get started with Electric Poet, the File menu gives you access to opening a Library or creating a Library from “TEXT to Library.” It’s important to note that you need to have your text file in Teach Text format before attempting to create your own Library. I discovered that when opening a raw text file the program would create a list of words (as it would normally when creating a Library), but then the program would lock up and while I could still move the mouse, I could no longer use the menu, switch programs, or activate the Finder. I would have to kill the SheepShaver process on Debian and relaunch. I observed this same behavior when running Electric Poet on the 68k emulator Basilisk II.

    To avoid this problem, open your raw text file in BBEdit or another full-featured text editor (if it is larger than 32K–the Teach Text limit), copy an excerpt to the Clipboard, and then go into Teach Text, paste the text, and save it as a file. Then, use “TEXT to Library” in Electric Poet to create a Library from that Teach Text-saved file.

    Electric Poet 1.6 for Macintosh, Poet menu options

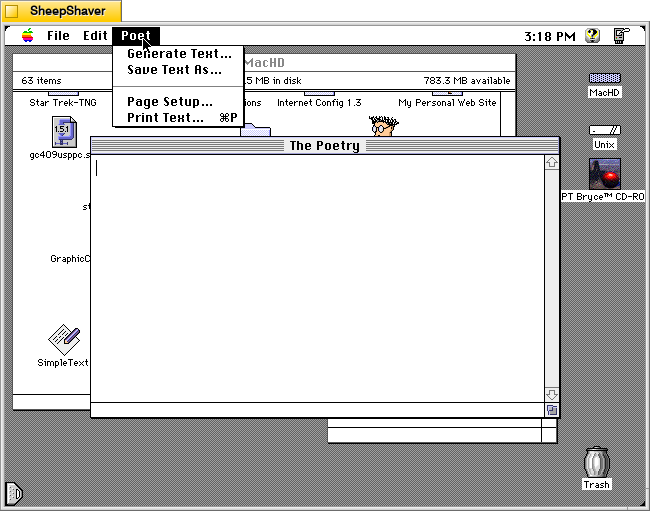
    Once you’ve opened your Library file, you can now use the Poet menu to “Generate Text.”

    Electric Poet 1.6 for Macintosh, Poet menu > Generate Text window

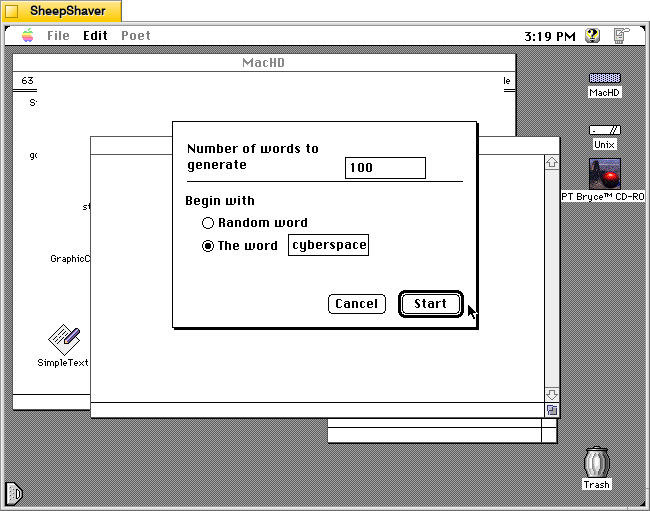
    The “Generate Text” menu option presents you with these controls before generating some text in “The Poetry” window. It allows you to choose how many words to generate and the option to begin with a random word or a specific word. If you choose a specific word, bear in mind that it is case sensitive. For example, I tried beginning with “Cyberspace,” but the word was not found in the Library. I tried with “cyberspace” and it generated text as shown below.

    Electric Poet 1.6 for Macintosh, Output in The Poetry window

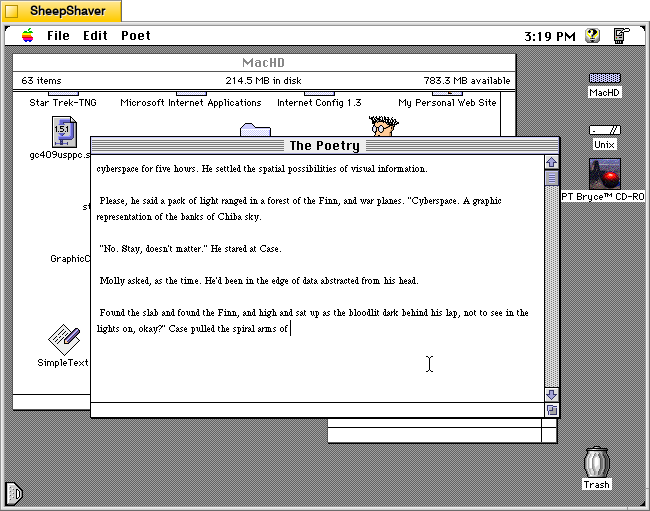
    Above, is a sample of text generated from “The Shopping Expedition,” the third chapter of William Gibson’s Neuromancer (1984). This example is just one run. Subsequent runs will yield very different results. In this regard, it is like using Stable Diffusion or LLaMA in that many iterations are often required to generate an output that is desired by the end user.

    Soon, I’ll post about Kant Generator Pro, another Macintosh text generator program that creates pseudo-sense/technobabble text (writing like the philosopher Kant) as well as form generated writing, such as thank you notes. The form generated writing that Kant Generator Pro can do is aligned with one of the kinds of writing large language models are supposed to be able to help us with–emails, follow-ups, etc.

  • September 2023 Updates to the Generative AI and Pedagogy Bibliography Page

    An anthropomorphic cat dressed like a professor in a tweed jacket, sitting at a desk with papers in front of him. Shelves of books behind him. Image created with Stable Diffusion.

    Since posting the original version of my Generative Artificial Intelligence (AI) and Pedagogy Bibliography and Resource List in April 2023, I have continued to add resources that I find through my research and daily online reading. I’ve added 61 articles and books to the bibliography since August 2023 for a total of 382 MLA-formatted references. Also, it has 55 online groups and resources linked at the bottom. Whenever you access the bibliography, you can check the bottom of the page to see if I’ve recently updated it–I always add the date for any updates.

    I hope that the bibliography might be useful to you! If there’s something that my bibliography is missing, send me an email (details in the “Who is Dynamic Subspace” widget to the right) or connect with me on social media (links on my About page).

  • Ten Suggestions on Teaching With/About Generative Artificial Intelligence (AI) in the Writing Classroom

    Anthropomorphic cat wearing suit and tie, and standing in front of a chalkboard. Image created with Stable Diffusion.
    Anthropomorphic cat wearing suit and tie, and standing in front of a chalkboard. Image created with Stable Diffusion.

    I’ve been spending a lot of time studying and using generative AI technologies and thinking about their pedagogical implications, and over the summer, I invested more energy into taking intensive online classes relating to generative AI on LinkedIn Learning, which I wrote about here and here. The suggestions below are a distillation of some of the important ideas that I have learned and plan to implement after my sabbatical this year concludes. Readings associated with these points can be found on my extensive generative AI pedagogy bibliography. Maybe you will find some of these helpful to your thinking for your own classes as we make our way into the science fictional future together!

    1. Build ethical and legal issues of generative AI into every discussion and assignment. Of course, a separate module or a whole course can be focused on these topics, but students need to see how ethical and legal issues are tightly woven into how these technologies are developed, the challenges that they present, and how to be prepared to avoid, mitigate, or resolve those challenges. By weaving ethical and legal issues into the quotidian, it helps students think critically about these issues throughout the learning process and it avoids the conclusion that ethics and legal concerns are just an afterthought.
    2. Show students how bias in generative AI is real. Since generative AI is trained on datasets of work created by people, the AI systems will reflect the biases inherent in the content of the dataset and the ways different people might be represented in the dataset (e.g., more books by white male authors and fewer by writers of color or women writers). Bias is unfortunately baked in. Help students explore how these biases reveal themselves insidiously, might be discovered through prompting, and how to mitigate them (if possible) in the way they use generative AI as a part of their workflow.
    3. Help students become responsible generative AI users. Students need to be taught how to document, cite, and acknowledge the use of AI in their work at school and later in the workplace. This can refute earlier use of ChatGPT and similar sites that fueled what some might consider plagiarism or cheating. Helping students see how it’s okay to use these tools when allowed and properly documented helps them see how they are a tool to support their work rather than a way to avoid working.
    4. Reveal how generative AI technologies are designed, developed, and operated. By learning how generative AI is built and deployed, students get to see how the sausage is made. They will learn that generative AI isn’t magical or all knowing or perfect. Instead, they will realize that years of research and development in mathematics and computer science led to the current state of the art with these technologies, which is still lacking. They will discover the limitations of what these technologies offer (e.g., text generating AI primarily performs sentence completion and has no understanding of what it is doing, or its training data has gaps, deficiencies, biases, etc. that directly affect the text generated). This can be paired with lessons on how large language models are trained, how they are a black box in terms of how they work, and initiatives to build explainable artificial intelligence (XAI).
    5. Approach generative AI as another layer for students’ digital literacy development. Considering AI’s biases, falsehoods, so-called hallucinations, and off-topic responses, pairing generative AI with instruction on vetting information, using research tools (online and off), and applying one’s own skepticism will combat the notion of AI’s trustworthiness, expertise, and authoritativeness. Also, it gives students another source for comparing, contrasting, and verifying when checking facts and establishing reliability of various sources of information.
    6. Introduce generative AI as a new tool for students to add to writing and creative workflows. Some students might like to think that generative AI is a one-stop shop, but we can reveal to them how it can support different elements within a larger creative framework that depends on their cognition, imagination, and effort to produce deliverables. It can aid with ideation, brainstorming, planning, and outlining, as well as handling less important writing tasks, such as replying to an email or DM. An important corollary to this is the fact that prompt engineering is a skill unto itself that students have to learn and develop. In some cases, figuring out the best prompt might require more time, energy, and collaboration with others to accomplish than had the students done the writing output themselves.
    7. Refocus on editing, revision, and the writing process to incorporate generative AI text into student work. One way to accomplish this is teaching students higher level editing and revision tasks using AI generated text as the material for editing. Another way is to teach students how to use editing tools, such as those built into Microsoft Word, Google Docs, and LibreOffice, to work with the text generated by AI.
    8. Harness generative AI as a learning tool to support student experimentation and discovery by example. Students can ask the generative AI to summarize their writing, rewrite their writing for different audiences, turn outlines into paragraphs, etc. However, for students to gain some benefit from this, there needs to be a reflective writing exercise that gives the student an opportunity to dissect what the AI did to the student’s original composition and then based on what the student learns in reflection, they attempt their own new composition with the same goal as that given to the generative AI. The AI’s output can be combined with the student’s reflection and composition for evaluation by peers or the instructor, depending on how you are providing feedback to students on their work.
    9. Recognize writing students as technical communicators, because they use generative AI technology in their writing processes. I am thinking of part of the Society for Technical Communication’s definition of tech comm: “Communicating by using technology, such as web pages, help files, or social media sites.” Using AI to create outputs or as a part of the writing process means that students are using technology to communicate in a deeper way than how we might have thought of this before. Acknowledging this with students might make more of them aware of this as a career path or how they might leverage their communication skills as they transition into the workplace.
    10. Warn students about the possible jeopardy they face by providing their writing, prompts, questions, and personal identifying information to online-based generative AI tools like ChatGPT. Anything you type into the system is saved and associated with you. This means that your inputs might be used to train and fine tune future versions of the generative AI system, and the data collected about you based on what you type and how you use the system might be utilized by the system provider or sold to third parties (e.g., for advertising, adjusting insurance rates, making loan decisions, etc.). This can be connected to a larger discussion of how to protect one’s self online, practice privacy best practices, employ obfuscation techniques, etc. Teaching students how to use their own locally hosted LLMs, such as Meta’s LLaMA and its derivatives. This gives them more control over how their data, and it gives them the option to fine tune their local model to better fit their needs.
  • Reflections on a Month of LinkedIn Learning

    Photo of a business cat taking notes in his office. Image created with Stable Diffusion.
    Photo of a business cat taking notes in his office. Image created with Stable Diffusion.

    As I wrote at the beginning of July here, I planned to take advantage of LinkedIn Learning’s free one-month trial. I wanted to report back on my experience of taking LinkedIn Learning courses and provide more details about some of my tips that might help you be more successful with LinkedIn Learning.

    Breakdown of the Courses and Learning Paths

    LibreOffice Calc spreadsheet showing Jason's LinkedIn courses and time totals.

    I created the spreadsheet above in LibreOffice Calc as a list of all of the courses I had completed between June 29 and August 3 (I’m including the end of June courses in the free Career Essentials in Generative AI by Microsoft and LinkedIn that gave me the idea to continue with the free one month trial period). I included the instruction time for each course. This allowed me to calculate that I had completed 43 hours 11 minutes of course instruction across 39 courses during my LinkedIn Learning trial period.

    I regret not keeping track of how long I spent on each course, which was far longer due to pausing the video to write notes, studying notes, taking quizzes, writing assignments, and taking exams. I believe the 50% extra time per course that I wrote about in July holds true.

    I focused on two main areas: Generative AI, which I am building into my workflows and maintaining a pedagogical bibliography for here; and Diversity, Equity, and Inclusion (DEI) Communication Best Practices, which I wanted to use to improve my teaching practices by structuring my classroom as supportive and welcoming to all students.

    In the Generative AI courses, I learned about machine learning, different forms of generative AI, how generative AI is integrated (or being integrated) into local and server software, and frameworks for critique of AI systems in terms of ethics, bias, and legality. Also, I took some courses on Python to get an inkling of the code underpinning many AI initiatives today.

    In the DEI Communication Best Practices cluster of courses, I learned helpful terminology, techniques for engagement, what to do to support and include others, and how to be an ally (mostly with an emphasis on the workplace, but thinking about how to leverage these lessons in the classroom). These courses covered combating discrimination, planning accessibility from the beginning and benefit of all, and supporting neurodivergence.

    Overall, each learning experience was beneficial to my understanding of the topic. However, some instructors delivered better courses–for my way of learning–by employing repetition, anchoring key topics with words and definitions on the video (which you can pause and write down), giving more quizzes over shorter amounts of material (instead of fewer quizzes over longer time spans of material), and giving students mini projects or assignments to reinforce the lesson (e..g, pause and write about this, or pause the video, solve this problem, and “report back”–the course isn’t interactive but the “report back” idea is to compare your solution to the instructor’s after the video is played again).

    All of the courses provide a lot of information in a very short amount of time. In some cases, the information compression is Latvian repack level. Even taking notes in shorthand, I could not keep up in some instances. To capture all of the information, I had to pause videos repeatedly, repeat (using the 10 second reply often) and read the transcript.

    While I enjoyed the standalone courses, the Learning Paths provided a sequence and overlap in material that helped reinforce what was being taught. Also, Learning Paths helped me see connections between the broader implications of the topic (e.g., DEI, accessibility, neurodiversity, etc.) as well as explore certain aspects of the topic in more depth (e.g., how to approach conversations on uncomfortable topics or how to ask for permission to be an ally in a given situation).

    Each instructor has a unique way of speaking and engaging the learner. I really enjoyed the diversity of the instructors across all topics.

    The accessibility features built into LinkedIn Learning helped me follow along and make accurate notes. In particular, I always turned on closed captioning and clicked the “Transcript” tab beneath the video so that I could easily follow along and pause the video when there was a keyword or definition or illustration that I wanted to capture in my notes.

    LibreOffice Calc chart showing how many hours of courses were completed on the days between 6/29 and 8/3/2023.

    I added the course instruction time for those courses completed on the same day to generate the chart above that illustrates the ebb and flow of my course completion across the month. In some cases, I spread out the instruction across days to give myself enough time to learn and practice the topics being discussed (e.g., Python programming or Stable Diffusion image generation). There were other days that I paused my learning to work on my research or simply to take a break from learning.

    On LinkedIn Learning, some of the courses are grouped together into what are called Learning Paths, which yield a separate certificate of completion from the certificates that you earn for each individual course. In some cases, as in the Career Essentials in Generative AI by Microsoft and LinkedIn also includes an exam with a time limit (1.5 hours) that must be passed before the Learning Path certificate is given. About 50% or 21 hours 45 minutes of the 43 hour 11 minute course instruction time applied to five earned Learning Paths for me:

    • Career Essentials in Generative AI by Microsoft and LinkedIn, 3h 49m
    • Accessibility and Inclusion Advocates, 3h 18m
    • Diversity, Inclusion, and Belonging for All, 6h 16m
    • Responsible AI Foundations, 4h 15m
    • LinkedIn’s AI Academy, 3h 54m

    LinkedIn Learning Success Tips

    Overall, I want to reiterate the tips that I wrote about here for being successful at LinkedIn Learning–both in terms of how you learn and how you demonstrate what you have learned. Below are some reiterated tips with details based on my experience this past month.

    Be an Active Learner: Take Notes, Do the Exercises, and Complete the Quizzes

    Fanned out loose-leaf notes that Jason took during his LinkedIn Courses.

    The one thing that I would like to stress above all others is how important it is to treat a LinkedIn Learning course like a classroom learning experience. What I mean by that is that you need to set aside quality time for learning, free from distraction, where you can take notes and complete the exercises, and study what you’ve learned before taking quizzes or exams. Employing your undivided attention, writing your notes by hand in a notebook, and completing quizzes, exams, and assignments all contribute to your learning, integrating what you’ve learned with your other knowledge, and preparing yourself to recall and apply what you’ve learned in other contexts, such as in a class or the workplace.

    Unless you have eidetic memory, the fact is that you won’t learn a lot by passively watching or listening to courses. And even if you have photographic memory, all you will gain are facts and not the integration, connections, and recall that comes from using and reflecting on what you have learned.

    Remember to Add Certifications to Your LinkedIn Profile

    Jason Ellis's Licenses & Certifications section on his LinkedIn Profile.

    Remember to add each completed LinkedIn Course and Learning Path certification to your profile. They will appear in their own section as they do on mine shown above.

    Completed Courses and Learning Paths do not automatically appear on your profile (consider: someone might not want all of their training to appear on their LinkedIn Profile for a variety of reasons).

    To add a Course or Learning Path to your LinkedIn Profile, go to LinkedIn Learning > click “My Learning” in the upper right corner > click “Learning History” under “My Library” on the left > click the “. . .” to the right of the Course or Learning Path > click “Add to Profile” and follow the prompts.

    LinkedIn also gives you the option to create post on your Profile about your accomplishment, which you should opt to do. When you do this, it auto suggests skills that it will add to your Skills section of your Profile. You can have up to 50 skills on your profile, so keep track of what’s there and prune/edit the list as needed to highlight your capabilities for the kinds of jobs that you are looking for. More on Skills further down the page.

    Add Certifications to Your Resume or CV

    Excerpt image of Jason Ellis' CV. Link to CV below.

    As shown above and viewable on my CV here, I added links to my LinkedIn Course and Learning Path certifications in a dedicated section of my CV. In addition to the unique link to my certifications, I included the organization that issued it (i.e., LinkedIn), and the date of completion. You can do the same on your CV or resume.

    To get the link to a Course or Learning Path completion certificate, go to LinkedIn Learning > click “My Learning” in the upper right corner > click “Learning History” under “My Library” on the left > click the “. . .” to the right of the Course or Learning Path > click “Download certificate” > click “LinkedIn Learning Certificate” > toggle “On” under the top section titled “Create certificate link” > Click “Copy” on the far right.

    While you are here, you can download a PDF of your certificate for safe keeping at the bottom left of this last screen. You can add these PDFs to a professional portfolio or alongside a deliverable that you create based on the skills that you gained from that course to demonstrate your learning and mastery.

    Demonstrate Your Skills

    Jason Ellis' Skills section on his LinkedIn Profile.

    As I mentioned above, when you post about completing a course, LinkedIn Learning can autogenerate relevant skill terms to add to the Skills section on your Profile (as shown above on my Profile). When you have the spare time and focus, you should occasionally click on “Demonstrate skills” (you can do this without a LinkedIn Learning subscription). This gives you options for taking exams related to different skills that you’ve added to your Skills section of your Profile. If you pass, it provides some proof that you know something about that particular skill. Beware though: these exams can be tough. When I took the HTML exam, I discovered big gaps in what I knew from learning HTML years before without keeping up with changes to HTML in the intervening years. While I passed the exam, I made notes about those questions that I got wrong so that I knew what to learn more about to fill in those gaps.

    Also, some skills don’t have exams associated with them. In those cases, you may submit a video or essay to demonstrate your experience to potential recruiters or hiring managers. If you do this, you should plan it out, shoot and edit your video to give the best visual and auditory impression, or write and revise your essay so that it is of the highest professional quality.

    Is It Worth It?

    Looking back on what I learned, how I learned it, and who I learned it from, I’m glad that I invested the time and energy into a month of LinkedIn Learning. I’ve already started putting some of the lessons into practice (e.g., the generative AI and ethical AI courses), and I’m planning out how I will roll out the DEI approaches in my courses when I return to teaching in Fall 2024 (I am on sabbatical this academic year). In the future, I plan to pay for LinkedIn Learning when additional classes are available and I have the time to immerse myself in learning.

    If you’re looking to skill up, I think that LinkedIn Learning can be beneficial if you go into it with a learning and reflective mindset. This means that you are willing to invest your attention, time, energy, and thought to learning the course material, want to reflect on how what you learn connects to other things you’ve already learned through school and work experience, apply what you’ve learned to deliverables that demonstrate you have integrated what you have learned (e.g., a detailed post on your LinkedIn Profile, a blog post, a poster, a video, an addition to your professional portfolio, etc.), and reflect, preferably in writing, on what you’ve learned, how you applied it, what you would like to see yourself accomplish next, and how to take those next steps.

    As I said above, you likely won’t gain much by passively listening to LinkedIn Learning Courses while doing other things or being distracted by your environment. Invest in this form of learning and you will add to what you know and can do. In that spirit, it’s like my Grandpa Ellis used to tell me, “Jake, no one can take away your education!”

  • Mirrored Moment of Computing Creation: KPT Bryce for Macintosh

    Outer space scene rendered in KPT Bryce on Mac OS 7.5.5.
    Outer space scene rendered in KPT Bryce 1.0.1 on Mac OS 7.5.5.

    A conversation on LinkedIn yesterday with a former Professional and Technical Writing student about user experience (UX) and generative artificial intelligence (AI) technologies reminded me of the UX innovations around an earlier exciting period of potential for computers creating art: KPT Bryce, a three-dimensional fractal landscape ray trace rendering program for Mac OS released in 1994. It was one of the first programs that I purchased for my PowerMacintosh 8500/120 (I wrote about donating a similar machine to the Georgia Tech Library’s RetroTech Lab in 2014 here). Much like today when I think about generative AI, my younger self thought that the future had arrived, because my computer could create art with only a modicum of input from me thanks to this new software that brought together 3D modeling, ray tracing, fractal mathematics, and a killer user interface (UI).

    Besides KPT Bryce’s functionality to render scenes like the one that I made for this post (above), what was great about it was its user interface, which made editing and configuring your scene before rendering in an intuitive and easy-to-conceptualize manner. As you might imagine, 3D rendering software in the mid-1990s was far less intuitive than today (e.g., I remember a college classmate spending hours tweaking a text-based description of a scene that would then take hours to render in POVRay in 1995), so KPT Bryce’s easy of use broke down barriers to using 3D rendering software and it opened new possibilities for average computer users to leverage their computers for visual content creation. It was a functionality and UX revolution.

    Below, I am including some screenshots of KPT Bryce 1.0.1 emulated on an installation of Mac OS 7.5.5 on SheepShaver (N.B. I am not running SheepShaver on BeOS–I’ve modified my Debian 12 Bookworm xfce installation to have the look-and-feel of BeOS/Haiku as I documented here).

    KPT Bryce 1.0 program folder copied to the computer's hard drive from the KPT Bryce CD-ROM.
    KPT Bryce 1.0 program folder copied to the computer’s hard drive from the KPT Bryce CD-ROM.
    KPT Bryce 1.0 launch screen.
    KPT Bryce 1.0 launch screen.
    Basic scene randomizer/chooser. Note the UI elements on the lower window border.
    KPT Bryce initial scene randomizer/chooser. Note the UI elements on the lower window border.
    KPT Bryce's scene editor opens after making initial selections.
    KPT Bryce’s scene editor opens after making initial selections.
    KPT Bryce's rendering screen--note the horizontal dotted yellow line indicating the progression of that iterative ray tracing pass on the scene.
    KPT Bryce’s rendering screen–note the horizontal dotted yellow line indicating the progression of that iterative ray tracing pass on the scene.
    KPT Bryce rendering completed. It can be saved as an image by clicking on File > Save As Pict.
    KPT Bryce rendering completed. It can be saved as an image by clicking on File > Save As Pict.