An anonymous donor recently gifted a tremendous collection of Science Fiction magazines (complete runs from the 1950s to the present), novels, and criticism to the New York City College of Technology, CUNY (City Tech). Alan Lovegreen and I collaborated on the proposal to acquire the collection and fund its relocation to City Tech’s Library Special Collections and Archives. While the Library prepared space for the 145 boxes of materials, we stored the collection in our two shared office spaces. Now that the space is available in the Archives, we have been moving the materials through the serpentine passages of 300 Jay Street and onto the shelves. So far, we’ve moved over 100 boxes into the Archives, and we anticipate completing the move very soon. To document the collection’s integration into the City Tech Library Archives and promote Science-Fiction-focused initiatives at the college, I created a new website called “Science Fiction at City Tech” on our open-learning platform, OpenLab. Due to the importance of this collection and the possibilities that it opens up for research, teaching, and recruitment, I added a permanent link to the Science Fiction at City Tech site in the menu above. After everything is shelved, I will create a photograph-based temporary finding aid, and the City Tech Library Archives (helmed by Keith Muchowski) will catalog the collection. There are already plans in the works for symposia, student-involvement projects, and more. Stay tuned for updates here and on the Science Fiction at City Tech site for updates.
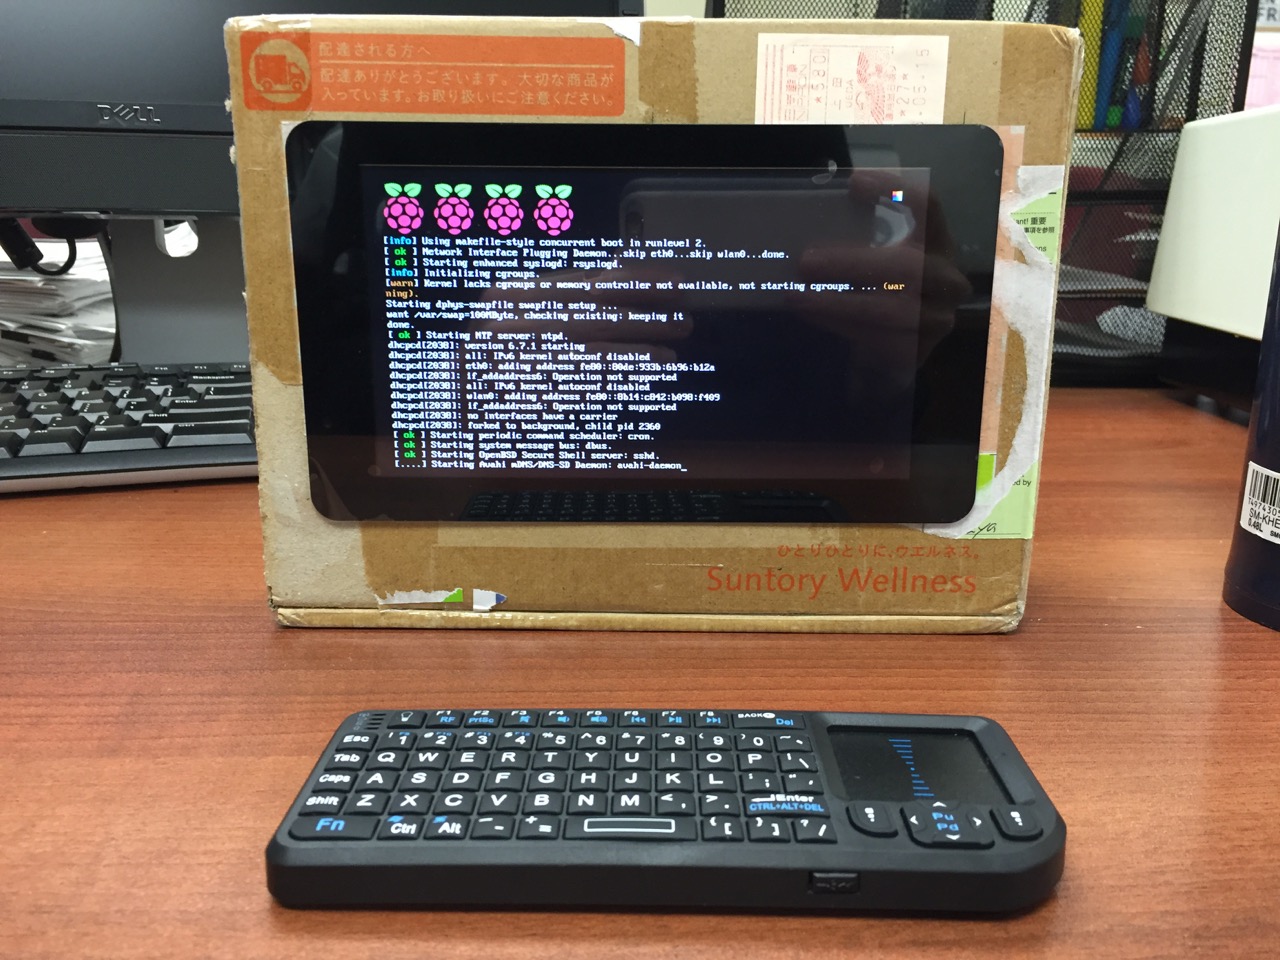
My Cardboard Box Raspberry Pi 2, Model B with 7″ Touchscreen Display and wireless keyboard.
This guide demonstrates how to install Raspbian on a Raspberry Pi 2, Model B, connect the Raspberry Pi to a 7″ Touchscreen LCD, and integrate the computer and touchscreen in a cardboard box (which doubles as a case and storage for battery, keyboard, and cables).
I got interested in the Raspberry Pi, because it has many capabilities for learning: kitting out a computer, installing a Linux-based operating system, programming interactive software, and building with electronics. In particular, I am interested in how the Raspberry Pi can be used to create interactive software and be a platform for digital storytelling (which figures into one of the upcoming classes that I will be teaching at City Tech–ENG 3760 Digital Storytelling).
My haul from Tinkersphere.
Instead of buying my kit online, I wanted to shop local to get started. Originally, I considered going to Microcenter, which is near where I live in Brooklyn. Unfortunately, they were sold out of the touchscreen display that I wanted. Instead, Y and I took a train into Manhattan and visited Tinkersphere where one of their helpful staff guided me to the things on my digital grocery list. I purchased Tinkersphere’s pre-made Raspberry Pi 2 kit, a 7″ Touchscreen LCD display, a battery pack (in retrospect, I should have purchased two of these, which I will discuss below), and a mono speaker with 1/8″ plug.
Contents of Tinkersphere’s Raspberry Pi 2, Model B kit.
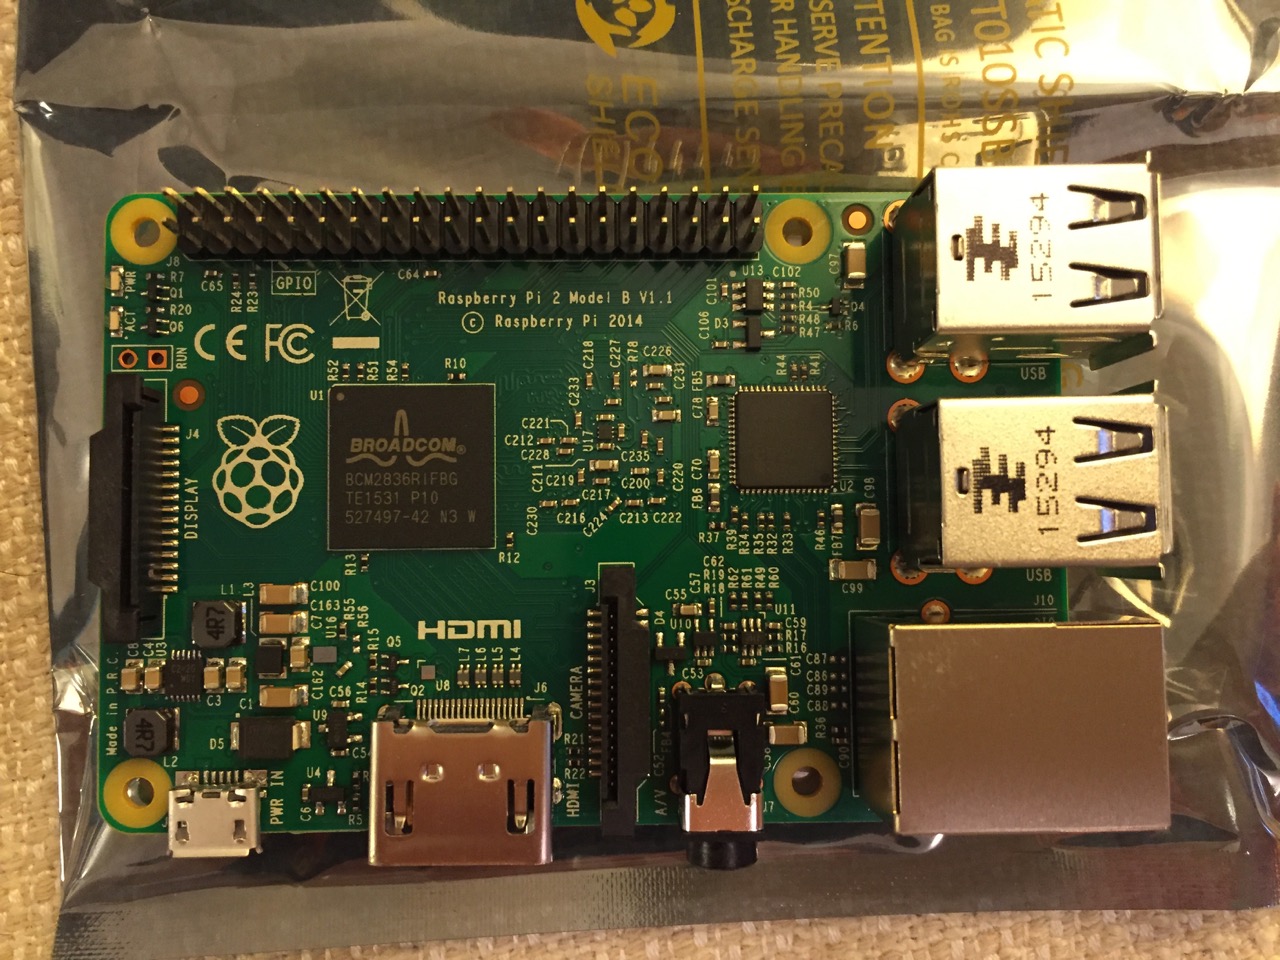
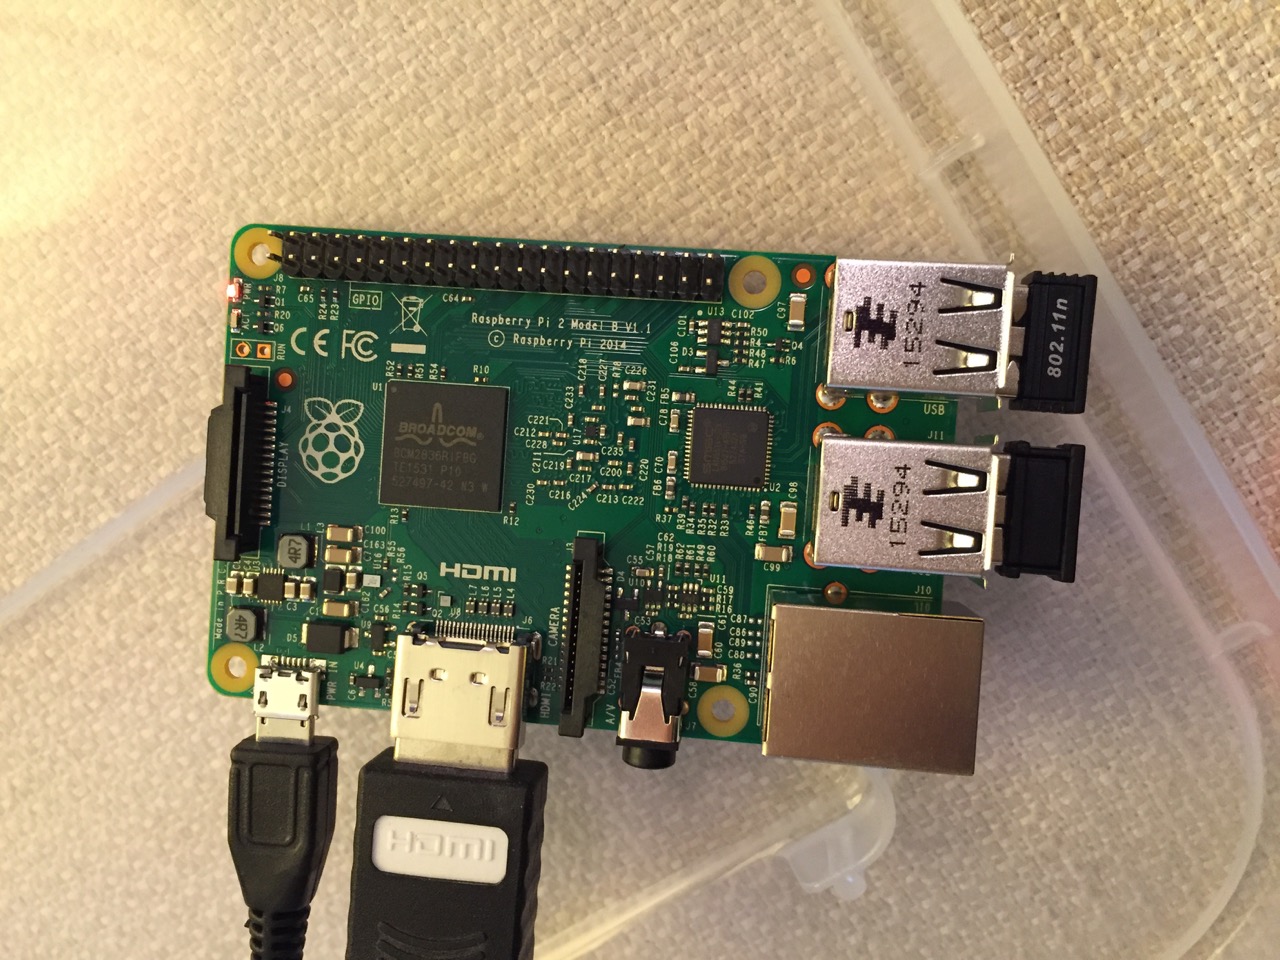
Tinkersphere’s Raspberry Pi 2, Model B kit includes all of the basic equipment needed to begin working with this tiny computing platform. The kit is built around the Raspberry Pi 2, Model B computer with a 900MHz quad-core ARM Cortex-A7 CPU, 1GB RAM, 4 USB ports, 40 GPIO pins, HDMI port, ethernet port, combined 3.5mm audio jack and composite video, camera interface (CSI), display interface (DSI), micro SD card slot, and a VideoCore IV 3D graphics core. Additionally, the kit includes a wireless keyboard/trackpad, USB wifi adapter, 8GB micro SD card with NOOBS (the easy to use Raspbian installer), USB micro SD card reader, breadboard, wires, and 5v power supply.
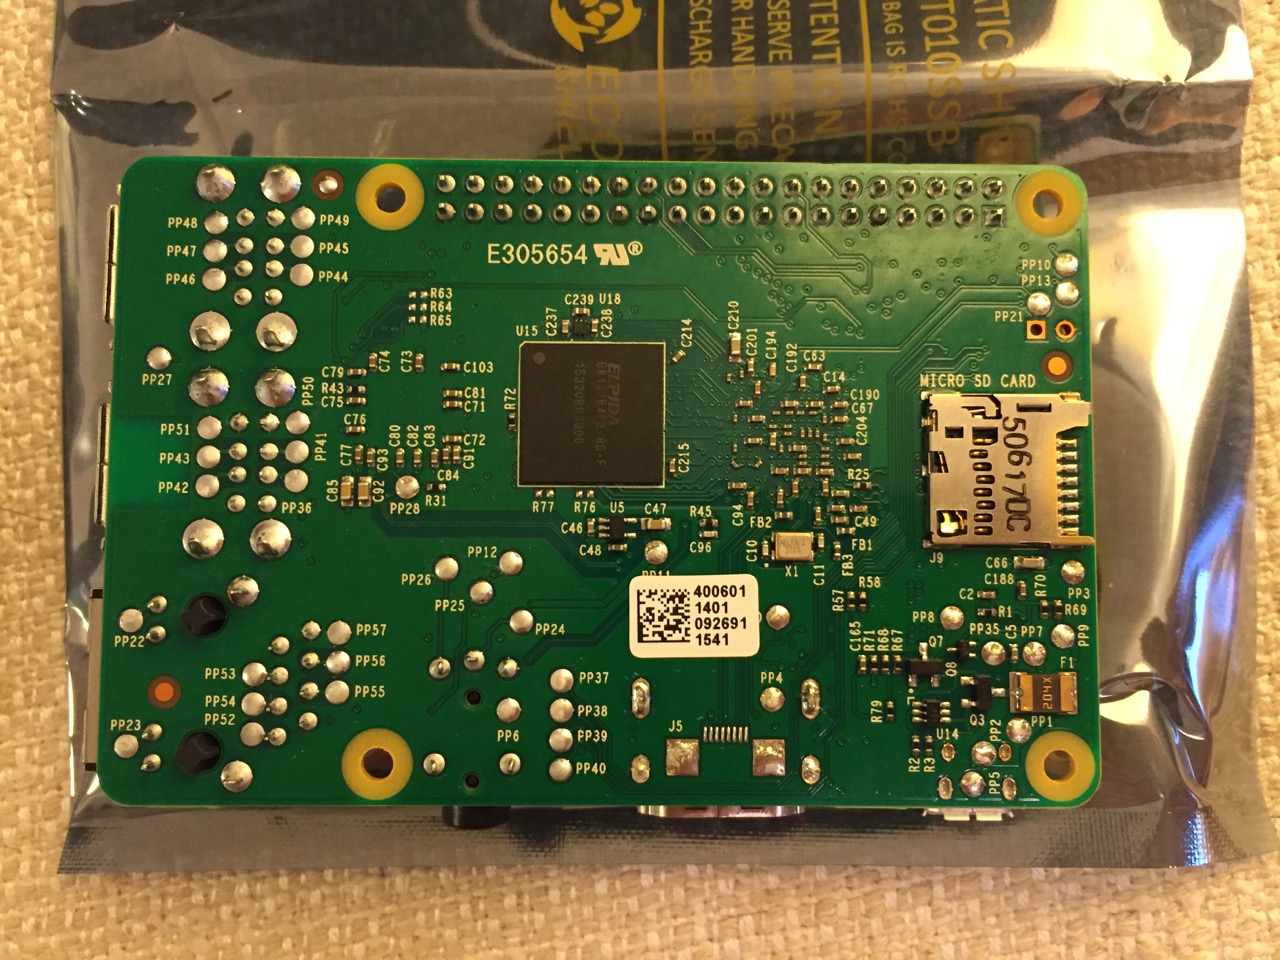
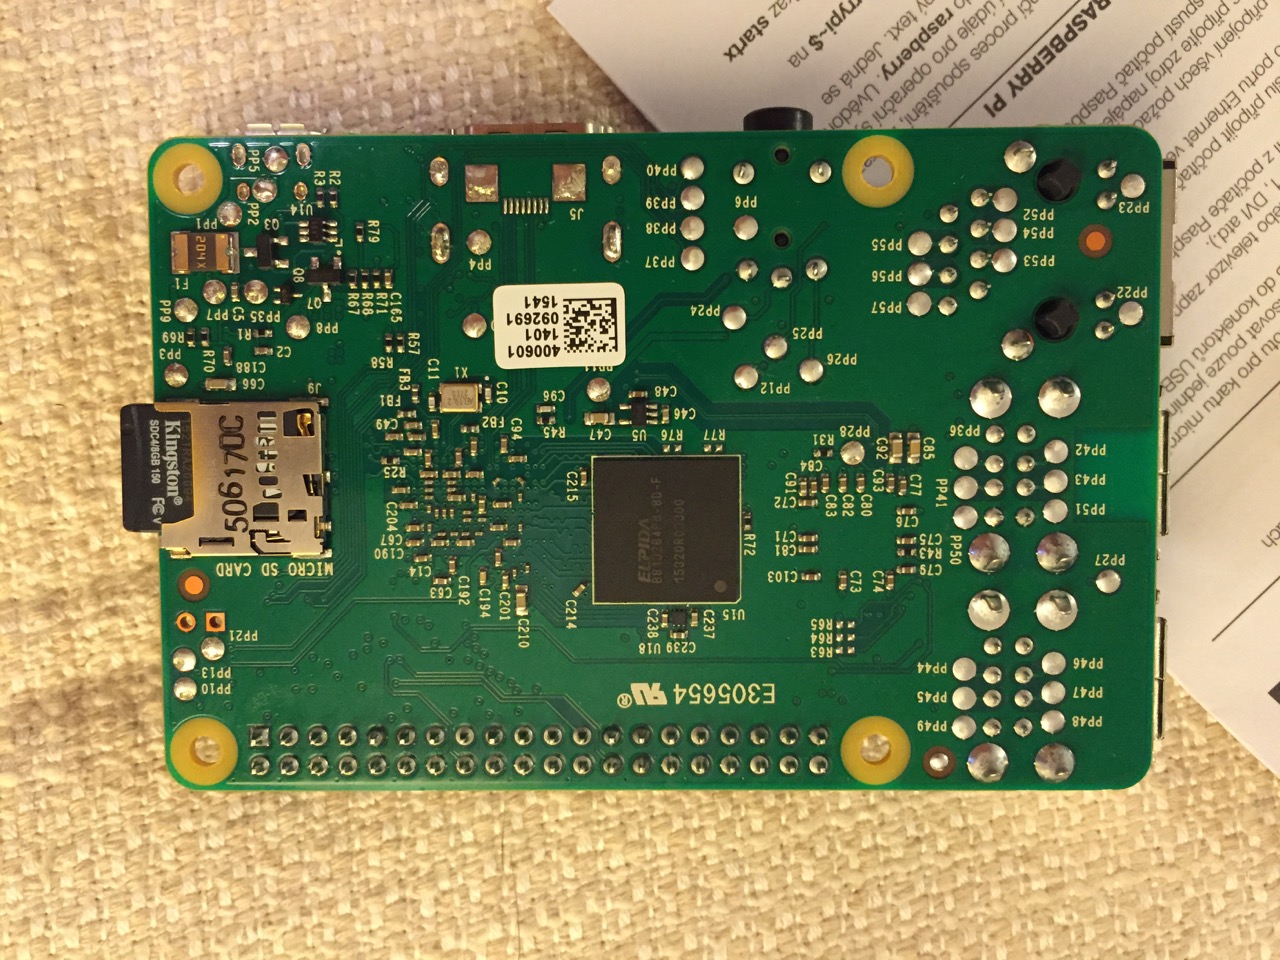
To begin the setup, we should orient ourselves with the Raspberry Pi. This is the Raspberry Pi 2, Model B computer viewed from the top and the bottom:
Raspberry Pi 2, Model B, Top View.
Raspberry Pi 2, Model B, Bottom View.
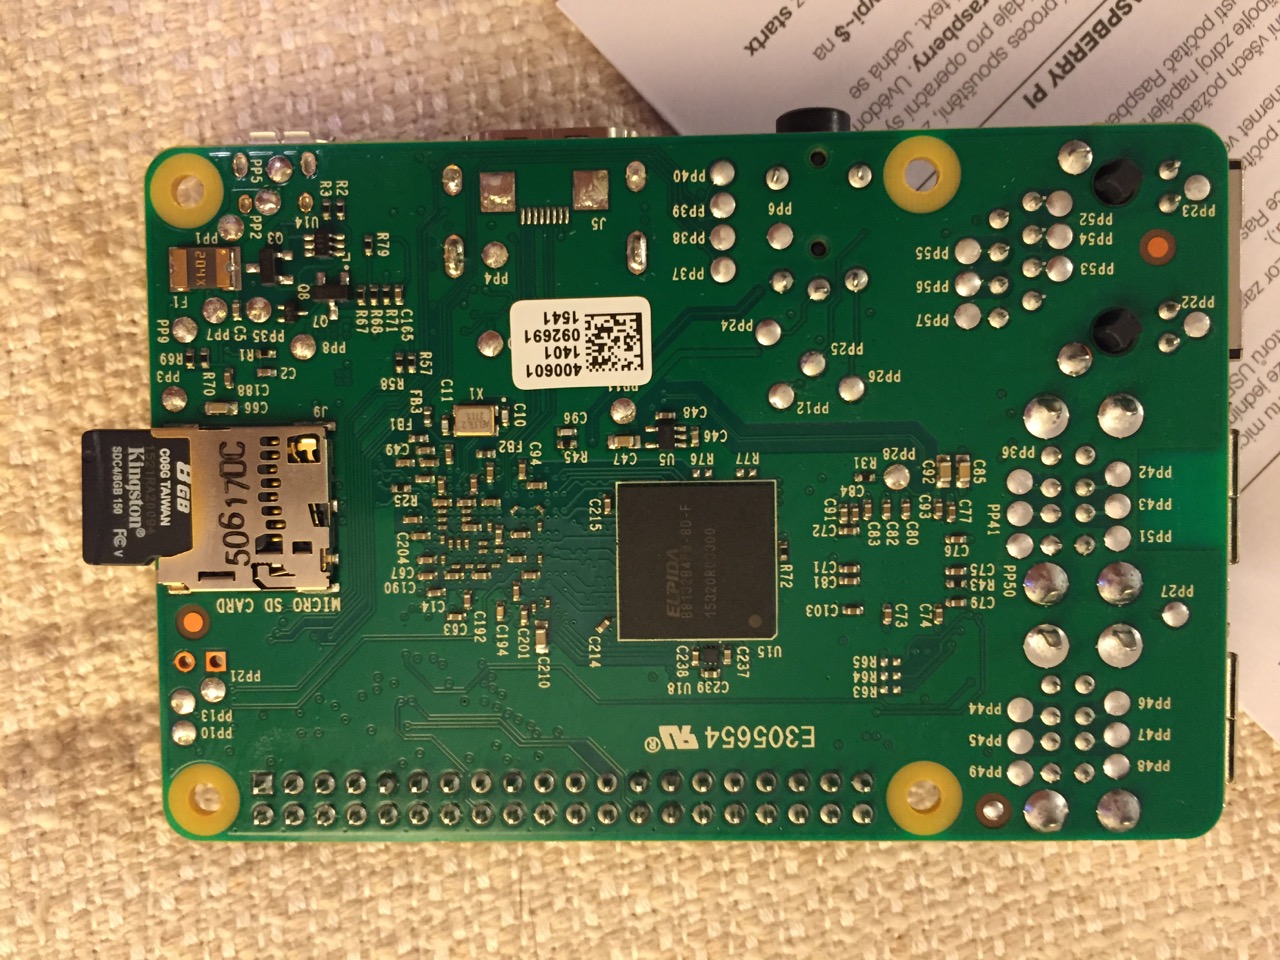
The first thing that we need to do is insert the micro SD card with a copy of NOOBS pre-copied. If you need a copy of NOOBS for your own micro SD card, you can download it from here and follow the instructions here for formatting and copying the files from a Mac or PC to the micro SD card. The Raspberry Pi’s micro SD card slot is located on the bottom side of its circuit board. A micro SD card goes in only one way which allows you to press it in. If correct, the card should “click” and stay as seen in the photos below.
Insert the micro SD card like this.
Press the micro SD card in and it will stay in place with a “click.”
The Raspberry Pi connected from left to right: micro USB power input from 5v power supply, HDMI, wireless keyboard/trackpad receiver, and wifi adapter.
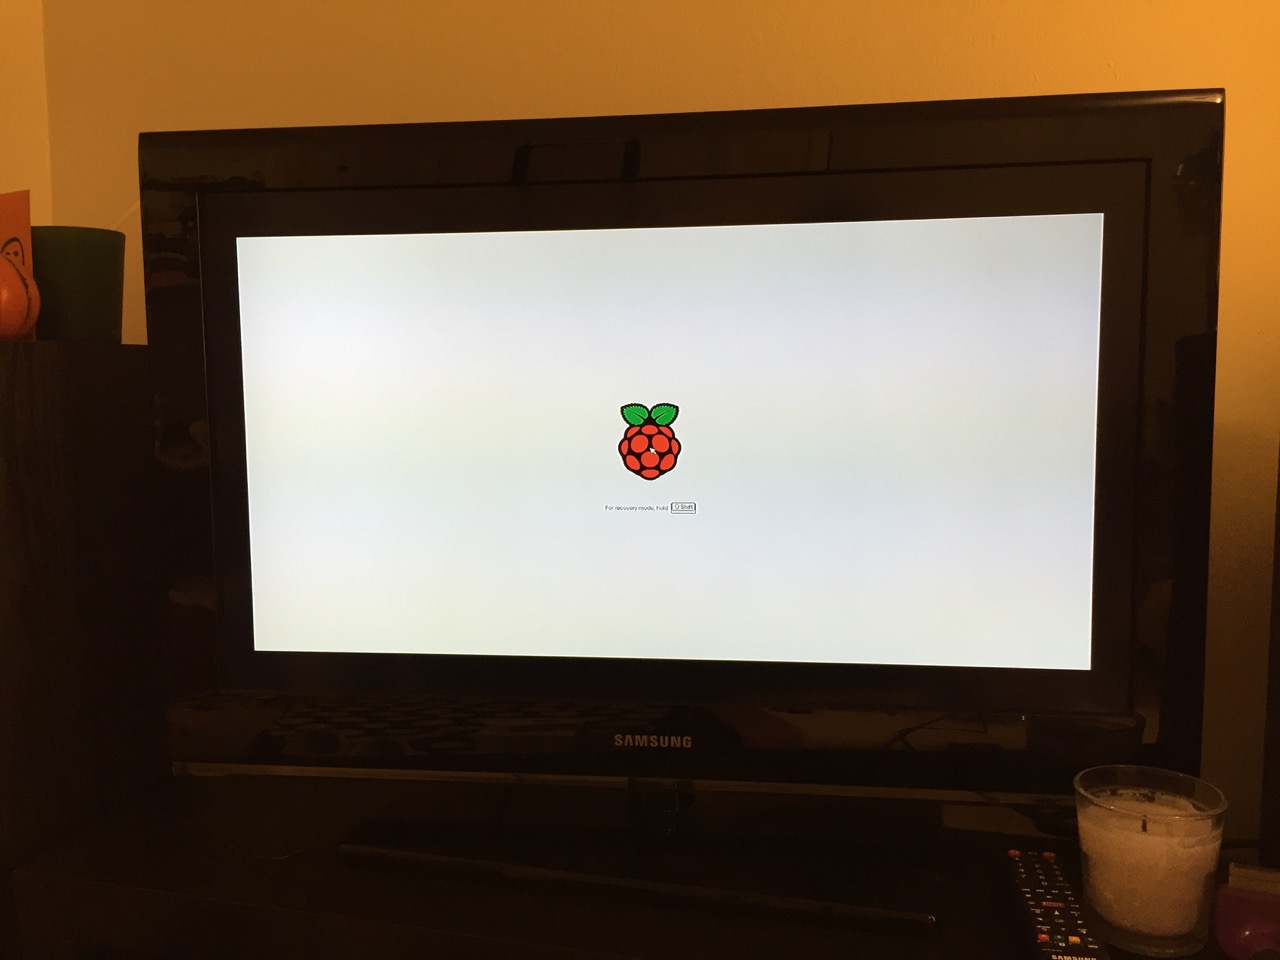
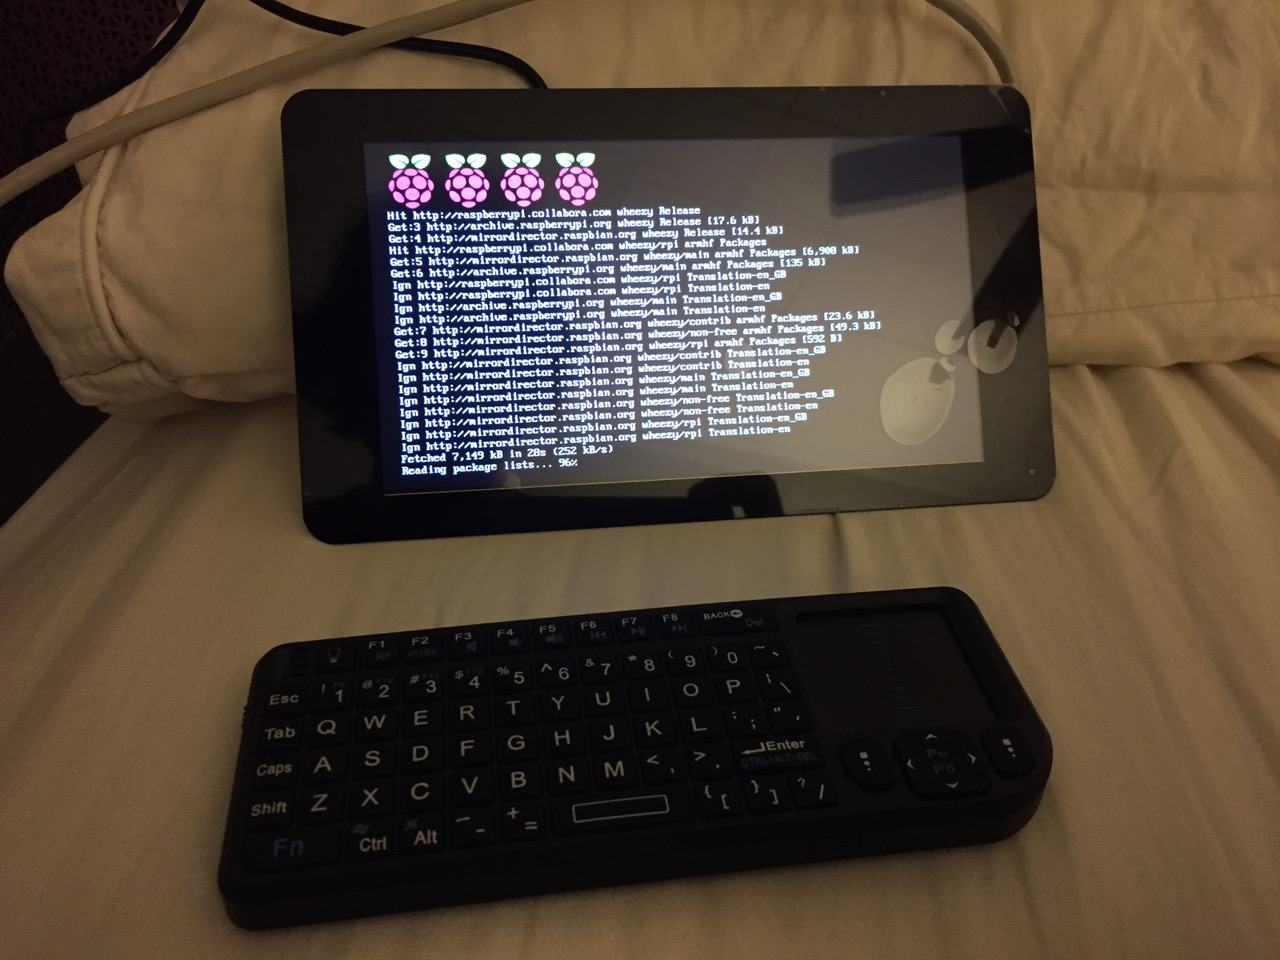
Next, connect the Raspberry Pi to a display (such as a TV) with HDMI, and plug in the wifi adapter and wireless keyboard into two available USB ports. Alternatively, you can connect the Raspberry Pi to the Internet via ethernet and to a wired keyboard and mouse. Then, connect it to the 5v power supply. As soon as it is plugged in, the Raspberry Pi is turned on and operational. It will begin to boot from the micro SD card’s NOOBS installer, which will guide you through the process of installing Raspbian. See the images below to see what this looks like and what choices you should make for a basic installation.
NB: While we could have connected the 7″ Touchscreen Display to the Raspberry Pi before beginning the installation, the current version of NOOBS would not detect and use the touchscreen display. It is necessary for Raspbian to be installed and updated before the 7″ Touchscreen Display will be recognized and used as the Raspberry Pi 2’s primary display.
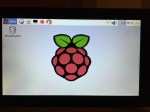
NOOBS boot screen with the Raspberry Pi logo.
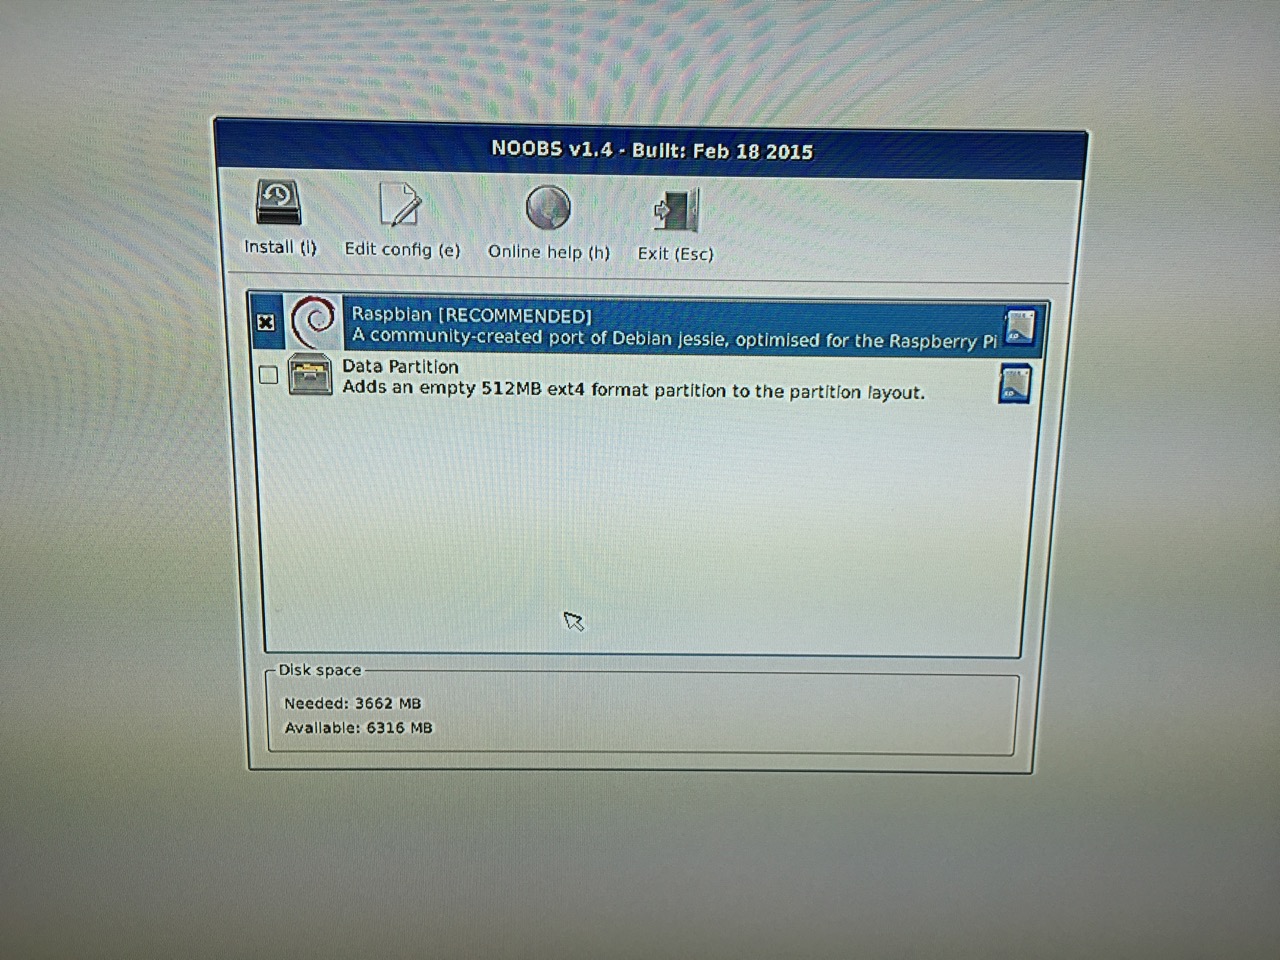
The NOOBS installer asks what you would like installed. Place a check next to Raspbian.
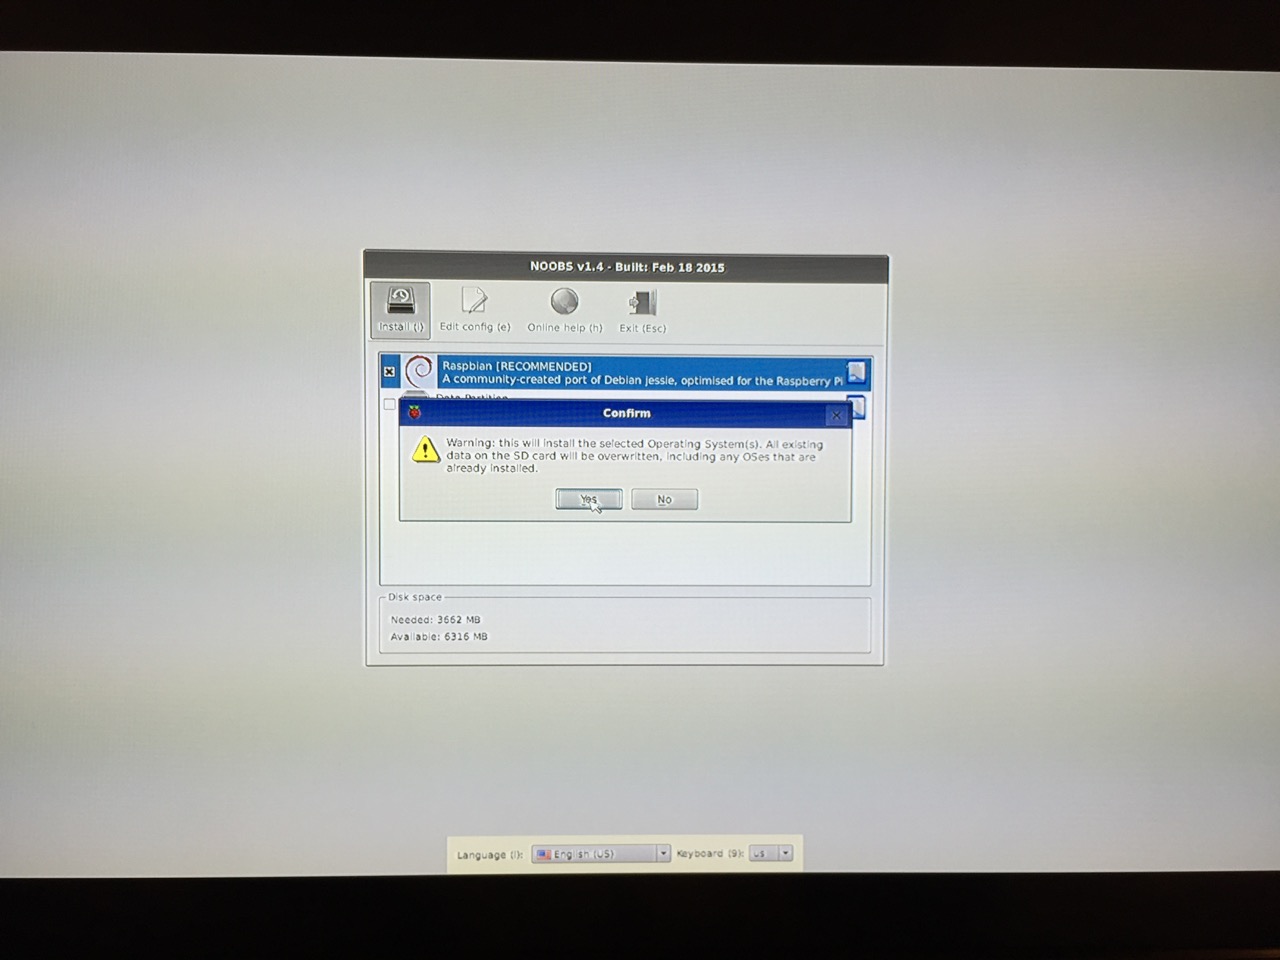
The NOOBS installer will ask that you confirm your choice. If you haven’t already done so, choose US keyboard and locationalization at the bottom of the screen before proceeding. Then, confirm.
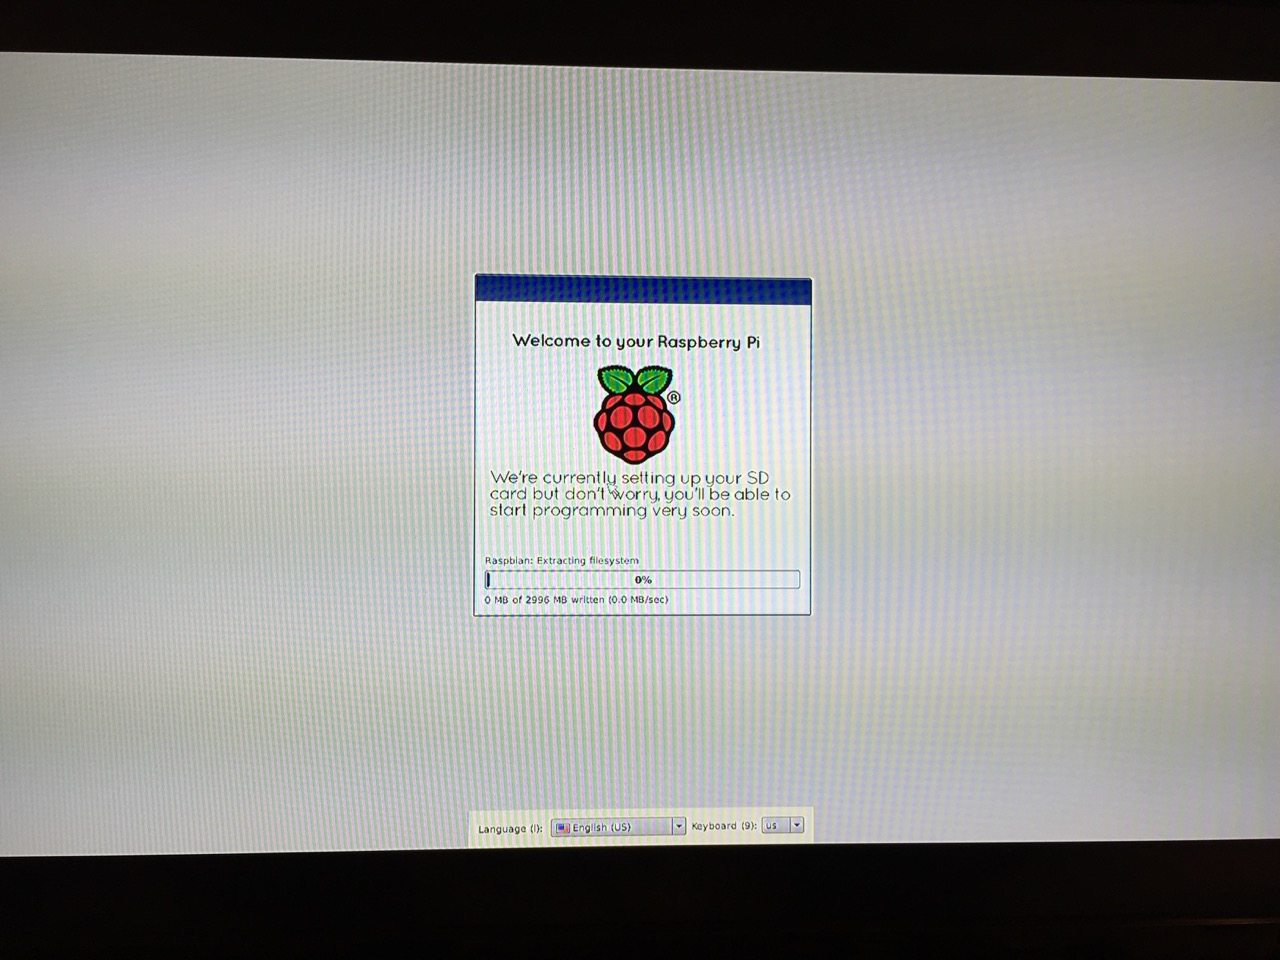
The installation will proceed and complete. With the micro SD card that I have and without overclocking the Raspberry Pi, it took about 20-30 minutes for the installation to complete.
After rebooting following the installation, the raspi-config tool launches. This program gives the user easy access to many configuration options for the Raspberry Pi including how it should boot (automatically login and load xwindows, or boot to a command prompt login), and if you would like to overclock the Raspberry Pi for additional performance (use this option with caution–you will likely want to add heat sinks and increased ventilation if you overclock the system). I configured my Raspberry Pi to operate at normal speed and to boot to the command line with login.
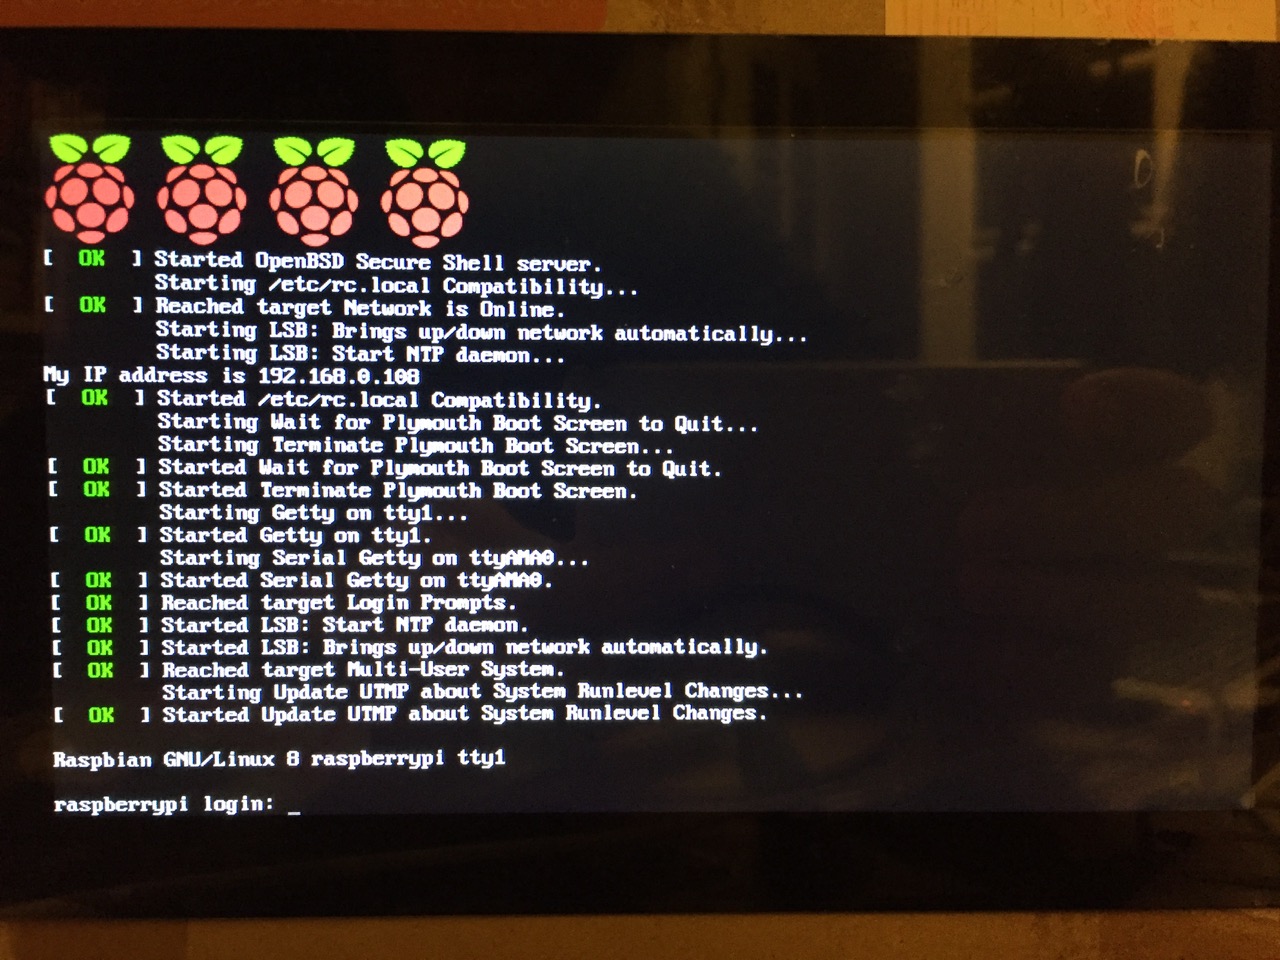
After booting into Raspbian, the first thing that you see is the login prompt.
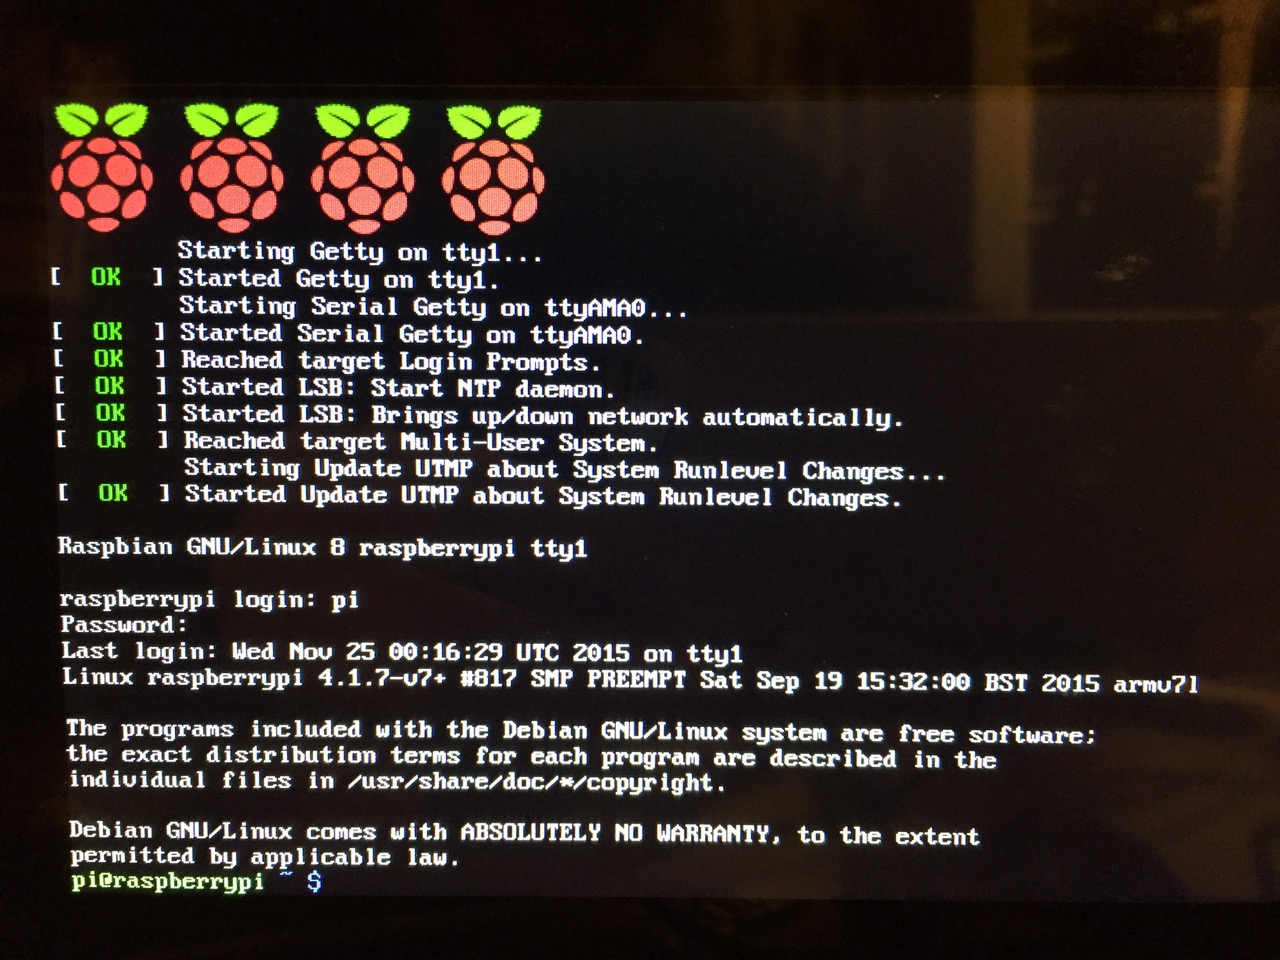
The default login for the Raspberry Pi is username “pi” and password “raspberry”. Type each of these credentials in when asked followed by pressing the Enter key. Then, you will find yourself at the command line interface (CLI).
Before setting up the 7″ Touchscreen Display, we need to update Raspbian. To do this, first type: “sudo apt-get update”. If prompted to install anything because it will take a certain amount of space, simply type “y” and press “Enter”.
Entering a command at the prompt in Raspbian’s CLI.
To explain what this command means, “sudo” runs a command as superuser, or the user that is all powerful on a linux system. The command that you want to run as superuser is “apt-get,” which is a package manager, or a manager of software packages that run on your Raspberry Pi. “update” is a modifier for “apt-get,” and its purpose is to tell “apt-get” to update its index of available software packages with what is stored on the remote software repository (where your Raspberry Pi is downloading its software from).
After the update operation completes and you return to the command prompt, type: “sudo apt-get upgrade”. Similarly, agree to the prompts with “y” and “Enter”. The “upgrade” modifier to “apt-get” tells it to upgrade the software based on what it learned when updating its index with the previous command. Thus, when you run these two commands, you should run the update command first (learn) and the upgrade command second (act on what was learned).
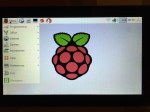
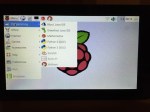
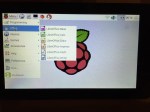
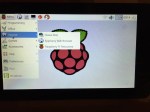
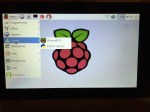
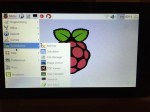
To launch into Raspbian’s X11, type “startx”. Inside X11 or xwindows, you will find many of the GUI-based software that really makes the Raspberry Pi sing: Scratch, Python, Mathematica, and more. If you have never used X11, it works a lot like Windows 95/98 except that the Start Menu bar is at the top of the screen instead of at the bottom and “Start” is replaced by “Menu.” Some quick launch apps are directly available to be launched with a single click from the start bar (such as Terminal, the Epiphany web browser, and Wolfram Mathematica) while all of the installed X11 programs are available from the “Menu.” Below are images of the Raspbian desktop and navigating through some of the default programs available.
To easily install additional software, you can install the Synaptic Package Manager, which simplifies finding and installing software packages by wrapping package management in an easy-to-use GUI. From inside X11, open Terminal and type “sudo apt-get install synaptic”. This will install Synaptic, which you can open by clicking on Menu > Preferences > Synaptic Package Manager (more info on this and other Raspberry Pi stuff on Neil Black’s website).
When you done browsing around, you can click on the and choose to shut down. After a few moments, your display should show a blank screen and the activity lights on the back of the Raspberry Pi (red and green) should only be showing a solid red. At that point, unplug the micro USB 5v power adapter. If you are ready to install the 7″ Touchscreen Display, unplug the HDMI cable, too.
In the images below, I demonstrate how to assemble the 7″ Touchscreen Display and connect it to the Raspberry Pi. I followed the excellent instructions available on the official Raspberry Pi website, which also details how to install the Matchbox virtual keyboard for using the touchscreen without a keyboard.
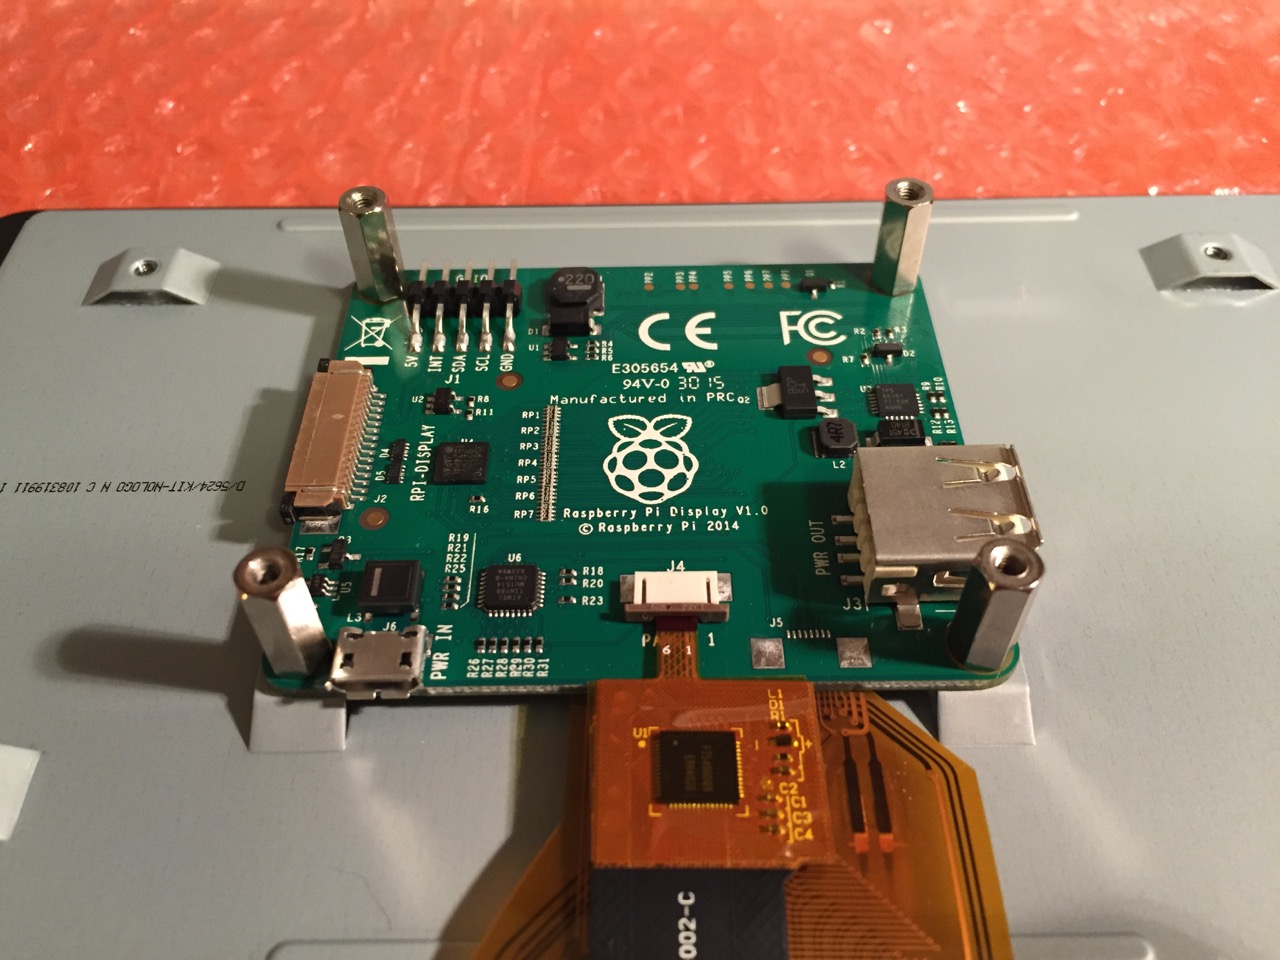
To begin connecting the 7″ Touchscreen Display to the Raspberry Pi, place the screen facing down.
Screw in the standoff posts to hold the display controller card to the display. Connect the display and touchscreen wires as described on the official installation guide.
Insert the display cable to the video input on the controller card.
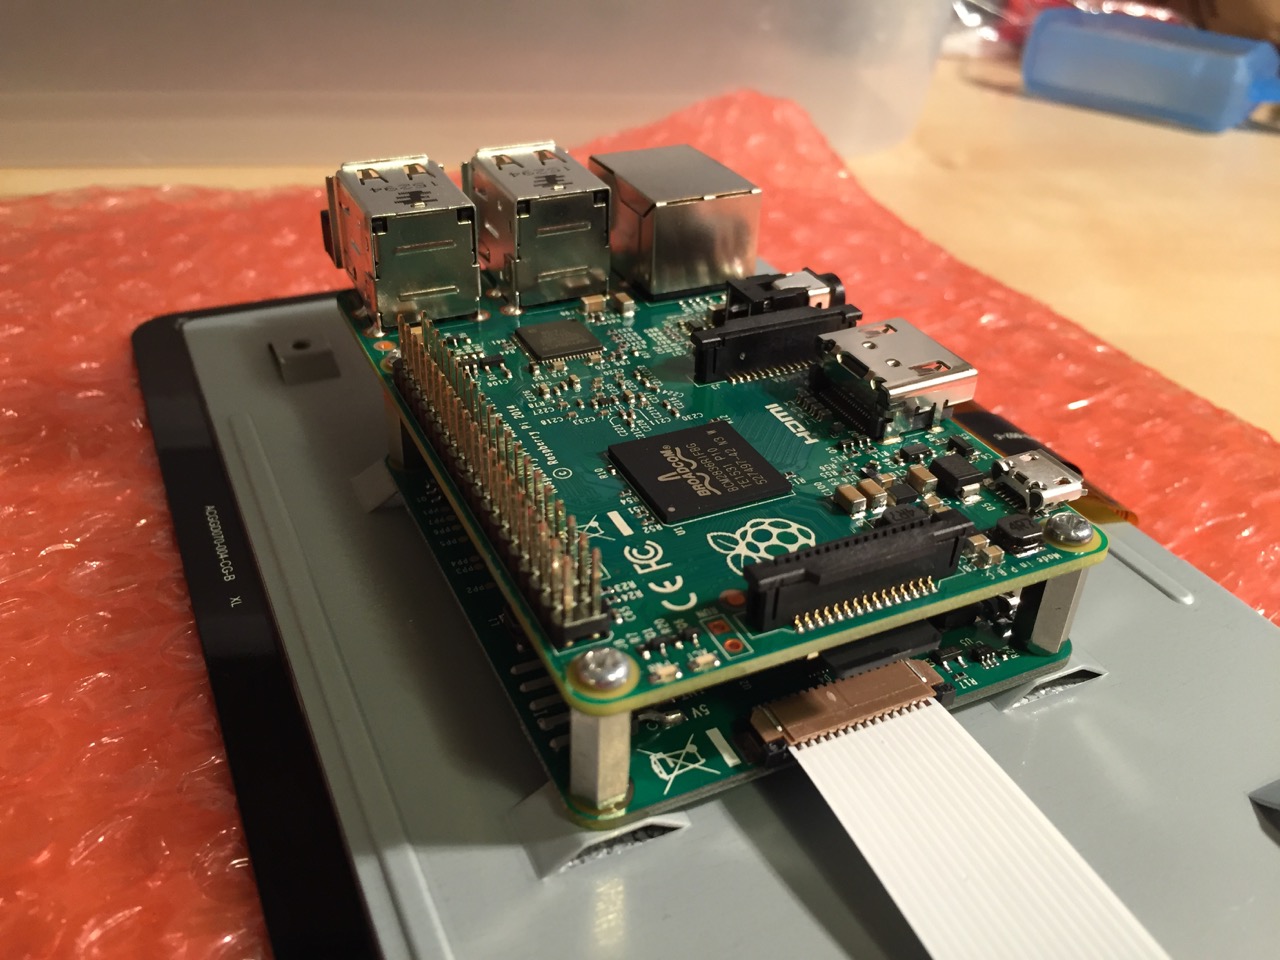
Place the Raspberry Pi above the display controller card and attach with the supplied screws that screw into the top of the standoff posts.
Connect the other end of the display cable into the output connector on the Raspberry Pi.
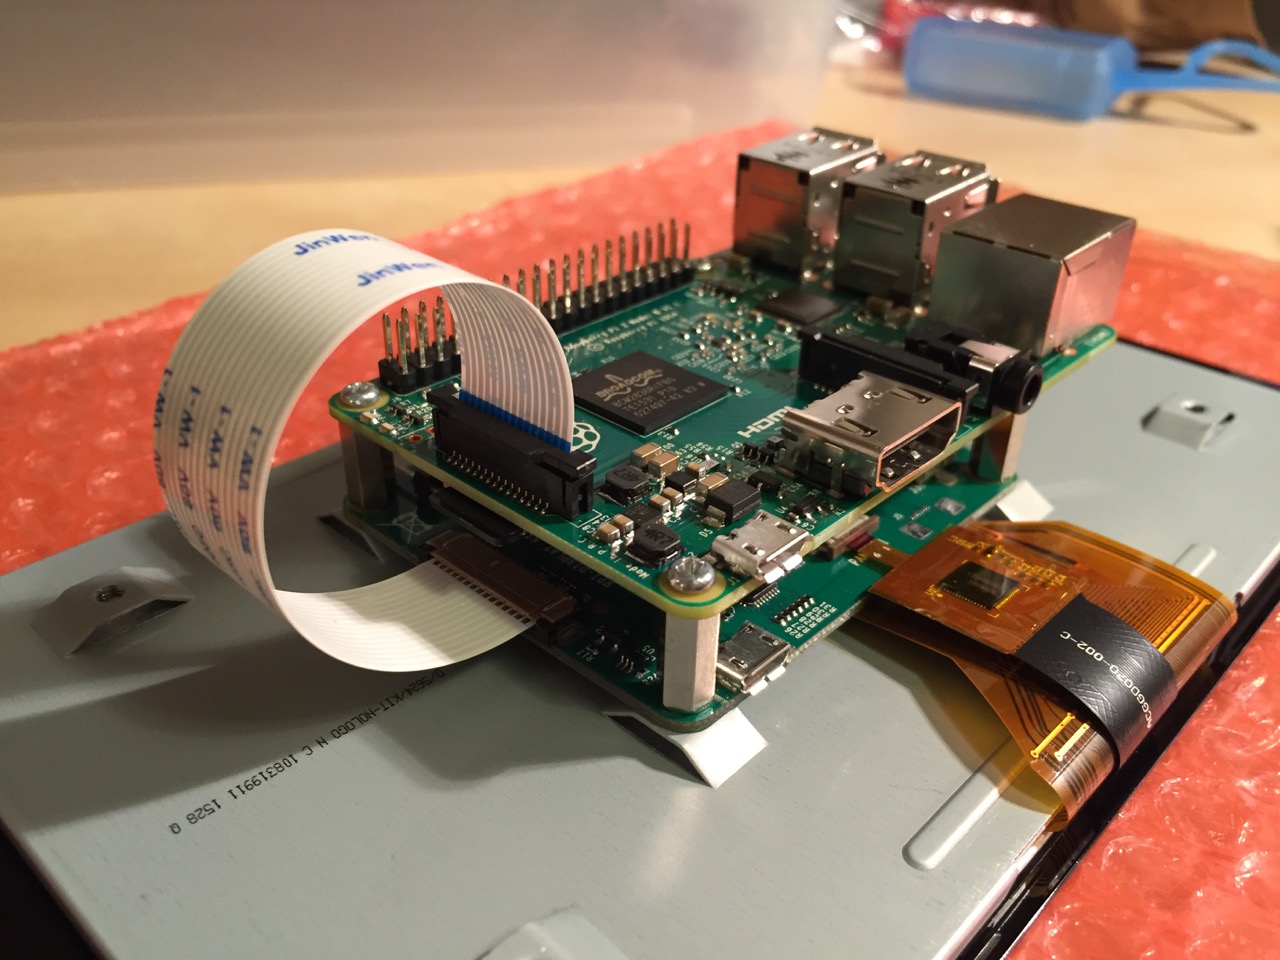
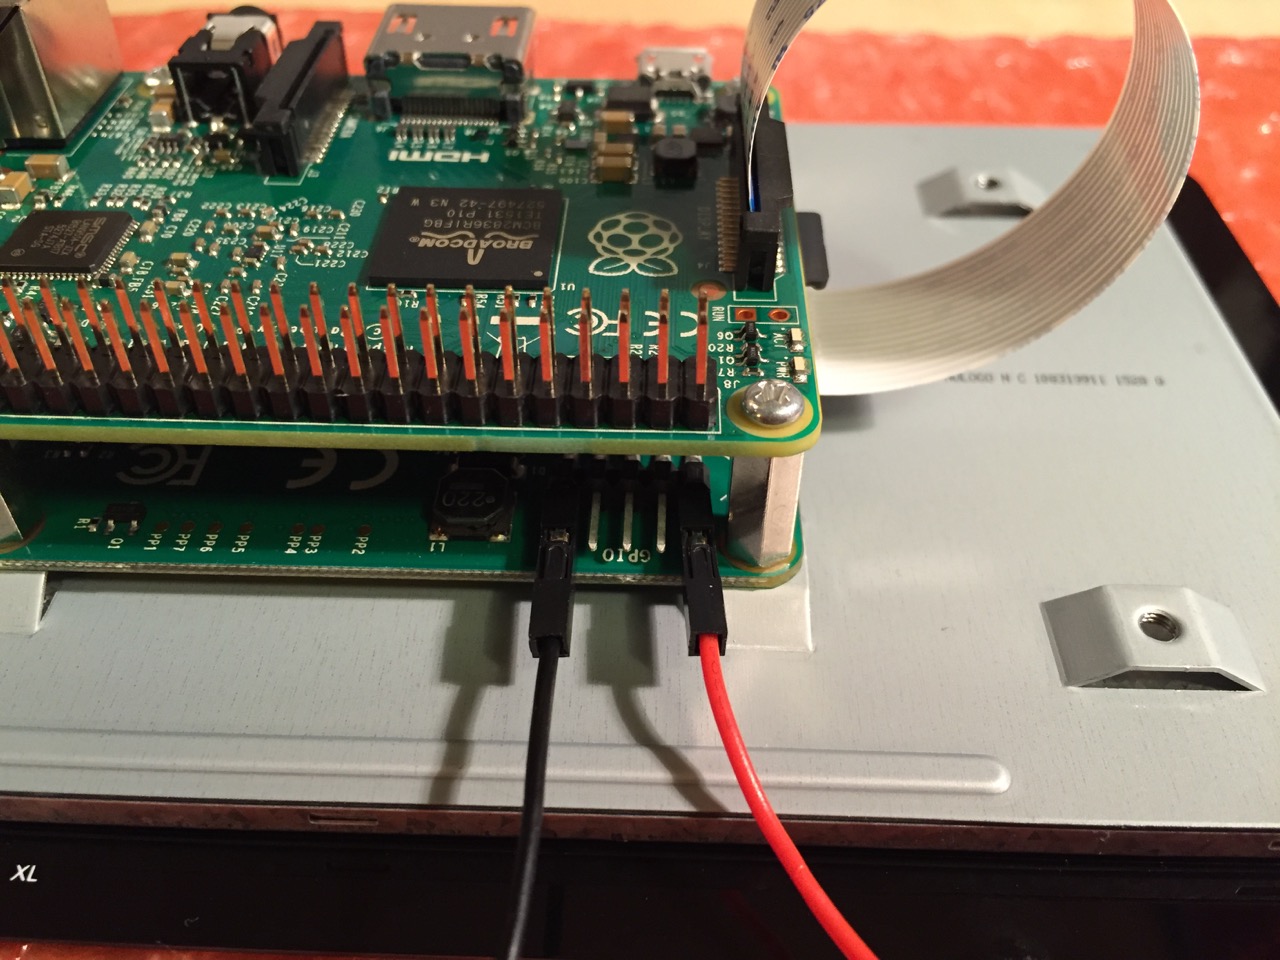
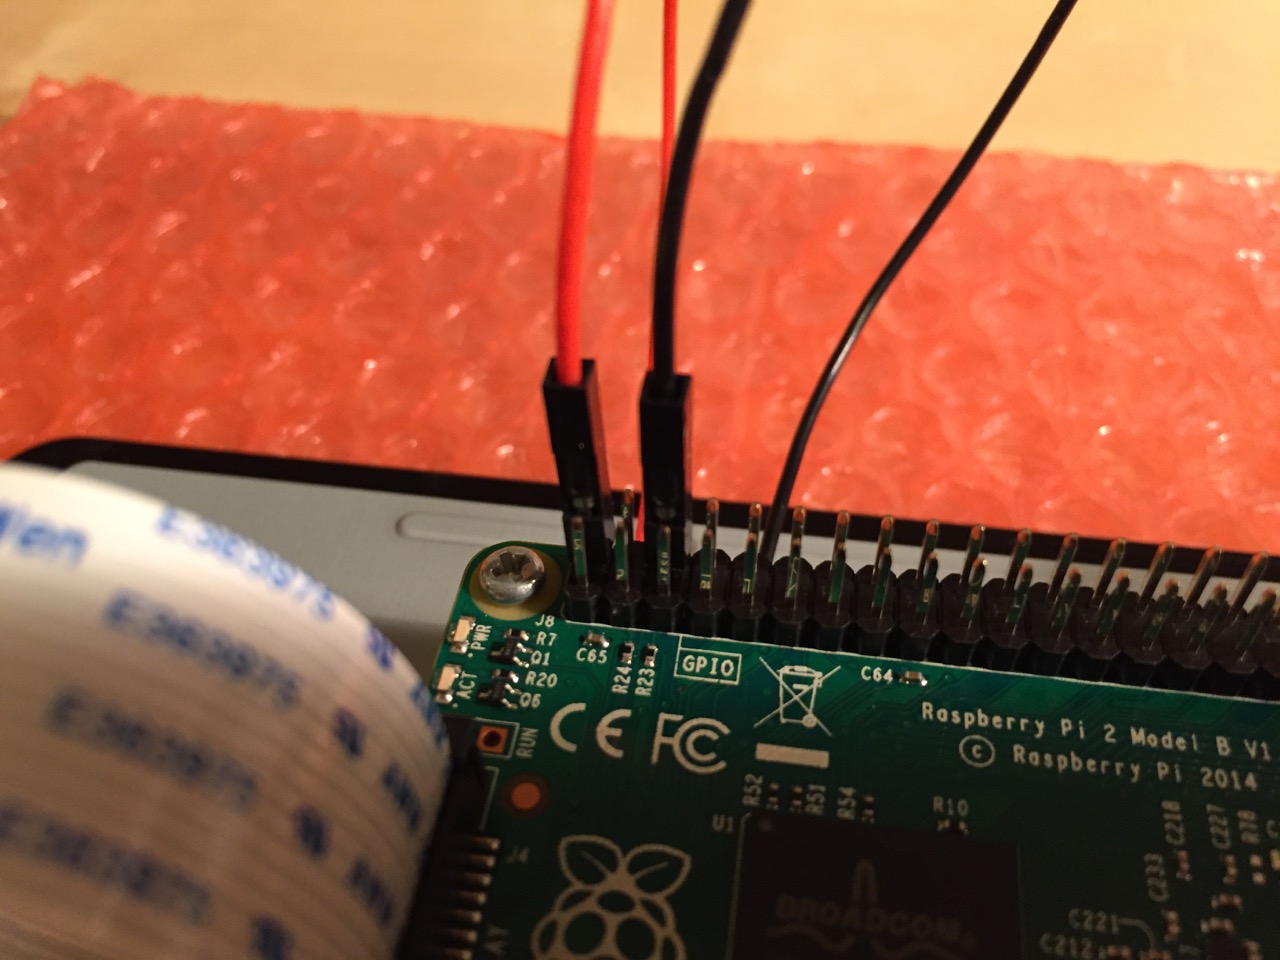
Use the supplied jumper wires to connect connect the power input of the display controller card…
…to the power output leads on the GPIO pins on the Raspberry Pi. This is one of three possible powering configurations–the other two involve USB.
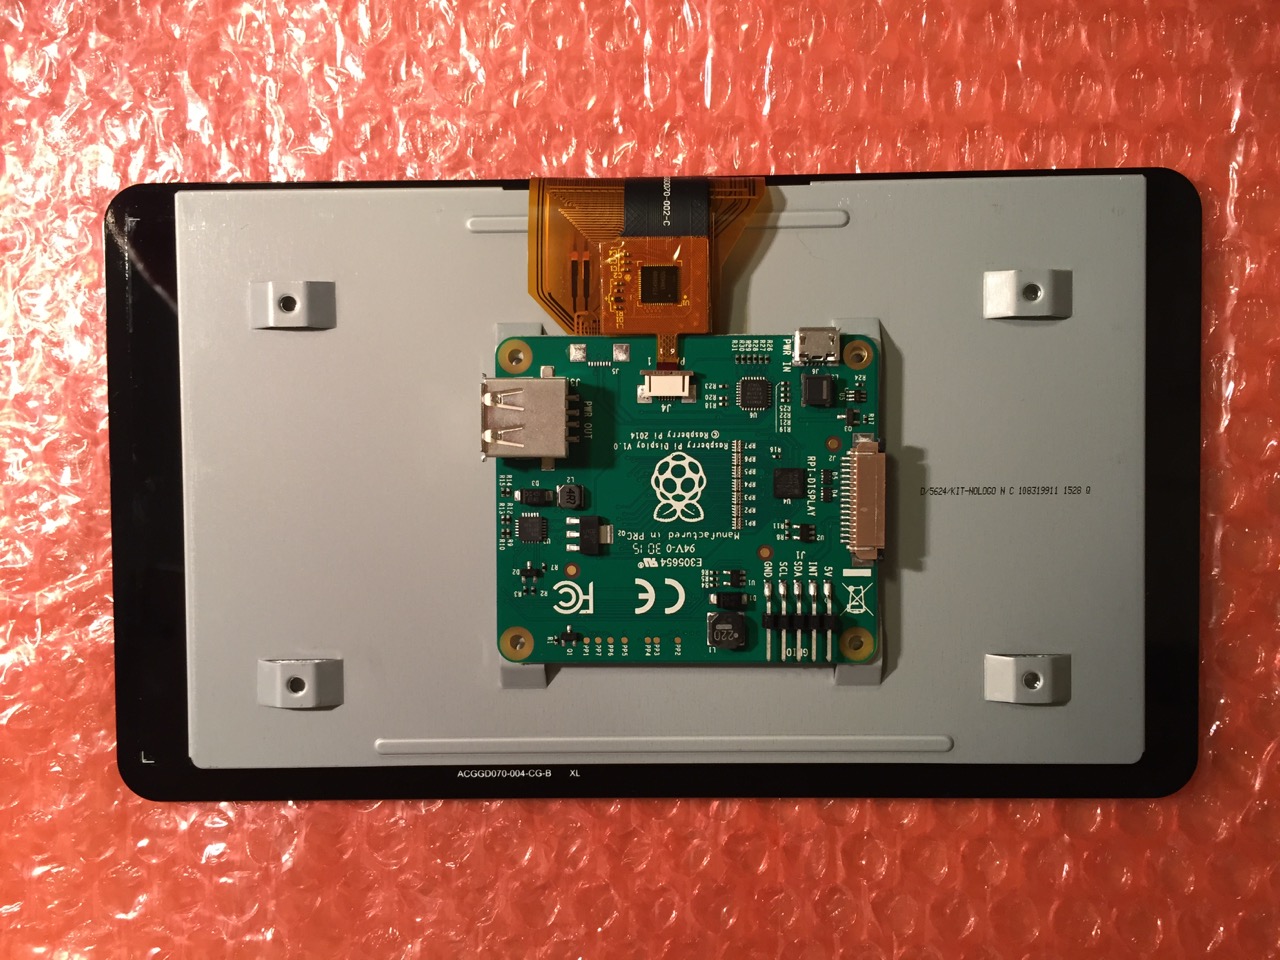
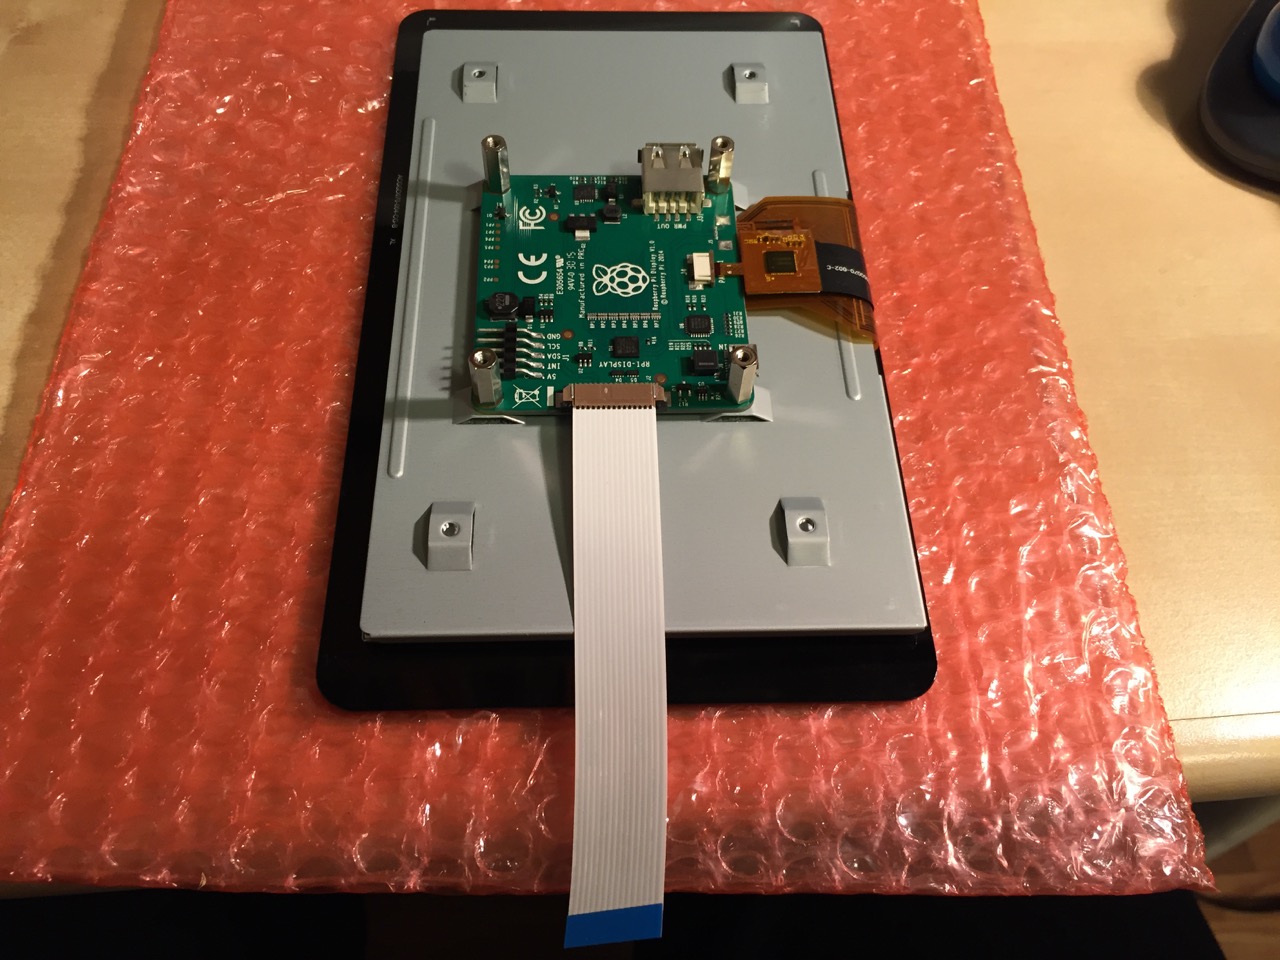
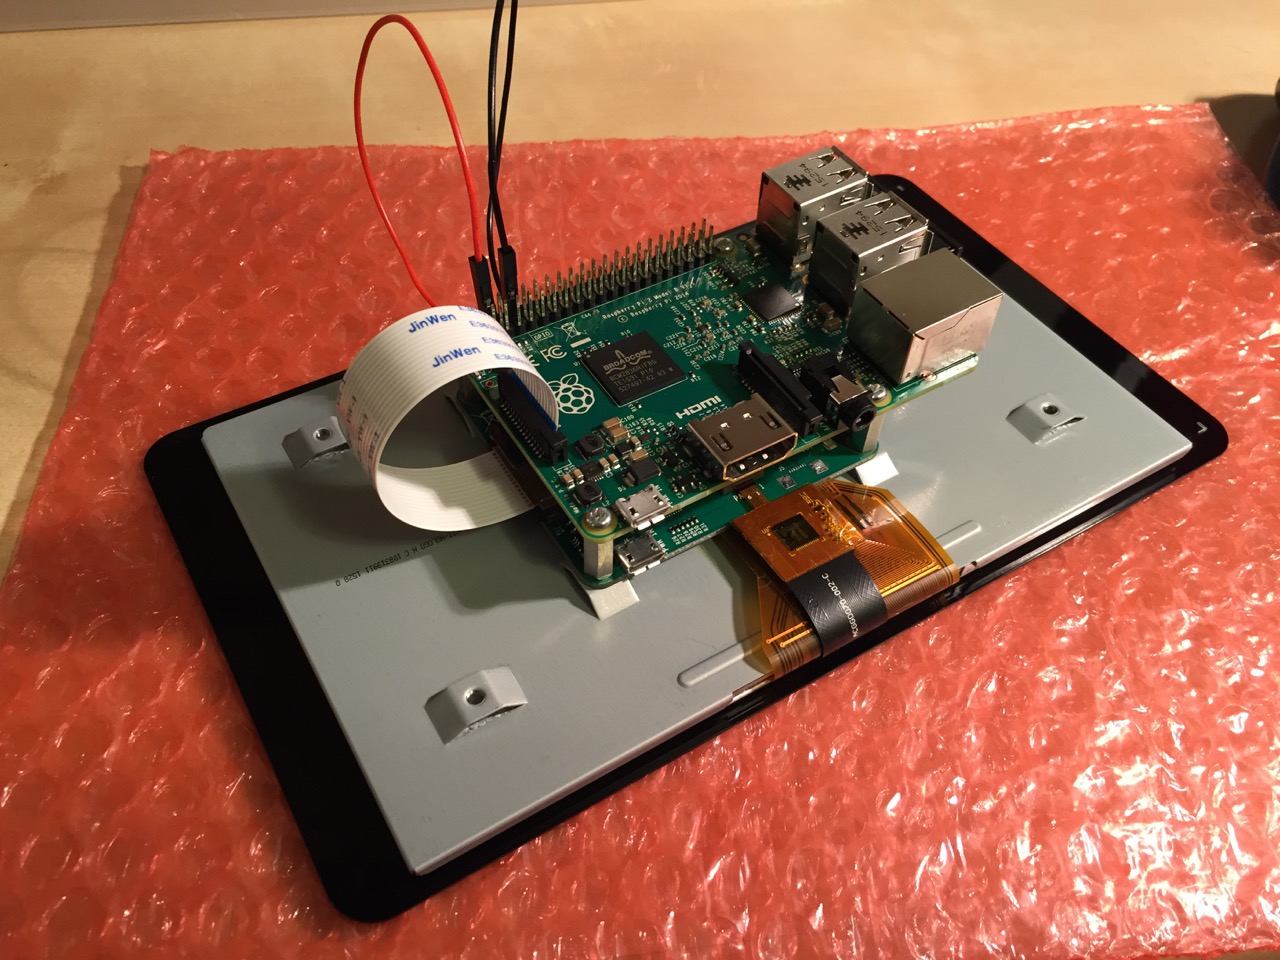
This is the rear of the 7″ Touchscreen Display assembled with the controller card and Raspberry Pi.
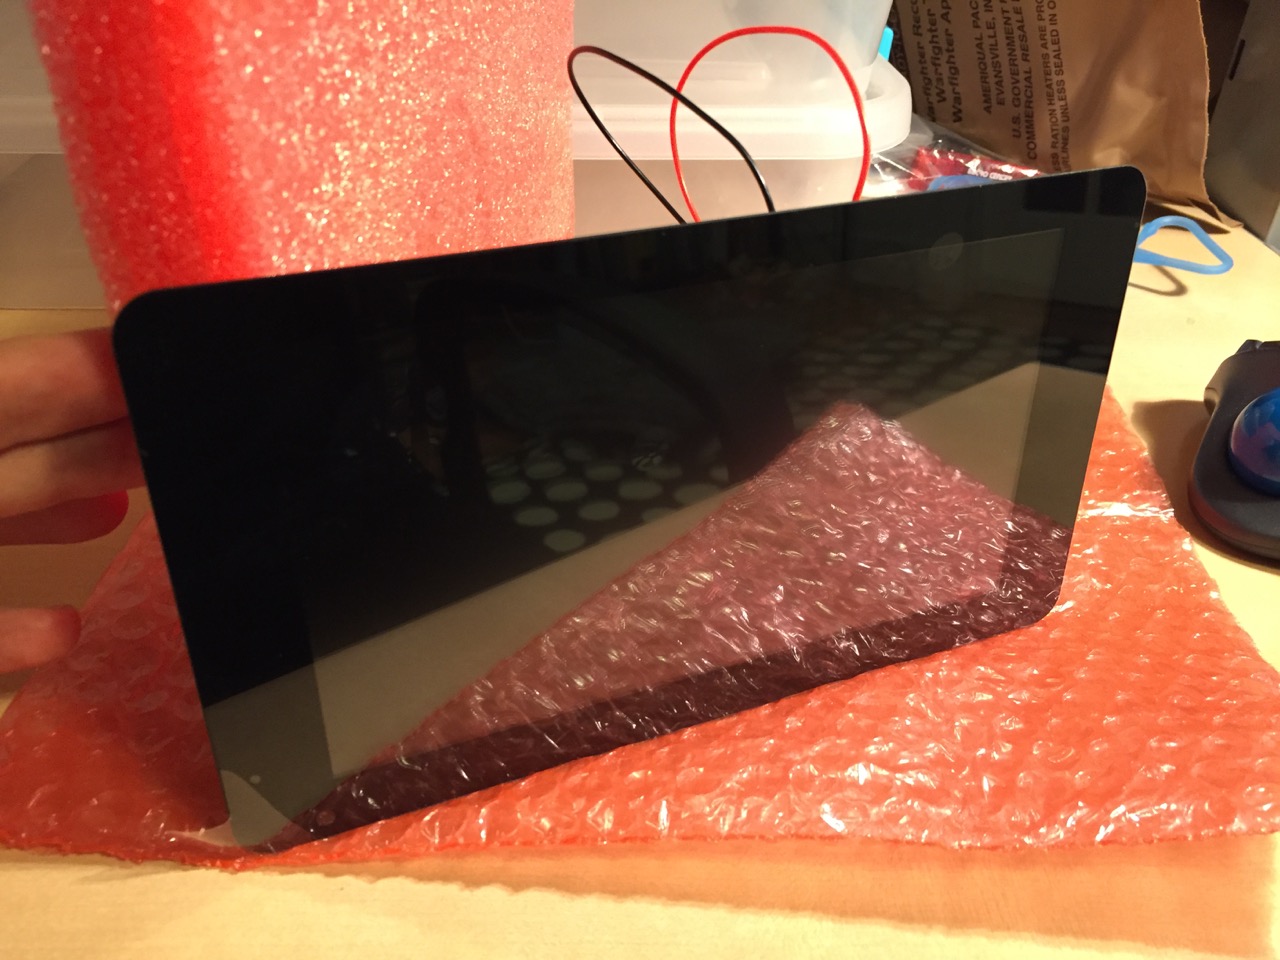
This is the front of the 7″ Touchscreen Display with the power leads sticking out from behind.
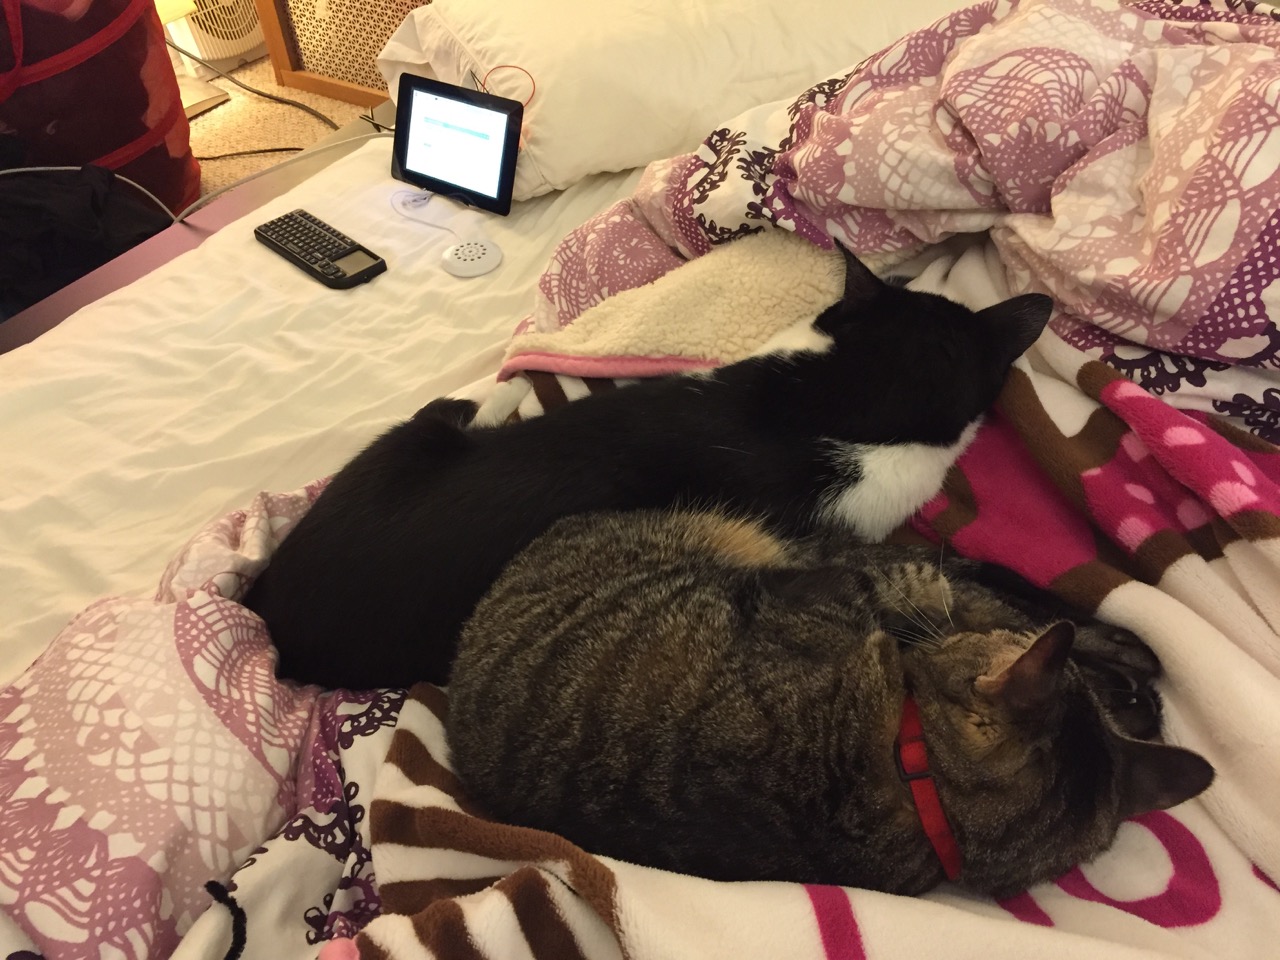
This is the Raspberry Pi powered up again with the 7″ Touchscreen Display.
Mose and Miao had lost interest in the project by this point.
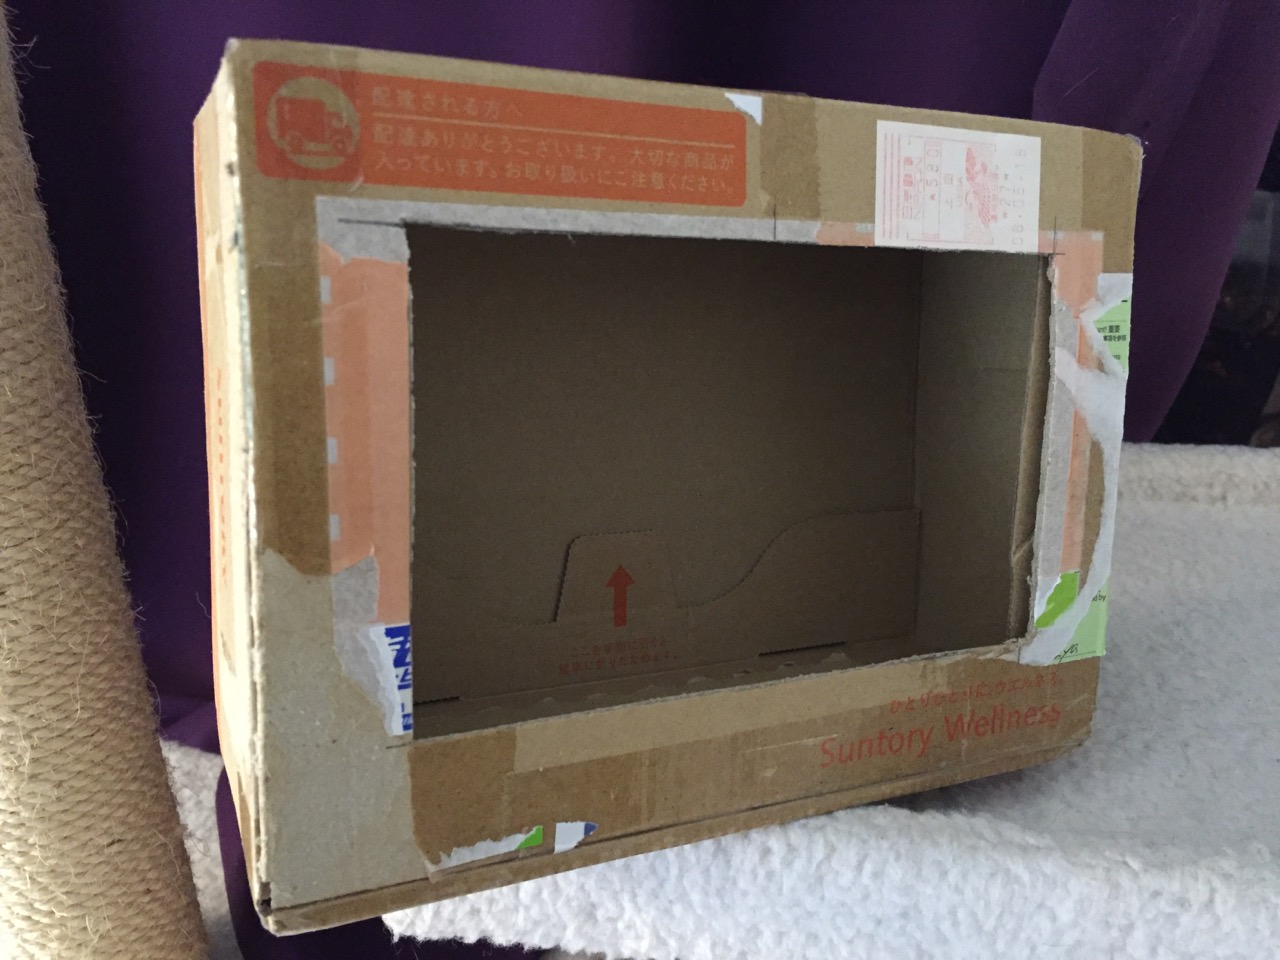
To complete the project, I cut a hole into a Suntory shipping box from Japan that is the exact same size as the 7″ Touchscreen Display box, which would work well, too. It is works well for holding up the Raspberry Pi and storing its accessories when I go between home and work.
Of course, you can use the Raspberry Pi with or without a case depending on your needs. I used the Suntory cardboard box from Japan for practical reasons (thinking: William Gibson: “the street finds its own use for things”–it’s a good size, on-hand, and looks cool) and research reasons (thinking about my work on proto-cyberpunk and the hidden nature of computing, which is an idea explored in my previous blog post about the poster that I created for the 13th annual City Tech Poster Session).
I have run the computer and touchscreen from the 5v battery that I purchased from Tinkersphere, but I get a graphics warning that the Raspberry Pi is under voltage (a rainbow pattern square persists in the upper right corner of the display whether in the CLI or xwindows). I might get a second battery to run the display alone, which would help me troubleshoot if the battery that I have now is actually outputting enough voltage and amperage needed by the Raspberry Pi alone. In the meantime, I am running everything at my desk with the 5v power adapter, which provides ample power for the Raspberry Pi and 7″ Touchscreen Display.
In the future, I would like to use the Raspberry Pi in a writing or technical communication course. There are many ways to leverage the technology: problem solving, writing about process, creating technical documents such as reports and instructions, using the Raspberry Pi as a writing/multimodal composing platform, digital storytelling with tools that come with the Raspberry Pi, and more. These ideas are built only around the Raspberry Pi and its software. A whole other universe of possibilities opens up when you begin building circuits and integrating the Raspberry Pi into a larger project.
The basic cost of entry with the platform is $30 for the Raspberry Pi 2, Model B and a few dollars for an 8GB micro SD card. If you have access to a display with HDMI, a USB keyboard and mouse, and ethernet-based Internet access, you can get started with Raspberry Pi almost immediately. For a future grant application, I am imagining a proposal to purchase the basic needed equipment to use Raspberry Pi in an existing computer lab. I can bring the kits to each class where students can use them on different assignments that meet the outcomes for that course but in an engaging and challenging way that I think they would enjoy and would be beneficial to them in ways beyond the immediate needs of the class.
On this last point, I am thinking of working with digital technology in an a way many of my students will not have had a chance to before, feeling a sense of accomplishment, learning from one another on team-based projects, experiencing a sense of discovery with a computing platform that they might not have used before, and of course, communicating through the process of discovery in different ways and to different audiences. This might be something that you’re interested in, too. Drop me a line if you are!
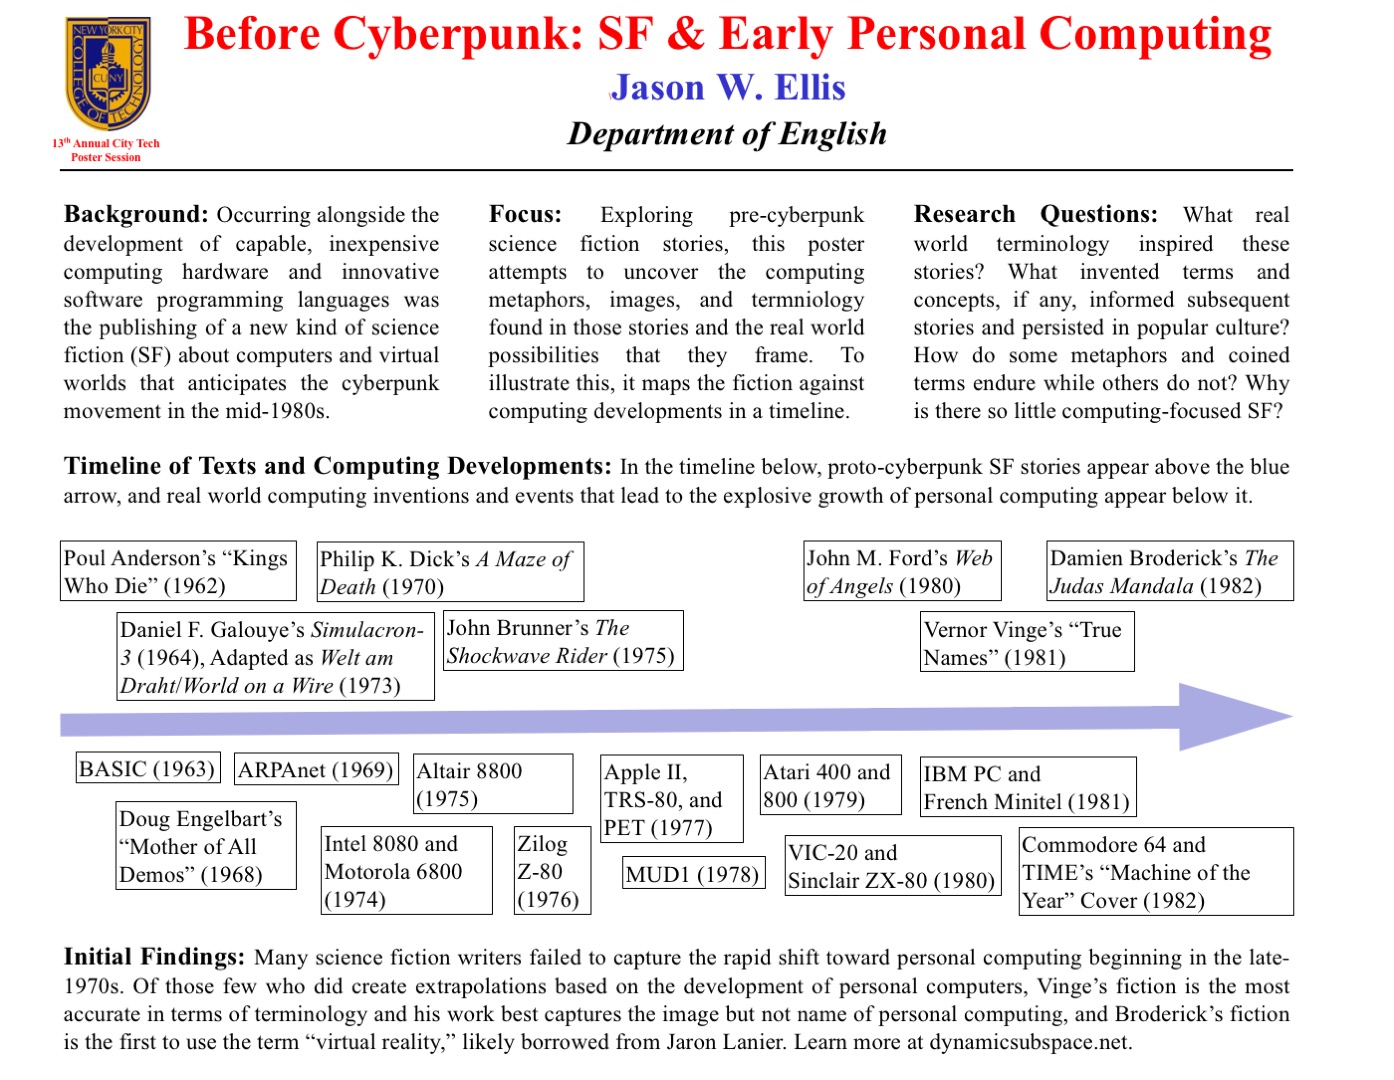
For the New York City College of Technology, CUNY’s 13th Annual Research Poster Session, I created the poster embedded above to illustrate my current research on pre-cyberpunk science fiction (SF) about computing and personal computing. The poster discusses my focus and provides a timeline with SF about computing matched with key technological innovations that made the personal computing revolution in the late-1970s possible.
What I am interested in is the fact that William Gibson’s “cyberspace” captured the popular imagination about the metaphorical place where computing, processing, navigating, interacting, and communicating occurs, but some of the very good SF about computing that predates Gibson’s coining the term cyberspace failed to leave an indelible impression. Certainly, these stories were read and circulated, but the reach of their images and metaphors seem to have been limited in scope as compared to Gibson’s writing.
One of the ideas that I have had since creating the poster is that the idea of hidden computing or outlaw computing is something central to Vernor Vinge’s “True Names.” This, of course, features large in Gibson’s fictions, and it is the image that I am looking for in other SF of this transitional era.
At the poster session, I will carry my Raspberry Pi-based touchscreen-computer-in-a-Suntory-box-from-Japan to demonstrate the idea of hidden computing. I will post a step-by-step instruction post soon about assembling the Raspberry Pi-based computer and offer some additional thoughts about how I would like to use them in my technical communication classes.
In this post, I want to provide some of my notes and links to relevant resources as a record of the initial research that I did in preparation of this poster. It is my hope that it might lead to conversations and collaborations in the future.
Fiction Sources
Murray Leinster’s “A Logic Named Joe” (1946): Home computers connected to a large scale network. [Couldn’t fit within poster dimensions, but a significant work that needs mentioning.]
Isaac Asimov’s “The Fun They Had” (1951): Children discovering a print book are agog at what it represents while their classroom/desktop teaching computers flash mathematical fractions at them. [Couldn’t fit within poster dimensions, but another important work in this genealogy.]
Poul Anderson’s “Kings Who Die” (1962): Human-computer interface, according to Asimov and Greenberg in The Great SF Stories #24, “one of the first stories to address this question” (69).
Daniel F. Galouye’s Simulacron-3 (1964): Also published as Counterfeit World. Adapted as Welt am Draht/World on a Wire (1973). Simulated reality for artificial beings programmed to believe (except in the case of one character) that they are real and living in the “real world.”
Philip K. Dick’s A Maze of Death (1970): A crew in a disabled spacecraft while awhile their remaining lives in a computer generated virtual world.
John Brunner’s The Shockwave Rider (1975): Computer programming and hacking. First use of the term “worm” to describe a type of self-propagating computer program set loose on the computer network. Protagonist as outlaw.
[Five year gap during the personal computing revolution. Were the SF writers playing with their new personal computers?]
John M. Ford’s Web of Angels (1980): The “Web” is a communication and computing network connecting humanity. “Webspinners” are an elite group of programmers who can manipulate the Web in unique and unexpected ways. Protagonist as outlaw.
Vernor Vinge’s “True Names” (1981): Computing power hidden from view of a watchful government–literally under the floor boards. Early MMORPG/virtual reality experience of what was later called cyberspace. Protagonist as outlaw.
Damien Broderick’s The Judas Mandala (1982): First SF to use the terms “virtual reality” and “virtual matrix.” Protagonist as conspirator/outlaw?
Nonfiction Sources
Cavallaro, Dani. Cyberpunk and Cyberculture: Science Fiction and the Work of William Gibson. New Brunswick, NJ: Athlone Press, 2000. Print.
Ferro, David L. and Eric G. Swedin. Eds. Science Fiction and Computing: Essays on Interlinked Domains. Jefferson, NC: McFarland, 2011. Print.
Kay, Alan C. “A Personal Computer for Children of All Ages.” ACM ’72 Proceedings of the ACM Annual Conference – Volume 1. New York: ACM, 1972. n.p. Web. 18 Nov. 2015.
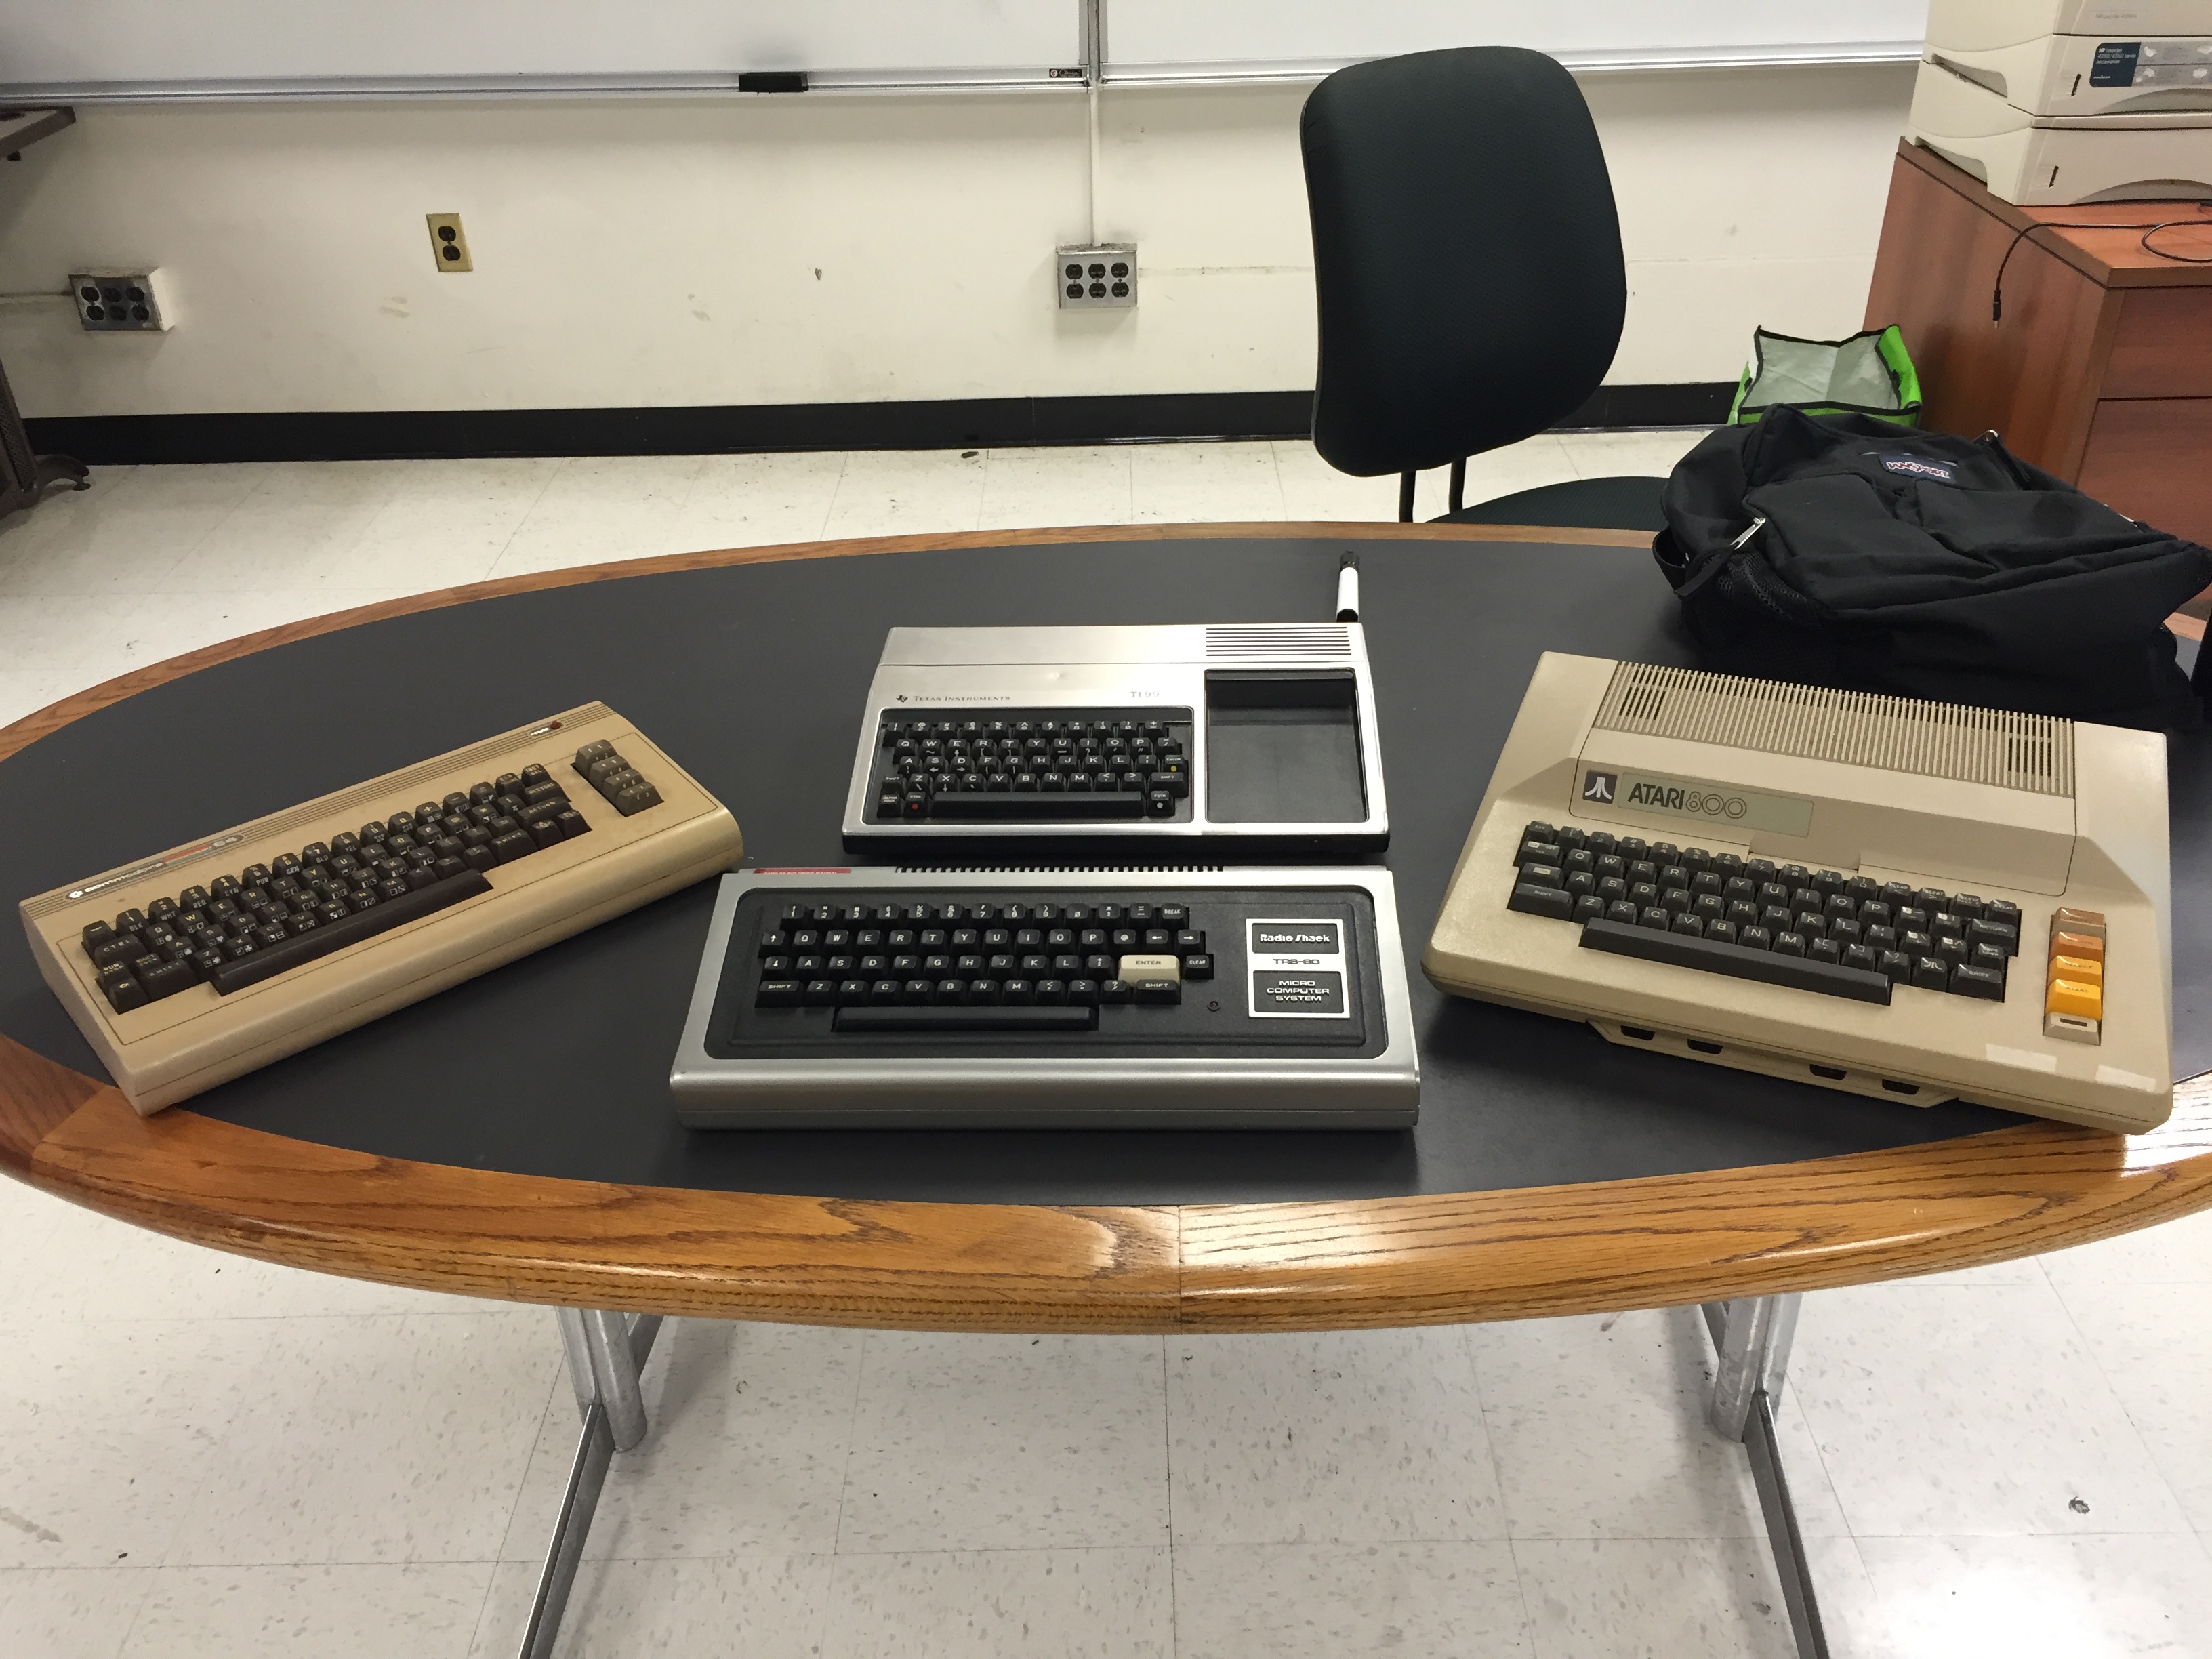
R to L: Commodore 64, TRS-80, TI-99/4A, and Atari 800.
In ENG 1133 Specialized Communication for Technology Students at City Tech this semester, I am rolling out a new major project focusing on creating documents based on a specific vintage computer. This project is an offshoot of my archival retrocomputing research (latest update here).
As in my other technical communication-based classes, I prefer students have an opportunity to learn how to write certain kinds of technical and business documents in a collaborative setting. They obtain the double benefit of learning the document genre and conventions while also negotiating collaborative writing practices that they will encounter in the workplace.
For this project, in teams of 4-5 students, they will create agendas, minutes, a research report, a bid/proposal, single-sourced documents (tri-fold brochure and owner’s manual), a document testing report, and a presentation. The documents that each team creates will be based on what they learn about a specific vintage computer. I assigned teams to one of four vintage computers that I obtained from Stan Kaplan at City Tech: Commodore 64, Radio Shack TRS-80, Atari 800, and Texas Instruments TI-99/4A (using a double integer sequence from random.org in front of the class). A copy of the assignment can be downloaded here: ellis-jason-eng1133-project2-2015-fall, and the class syllabus can be downloaded here: ellis-jason-eng1133-syllabus-2015-fall.
In addition to using library resources, students are encouraged to use Archive.org’s vast retrocomputing resources, holdings, and interactive features.
I am looking forward to learning from my students’ research and seeing their documents emerge from their collaborations.
Having just finished William Gibson’s All Tomorrow’s Parties (1999) and thus concluding his Bridge Trilogy, I cannot say with anything resembling certainty that I have read or not read these novels before. As I said when I began writing a few notes on my blog about Virtual Light and Idoru, I have a creepy feeling of having been in these novels before, of having read them sometime and some place. If I have encountered these novels directly before, the memory source for those encounters is locked away in some inaccessible part of my memory. Anyways, if I did read them before and there should be some memory, I am hopeful that it is still there and simply inaccessible to my mind’s eye in the present and not eradicated by some biological injury.
Despite my memory’s misgivings and uncertainty, I can certainly say that I enjoyed this vision of the future/present/near past illustrated in the fast and sharp language Gibson lays down in these three novels. In All Tomorrow’s Parties, we experience Laney’s virtuosity as a netrunner who builds alliances/buys alliances that out maneuvers the 0.001%er Harwood. Laney’s ability as a psychopharmacologically enhanced cyborg who can see the flows of data, understands what we have all just recently learned about the power of metadata, and seizes the accreting eddies and currents of information, narrative, and inevitability leading to something bigger, powerful, and otherwise unseen–an undertow of history.
Laney as netrunner seems an analog of what we have all become in one way or another. We manage our flows of information with RSS feed aggregators, news readers, the Facebook wall, the Twitter feed, the timeline, hashtags, tagging, Friend lists, Google+ Circles, subscriptions, etc. Before all of this, there was talk in the magazines about creating intelligent agents–small programs that would scour the Internet for the information and news that we would like to learn more about (perhaps through keywords and other coded instructions)–that helped manage what we read and saw while also managing our precious pre-broadband bandwidth.
It is worth noting that in both cases, watching the firehose of feed data now or harvesting news bits with intelligent agents, all data written by someone for the info consumption of others is a practice of historic preservation, archivization, observing what has come before. Taken one step further, none of us experience the present due to our biological senses and cognition systems that delay our experiencing the world beyond ourselves. Thus, the netrunner (and ourselves as modern netizens) are a further step away–observer experiences, reports multimodally over the Internet, we experience the multimodal report. To go further on this point or digress on the transformation of these experiences by the media and modal channels involved would likely cover several volumes, so I will end the digression here.
There are times when I feel like Laney must have felt in his dank cardboard hovel in the Japanese train station. Surrounded by his own filth and barely holding on to life with a ritual of cough syrup and sugars to keep his body barely operational but well enough that he could remain plugged into the data feed via his VR eye goggles. Trying to keep up what is going on in the world, going on with family and friends, going on professionally via the numerous and multiplying channels of social and broadcast media is daunting. It is a burden–a heavy one at that. Any attempt that I make at streamlining, modulating, organizing, and taming these never ceasing feeds of information makes me feel overwhelmed, lacking control, and otherwise wasted. My own compulsion to try to keep up, to interact, and to communicate in kind leaves me feeling dread over joy more often than not.
At least in Laney’s case in All Tomorrow’s Parties, he is working toward a goal of swinging the nodal point away from Harwood and towards something different, perhaps altruistic and thus the many Rei Toei’s are born of nanotech assemblers in the many Lucky Dragon establishments.
Another interesting image for me and my work as a researcher of our shared digital culture is the Bad Sector shop on the San Francisco side of the bridge. Chevette finds Tessa outside the Bad Sector shop working on her tiny video drone, God’s Little Toy (an increasingly ubiquitous and problematic technology today ranging from privacy violation to public safety in the air and on the ground). Later, Rydell goes to the Bad Sector to obtain two cables for Rei Toei’s holographic projector. Inside the Bad Sector shop, Gibson describes its Jurassic technologies–lingering on audio recording media going back to the beginning and vintage personal computers–particularly those encased in beige. Of course, the shop’s name refers to a bad sector on computer readable magnetic media–a physically unreadable or damaged location on the media platter–floppy or hard disk.
For media archivists, the bad sector is like a burned or rotted page in an ancient manuscript. There is the possibility that the data might exist copied by the manipulations of digital technology far more quickly than that by a human scribe, but if no copy or backup exists, the bad sector–depending on the type of magnetic media, its data density, etc–could leave some information permanently inaccessible. Although, I can imagine a bad sector can, in some very particular circumstances, tell us things about how technology-as-culture was developed and continues to develop (the physicality of drive mechanisms, error correction algorithms, the application of scientific principles to avoid physical destruction of the drive media, the deformities or problems with a given writer’s computer setup, how that writer’s computer influenced the development of cultural works–lost drafts, overwritten work, etc.). So, the bad sector can be seen as a loss on the one hand and potentially a gain for understanding on the other.
My office at City Tech (and the previous labs of vintage computer that I have built up, sold off, donated over the years beginning at my childhood home in Brunswick, GA, my flea market booth at Duke’s Y’all Come Flea Market in Darien, GA, my home in Norcross, GA, the Special Collections of Georgia Tech’s Library Archives, and now my college in Brooklyn, NY) is kind of like the Bad Sector on the bridge. It is cobbled together. It is incomplete. It is bricolage. It is pieced and held together with equal parts ingenuity and duct tape. Unlike the Bad Sector in All Tomorrow’s Parties, it is mine and not something bought and sold by off-bridge investors. Like the bridge in the novel, my vintage/retro computing lab is a community effort–I get and give, others get and give. I work on it and at it to remember where we have come from and to reflect on how our past innovations inform and continue to speak to our current digital culture. I want its archive to provide testimony about who we were and who we have become as human beings and thinking organisms. It is part of my research and pedagogy.
William Gibson’s Bridge Trilogy (Virtual Light, Idoru, and All Tomorrow’s Parties) is an impressive vision. My deja vu or amnesia–depending on your point of view–about the novels might say more about how much like the present some themes and images in Gibson’s novels speak to the way things were and are in the real world.