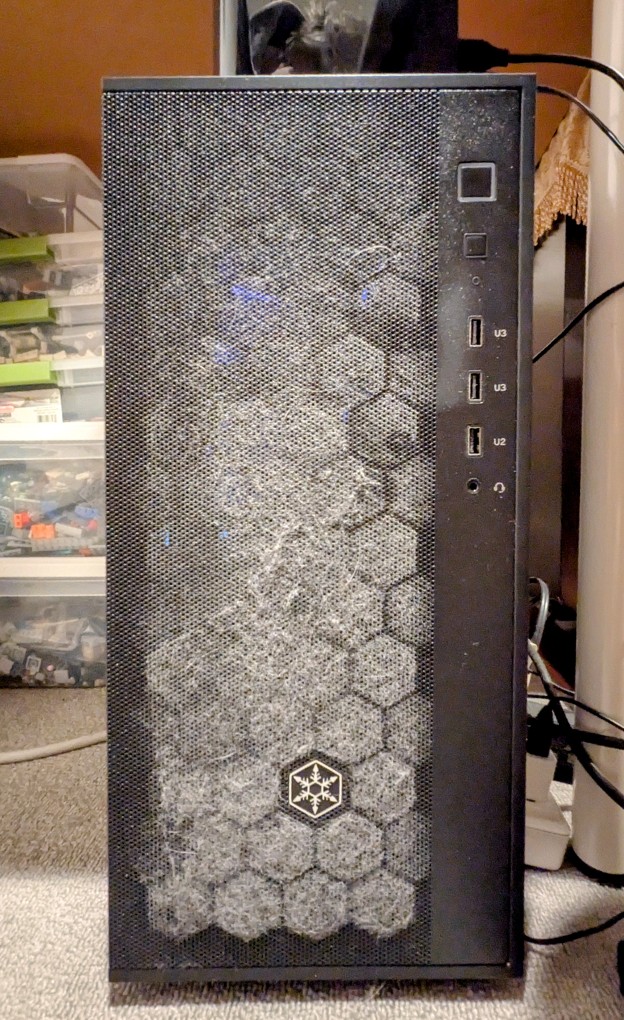
Due to the noise my workstation makes during AI inference, I keep it on the floor under an adjacent desk. Down there, it’s in the shadows. So, I was a little surprised how dusty the front air intake was after being in operation just a little over a month. It probably says a lot about how bad the air quality is in my apartment despite running three HEPA air cleaners in a roughly 600 square foot space. I know that it would be better for the PC to be up off the floor–on the desk, for example. Unfortunately, its noise and disco lights on the CPU fan and white light on the NVIDIA RTX 3090 make this an undesirable choice. I’ll have to remember to vacuum it every two weeks or so, and I might add a foam sheet behind the front grill to help catch more dust before it goes into the case and lands on the components’ heatsinks and fans.
I’m reminded of The Crafsman‘s “Don’t Forget Your Dust Mask.”
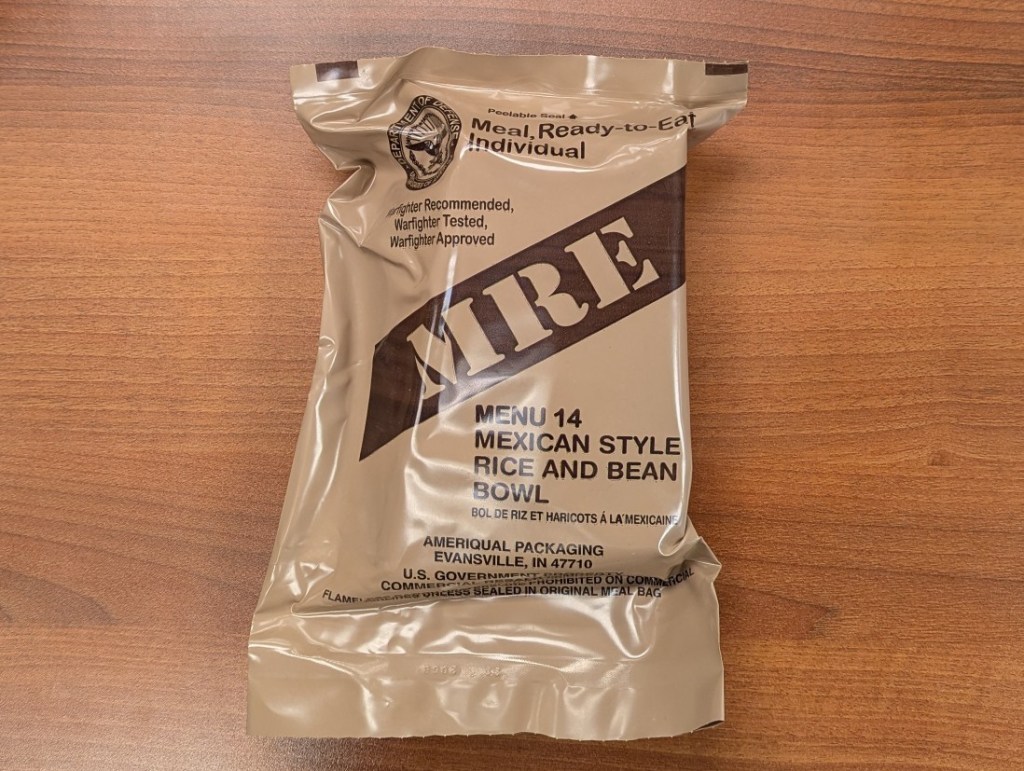
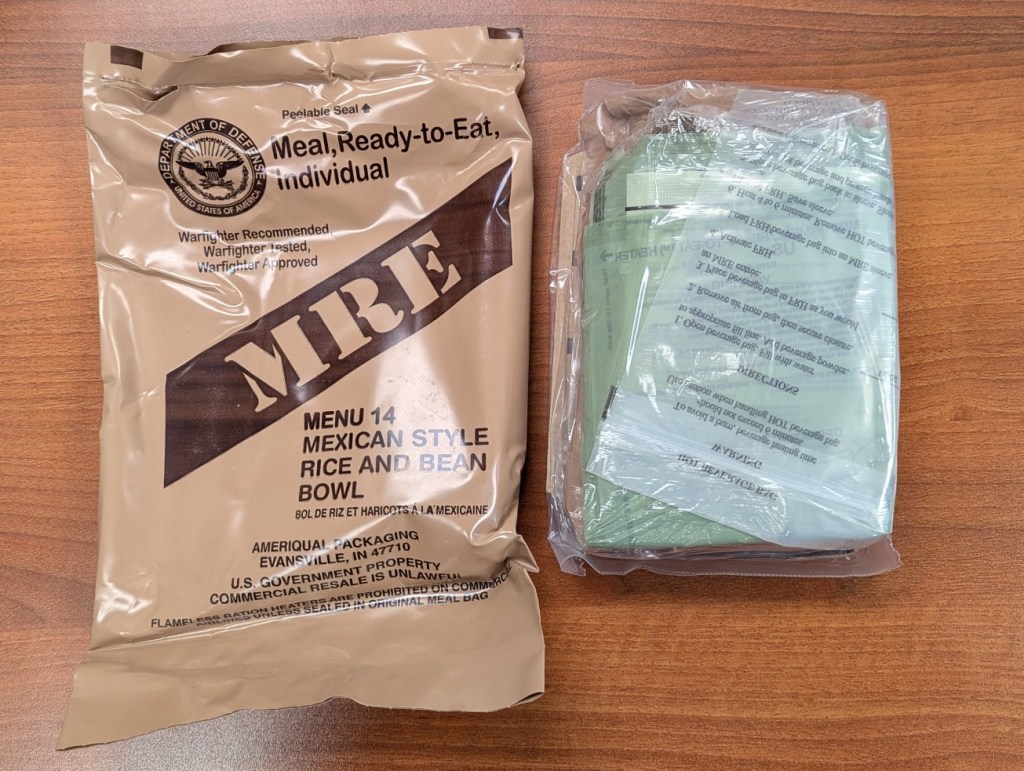
Yesterday, I enjoyed MRE Menu 14: Mexican Style Rice and Bean Bowl from Case B. After teaching one class and spending an hour in the library archives pulling materials for a graduate student from the City Tech Science Fiction Collection, I was ready for some sustenance before teaching my evening class. This MRE hit the spot!
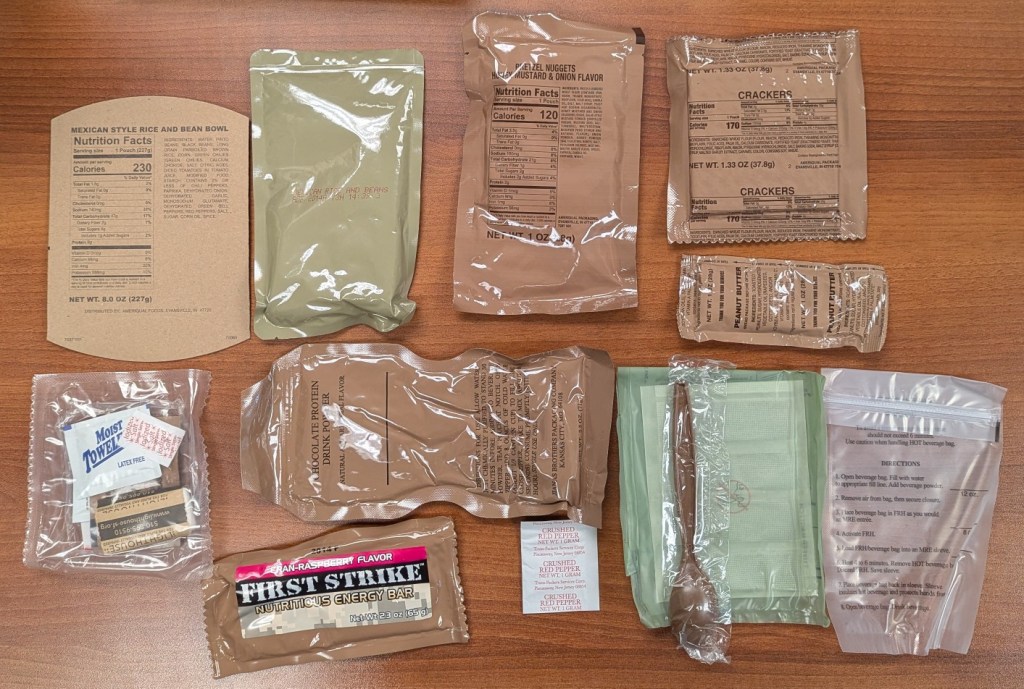
Menu 14 includes the following items clockwise from the top left:
Carboard Sleeve
Mexican Style Rice and Bean Bowl Entree
Pretzel Nuggets Honey Mustard & Onion Flavor
Crackers
Peanut Butter
Beverage Pouch
Water-activated Heater
Spoon
Crushed Red Pepper
Chocolate Protein Drink Powder
First Strike Nutritious Energy Bar Cran-Raspberry Flavor
I tried the rice and beans before adding the crushed red pepper, and I liked the flavor as is and saved the pepper for later. I didn’t try any of the sides of this MRE, because I also brought some dessert from home. I’ll mix-and-match the sides with other MREs in the future.
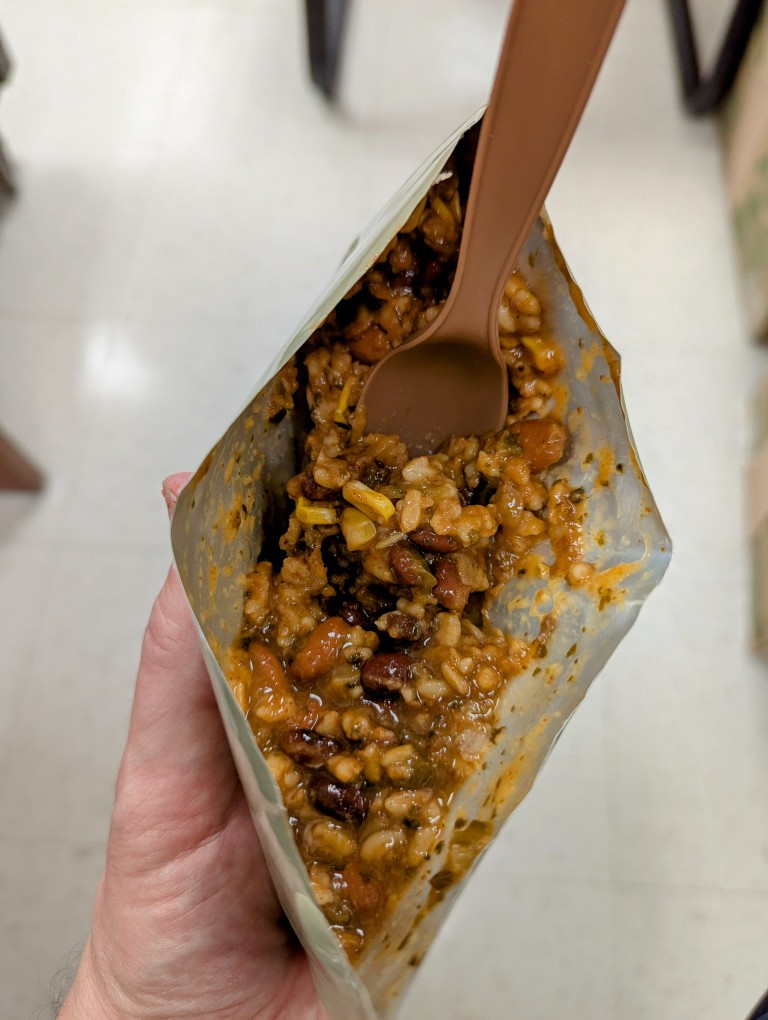
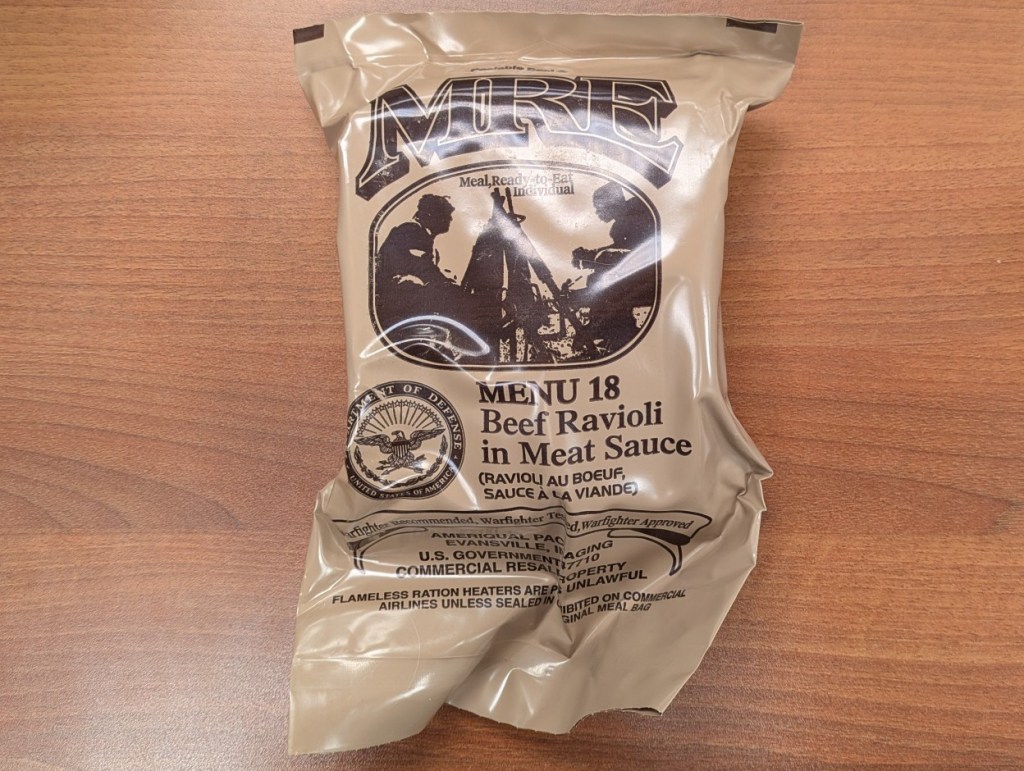
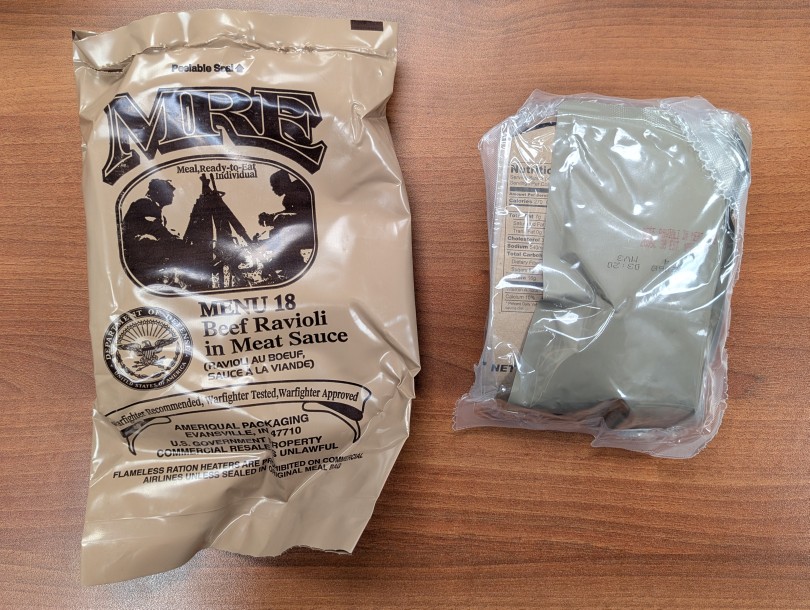
Last week, I brought MRE Menu 18: Beef Ravioli in Meat Sauce (from a 3/25 inspection date Case B) to work so that I could have dinner quickly between my first class followed by office hours and then my evening class. I was so hungry that I didn’t take pictures of the contents. Suffice to say that it was tasty and filling, and I saved some of the sweets for later.
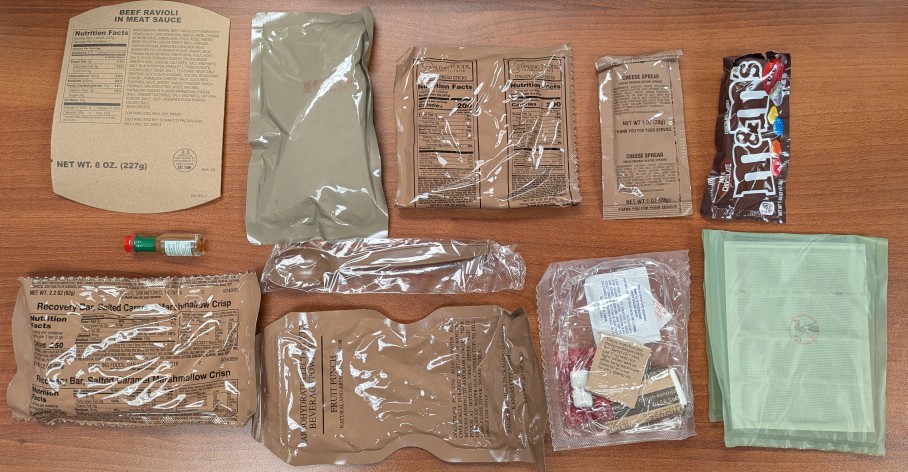
Menu 18 included these items:
Cardboard sleeve
Beef Ravioli in Meat Sauce entree pack
Italian Bread Sticks
Cheese Spread
M&M’s
Water-activated heater
Accessory Pack (gum, matches, coffee, sugar, sweetener, creamer, and TP)
Carbohydrate Electrolyte Beverage Powder: Fruit Punch
Spoon
Recovery Bar, Salted Caramel Marshmallow Crisp
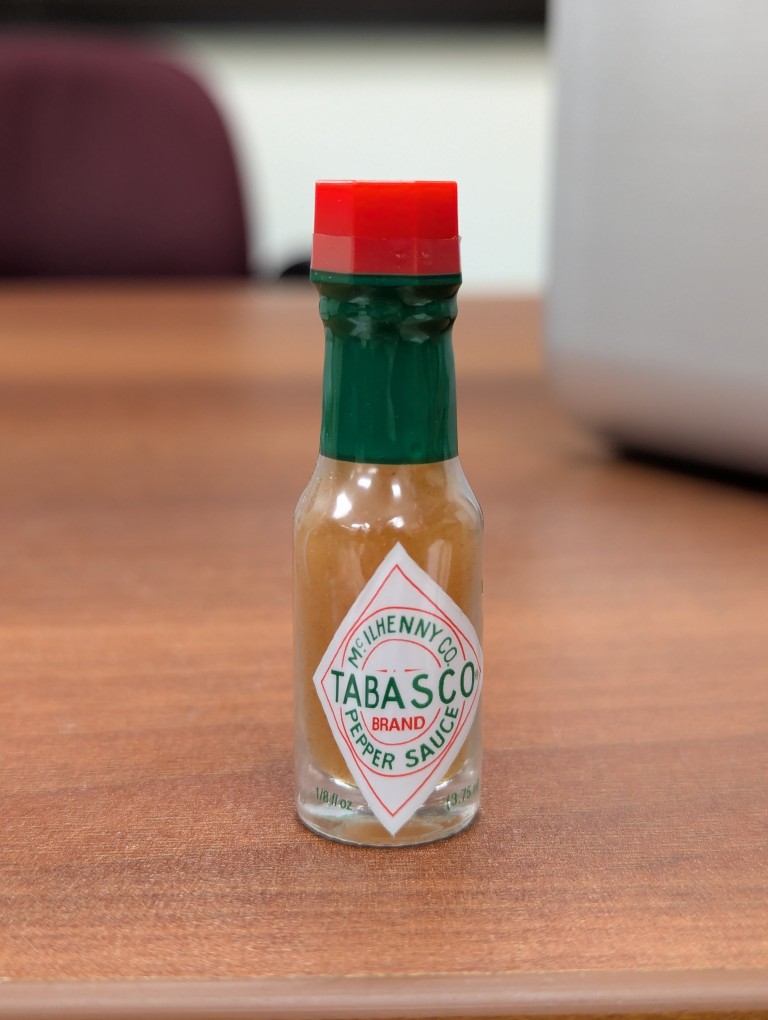
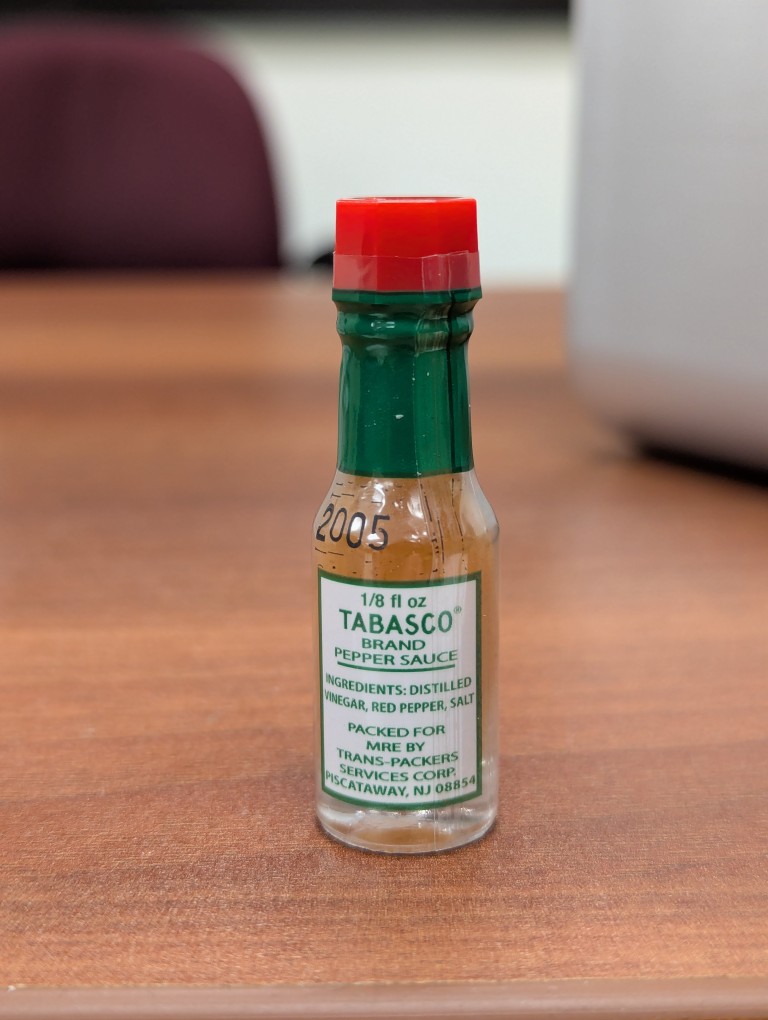
Tabasco Sauce in Glass Bottle
The Tabasco Pepper Sauce was the real prize in this MRE. I haven’t received a Tabasco Sauce bottle in years from the many cases that I’ve purchased. Apparently, they had been removed for about a decade before being re-implemented shortly before the MRE case this menu pouch came from was produced. So, I should have some more Tabasco to look forward to as I work my way through this case!
For my dinner that night, I ate the Italian Break with Cheese Spread and the Ravioli in Meat Sauce. The ravioli remind me of miniaturized Chef Boyardee in a pouch instead of a can. I saved the Recovery Bar for another day–maybe a long hike. I’ve already enjoyed the M&M’s mixed with some peanuts and raisins for trail mix.
While MREs’ main function is ready nutrition, its morale function via its nostalgic, tasty, and sweet contents can’t be understated.
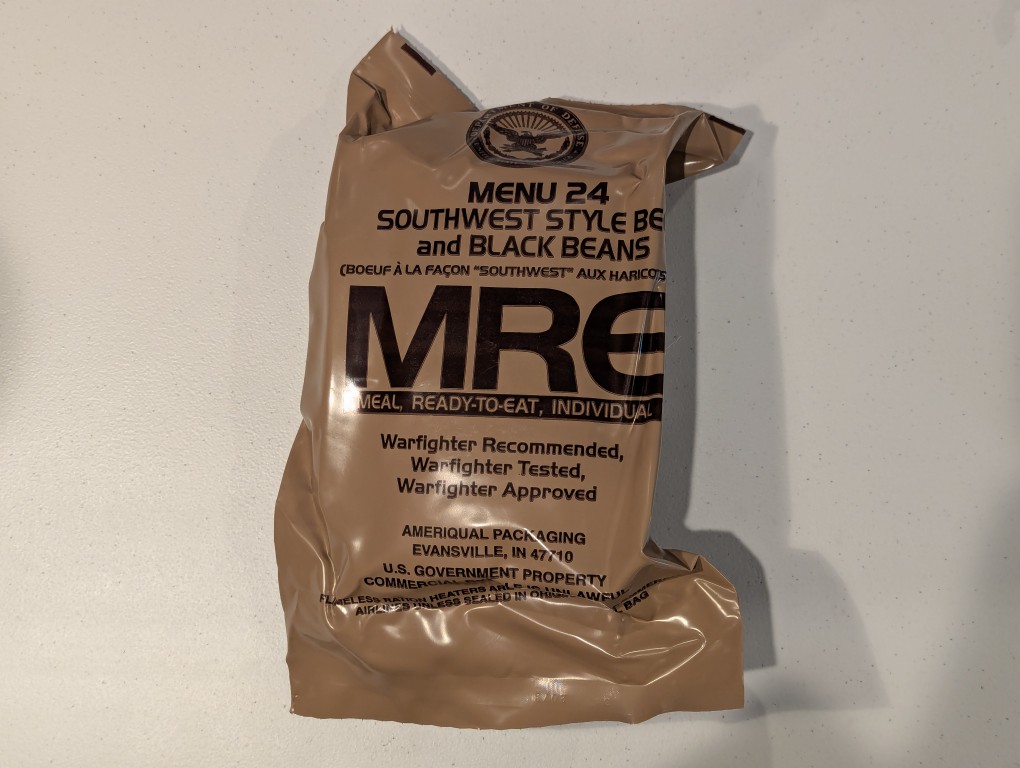
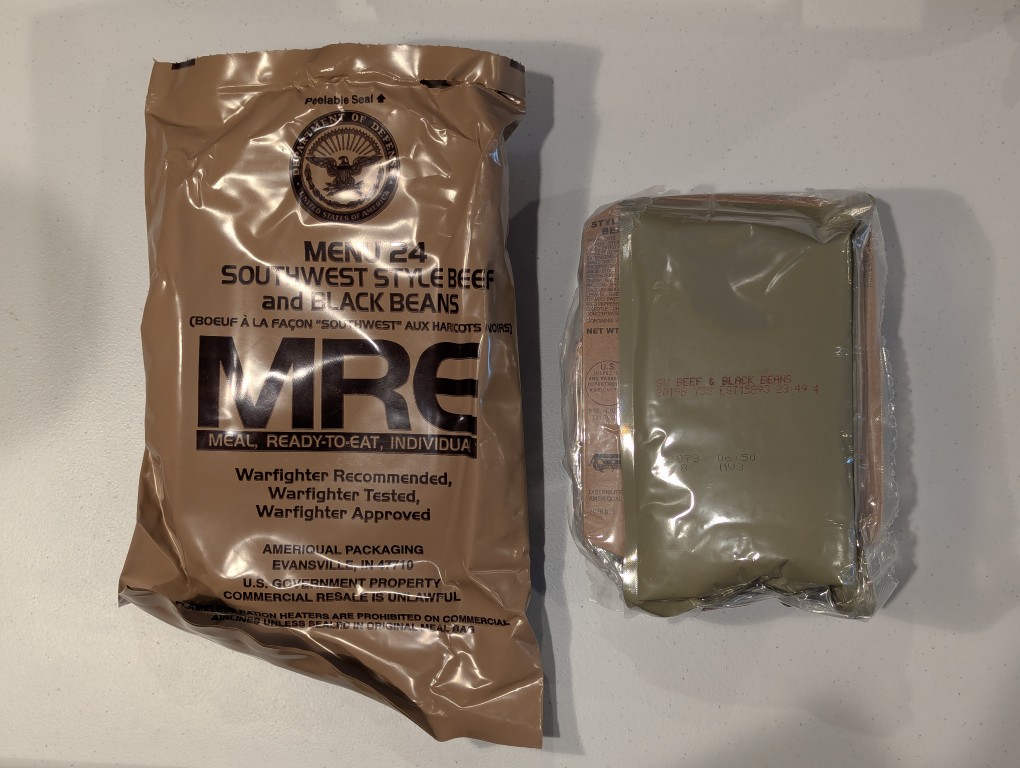
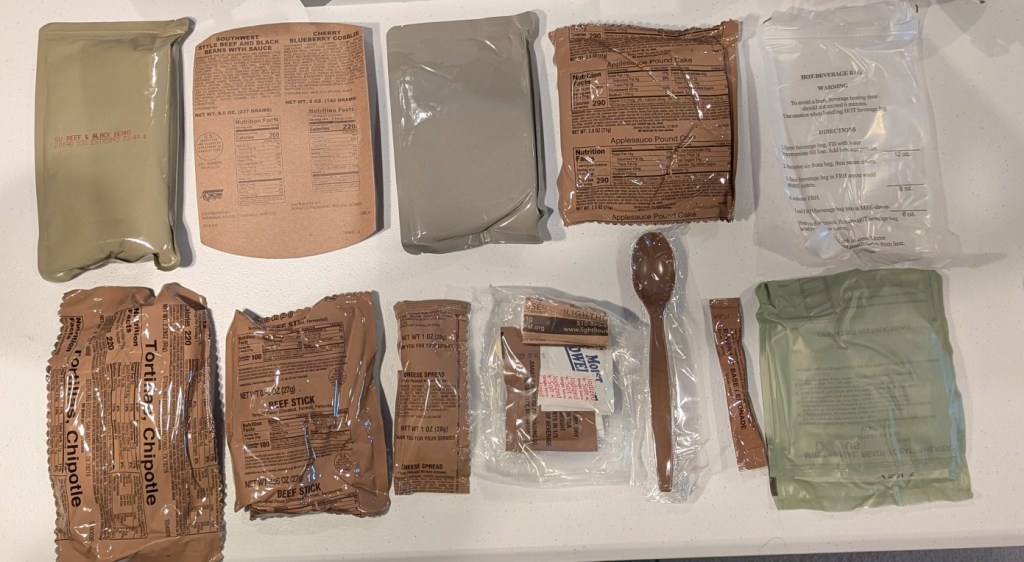
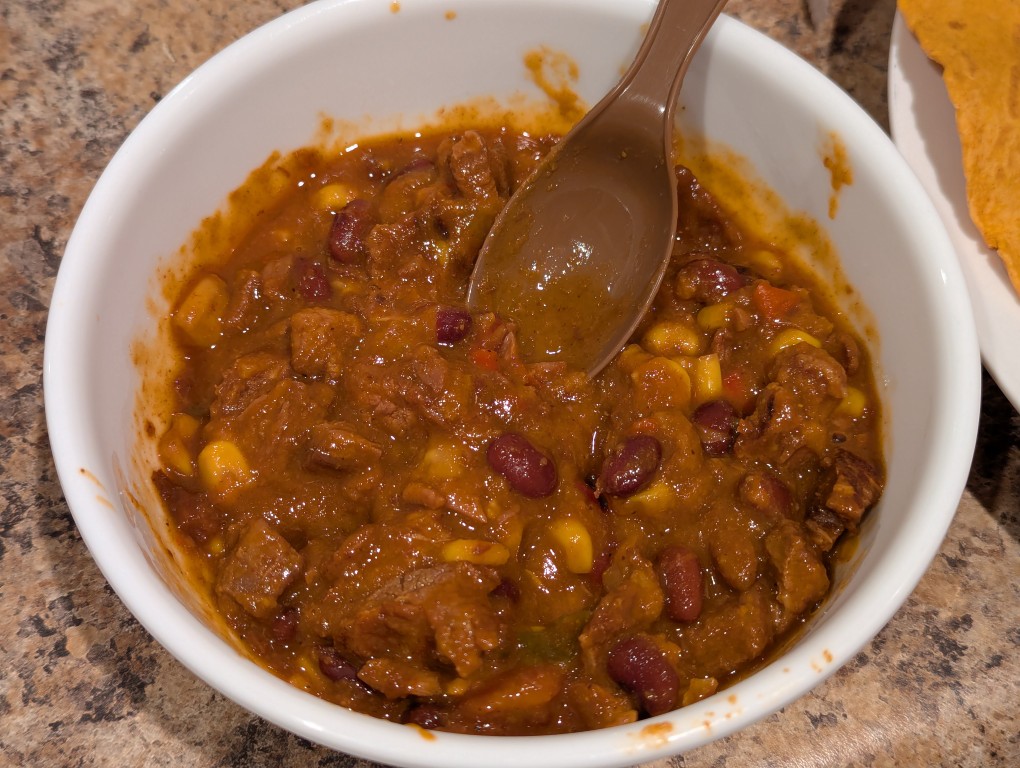
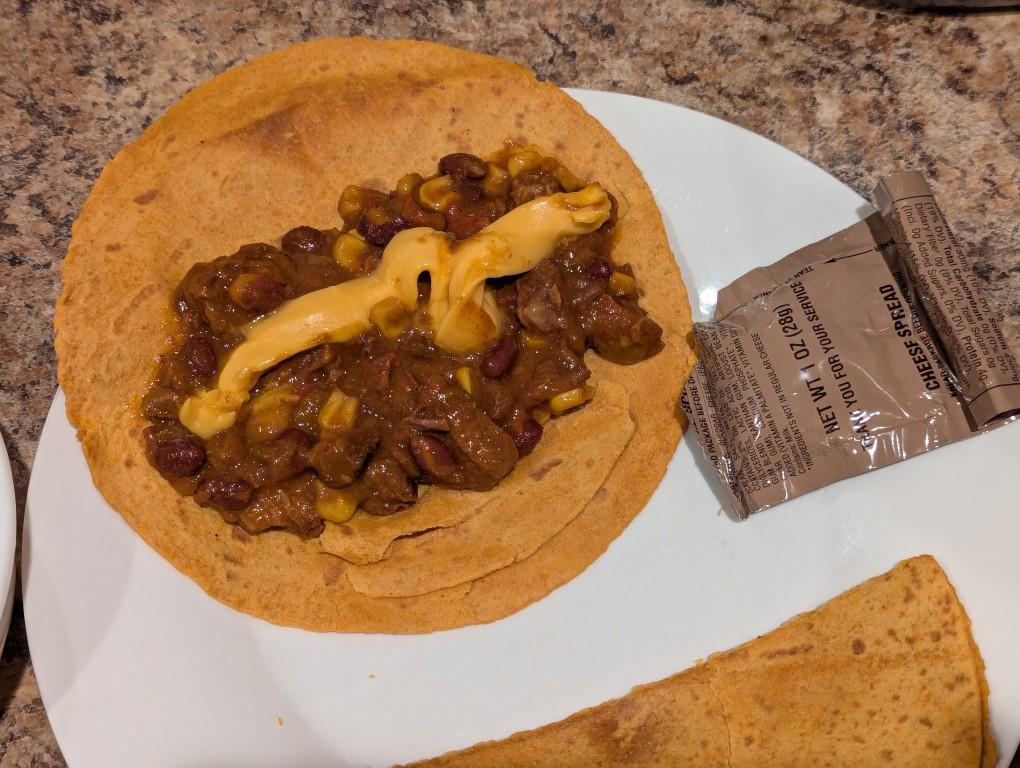
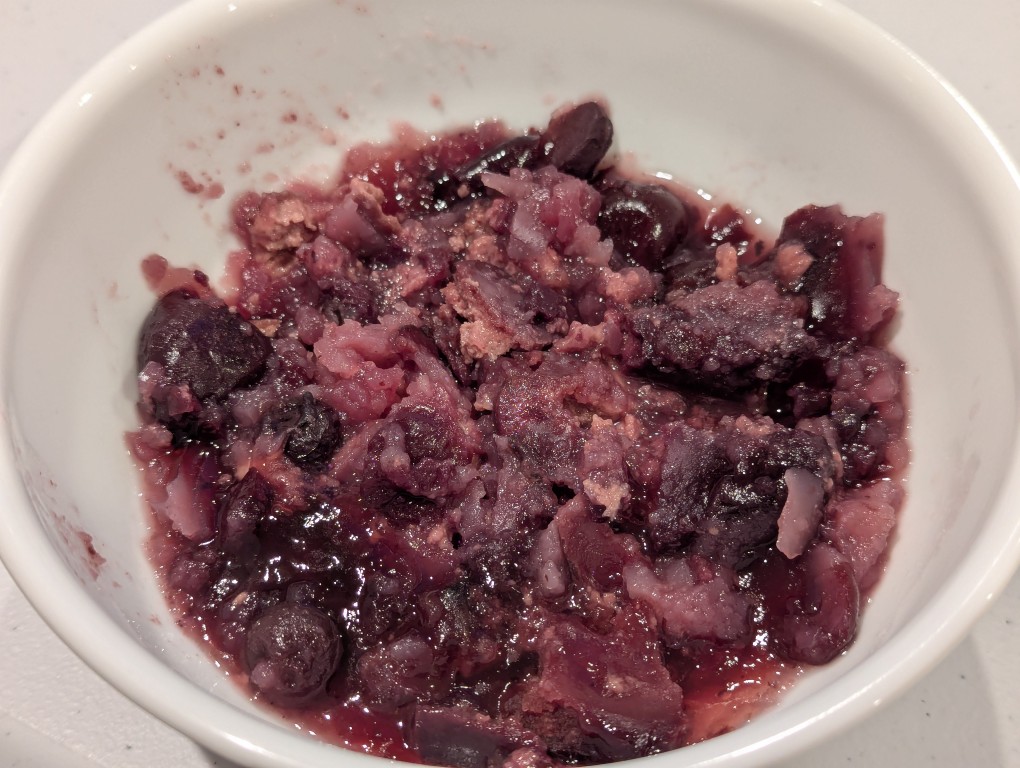
A few nights ago, I dug into another of my MRE favorites–Menu 24: Southwest Style Beef and Black Beans from the B Case (packed 3/22 with 3/25 inspection date) that I opened recently. The entree has a mild spicy flavor and the beef, beans, corn, and sauce work well together. As I’ve noticed in some recent cases, the tortillas are stuck together. The trick to loosen them up is to heat them with the supplied water-activated heater or microwave them (removed from the pouch, of course) for 10 seconds or so. The reason that I titled this post two desserts for the price of one is that this MRE includes Cherry Blueberry Cobbler and Applesauce Pound Cake. All around, this is a very tasty meal!
Menu 24 includes clockwise from the upper left:
Southwest Style Beef and Black Beans entree pouch
Cardboard sleeve
Cherry Blueberry Cobbler pouch
Applesauce Pound Cake
Hot Beverage Bag
Water-activated Heater
Beverage Base Lemonade
Spoon
Accessory Pack
Cheese Spread
Beef Stick
Tortilla, Chipotle
The Accessory Pack included clockwise from the upper left:
Bill’s Brew Freeze Dried Coffee
Creamer, Nno-Dairy, Dry
Sugar
Zero Calorie Sweetener
Iodized Salt
Chewing Gum
Moist Towelette
TP
To make my meal, I emptied the Southwest Style Beef and Black Beans into a bowl and microwaved it for 60 seconds.
Then, I spooned it out onto the chipotle-flavored tortillas and added cheese on top of the beef.
For dessert, I microwaved the cherry blueberry cobbler for 30 seconds in a bowl.
I enjoyed the applesauce pound cake as is out of the pouch!
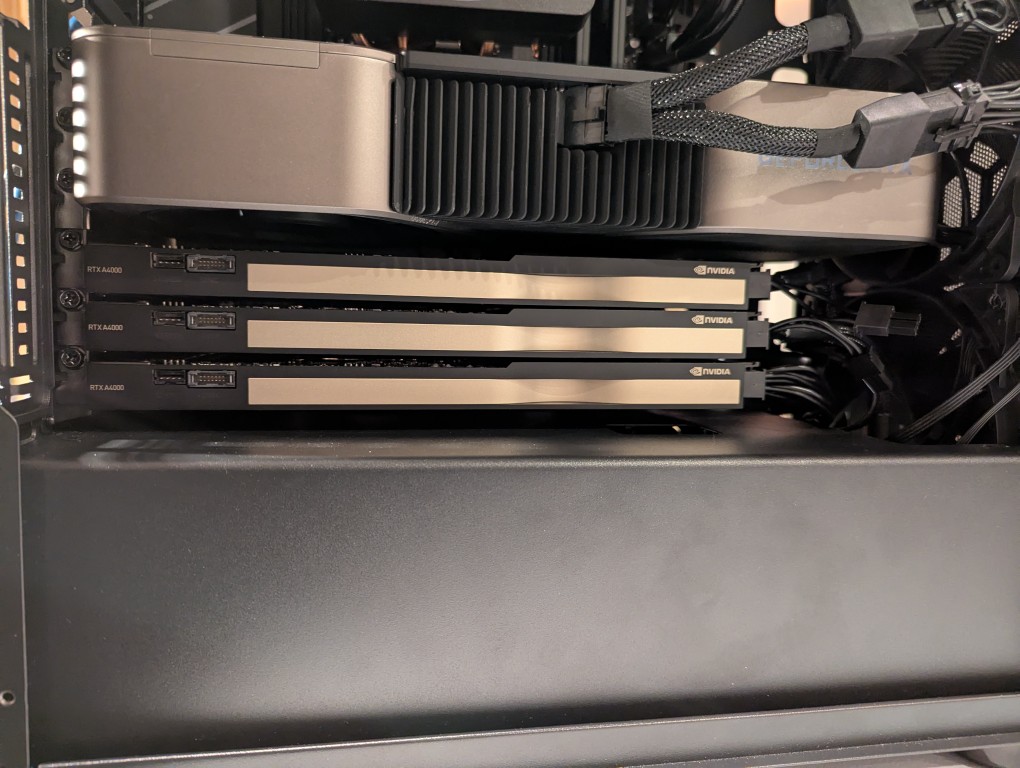
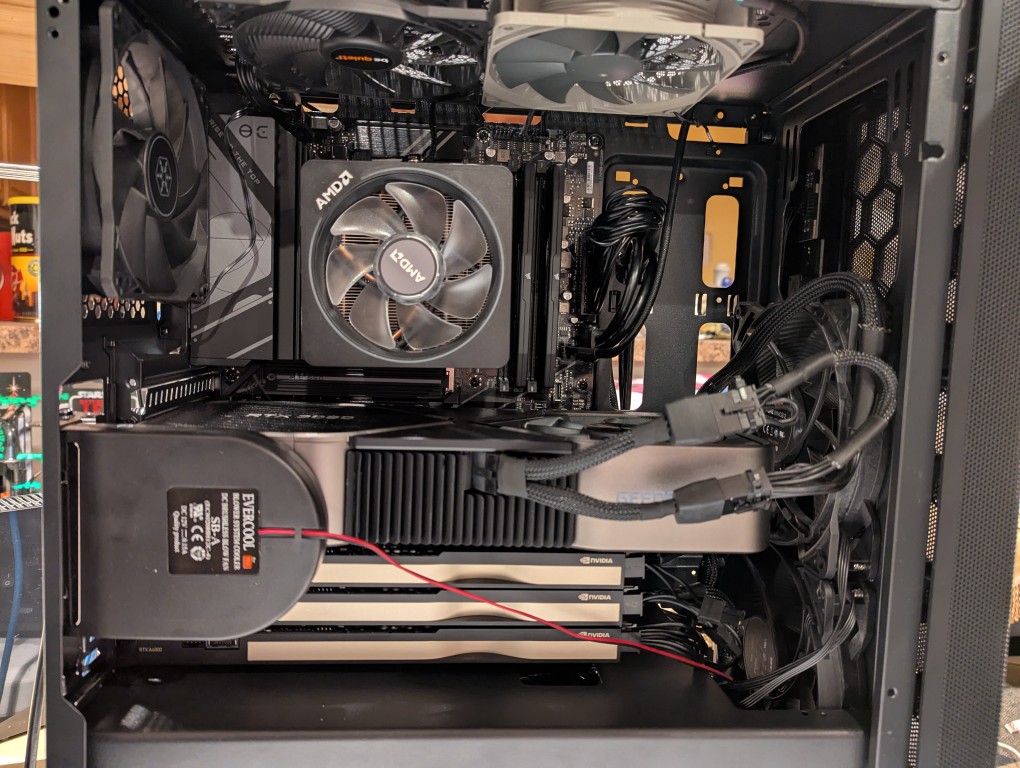
In my original write-up about building my new AI-focused workstation, I mentioned that I was concerned about the temperatures the lower three NVIDIA RTX A4000 video cards would reach when under load. After extensive testing, I found them–especially the middle and bottom cards–to go over 90C after loading a 70B model and running prompts for about 10 minutes.
There are two ways that I’m working to keep the temperatures under control as much as possible giving the constraints of my case and my cramped apartment environment.
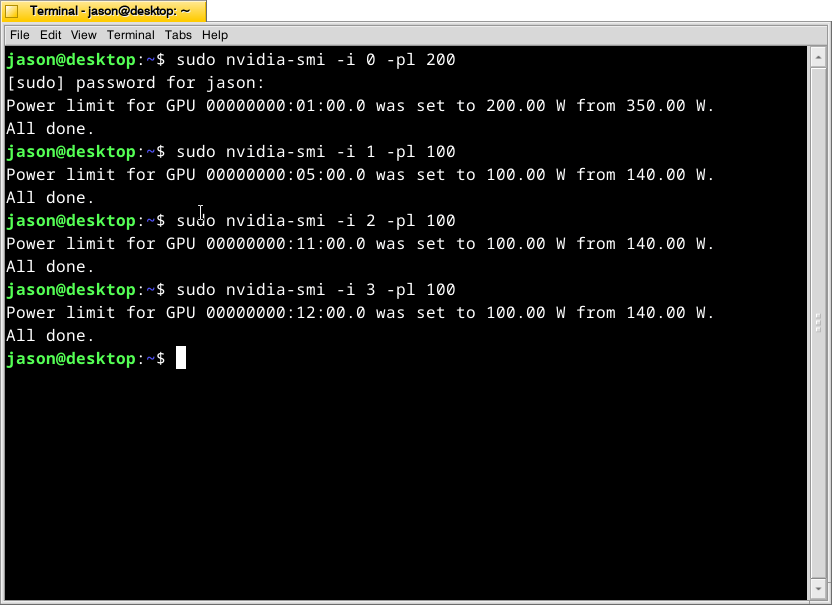
What this command, bundled with the NVIDIA driver, does is select a video card (the first video card in the 16x PCIe slot is identified as 0, the second video card is 1, the third is 2, and the fourth is 3) and change its maximum power level in watts (200 watts for card 0, 100 watts each for cards 1-3). If the power level is lower, the heat that the card can generate is lower. I set the 3090 FE (card 0) to 200 watts, because it has better cooling with two fans and it performs well enough at that power level (raising the power level leads to steeper slope of work being done).
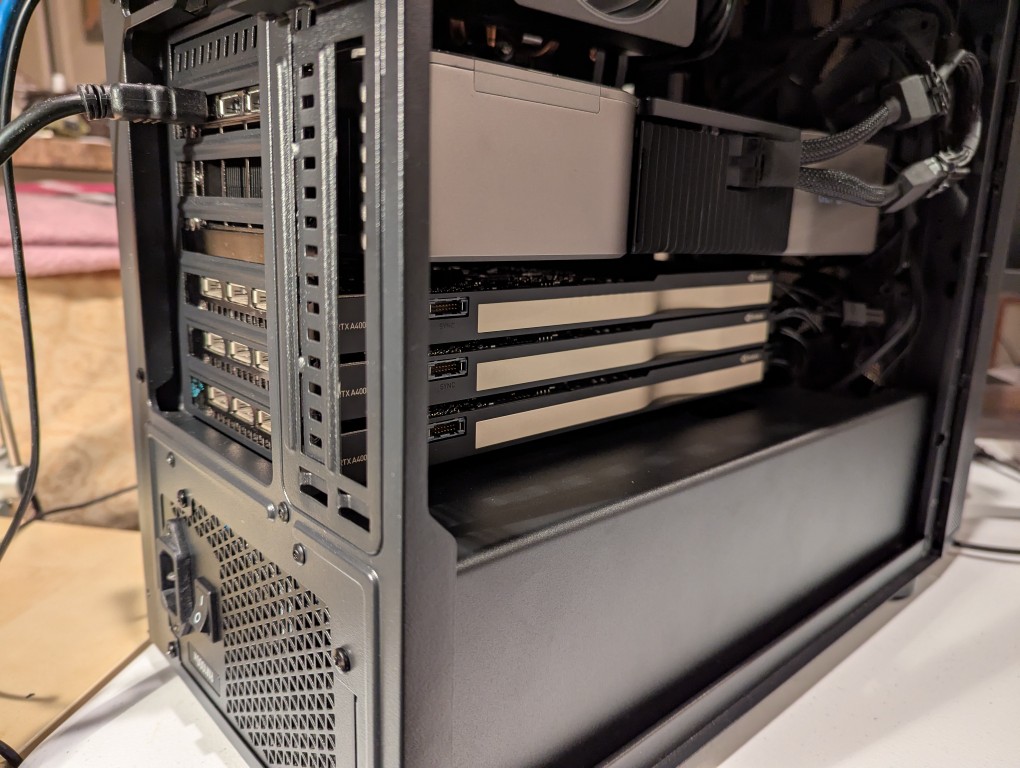
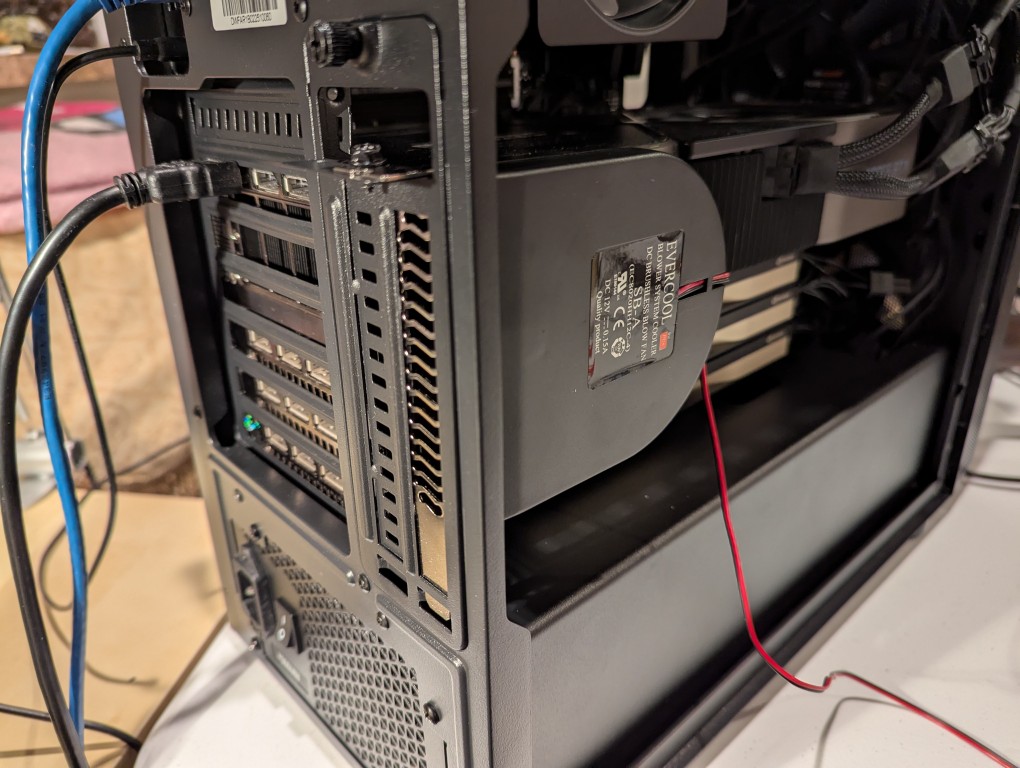
The second solution was to add more fans. The first fan is a PC case slot fan perpendicular to the video cards. This is a constantly on fan powered by a molex connector that has a blower motor that sucks in air from inside the case and ejects it out the back of the card. These use to be very useful back in the day before cases were designed around better cooling with temperature zones and larger intake and exhaust fans. The second fan was a Noctua grey 120mm fan exhausting out of the top of the case. This brings the fan count to two 140mm intake fans in the front of the case, two 120mm exhaust fans in the top of the case, one 120mm exhaust fan in the rear of the case in line with the CPU, and one slot fan pulling hot air off the video cards and exhausting it out of the back.
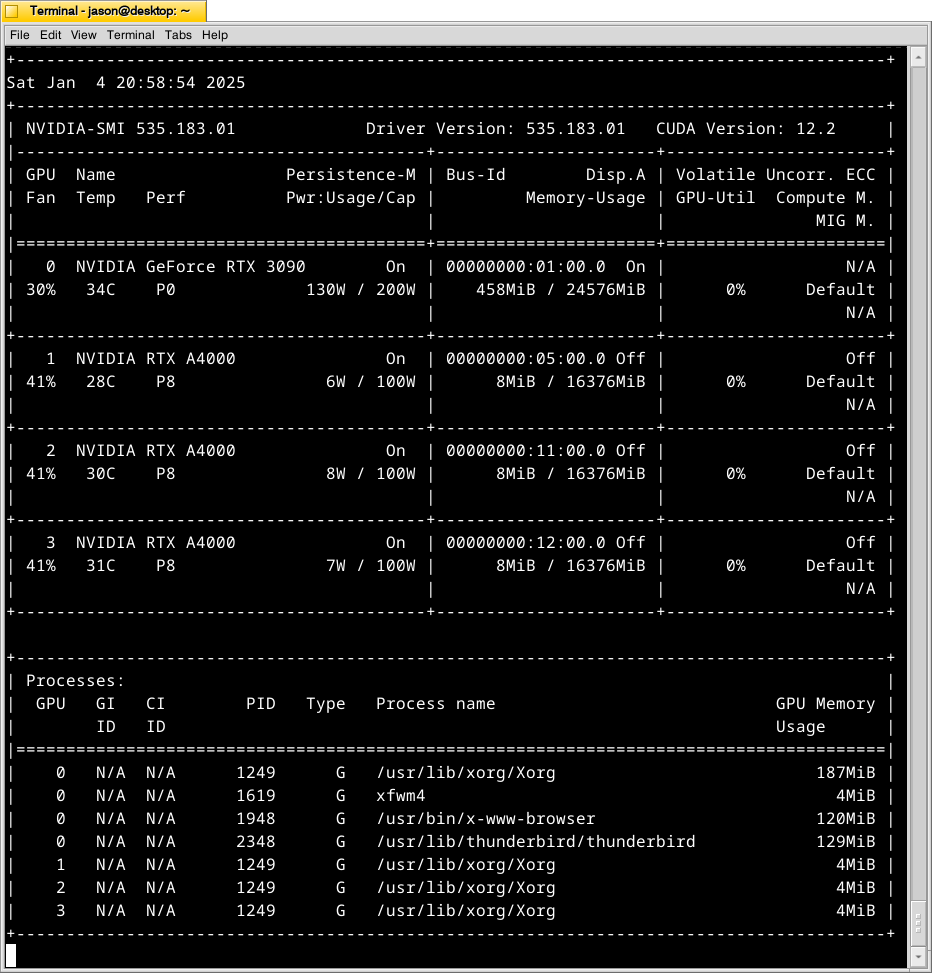
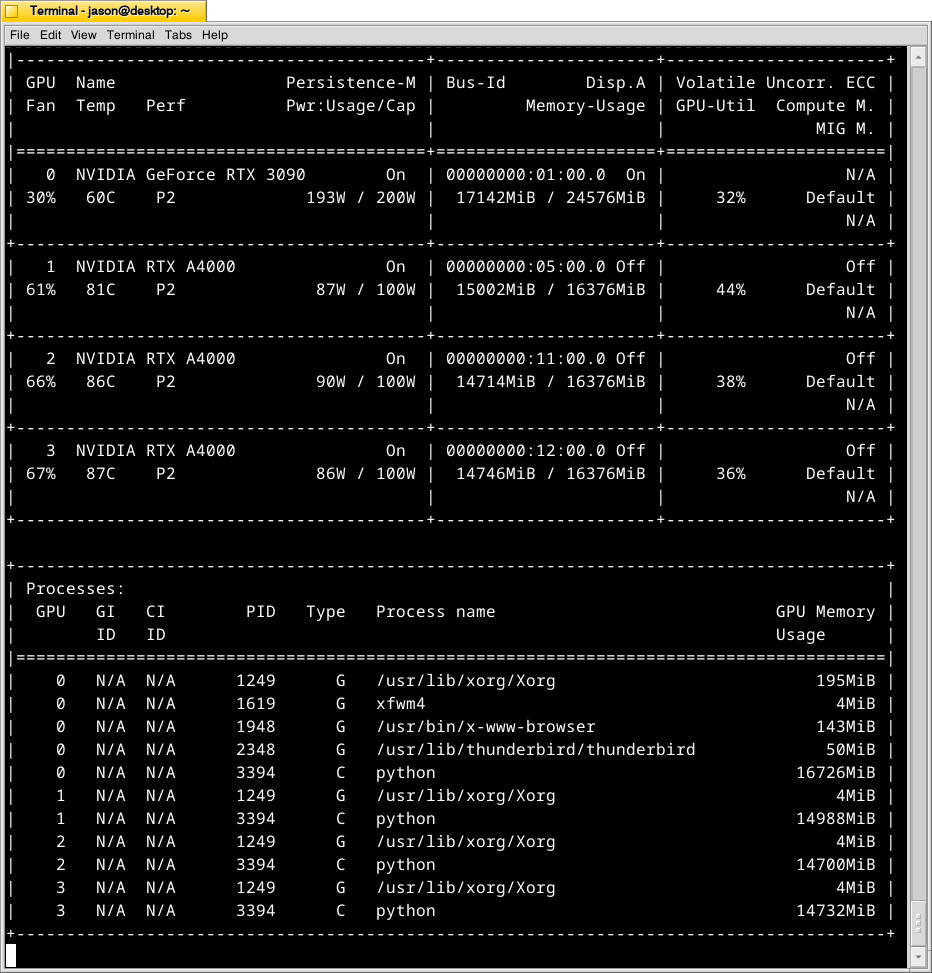
With these cooling-oriented upgrades, I’ve found that the temperatures are slightly better during operation, but perhaps helping in a way that I had not considered before is that the fans help cool the cards down faster after an operation is completed than the cards were cooling down on their own before. Also, the A4000 temps before seemed to be high, higher, and highest going from card 1 to 2 to 3. Now, the middle card or 2 has a slightly higher temp than the bottom card or 3. Below is the output from:
nvidia-smi -l 1
which displays information about the detected NVIDIA video cards including card type, fan speed, temperature, power usage, power cap, and memory usage. The first Terminal screenshot below shows the cards at rest before loading a model. The second Terminal screenshot below shows the cards after a model has been loaded and it is producing output from a prompt for some minutes.
Y made a good point that since it’s the winter, the ambient temperature in the apartment is much cooler–we usually keep it about 66F/19C. When summer comes, it will be much hotter in the apartment even with the window air conditioner going (we are on the top floor of a building that does not seem to be insulated based on sounding and spot temperature measurements).
The key to healthy computer components is cooling–forcing ambient air into the case and moving heated air out. Seeing how well the slot fan has worked, I’m thinking that a next step would be to drill one or two 120mm holes through the sheet metal side panel directly above where the A4000 video cards are and install high-CFM (cubic feet per minute) fans exhausting out. That would replace the currently installed slot fan. If I went that route, I can purchase PWM (pulse width modulation) fans so that I can connect them to the fan controllers on the motherboard, which will increase the speed of the fans according to the rising temperature inside the case when the computer is doing more work. This will reduce fan noise during low-load times but not affect cooling capacity.
On a final note, I will report that I initially tried forcing cooler ambient air into the case through those two rear perpendicular slots to the video cards where the slot fan is currently installed. My thinking was that I could force cooler air over the top of the cards and the blower fans on the cards would carry out the hotter air. What I did to test this was build an enclosed channel with LEGO that sealed against the two open slots and had two 70mm PWM fans pulling air from the channel and pushing it down onto the three A4000 video cards. Unfortunately, this actually increased the temperatures on all three A4000s into the mid-90s C! The heat produced by those cards fed back into the LEGO channel and hot air trickled out of the two slots. Lesson learned.