The most important lesson that I learned in the Boy Scouts is “Be Prepared.” I can’t count how many times being prepared has helped me or someone around me–usually in small ways, but occasionally in big ways.
One of the ways that I maintain preparedness is keeping an individual first aid kit (IFAK) on my person. My full kit fits inside a small MOLLE pouch that I keep in my backpack, but within that kit is a smaller pouch of core components that is small enough that I can slip it into a pocket if I’m not wearing my backpack.
I would recommend making a small kit like this to keep on your person. It’s easy to do using things you likely already have on-hand. When you or someone around you needs something in it, you’ll be thankful for investing a little bit of time, energy, and materials to be ready for that moment.
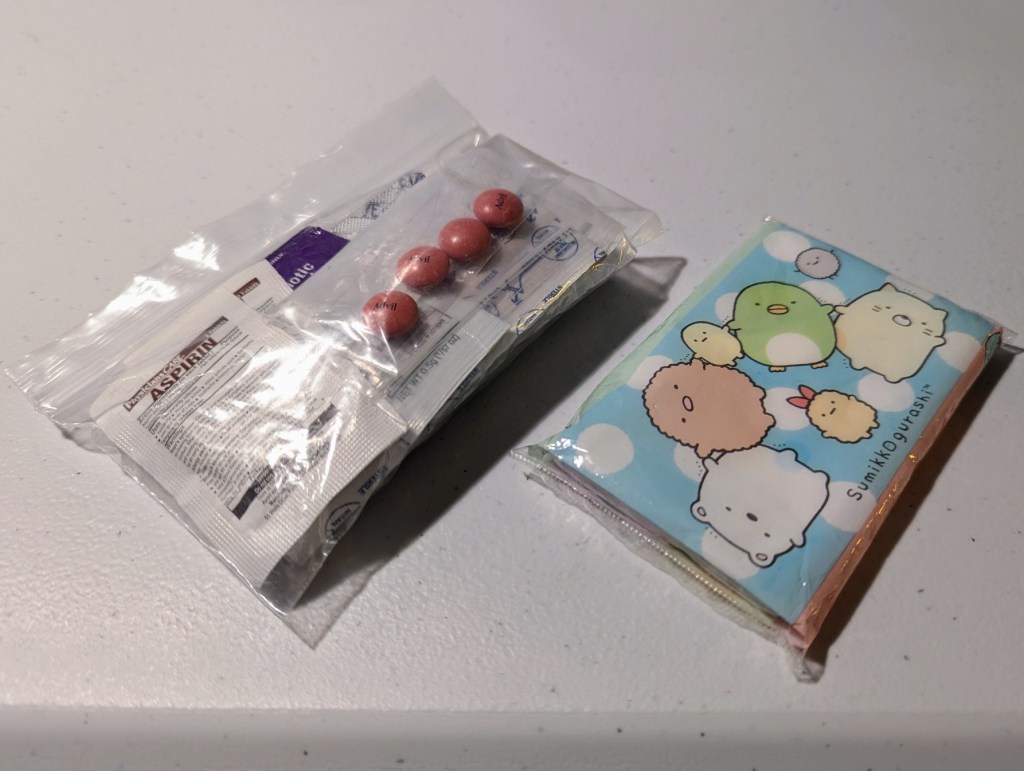
You can put whatever you think is most useful into your compact first aid kit. In mine, I carry things that I regularly use or think might be useful. I keep my kit in a waterproof snack-size Ziploc bag. It includes:
6 alcohol antiseptic pads
2 lens wipes
2 bandaids
2 aspirin
1 antibiotic ointment
3 single-use eye drops
4 Advil (ibuprofen)
4 Eve DX (a Japanese-made pain reliever that helps with migraines)
In addition to the first aid kit, I also keep a pouch of tissues (my current Japanese-made Sumikkogurashi ones were donated by Y).
Whatever you put in your first aid kit, stick to what fits your needs. Keep it up to date as you use things in it. And, adjust its contents as your needs change.
One thing that I haven’t shared on my blog before is my love for USGI Meal, Ready to Eat, or MREs (though, I have mentioned them in passing). While I keep some on-hand for emergencies, I genuinely enjoy eating them. I recently purchased some pulled items and two cases of A and B menus, so I thought that I would share some photos and thoughts while I work my way through them.
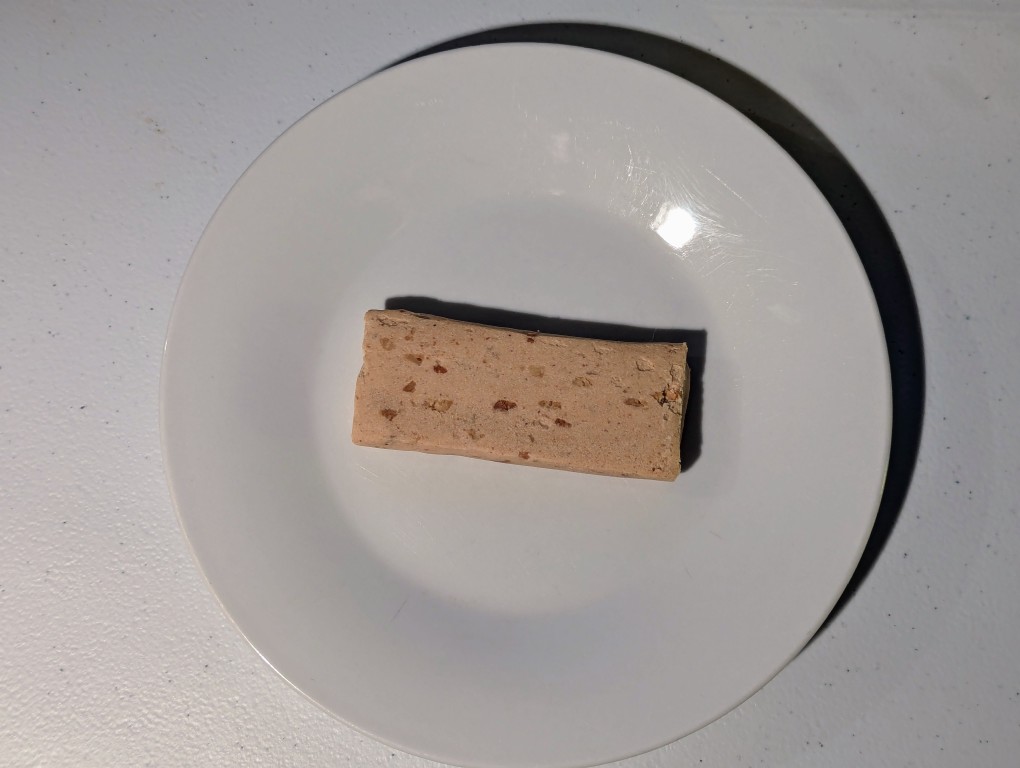
This post shows my second favorite dessert option: the Peanut Butter Dessert Bar (my favorite dessert is the Cherry Blueberry Cobbler). This dessert easily won me over, because I love peanut butter. I have it nearly every day with my breakfast–a spoonful added to a 1/4 cup of oatmeal.
I bought 12 of these peanut butter bars as stand-alone items. This one was produced by Sterling Foods out of San Antonio, Texas with a date code of 1301, which translates to Oct. 21, 2021. The bar has a compact size–about the same as a flattened Snickers bar, and it packs in 240 calories! It is firm but a little pliable. It has a smooth texture with some crunchy nut bits mixed into it. It hit the spot after a Chinese takeout dinner of spicy beef and onion.
See the pictures below for its original condition and packaging.
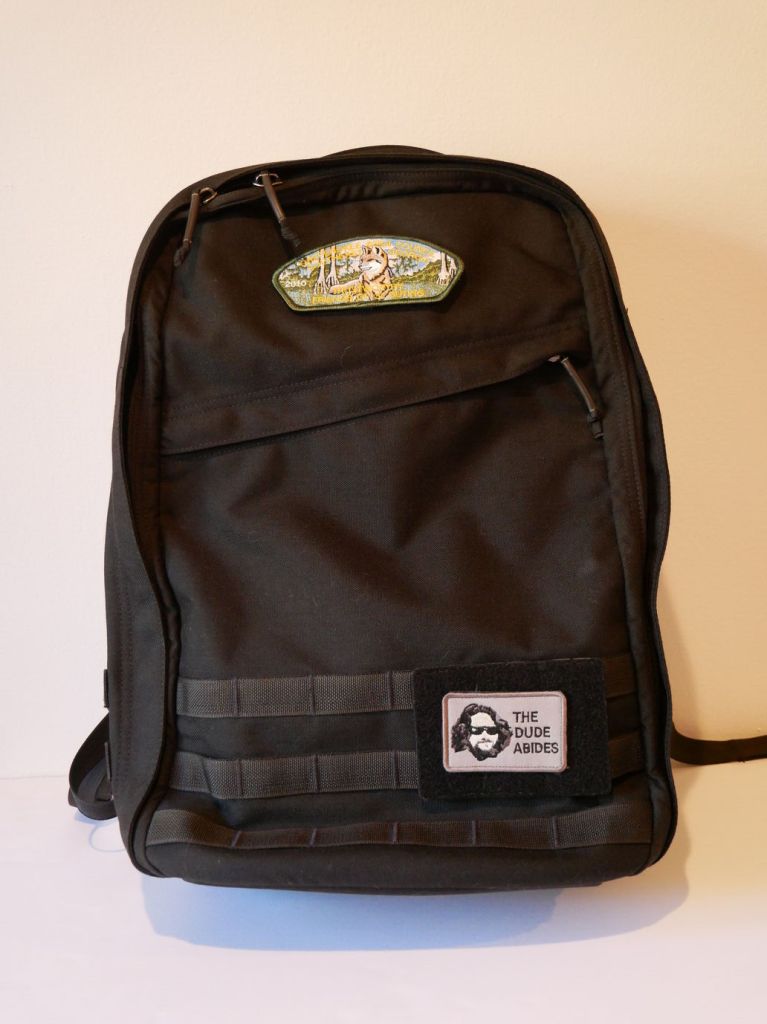
As I’ve documented here, here, and here, I continue searching for the perfect backpack. While there may not be one backpack that checks all of my boxes, I think that the GoRuck GR1 (26L) checks the most.
I purchased the larger 26L version of the GR1 before the fall semester began. It is the most expensive backpack that I’ve ever purchased, but its design, materials, construction, and “Built in the USA” provenance supported the price.
My original intended use for it was to carry my 16″ Lenovo ThinkPad P1 Gen 4 laptop, charger, water bottle, coffee thermos, and papers to and from the City Tech campus.
Then, after my dad was released from the hospital after a back problem, it became a travel companion for overnight train rides to-and-from NYC (along with a simple barrel duffel bag). It carried my laptop, charger, 8″ Samsung Tab Active3 tablet, its charger, an MRE and snacks, 1 liter of water, overnight clothes, and 1 quart Ziploc bag for toiletries.
So far, it has excelled in both work commuting and long distance train travel. It holds my gear, it’s easy to organize, and it’s constructed tough.
Below are photos of its pockets and their use.
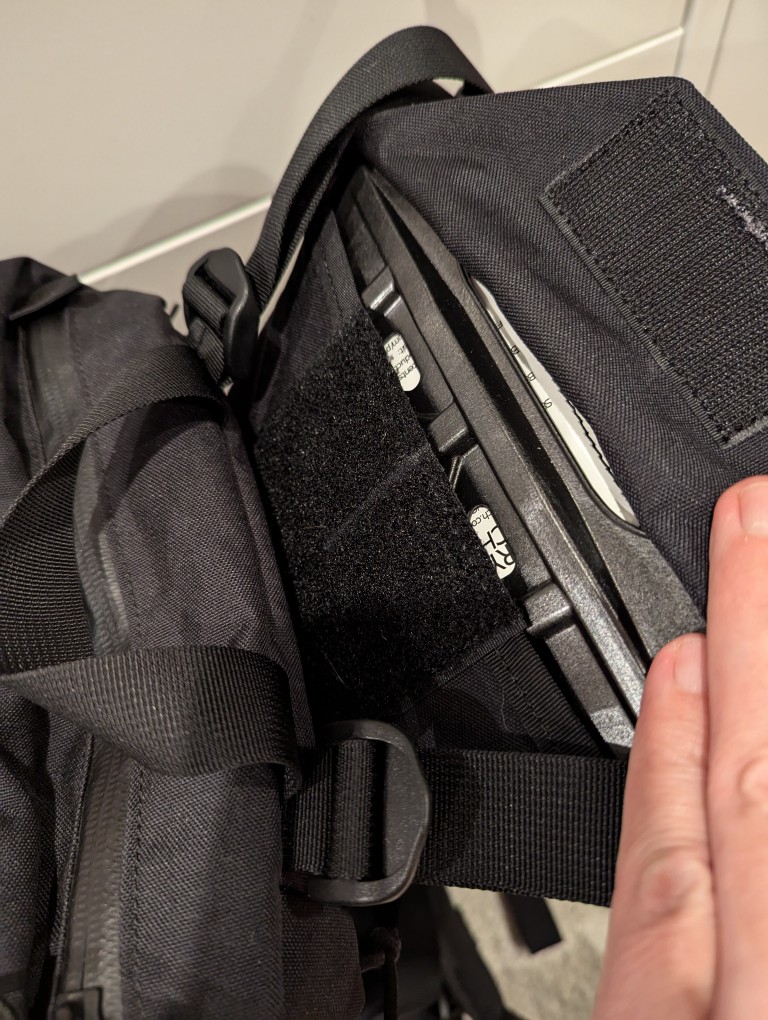
Between the shoulder straps and top hand grab is a pocket that holds my RayBan sunglasses in their case and my reading glasses in a smaller plastic case.
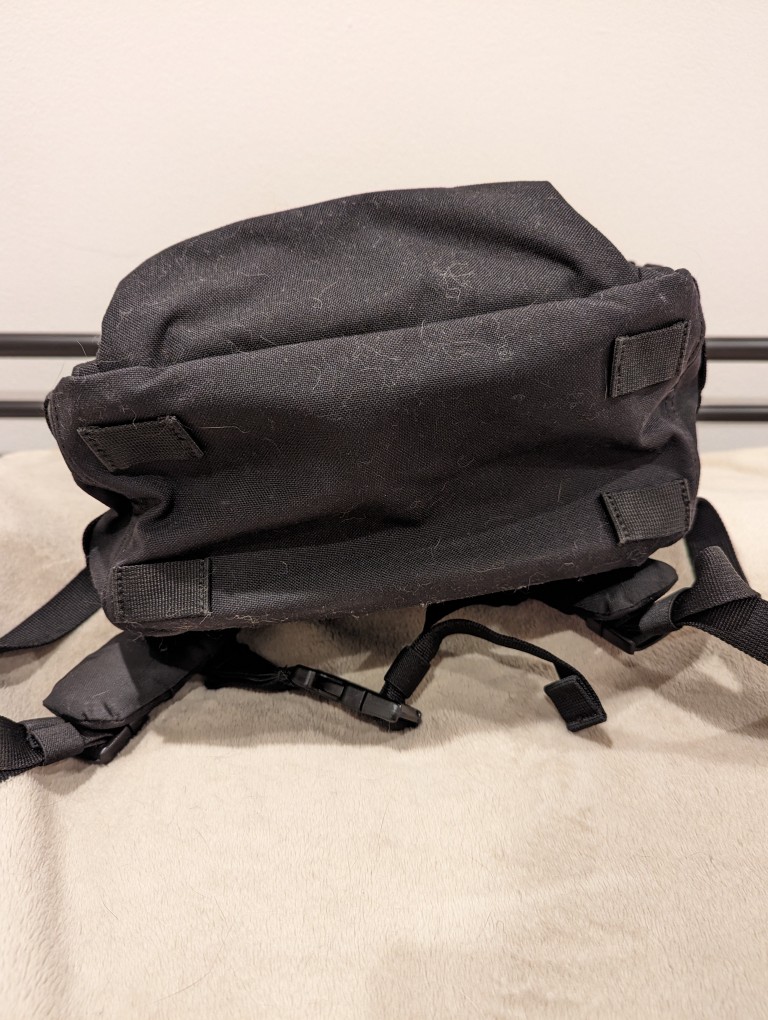
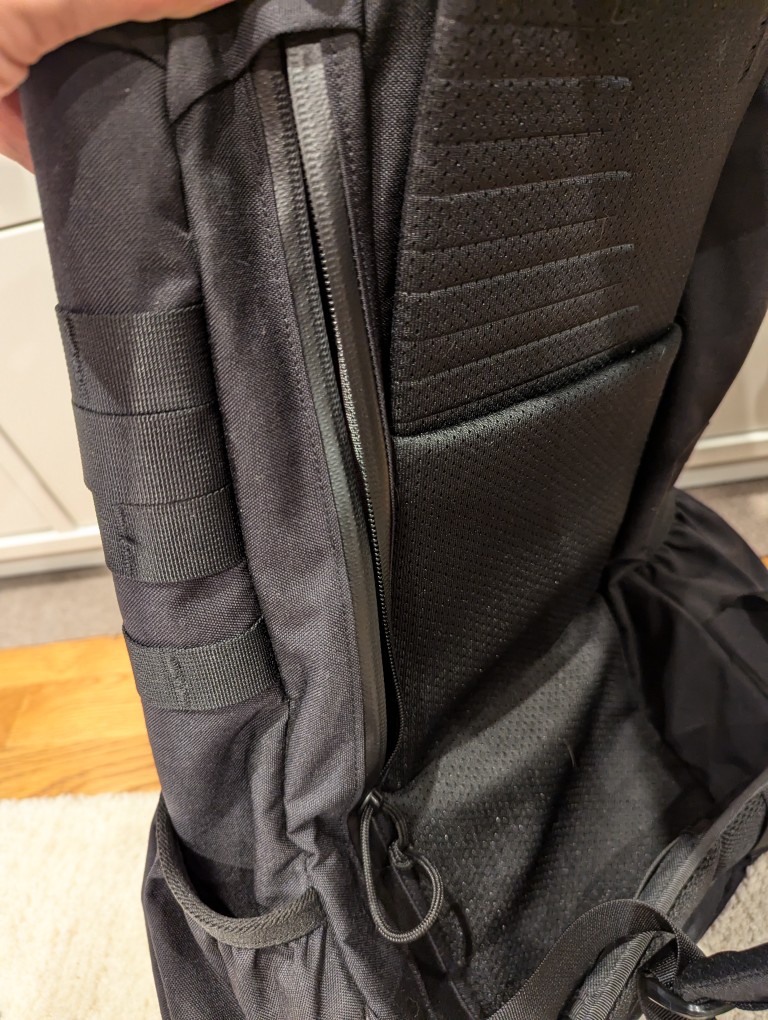
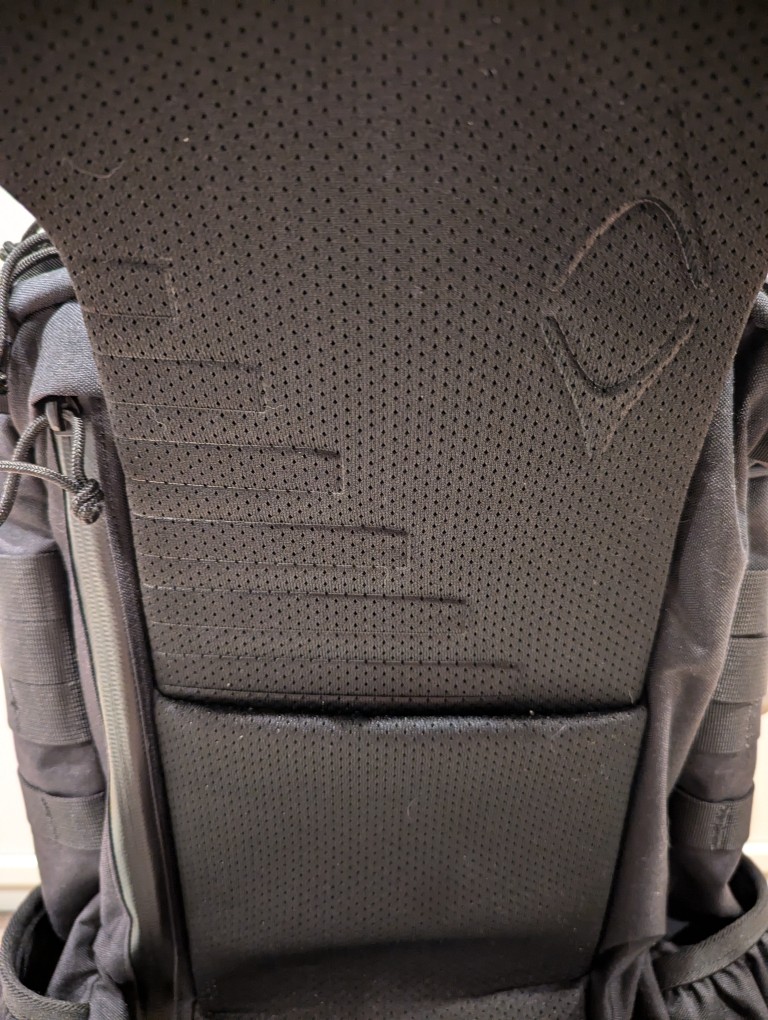
The back of the backpack supports breathing and features a smoother synthetic material than the body of the backpack. It’s advertised as being less aggressive on clothes, which I can confirm.
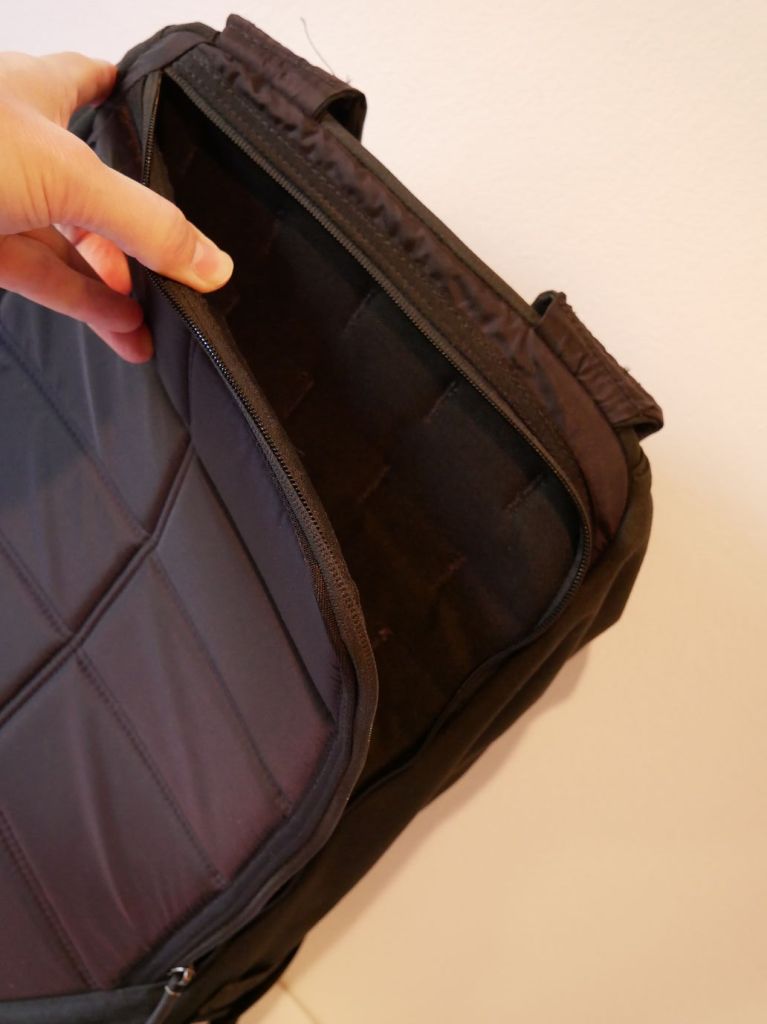
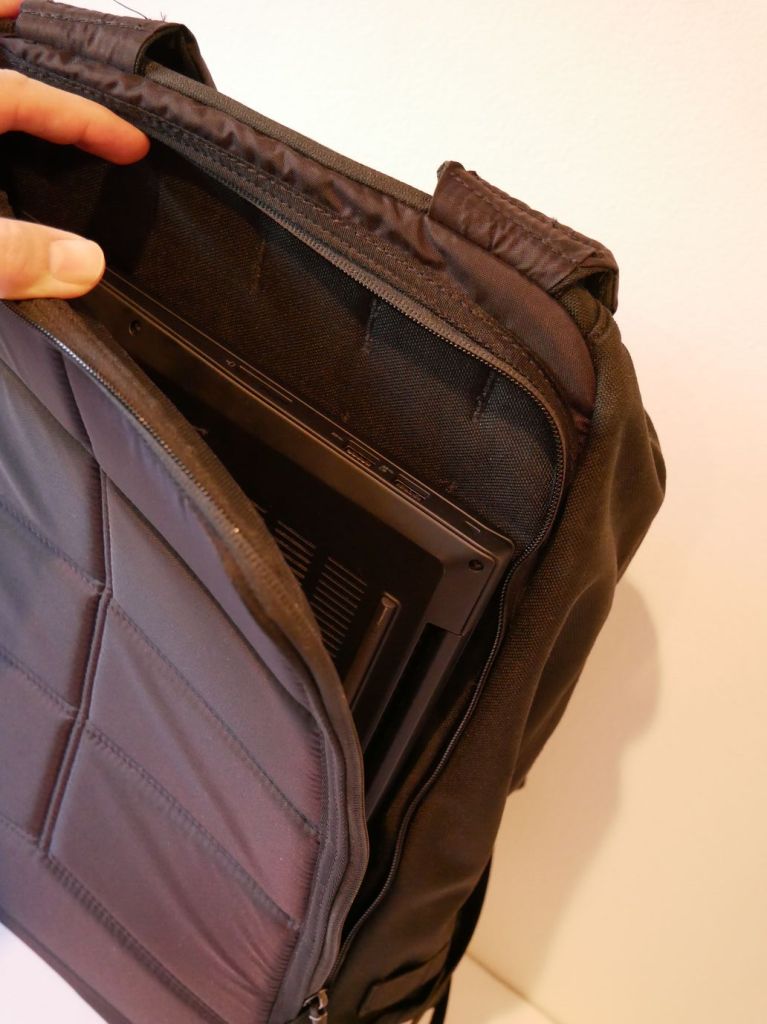
Flipping the shoulder straps around makes the “bomb proof” laptop sleeve more easily accessible. It is advertised as holding up to a 16″ laptop.
You can see above that the laptop sleeve does indeed hold my 16″ Lenovo ThinkPad P1 Gen 4 with room to spare on its width (i.e., the height of the pocket in relation to the backpack) and just a hair of extra space for its depth (i.e., the width of the pocket in relation to the backpack).
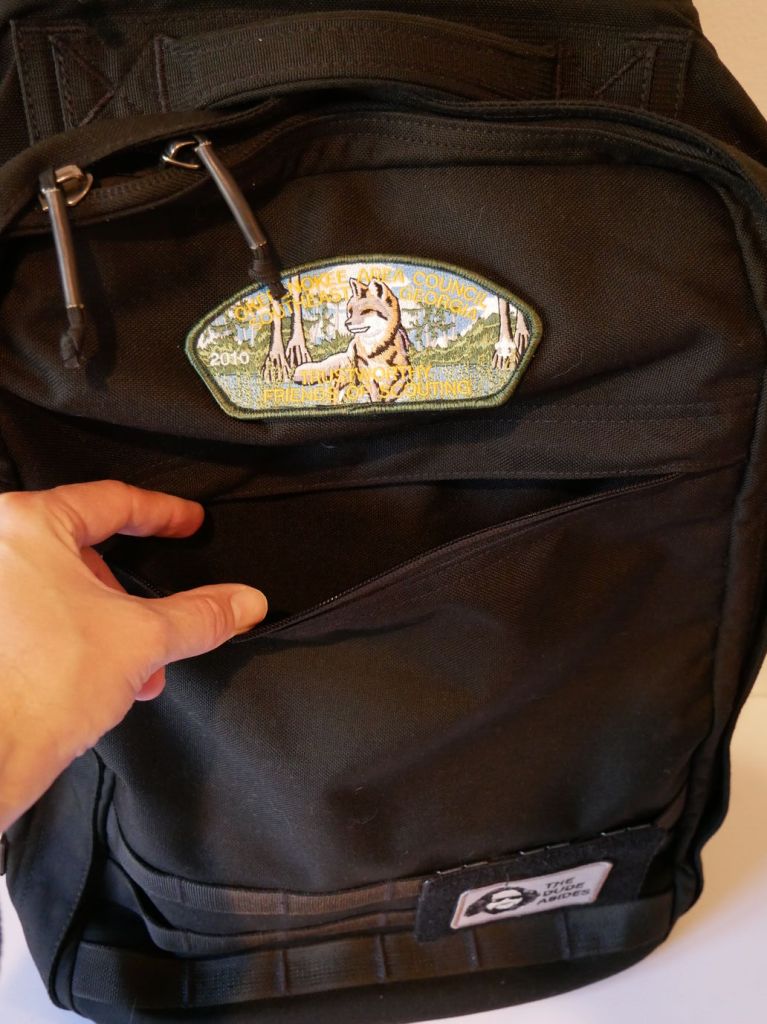
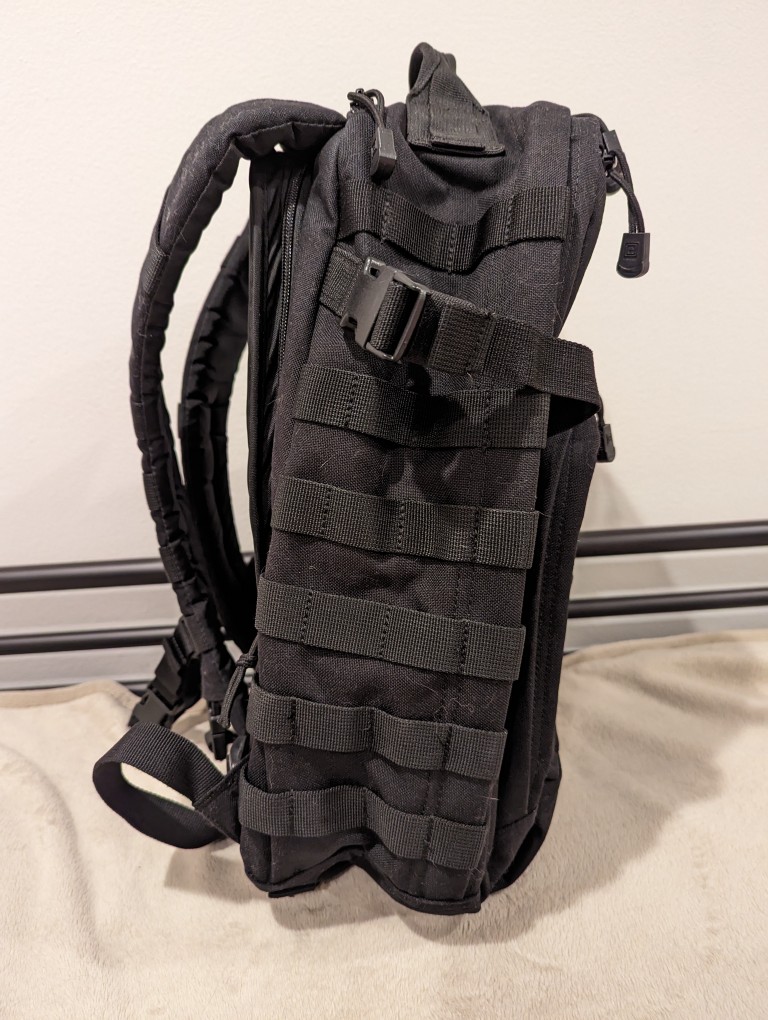
The front zippered diagonal pocket extends from the zipper to the bottom of the pack. It can hold a lot! I keep an Apple Airtag and pocket knife in there. The top of the pack has a 2″ x 3″ hook-and-loop patch area, which I attached one of my Scouting patches to. I added a 3.5″ x 4.5″ hook-and-loop MOLLE panel to the bottom area of my GR1 where I affixed my “The Dude Abides” patch.
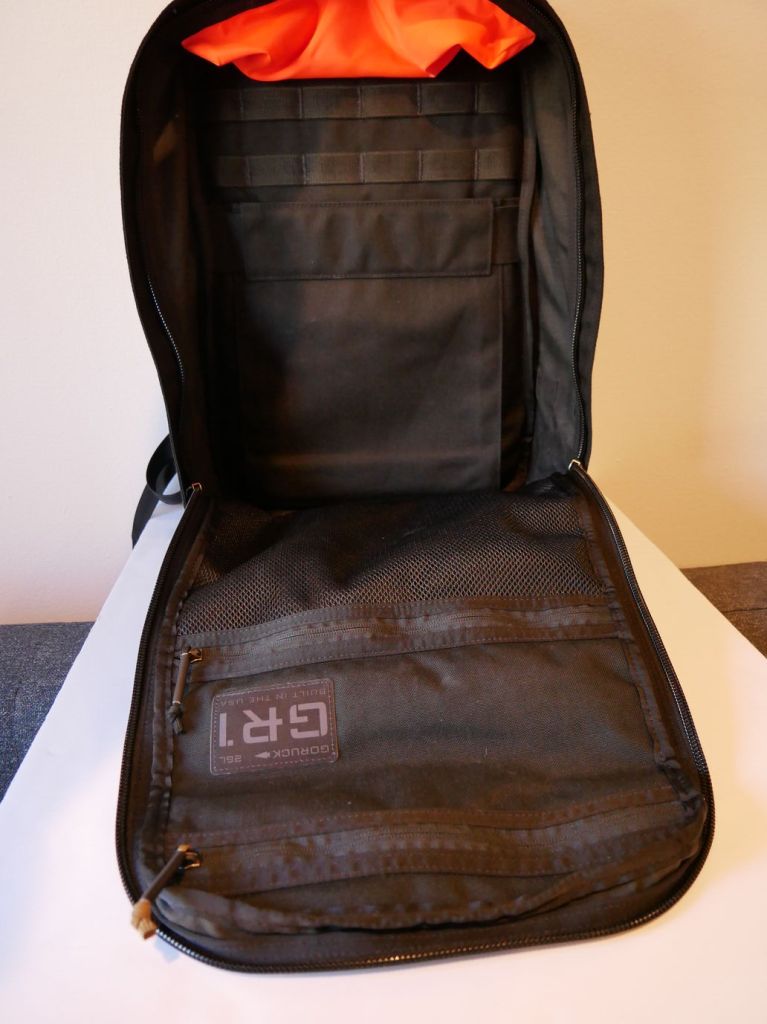
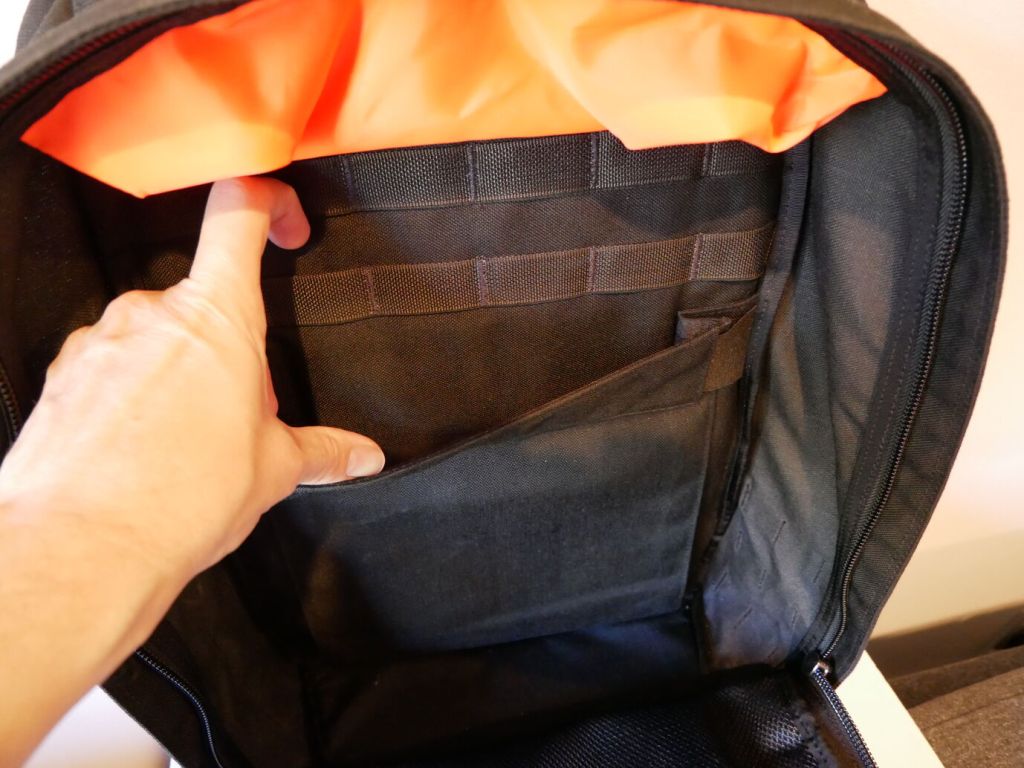
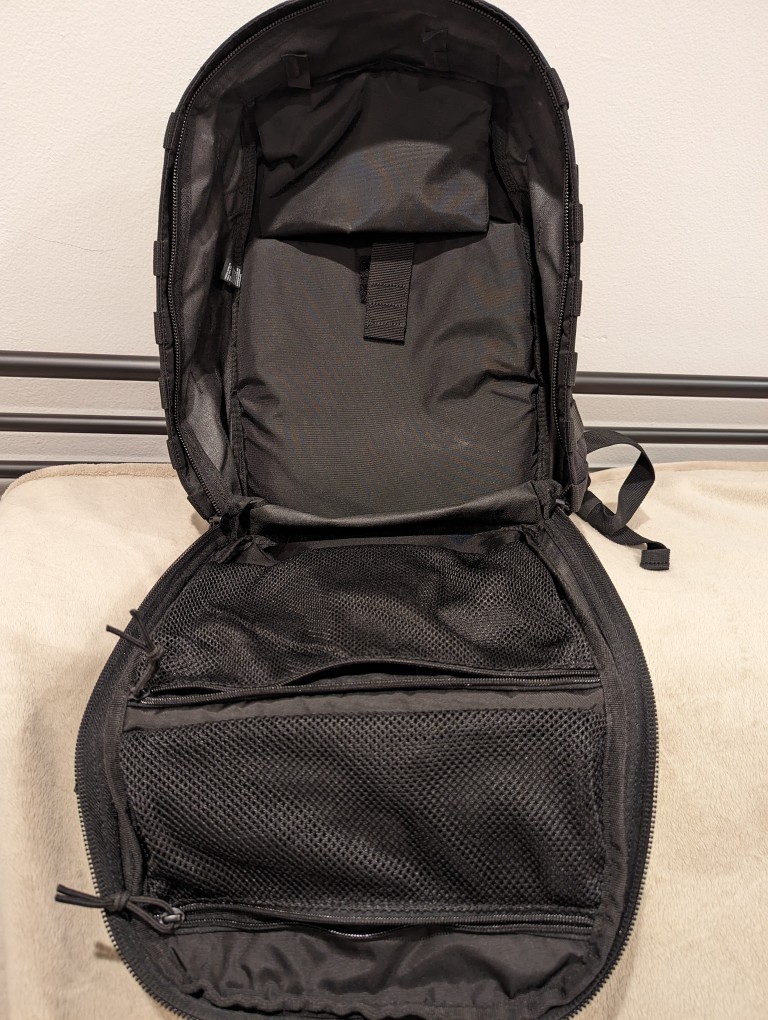
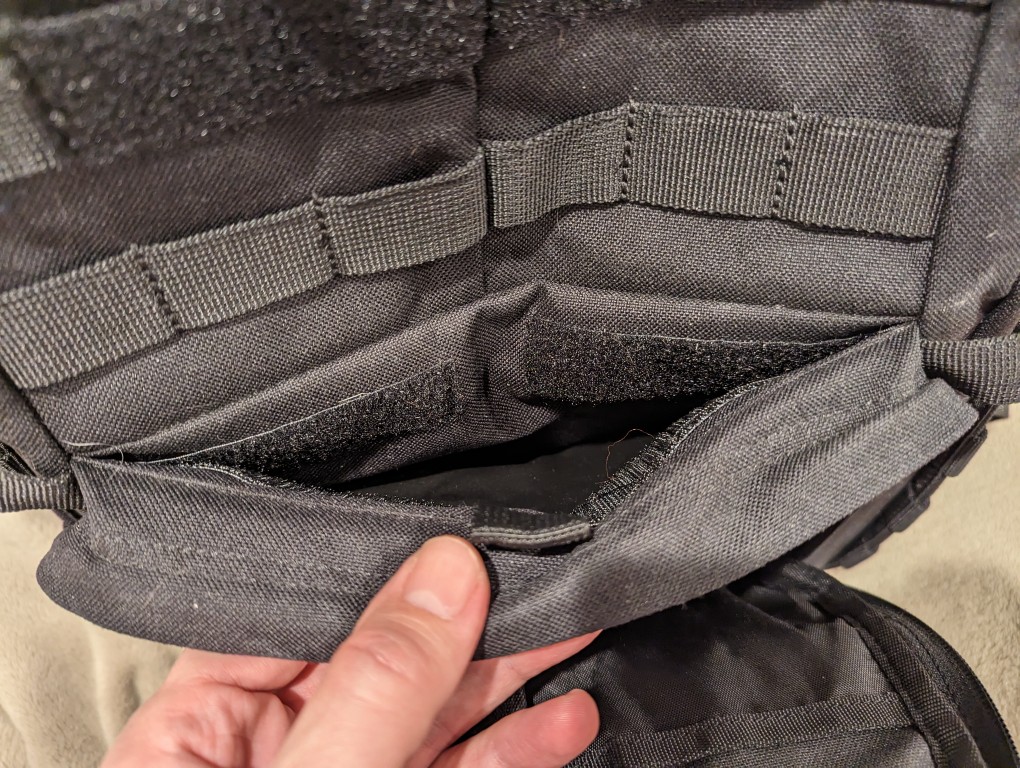
In addition to the MOLLE attachments on the outside of the pack, there is more MOLLE inside for pouches or hook-and-loop panels.
On the back interior of the GR1, there’s an elastic panel that can hold a smaller laptop or tablet. I used it to hold my 8″ Samsung Galaxy Tab Active3 in a hard case with plenty of room to spare.
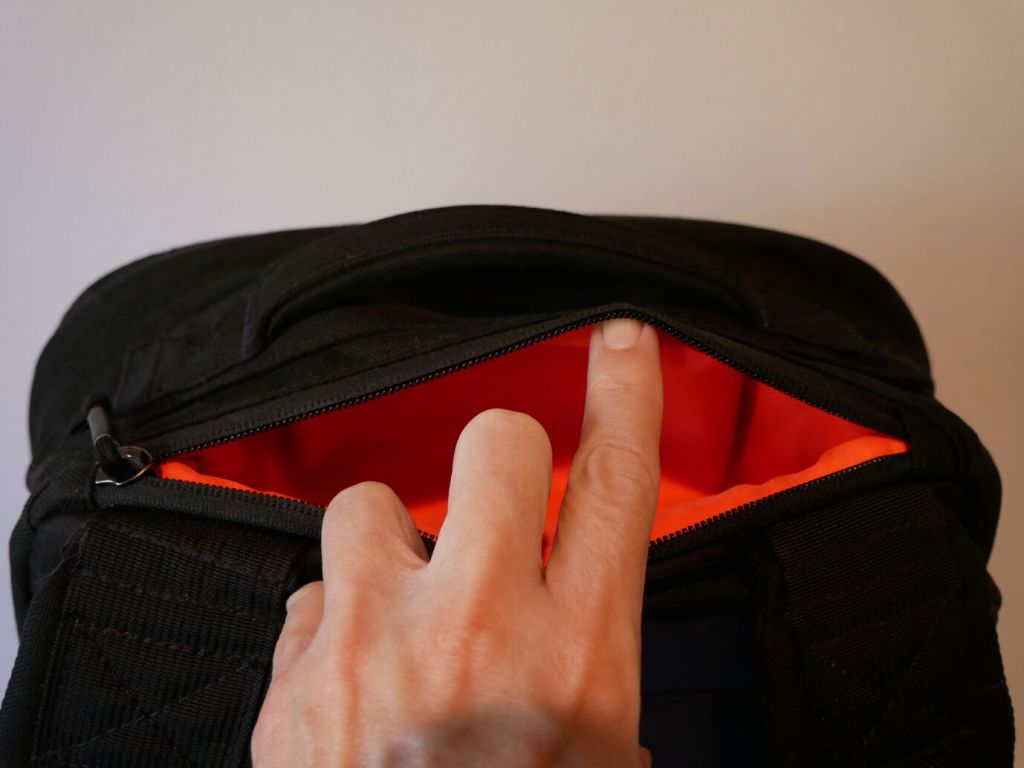
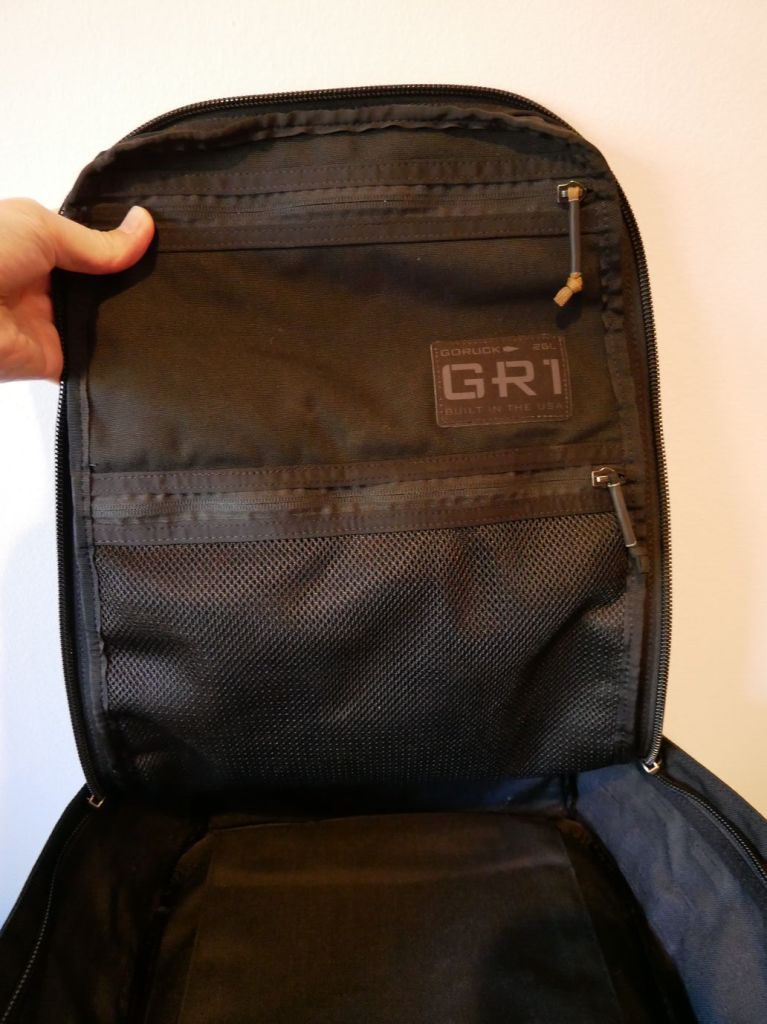
The front flat interior has two zippered pouches. The top one is smaller but opaque. The bottom one is larger but its contents viewable thanks to the netting.
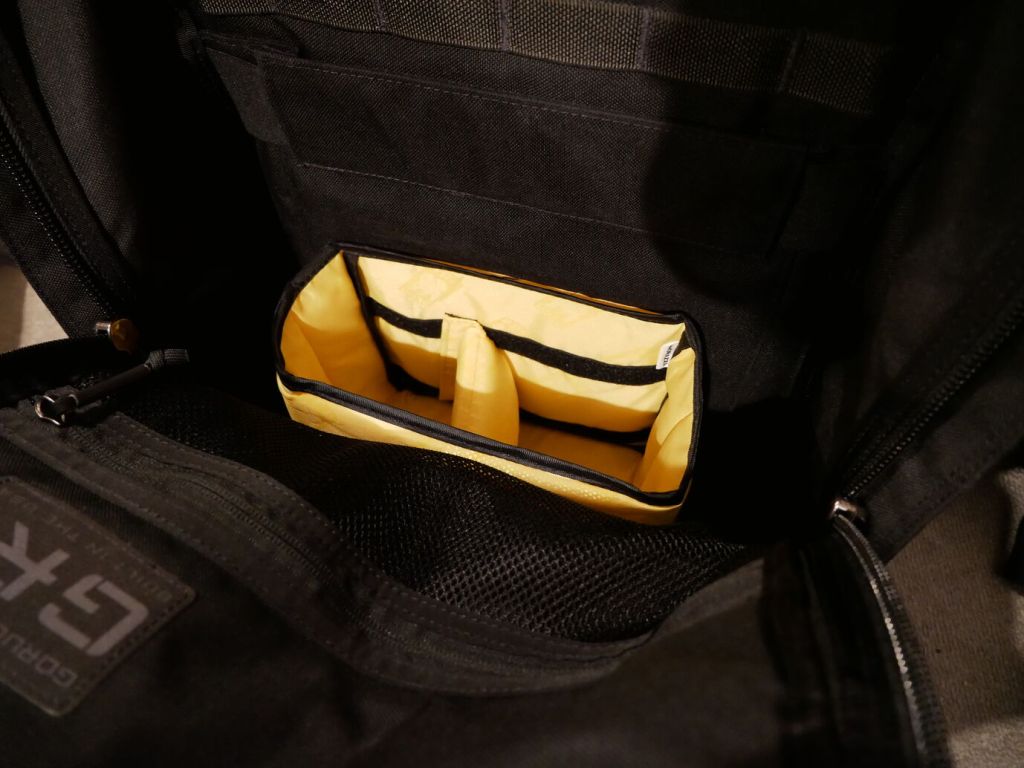
To help with organizing my gear, I dropped the larger half of the yellow, padded Ape Case Cubeze Duo (ACQB 41) with one divider in the bottom of the pack. This creates four areas in the bottom of the pack to keep things from banging around–a thermos, two water bottles, and charging brick for the Lenovo laptop.
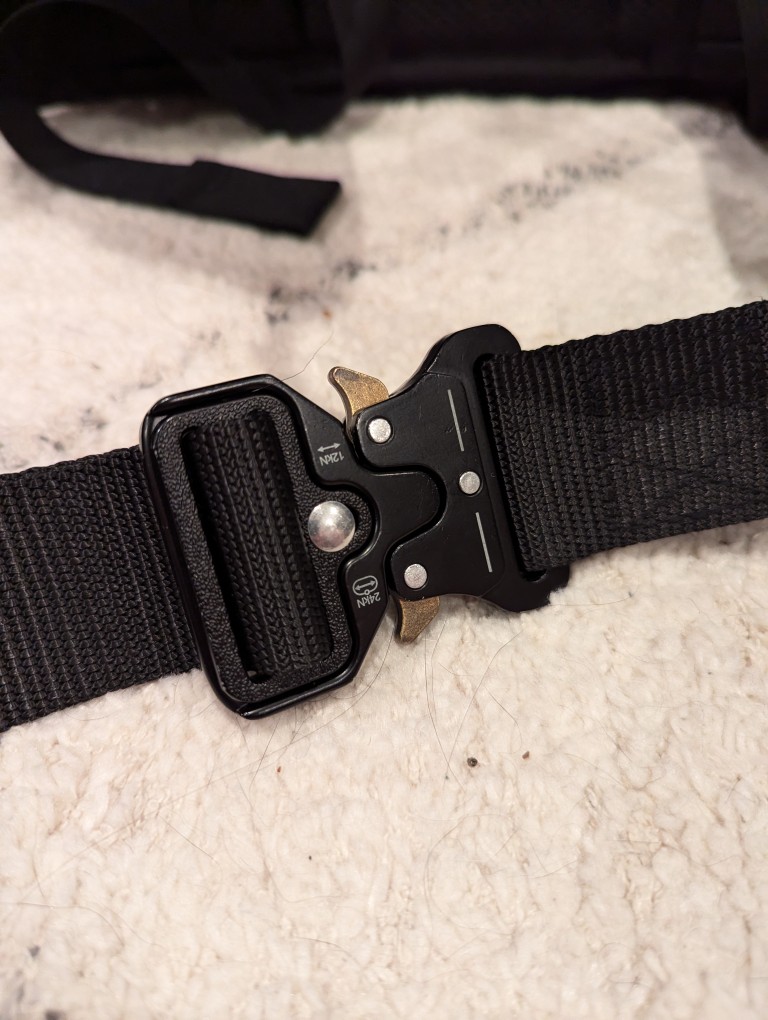
The GR1 doesn’t come with a sternum strap, but I haven’t found that it needs one while walking or climbing stairs. Having one less strap to undo or get caught while dangling is okay with me. It’s also easy to put on and take off. However, depending on my load–specifically with the 16″ Lenovo, I bend over to put on my shoes before donning the pack so that I don’t put too much pressure on the laptop within the pack against my arched back.
I’m very happy with the GR1 and look forward to carrying it in the days ahead.
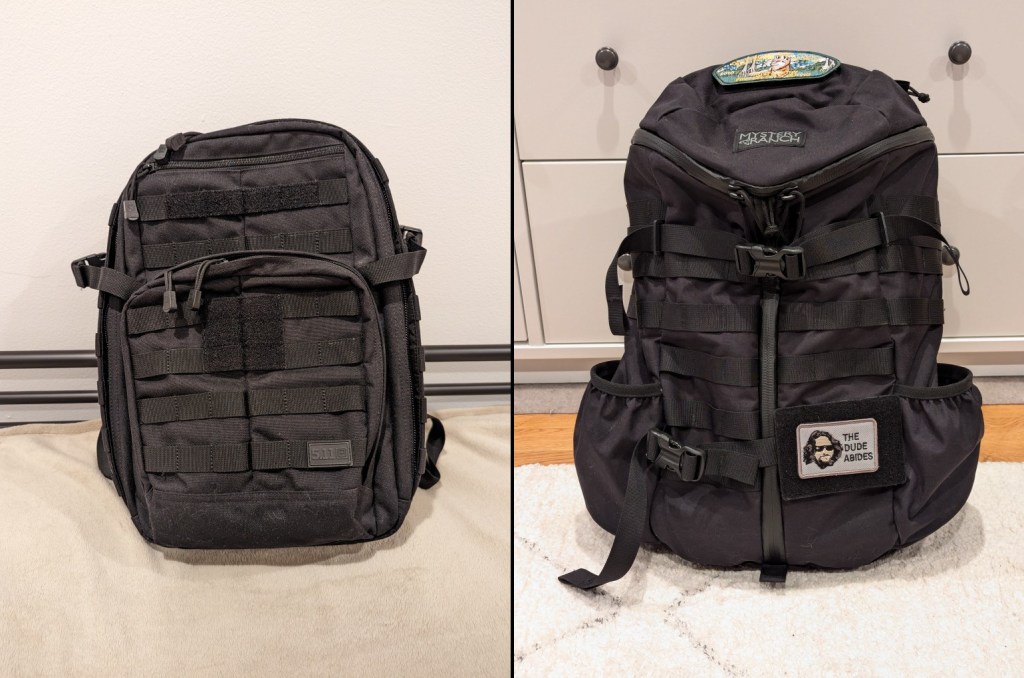
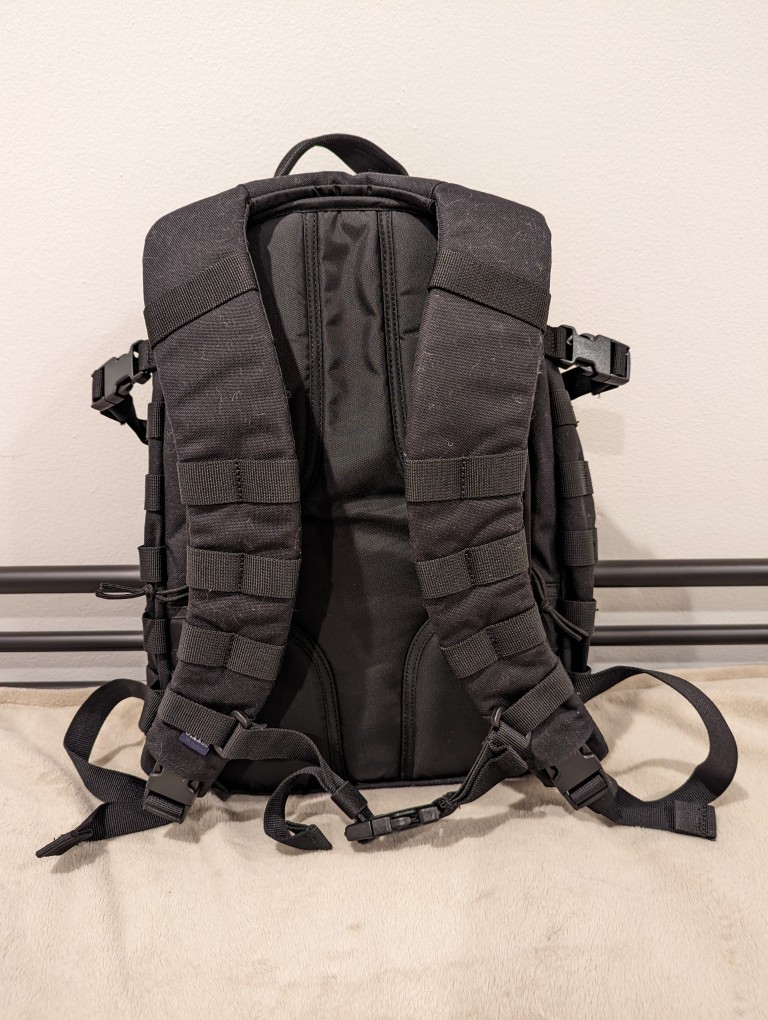
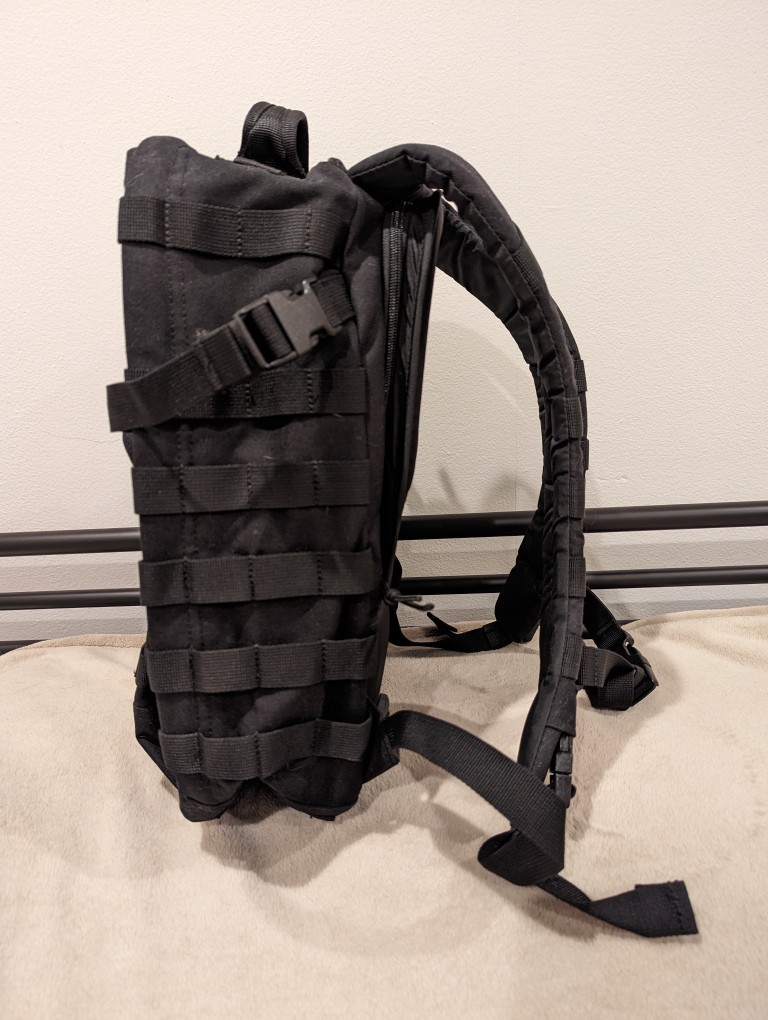
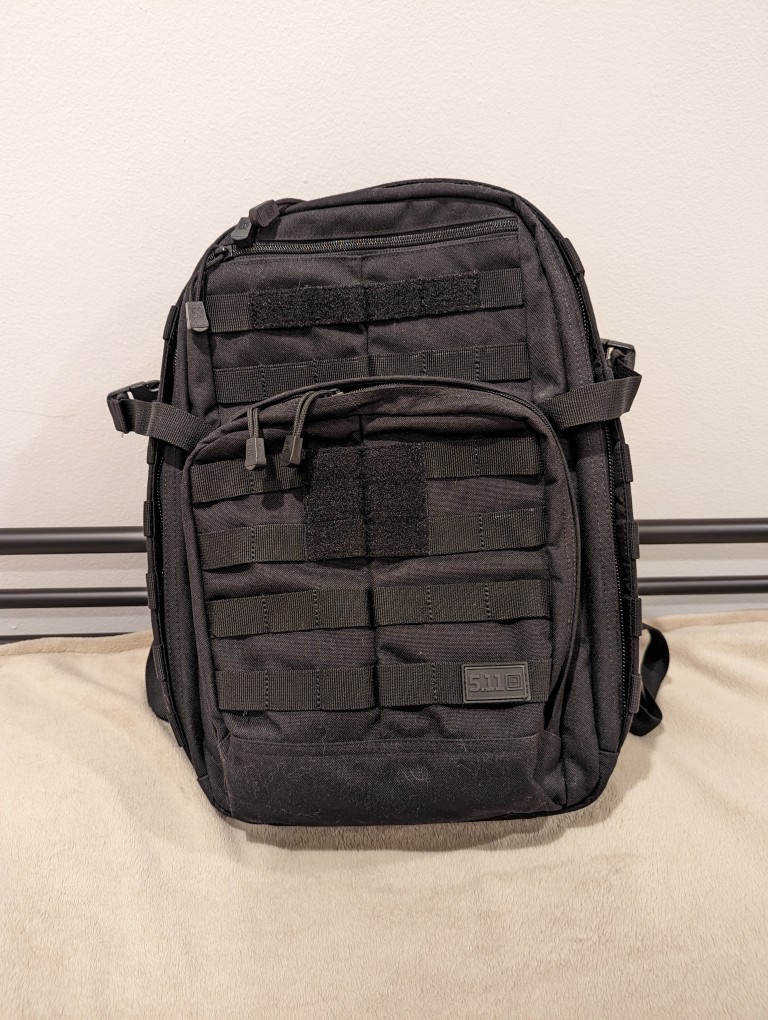
When I upgraded to a 16″ Lenovo ThinkPad P1 Gen 4 workstation-class laptop earlier this year, I soon learned that it was too large to fit safely in my 24-liter 5.11 Rush 12 2.0 backpack. While my old 12″ ThinkPad X230 easily fit into the up-to-15″ laptop capable compartment of the 5.11 Rush 12 2.0, the newer ThinkPad P1 Gen 4 dangerously pressed against its corners. Also, I trouble wearing the 5.11 Rush 12 2.0 with a a padded waist belt while carrying a heavy load–I couldn’t get the bag to ride securely against my back when doing that. Nevertheless, the 5.11 Rush 12 2.0 is virtually bulletproof and a very well made backpack. Unfortunately, it just didn’t meet my changing needs.
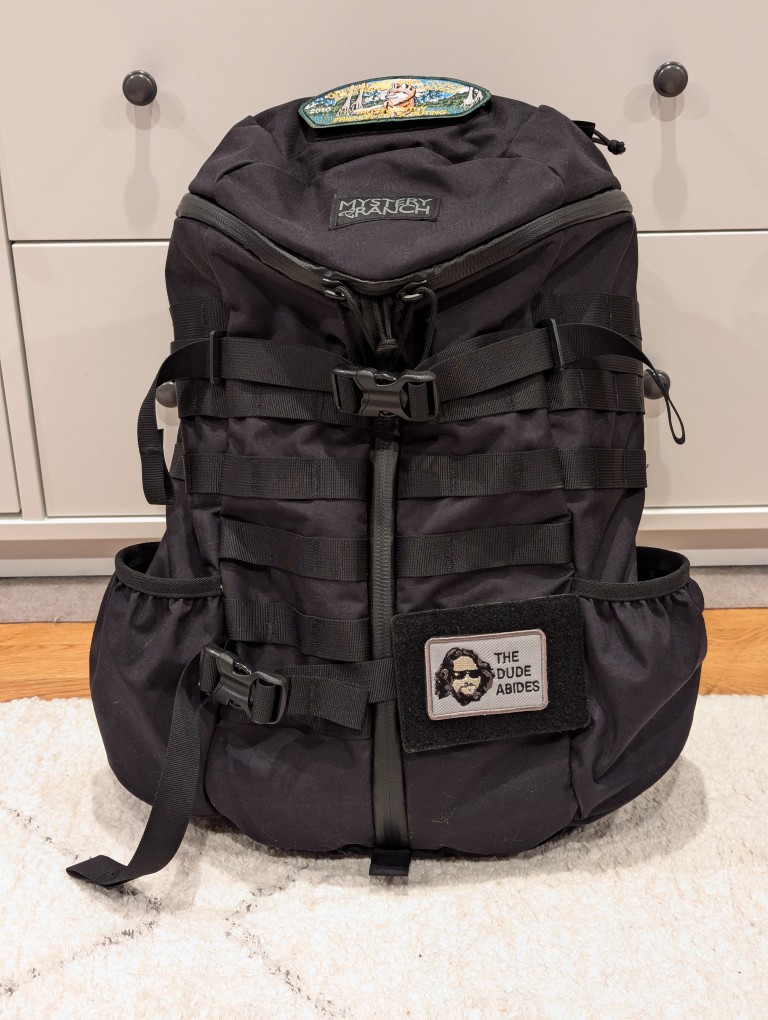
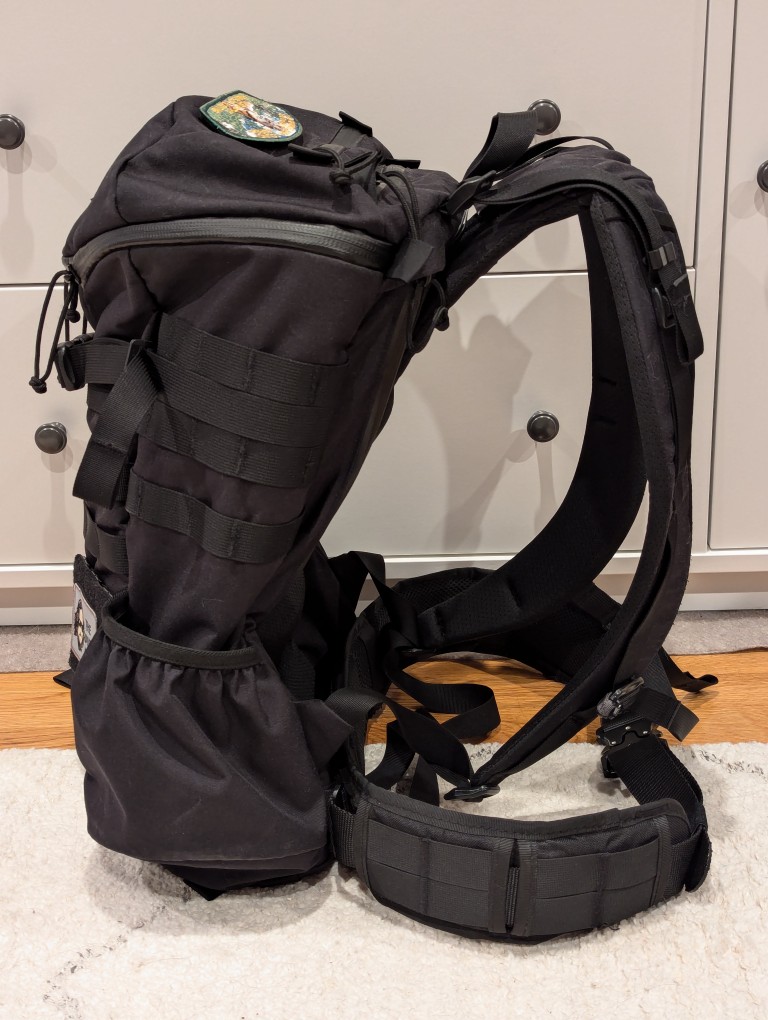
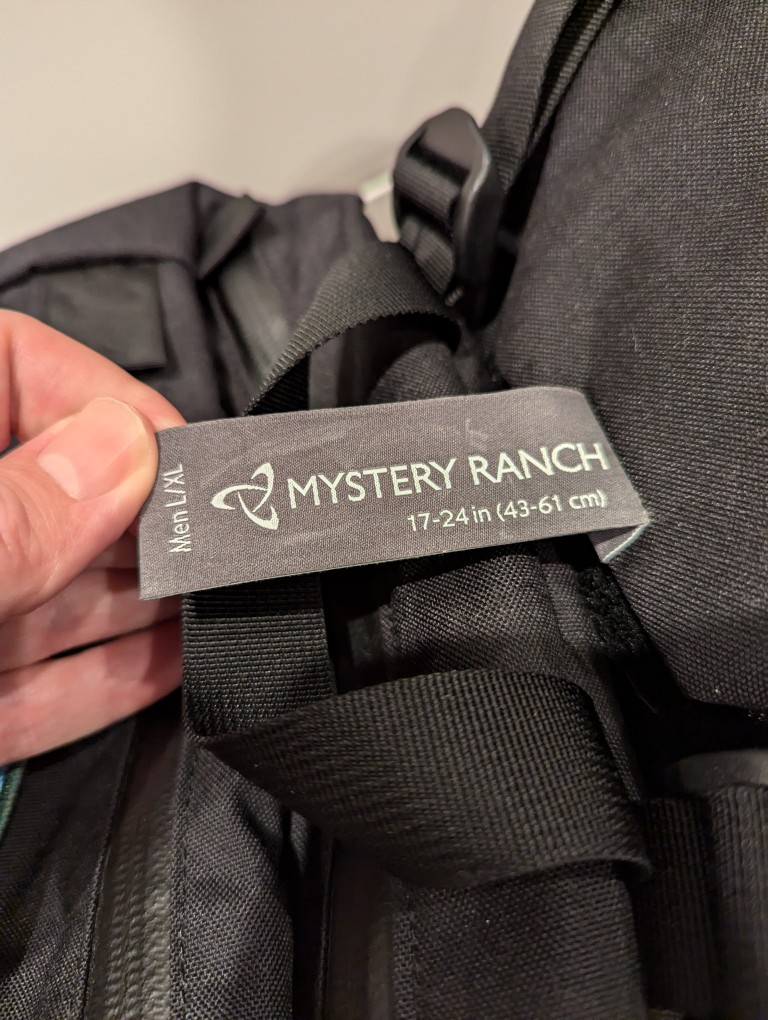
Looking for a larger backpack with MOLLE, waist belt attachment points, and a tough build like the 5.11 Rush 12 2.0 was easy–there’s a number of great alternate bags that fit those needs. However, finding one that also has a laptop sleeve capable of safely holding a 16″ laptop more challenging, because most manufacturers only support up to 15″ laptops. Thankfully, the Mystery Ranch 2 Day Assault L/XL backpack fit my needs quite well.
Like the 5.11 Rush 12 2.0, the Mystery Ranch 2 Day Assault L/XL backpack is built tough.
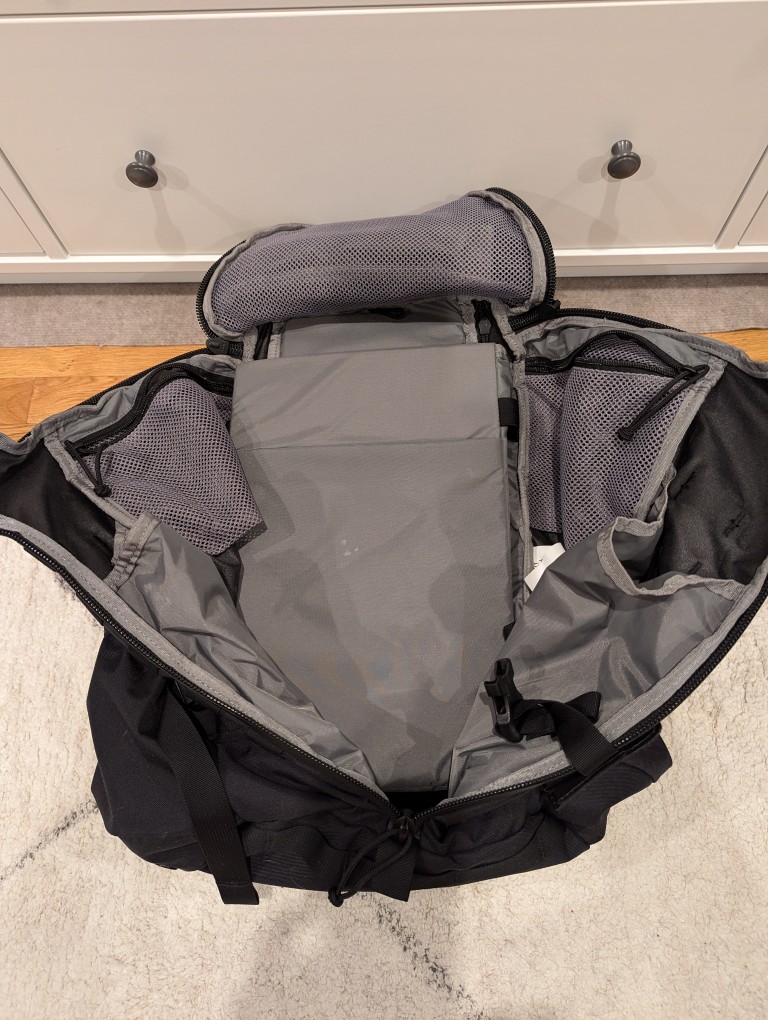
Meeting my new requirements in a backpack, it has a larger volume (24 liters vs. 29.7 liters), and its built-in laptop sleeve can accommodate a 16″ laptop (my ThinkPad P1 Gen 4 measures 10″ deep x 14 1/8″ wide x 15/16″ tall). However, I have to load and unload the ThinkPad through the main pocket as it is too wide and deep to easily maneuver through the zippered laptop side-loading pocket).
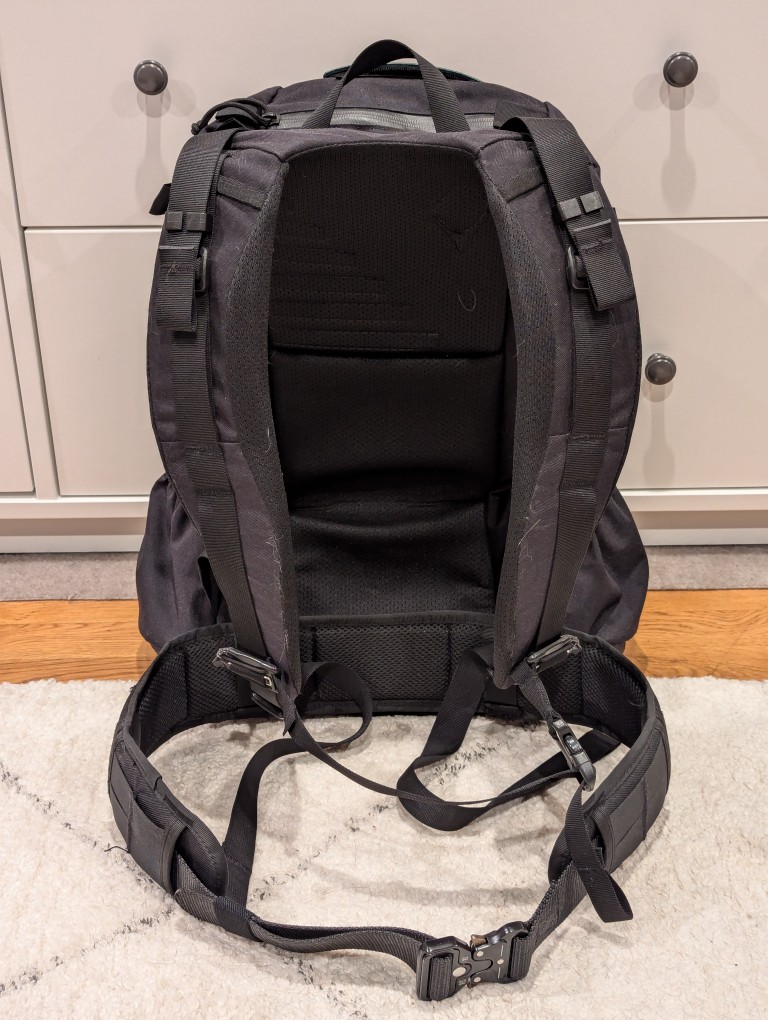
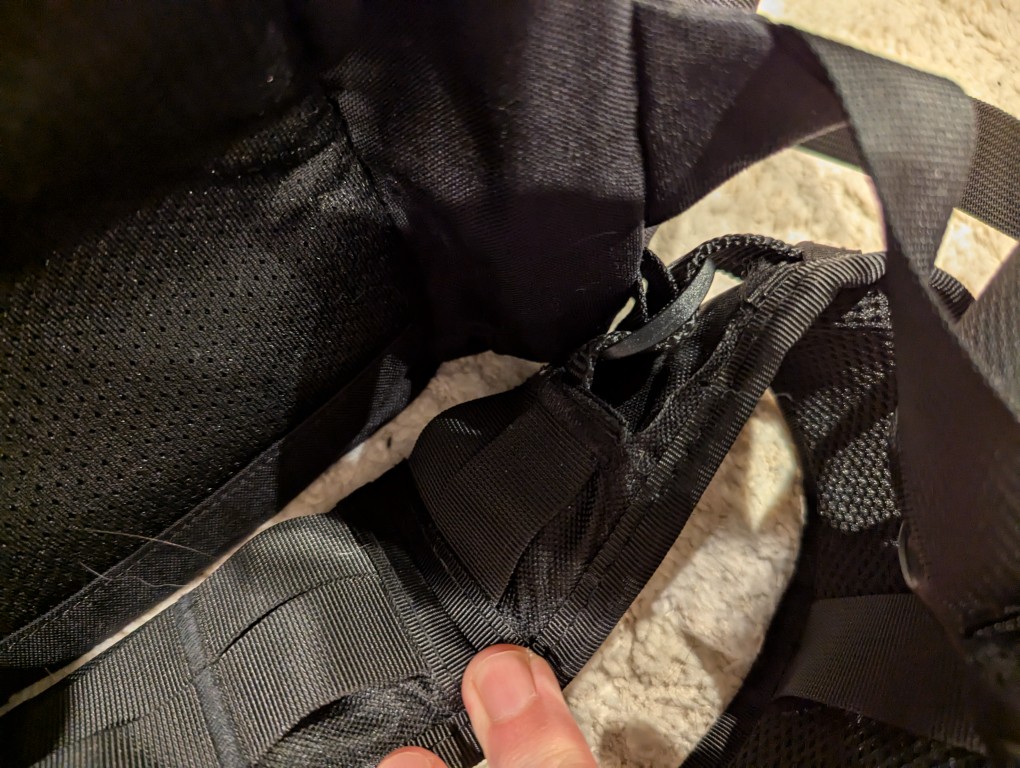
To help with load carrying, it has an innovative lengthening system that helps the pack ride close against your body. To adjust this system, remove the plastic frame shown in the gallery above, shove it into the velcro area behind the straps to release the hook and loop material holding the straps and pack together, pull up to lengthen, put the frame back in its place, press the pack flat to ensure the hook and loop are reattached, and adjust the straps as needed to have the straps rest tightly against your torso and shoulders and the bottom of the pack against your waist.
This adjustment system works well with the aftermarket padded waist belt that I originally used with the 5.11 Rush, but moved over to the Mystery Ranch 2 Day Assault pack. The Mystery Ranch bag included a two-piece simple nylon belt with plastic buckle. Its intention is to help hold the back against your body but not help with load carrying. I removed it and modified a Condor Battle Belt (it has a padded outer belt with MOLLE and an inner 1 1/2″ nylon belt with aluminum quick-release buckle). I cut off the D-ring equipment carriers and cut expanded holes in the outer padded belt to allow the inner 1 1/2″ belt to thread through the belt attachments on the Mystery Ranch pack. I added extra stitching to the outer padded belt and melted the nylon to prevent unraveling from these modifications.
The strangest thing about Mystery Ranch bags is the three-zipper main pocket opening. It is difficult to open and close these one-handed. However, the zippers are top-quality and waterproof. And, with the main pocket fully open, it can ingest a tremendous amount of gear, but it will likely require the bag to be fully opened to extract that gear if it is larger (e.g., a boxed 12 pack of aluminum cans).
Another modification that I made to the bag was to plug its main pocket drain holes with closed hole rubber grommets (I don’t want anything crawling in and setting up shop) and added some strap clips to keep the shoulder adjustment straps from flying all over the place while putting on the pack or walking with it.
Its two side mounted stuff pouches easily hold water bottles, thermoses, and short collapsible umbrellas. During the summer, I keep a pack of menthol cooling sheets and an electric fan in one so that I can reach back to grab them without having to take off the pack.
When I traveled to see my parents a few months ago, I added some MOLLE pouches to the exterior mounts (first aid, toiletries, cables, chargers, multitool, and snacks), but I took them off to reduce the pack’s weight when I am in the city where I walk further distances with it and would prefer the weight go towards what I am carrying instead of how I’m carrying those things.
The Mystery Ranch 2 Day Assault pack is holding up and meeting my expectations. With the new academic year about to begin, I’ll see how it holds up trekking to and from campus.
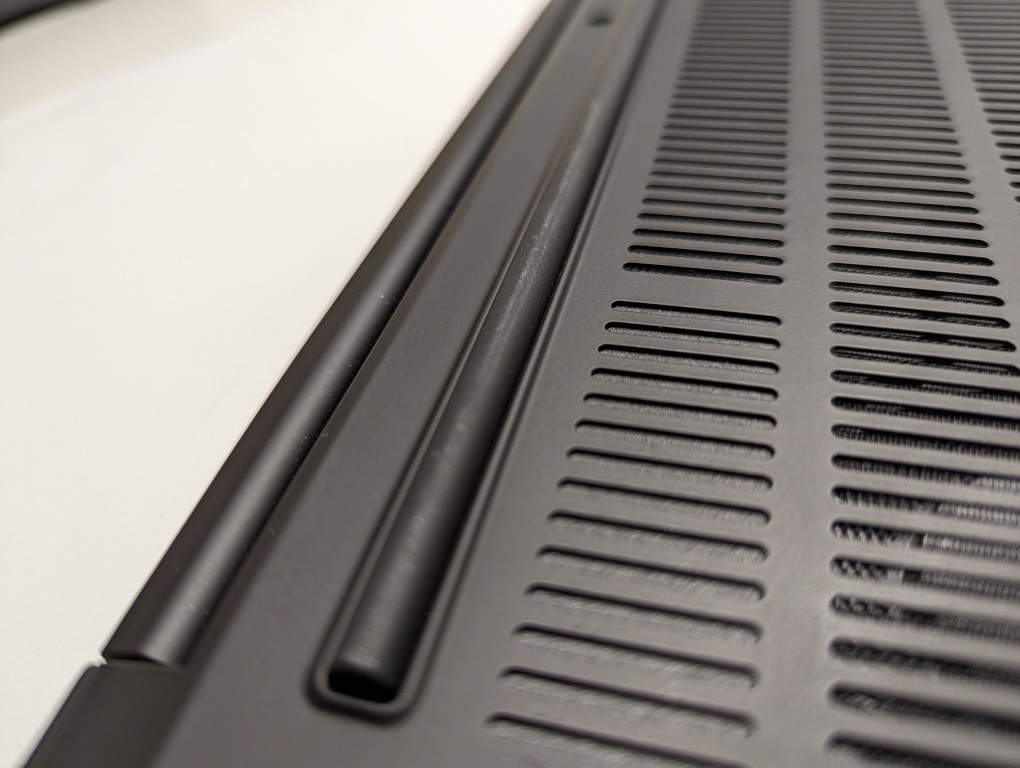
As I wrote about yesterday, my Lenovo ThinkPad P1 Gen 4 maintains lower temperatures when it has improved air flow under its body where the twin cooling fan intakes are. Without raising the laptop, the laptop’s support feet only give it about 3 mm of space underneath it, which chokes the intake fans. Since getting the laptop late last year, I’ve used a variety of at-hand objects–books and small boxes most often–to prop up the back of the laptop when I was stressing the laptop with a heavy workload.
I wanted a permanent solution, but the portable options available in retail are either bulky adjustable metal or plastic platforms or folding 4-point stands. The former takes up a lot of room and those with fans don’t always translate to lower temps, and the latter might not provide the support needed on the ThinkPad P1’s lengthy support foot at the rear of the laptop. So, I turned to LEGO to create a customized stand that gives the ThinkPad the support it needs while also being compact and easily carried in my backpack.
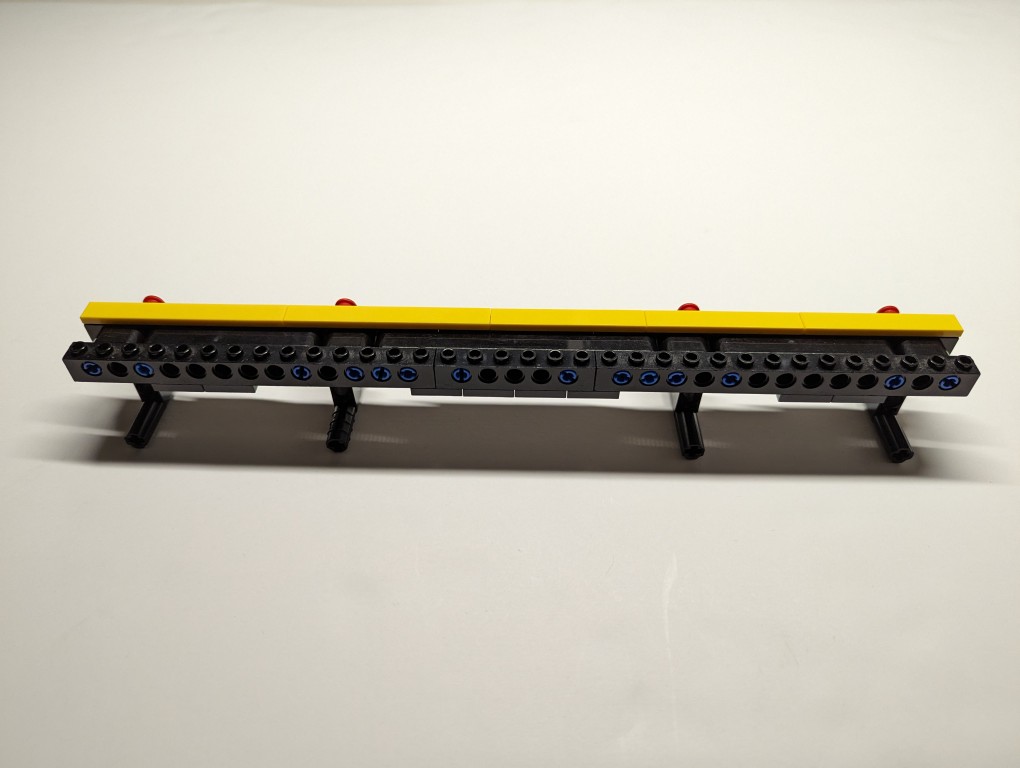
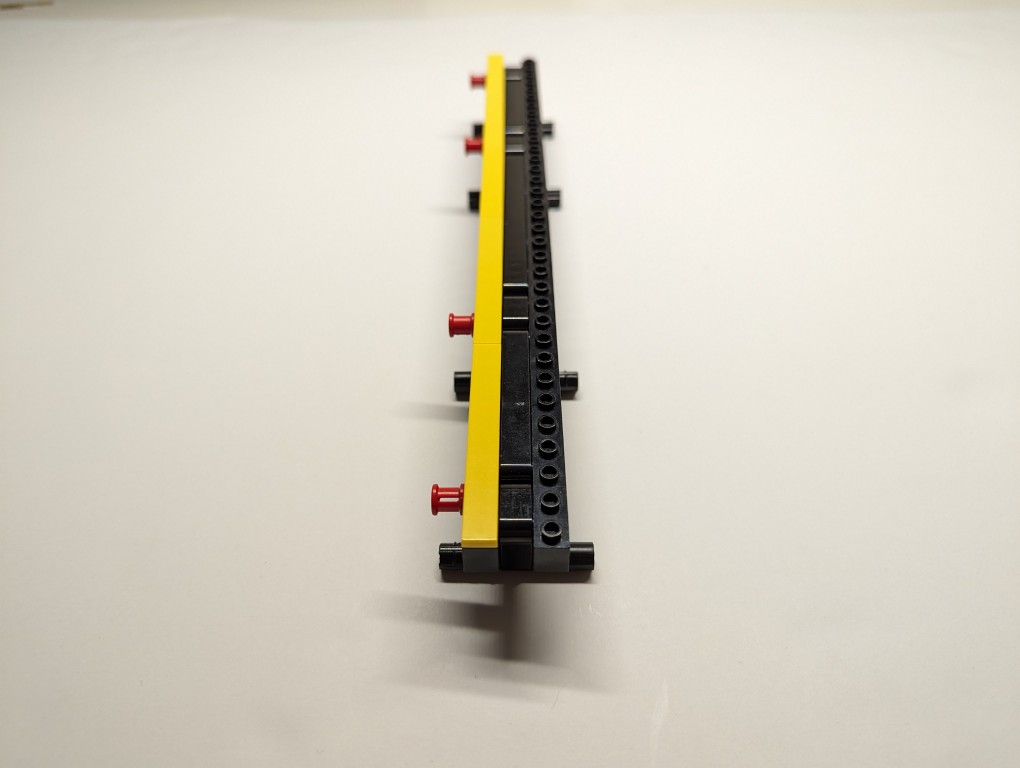
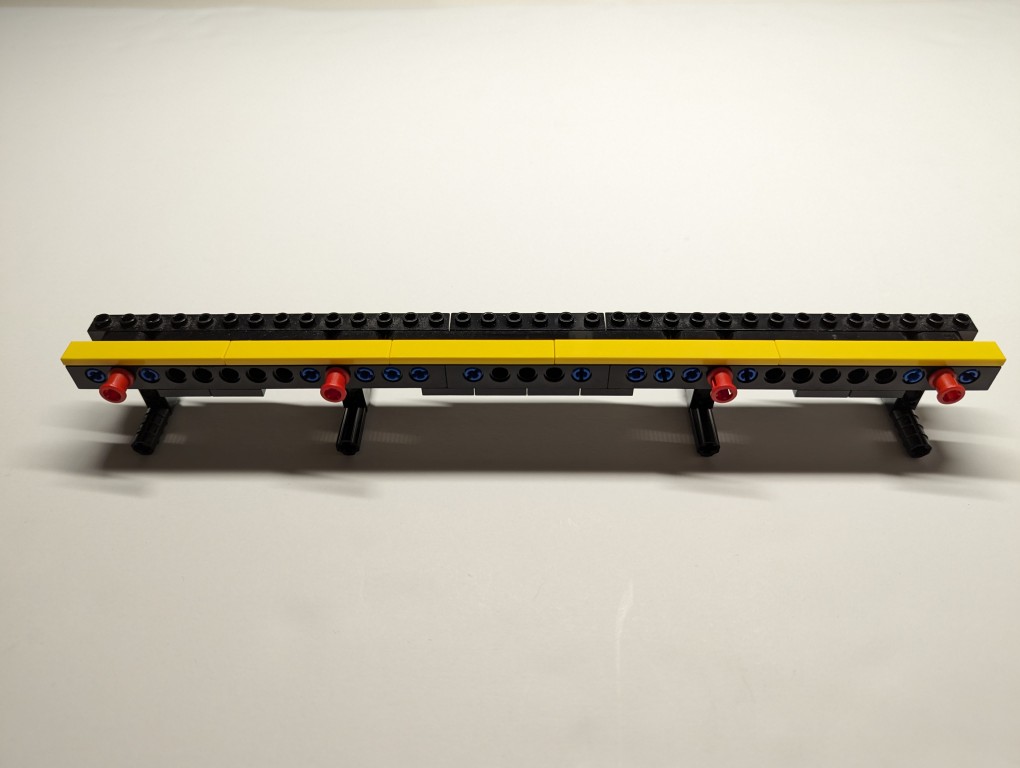
What I made to solve this problem mostly used LEGO Technic elements with some brick elements (plates to provide support underneath its joints and the bright yellow smooth plates on top to orient the stand and provide a stop against the ThinkPad’s support foot).
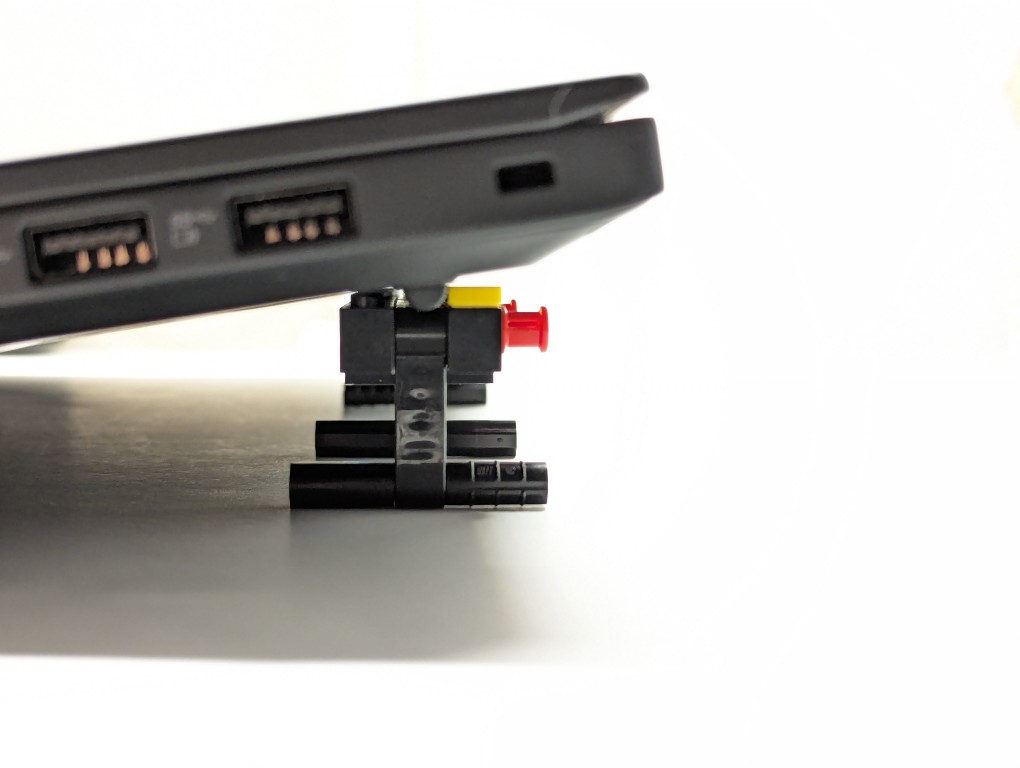
The ThinkPad’s support foot fits perfectly in the center of the stand without the studs toward the front or the flat plate in the back touching the laptop’s body.
Essentially, the stand is built like a sandwich: the bread is the Technic bricks with holes on either side, and the filling is the Technic liftarms (straight and L-shaped). I used 3-stud wide pins to hold the sandwich together. The red pins are only used to provide stability to the support legs when they are deployed for use.
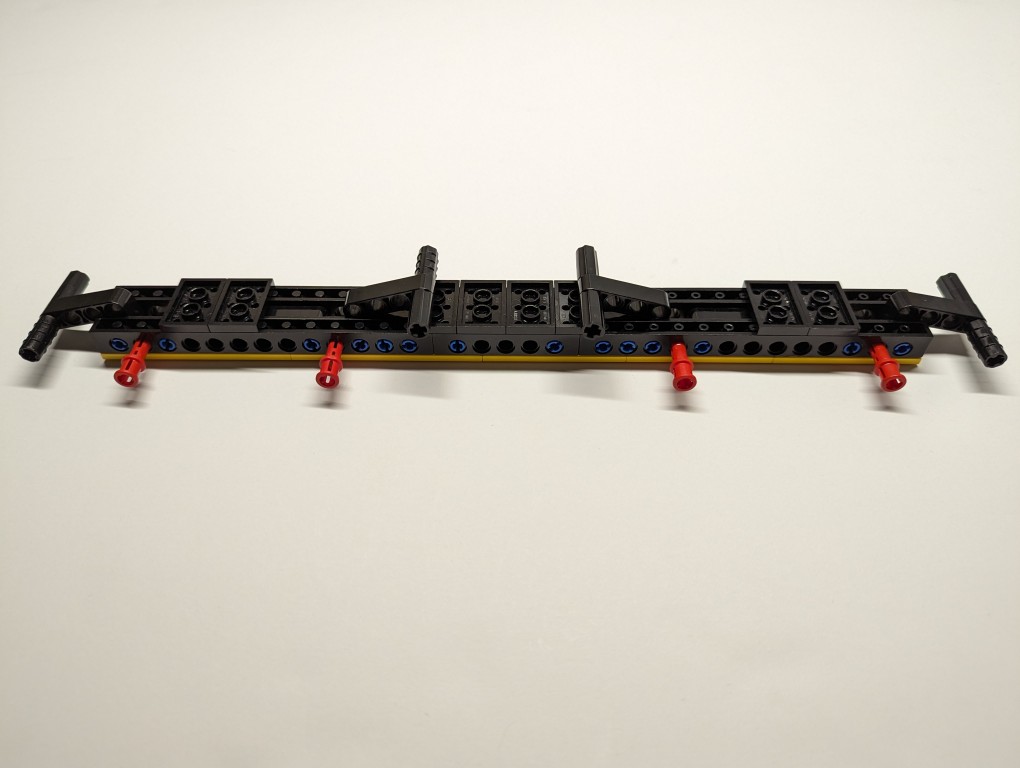
On the back of the stand, the red pegs can be partially pulled out and the feet folded.
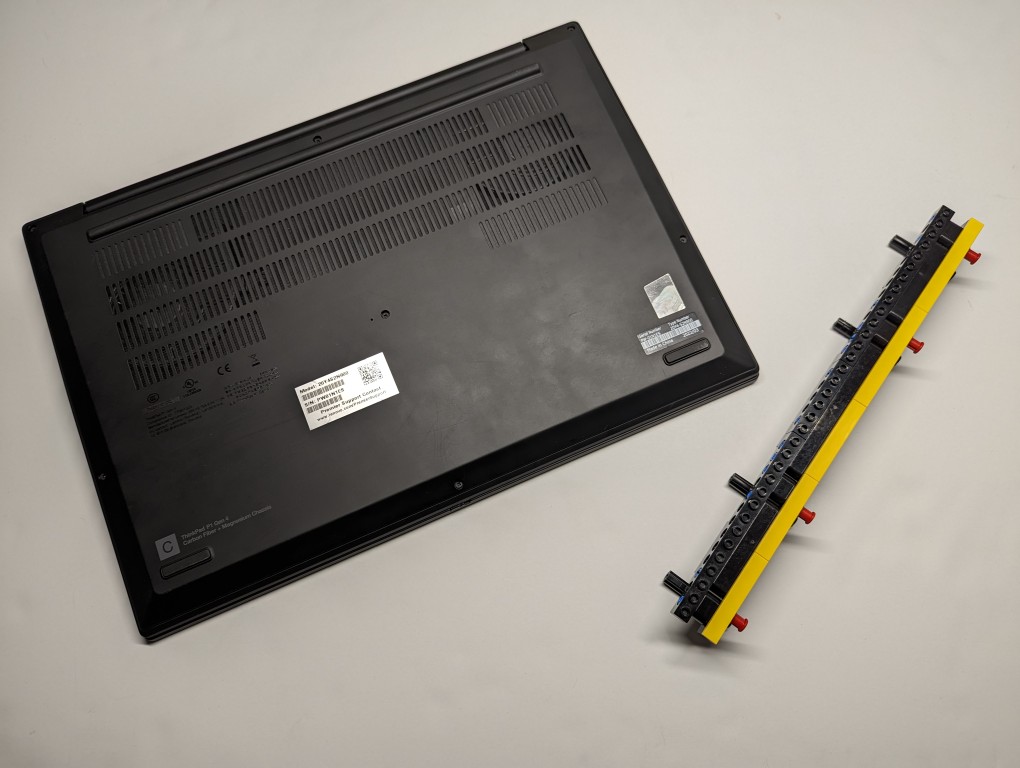
The LEGO stand completely covers the support foot at the rear of the laptop (seen at the top of the photo above). When folded, it easily slips into the backpack that I use to carry this ThinkPad.
LEGO is a versatile, rapid prototyping medium for building art, expressing ideas, and in this case, creating something practical to solve a specific problem.
If you have some LEGO bricks laying around idle, you might stop and think about what problem they might be able to solve for you!