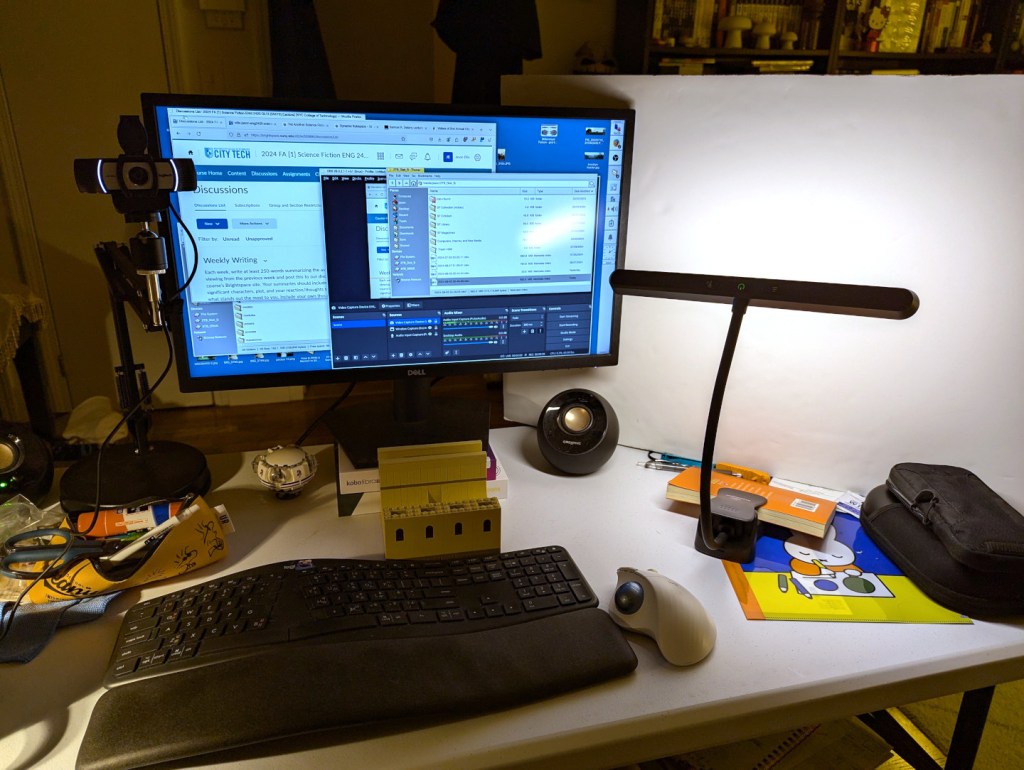
For my online, asynchronous Science Fiction (ENG 2420) class at City Tech this semester, I am recording my weekly lectures at my desk at home. I think the setup that I created for the second week’s lecture shown above will work out well for my recordings.
I have a 1080p Logitech webcam with stereo mics on the left of my monitor. I have a 2 x 3 ft. foam board propped up on the right side. Originally, this was to cut down on the sound from the living room air conditioner. But, tonight, I setup a temperature controlled LED light to reflect light off the foam board onto me. This produced a much better picture than with the overhead pot lights and even provided nice illumination with the overhead lights turned off as shown.
I used OBS Studio to record my lecture, and I edited the footage with Shotcut. Then, I uploaded the edited MP4 to YouTube.
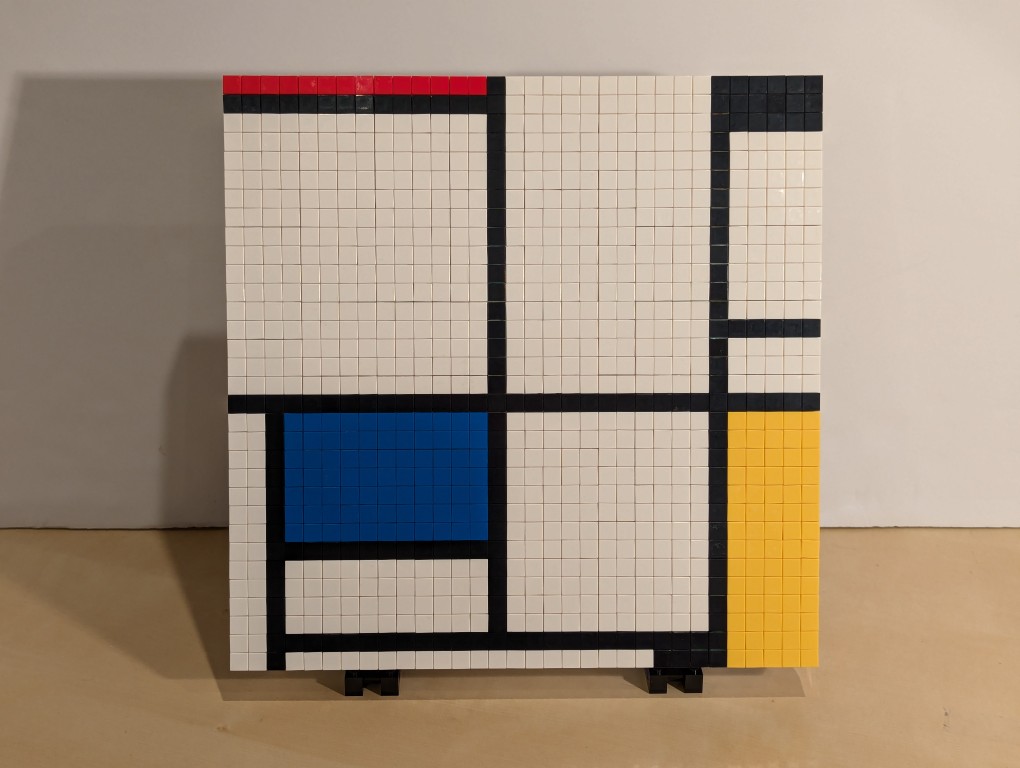
I have appreciated Piet Mondrian’s neoplasticism artwork for many years. As I wrote about here, I was glad to see his work shown in Lt. Cmd. Data’s quarters on Star Trek: The Next Generation. Then, after seeing some of his works in person at the Museum of Modern Art in Manhattan, I hatched a plan to copy his the painting from Data’s quarters–Mondrian’s Tableau I (1921) on display at the Kunstmuseum Den Haag–using a different medium: LEGO.
Planning with GIMP
Before creating a planning image using GIMP, I had to decide what size I wanted (and could afford) my build to be. I had already decided to use LEGO 1×1 flat tiles as the “painting medium.” Using LEGO’s Pick-a-Brick service online, these bricks cost $0.05 each in a variety of colors. If I went with a 32×32 stud “canvas,” that would give a surface area of 1,024 studs and therefore a need of 1,024 flat tiles to cover all of those studs. This would cost $51.20 for enough tiles to cover a 32×32 surface. Other options that I considered was enlarging each dimension by 1.5 to 48×48 for 2,304 studs and a cost of $115.20 for enough tiles or enlarging by 2 to 64×64 for 4,096 studs and a cost of $204.80 for enough tiles. Even using bricks that I already owned to create the canvas and stand, it was hard to spend more than the $51.20 for enough tiles to cover a 32×32 canvas and essentially fill the volume of your hands cupped together.
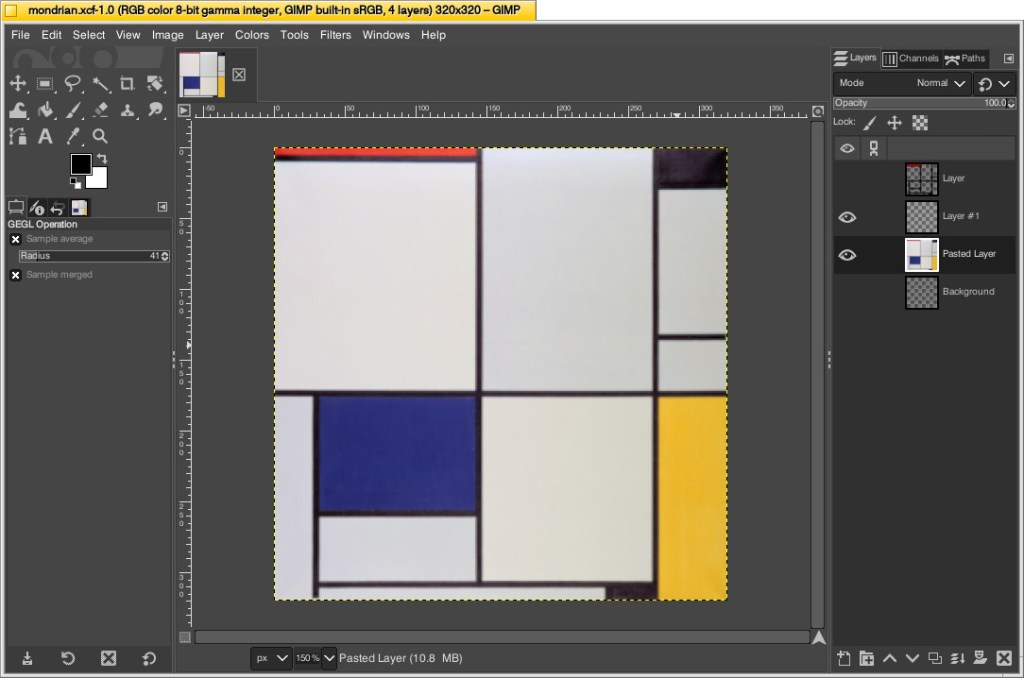
With that decision made, I could begin working in GIMP. First, I opened an image of Mondrian’s Tableau I (1921). The original is painted on a 103cm x 100cm canvas. Since I am creating a perfect square, I needed to square this image and resize it to match my calculations. To do this, I simply selected Image > Scale Image > unlinked the horizontal and vertical resolution > entered 320 for X and Y > clicked Scale. This made the image a perfect square with a resolution of 320 by 320.
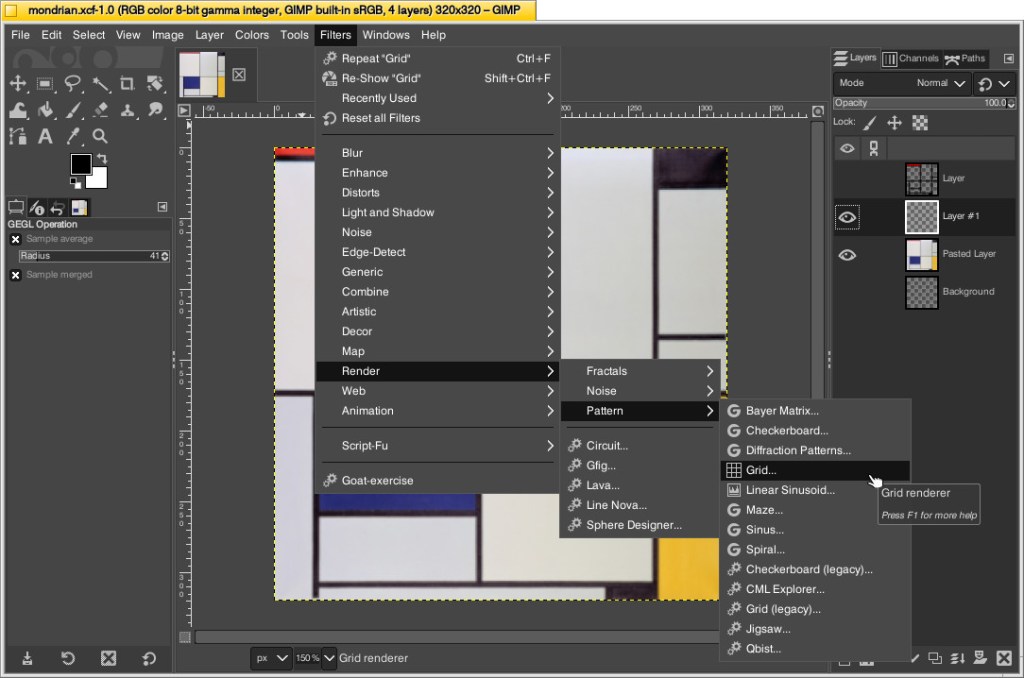
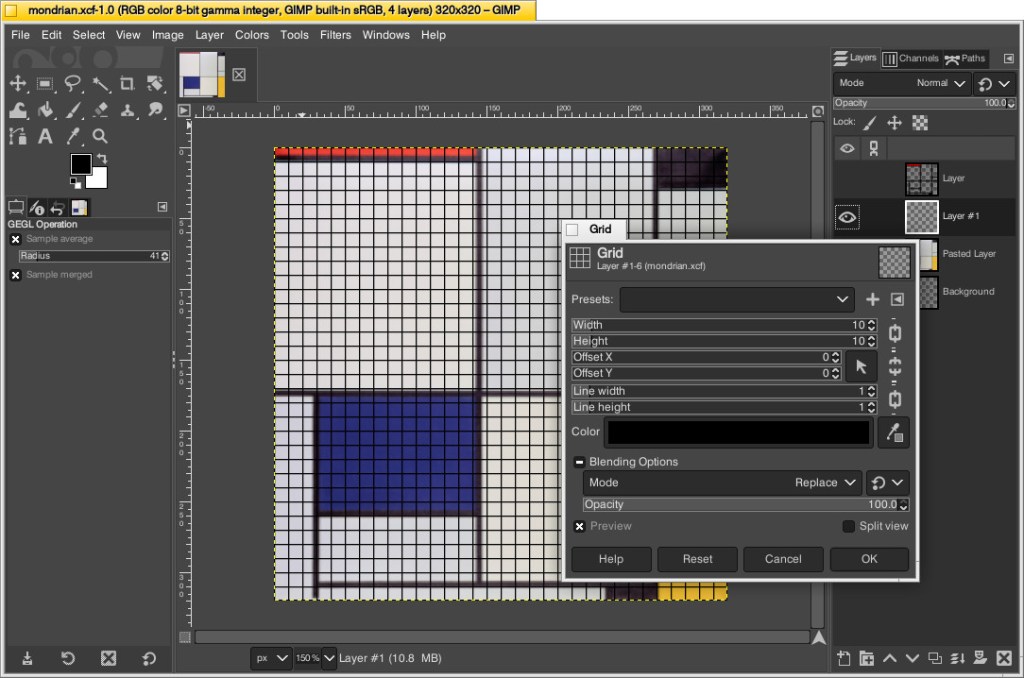
Next, I needed to make the image look more LEGO-like to calculate how many flat tiles I would need of each color. To do this, I added a new layer over the original image and then clicked Filters > Render > Pattern > Grid.
On the Grid pop-up window, I changed the Width and Height to 10–meaning that there would be a grid line every 10 pixels on the X and Y axes. Since I had already scaled the image to 320 pixels on each side, this grid would perfectly approximate the 32 x 32 grid of my LEGO canvas. Also, I set the line width and height to 1 pixel each so that it wouldn’t be too large and obscure the next step. After clicking OK, the grid appears over the image.
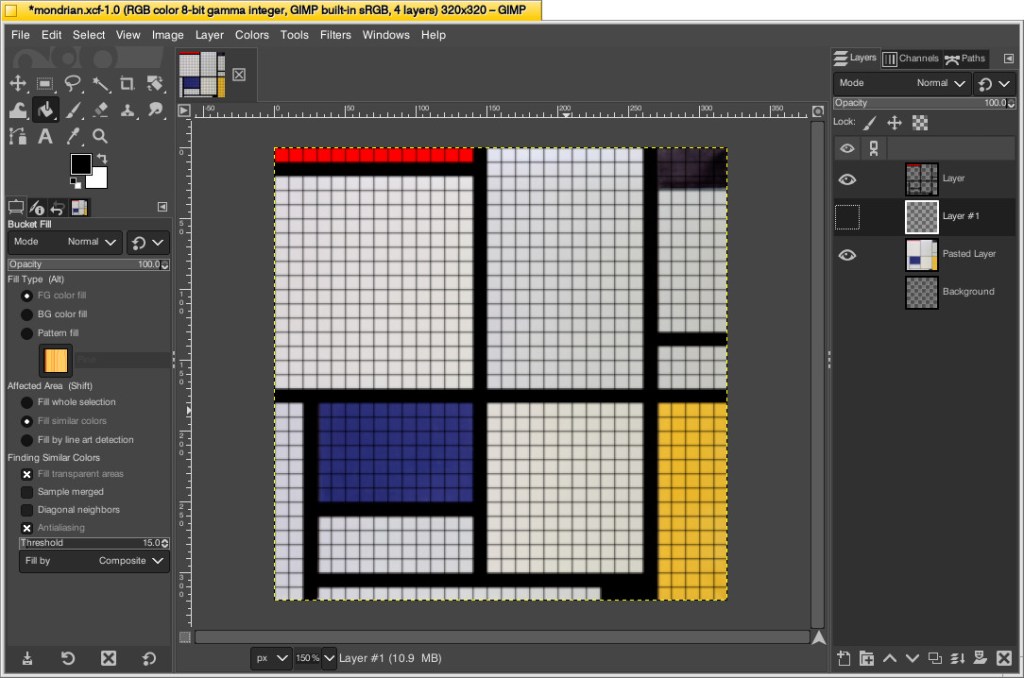
While remaining on the layer with the grid, I selected the paint bucket tool, selected the color of the target areas–black, blue, red, and yellow–in turn, and filled the appropriate squares to match the original painting underneath. I did this to make sure I was making the tile count as accurate as possible. If I hadn’t done this, the black lines would be less noticeable and what I might count as a colored square versus a black line might become confused. At a LEGO resolution of 32×32 studs, it was impossible for me to make it as accurate as the original, so this technique helped me approximate the original with a high degree of accuracy.
Then, I counted the squares of each color to make my LEGO order: 686 white, 177 black, 77 blue, 70 yellow, and 14 red. I ordered a extra flat tiles of each color in case my counting was incorrect.
Building the Canvas
I wanted to build a substantial canvas for the Mondrian instead of using a 32×32 base plate. Also, I wanted to build with as many white bricks and plates as I could to reduce how much I had stored in plastic bins under my desk.
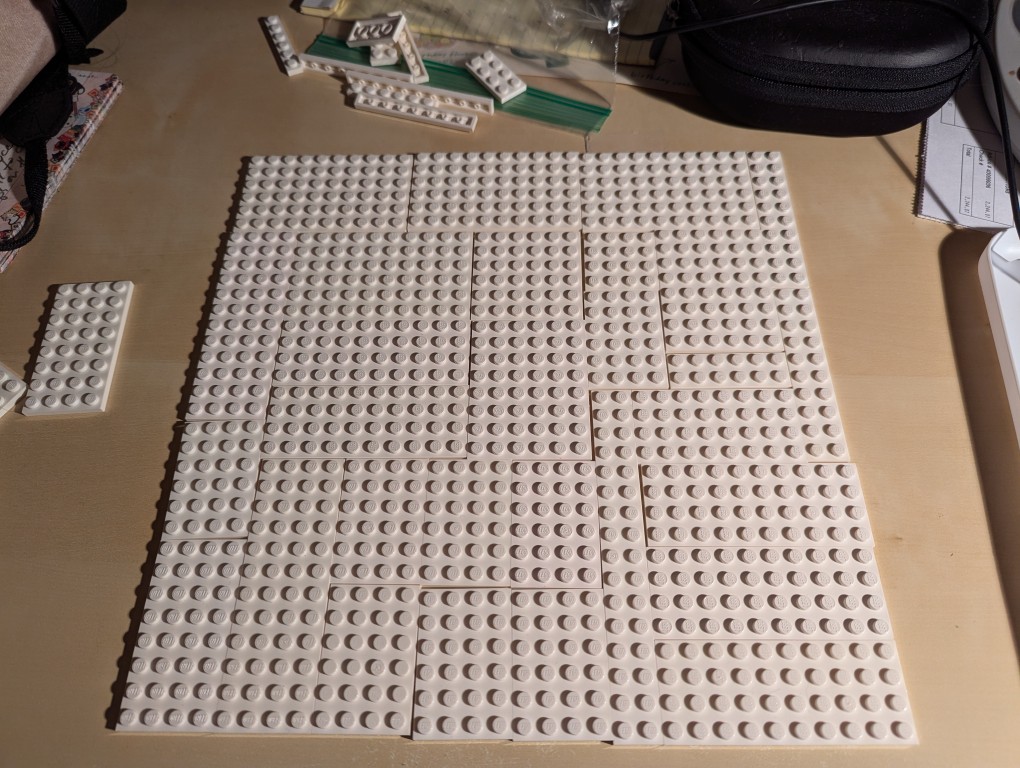
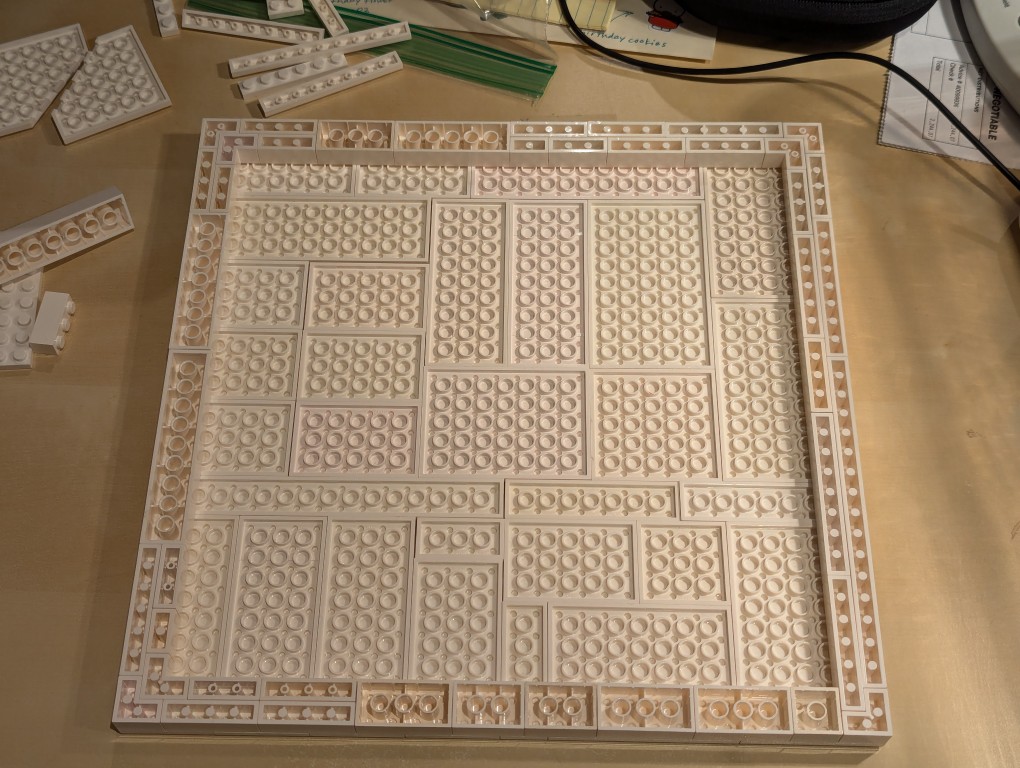
To begin, I laid out a 32×32 grid of plates. I didn’t have a large number of similar types of white plates, so I had to try different configurations before settling on one. If I had to do over again, I would have tried configuring it for more staggered stepping instead of long break lines as I did.
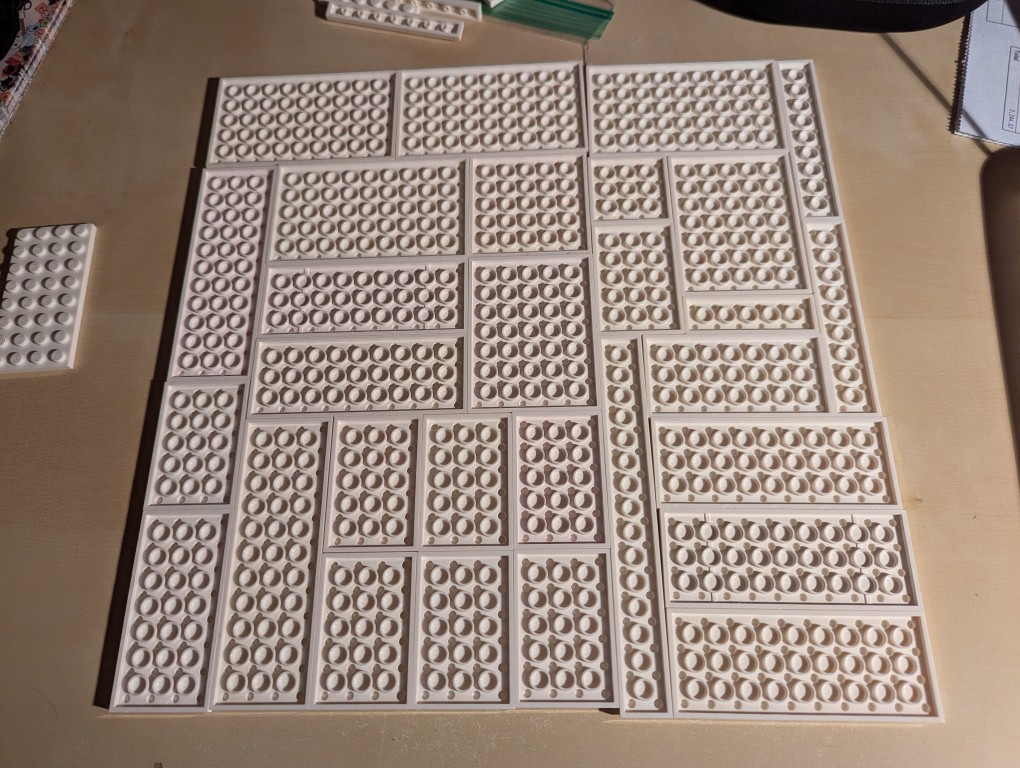
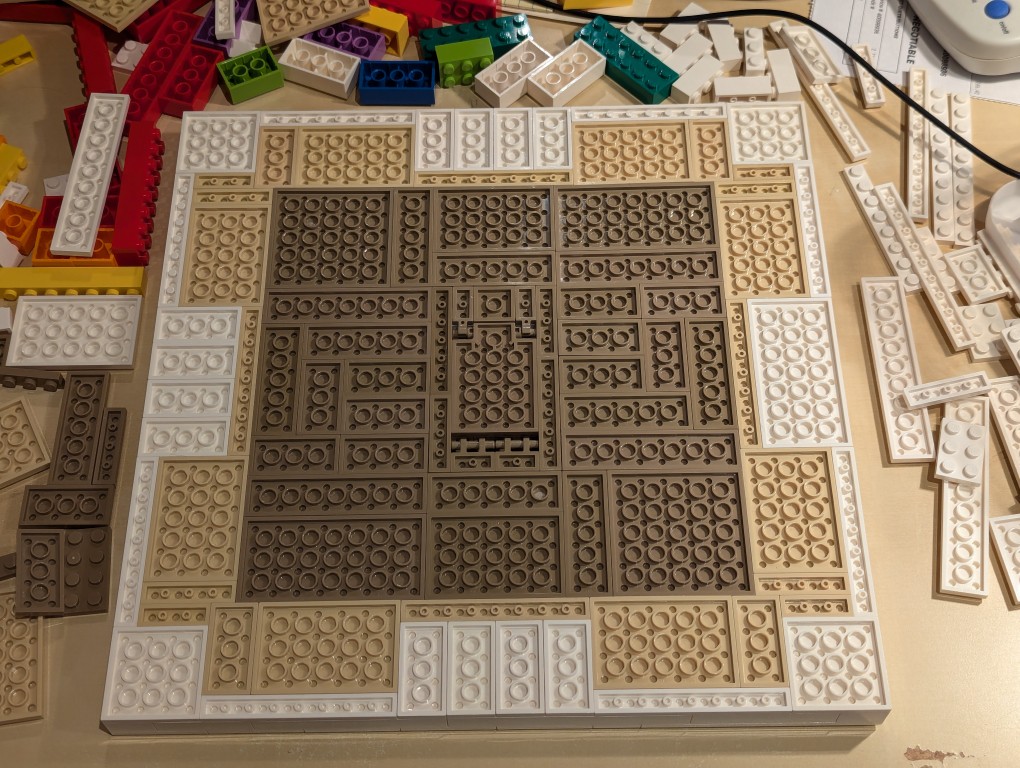
I flipped over the plates to begin building the support frame for the canvas using bricks.
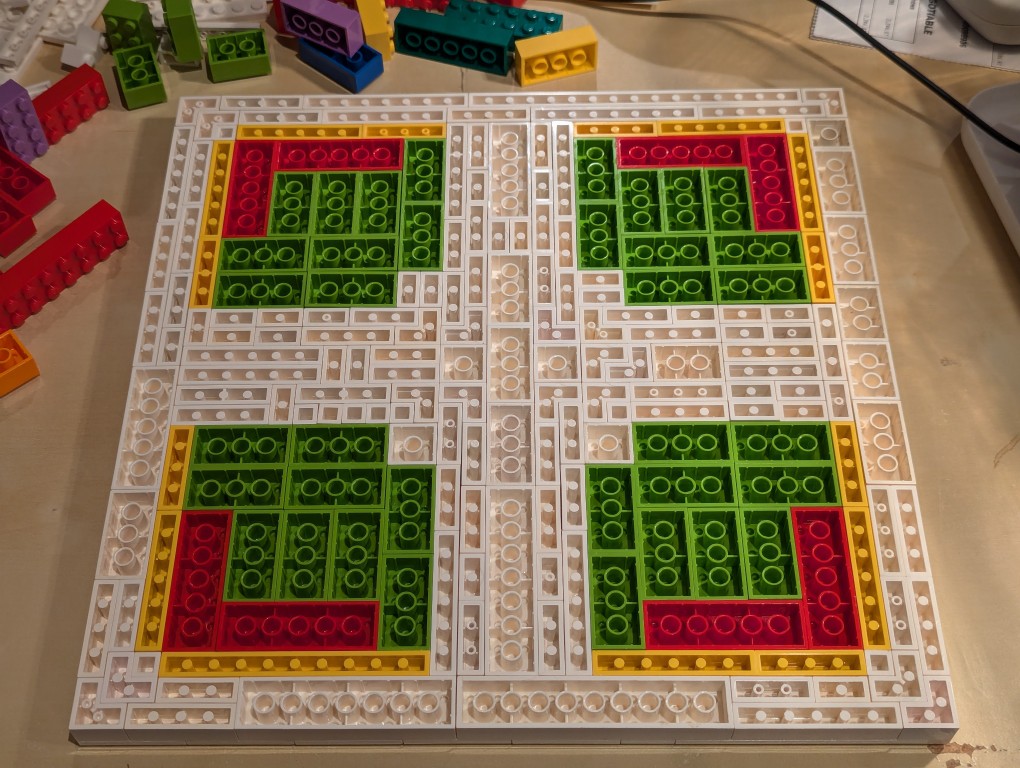
I wanted the canvas to appear stretched, so I continued the color white from the canvas’ plates to the border.
Knowing these other colors would be hidden, I used filler bricks in a mirrored pattern (I would know what it was like underneath even though no one else would).
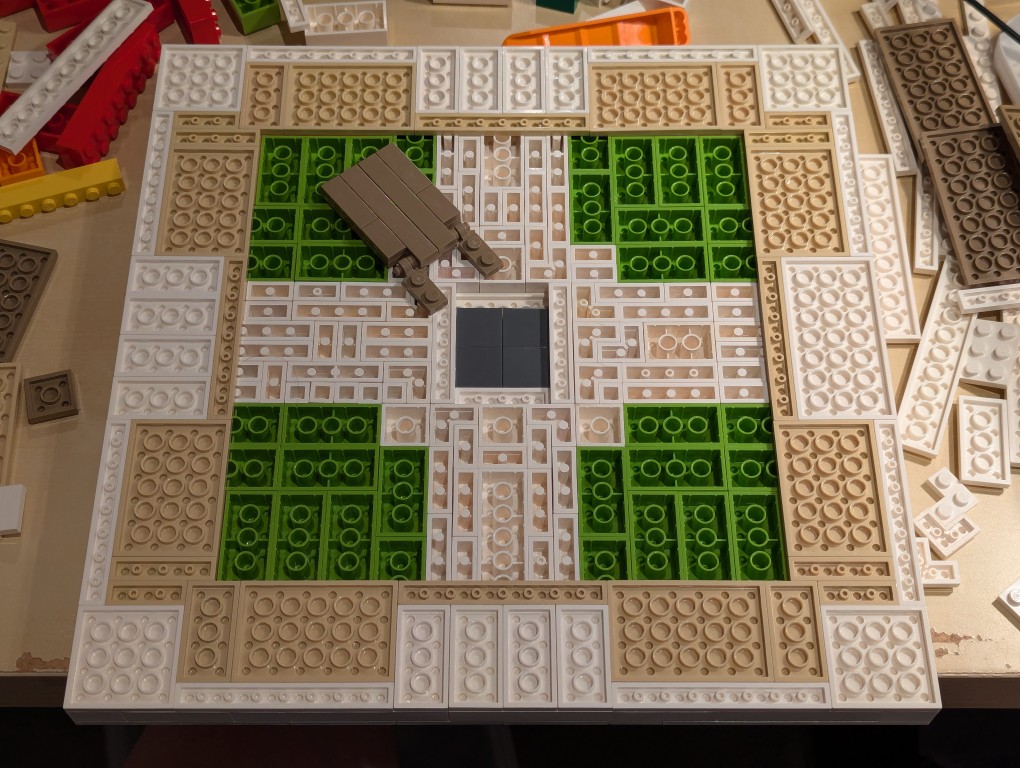
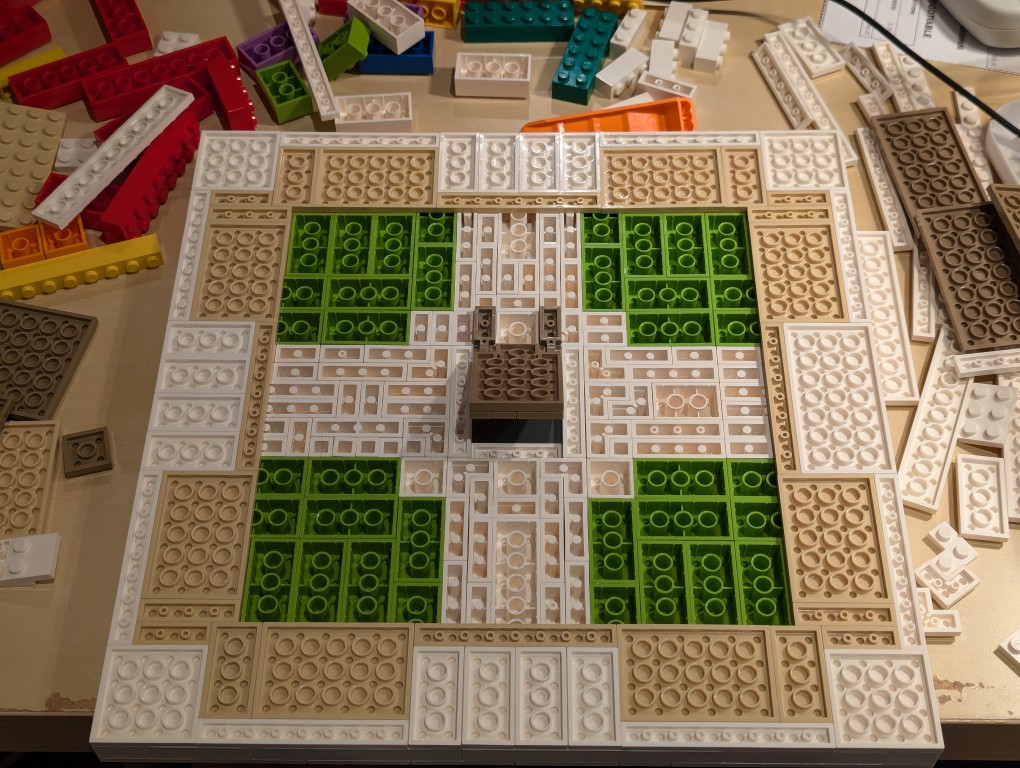
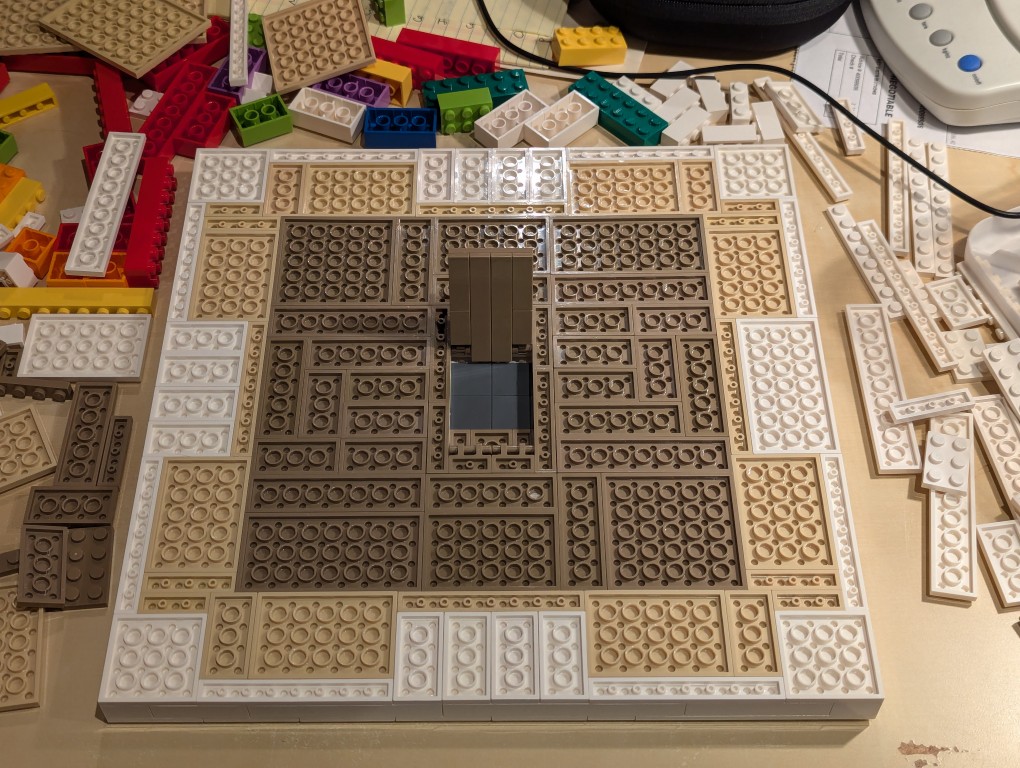
After beginning to cover the filler bricks with white plates (stretched canvas) and sand plates (wood frame), I thought that it would be cool to build a hidden compartment to hold a written statement about the artwork. So, I pulled out some central bricks, filled the center with inverted 2×2 flat tiles.
I constructed a compartment door on hinges in the middle of the back of the canvas and filled the rest of the space with dark sand plates (paper backing protecting the canvas).
Here is the hidden compartment door open.
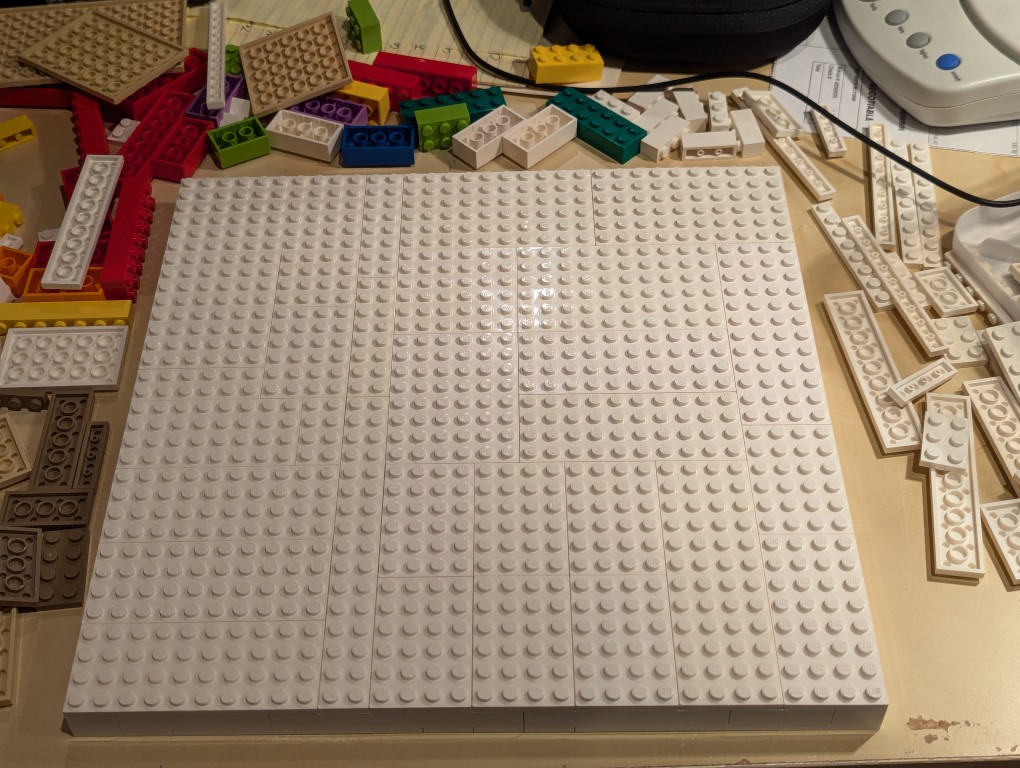
Flipped back over, the canvas is primed and ready for the “paint.”
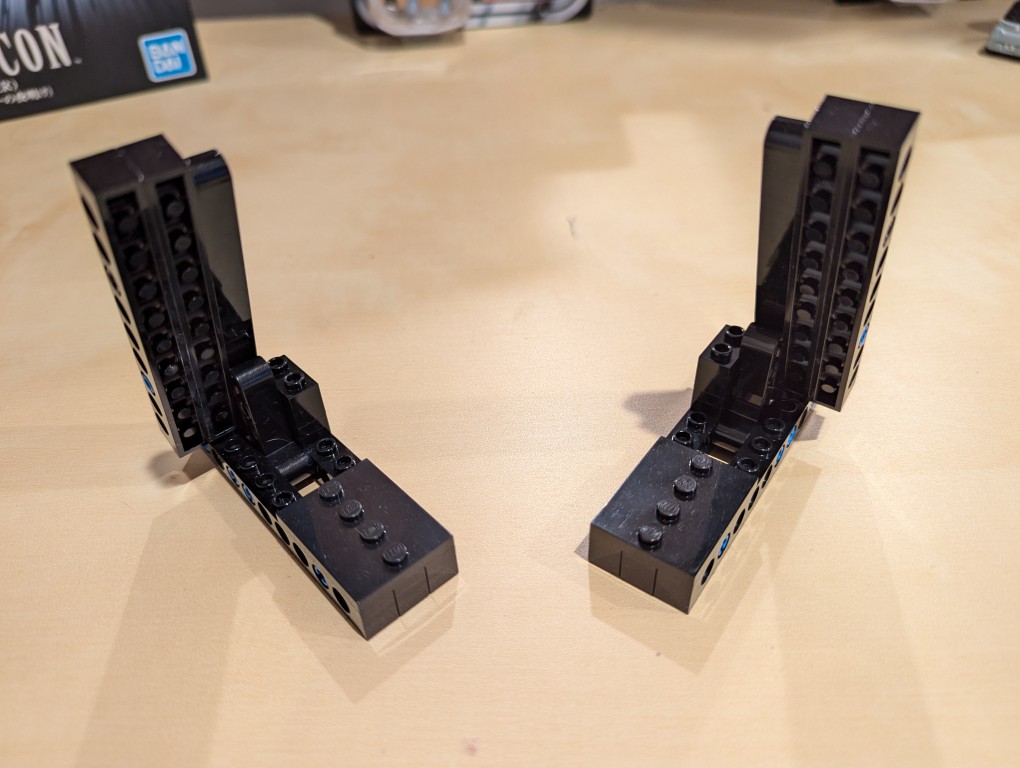
Constructing Display Stands for the Canvas
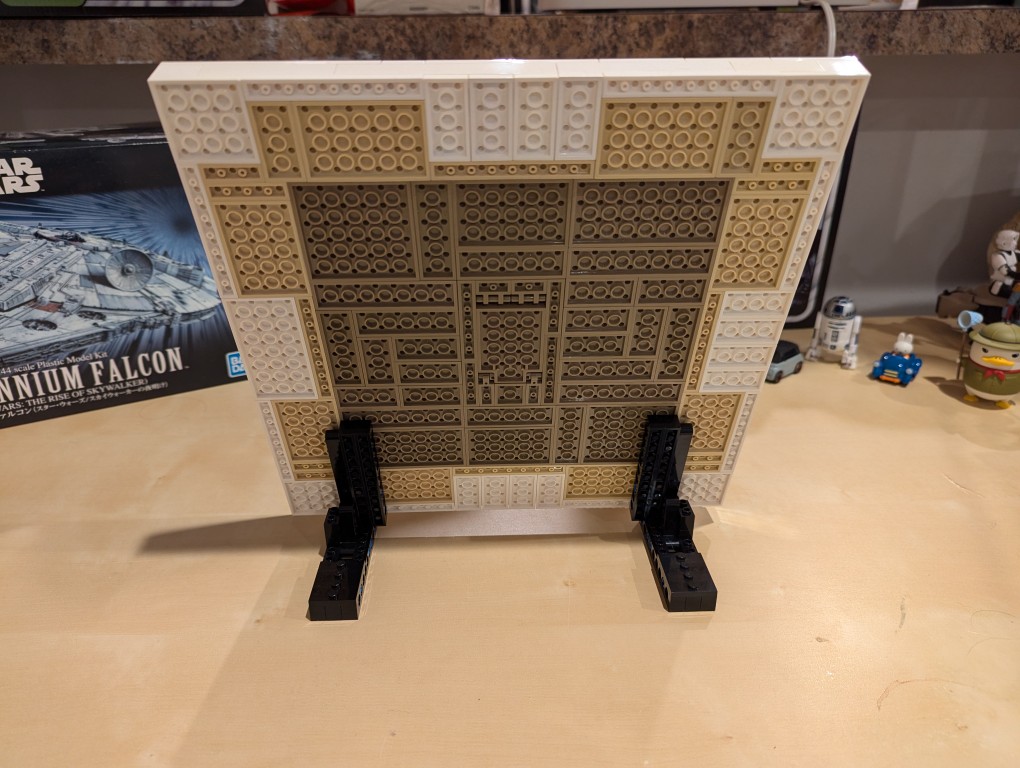
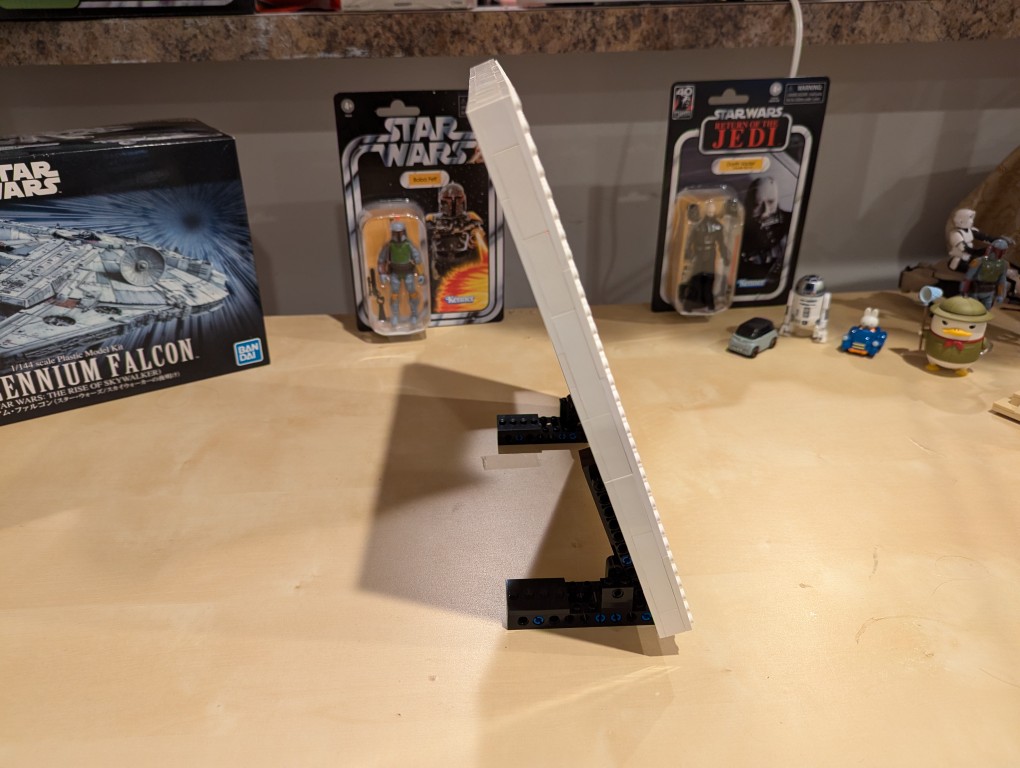
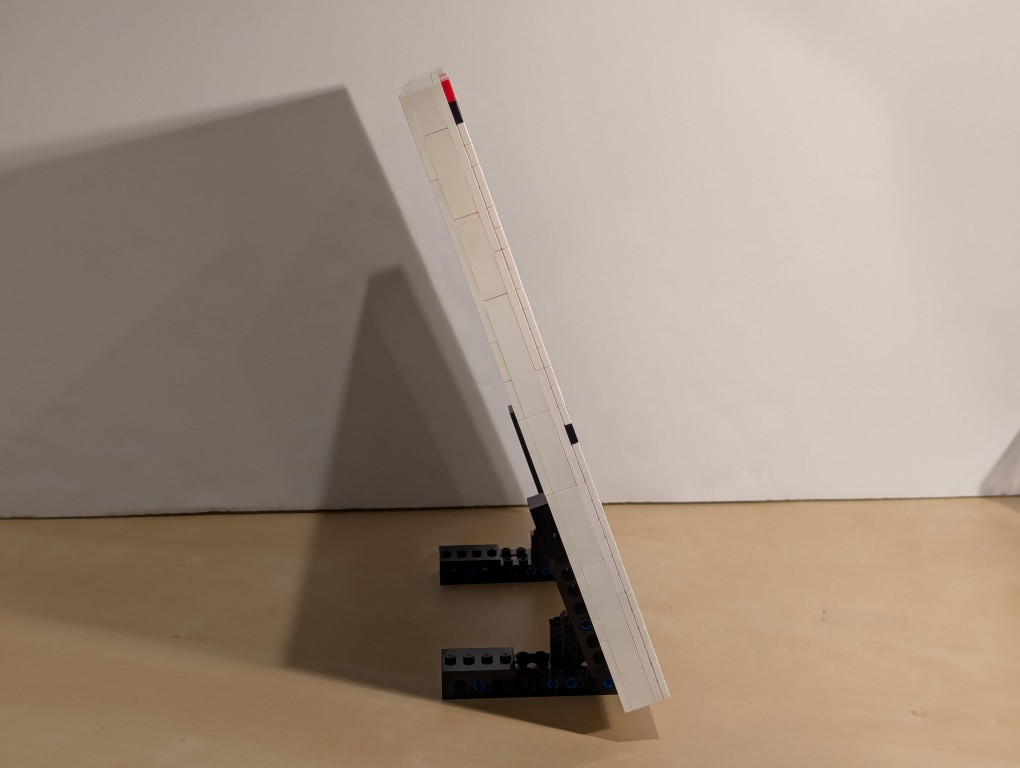
I used LEGO Technic bricks to build two stands for the canvas so that it was held at a stable angle.
It’s about 70 degrees from horizontal.
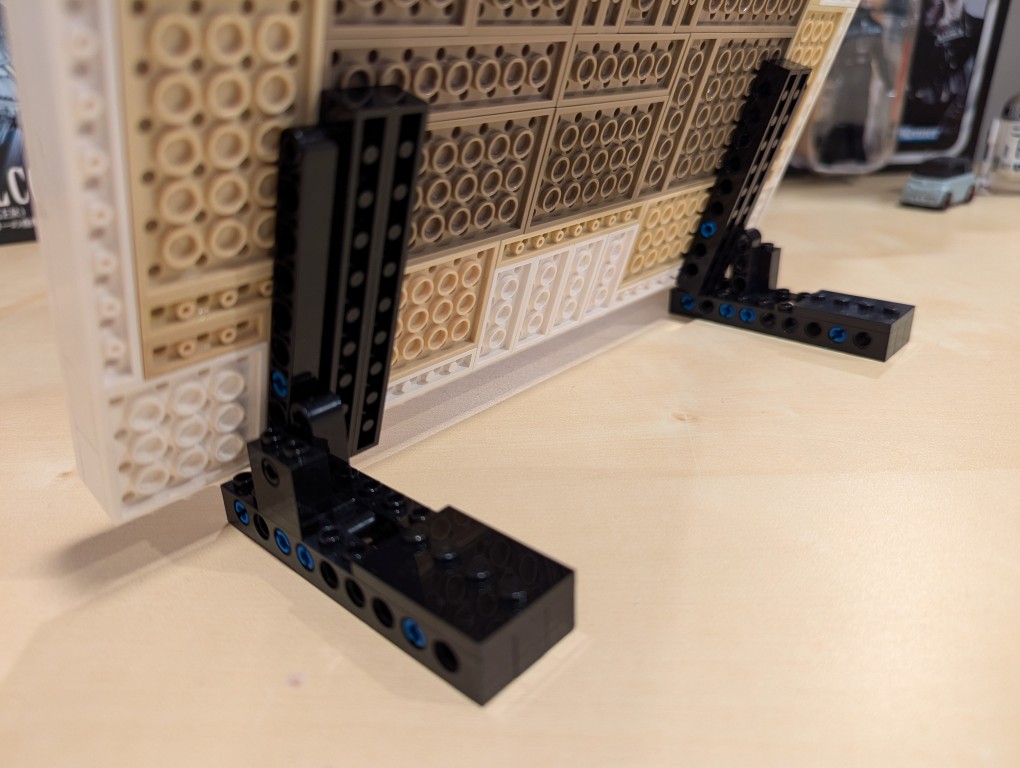
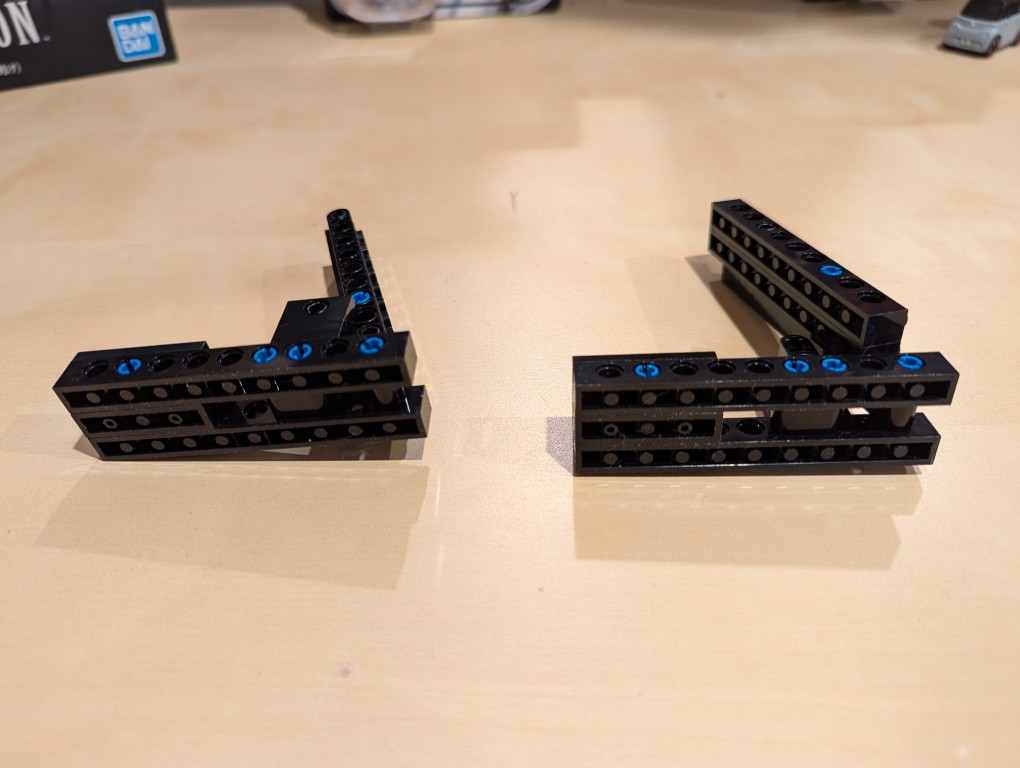
I beefed up the friction connection between the stands and the canvas by using two 1×10 Technic bricks that attach to the canvas.
From the blue color, you can see that I used a number of 3 brick width pins.
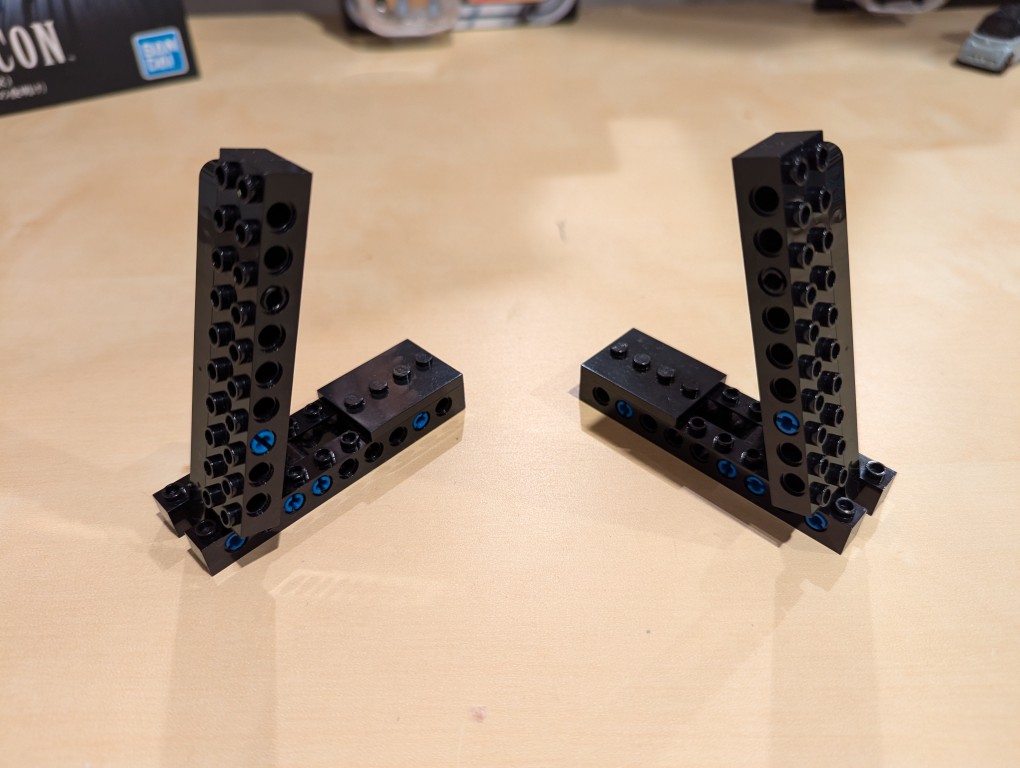
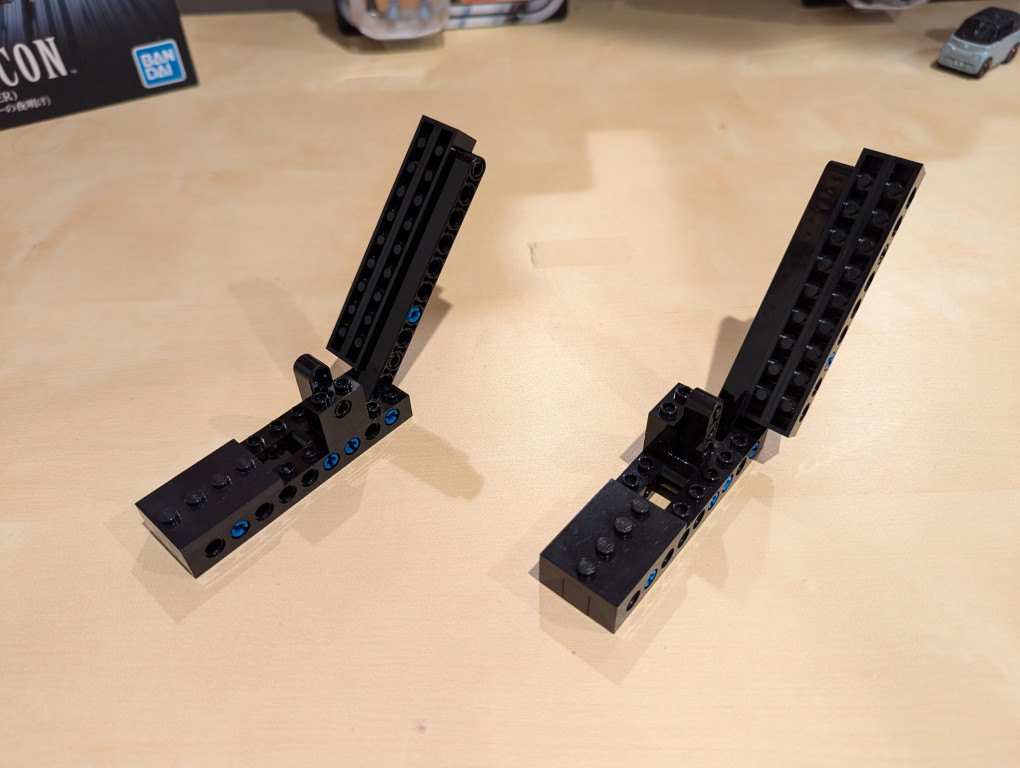
These photos show the stands in more detail detached from the canvas.
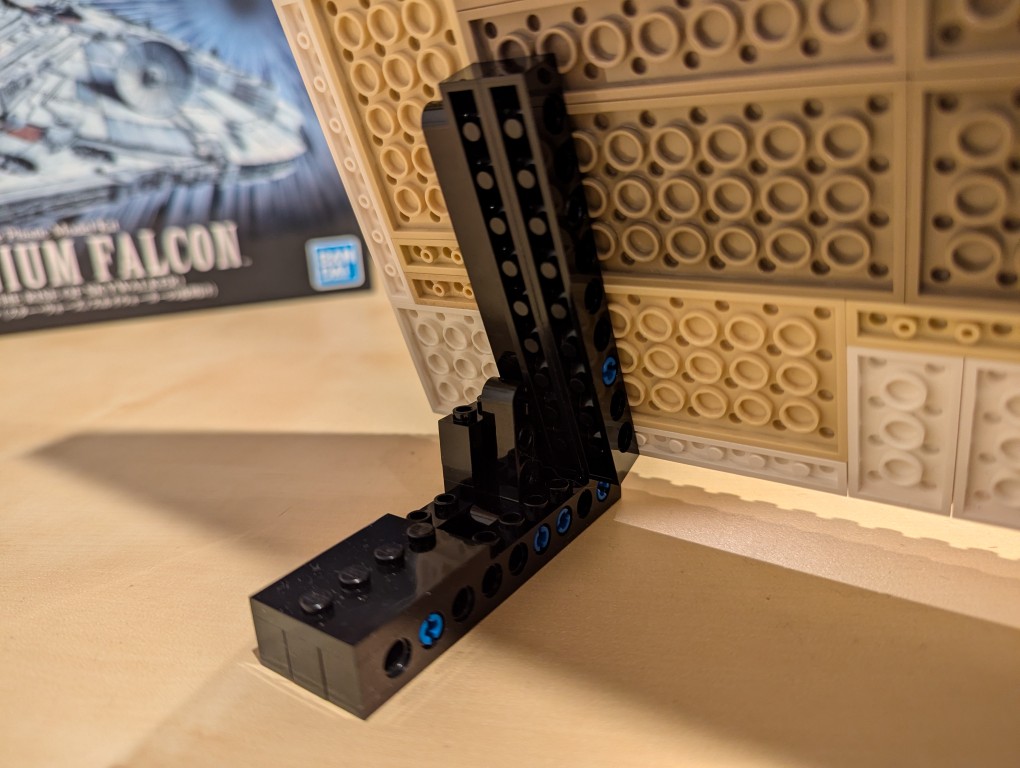
Note that the angle is achieved by having the long arm simply rest against a smaller L-shaped Technic support arm. Gravity holds things in place.
I added extra Technic bricks to the stand’s bottom support legs for extra strength.
Assembling Mondrian’s Tableau I (1921)
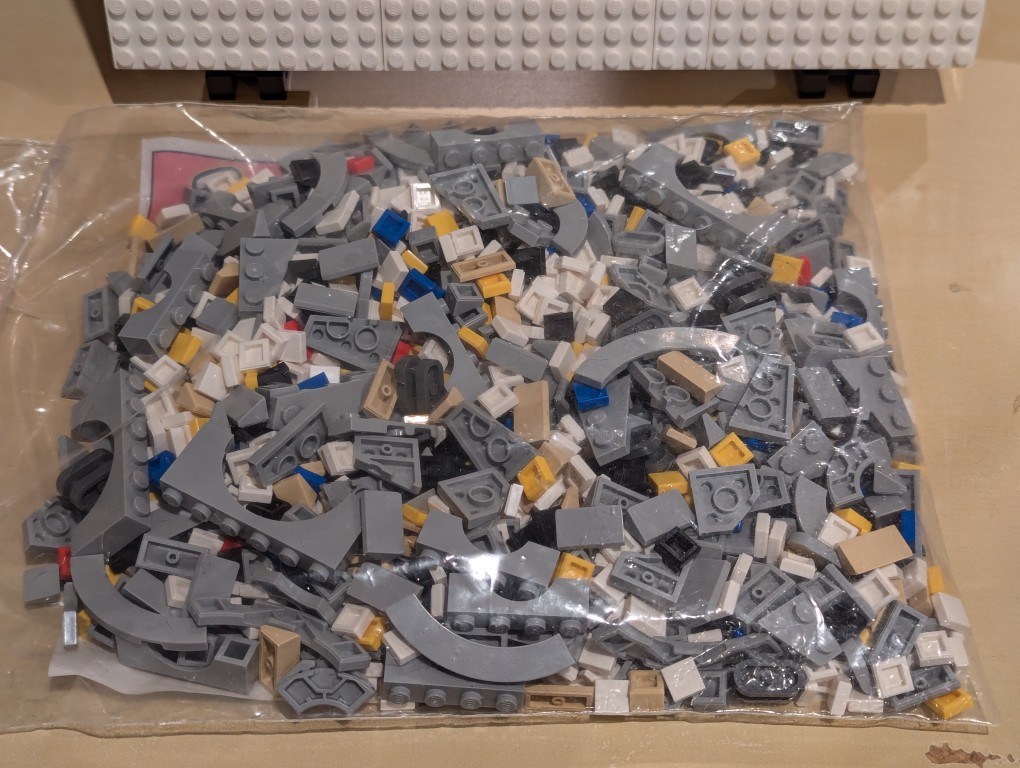
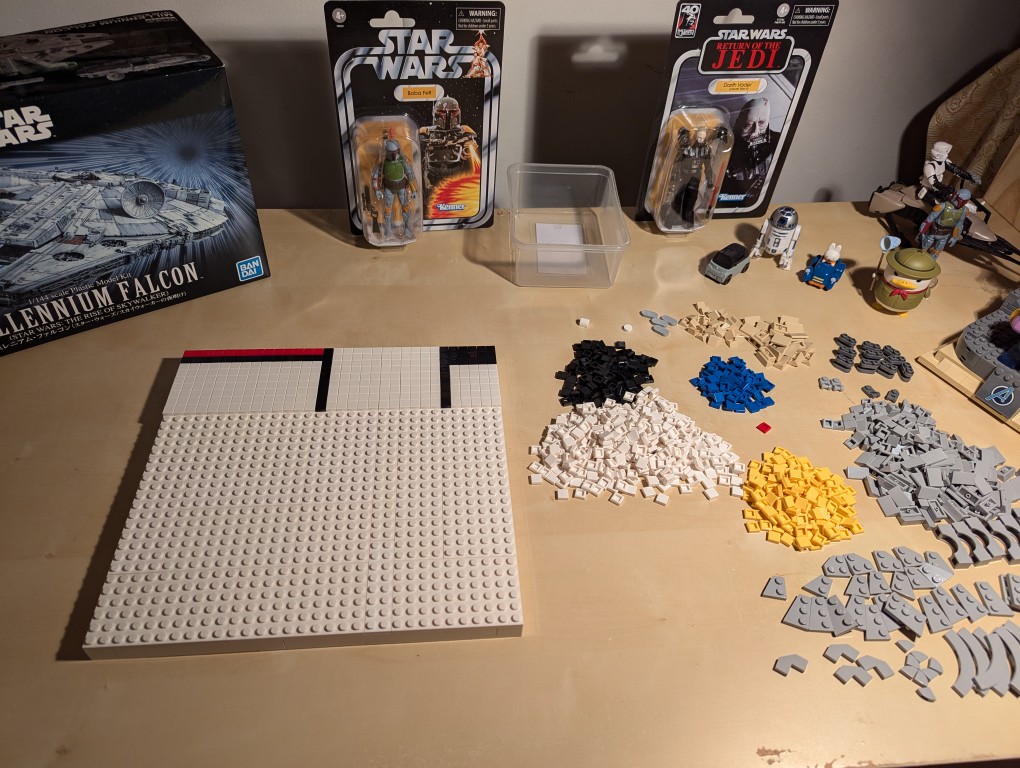
After placing my LEGO Pick-a-Brick order for the “painting” 1×1 flat tiles, it took about a week-and-a-half to arrive.
I ordered bricks for a custom Millennium Falcon that I am currently also working on, so I needed to sort everything out.
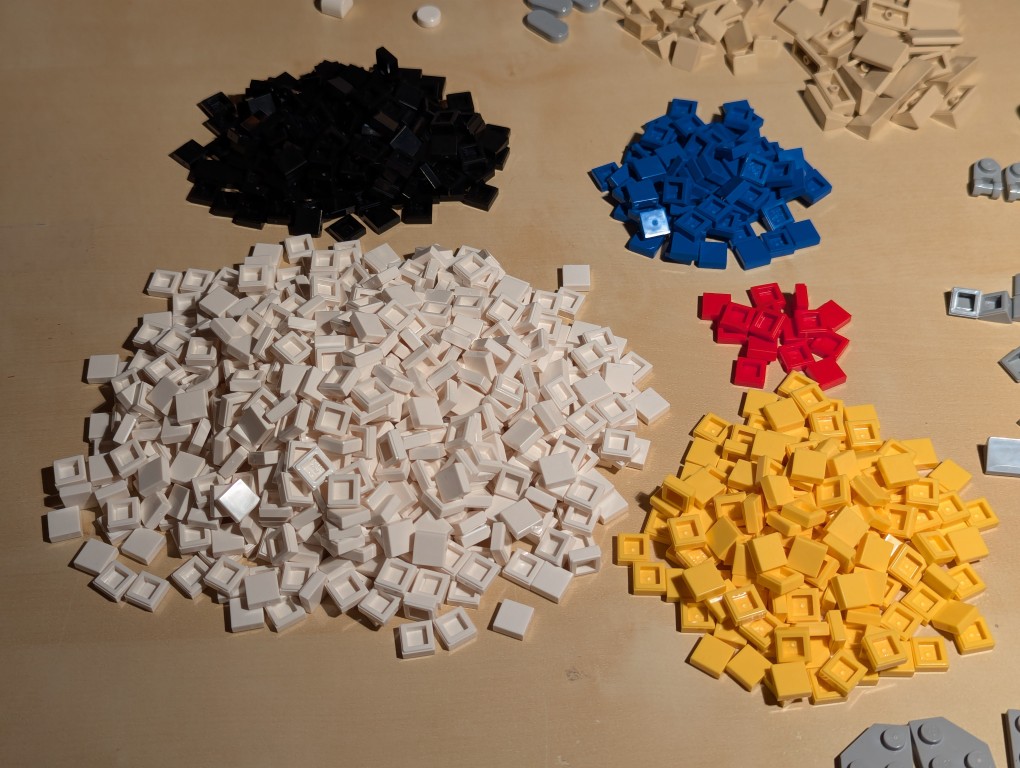
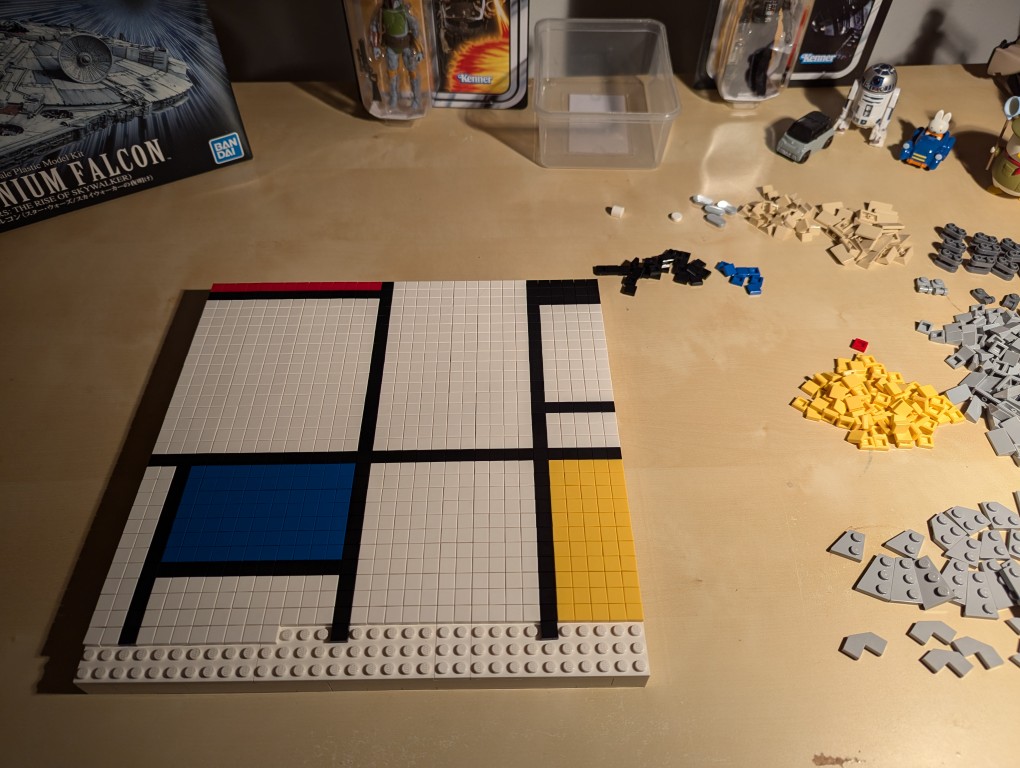
Here I am sorting the LEGO bricks.
With the bricks sorted, I began to paint my recreation of Mondrian’s Tableau I (1921).
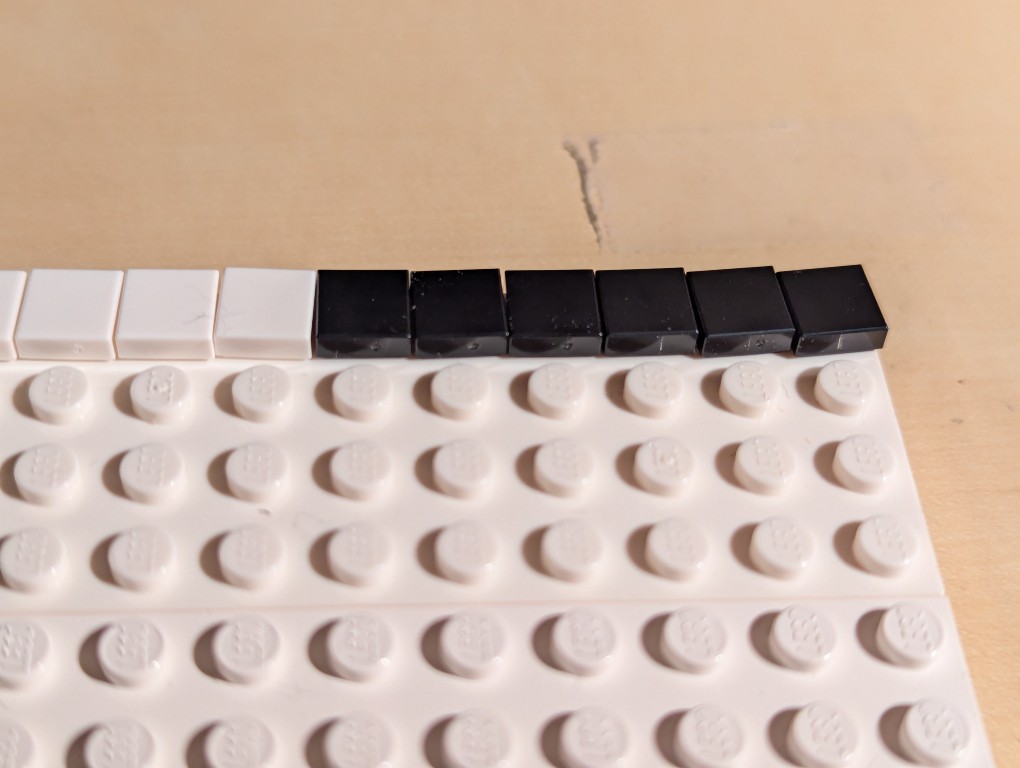
I began at the top horizontal line and created one line at a time–kind of like a CRT drawing a line of pixels across the screen one-at-a-time.
The problem with LEGO flat tiles is that they are difficult to align just by placing them on a stud.
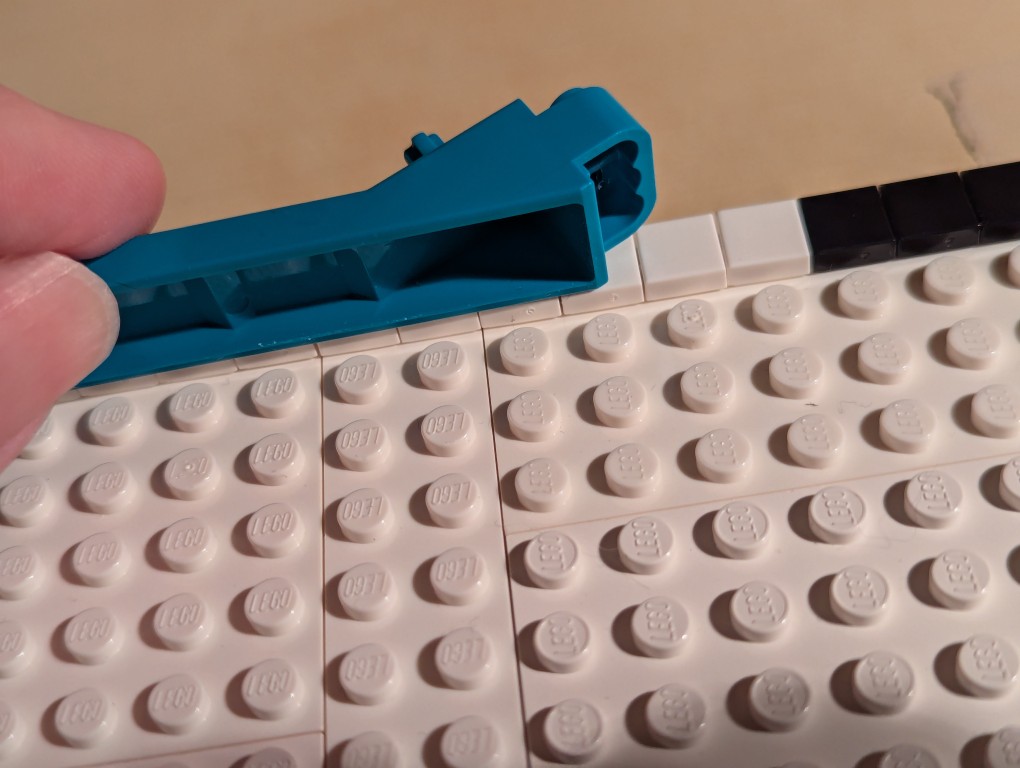
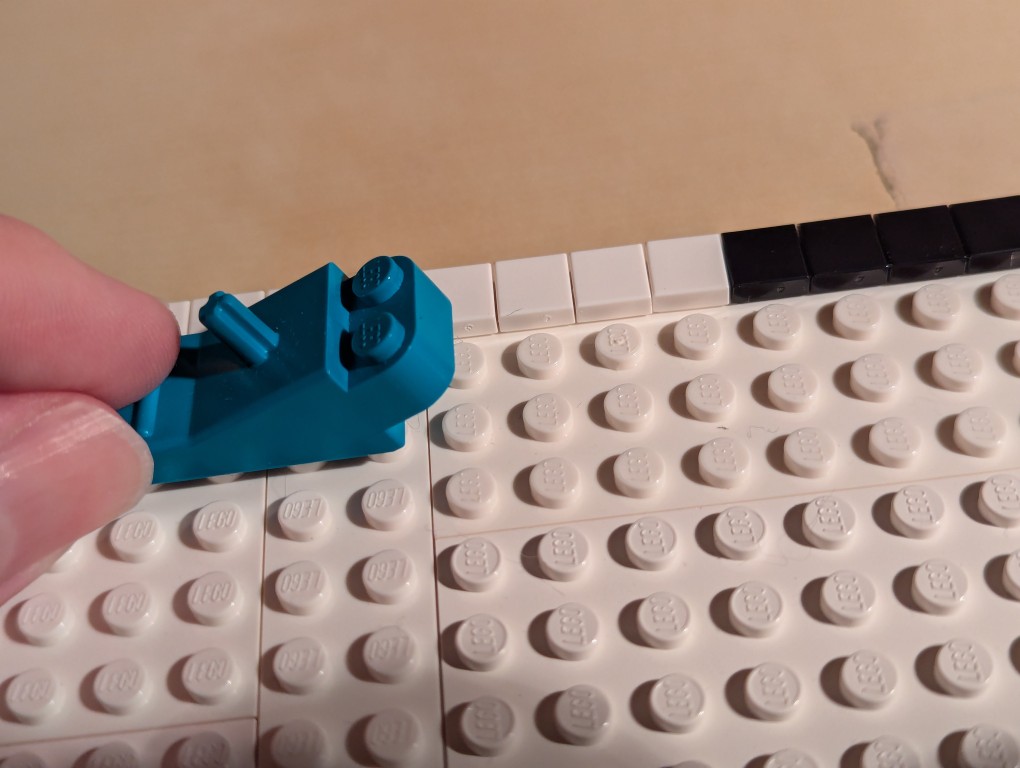
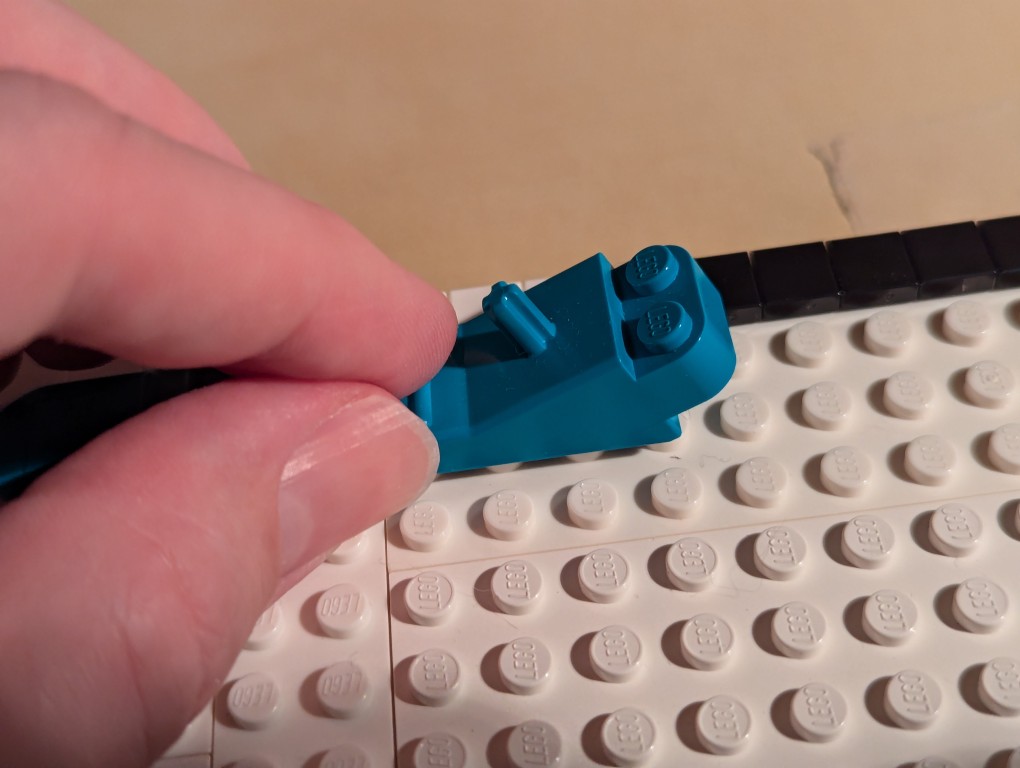
To align each line of flat tiles, you can take a brick separator, place it edge-wise along the flat tiles, and pull it back-and-forth lightly–hard enough to press against the flat tiles’ edges but not so hard as to keep it from moving above the adjacent studs as in the picture above.
As you can see, the flat tiles are now aligned better. I did this trick for each line of flat tiles as I worked down the canvas.
Nearing the end of the build, I discovered that I didn’t have enough flat tiles in white and black. I recounted and recalculated. My count was correct, but LEGO short changed me about 70 elements from my order and gave me 70 extra yellow tile that I didn’t order. I called their customer service the next day and asked that they correct the order. I received the missing parts after another week-and-a-half. I continued “painting.”
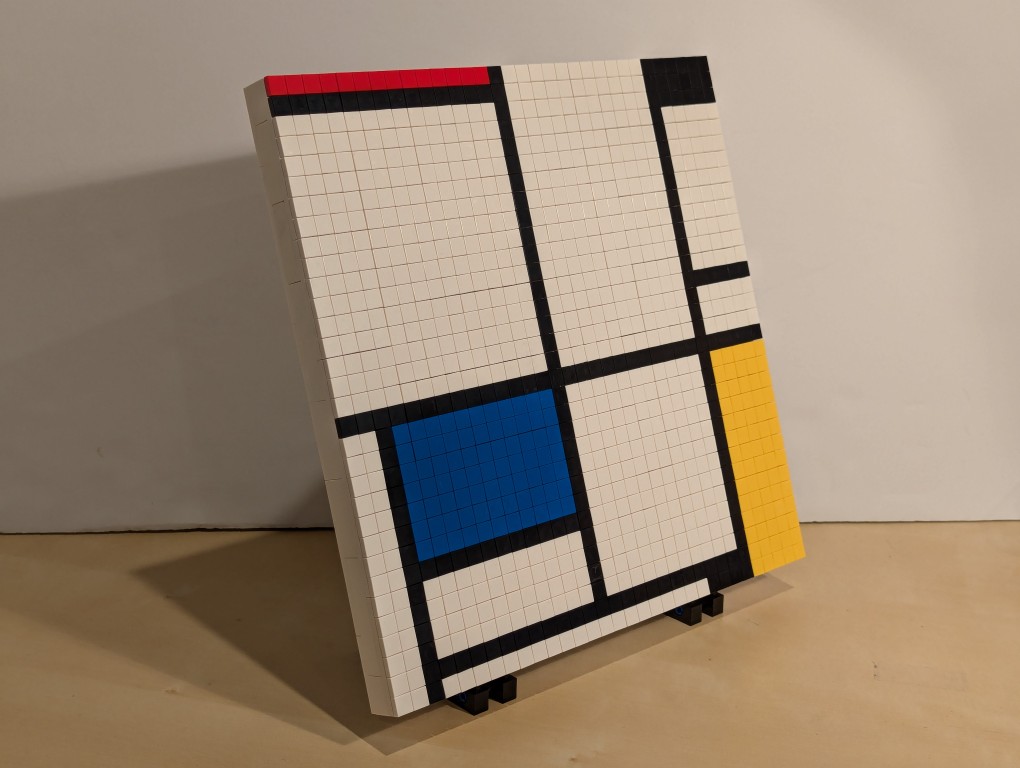
After several weeks, I had completed my copy of Mondrian’s Tableau I (1921) using LEGO!
The side view reveals hints of the “paint” of the lines of 1×1 flat tiles.
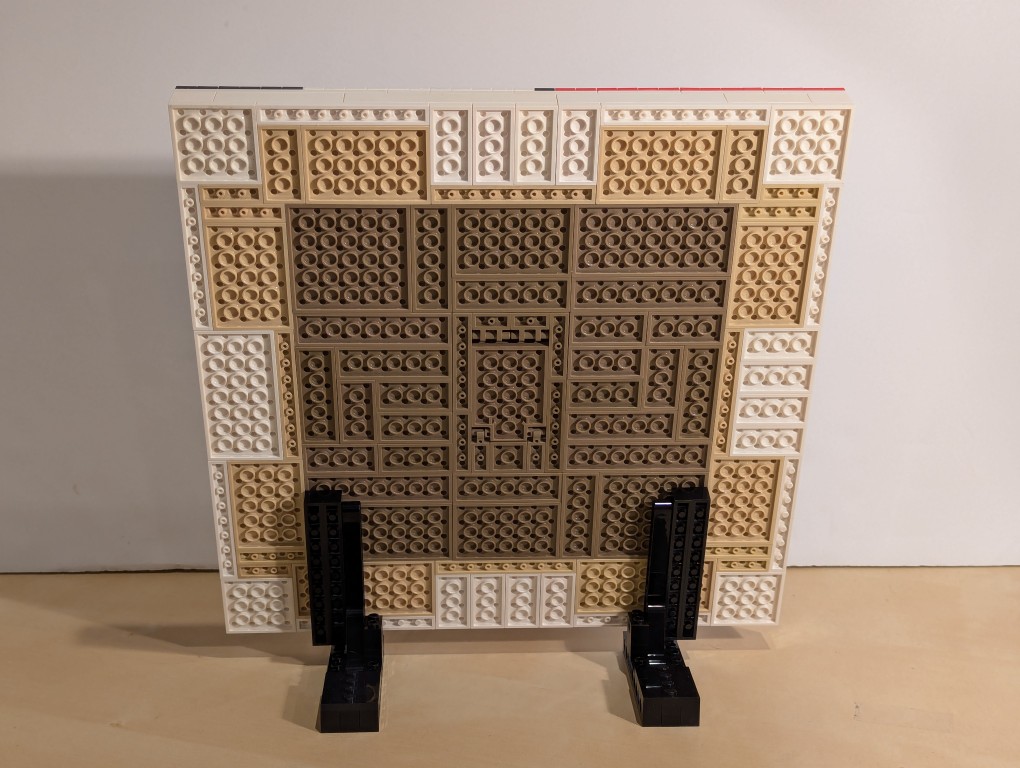
The back of the canvas mounted on the display stands has its hidden compartment in the back center of the canvas.
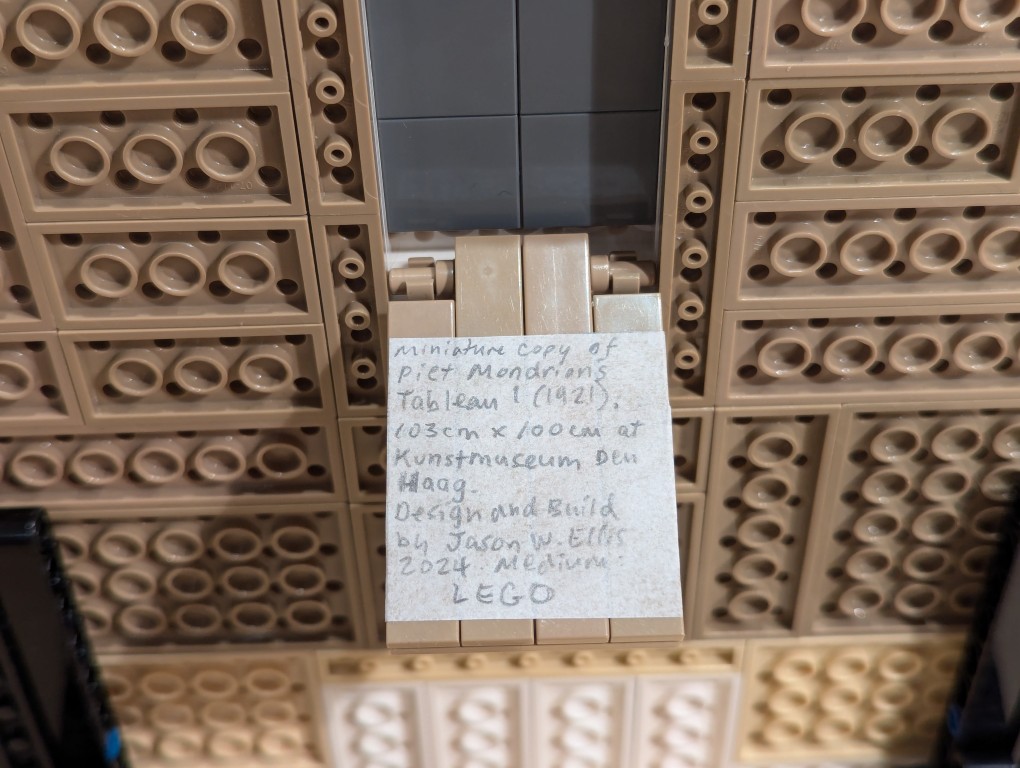
For the hidden artist statement, I cut out a 4×4 square and wrote in pencil, “Miniature copy of Piet Mondrian’s Tableau I (1921), 103cm x 100cm at Kunstmueum Den Haag. Design and Build by Jason W. Ellis 2024. Medium: LEGO.” I pasted it on the flat tiles inside the lid of the hidden compartment.
Yesterday, Y and I took the subway to Manhattan to watch the film Alien: Romulus on the IMAX screen at the AMC 14 on 34th Street.
I thought that Alien: Romulus was an interesting story that threaded the needle of connecting the origin film Alien (1979) via the first Xenomorph we saw and the android Ash (Ian Holm) to Prometheus (2012) and Alien: Covenant (2017) via the black liquid (hints of the black oil from The X-Files) and the Engineers. The retrocomputers, ASCII text, and a computer with a 3.5″ floppy disk drive made it feel like the same world as Alien. I felt that some of the lines were corny, over-the-top, and unnecessary fan service, but overall, it was an interesting and sometimes exciting addition to the series.
Unrelated to the film per se, I have some thoughts instead about the technologies of presentation and communal engagement with the film.
First, movies shown in theaters, especially IMAX films, are shown with the volume far too loud. Y and I last went to an IMAX film over 10 years ago, but the memory of how that experience hurt both of our ears, we planned ahead and brought foam ear plugs. Even with our ear plugs, which work wonders at eliminating noise in other settings, were just barely up to the task of keeping the volume of the film presentation at tolerable levels. Let me put that another way: While wearing ear plugs, I was able to hear the film’s dialog and sound effects and music just fine and sometimes a little not fine when it got so loud as to overpower the ear plugs. That’s too damn loud. It was only after we were leaving that Y thought we should have checked the decibel levels. Hindsight is 20-20.
Second, I know to some I might sound like an old man yelling at kids to get off my lawn, but for those who have known me a long time, they know that I’ve been deadly serious about this since going to see films when I was a kid. That is we owe other theater goers our respect so that everyone can enjoy the film. Carrying on, talking, or using a phone during a movie can disturb others, so we shouldn’t do those things. Unfortunately, some of the other customers, who would have paid the same $30 per ticket we paid, don’t care for social norms and simple decency. It would be one thing if these were kids who didn’t know any better, but these were adults who acted like kids. Hell is other people, I suppose.
Considering these things, I prefer to stay at home to enjoy a film without ear plugs or annoying guests. Of course, I am assuming the neighbors don’t act the fool, which I’ve tried my best to address following these tips.
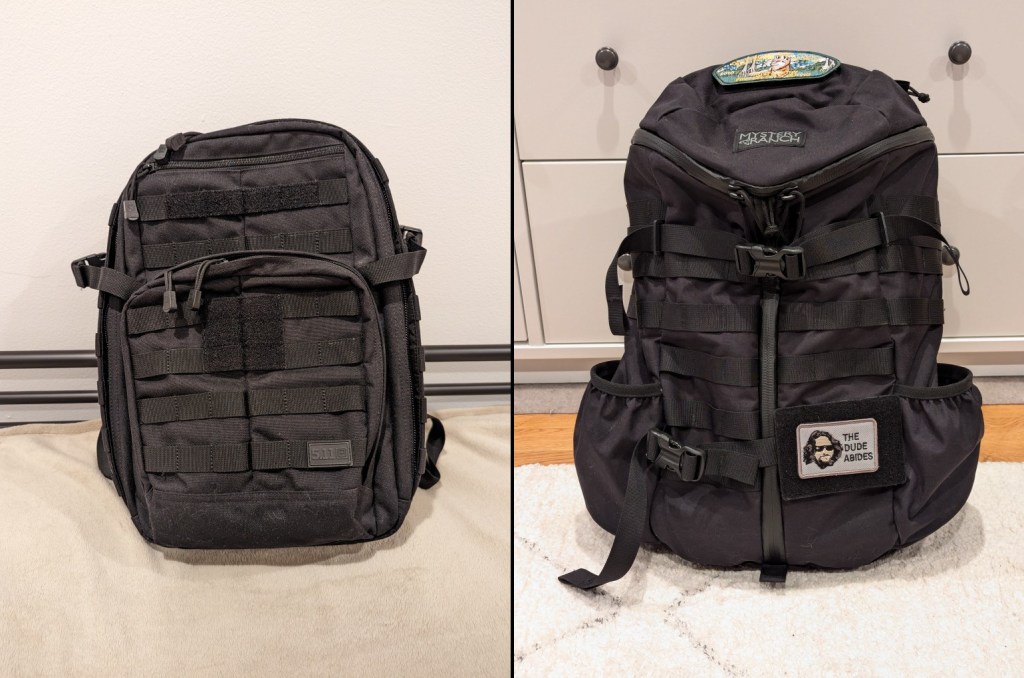
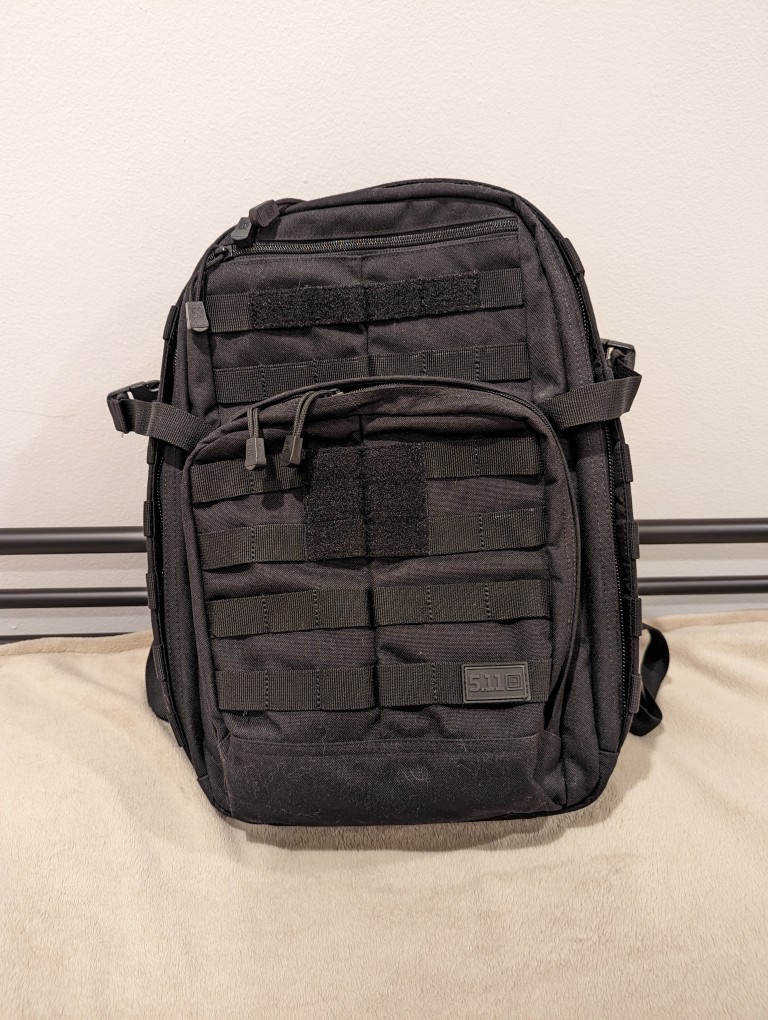
When I upgraded to a 16″ Lenovo ThinkPad P1 Gen 4 workstation-class laptop earlier this year, I soon learned that it was too large to fit safely in my 24-liter 5.11 Rush 12 2.0 backpack. While my old 12″ ThinkPad X230 easily fit into the up-to-15″ laptop capable compartment of the 5.11 Rush 12 2.0, the newer ThinkPad P1 Gen 4 dangerously pressed against its corners. Also, I trouble wearing the 5.11 Rush 12 2.0 with a a padded waist belt while carrying a heavy load–I couldn’t get the bag to ride securely against my back when doing that. Nevertheless, the 5.11 Rush 12 2.0 is virtually bulletproof and a very well made backpack. Unfortunately, it just didn’t meet my changing needs.
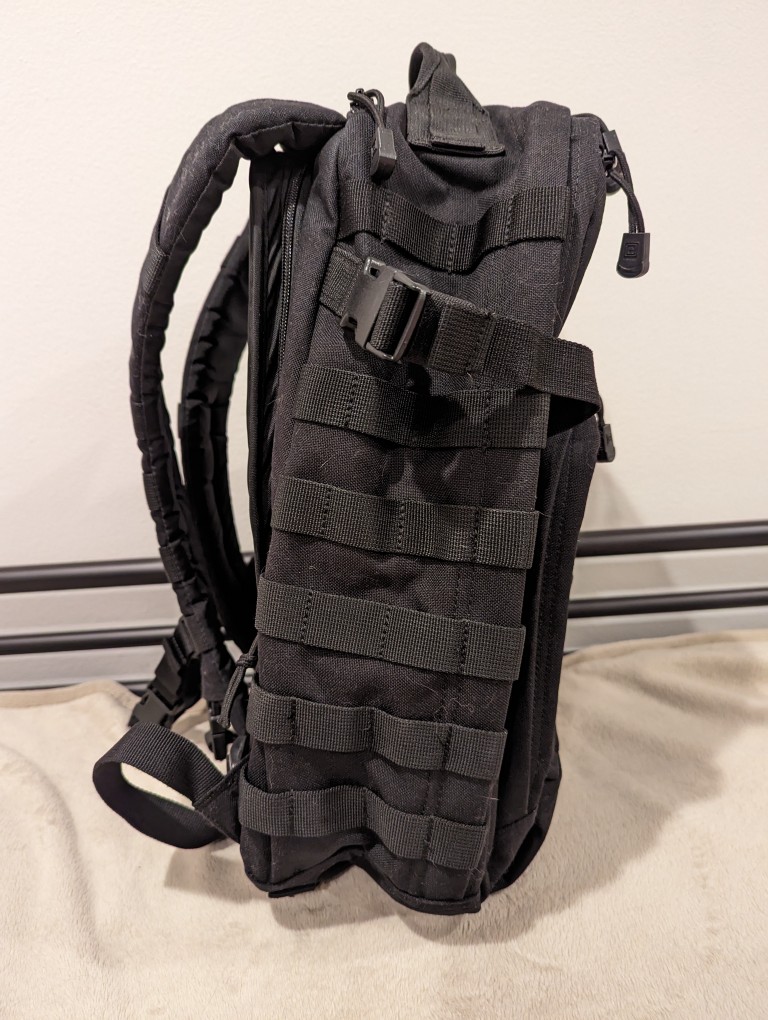
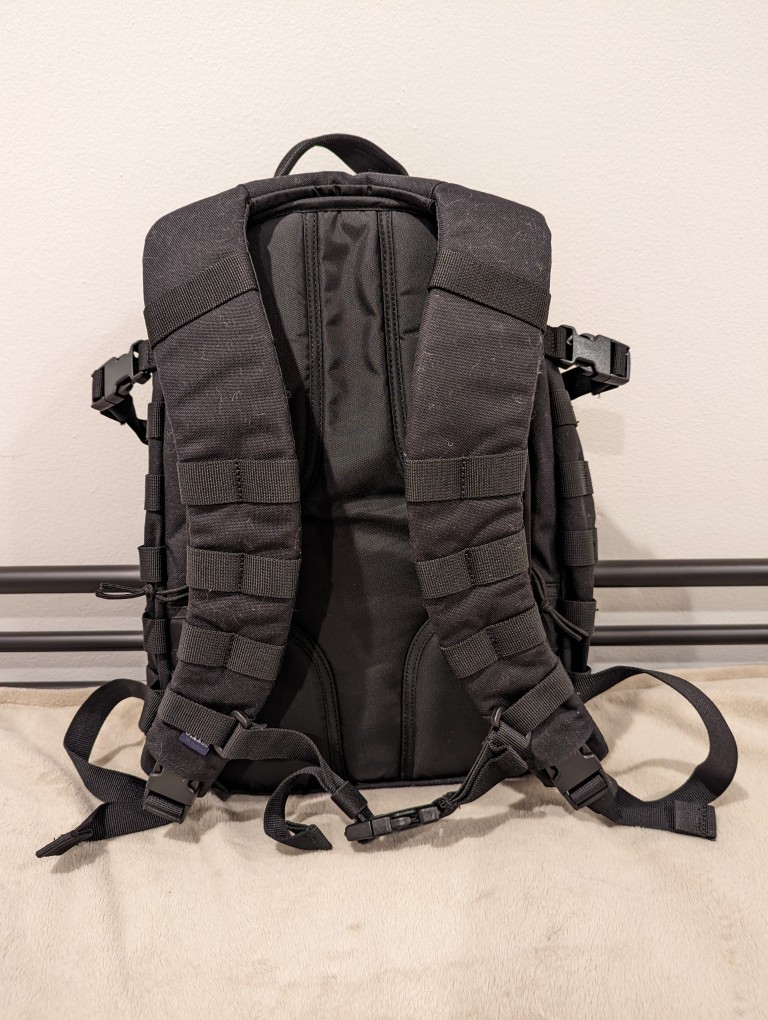
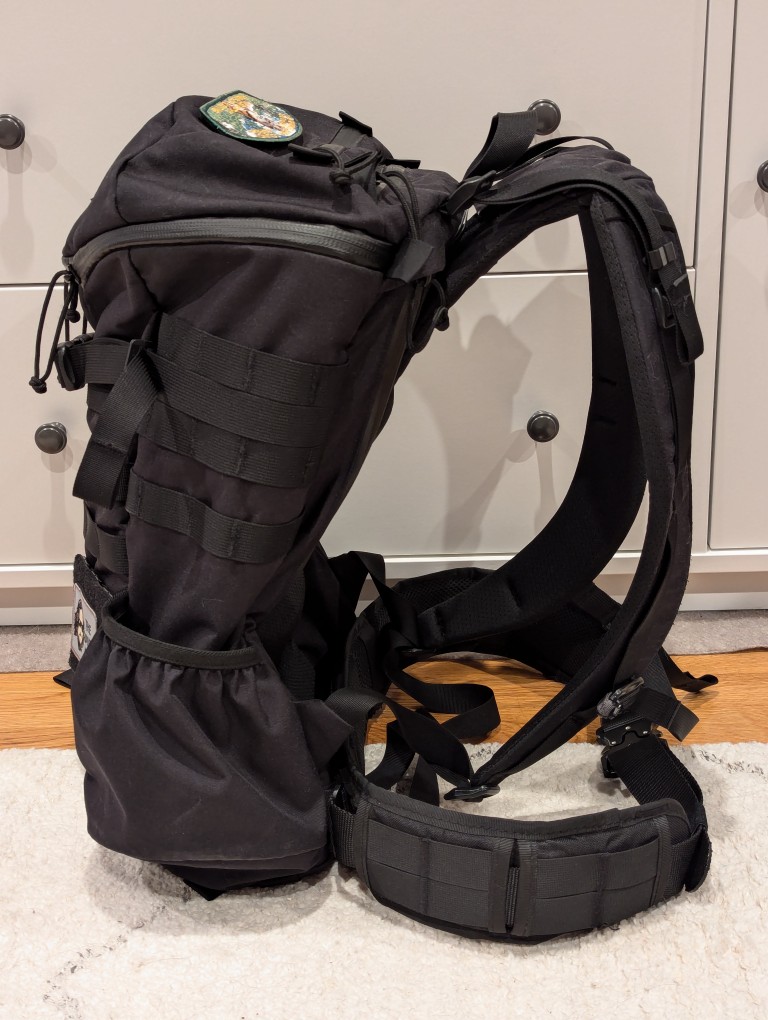
Looking for a larger backpack with MOLLE, waist belt attachment points, and a tough build like the 5.11 Rush 12 2.0 was easy–there’s a number of great alternate bags that fit those needs. However, finding one that also has a laptop sleeve capable of safely holding a 16″ laptop more challenging, because most manufacturers only support up to 15″ laptops. Thankfully, the Mystery Ranch 2 Day Assault L/XL backpack fit my needs quite well.
Like the 5.11 Rush 12 2.0, the Mystery Ranch 2 Day Assault L/XL backpack is built tough.
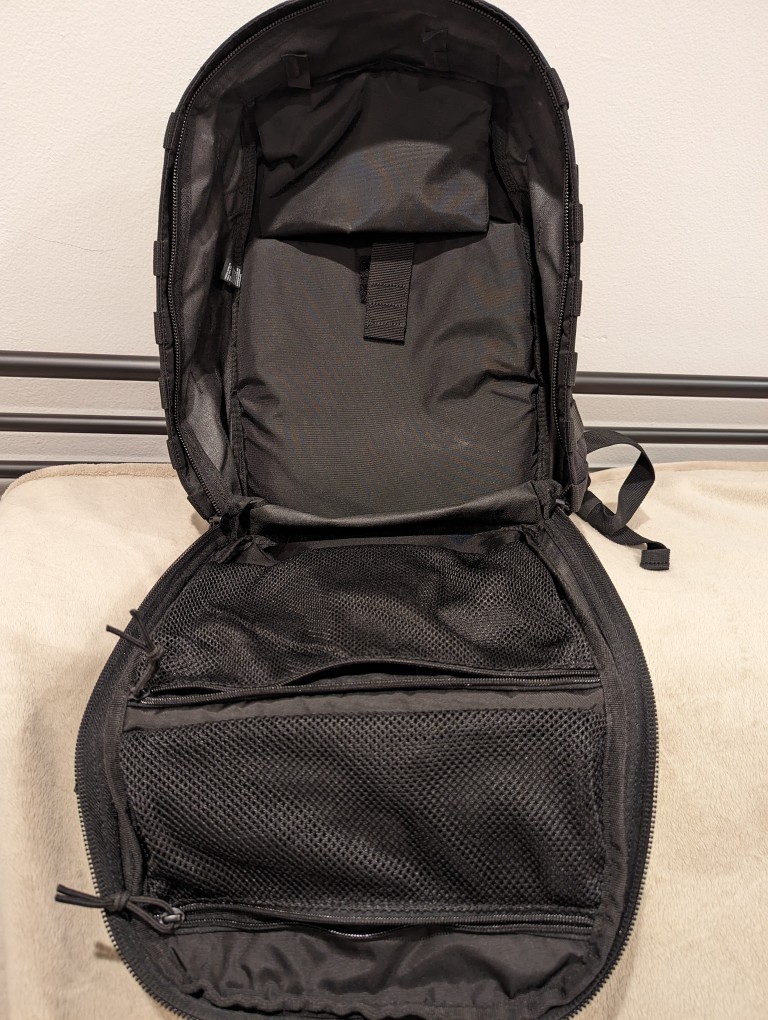
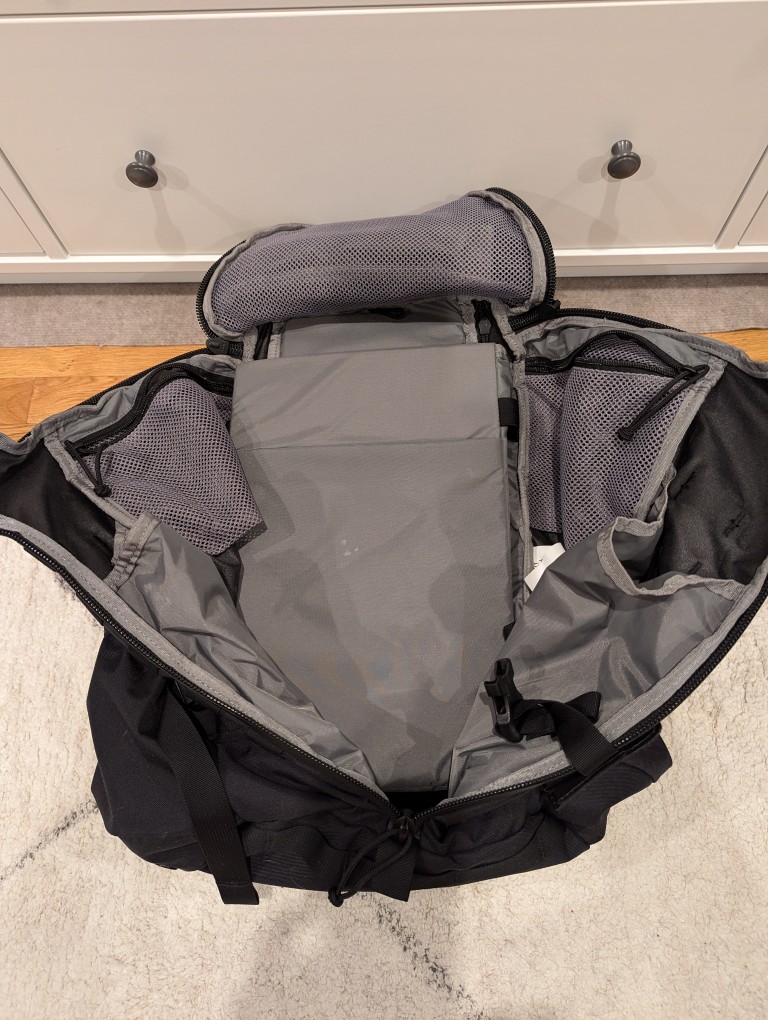
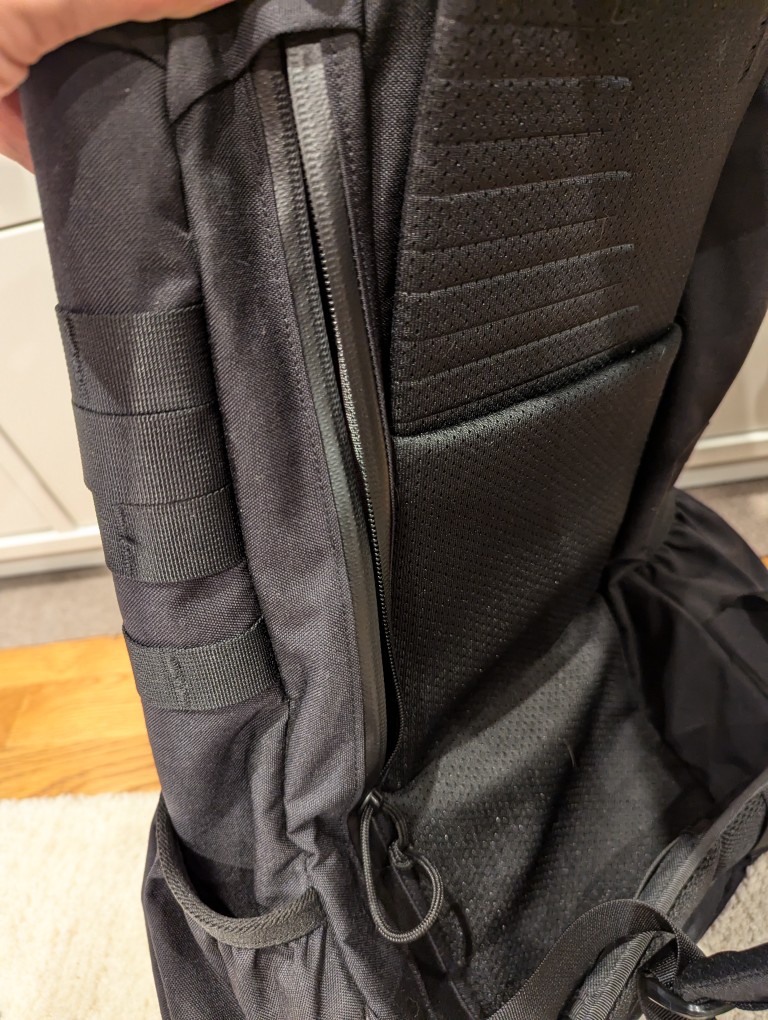
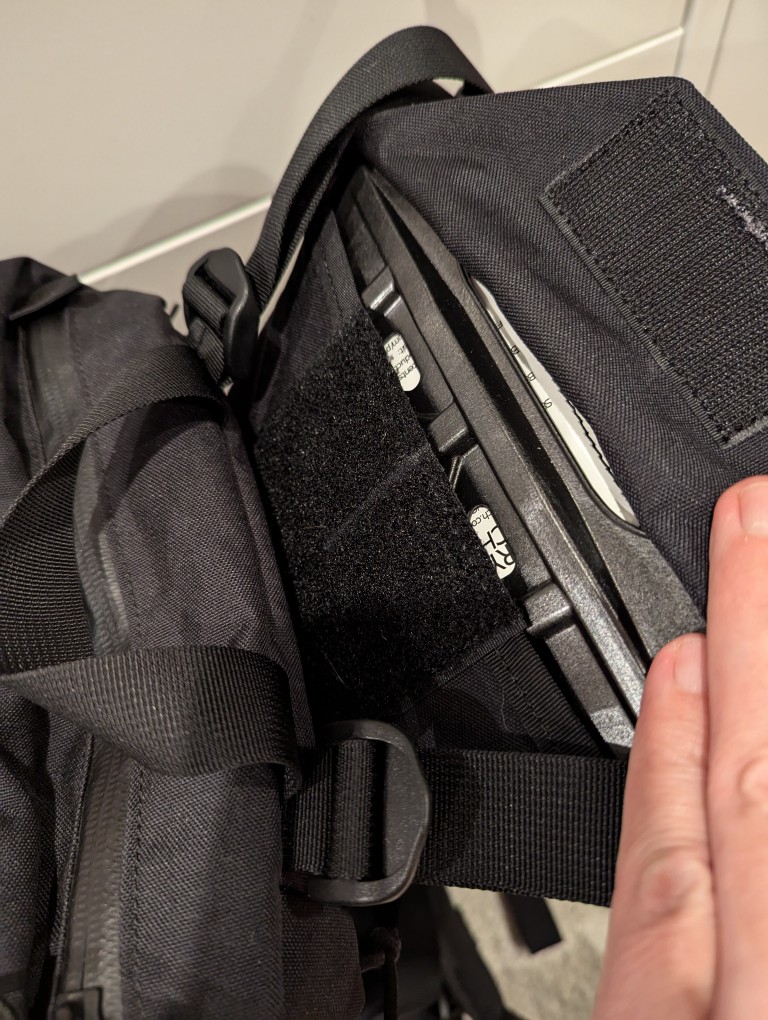
Meeting my new requirements in a backpack, it has a larger volume (24 liters vs. 29.7 liters), and its built-in laptop sleeve can accommodate a 16″ laptop (my ThinkPad P1 Gen 4 measures 10″ deep x 14 1/8″ wide x 15/16″ tall). However, I have to load and unload the ThinkPad through the main pocket as it is too wide and deep to easily maneuver through the zippered laptop side-loading pocket).
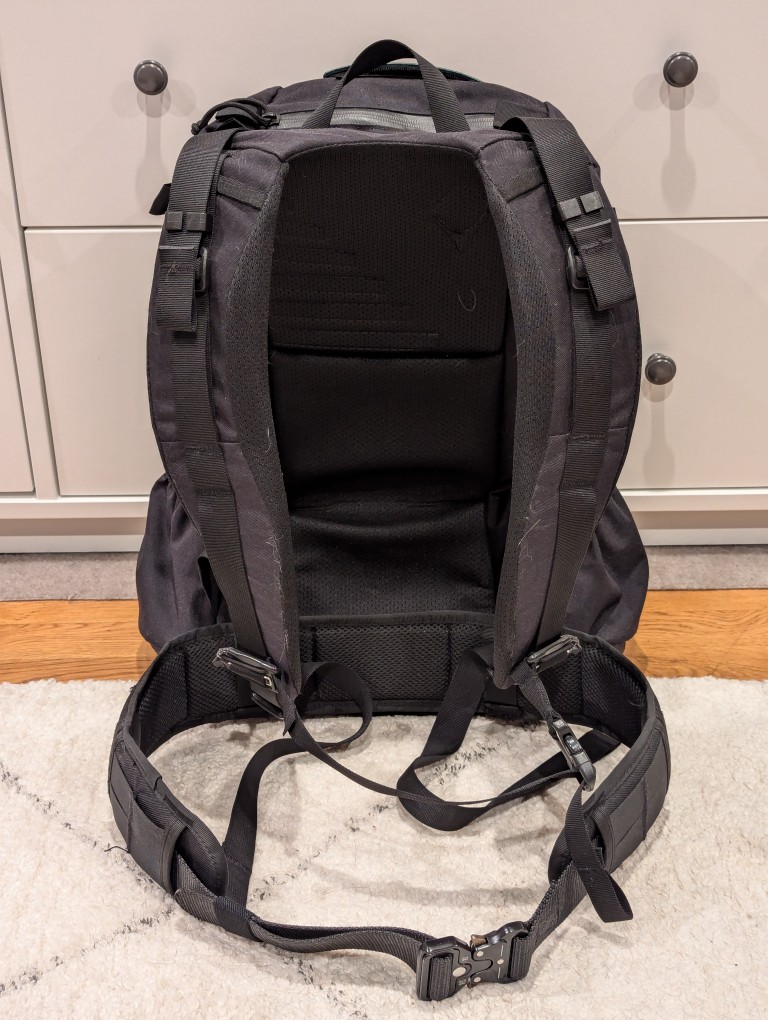
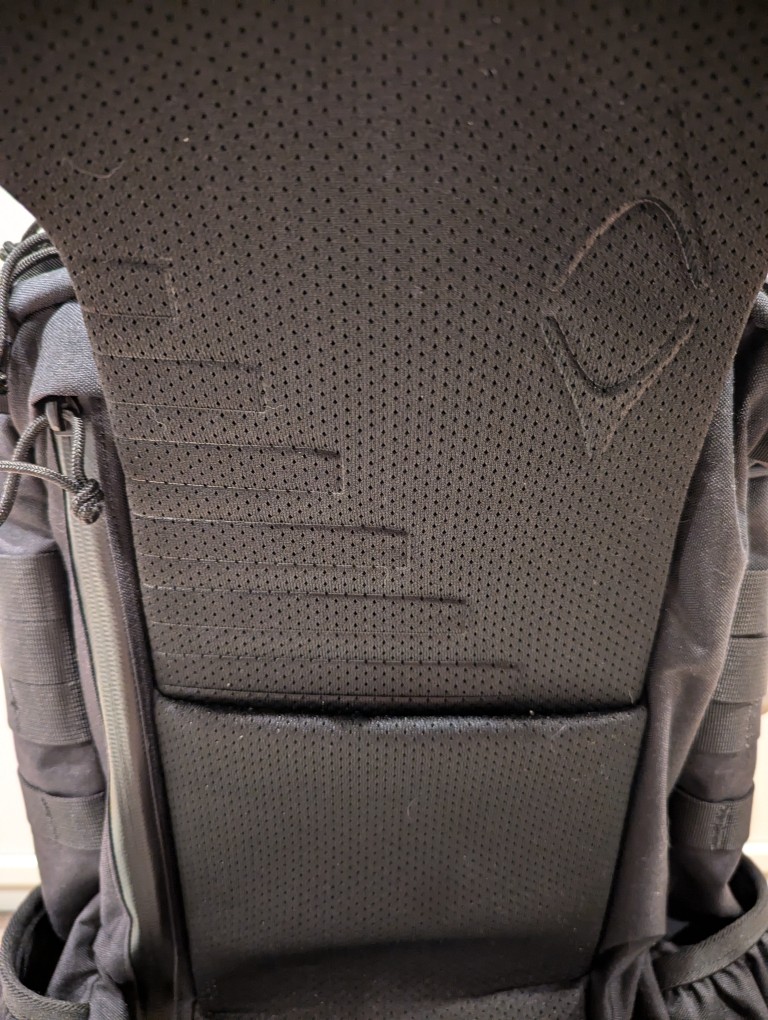
To help with load carrying, it has an innovative lengthening system that helps the pack ride close against your body. To adjust this system, remove the plastic frame shown in the gallery above, shove it into the velcro area behind the straps to release the hook and loop material holding the straps and pack together, pull up to lengthen, put the frame back in its place, press the pack flat to ensure the hook and loop are reattached, and adjust the straps as needed to have the straps rest tightly against your torso and shoulders and the bottom of the pack against your waist.
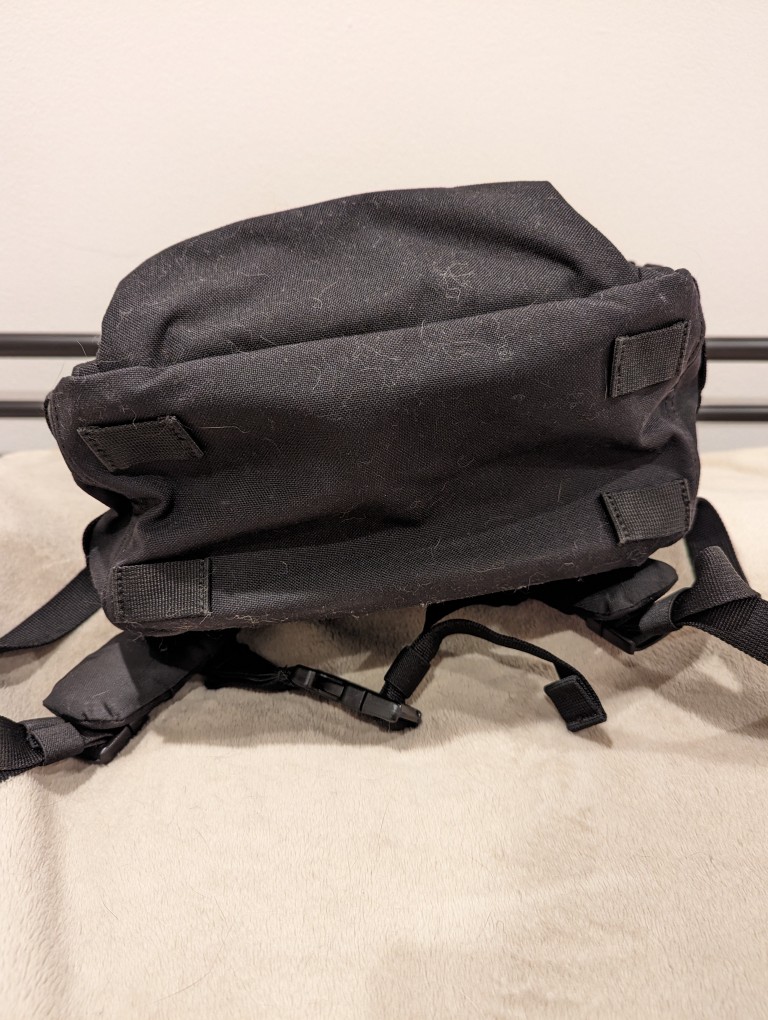
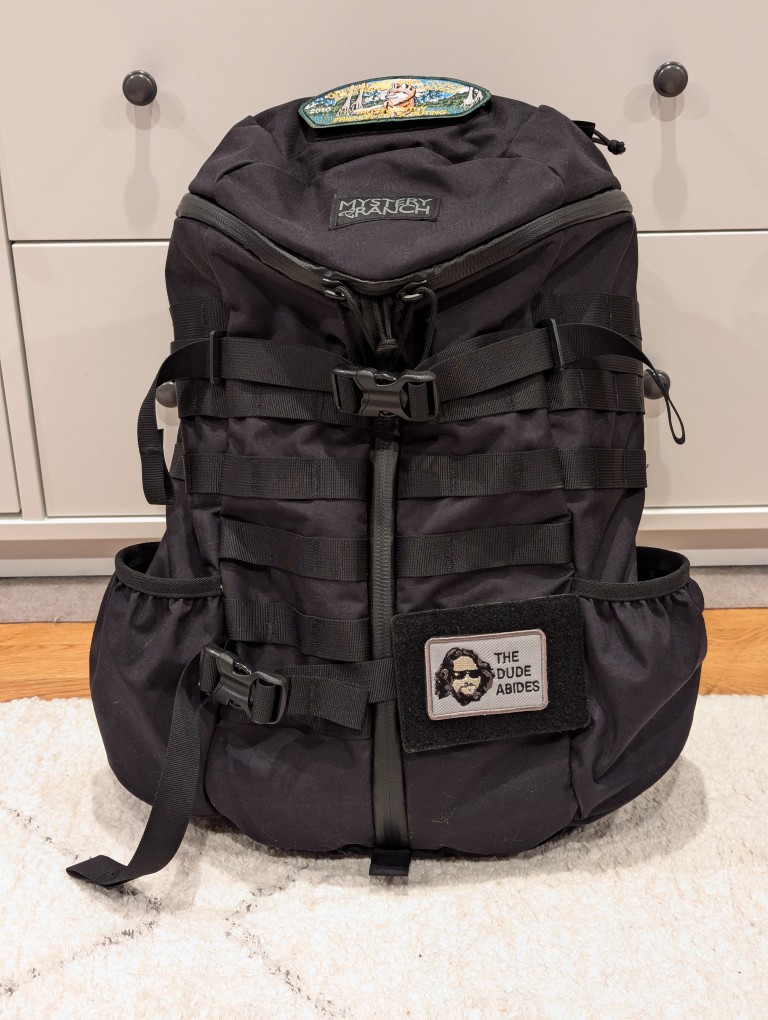
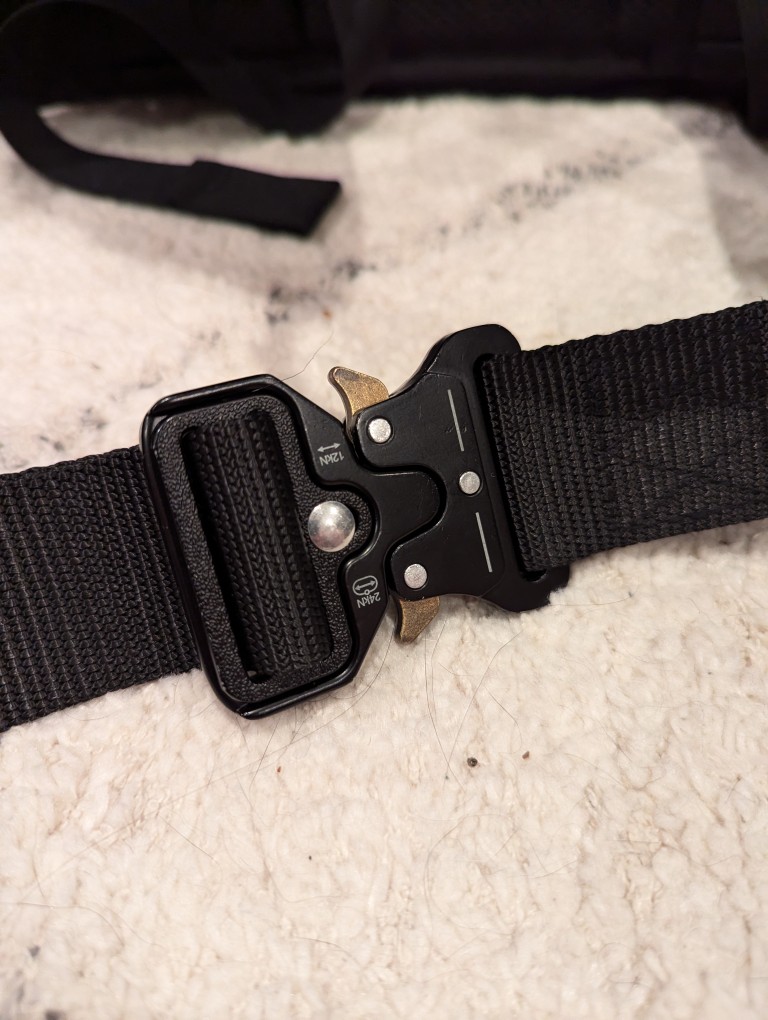
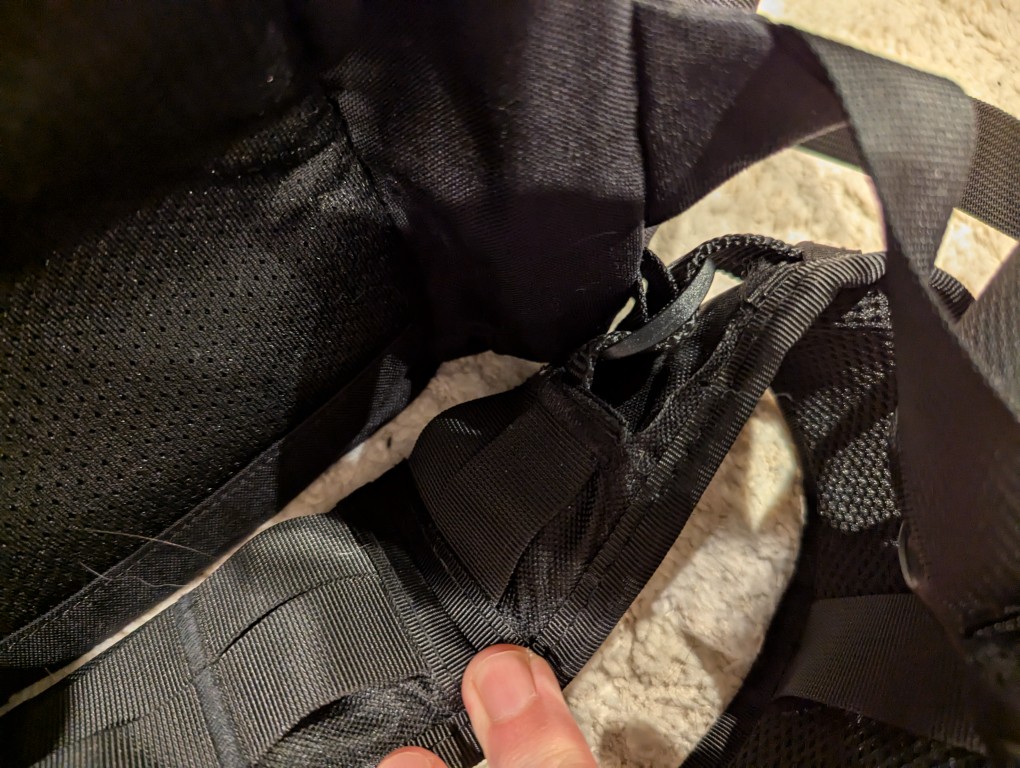
This adjustment system works well with the aftermarket padded waist belt that I originally used with the 5.11 Rush, but moved over to the Mystery Ranch 2 Day Assault pack. The Mystery Ranch bag included a two-piece simple nylon belt with plastic buckle. Its intention is to help hold the back against your body but not help with load carrying. I removed it and modified a Condor Battle Belt (it has a padded outer belt with MOLLE and an inner 1 1/2″ nylon belt with aluminum quick-release buckle). I cut off the D-ring equipment carriers and cut expanded holes in the outer padded belt to allow the inner 1 1/2″ belt to thread through the belt attachments on the Mystery Ranch pack. I added extra stitching to the outer padded belt and melted the nylon to prevent unraveling from these modifications.
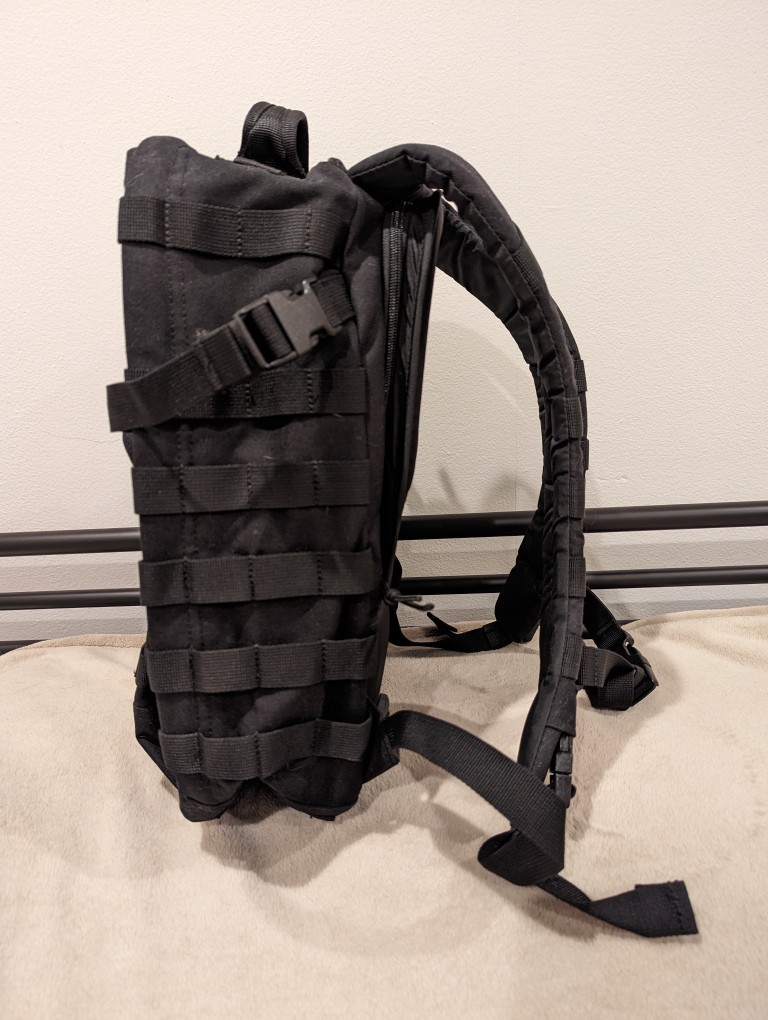
The strangest thing about Mystery Ranch bags is the three-zipper main pocket opening. It is difficult to open and close these one-handed. However, the zippers are top-quality and waterproof. And, with the main pocket fully open, it can ingest a tremendous amount of gear, but it will likely require the bag to be fully opened to extract that gear if it is larger (e.g., a boxed 12 pack of aluminum cans).
Another modification that I made to the bag was to plug its main pocket drain holes with closed hole rubber grommets (I don’t want anything crawling in and setting up shop) and added some strap clips to keep the shoulder adjustment straps from flying all over the place while putting on the pack or walking with it.
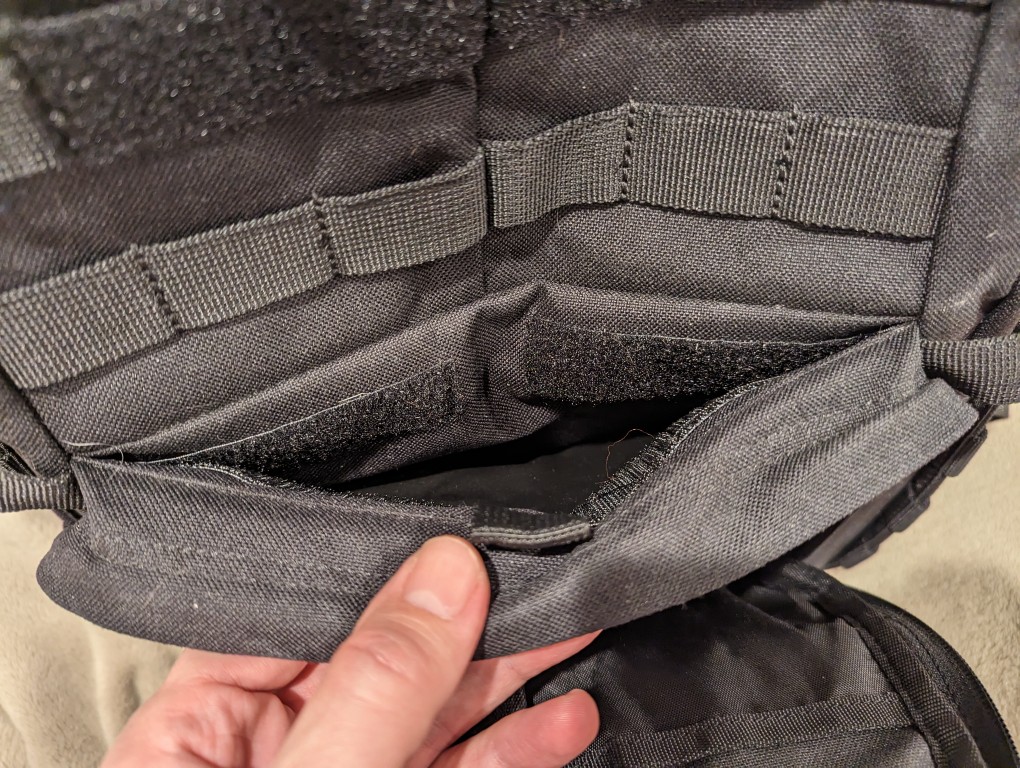
Its two side mounted stuff pouches easily hold water bottles, thermoses, and short collapsible umbrellas. During the summer, I keep a pack of menthol cooling sheets and an electric fan in one so that I can reach back to grab them without having to take off the pack.
When I traveled to see my parents a few months ago, I added some MOLLE pouches to the exterior mounts (first aid, toiletries, cables, chargers, multitool, and snacks), but I took them off to reduce the pack’s weight when I am in the city where I walk further distances with it and would prefer the weight go towards what I am carrying instead of how I’m carrying those things.
The Mystery Ranch 2 Day Assault pack is holding up and meeting my expectations. With the new academic year about to begin, I’ll see how it holds up trekking to and from campus.
Several streets in Carroll Gardens are bisected where the F and G subway lines escape their underground confinement and rise into the air for a short stretch between there and Park Slope. This is the end of one of those streets where the dead end sign hangs on the chain link fence above a brick wall. The roof of a subway train is tearing by from left to right at the bottom of the frame.