Issue 17 of New American Notes Online (NANO) on “The Interview” was recently published.
My interview with Emily Hockaday, senior managing editor of Asimov’s Science Fiction Magazine, on Artificial Intelligence (AI), Generative AI, and science fiction publishing is a part of the issue.
Click through here to see the other interviewees and topics covered in this special issue.
Editor Sean Scanlan sent out this press release for the issue:
A new issue of NANO: New American Notes Online has been published
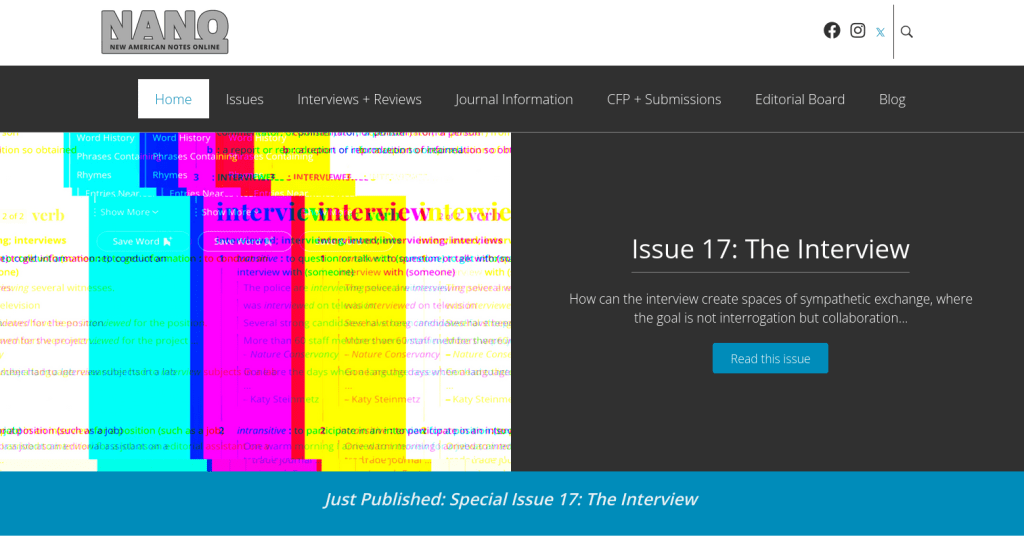
Special Issue 17: The Interview
Publication date: June 2025
ISSN: 2160-0104 (Online)
NANO is an indexed, Open Access, and Open Source humanities journal. NANO never charges to submit or to read content. NANO is published by City Tech, part of the City University of New York.
NANO announces its new issue, an exploration of the ways that interviews connect people.
The interview is woven into our hyper-connected world through podcasts, Zooms, magazines, newspapers, social media, and they still occur in private settings. Interviews are ubiquitous. They can be formal and informal, closed or open-ended; they can yield quantitative and qualitative results; they can invoke power and symbolic capital. But, the interview can also be less about gate-keeping and more about the tension inherent in knowledge production and sharing. The eight interviews in this special issue of NANO create spaces of exchange, where the goal is not interrogation but collaboration, curiosity, and mutual understanding.
Two interviews focus on teaching. A multimedia project by Shauna Chung, Naila Butt, Sandy Fougeres, and Khemraj Persaud describe ways that interviews fuse writing and workplace readiness while the scholar Laura Westengard reveals the communal spaces where gothic and queer reinforce each other.
Two interviews focus on visual art. Jennifer Lockard Connerley discusses ways that academia and spirituality enhance portraiture while Bill Saylor reveals how his environmental and natural abstractions arise.
Two interviews focus on translation. Dana Crăciun acknowledges the difficulty of translation while Johannes Göransson eyes translation’s inherent creativity.
Two interviews focus on creativity and theory. The writer and editor Emily Hockaday discusses the challenges of running a science fiction magazine in the age of AI while Marcus Boon reflects on his interdisciplinary practices.
Editor’s Introduction for NANO Special Issue 17: The Interview
by Sean Scanlan
How the Interview Can Become a College Writing Tool for Workplace Readiness
by Shauna Chung, Naila Butt, Sandy Fougeres, Khemraj Persaud
An Interview with Marcus Boon, Author of In Praise of Copying
by David Banash
An Interview with Jennifer Lockard Connerley: Portrait of the Artist as a Young Academic
by Tara Robbins Fee
An Interview with Emily Hockaday, Senior Managing Editor of Asimov’s Science Fiction Magazine
by Jason Ellis
An Interview with Dana Crăciun, the translator of Salman Rushdie’s works into Romanian
by Carmen Neamțu
An Interview with Laura Westengard, Author of Gothic Queer Culture
by Leigh Dara Gold
An Interview with Johannes Göransson
by Matt Miller
https://nanocrit.com/index.php/issues/issue17/An-Interview-with-Johannes-Goransson-by-Matt-Miller
An Interview with Bill Saylor
by Sean Scanlan
https://nanocrit.com/index.php/issues/issue17/An-Interview-with-Bill-Saylor-by-Sean-Scanlan