Tag: Backpack

  • GoRuck GR1 26L, an Outstanding Backpack for Travel and Work That Easily Carries a 16″ Laptop

    GoRuck GR1 26L

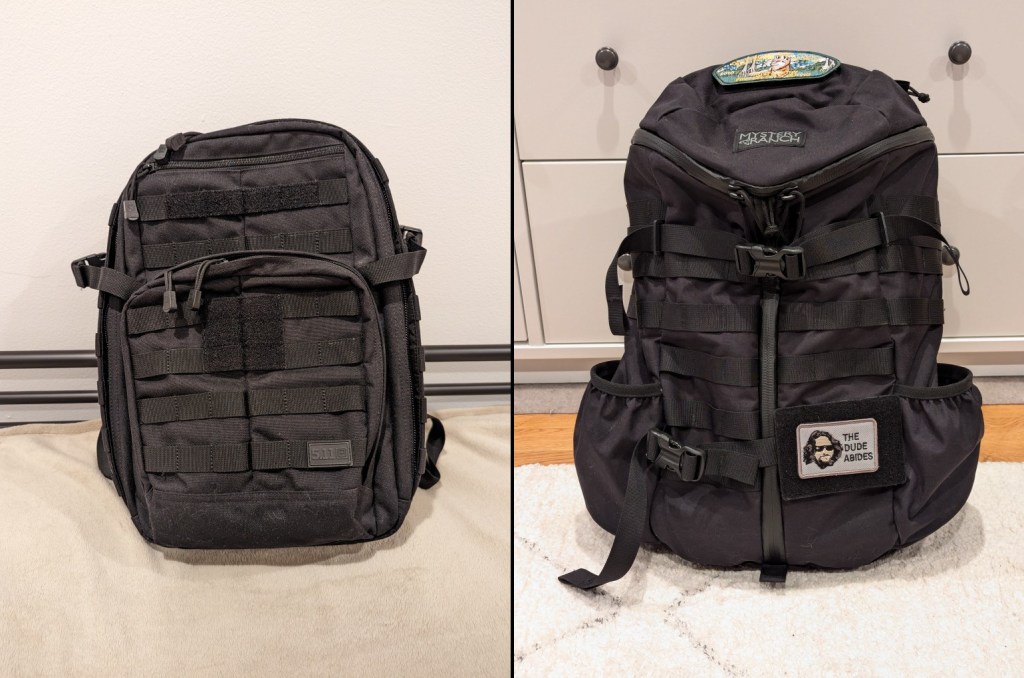
    As I’ve documented here, here, and here, I continue searching for the perfect backpack. While there may not be one backpack that checks all of my boxes, I think that the GoRuck GR1 (26L) checks the most.

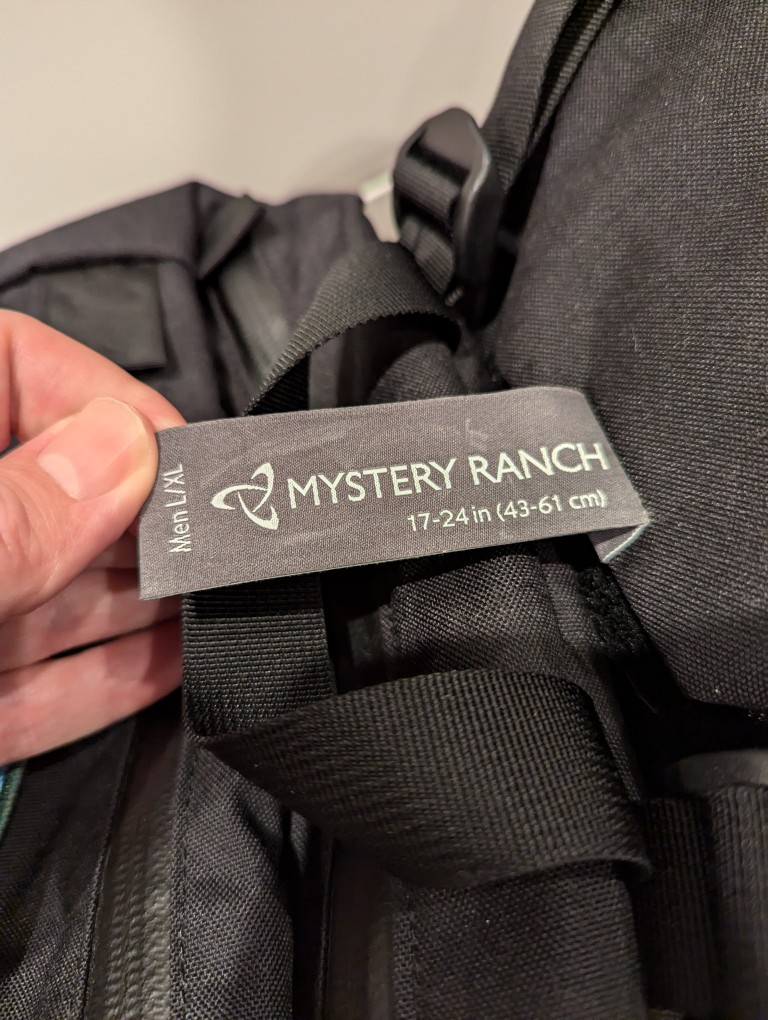
    I purchased the larger 26L version of the GR1 before the fall semester began. It is the most expensive backpack that I’ve ever purchased, but its design, materials, construction, and “Built in the USA” provenance supported the price.

    My original intended use for it was to carry my 16″ Lenovo ThinkPad P1 Gen 4 laptop, charger, water bottle, coffee thermos, and papers to and from the City Tech campus.

    Then, after my dad was released from the hospital after a back problem, it became a travel companion for overnight train rides to-and-from NYC (along with a simple barrel duffel bag). It carried my laptop, charger, 8″ Samsung Tab Active3 tablet, its charger, an MRE and snacks, 1 liter of water, overnight clothes, and 1 quart Ziploc bag for toiletries.

    So far, it has excelled in both work commuting and long distance train travel. It holds my gear, it’s easy to organize, and it’s constructed tough.

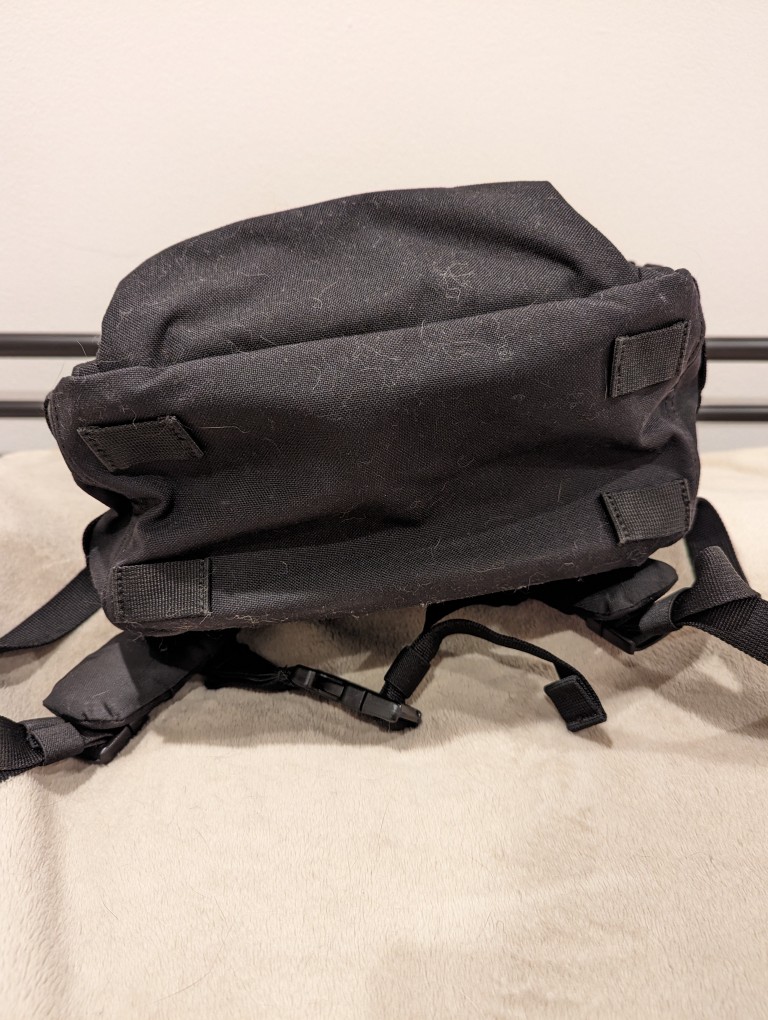
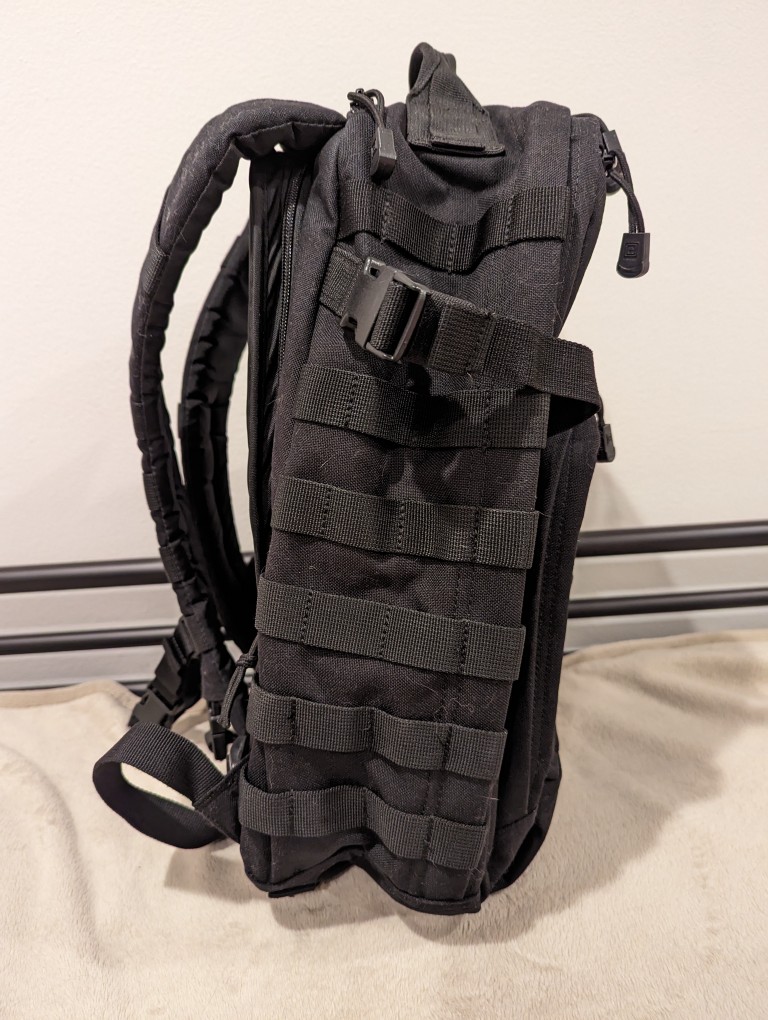
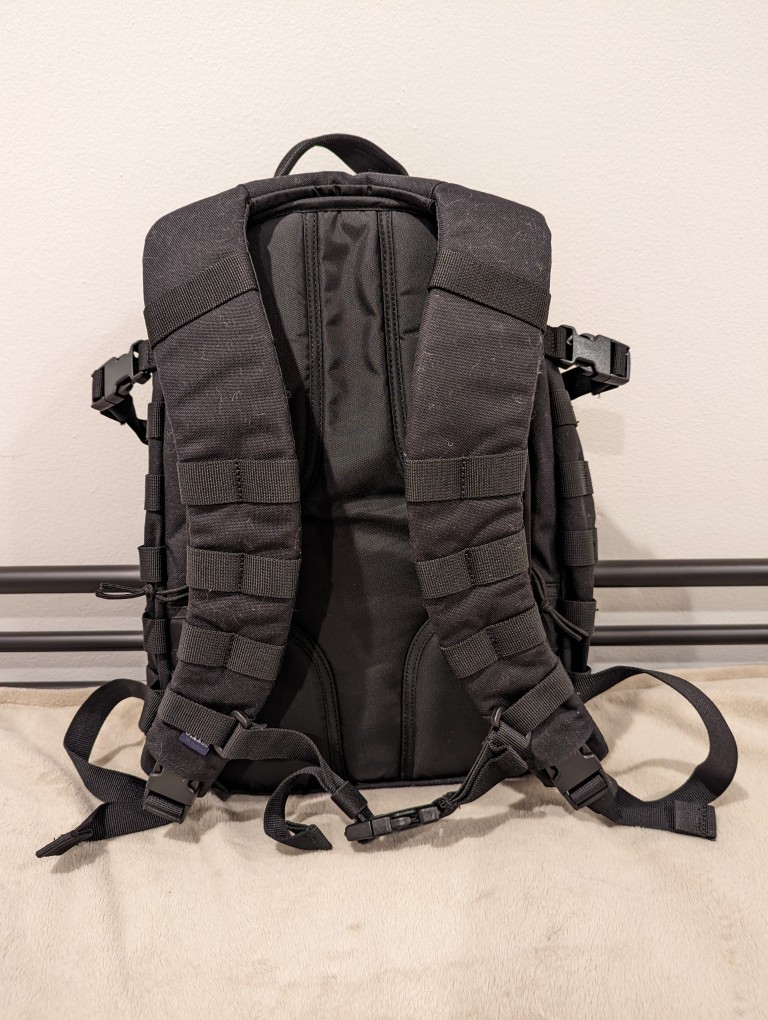
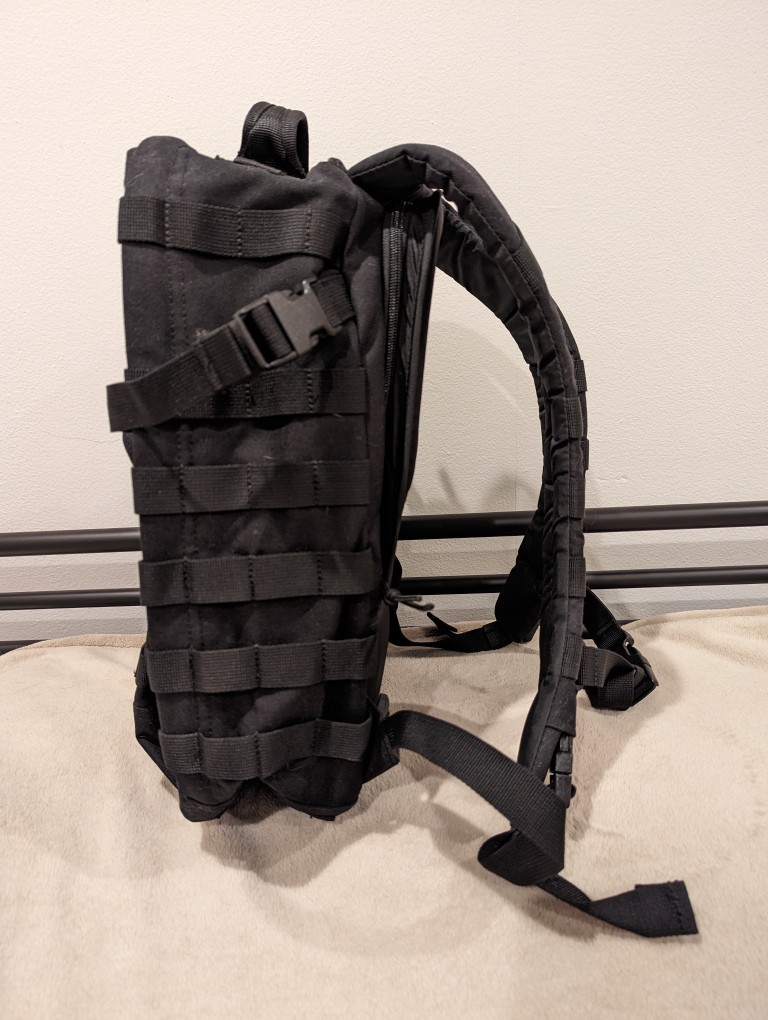
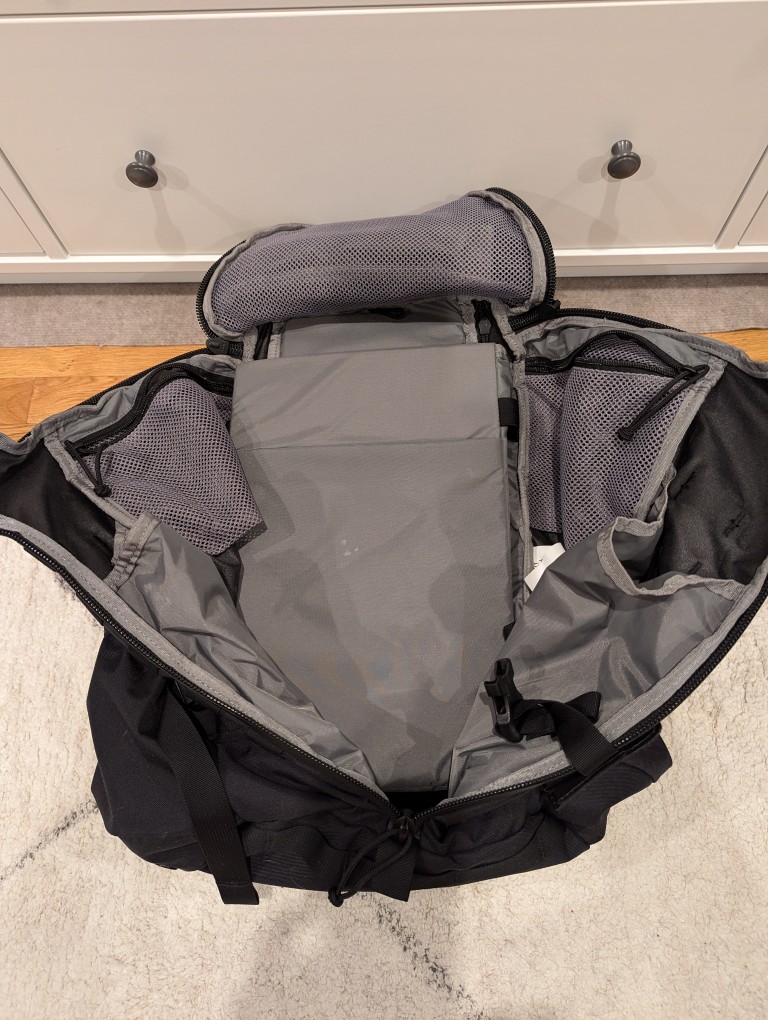
    Below are photos of its pockets and their use.

    GoRuck GR1 26L

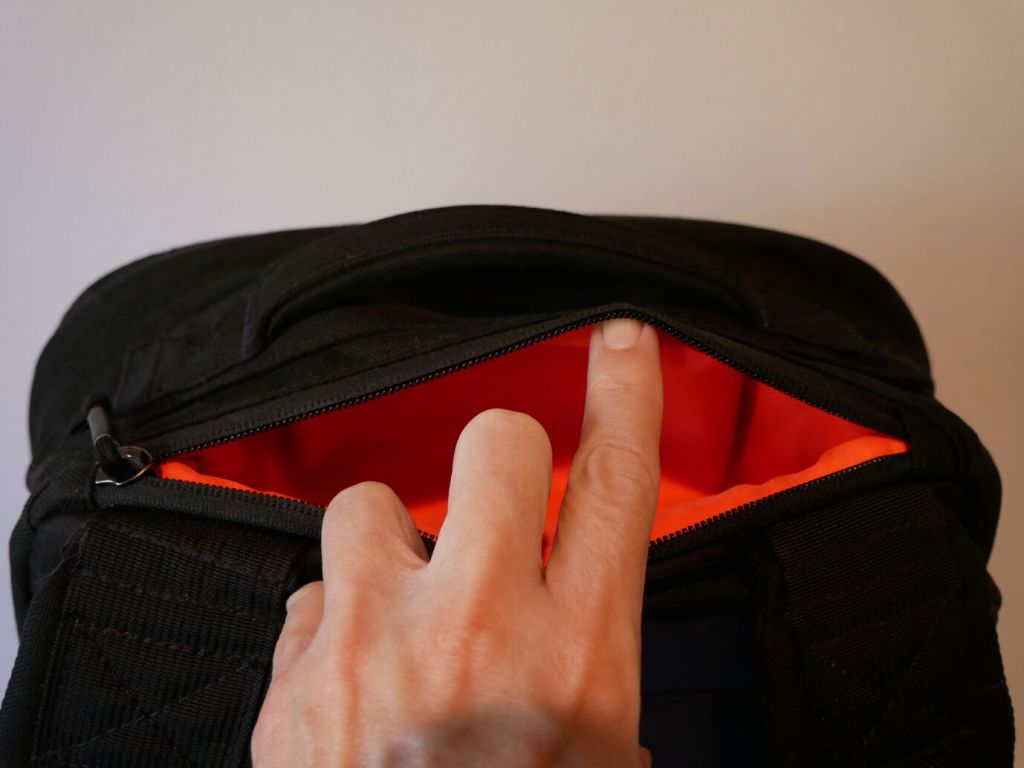
    Between the shoulder straps and top hand grab is a pocket that holds my RayBan sunglasses in their case and my reading glasses in a smaller plastic case.

    GoRuck GR1 26L

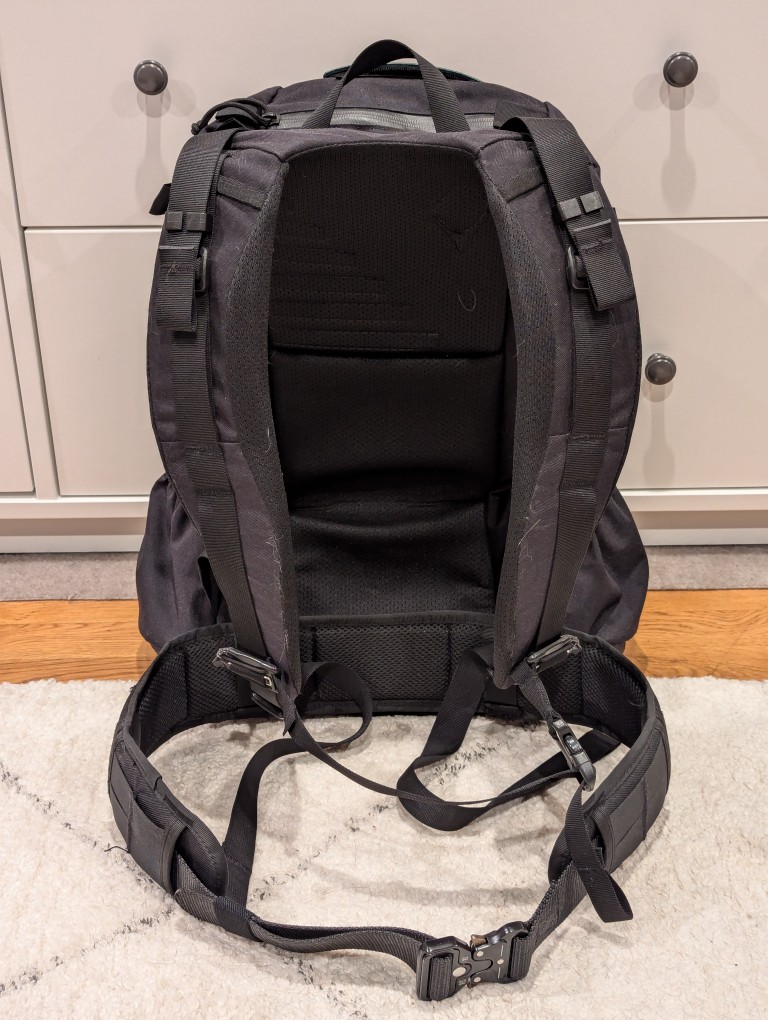
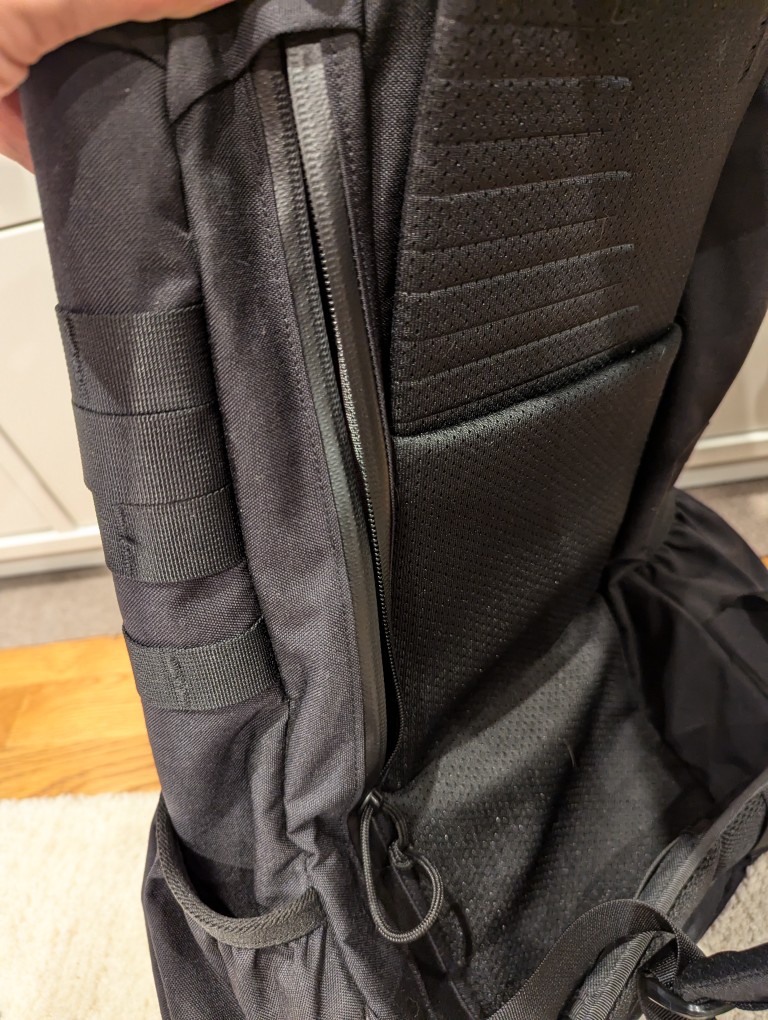
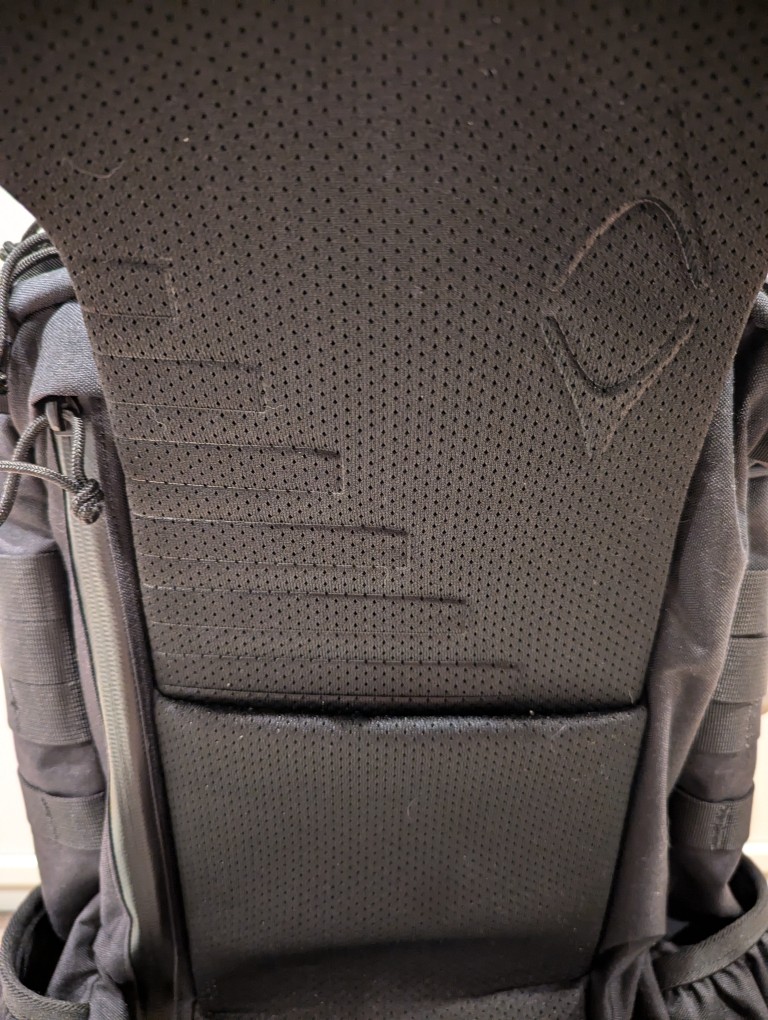
    The back of the backpack supports breathing and features a smoother synthetic material than the body of the backpack. It’s advertised as being less aggressive on clothes, which I can confirm.

    GoRuck GR1 26L

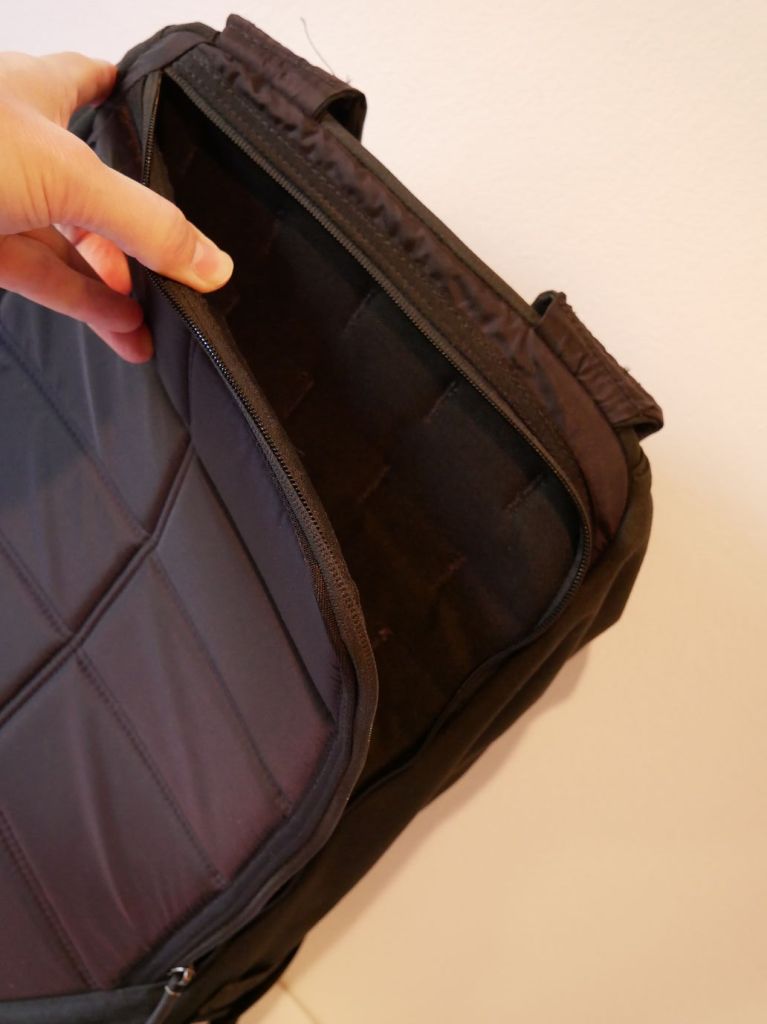
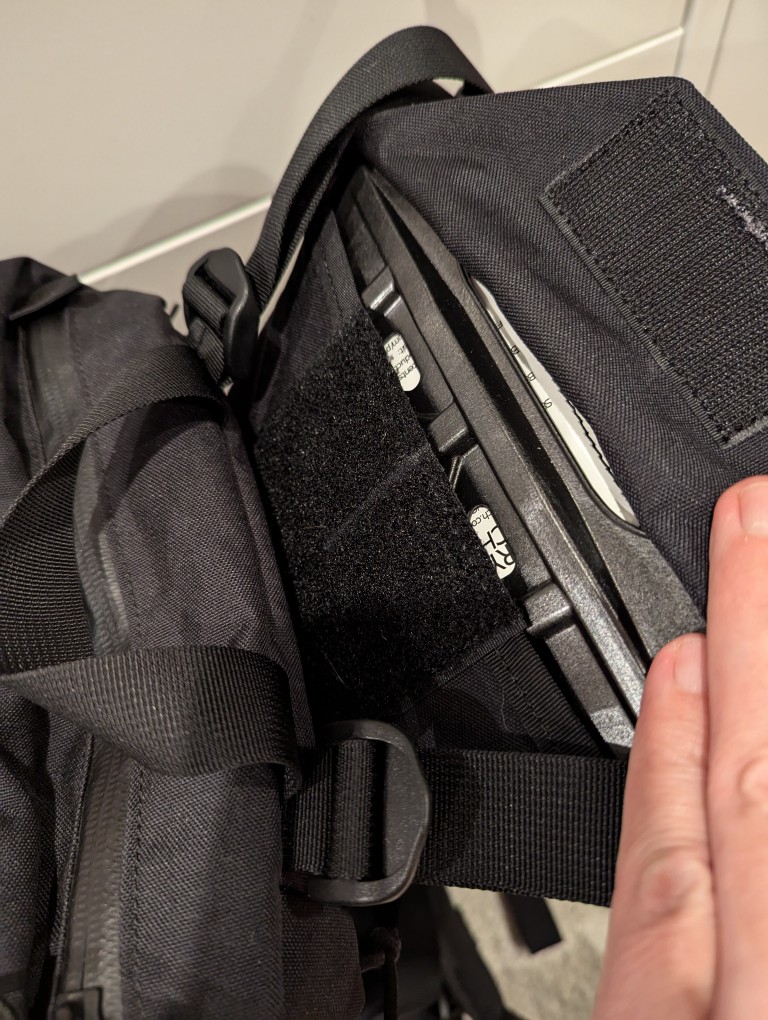
    Flipping the shoulder straps around makes the “bomb proof” laptop sleeve more easily accessible. It is advertised as holding up to a 16″ laptop.

    GoRuck GR1 26L

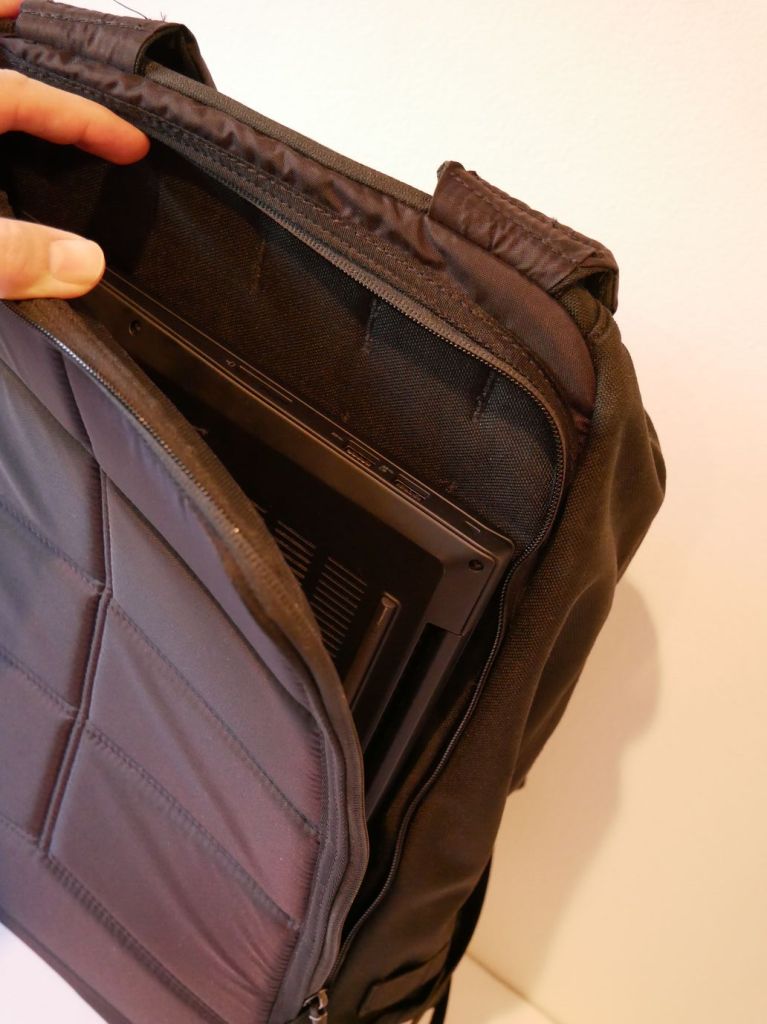
    You can see above that the laptop sleeve does indeed hold my 16″ Lenovo ThinkPad P1 Gen 4 with room to spare on its width (i.e., the height of the pocket in relation to the backpack) and just a hair of extra space for its depth (i.e., the width of the pocket in relation to the backpack).

    GoRuck GR1 26L

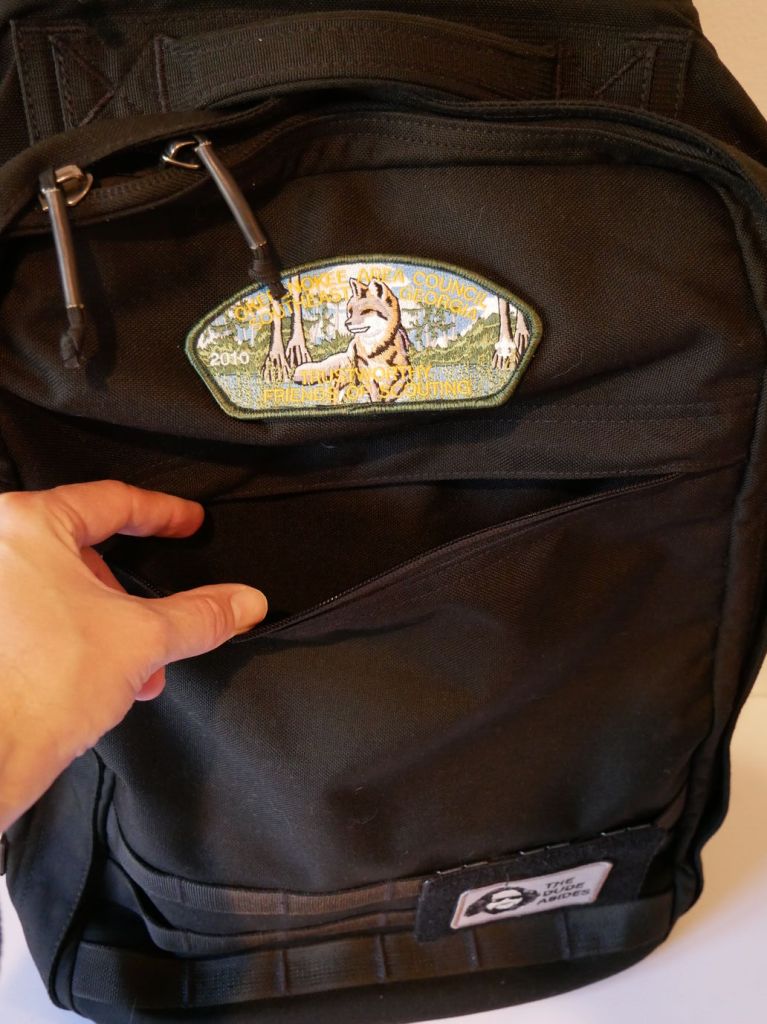
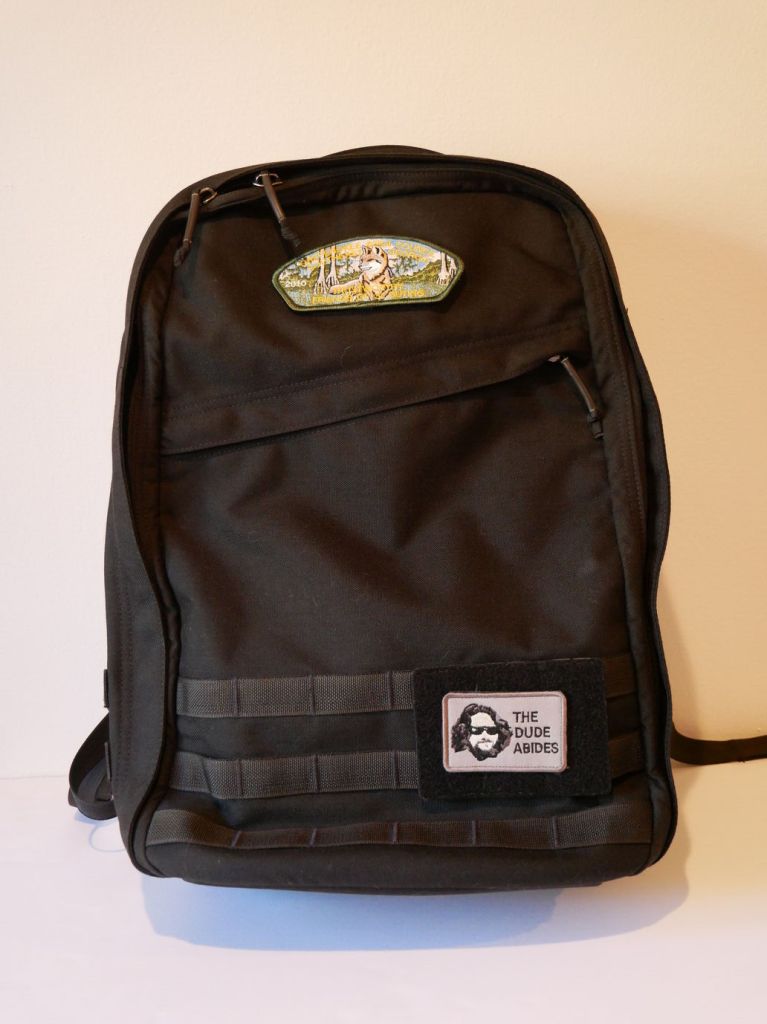
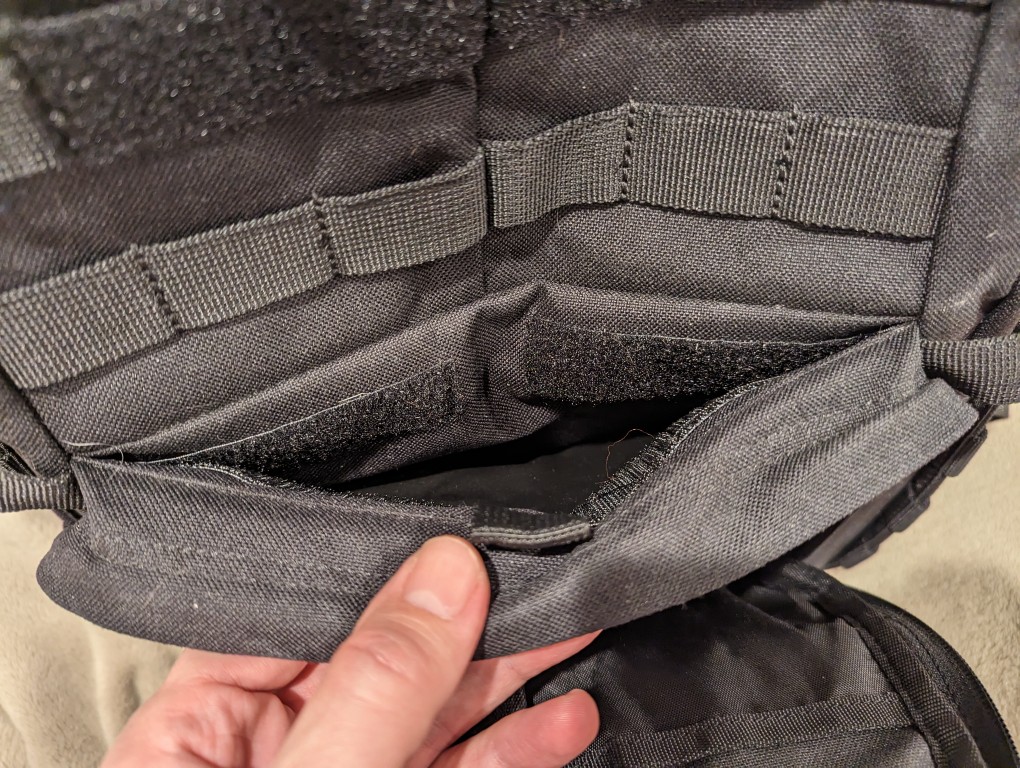
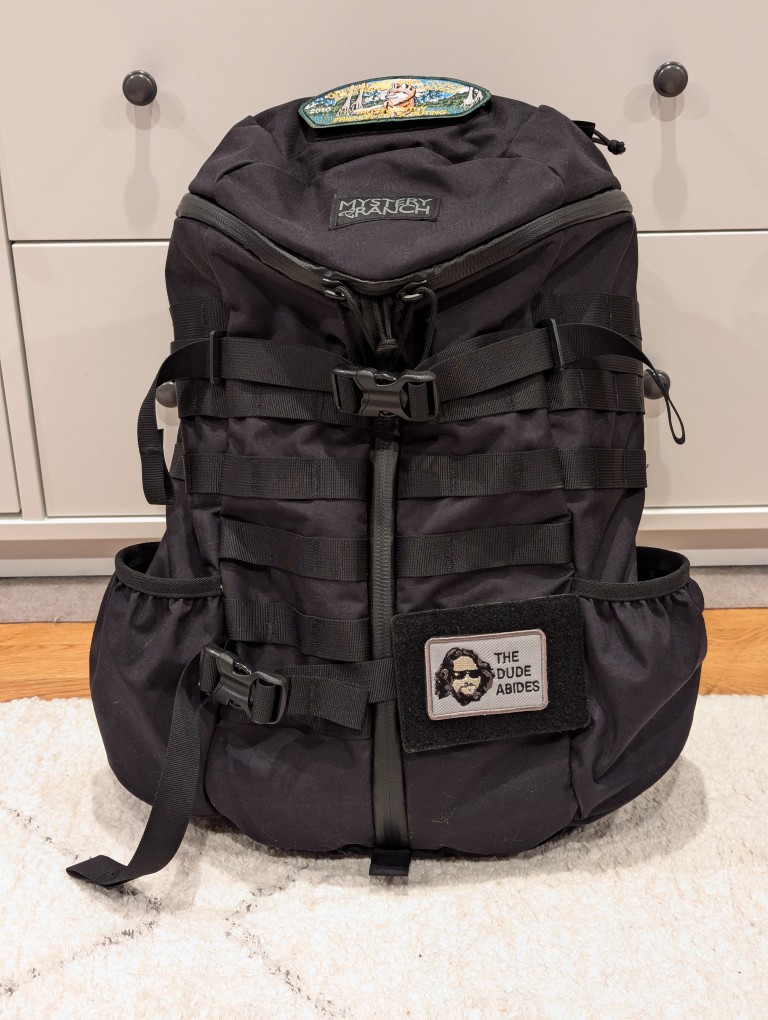
    The front zippered diagonal pocket extends from the zipper to the bottom of the pack. It can hold a lot! I keep an Apple Airtag and pocket knife in there. The top of the pack has a 2″ x 3″ hook-and-loop patch area, which I attached one of my Scouting patches to. I added a 3.5″ x 4.5″ hook-and-loop MOLLE panel to the bottom area of my GR1 where I affixed my “The Dude Abides” patch.

    GoRuck GR1 26L

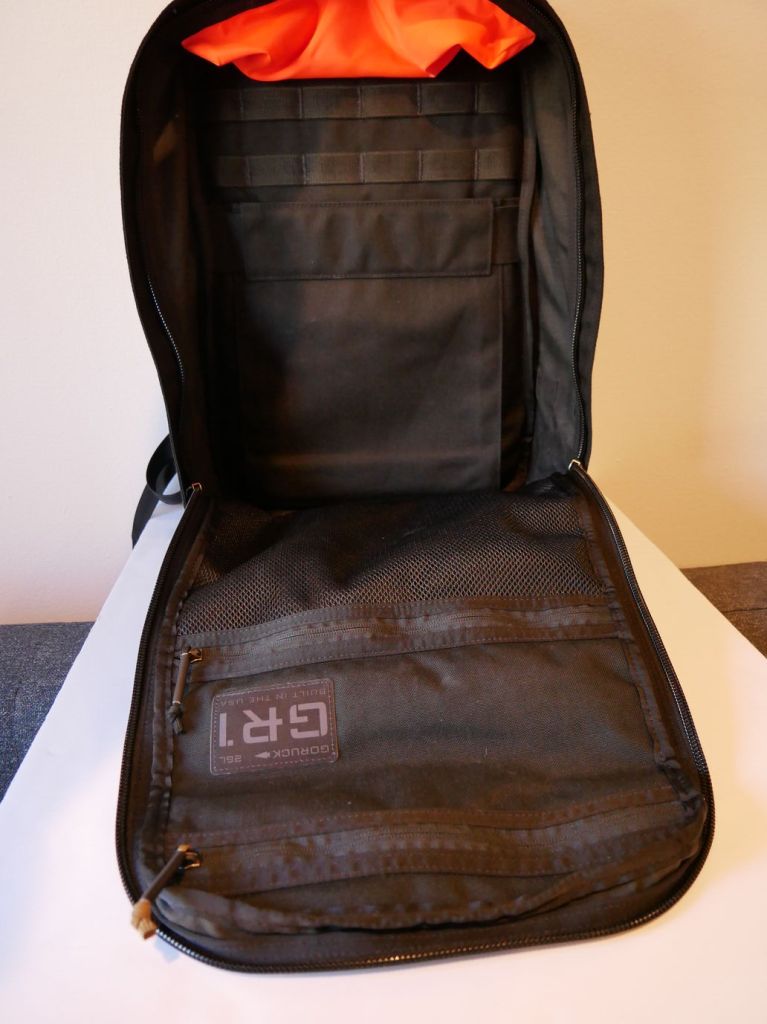
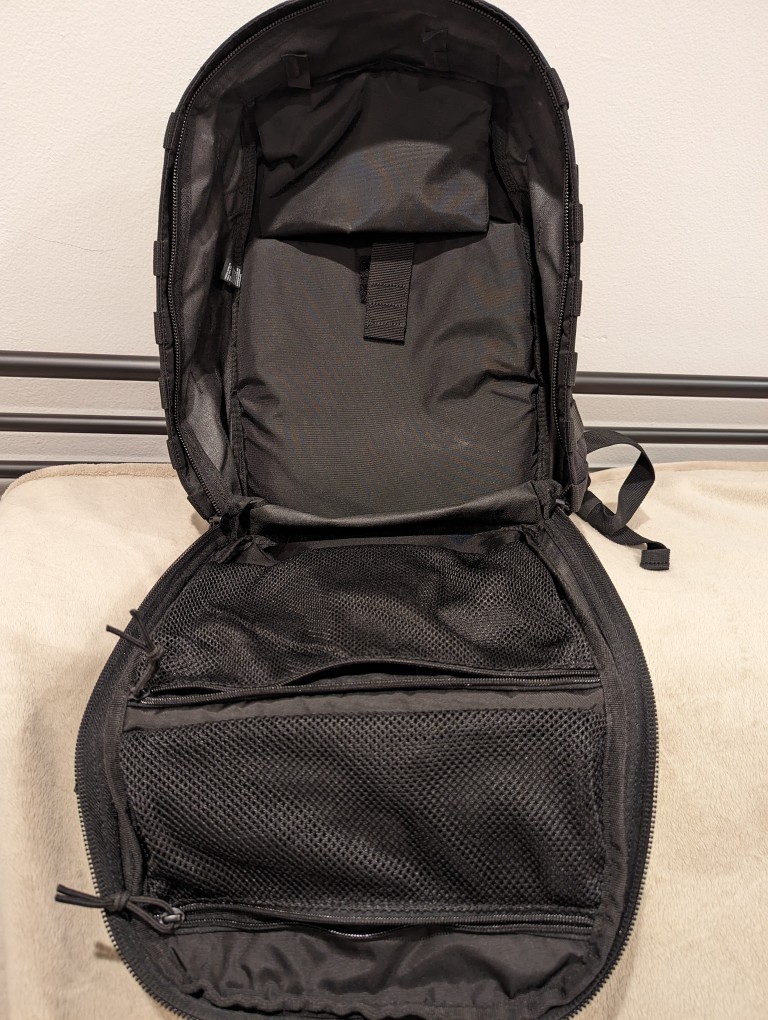
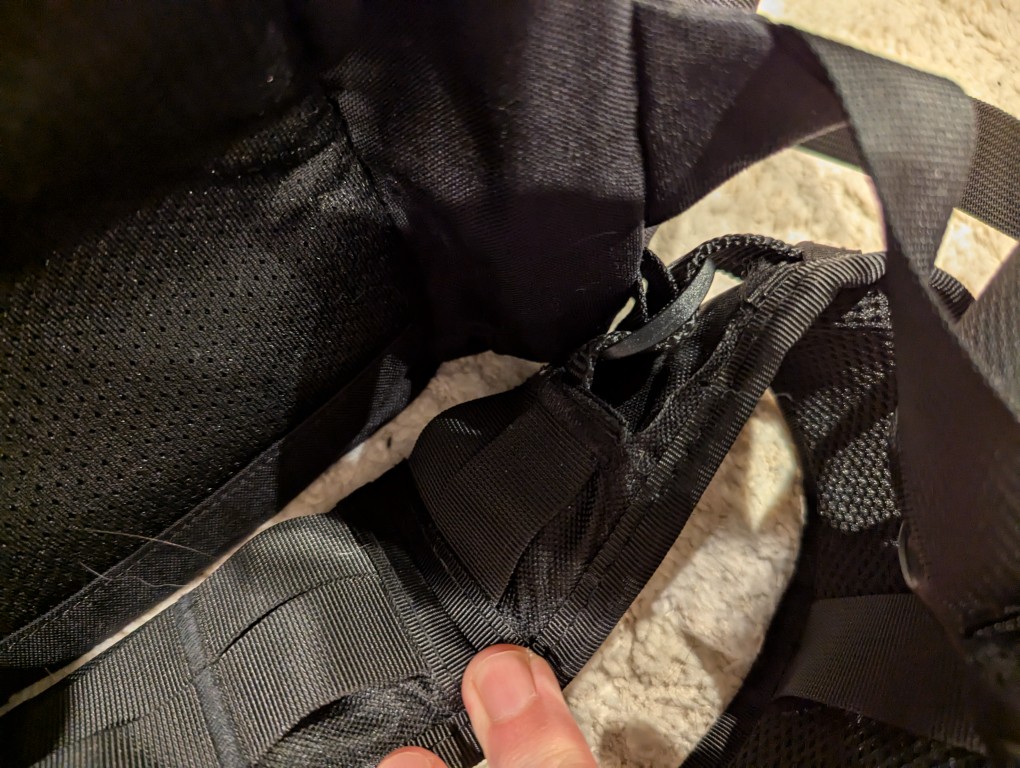
    In addition to the MOLLE attachments on the outside of the pack, there is more MOLLE inside for pouches or hook-and-loop panels.

    GoRuck GR1 26L

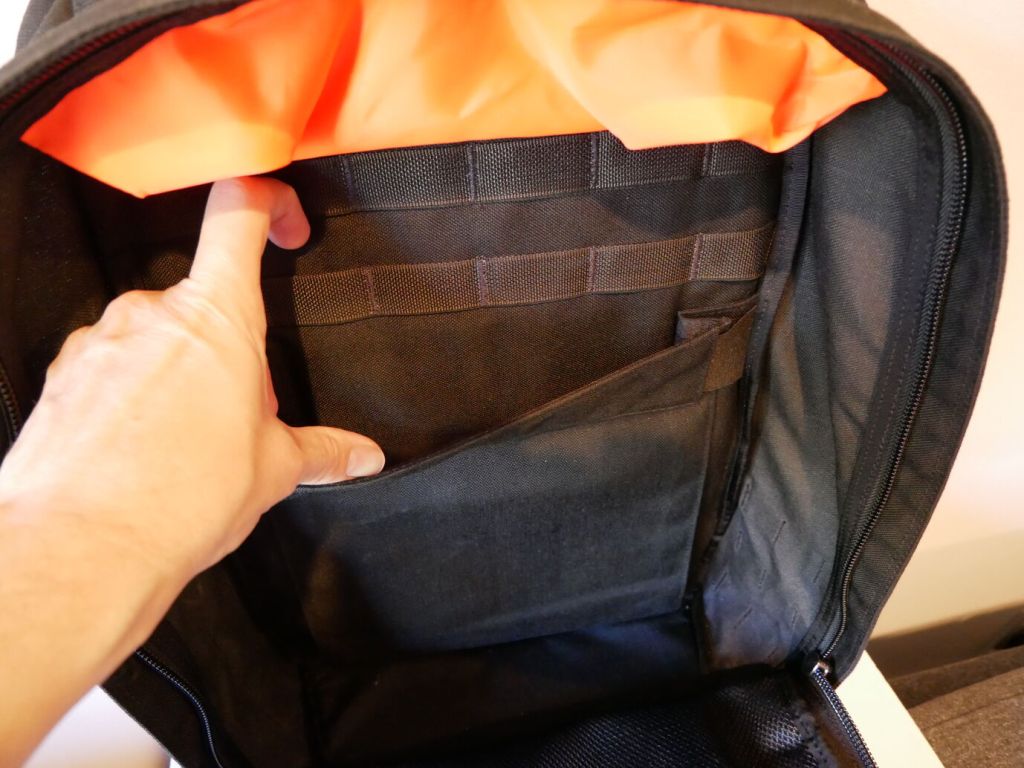
    On the back interior of the GR1, there’s an elastic panel that can hold a smaller laptop or tablet. I used it to hold my 8″ Samsung Galaxy Tab Active3 in a hard case with plenty of room to spare.

    GoRuck GR1 26L

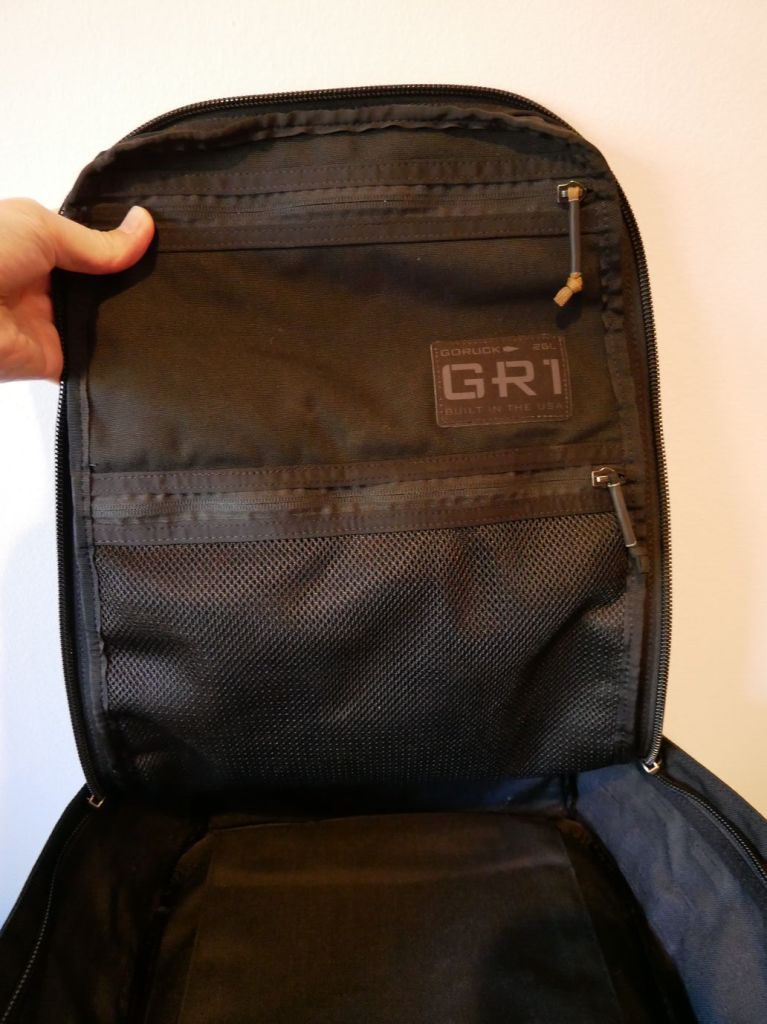
    The front flat interior has two zippered pouches. The top one is smaller but opaque. The bottom one is larger but its contents viewable thanks to the netting.

    GoRuck GR1 26L and Ape Case

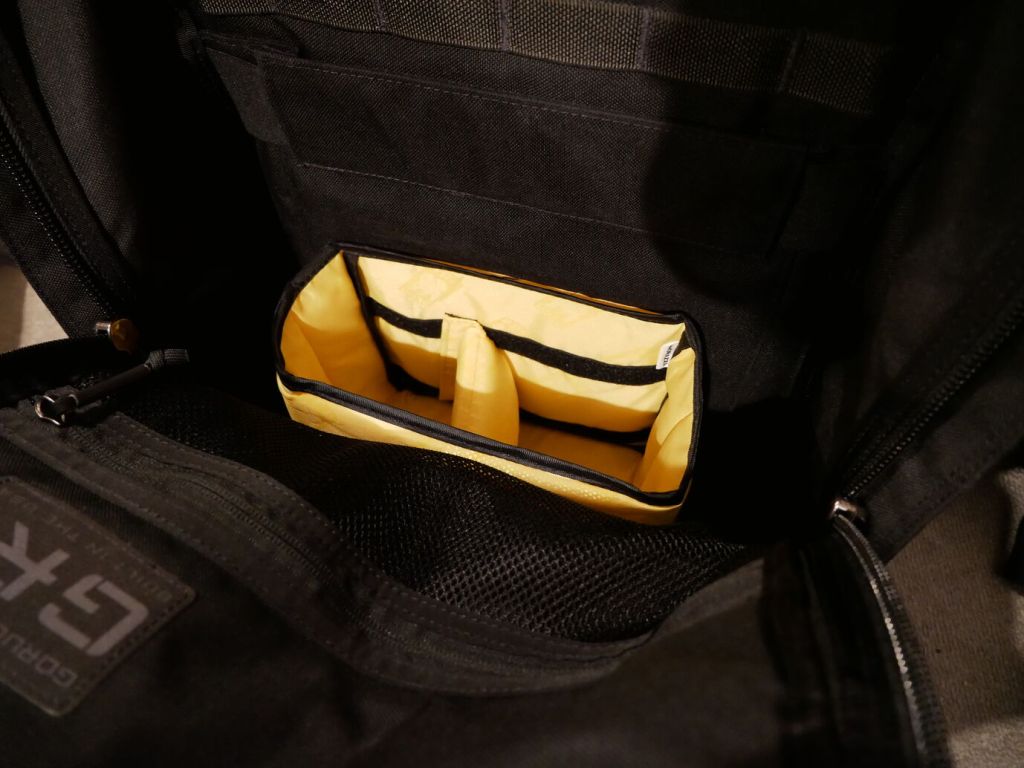
    To help with organizing my gear, I dropped the larger half of the yellow, padded Ape Case Cubeze Duo (ACQB 41) with one divider in the bottom of the pack. This creates four areas in the bottom of the pack to keep things from banging around–a thermos, two water bottles, and charging brick for the Lenovo laptop.

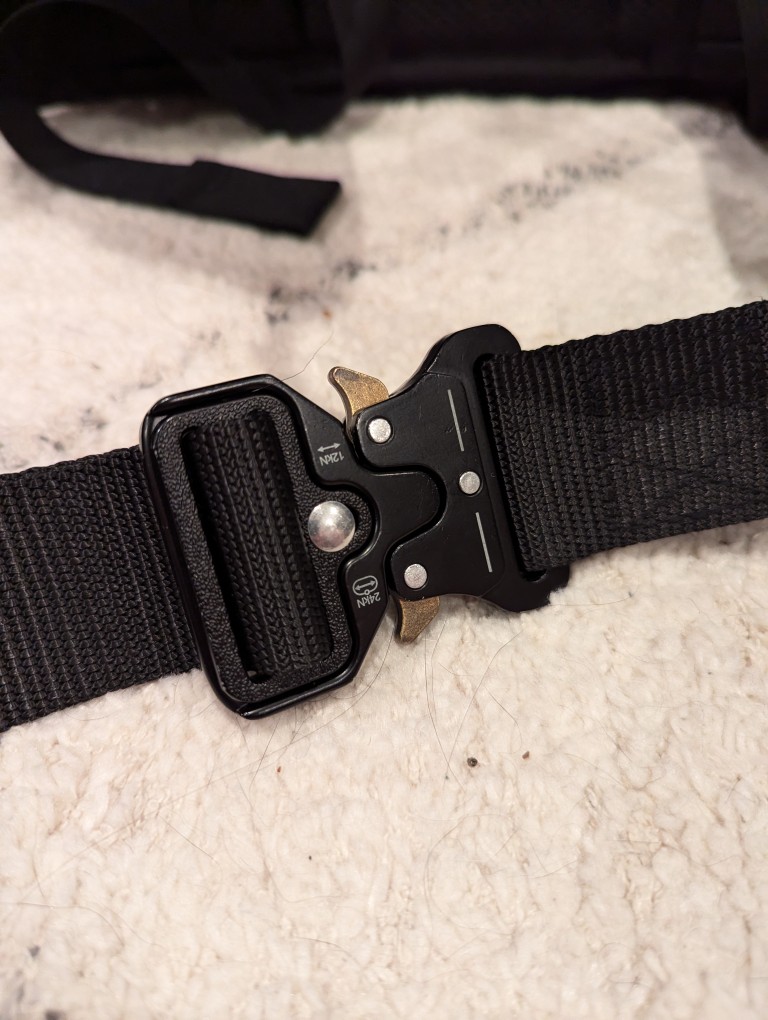
    The GR1 doesn’t come with a sternum strap, but I haven’t found that it needs one while walking or climbing stairs. Having one less strap to undo or get caught while dangling is okay with me. It’s also easy to put on and take off. However, depending on my load–specifically with the 16″ Lenovo, I bend over to put on my shoes before donning the pack so that I don’t put too much pressure on the laptop within the pack against my arched back.

    I’m very happy with the GR1 and look forward to carrying it in the days ahead.

  • Upgrading from the 5.11 Rush 12 2.0 to the Mystery Ranch 2-Day L/XL Backpack

    5.11 Rush 12 2.0 backpack and Mystery Ranch 2-Day L/XL Backpack

    When I upgraded to a 16″ Lenovo ThinkPad P1 Gen 4 workstation-class laptop earlier this year, I soon learned that it was too large to fit safely in my 24-liter 5.11 Rush 12 2.0 backpack. While my old 12″ ThinkPad X230 easily fit into the up-to-15″ laptop capable compartment of the 5.11 Rush 12 2.0, the newer ThinkPad P1 Gen 4 dangerously pressed against its corners. Also, I trouble wearing the 5.11 Rush 12 2.0 with a a padded waist belt while carrying a heavy load–I couldn’t get the bag to ride securely against my back when doing that. Nevertheless, the 5.11 Rush 12 2.0 is virtually bulletproof and a very well made backpack. Unfortunately, it just didn’t meet my changing needs.

    Looking for a larger backpack with MOLLE, waist belt attachment points, and a tough build like the 5.11 Rush 12 2.0 was easy–there’s a number of great alternate bags that fit those needs. However, finding one that also has a laptop sleeve capable of safely holding a 16″ laptop more challenging, because most manufacturers only support up to 15″ laptops. Thankfully, the Mystery Ranch 2 Day Assault L/XL backpack fit my needs quite well.

    Like the 5.11 Rush 12 2.0, the Mystery Ranch 2 Day Assault L/XL backpack is built tough.

    Meeting my new requirements in a backpack, it has a larger volume (24 liters vs. 29.7 liters), and its built-in laptop sleeve can accommodate a 16″ laptop (my ThinkPad P1 Gen 4 measures 10″ deep x 14 1/8″ wide x 15/16″ tall). However, I have to load and unload the ThinkPad through the main pocket as it is too wide and deep to easily maneuver through the zippered laptop side-loading pocket).

    To help with load carrying, it has an innovative lengthening system that helps the pack ride close against your body. To adjust this system, remove the plastic frame shown in the gallery above, shove it into the velcro area behind the straps to release the hook and loop material holding the straps and pack together, pull up to lengthen, put the frame back in its place, press the pack flat to ensure the hook and loop are reattached, and adjust the straps as needed to have the straps rest tightly against your torso and shoulders and the bottom of the pack against your waist.

    This adjustment system works well with the aftermarket padded waist belt that I originally used with the 5.11 Rush, but moved over to the Mystery Ranch 2 Day Assault pack. The Mystery Ranch bag included a two-piece simple nylon belt with plastic buckle. Its intention is to help hold the back against your body but not help with load carrying. I removed it and modified a Condor Battle Belt (it has a padded outer belt with MOLLE and an inner 1 1/2″ nylon belt with aluminum quick-release buckle). I cut off the D-ring equipment carriers and cut expanded holes in the outer padded belt to allow the inner 1 1/2″ belt to thread through the belt attachments on the Mystery Ranch pack. I added extra stitching to the outer padded belt and melted the nylon to prevent unraveling from these modifications.

    The strangest thing about Mystery Ranch bags is the three-zipper main pocket opening. It is difficult to open and close these one-handed. However, the zippers are top-quality and waterproof. And, with the main pocket fully open, it can ingest a tremendous amount of gear, but it will likely require the bag to be fully opened to extract that gear if it is larger (e.g., a boxed 12 pack of aluminum cans).

    Another modification that I made to the bag was to plug its main pocket drain holes with closed hole rubber grommets (I don’t want anything crawling in and setting up shop) and added some strap clips to keep the shoulder adjustment straps from flying all over the place while putting on the pack or walking with it.

    Its two side mounted stuff pouches easily hold water bottles, thermoses, and short collapsible umbrellas. During the summer, I keep a pack of menthol cooling sheets and an electric fan in one so that I can reach back to grab them without having to take off the pack.

    When I traveled to see my parents a few months ago, I added some MOLLE pouches to the exterior mounts (first aid, toiletries, cables, chargers, multitool, and snacks), but I took them off to reduce the pack’s weight when I am in the city where I walk further distances with it and would prefer the weight go towards what I am carrying instead of how I’m carrying those things.

    The Mystery Ranch 2 Day Assault pack is holding up and meeting my expectations. With the new academic year about to begin, I’ll see how it holds up trekking to and from campus.

  • Simple Sewing: Hook-and-Loop Patches for Your Backpack

    I outfitted the front MOLLE (Modular Lightweight Load-Carrying Equipment) webbing surface of my backpack with M-Tac’s Morale Patch Boards (3″ square and 4.5″ x 3.5″ rectangle) so that I could swap and change embroidered patches that I sewed hook backing to along the outer border of the patch.

    I enjoy displaying patches that mean something to me. Maybe someone else will see them and get a boost. But for myself, it’s carrying a little morale with me wherever I go.

    I cut slightly more hook material than needed, positioned the patch on the opposite side of the hooks, sewed around the border of the patch through the hook material, and finally, trimmed the excess hook material.

    Unless you’re planning to tape where you’re sewing patches directly to your bag, using hook-and-loop attachments like this will maintain its waterproof/water-resistance.

    Pro Tips:

    • Verify what you need to attach to your patches (hook or loop backing) before you sew!
    • Use a sharp needle of size 2, 3, or 4 as patches are generally heavier fabric and some have thermal heat backing.
    • Absent a thimble to help push the needle through the fabric, use the corner of the table, a LEGO brick, or something else sturdy and not easily damaged by the back of the needle pressing into it.
    • A cheap travel sewing kit with a few needles (though they might be smaller gauge needles than ideal), different color thread to match the border of your patches, and a needle threader should get you started. But, you can create your own kit with a spool of black thread, a pack of needles, and a thimble.

  • In Search of a Better Backpack, Review of The North Face Electra

    IMG_2073

    Despite being labeled for “Women,” I recommend The North Face Electra backpack for anyone needing a compact, EDC bag that can accommodate a 10.5″ tablet. This is my new work bag that carries the things that I need daily without incurring too much added weight.

    IMG_2082

    In a previous blog post, I wrote praise for the Magnoli Clothiers’ British Mark VII Gas Mask Bag reproduction, because it is a good everyday bag for carrying an iPad mini, notebook, lunch, and thermos. It is still a good bag, but I sold my iPad Mini after I got Apple’s new 10.5″ iPad Pro, which would not fit in the Mark VII without the removal of the supporting material stitched through the center of the bag. As you can see in the photo above, TNF Electra is slightly larger than the Mark VII. The Mark VII has just shy of 6L capacity whereas the TNF Electra has 12L capacity.

    I use the TNF Electra to carry the same, essential things as I used the Mark VII to carry, but the difference between the kits is the iPad upgrade from mini to Pro. Above, you can see the various pockets that differentiate the TNF Electra. It has a padded tablet sleeve in the main zippered compartment, the front flap has a Napoleon-style pocket that I use to hold my cellphone, a small zippered compartment in the lower left for change, keys, or another small item, and a slightly larger zippered compartment at the top of the back beneath the grab handle that holds all of my small, regular use items like hand sanitizer, eye drops, pen, pocket knife, etc.

    IMG_2083

    The TNF Electra weighs the same as a Jansport Superbreak–12 oz. However, the Superbreak has more than double the capacity–25L. The difference between the two packs is that the Electra has a smaller surface area against the back, and it has more substantial padding in the back and around the tablet sleeve. The Superbreak has thin back padding and no laptop/tablet sleeve. The TNF Electra’s zippers are more subtantial YKK brand than what Jansport uses on the current Superbreak packs.

    IMG_2074

    The TNF Electra features “Women-specific back panel and shoulder straps.” These have worked fine for me, too. The pack rides high on my back, which I prefer to a pack that is lower, because it allows my back to breathe more and remain cool on my long walks to-and-from work.

    IMG_2080

    The TNF Electra that I have is black heather and burnt coral metallic (it reminds me of Apple’s Rose Gold). Y liked my bag so much that we got her one in dark eggplant purple dark/amaranth purple.

    I like the TNF Electra, because it holds just what I need, is lightweight and compact, and helps me stay cool on my daily long walks.

    While its labeling and colors might signify its use by a specific gender, I think its better to focus on one’s needs than on the social signifiers made into a tool–in this case–a useful bag.

  • Magnoli Clothiers’ British Mark VII Satchel Review, an Excellent Everyday Carry EDC Bag Inspired by Indiana Jones

    IMG_1752

    A bag is a form of technology that helps us move our things from place to place so that we can get our daily work done. Every bag has affordances and constraints. Unfortunately, I find myself running up against what I see as unbalanced trade-offs in these affordances and constraints for my particular circumstances.

    I don’t begrudge a tool’s constraints. In fact, these constraints can be quite liberating. For example, Thomas Lux, my former poetry professor at Georgia Tech, would purposefully give his students specific constraints for a week’s assignment: there can be only so many words, there can be only so many lines, there must be the color green, etc. He explained that these constraints open up possibilities that would not have existed had he not instructed us to create a new work of poetry based around these constraints. Put another way, while affordances are the explicitly designed ways and interfaces for using a technology, constraints can open up new, unforseen possibilities along the lines of William Gibson’s important observation: “the street finds its own use for things.”

    IMG_1766

    Of the bags that I do own, I’ve unstitched a lot of the fluff on my small Timbuk2 messenger, and I’ve unriveted and cut the unnecessary branding and features of my STM Aero 13 backpack. I’ve made them more usable for me, but I come to realize that I didn’t like how large they are for everyday use. Certainly, if I’m going to the store for groceries, a larger bag is better (my stock Jansport Super Break II is usually deployed for these missions), but I’m thinking about the gear that I carry everyday.

    IMG_1759

    So, my bag problem came to be one about just the needed size for the things that I carry everyday. I should explain that these are the things that I carry to and from work. This is about a 2 mile round trip walk. This makes weight and comfort a prime consideration. Also, as I think is true for many instructors, if a large enough bag is available, I tended to bring a lot of work home with me in the form of books and stacks of papers. However, my interaction with this material often was simply via osmosis instead of material-in-hand engagement. I would carry things home with an intention of using the materials and then returning them to campus later, but this often didn’t happen. Life gets in the way (or simply exhaustion–probably from lugging 10 pounds of student work a mile down Court Street), and the books and papers would be returned via a return trip to be used ultimately on campus. Thus, I wanted an EDC bag that would obviate the possiblity of using it for carrying these kinds of materials. Also, I thought that this change might turn me to using my tech gear in a new way–digitizing and scanning only the most important and pressing work to carry home on a device or upload to the cloud.

    2010-08-28 - Christmas 1982 2

    As you’re probably familiar with, the character Indiana Jones made famous the anachronistic British Mk VII gas mask bag (the bag did not yet exist during the period of the first three Indy films). When I was a kid, my cousin Amie and her folks gave me one of my most precious gifts–a Dukes of Hazard shoulder bag. I wore it everywhere and it always contained my most essential kit–toys, candy, and a leather whip. Yes, I fancied this bag as my Indy bag. When its strap broke, I tied my best knot to keep on adventuring with it. Looking through old photos like the one above when I received it, I was reminded about how much I liked its size and simplicity.

    FullSizeRender (4)

    In my searches, a name kept popping up: Magnoli Clothiers. It is an outfit based in New Zealand that specializes in making clothing and prop reproductions from film and television (and other bespoke tailoring services, too). Many folks online–especially in forums discussing Indiana Jones–recommended their reproduction of Indy’s bag called the British Mk VII Satchel. I figured that its low cost justified trying it out. Also, I liked that it didn’t include a shoulder strap. Magnoli Clothiers offers an add-on leather strap, which would make the Mk VII satchel match Indy’s customized look (the original Mk VII bag has a built-in canvas shoulder strap). For me, however, I decided to get a 55″ Rothco General Purpose Nylon Strap. It is adjustable and has metal hooks on either end to mate with the customized metal rings on either side of Magnoli Clothiers’ Mk VII satchel.

    The British Mk VII satchel measures about 11″ x 11″ x 3″. It has a number of compartments. The front-most pocket holds an Apple iPad Mini 4 with Smart Cover and a Muji A5 notebook. The large middle compartment is open at the bottom, but there is a divider making the left side slightly larger than the right. I put my 16 oz. Zojirushi thermos on the right and my lunch/supper fixings (usually MREs) on the left. Rolling about in the bottom of this compartment, I leave my pens, pencils, pocket knife, flashlight, eye drops, and Advil. In the back of the back against your body are two small pockets–my phone goes into one of these and my business cards in the other. Sewn between these pockets is a small pouch that holds a 1 oz. hand sanitizer bottle perfectly.

    IMG_1761

    Over the past two weeks, I’ve been having great success with the British Mk VII satchel. Its affordances (It carries my essential things to and from work) and its constraints (Its smaller volume made me change my workflow to be honest with my carry-home workload and essentially carry less to and from work) have worked out very positively for me. I’m curious about how it will hold up in the long term, but its already received bumps and brushes on the street, train, and campus without any appreciable wear. If you are looking for a small bag for essentials, drink, food, and personal electronics, I highly recommend the British Mk VII satchel.

    IMG_1558