Usually when folks talk about Everyday Carry (EDC), they are referring to preparedness, emergency readiness, and SHTF. It can also mean the kit that one carries on his or her person everyday for whatever reason. I would like to expand EDC to include LEGO.
For me, and I suspect many others, LEGO is a source of imagination, thought, expression, and stress relief. Why not carry a selection of LEGO bricks, pieces, and minifigures with you for any eventuality–thinking through a problem, filling spare time, demonstrating an idea to others, or sharing fun with a friend.
Muji’s Portable Case (64 x 52 x 20 mm) is a very good size for an essentials-only LEGO kit that can fit in a shirt pocket, pouch, or bag (shown above). The Portable Case easily holds two LEGO minifigures, a minifigure with bricks, or bricks alone. I have included photos of sample kits that I built to use with the Portable Case as a LEGO EDC: an off-road vehicle with obstacles, an aeronautics set, an Iron Man set, and a The Last Starfighter set with a Gunstar and Kodan Deck Fighter.
Off-Road Vehicle
Aeronautics Set (with control tower, two rockets, and airplane)
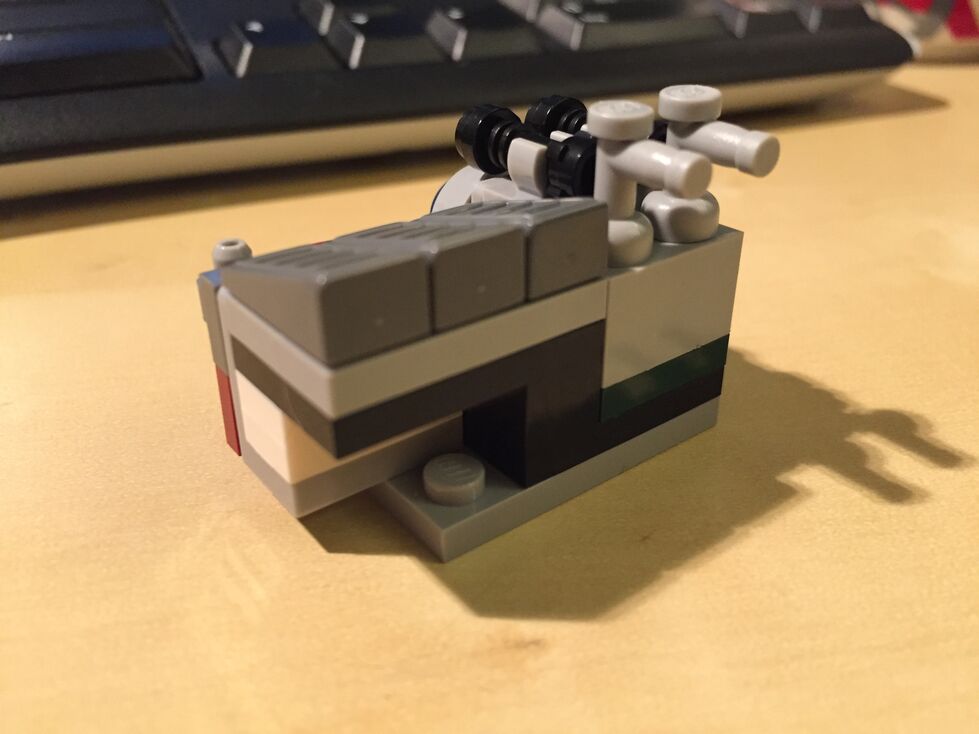
Iron Man Set (with attacking robot and blasted wall)
The Last Starfighter Set (with Gunstar, Kodan Deck Fighter, and asteroids)
Of course, these are only a few of the infinite possibilities for building your own LEGO EDC. An Altoids tin would serve a similarly good purpose to hold a small selection of LEGO bricks, elements, and minifigures for building on the go. I imagine that children (and not just AFOLs) would dig something like this, too.
I picked the Muju Portable Case due to its size and sturdy construction, but Muji has other size cases that would work well if you need to carry additional LEGO in your daily kit.
EDC LEGO kits should be something that bring joy to the work of imagination and building. Carry what you need, and keep your kit fresh for the cognitive and imaginative work at hand. Also, we can spread the joy that comes from this mind-work with our hands to others with customized kits tailored to friends or coworkers’ needs.
Over the past few days, I build a small scale model of the new City Tech academic building at 285 Jay Street. Still under construction, this model highlights its eventual glass-covered transparency (see this PDF for additional renderings of the building’s completed construction) with the model’s approximately 160 clear 1×2 bricks:
My Serious Change Through Play collaborator Patrick Corbett original gave me the idea to build a model of the new building after we made our first grant-funded LEGO brick purchase. Here is what that first, simple model looked like:
With only a few LEGO and Duplo bricks, I was able to capture the glass structure, upper floors overhang, and intersecting curve of the auditorium. Eventually, we incorporated this model into the Serious Change Through Play branding logo. While I like this smaller model, I wanted to build one that was larger and captured more detail without breaking the bank.
To begin my larger design and assess what extra LEGO pieces that I would need beyond those that I already own, I copied LEGO brick/plate design grids (see Duckingham Design’s grids, which are terrific) into Microsoft Windows’ Paint and drew in a rough sketch of each side’s elevation:
After these initial designs, I knew that I had most of what I would need to build the base and solid-color aspects. However, I didn’t have any of the clear bricks. Luckily, I saw a bin full of clear 1×2 bricks at the Flatiron LEGO store a week ago, so I returned there to purchase those and spare bricks that I thought might be useful during the build:
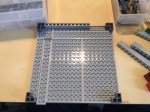
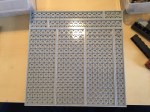
After disassembling all of the bricks in the pick-a-brick container (NB: if you purchase a pick-a-brick container from the LEGO store, you should assemble all of the bricks in order to maximize how many bricks can fit and minimize wasted empty space), I used plates and bricks to construct a 20×20 stud base with a height of 1 brick and two plates (one plate level on top and one plate level on bottom):
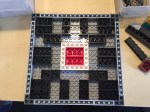
Next, I began the fun part of the build, which I like to think about as similar to the writing process–brainstorm, draft, and revise. While I had my elevations to work from, I thought of specific ways to put the bricks together that represented the building better and served to make a stronger model. For example, using overlapping joints and interlocking corners in the upper stories look good and make the model sturdier.
The intersecting auditorium provided some of the best challenges during this build, because it has an interesting curve that is like the forward leading edge of an airplane wing. This required a lot of digging through my boxes of bricks to find pieces that conveyed this as best as possible at this scale and appear close to the colors in the building design documents:
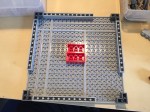
You might have noticed a white, silver, and blue structure in the rear of the building. I felt that I would be remiss if I neglected to include the spirit of the building that used to be at 285 Jay Street–City Tech’s previous auditorium with its Klitgord mosaic (see page 8 of City Tech Connections vol. 6 no. 2 here for more information, or speak to Dr. Mary Nilles, who taught me about the history of the mosaics). The original Klitgord mosaics, crafted by Nathiel Choate and Joseph von Tury in 1962 for the auditorium building, look like this (photo by William Avery Hudson):
Photo by William Avery Hudson.
Using the microscale of my model, I wanted to capture the color scheme and figures despite the extremely low resolution of the medium at this scale. Nevertheless, I figured that I could convey that there are six human figures and a color scheme of white, silver, and blue. Therefore, I built this model of the mosaic–perhaps the preserved mosaic will have a home in the new building?
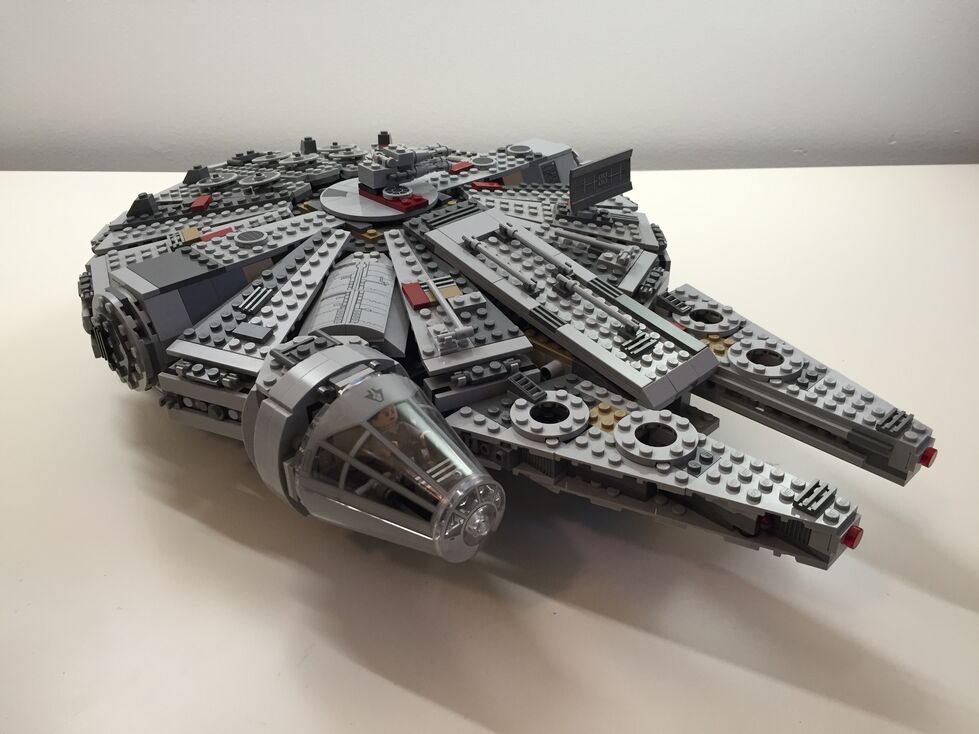
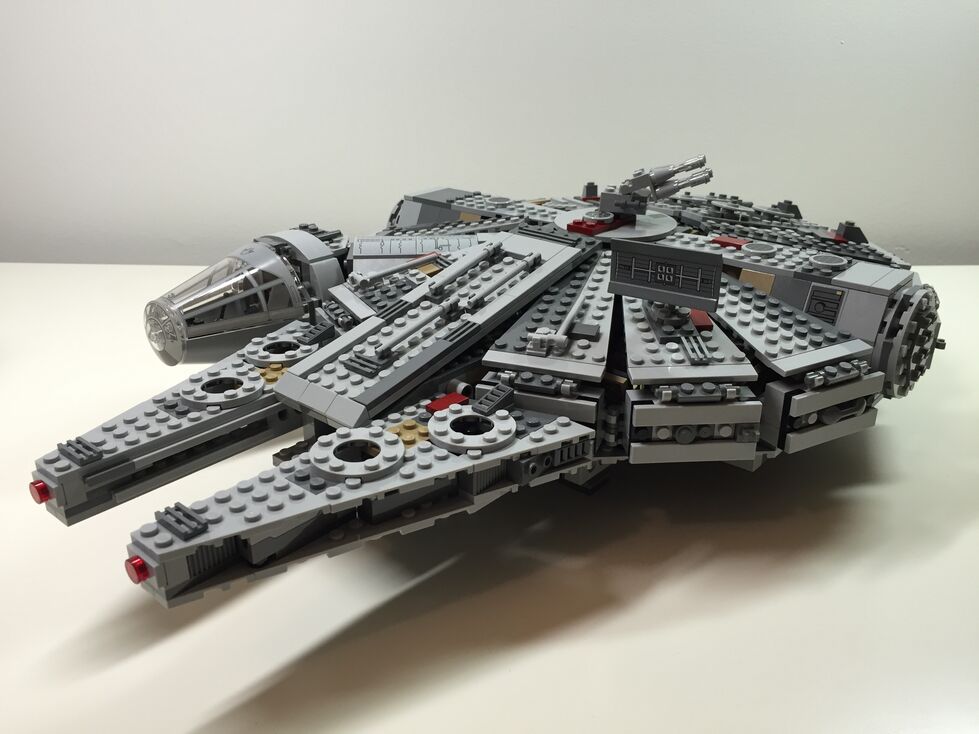
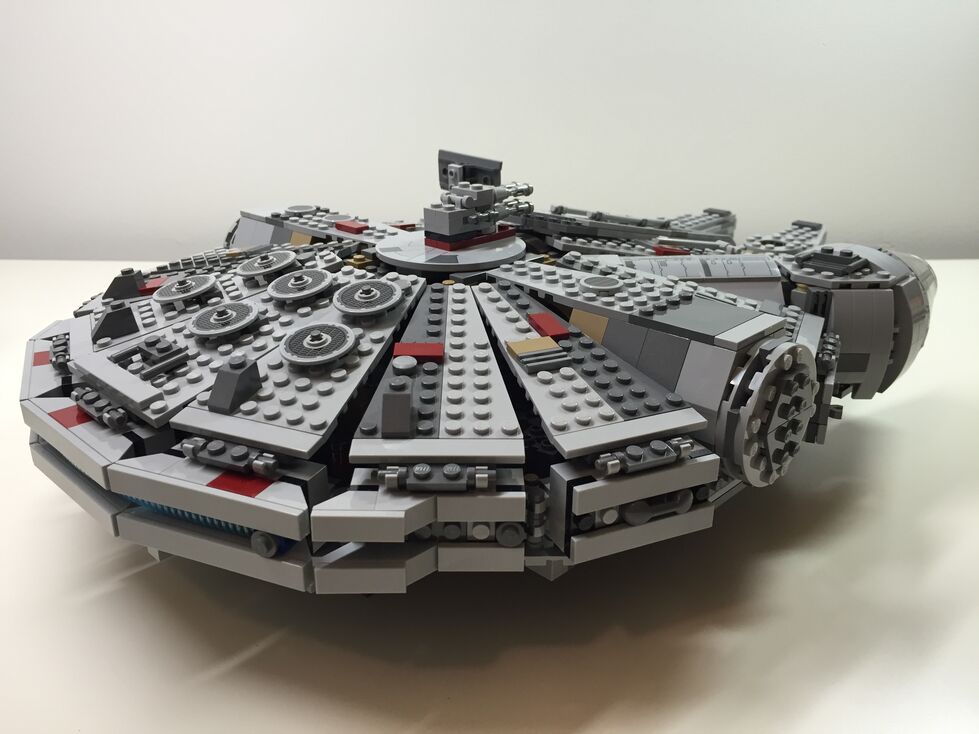
After watching Star Wars Episode VII The Force Awakens for the first of four times (so far), I purchased the new LEGO Millennium Falcon 75105 (LEGO website page and Brickset model page). It is a wonderfully designed model that balances play with detail. This latest Falcon model from LEGO captures how the passage of time and change of hands has affected this storied ship’s appearance in the film. Despite the interior and exterior greebling, the layout of the Falcon is spacious and accommodating for customization by the LEGO builder. It was my intention to customize the Falcon to be more screen accurate in the main hold and cockpit, and more detailed in the engine compartment and rear storage/bunk spaces. Through the process of customization, I worked on the exterior dorsal and ventral sides (including an improvement to the boarding platform. Below, I offer some explanation and photos for each before and after stage of my customization, including the cockpit, exterior dorsal, exterior ventral, interior fore, and interior aft.
Cockpit, Before Customization
The original cockpit accommodates two minifigures–one sitting forward on the right (pilot) and one sitting one row behind on the left (copilot). It comes with a single lever for control and a printed wedge brick with cockpit controls. Due to the conical elements used for the cockpit, space is extremely limited. However, the rear of the cockpit has a strange design that is not evocative of the rear of the cockpit, which would have controls, lights, and a door. I targeted these issues in my customization seen below.
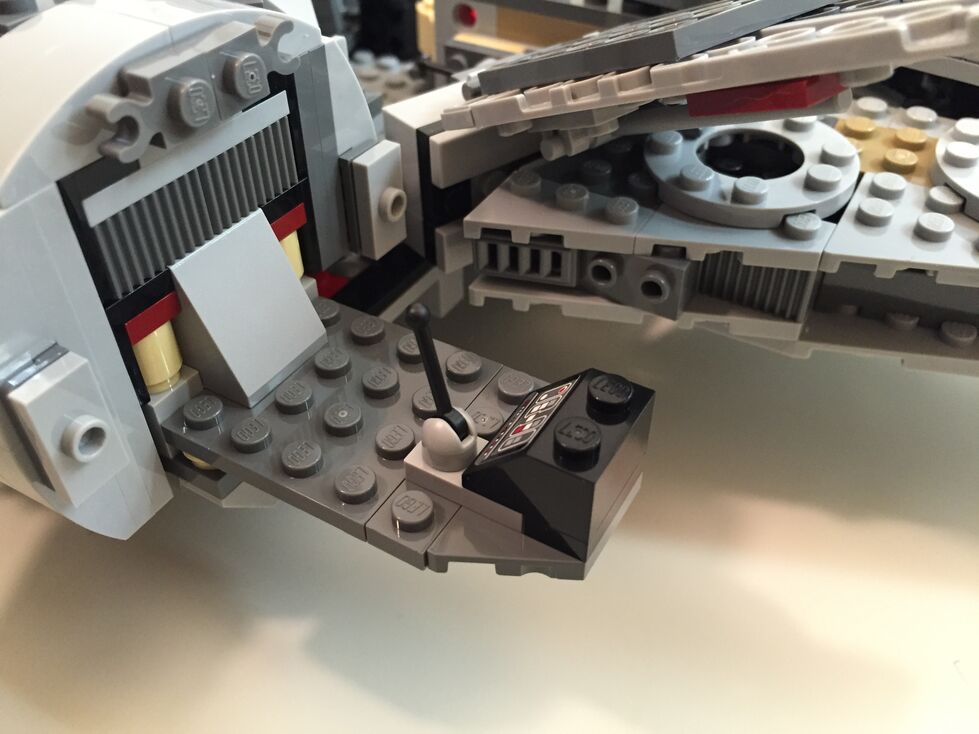
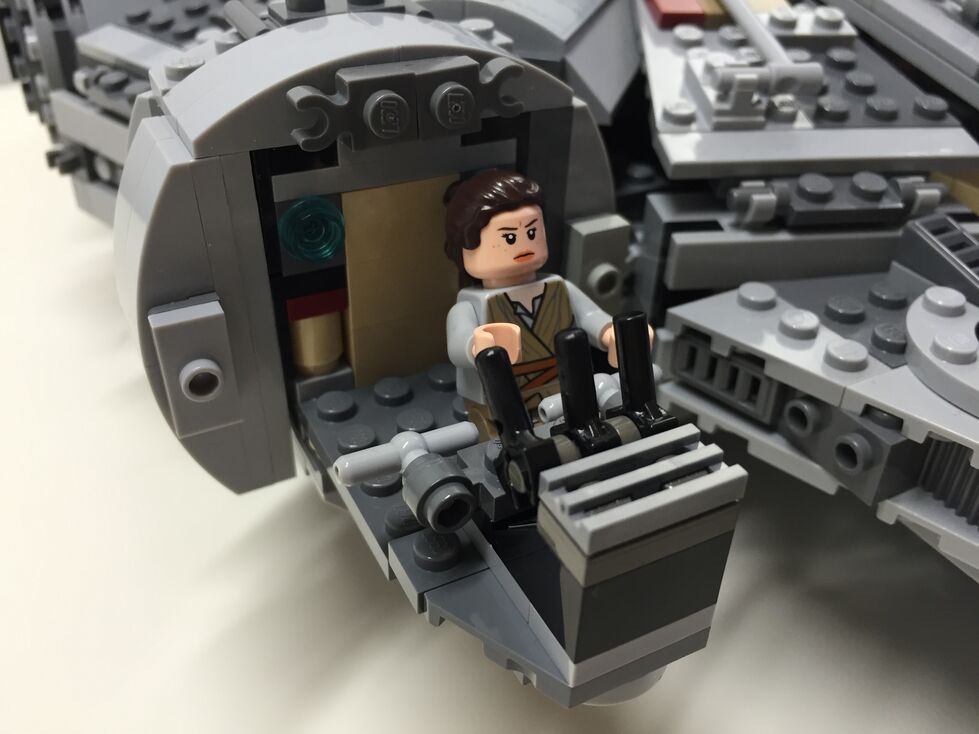
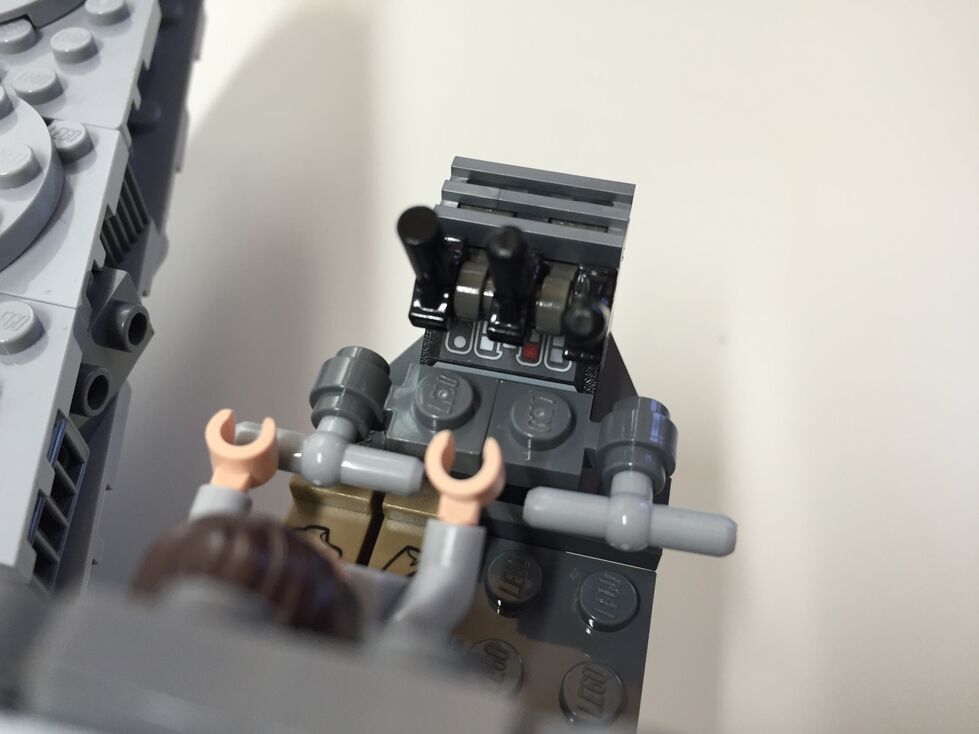
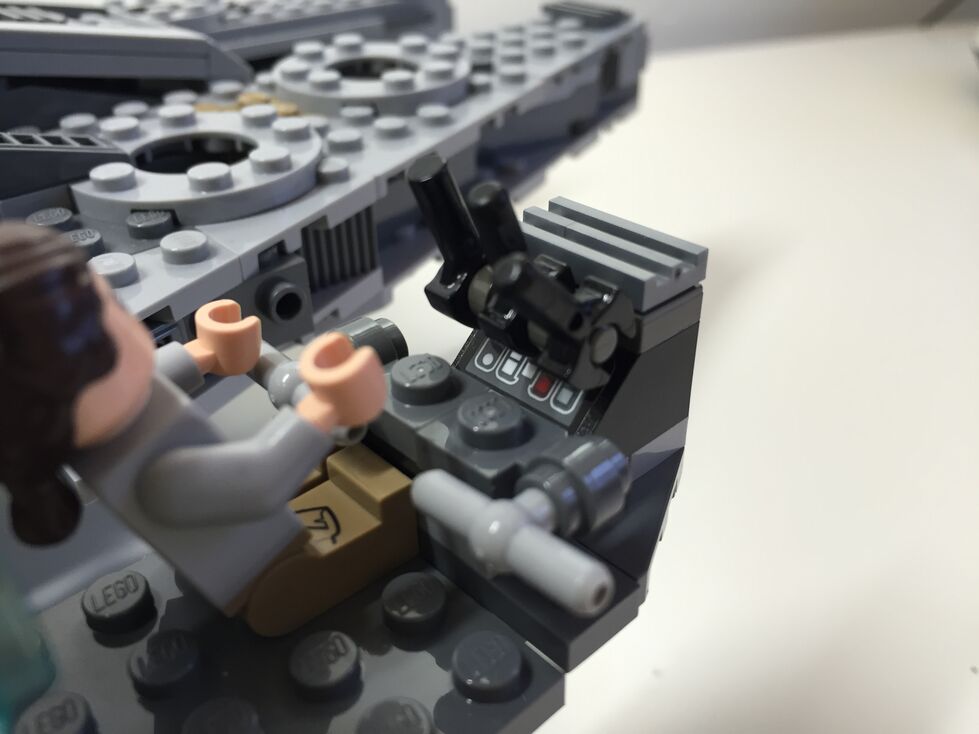
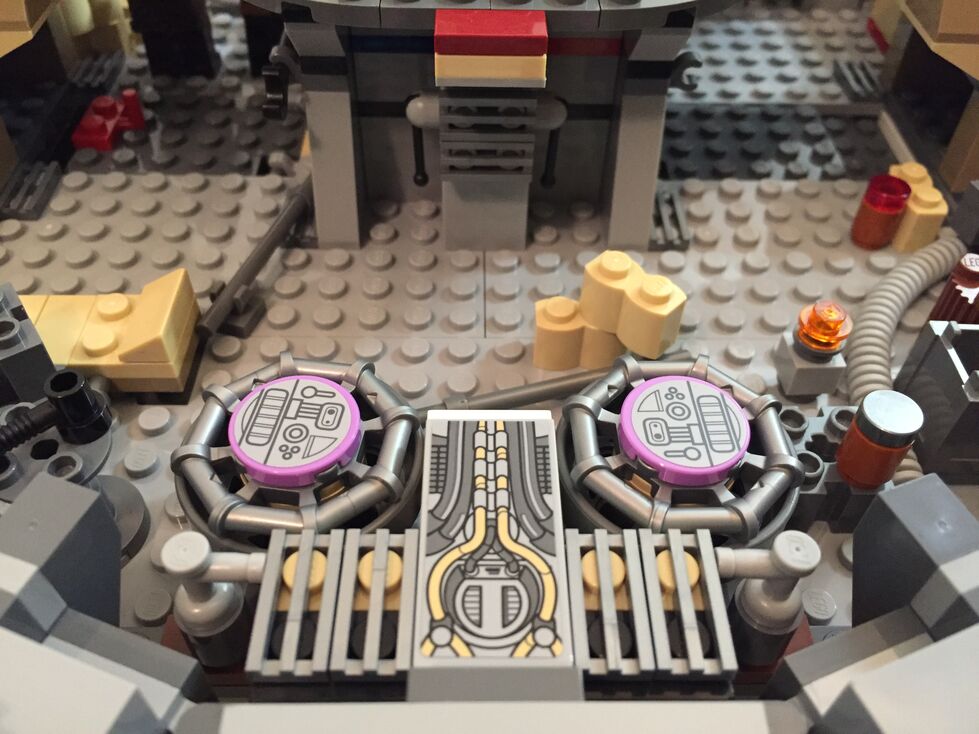
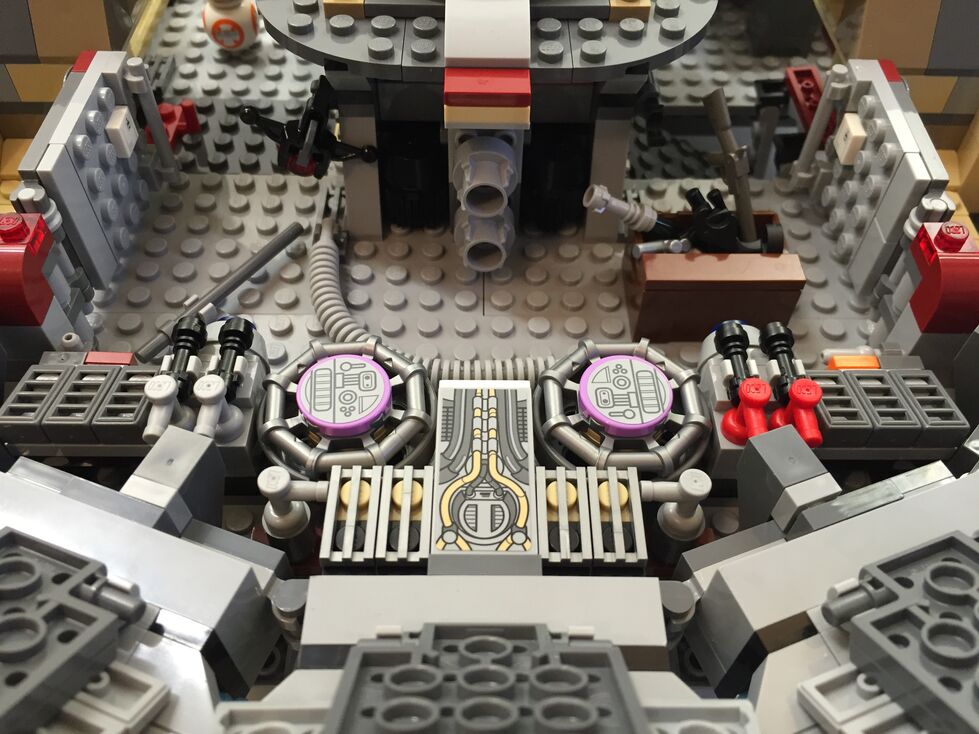
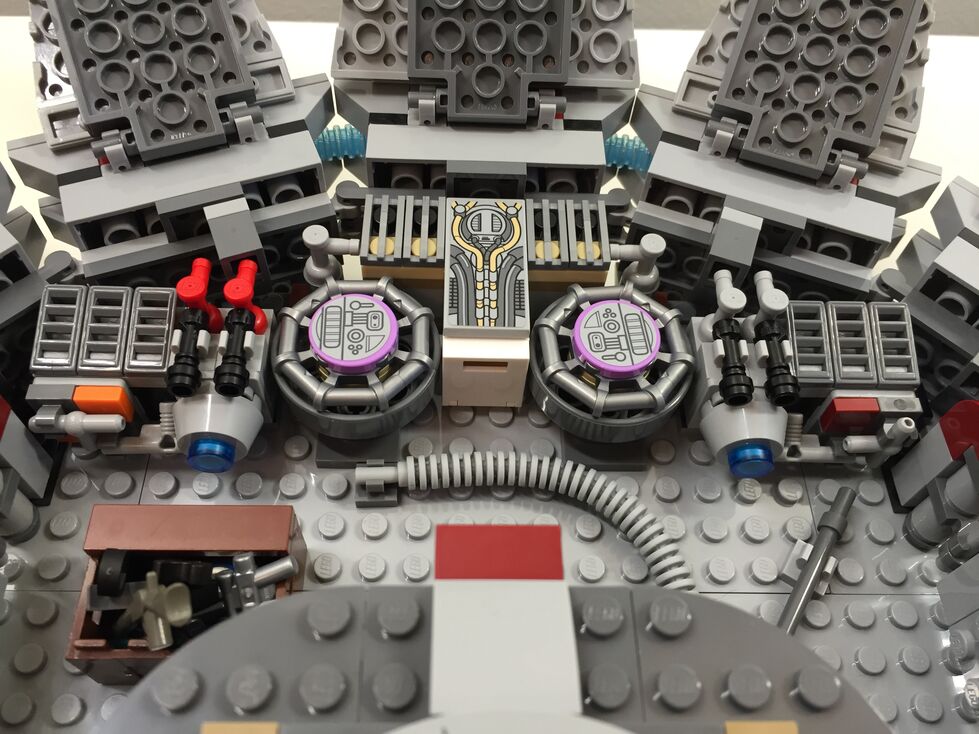
Cockpit, After Customization
In my customization of the cockpit interior, I raised the control panel by one plate and gave the pilot and co-pilot handle-bar controls like in the films. Above the directional control bars, there are three adjustable levels sitting on top of the printed control panel wedge brick for controlling the engines.
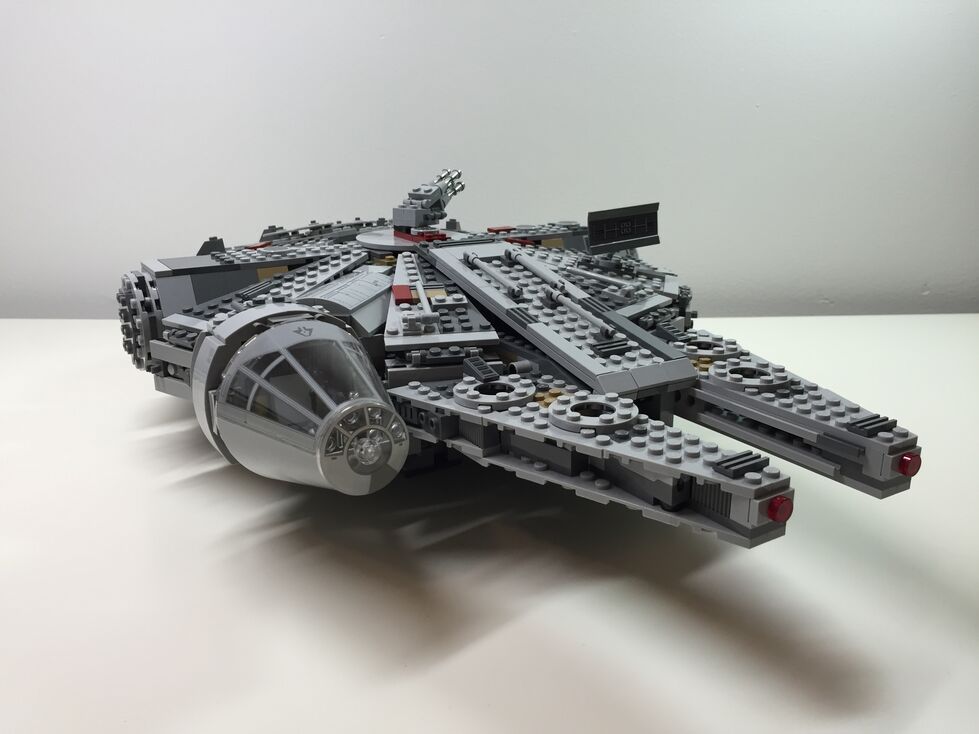
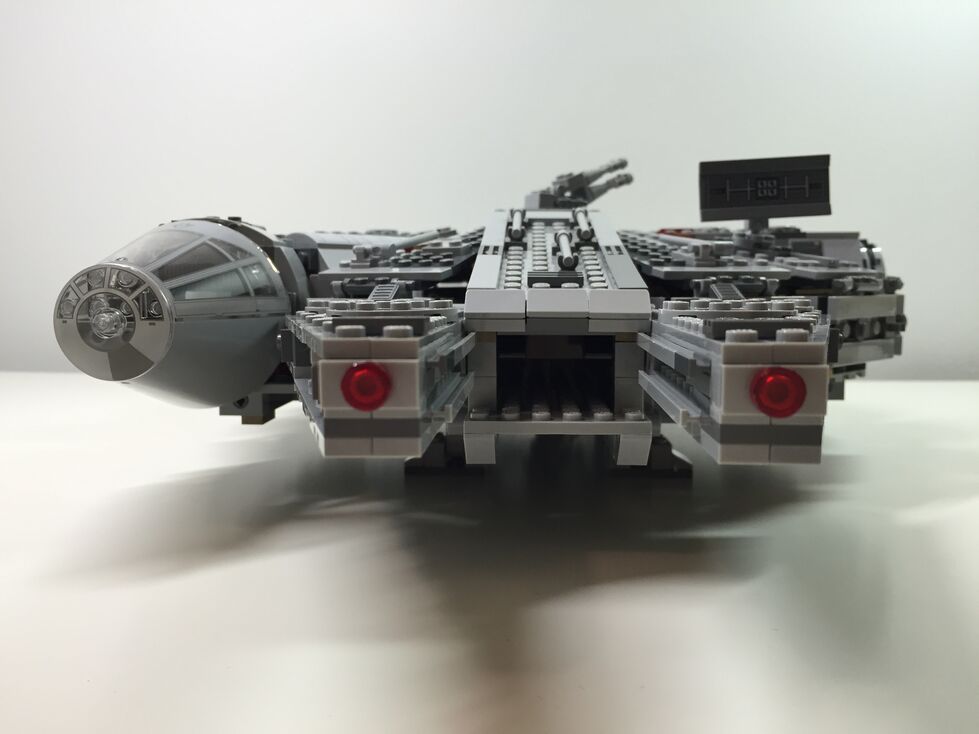
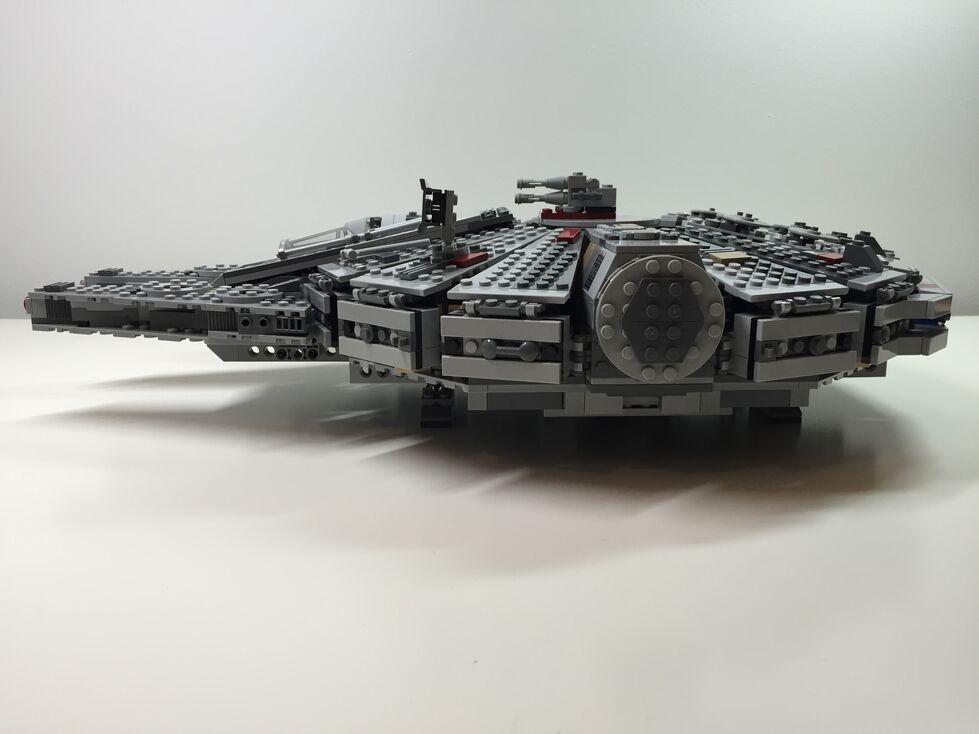
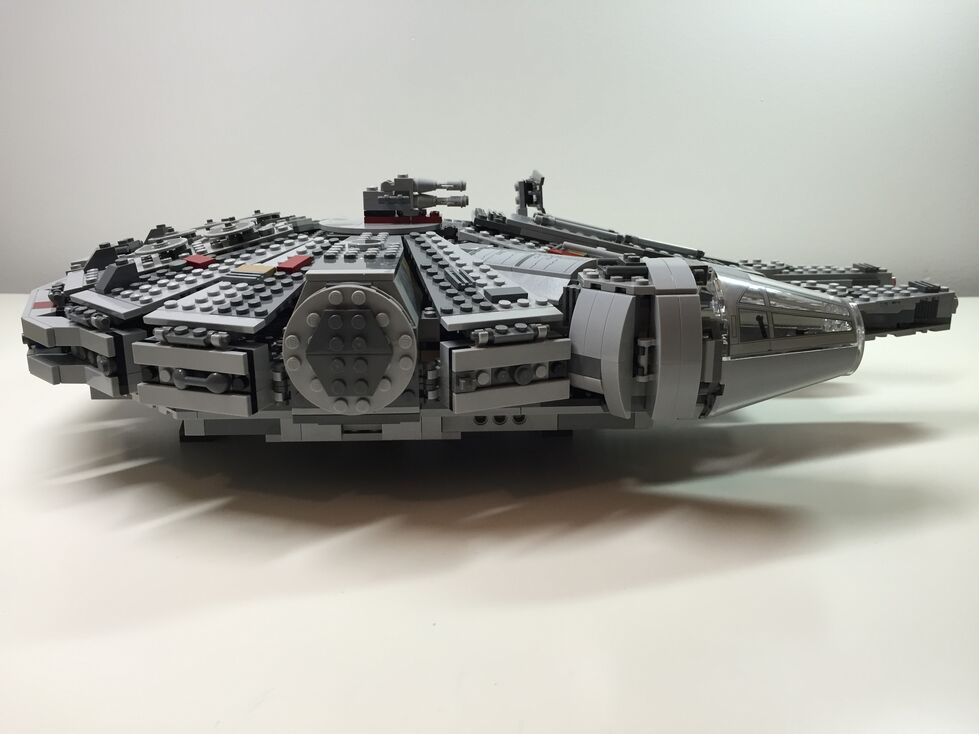
Exterior Dorsal, Before Customization
These images are of the Falcon’s exterior before any customization. Of note, the Millennium Falcon’s fore running lights are red instead of clear (a change depicted in The Force Awakens), and a less clean exterior to illustrate its aging and modifications.
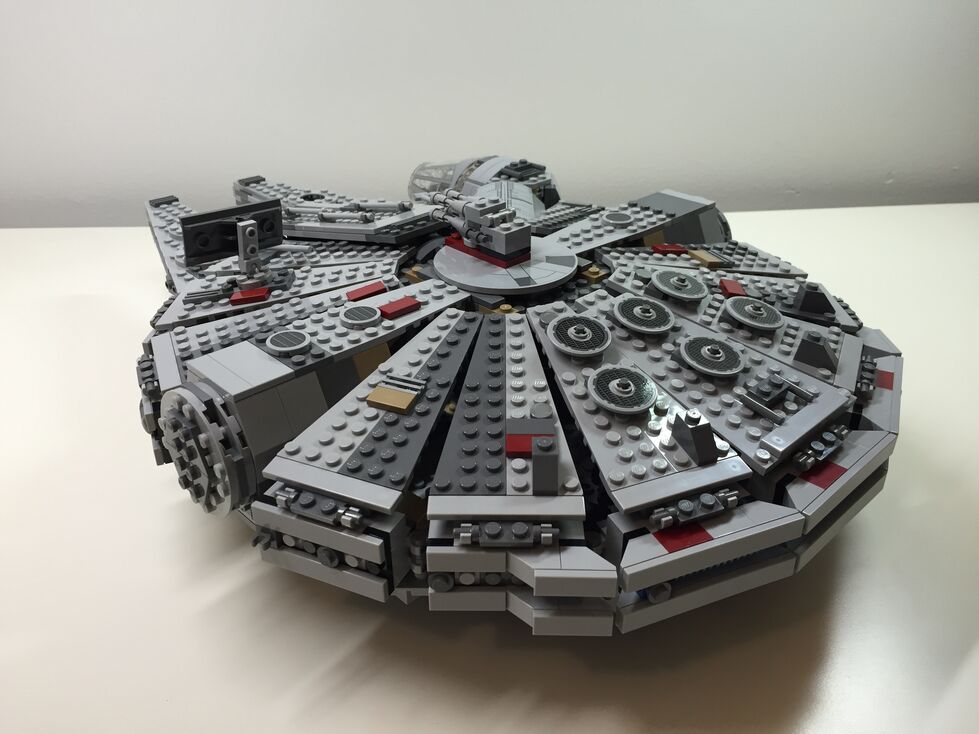
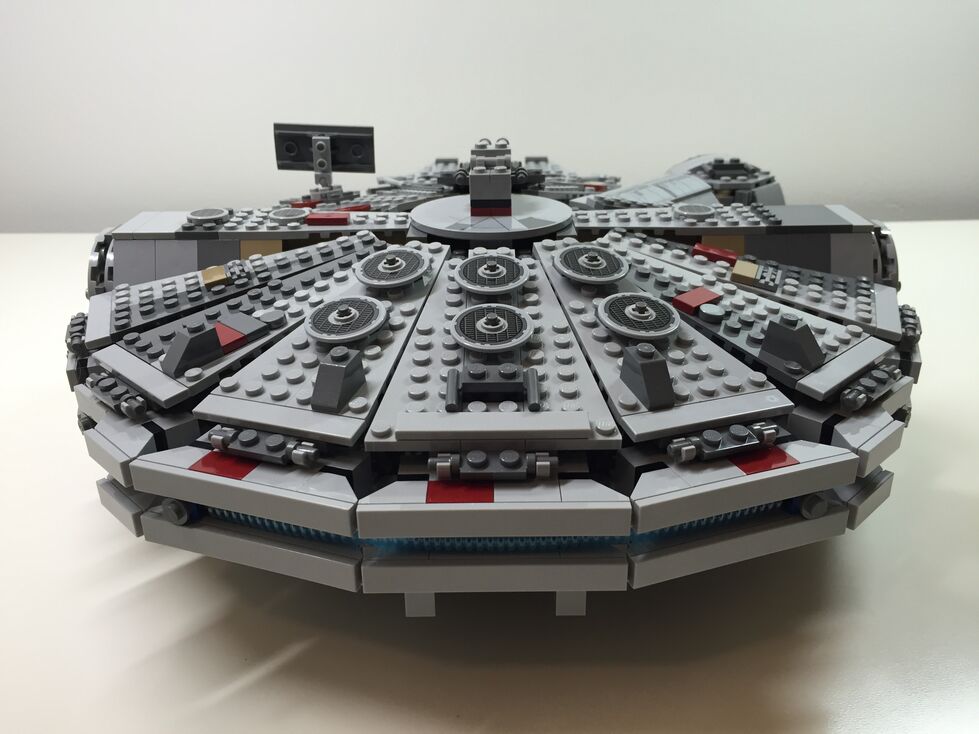
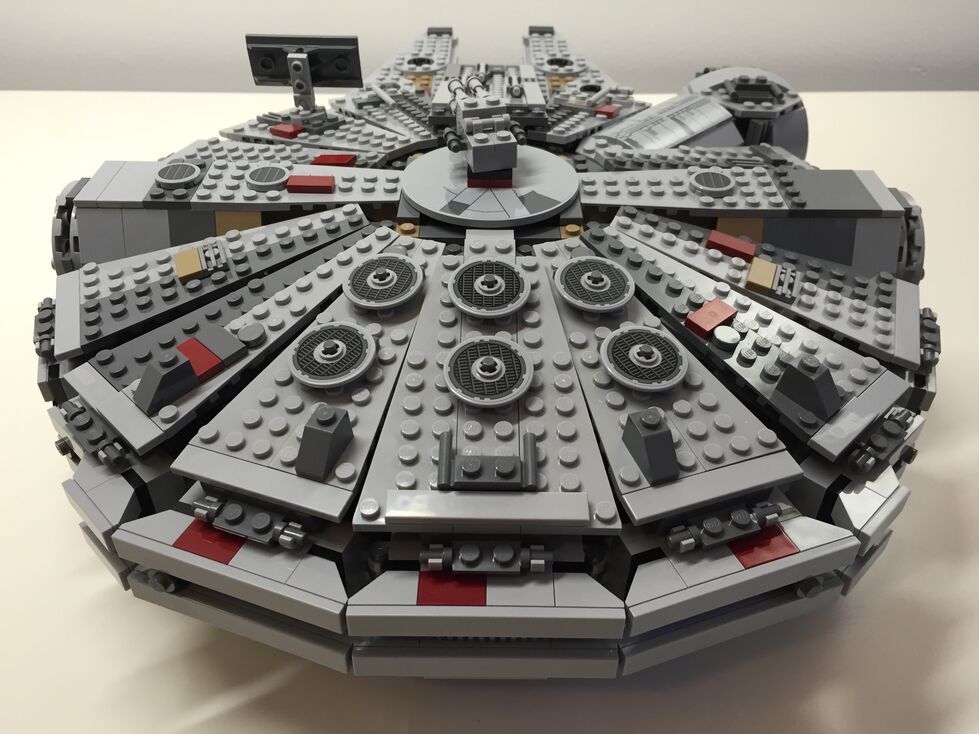
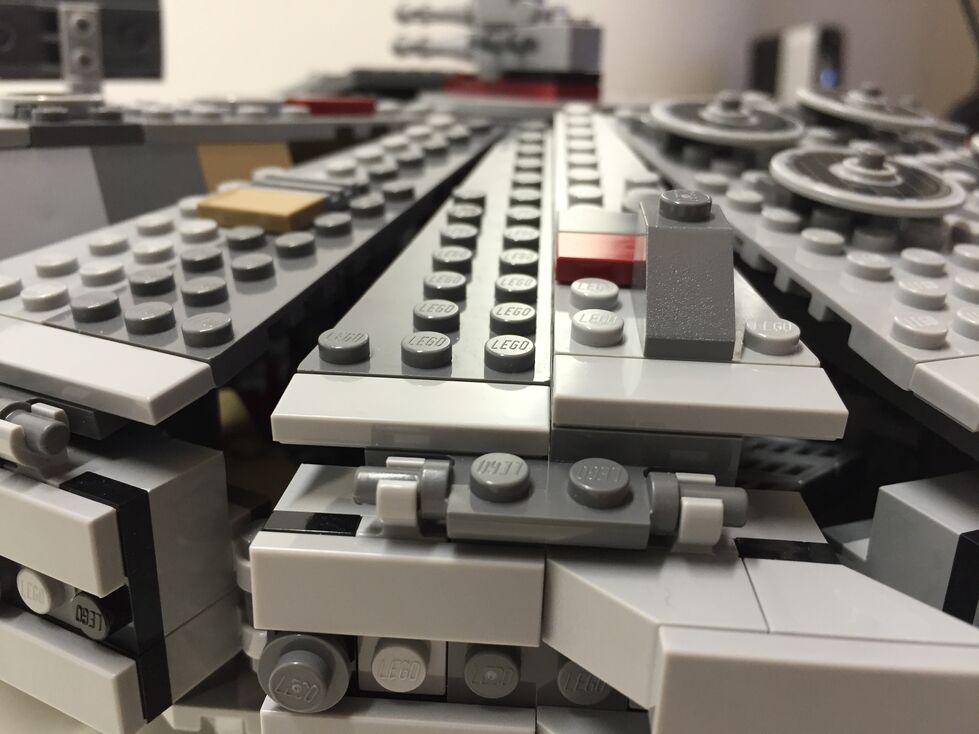
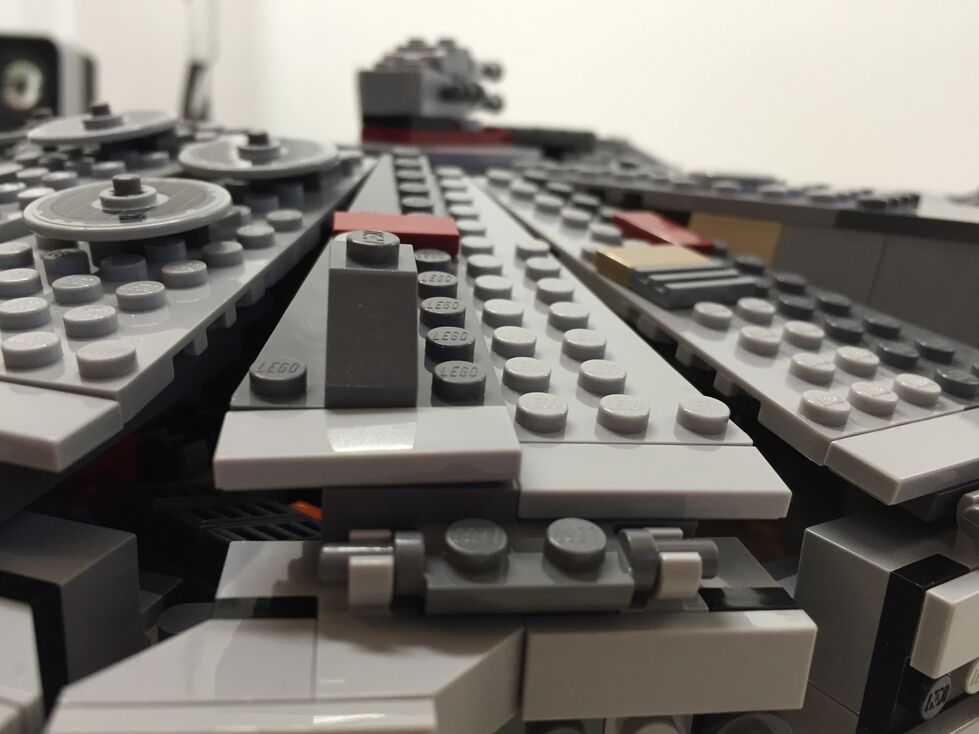
Exterior Dorsal, After Customization
The one external element that I wanted to accentuate as much as possible was the slightly raised panels above the rear quarter over the engines. This was easily accomplished by adding a single plate above the hinge for each sectional panel, and adding a single plate height to half of the bordering panels. The latter, however, also required finding 1×3 flat plates for the segmented panels as seen below.
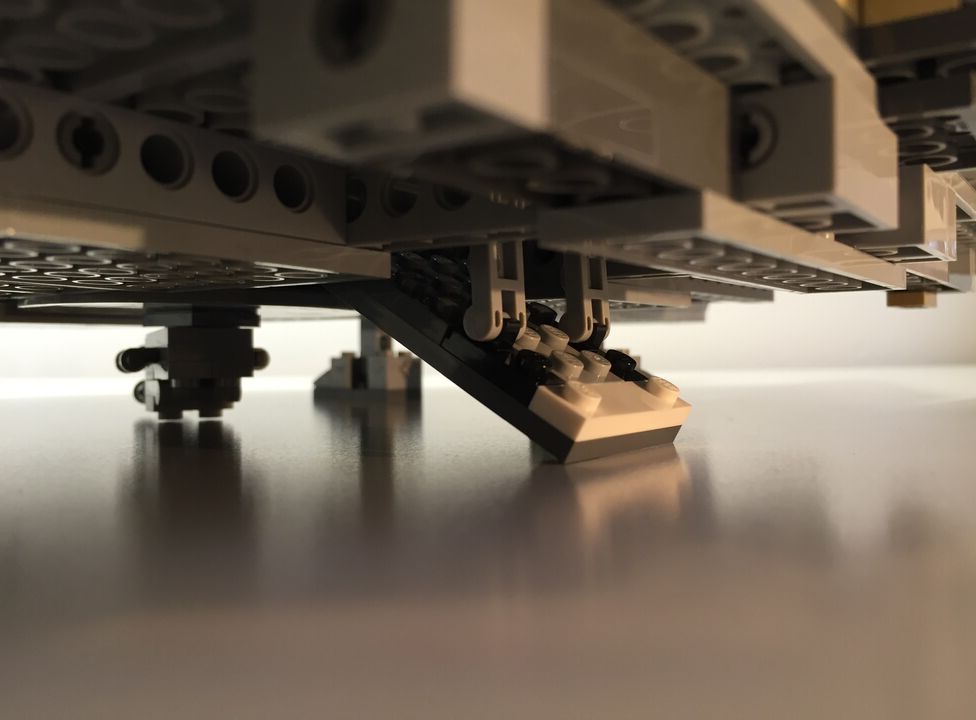
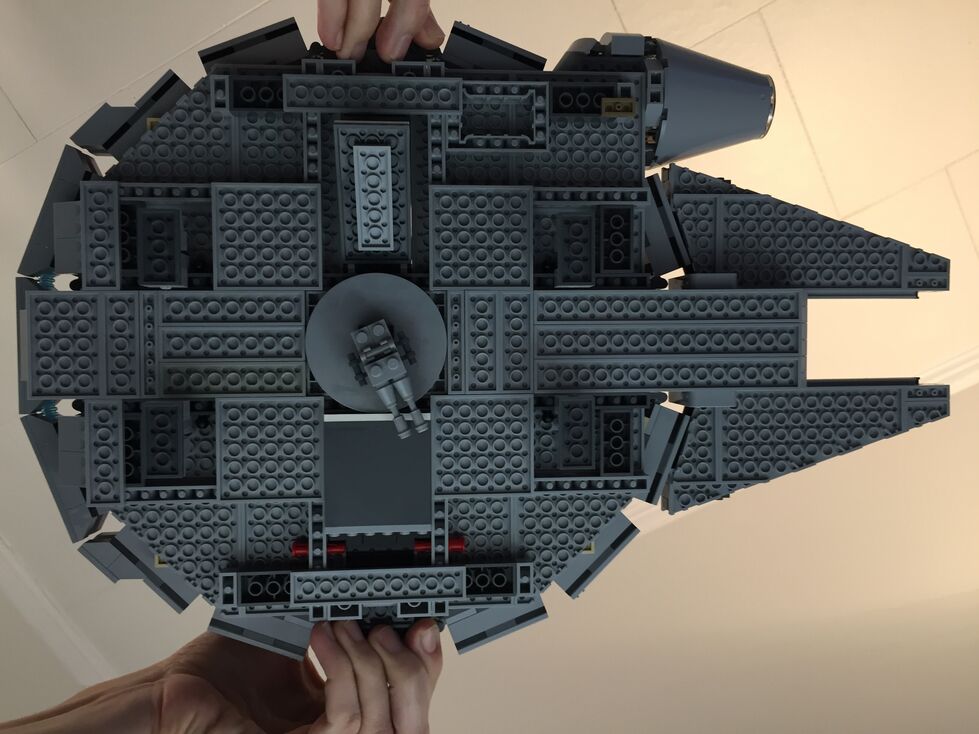
Exterior Ventral, After Customization (no Before photos taken)
Originally, the boarding platform does not have hydraulic lifters and the bottom of the Falcon is largely exposed to the Technic beams that form the support skeleton for the model. I added the lifters and covered much of the bottom (more can be done when I have the bricks available to accomplish a better approximation of the Falcon’s bottom exterior (angled forward pods and rear hold pod beneath the engines).
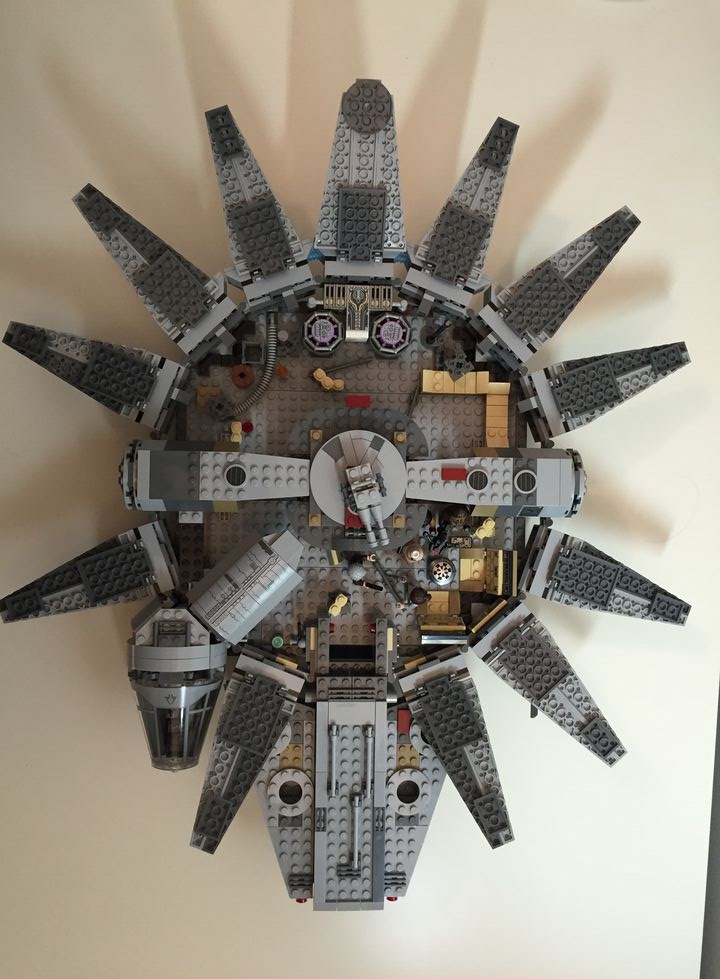
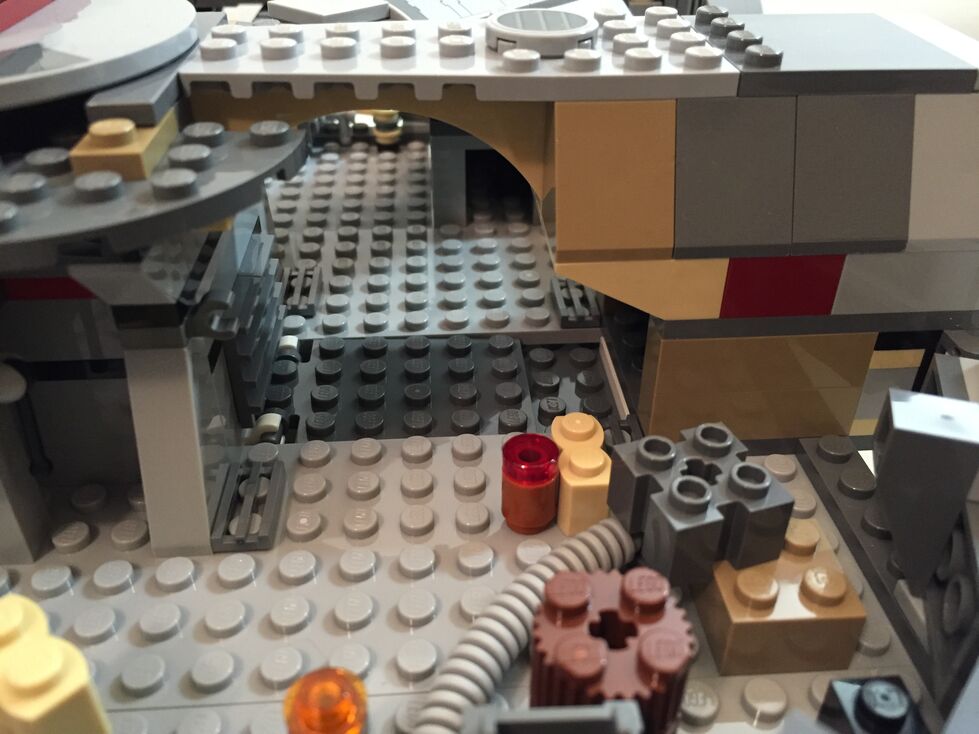
Interior Fore, Before Customization
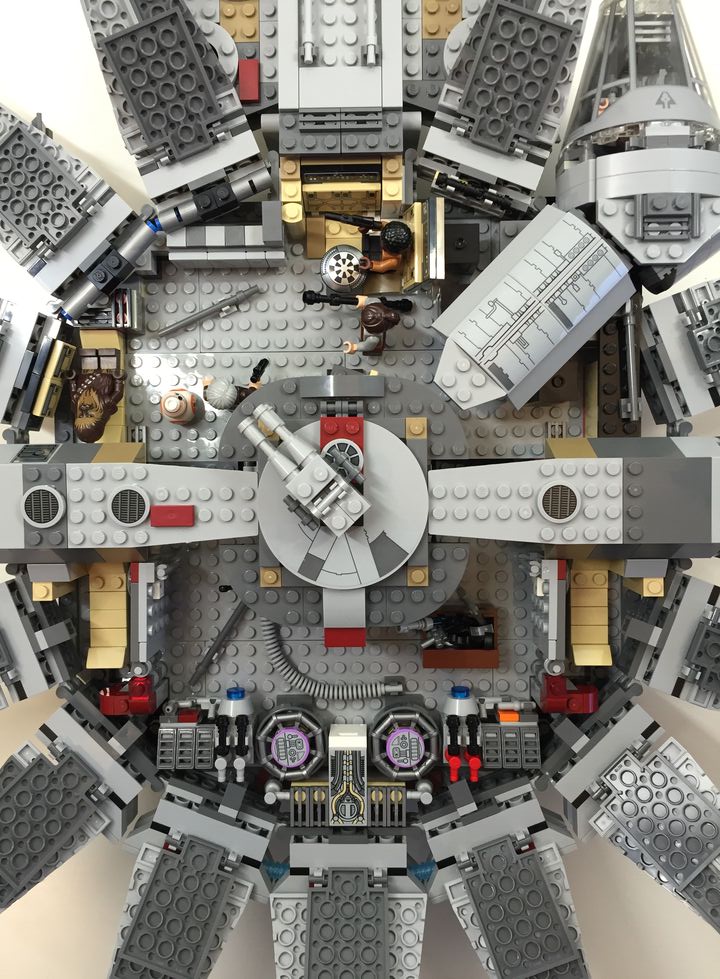
The 75105 Millennium Falcon model continues the innovative “petal” design forming the dorsal fuselage of the spacecraft, which first appeared in the 4504 set and was improved in the 7965 set. The best change from the earlier designs is for the forward bisecting panel leading from the mandibles to the gun turret. Instead of opening up toward the turret (4504) or opening forward toward the mandibles (7965), the panel now swings forward and down between the mandibles thus giving easier access to the builder for play inside the Falcon. The navigational computer is more accurately captured with a sticker applied to a flat plate than printed wedge bricks in 7965, and the Dejarik table is printed on a round shield element. My complaints with the interior design have to do with the inaccuracy of the placement of the Dejarik table/benches and bunks. I focused on this in my customization.
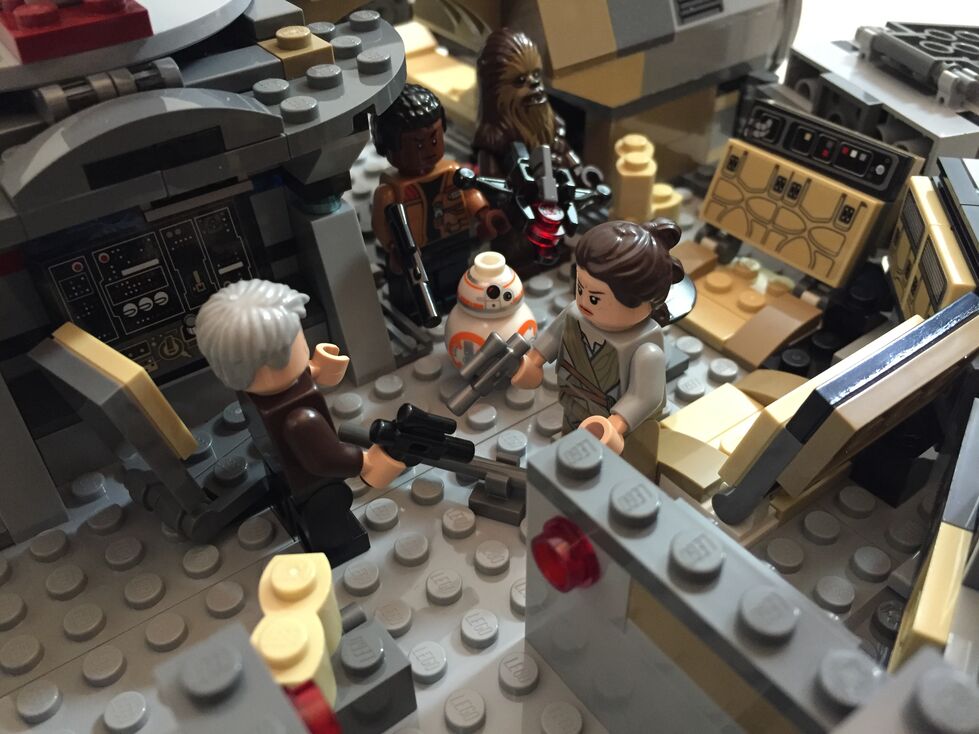
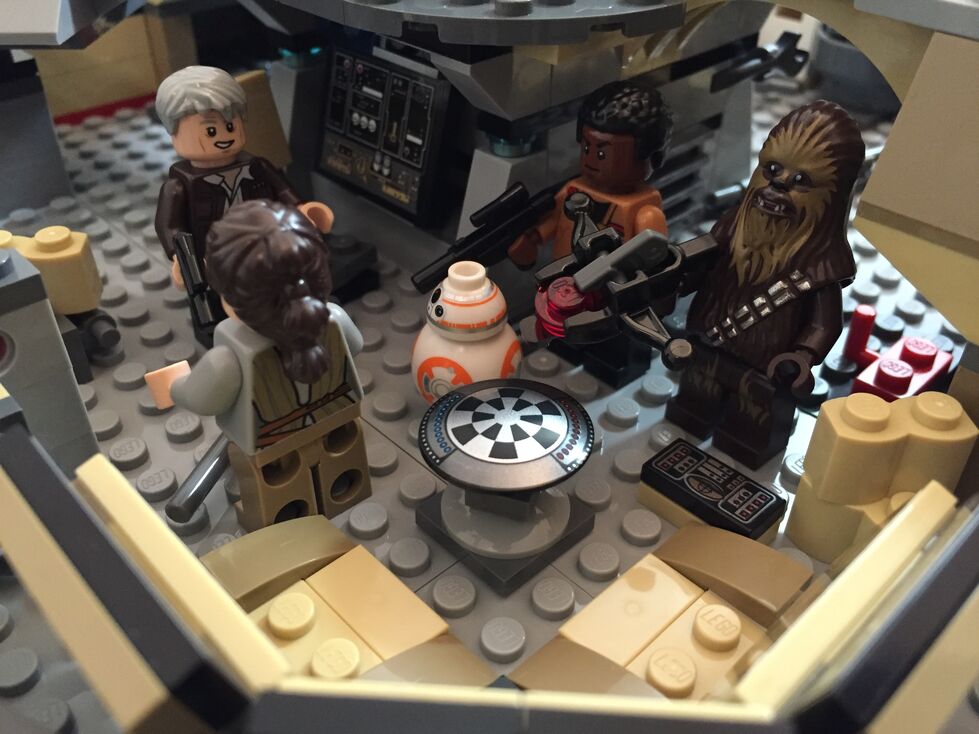
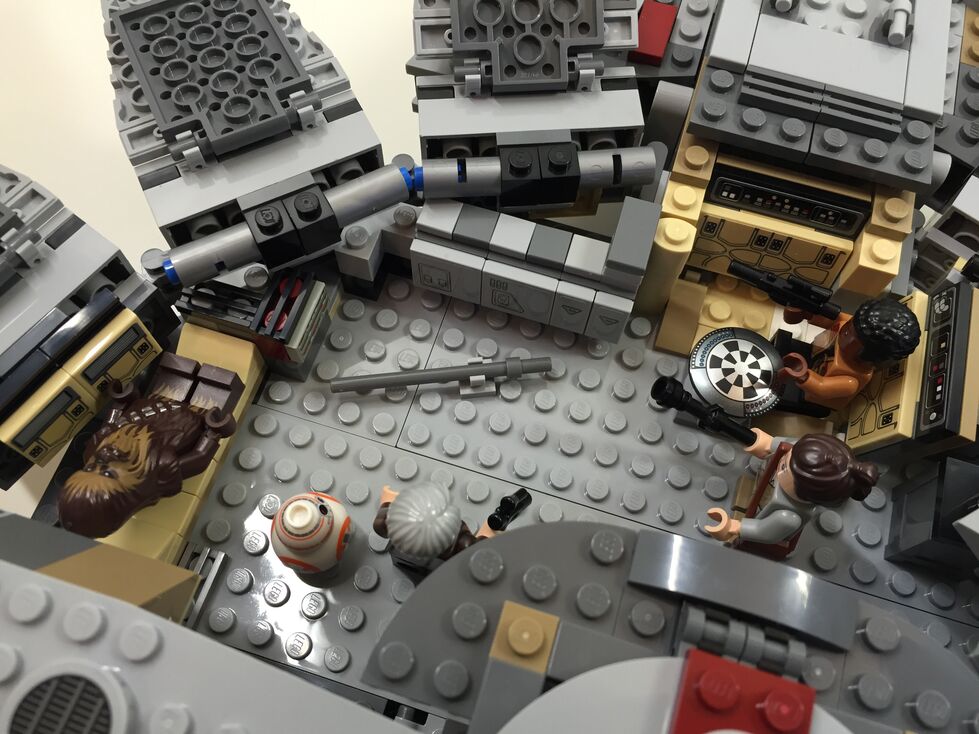
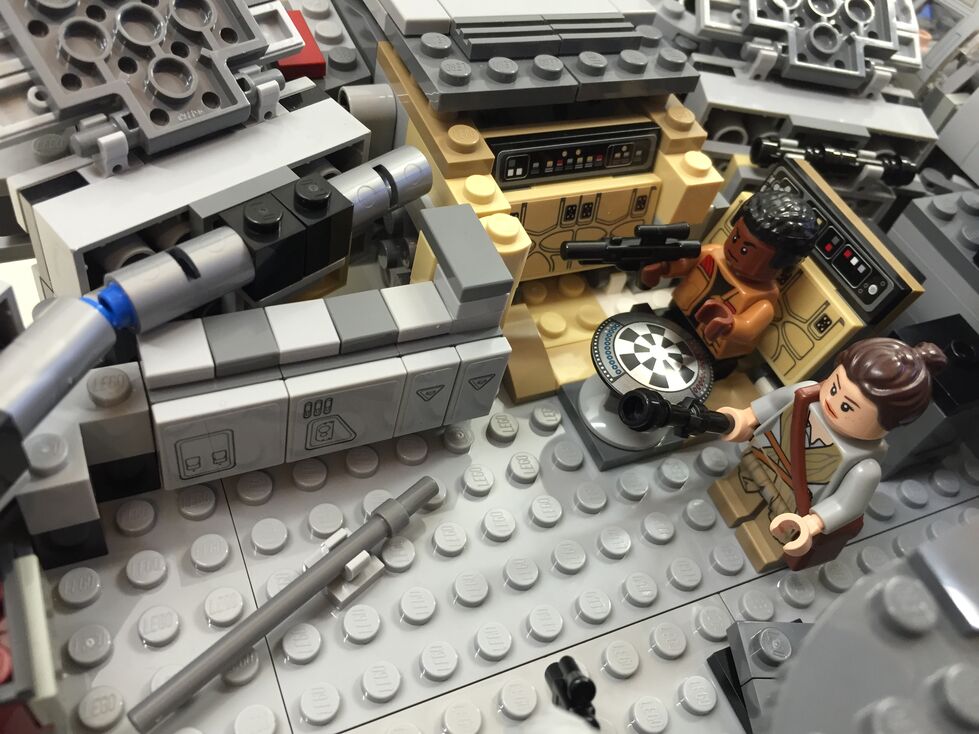
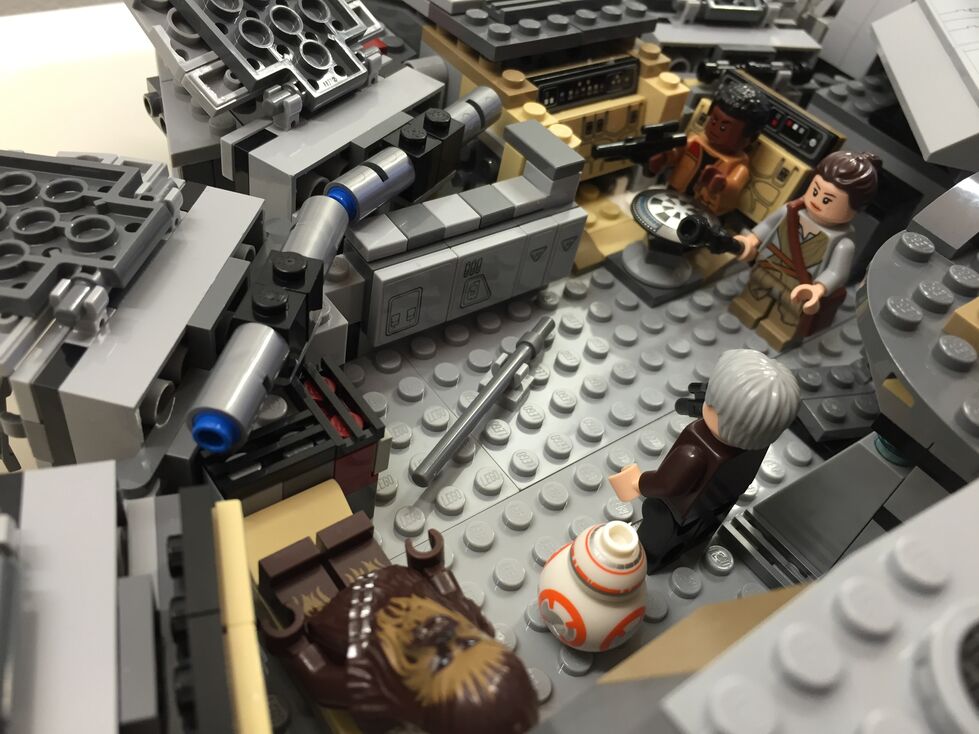
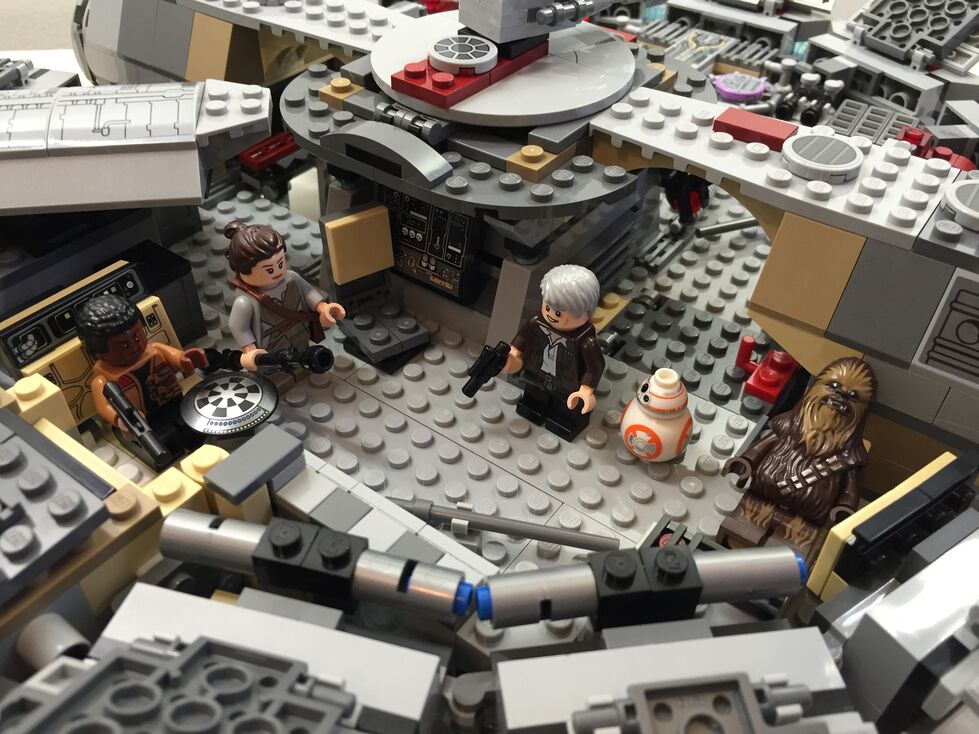
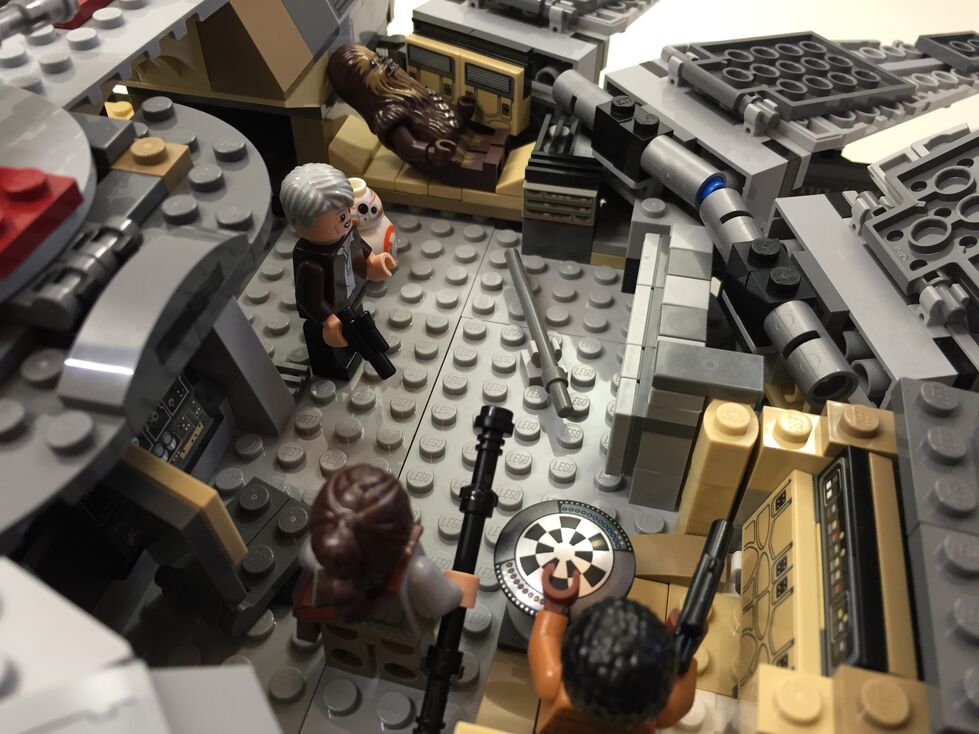
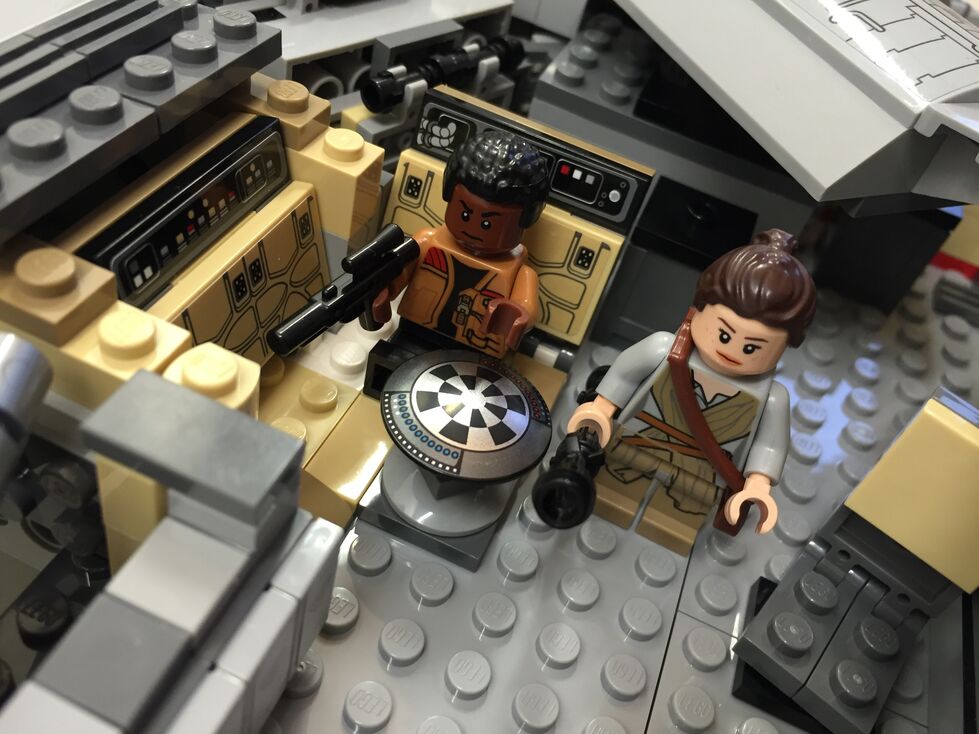
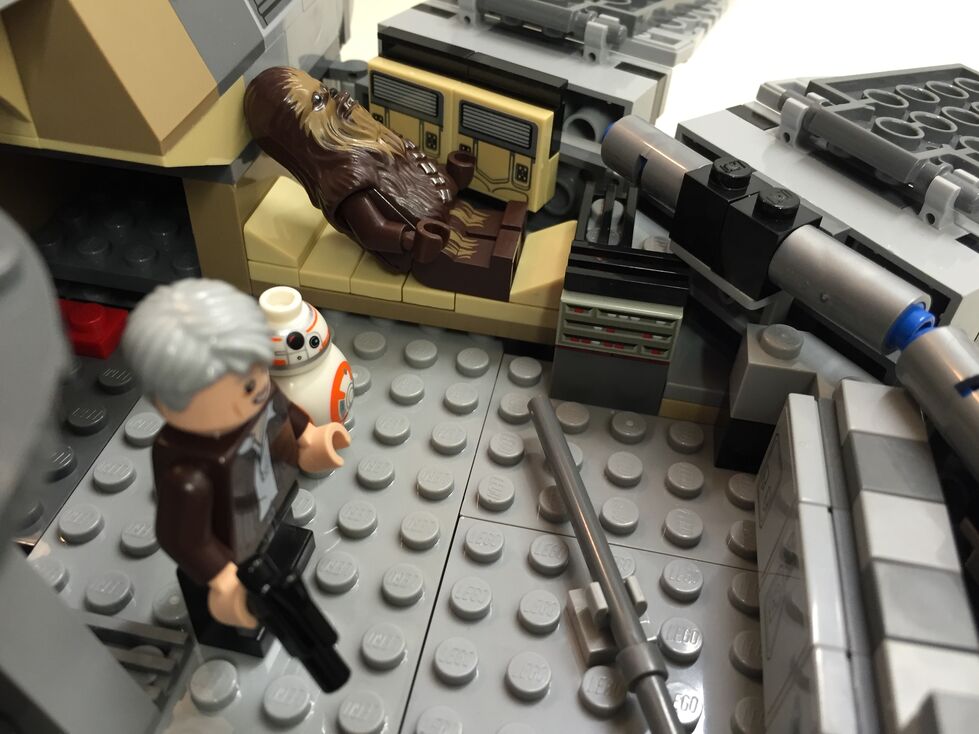
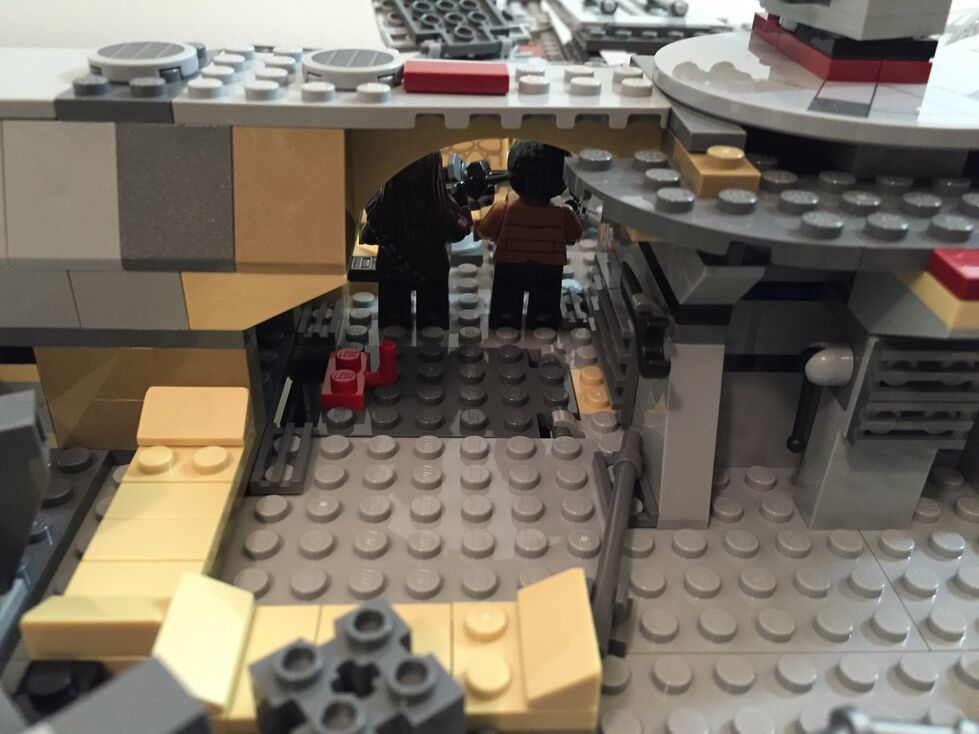
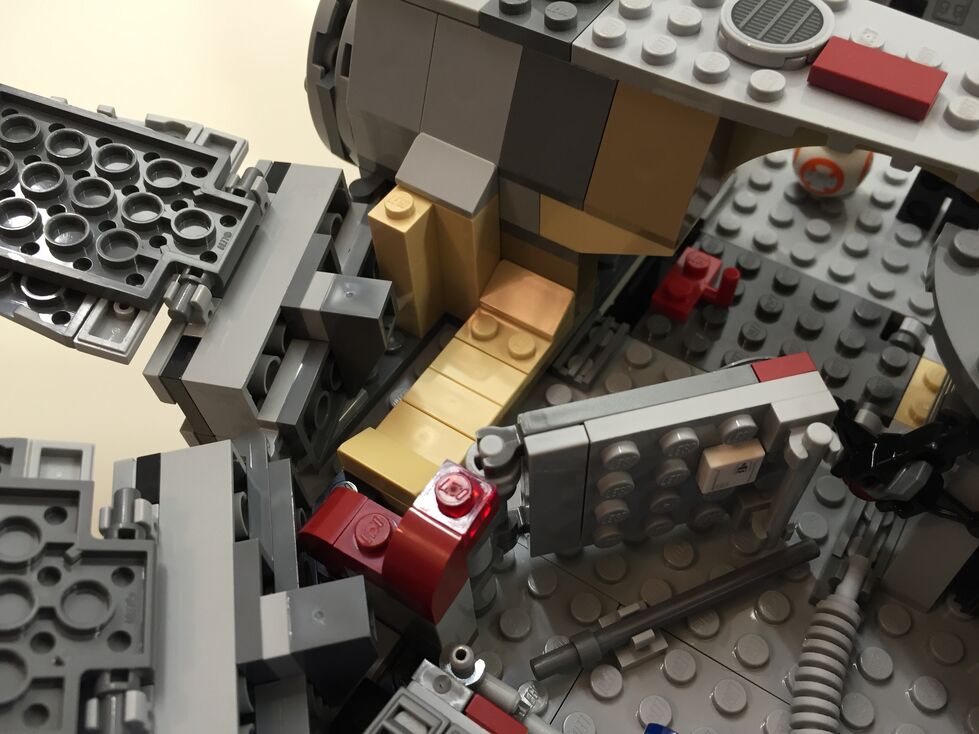
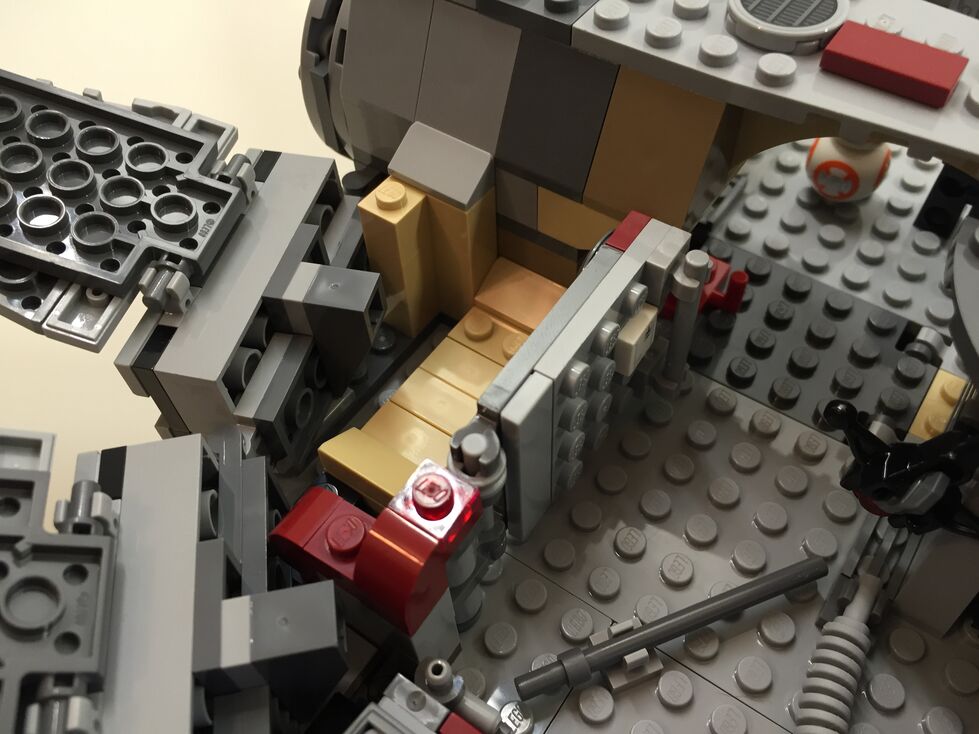
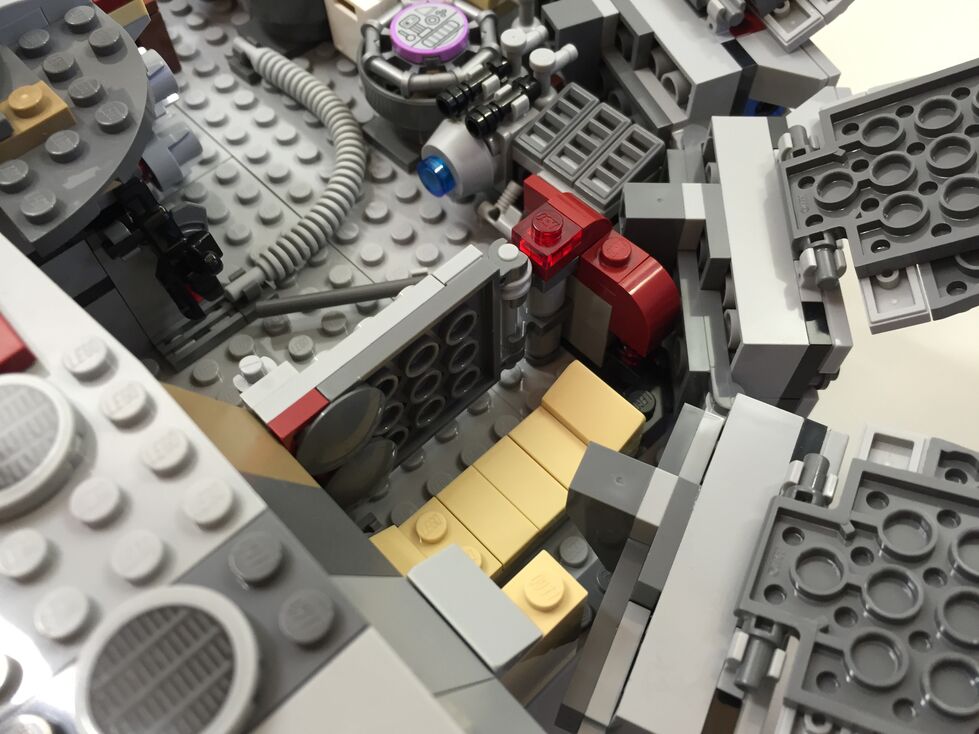
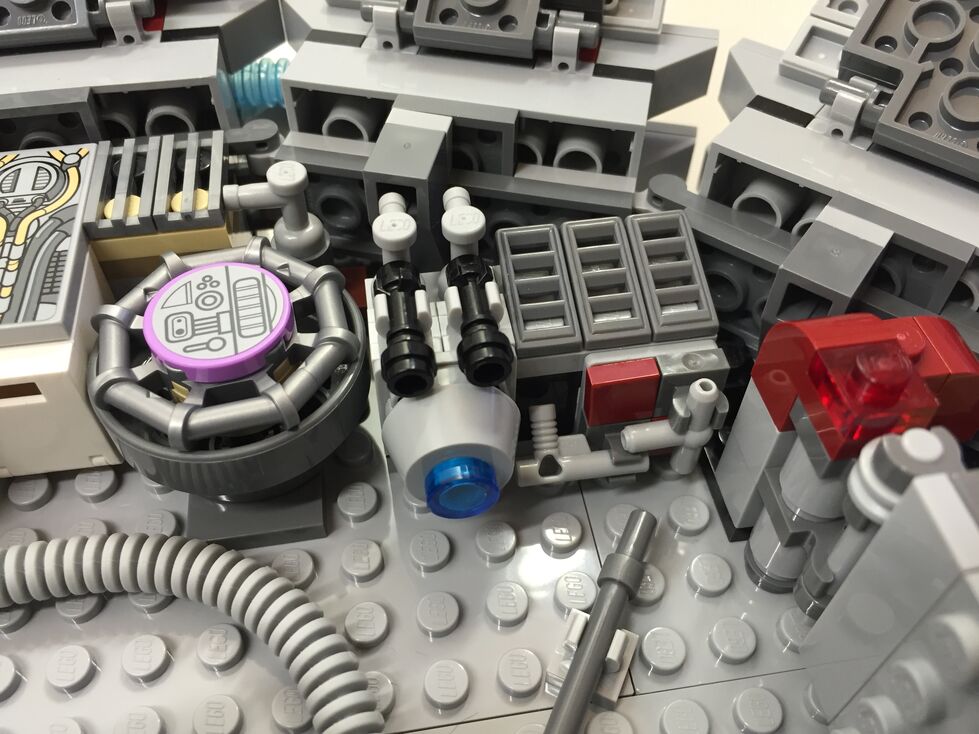
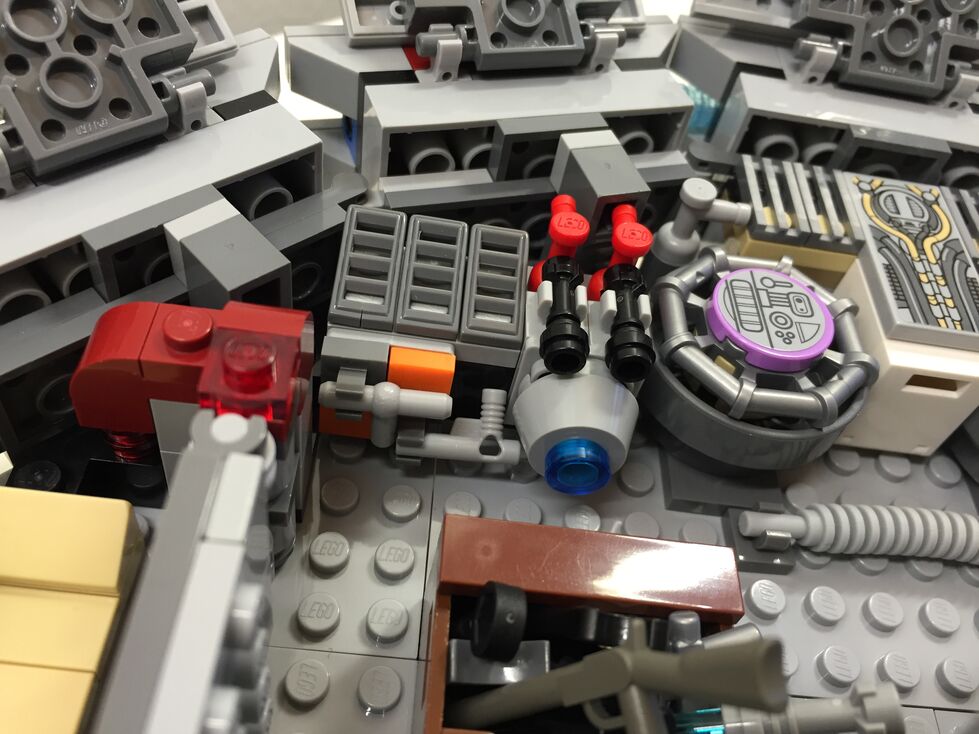
Interior Fore, After Customization
In my customization, I moved the Dejarik table and benches across from the navigation computer, which required rebuilding part of the mandible supports and the swing components for the center panel (to clear the center bench back). I relocated one of the bunks to the end of the hold to create the medibay where Finn bandages Chewbacca’s arm. In the main hold, I constructed a forward wall with panel details taken from the First Order Snowspeeder 75100 set.
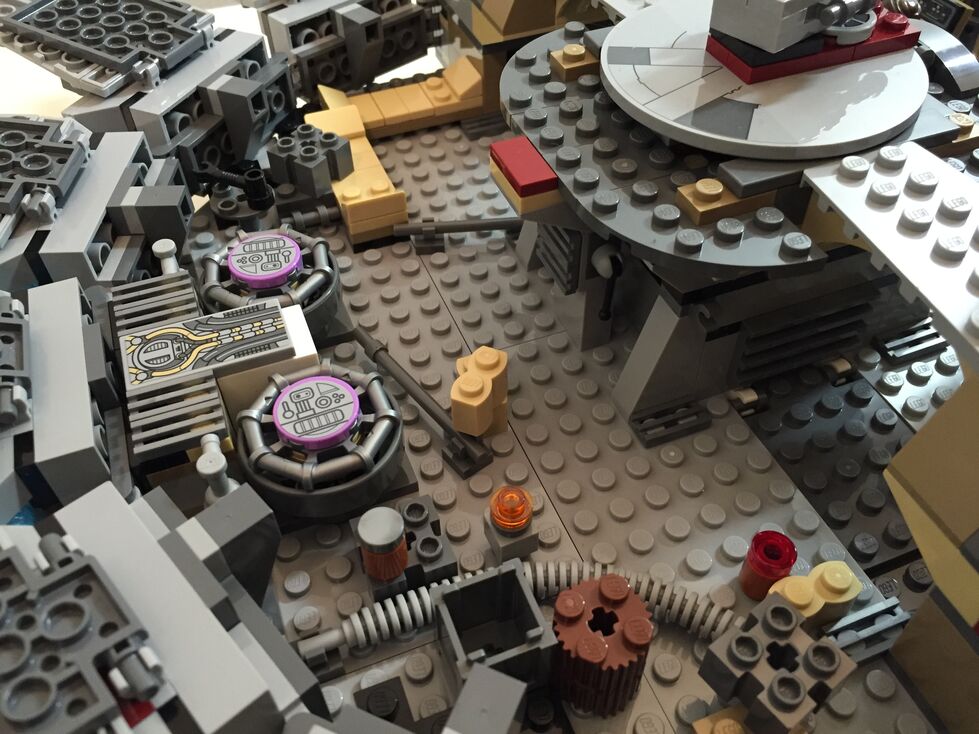
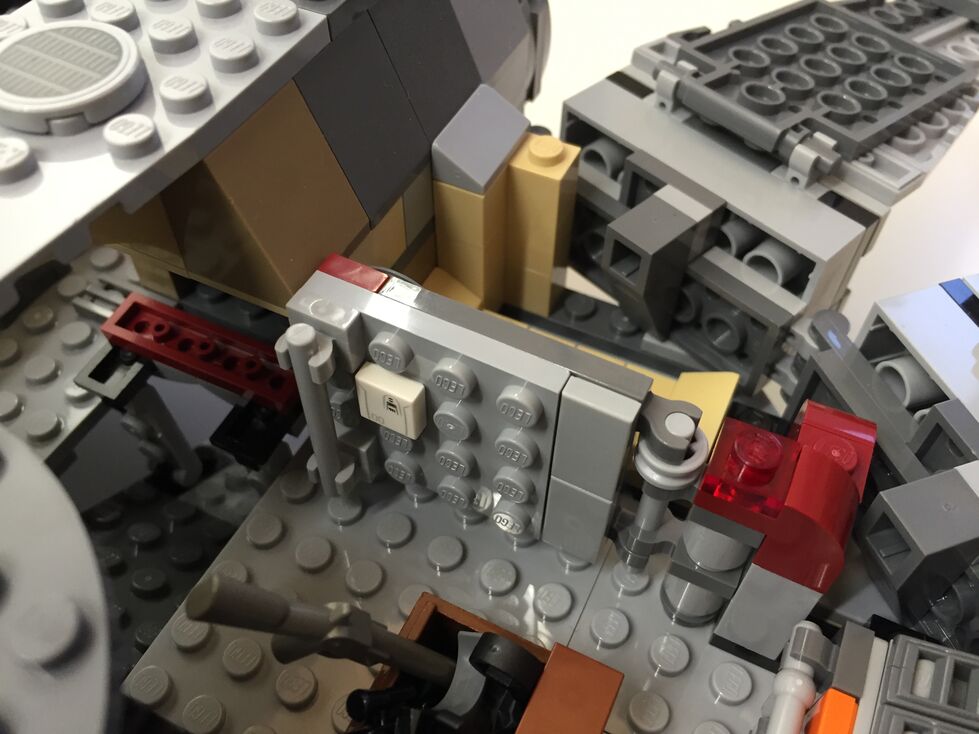
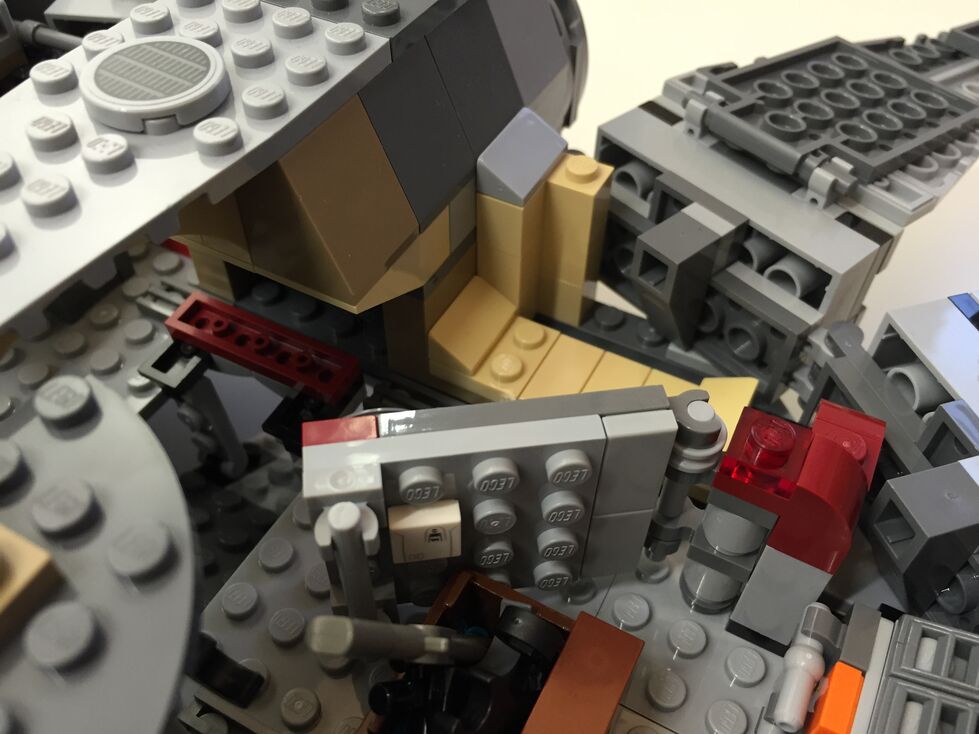
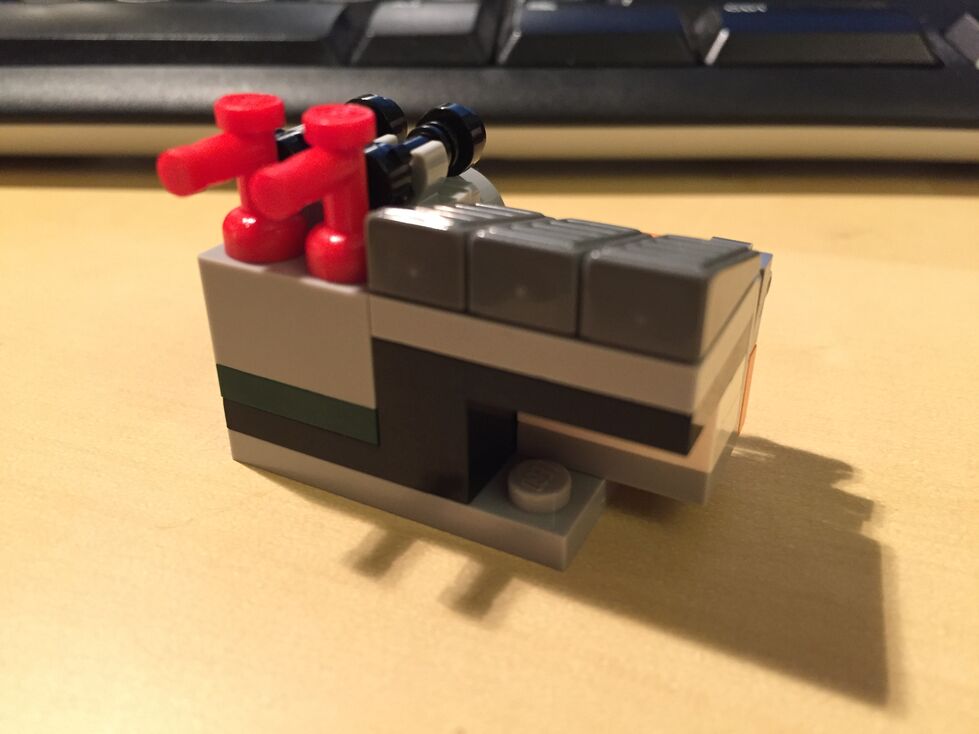
Interior Aft, Before Customization
The engine compartment in the rear of the model is similar to the one in 7965. This part of the Falcon captures the junked essence of the Falcon in general and the effects of the passage of time and unkind handling of the Falcon depicted in The Force Awakens. I wanted to keep its garbage appearance while giving the engine compartment greater substantiality.
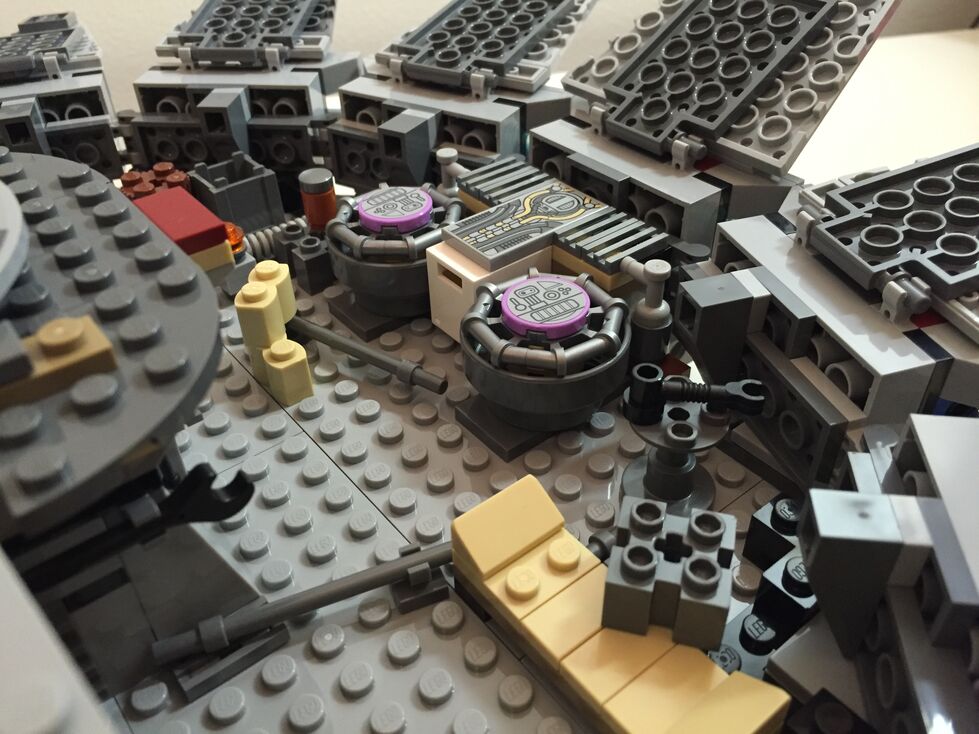
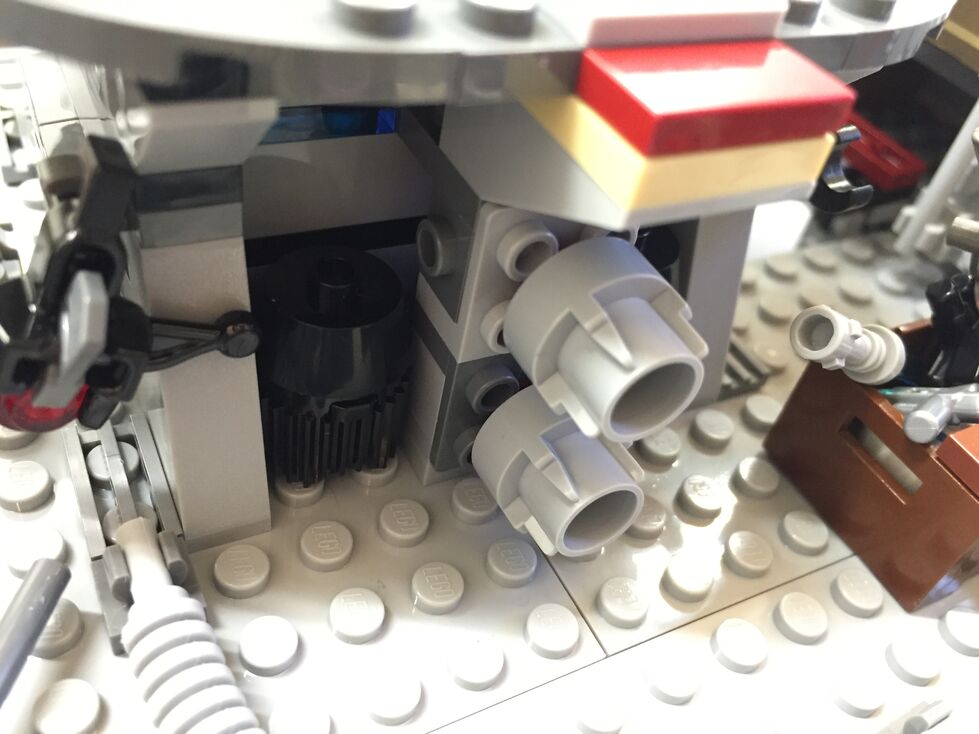
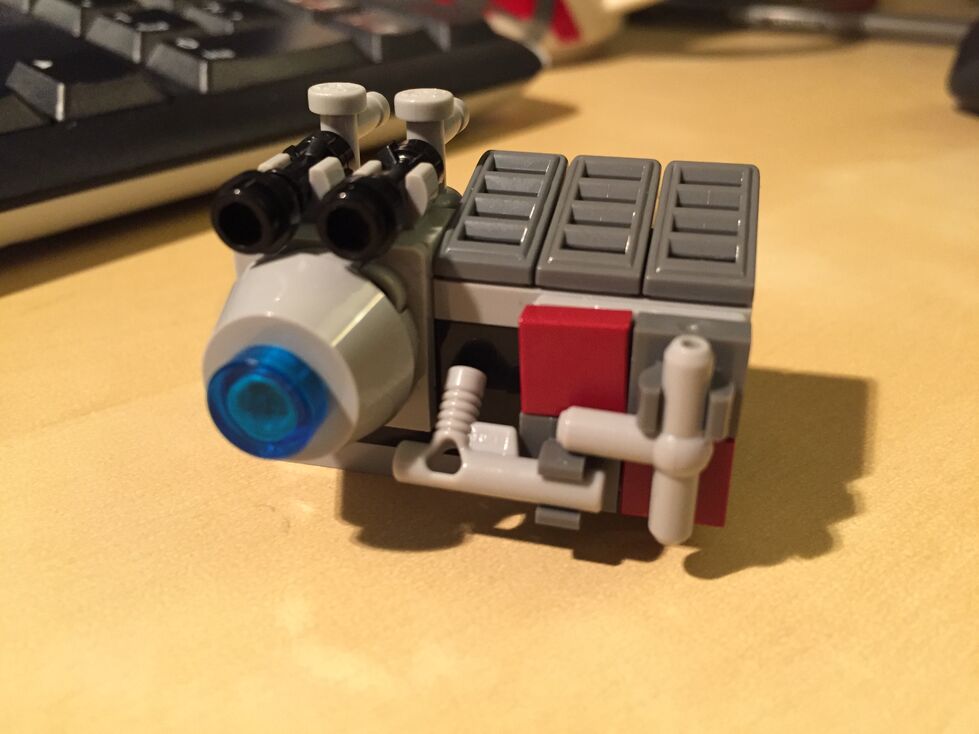
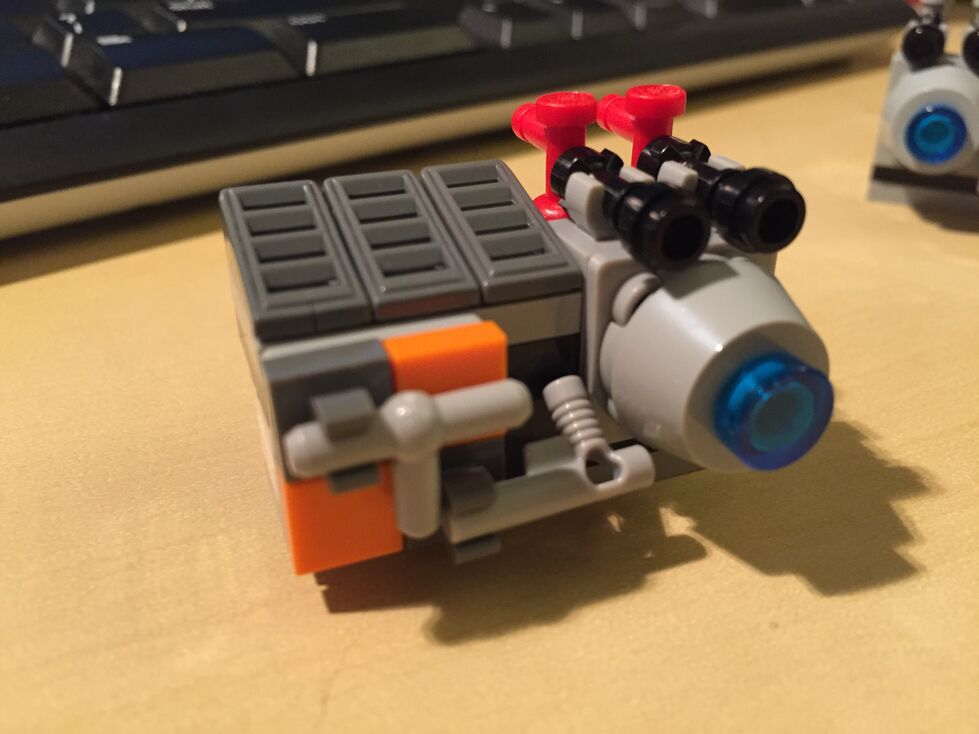
Interior Aft, After Customization
In the rear hold/engine compartment, I constructed two storage rooms/bunks with swinging doors (I would have preferred to have sliding doors but I don’t have the elements to do this while conserving the limited space available), and I designed additional mirrored engine modules that go on either end of the original engine included with the set, which I hope makes the engine look more substantial for a spacecraft capable of completing the Kessel Run in 14, er, 12 parsecs!
Conclusion
I hope to further customize the 75105 Millennium Falcon. As I acquire new bricks and elements, I would like to think about how to better integrate the engines into the design and aesthetic of the YT transport. Other goals include, integrate a mechanism for lowering and raising the boarding platform, similar to the 4504 set, design screen accurate landing gear that raise the Falcon by at least one plate higher while on display, and further integrate my customization into the model so that it attains a unity of design instead of a piecemeal added-on quality.
If you have customized the 75105 or other Millennium Falcon sets, please sound off in the comments. Thanks for stopping by!


")

")