Tag: DIY

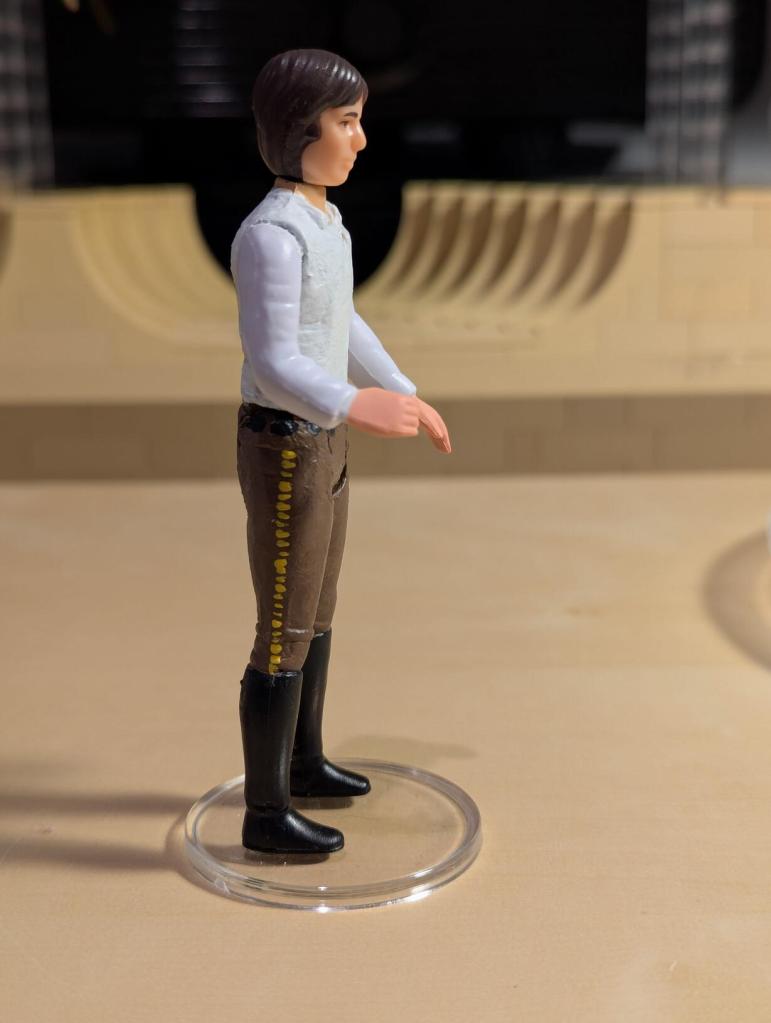
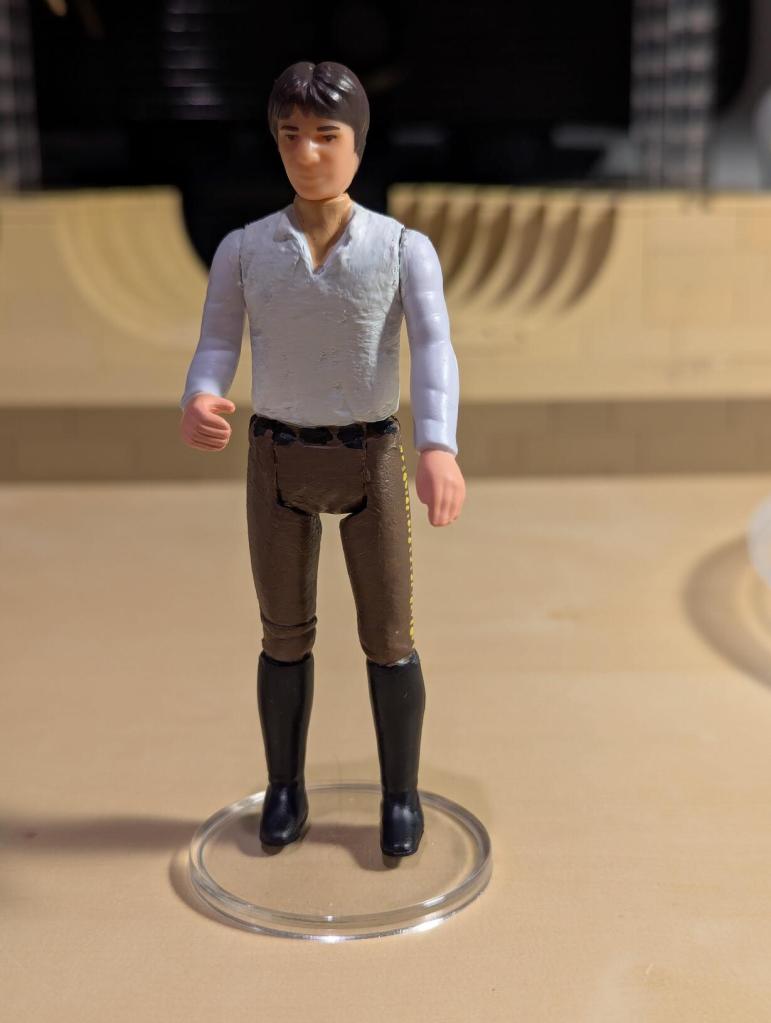
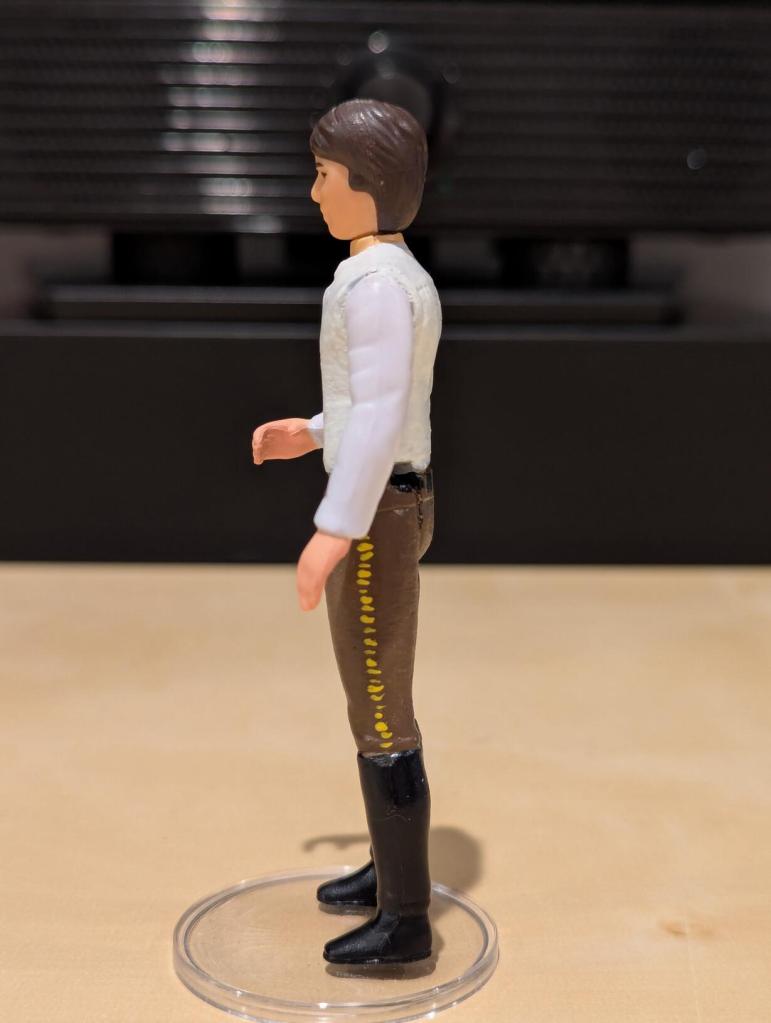
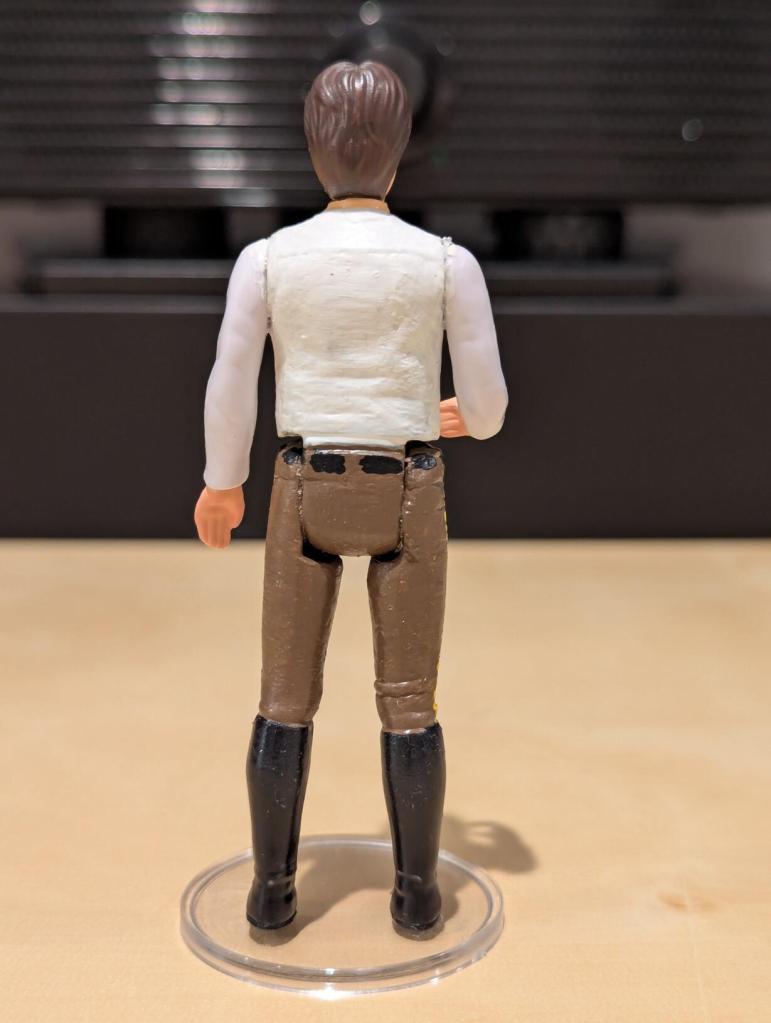
  • Custom Kenner “Big Head” Han Solo After Being Freed from Carbonite in ROTJ

    Custom Kenner "Big Head" Han Solo After Being Freed from Carbonite in ROTJ

    I wanted to build a custom action figure of Han Solo after he had been freed from carbonite in Return of the Jedi (1983), because I don’t like the “Last 17” version of Han Solo in Carbonite Chamber by Kenner (1985) and his NFL linebacker-like appearance (a complaint that I have about the evolution of Kenner’s action figure line from POTF–Barada (1985) is another not-true-to-screen-likeness–to its extreme in the POTF2 revival in 1995–consider the bulked-up Han Solo, for example).

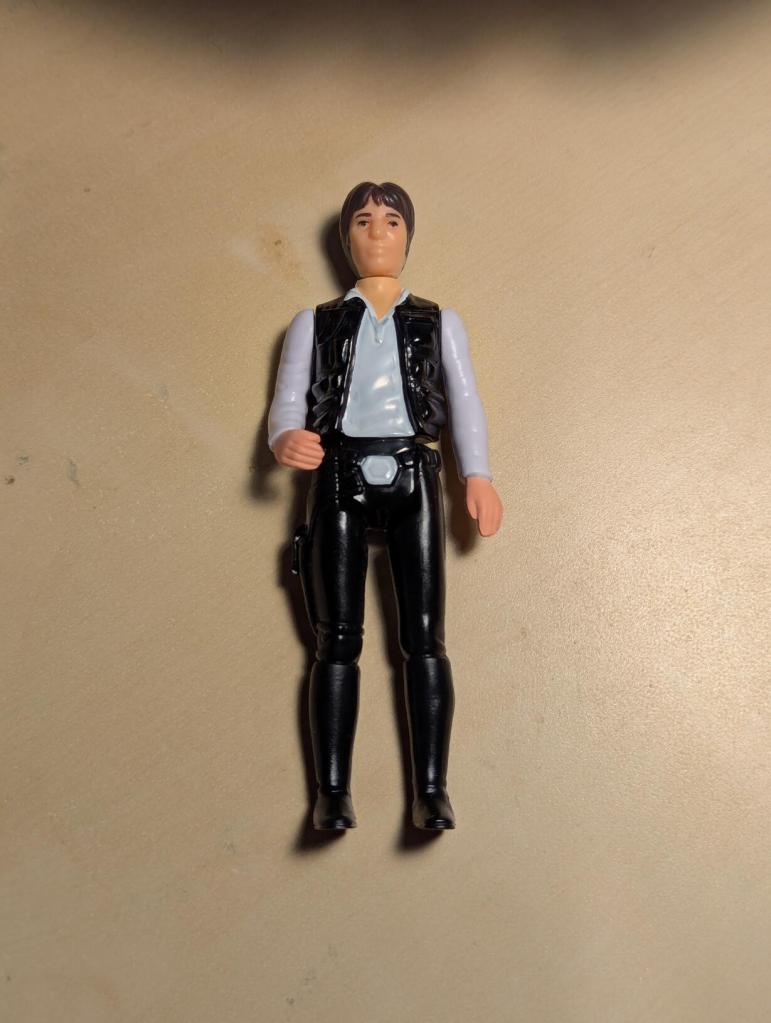
    Kenner’s original Han Solo action figure (1978) from Star Wars (1977) seemed like a good starting place for my custom action figure. Instead of butchering a vintage one, I opted for a Hasbro Retro Collection version of Han Solo with the “big head” (2019).

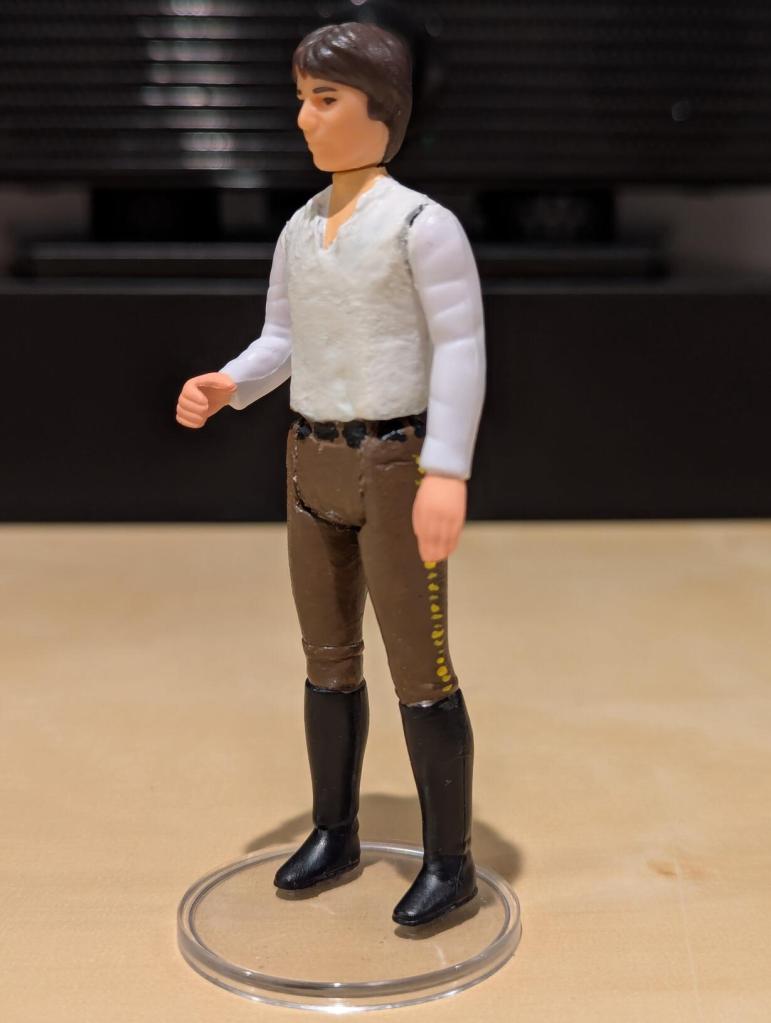
    If you remember the ending of The Empire Strikes Back (1980) and the first act of ROTJ, Han goes into and comes out of carbon freeze wearing a white shirt, brown pants with second-class yellow Corellian bloodstripes, and boots.

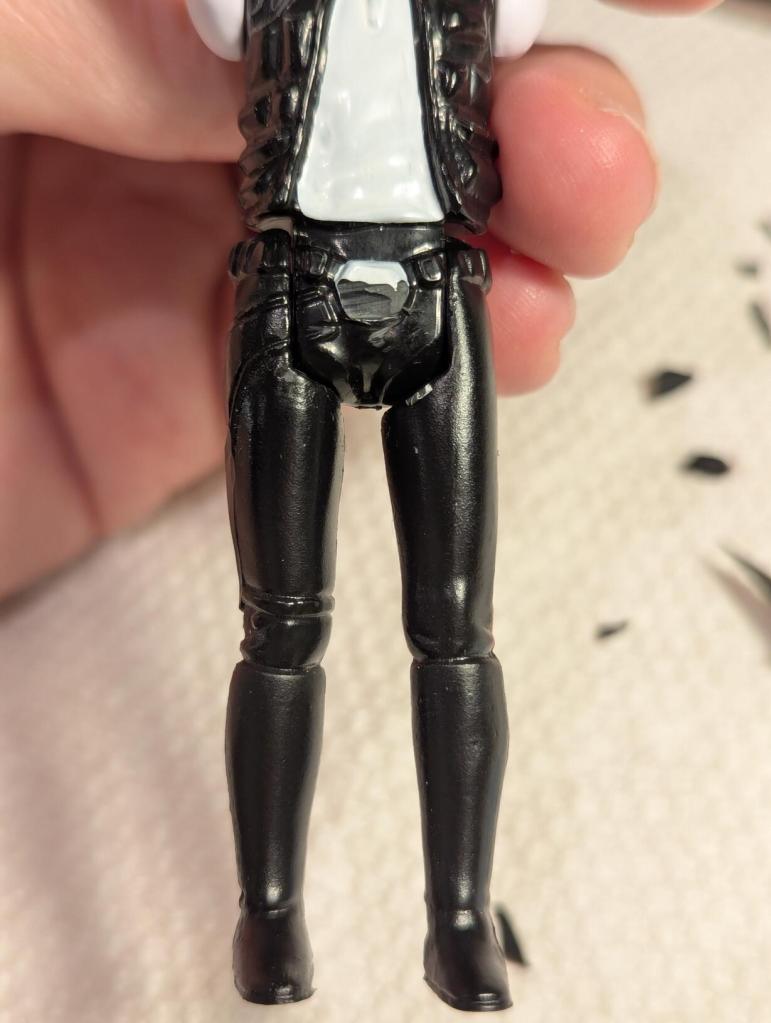
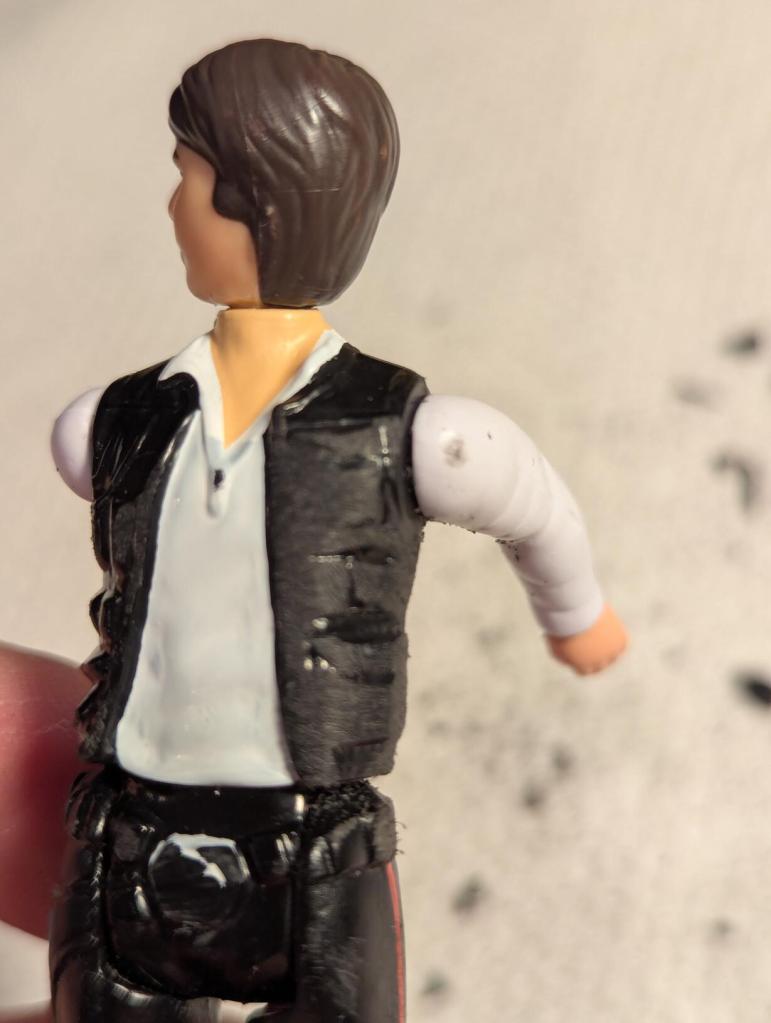
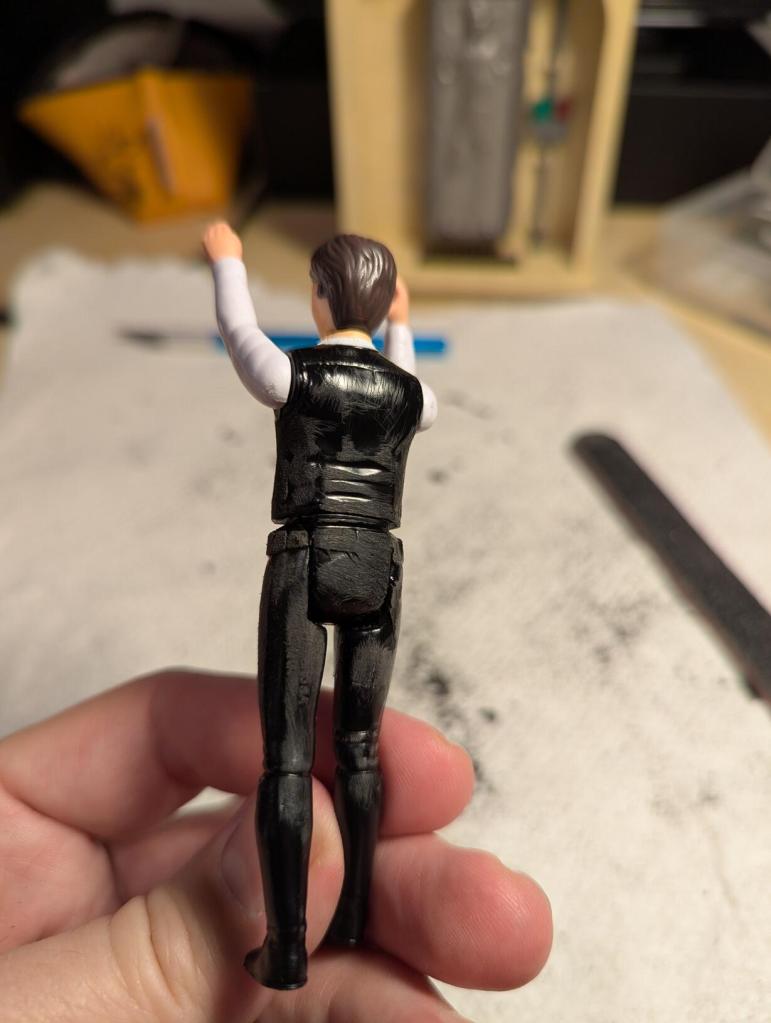
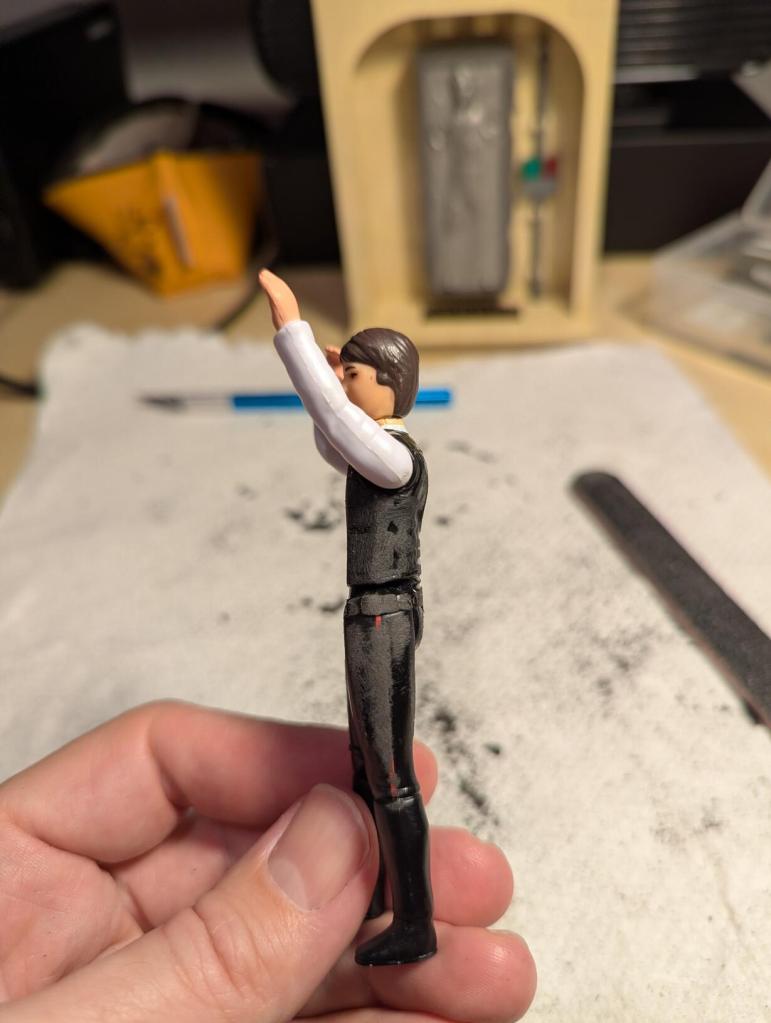
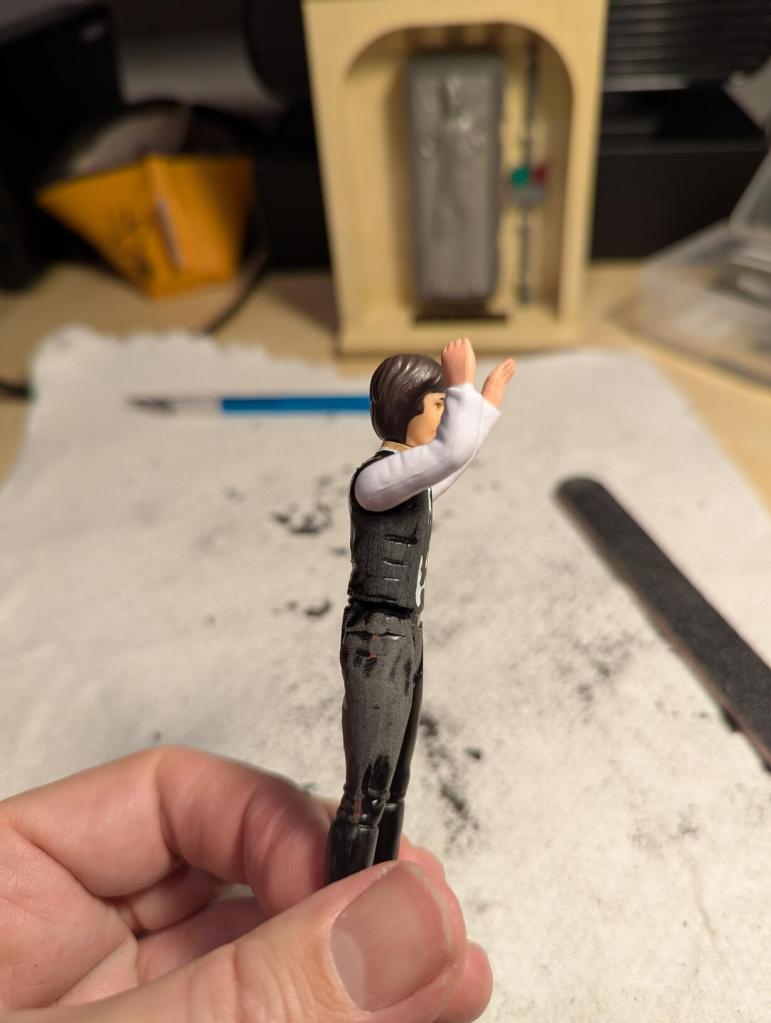
    To customize the original Han Solo action figure, I needed to remove his vest and blaster holster and belt, smooth over those areas, prime, paint, and varnish. The following photos and notes detail how I customized Han for the beginning of ROTJ.

    This is the Hasbro Retro Collection Han Solo with big head that I started with. I forgot to take a side view shot, but he has the first class red Corellian bloodstripe (according to Star Wars lore, Solo began wearing the second class yellow bloodstripe to draw less attention to himself).
    Custom Kenner "Big Head" Han Solo After Being Freed from Carbonite in ROTJ
    Custom Kenner "Big Head" Han Solo After Being Freed from Carbonite in ROTJ
    Custom Kenner "Big Head" Han Solo After Being Freed from Carbonite in ROTJ

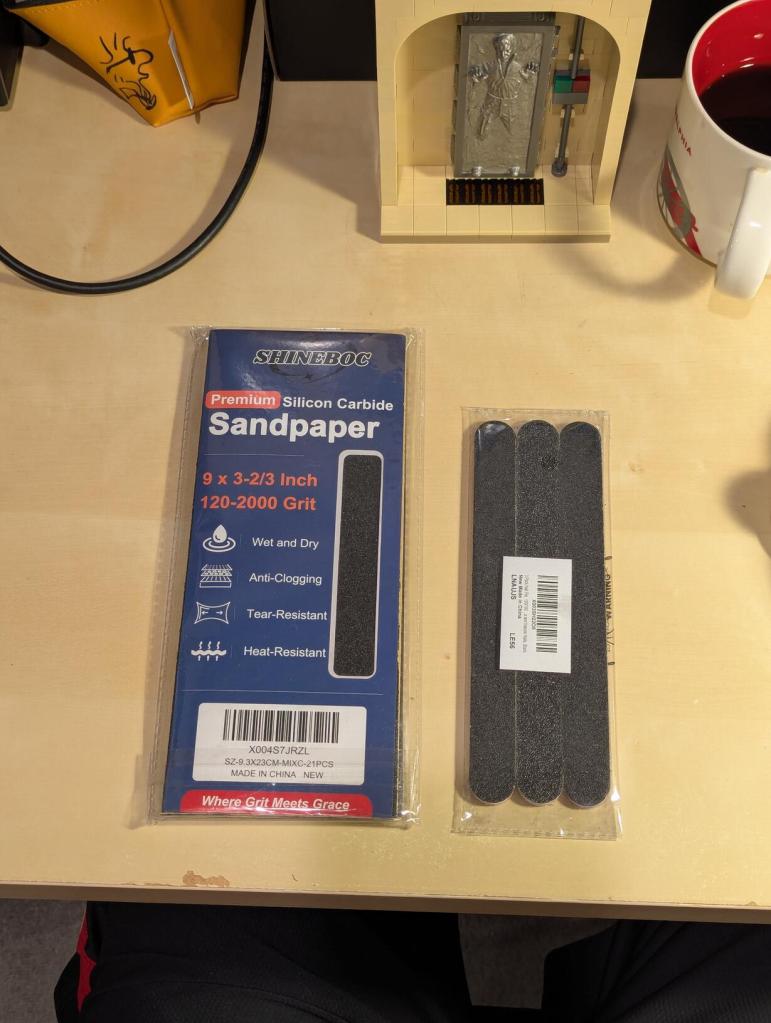
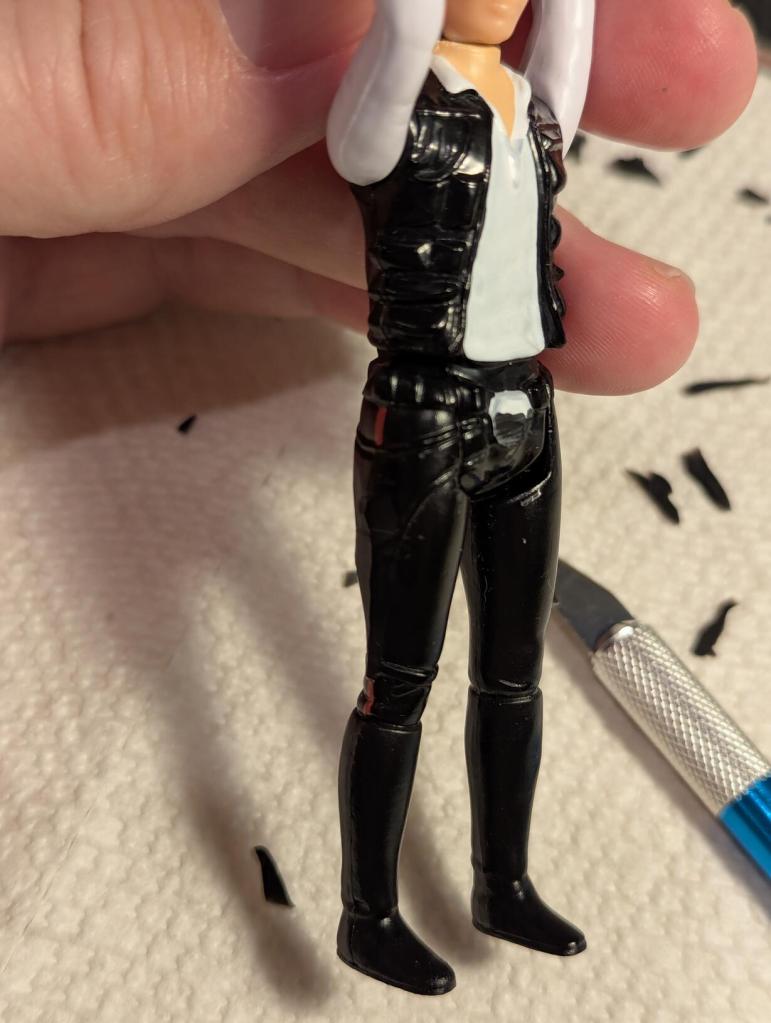
    I used a hobby knife to remove as much plastic as possible before switching to files and sandpaper from heavy to fine grit sandpaper.

    One regret is that I didn’t spend more time with the finer grit sandpaper. Priming and painting magnified imperfections that I couldn’t feel or see when I was working on the figure’s customized body shape.
    Custom Kenner "Big Head" Han Solo After Being Freed from Carbonite in ROTJ
    Custom Kenner "Big Head" Han Solo After Being Freed from Carbonite in ROTJ
    Custom Kenner "Big Head" Han Solo After Being Freed from Carbonite in ROTJ
    Custom Kenner "Big Head" Han Solo After Being Freed from Carbonite in ROTJ
    Custom Kenner "Big Head" Han Solo After Being Freed from Carbonite in ROTJ
    Custom Kenner "Big Head" Han Solo After Being Freed from Carbonite in ROTJ
    Custom Kenner "Big Head" Han Solo After Being Freed from Carbonite in ROTJ
    Custom Kenner "Big Head" Han Solo After Being Freed from Carbonite in ROTJ
    Custom Kenner "Big Head" Han Solo After Being Freed from Carbonite in ROTJ

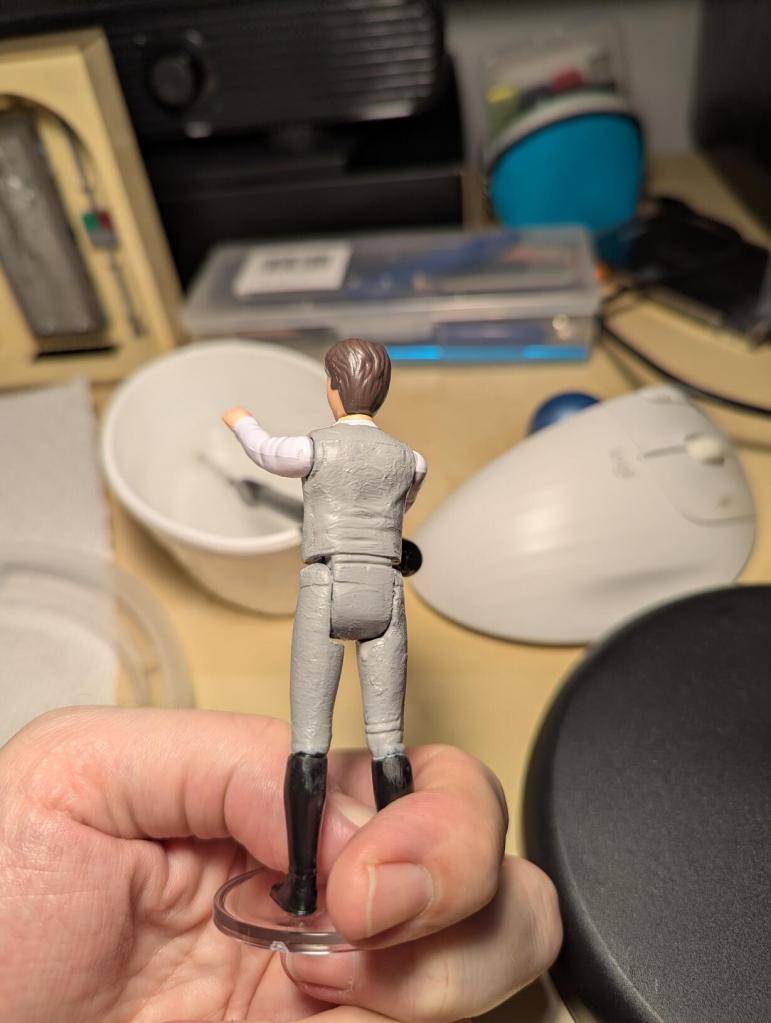
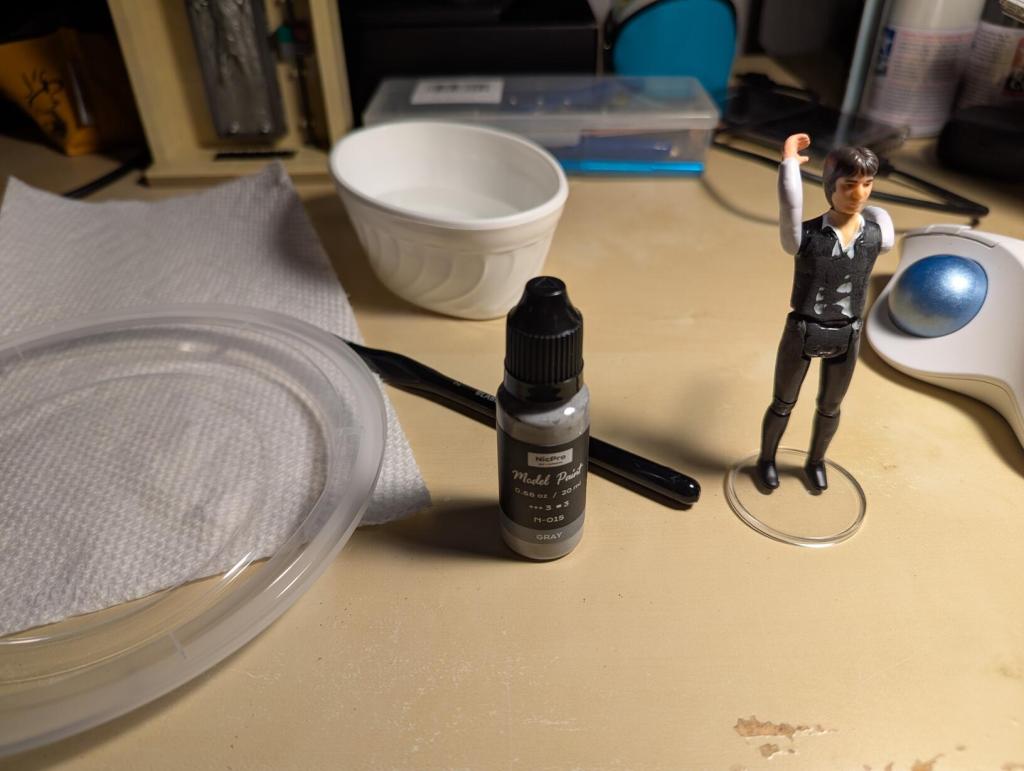
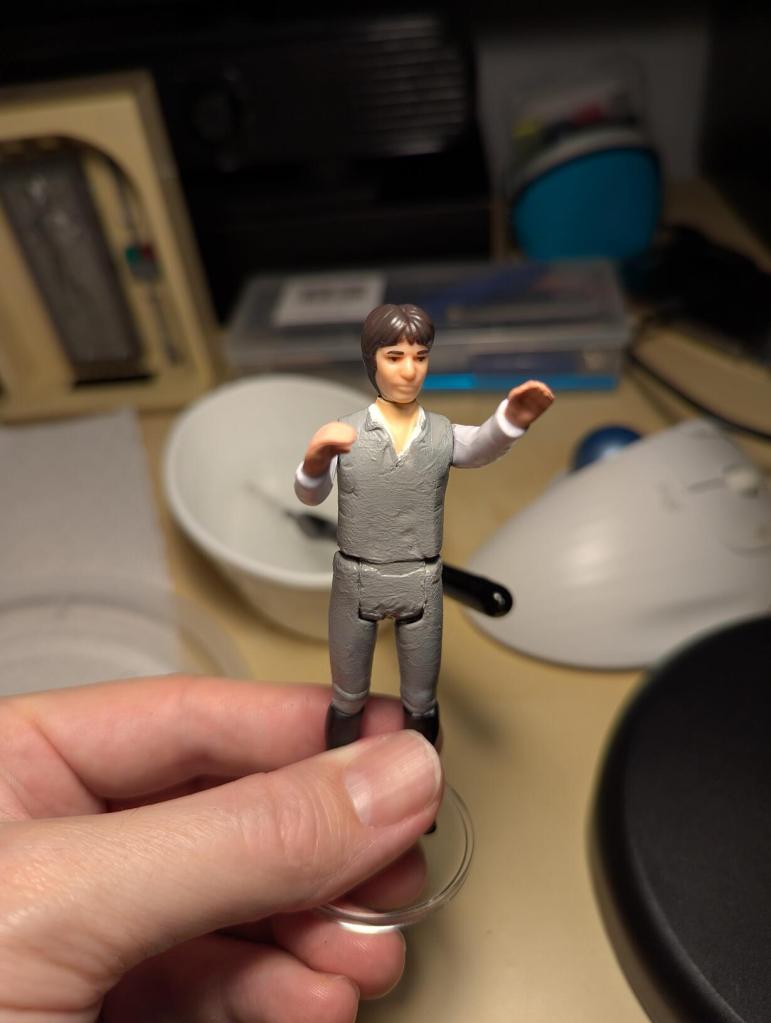
    I further smoothed some of the ridged areas on his side and back before proceeding to apply a gray primer.
    Custom Kenner "Big Head" Han Solo After Being Freed from Carbonite in ROTJ
    Custom Kenner "Big Head" Han Solo After Being Freed from Carbonite in ROTJ
    Custom Kenner "Big Head" Han Solo After Being Freed from Carbonite in ROTJ

    I applied two coats of primer–letting each coat dry 24 hours before applying the next. Then, I moved on to painting.

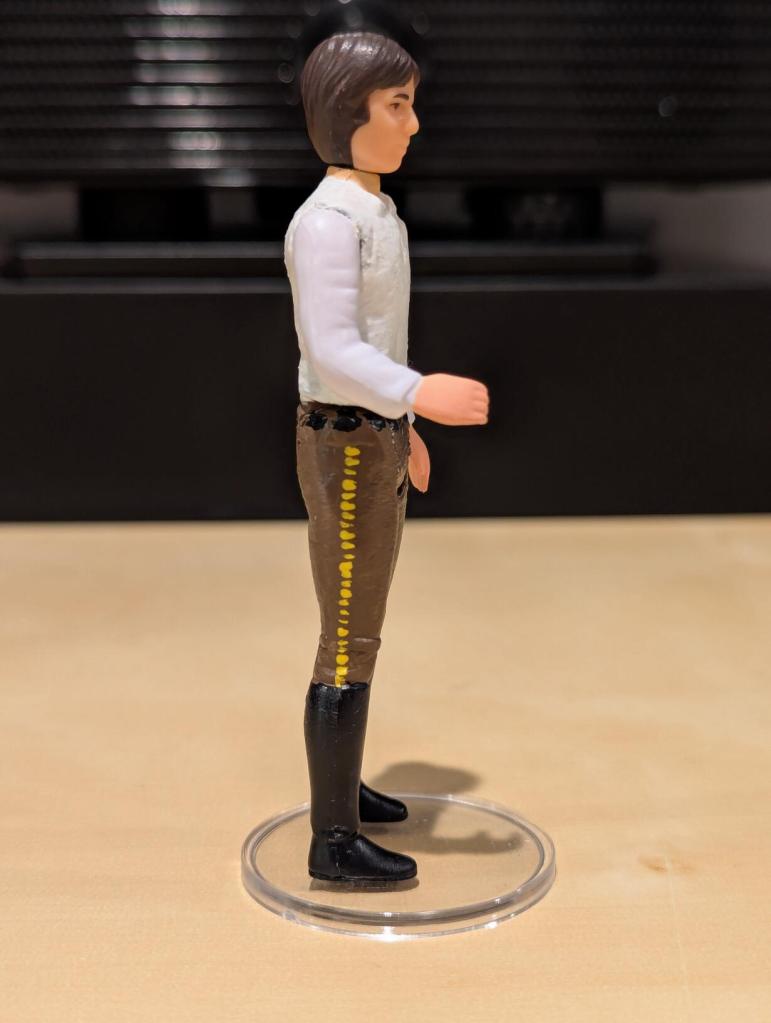
    For his pants, I used Earth Brown with only a dab of Black mixed in. I only had matte finish paints when I worked on this customization. If I had to do it over, I would have went with glossy paints to improve the plastic-like appearance (e.g., so the shirt’s reflectivity would match the unpainted white sleeves).
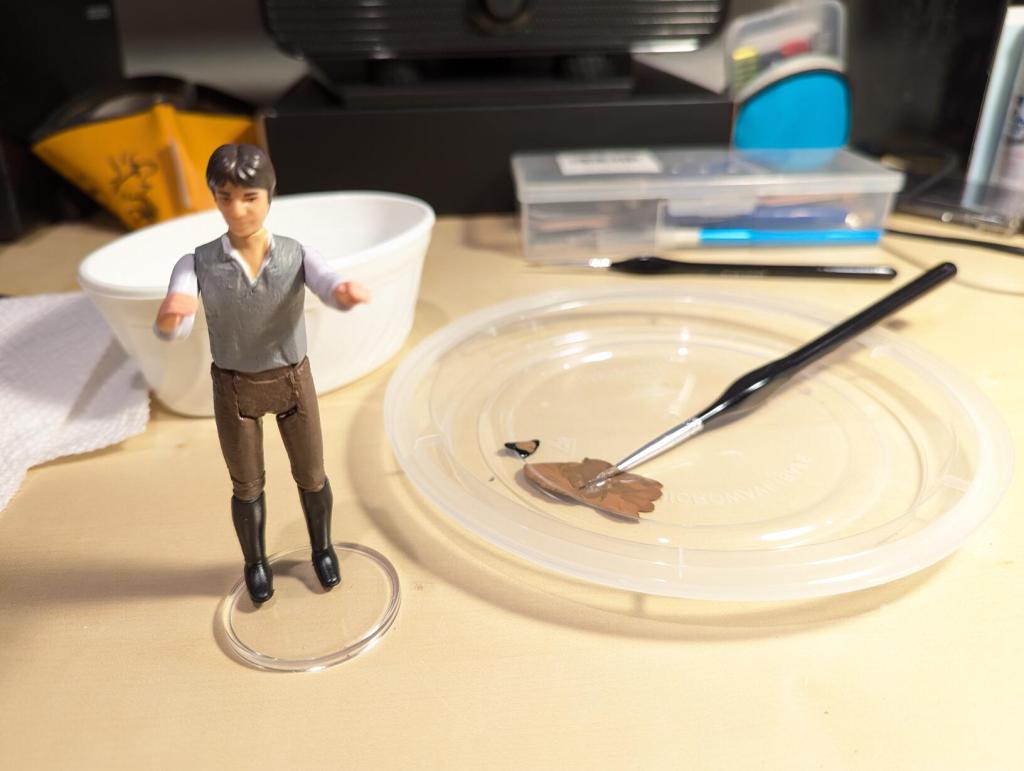
    Custom Kenner "Big Head" Han Solo After Being Freed from Carbonite in ROTJ

    I only did one coat of brown, but I let it dry 24 hours before proceeding with painting Han’s shirt.

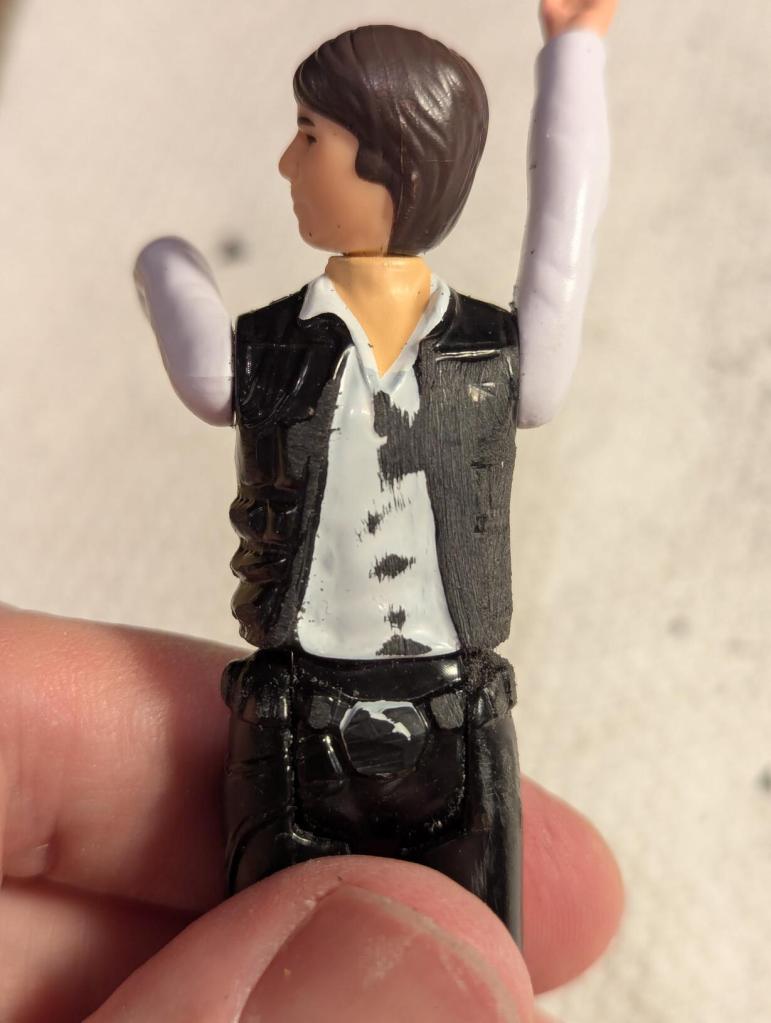
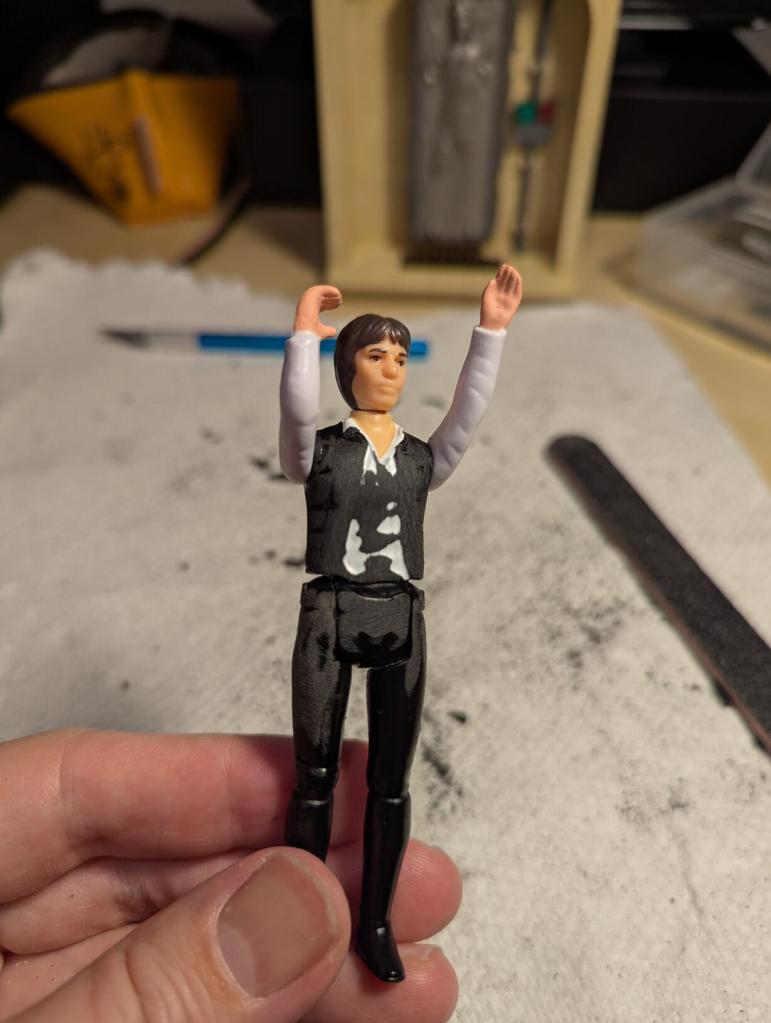
    I had trouble with adhesion of the white to the primer–even letting a coat dry for 24 hours, I would get some white flakes to come off when I would try to lightly sand it before applying the next coat.

    He ended up with three coats of white paint on his shirt.

    Also, I wish that I had completely disassembled the action figure so as to avoid the bunching/tearing of paint around his arm/shoulder joints when I would move them.
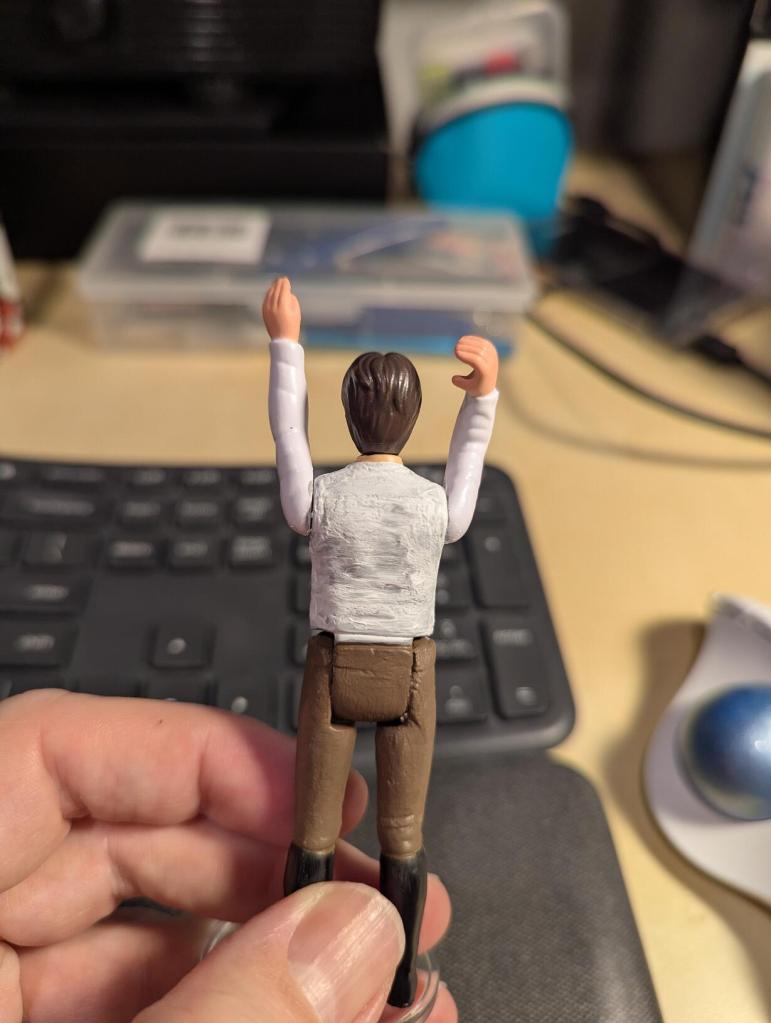
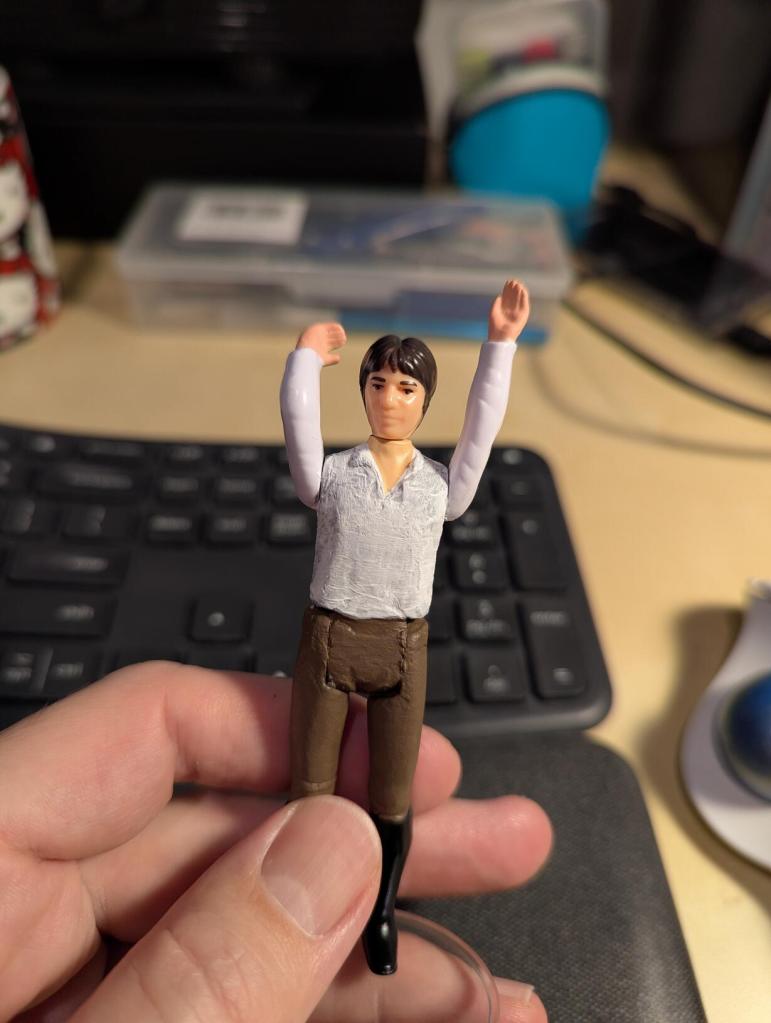
    Custom Kenner "Big Head" Han Solo After Being Freed from Carbonite in ROTJ
    Custom Kenner "Big Head" Han Solo After Being Freed from Carbonite in ROTJ
    Custom Kenner "Big Head" Han Solo After Being Freed from Carbonite in ROTJ
    Custom Kenner "Big Head" Han Solo After Being Freed from Carbonite in ROTJ

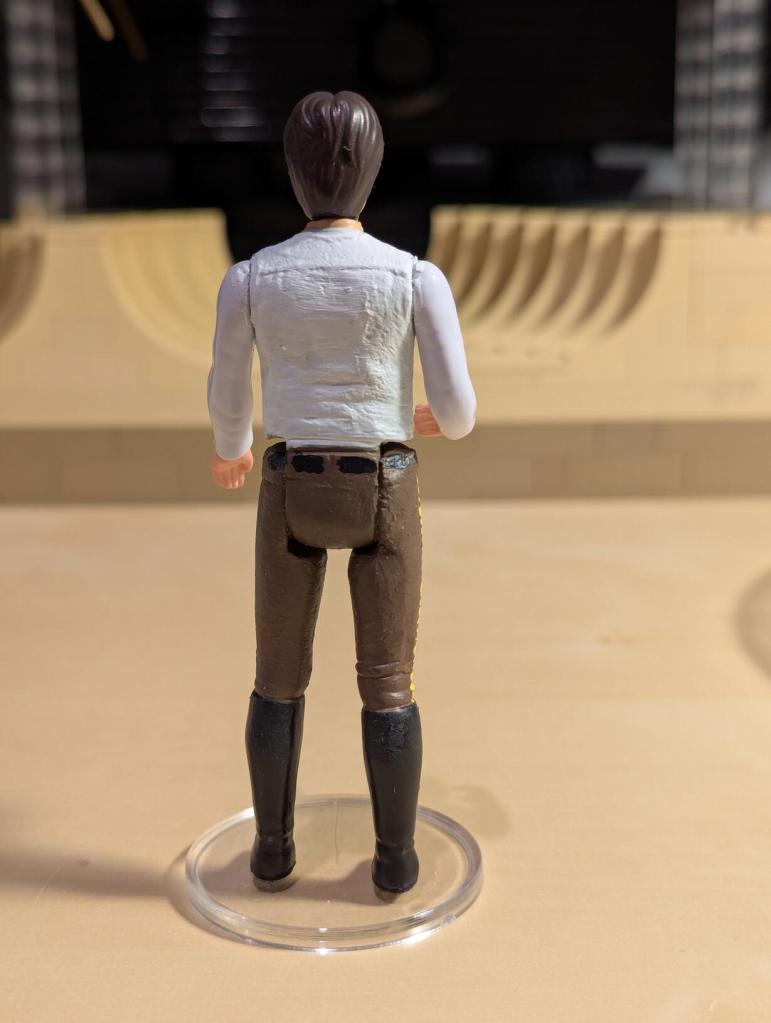
    The last paint applied was to create a black belt passing through belt loops. I used black paint and a very fine brush for this. Unfortunately, my hands shook a little too much and I couldn’t create good black rectangles for each belt segment appearing between brown “loops.”

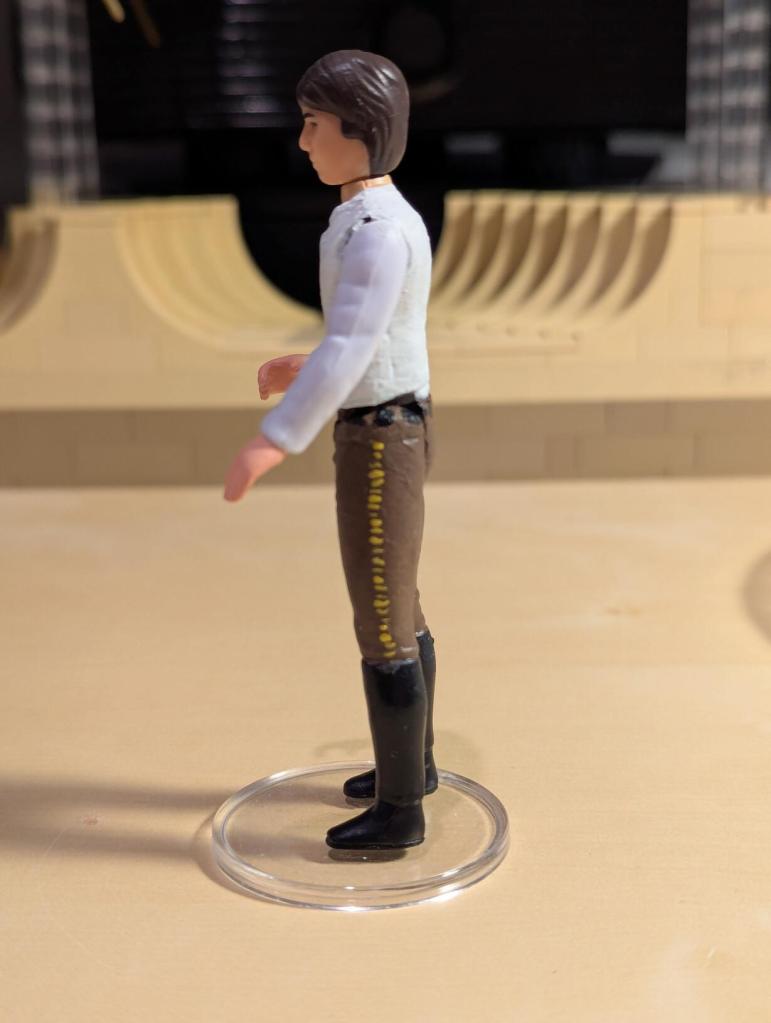
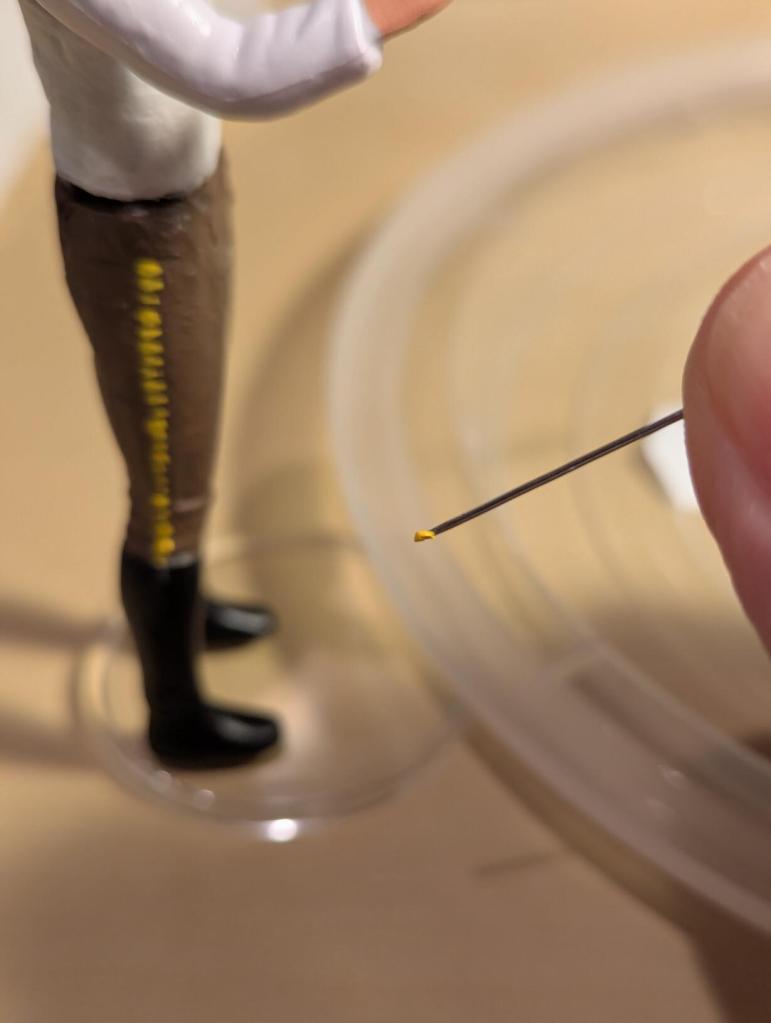
    The trickiest painting application was the second class yellow Corellian bloodstripe. Each pant leg should have tiny yellow rectangular bars that go along the side of the leg from top to bottom. I used a pin and Medium Yellow paint. I put a tiny dab of paint on the pin and created 2-3 lines of the bloodstripe. I repeated this until both sides were done. I was happy with how the stripes turned out.
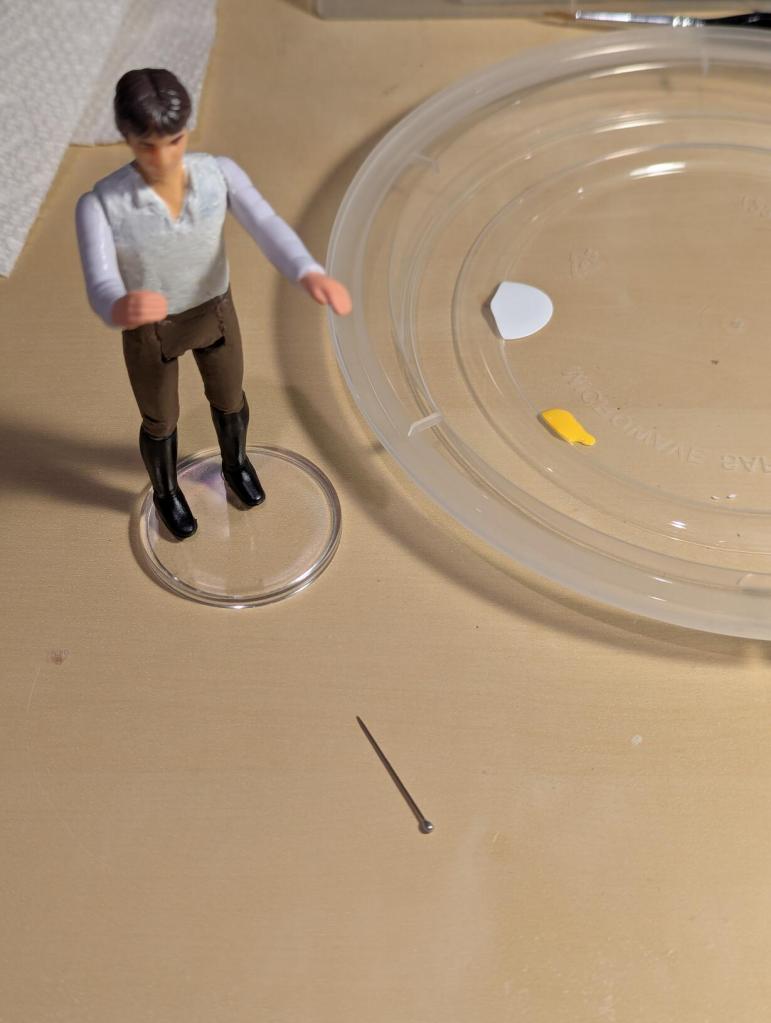
    Custom Kenner "Big Head" Han Solo After Being Freed from Carbonite in ROTJ
    Custom Kenner "Big Head" Han Solo After Being Freed from Carbonite in ROTJ
    Custom Kenner "Big Head" Han Solo After Being Freed from Carbonite in ROTJ
    Custom Kenner "Big Head" Han Solo After Being Freed from Carbonite in ROTJ
    Custom Kenner "Big Head" Han Solo After Being Freed from Carbonite in ROTJ
    Custom Kenner "Big Head" Han Solo After Being Freed from Carbonite in ROTJ

    The last step was applying a Satin Acrylic Varnish by Vallejo. Following the instructions, I kept the brush wet with water while applying the varnish. I painted two coats–giving each coat 24 hours to dry.

    Custom Kenner "Big Head" Han Solo After Being Freed from Carbonite in ROTJ

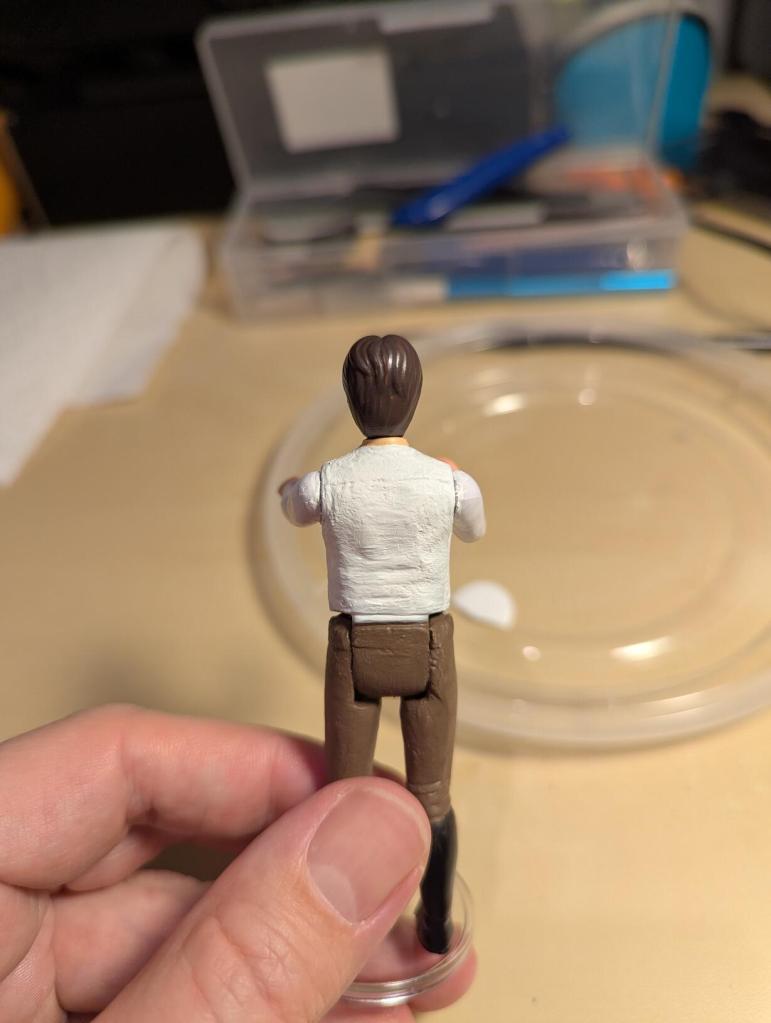
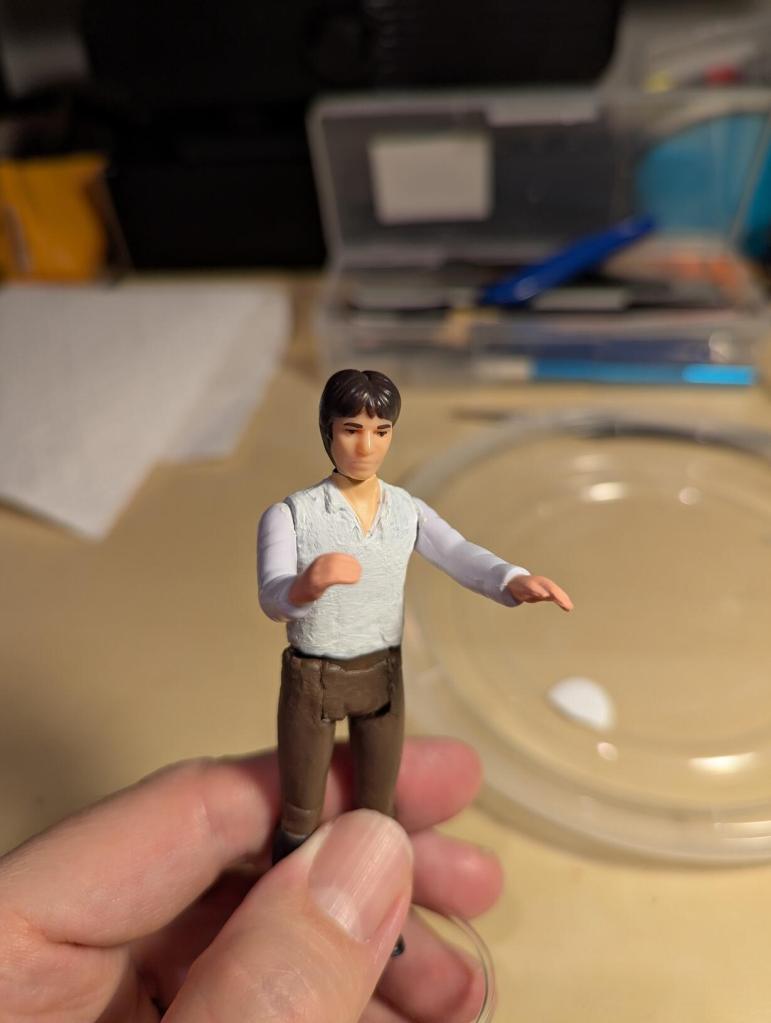
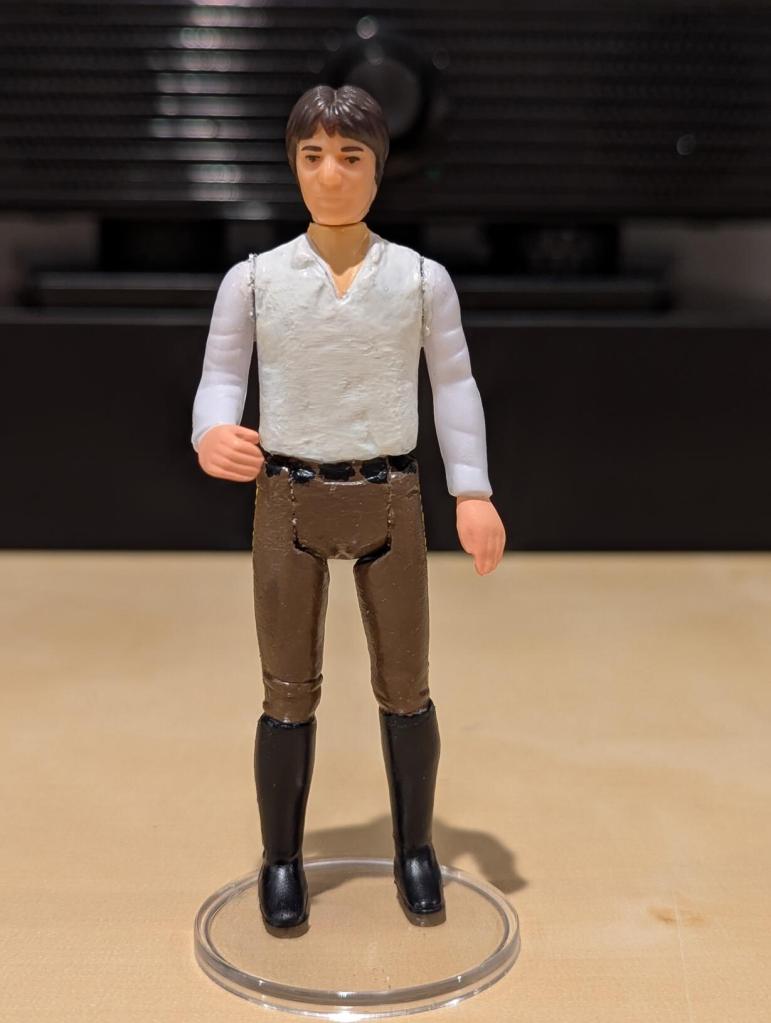
    The finished customized Han Solo action figure is below:
    Custom Kenner "Big Head" Han Solo After Being Freed from Carbonite in ROTJ
    Custom Kenner "Big Head" Han Solo After Being Freed from Carbonite in ROTJ
    Custom Kenner "Big Head" Han Solo After Being Freed from Carbonite in ROTJ
    Custom Kenner "Big Head" Han Solo After Being Freed from Carbonite in ROTJ
    Custom Kenner "Big Head" Han Solo After Being Freed from Carbonite in ROTJ
    Custom Kenner "Big Head" Han Solo After Being Freed from Carbonite in ROTJ
  • LEGO-Built Display Stand for Kenner’s 1985 Tatooine Skiff or Hasbro’s 2000 Re-Issue

    LEGO-Built Display Stand for Kenner's 1985 Tatooine Skiff or Hasbro's 2000 Re-Issue

    One of my favorite Star Wars toys was the Kenner Power of the Force Tatooine Skiff from 1985. I don’t remember the circumstance of getting it–was it a present or did I purchase it–but I remember enjoying the time that I spent taking my heroes on adventures on it.

    I no longer have that Tatooine Skiff and it’s virtually impossible for me to spend how much it would cost to replace it (complete, loose versions are trending in the $1000 range as of writing this). Thankfully, Hasbro’s 2000 reissue cost me only $50 plus shipping on ebay. The reissue is virtually identical to the original–same controls for the rudders, plank, figure launcher, and landing gear–but it has updated paint and detailing and the foot pegs are smaller for the POTF2 line of action figures (instead of the larger pegs needed for vintage Star Wars action figures).

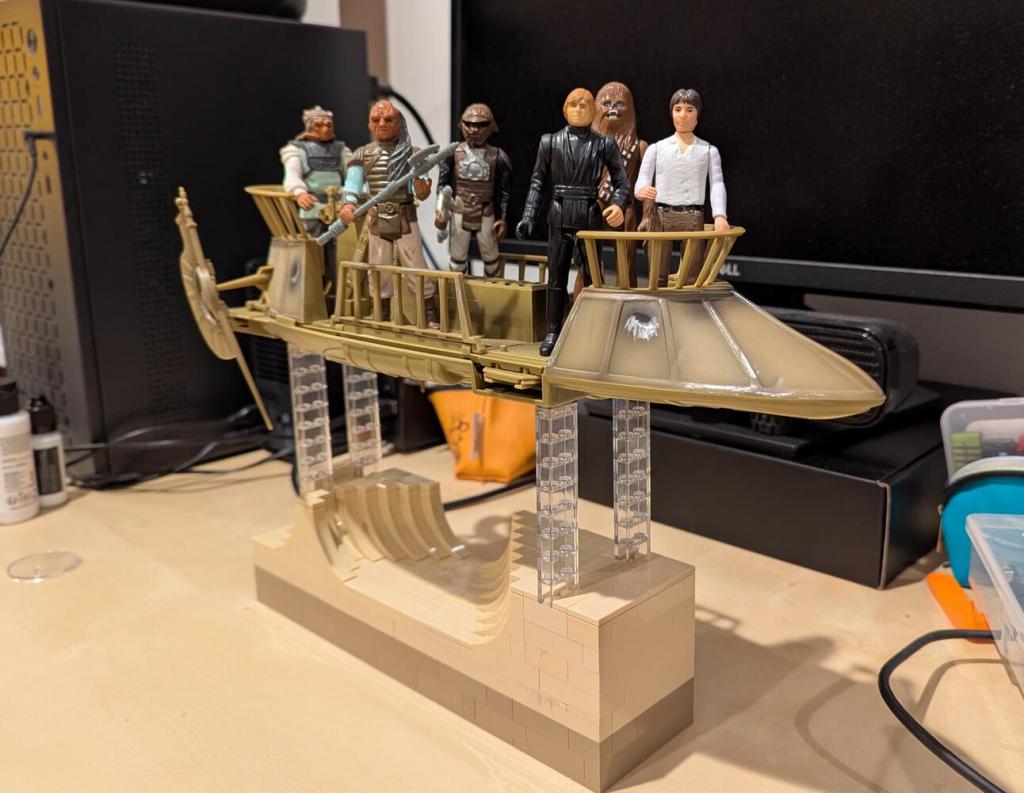
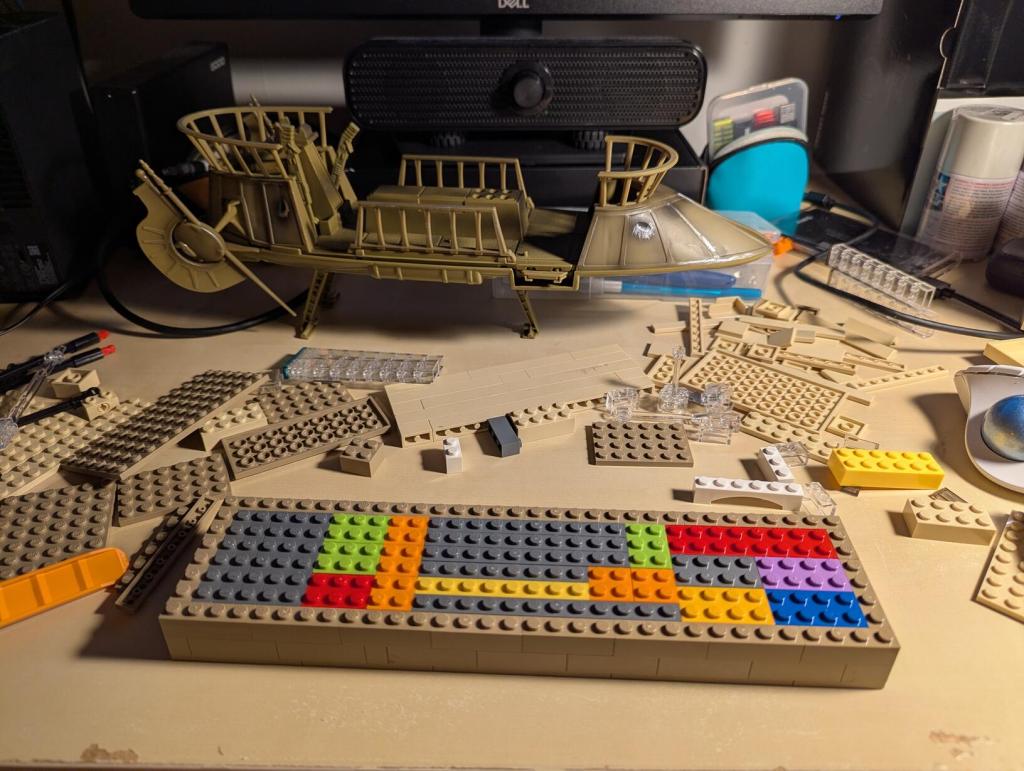
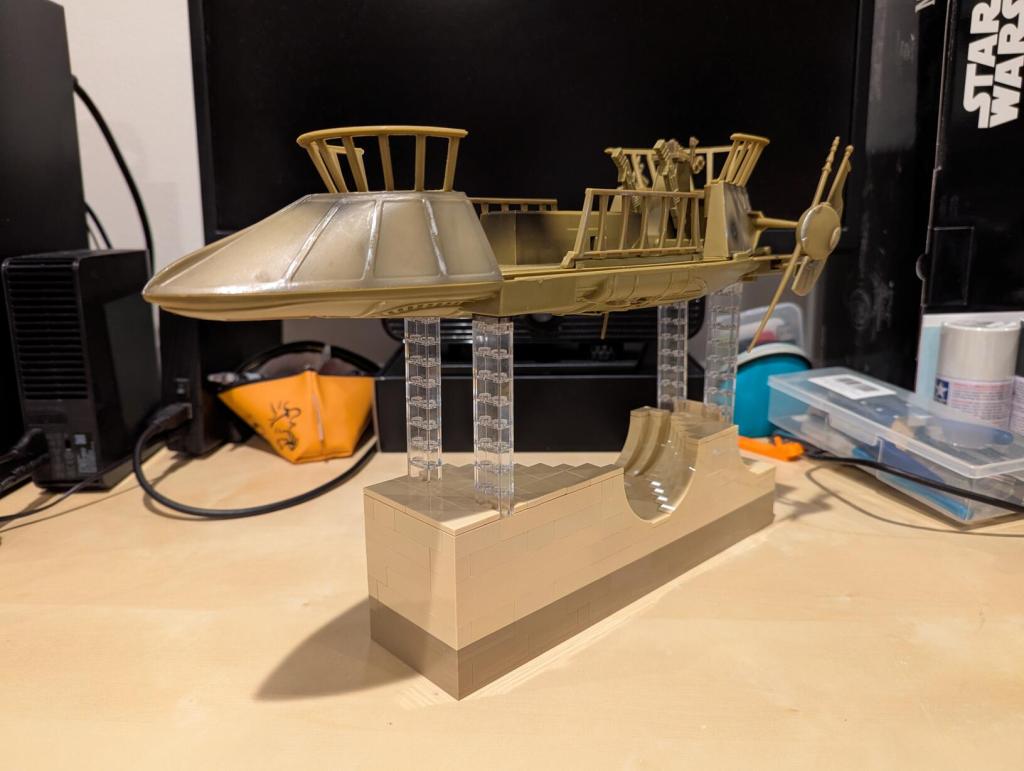
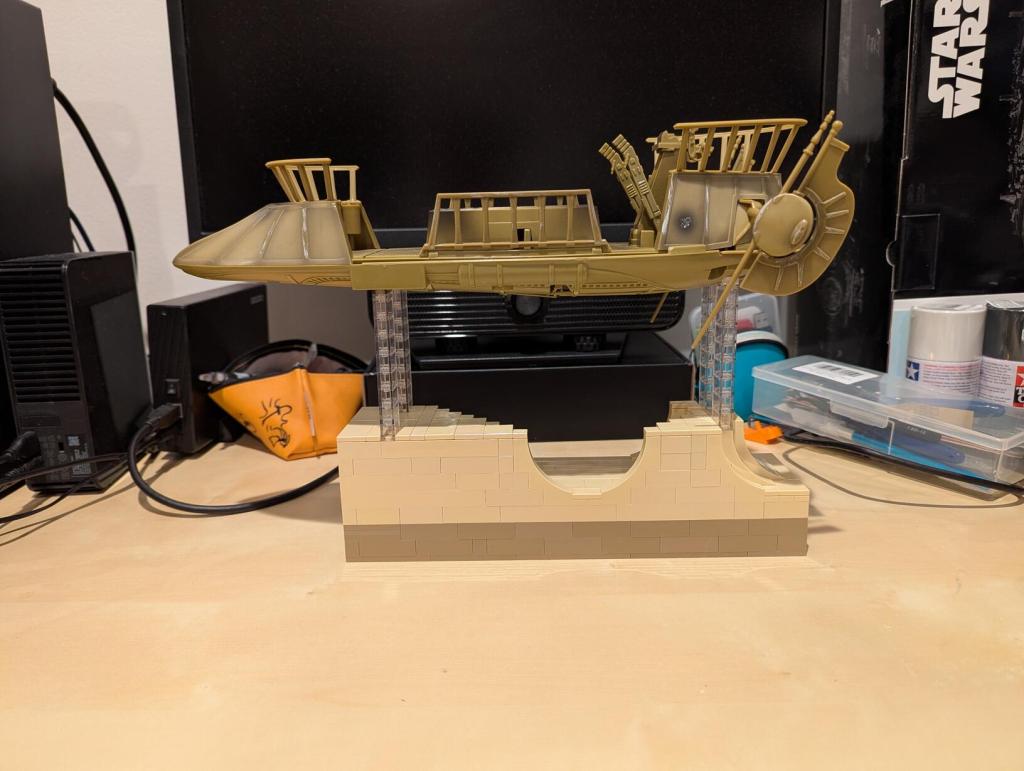
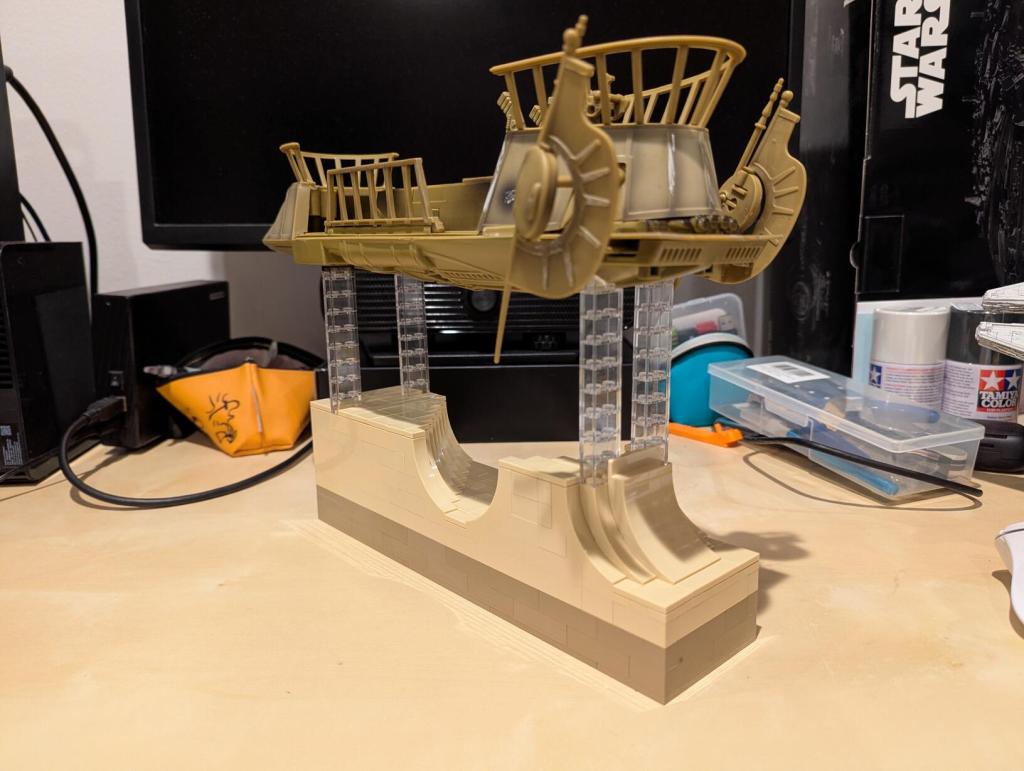
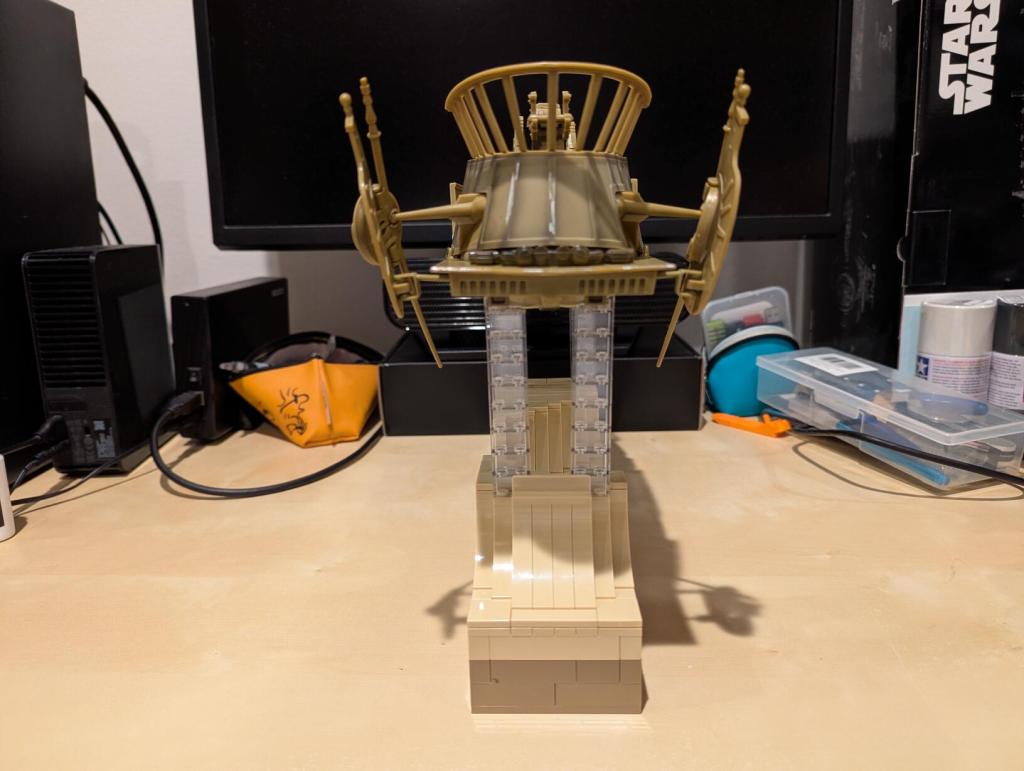
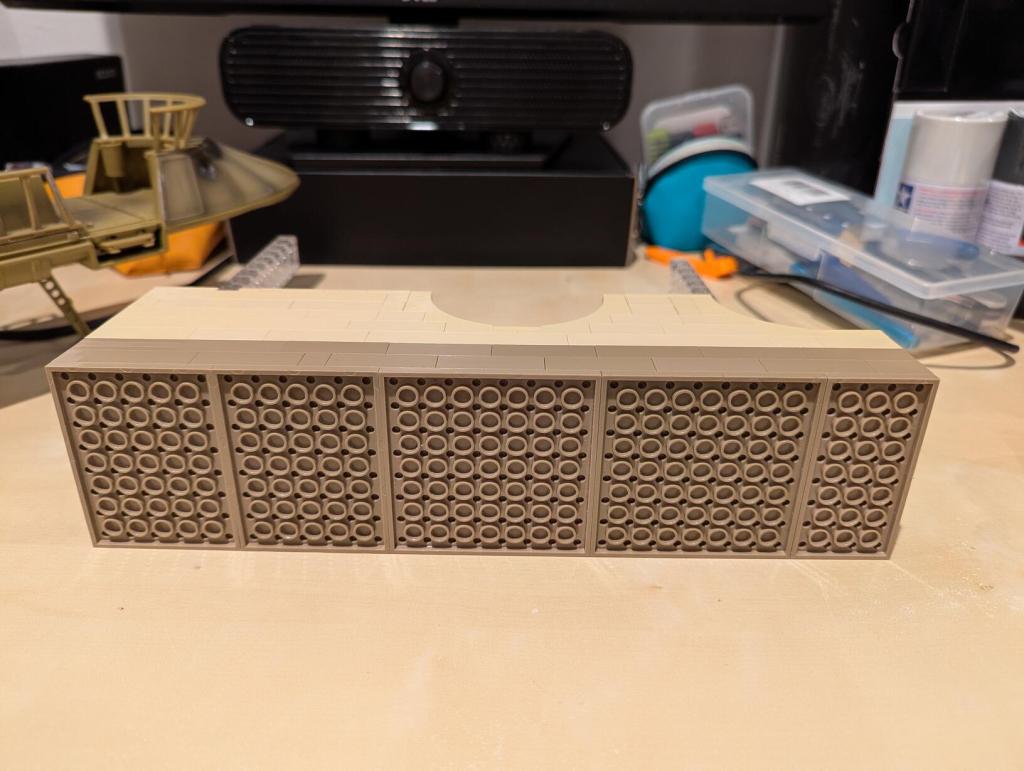
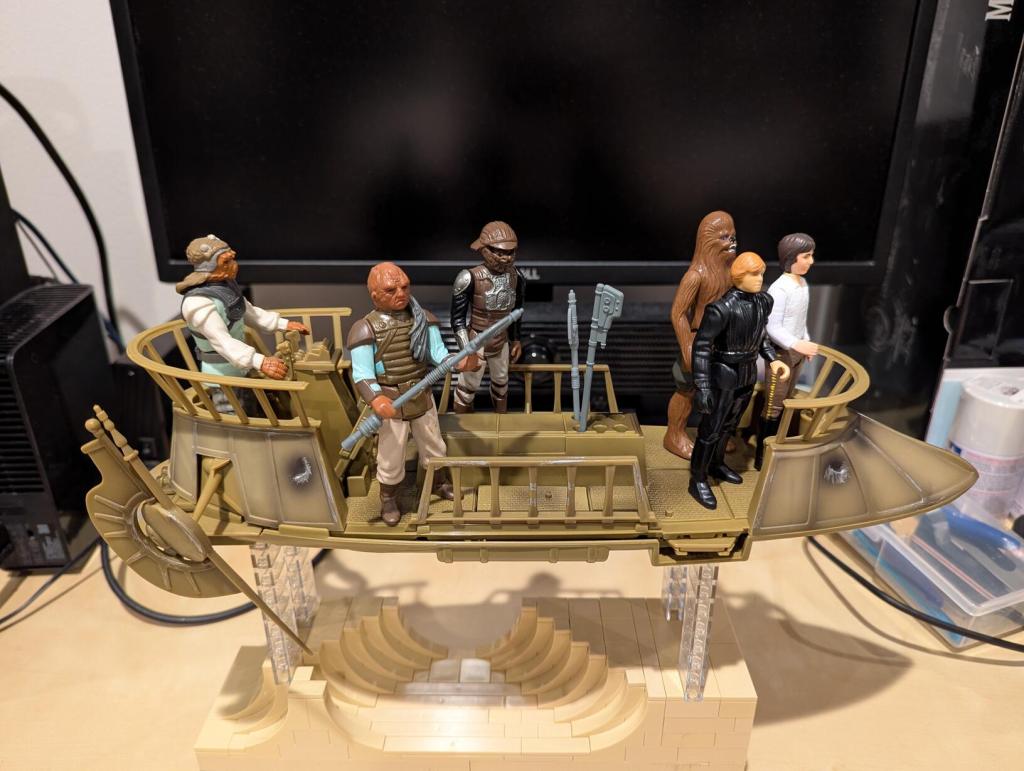
    I wanted to display the desert skiff with landing gear up as it if were skimming along in the air above the dune sea. LEGO seemed like my best option with what I had on-hand. Below are photos of building the display stand and how it looks with the desert skiff on the stand.

    LEGO-Built Display Stand for Kenner's 1985 Tatooine Skiff or Hasbro's 2000 Re-Issue
    LEGO-Built Display Stand for Kenner's 1985 Tatooine Skiff or Hasbro's 2000 Re-Issue
    LEGO-Built Display Stand for Kenner's 1985 Tatooine Skiff or Hasbro's 2000 Re-Issue
    LEGO-Built Display Stand for Kenner's 1985 Tatooine Skiff or Hasbro's 2000 Re-Issue
    LEGO-Built Display Stand for Kenner's 1985 Tatooine Skiff or Hasbro's 2000 Re-Issue
    LEGO-Built Display Stand for Kenner's 1985 Tatooine Skiff or Hasbro's 2000 Re-Issue
    LEGO-Built Display Stand for Kenner's 1985 Tatooine Skiff or Hasbro's 2000 Re-Issue
    LEGO-Built Display Stand for Kenner's 1985 Tatooine Skiff or Hasbro's 2000 Re-Issue
    LEGO-Built Display Stand for Kenner's 1985 Tatooine Skiff or Hasbro's 2000 Re-Issue
    LEGO-Built Display Stand for Kenner's 1985 Tatooine Skiff or Hasbro's 2000 Re-Issue
    LEGO-Built Display Stand for Kenner's 1985 Tatooine Skiff or Hasbro's 2000 Re-Issue
    LEGO-Built Display Stand for Kenner's 1985 Tatooine Skiff or Hasbro's 2000 Re-Issue
    LEGO-Built Display Stand for Kenner's 1985 Tatooine Skiff or Hasbro's 2000 Re-Issue

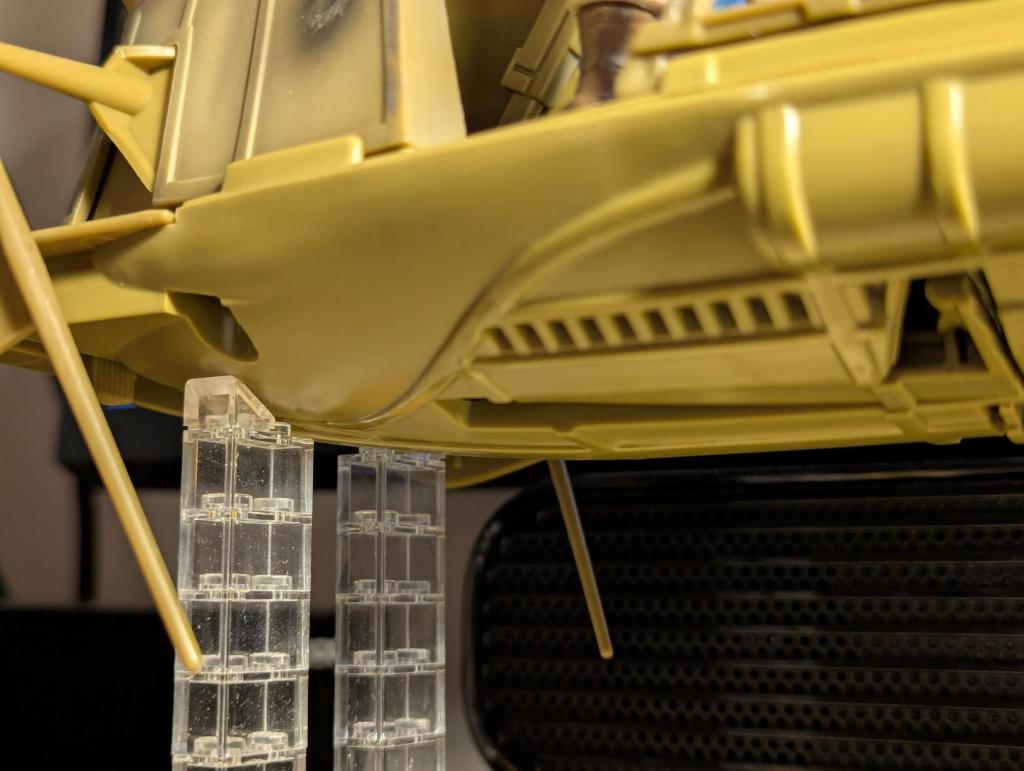
    The rear clear brick columns each have one clear cheese wedge to hug the curvature of the undercarriage of the skiff.

    LEGO-Built Display Stand for Kenner's 1985 Tatooine Skiff or Hasbro's 2000 Re-Issue

    The front clear brick columns are topped with 1×2 transclear tiles that hold up the flat plank area under the skiff.

    LEGO-Built Display Stand for Kenner's 1985 Tatooine Skiff or Hasbro's 2000 Re-Issue

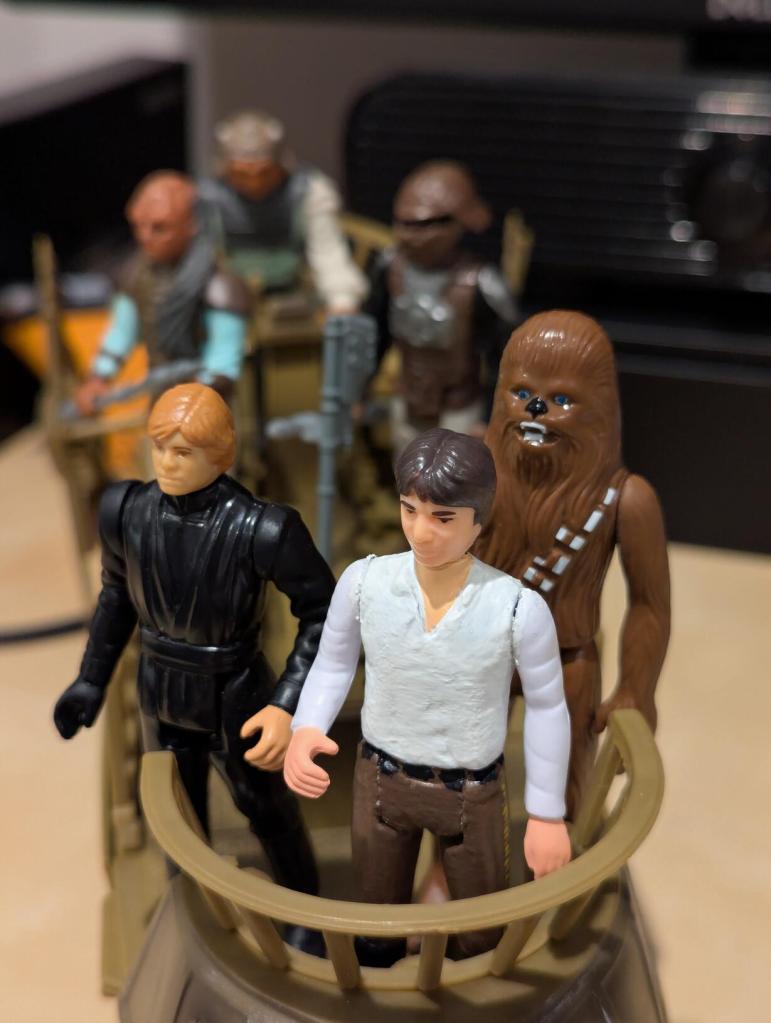
    Did you notice the Han Solo with white shirt and brown pants in the completed diorama? I’ll write about how I customized that action figure tomorrow.

    LEGO-Built Display Stand for Kenner's 1985 Tatooine Skiff or Hasbro's 2000 Re-Issue
  • LEGO-Built Alcove in Jabba’s Palace to Display Hasbro’s Han Solo in Carbonite and Kenner’s Boushh (Princess Leia)

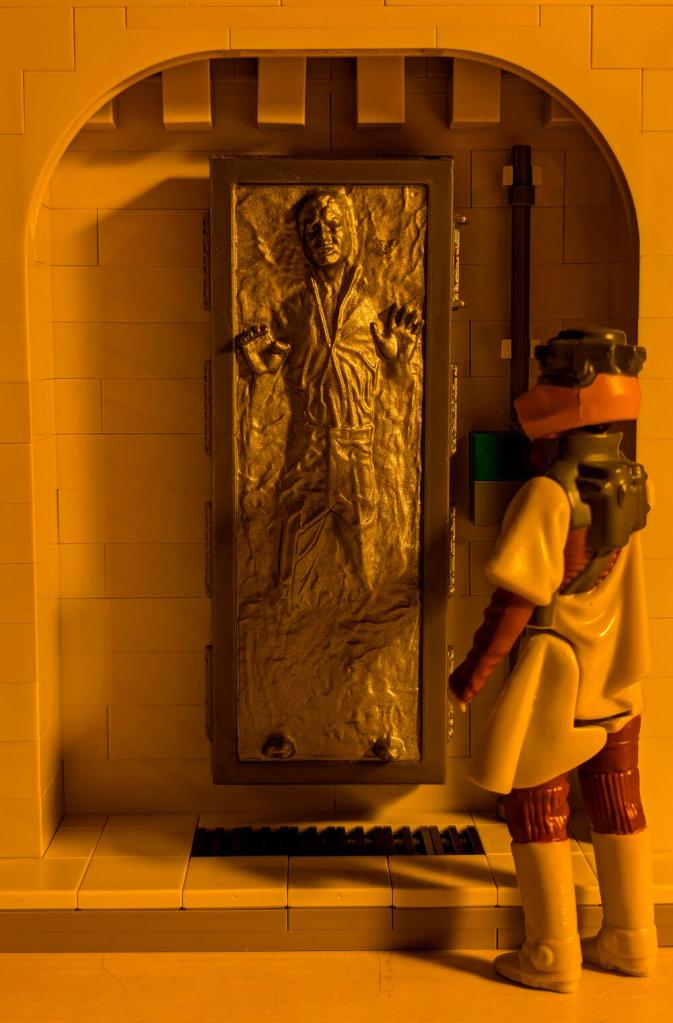
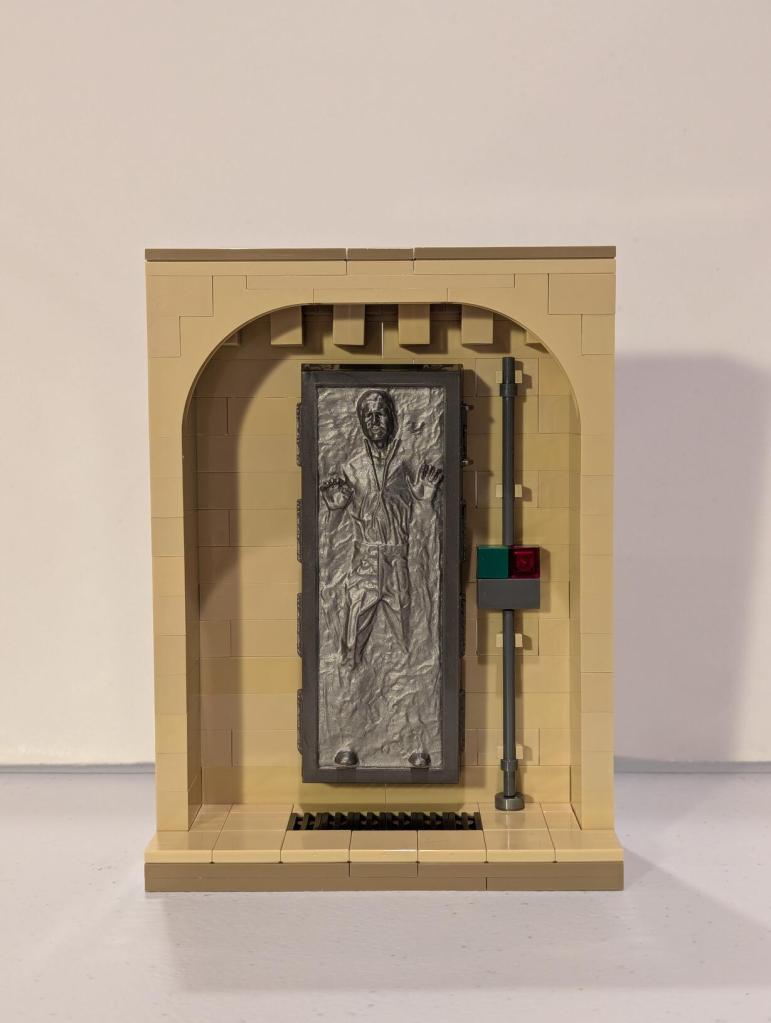
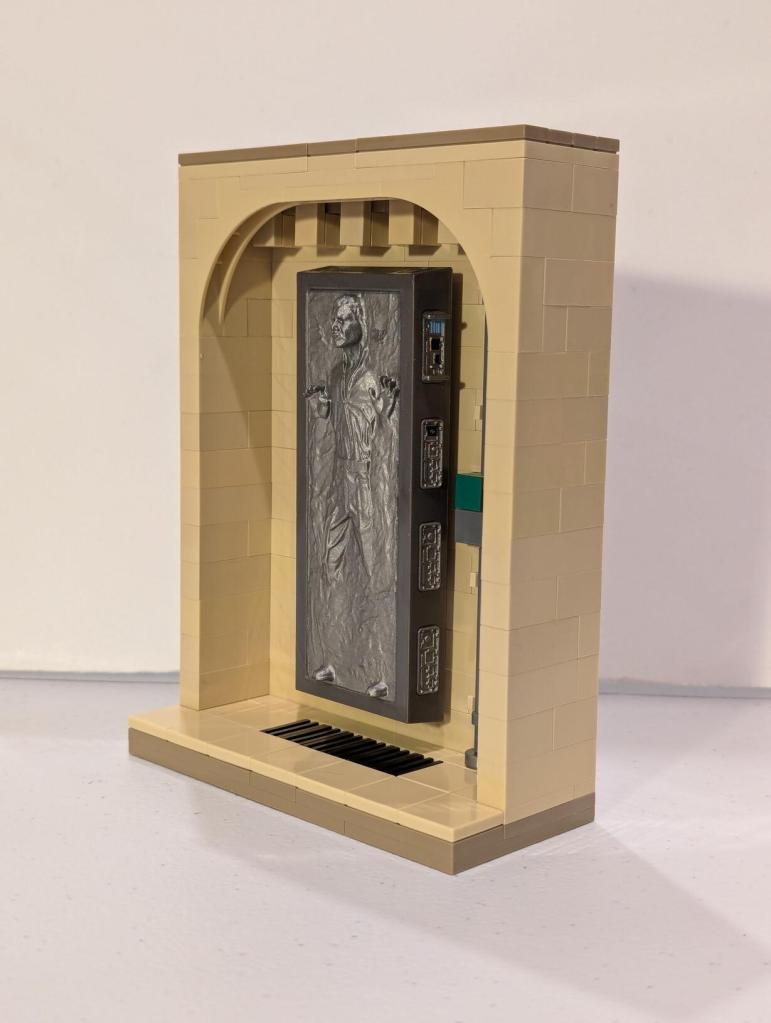
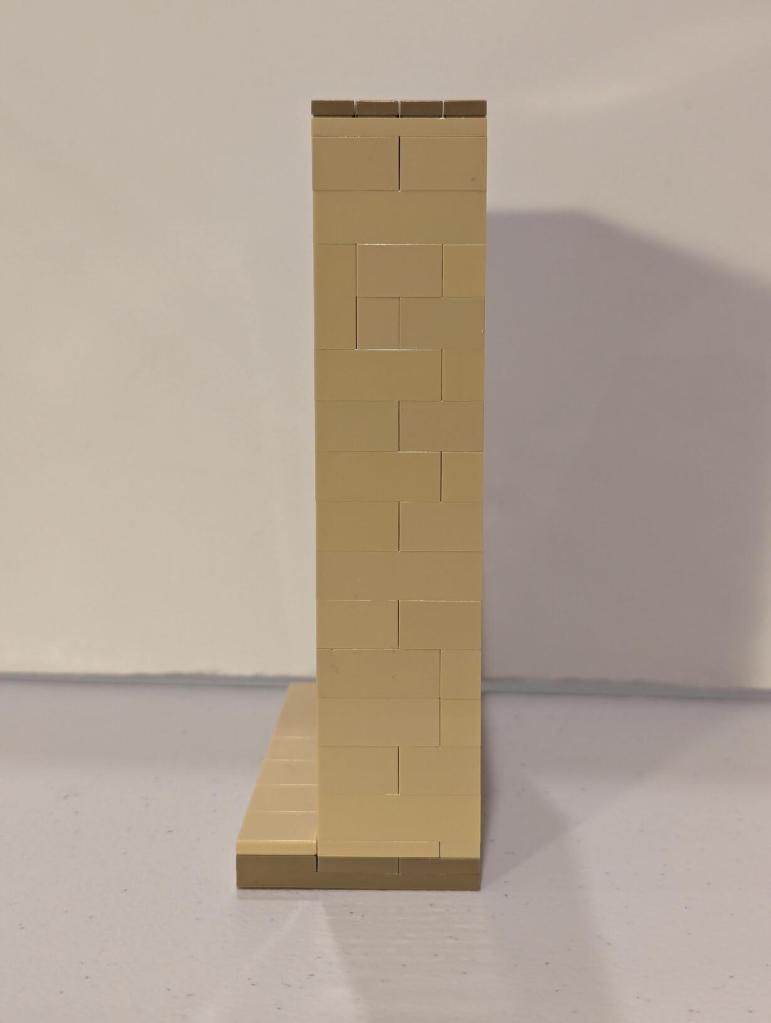
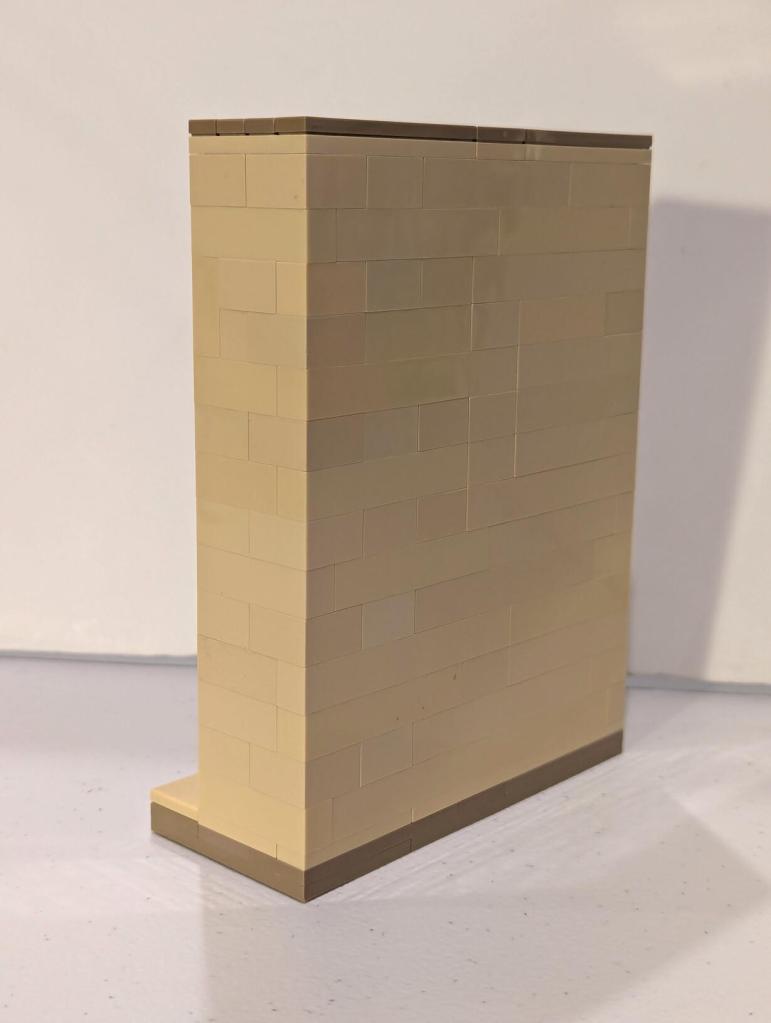
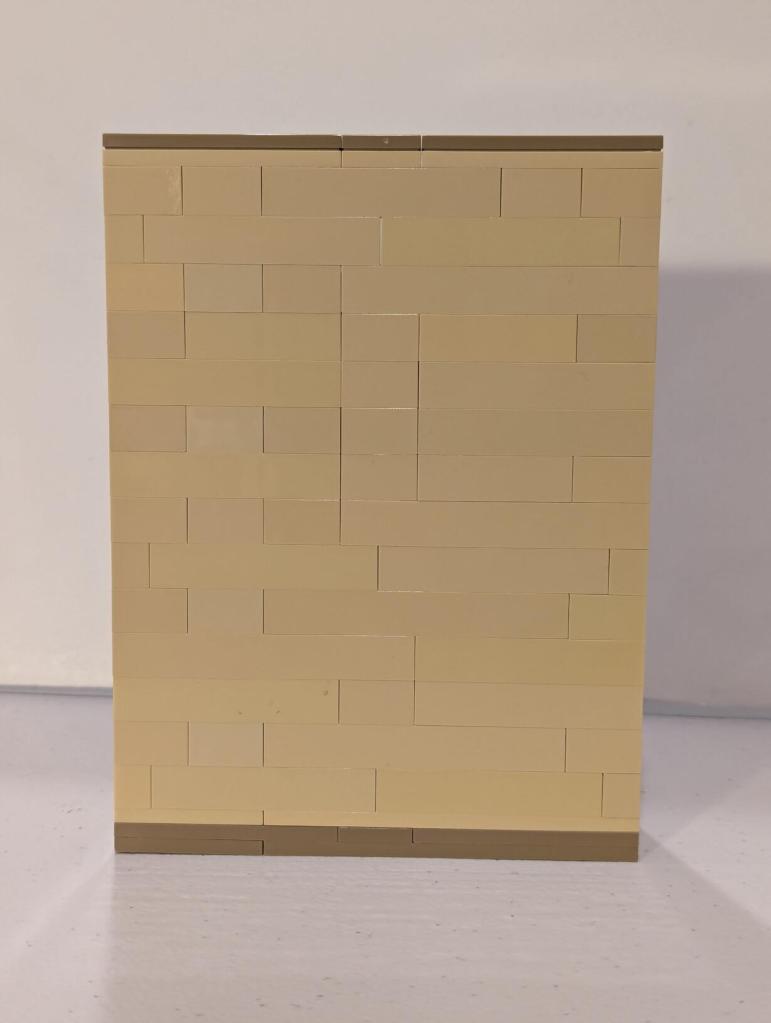
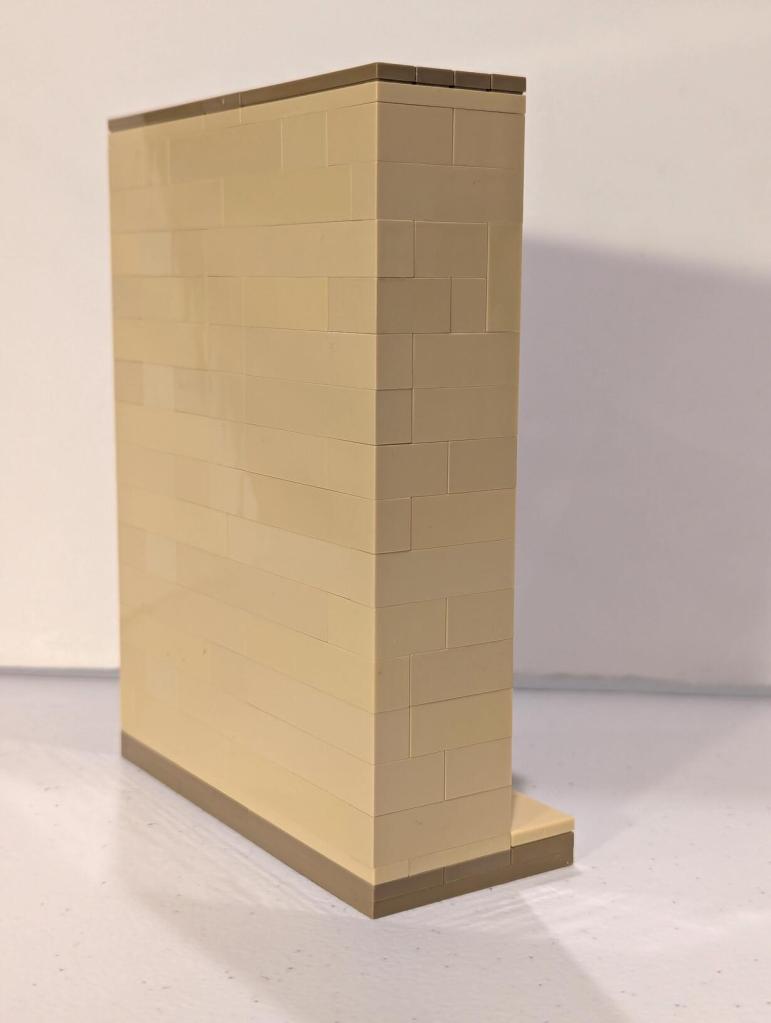
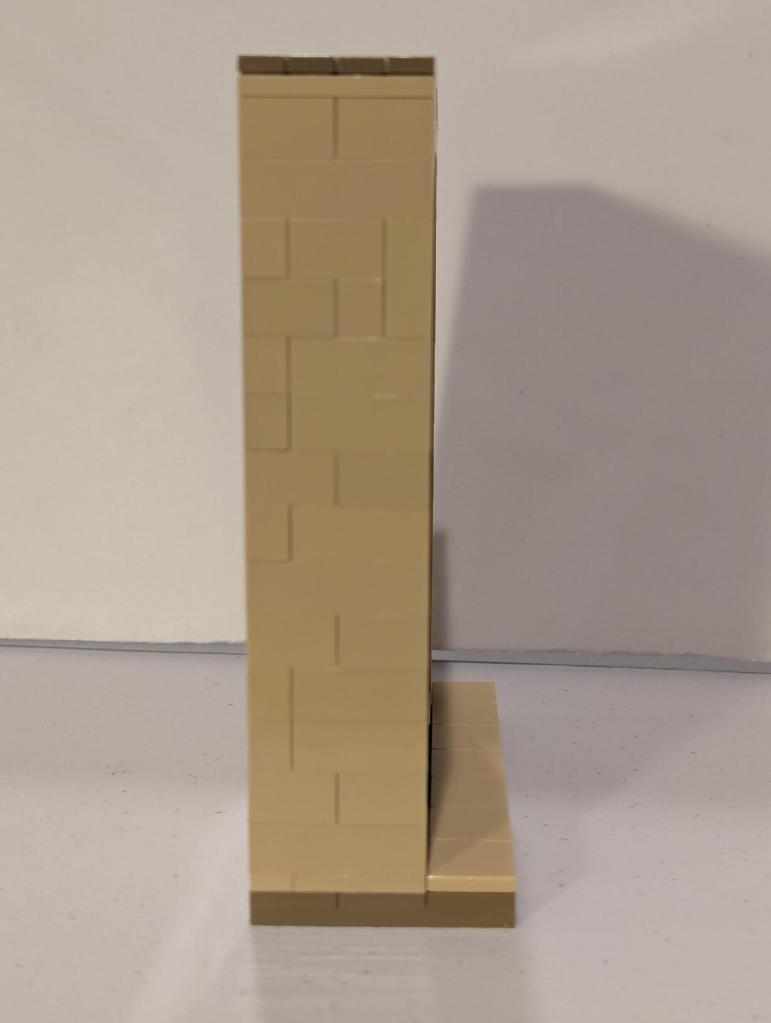
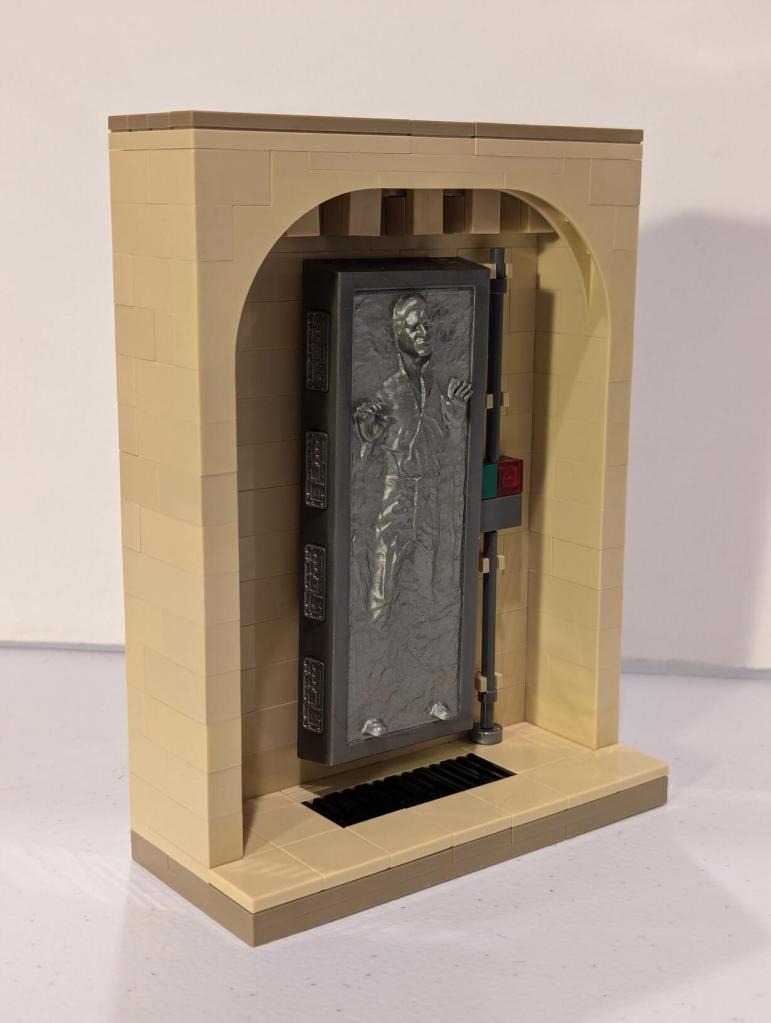
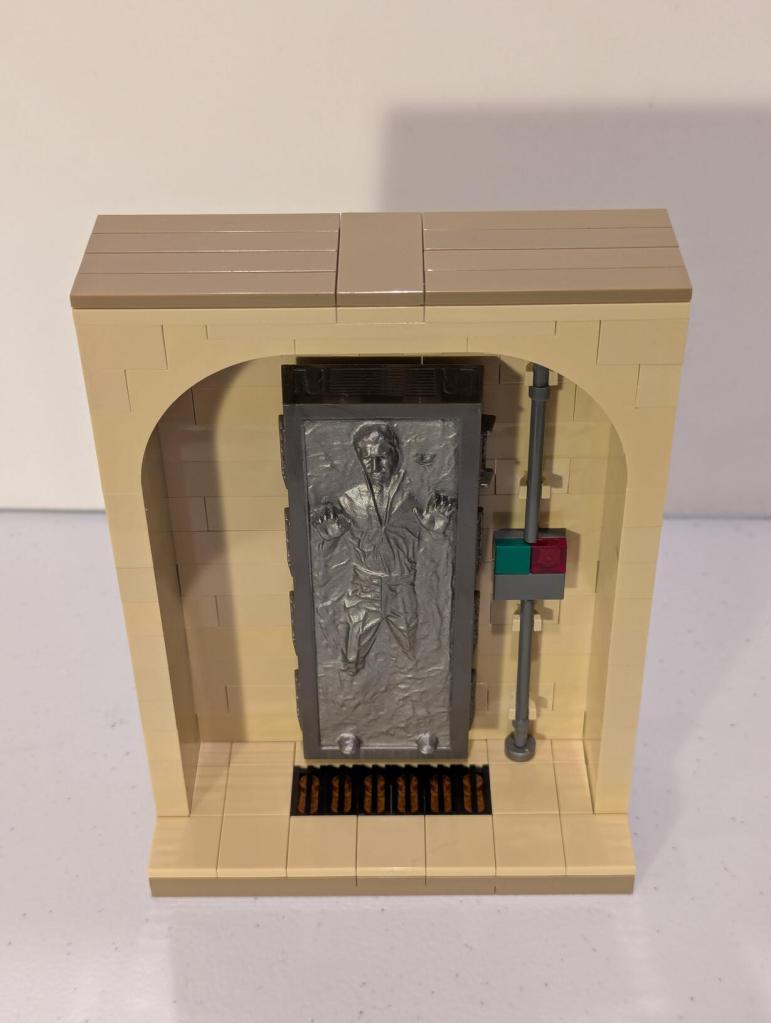
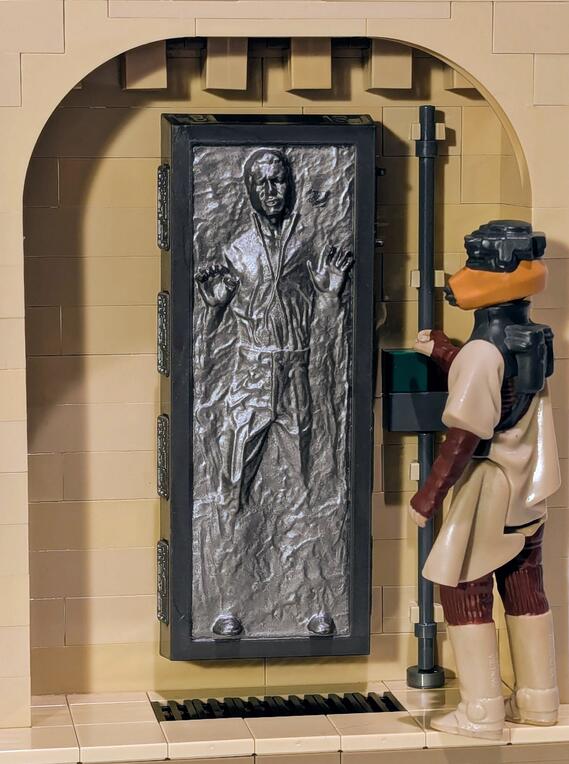
    Han Solo in Carbonite displayed in an alcove of Jabba's Palace built out of tan LEGO bricks.

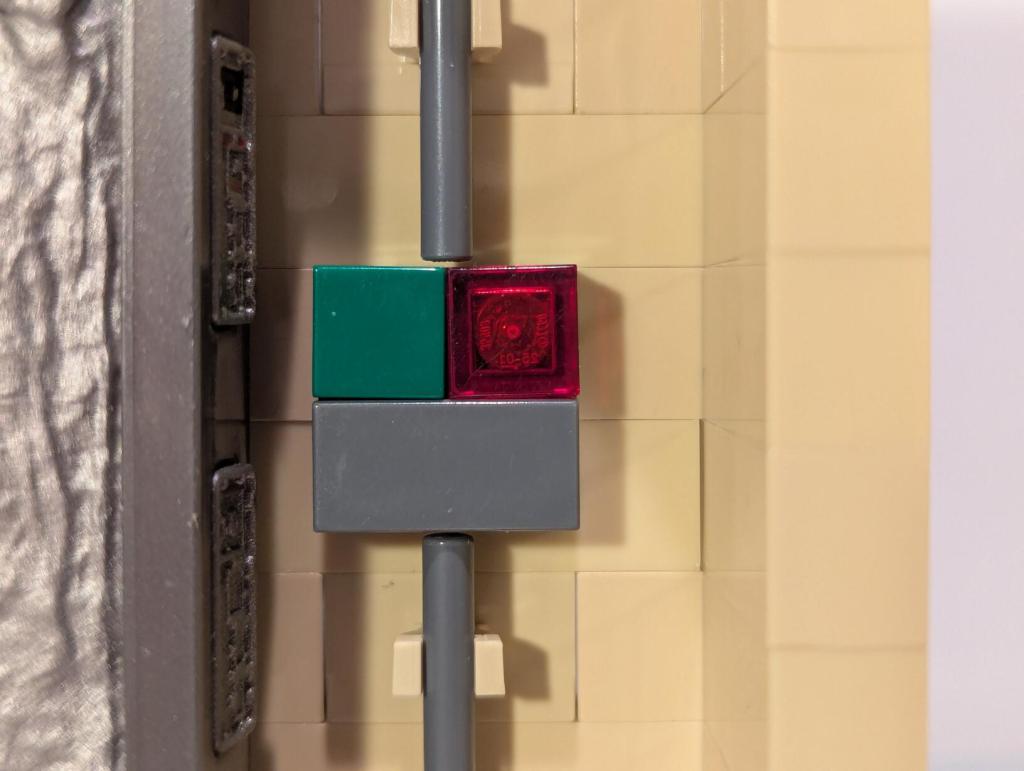
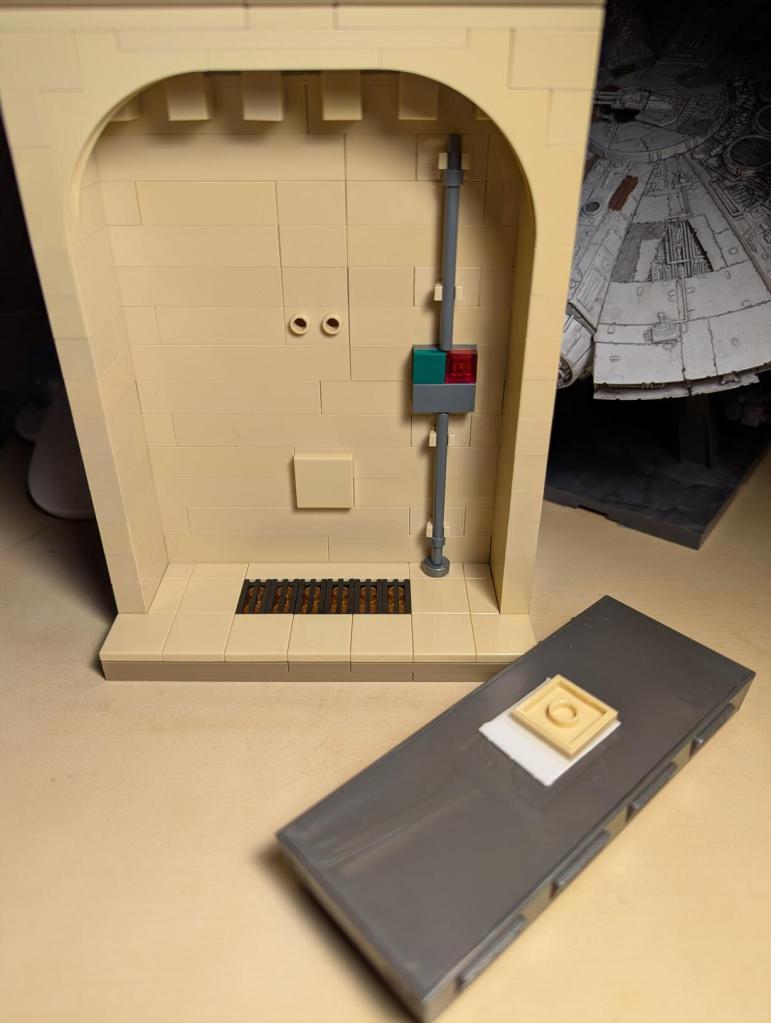
    I wanted to display Han Solo in Carbonite more prominently on my Return of the Jedi/Jabba’s Palace shelf of my Star Wars collection. There is Hasbro’s set that includes Han, and there are some third-party creations on eBay, Etsy, and other websites. However, I have a lot of LEGO, so I figured that I would see what I could do with what I have on-hand before spending money on a solution. After several iterations, I finalized the MOC shown in the pictures on this post.

    Han Solo in Carbonite displayed in an alcove of Jabba's Palace built out of tan LEGO bricks.
    Han Solo in Carbonite displayed in an alcove of Jabba's Palace built out of tan LEGO bricks.
    Han Solo in Carbonite displayed in an alcove of Jabba's Palace built out of tan LEGO bricks.
    Han Solo in Carbonite displayed in an alcove of Jabba's Palace built out of tan LEGO bricks.
    Han Solo in Carbonite displayed in an alcove of Jabba's Palace built out of tan LEGO bricks.
    Han Solo in Carbonite displayed in an alcove of Jabba's Palace built out of tan LEGO bricks.
    Han Solo in Carbonite displayed in an alcove of Jabba's Palace built out of tan LEGO bricks.
    Han Solo in Carbonite displayed in an alcove of Jabba's Palace built out of tan LEGO bricks.
    Han Solo in Carbonite displayed in an alcove of Jabba's Palace built out of tan LEGO bricks.
    Han Solo in Carbonite displayed in an alcove of Jabba's Palace built out of tan LEGO bricks.
    Han Solo in Carbonite displayed in an alcove of Jabba's Palace built out of tan LEGO bricks.
    Han Solo in Carbonite displayed in an alcove of Jabba's Palace built out of tan LEGO bricks.
    Han Solo in Carbonite displayed in an alcove of Jabba's Palace built out of tan LEGO bricks.
  • How to Modify 3/8″ Threaded Bolt-On Caster Wheels to Fit Unthreaded 7/16″ Mount Points on Home Hospital Bed

    home hospital bed with messy sheets

    If you have a home hospital bed that needs to be relocated easily but can’t find unthreaded caster wheels, this guide might be helpful to you.

    The problem that I recently encountered was a very heavy home hospital bed that needed to be moved around easily without being dragged around on a new floor. The particular bed that I was dealing with was manufactured by Thill, Inc in the USA. It is at least 30 years old and exceedingly heavy.

    thill manufacturer label on steel frame of bed

    It sits on four feet capped with glued-in plastic inserts with 7/16″ holes. Judging by late model home hospital beds, there are caster wheels that lock into these holes. Unfortunately, I couldn’t source four of them within the tight time frame that I was needing to make this bed mobile.

    ruler showing mount point is 7/16"

    I knew that I could get threaded bolt-on casters with non-marking rubber wheels from Rural King in Waycross, Georgia. However, those caster wheels’ bolts were 3/8″ threaded. I needed a way to make those bolts larger and secure on the bed. I thought of how to build a sleeve that would increase the bolt’s diameter but not be easily compressed with use. I had just finished drinking a canned Starbucks Espresso when I imagined how I could use its aluminum can to build a sleeve.

    unopened starbucks espresso and cream drink

    My plan was to cut some of these aluminum cans into sheets that I could wrap around the 3/8″ bolt to increase its size to 7/16″ when it was pushed into the mount point on each foot of the bed. Any aluminum can would work, but I had a the Starbucks cans on-hand, so that’s what I used.

    drawing of sheet of aluminum being wrapped around caster mounting bolt

    Using a razor, I cut the top and bottom of each can off. Then, I carefully cut down the height of the can to create a sheet of aluminum. Then, I used tin snips to cut the sheets of the needed length and width to match the bolts on the caster wheels.

    cut up aluminum cans with tin snips and ruler on 12" board

    This is approximately what each sheet looked like, but I used ones with cleaner edges for the final assembly.

    sheet of aluminum can

    I tightly rolled the aluminum sheet around the bolt. Holding it in place with my fingers, I pushed the bolt into the mounting point. If it slid in too easily, I used a longer sheet of aluminum to bulk it up before trying again. The goal was to install the caster wheel securely so that it wouldn’t wobble or fall out if the bed were lifted off the floor.

    rolled sheet of aluminum

    Once the four caster wheels were installed, the bed could be easily wheeled around on the floor with minimal effort–far easier than trying to lift or drag its heavy mass!

    caster wheel installed on hospital bed
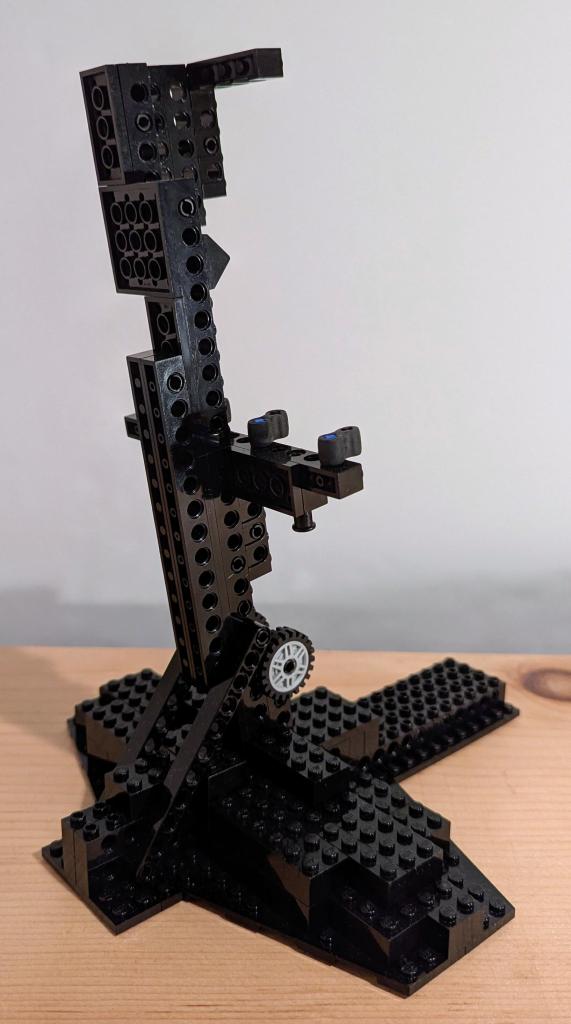
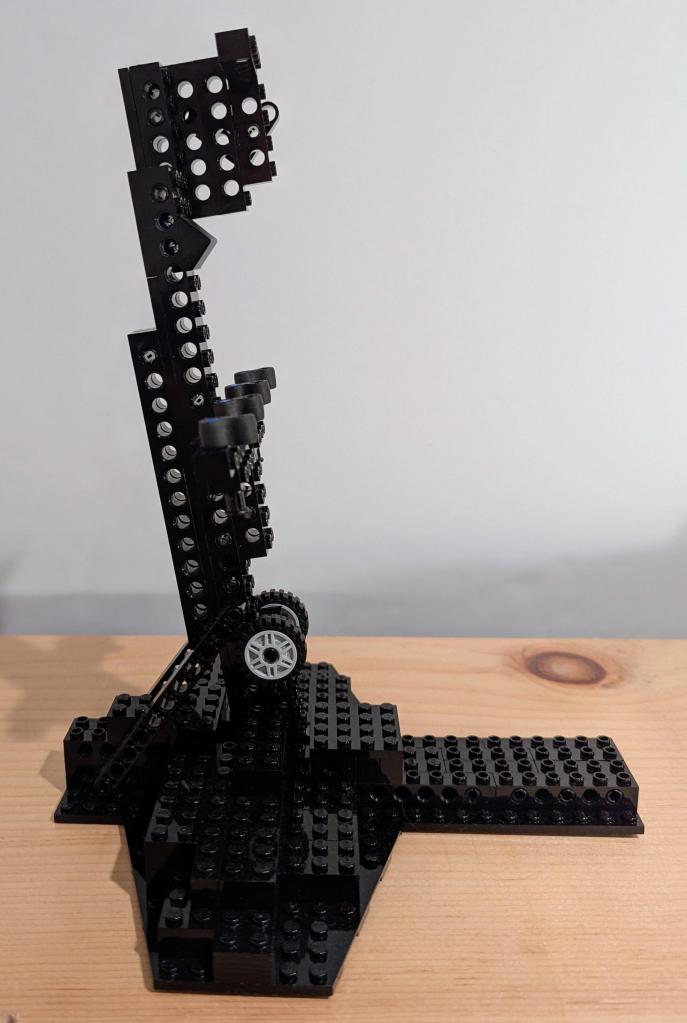
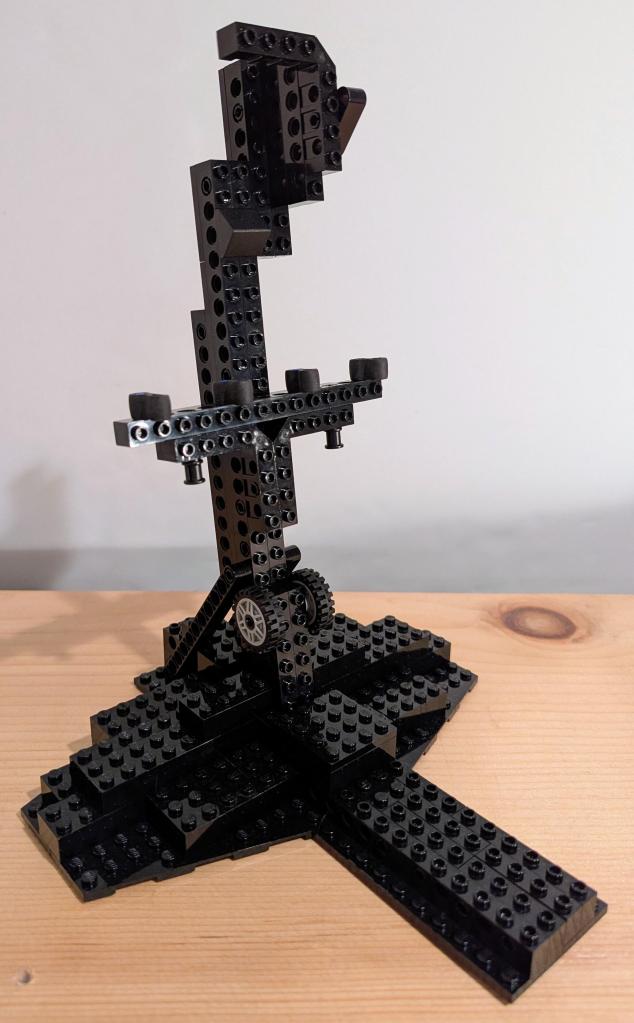
  • DIY LEGO Display Stands for Kenner’s 1979 Millennium Falcon and 1981 Slave I Vehicles in Flight

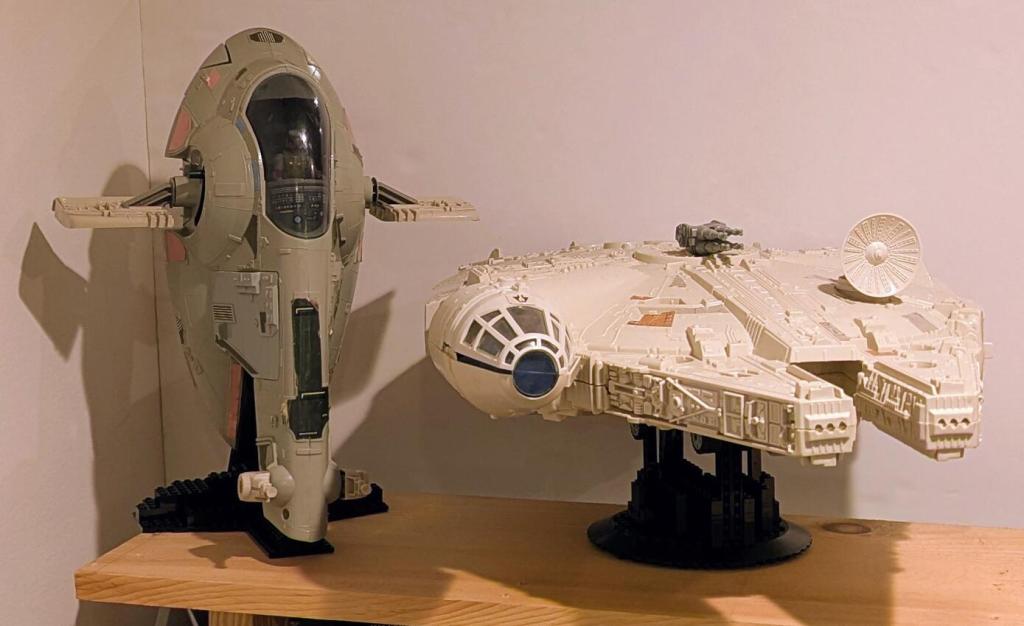
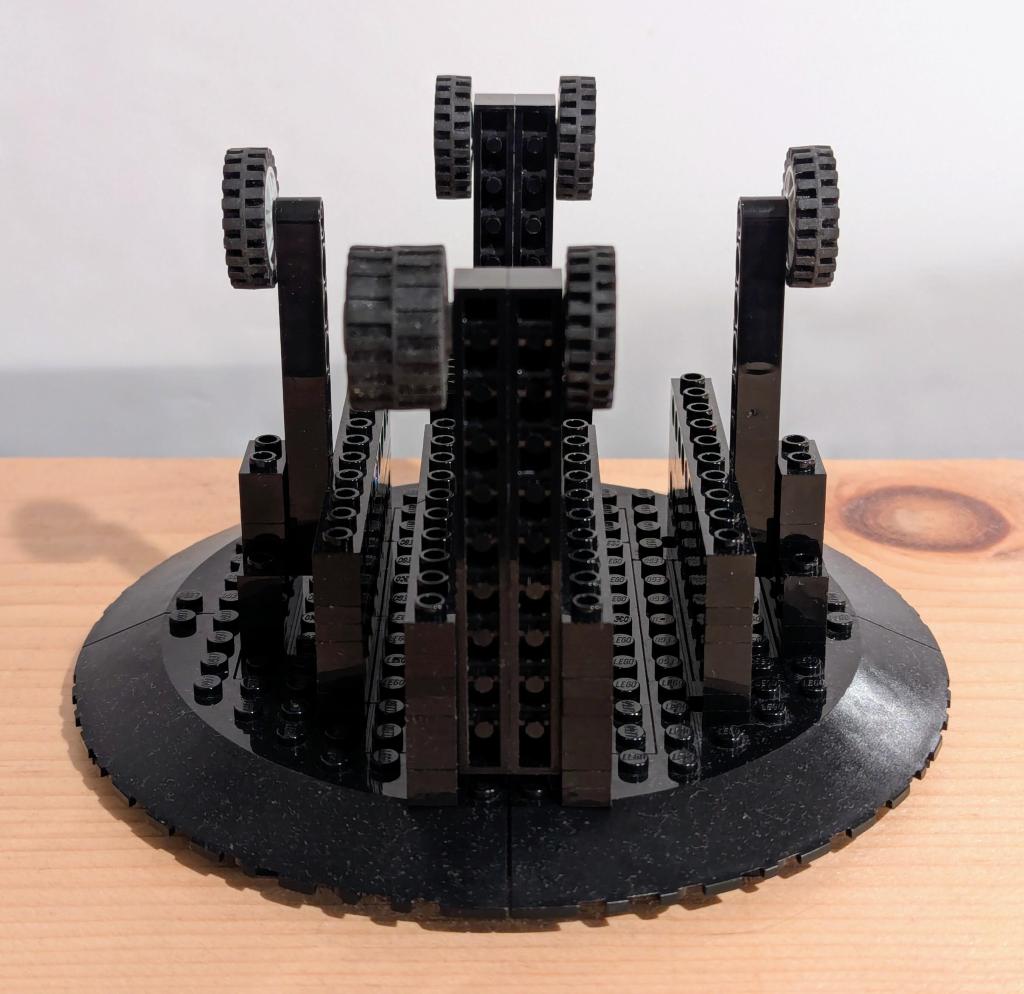
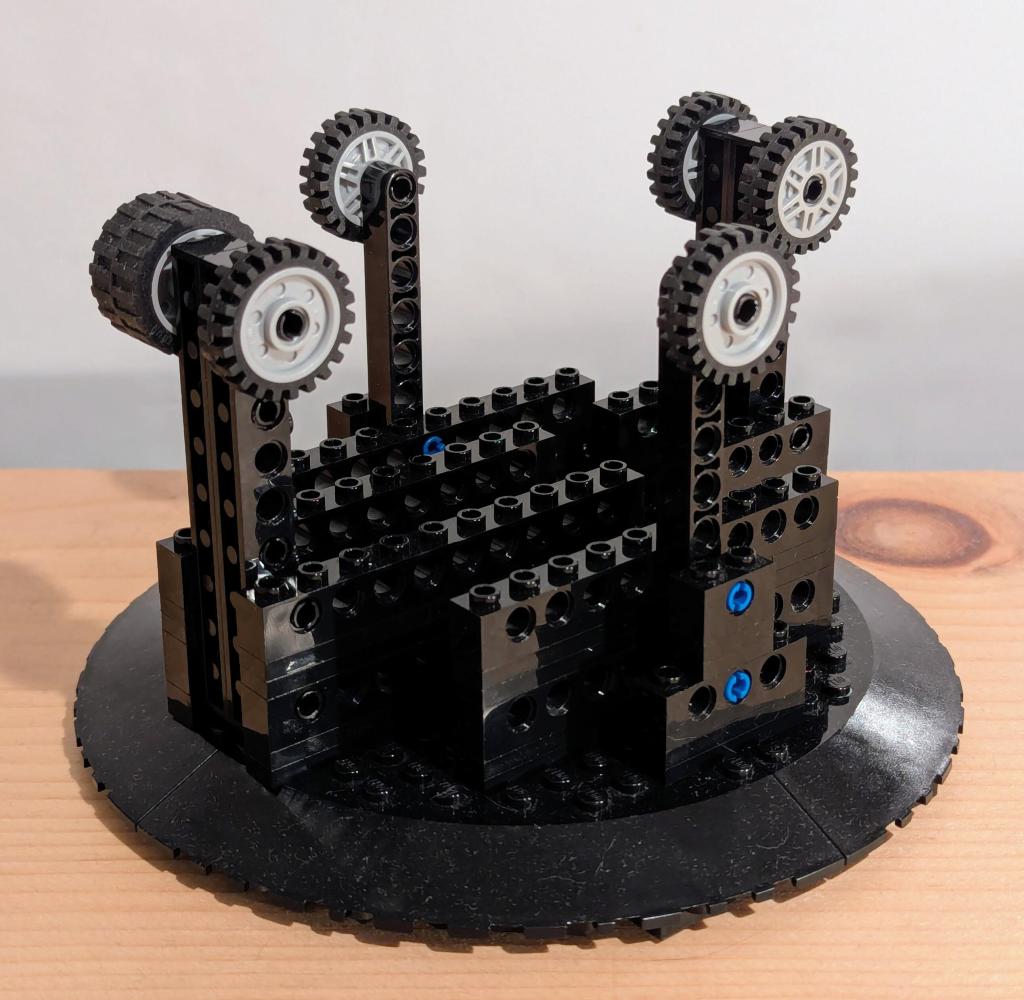
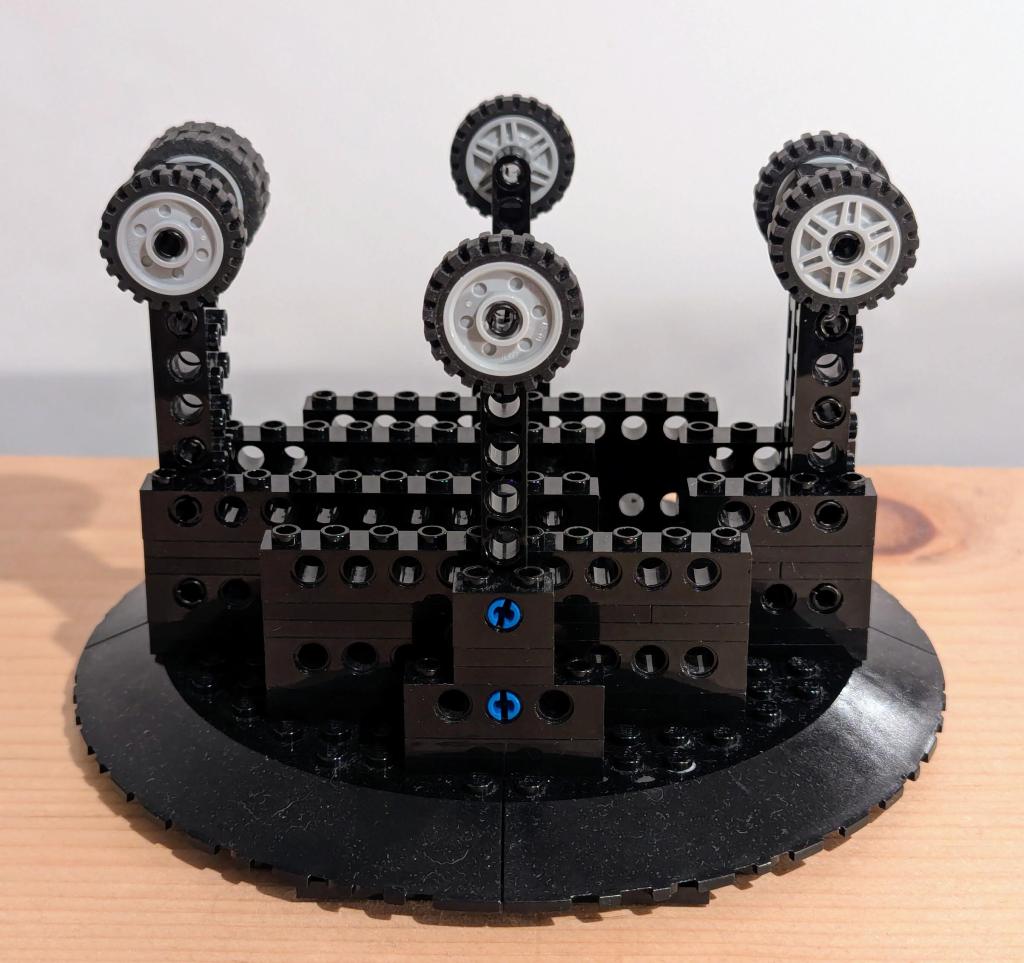
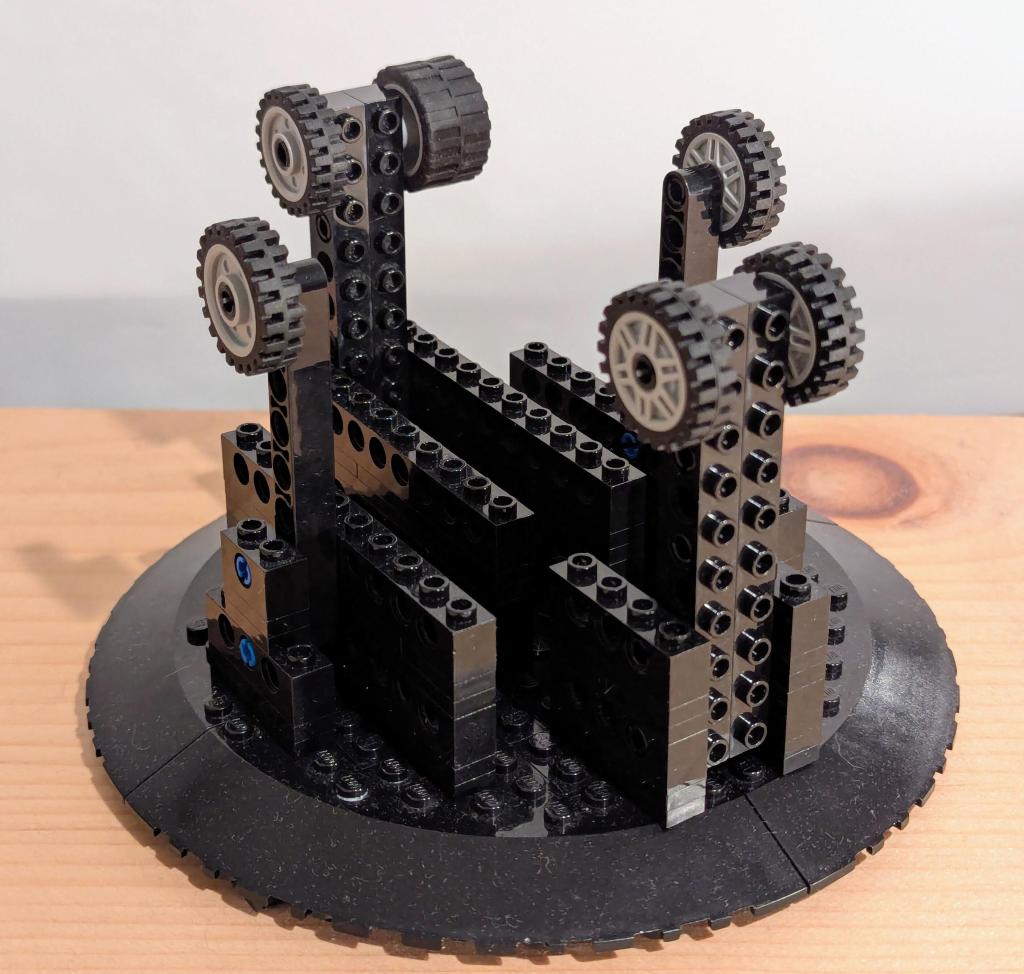
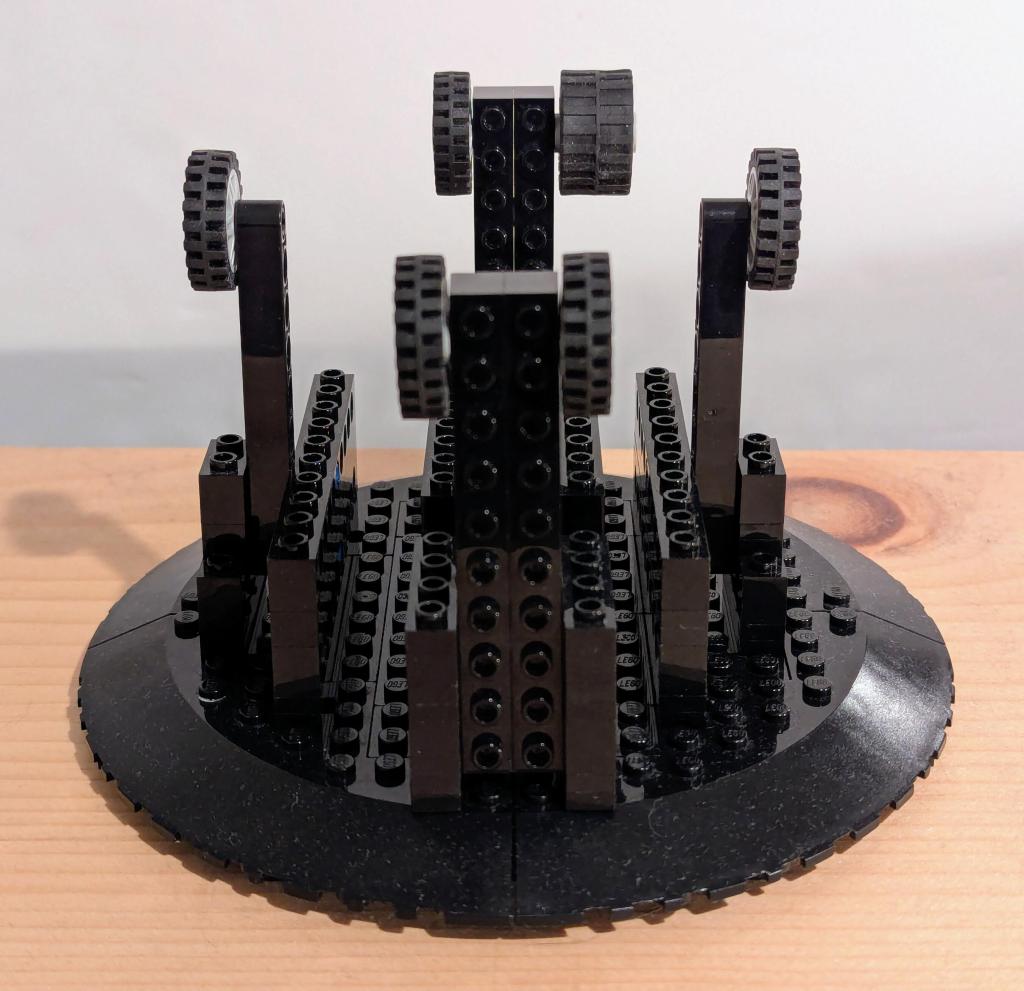
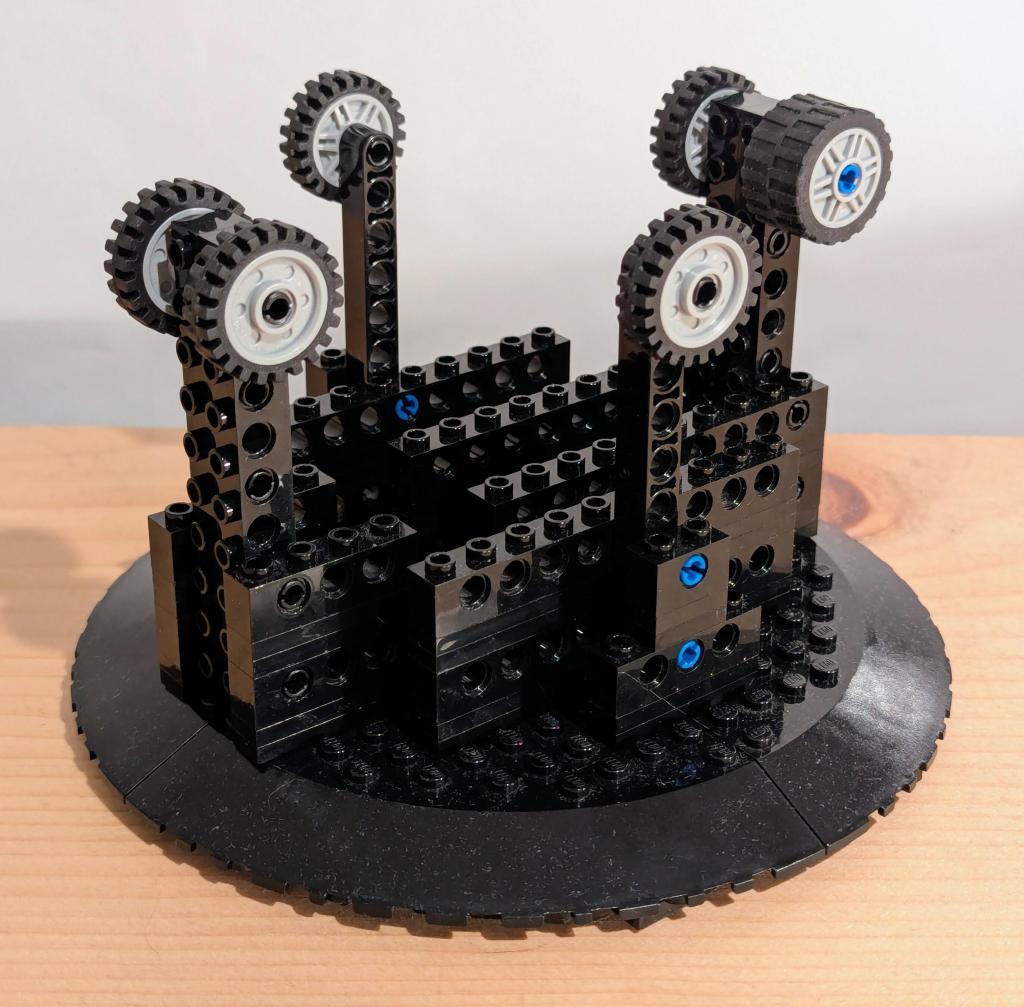
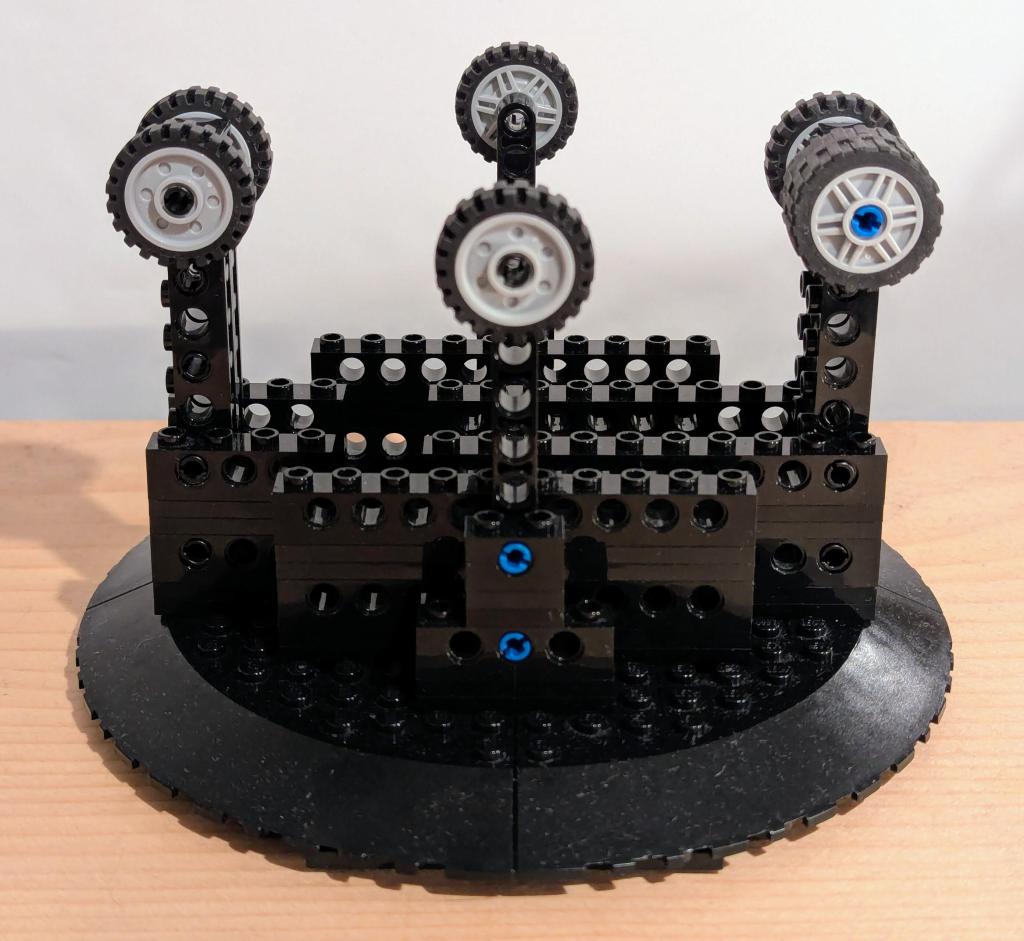
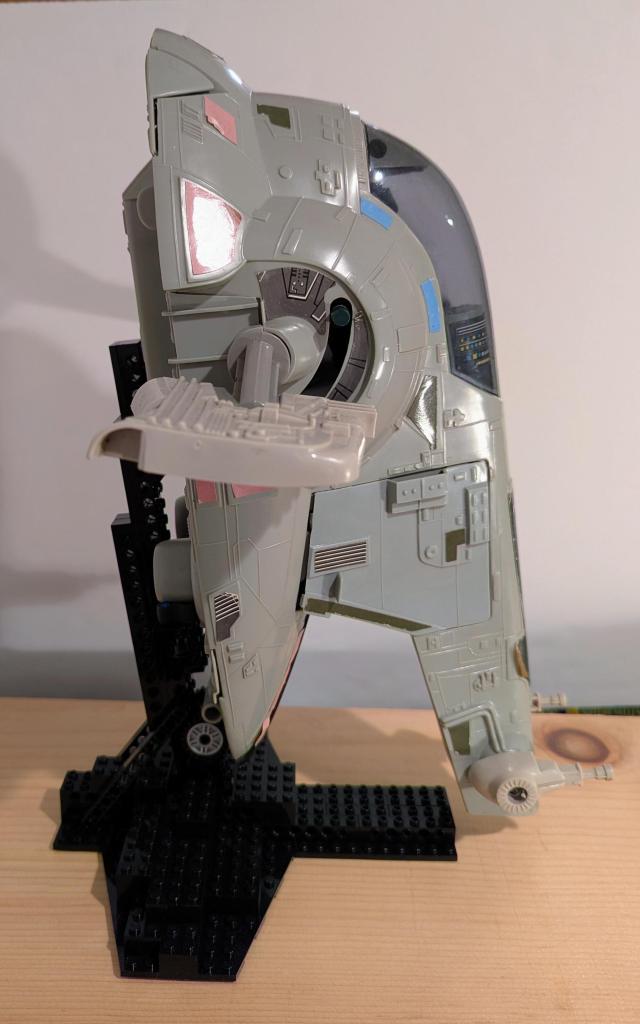
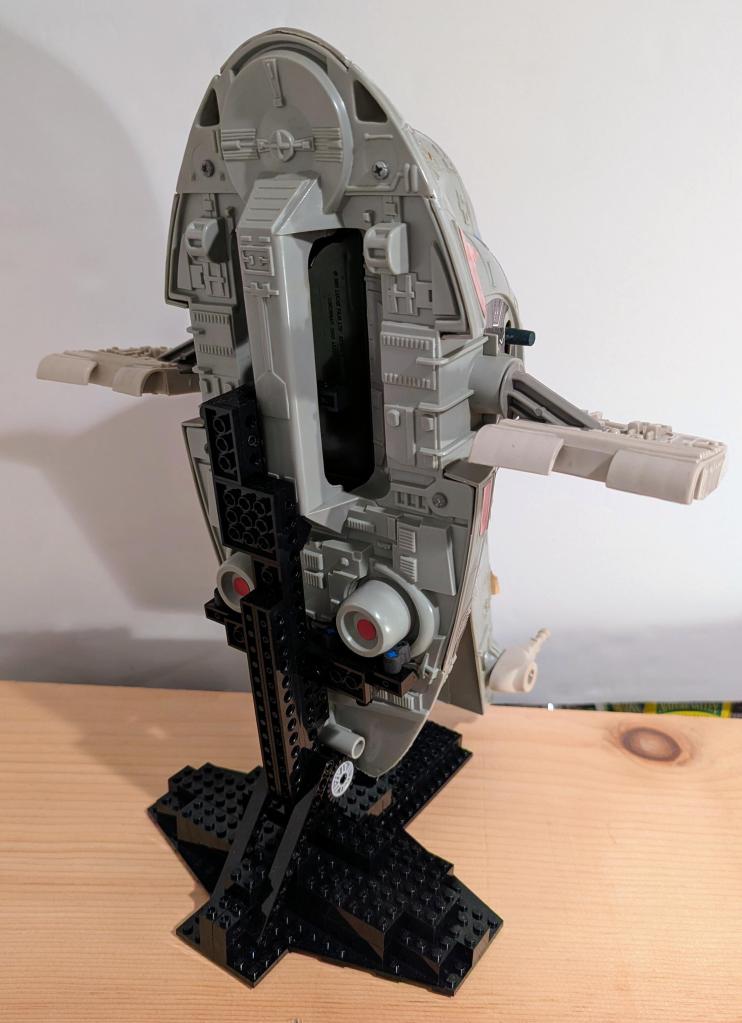
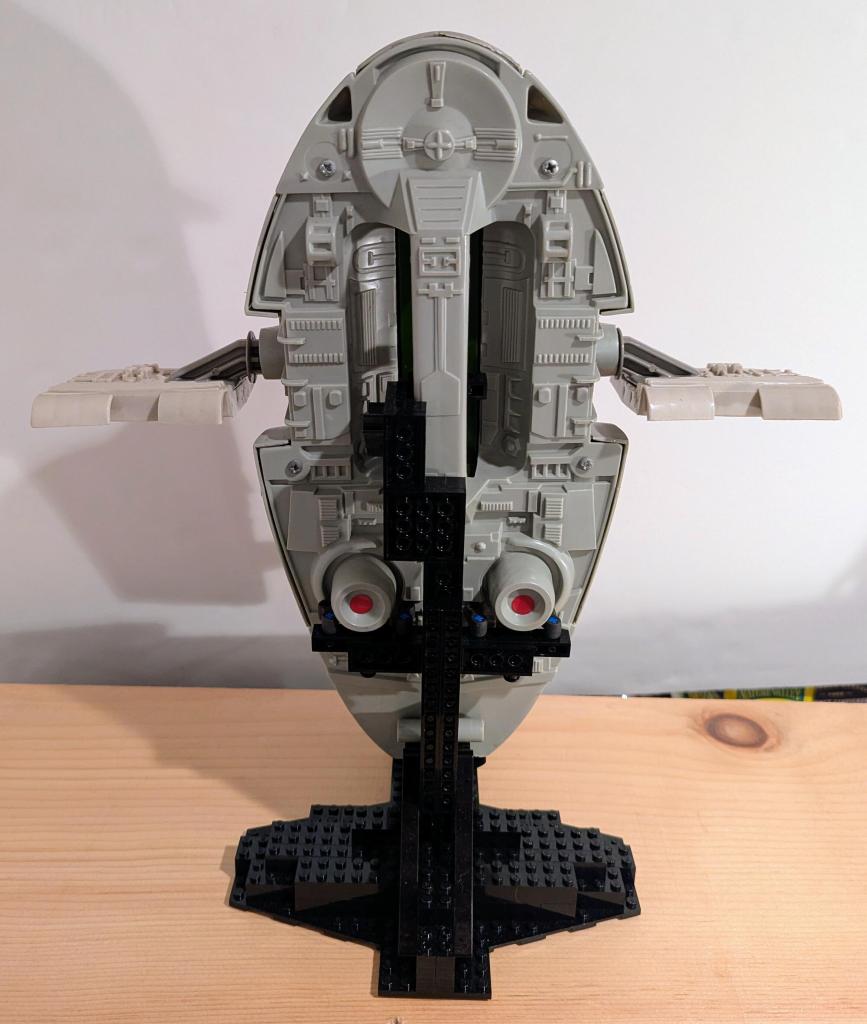
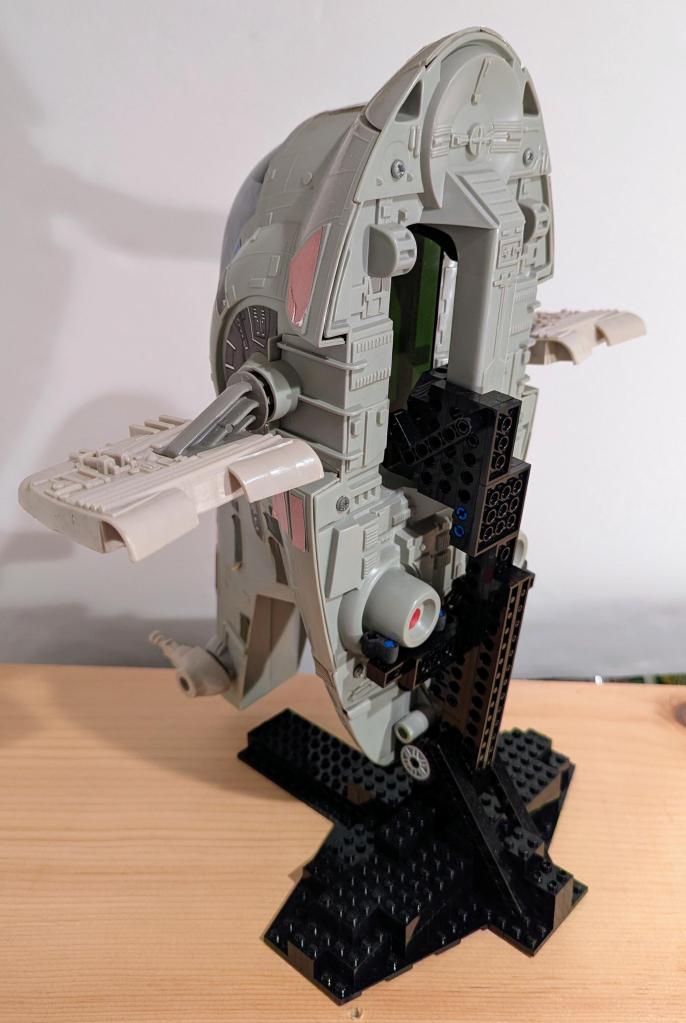
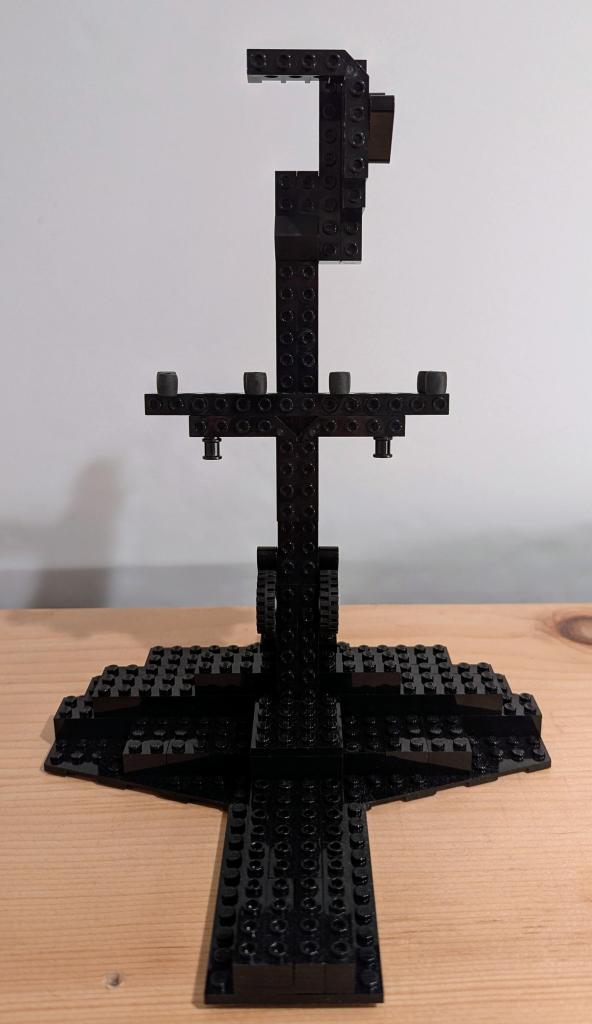
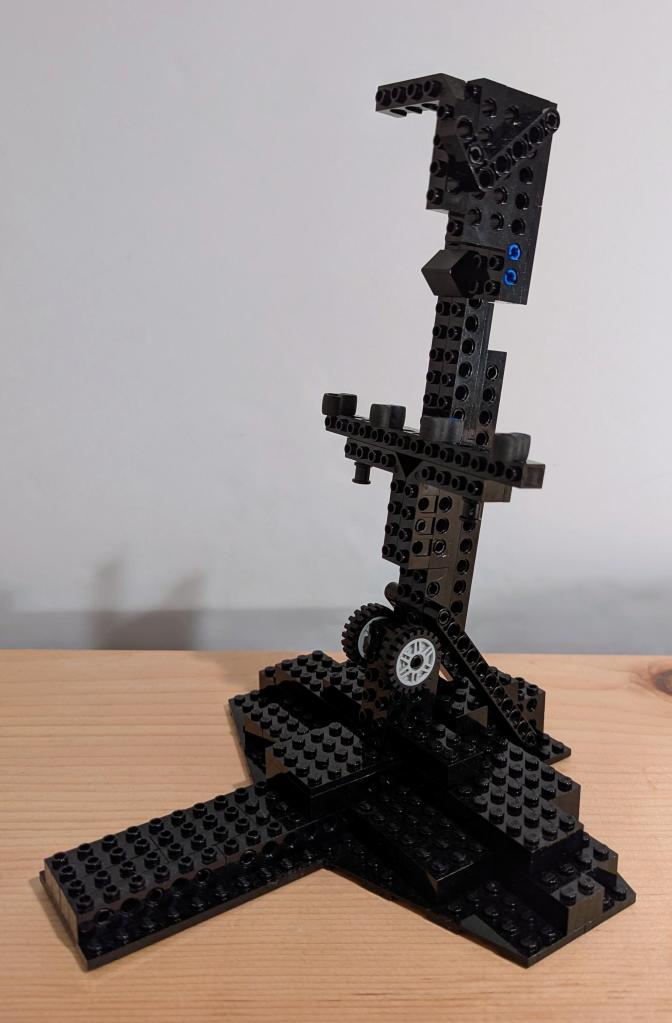
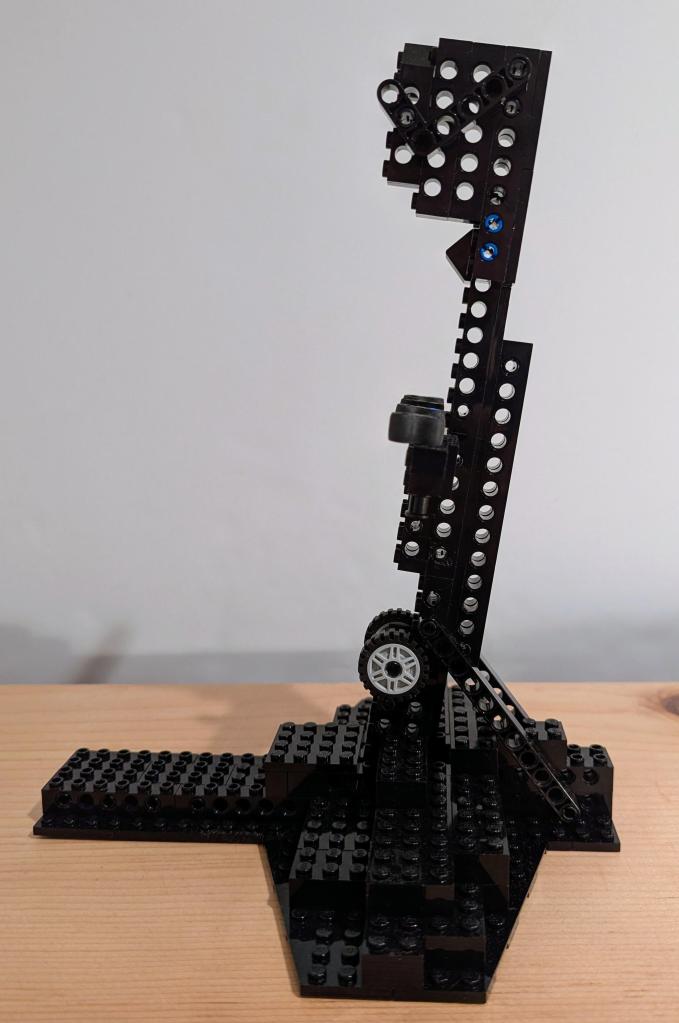
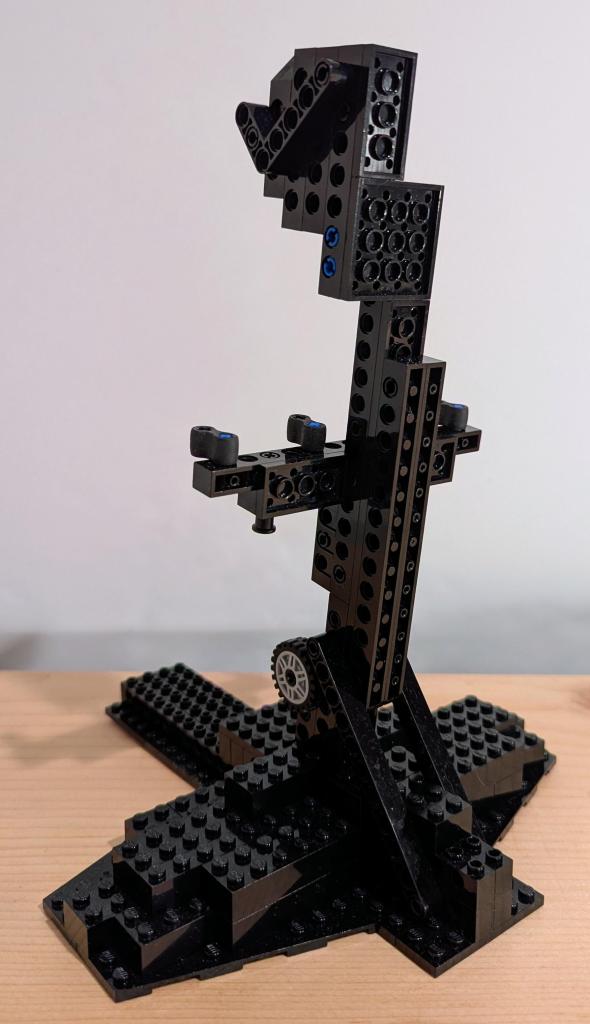
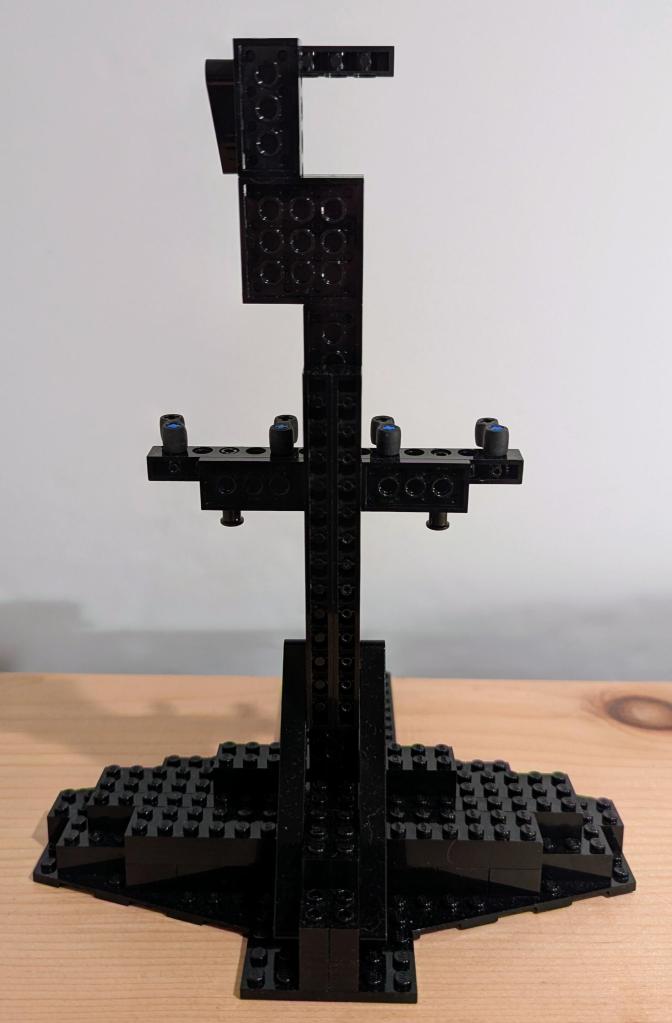
    I wanted to display my Kenner Millennium Falcon, which I’ve had for awhile, and my recently acquired Slave I on a shelf above my desk at home. While I liked seeing them on the shelf above my desk–Falcon with gear down and Slave I resting on its base–I thought displaying them in flight would look a lot cooler. There are aftermarket displays, including some nice ones that are clear acrylic, but since I have so much LEGO on-hand, I figured I should use what I have instead of purchasing something new. Below, I’m including detailed photos of each stand in case you are interested in building your own.

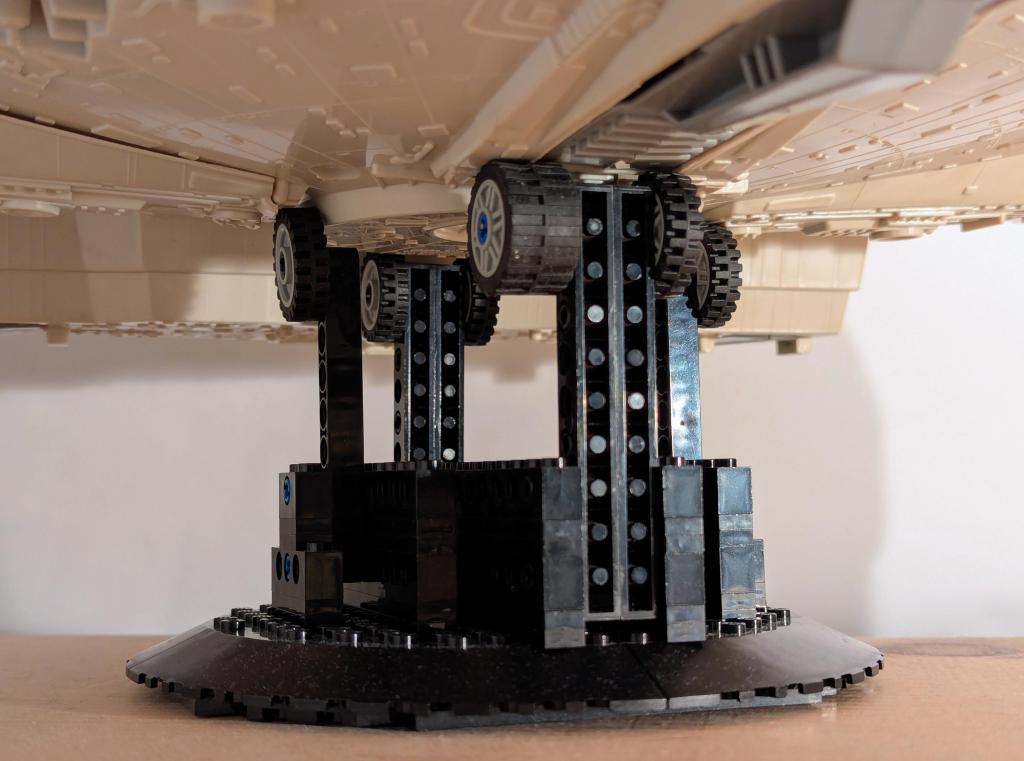
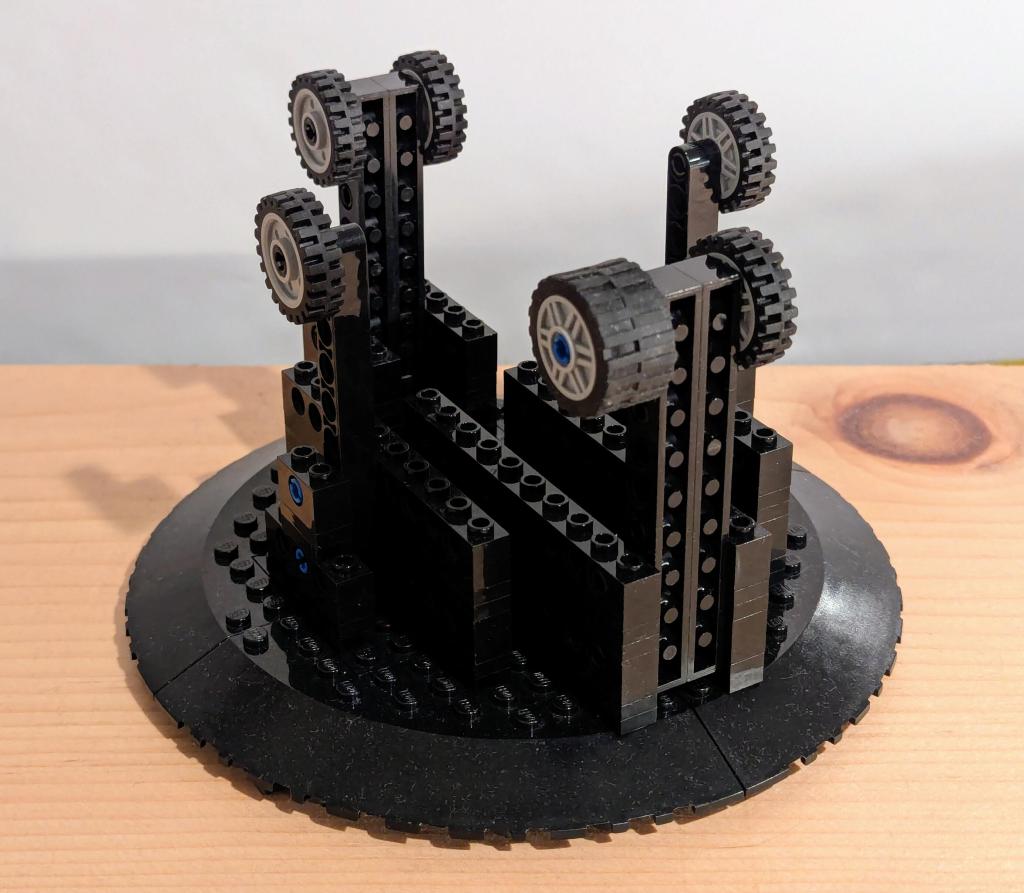
    LEGO Flight Display Stand for Kenner Millennium Falcon (1979)

    The Falcon display stand presented an interesting problem. Due to its asymmetrical design (with cockpit stuck off on its forward right quadrant), getting it to balance from the center gunner platform was difficult. Also, I didn’t want to build the stand with a wider width so that I could avoid putting any weight on the fragile loading ramp piece. A very simple solution presented itself when I ran out of single-stud wide tires. Putting a two-stud wide tire on the front support arm in the direction of the cockpit substantially balanced the Falcon so that it doesn’t wobble or move on the stand at all even while I’m typing on my keyboard below it on my desk.

    LEGO Flight Display Stand for Kenner Slave I (1981)

    Slave I’s unique design presented its own unique challenges for building an in-flight display stand. It is designed to be in flight mode by someone grasping the handle on the back of its base. The straight forward approach would be to build a long arm with a hook or some assemblage to “grasp” around the handle. When I was testing this out, I didn’t have enough long black 1 x n Technic bricks to construct a stable and supported arm (needing at least a sandwich of Technic bricks over and under a 2 x n plate).

    I opted to build a shorter support arm that would contact with Slave I in three places–hook around the bottom of the handle for stability, 4 x Technic, Axle Connector Double – Flexible Rubber holding the weight under the two bottom engine exhausts, and two 1-stud wide tires under the screw assembly that holds the base at the loading ramp together.

    Due to its center of gravity, I angled the arm back a couple of degrees and built the display stand’s base wide, short in the back, and long in the front.