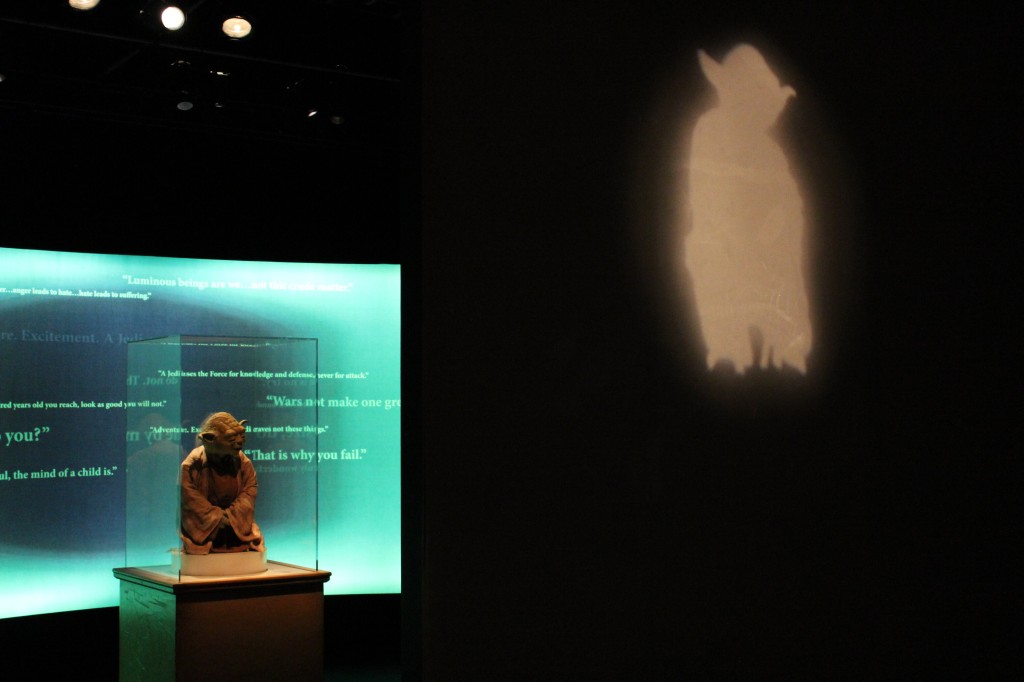
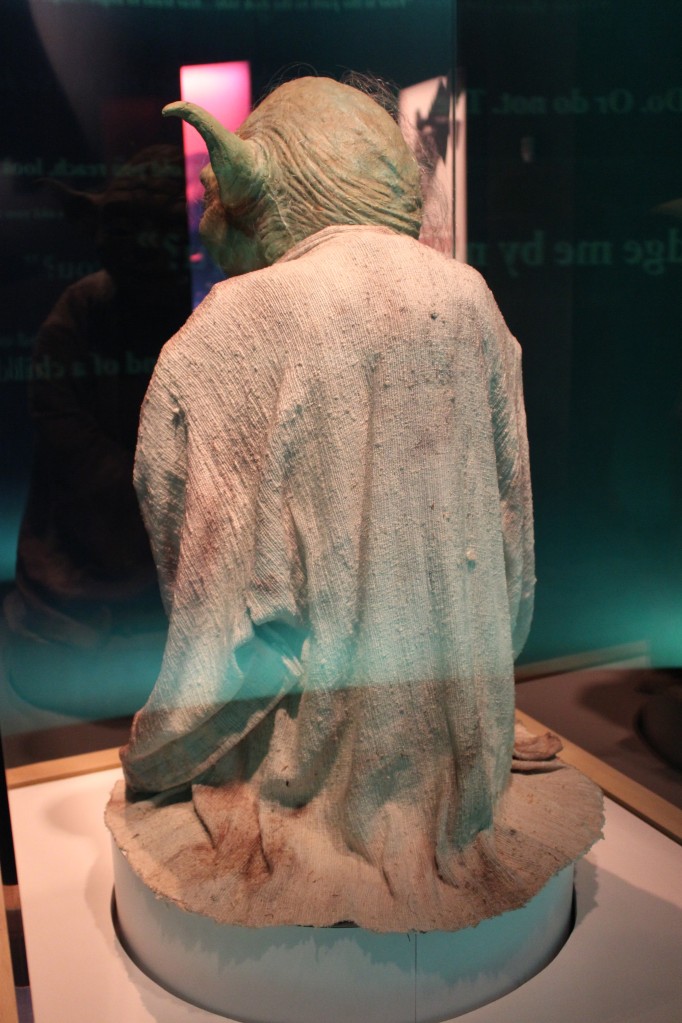
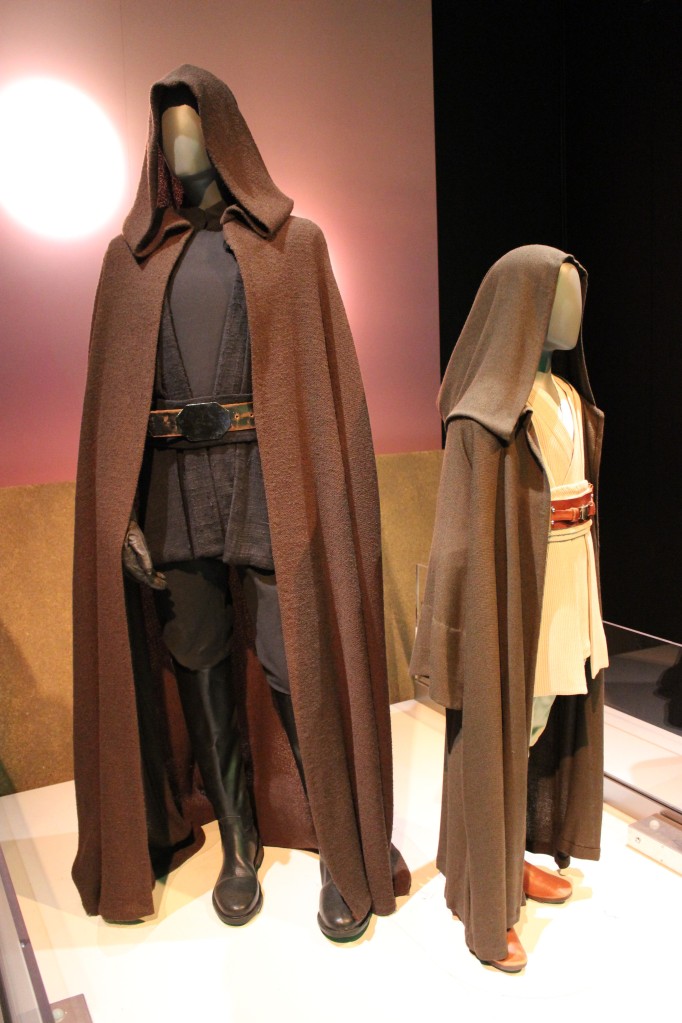
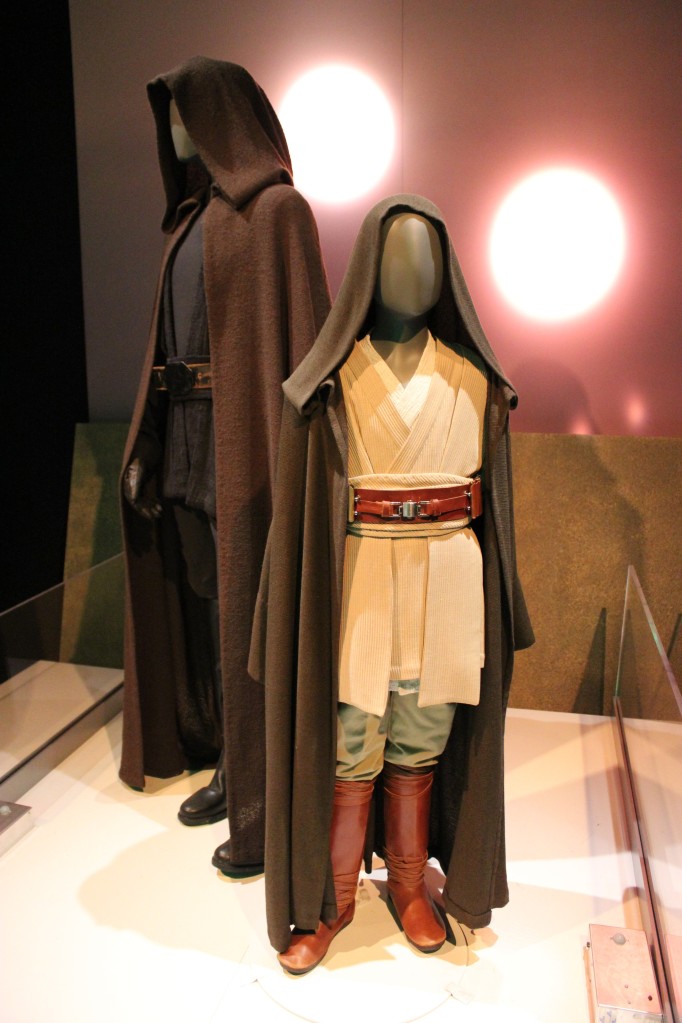
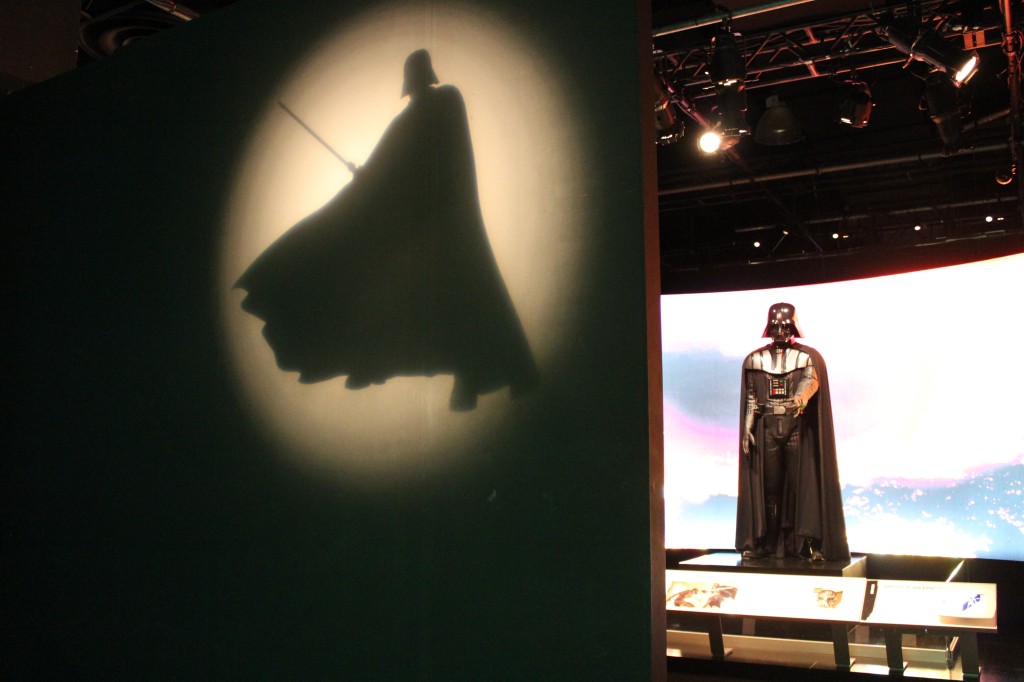
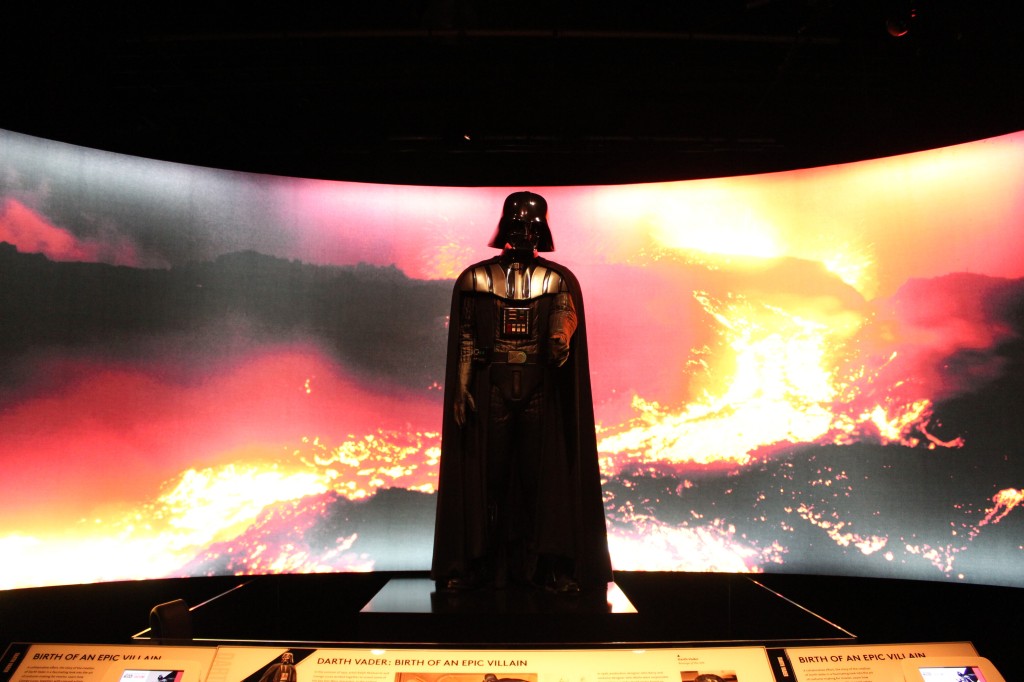
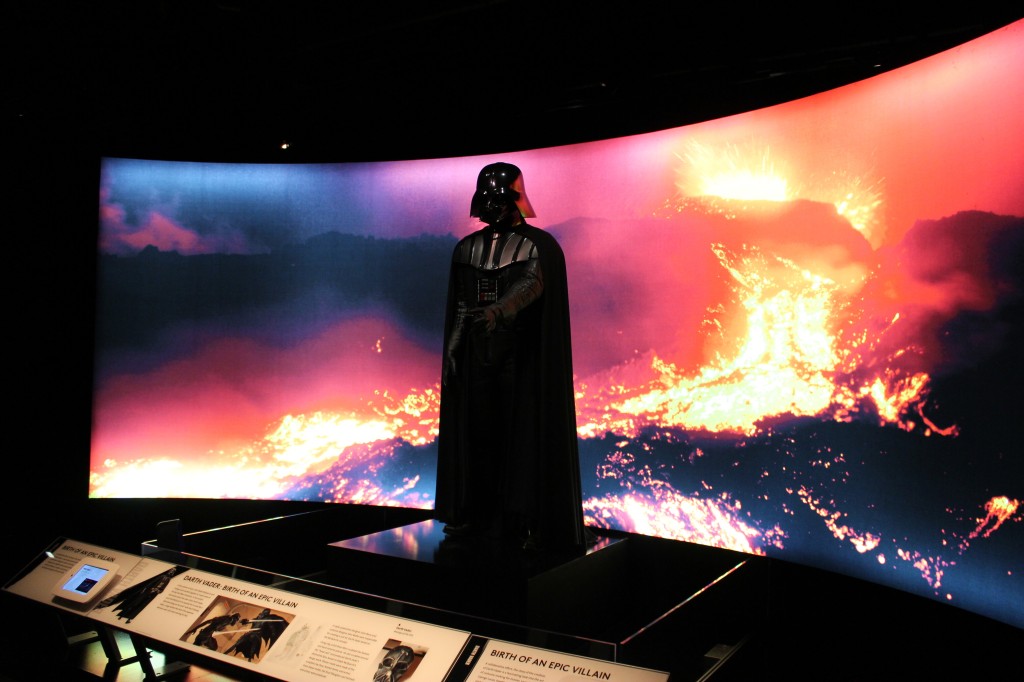
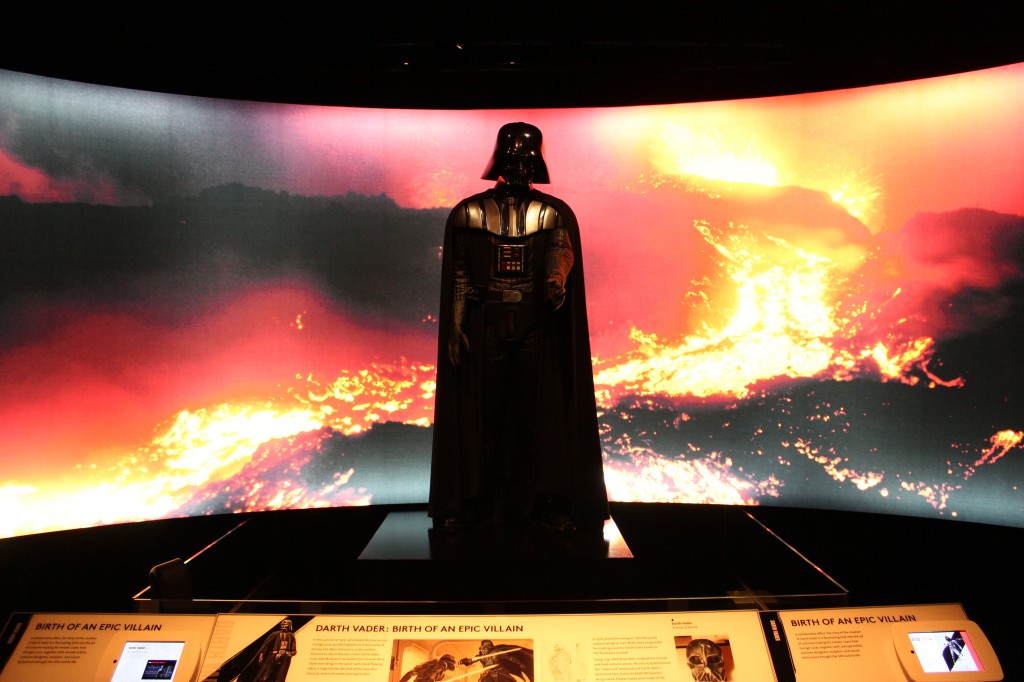
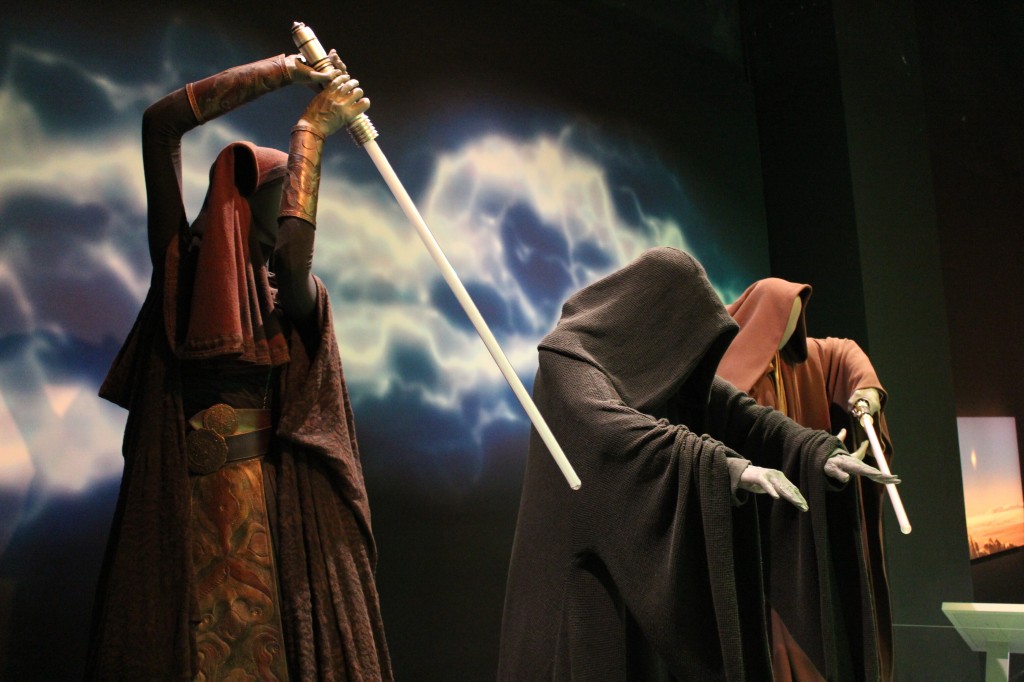
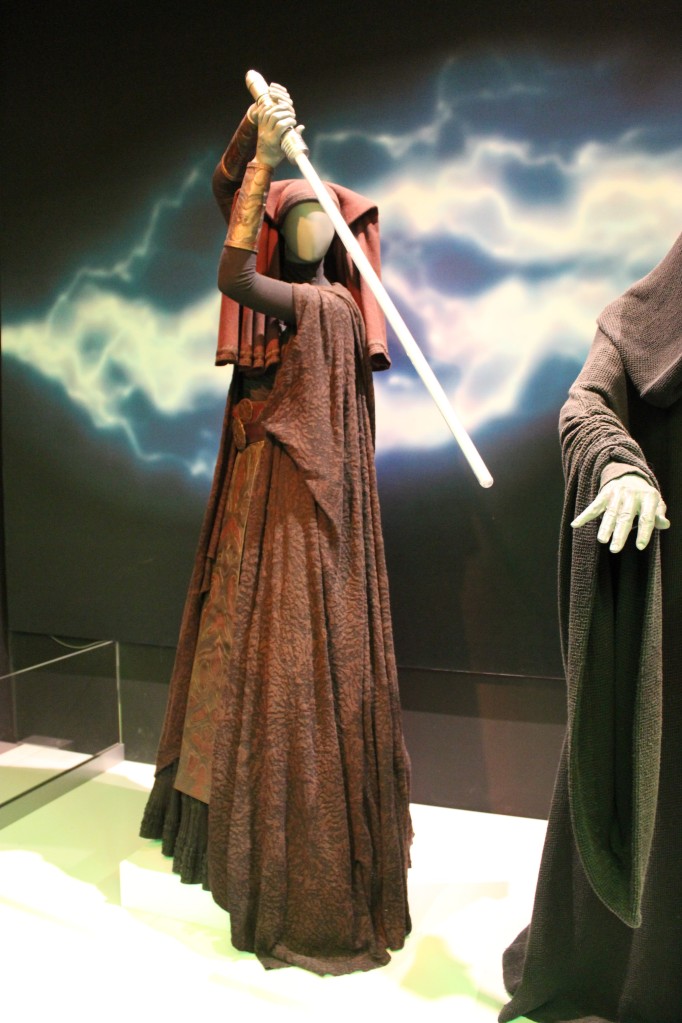
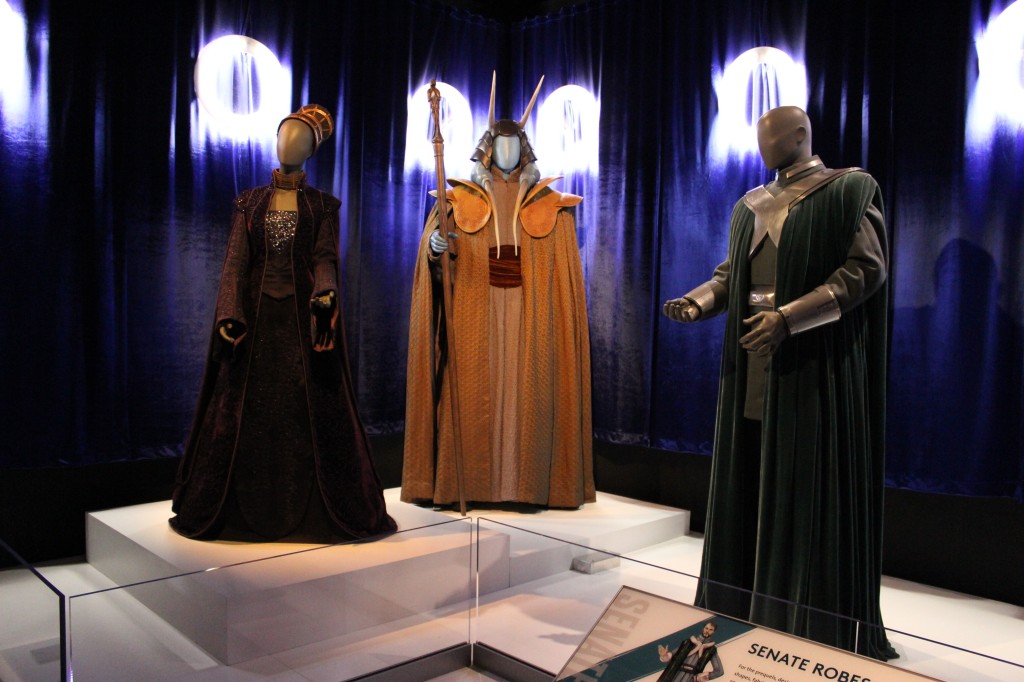
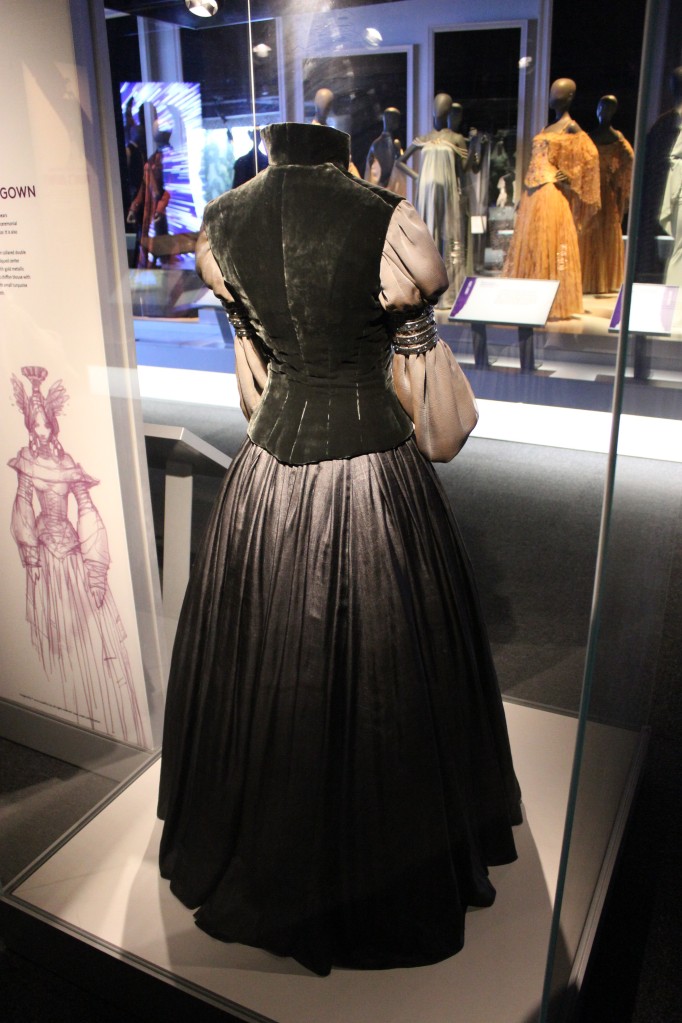
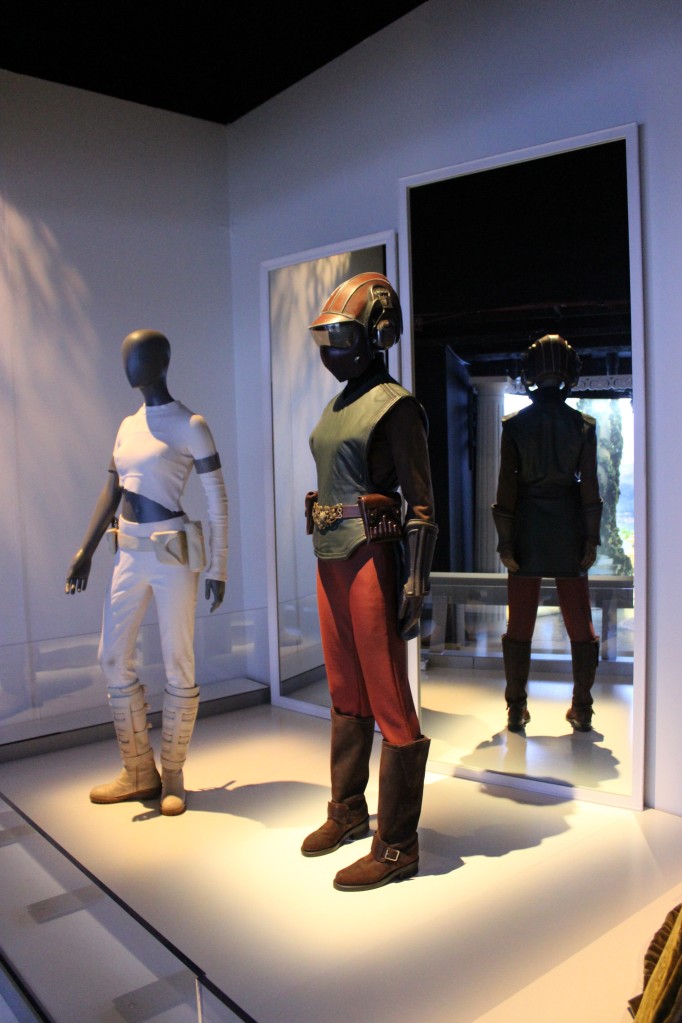
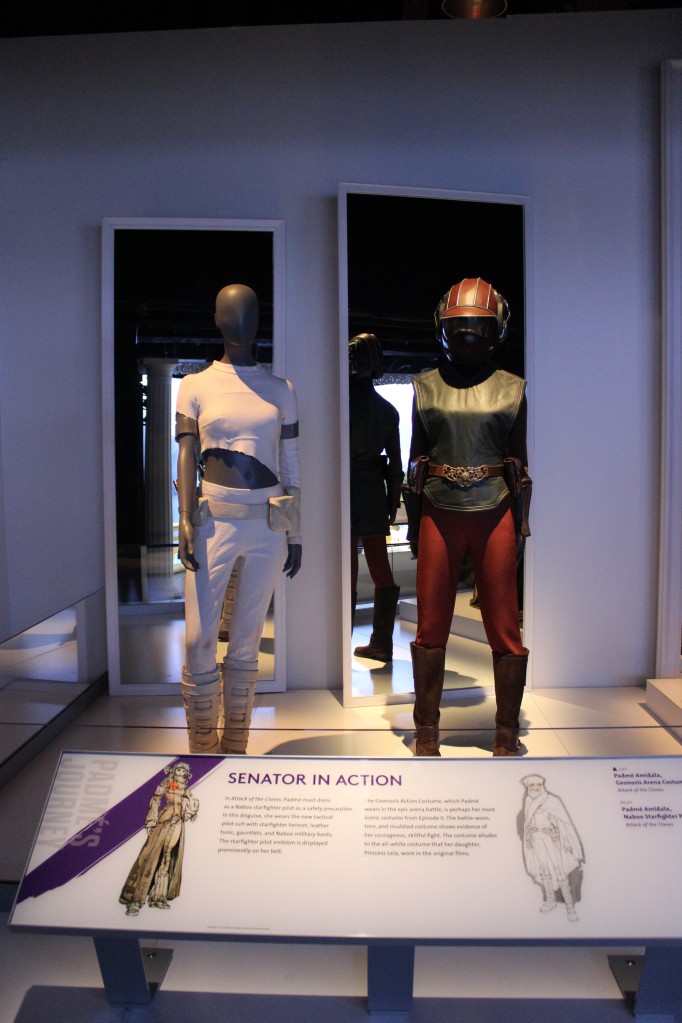
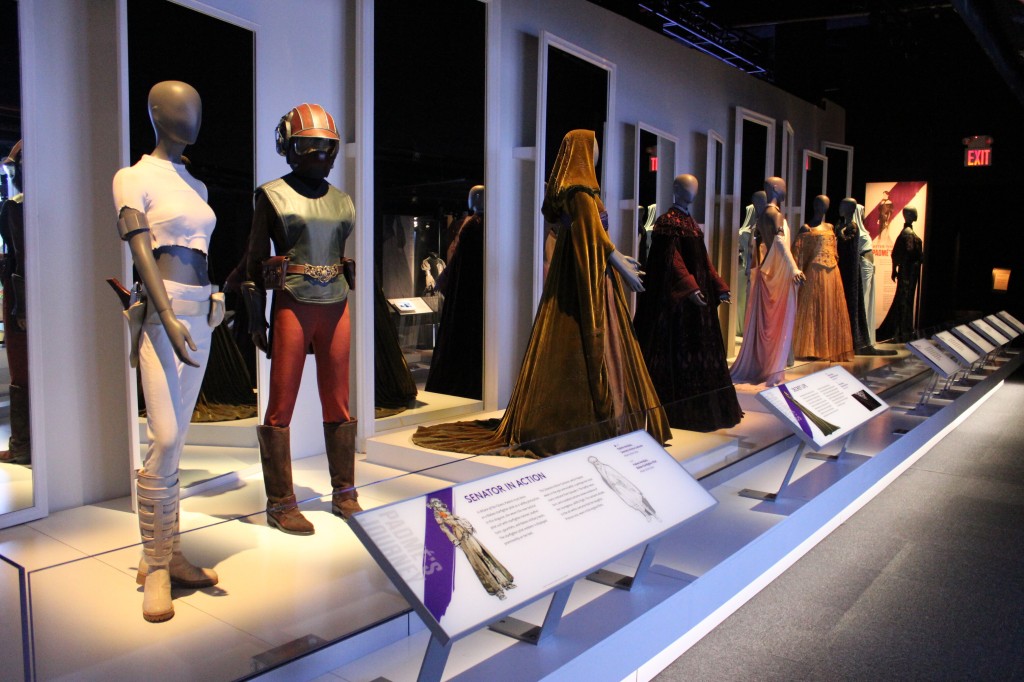
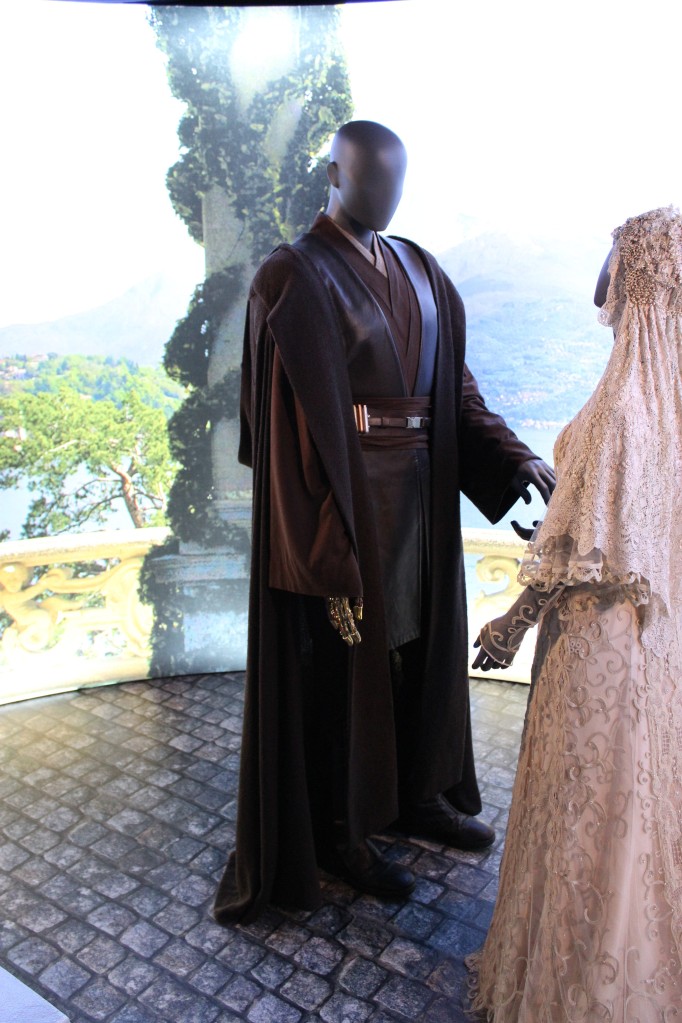
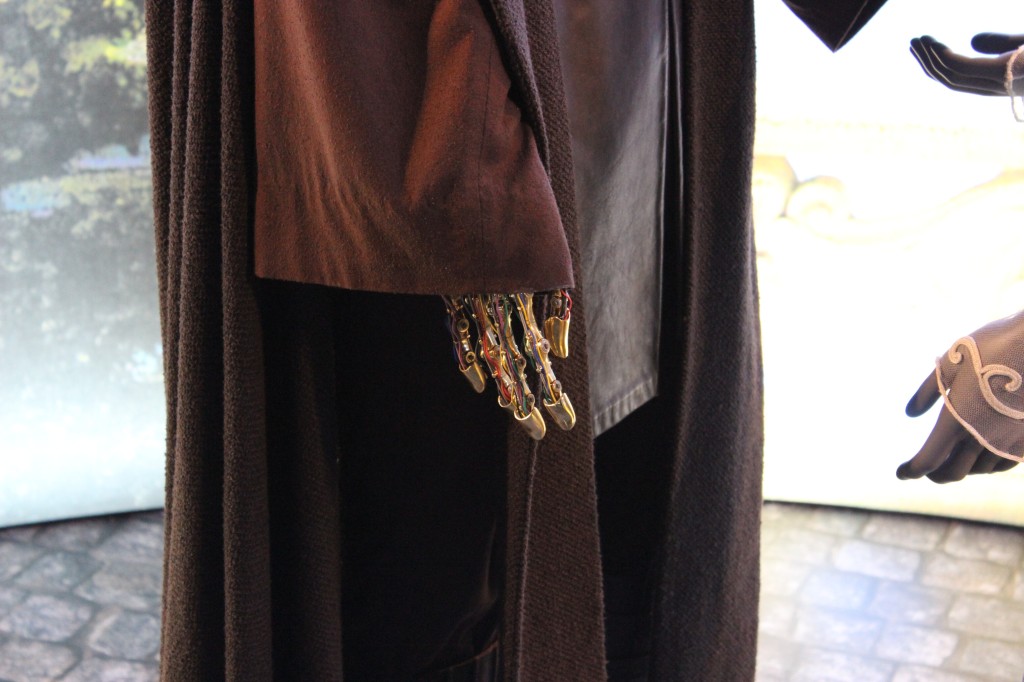
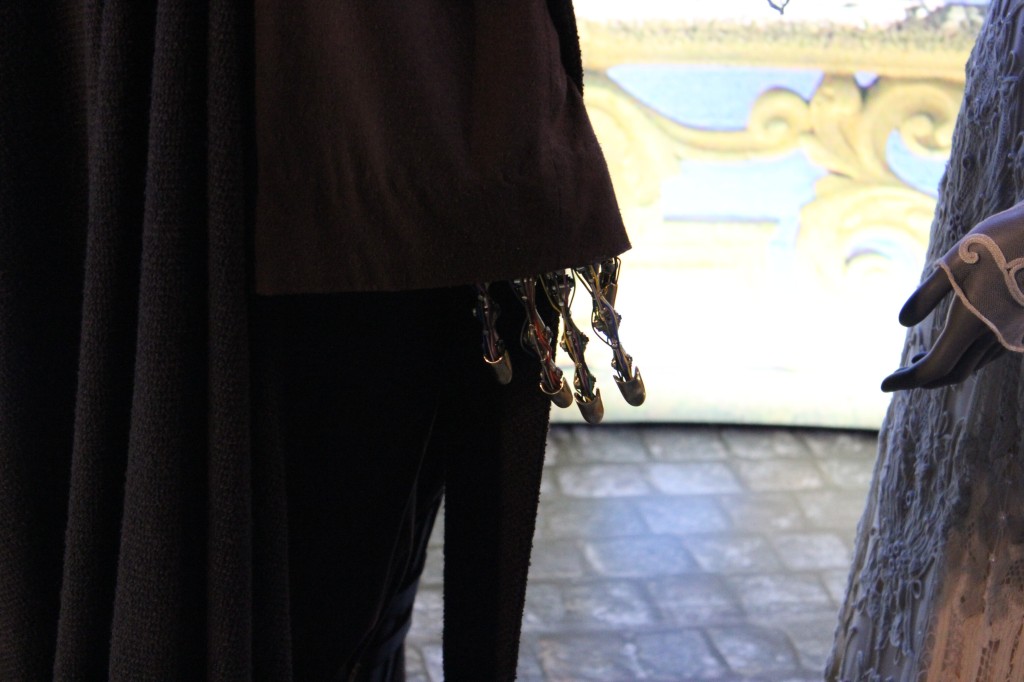
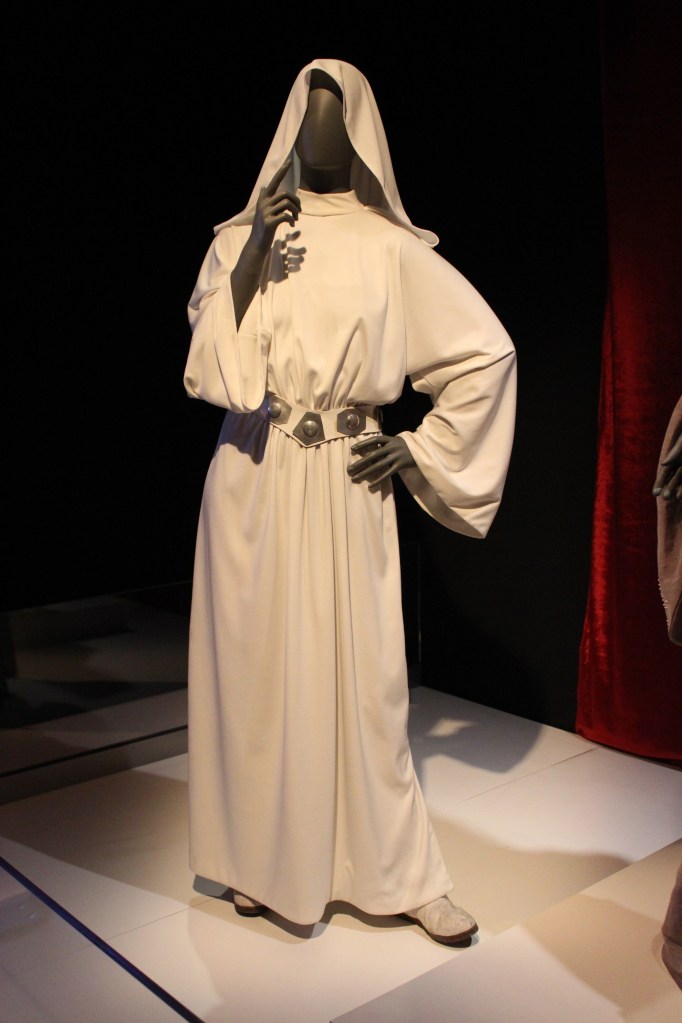
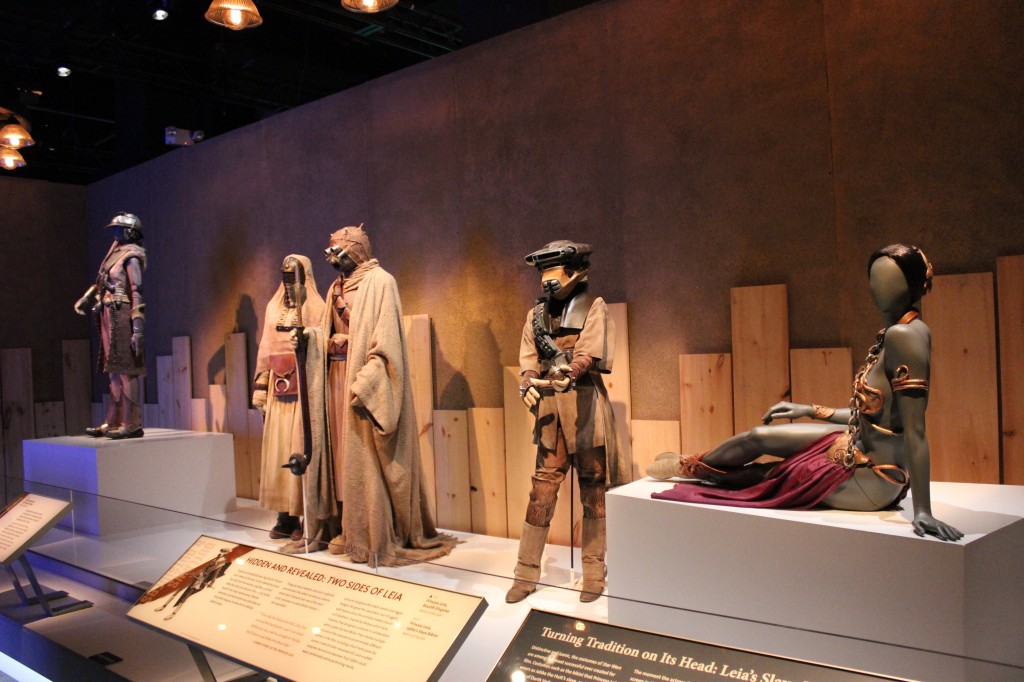
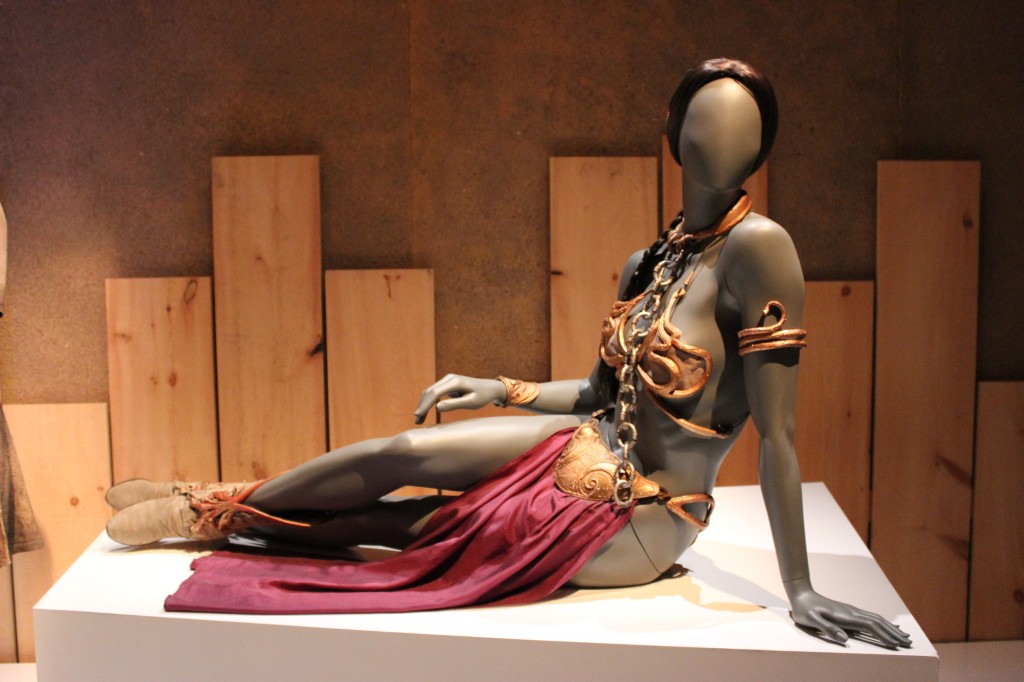
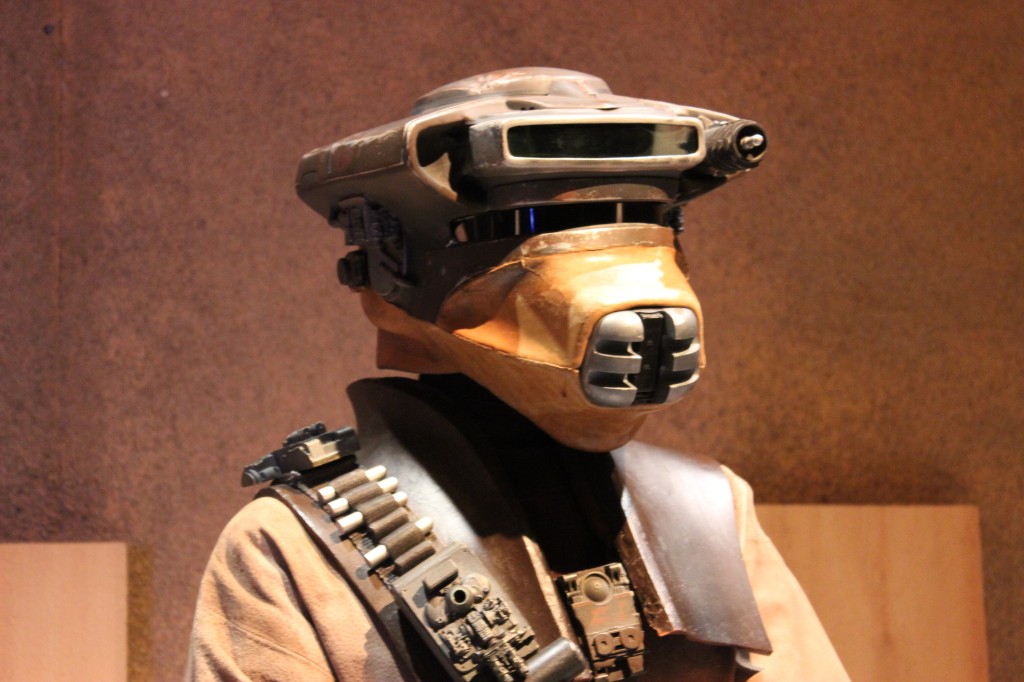
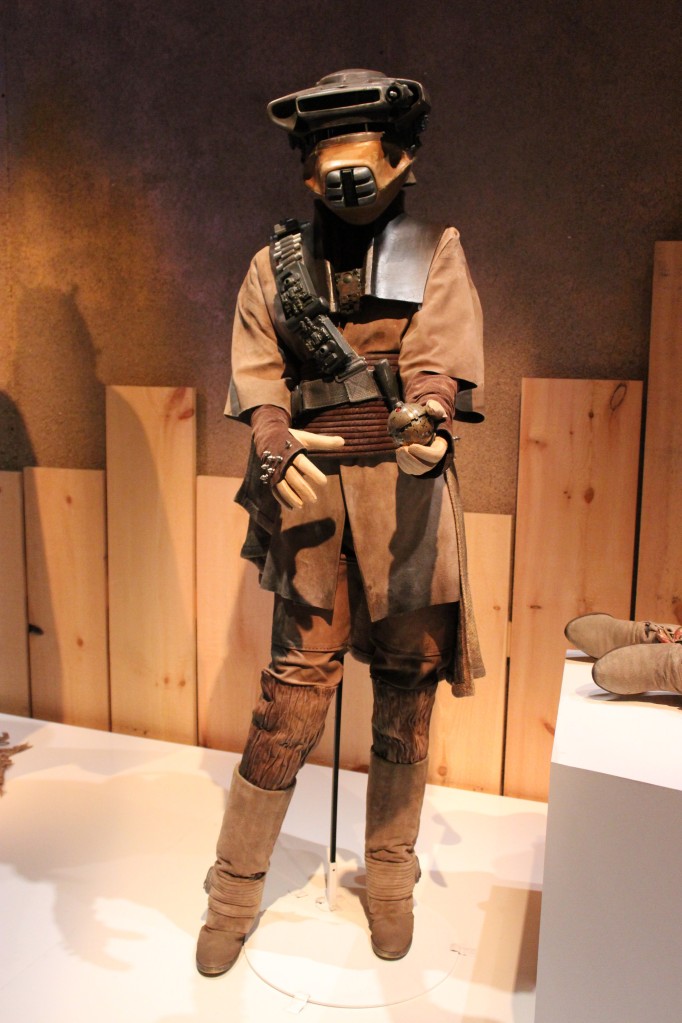
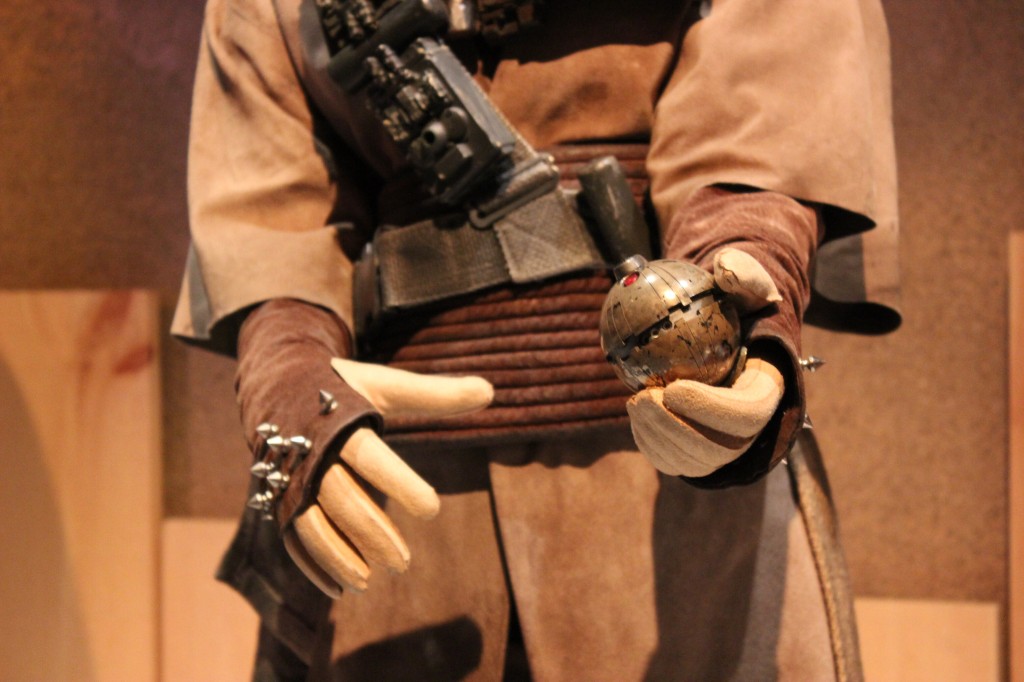
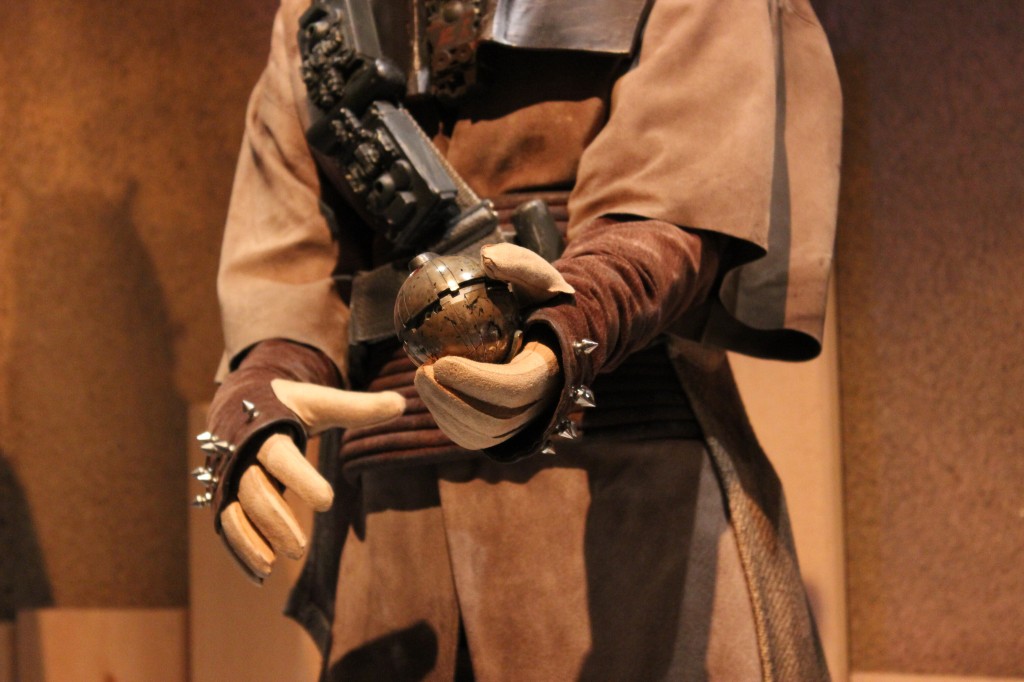
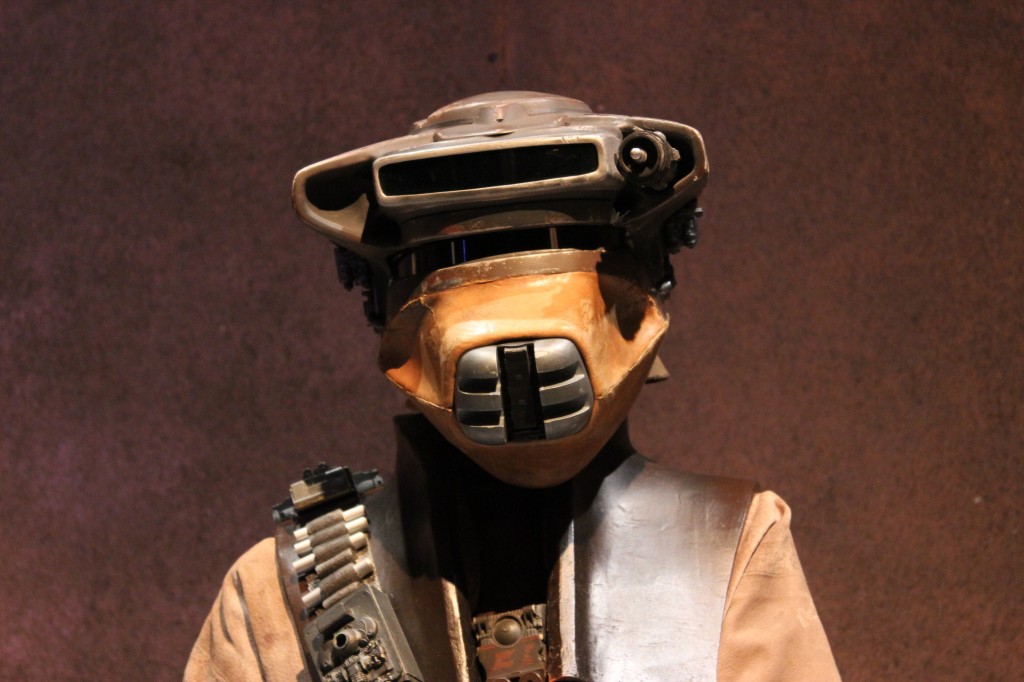
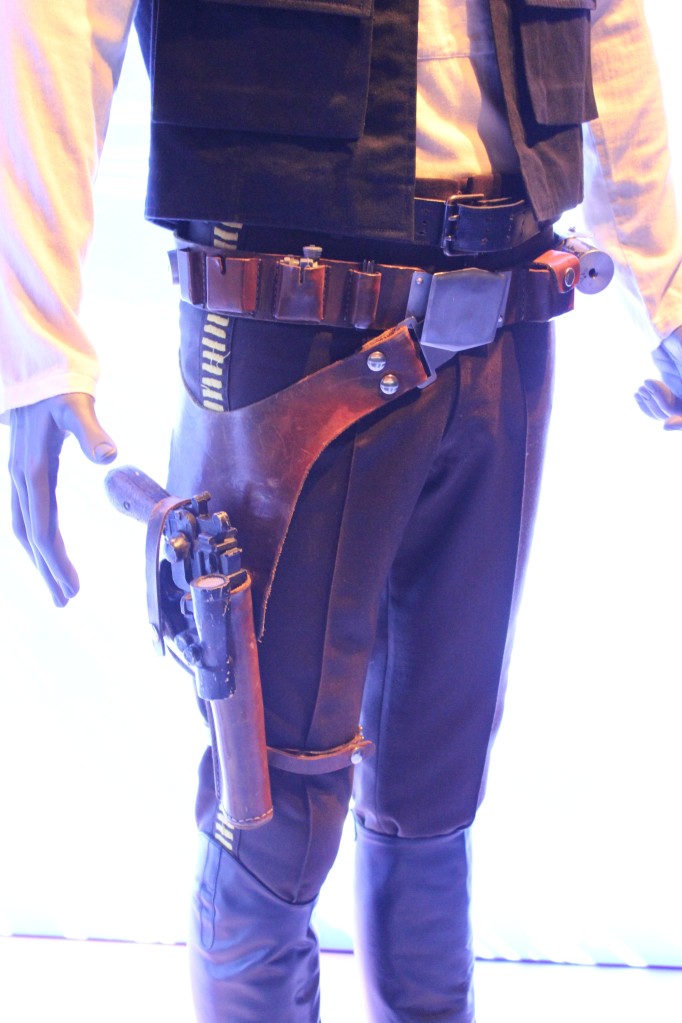
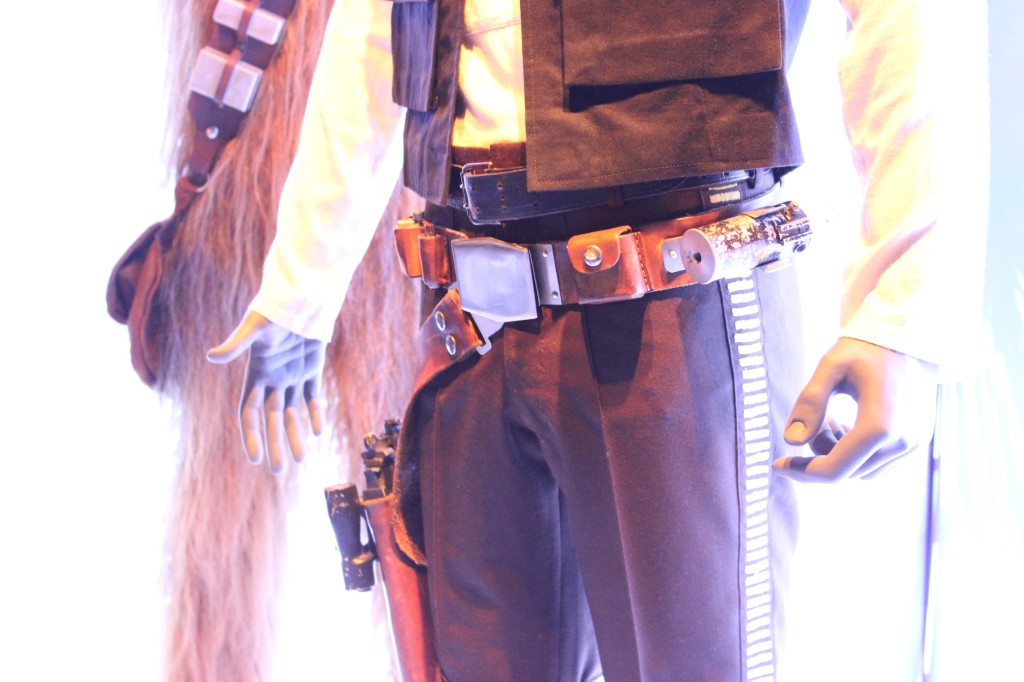
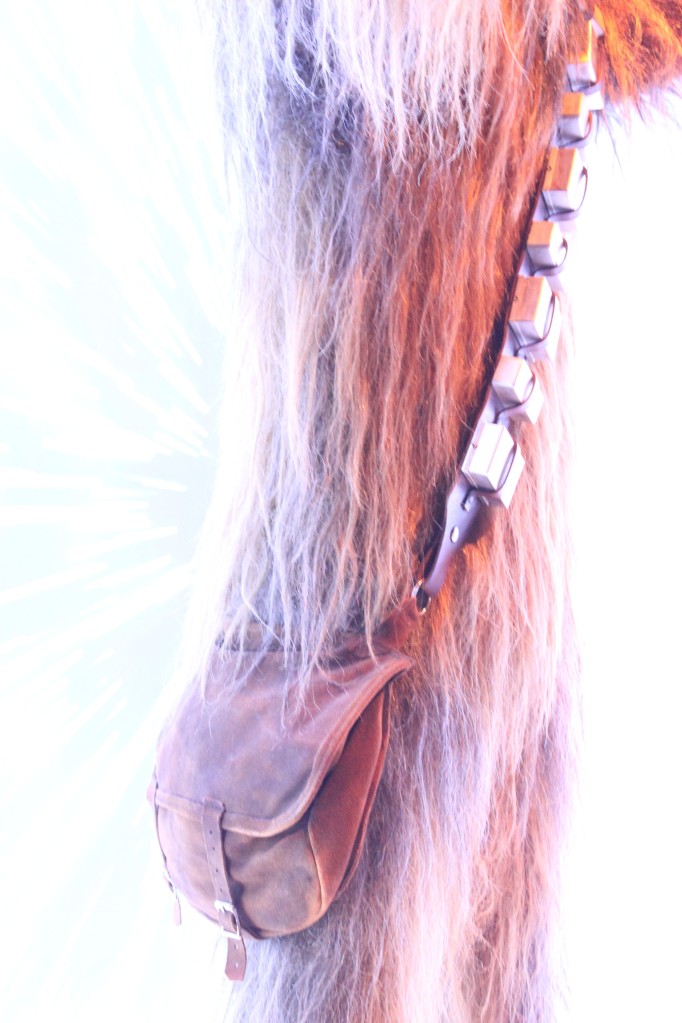
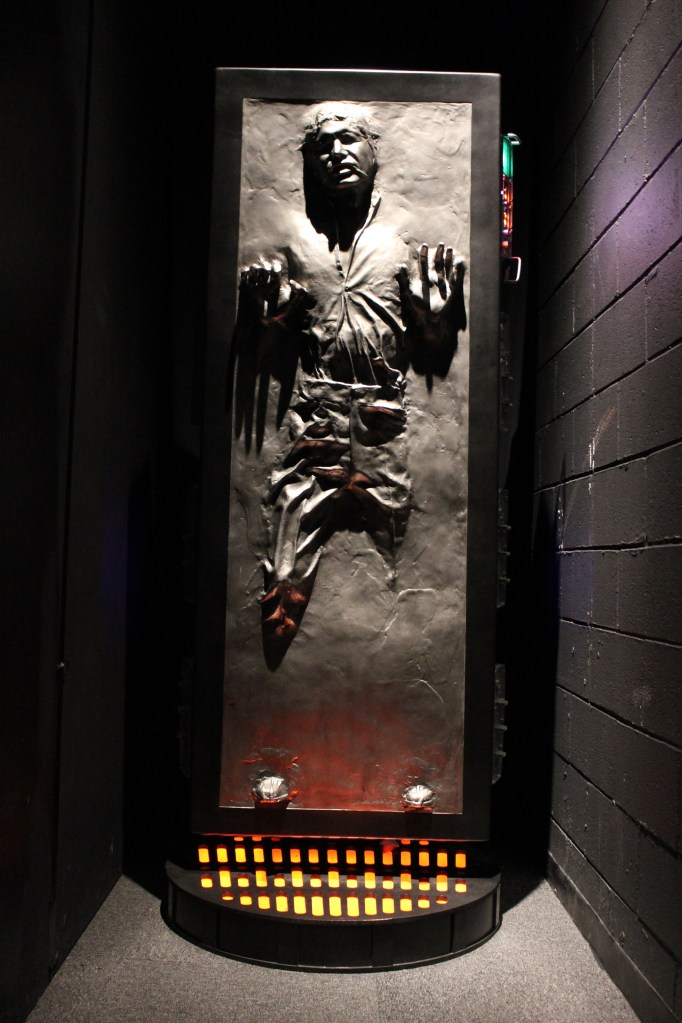
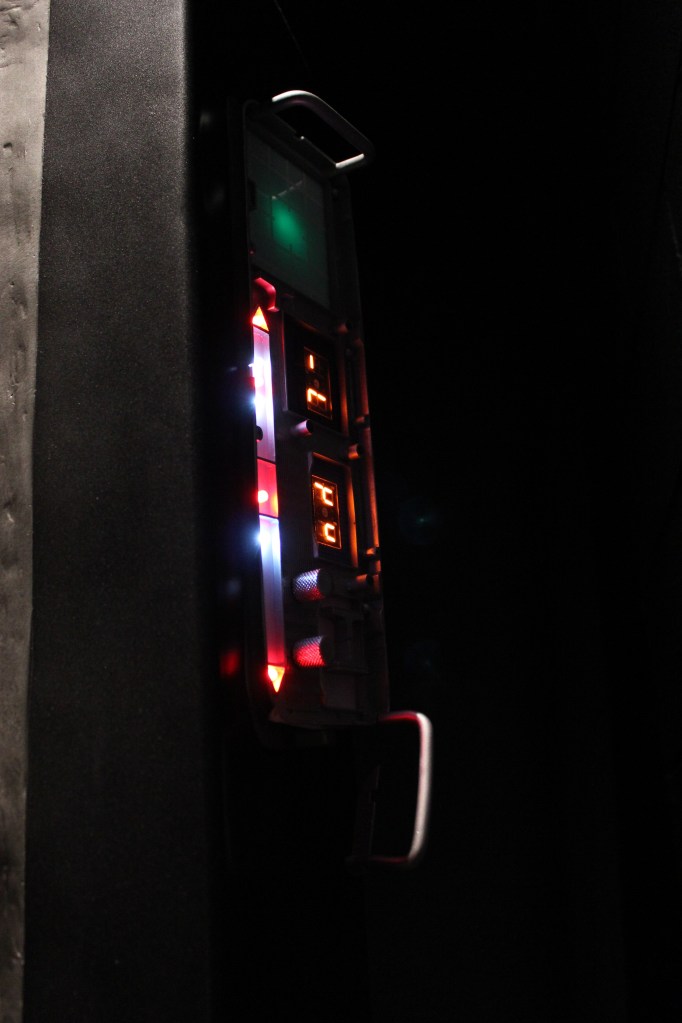
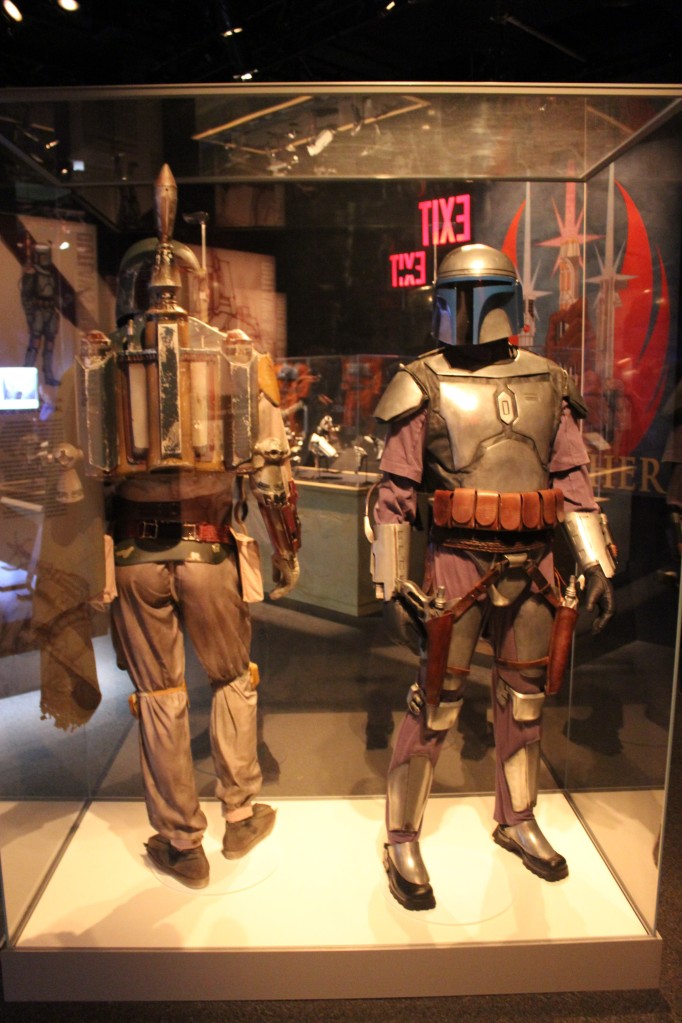
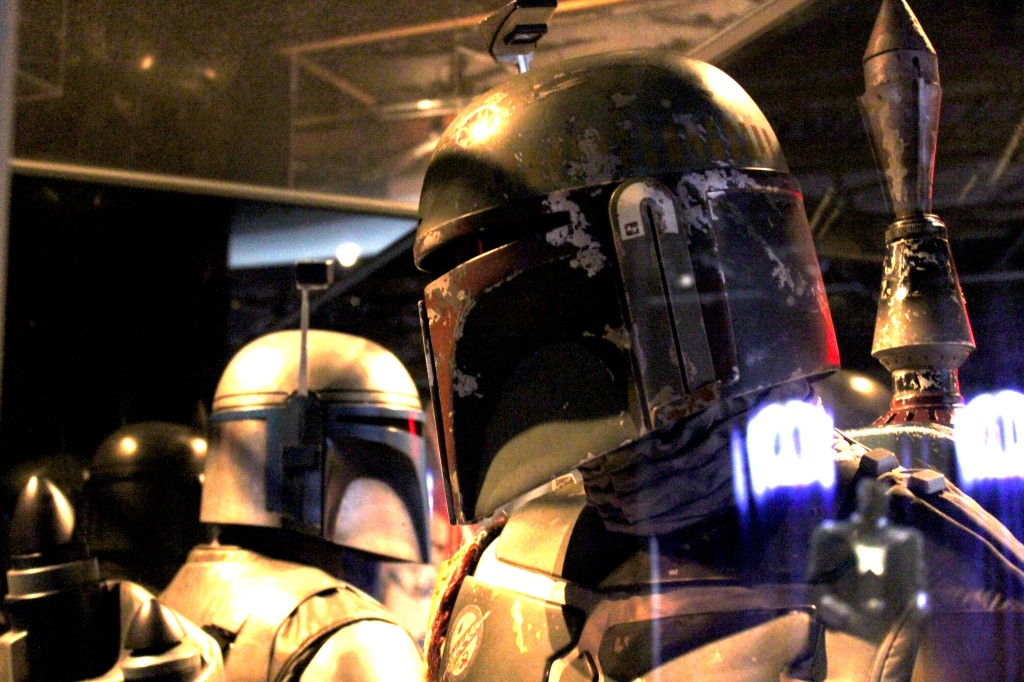
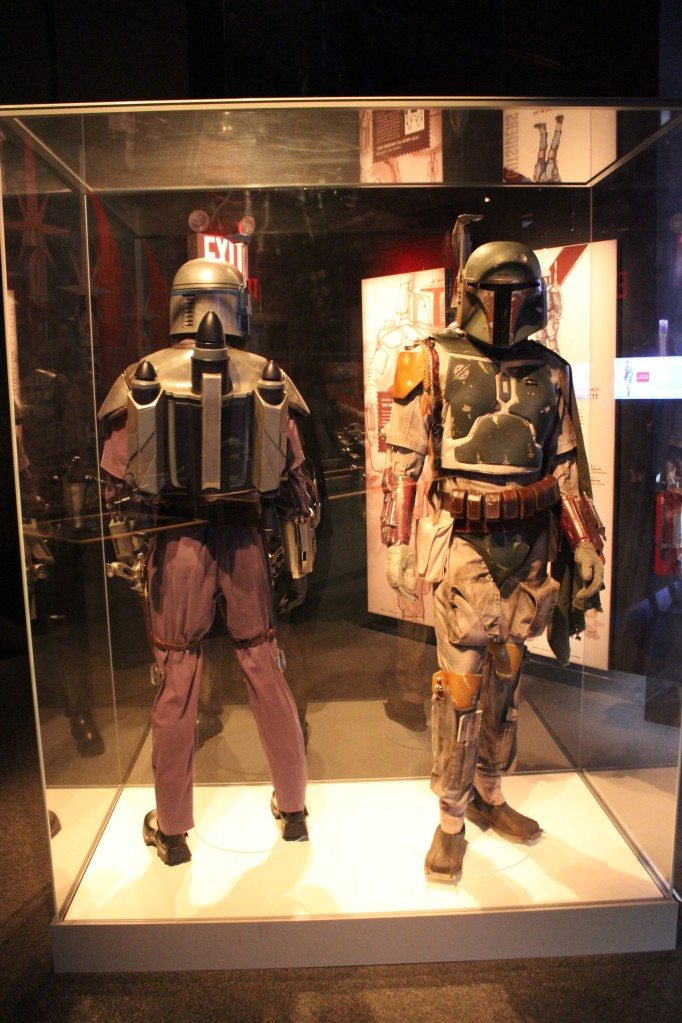
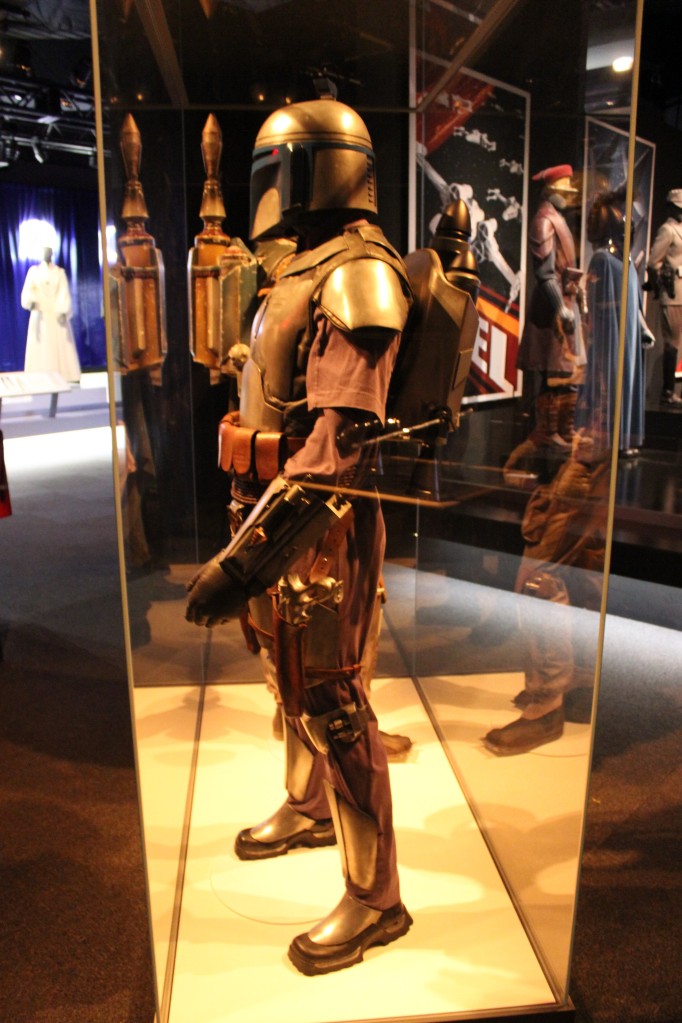
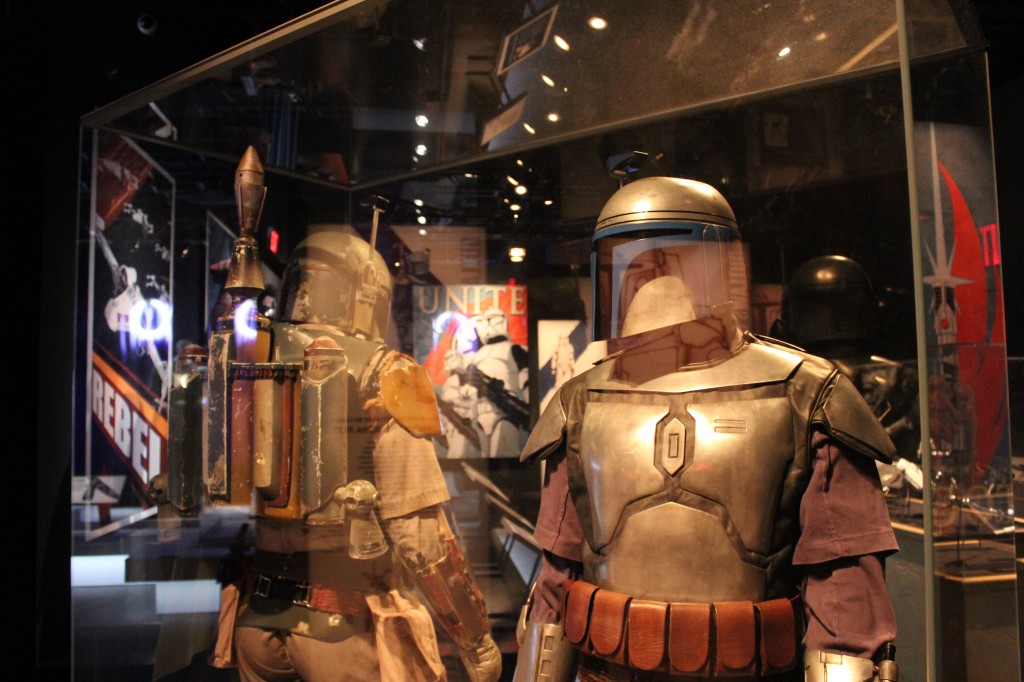
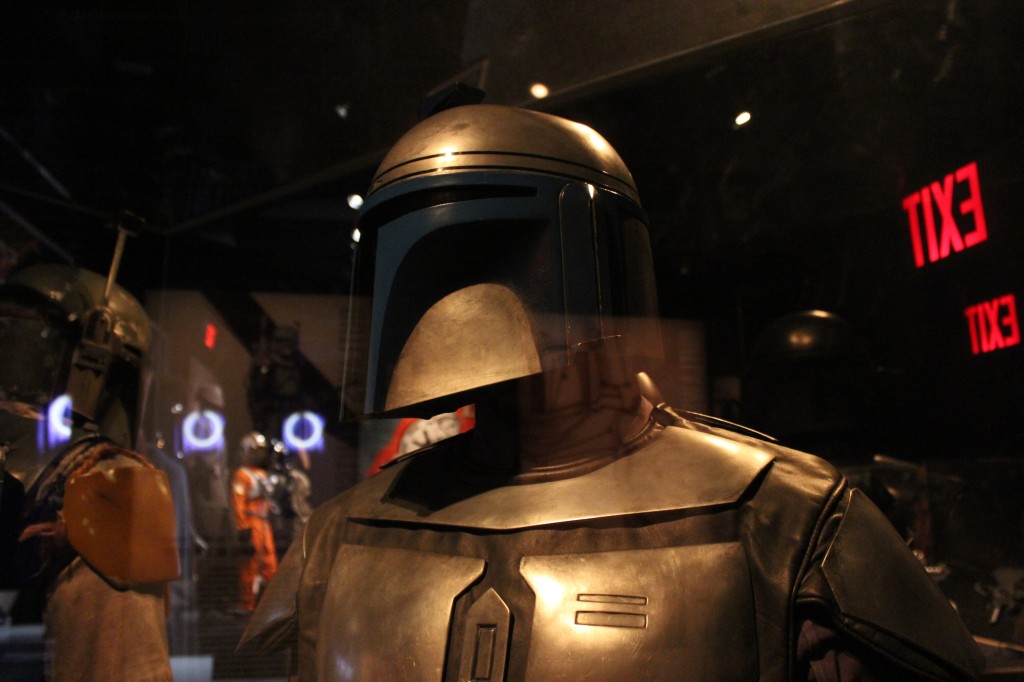
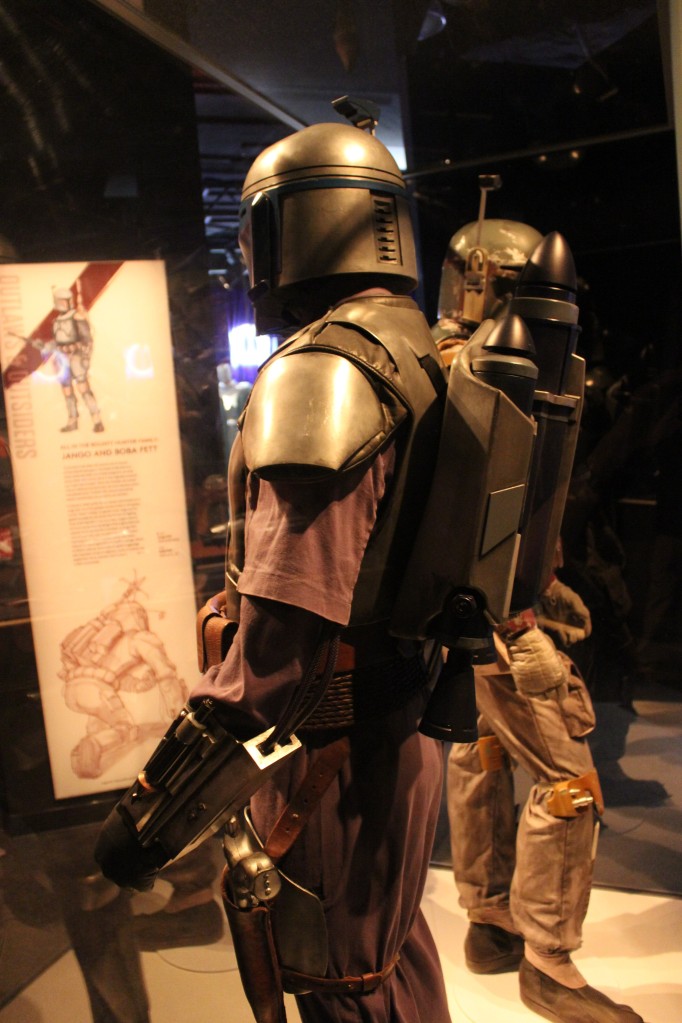
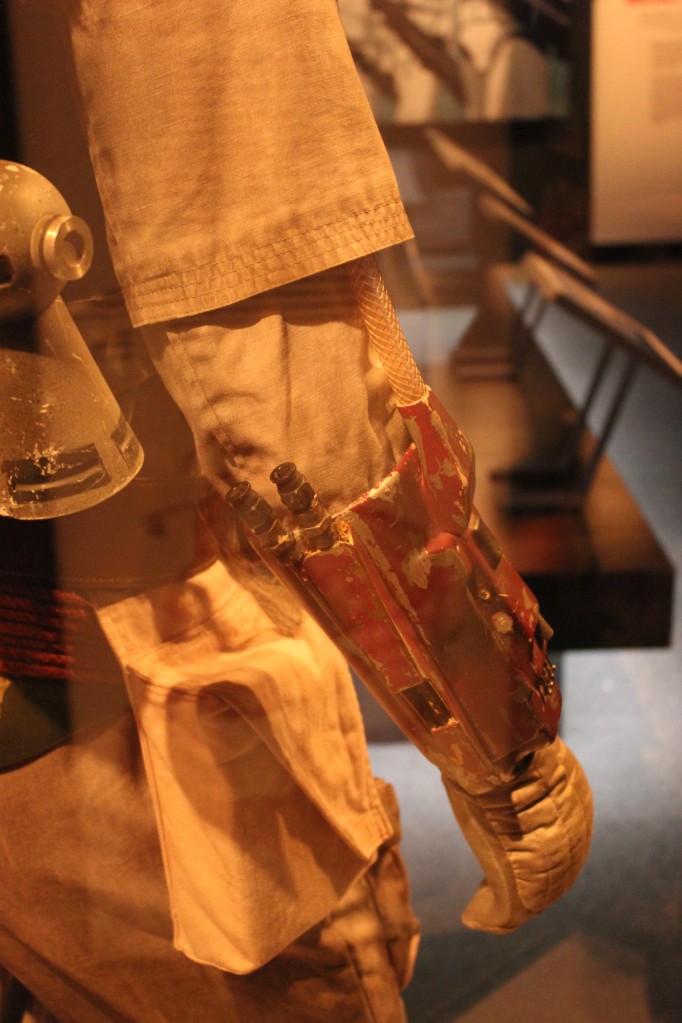
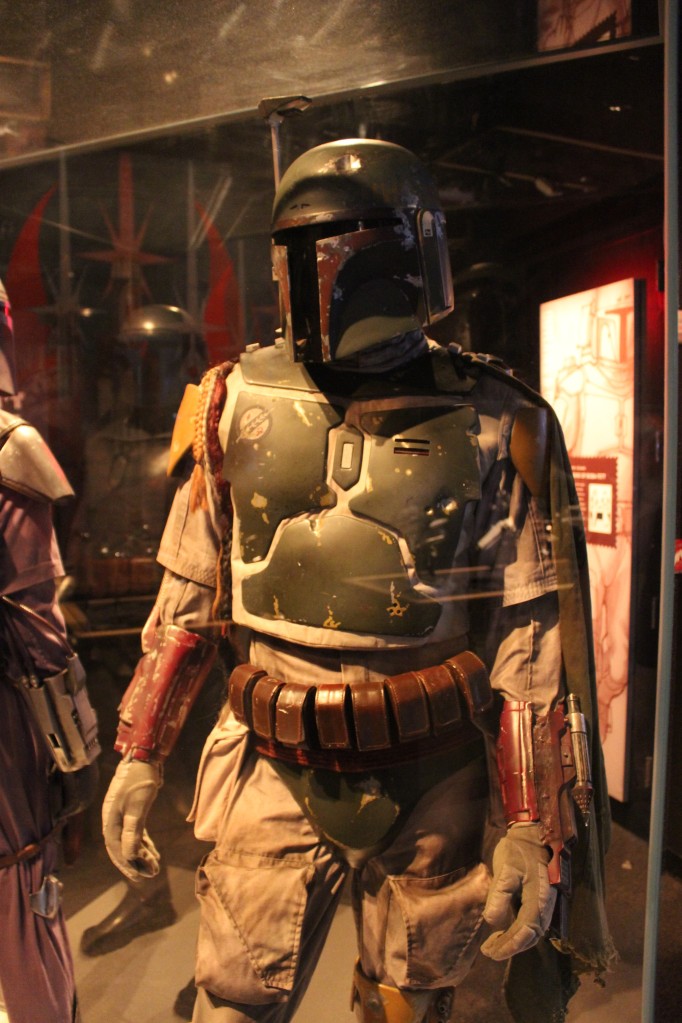
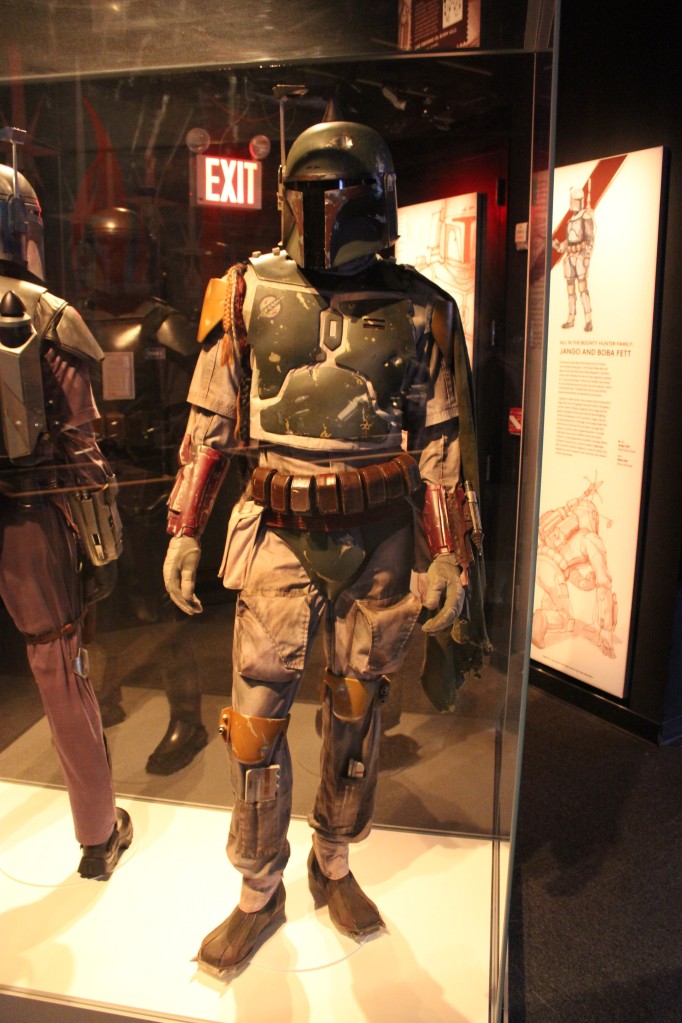
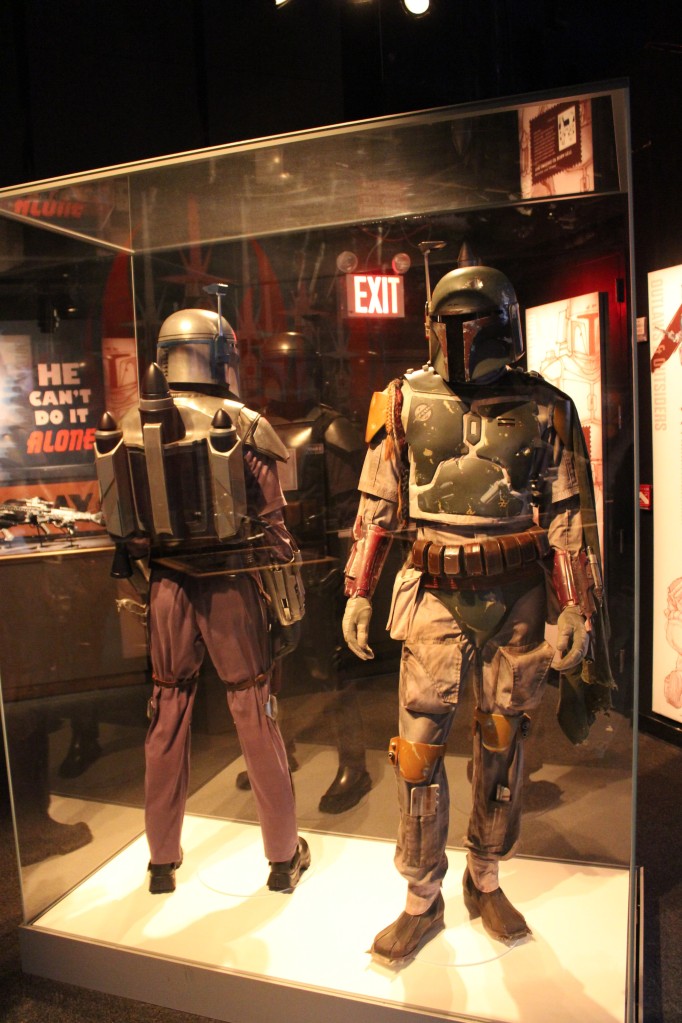
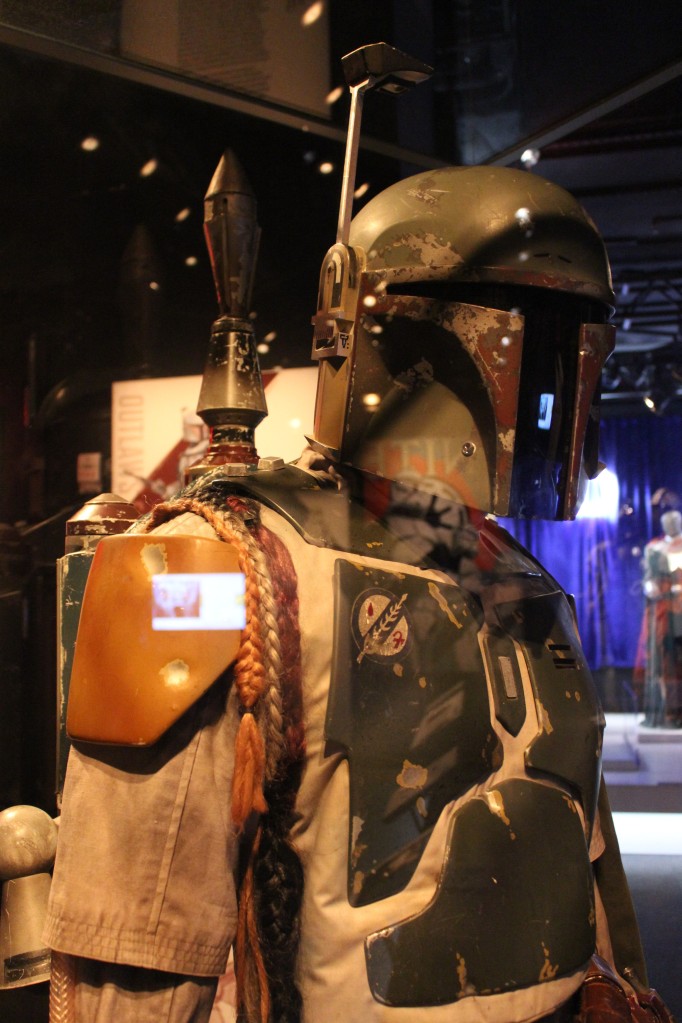
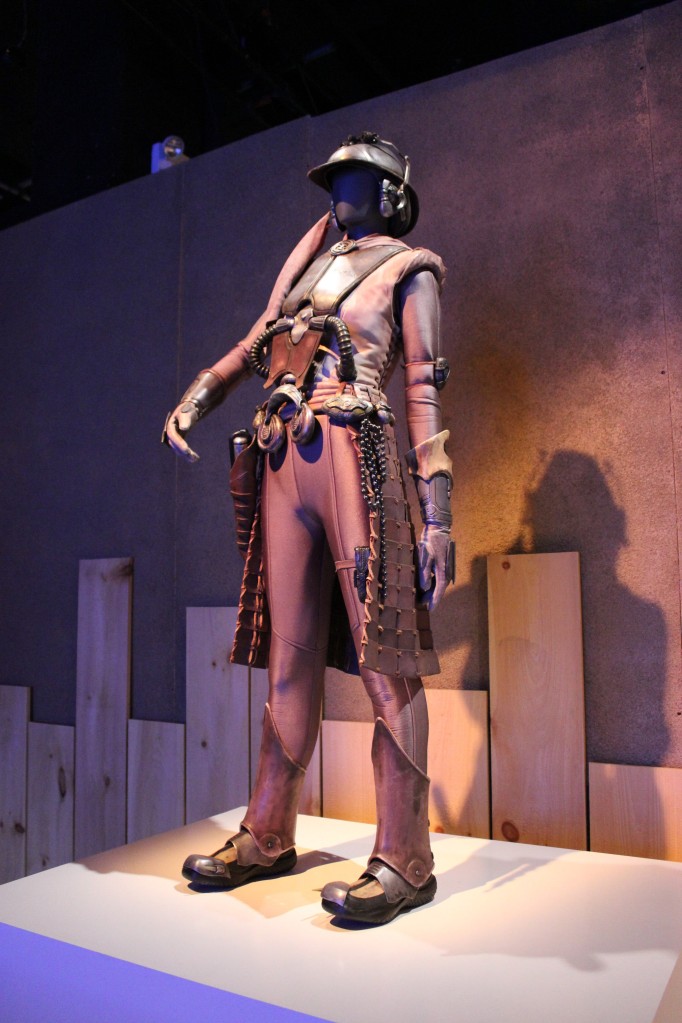
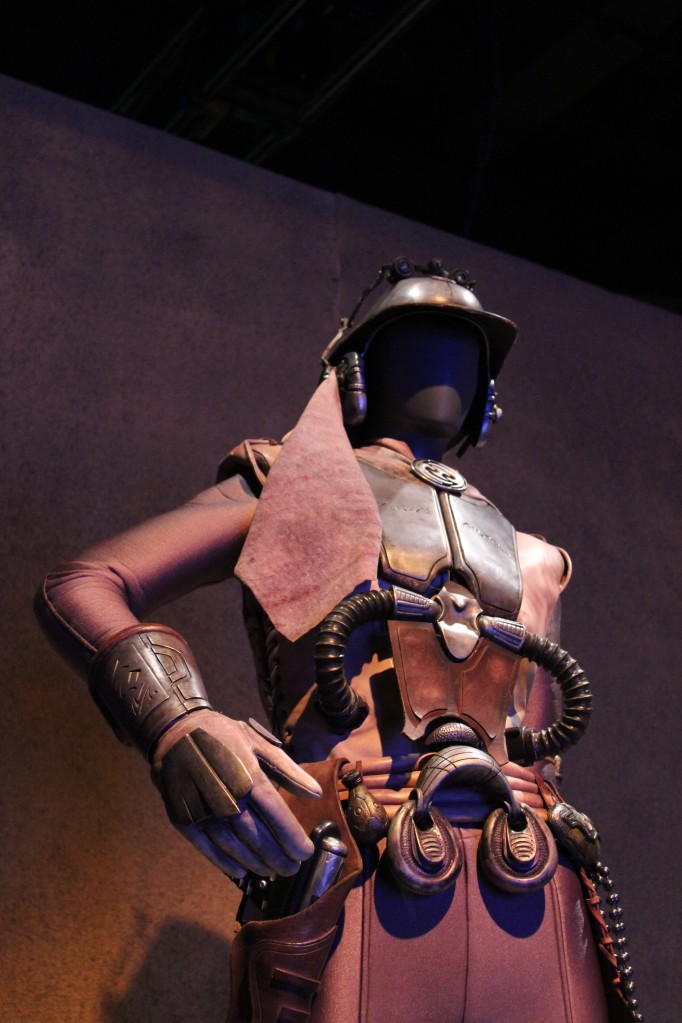
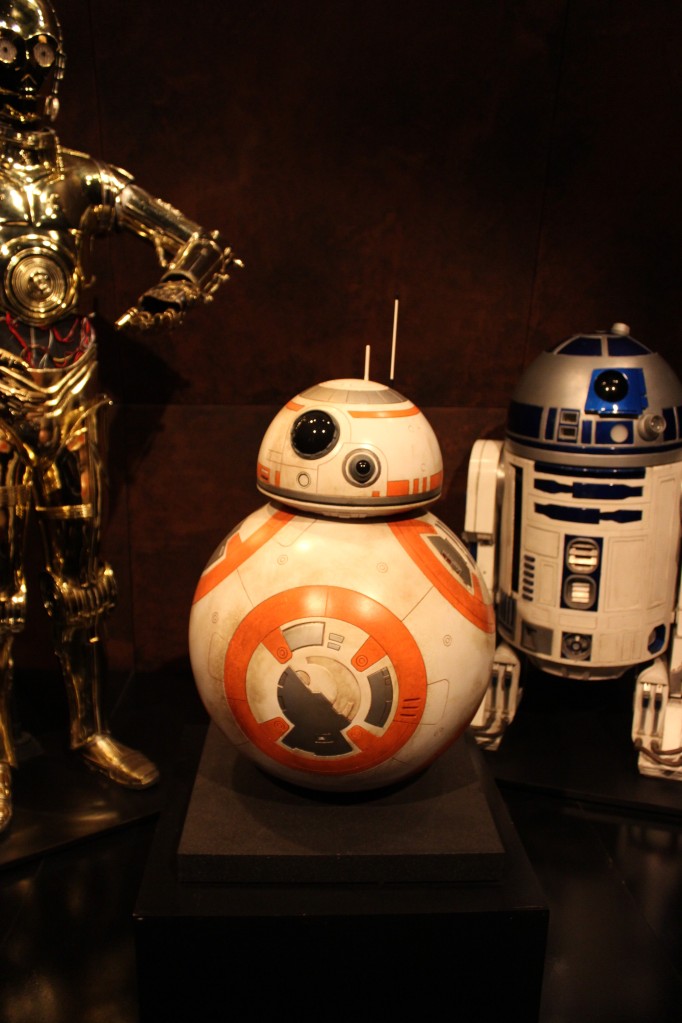
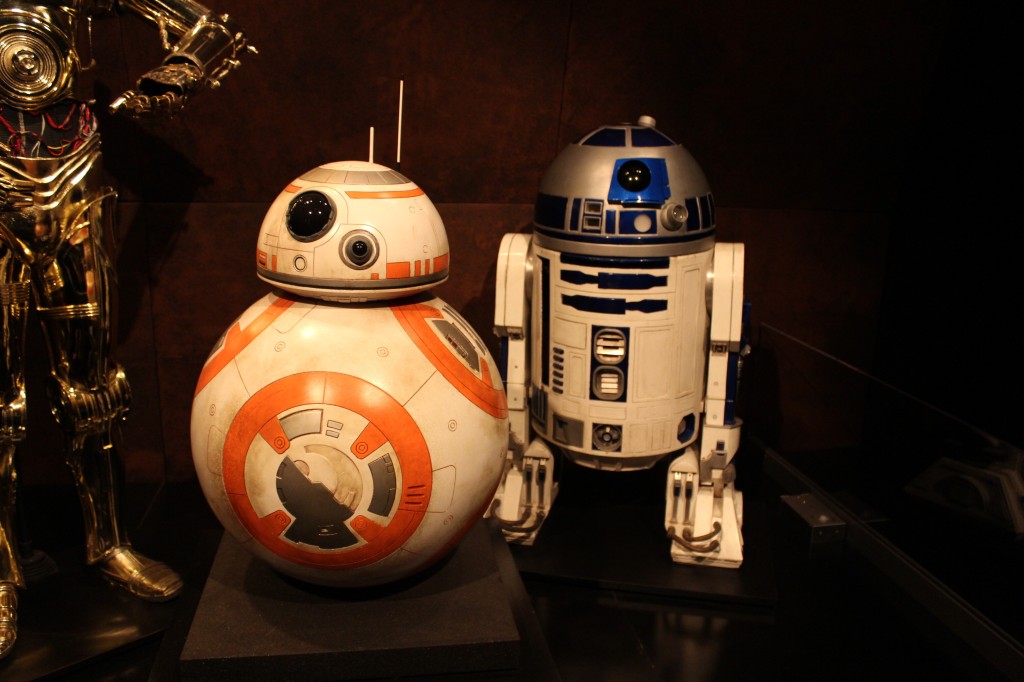
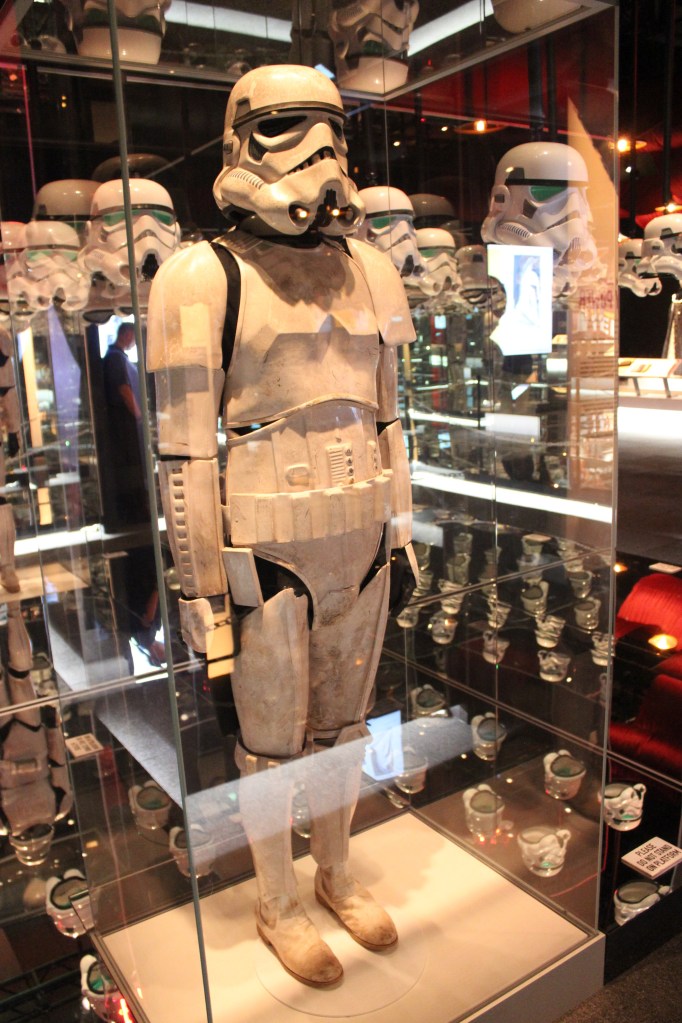
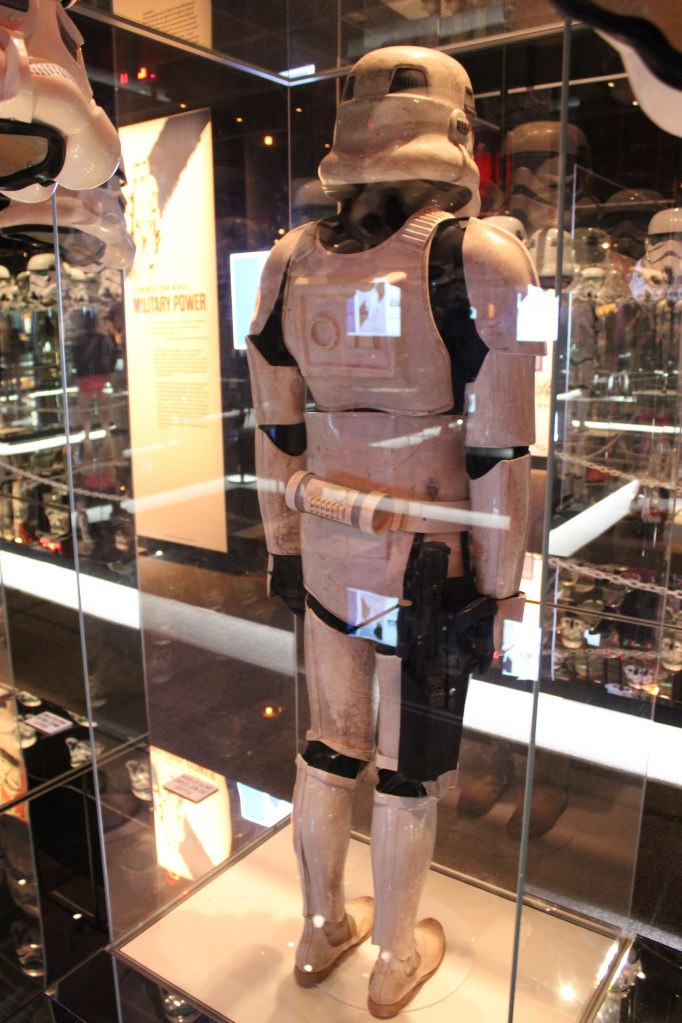
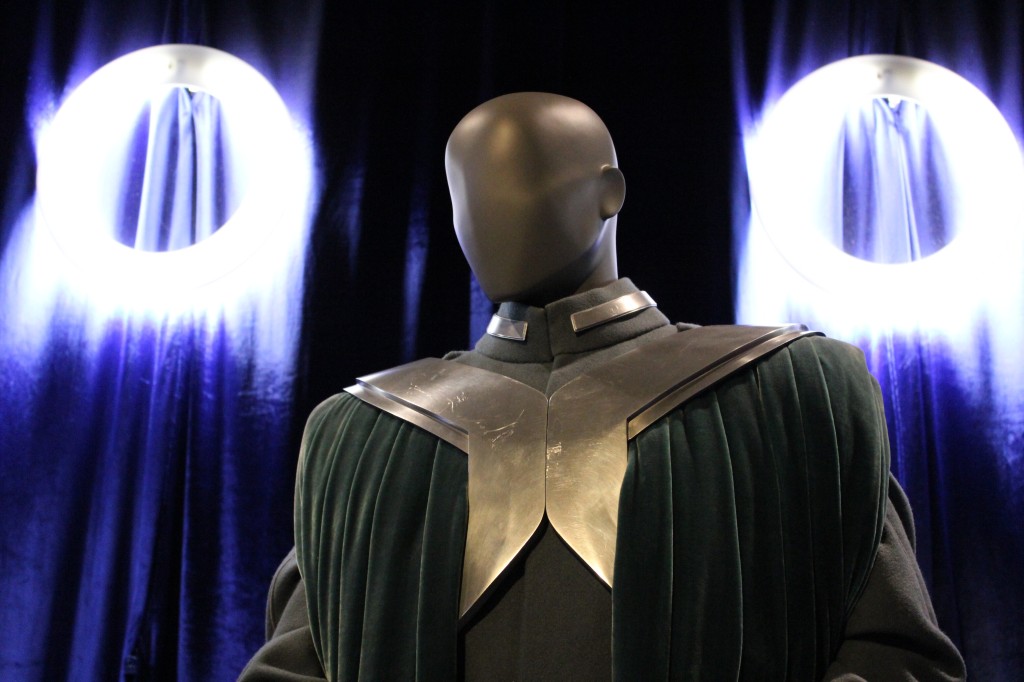
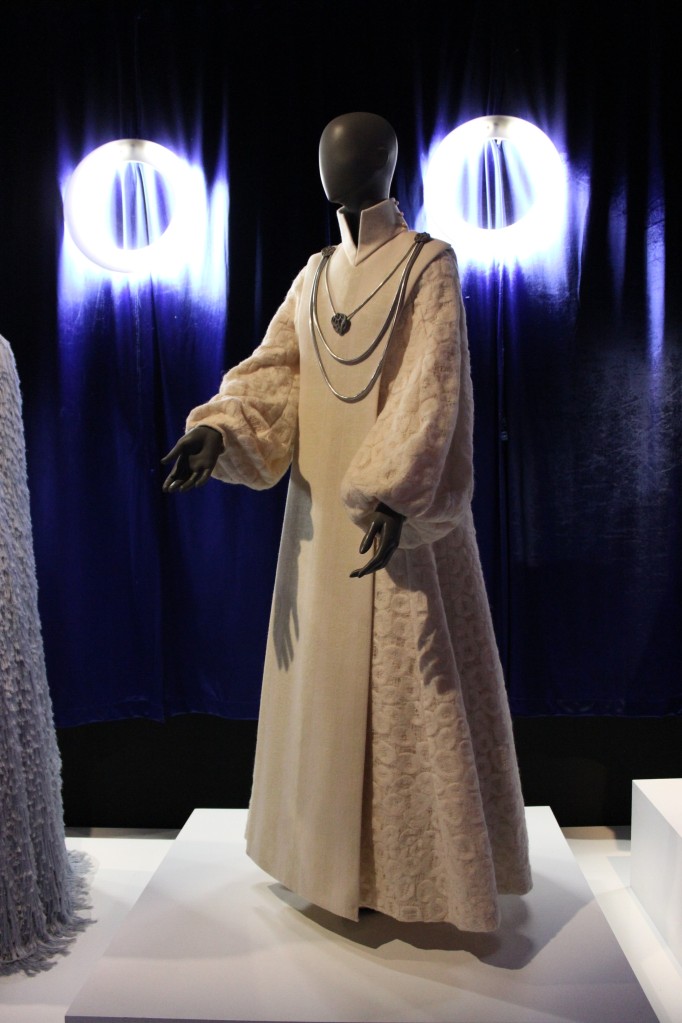
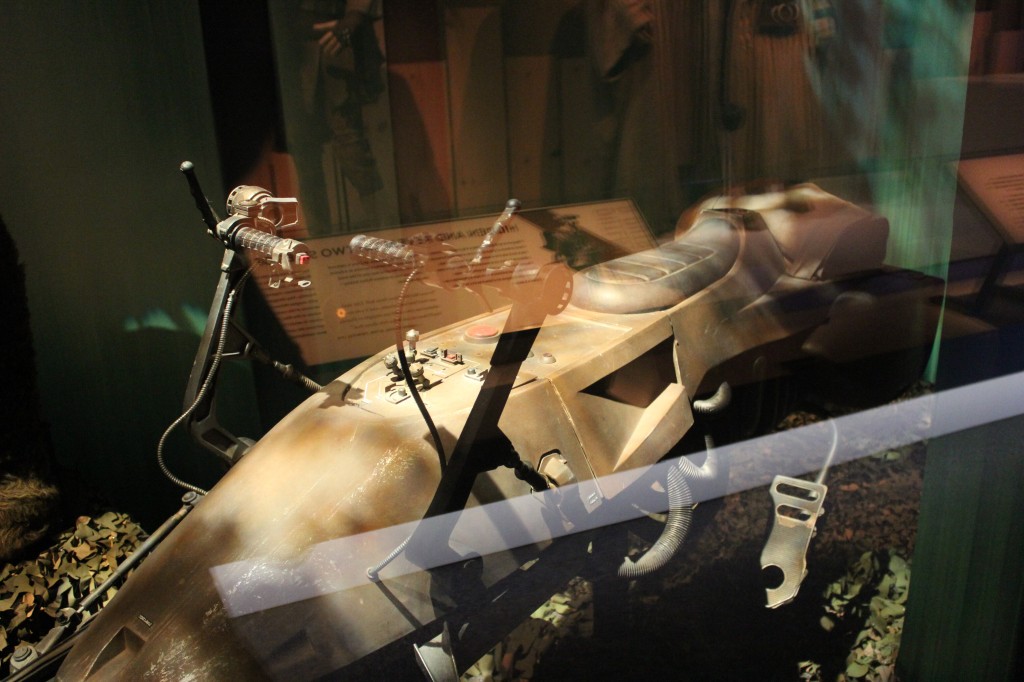
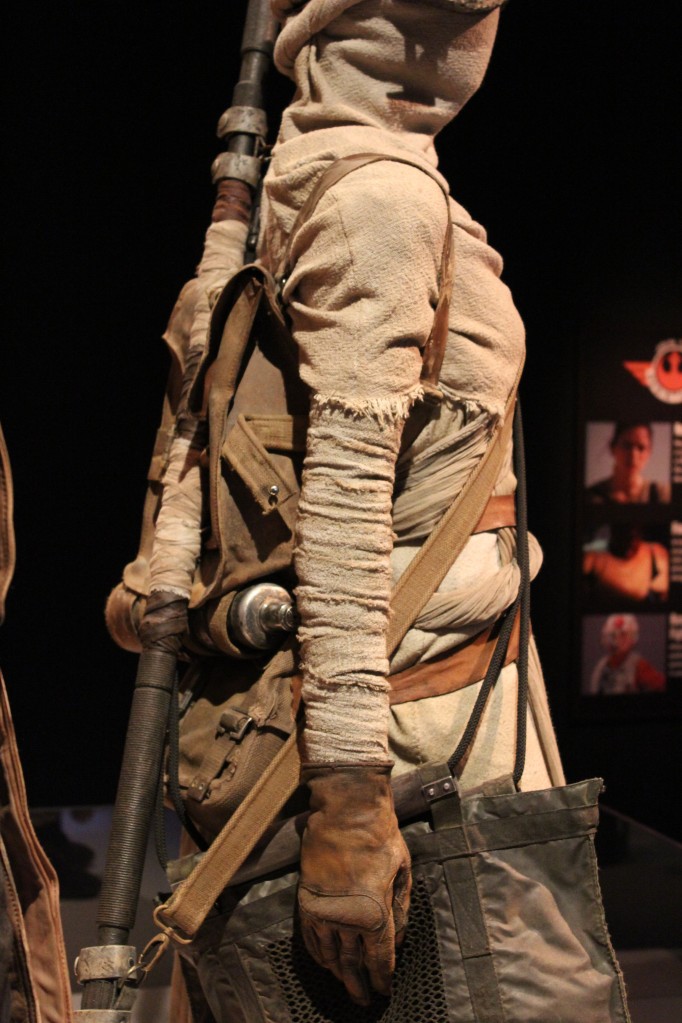
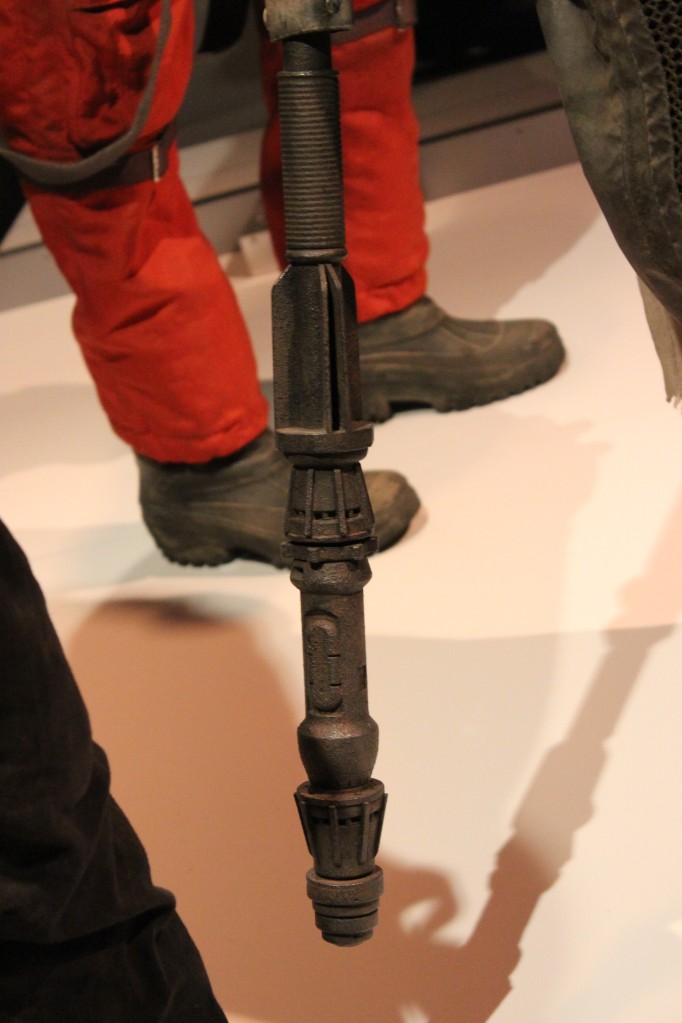
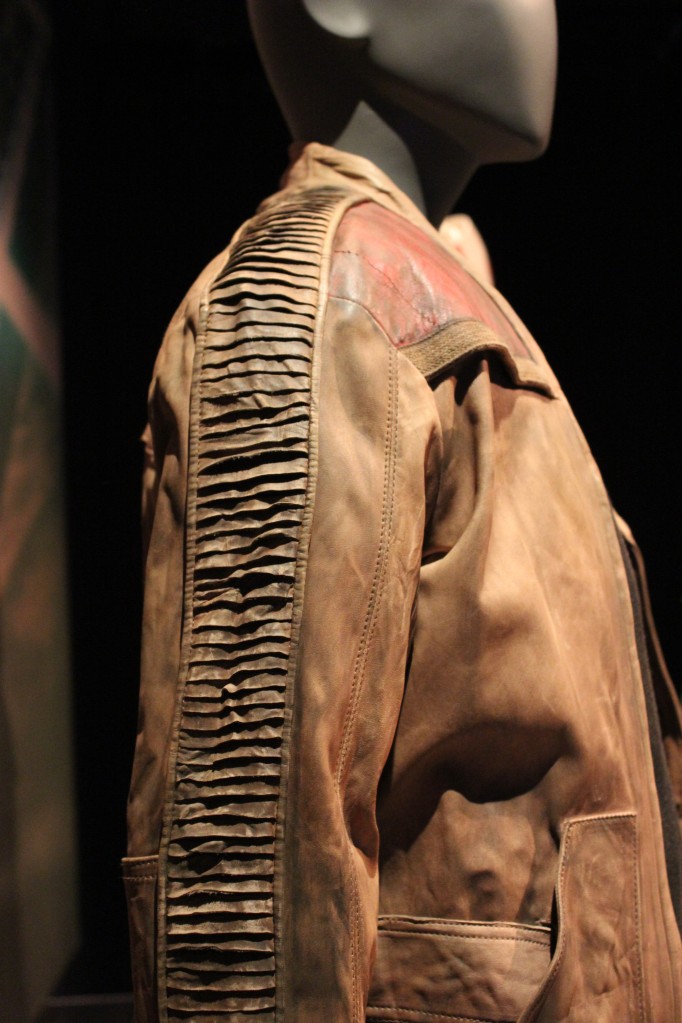
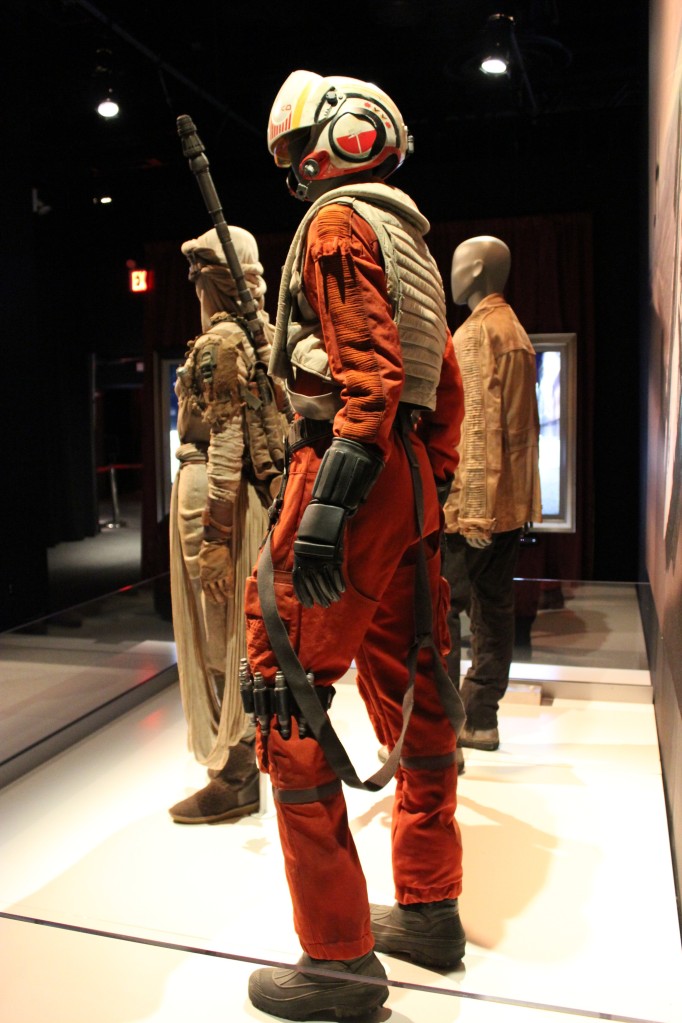
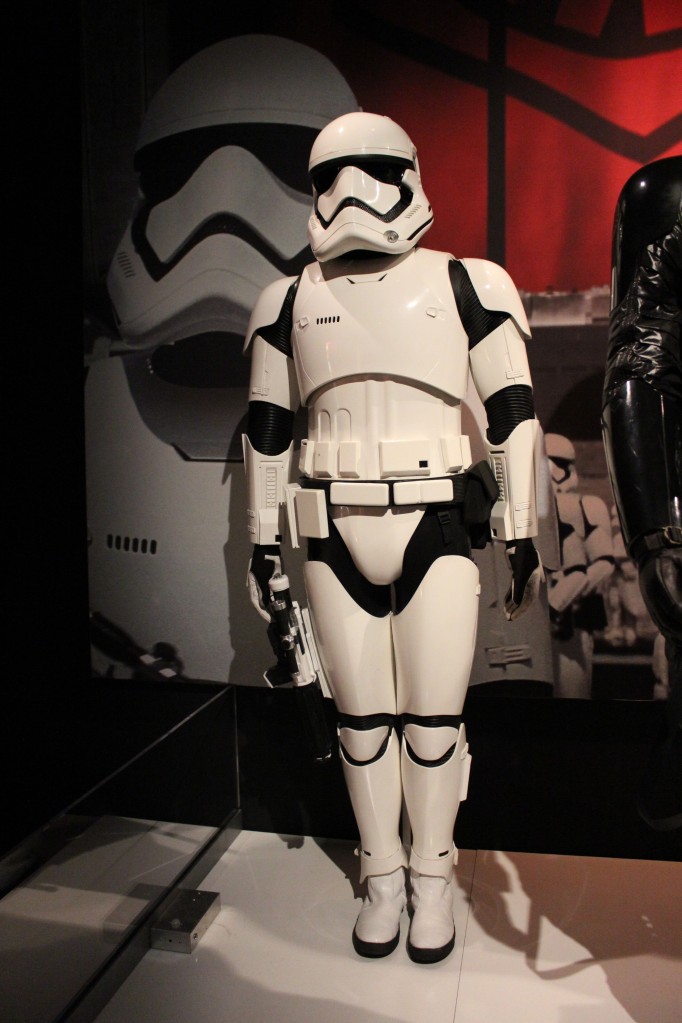
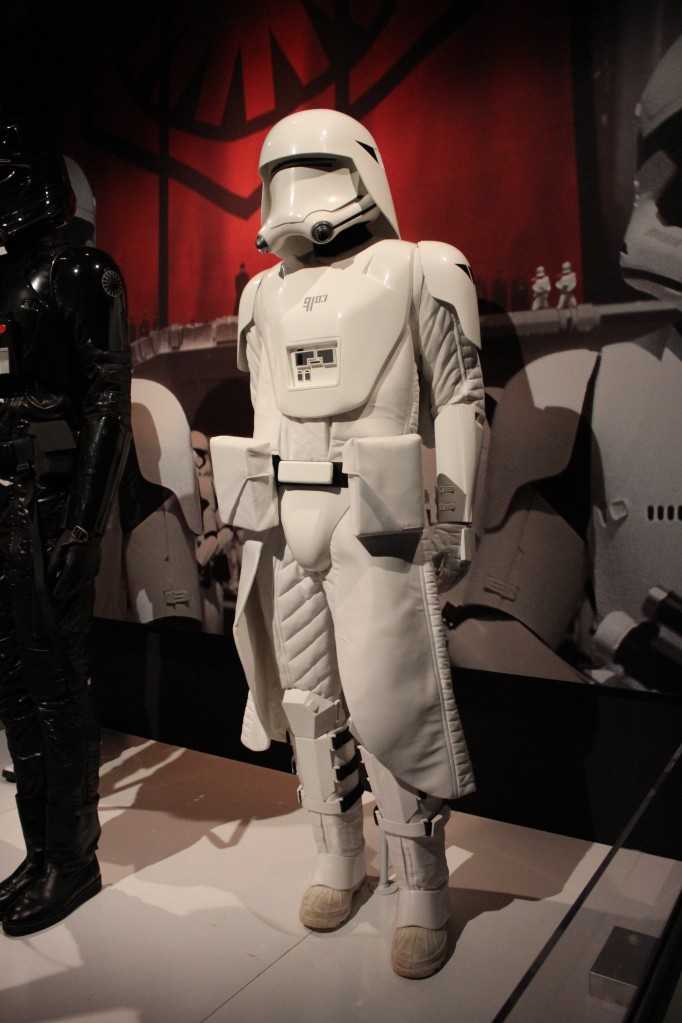
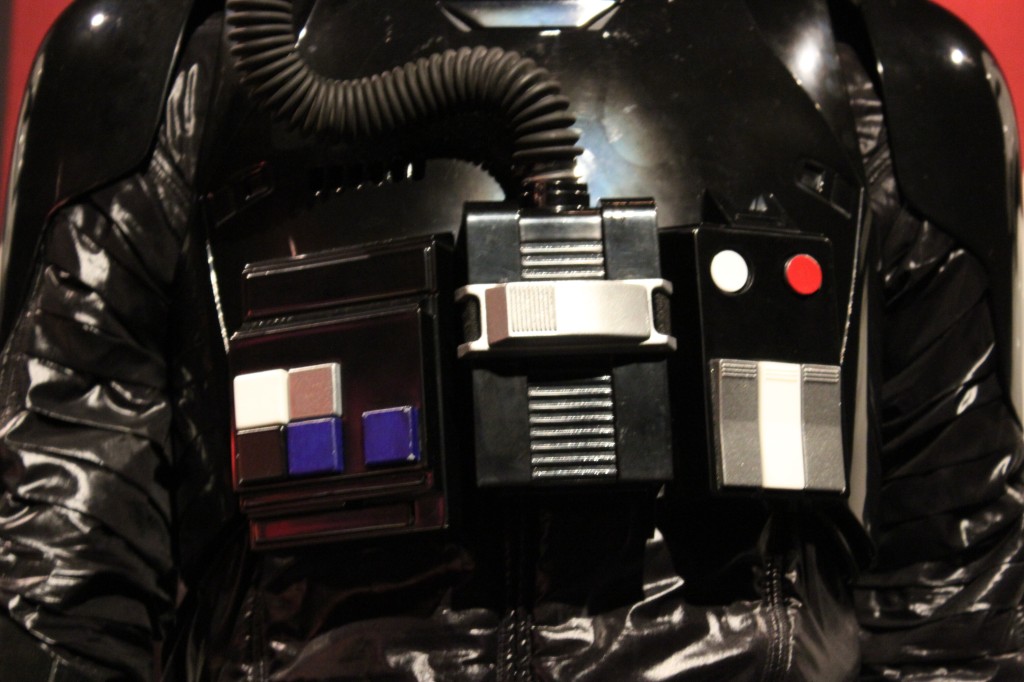
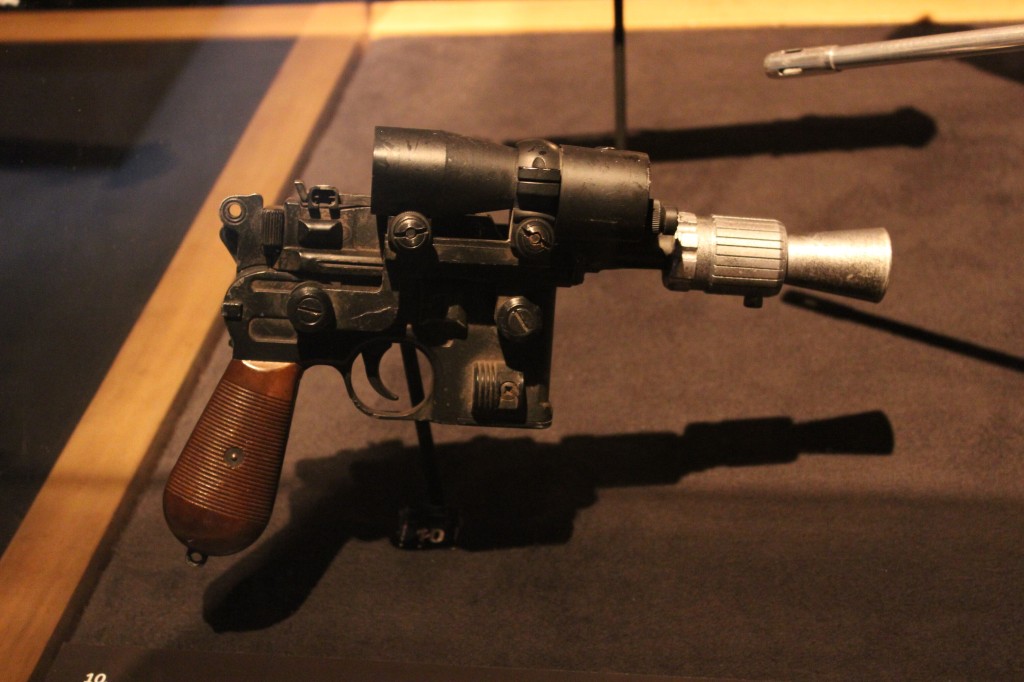
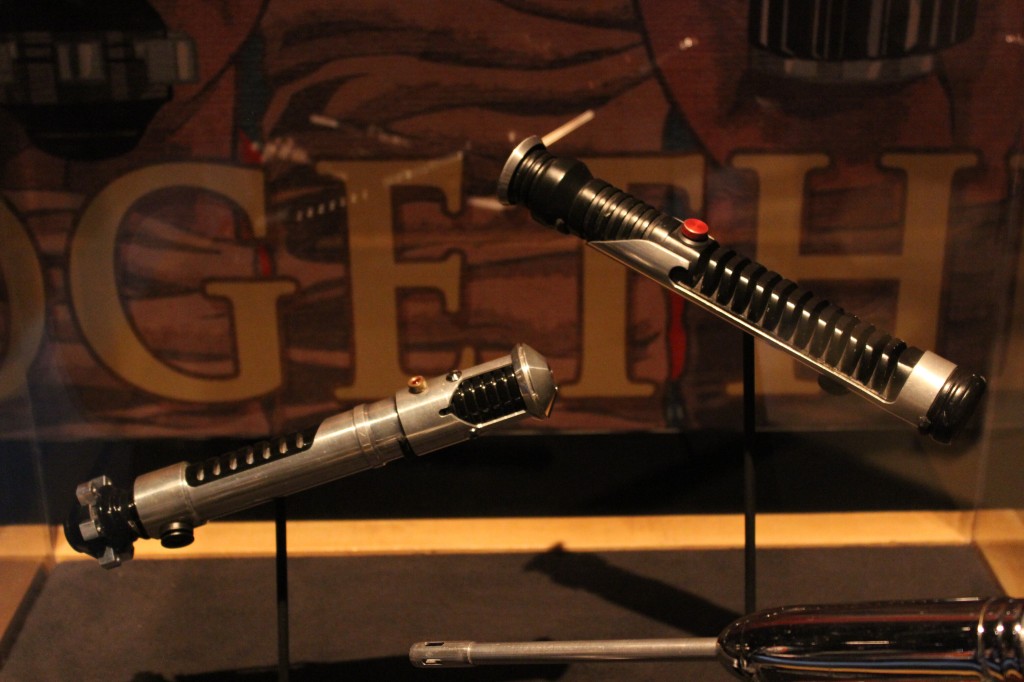
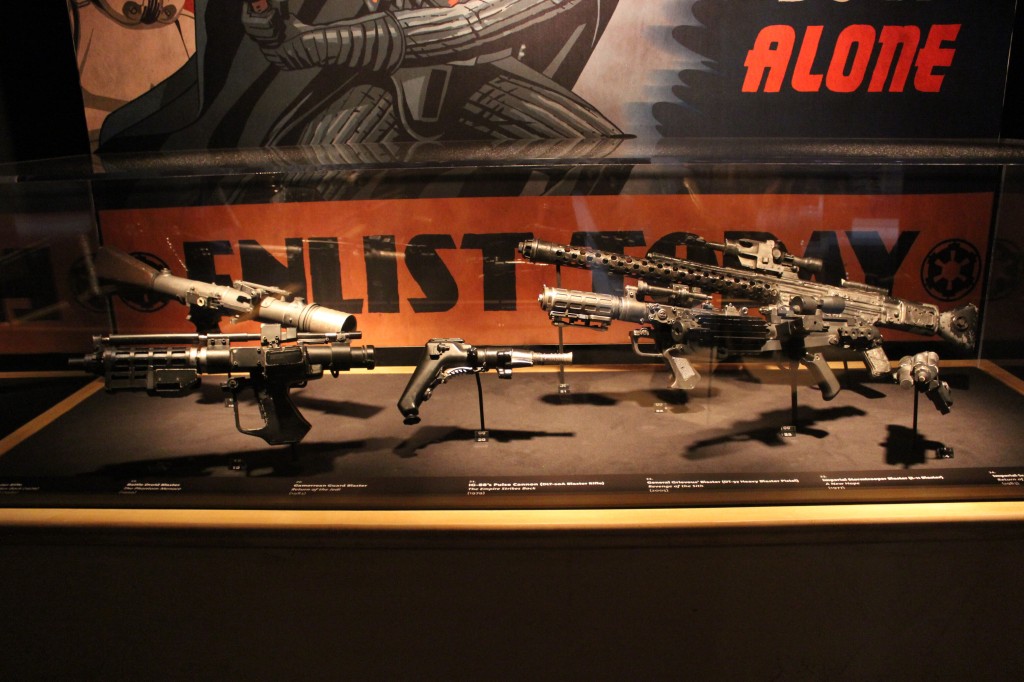
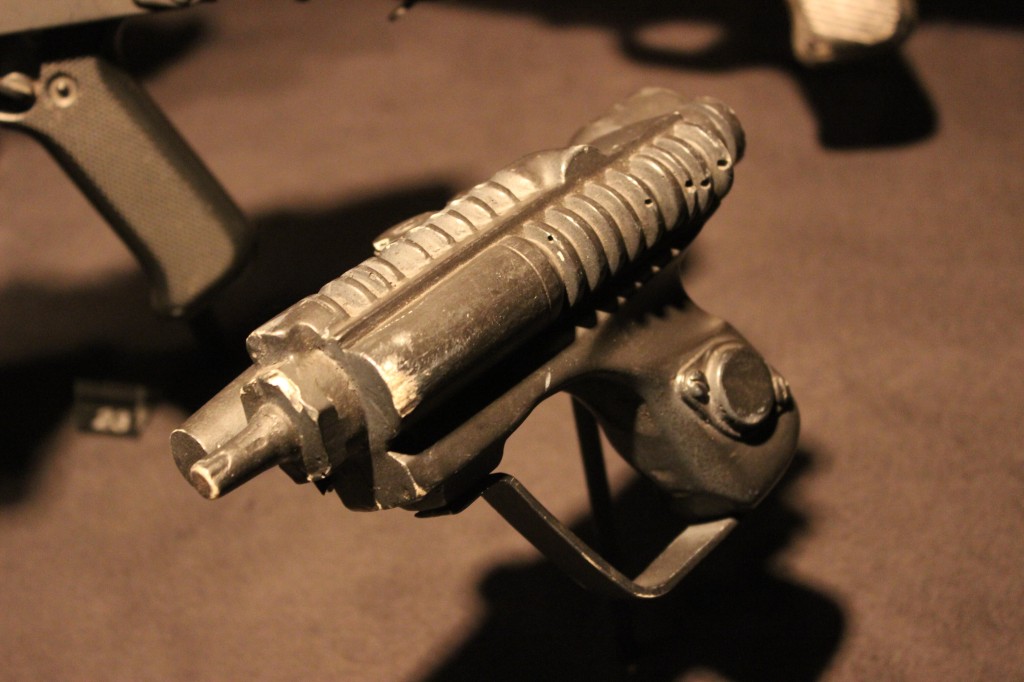
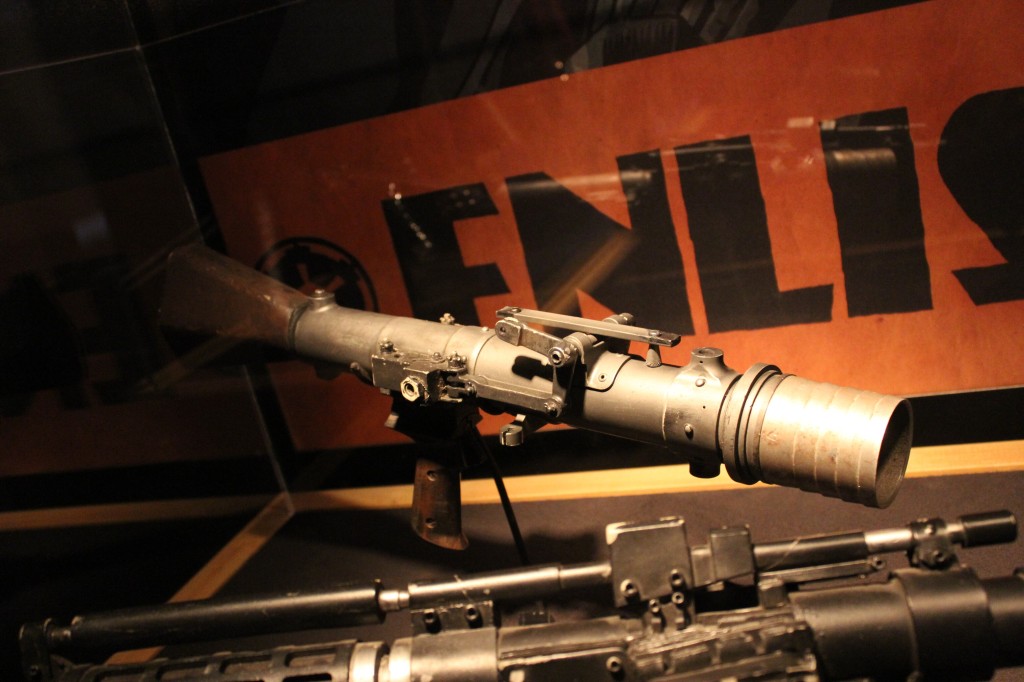
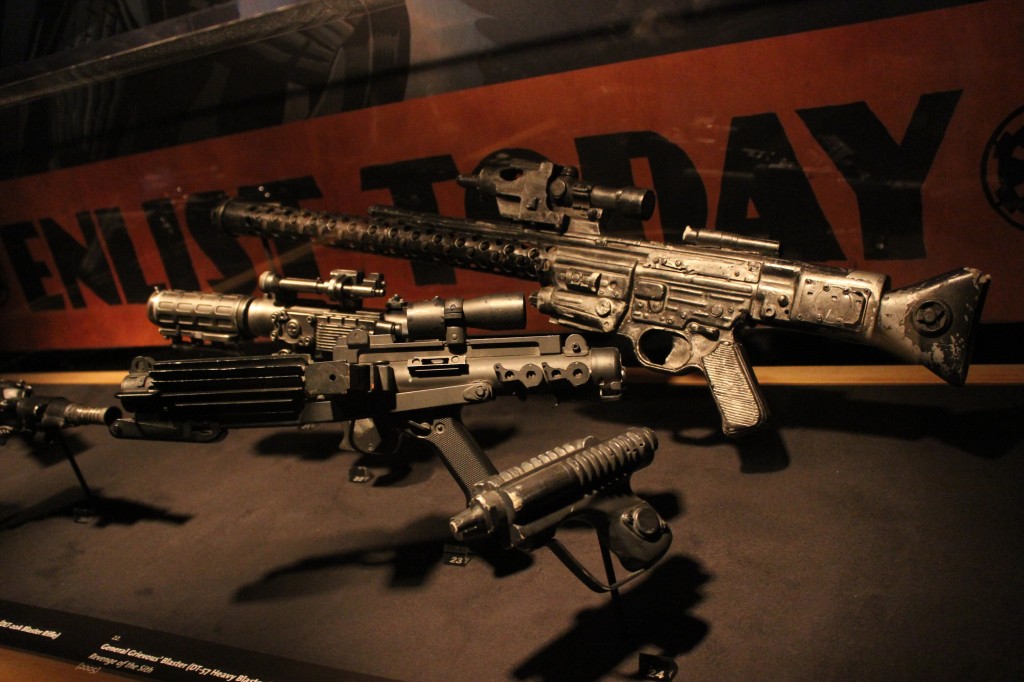
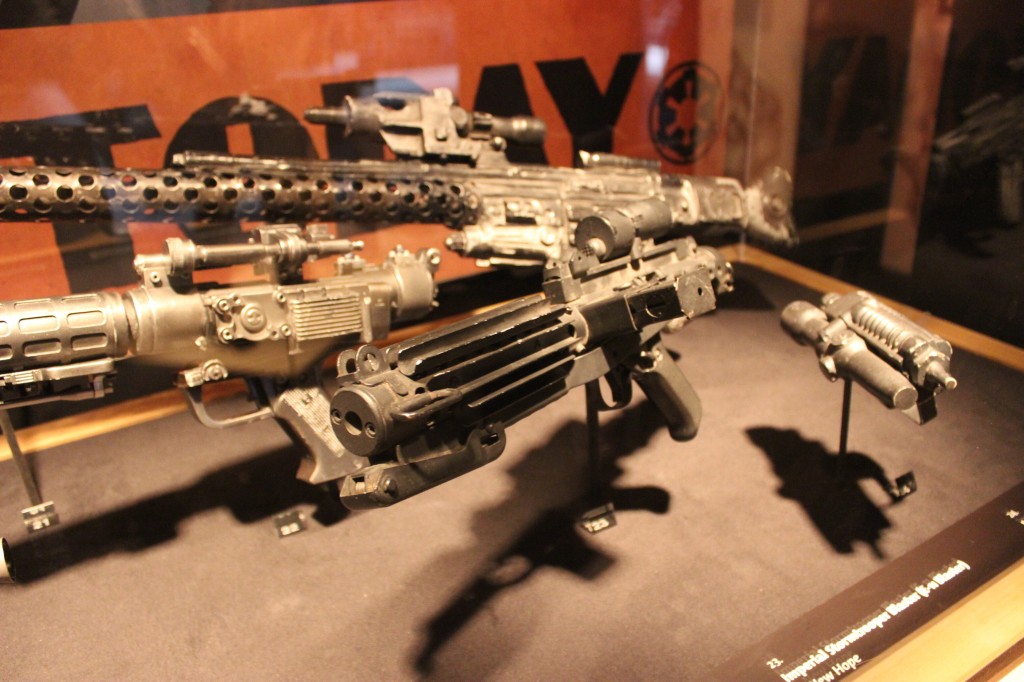
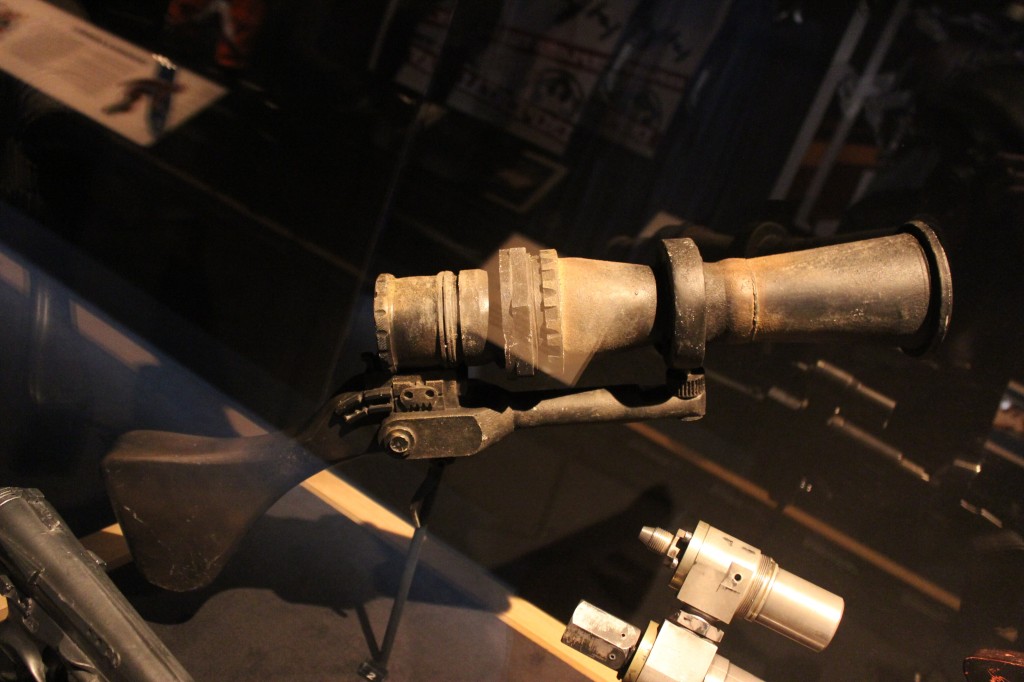
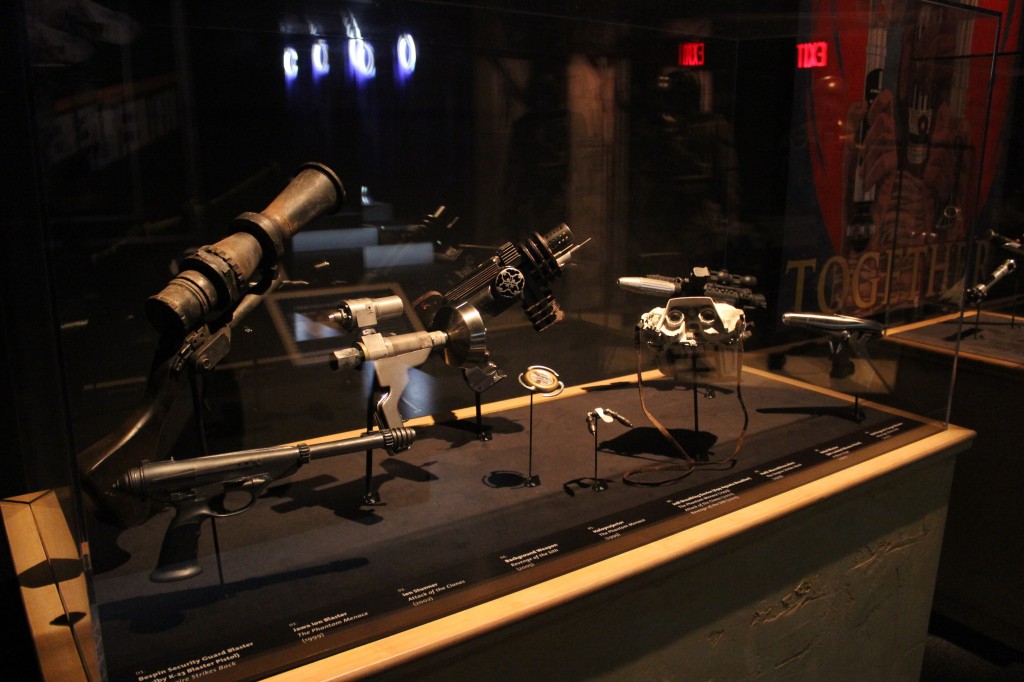
In a stroke of luck in the lead-up to Sean Scanlan and I publishing our co-edited special issue of New American Notes Online (NANO) on Star Wars Episode VII: The Force Awakens, the Smithsonian and Lucas Museum of Narrative Art traveling exhibition collaboration called Star Wars and the Power of Costume came to New York City. I visited the exhibition with my Canon T3i one summer afternoon in 2016. It was exhilarating to me to be close to the costumes and props from my most loved movie franchise. Also, I imagined how the exhibit must be a goldmine for costuming details for Star Wars cosplay.
I’m afraid that my photography skills and control over my equipment is left wanting, but I tried my best to capture the costumes and equipment as best as I could for my own enjoyment when revisiting the exhibition via memory conjured by the photos. Now, I’m sharing my photos of the exhibition for your benefit here.
Also, I attended an earlier Star Wars exhibition in London nine years earlier, which I will post next week as my Flickr album of those photos no longer exists [link added to the London Star Wars Exhibition on 17 Oct. 2023]. It will feature costumes and some vehicles and models. In the meantime, I hope that you enjoy virtually visiting the Power of Costume below.
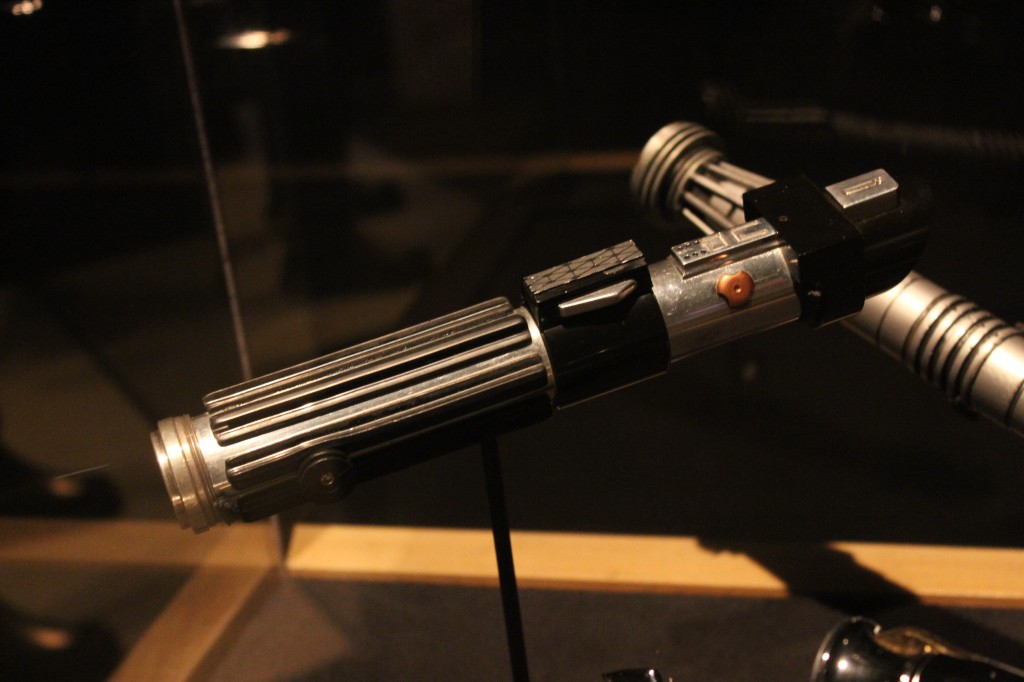
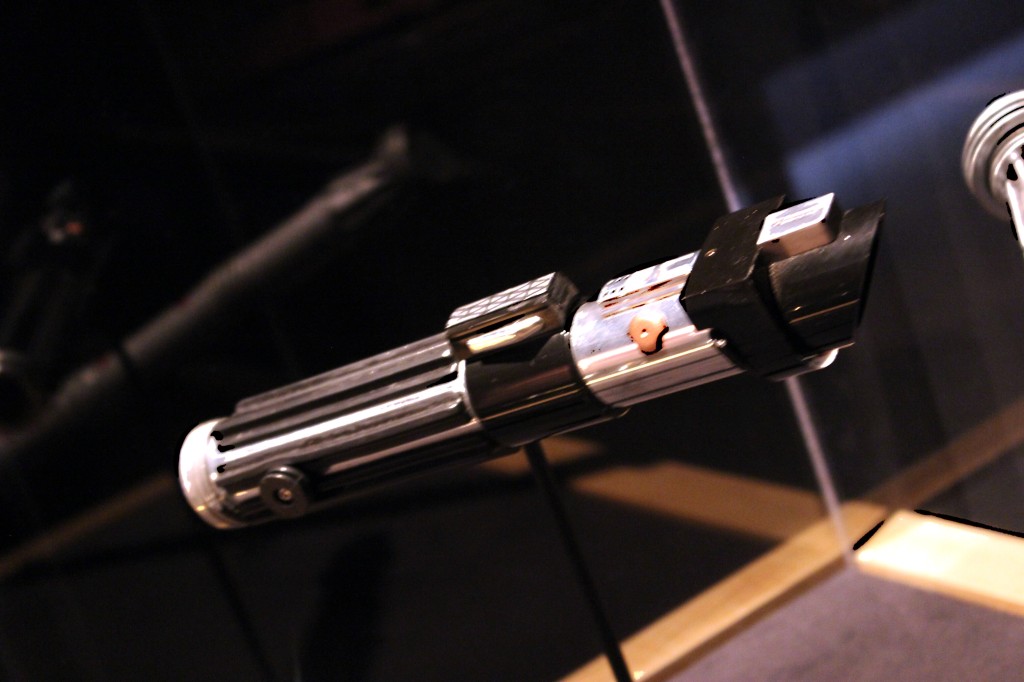
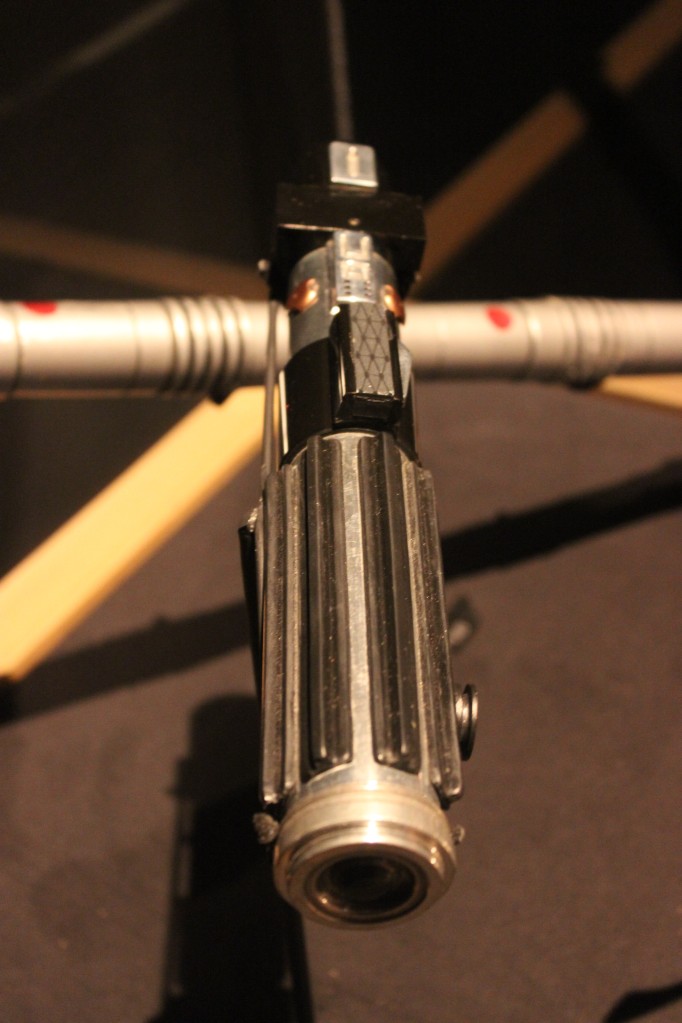
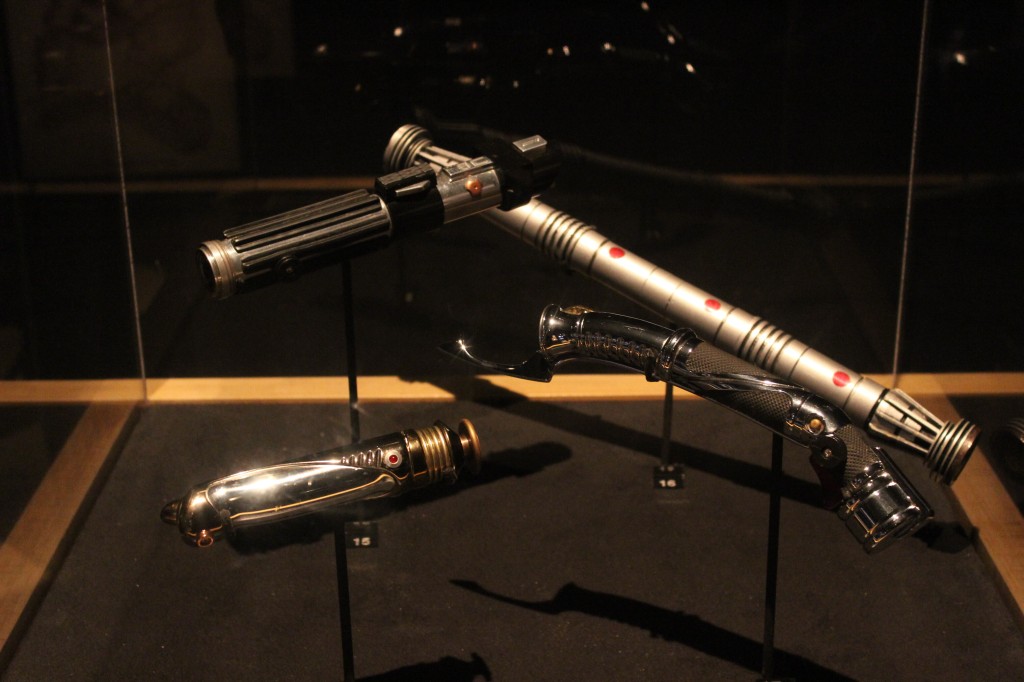
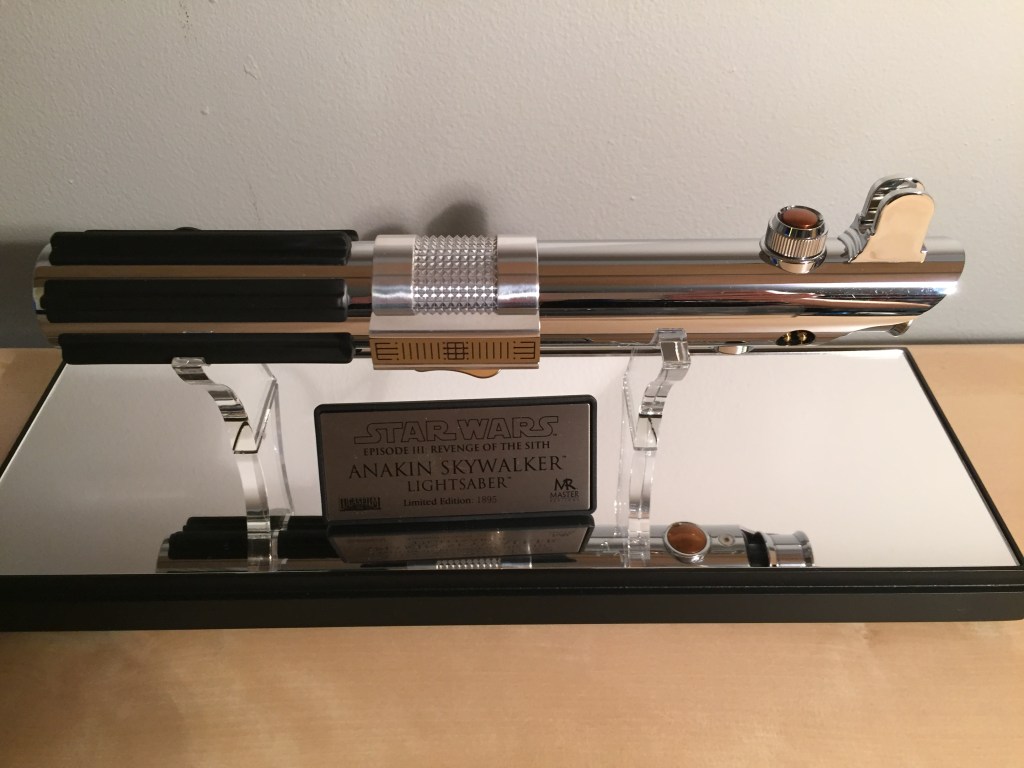
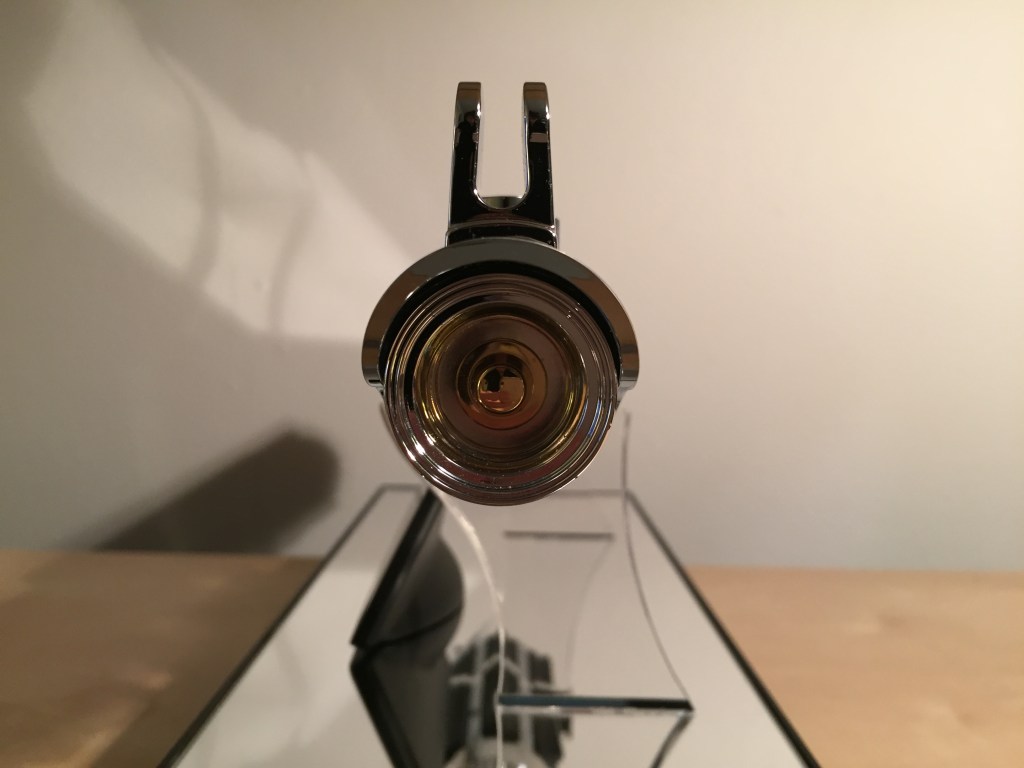
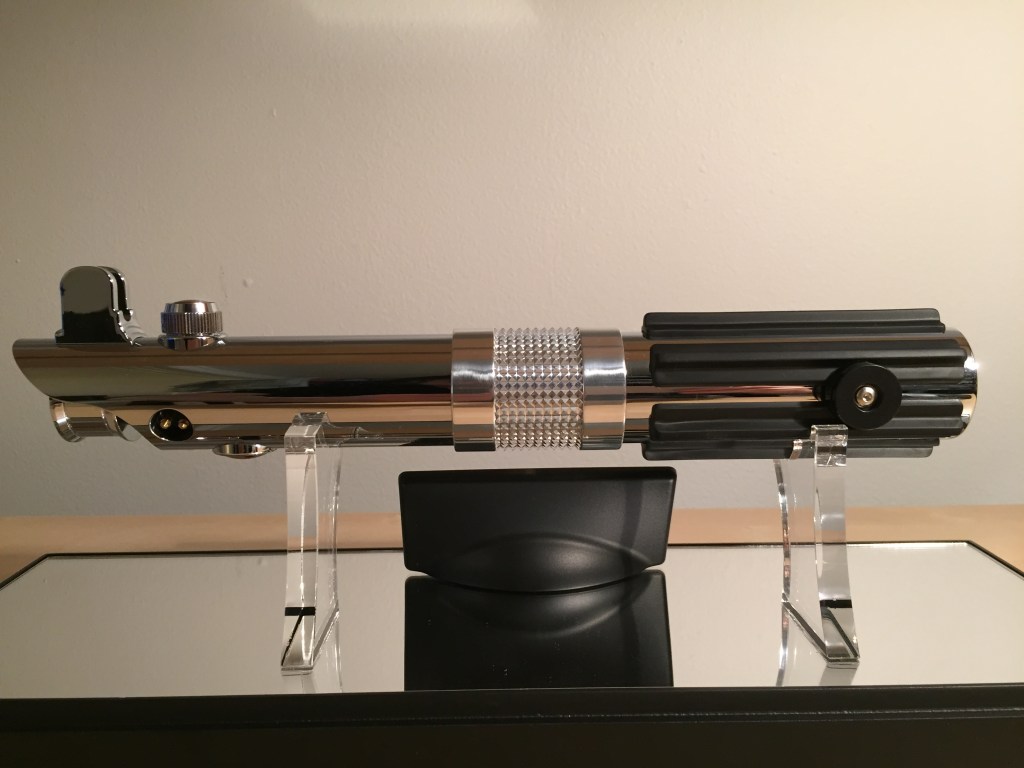
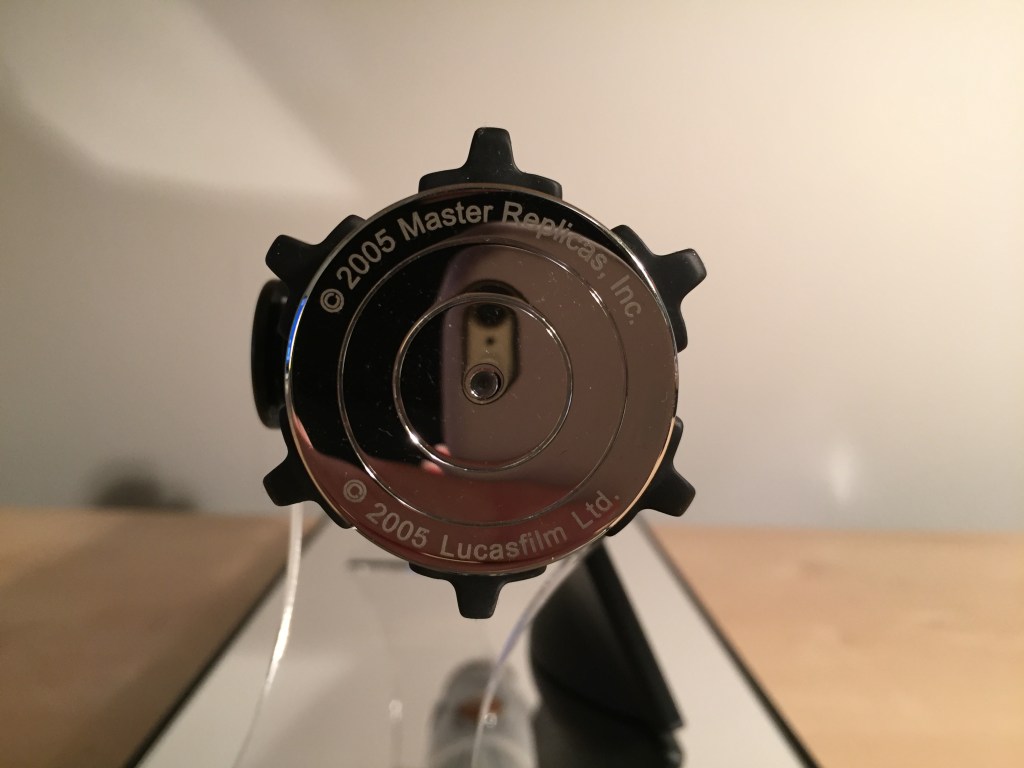
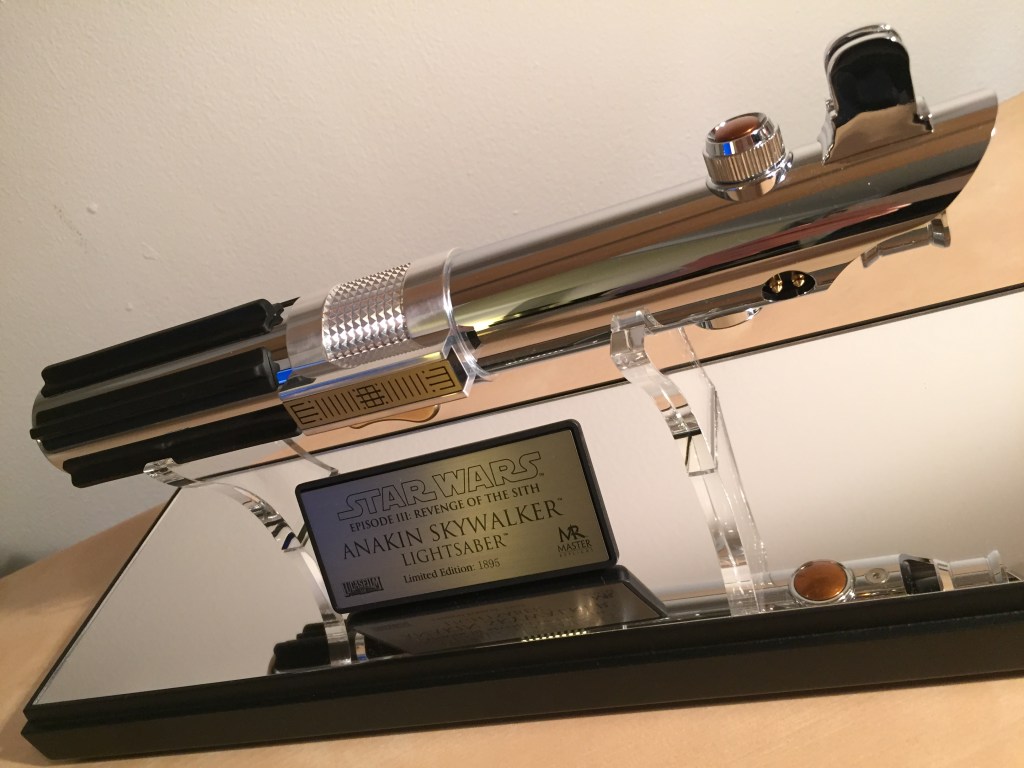
Then, in 2006, my folks gave me the Master Replicas (MR) Anakin Skywalker lightsaber shown above as my Georgia Tech graduation present. It feels like a solid piece of steel or an alloy–heavier than aluminum. It is certainly heavier than the mostly hollow Graflex flash handle (sans batteries). Also, it doesn’t have a belt clip, but given its weight, it would not be practical to have this dangerously heavy lightsaber reproduction hang for your belt during anything more than standing still.
The MR lightsaber is designed for display, and it performs well in that function. The mirrored base illuminates the lightsaber with reflected ambient light. The plastic cover keeps out the dust. The shiny surface of the MR lightsaber attracts grease, fingerprints, and dust, so it’s best to keep a lint-free cloth or gloves nearby for picking it up.
Even sitting there on the shelf, the MR lightsaber inspires imaginative adventures as a Jedi defending the Republic, righting wrongs, and fighting for justice.
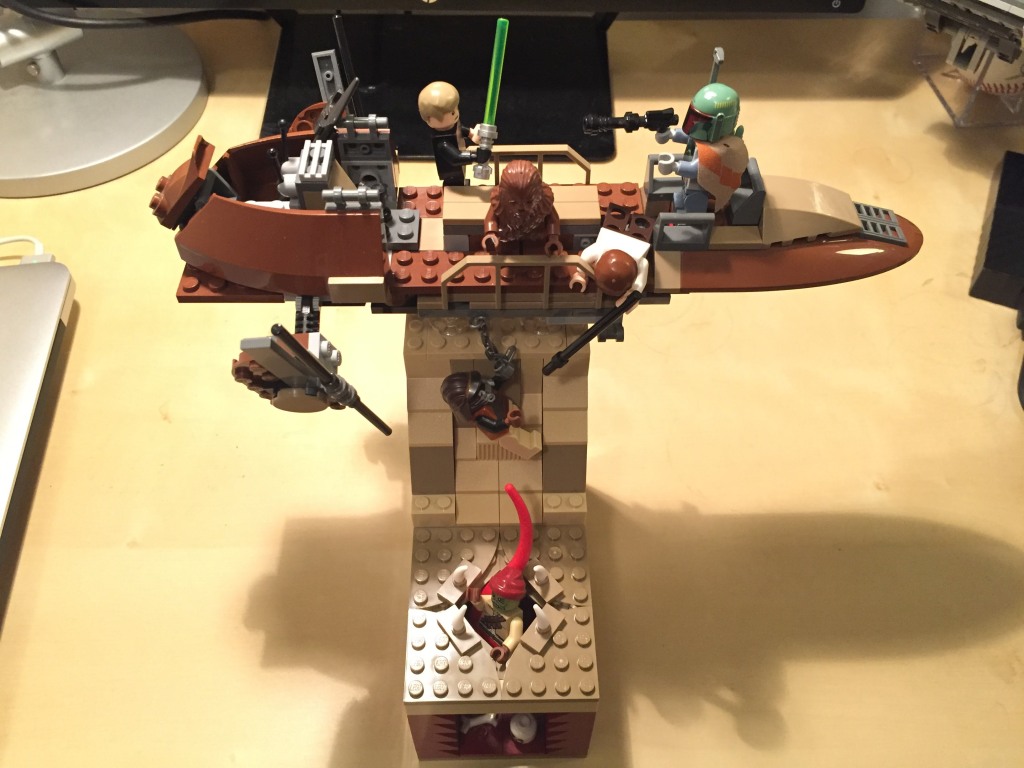
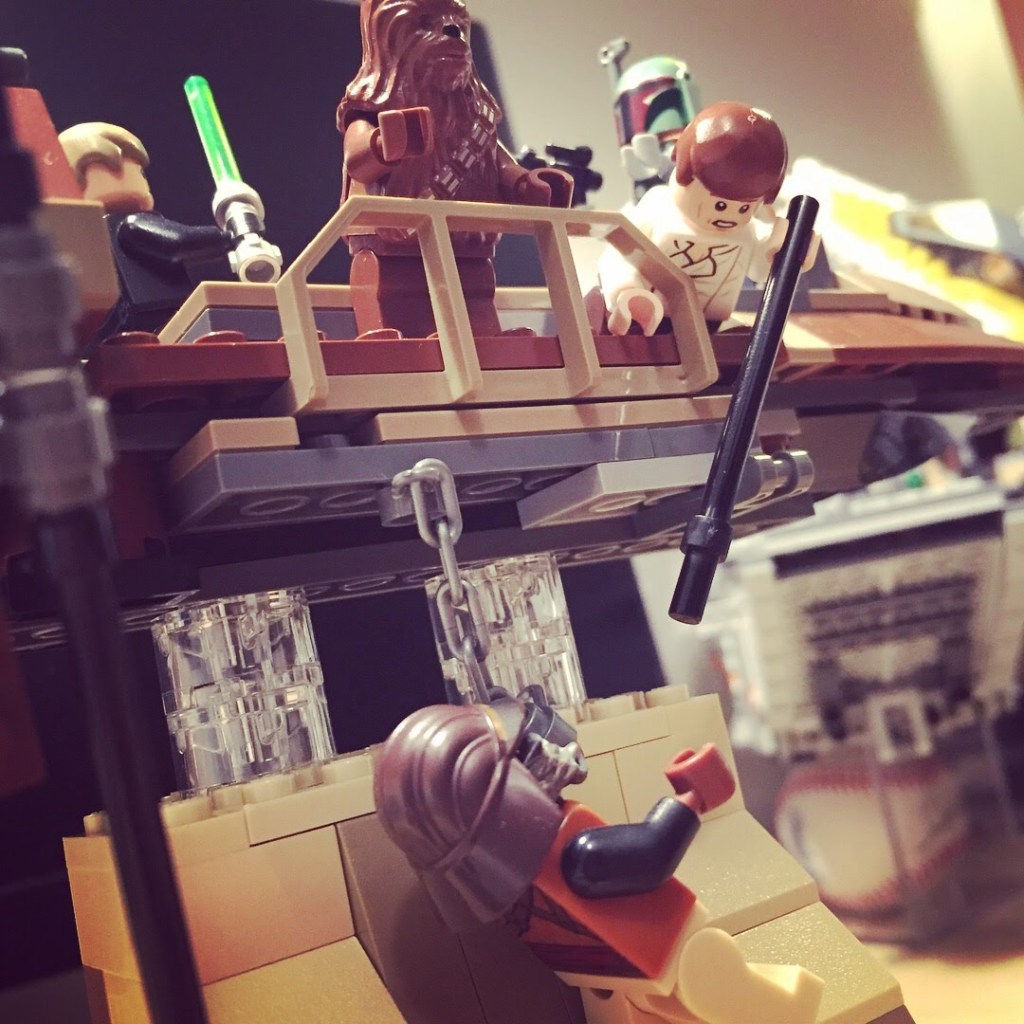
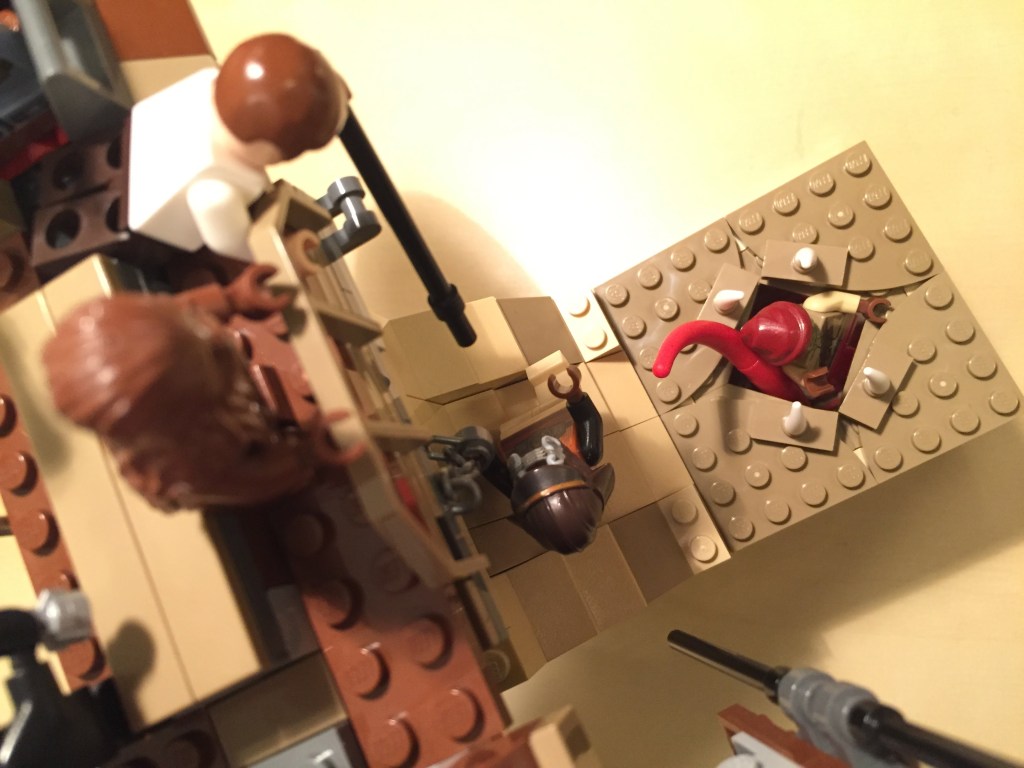
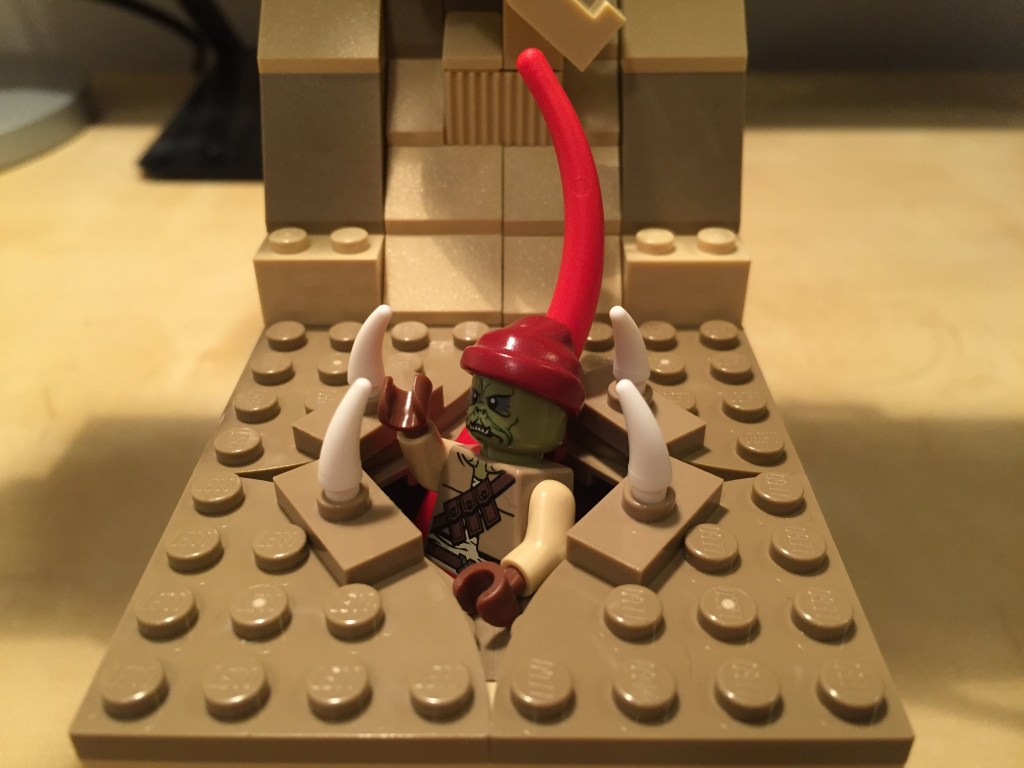
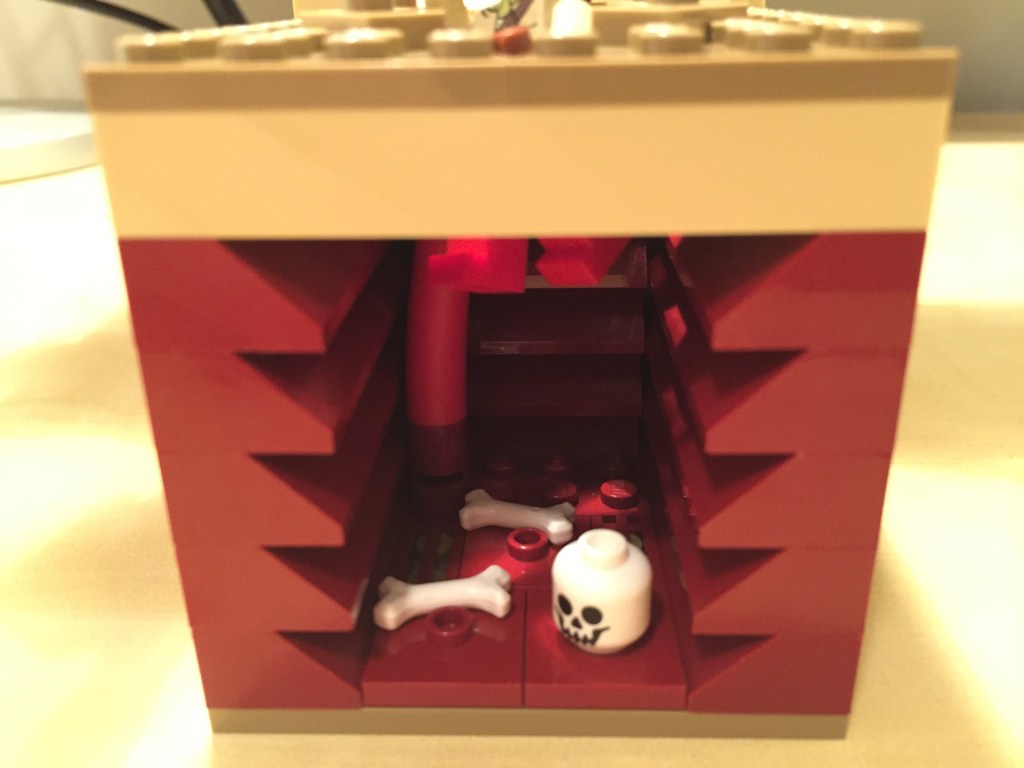
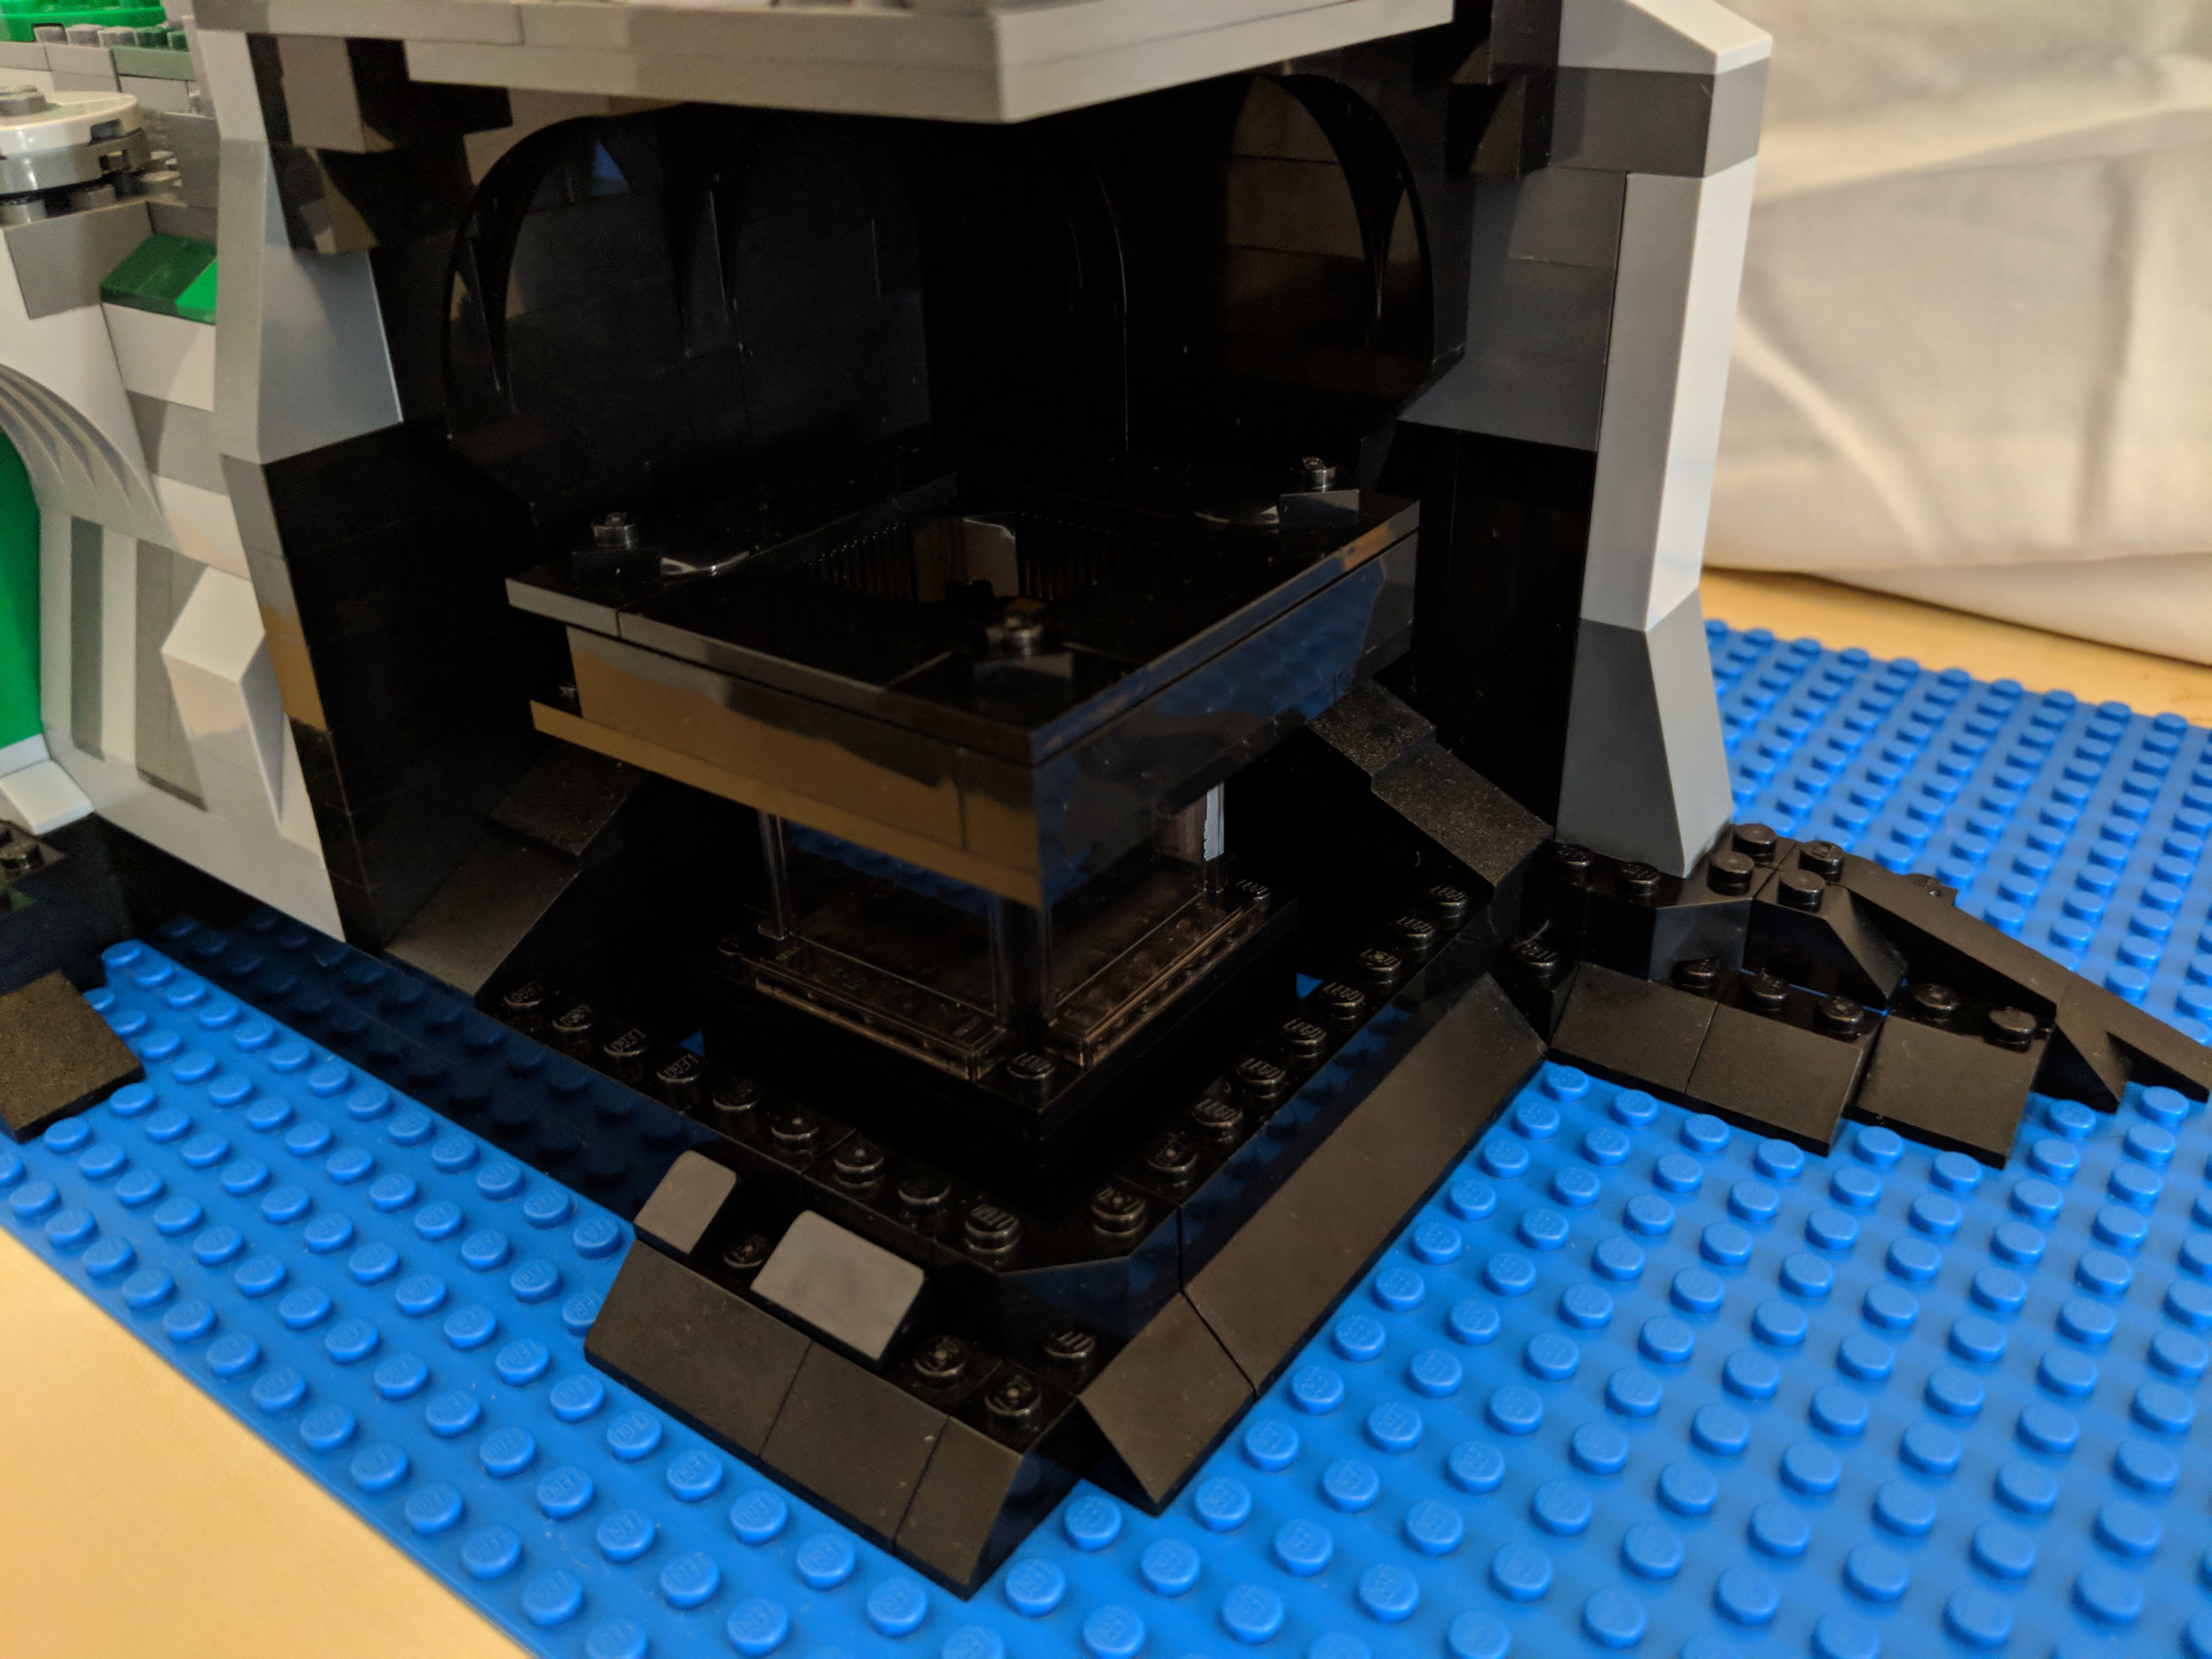
Following some of my recent LEGO MOC and MOD posts here, here, and here, this LEGO scene of the Desert Skiff rescue above the Sarlacc Pit from Return of the Jedi (1983) is another pre-pandemic build of mine. The desert skiff is an unmodified 9496 set from LEGO. However, I added more minifigures (Han and Chewbacca), and I recreated the scene as it roughly appears in the film when Lando Calrissian falls overboard with one of Jabba’s henchmen who is devoured by the Sarlacc. The base of the build is the high walls of sand surrounding the Sarlacc’s maw with a toothed opening and digestive tract beneath the sand full of bones and skulls of its past meals.
Before building this version of the scene, I had constructed a wider base and used the Sarlacc Pit monster build that came with 9496 as shown on the top shelf in the photo above. Also, Lando was holding onto the Desert Skiff by a whip instead of a chain, which I used on the newer diorama shown in more detail below. Pity the poor bastards who get slowly digested over a thousand years–that is, until Boba Fett took care of the buried beast!
I’ll note that when I was a kid, the Power of the Force Tatooine Skiff by Kenner was one of my favorite vehicles next to the Millennium Falcon, not only because it had a lot of playability and features packed into but also because I recognized the engineering and craftsmanship that went into its design, including retractable skids, extending/dropping plank, and a sideboard action figure launcher.
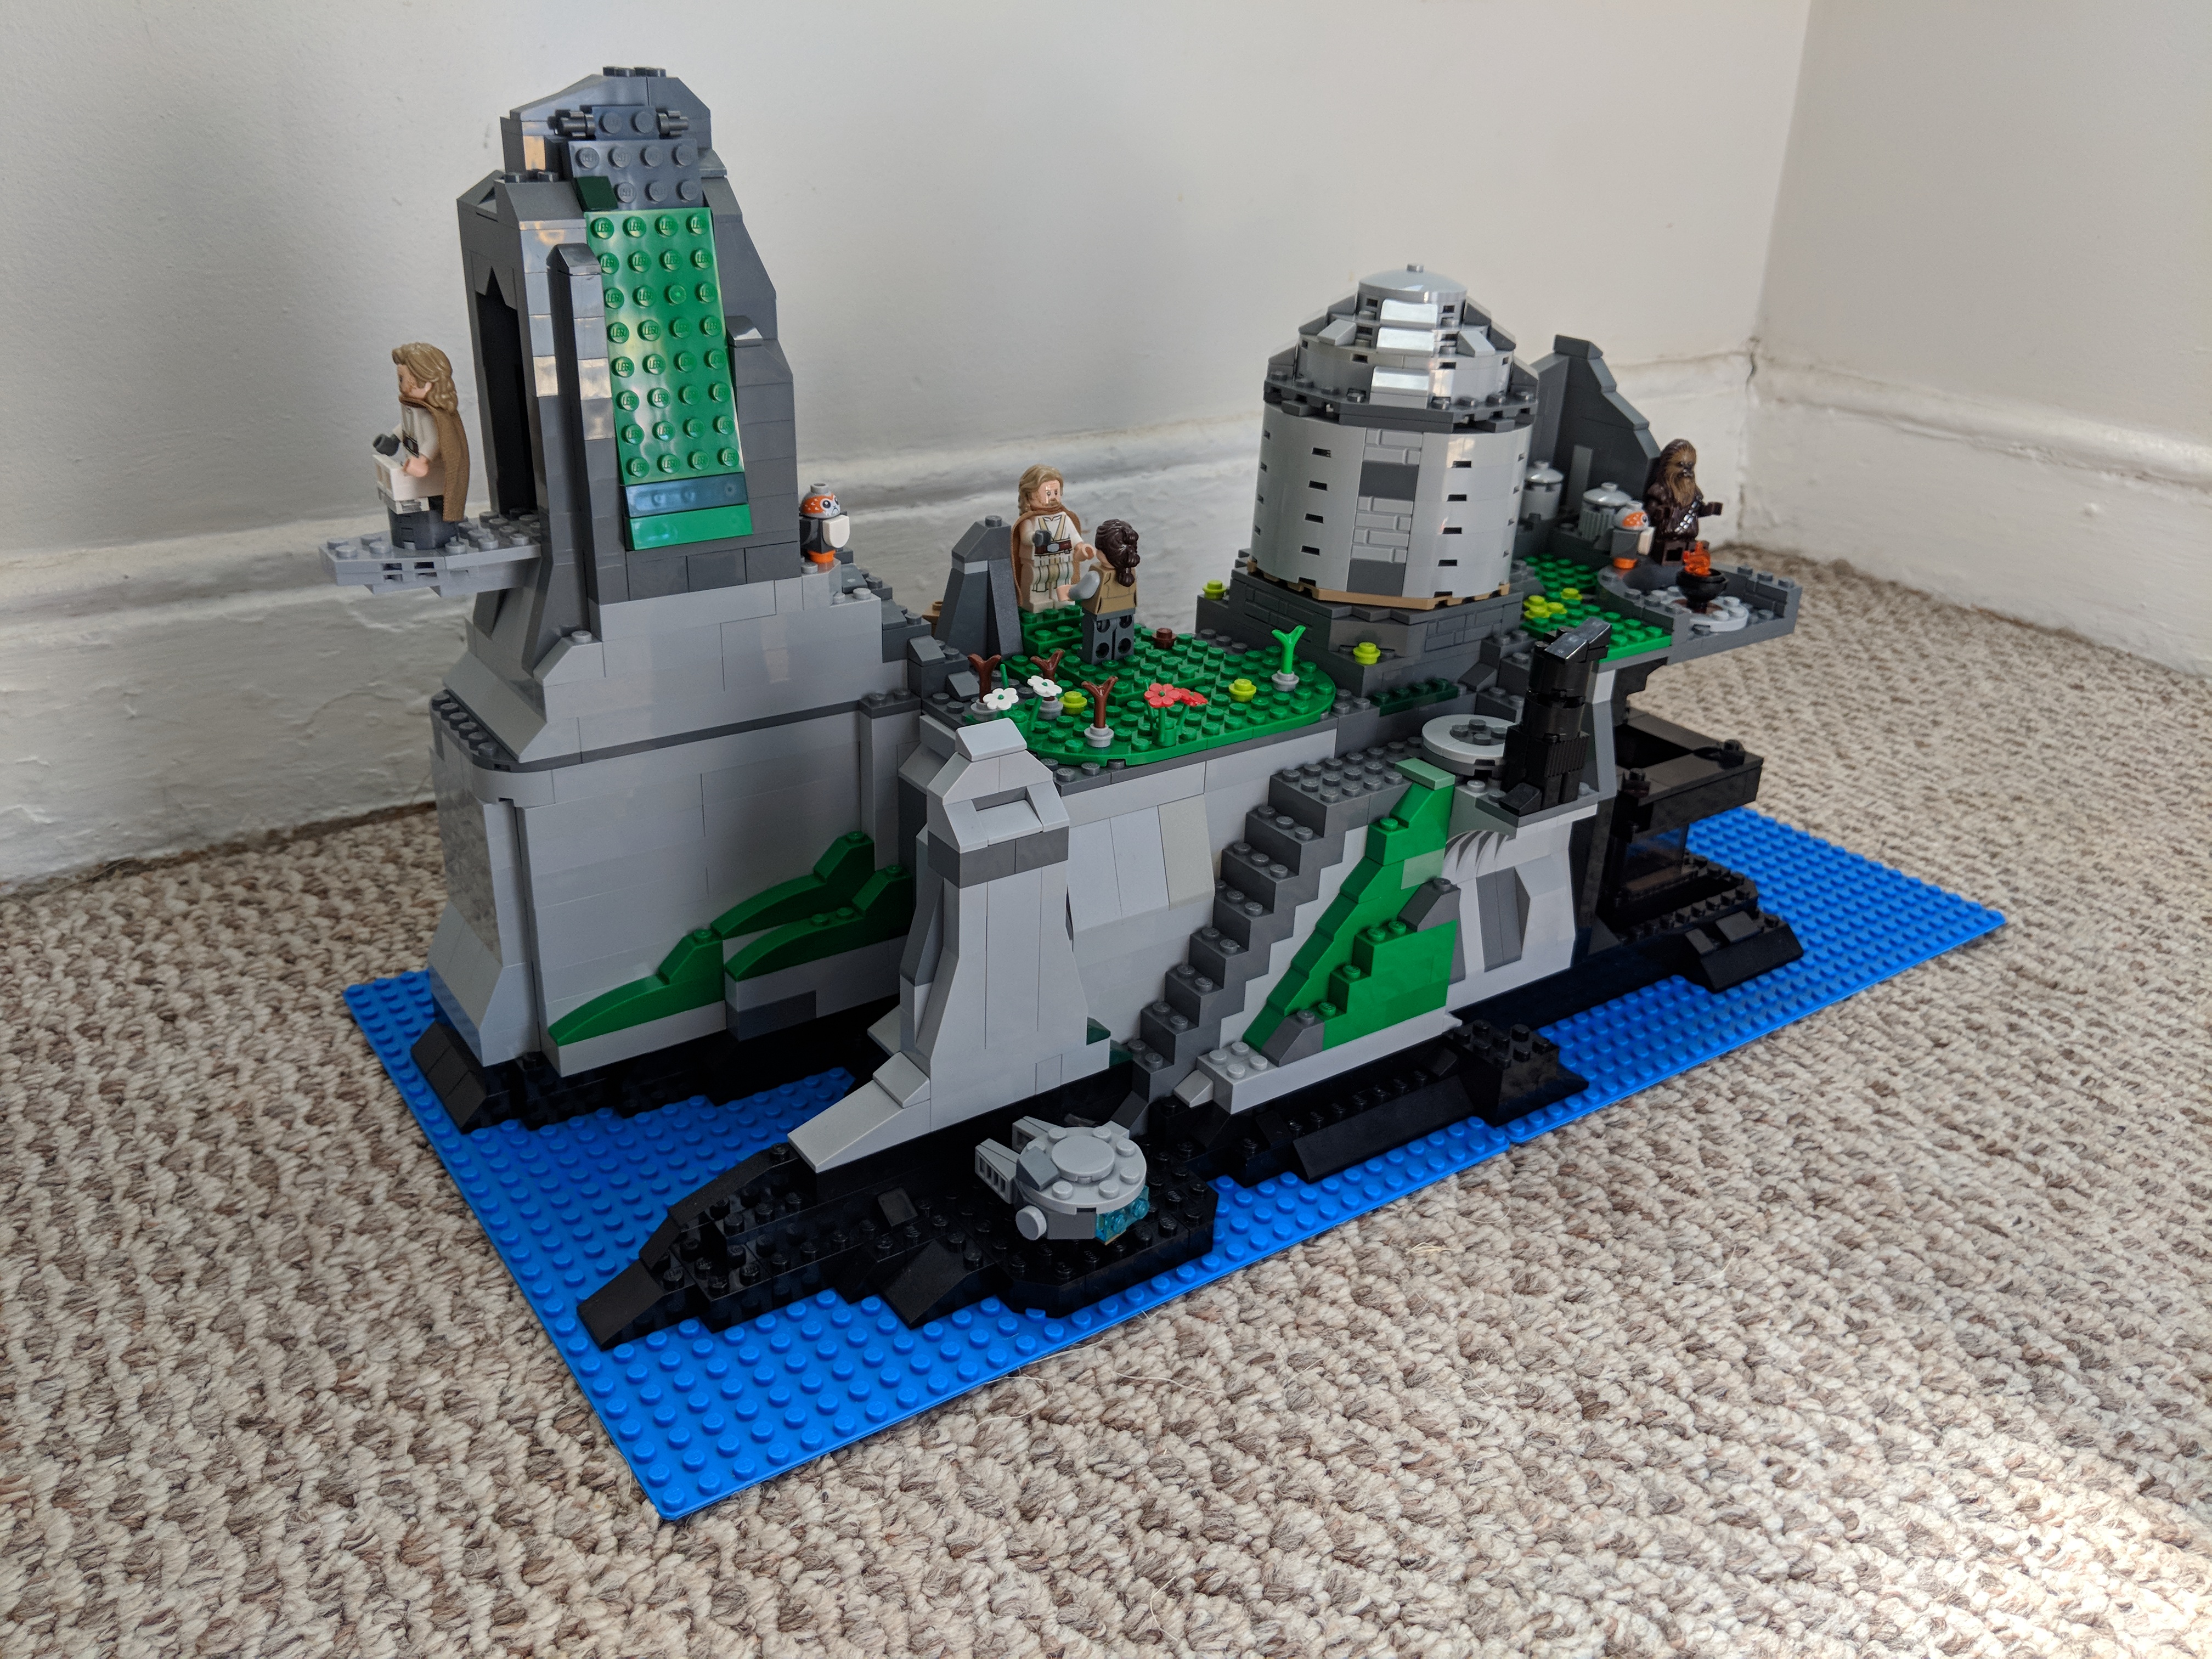
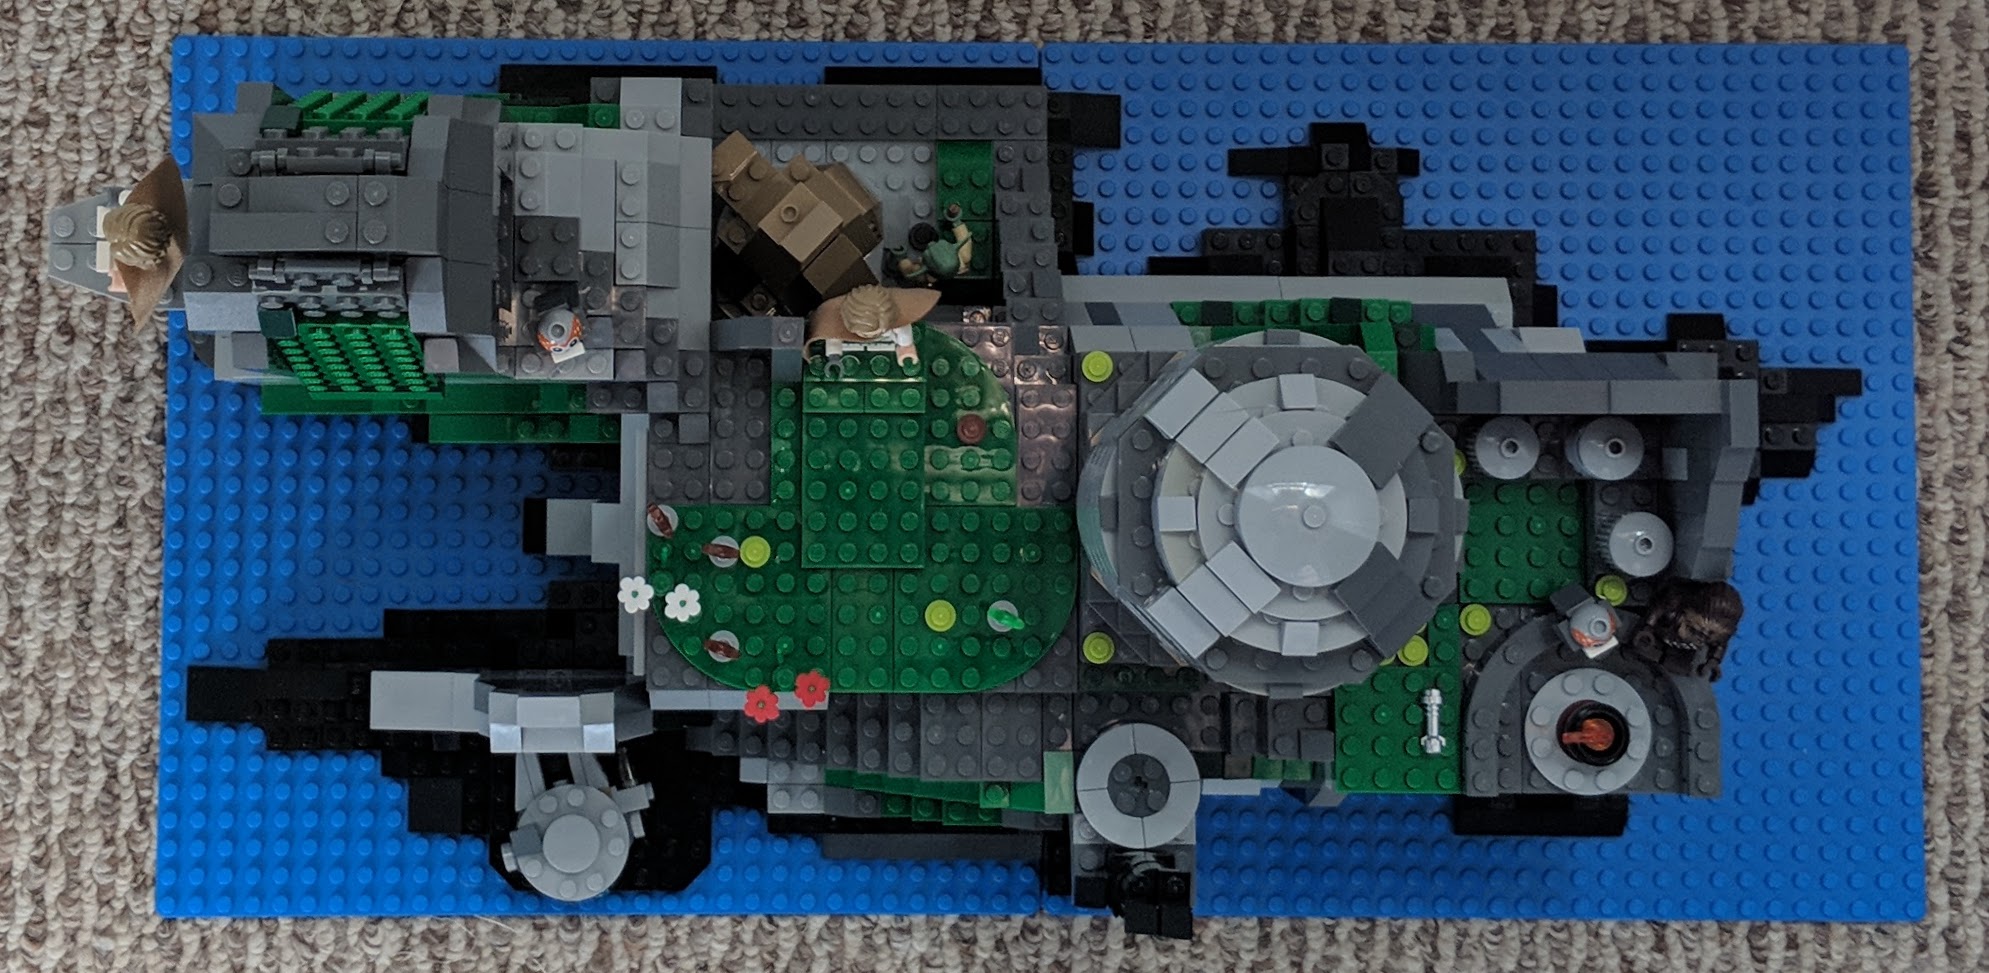
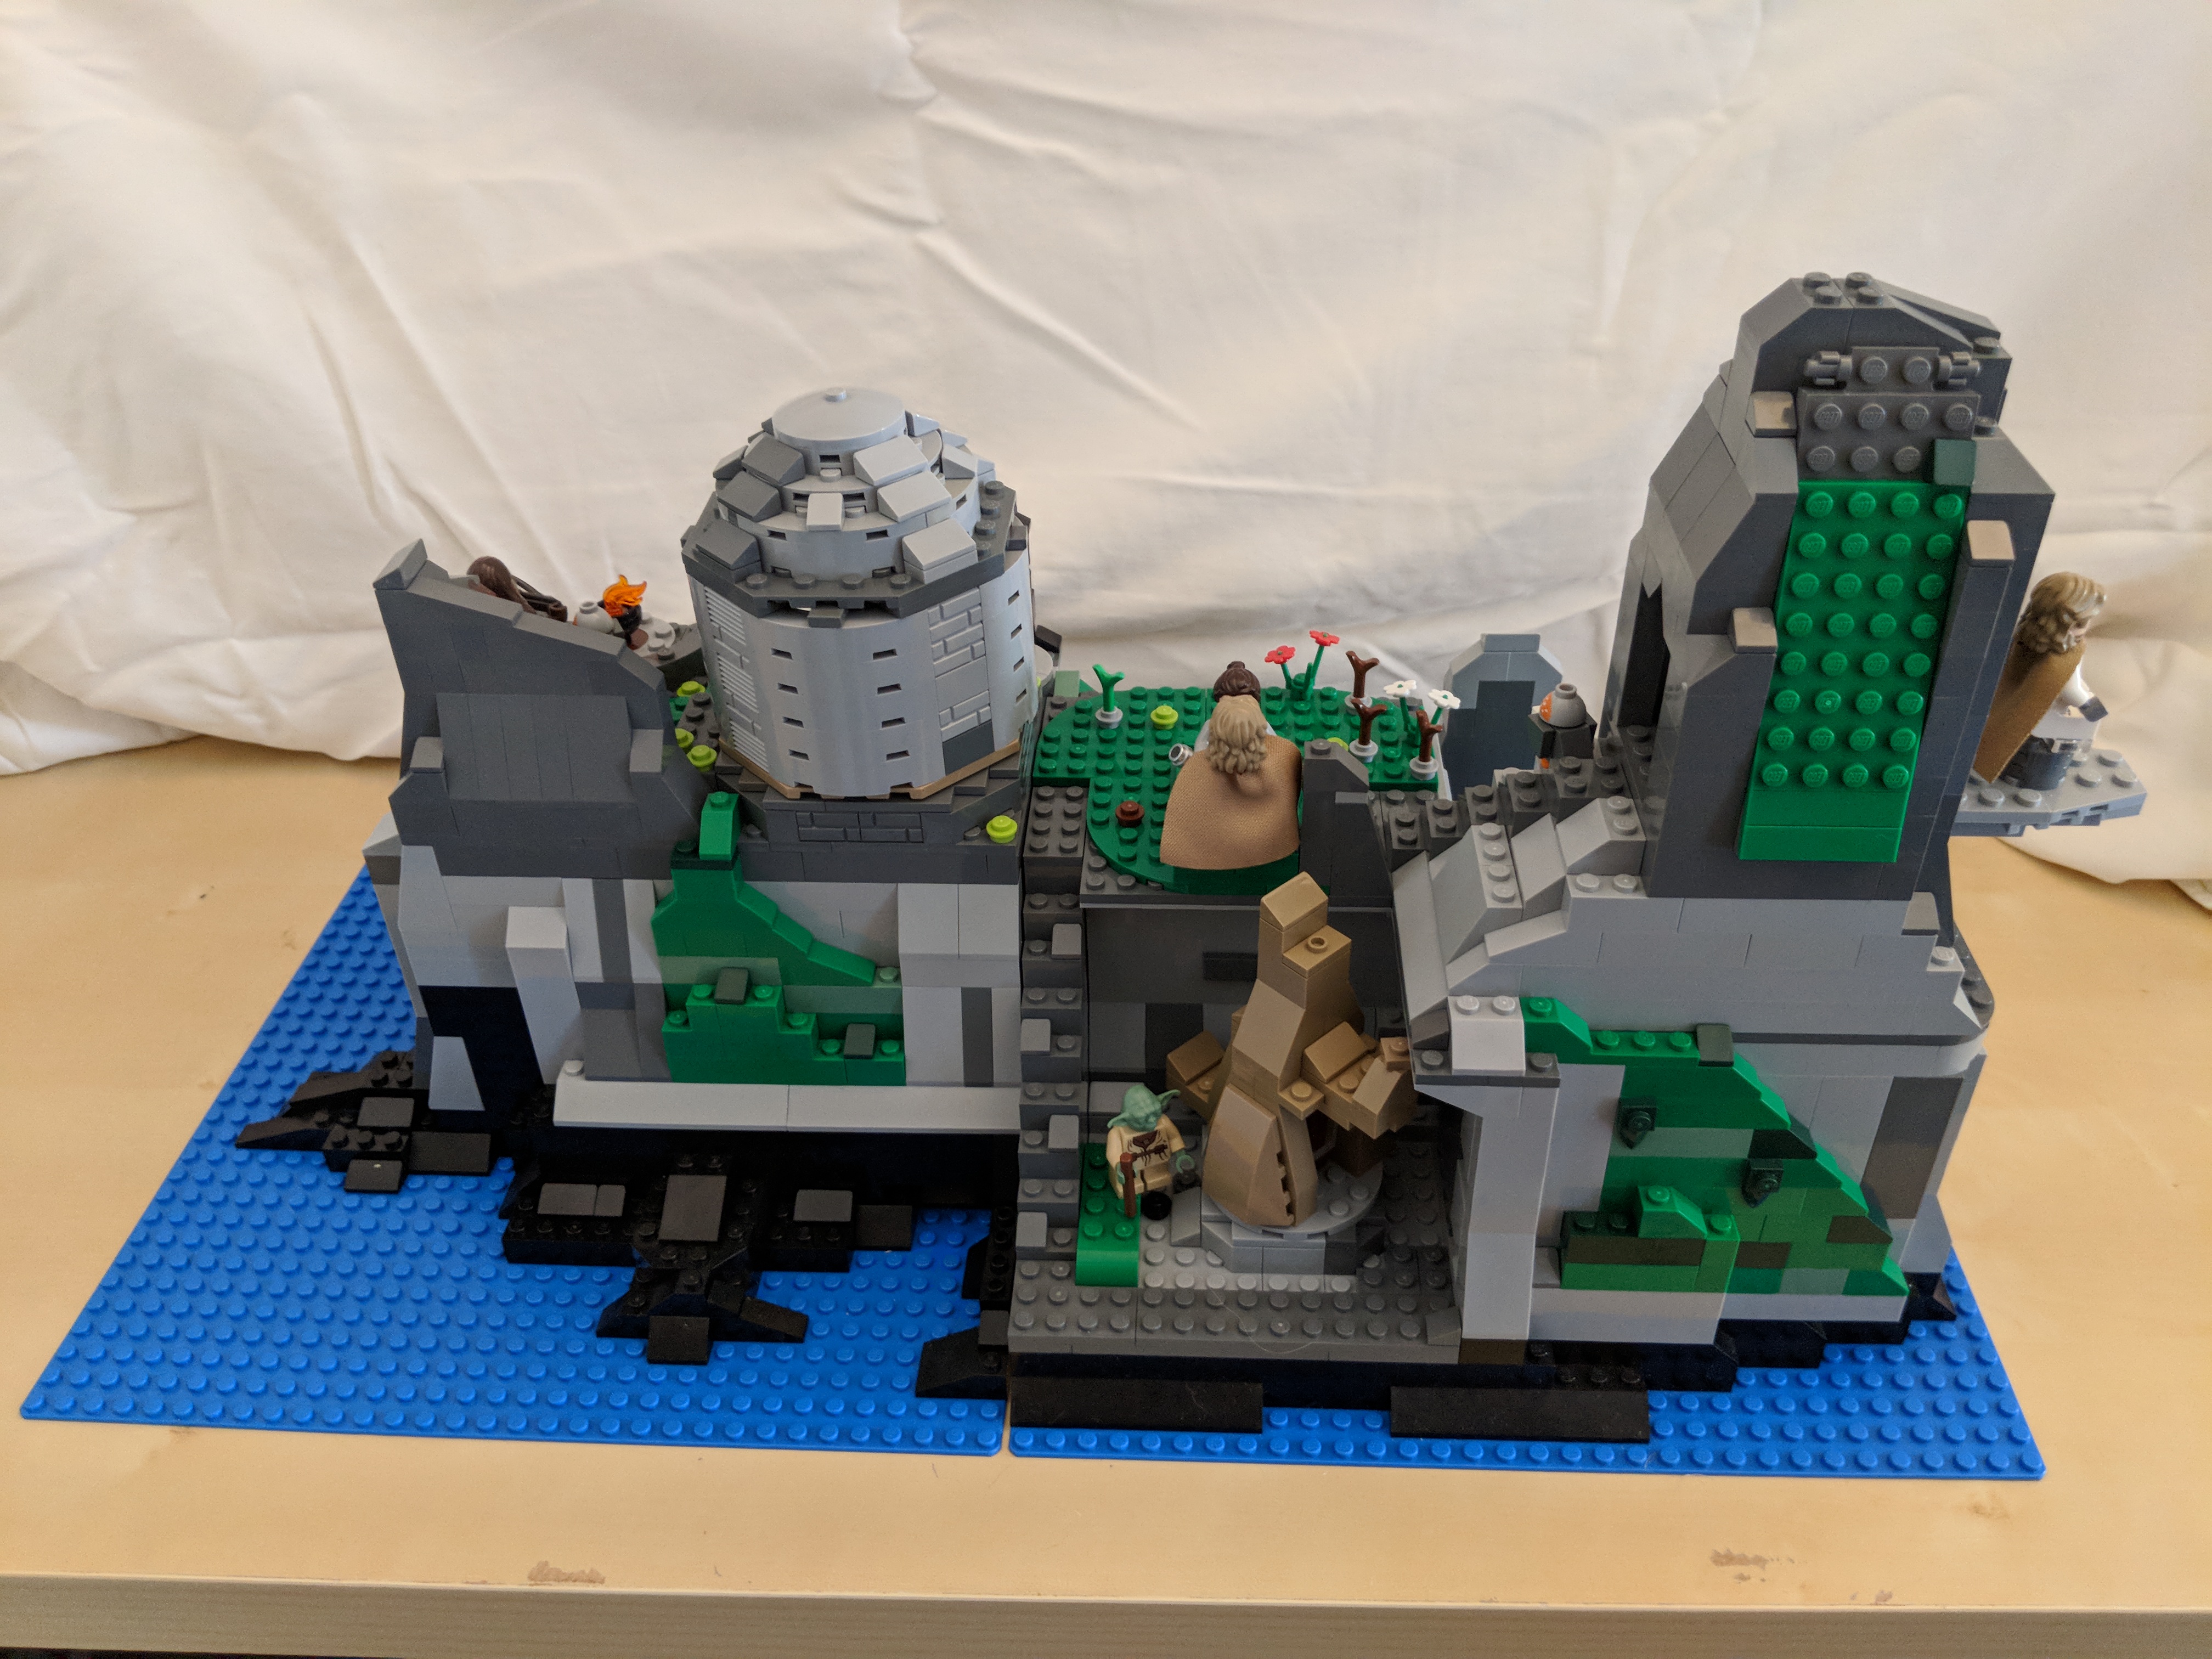
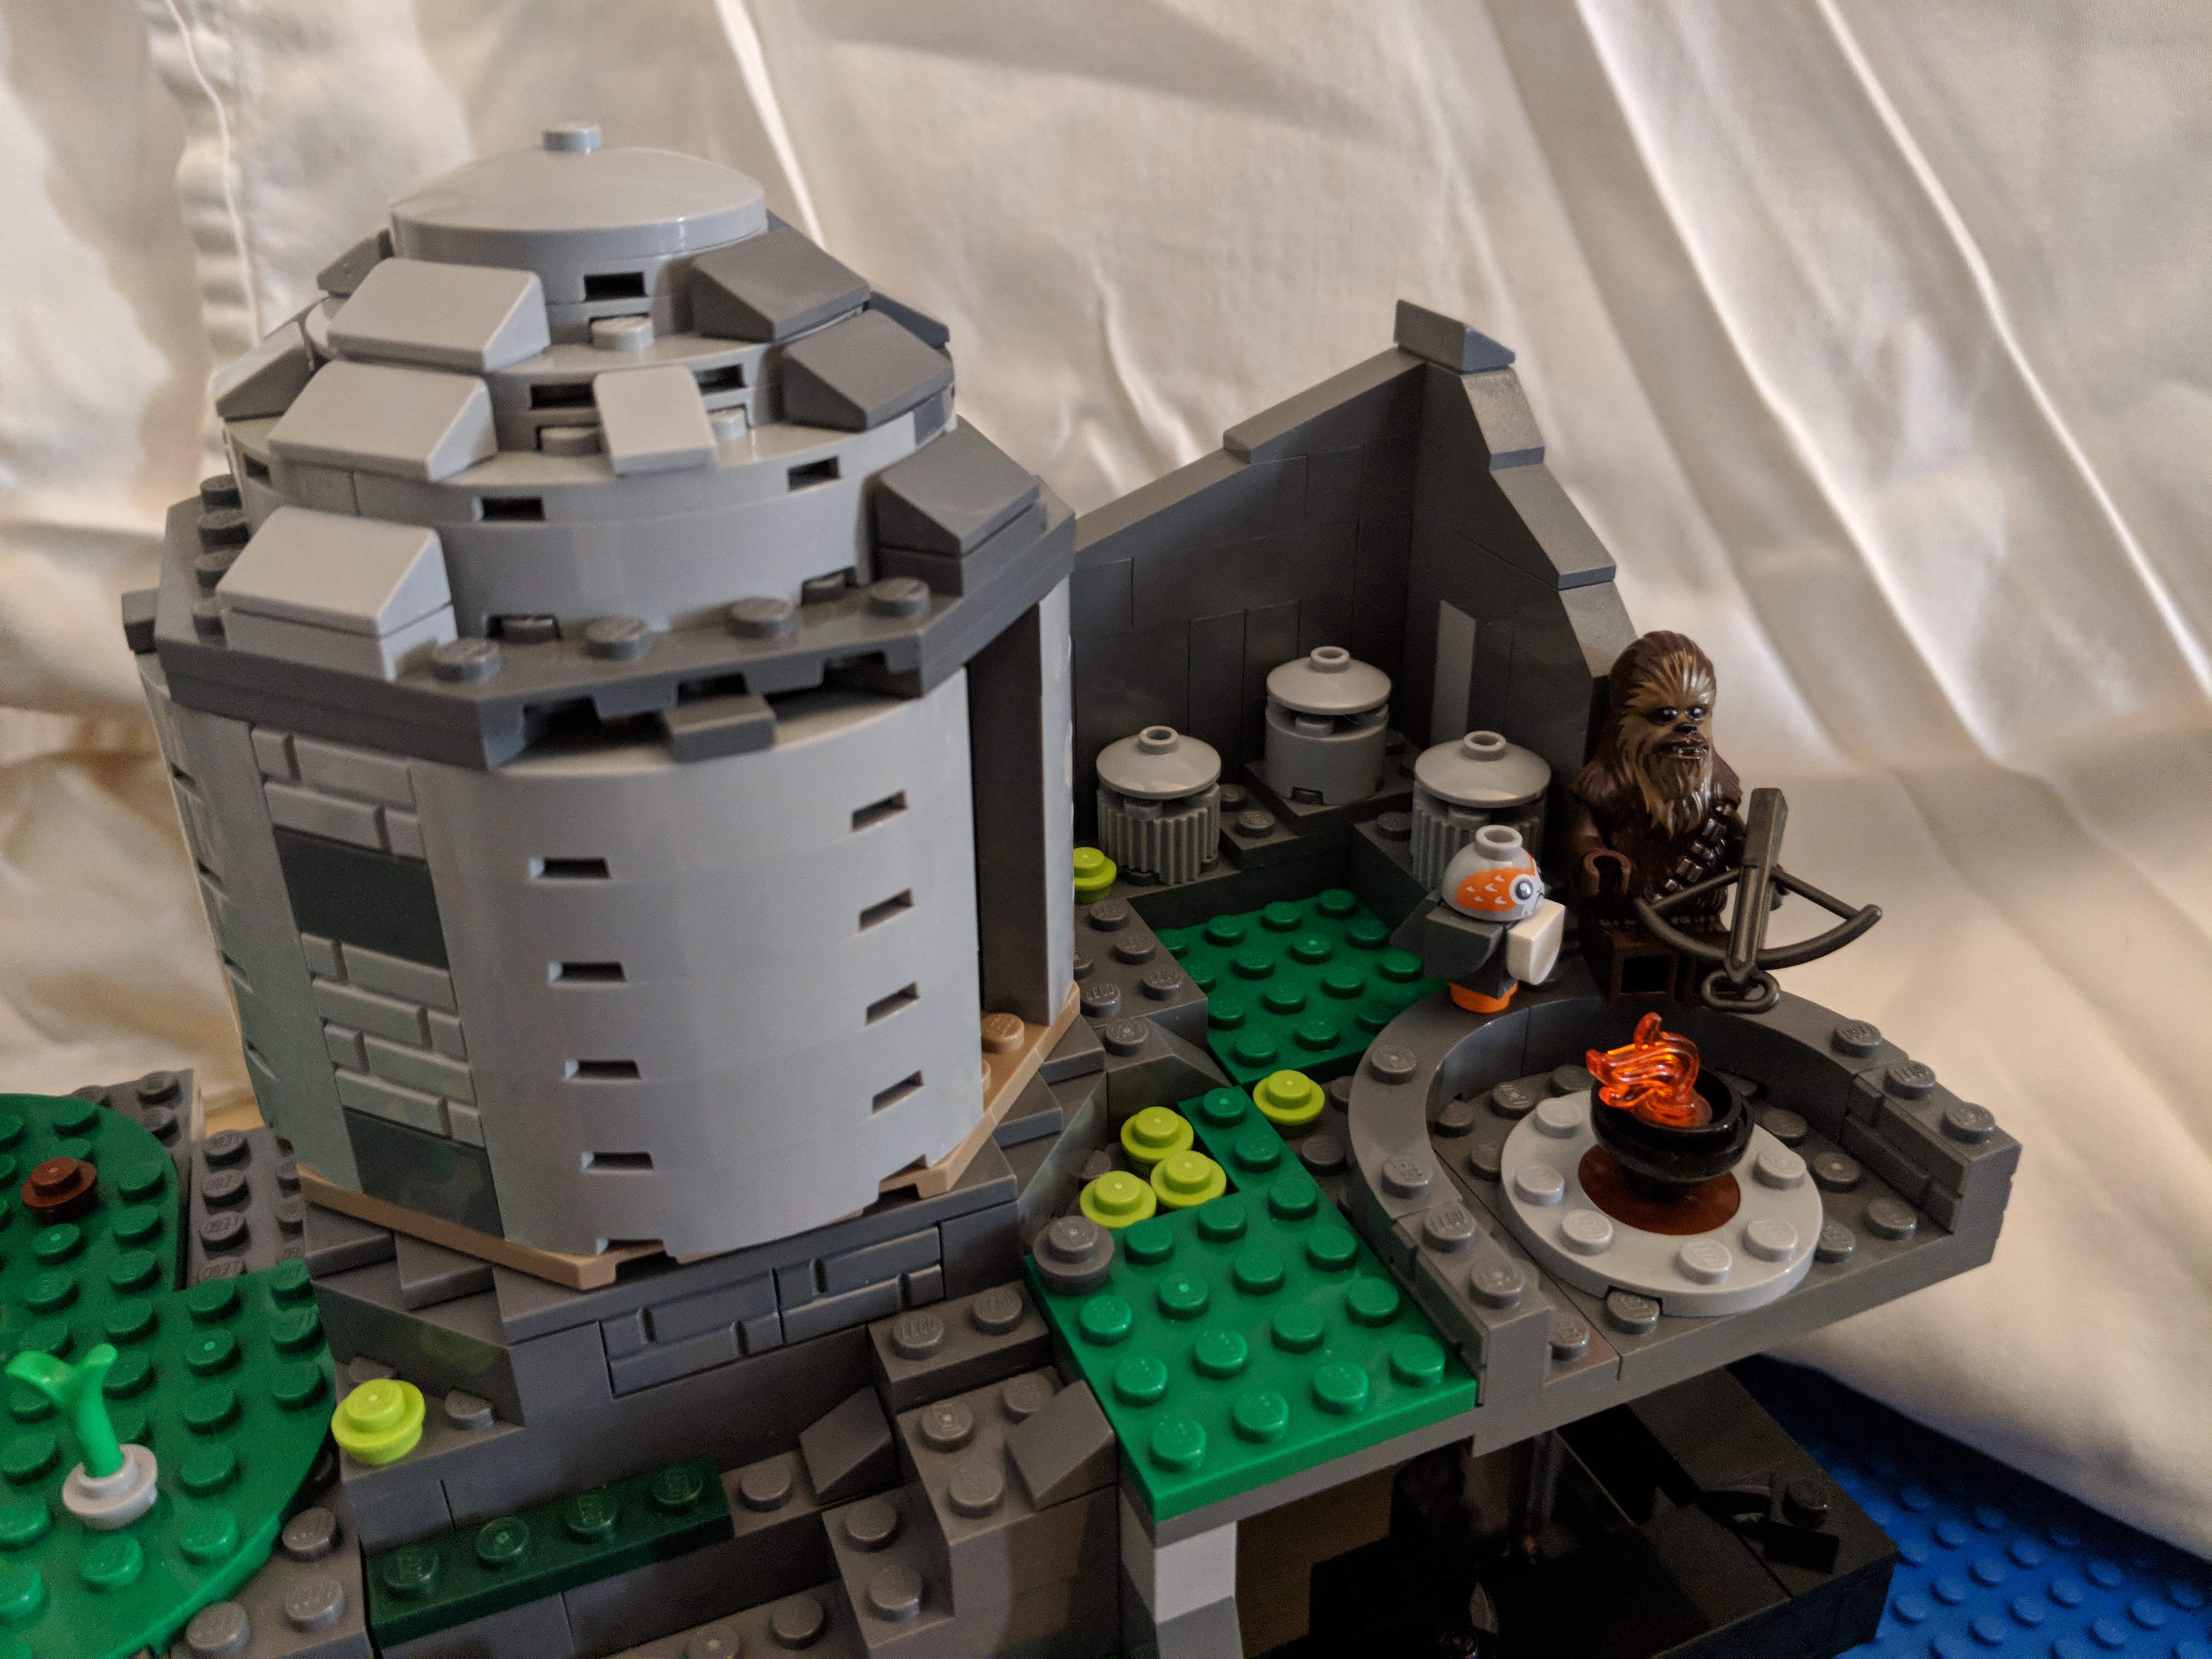
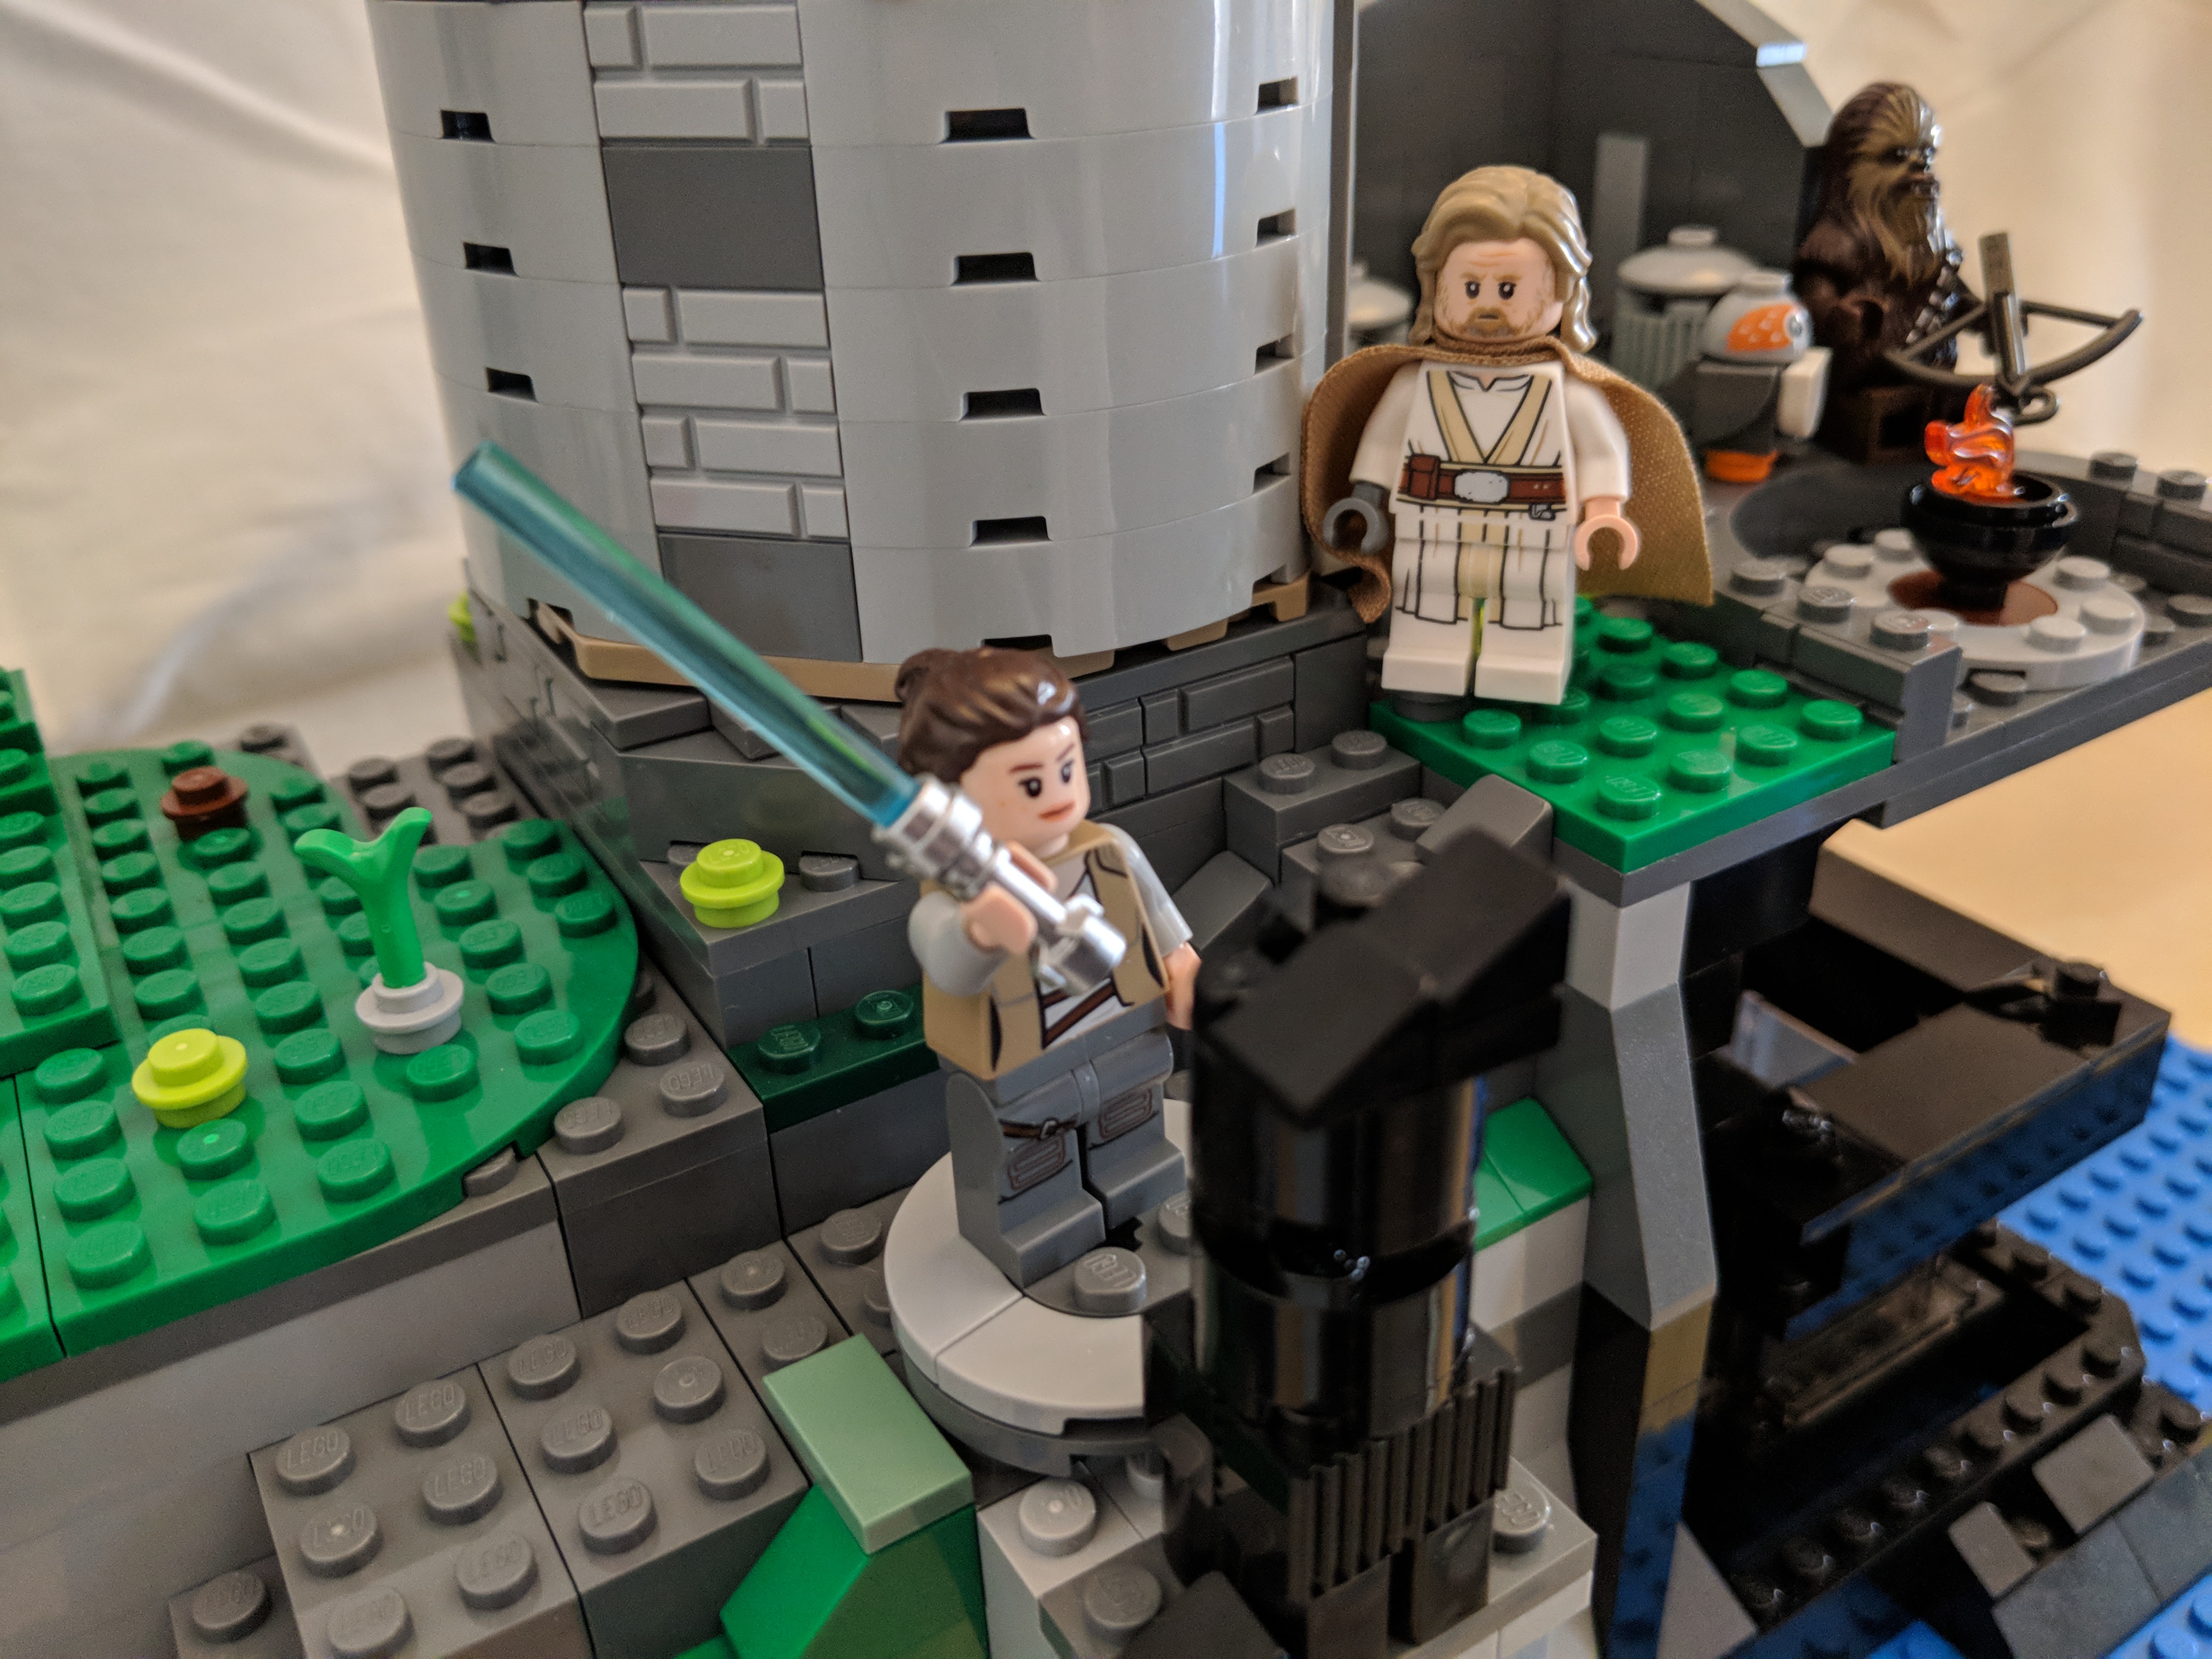
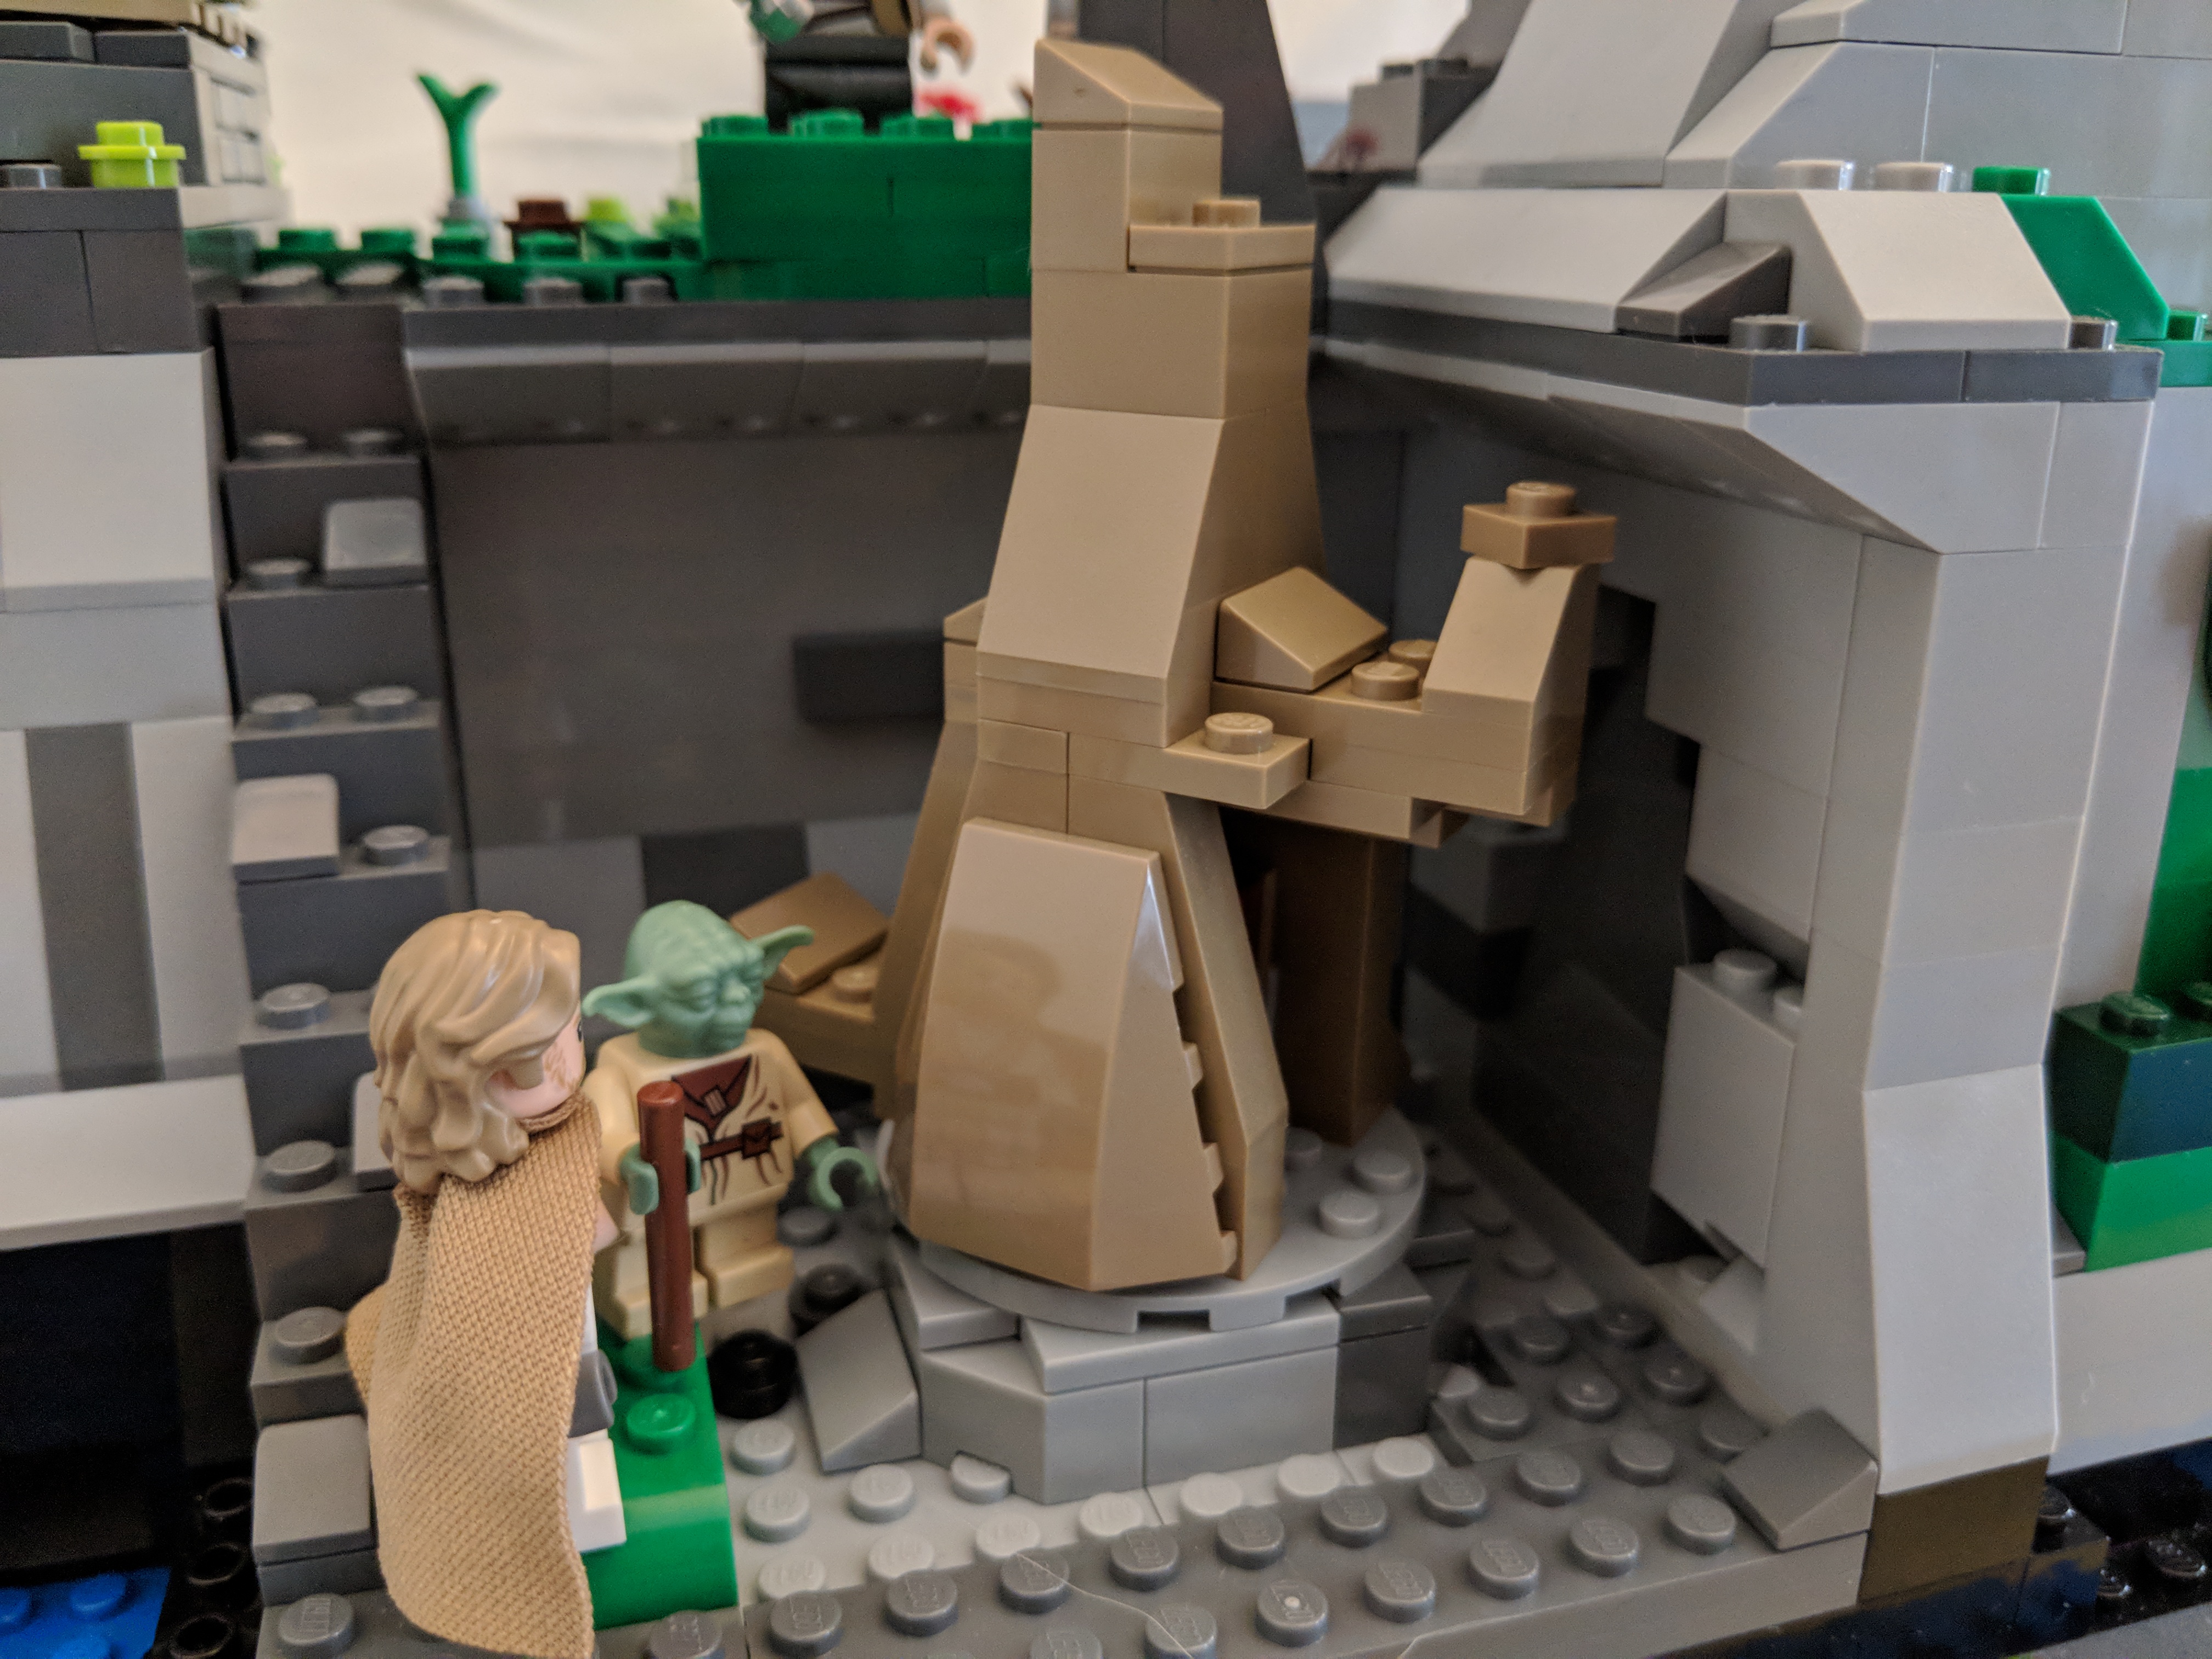
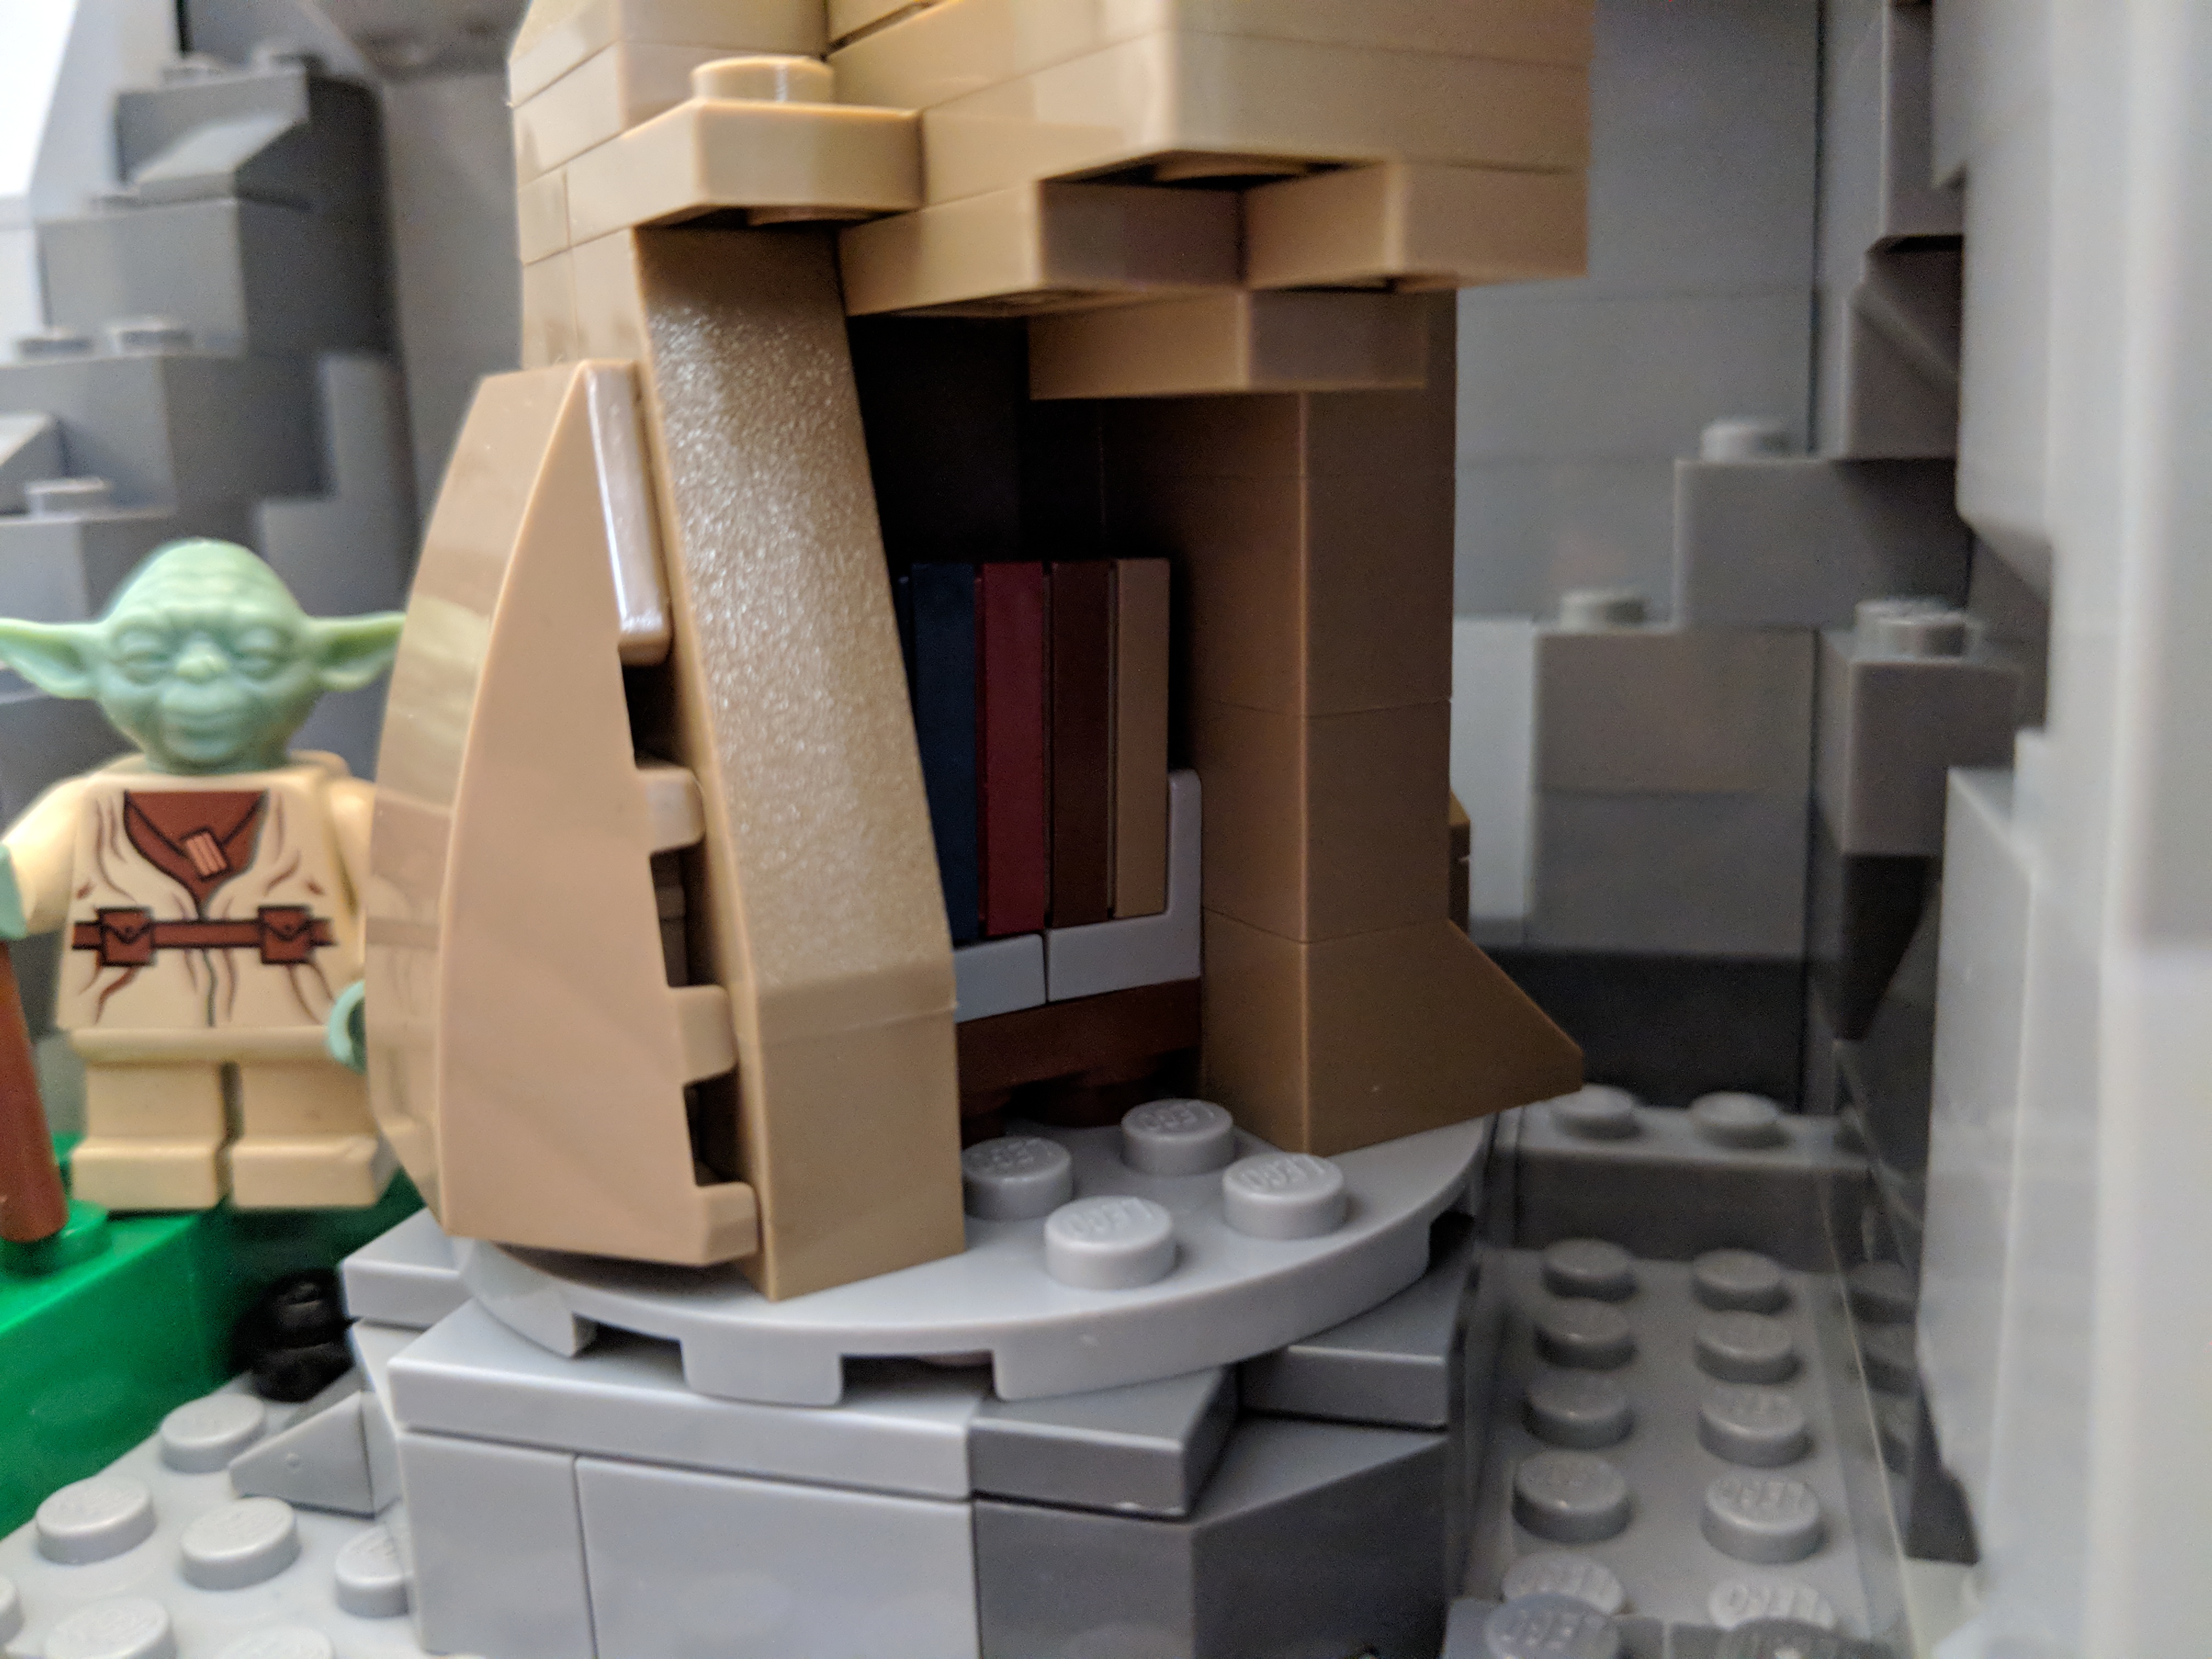
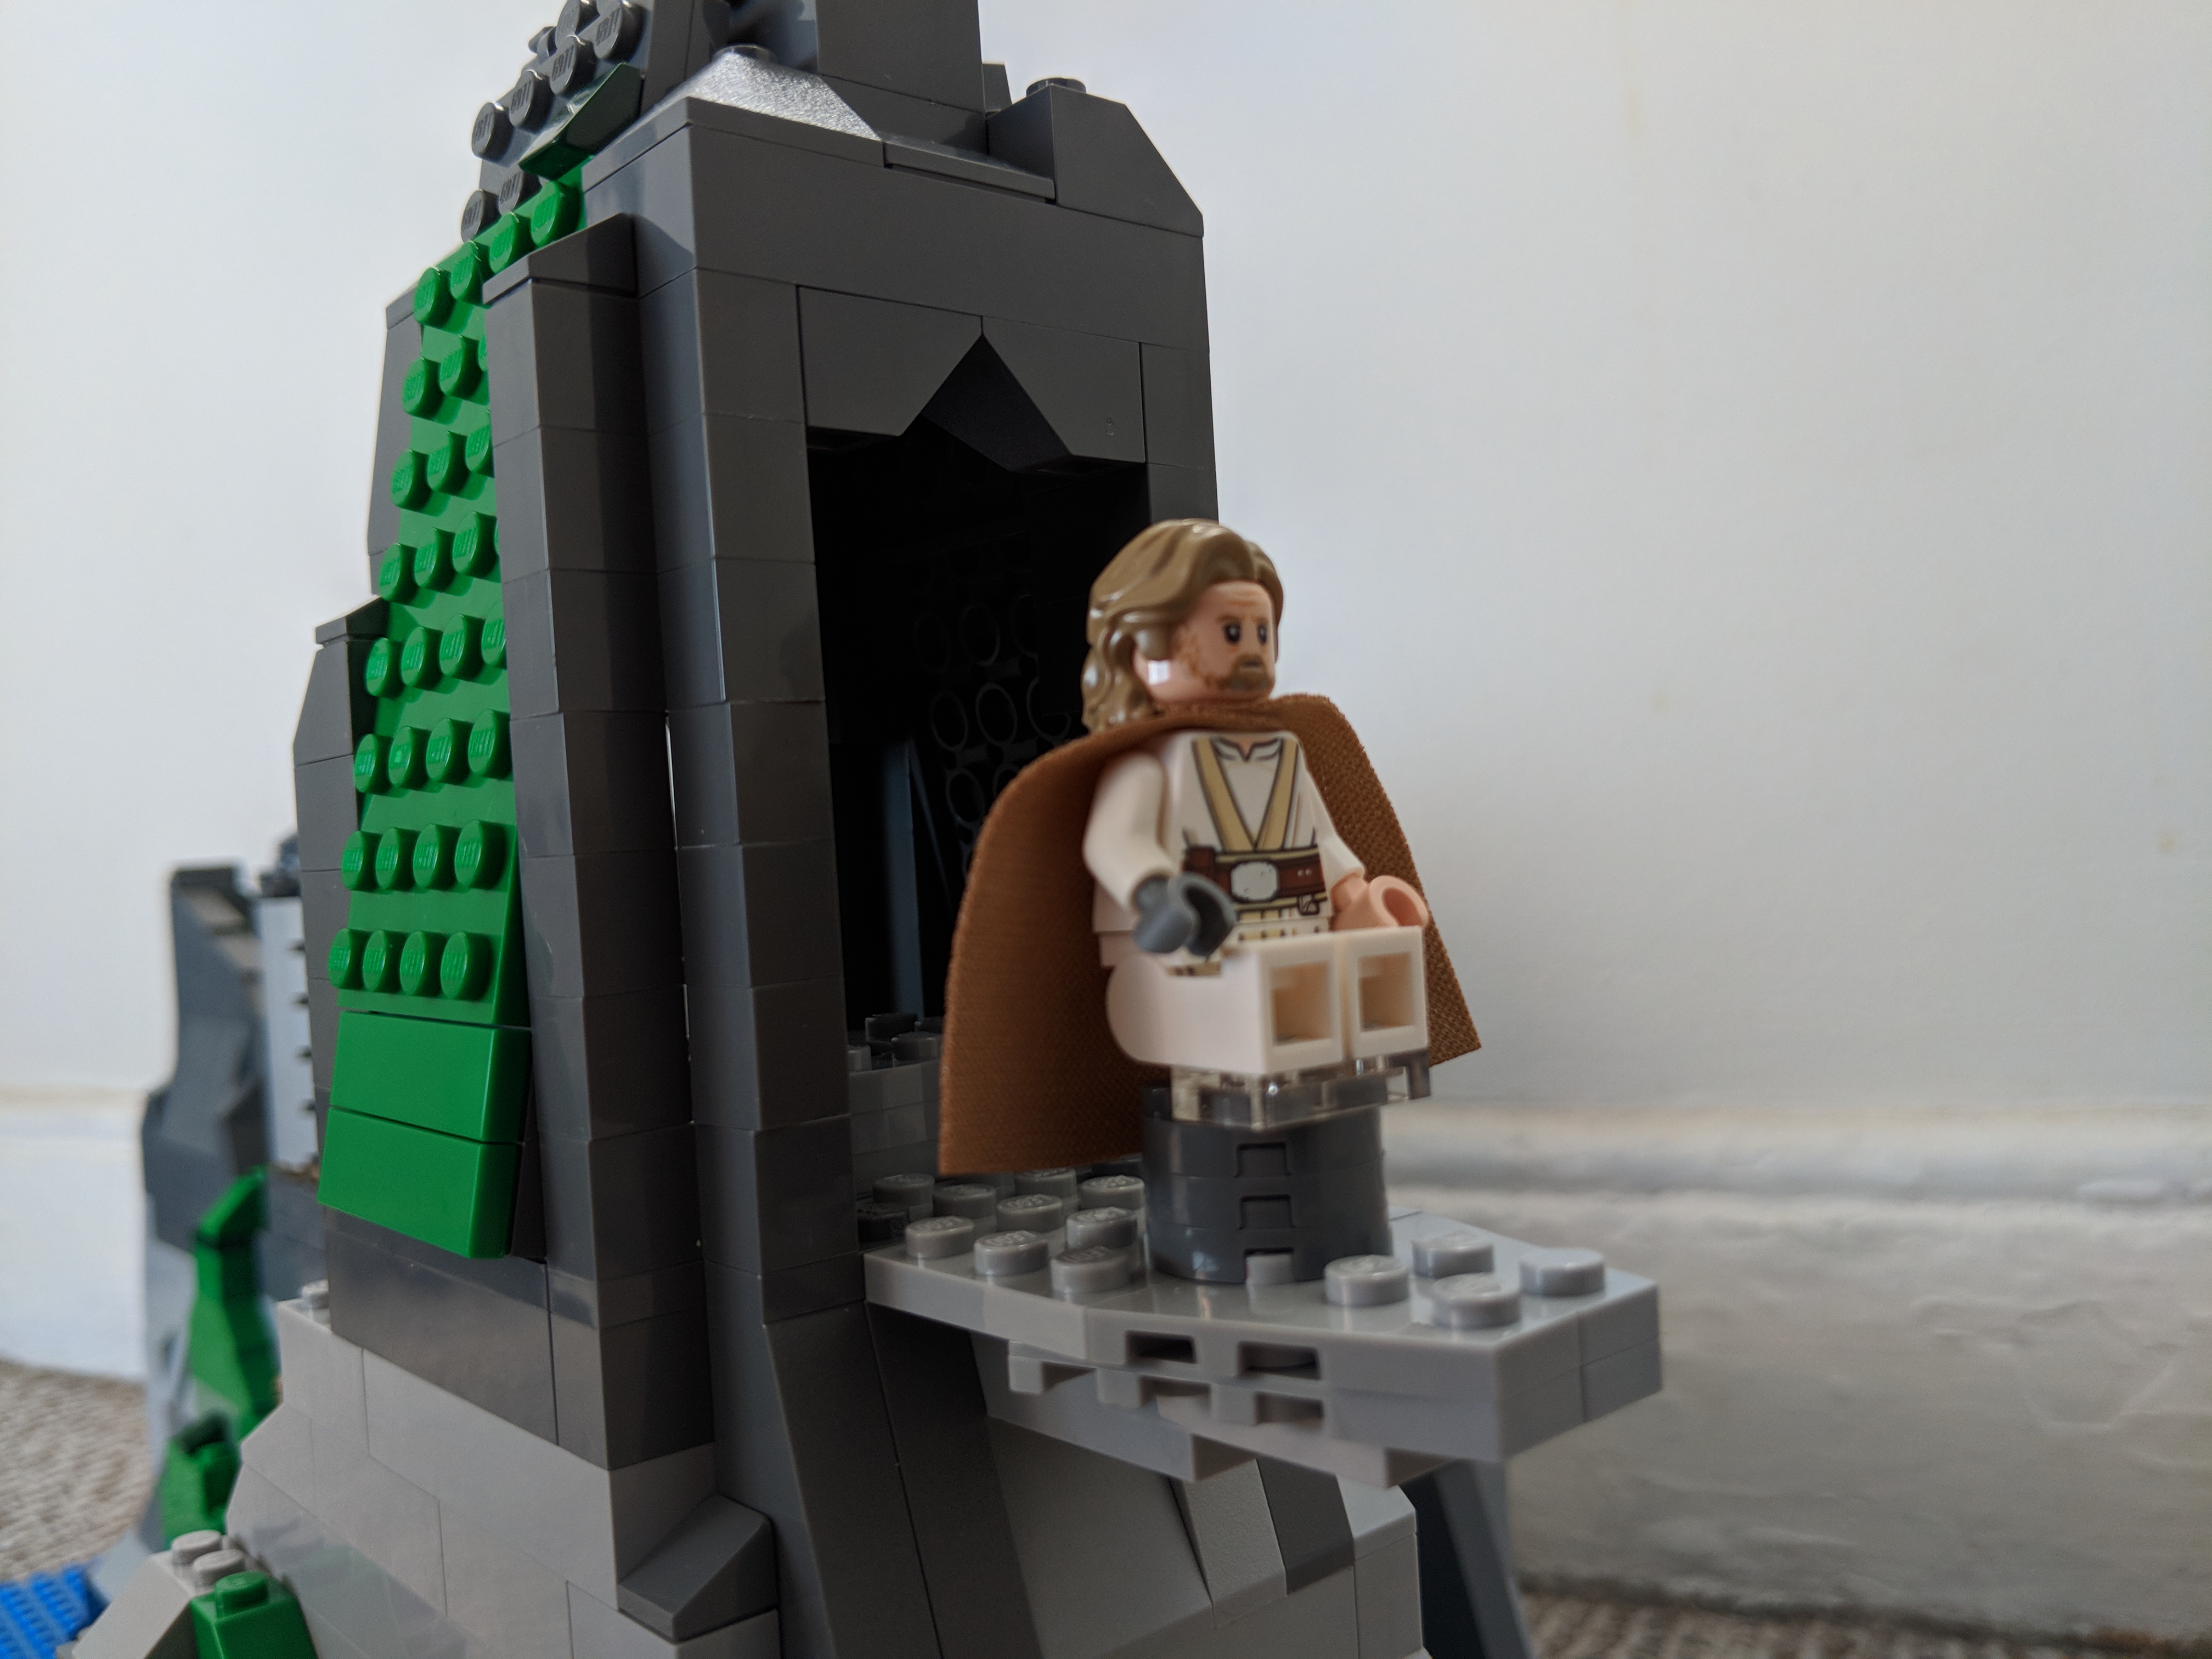
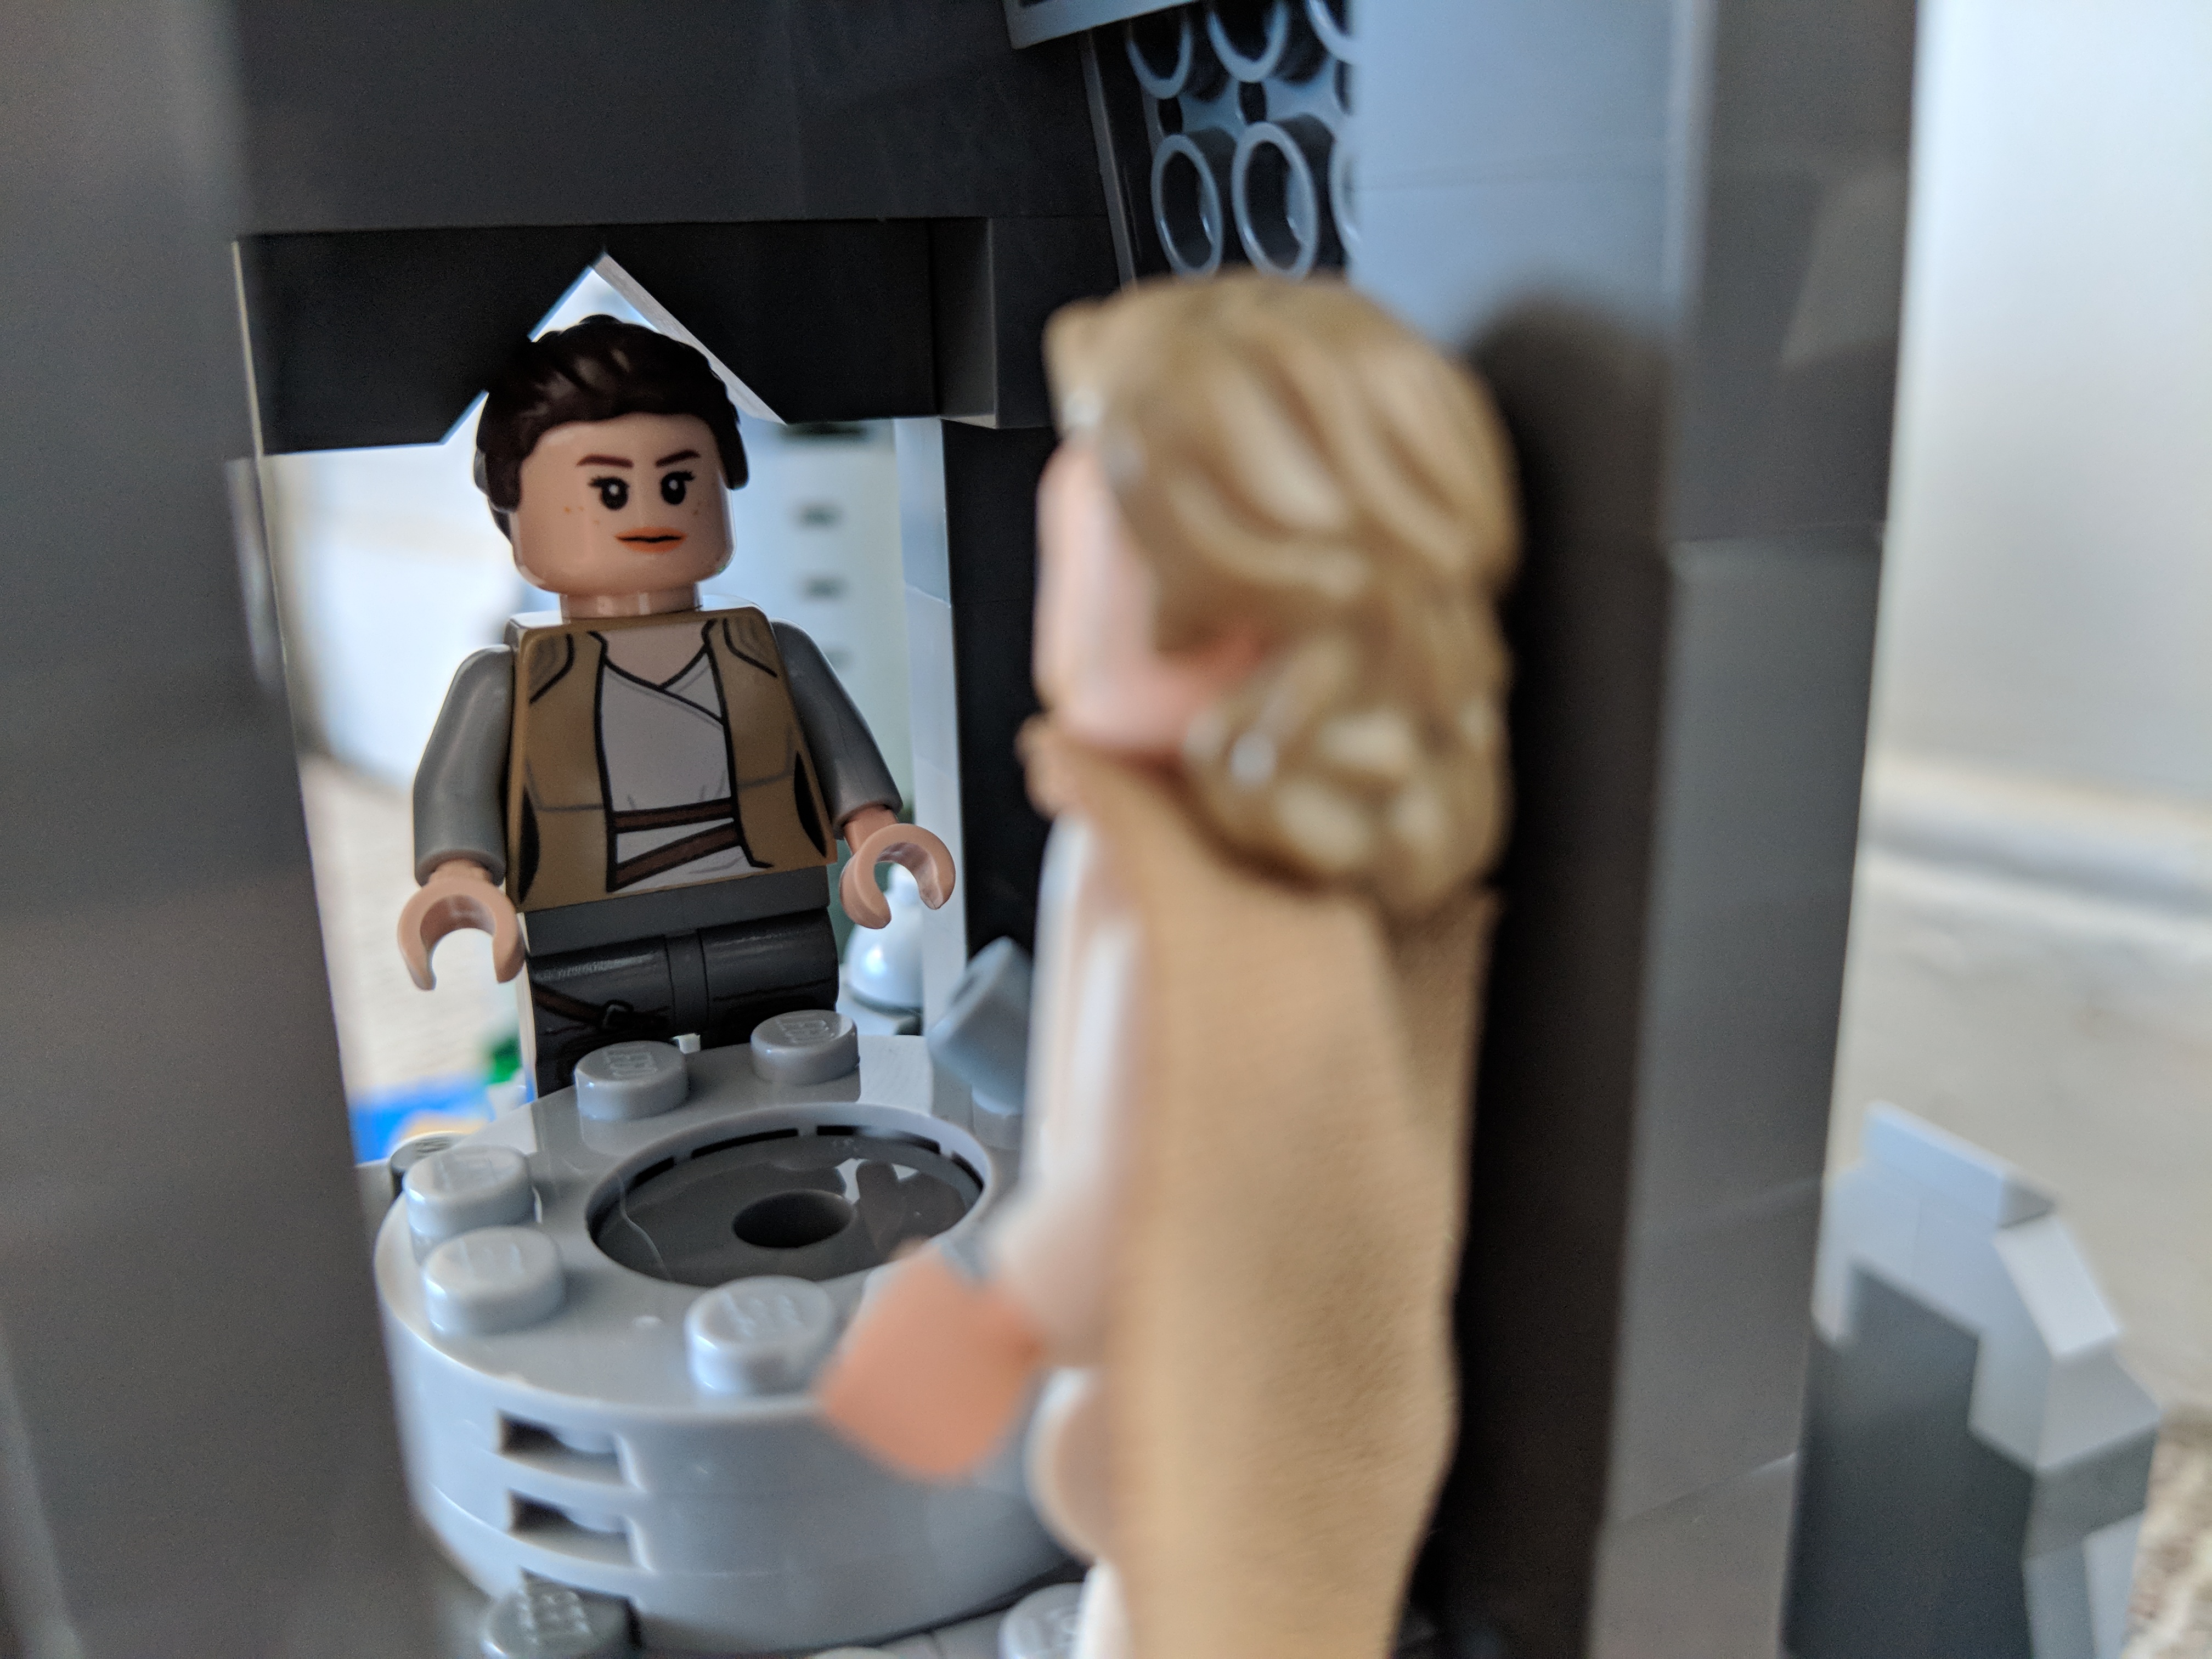
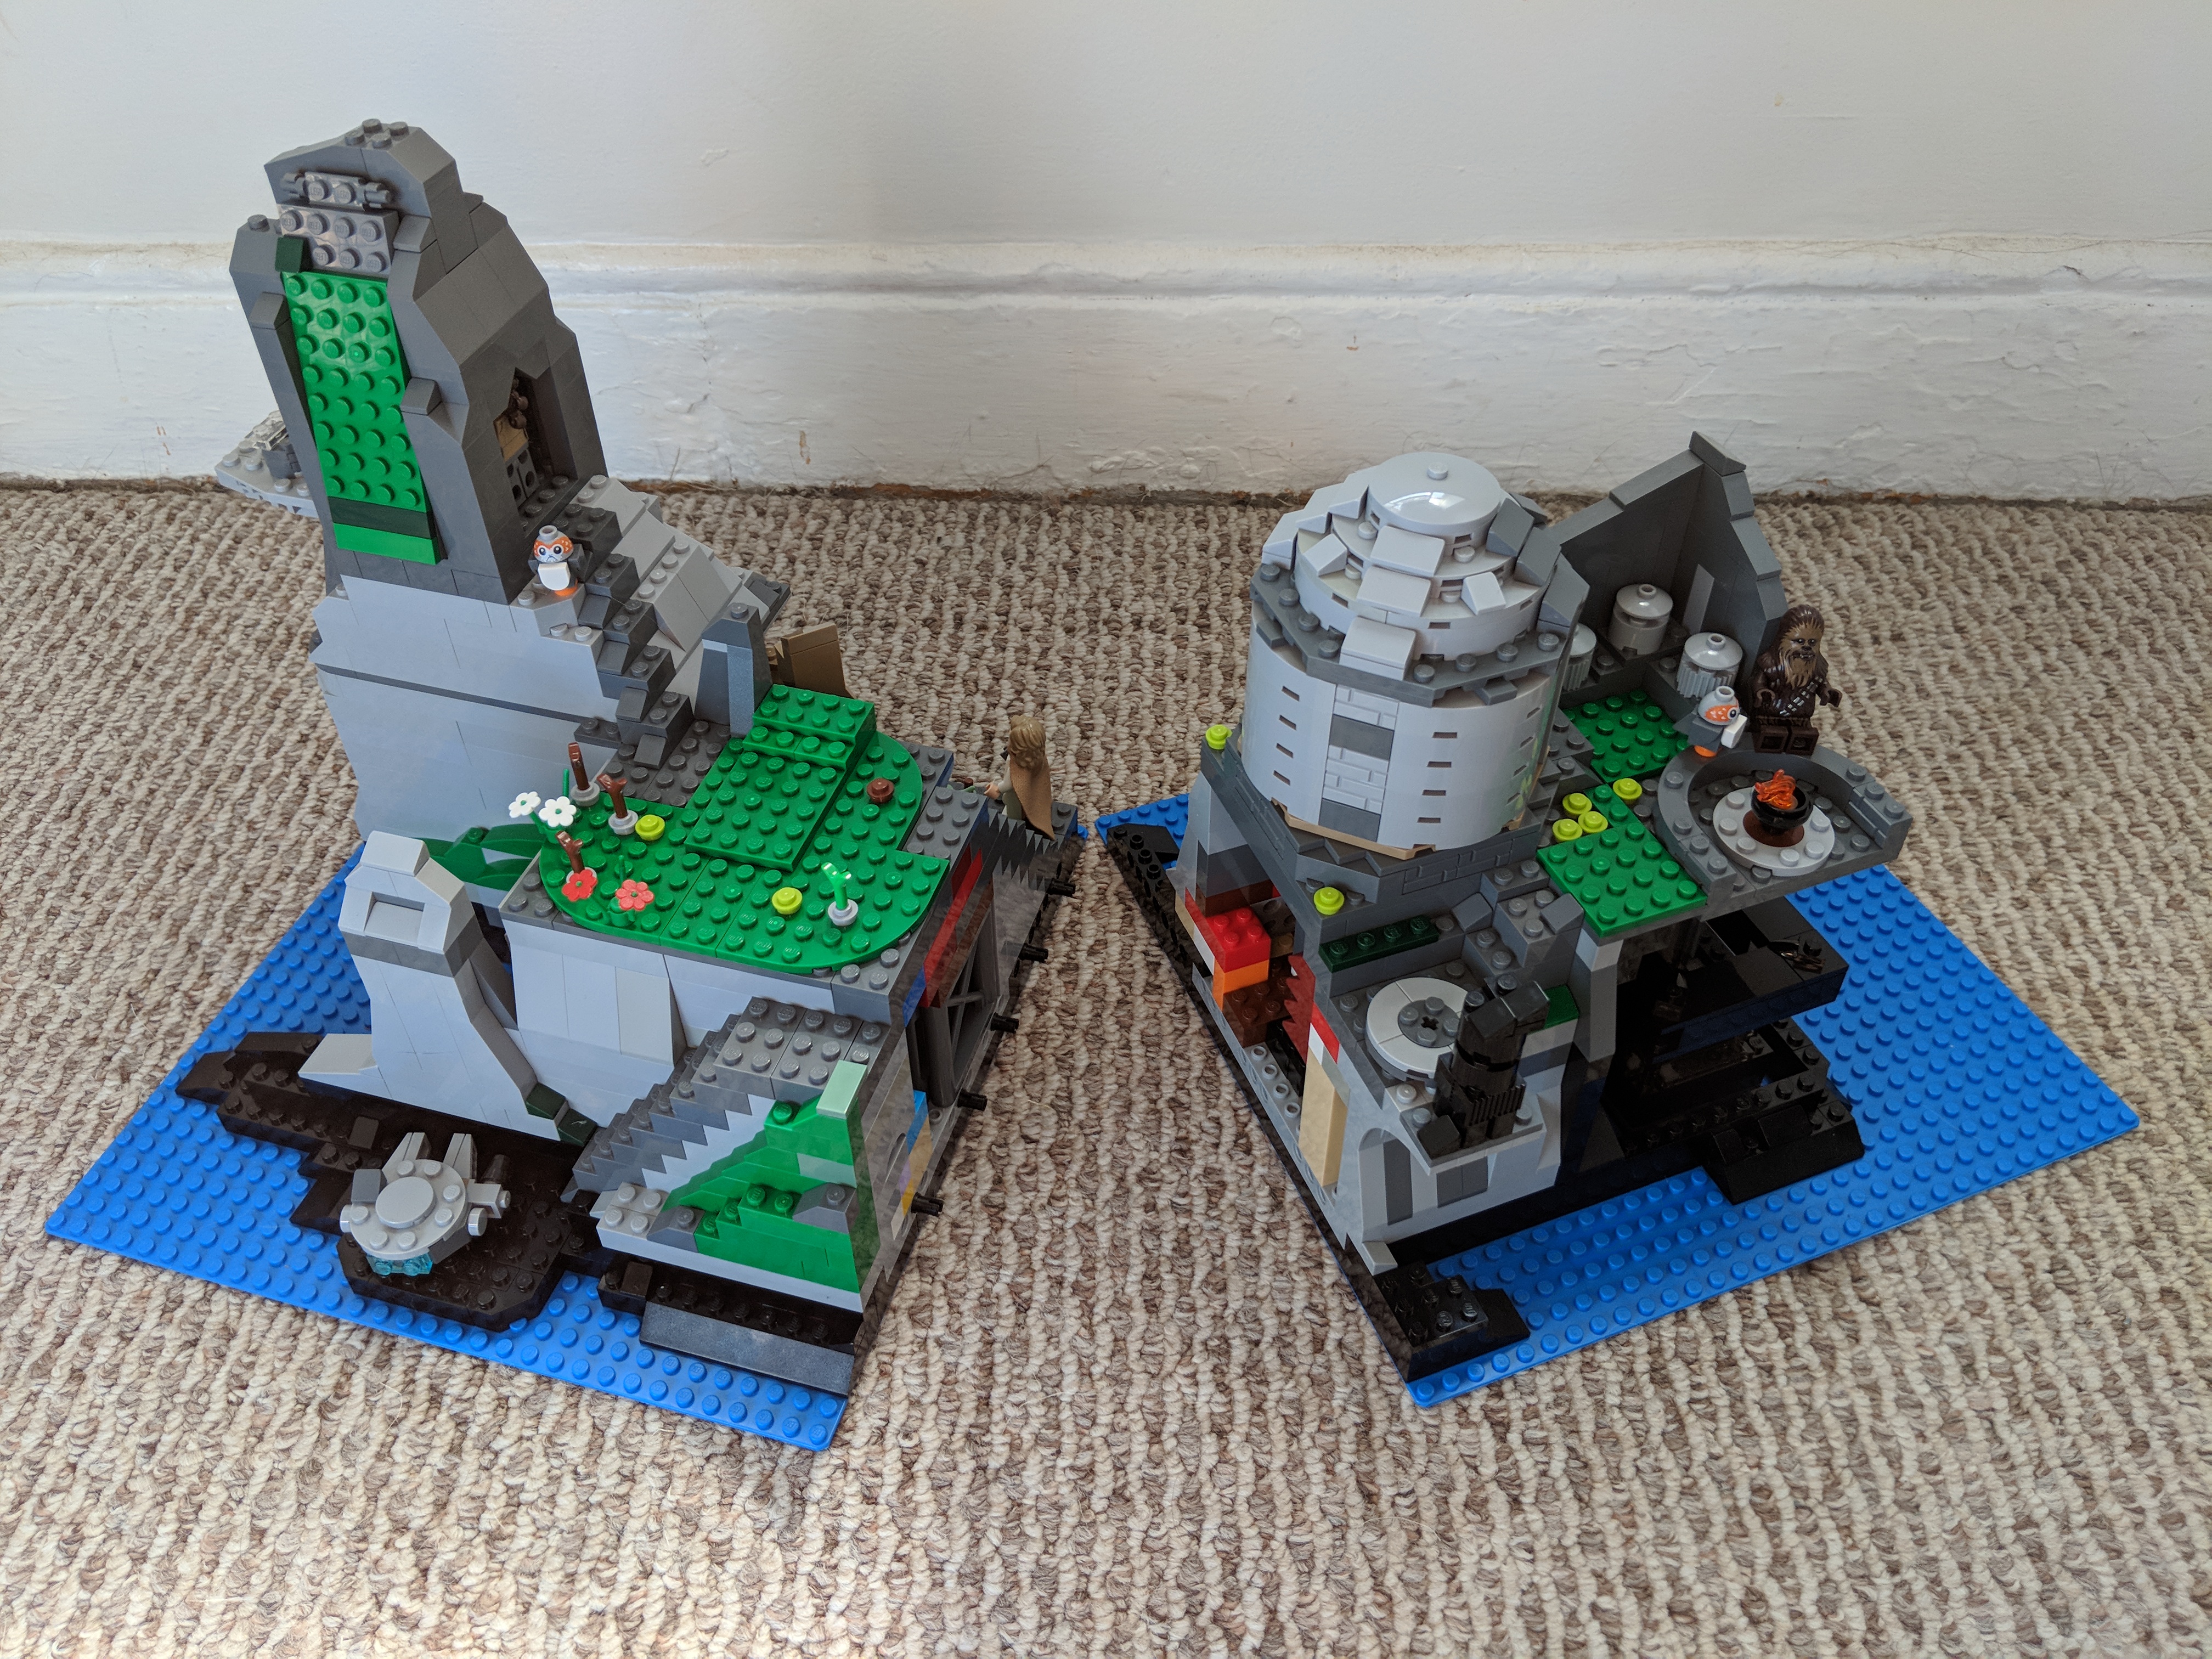
Inspired by LEGO’s Death Star playset, which is both enormous and scene-focused, I built a 64 x 32 stud MOC of Temple Island on Ahch-To from Star Wars: The Last Jedi. First glimpsed at the end of The Force Awakens and explored in the latest installment, Temple Island is the home of the first Jedi Temple, and it is where Luke Skywalker has been hiding away during the rise of the First Order under the leadership of Snoke and supported by Luke’s former pupil, Ben Solo or Kylo Ren.
As a LEGO playset, it has to balance accuracy, playability, and scale. For accuracy, I based the island’s shoreline on Ireland’s Skellig Michael, which is the location where these scenes were shot for the film. Also, the island’s topography were adhered to as closely as possible by having the north peak slightly lower than the higher south peak, and designing a middle valley between the two peaks, known as Christ’s Saddle on Skellig Michael. Each major scene involving Temple Island has been placed approximately where it would be on the island according to The Art of The Last Jedi and my observations of the film. And, each scene is scaled for play with LEGO minifigures, except where the Millennium Falcon lands along the shoreline, which would otherwise dwarf the island or require building a much larger model! For this element of the MOC, I used the Falcon included in last year’s LEGO Star Wars Advent Calendar (75184).
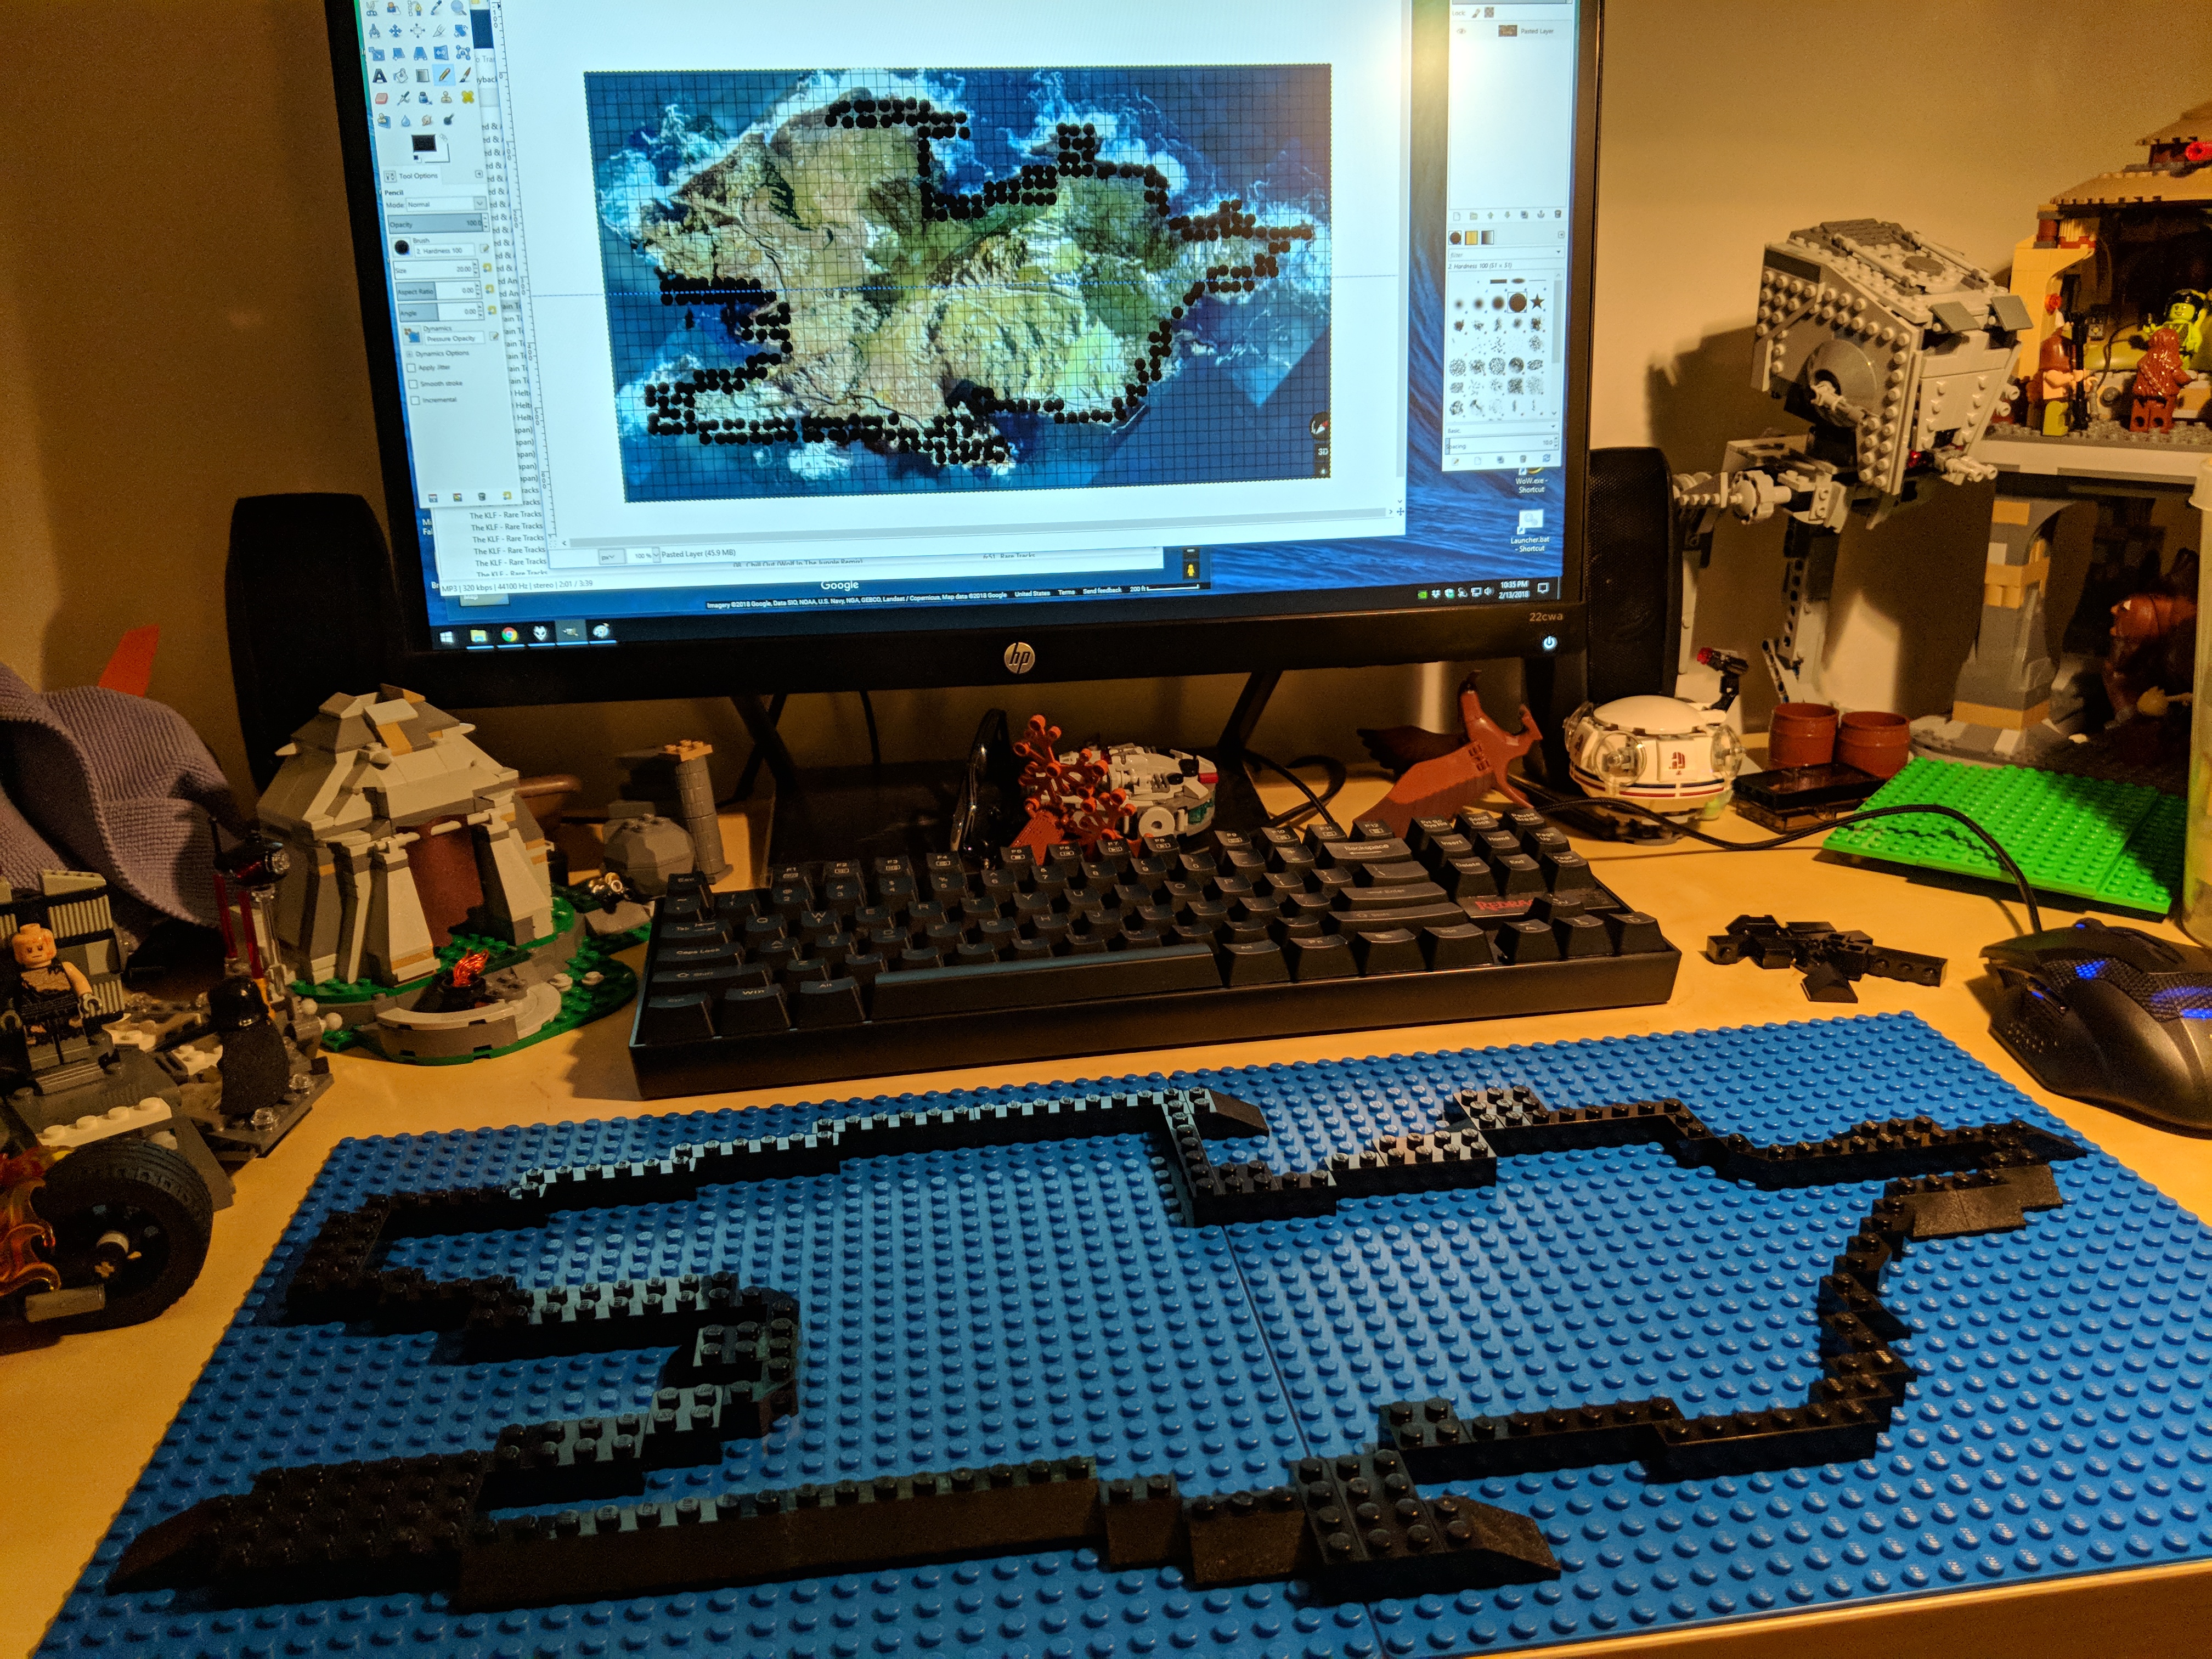
Including all prep time, this build took me about 40 hours. In addition to studying books and magazines that showed glimpses of Temple Island and its topography, I watched YouTube videos such as these: one, two, and three. I leveraged Gimp’s grid rendering to plan the overall design based on a Google Maps’ satellite image of Michael Skellig. Also, I purchased additional LEGO to supplement what I already had on-hand: two 32 x 32 stud blue base plates to construct the MOC on, one green Creative set (10708), and two LEGO Ahch-To Island Training sets (75200).
Below, I am including highlights from the construction process and the completed model. At the end, there are links to these albums with more photos of the MOC: Google Photos and Imgur.
Designing the Shoreline Using Google Maps, Gimp, and Generated Grid
Top and Side Views of Temple Island
Rey’s First Encounter with Master Skywalker
Luke Skywalker’s Hut and Village
Rey’s Lightsaber Practice (at the Wailing Woman Rock)
My cousin Ryan Cox is a longtime practitioner of a variety of martial arts including kung fu and tai chi. Ryan and his two older brothers–Ian and Jarret–grew up learning, sparring, and developing uncanny skill in hand-to-hand combat and weapons sparring. While Ryan and his brothers have developed rhizomic networks to enhance their abilities and pass on what they have learned to others, Ryan has went the most far afield when he traveled to Wudang Mountain to train with the kung fu monks who reside there.
Photo courtesy of Ryan Cox.
When we were younger, I remember myself being the one drawn to the Star Wars mythos more than anyone else in my family, but now Ryan tells me that he was always interested in the Jedi, their mystique, and their lightsabers. In more recent years, he has learned a lot of the backstory of the Star Wars universe from books and video games. His knowledge in those realms far outstrips my own.
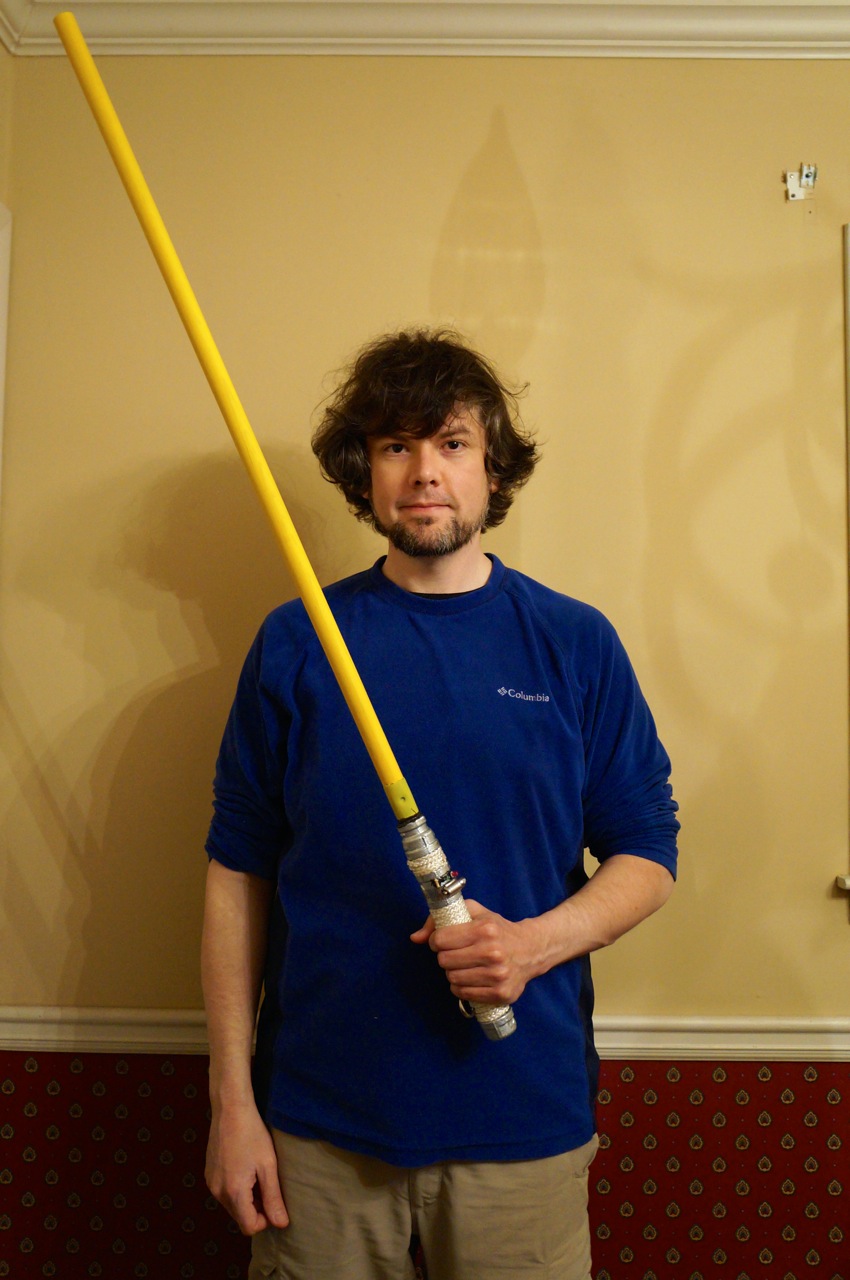
So, I was intrigued when he began talking with me about building his own lightsaber for demonstrating his swordmanship and possibly sparring if the “blade” were strong enough to withstand strikes. The guide that follows illustrates the first lightsaber that I built for Ryan in the fashion of General Rahm Kota’s. I used off-the-shelf parts easily obtained at Home Depot or any hardware store. Since I built this lightsaber, Ryan has modified it more, and I have built two lightsabers for myself–one that resembles Luke Skywalker’s Return of the Jedi lightsaber and one that resembles Darth Maul’s The Phantom Menace double bladed lightsaber. This guide focuses on Ryan’s “Mark I” lightsaber.
Pedagogically, I promote the idea that haptics, building, and making are integral parts to any kind of education. We are embodied beings who do things physically in the world–whether it be in real life or online. I enjoy building things in my own time as another way to think about things–in this case, Star Wars, science fiction, Jedi mythos, world building, canon vs. noncanon, and design considerations: rhetoric of technology, aesthetics, practicality, etc. In Ryan’s case, haptics, proprioception, and movement are integral to his learning and lived experience. I am looking forward to learning from him with this artifact that I designed and built. The modes are the same–physicality, materiality, and haptics–but our efforts converge from different directions for a kind of haptic, learning synergy.
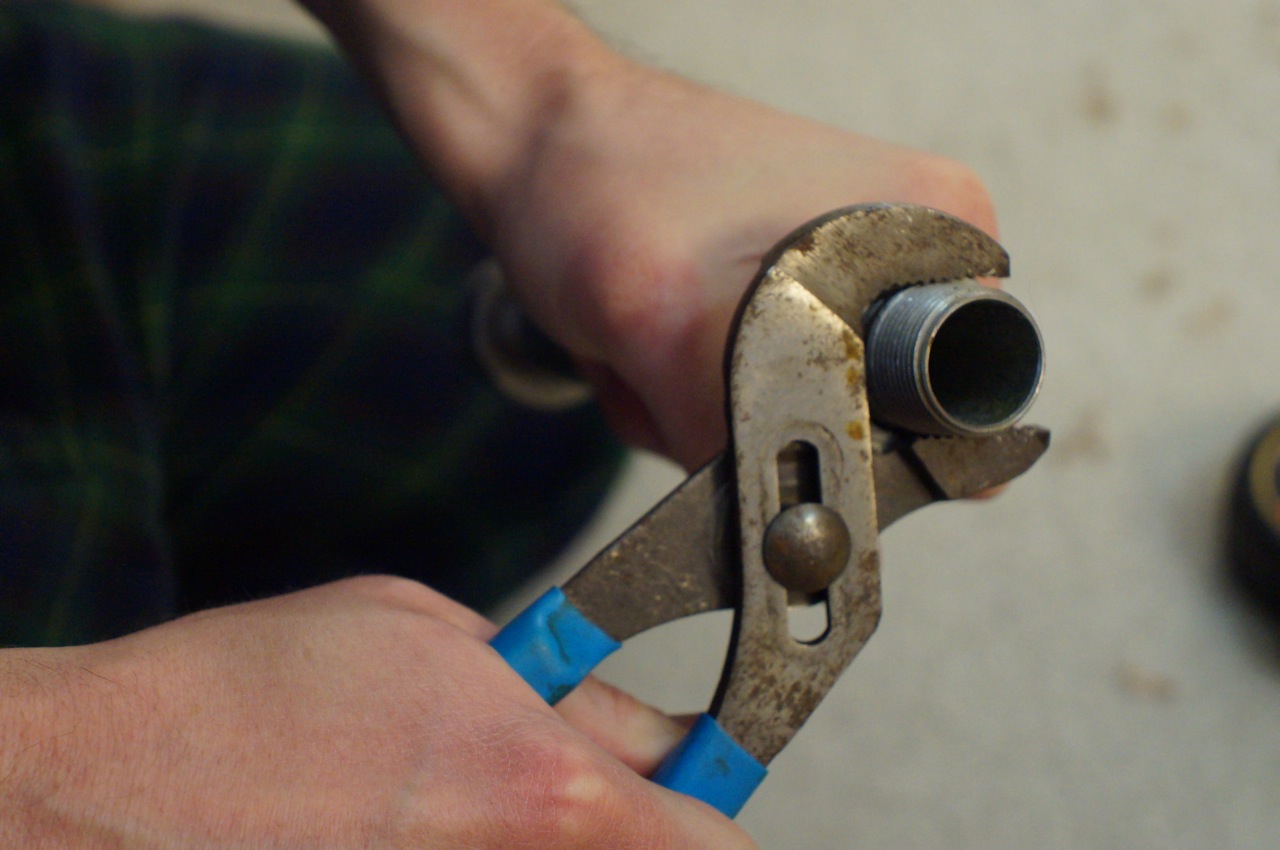
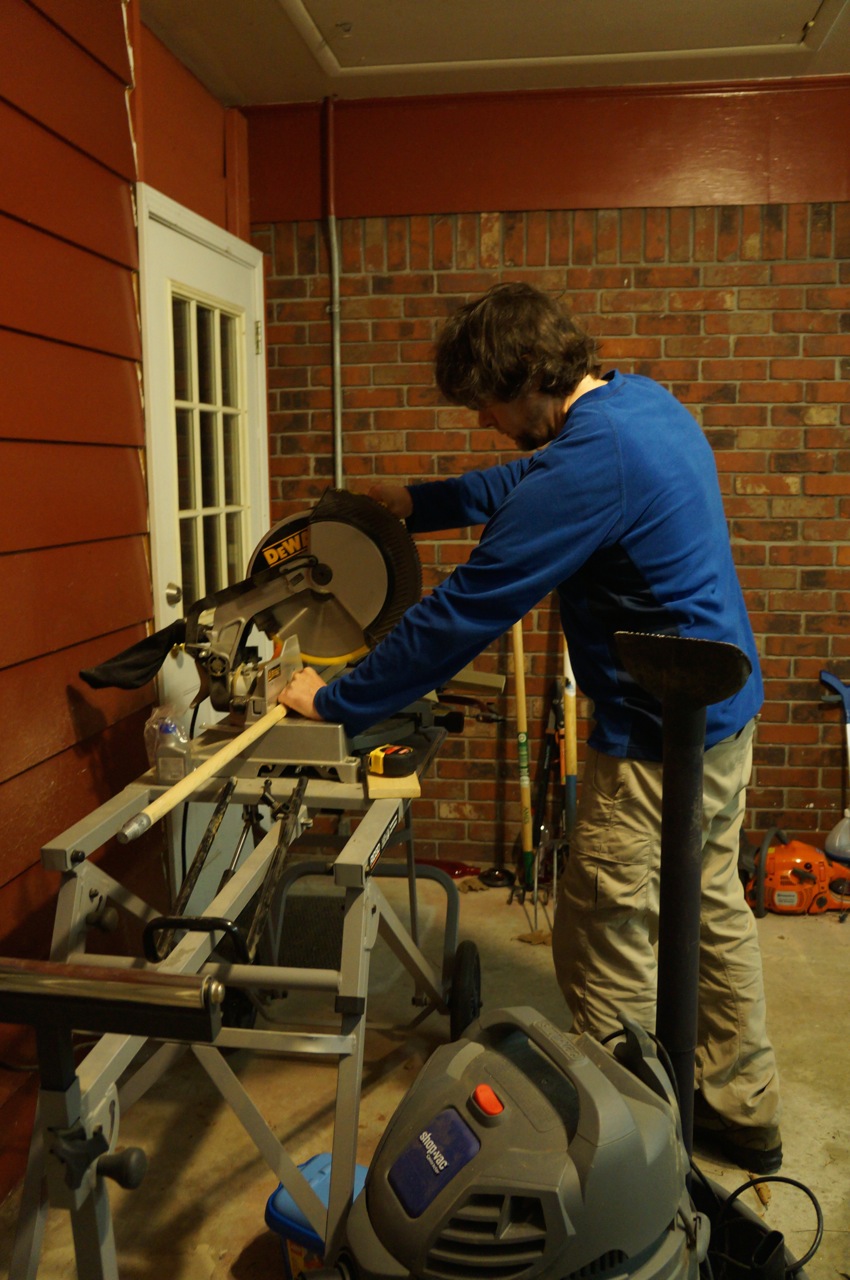
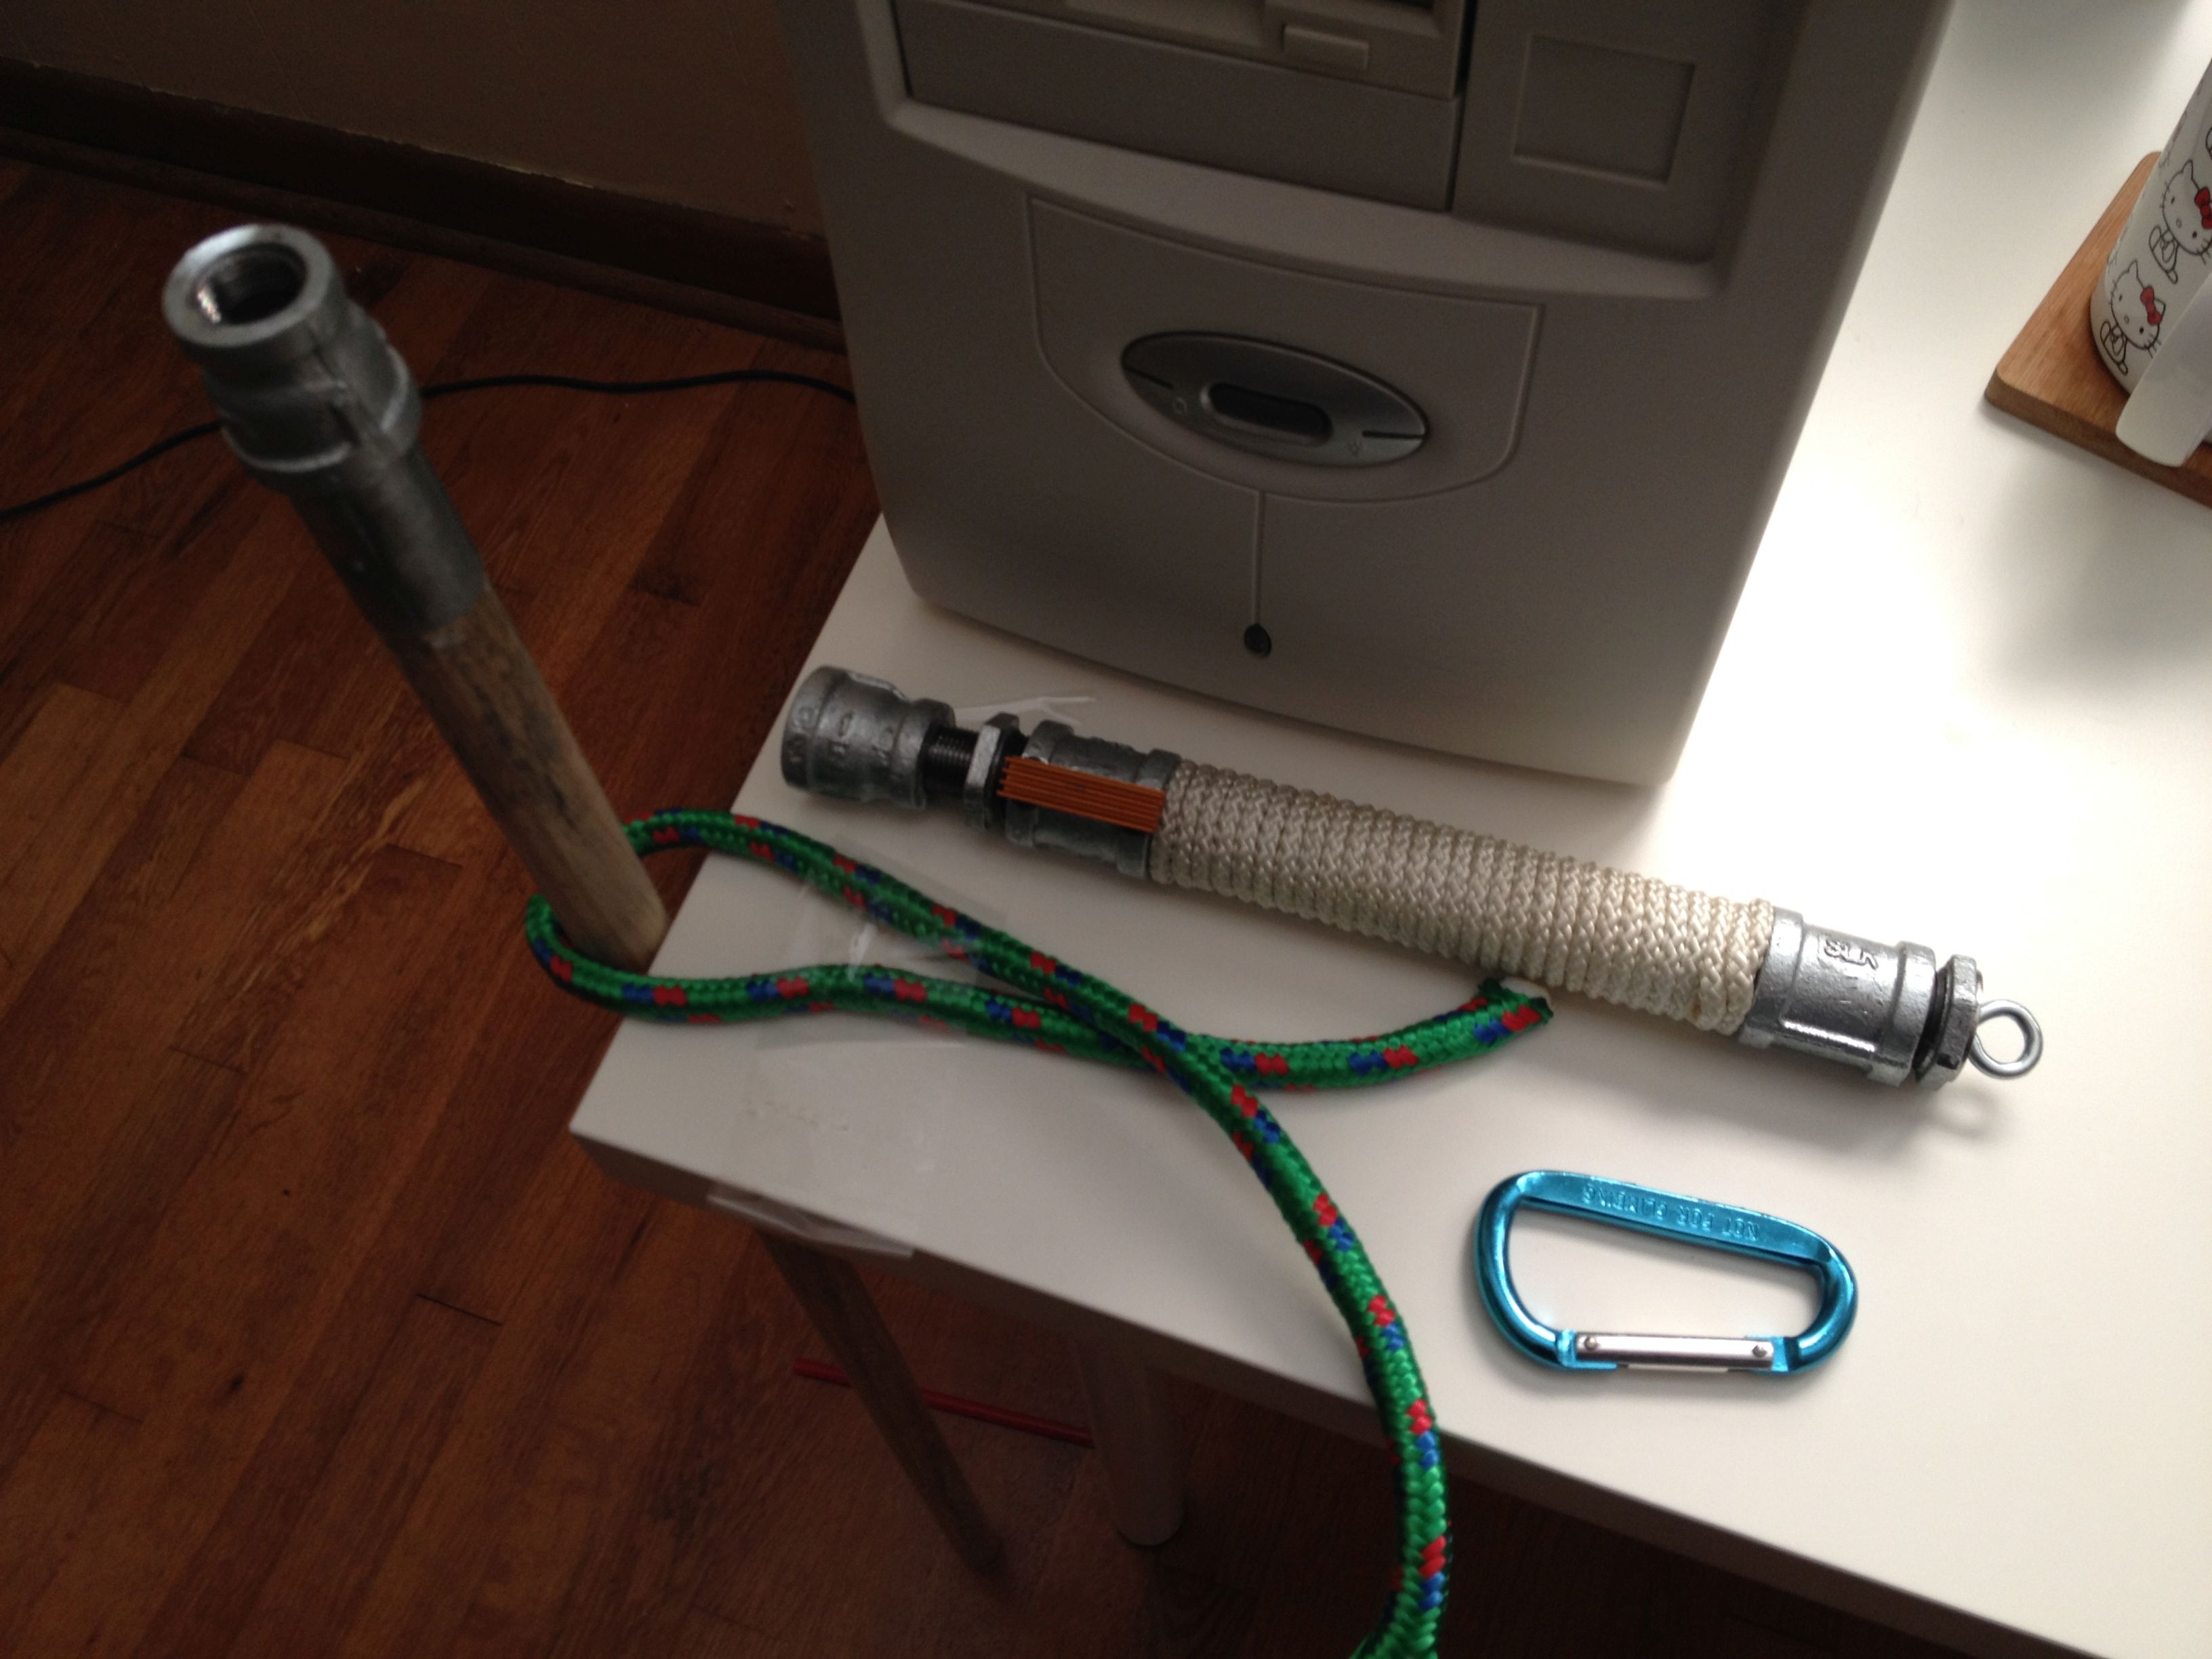
I began the project by assembling the parts that I needed for creating the lightsaber’s hilt and belt clip. I carried an image of Rahm Kota’s lightsaber on my iPhone and went to the plumbing aisle of my local Home Depot.
These parts included:
6″ x 3/4″ galvanized steel pipe
3/4″ coupling
Two 3/4″ to 1/2″ coupling (one for display and one for sparring with permanently installed “blade”–these two couplings are interchangeable)
“Close” 3/4″ pipe (approximately 1 1/2″ long)
3/4″ cap
D-ring
Carabiner
Hose clamps
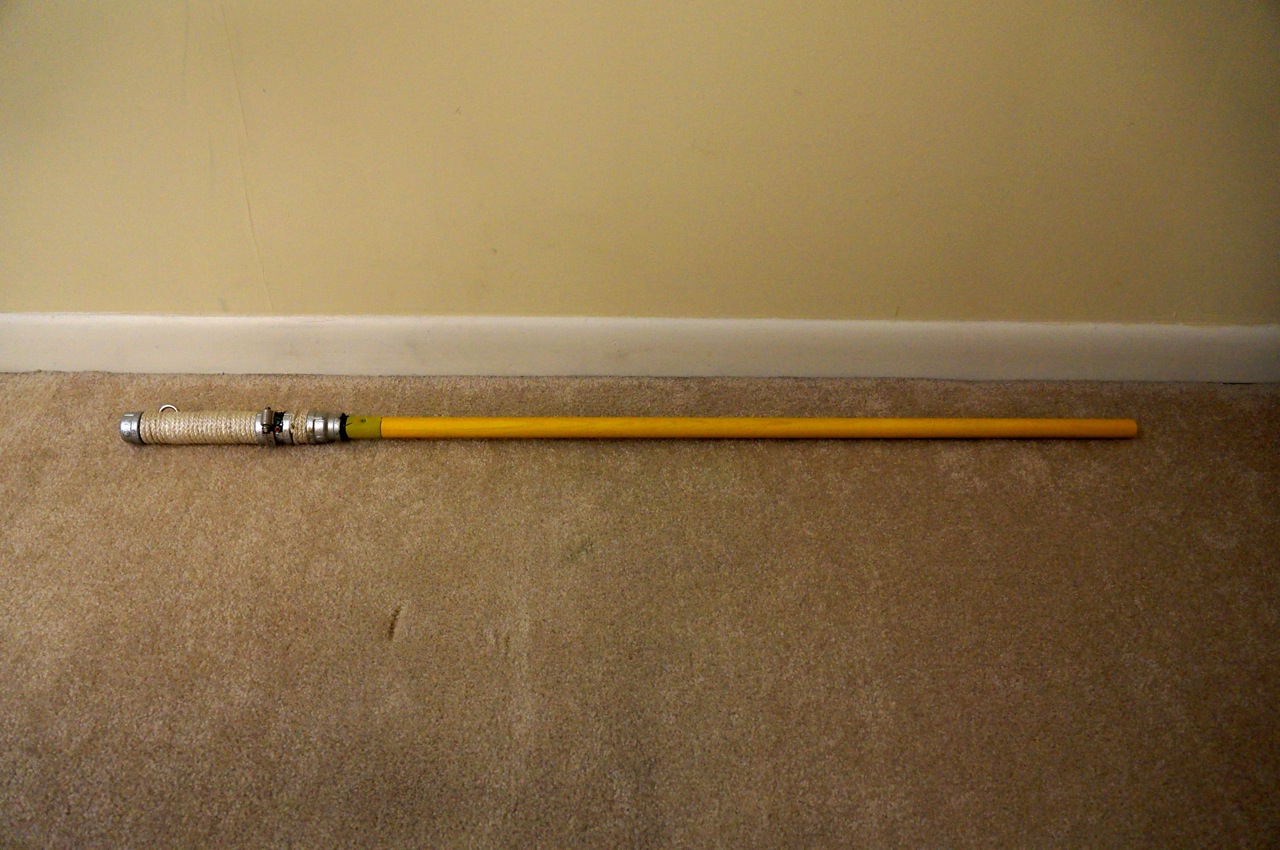
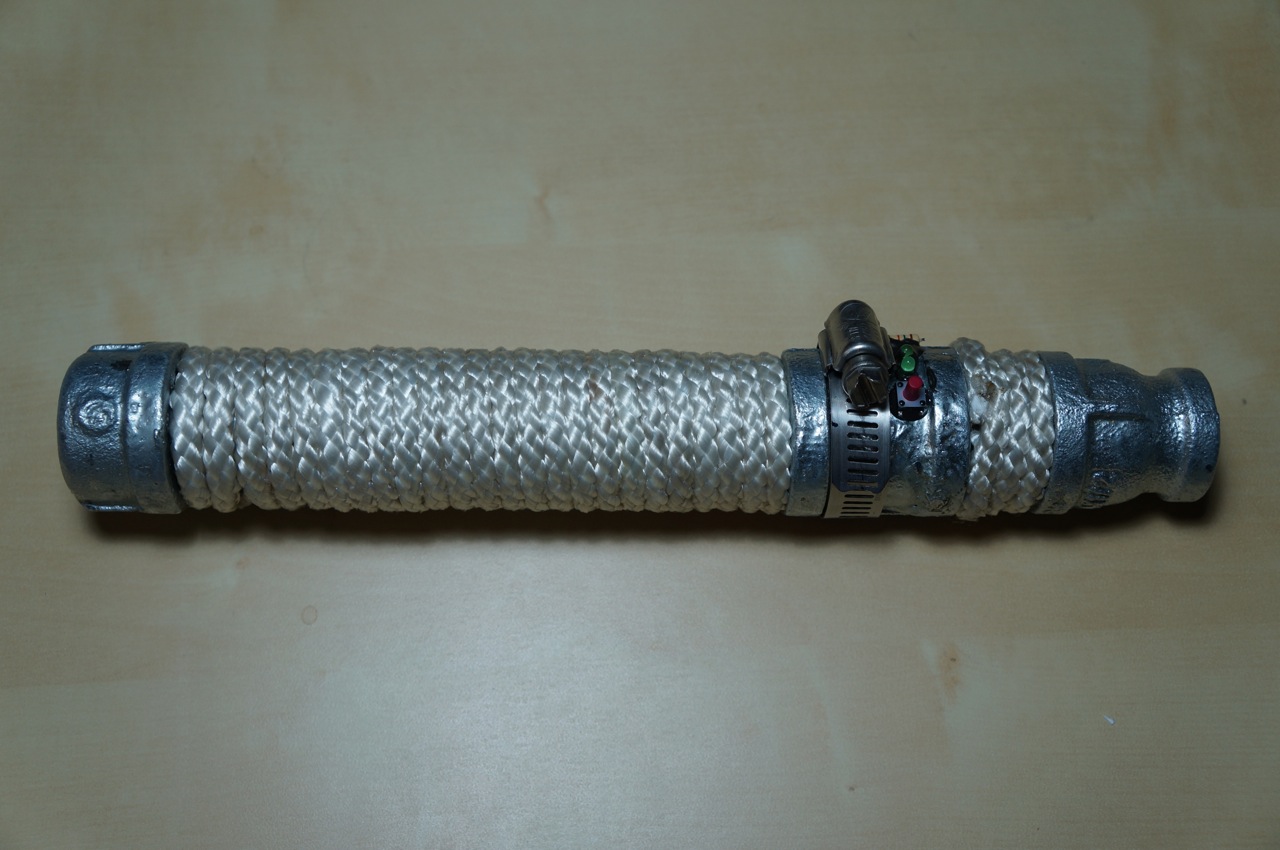
Roughly, these parts are assembled to create the lightsaber:
Other parts that I used for this build include:
1/4″ white nylon rope (grip wrap)
36″ x 1/2″ oak dowel rod (scrapped due to paint problem)
48″ x 1/2″ paint brush rod (cut to 36″ and replaced the oak dowel rod)
Doorbell button assembly (for parts)
80mm computer case fan (for electromagnet assembly)
JB Weld
Rustoleum Florescent Yellow Paint
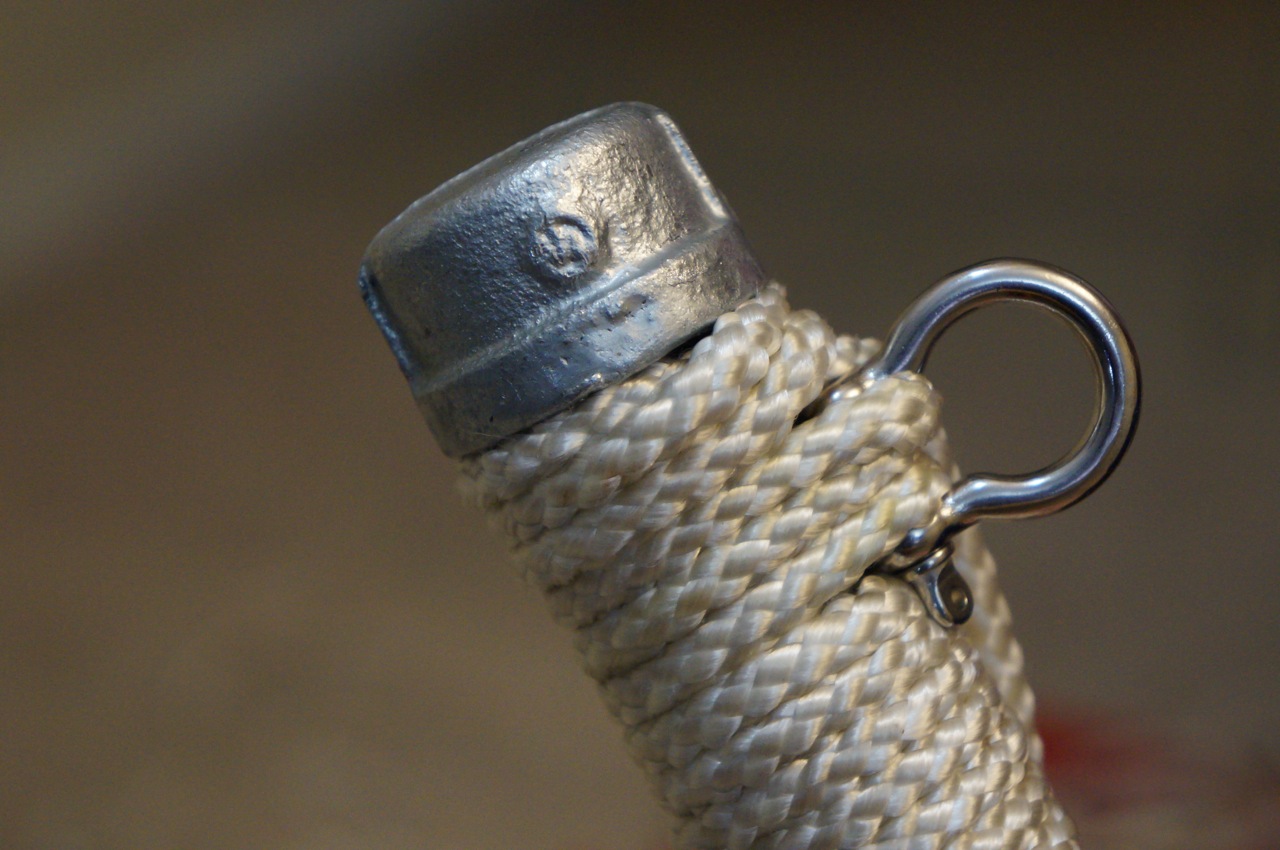
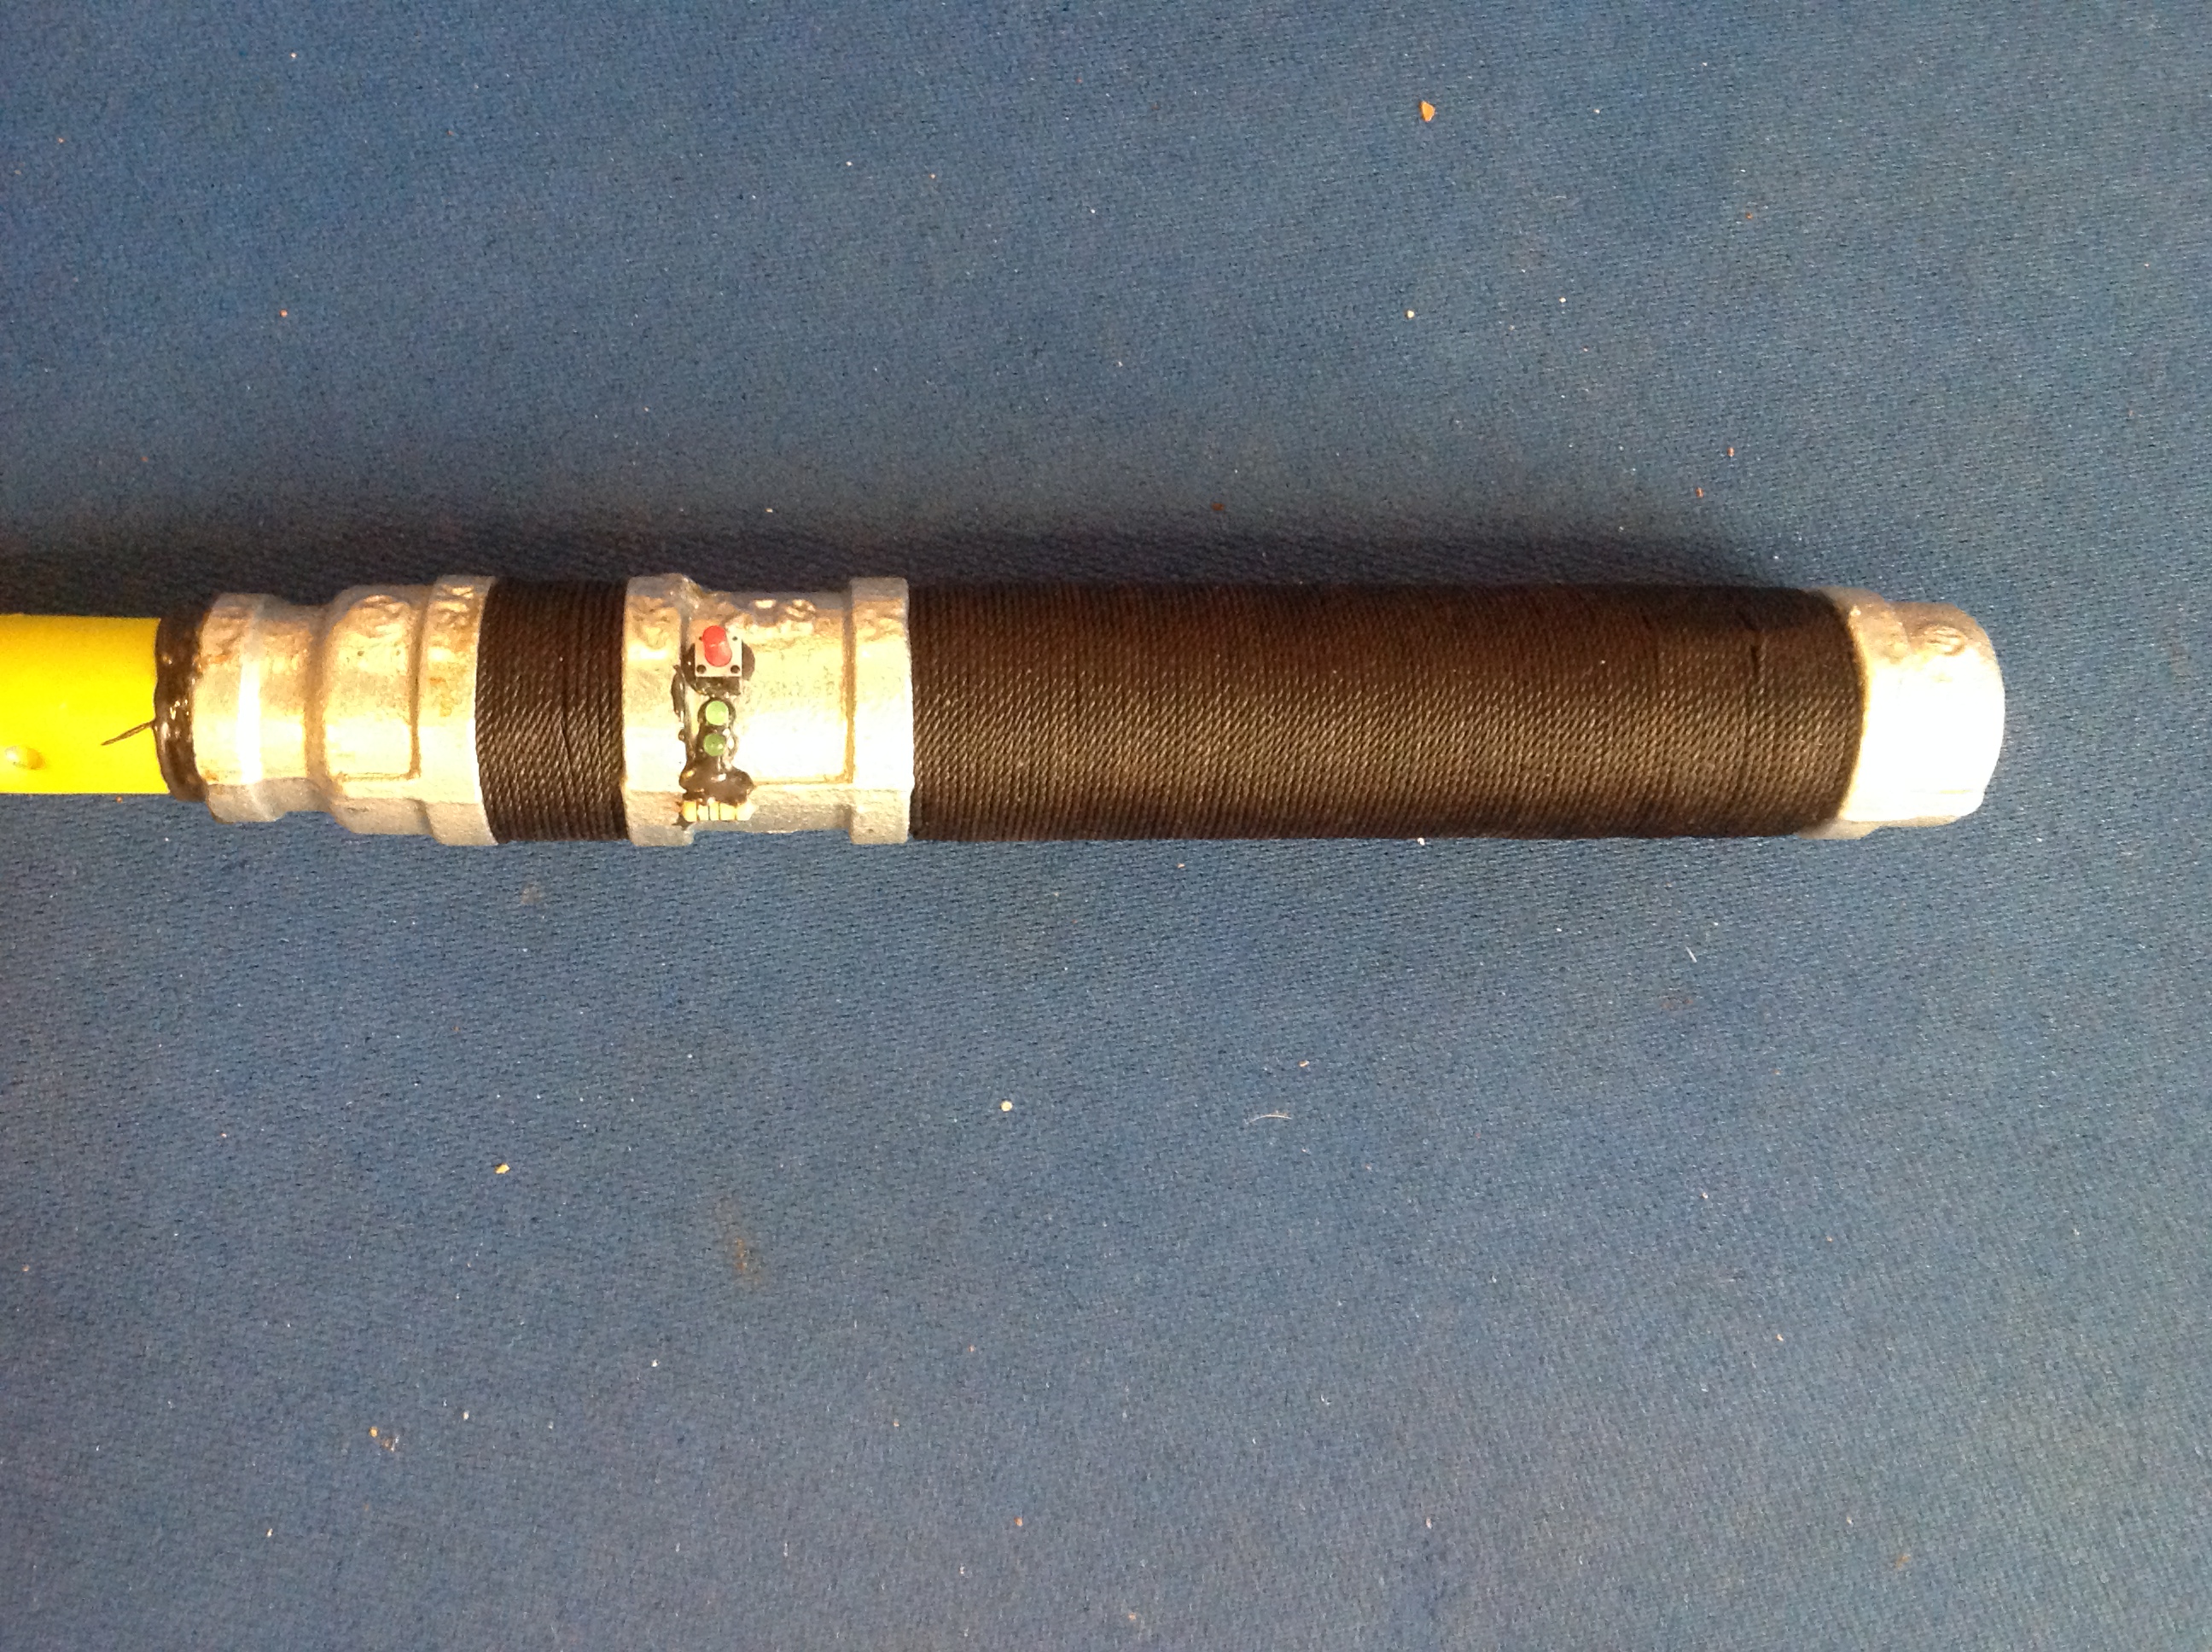
To create the lightsaber’s handle, I screwed all of the handle components together except for the 3/4″ to 1/2″ coupling like this: 3/4″ cap | 6″ x 3/4″ pipe | 3/4″ to 3/4″ coupling | 3/4″ close pipe.
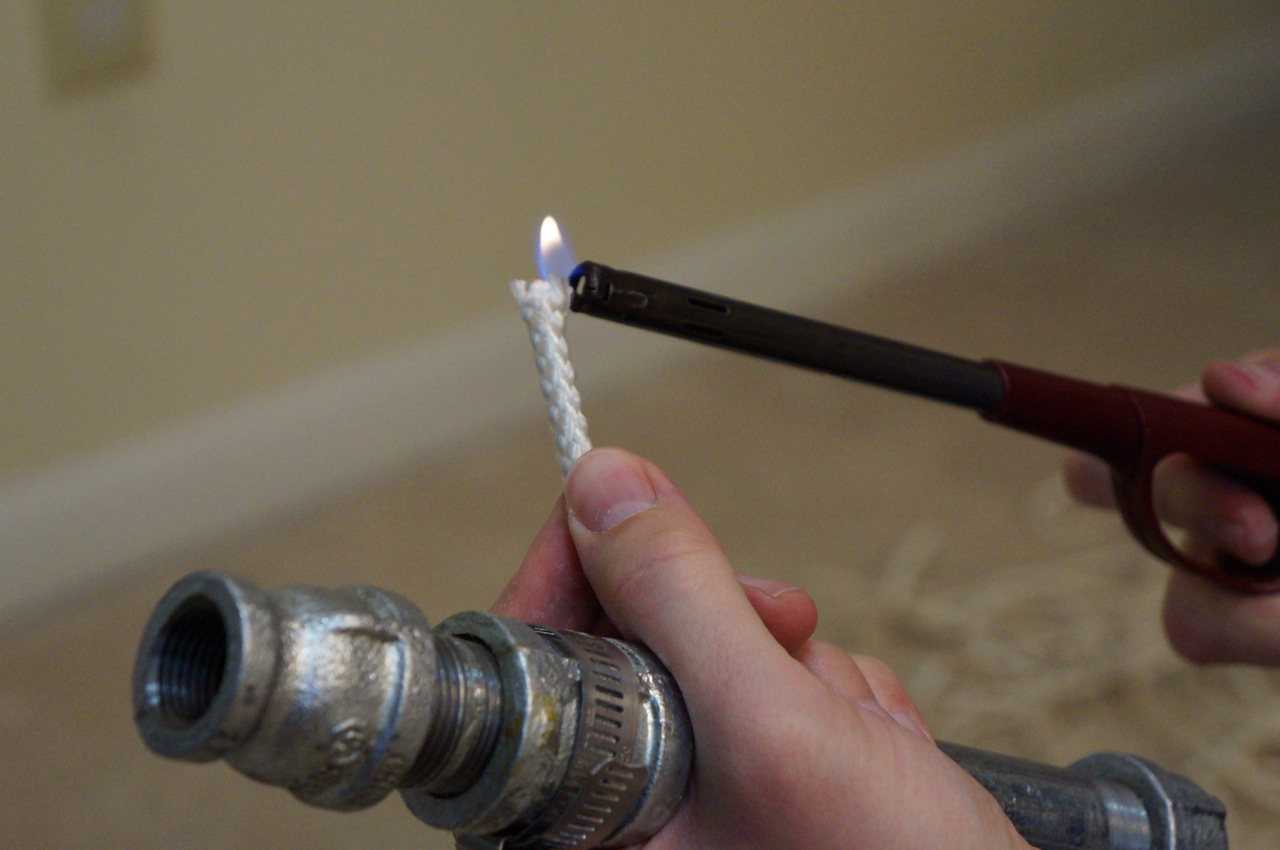
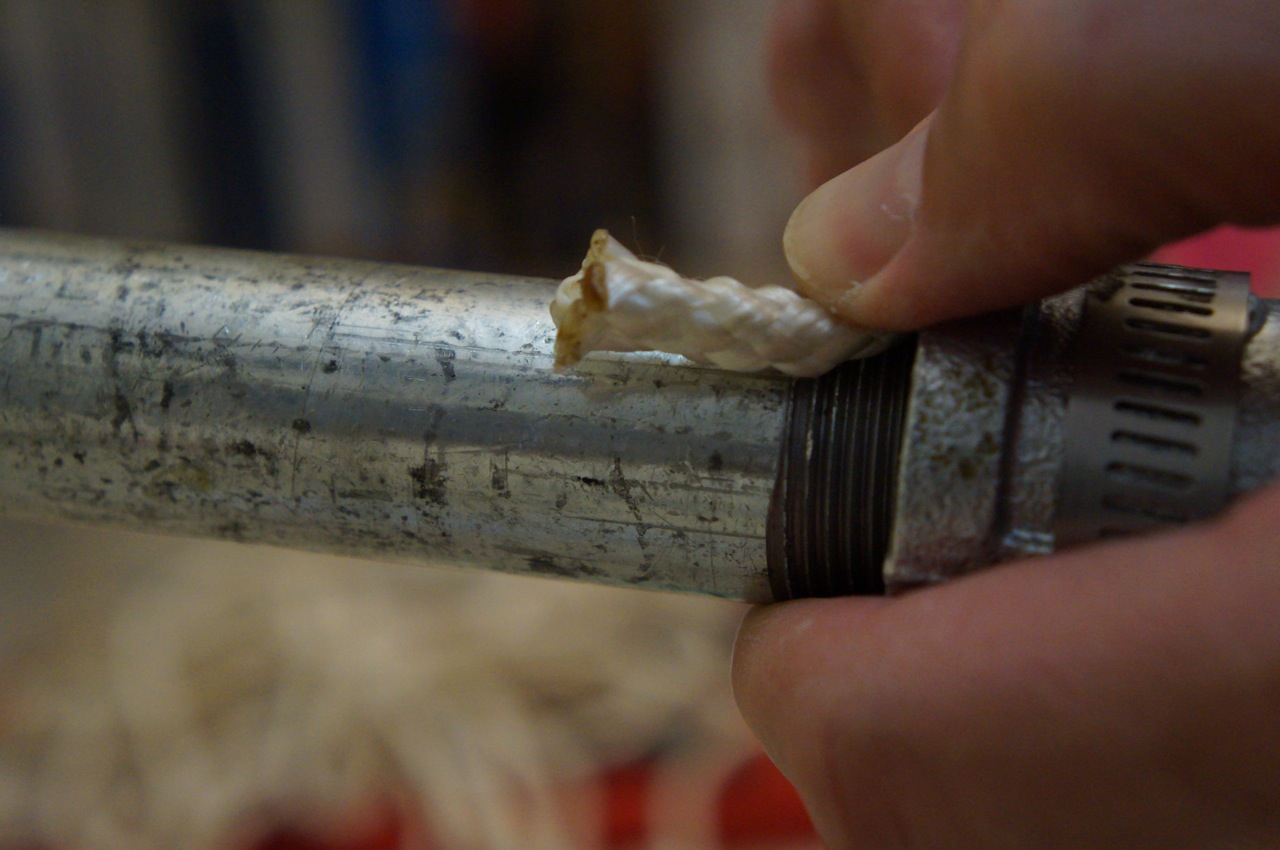
Then, I prepared the nylon rope to create the grip on the two pipe sections (6″ pipe and close pipe) by burning frayed ends to melt the nylon.
Beginning at the business-end of the lightsaber, I tucked a small piece of rope under the first wrap against the 3/4″ coupling to hold the rope in place and prevent unraveling.
At the top end, close to where the 3/4″ to 1/2″ coupling (or lightsaber emitter/business end), I created a loop with the rope under the last wrap, which I ran the last wrap through and pulled into the wrap, which hid the end of the rope under the wrap.
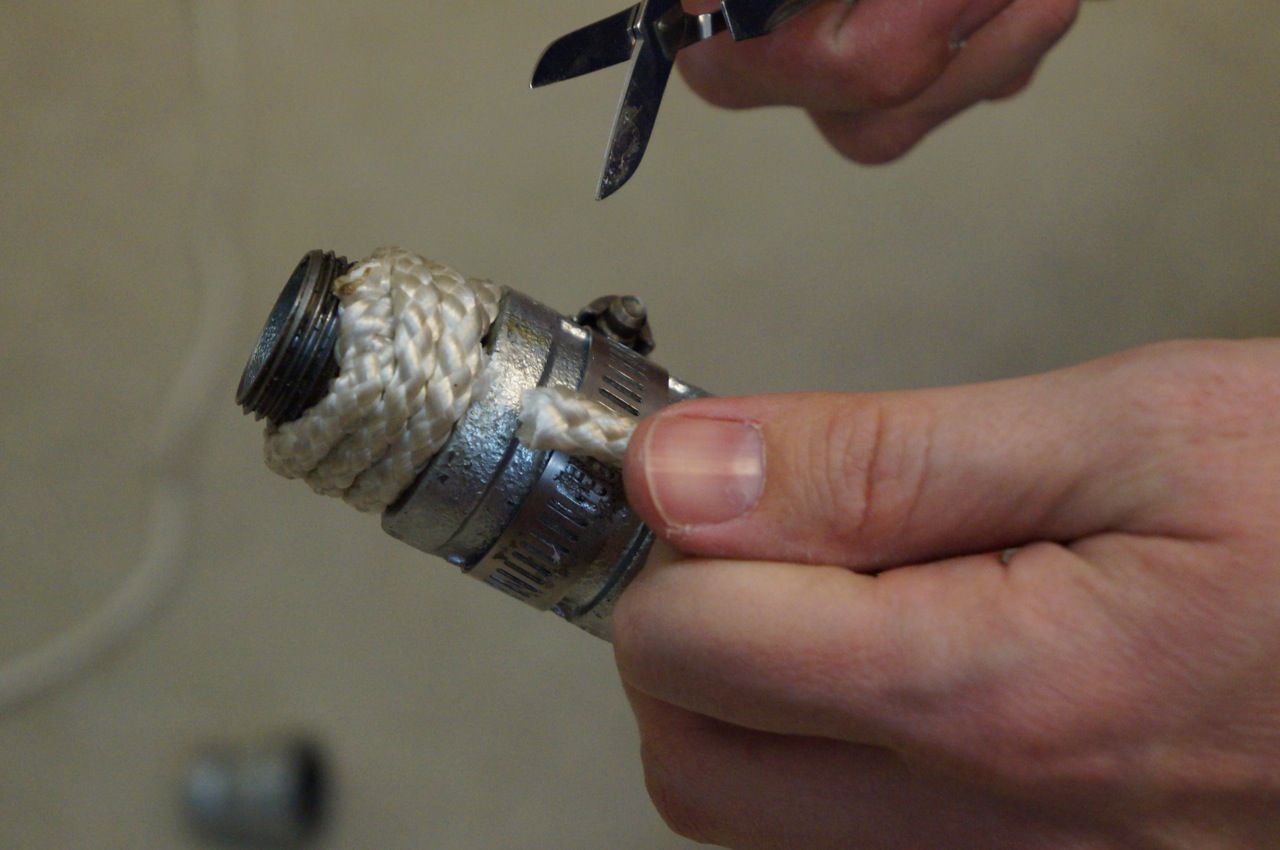
I cut the loose ends. Beginning on the other side of the 3/4″ coupling, I repeated these steps with the longer wrap of the 6″ pipe section. First, a small piece under the first wrap.
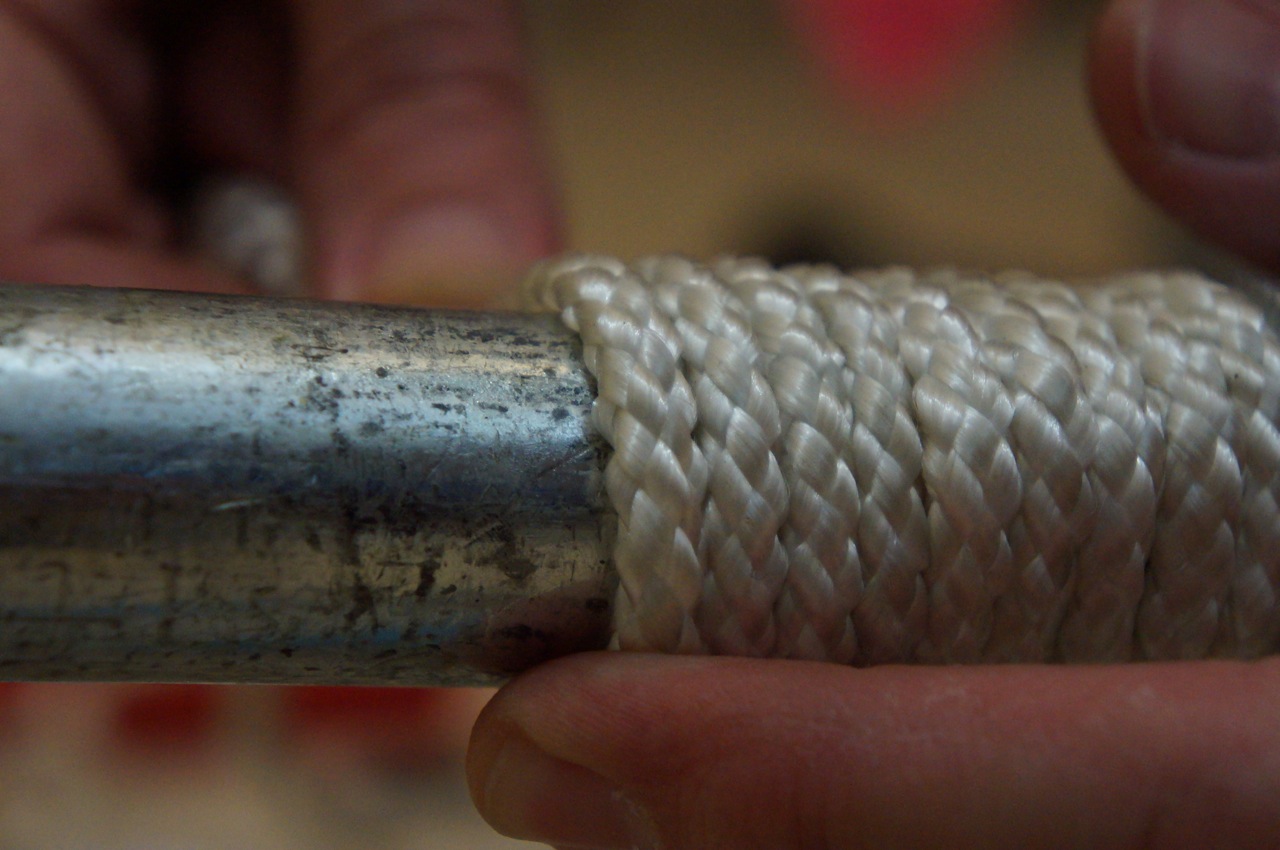
I pulled the rope tight around the pipe and pushed each wrap down to keep the grip as tight as possible.
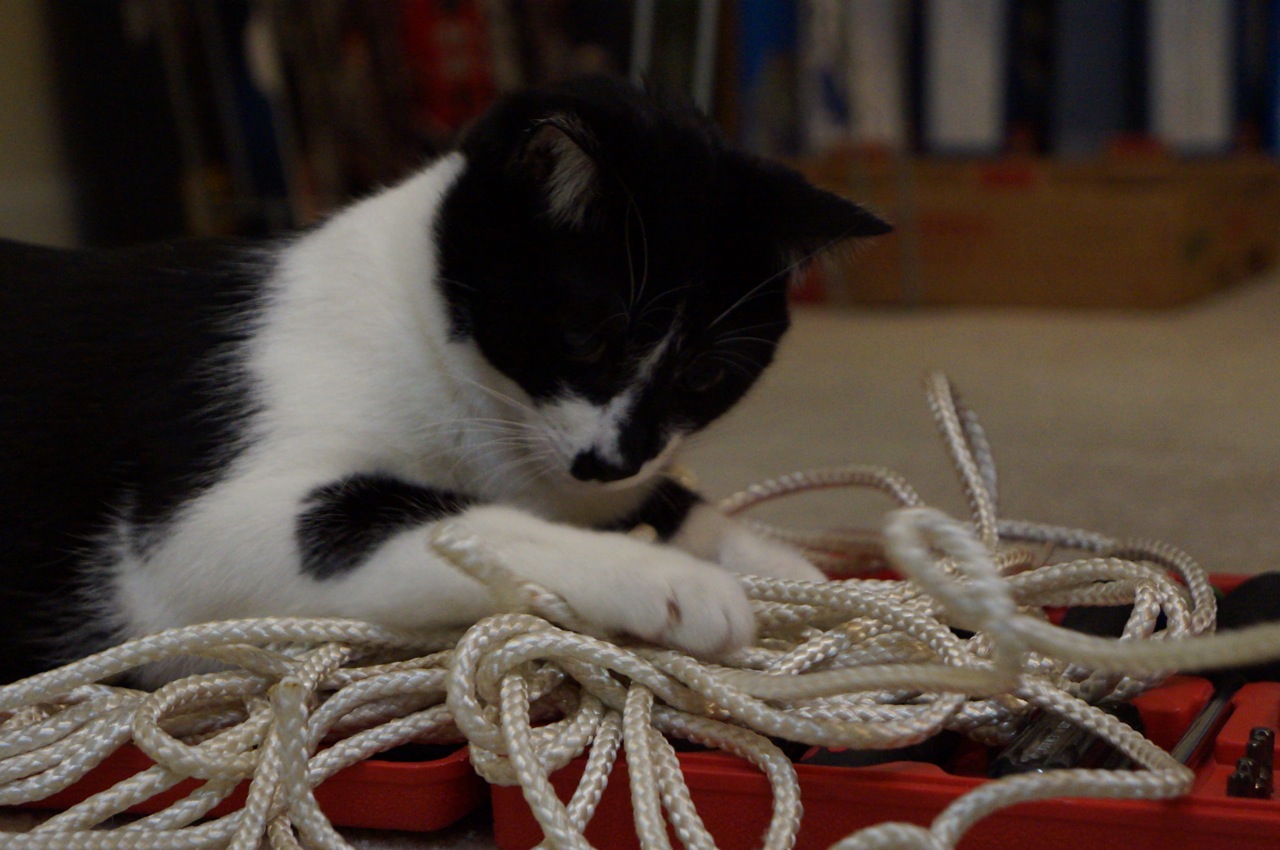
Mose tried to help with the process as much as possible.
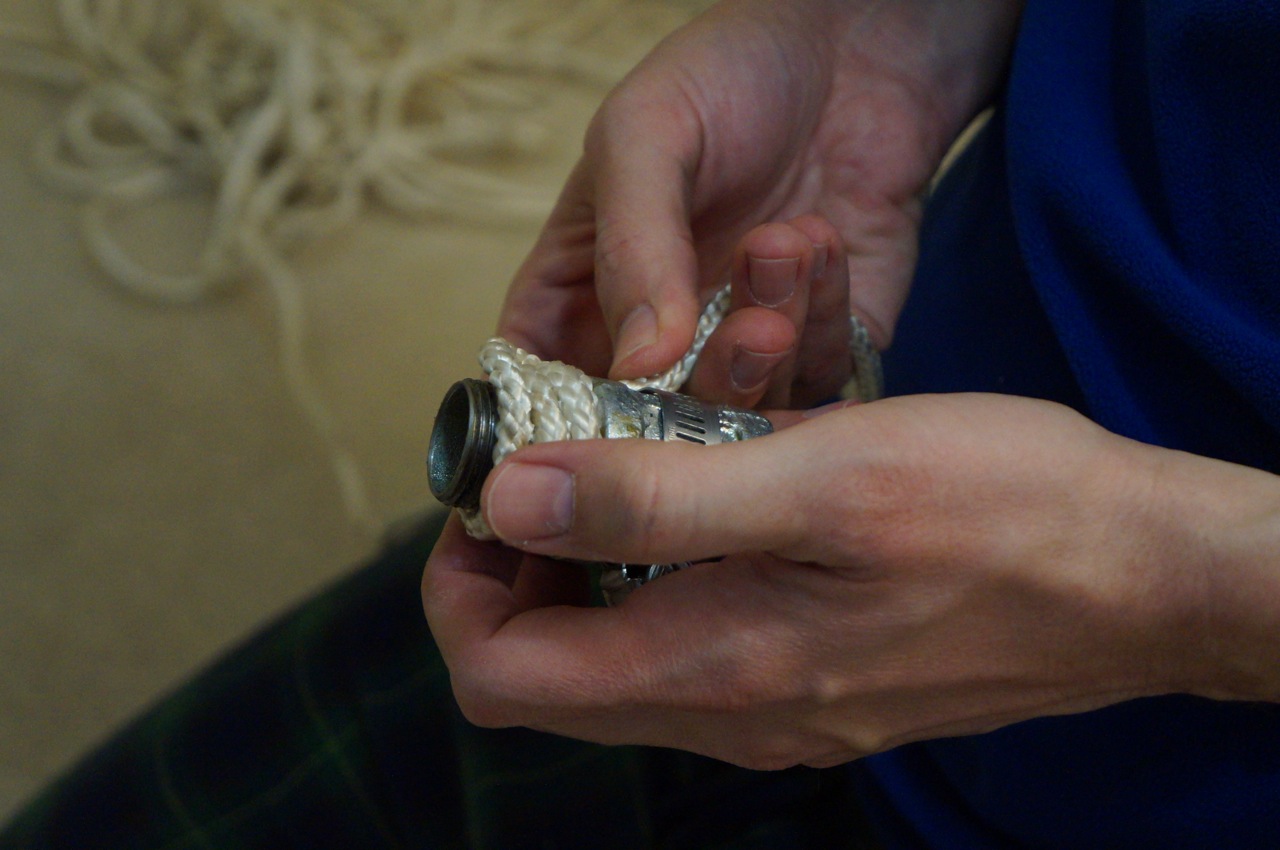
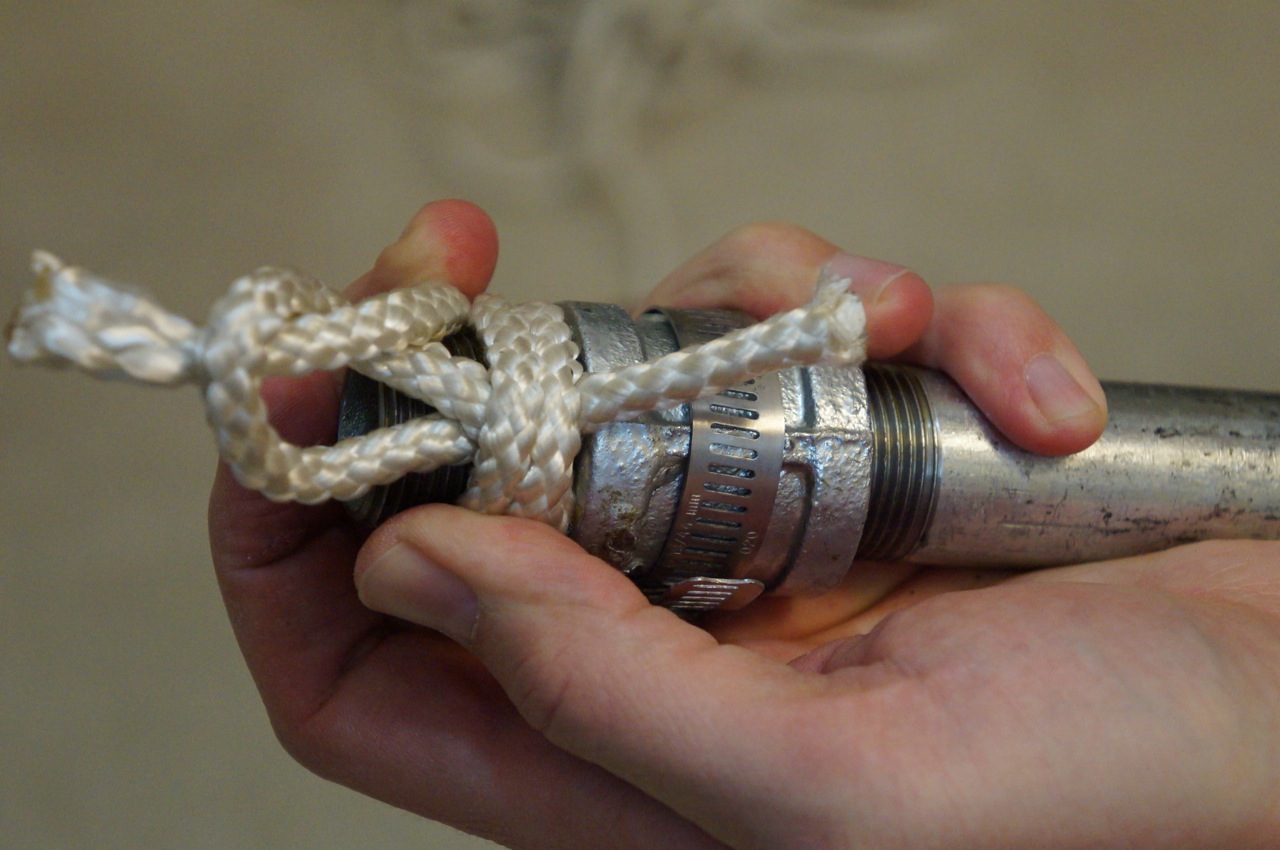
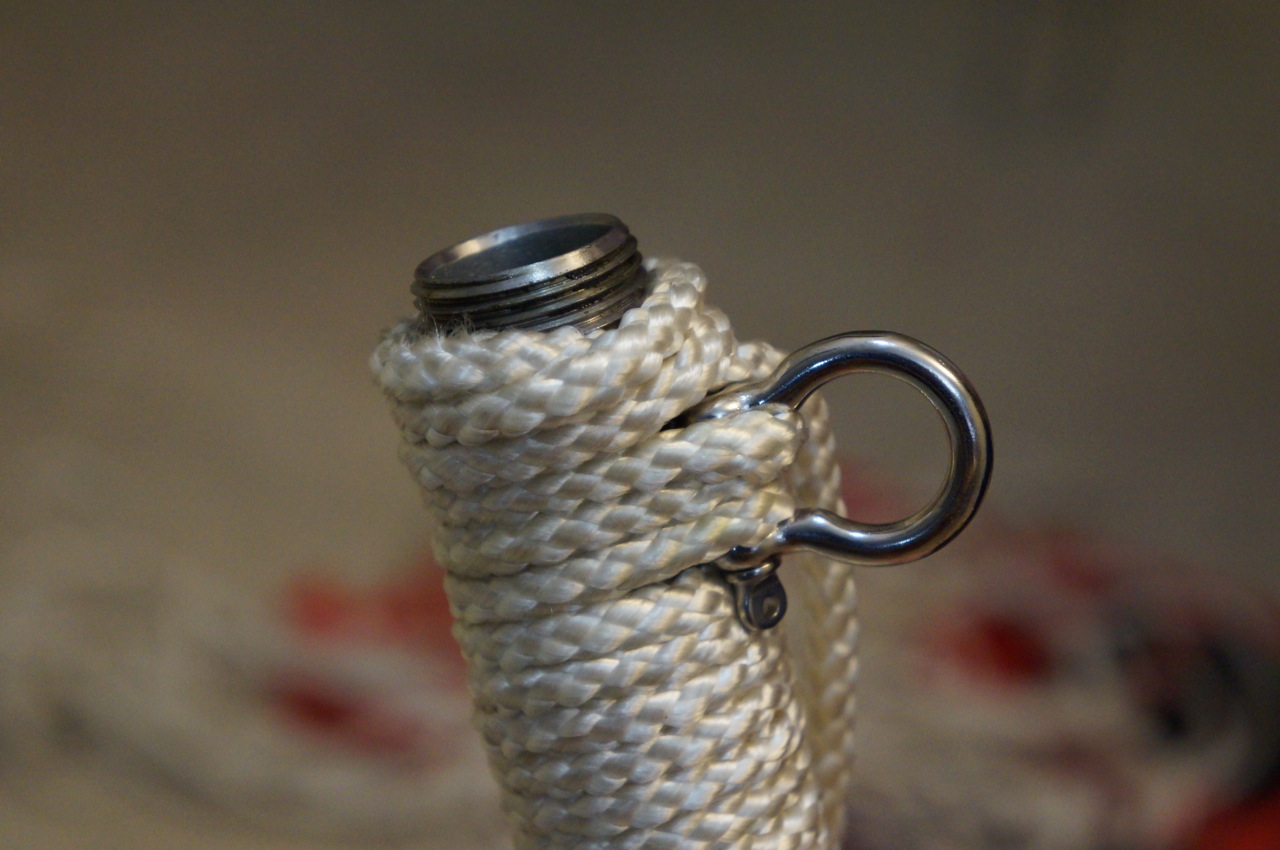
At the end of the 6″ long pipe, close to where the end cap goes, I placed the D-Ring and ran the rope through its eye to connect it to the handle.
As in the shorter section wrap, I created a loop and pulled the end of the rope through and under the last lines of wrap to hide the end and prevent the grip from unraveling.
Finally, I installed the cap. Before doing this, I wrapped the grip higher than necessary so that the the cap would compress the wrap when tightly screwed onto the 6″ pipe.
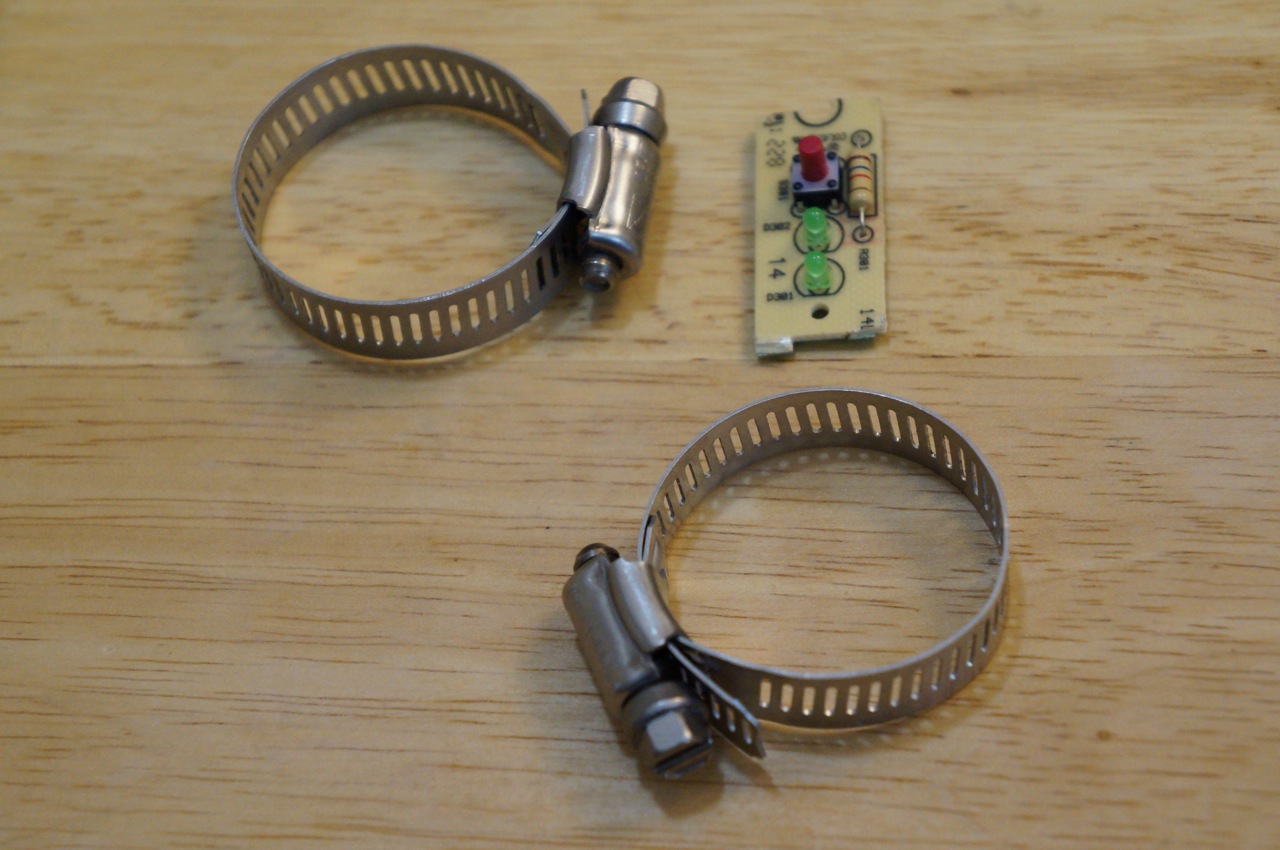
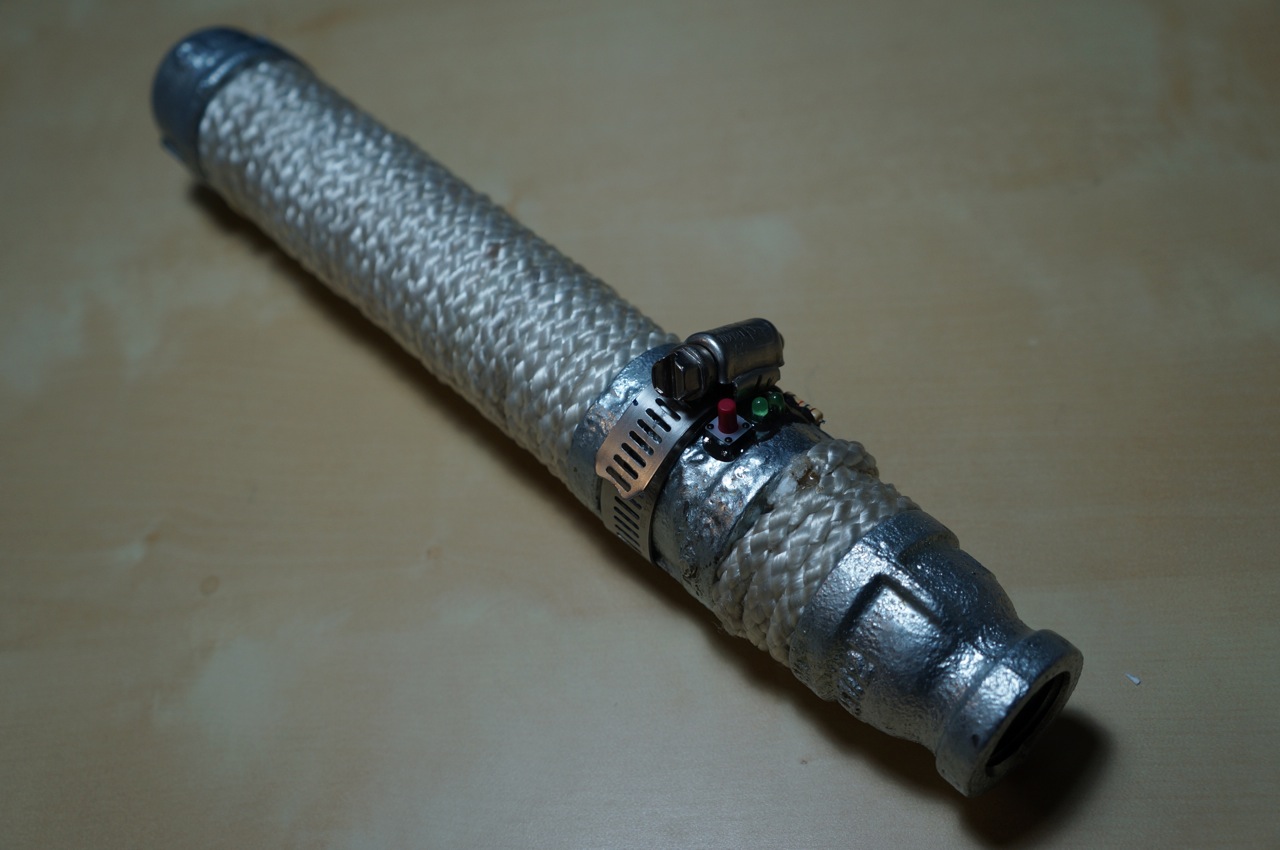
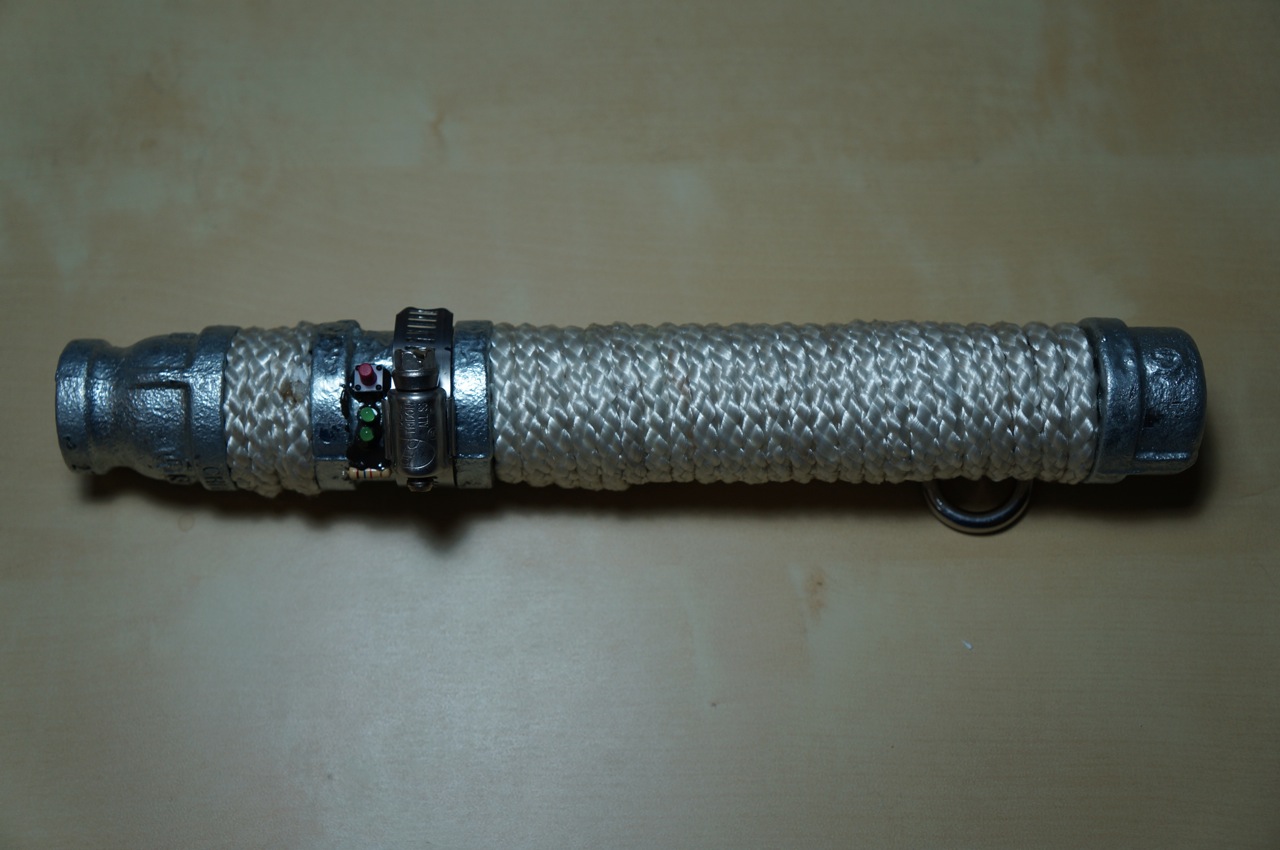
Since Ryan would likely bang his lightsaber when sparring, I wanted to make it as practical as possible while giving it a technological appearance. First, I tried attaching a circuit board from an average doorbell button with two hose clamps.
While I thought this fit the rugged look that Ryan might like for his lightsaber, I thought that it would be more practical to use only one hose clamp and affix the doorbell components with JB Weld after removing them from the circuit board.
I liked this configuration best. The hose clamp protects the switch, lights (non-functional), and resistor.
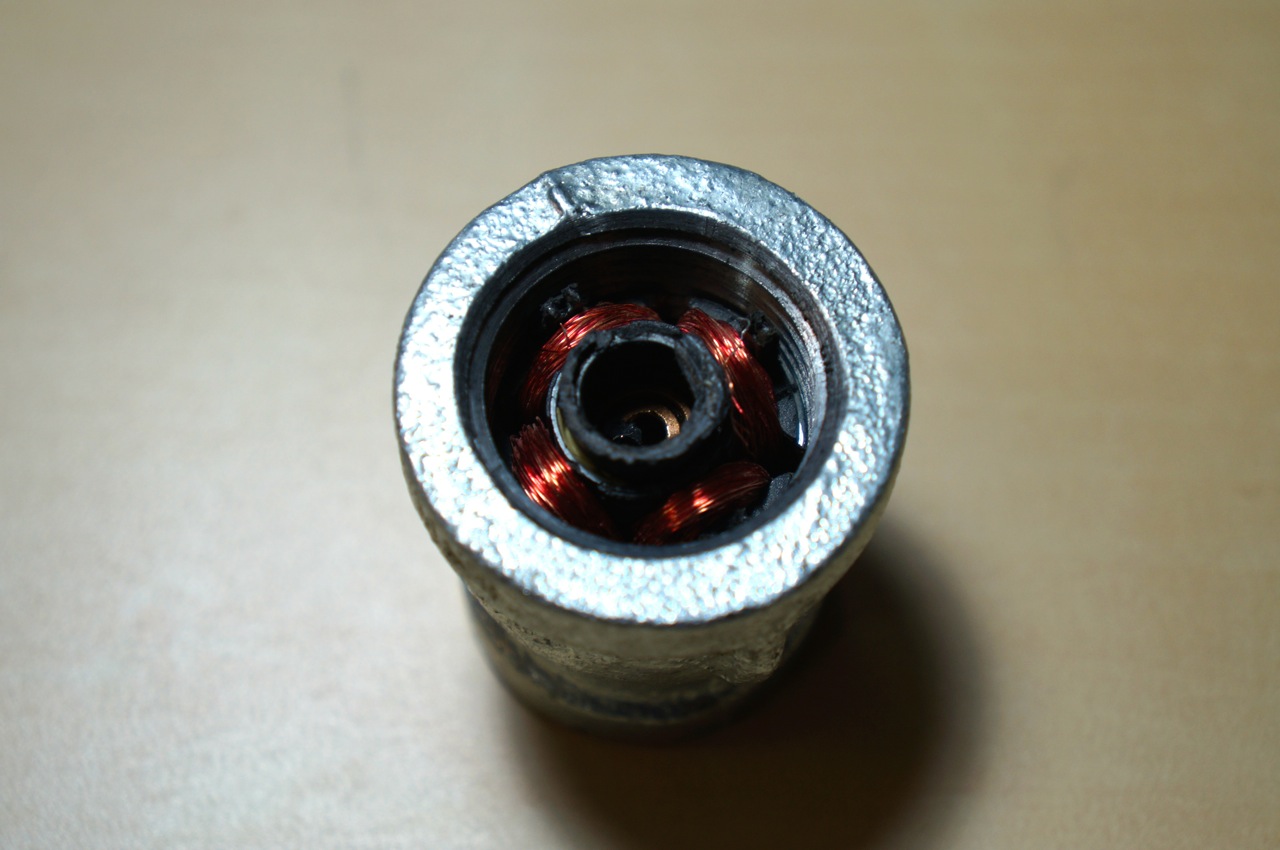
Next, I wanted the display emitter on the deactivated lightsaber (3/4″ to 1/2″ coupling) to look “realistic,” so I pulled the electromagnet from an 80″ computer fan, crushed it with my channelocks, and inserted it into the 3/4″ end of the 3/4″ to 1/2″ coupling. Repurposing the electromagnet draws on a visual/physical rhetoric of technology in the same way that movie props and set design use this for world building, extrapolating, and establishing plausibility.
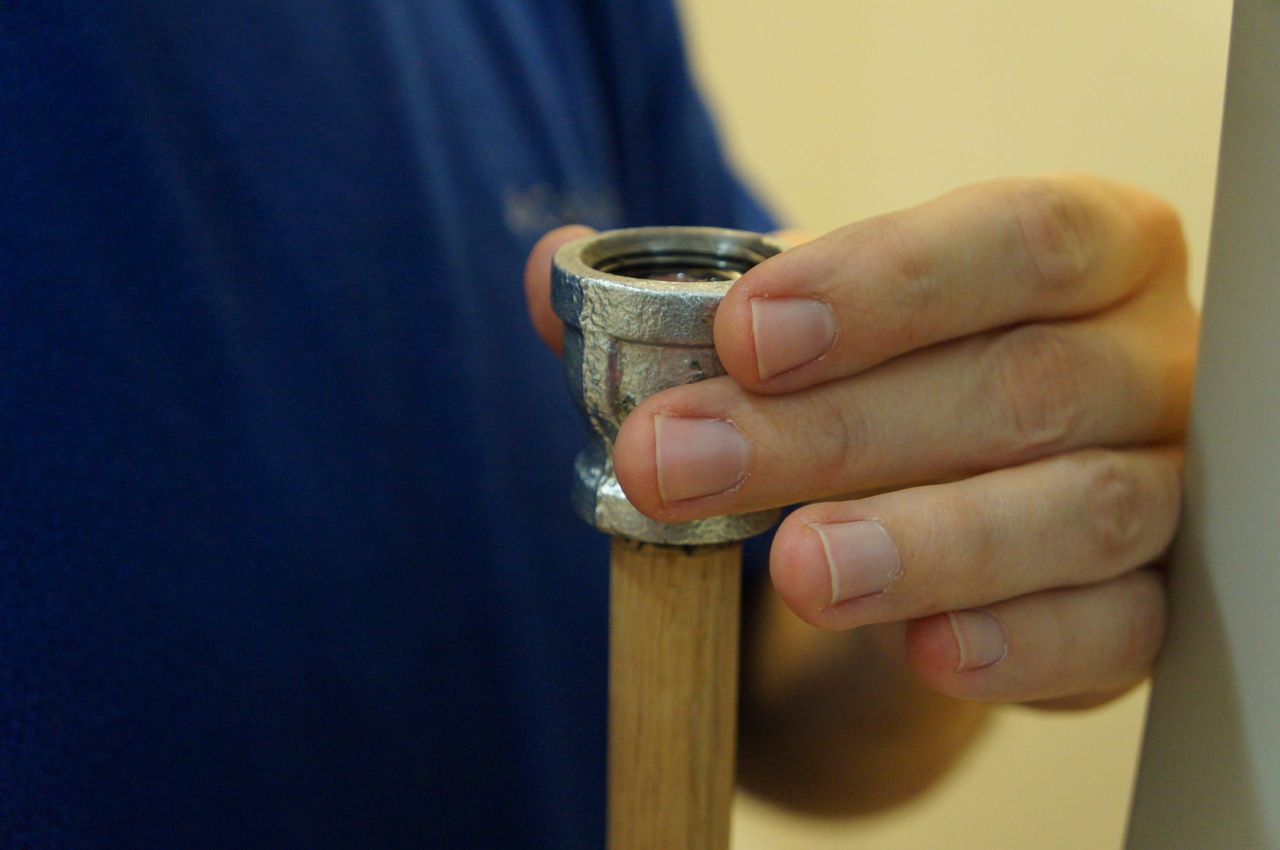
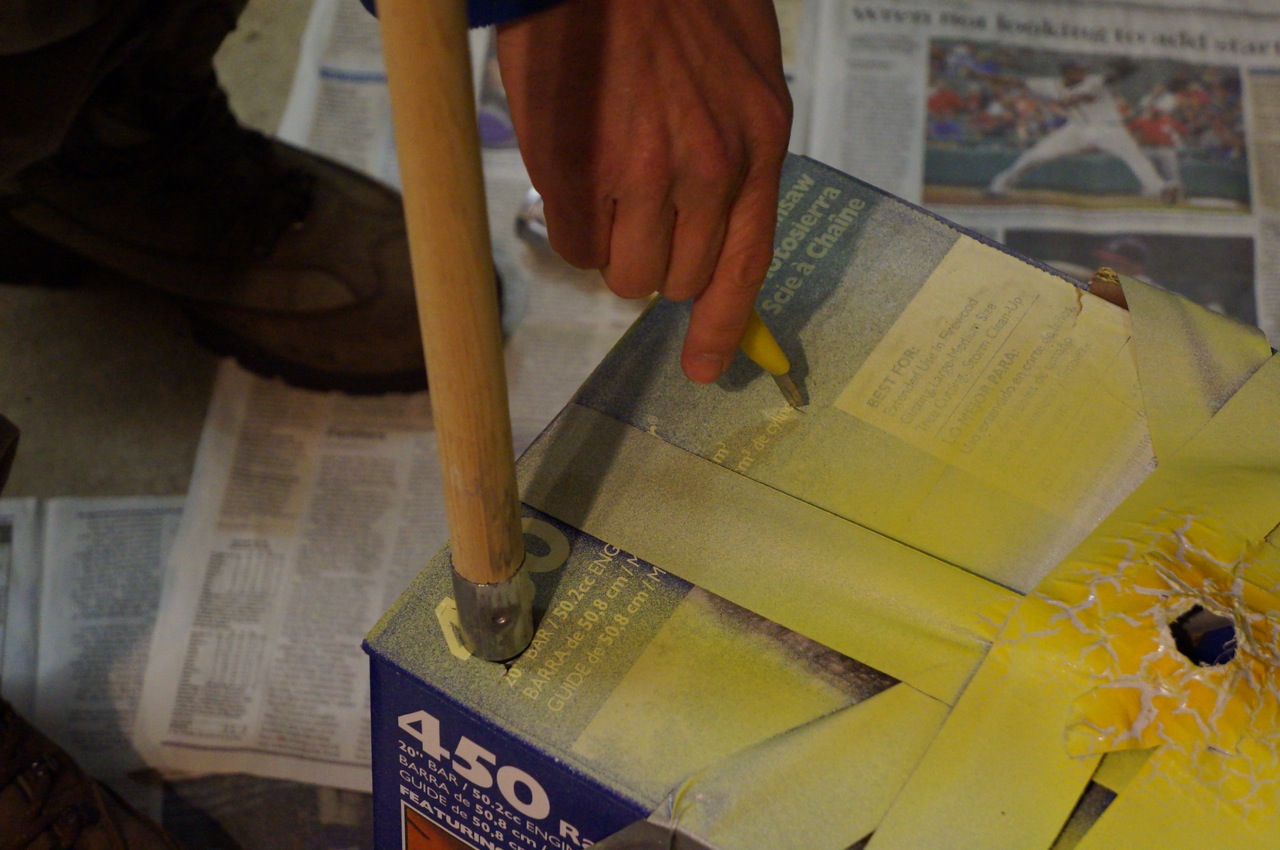
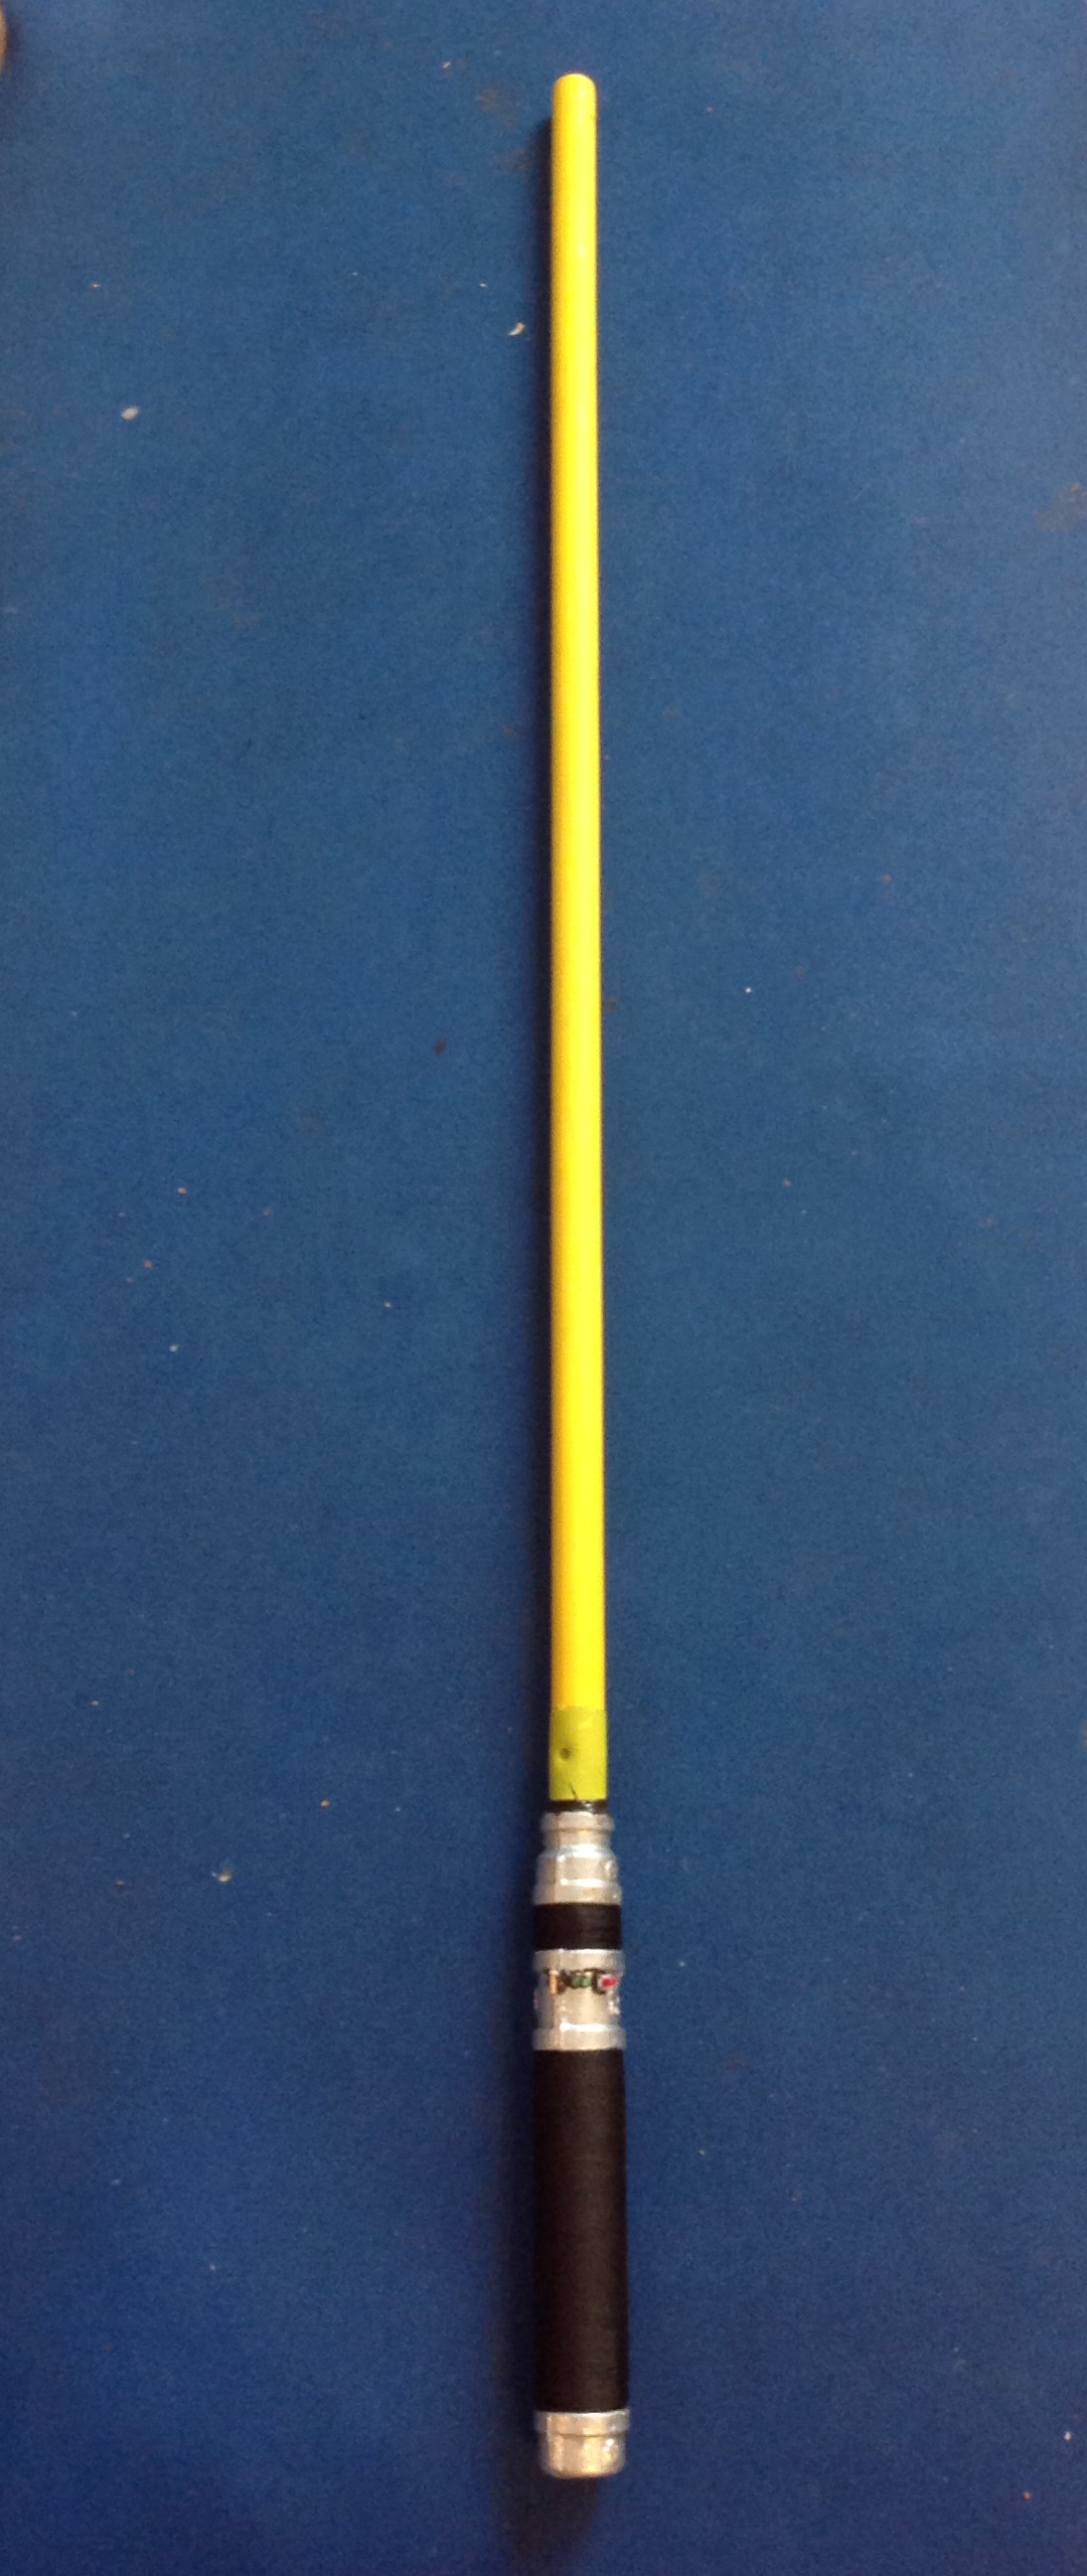
The next phase of the lightsaber build involved the other sparring emitter. I needed to rigidly attach a wooden blade to the second 3/4″ to 1/2″ coupling in the 1/2″ end of the coupling and paint it to match the yellow blade color that Ryan sought (signifying the Consular Jedi).
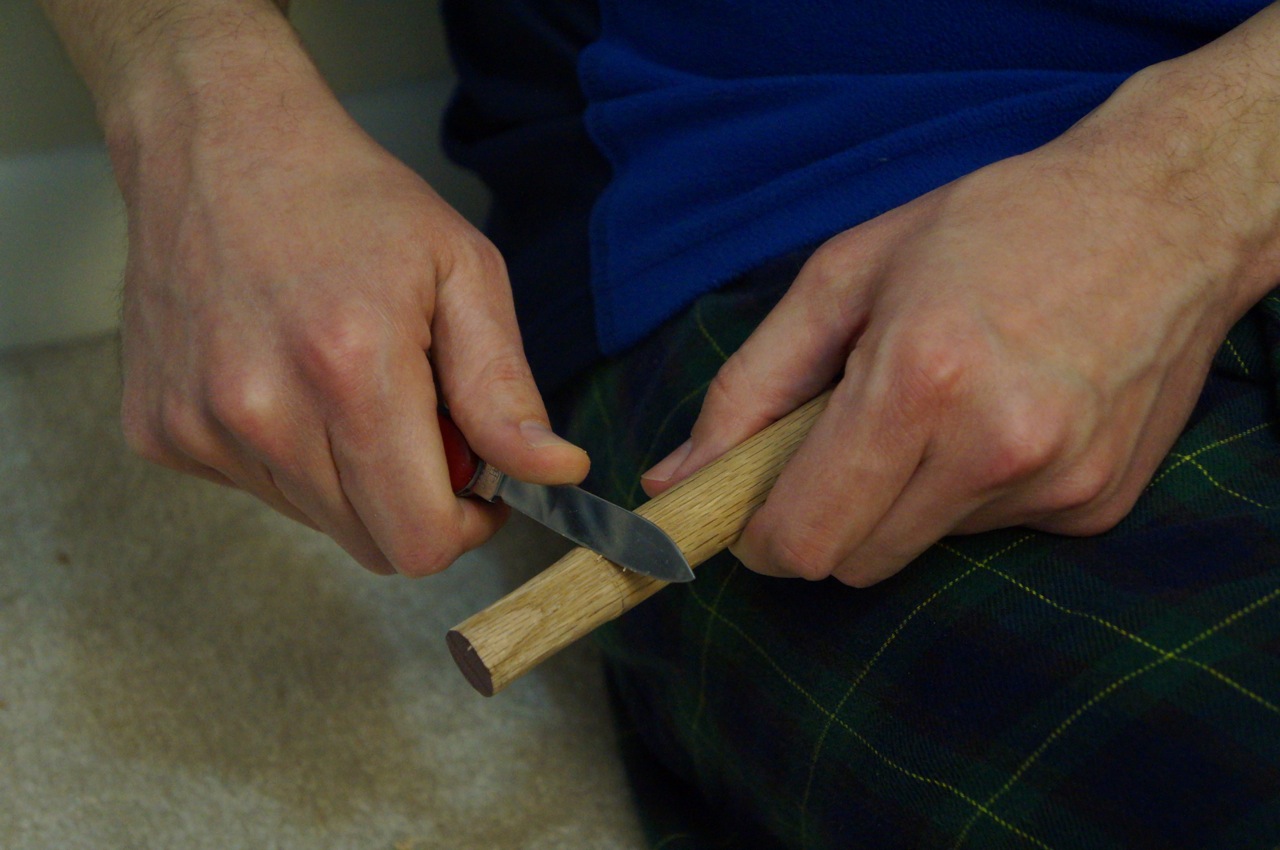
I began by taking an oak dowel rod and whittling one end enough to screw it into the 1/2″ end of the 3/4″ to 1/2″ coupling.
Then, I used JB Weld to permanently connect the coupling to the dowel rod.
I had to make sure that I did not put too much JB Weld on the tip closest to the 3/4″ pipe thread, which screw into the “close” end of the lightsaber when the blade needs to be drawn.
I made sure that it was centered and straight.
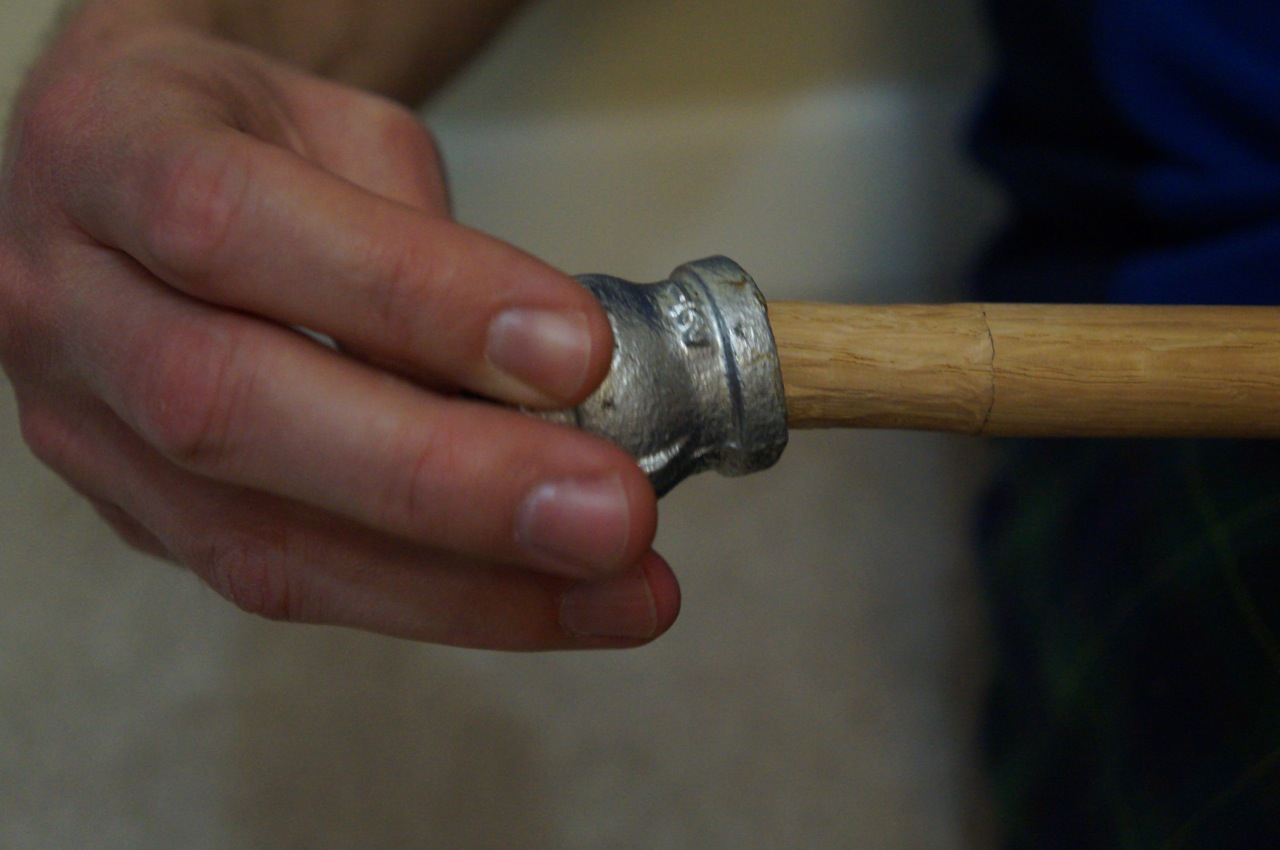
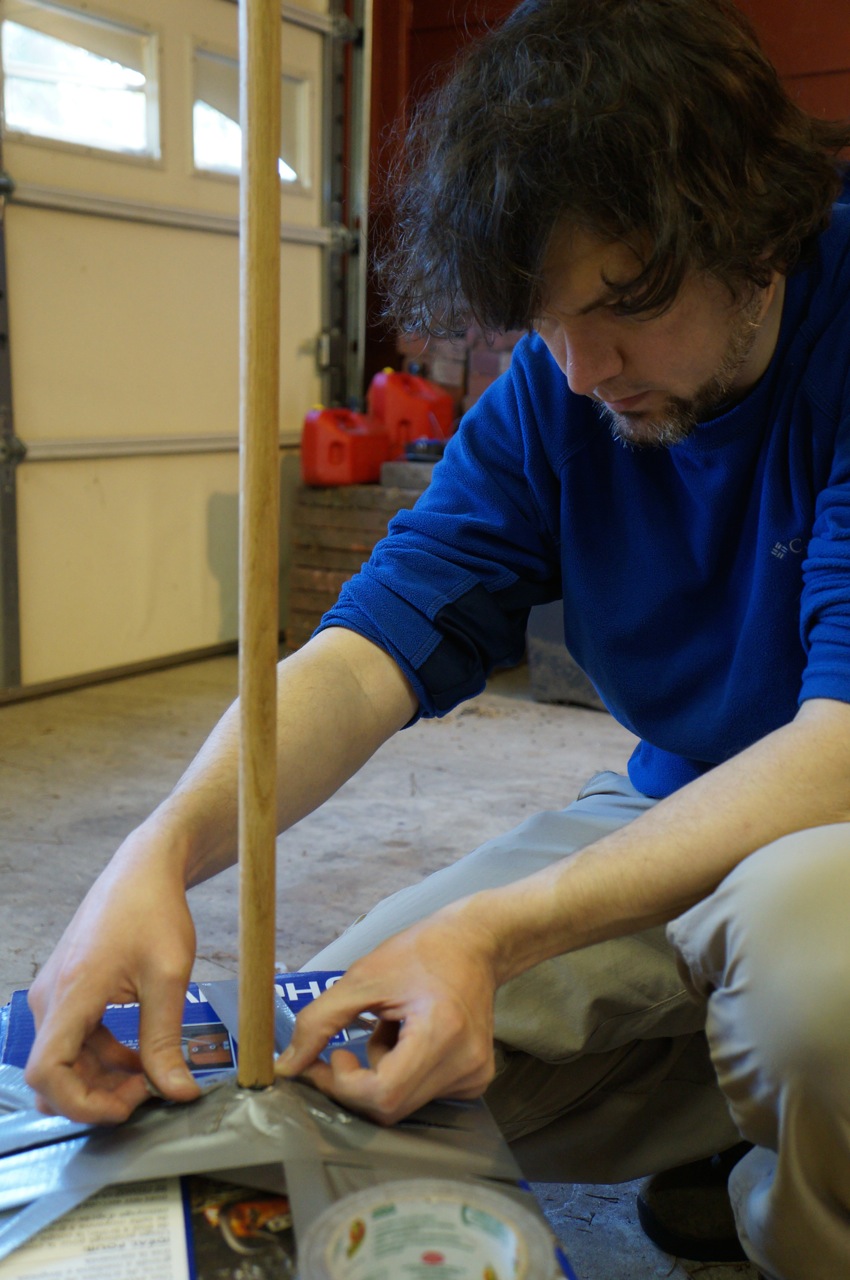
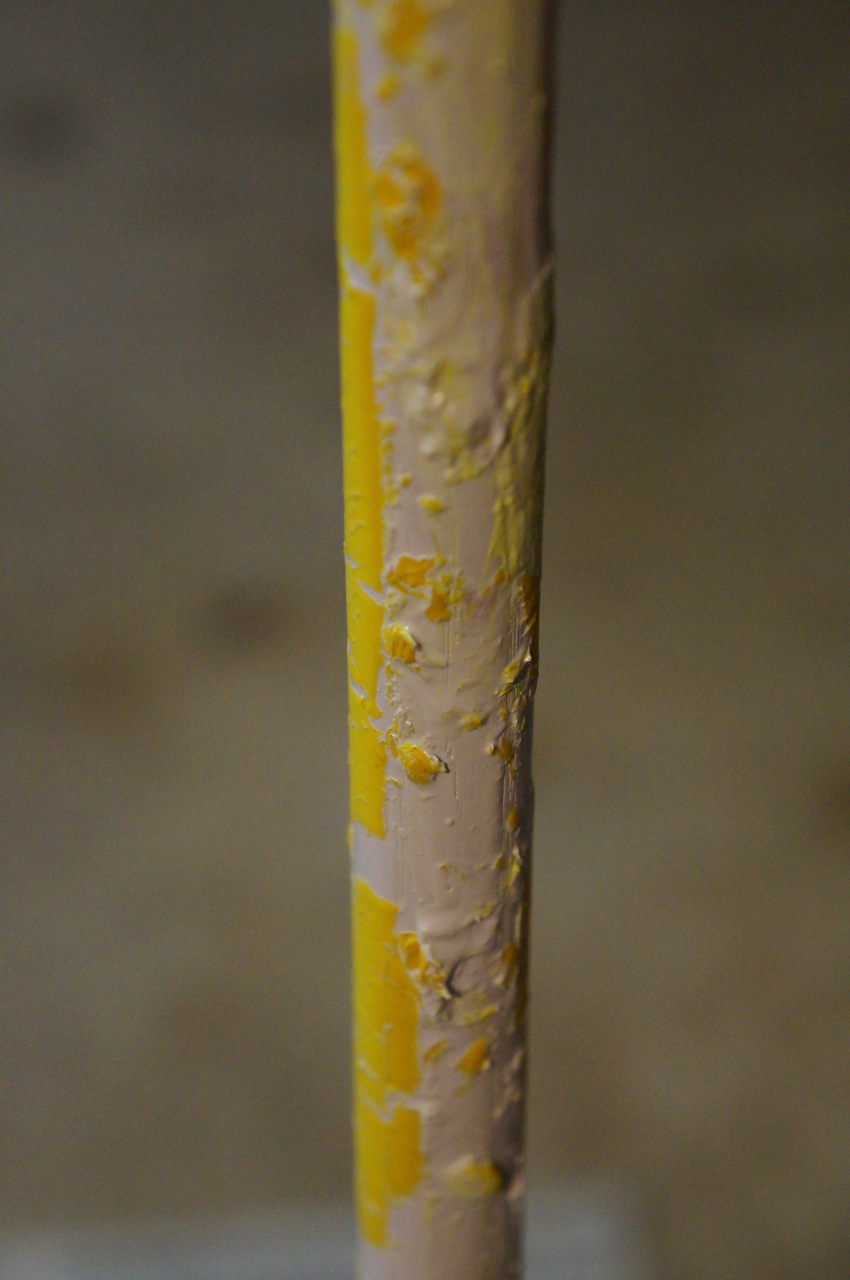
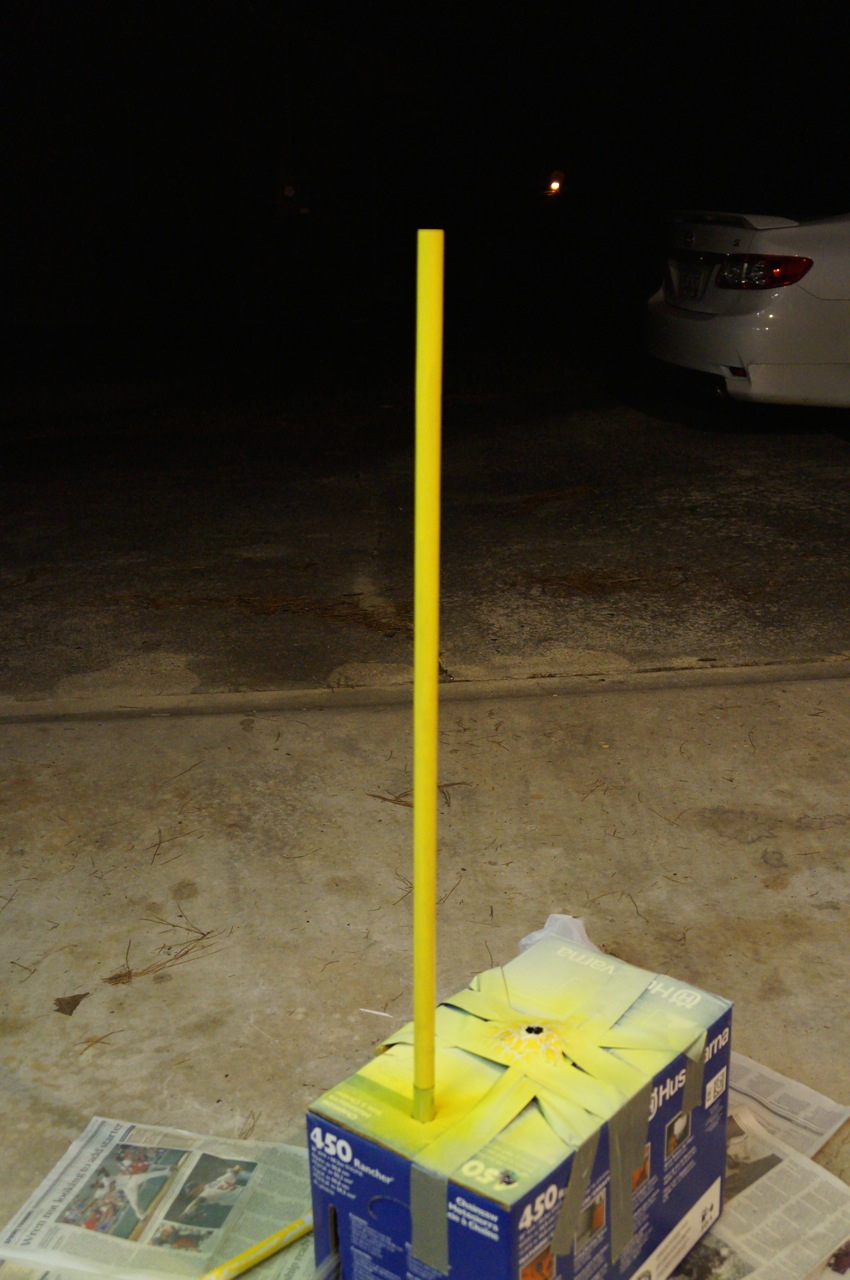
Finally, I painted the dowel rod above the coupling with a primer and then with the florescent yellow.
Unfortunately, I misread the spray paint cans and ended up with a mess when the florescent yellow would not stick to the dried primer (I mistakenly picked up white primer + paint instead of simply primer).
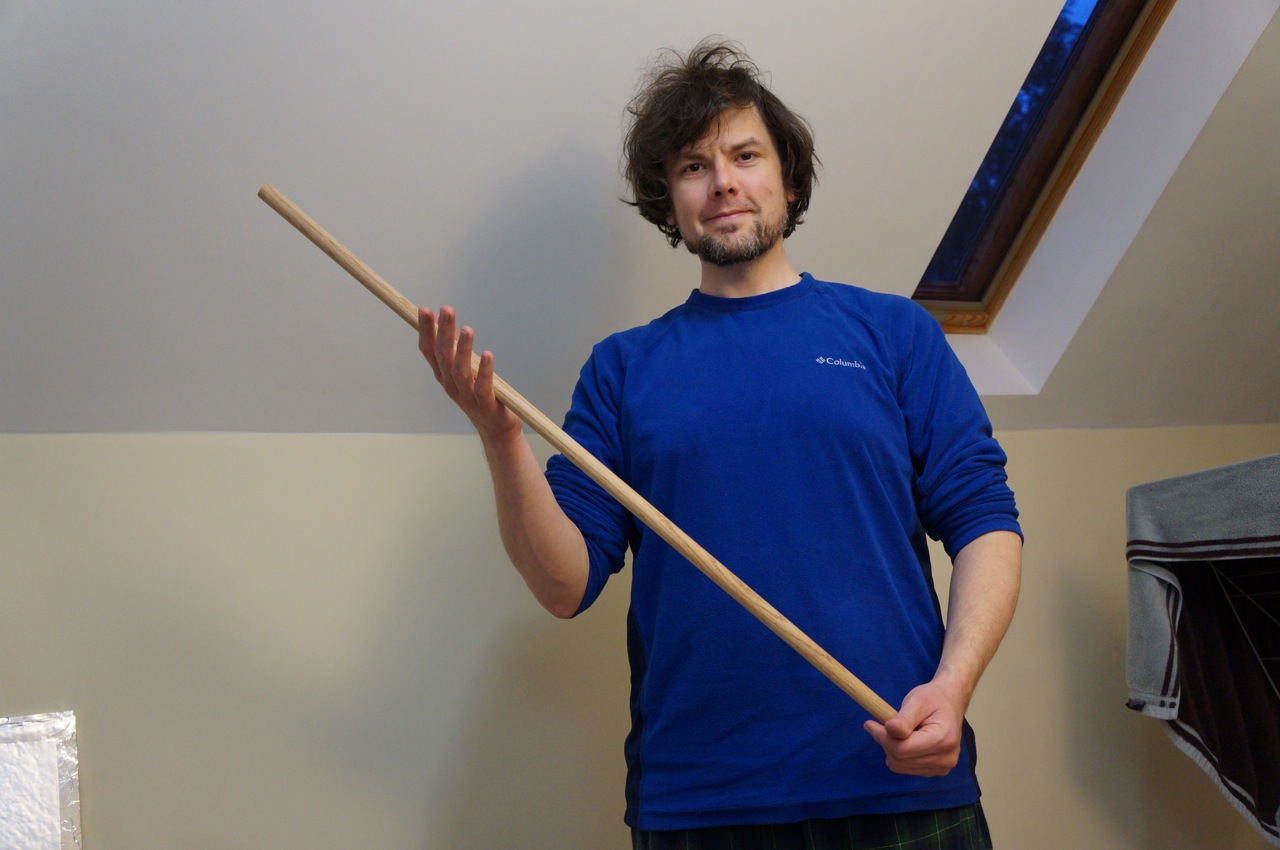
Luckily, I had a paint brush handle in the garage that was long enough to serve the same purpose even if it might be made out of pine instead of oak.
I cut the paint brush handle down to 36″.
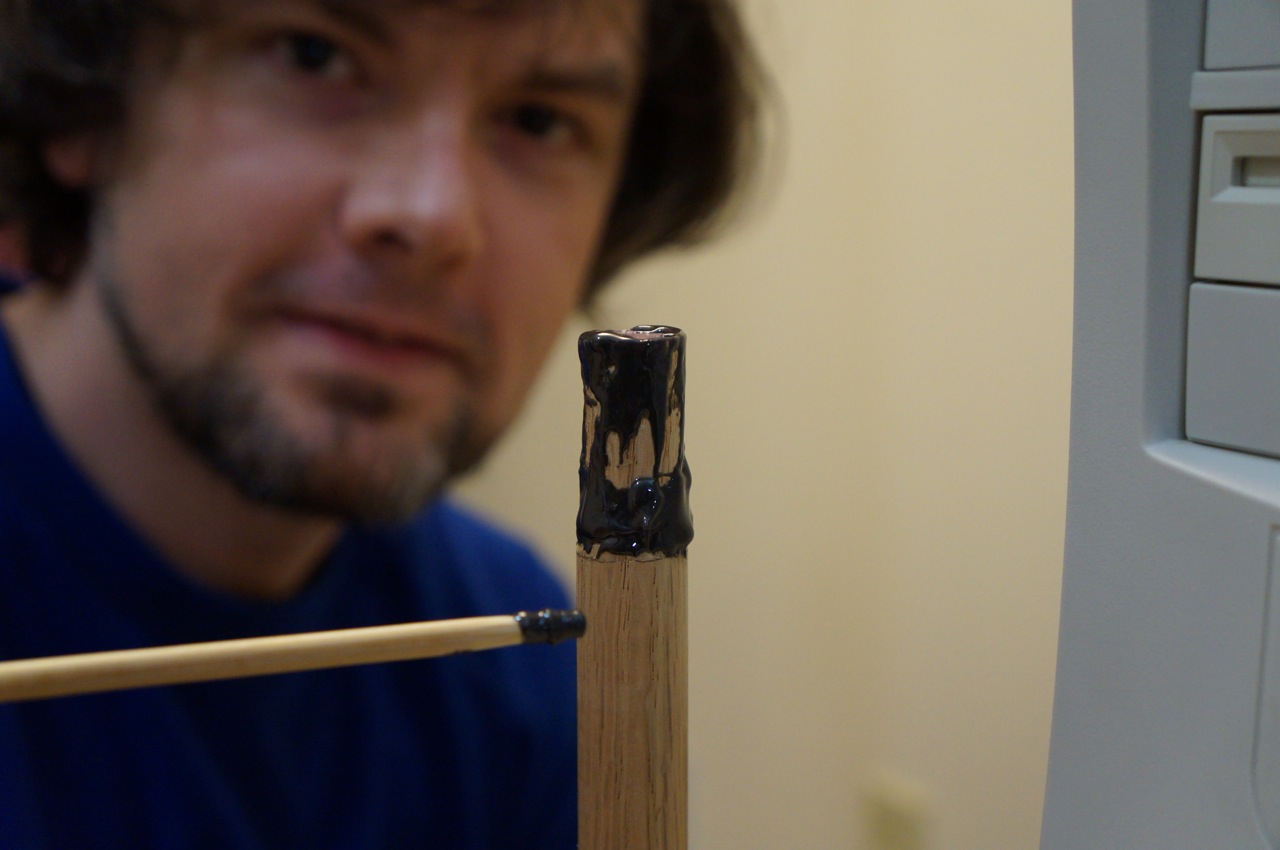
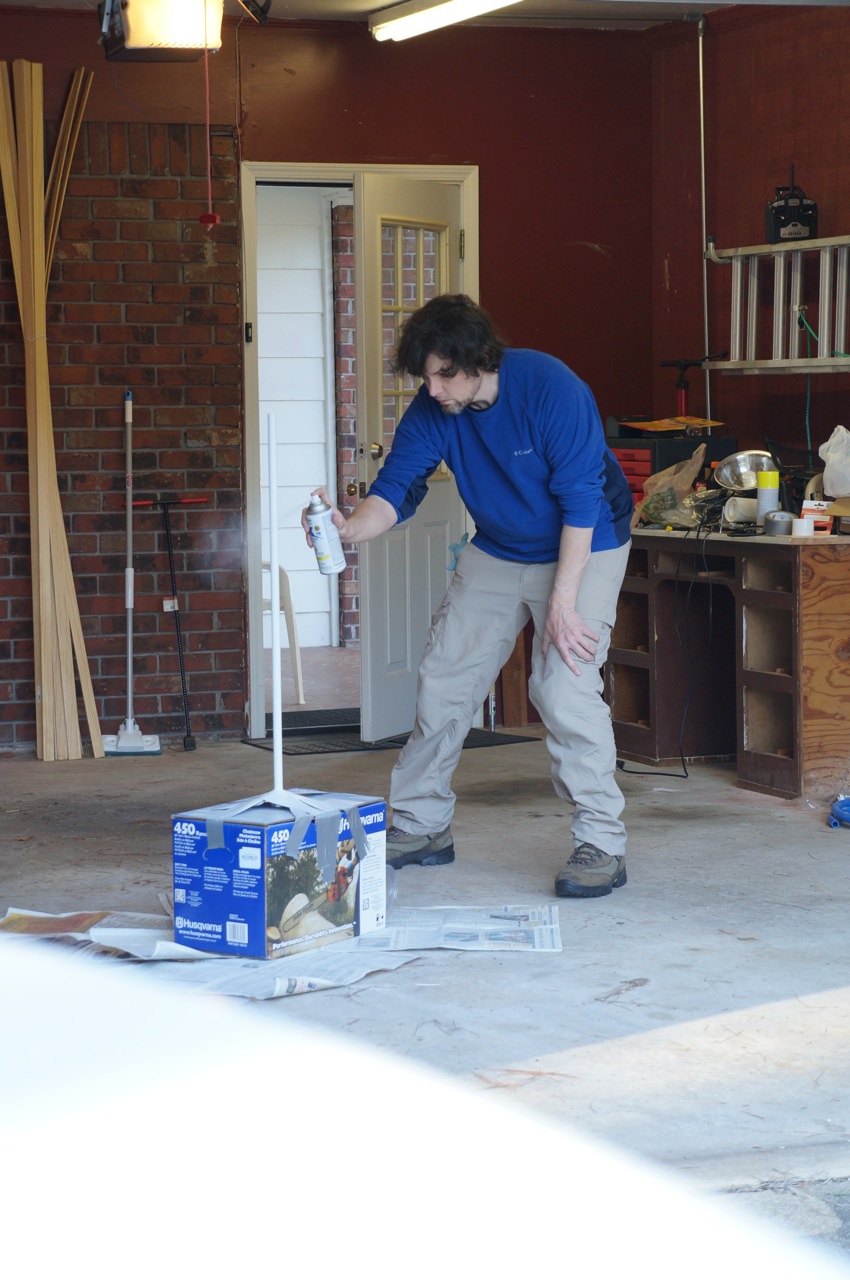
Set it up for painting with the remaining florescent yellow paint.
Many coats later, it was a bright yellow befitting a Consular Jedi!
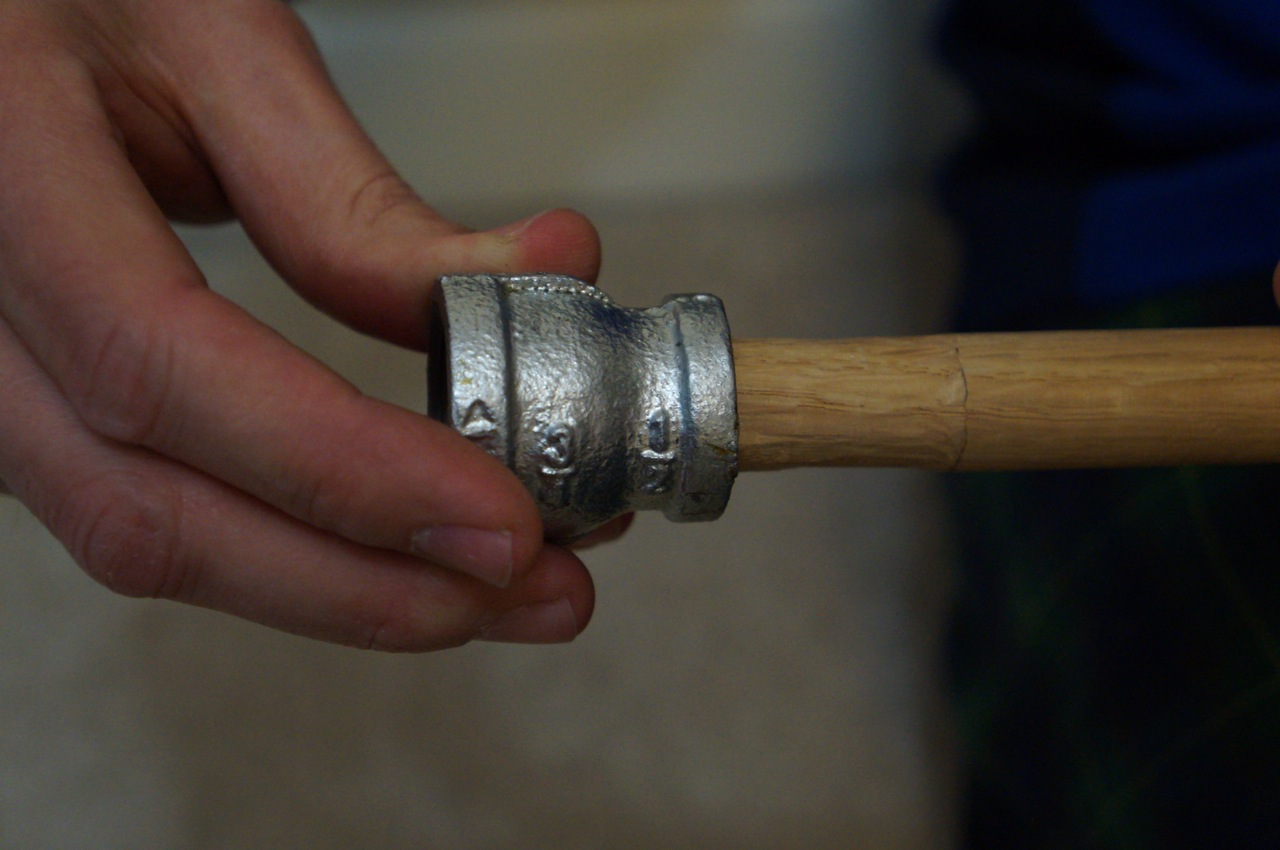
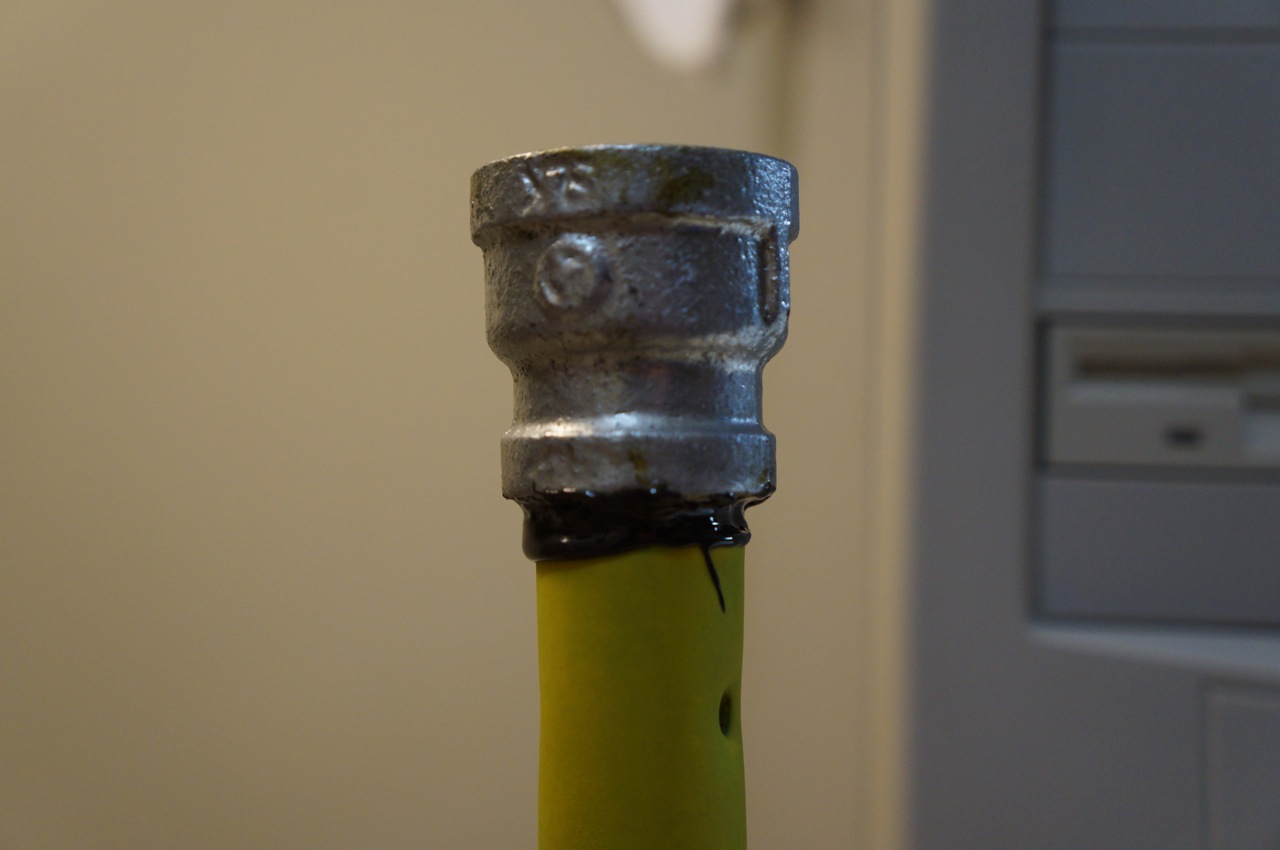
After the paint dried, I screwed the metal end of the brush into another 3/4″ to 1/2″ coupling and bonded the blade to the coupling with JB Weld.
After everything had dried, I mated the blade with the lightsaber handle.
I was happy with the outcome of the lightsaber in deactivated mode, too.
I gave the lightsaber to Ryan as a birthday present. I included this explanatory diagram that explains how the saber is more than simply parts (e.g., the rope is from the same bundle that Ryan and I used when we cut trees down in my yard last year).
Since I build this lightsaber, Ryan removed the nylon rope grip and improved it with three layers of bank line or tarred twine. The result is quite impressive aesthetically and practically!
Photo courtesy of Ryan Cox.
Photo courtesy of Ryan Cox.
I will post future posts on the lightsabers that I have built for myself and examples of our sparring (when we have the time for Ryan to teach me some things).
UPDATE: Readers asked me to post photos of my other lightsabers–one inspired by Luke Skywalker’s lightsaber in Return of the Jedi and Darth Maul’s double-bladed lightsaber from The Phantom Menace. When I built these sabers for myself, I didn’t take as many photos of the process as in the lightsaber above for Ryan, but these photos should illustrate the basics of how to build similar DIY lightsabers.
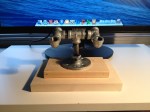
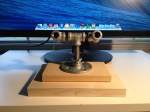
Luke Skywalker ROTJ Lightsaber and Stand
This was the first version of Luke’s lightsaber. I am working from memory as I do not have the lightsaber in front of me to give the exact specifications. I believe that working from the left to the right: 3/4″ to 1/2″ reducer, 1/2″ threaded pipe 1″ long, 1/2″ to 3/4″ bushing, 3/4″ coupler, 3/4″ pipe 7″ long, 3/4″ coupler, 3/4″ to 1/2″ bushing, flat washer with eye bolt affixed (epoxied into bushing). The orange lightsaber control attached to the first coupler is from a computer motherboard heatsink (sawed in half with a hacksaw) and epoxied to the coupler. The wrap is nylon rope.
In the next iteration, I replaced the nylon rope wrap with rubber o-rings that I ordered online (pack or 40 or 50). To install the o-rings, remove the last coupler on the right and roll down the o-rings one-by-one.
To display Luke’s lightsaber, I used smaller pipes attached to a wood base (two different sizes of lumber screwed together through the metal base connected to the pipes).
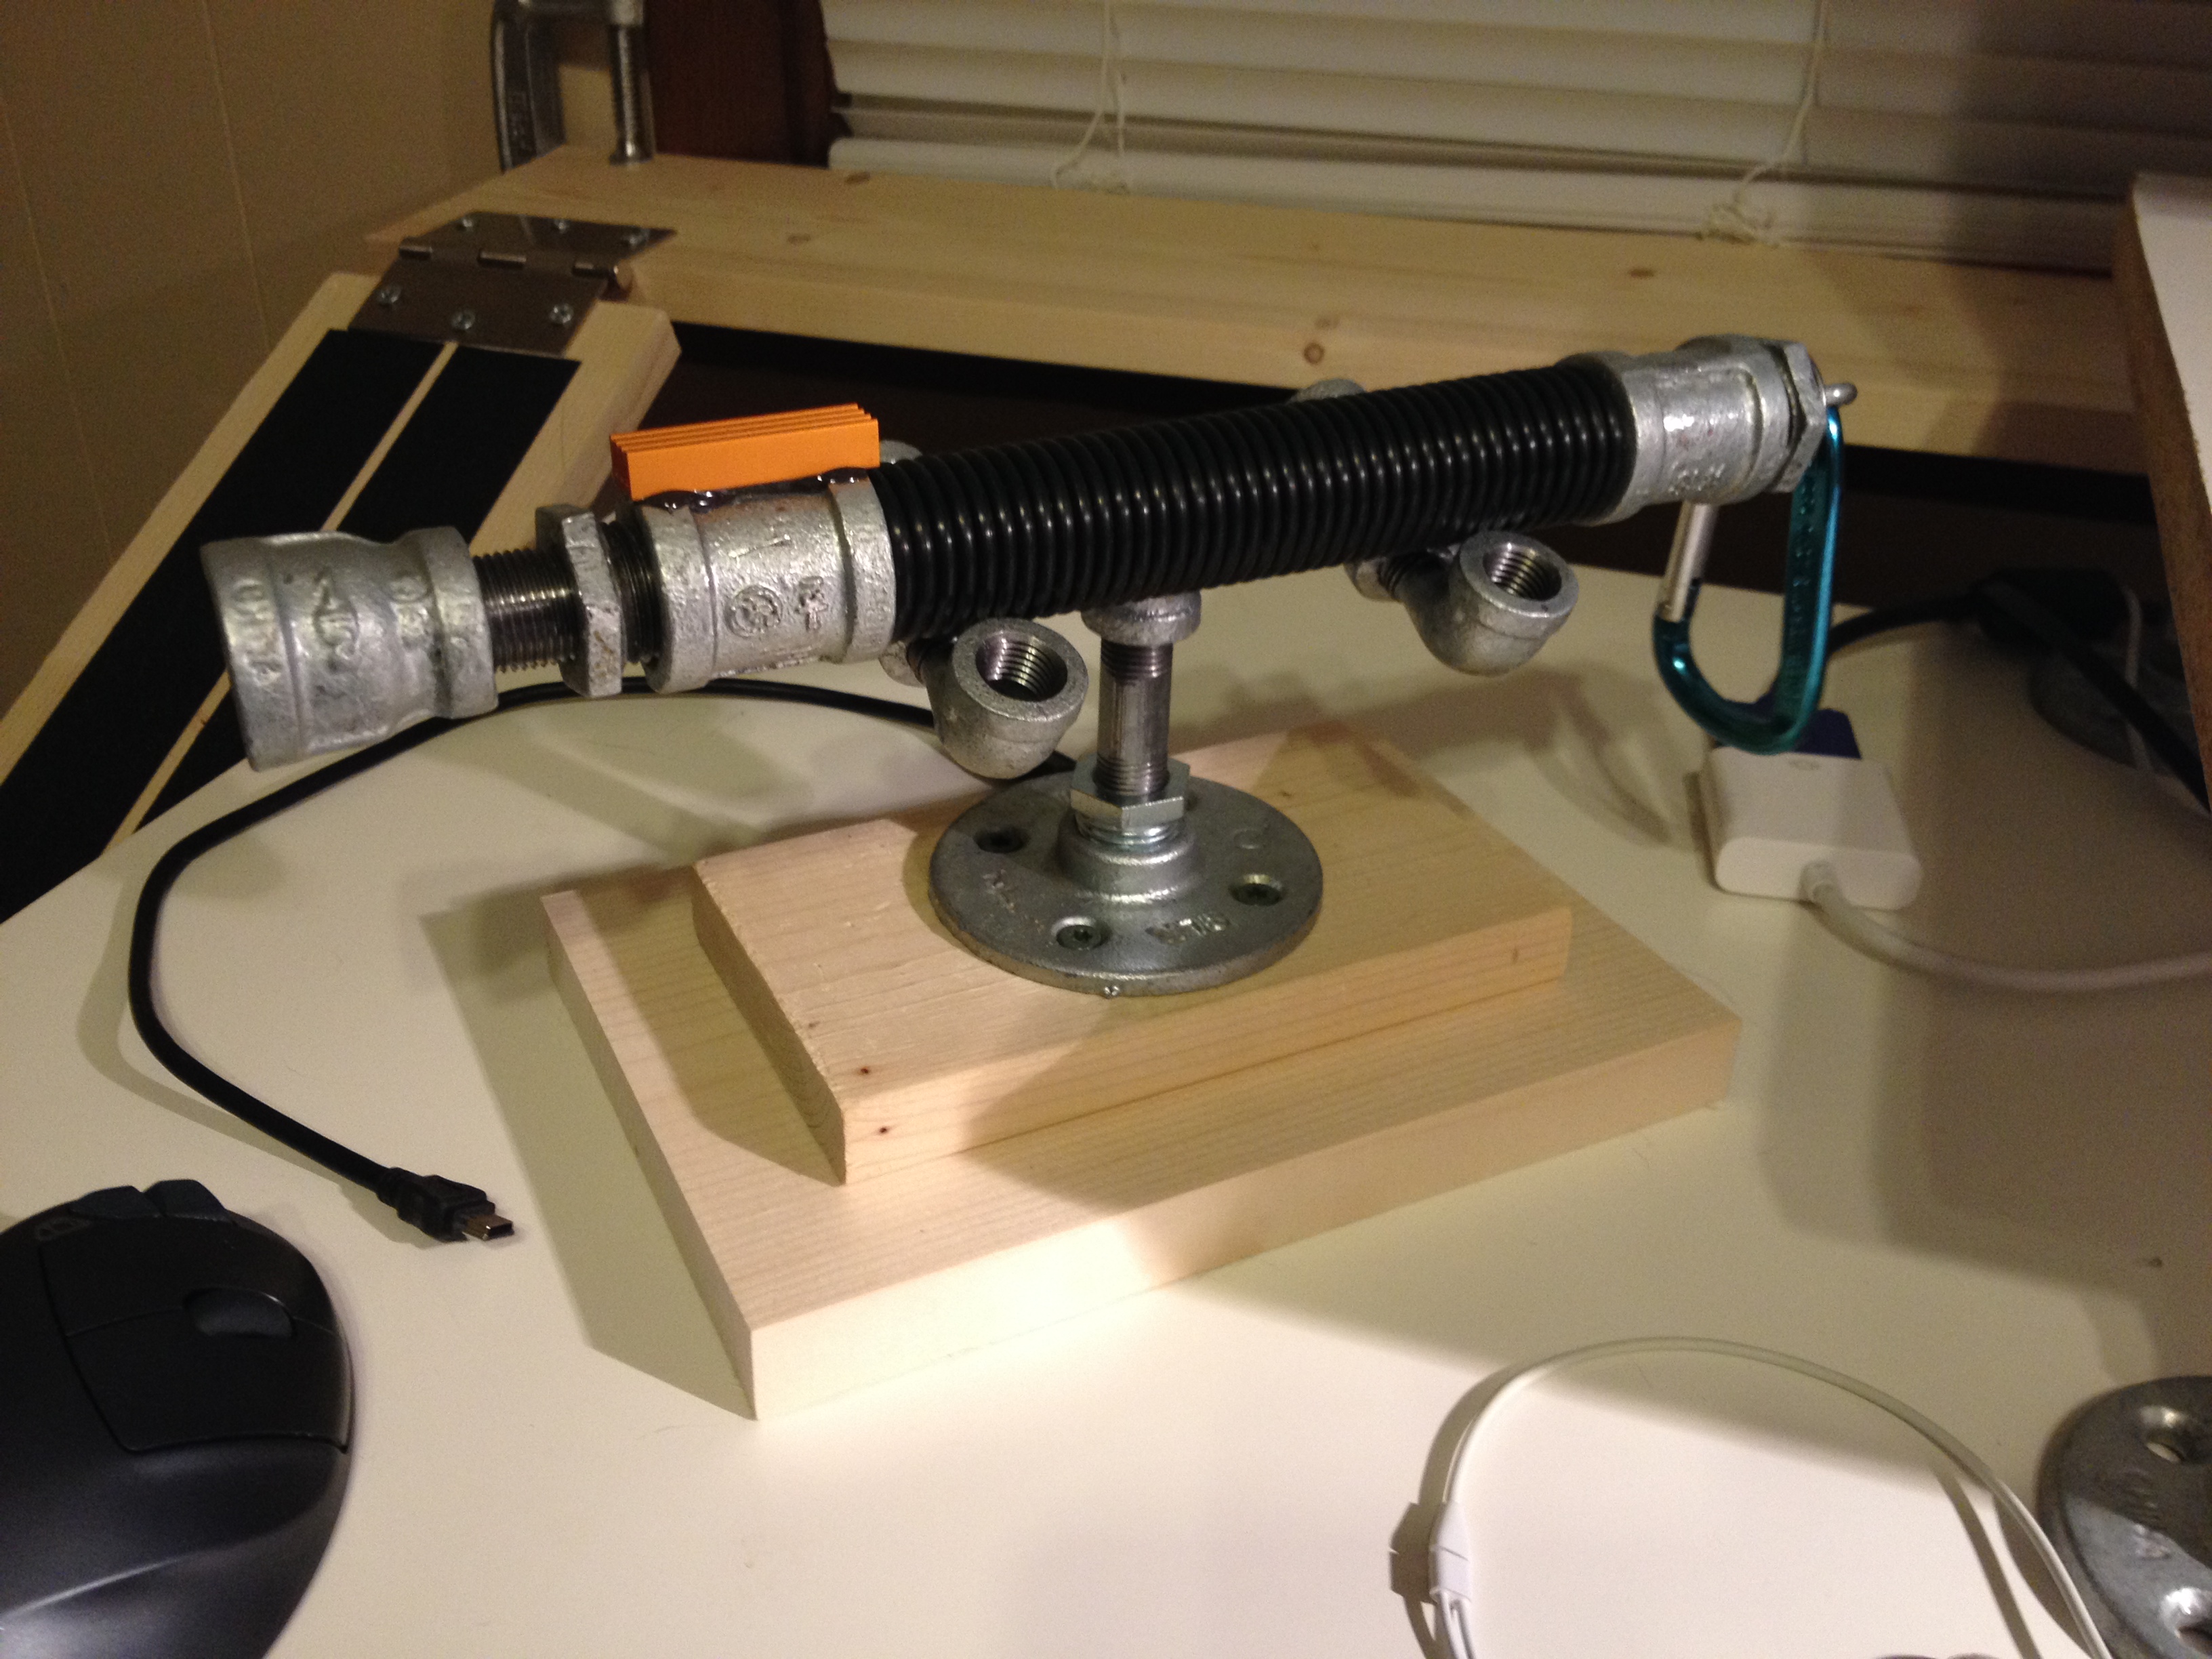
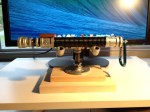
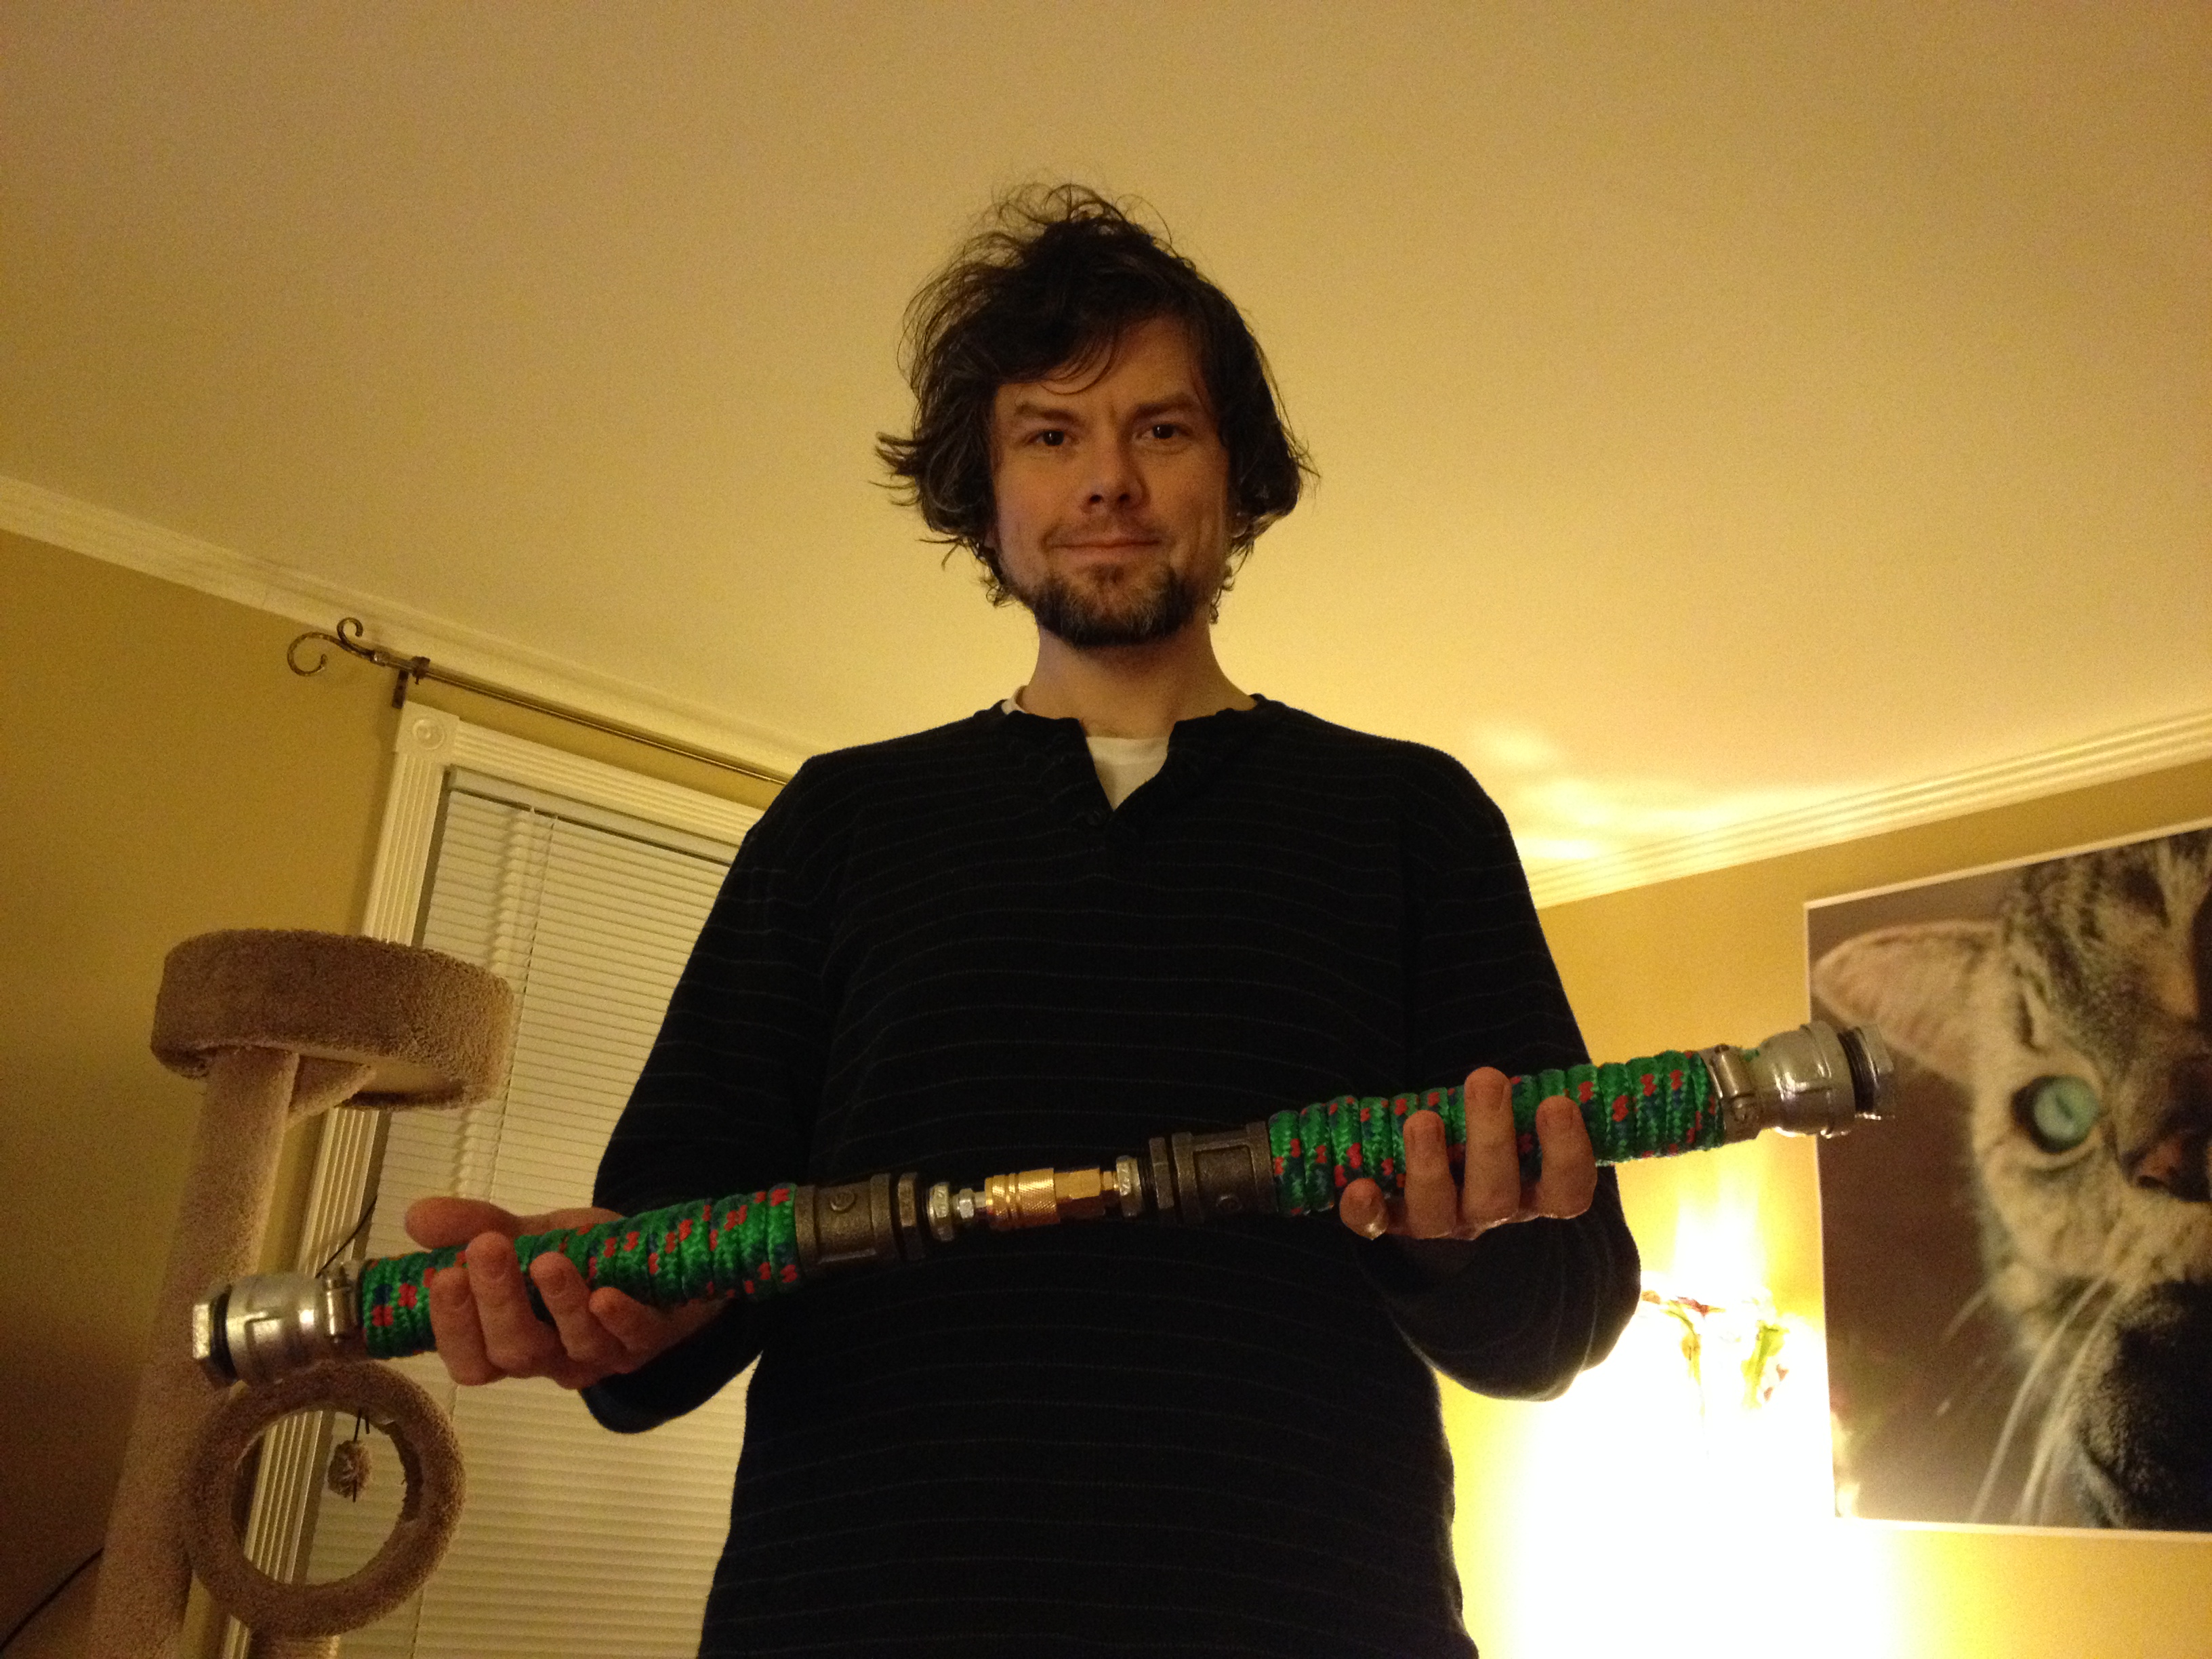
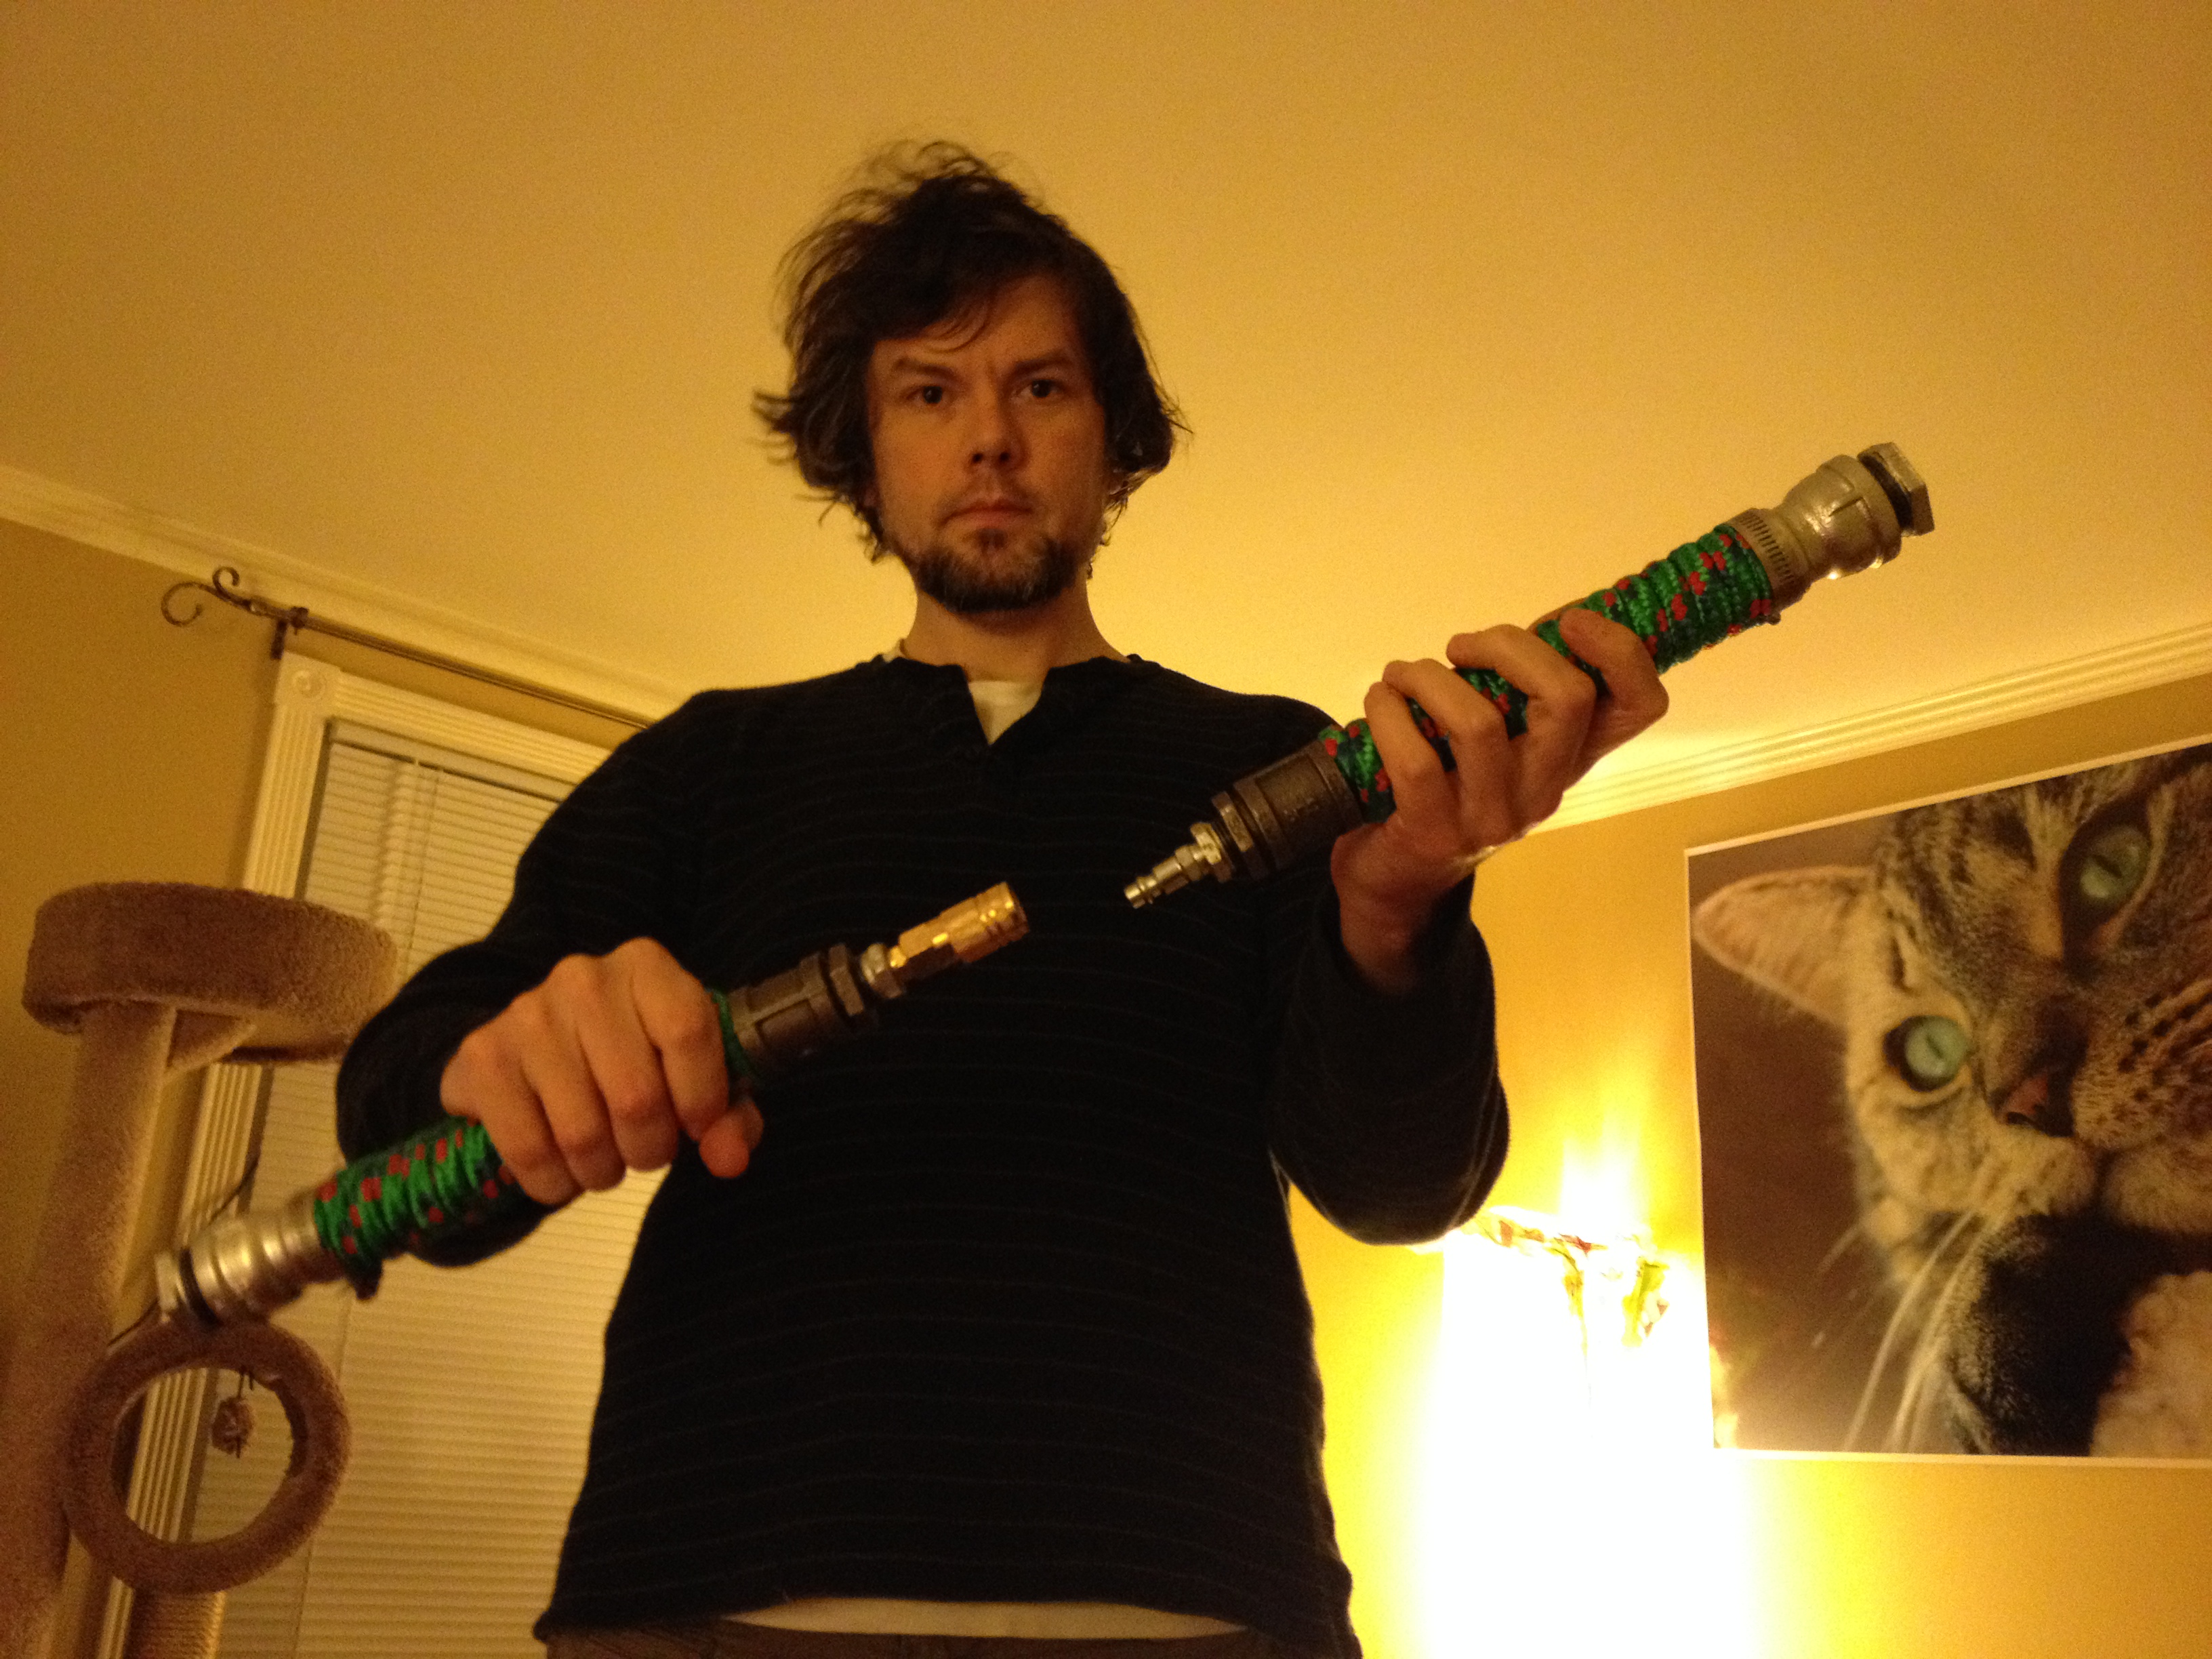
Darth Maul’s Double-Bladed Lightsaber
I built this Darth Maul inspired lightsaber as a way to figure out an easy way of having a two bladed saber that can split into two separate lightsabers. My solution was to use quick disconnect air hose fittings.
In order to make this work with the larger pipes used for Darth Maul’s lightsaber, which appears heftier in Episode I, I had to use two bushings to reduce down to the smaller size of the air hose fittings.
Here is the double-bladed lightsaber connected.
Here is the double-bladed lightsaber disconnected into two separate sabers. I didn’t build blade attachments for this saber, so I couldn’t test how much pressure/stress could be applied to the quick disconnect coupler that holds everything together. I suspect that this kind of assembly can only be used for show rather than demonstration of saber techniques (as I had constructed the two sabers above). With further modification, I believe that someone could sheath the quick disconnect coupler with metal so that the saber appears more solid from end-to-end instead of having this smaller, weak point in the middle as this demonstration saber appears.
I hope these extra photos and explanation help. Good luck with your builds, and please share any photos that you post online of your sabers in the comments below!