    Alas, poor Yorick! I knew him, Horatio: a fellow
    of infinite jest, of most excellent fancy: he hath
    borne me on his back a thousand times; and now, how
    abhorred in my imagination it is! my gorge rims at
    it. Here hung those lips that I have kissed I know
    not how oft. Where be your gibes now? your
    gambols? your songs? your flashes of merriment,
    that were wont to set the table on a roar? Not one
    now, to mock your own grinning? quite chap-fallen?
    Now get you to my lady's chamber, and tell her, let
    her paint an inch thick, to this favour she must
    come; make her laugh at that. -Shakespeare, Hamlet
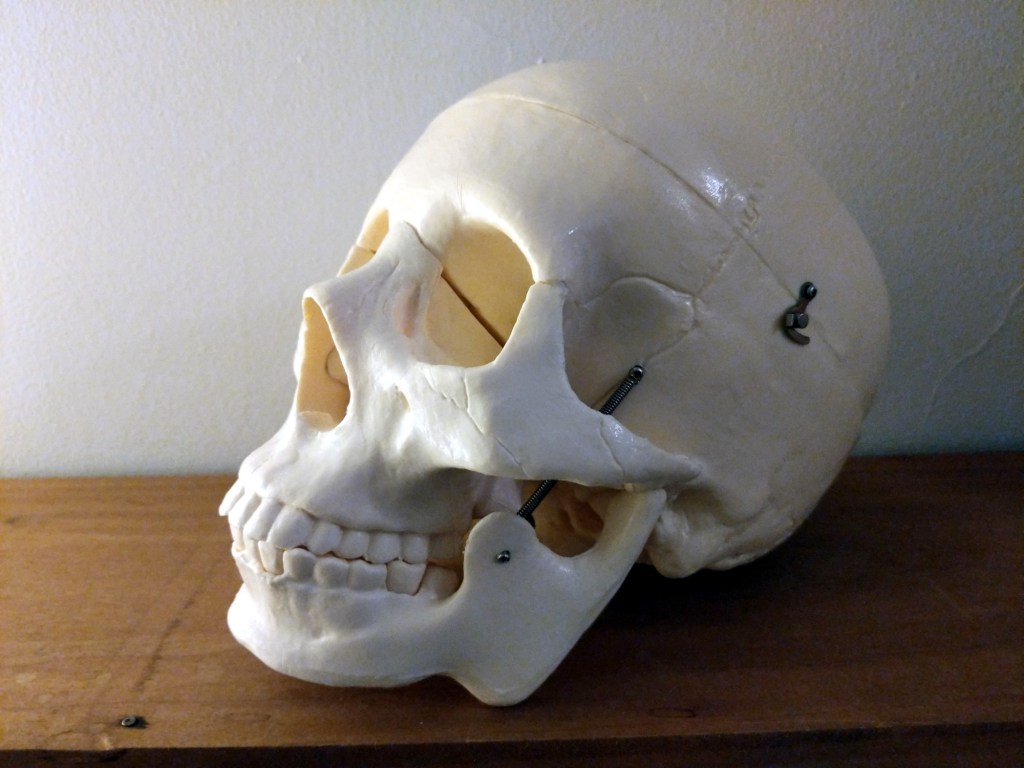
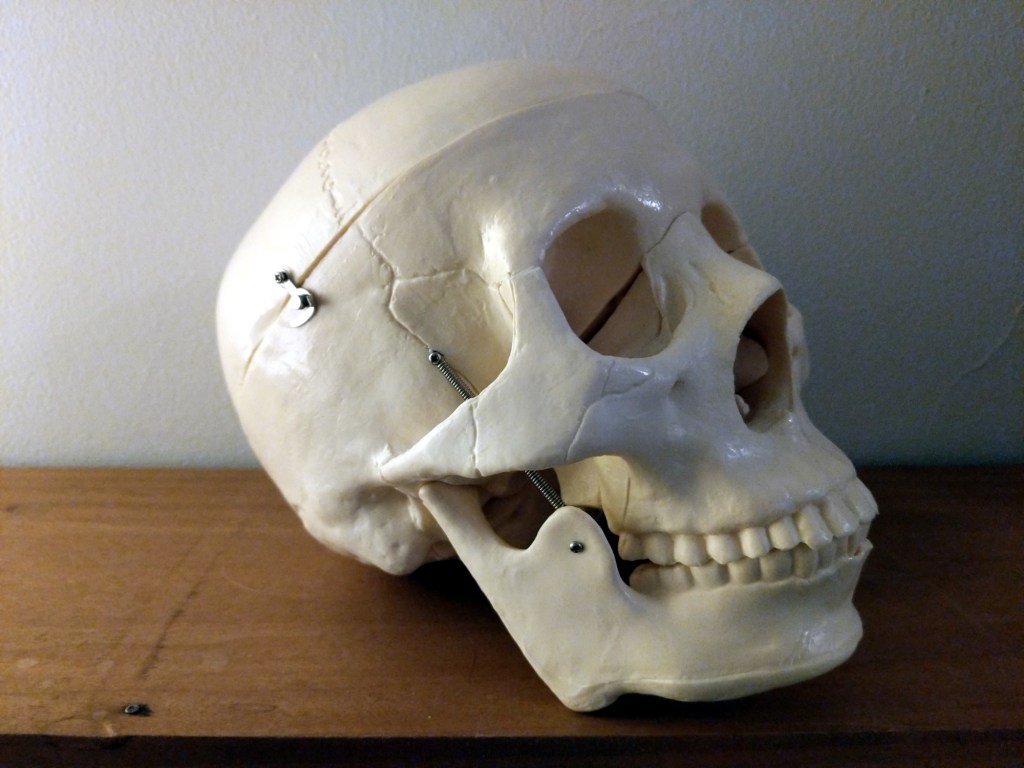
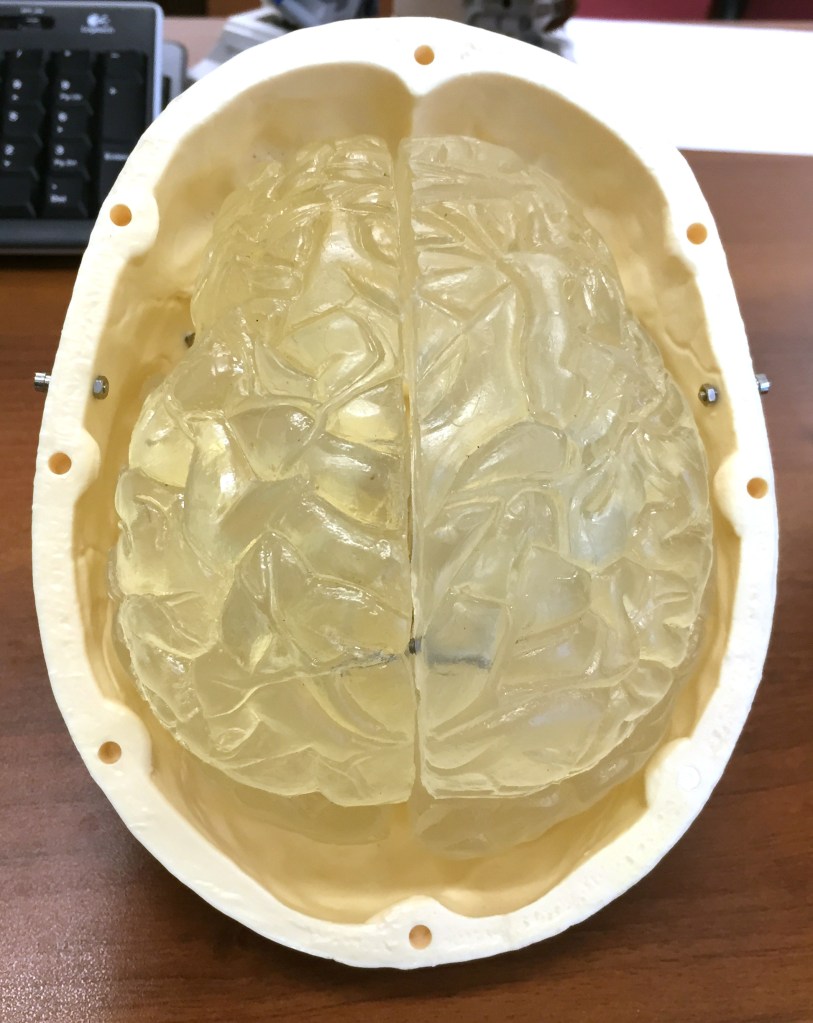
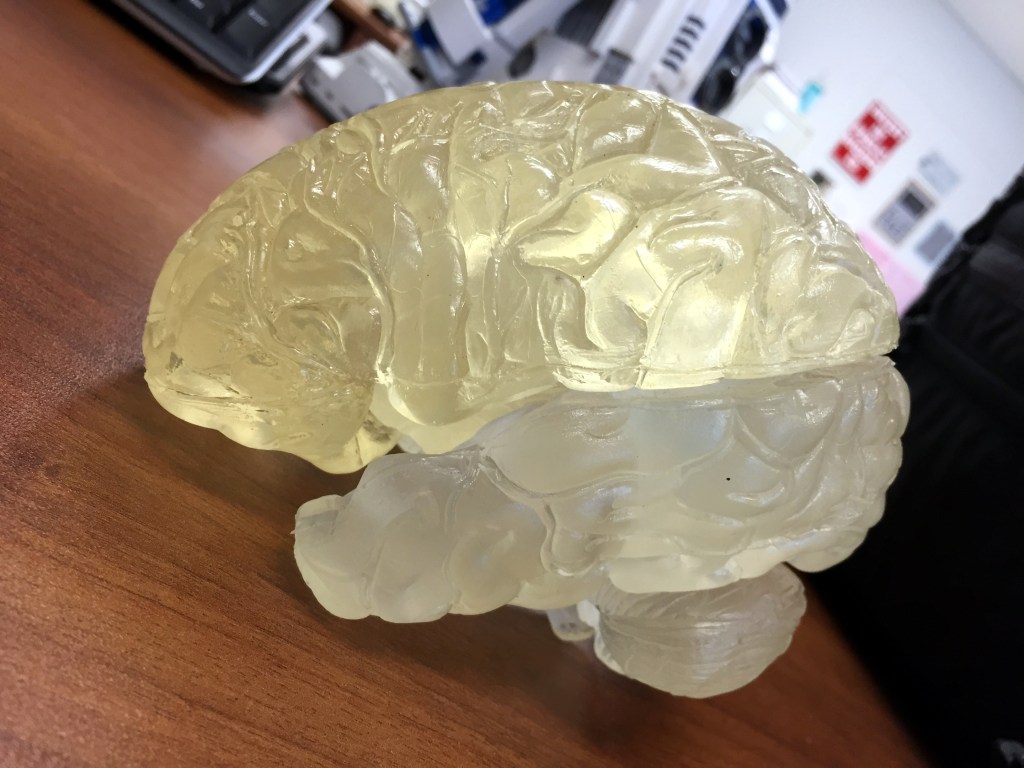
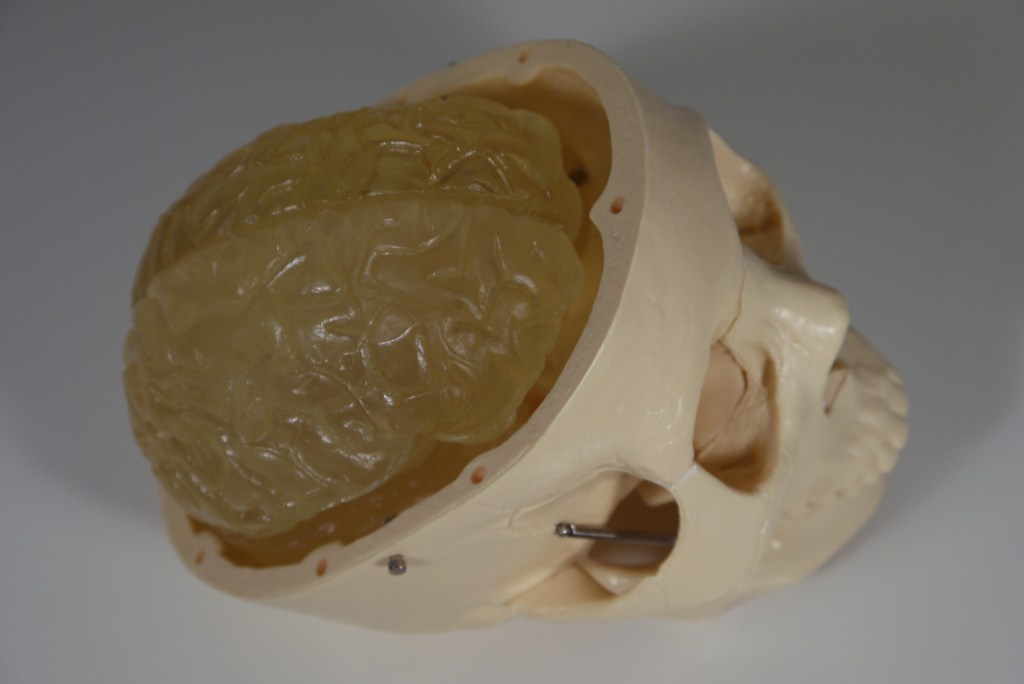
I bring my trusted skull and brain model nicknamed Yorick to my writing and science fiction classes when I want to talk about something related to cognition–e.g., how our attentional focus works, cognitive costs of switching cognitive tasks, time delay from sensory perception to processing to conscious awareness, where are the speech regions–Broca’s area and Wernicke’s area–located, etc. Yorick’s skull and multi-component brain gives students something that they can see and feel and manipulate when it gets passed around the classroom.
And when students leave a hat behind, Yorick gets a treat.
After I returned home, I built this LEGO MOC (my own creation) of the Weezer stage. At that point, I only had some Star Wars LEGO sets, so I had to pick up some additional bricks and minifigures to create this model. Notably, I purchased the cheapest Harry Potter set (for the bespectacled Rivers Cuomo) and a large brick assortment set for the stage base and back.
I based the stage arrangement on Weezer’s stage design at the Key Arena performance. They had a backdrop covered with equally distant squares. Lights behind the black squares illuminated and played lights on the backdrop. In front of the stage back was a large stylized “W” that descended from above when the band began playing.
For the backdrop lights, I used battery-powered Christmas lights.
For the stylized “W,” I cut it out from card stock.
Also, I used card sock to cut out guitar and bass shapes that I taped to rods that the minifigures held.
Apologies for the quality of the photos. I took the photos with my second digital camera. The first was a Sony Mavica with 3.5″ floppy disk. I sold it and purchased a Sony Cyber-Shot DSC-P3 (I think). I’m lucky to have these photos as I think I took them more to experiment with the camera than to memorialize the LEGO model!
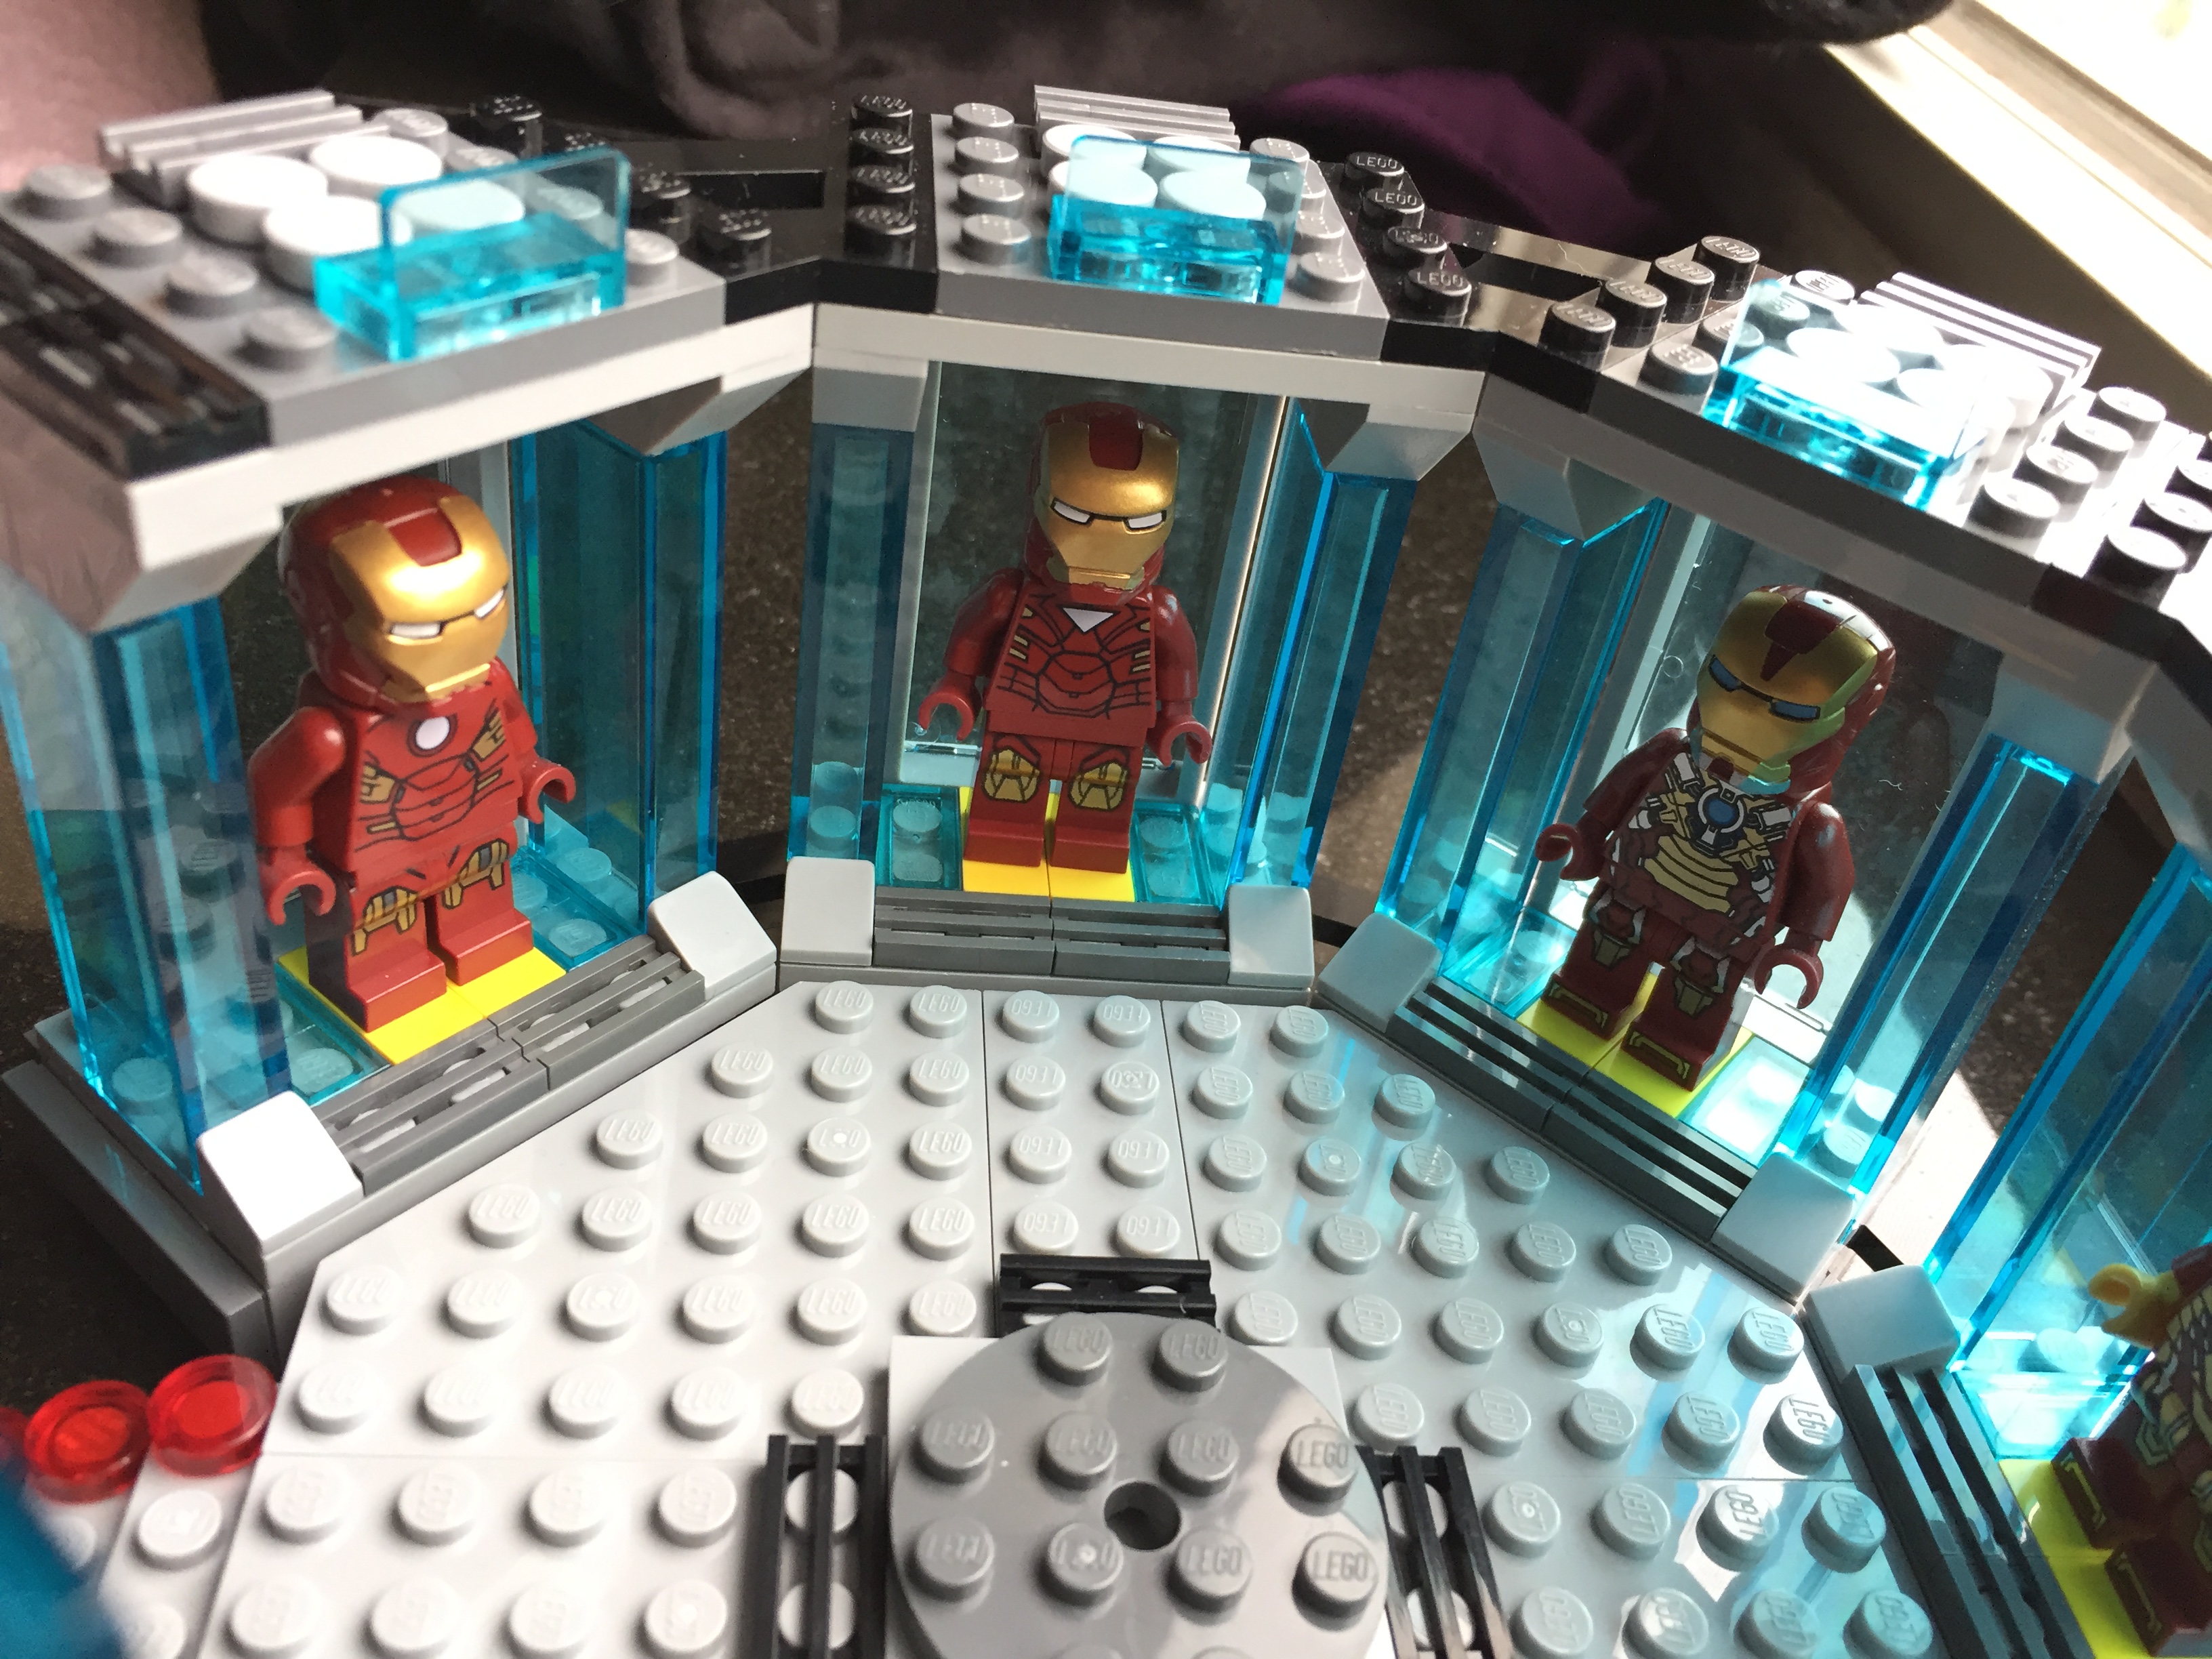
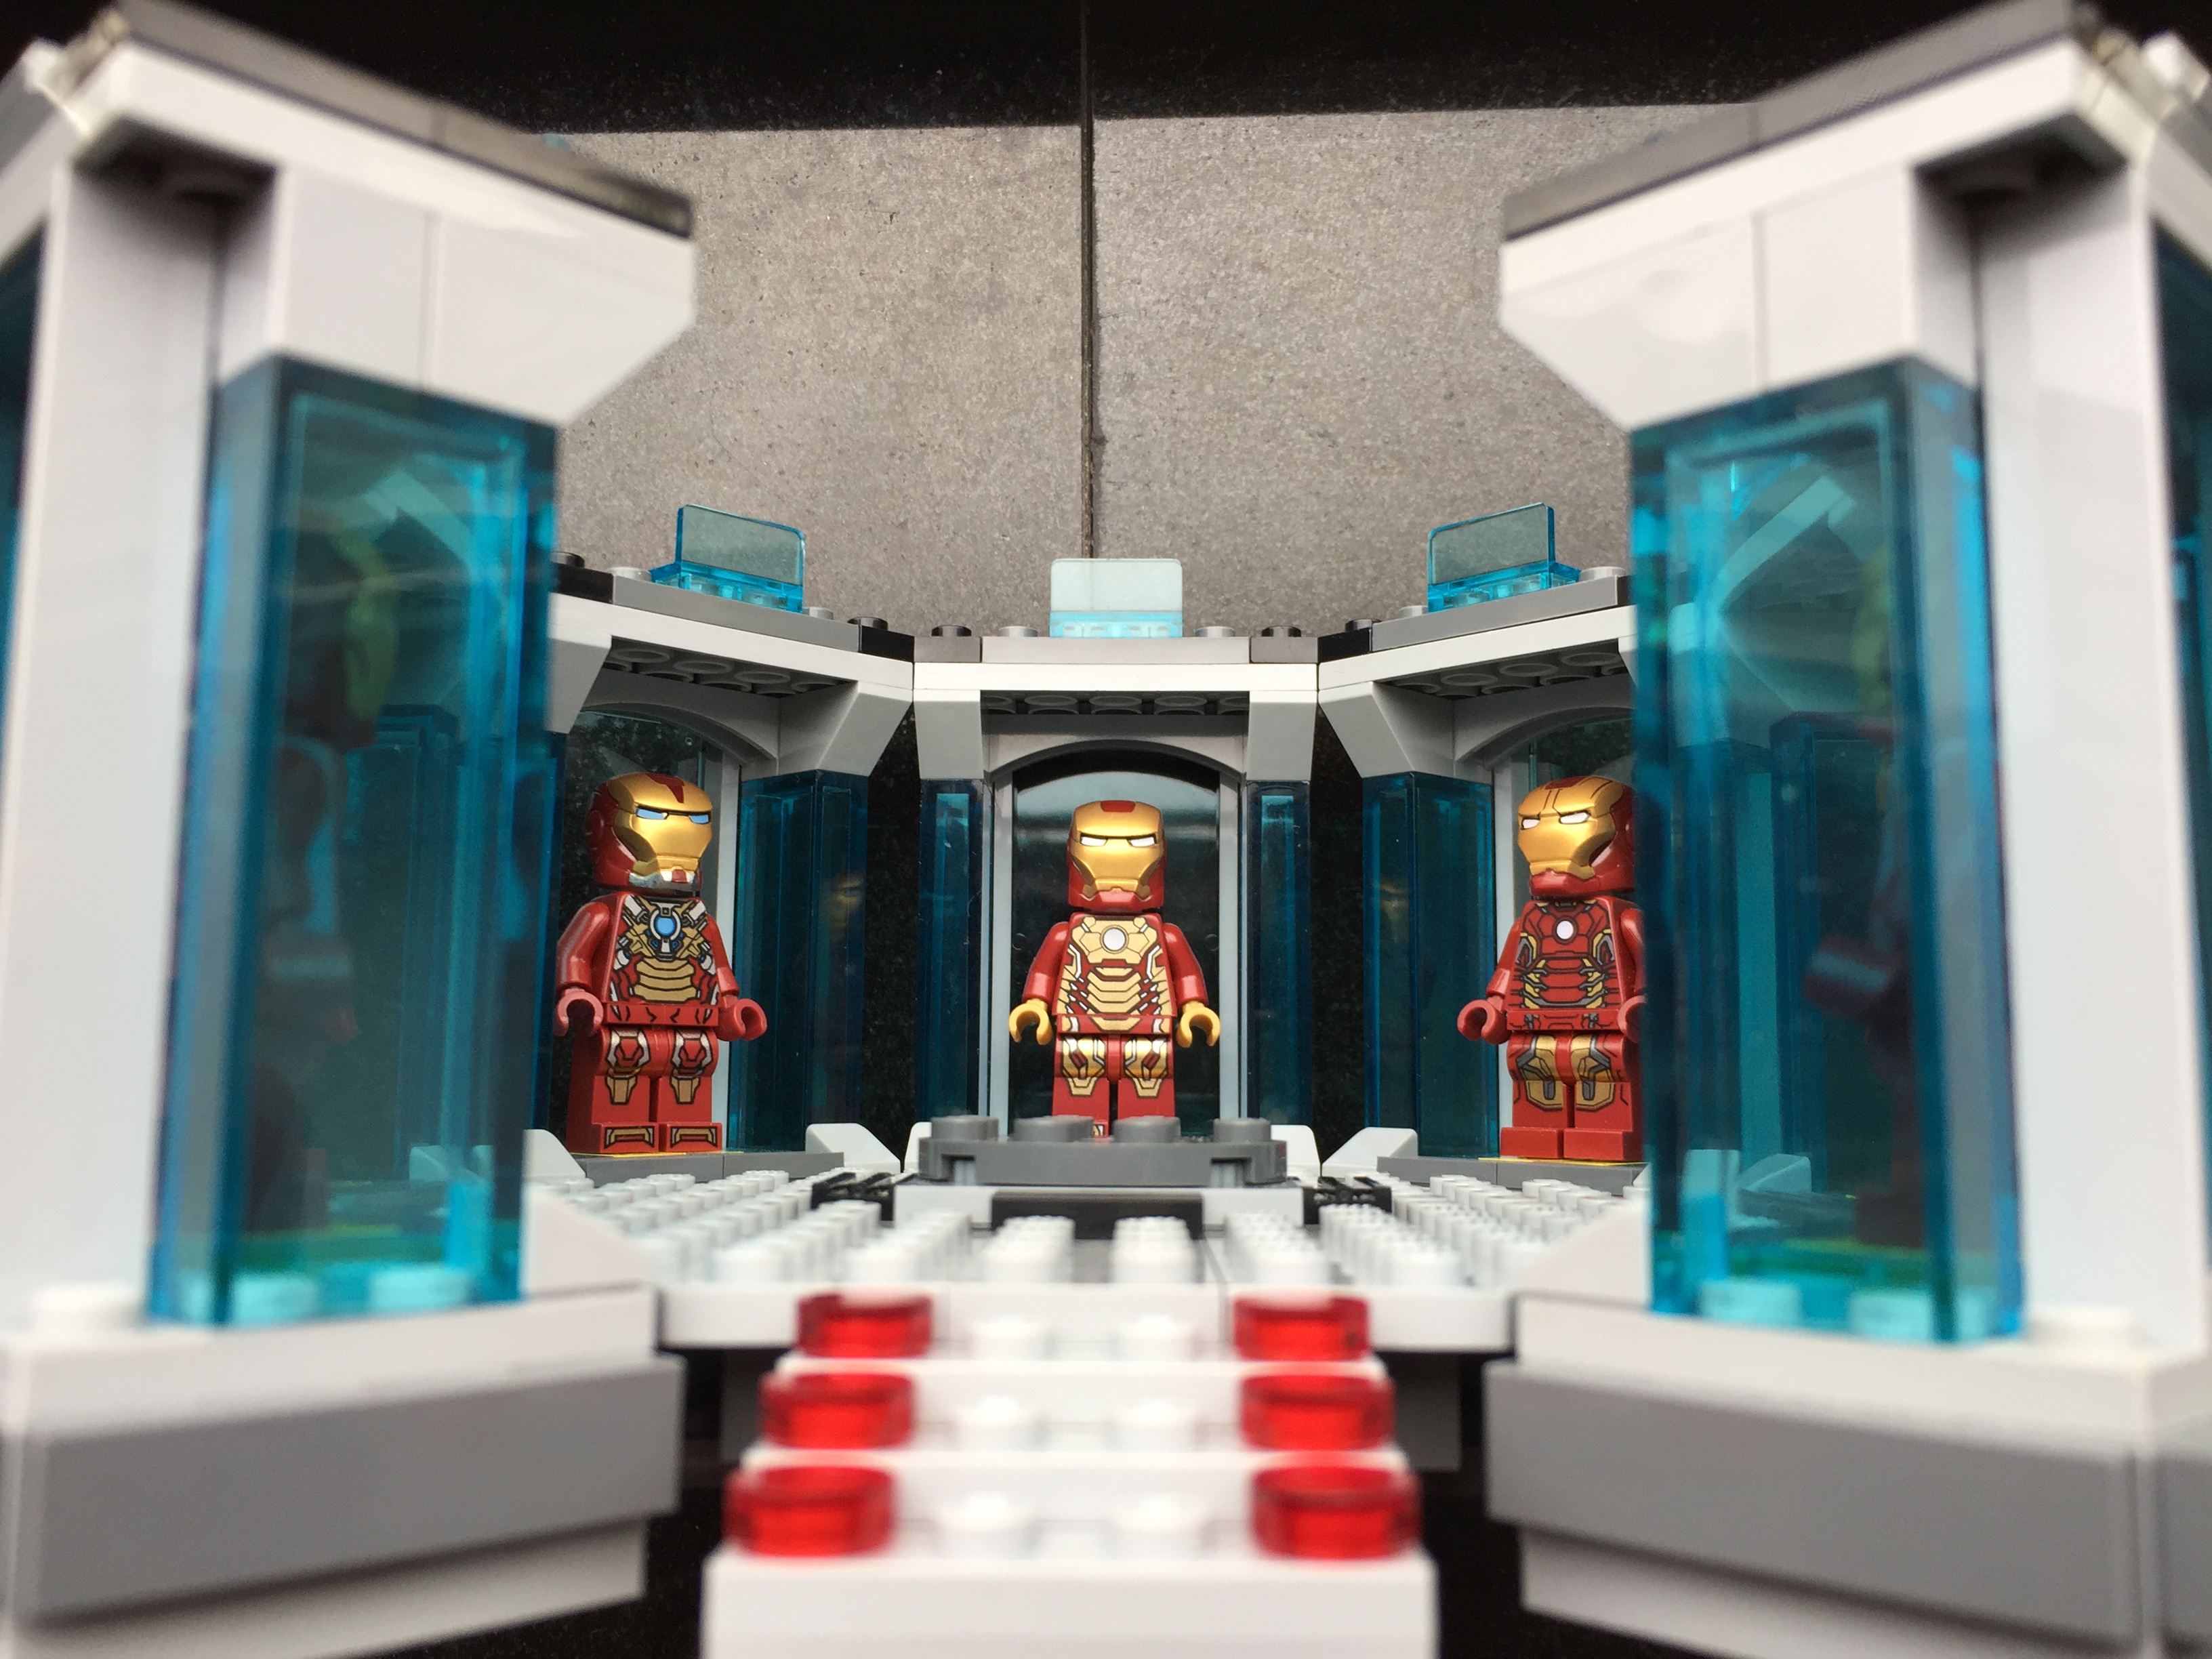
While continuing to sort my LEGO brick collection, I discovered four more Plate (A) 4M 45° pieces. With these special elements in-hand, I updated and expanded my LEGO Iron Man’s Hall of Armor, which I wrote about previously here.
I used a similar repetition for each armor suit pod, but I added one stud roof tiles (Roof Tile 1X1X2/3, Abs) at the base of each vertical transparent blue wall on either side of an armor suit.
Armors from left to right: Mark III (Iron Man film), Mark VI (Avengers), and Mark XVII “Heartbreaker” (Iron Man 3)
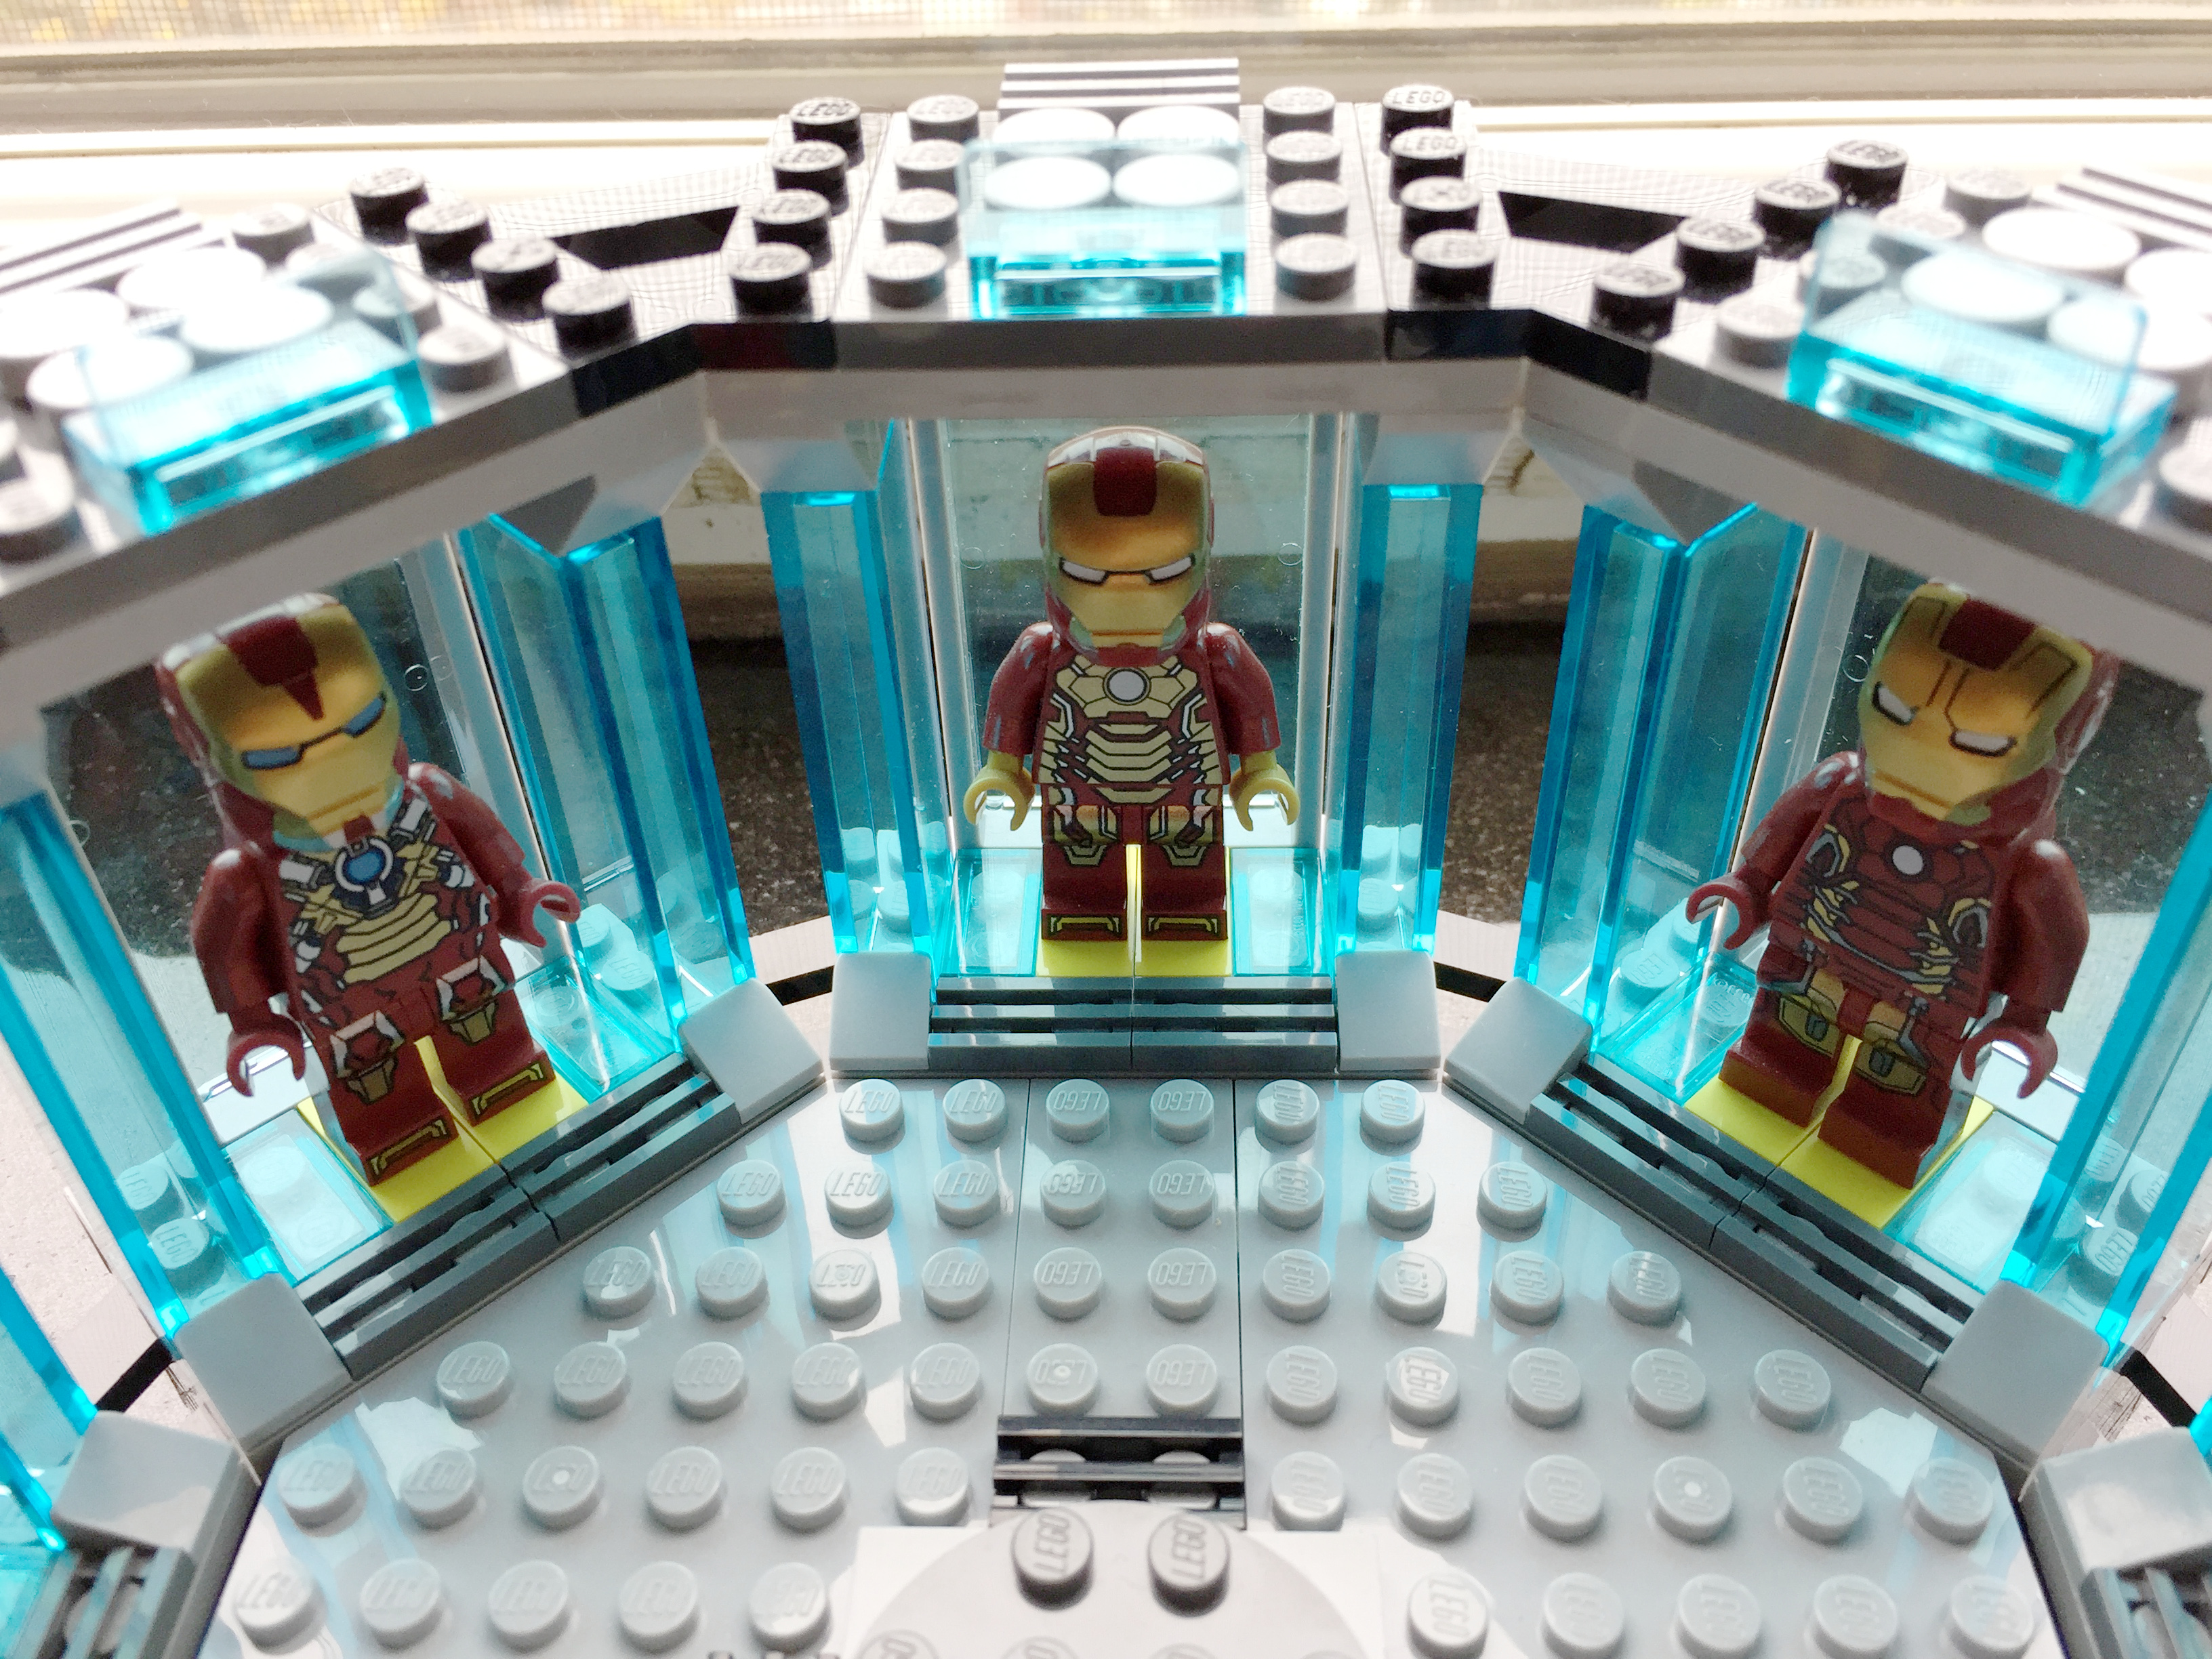
To complete the model, I needed Iron Man’s armor with the triangular arc reactor window from the first Avengers movie (Mark VI armor). I ordered the 30167 polybag on ebay from a seller in Brooklyn (interestingly, it takes longer for mail to arrive from within my city borough than it does from California or even Germany at standard postal rates!).
Armors from left to right: Mark XVII “Heartbreaker” (Iron Man 3), Mark XLII (Iron Man 3), and Mark XLIII (Avengers: Age of Ultron).
Armors from left to right: Mark XLIII (Avengers: Age of Ultron), Mark XLV (Avengers: Age of Ultron), and Mark XLVI (Captain America: Civil War).
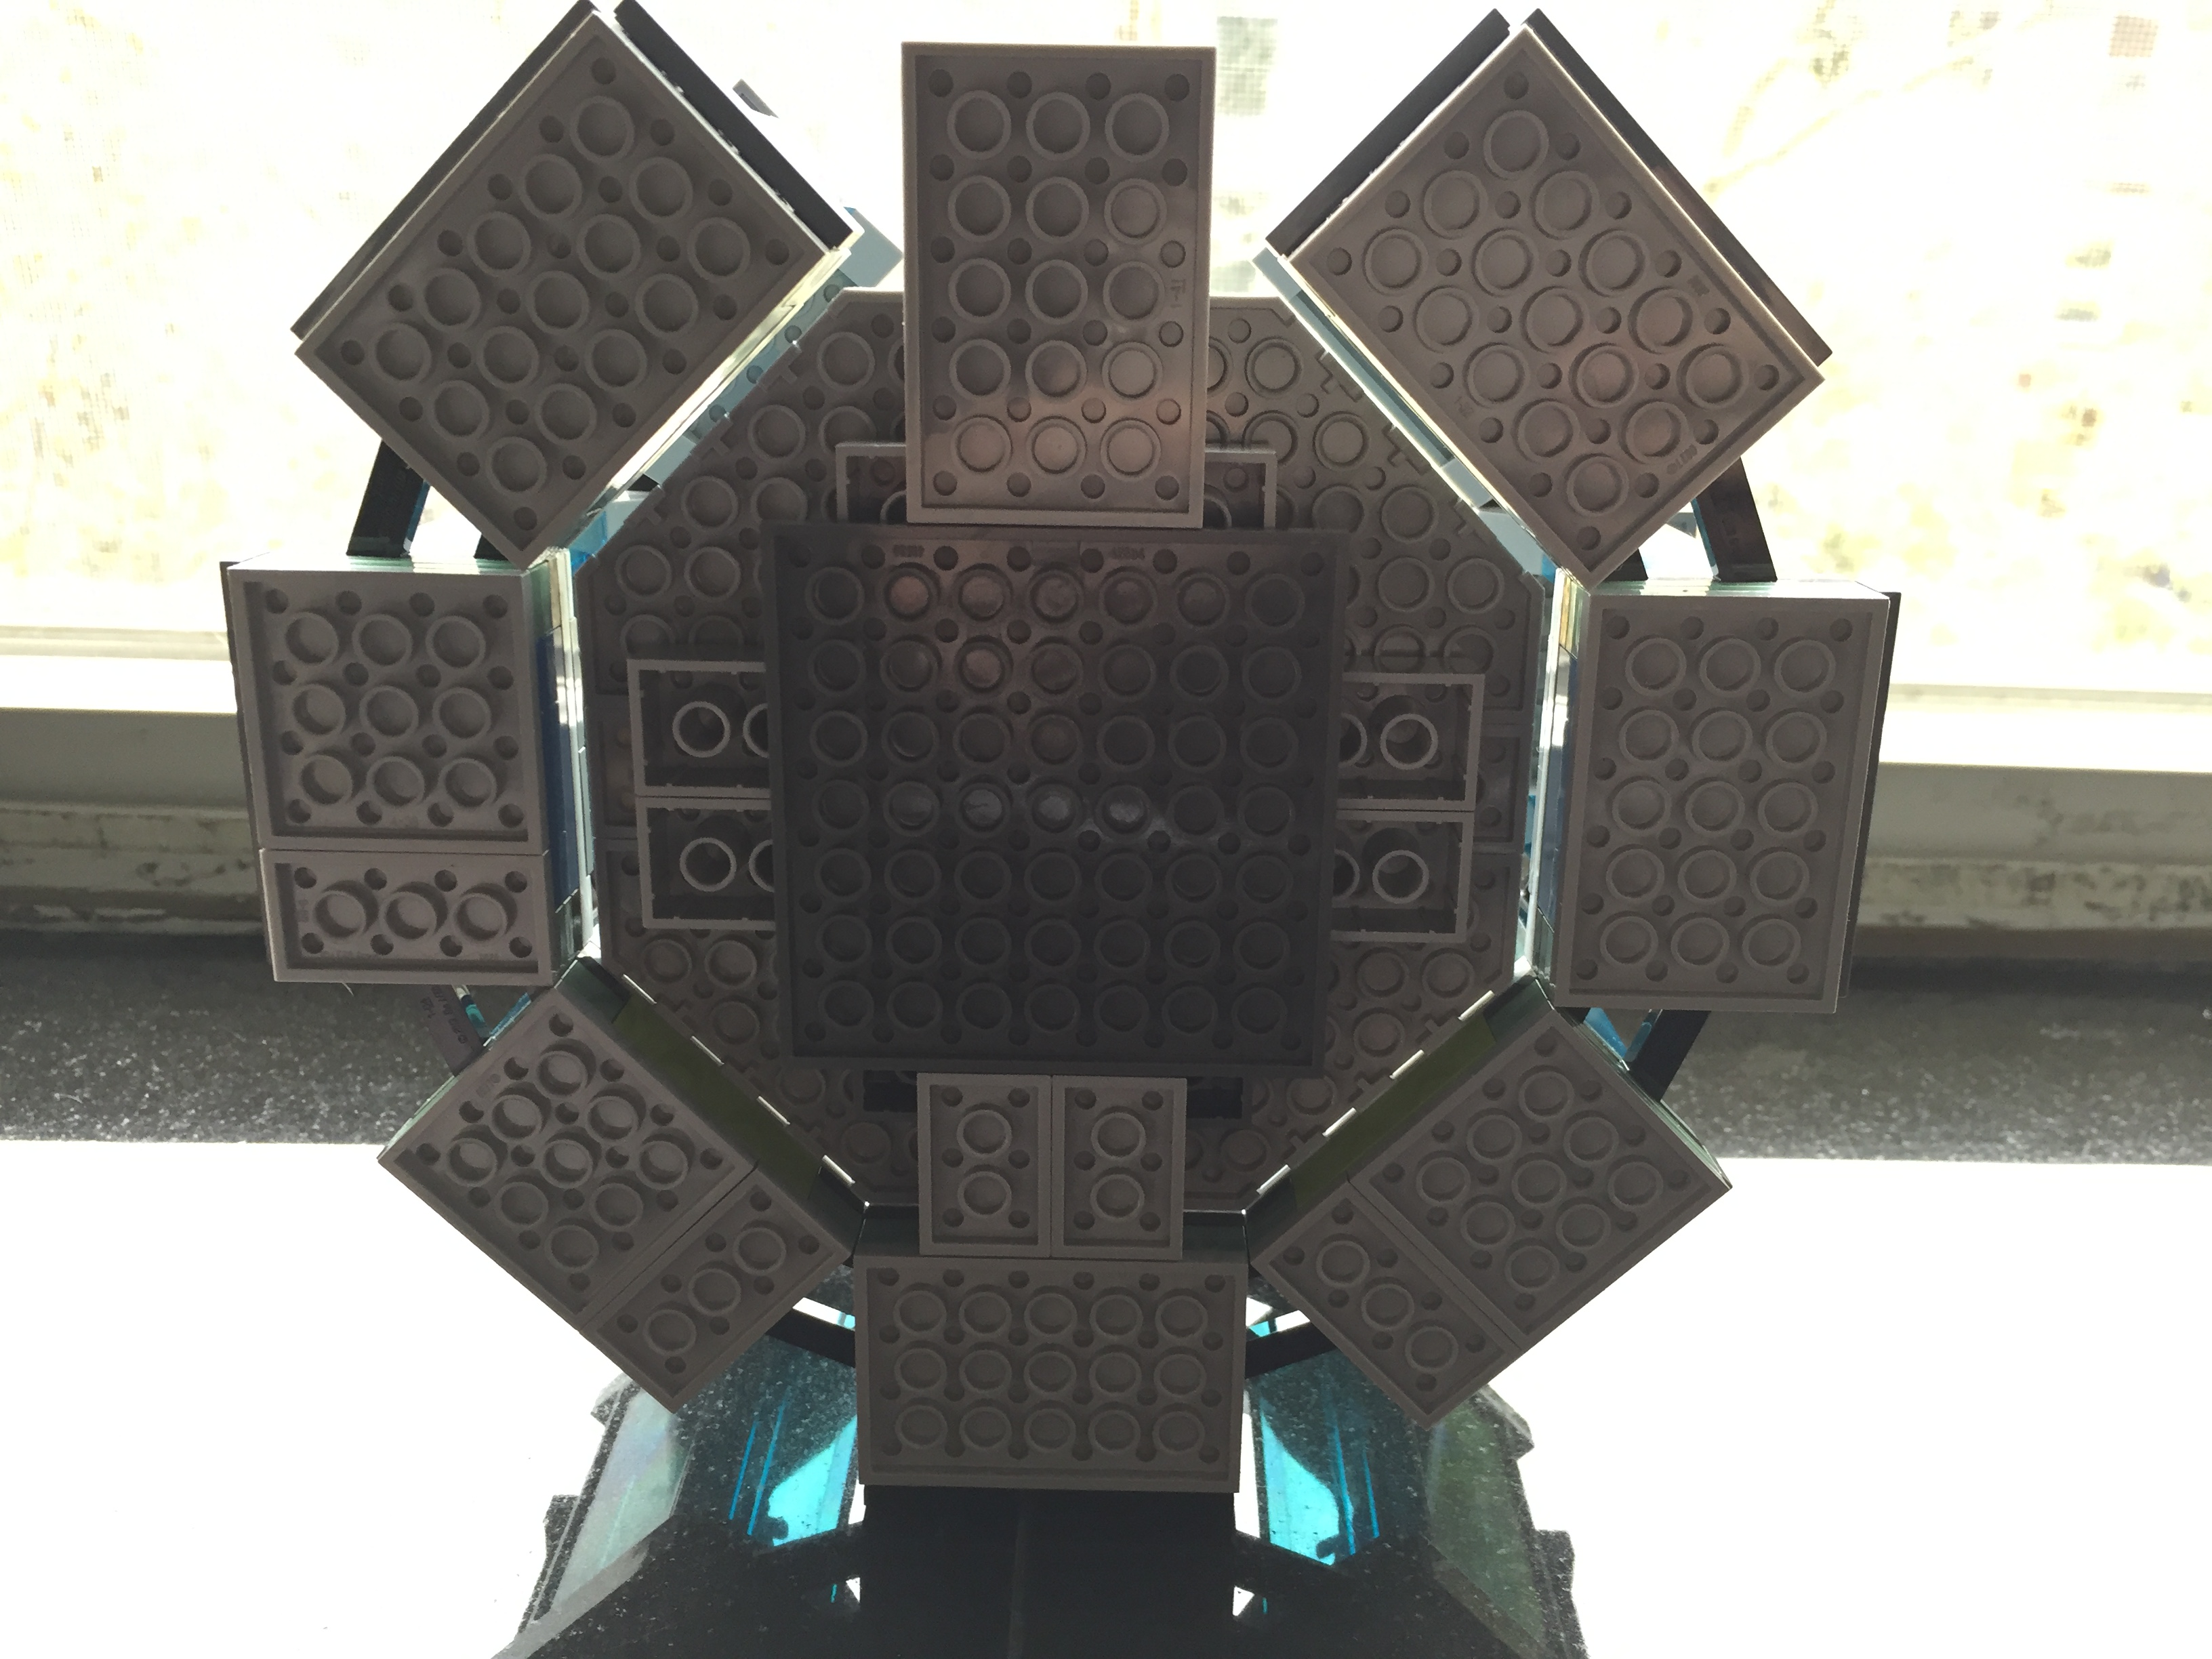
I needed to redesign the base, so I opted to give it a symmetrical support underneath and and a stairway entrance in the southward position. It connects to the circular armor pod assembly with Technics connector pegs and bricks under the northward armor pod. While the center platform makes a tight and neat fit to the upper three pods, its plate studs do not line up with the side or bottom pods (there is a slight gap of about 1/16 to 1/8 of an inch).
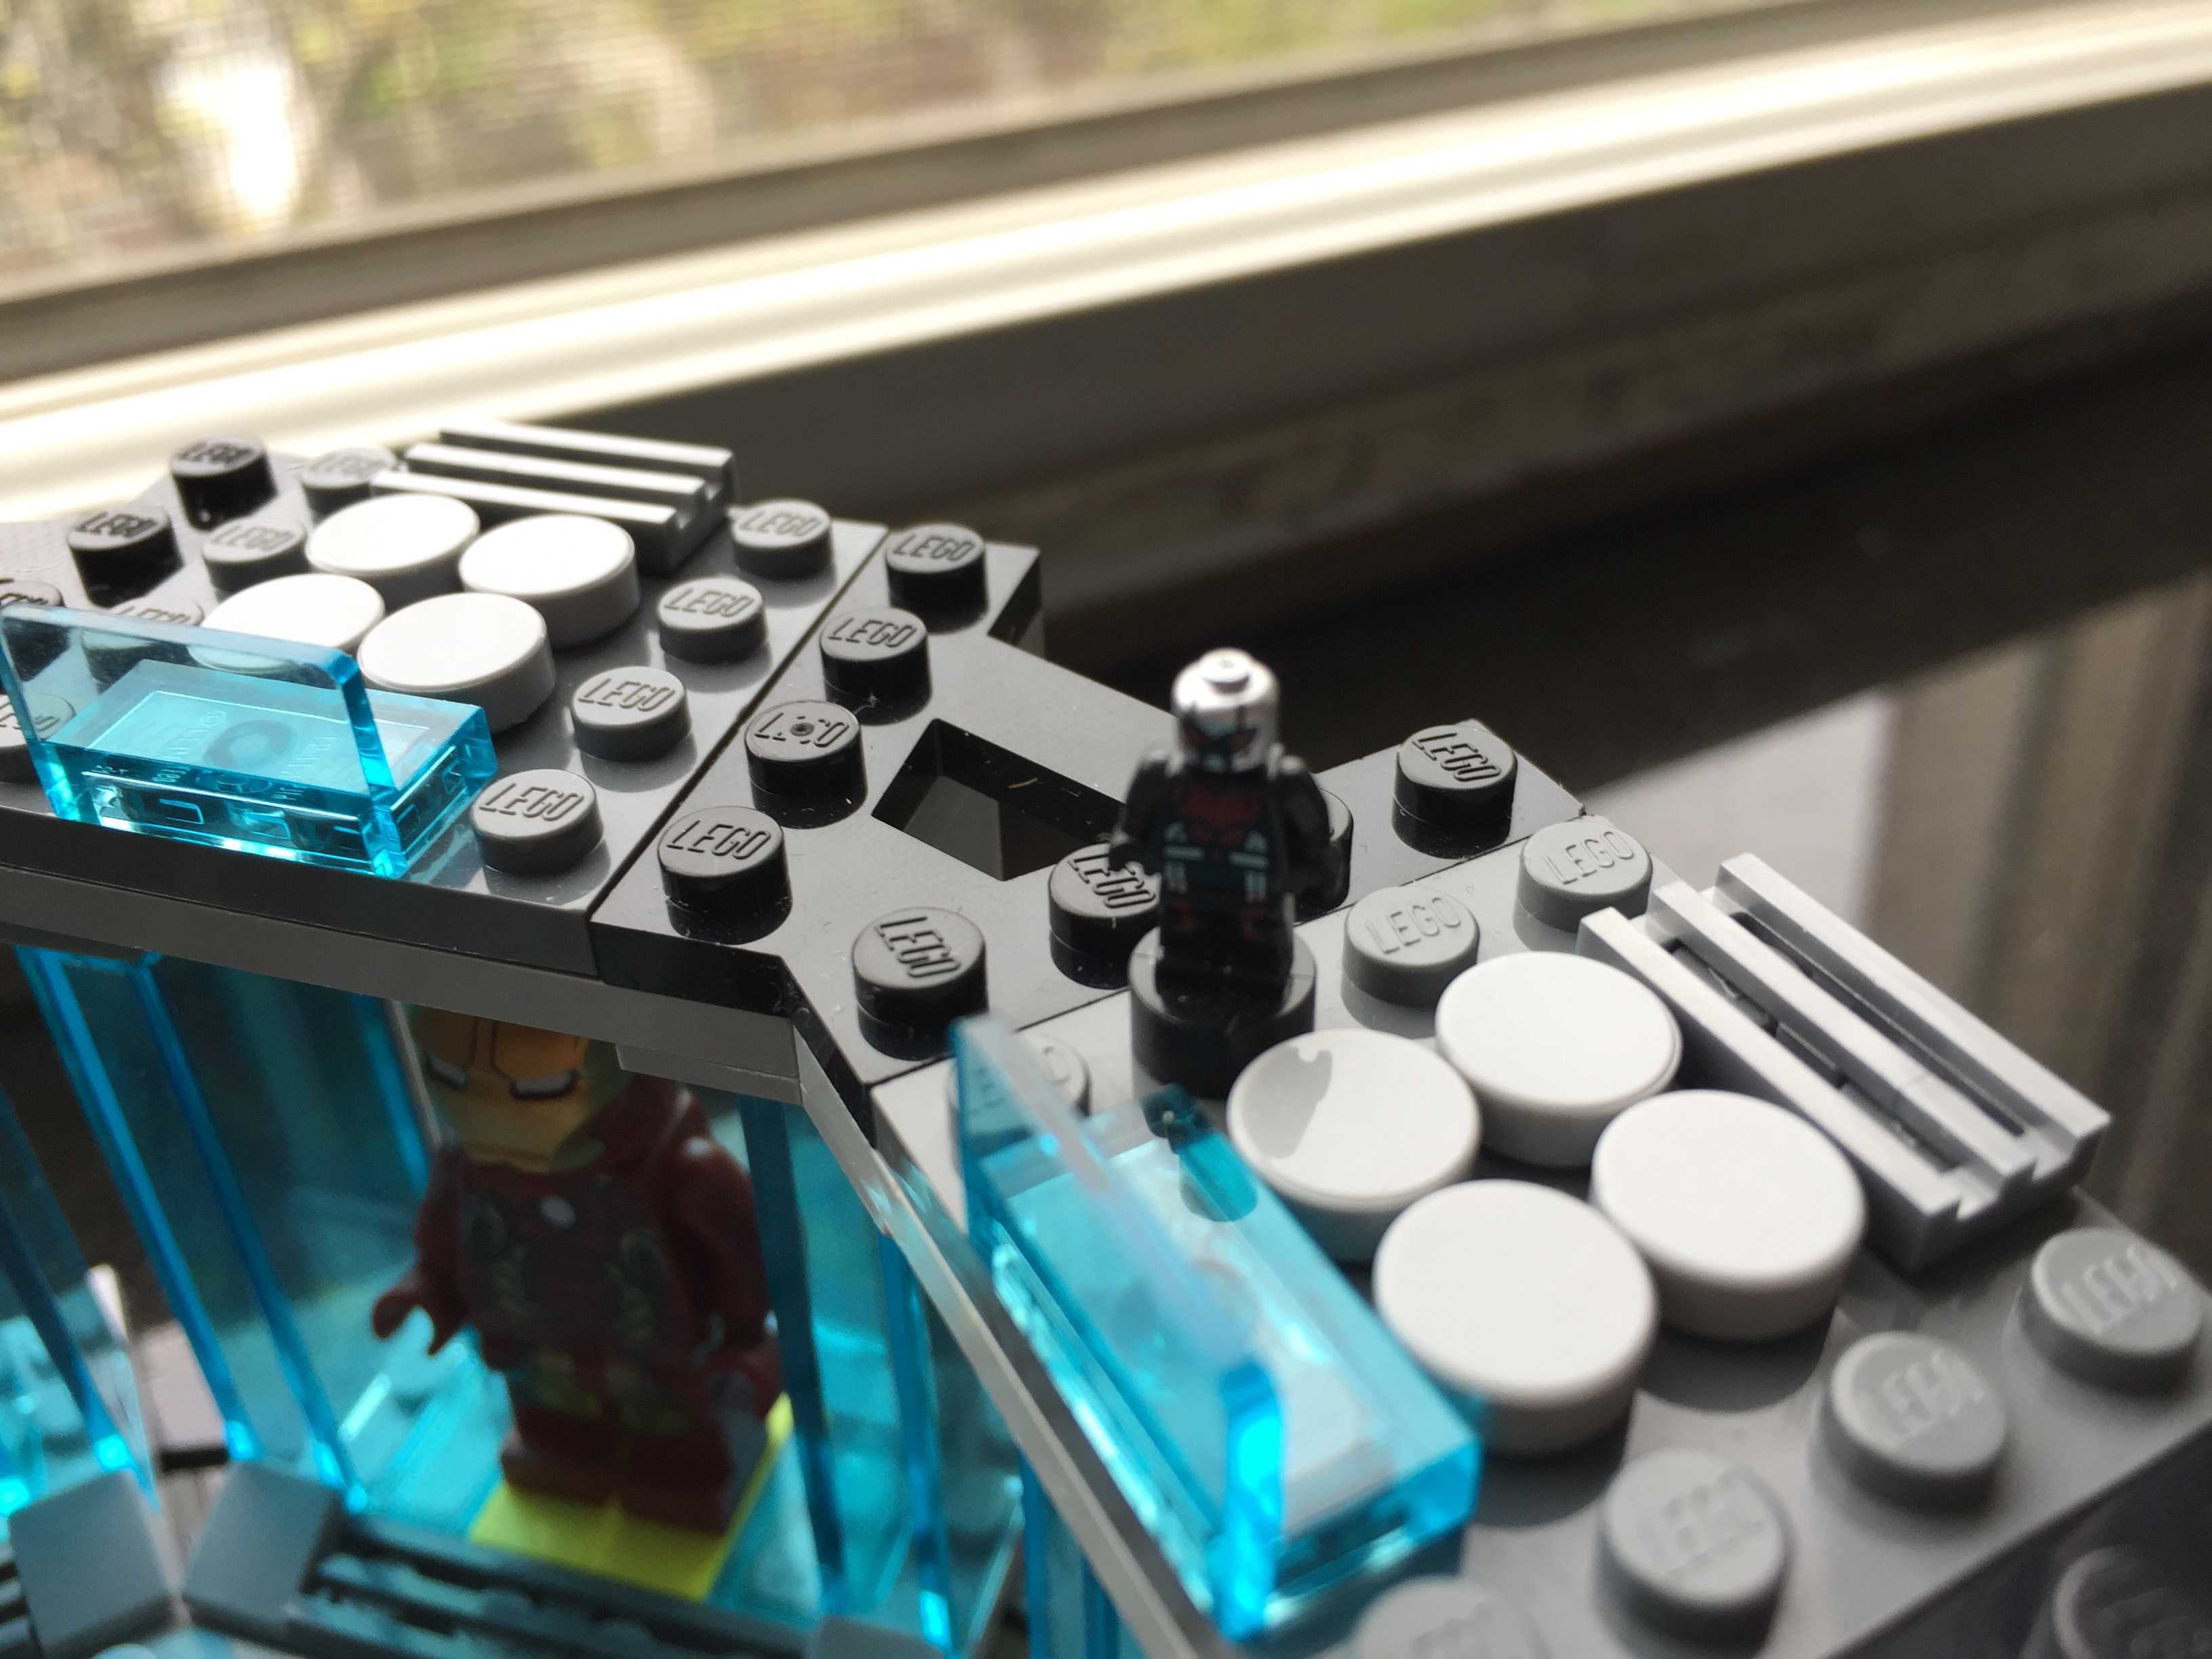
It is a sturdy model that can be lifted from any point. Due to its limited interior space and the size of my adult hands, it is difficult to remove and replace the Iron Man armor in each pod.
My next idea for the set is to elevate it by about its current height and create a crank-driven lift in the central platform for Tony Stark’s grand entrance. This will take some more planning and time. I’m sure that Ant Man will be watching my progress.
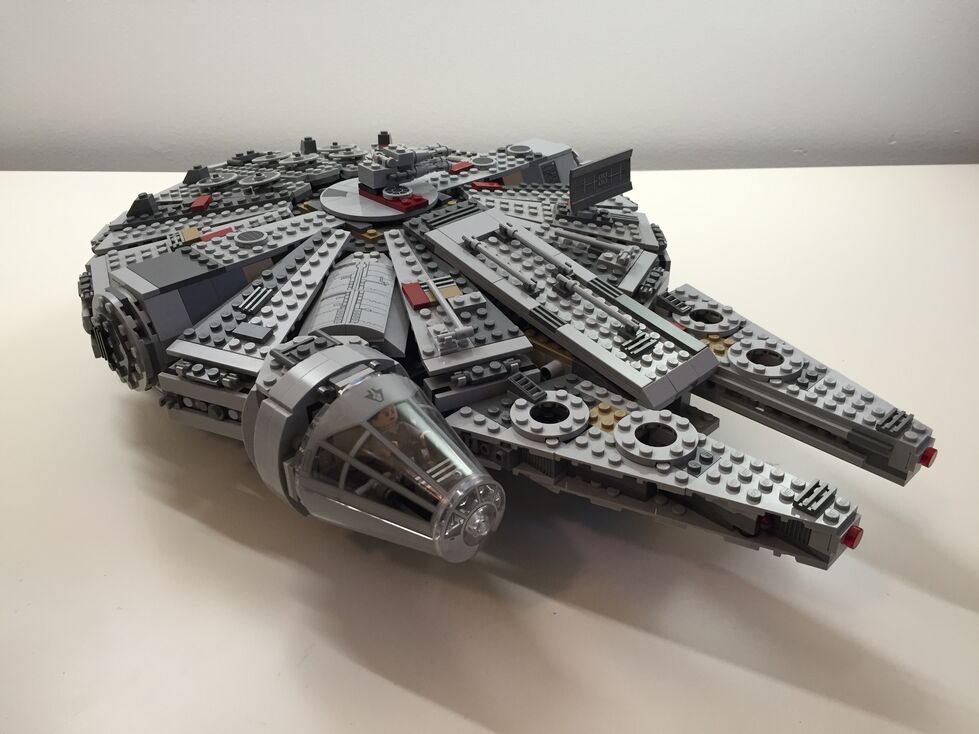
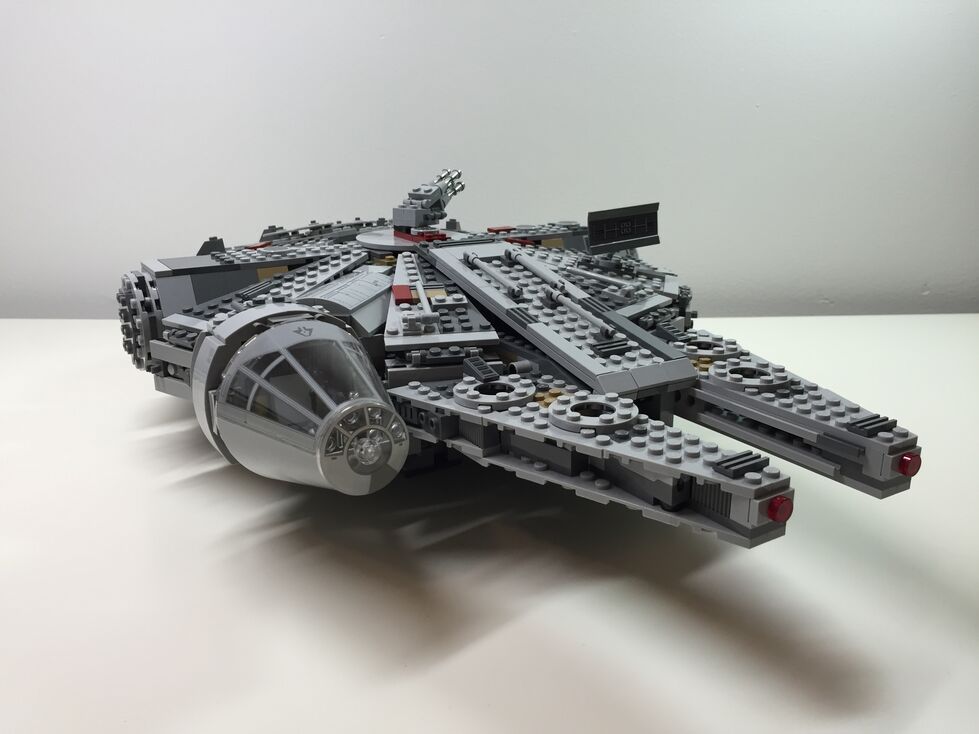
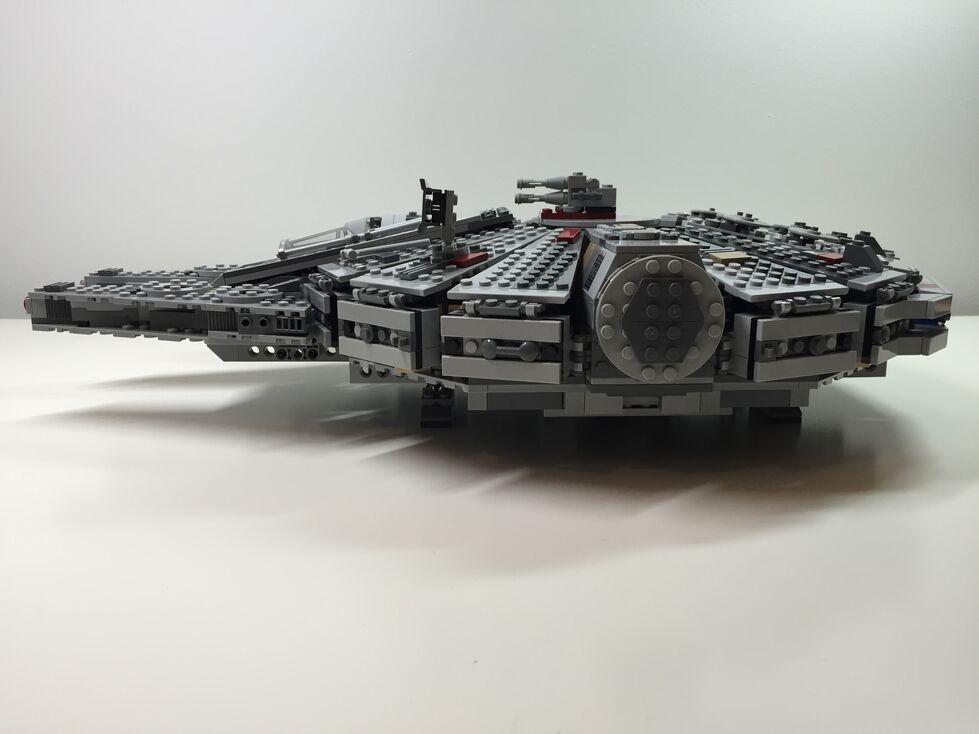
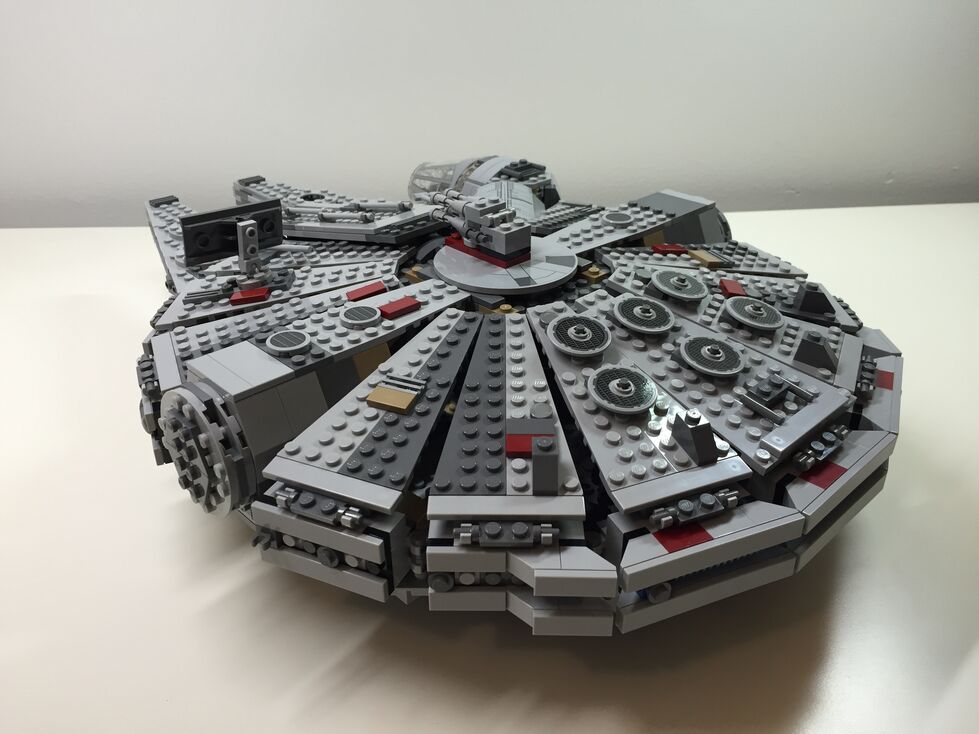
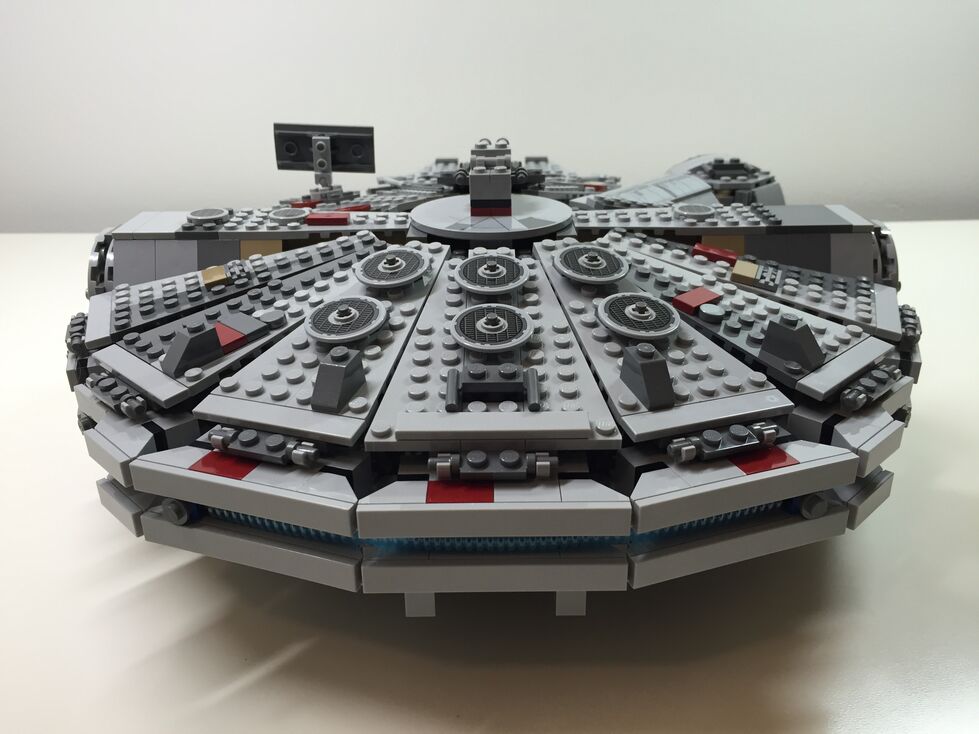
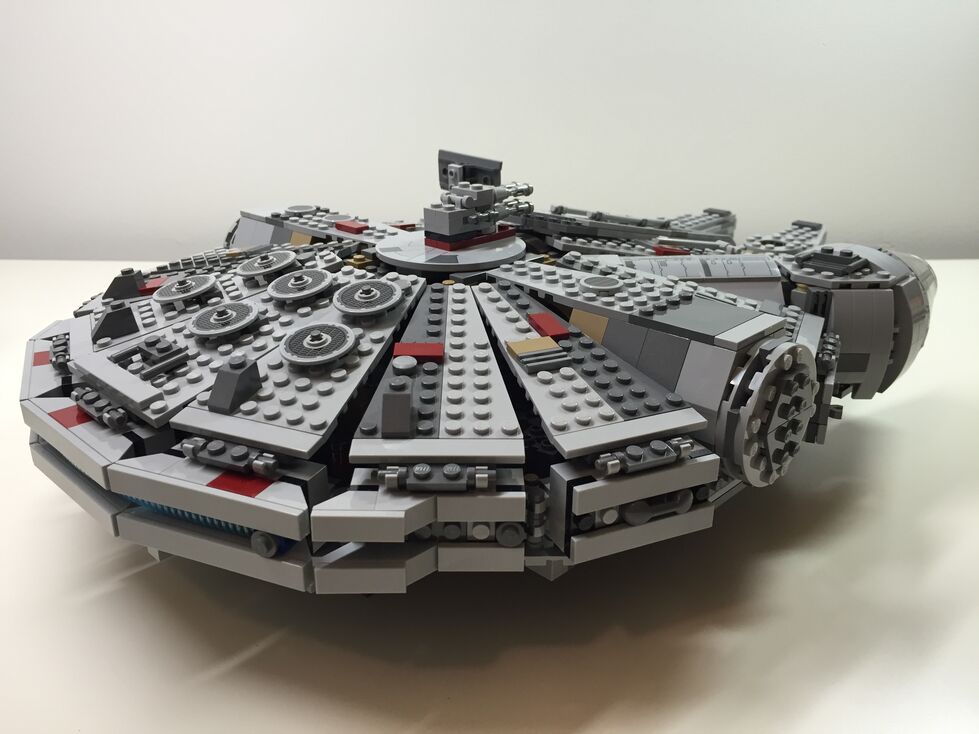
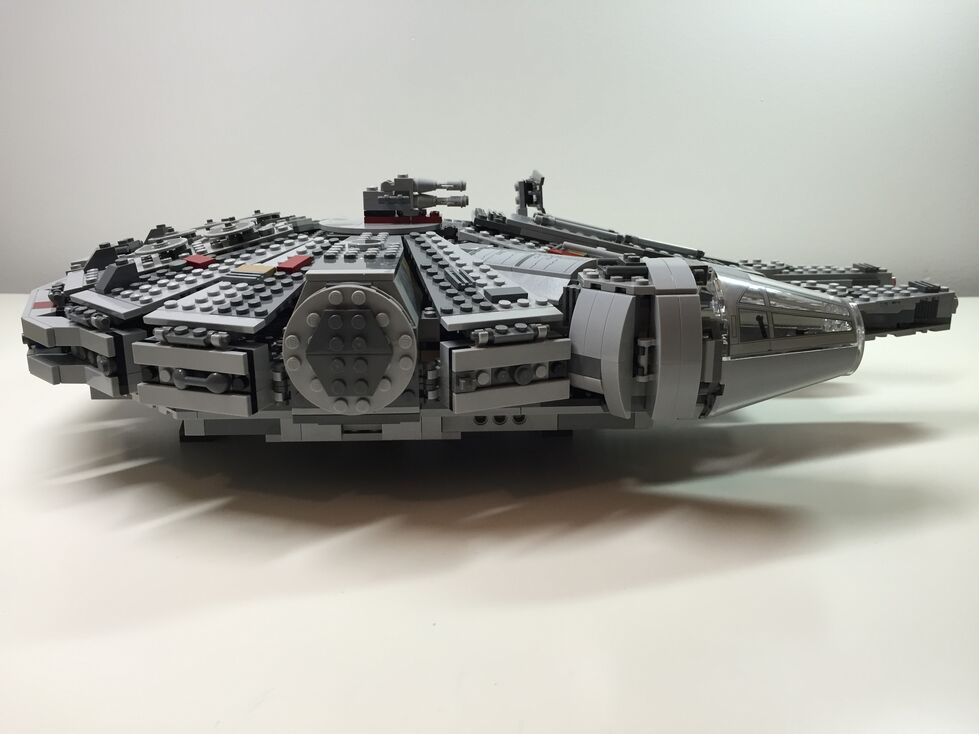
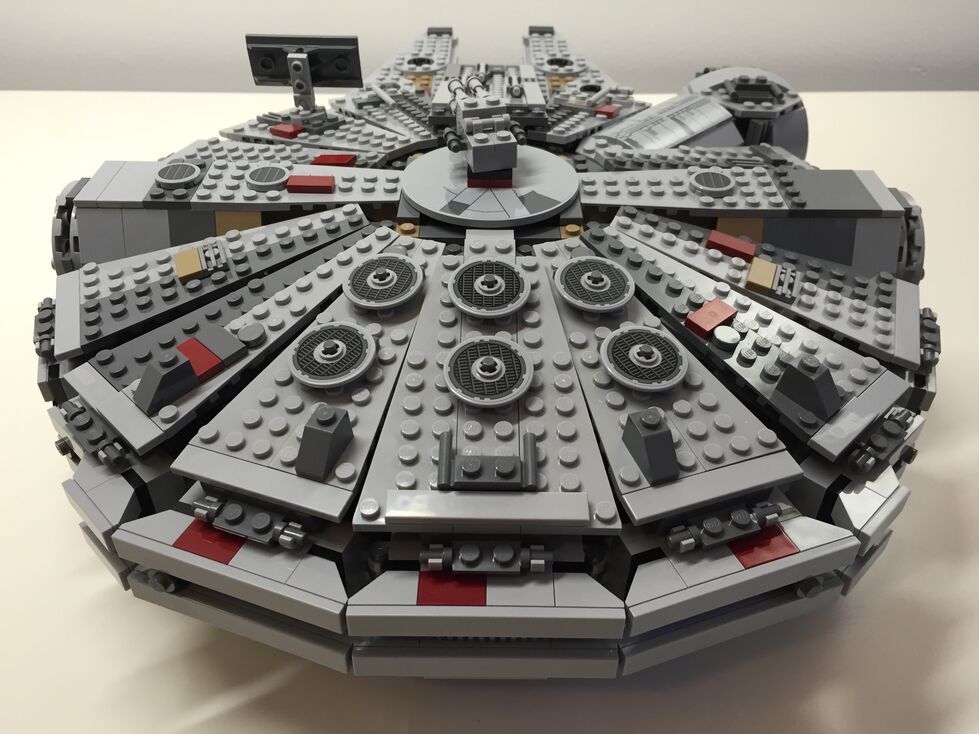
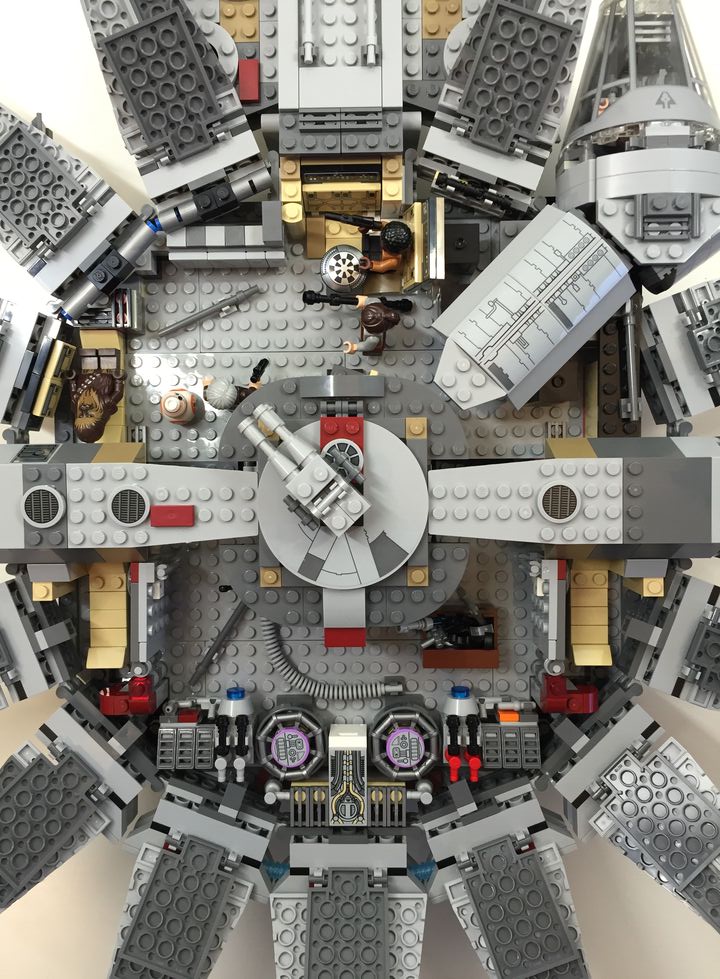
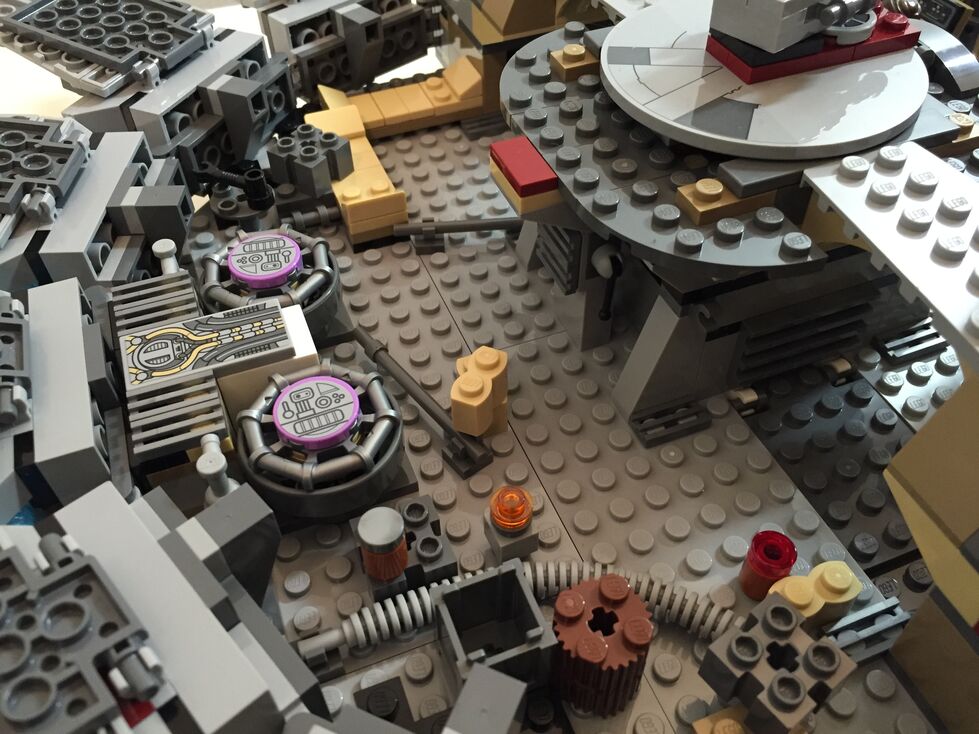
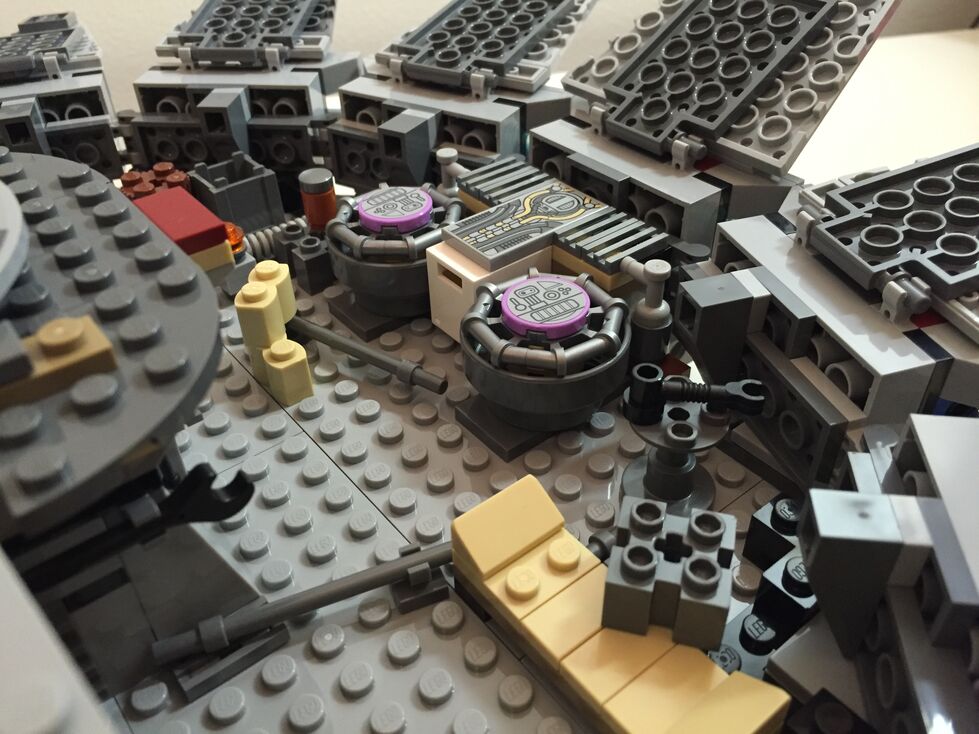
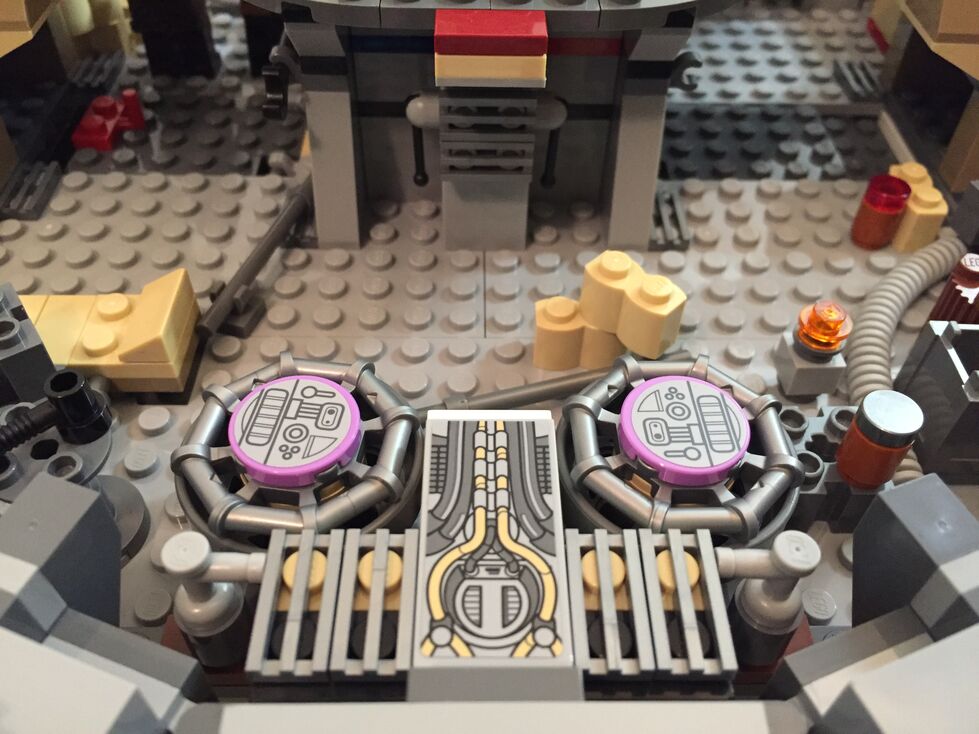
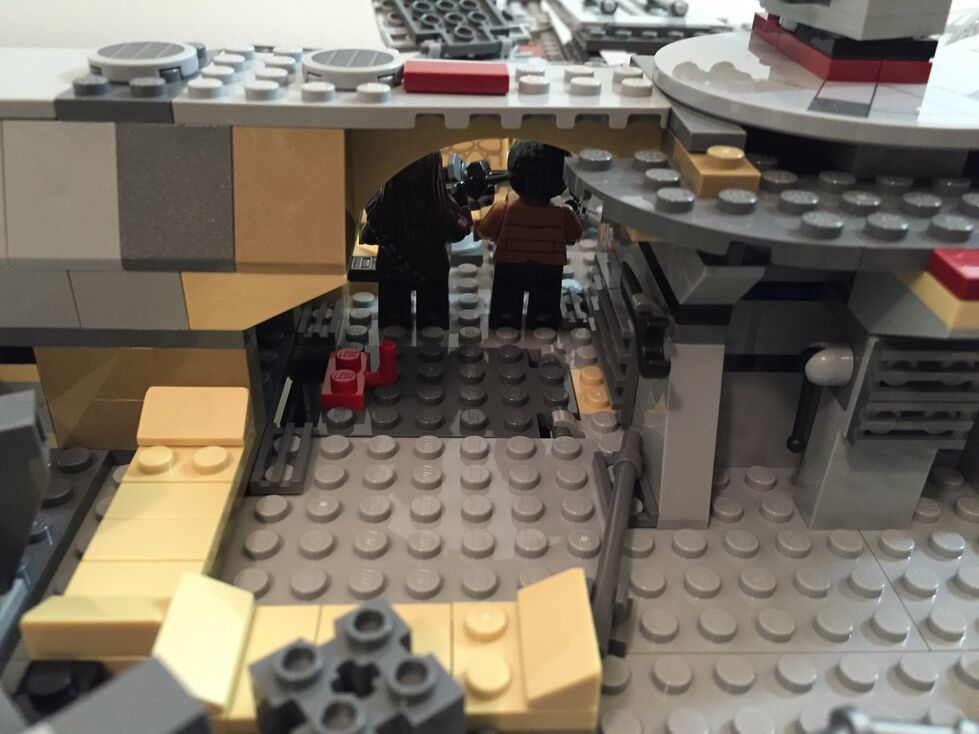
After watching Star Wars Episode VII The Force Awakens for the first of four times (so far), I purchased the new LEGO Millennium Falcon 75105 (LEGO website page and Brickset model page). It is a wonderfully designed model that balances play with detail. This latest Falcon model from LEGO captures how the passage of time and change of hands has affected this storied ship’s appearance in the film. Despite the interior and exterior greebling, the layout of the Falcon is spacious and accommodating for customization by the LEGO builder. It was my intention to customize the Falcon to be more screen accurate in the main hold and cockpit, and more detailed in the engine compartment and rear storage/bunk spaces. Through the process of customization, I worked on the exterior dorsal and ventral sides (including an improvement to the boarding platform. Below, I offer some explanation and photos for each before and after stage of my customization, including the cockpit, exterior dorsal, exterior ventral, interior fore, and interior aft.
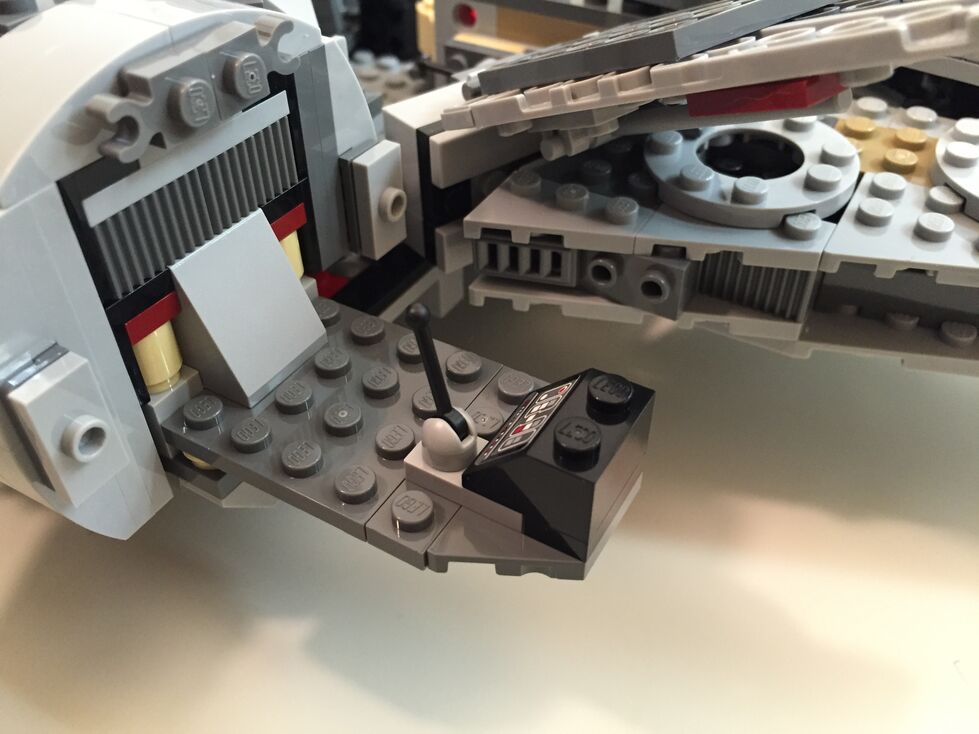
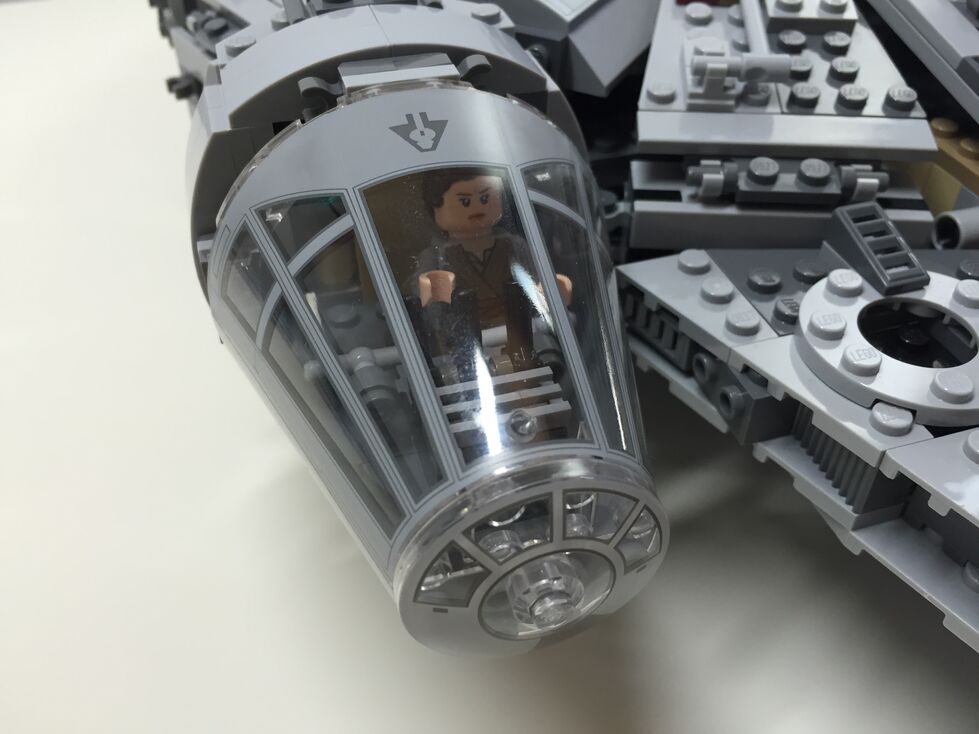
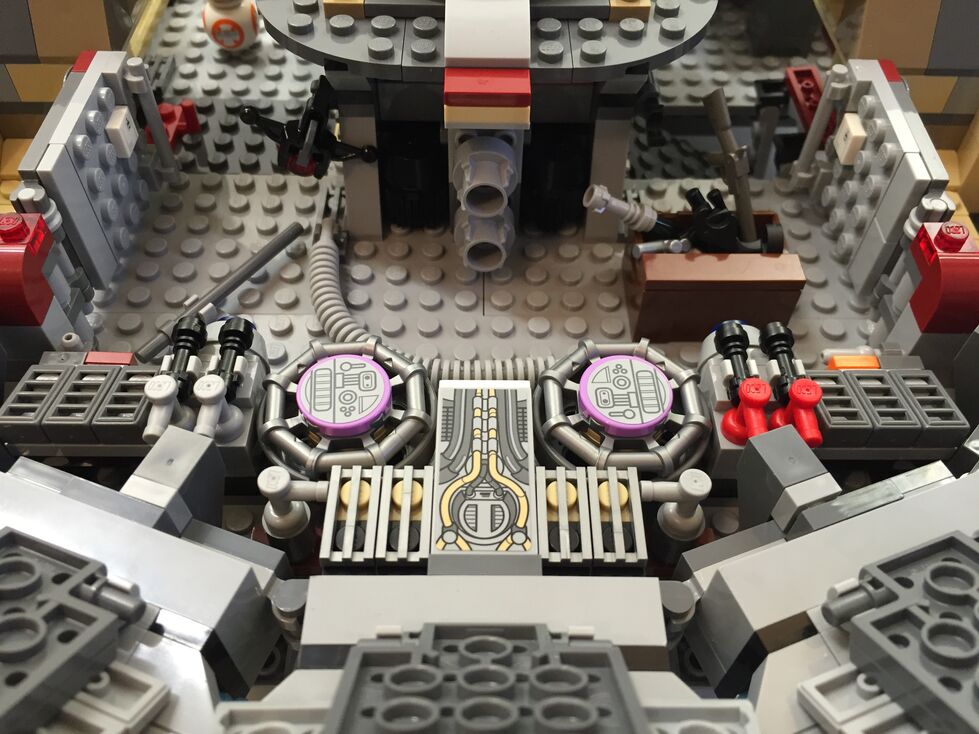
Cockpit, Before Customization
The original cockpit accommodates two minifigures–one sitting forward on the right (pilot) and one sitting one row behind on the left (copilot). It comes with a single lever for control and a printed wedge brick with cockpit controls. Due to the conical elements used for the cockpit, space is extremely limited. However, the rear of the cockpit has a strange design that is not evocative of the rear of the cockpit, which would have controls, lights, and a door. I targeted these issues in my customization seen below.
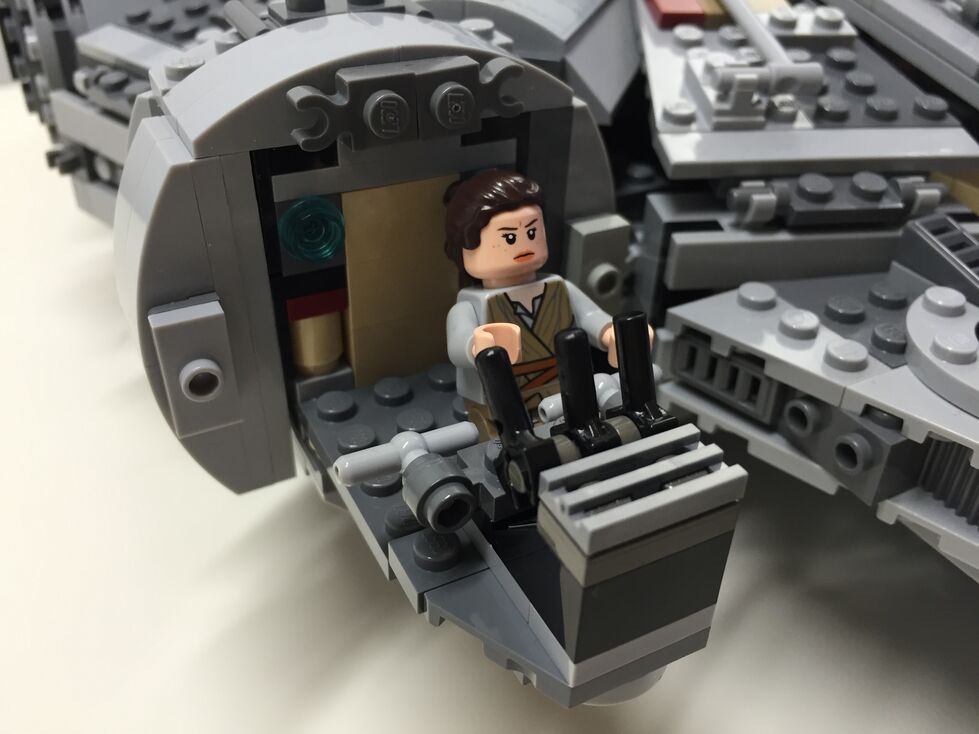
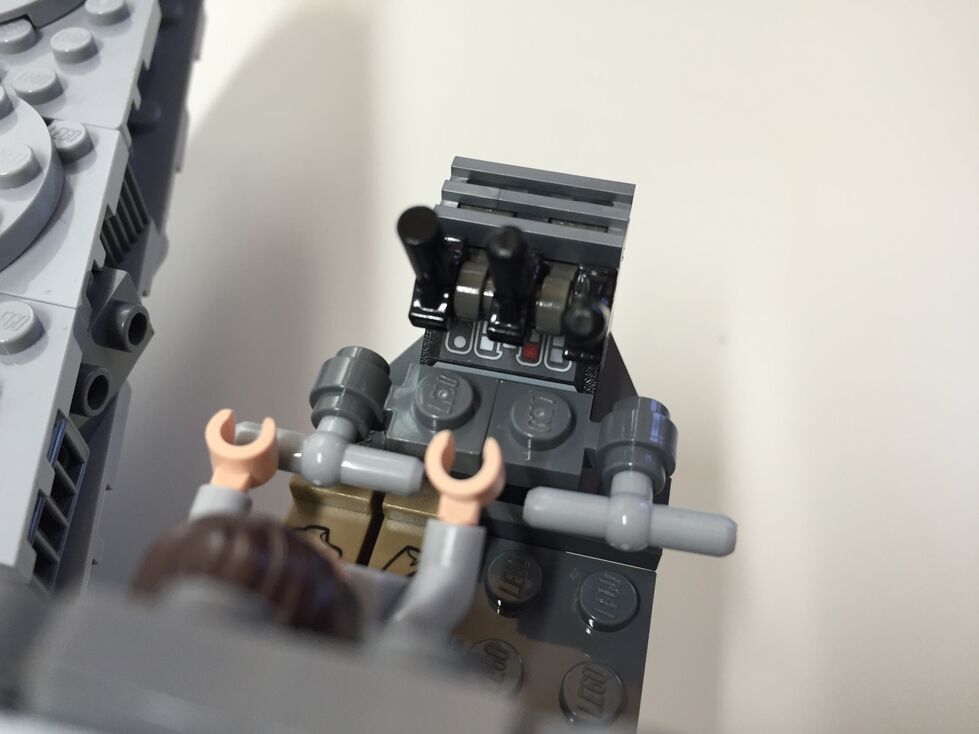
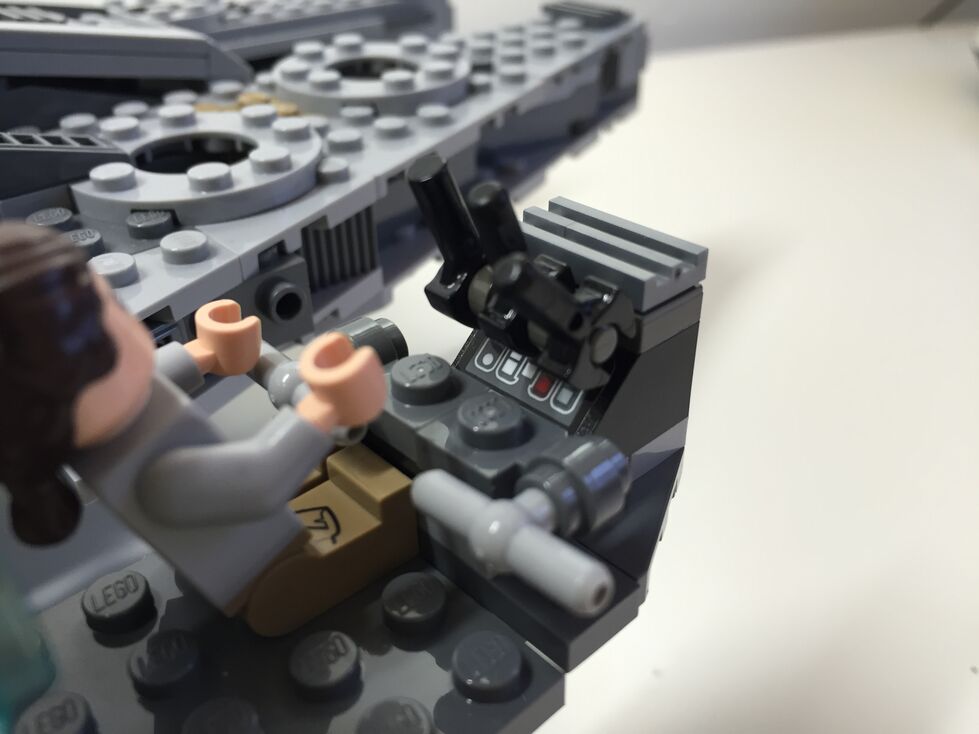
Cockpit, After Customization
In my customization of the cockpit interior, I raised the control panel by one plate and gave the pilot and co-pilot handle-bar controls like in the films. Above the directional control bars, there are three adjustable levels sitting on top of the printed control panel wedge brick for controlling the engines.
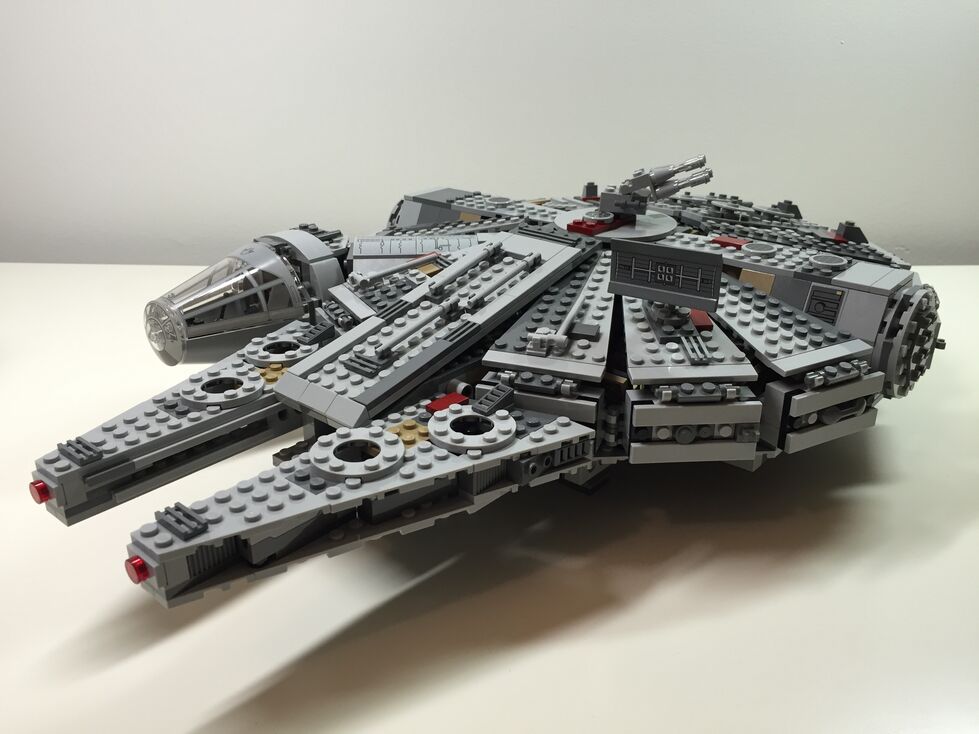
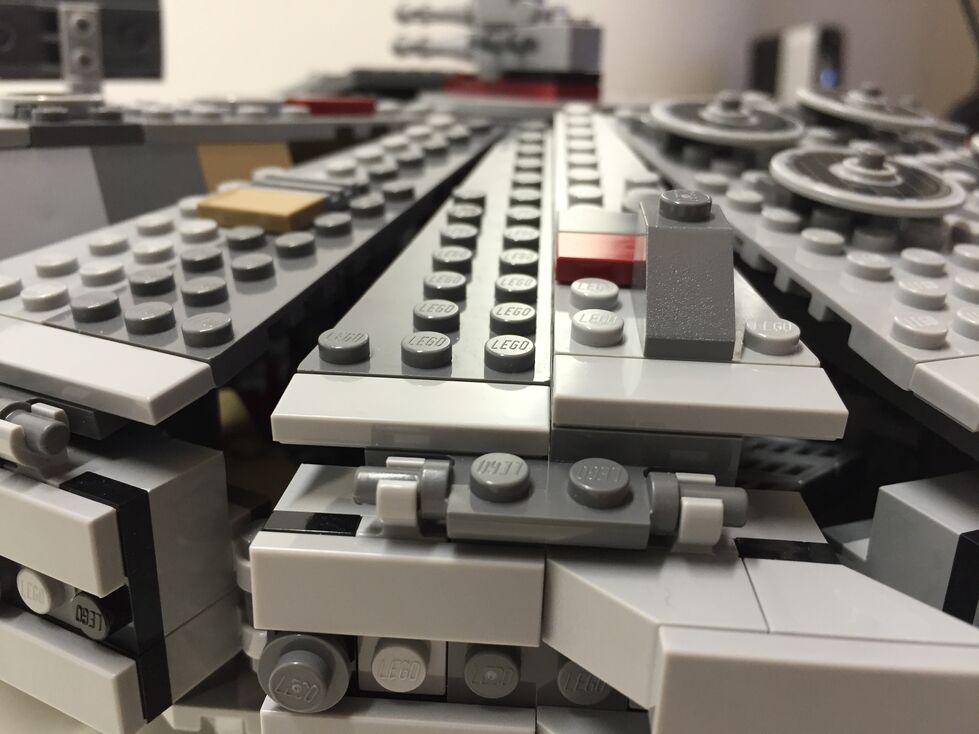
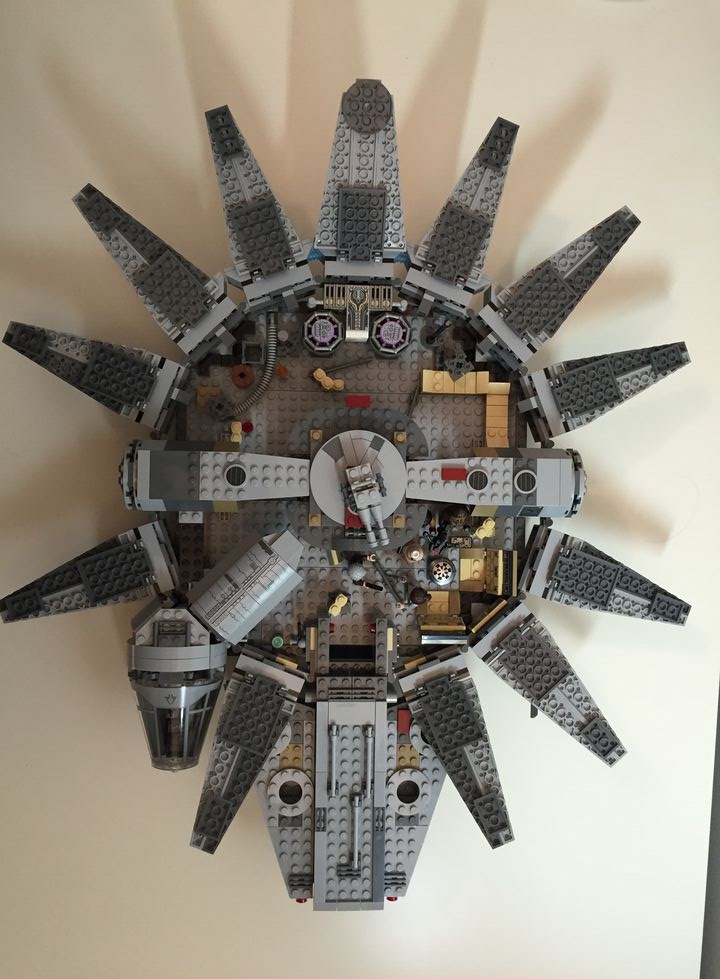
Exterior Dorsal, Before Customization
These images are of the Falcon’s exterior before any customization. Of note, the Millennium Falcon’s fore running lights are red instead of clear (a change depicted in The Force Awakens), and a less clean exterior to illustrate its aging and modifications.
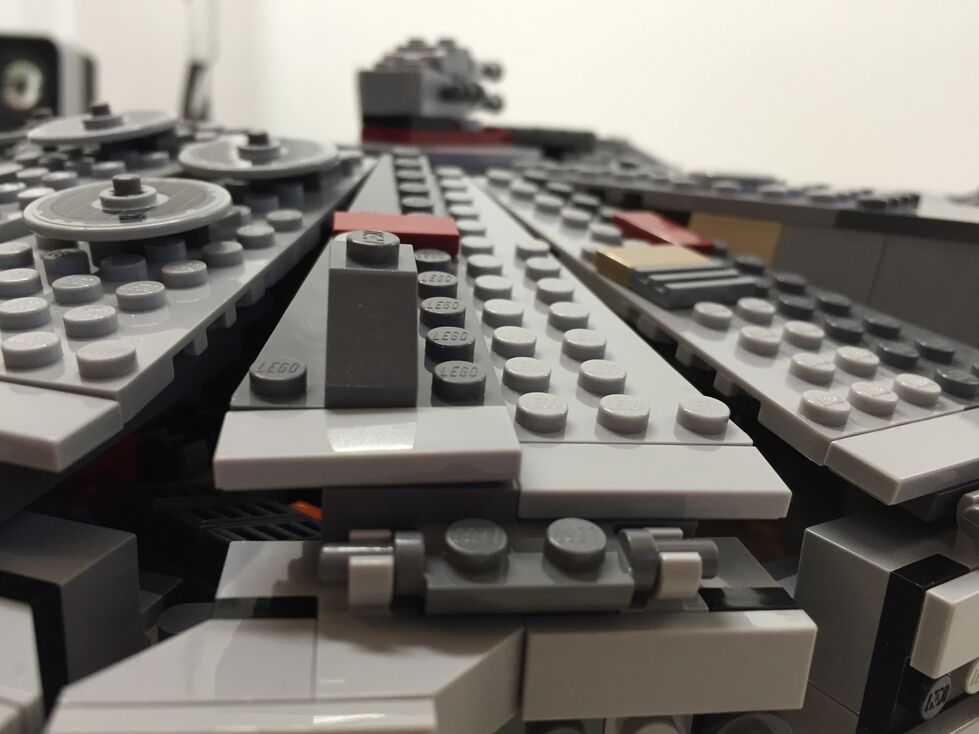
Exterior Dorsal, After Customization
The one external element that I wanted to accentuate as much as possible was the slightly raised panels above the rear quarter over the engines. This was easily accomplished by adding a single plate above the hinge for each sectional panel, and adding a single plate height to half of the bordering panels. The latter, however, also required finding 1×3 flat plates for the segmented panels as seen below.
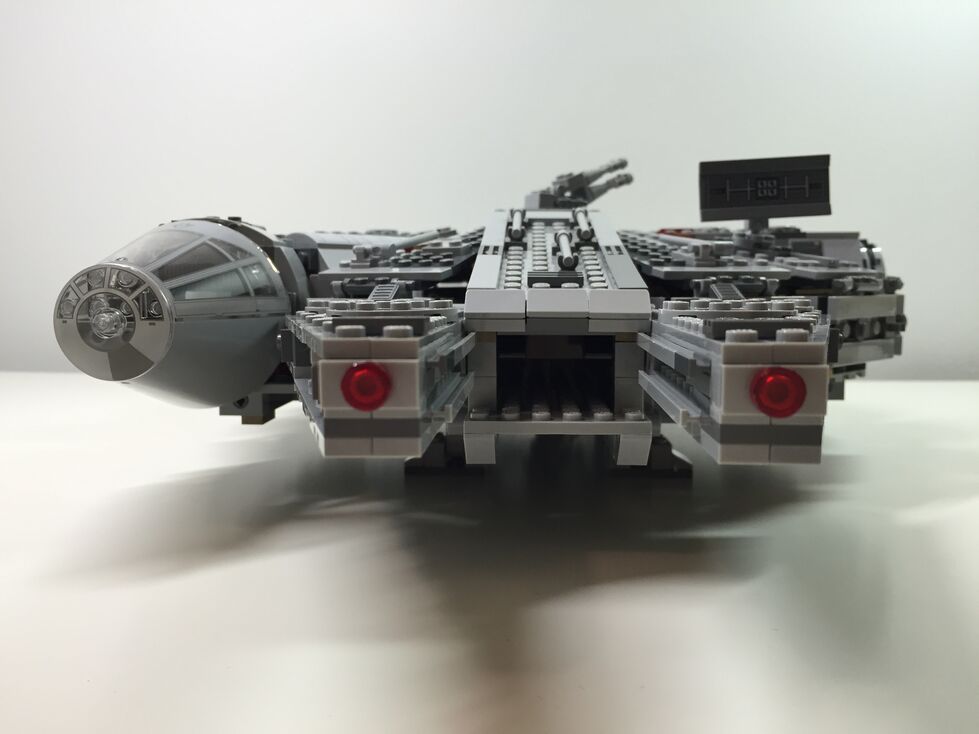
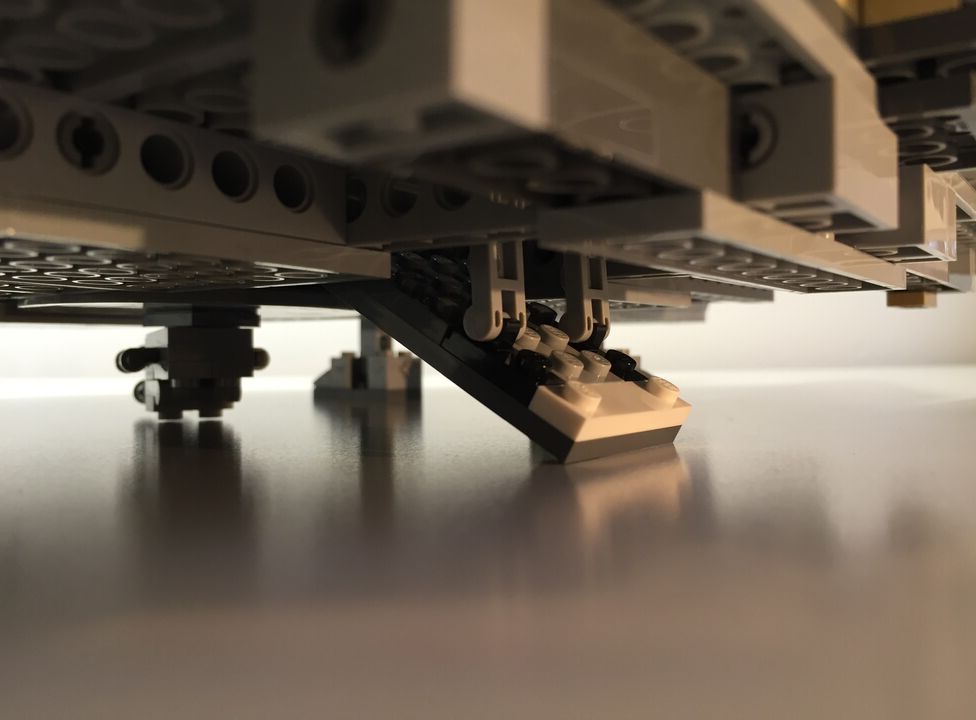
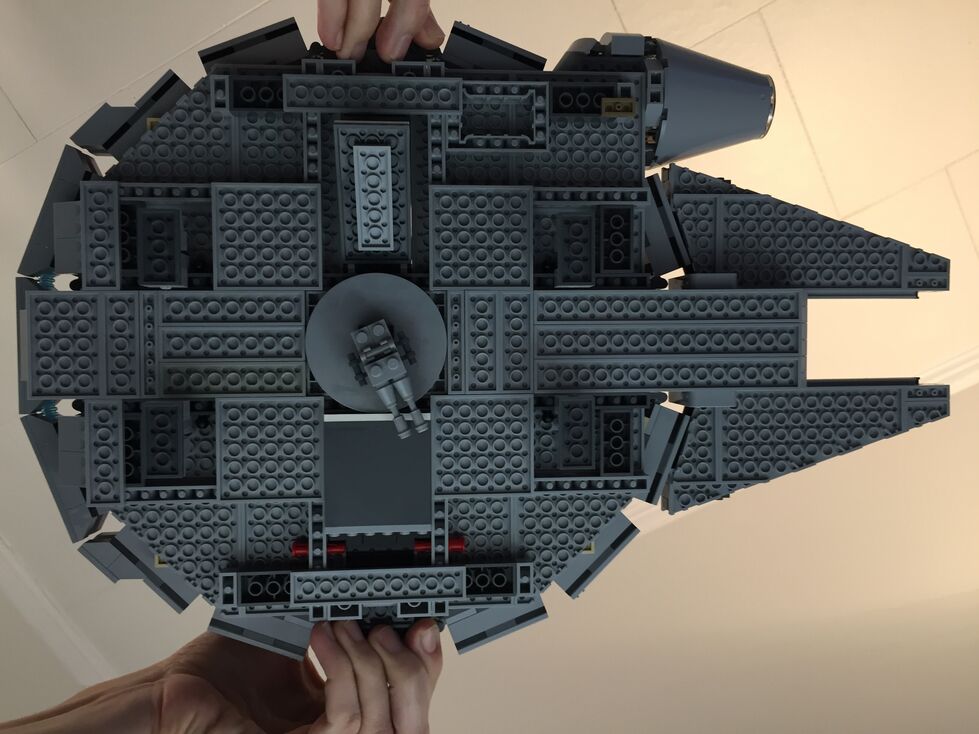
Exterior Ventral, After Customization (no Before photos taken)
Originally, the boarding platform does not have hydraulic lifters and the bottom of the Falcon is largely exposed to the Technic beams that form the support skeleton for the model. I added the lifters and covered much of the bottom (more can be done when I have the bricks available to accomplish a better approximation of the Falcon’s bottom exterior (angled forward pods and rear hold pod beneath the engines).
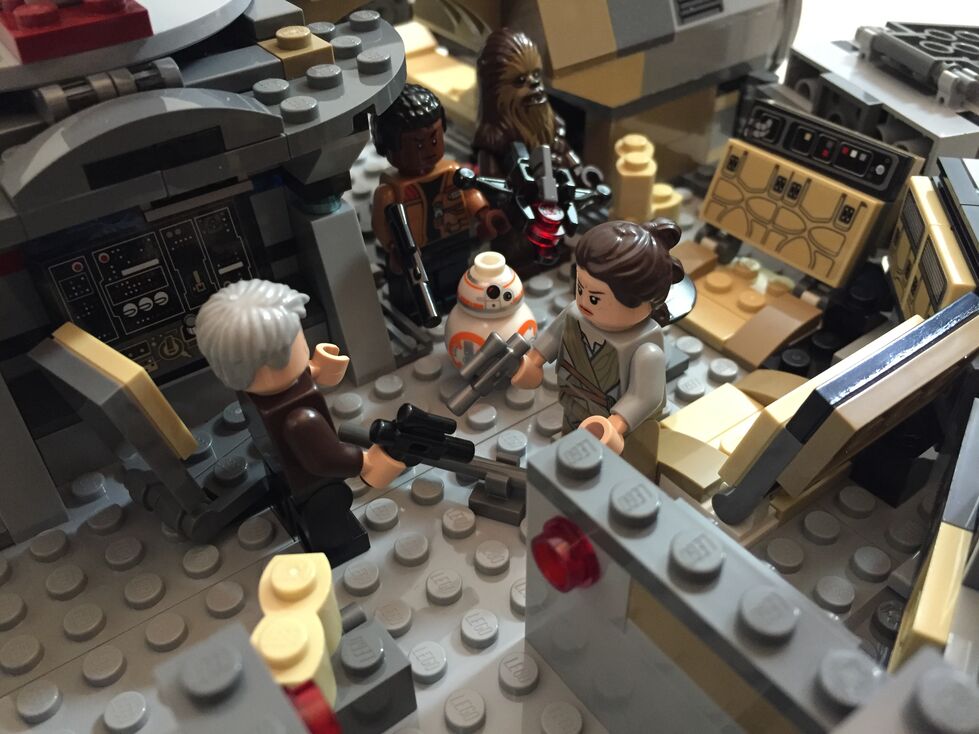
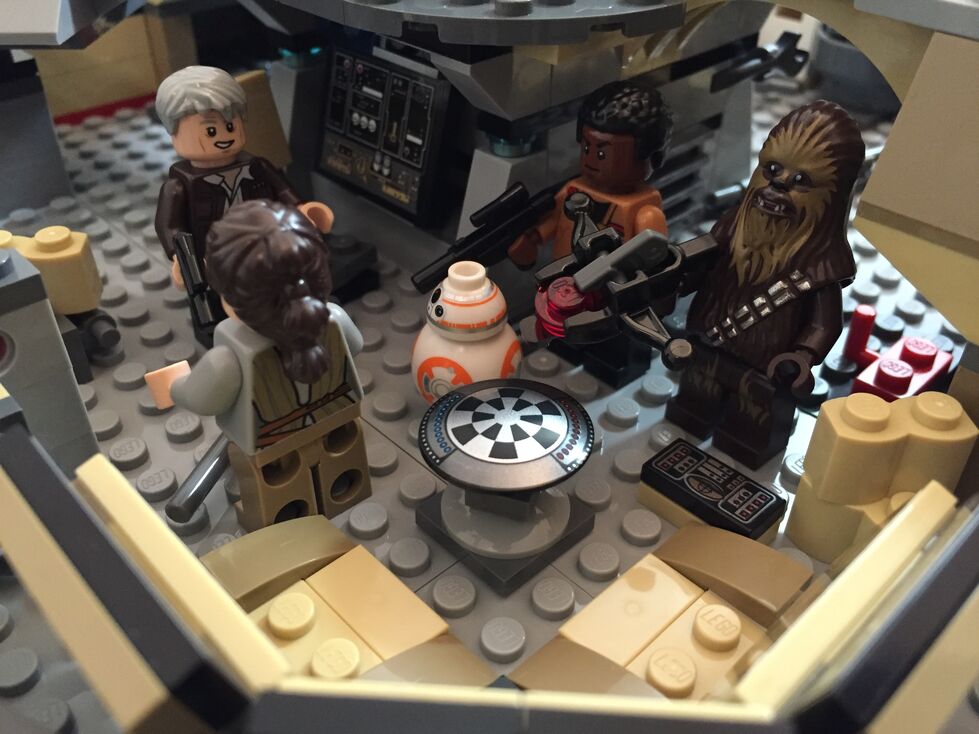
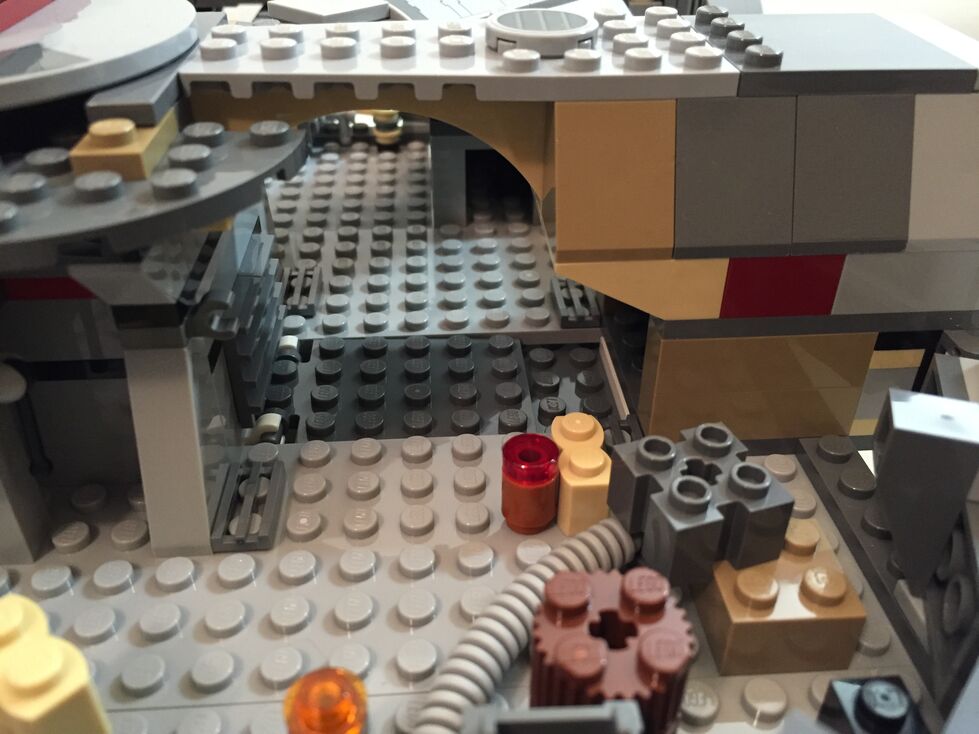
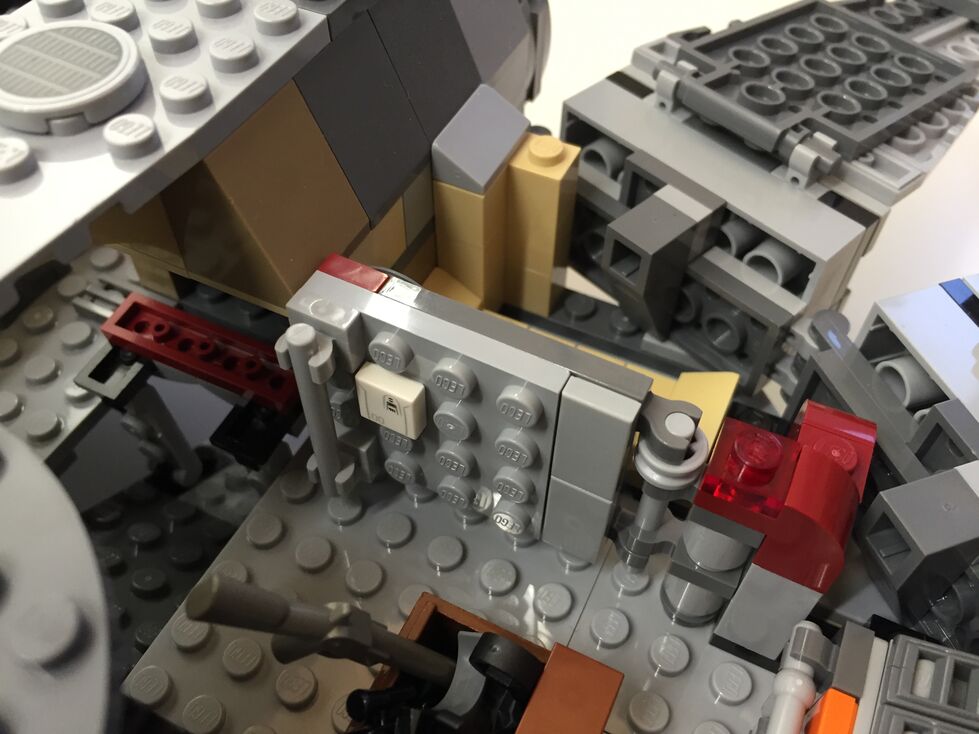
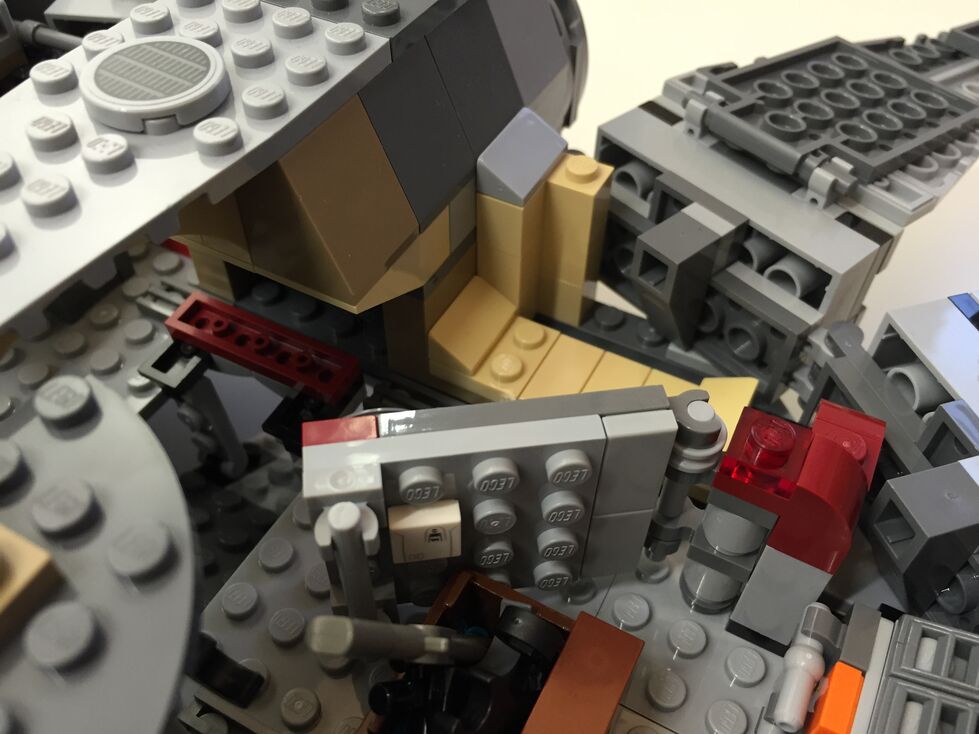
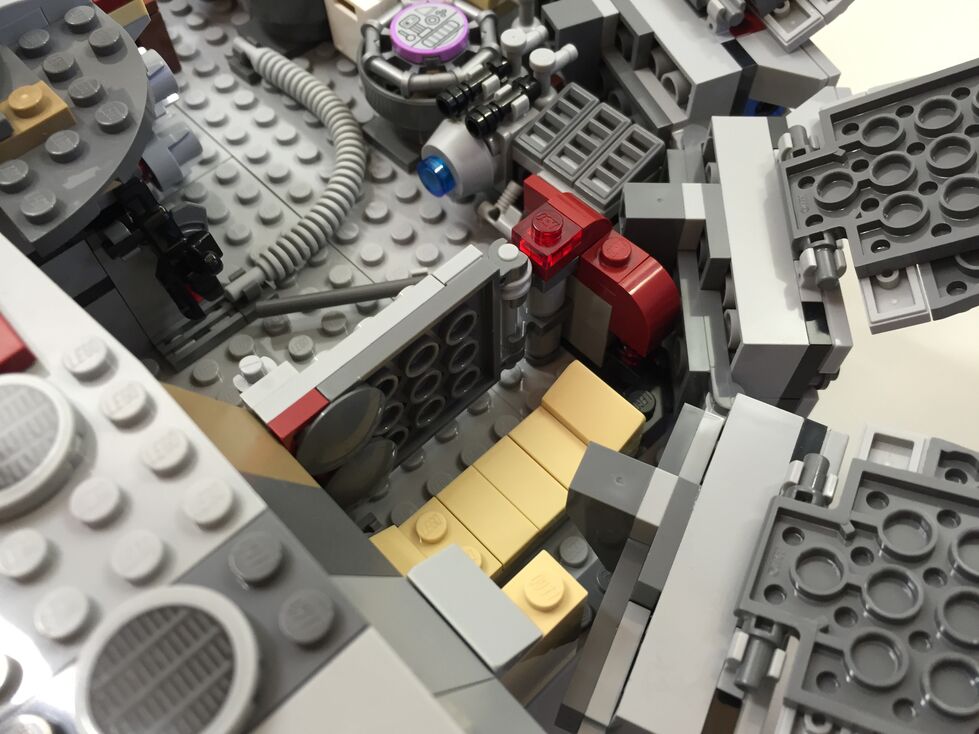
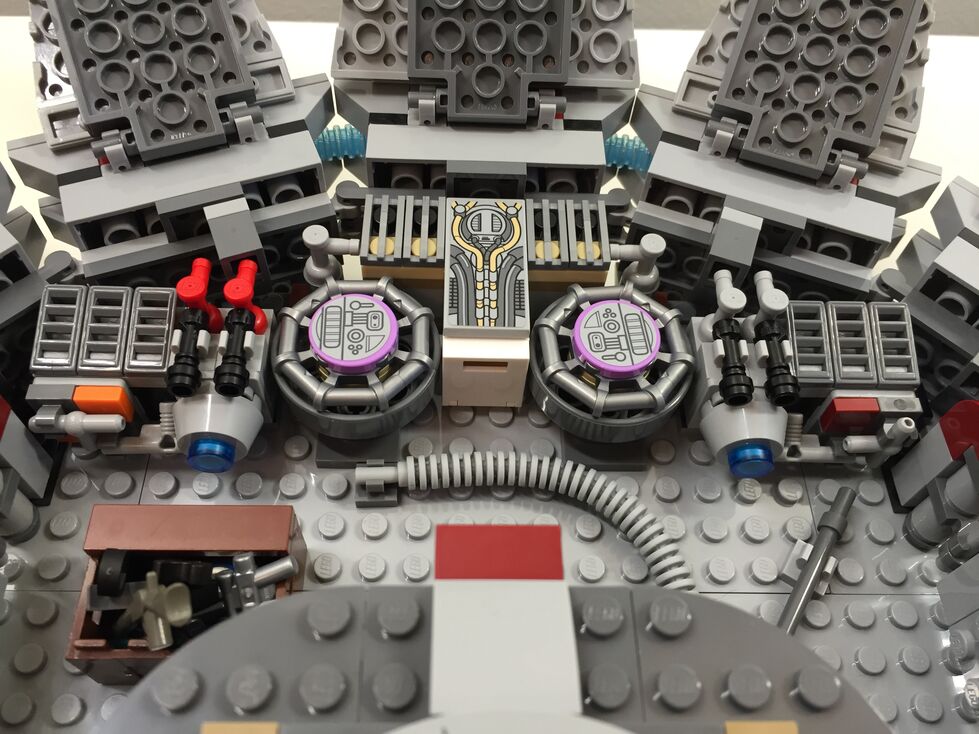
Interior Fore, Before Customization
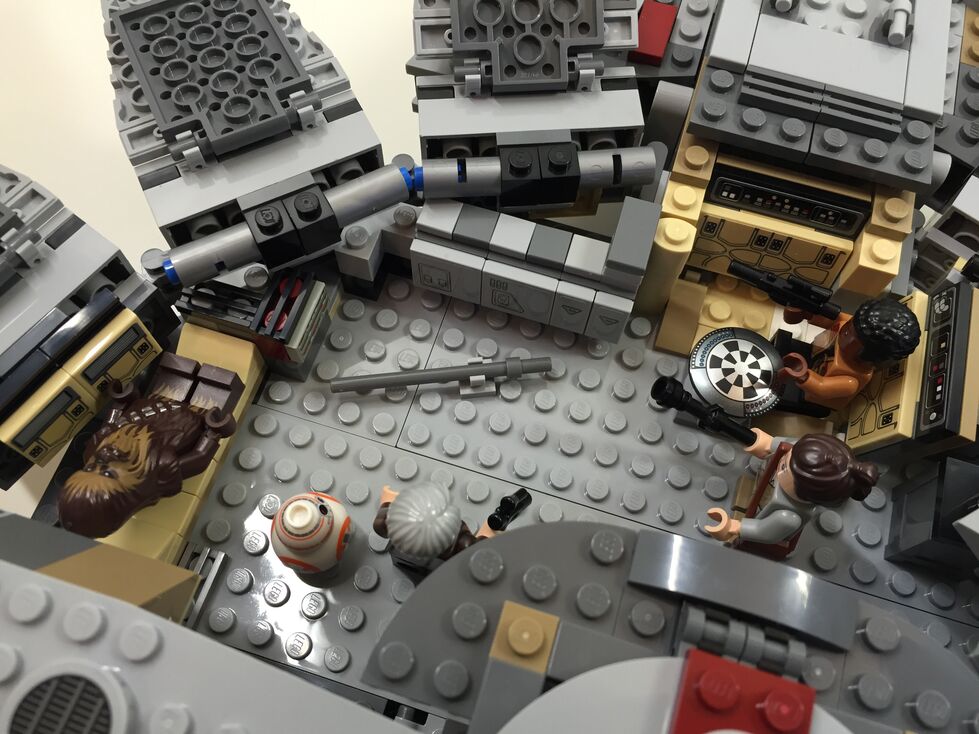
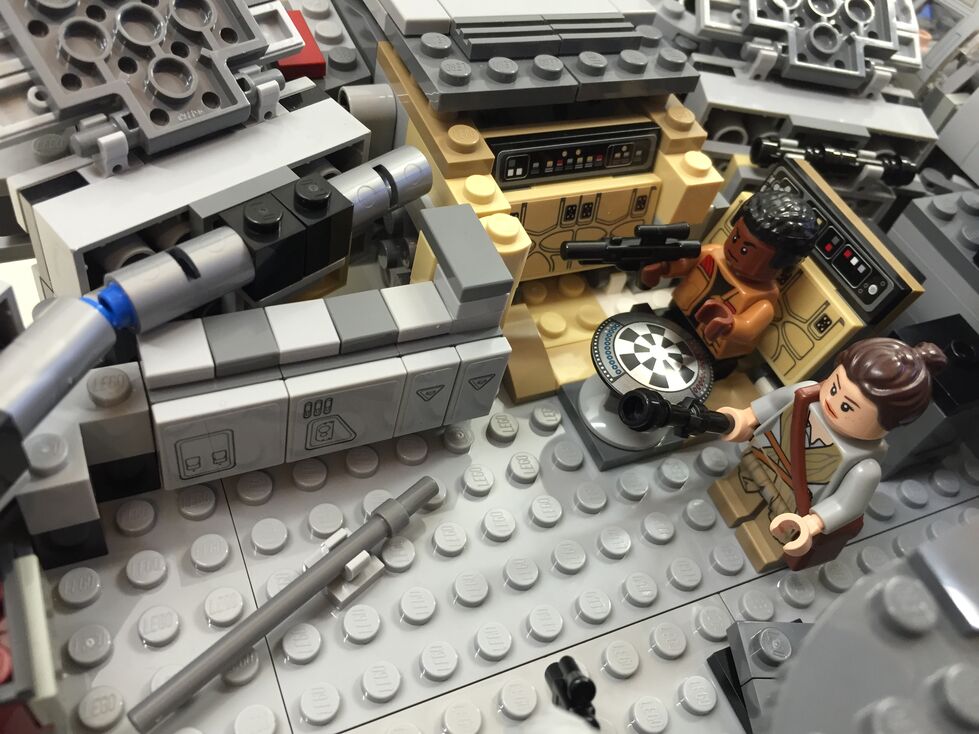
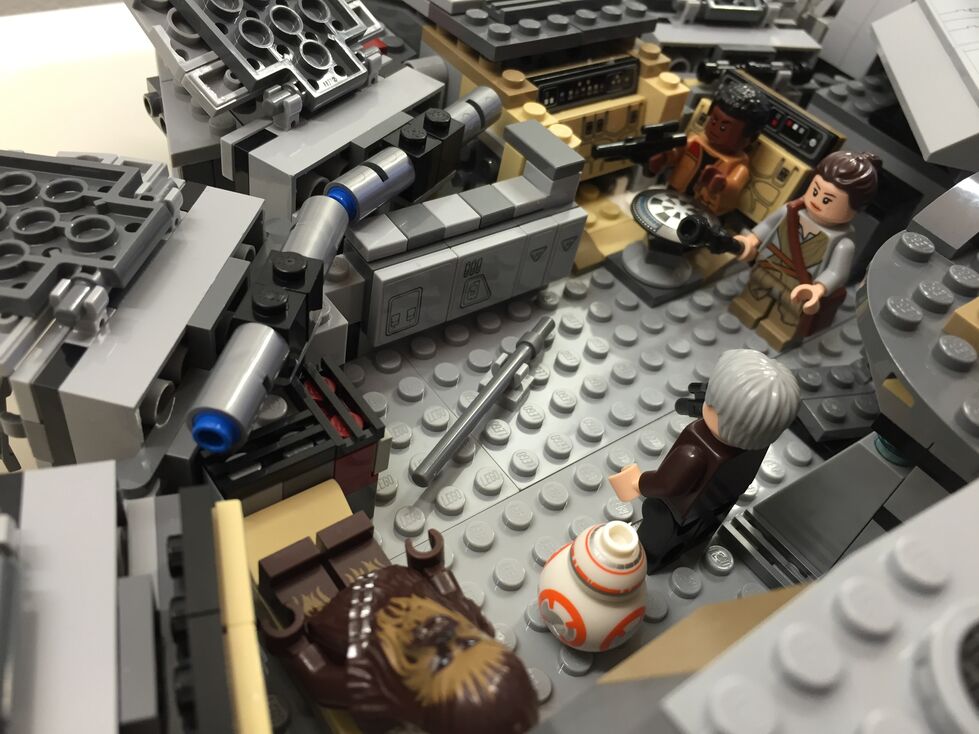
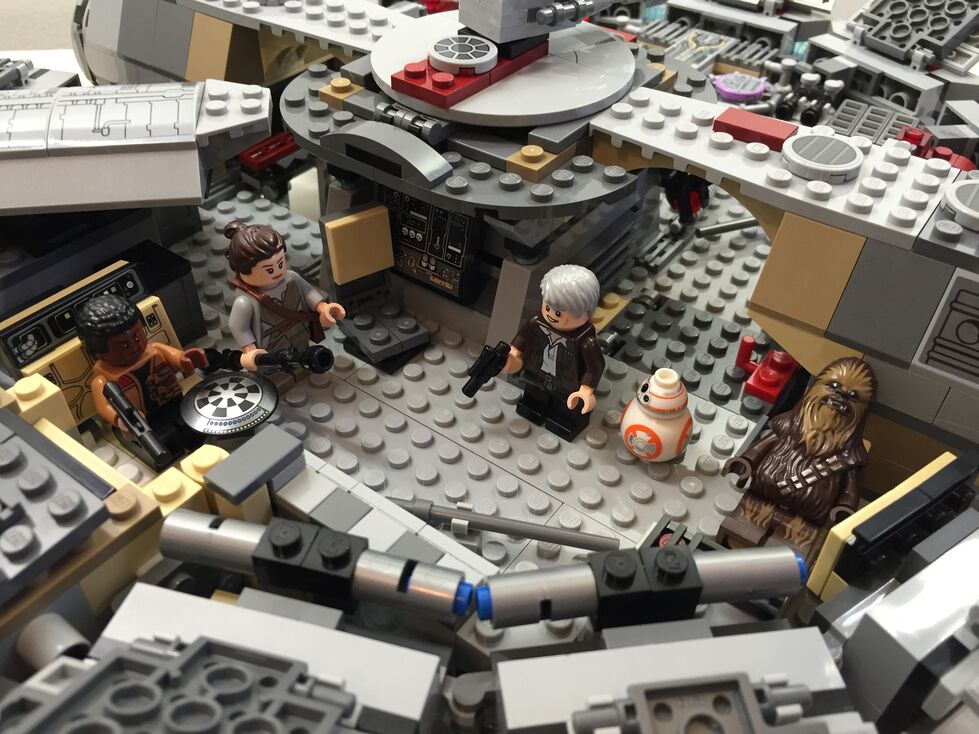
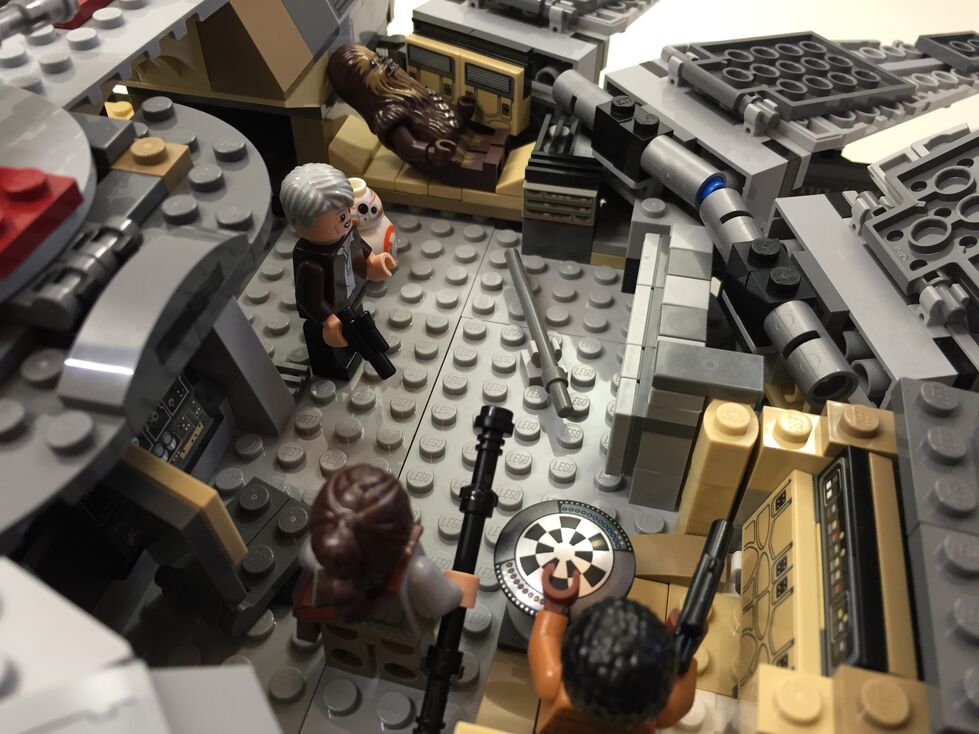
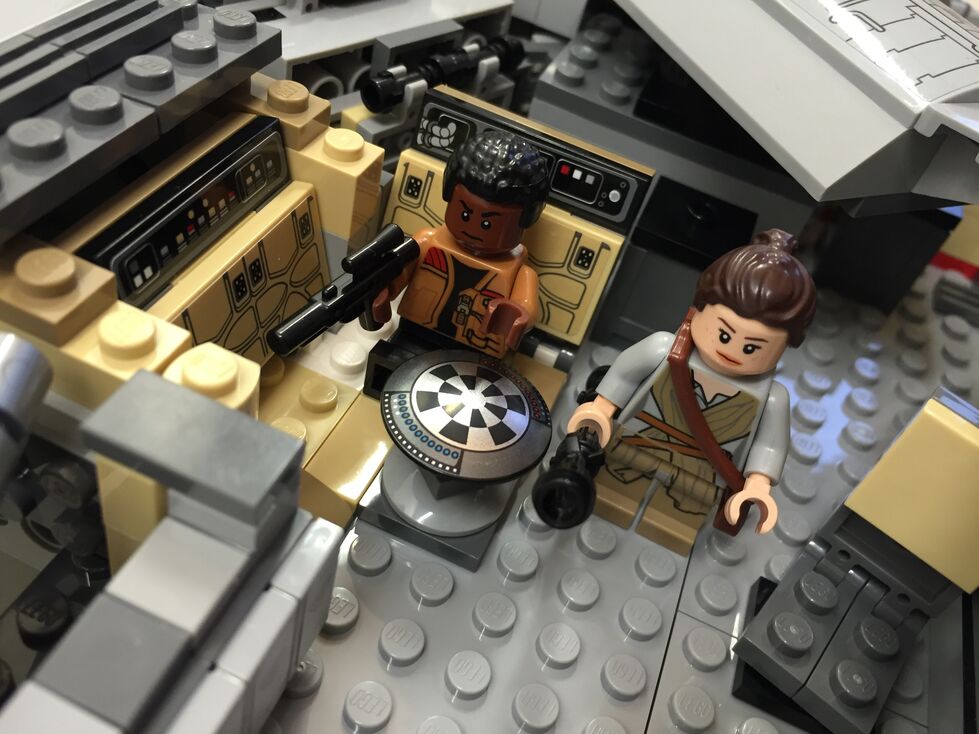
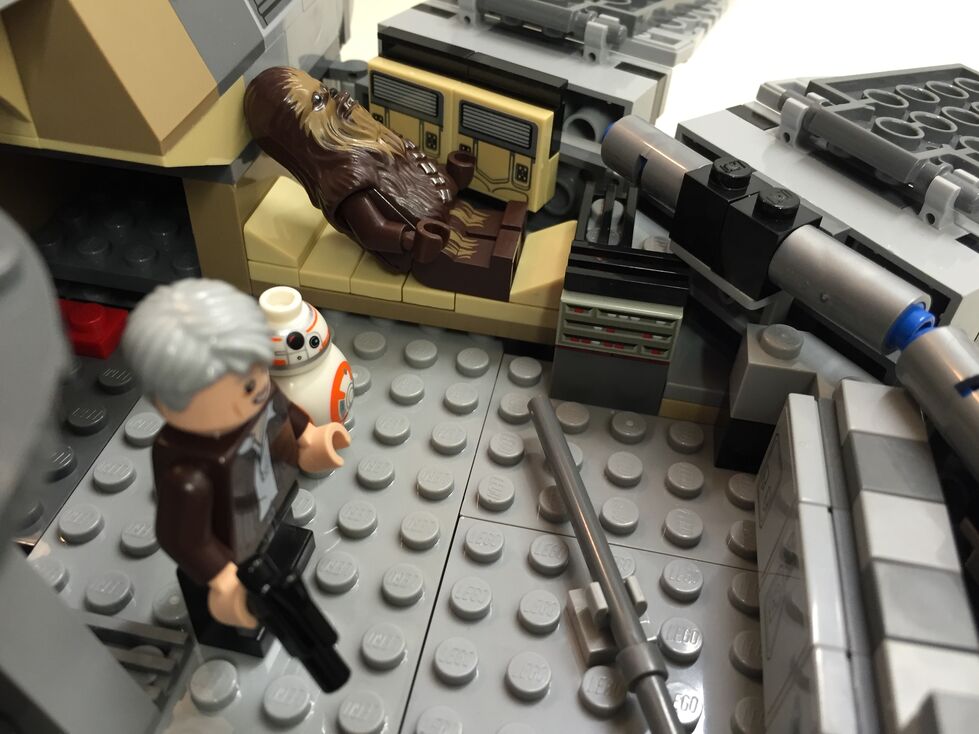
The 75105 Millennium Falcon model continues the innovative “petal” design forming the dorsal fuselage of the spacecraft, which first appeared in the 4504 set and was improved in the 7965 set. The best change from the earlier designs is for the forward bisecting panel leading from the mandibles to the gun turret. Instead of opening up toward the turret (4504) or opening forward toward the mandibles (7965), the panel now swings forward and down between the mandibles thus giving easier access to the builder for play inside the Falcon. The navigational computer is more accurately captured with a sticker applied to a flat plate than printed wedge bricks in 7965, and the Dejarik table is printed on a round shield element. My complaints with the interior design have to do with the inaccuracy of the placement of the Dejarik table/benches and bunks. I focused on this in my customization.
Interior Fore, After Customization
In my customization, I moved the Dejarik table and benches across from the navigation computer, which required rebuilding part of the mandible supports and the swing components for the center panel (to clear the center bench back). I relocated one of the bunks to the end of the hold to create the medibay where Finn bandages Chewbacca’s arm. In the main hold, I constructed a forward wall with panel details taken from the First Order Snowspeeder 75100 set.
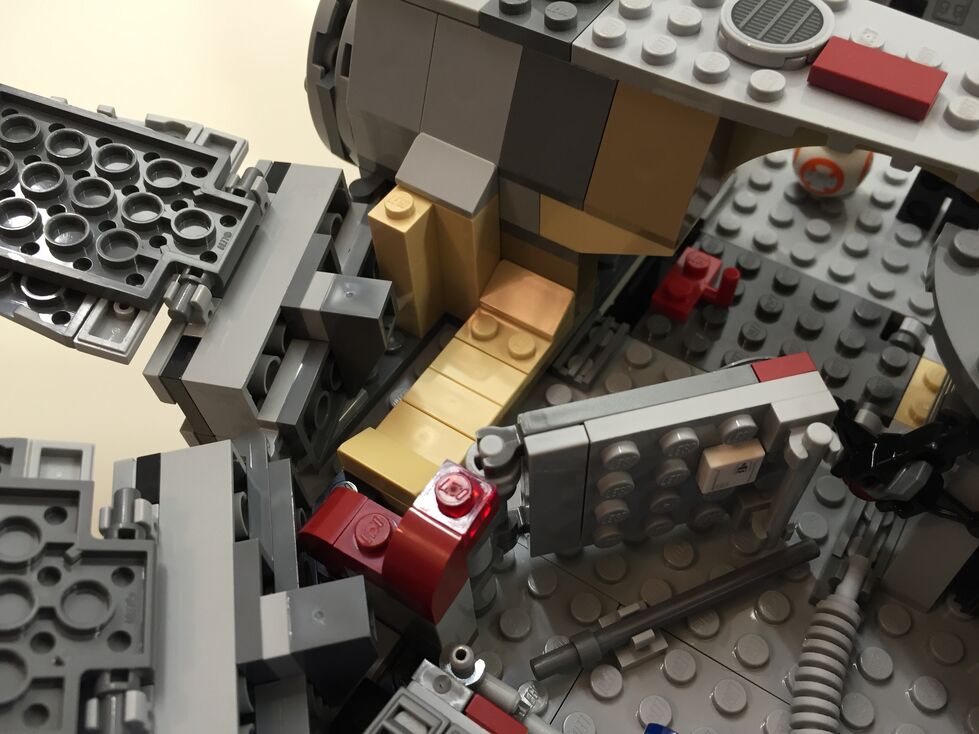
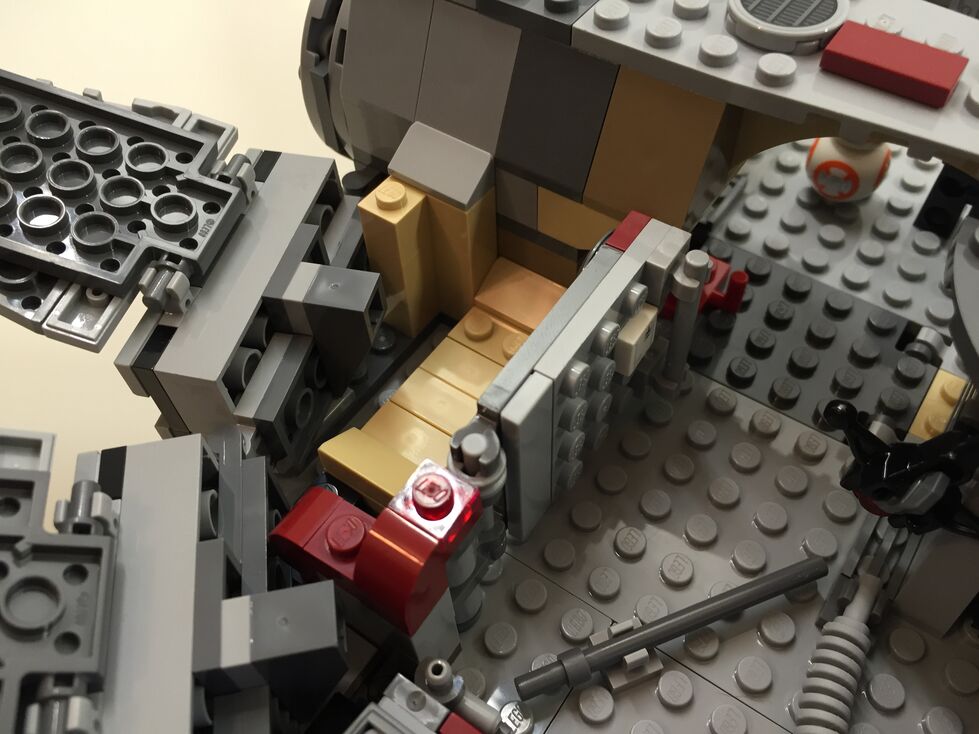
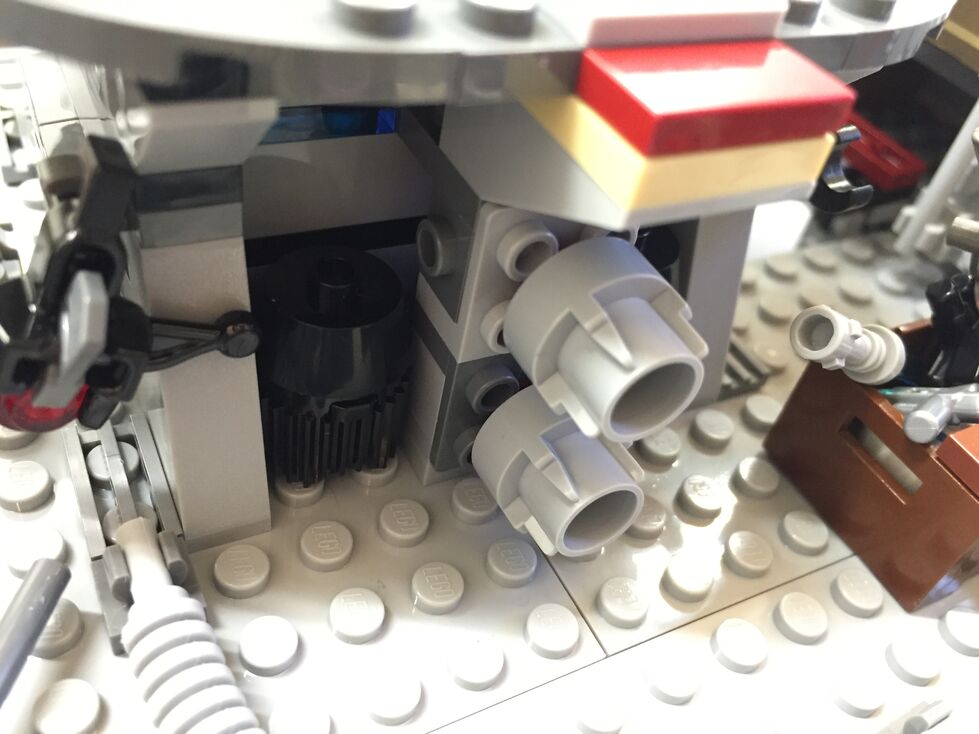
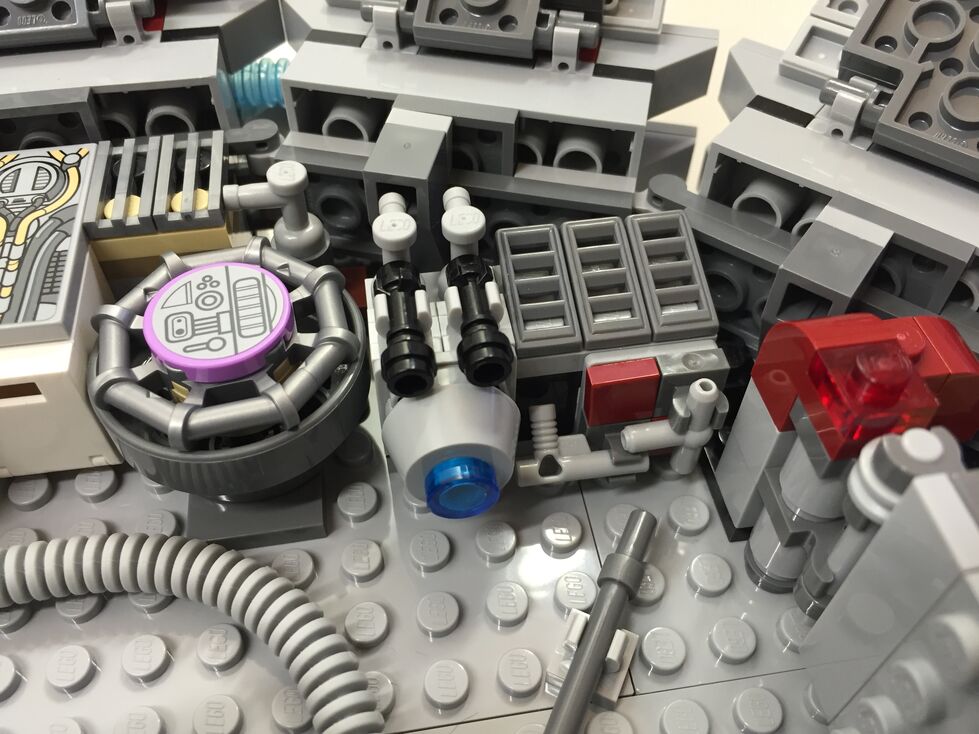
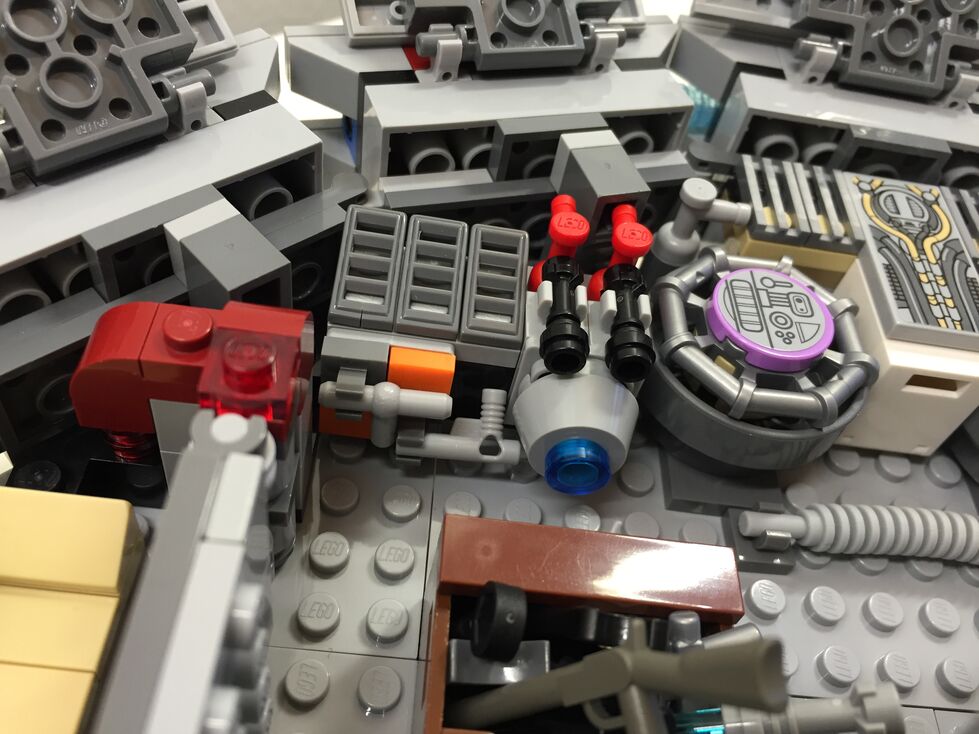
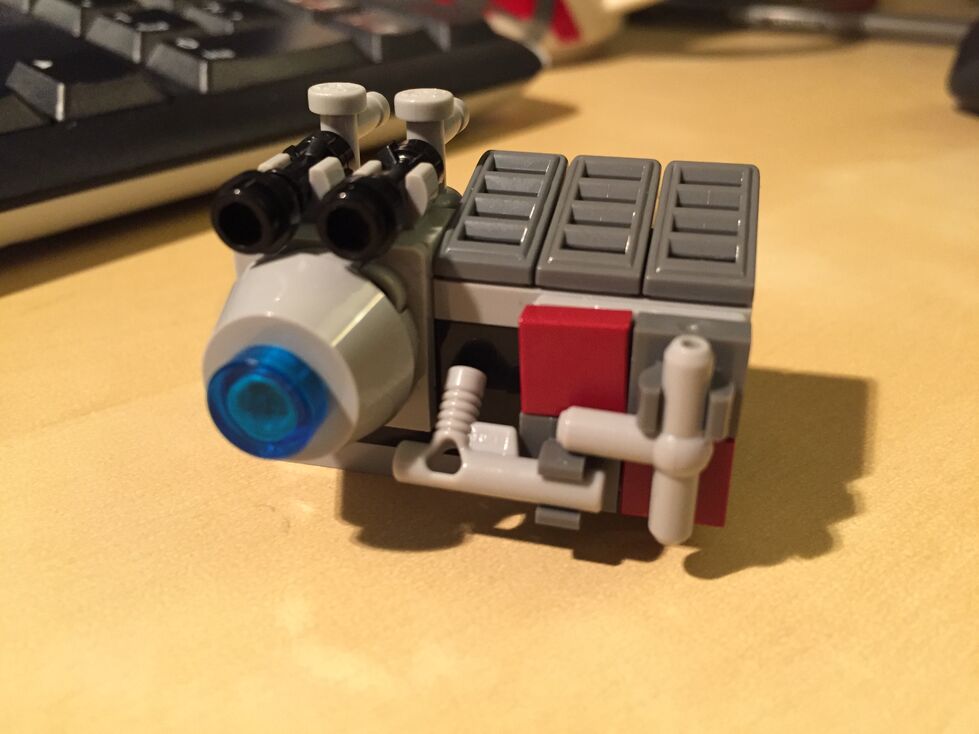
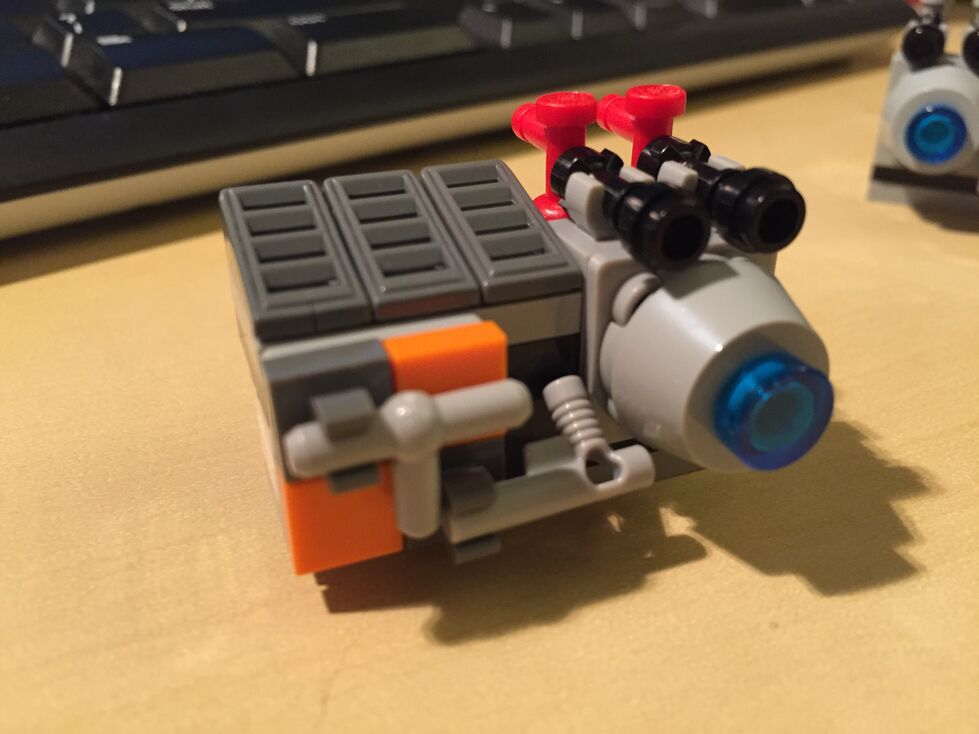
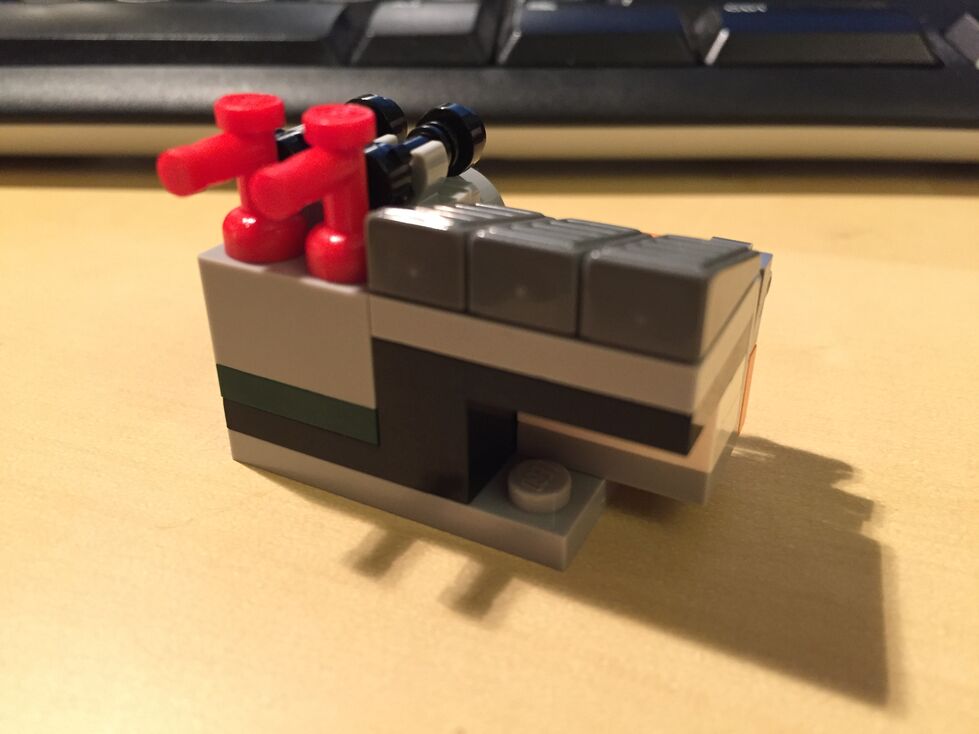
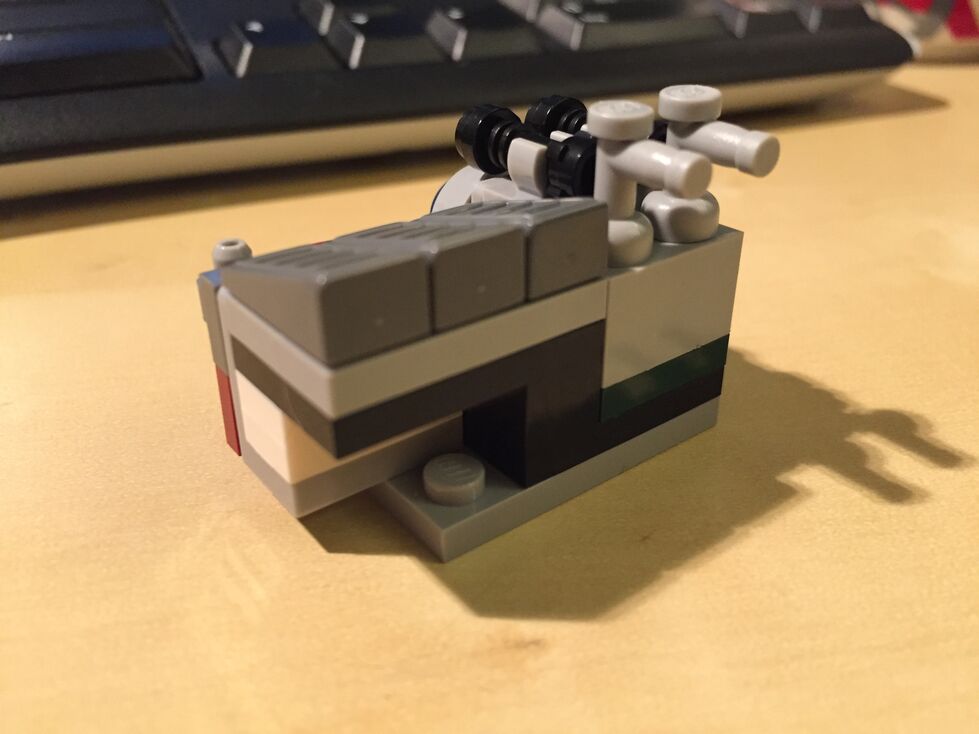
Interior Aft, Before Customization
The engine compartment in the rear of the model is similar to the one in 7965. This part of the Falcon captures the junked essence of the Falcon in general and the effects of the passage of time and unkind handling of the Falcon depicted in The Force Awakens. I wanted to keep its garbage appearance while giving the engine compartment greater substantiality.
Interior Aft, After Customization
In the rear hold/engine compartment, I constructed two storage rooms/bunks with swinging doors (I would have preferred to have sliding doors but I don’t have the elements to do this while conserving the limited space available), and I designed additional mirrored engine modules that go on either end of the original engine included with the set, which I hope makes the engine look more substantial for a spacecraft capable of completing the Kessel Run in 14, er, 12 parsecs!
Conclusion
I hope to further customize the 75105 Millennium Falcon. As I acquire new bricks and elements, I would like to think about how to better integrate the engines into the design and aesthetic of the YT transport. Other goals include, integrate a mechanism for lowering and raising the boarding platform, similar to the 4504 set, design screen accurate landing gear that raise the Falcon by at least one plate higher while on display, and further integrate my customization into the model so that it attains a unity of design instead of a piecemeal added-on quality.
If you have customized the 75105 or other Millennium Falcon sets, please sound off in the comments. Thanks for stopping by!