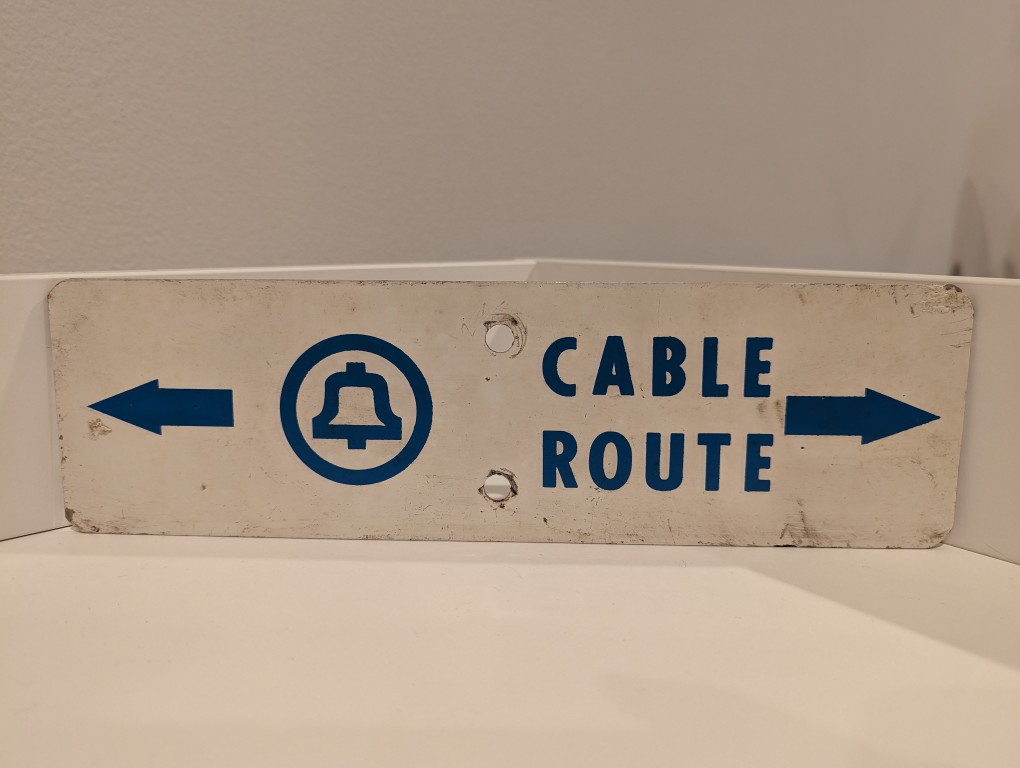
Long before AT&T was having massive data breaches, they were burying cables and putting up these signs in the back country to warn would-be diggers from slicing through buried copper or fiber optic cables.
Long before AT&T was having massive data breaches, they were burying cables and putting up these signs in the back country to warn would-be diggers from slicing through buried copper or fiber optic cables.
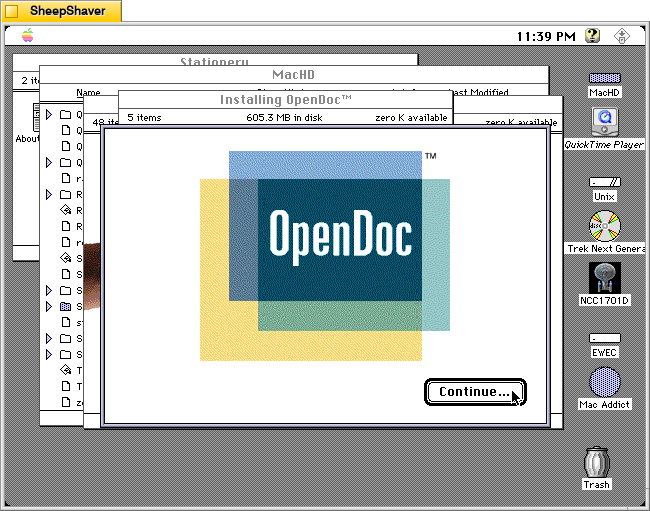
While searching around for early uses of algorithmic text, image, and music generating software from yesteryear (which I have been documenting on this page), I stumbled upon Don Crabb’s Guide to Macintosh System 7.5.5 (1996), which is a guide to using Apple’s System Software 7.5 on Macintosh and Power Macintosh computers in the mid-1990s.
In Chapter 5, “The Multimedia is the Message,” he writes the following prophetic passages that point to right about where we are now with giving generative AI access to our files so that we can chat with an AI about the contents of those files–for ideation, brainstorming, summation, search, discovering patterns, etc. Crabb had an idea that combined Apple’s then innovative OpenDoc technology, which flips the computing metaphor from application-centric to document-centric and that facilitates different Editors (aka programs) to work on/within different Documents or create new Documents via Stationary files, with the power of artificial intelligence to observe, learn, and collaborate with computer users. The foundation of his idea is what he calls the Open Desktop Architecture (ODA) and the Omniscient Sage. He writes:
The Multimedia/OpenDoc Desktop
The future of the Macintosh Desktop will reside in something I call Open desktop Architecture (ODA)— as Apple ought to articulate it and we ought to use it in the form of a new Multimedia/OpenDoc desktop.
Back in May of 1994 at the Worldwide Developer’s Conference, Don Norman— Apple Fellow and Interface Guru Extraordinaire— told us about one possible future Mac interface (AKA Finder) based on Apple Guide, that would become truly active in its assistance features and orientation. My Open Desktop Architecture relies on this same active assistance to make it fly, but it adds the OpenDoc document-centric idea of computing (see chapter 6 for more details) and the liberal use of multimedia data.
The Omniscient Sage
To start with, though, we need a basic interface metaphor in mind for our new desktop. I call my metaphor The Omniscient Sage. Corny sounding? You bet. But highly descriptive. The Omniscient Sage watches what you do on your Mac without being judgmental.
The role of the Omniscient Sage is to watch, assimilate, correlate, and then assist. Active assistance based on observation, analysis, and planning at a level as far above Apple Guide 1.0 as the it was above Balloon Help. Active assistance based on the artificial intelligence work that’s been modeled and executed over the last five years. Active assistance based on a world of OpenDoc files and apps.
Crabb, Don. Guide to Macintosh System 7.5.5. Hayden Books, 1996, p. 253.
Crabb’s Omniscient Sage seems science fictional thinking back to that period of time. This was the era when Apple was on the ropes and nearly down for the count. Then, Steve Jobs returned with NeXTSTEP, which delivered all of the things that Apple had led us to believe was forthcoming in OS 8 codenamed Copland. However, Jobs also killed OpenDoc at Apple.
Could the Omniscient Sage have been built on top of Mac OS X? While working towards OS X, Apple developed Apple Guide/Macintosh Guide as a robust help system that worked with AppleScript to guide the user along steps, and it could change based on the observed state of the software that the user needed help with. Yet, it was running on rails and therefore couldn’t adapt and adjust outside of those prescribed steps. Given advancements and R&D maybe this could have advanced towards something like Crabb imagined. But, when Mac OS X launched, the help system was much simpler as a web rendering engine and HTML.
Unfortunately, Crabb didn’t get to see how close we are now to his vision of the Omniscient Sage. He died in 2000 at the age of 44.

When Y and I lived in Atlanta, our house had a downstairs bedroom that we used for an office. However, it was an odd room. The kitchen and downstairs bathroom had tiled floors, and the rest of the downstairs–dining room, living room, and den–had hardwood floors. That downstairs bedroom had medium pile carpet. When our friend Masaya asked if he could visit us, we thought it was a good opportunity to refinish the downstairs bedroom as a guest room with hardwood floors. Here’s how we refinished its floor to match the stain of the rest of the downstairs.
First, I pulled up the carpet in the closet and a corner of the room to verify that it was the same kind of oak flooring as the rest of the downstairs. Having verified this, I began cutting and rolling the carpet and padding.

The padding had been glued down–thankfully not over the entire floor–but enough that I had to scrape some of it and the glue off the wood flooring using a paint scraper. However, I went slow and carefully to make sure that I didn’t gouge the wood with the tool. Whatever I didn’t get up, I knew that I could sand down eventually.

Then, I used a hammer to pull up the carpet tack strips around the edges of the room and vacuumed the floor clean.

For the next step, I went to the local Home Depot Rental Office to rent a stand-up belt sander for floors. This thing weighed about 100 pounds. It’s weight combined with a handle operated mechanism to engage the sanding belt against the floor and pull it forward made quick work of sanding the floor and removing all old paint, glue, and stains. As the wood wasn’t in too bad of shape, I used a fine grit sandpaper. Also note that when you use a floor sander like this, you want to move in the direction of the boards and give each pass a little overlap for an even finish across the whole floor. Also, you can see that I have the windows open. Even though the sander has a bag to catch the sawdust, it can’t catch it all. Open your windows and cover outlets and air returns to keep that dust from getting into places it shouldn’t be.

Halfway through, I changed out the belt for a fresh one. This probably wasn’t necessary, but I might have noticed some change in the sanded floor’s finish by this point in the project.

After using the belt sander over the whole floor, I saw some spots that needed additional work. When I did these spots, I went over the entire run as just using it in one spot might leave a dip in the floor. As I worked, I used the shop vac to keep the floor as clean as possible from the extra sawdust produced by the sander. And, around the edges of the room and inside the edges of the closets, we used a handheld orbital sander and sanding blocks to sand the 2″ or so on all sides that the belt sander was unable to reach due to its design.

After returning the belt sander to Home Depot, we cleaned the floor again and applied water to the wood with cloths to “pop the grain.” This makes the wood more receptive to the stain so less is needed to achieve the results that you want.

Before, we had taken photos of the existing hardwood floors in the house using natural light to capture the best image of the stain. We took this to Home Depot and matched it to a water-based stain and polyurethane combo so that we could finish the floor as soon as possible and give it time to cure and air out before moving furniture back in anticipation of our friend’s arrival.
With the wood damp, I stirred the stain/poly combo according to the instructions on the can and poured out some into a paint tray. Then, I dipped a foam paint/finish applicator into the stain/poly and gently worked it into the wood in the direction of the boards.

Once completed, give the floor enough time to air out and cure before moving things back in. If you don’t have to walk on it, just wait until its met the cure time as this will give you the strongest possible finish.

I didn’t want to pull up the baseboard, so I went back after the floor’s finish had cured and repainted the baseboard (putting down plastic, taping the edge, and putting enough coats to hide the stain that hit it). In hindsight, I should have taped the baseboard to protect it. However, the best option is to pull up the baseboard and reinstall after refinishing the floor.
We were very happy with the results. It was ready for our friend’s visit and we used it as an office again after he returned to Japan.

Recently, I had an opportunity to speak with colleagues about what Publishing Studies means to me. I edited my thoughts into the following note.
Publishing Studies: Theory and Praxis
Publishing Studies is an interdisciplinary field of study that encompasses rhetoric and composition, media studies, history of the book/newspaper/magazine/websites/etc., and practical skills including writing, editing, design, layout, production, marketing, business administration, etc. Publishing Studies programs prepare students for publishing industry careers.
Publishing Studies should be grounded in theory and praxis. Theory provides a foundation for understanding the field and its development. It gives ways of seeing and thinking about the process and purpose behind publishing. Theory helps one be a confident problem solver, an open-minded thinker, and a dynamic life-long learner who can adapt to changing work conditions and challenges. Balancing theory is practical skills. These skills are what help students build a portfolio, gain experience through internships and entry level positions, and obtain a job on their desired career path. Through their understanding of theory, students will understand that the skills they have when leaving a program will only go so far as the publishing industry changes. They can leverage their current skills to grow their skill set over time and be engaged members in their profession so that they know what new trends they should pay attention to and what new skills will keep them competitive in the job market.
Rhetoric
Publishing Studies is founded on rhetoric and composition. Publishing is all about communicating particular ideas to a particular audience using a particular (production scale/mass communication) medium. Knowing audience, rhetorical techniques, modes of communication (WOVEN=written, oral, visual, electronic, and nonverbal), and the writing process are essential skills for anyone interested in the publishing industry. Furthermore, being a reflective practitioner–using journal writing and reflection–supports the acquisition, integration, and improvement of the use of rhetoric and composition principles in the work place. There is a lot of overlap in this regard (as well as in the tools employed in the publishing field mentioned below) with Technical Communication.
Media Studies
Media and materiality are really big components of Publishing Studies, because publishing is all about using mass communication media technologies to reach an audience. Important issues for Publishing Studies from a Media Studies perspective might include: the effect/affect of media on audiences, how does media change over time, how does media influence other media, what biases are built into particular media or how those media are used, and are there issues with particular media at scale (e.g., Facebook and Twitter’s role in Brexit and the 2016 US election). Aesthetics, design, layout, and UX are important, too, and they overlap (as do many aspects of theory) with practical skills.
History of the Book/Newspaper/Magazine/Website/Etc
Perhaps under the umbrella of Media Studies, the History of the Book and other produced media such as newspapers, magazines, websites, social media, and others, are key to a fundamental understanding of Publishing Studies. The field encompasses many different forms of mass communication technologies, and the intertwined histories of these media provide a useful context for how we are at this particular moment in publishing history while also revealing how the history of publishing is not a Whig historical progression, but in fact, contains many interesting dead ends and forgotten technologies whose time might not have been right but contained some aspects that were useful and might deserve revisiting in the present. Layered in these histories are issues of labor, capital, production technologies, world historical events, and societal movements, all of which have influenced the development of the publishing history.
Practical Skills
Praxis is tempered by theory. Theory is made meaningful by praxis. The two support one another and enrich one’s experience of the publishing field in a way that helps propel students toward dynamic careers instead of cookie-cutter jobs. Publishing careers include writing, editing, design, layout, printing, IT, programming, procurement, representation, marketing, fact checking, research, and business administration. All of these rely on a basic set of writing, communication, and interpersonal skills, and each branches off into a discrete set of current (but always changing) skills involving knowledge-based work (e.g., planning, research, summarizing, extrapolating, etc.) and tool-based work (e.g., Adobe Creative Suite, Microsoft Office, CMS, etc.). Each career path’s set of widely accepted skills (i.e., those skills that employers are looking for in employees) are those that should be researched and taught by faculty. Besides their course work, students can learn more about these through trade publications and books, mentors, and internships.
