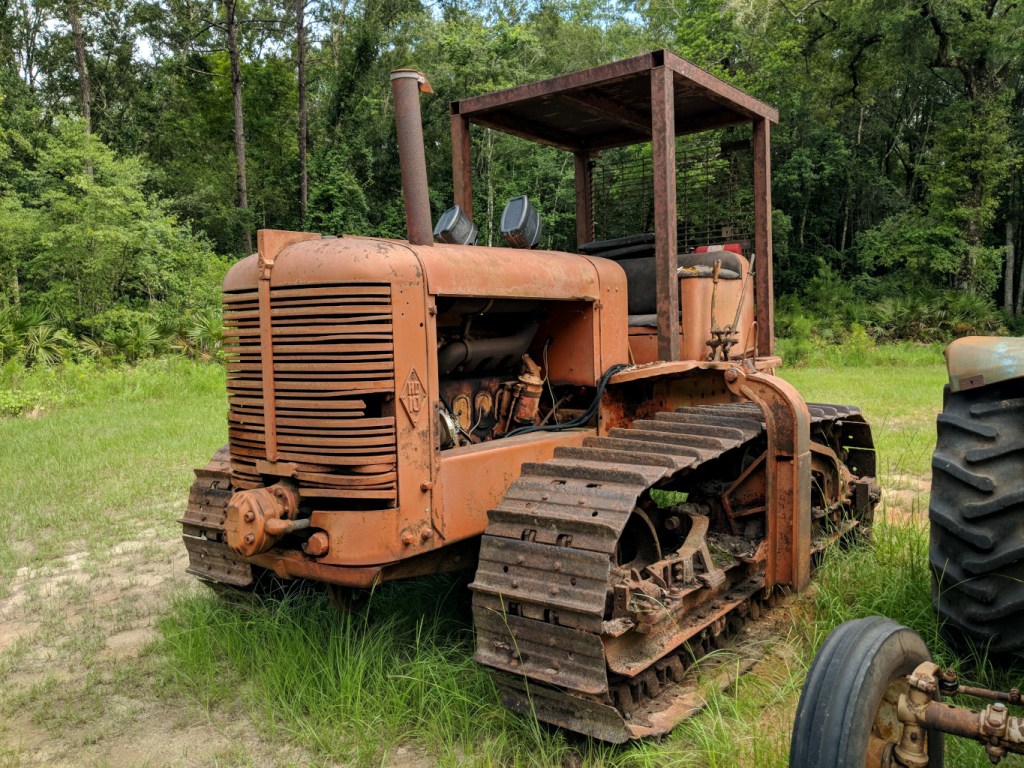
When I visited my folks a few weeks back, I saw this tiny flower of the Wahlenbergia genus poking out from behind part of my dad’s Allis-Chalmers HD10 bulldozer.
The Allis-Chalmers HD10 is a mid-century crawler that can have put in decades of service with proper care and maintenance. This HD10 has been parked for a few years, but it should be fire up with a new battery and minimal work.
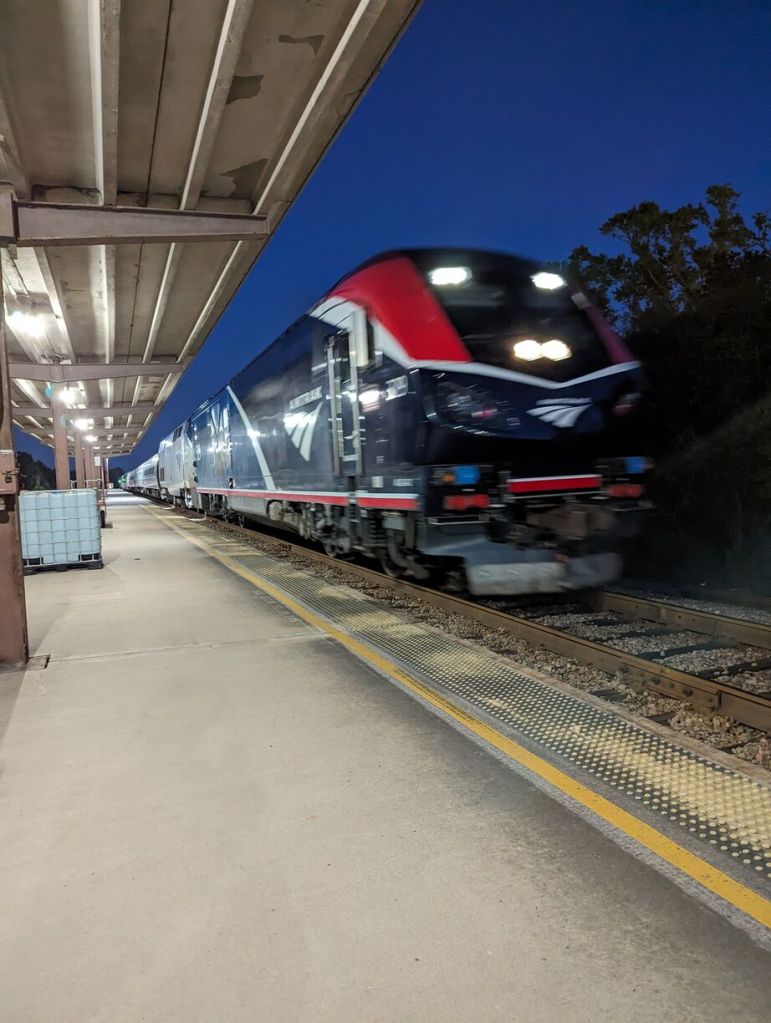
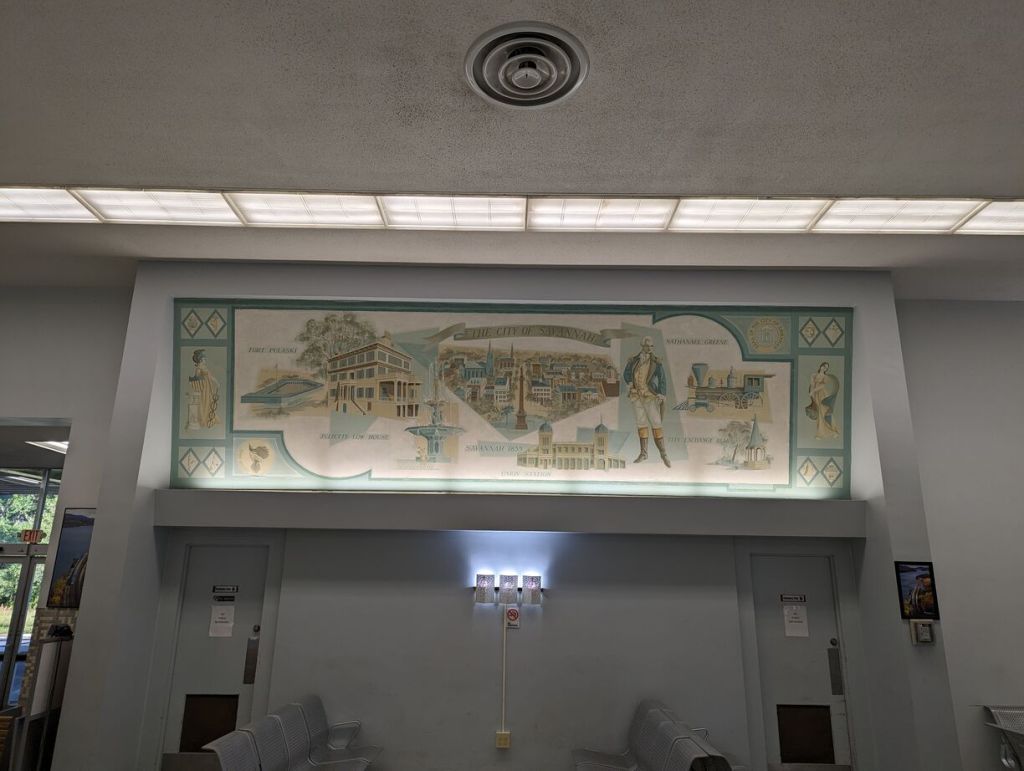
I decided to ride Amtrak back home after visiting my folks, because I dislike the indignity of traveling by air in the United States. I’ve had more than my fair share of “random bag checks,” and I disagree with the security theater at TSA checkpoints that does more to insult than protect.
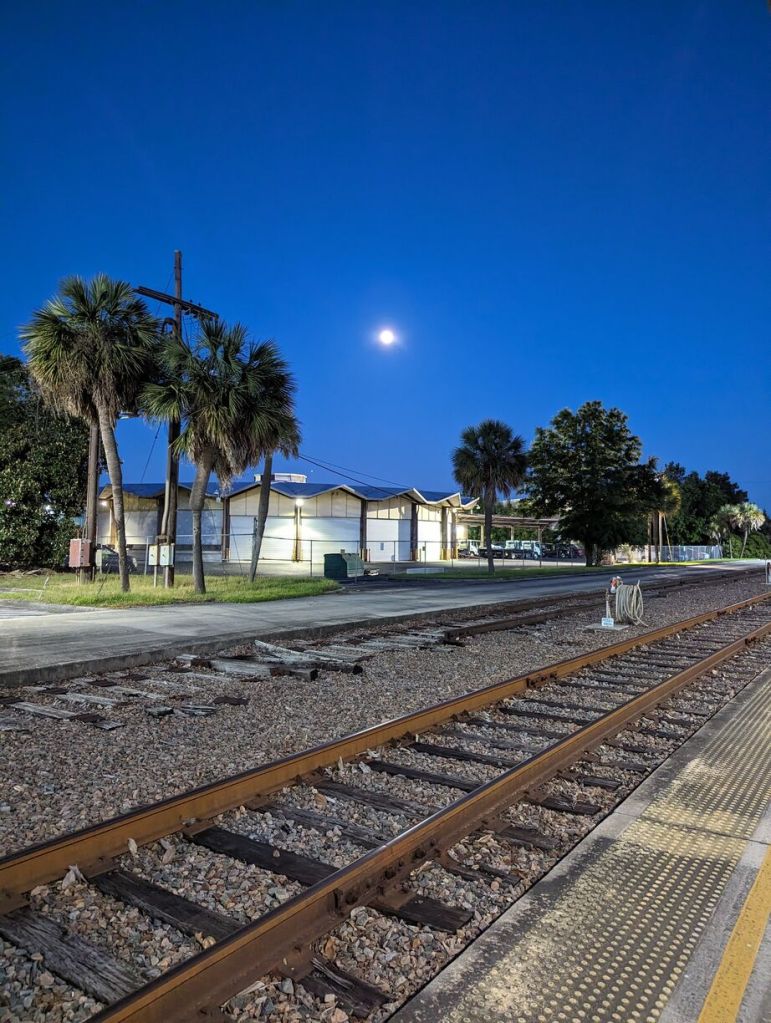
While a train obviously takes longer than an airplane flight, it provides the individual with a dignified travel experience. You walk from the station to the tracks, board your train, and off you go.
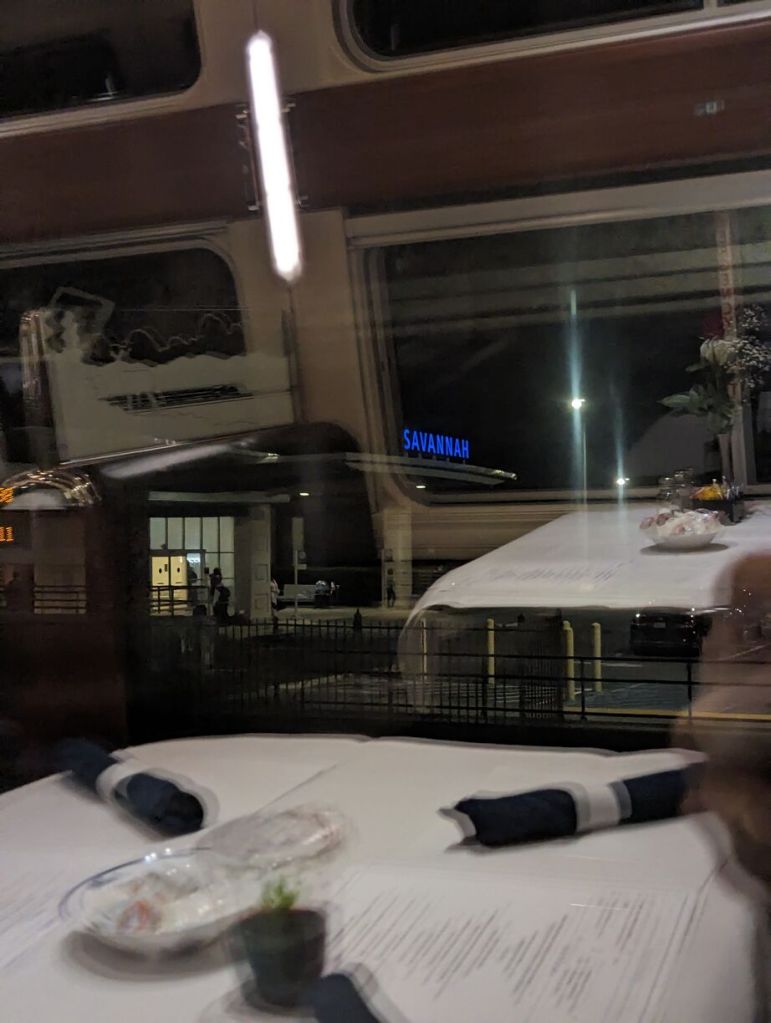
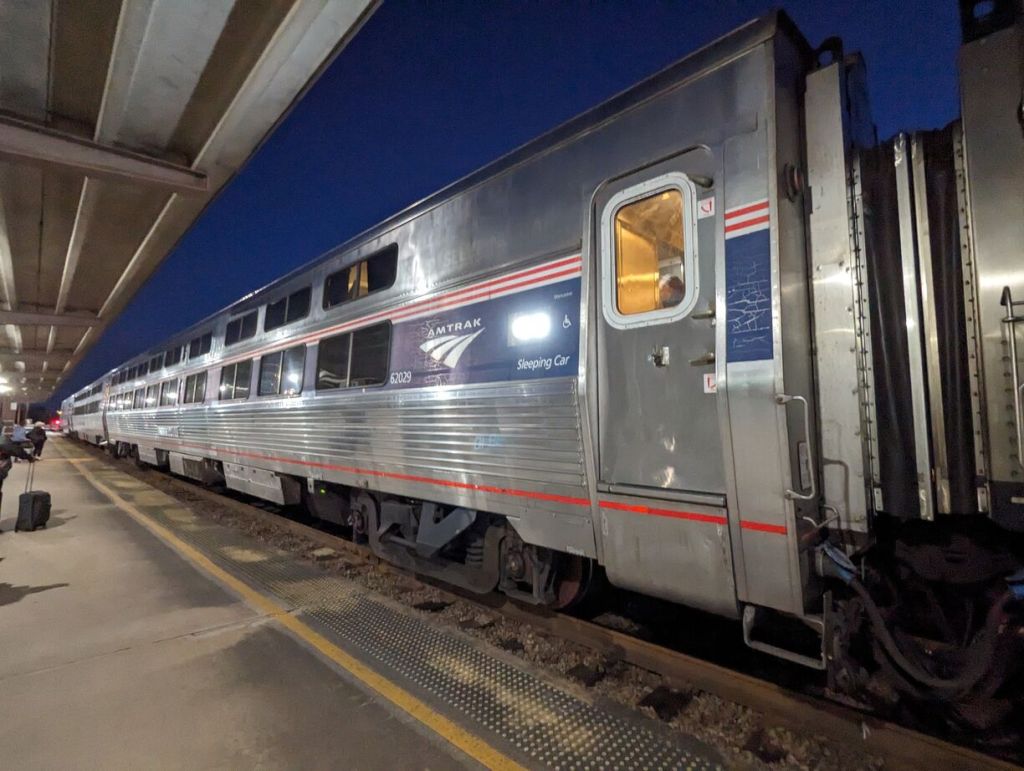
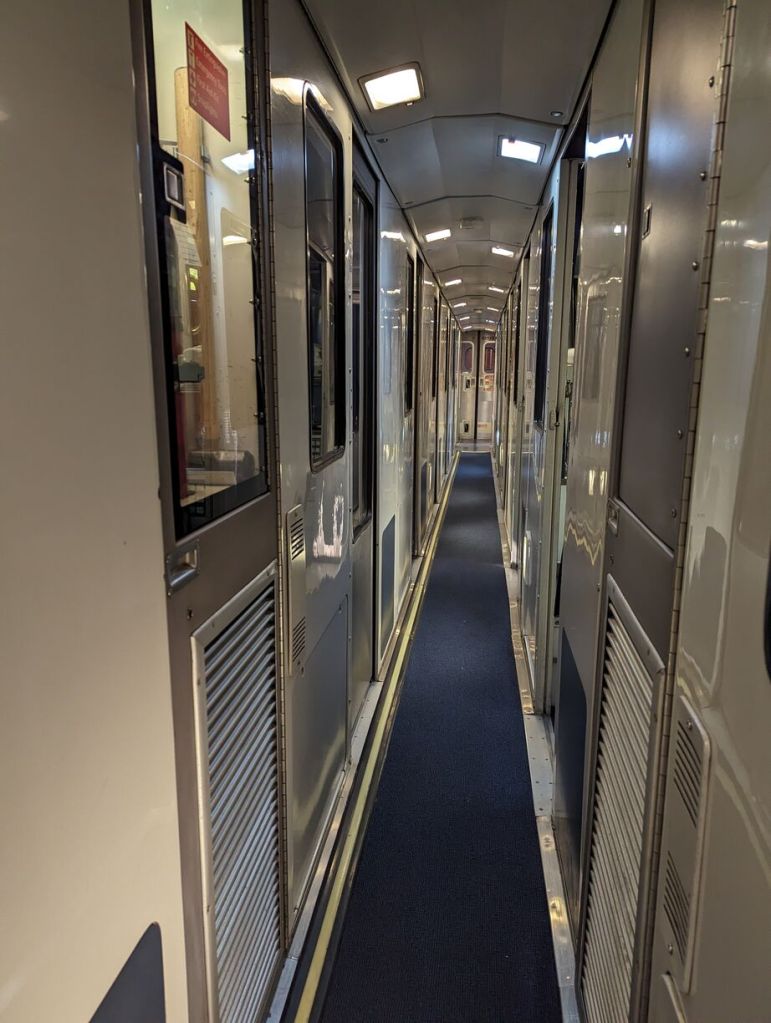
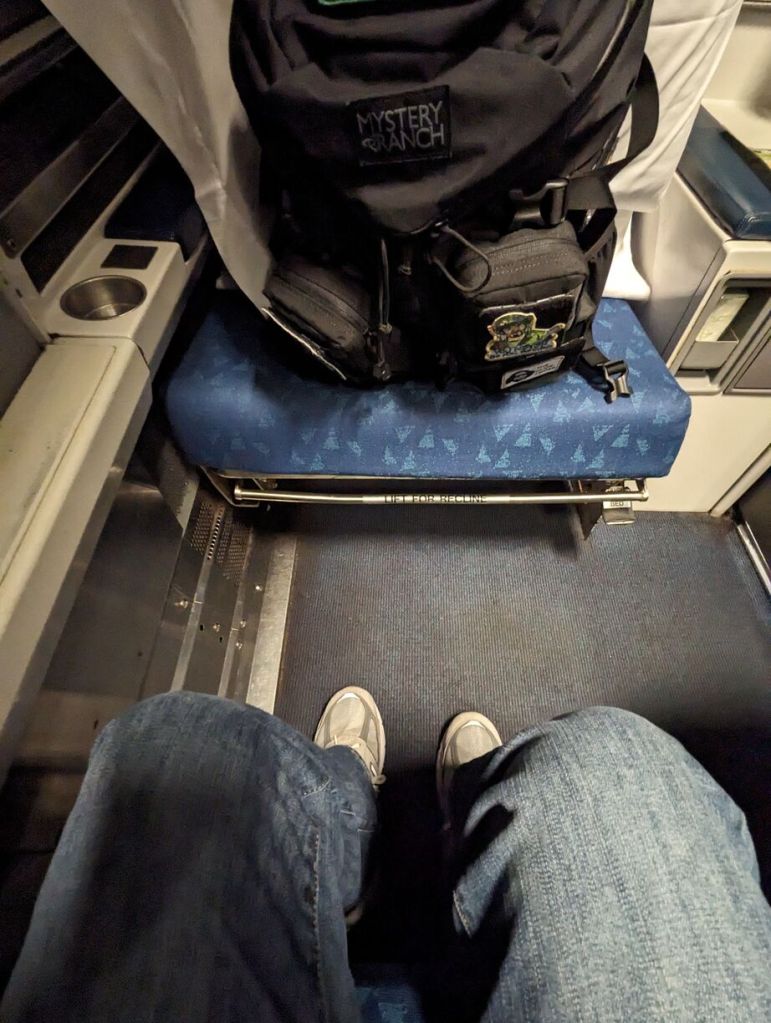
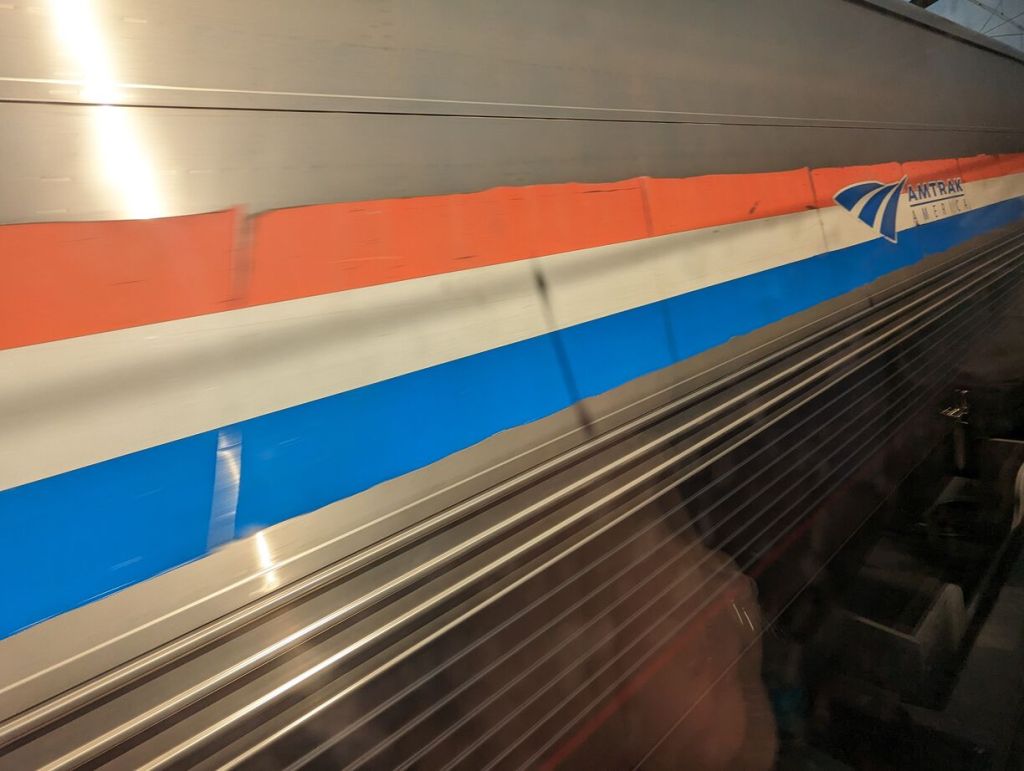
I opted for a roomette aboard Amtrak’s Silver Meteor so that I could sleep more easily on the overnight train ride. The scheduled trip time was about 14 hours, but the actual trip time was closer to 17. For one-way travel, the cost was only a little more than a plane ticket.
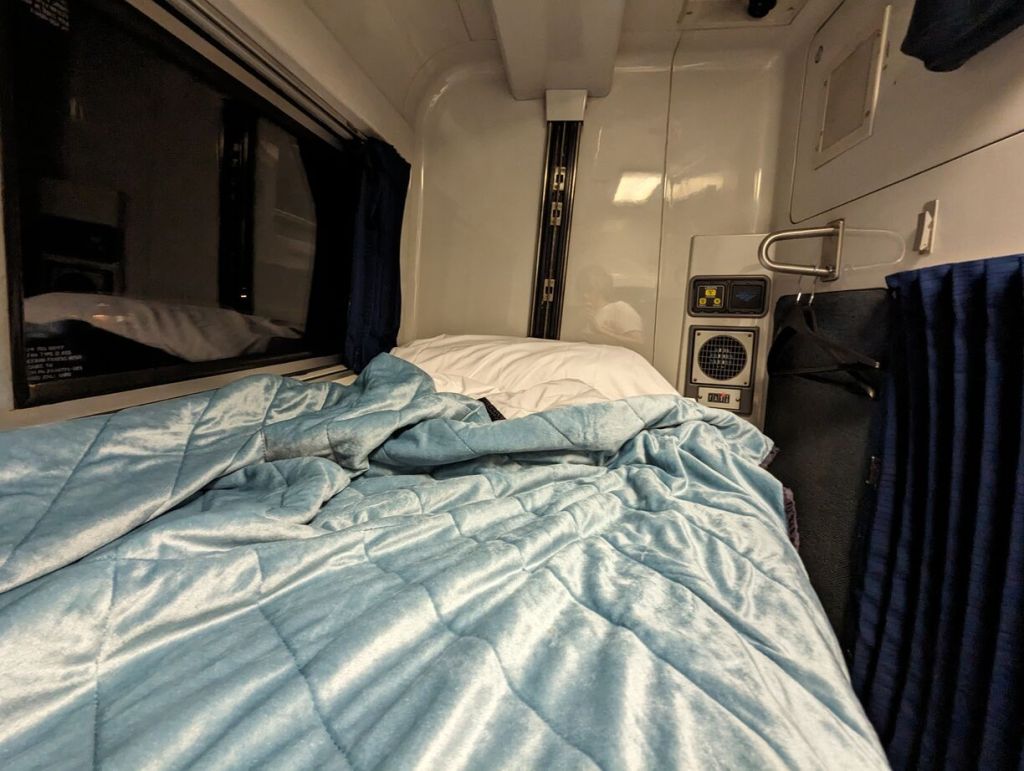
Overall, I enjoyed the experience. Perhaps because the experience was new, I had trouble staying asleep. When I ride again, I might take a sleep aid like Melatonin to help with my sleep. Also, as others have remarked online, there were delays. My train’s delays meant that I missed the dinner service, and since the train was designated only with dinner and breakfast service, there was no lunch service despite arriving 3 hours late in NYC the next day. Thankfully, I had learned from other train travelers and came prepared with extra water and snacks to tide me over. However, I might pack an MRE for a meal next time to have something more substantial to eat if needed.
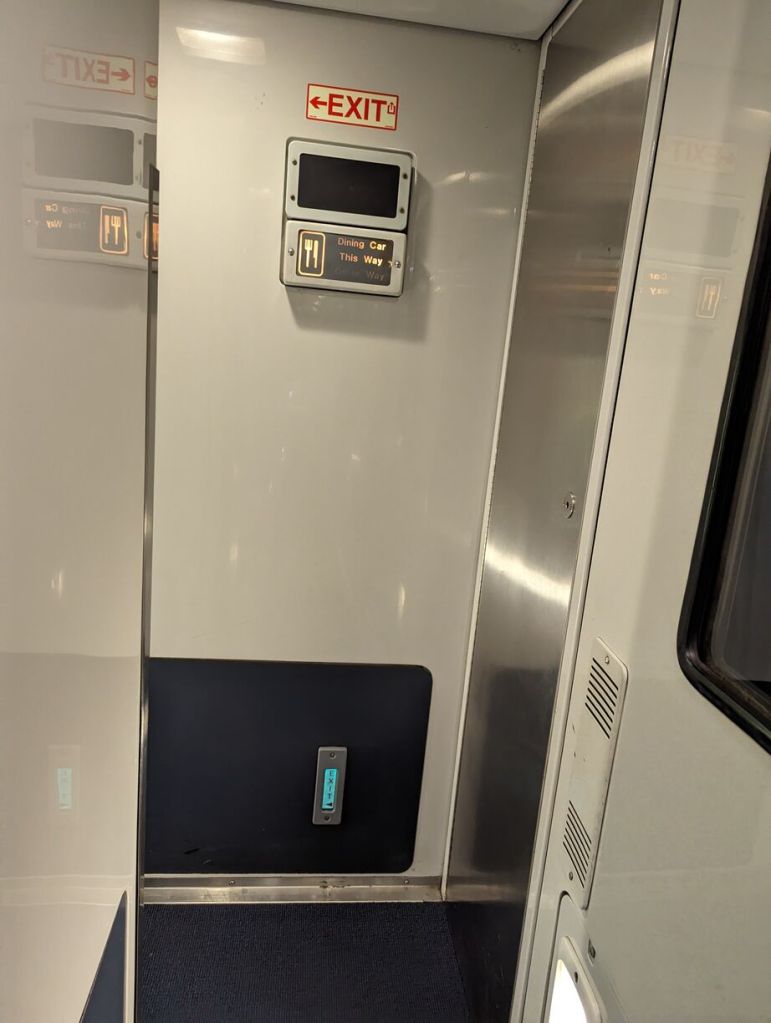
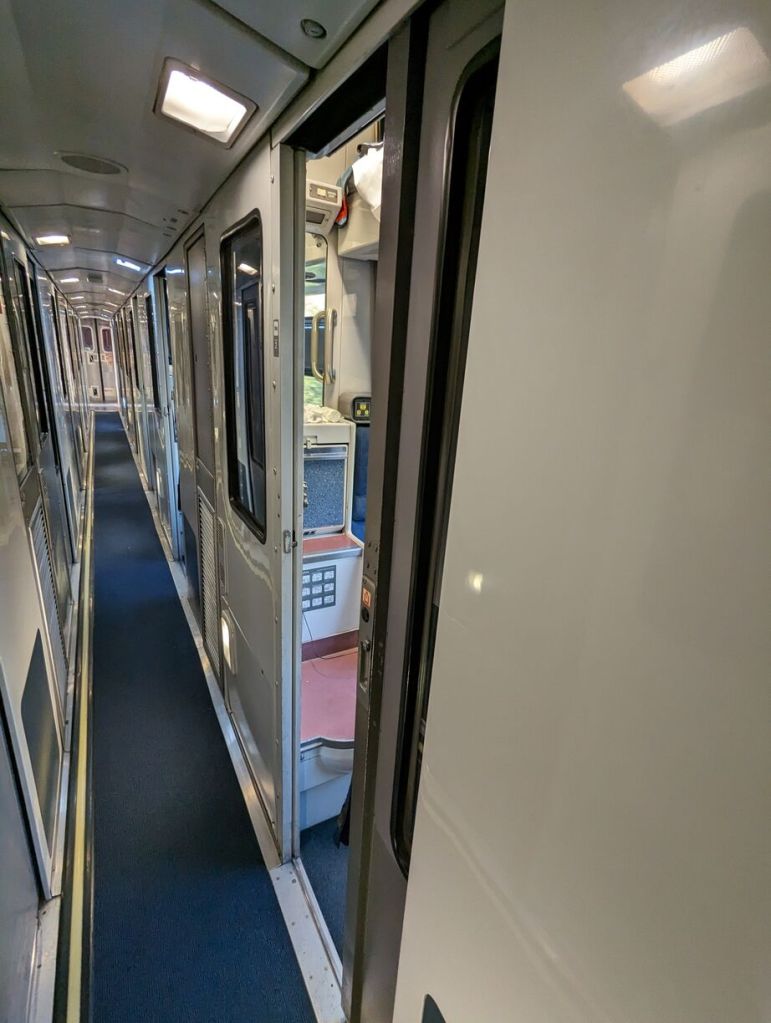
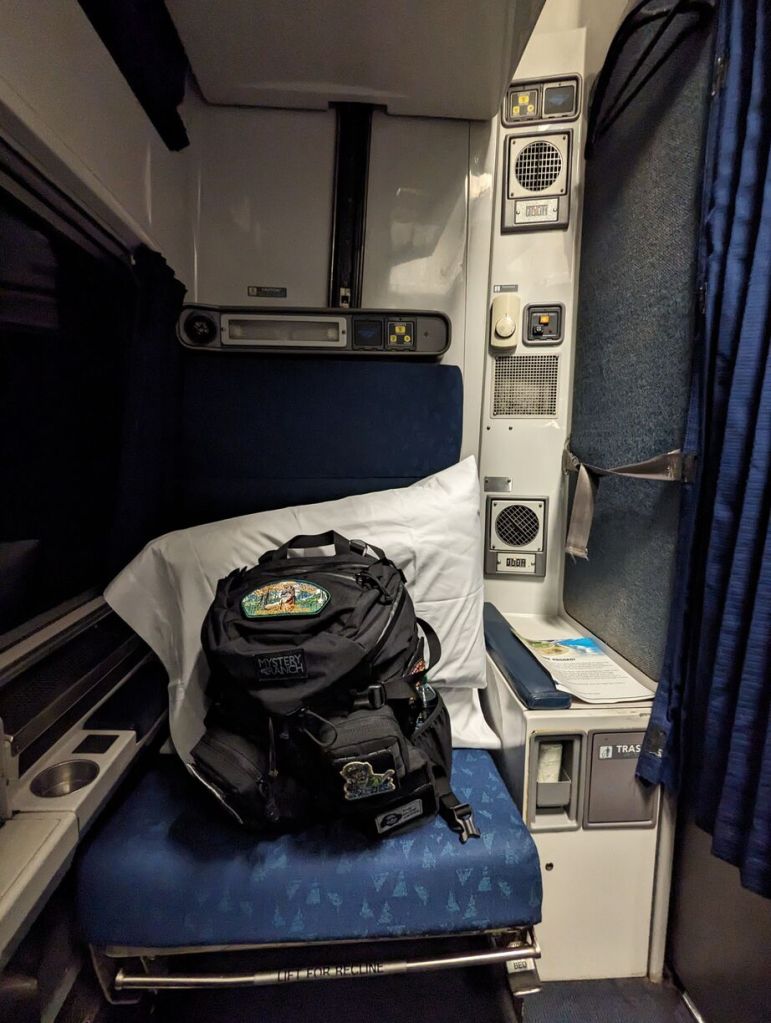
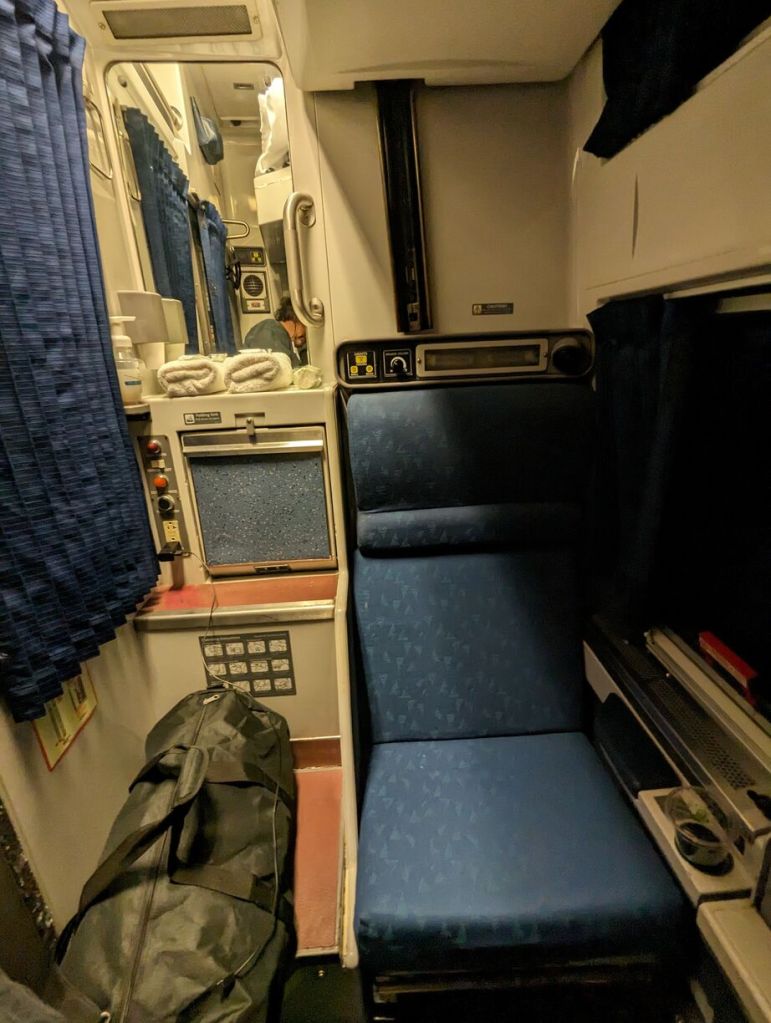
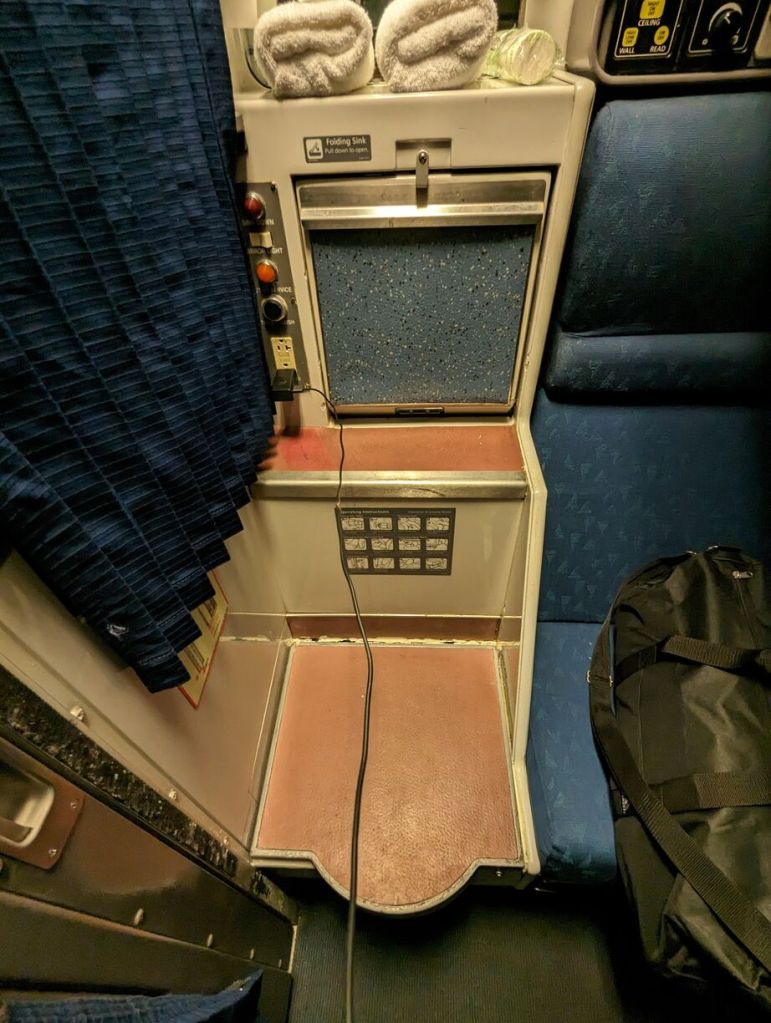
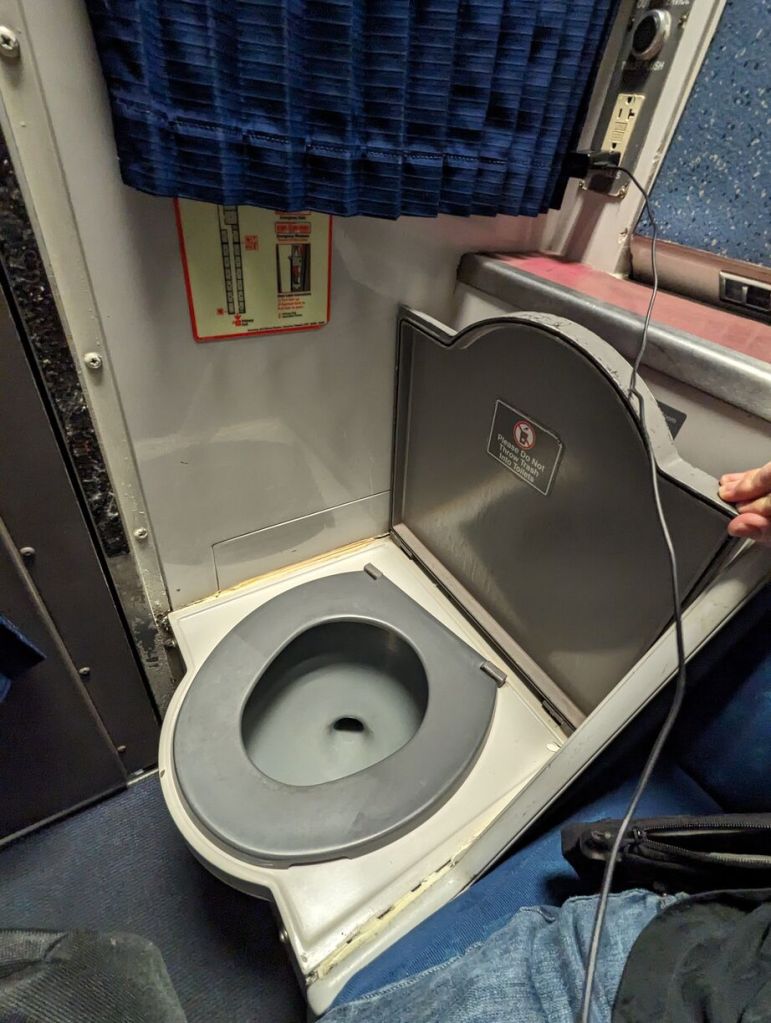
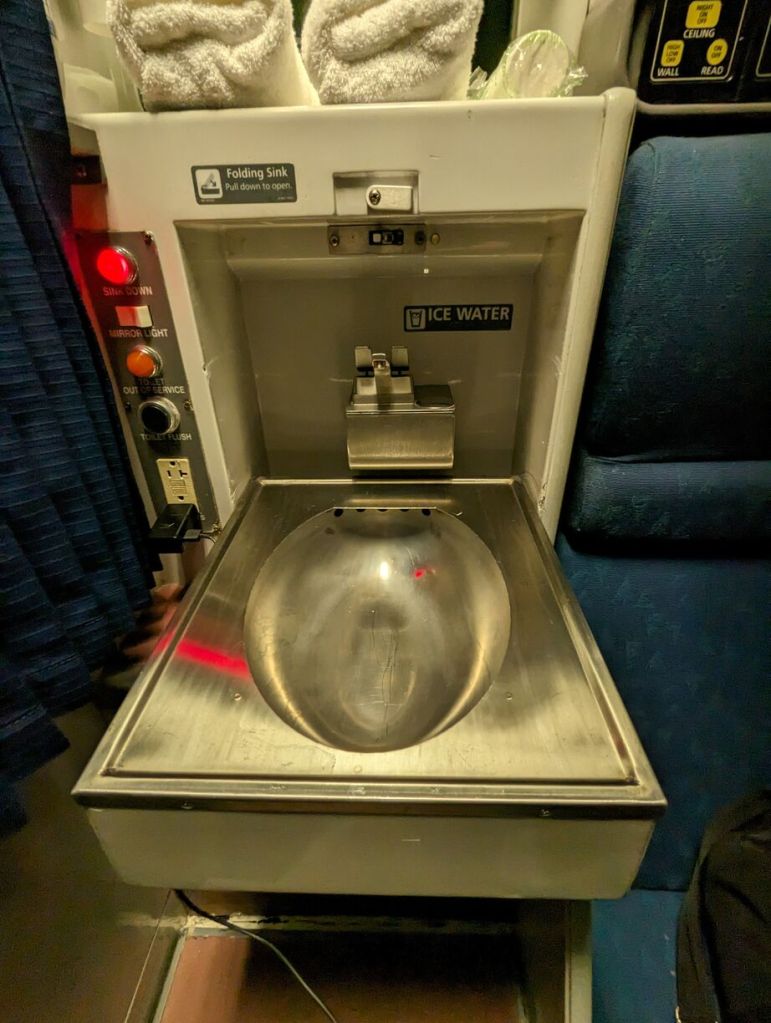
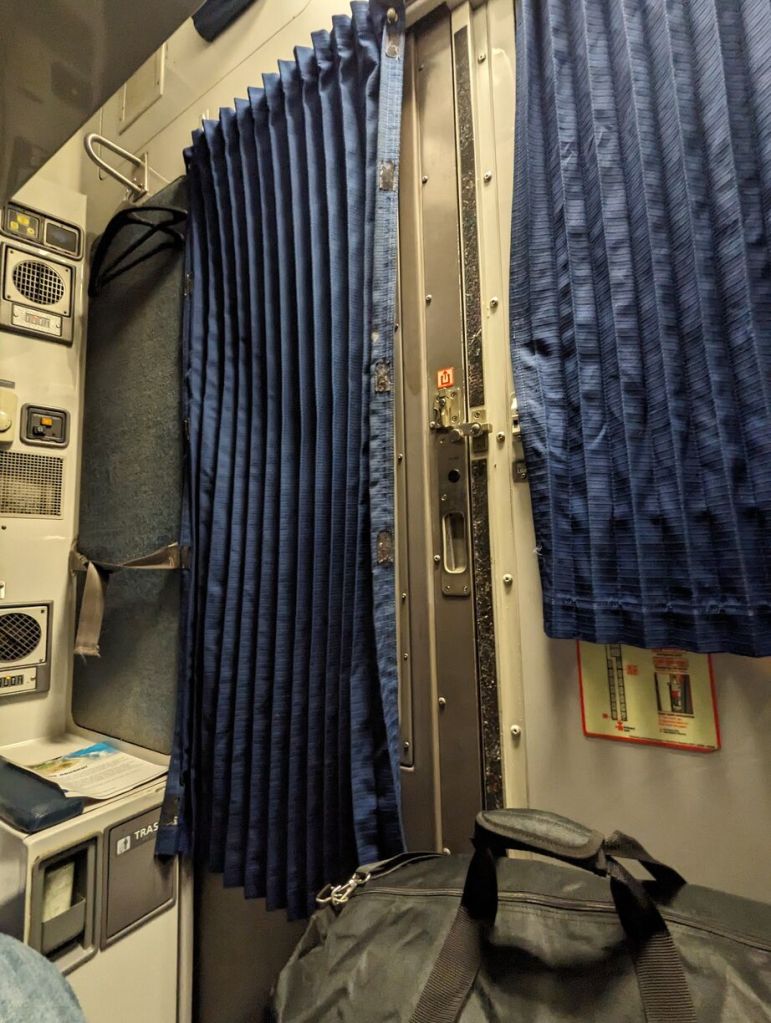
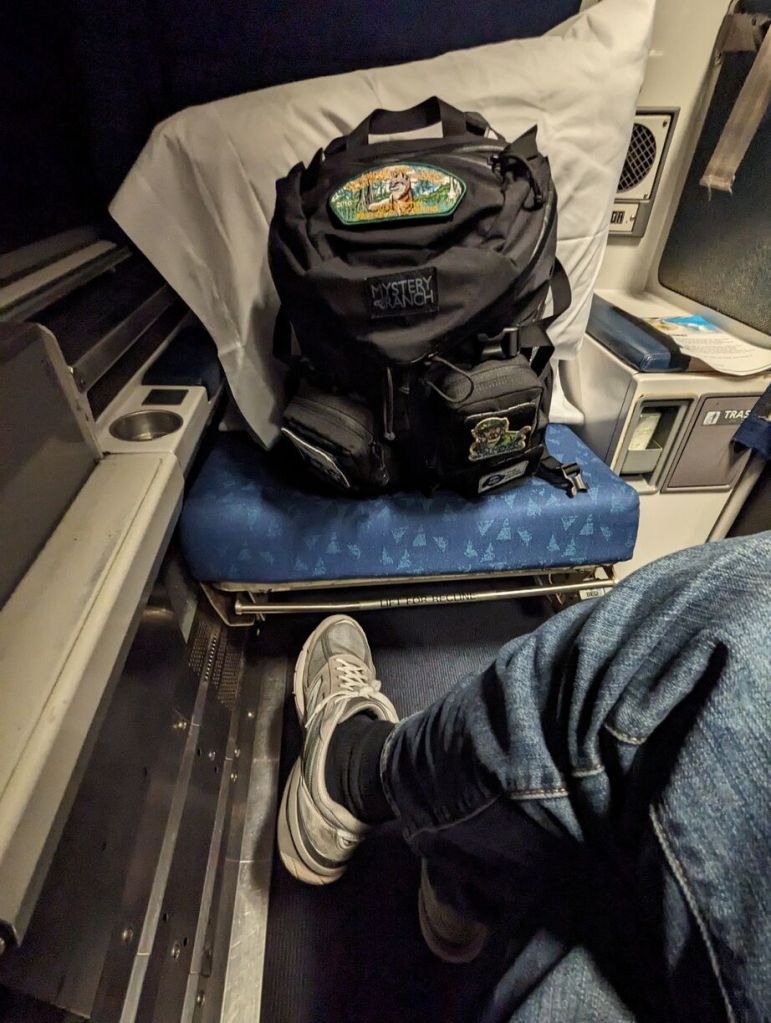
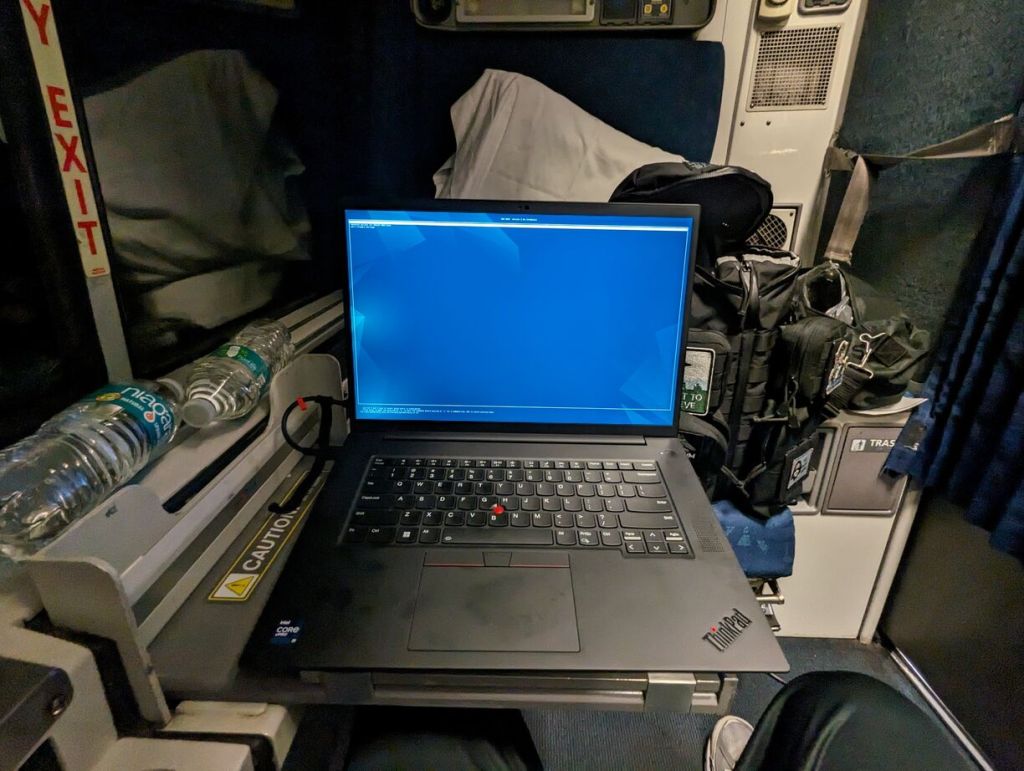
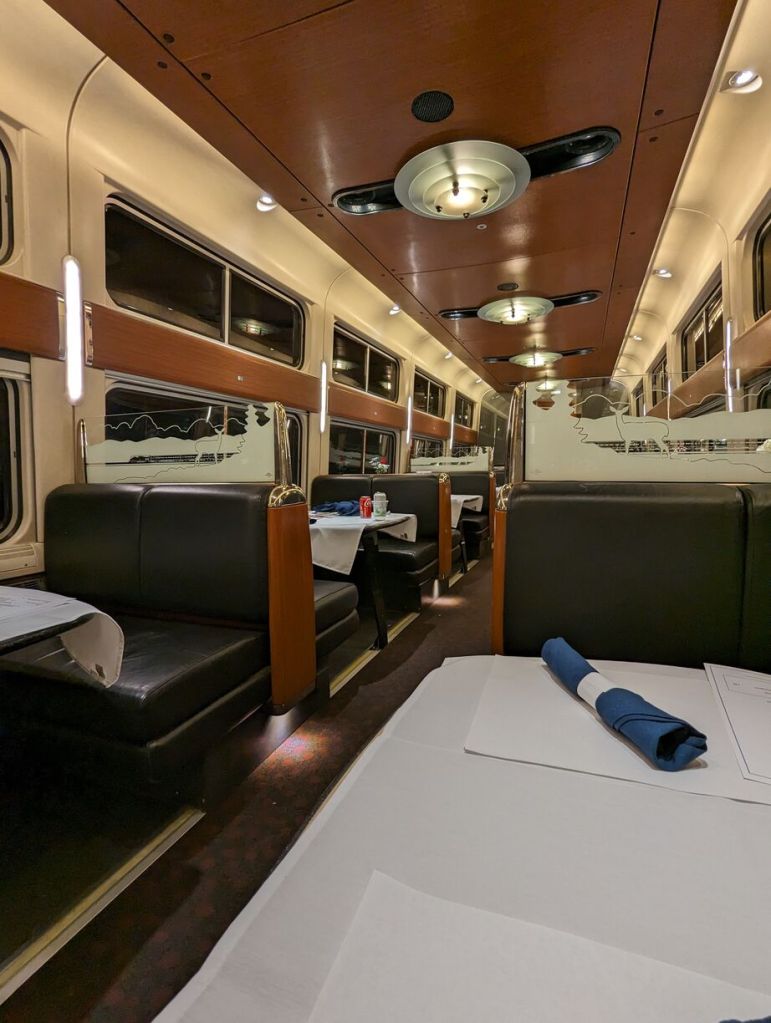
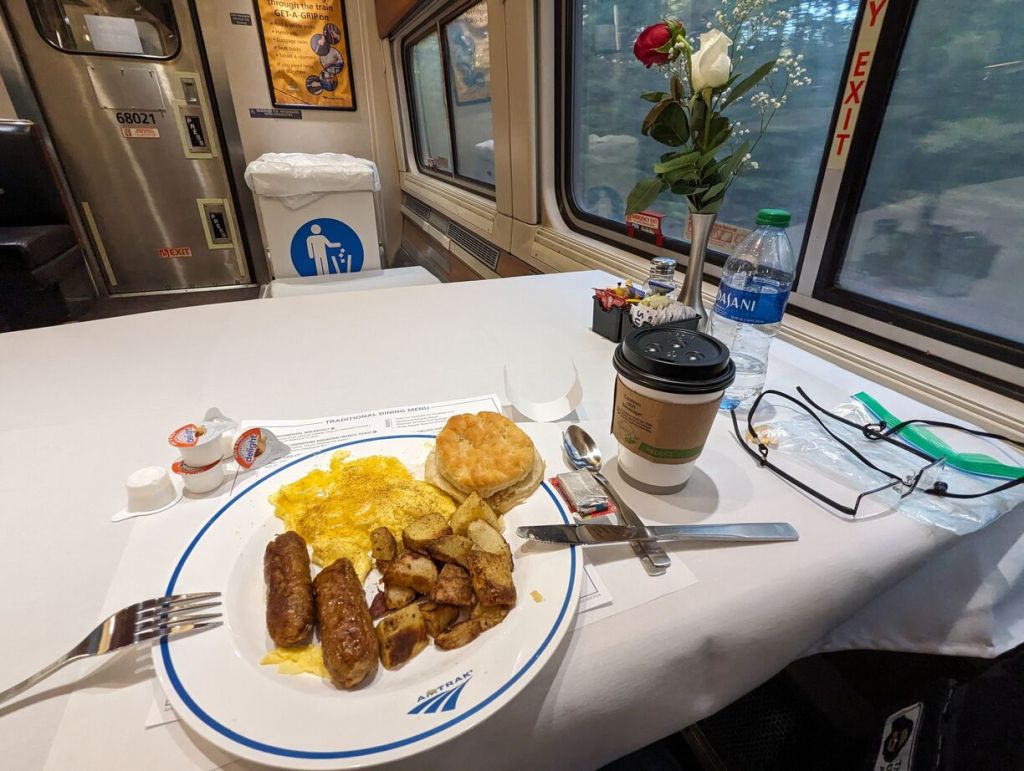
Below are some photos of my trip aboard the Silver Meteor and my roomette. I tried to capture the roomette’s features and amenities as well as demonstrate how much/little leg room there is if you are traveling with another person. Also, this train has a toilet in the roomette–something you would need to negotiate its use if traveling with someone else. Finally, I have some photos of the dining car and the early morning breakfast that I enjoyed (as the dining options are limited, the earlier you go to a meal, the more likely the option you want will still be available).
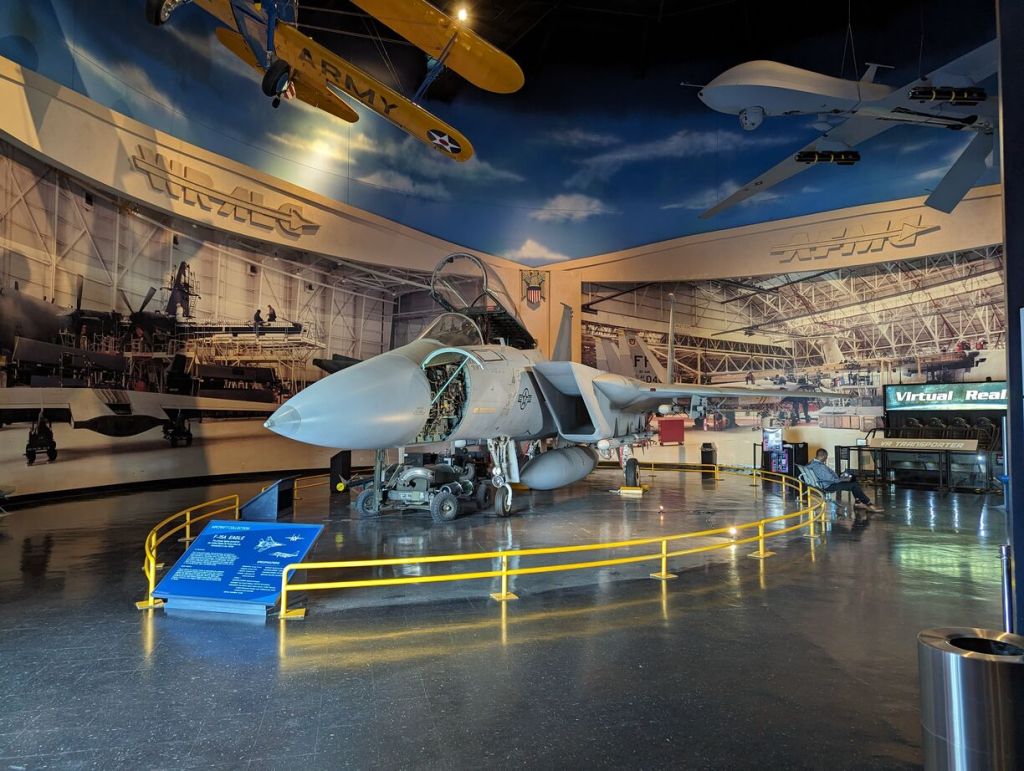
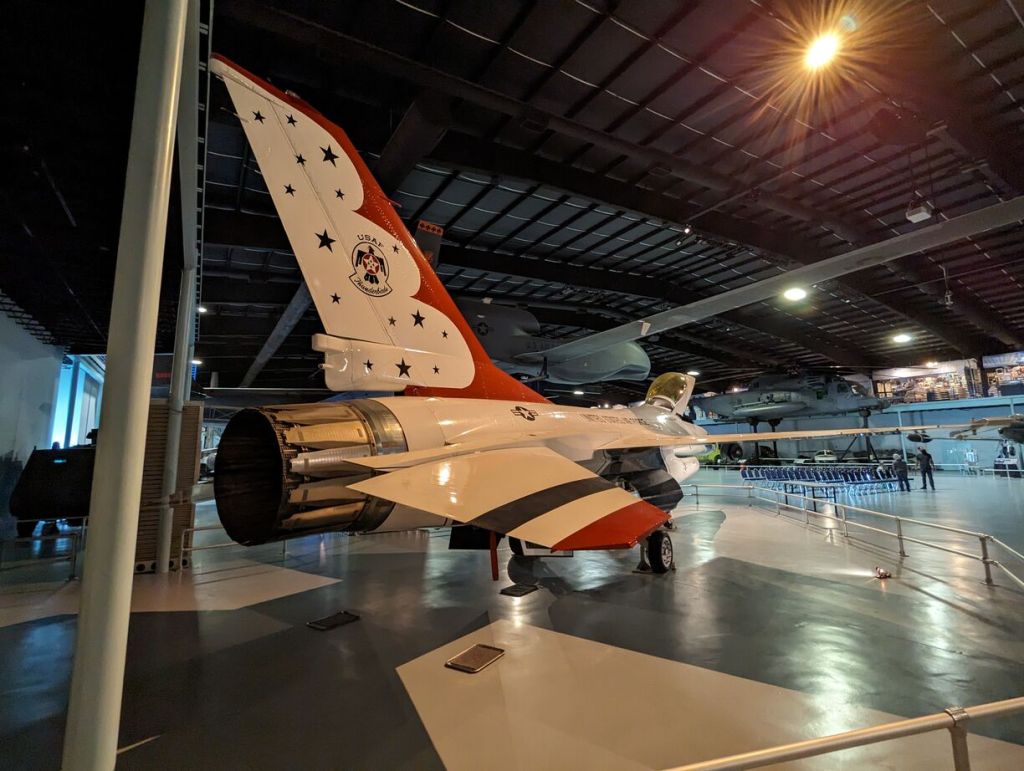
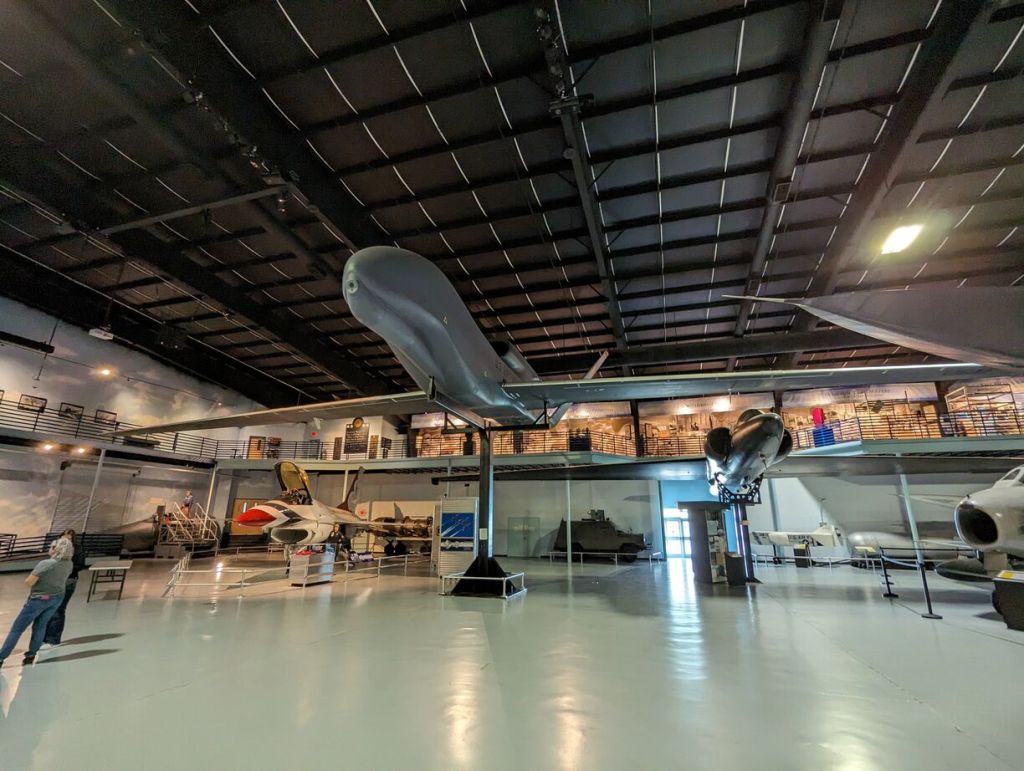
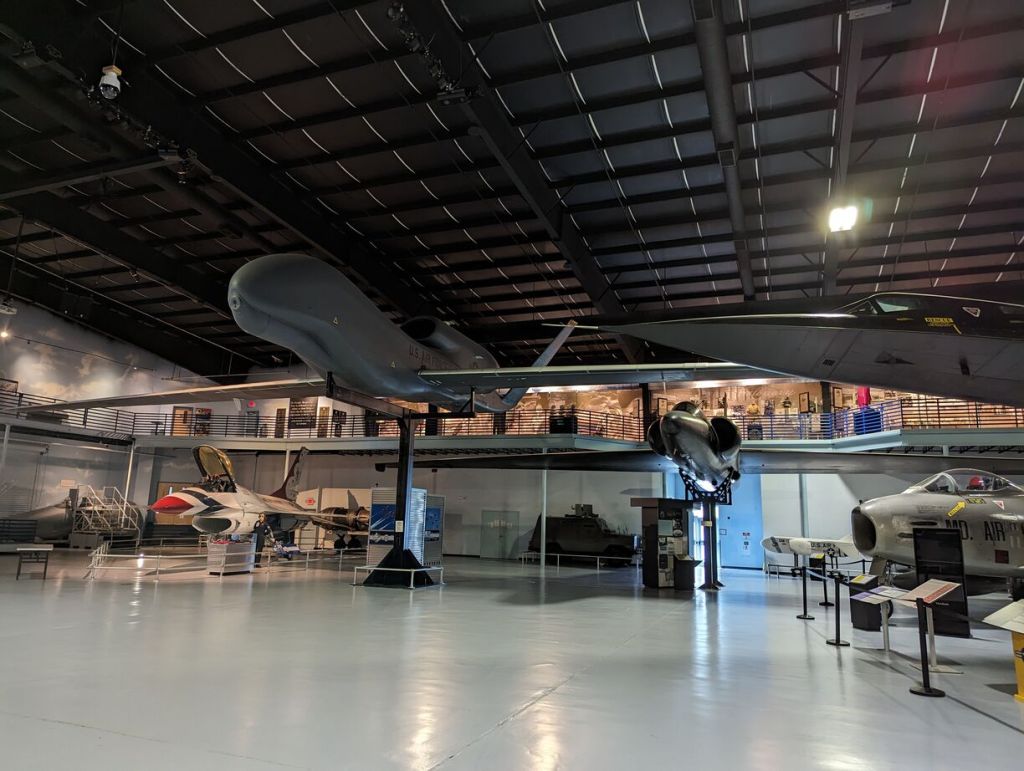
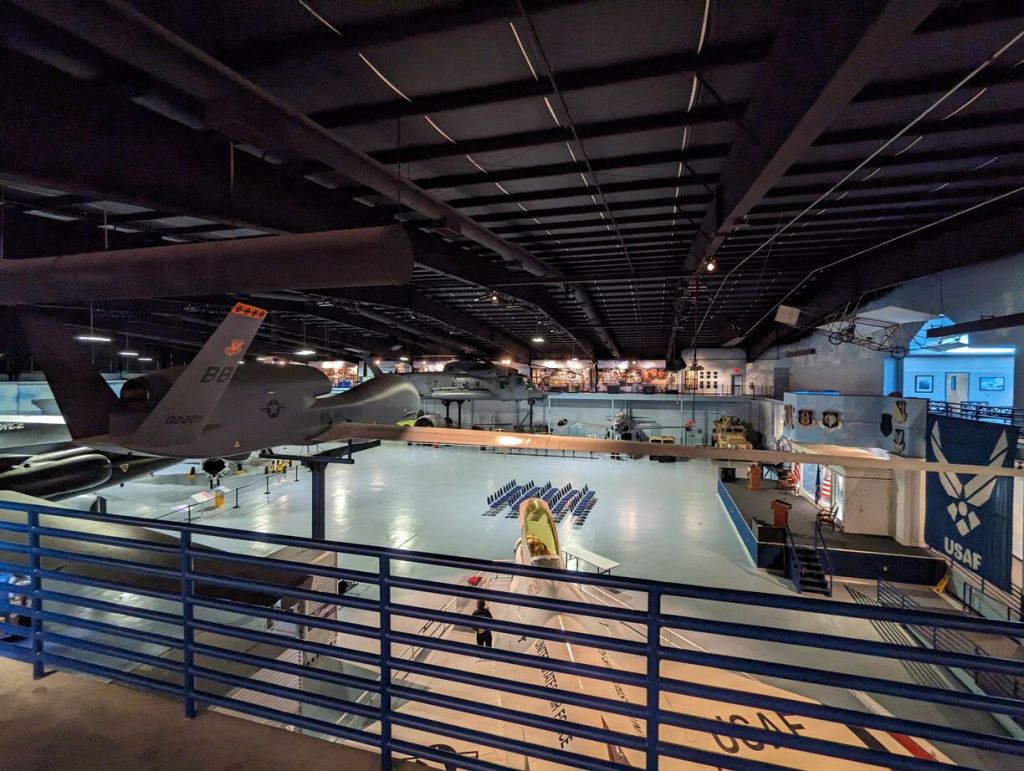
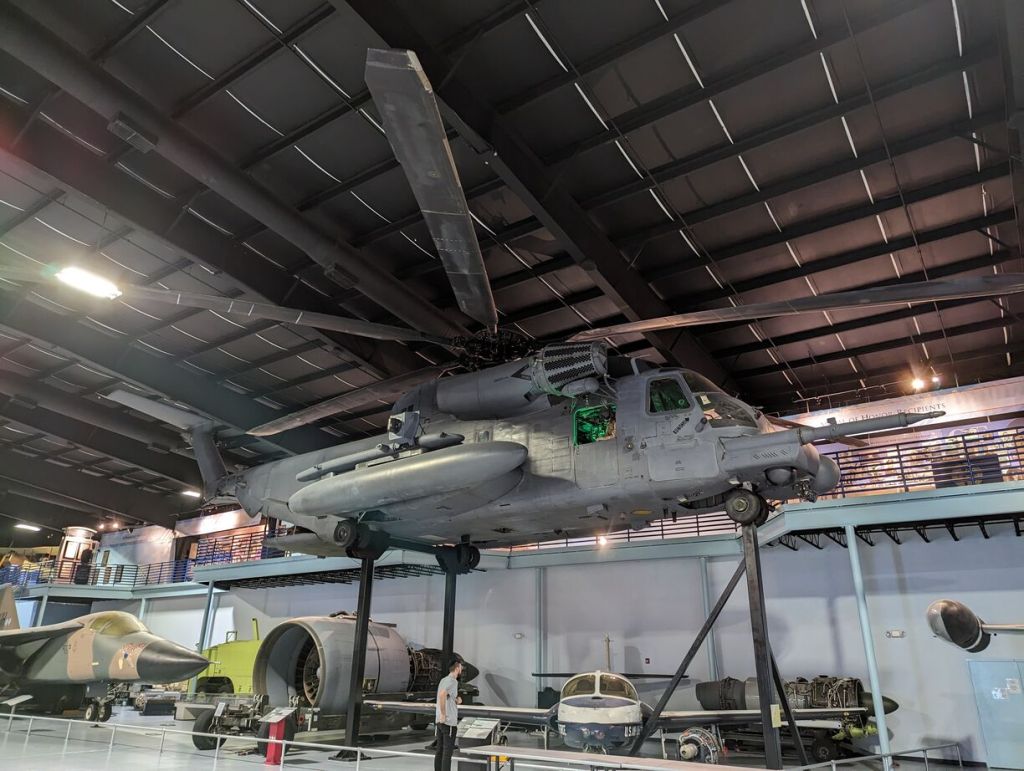
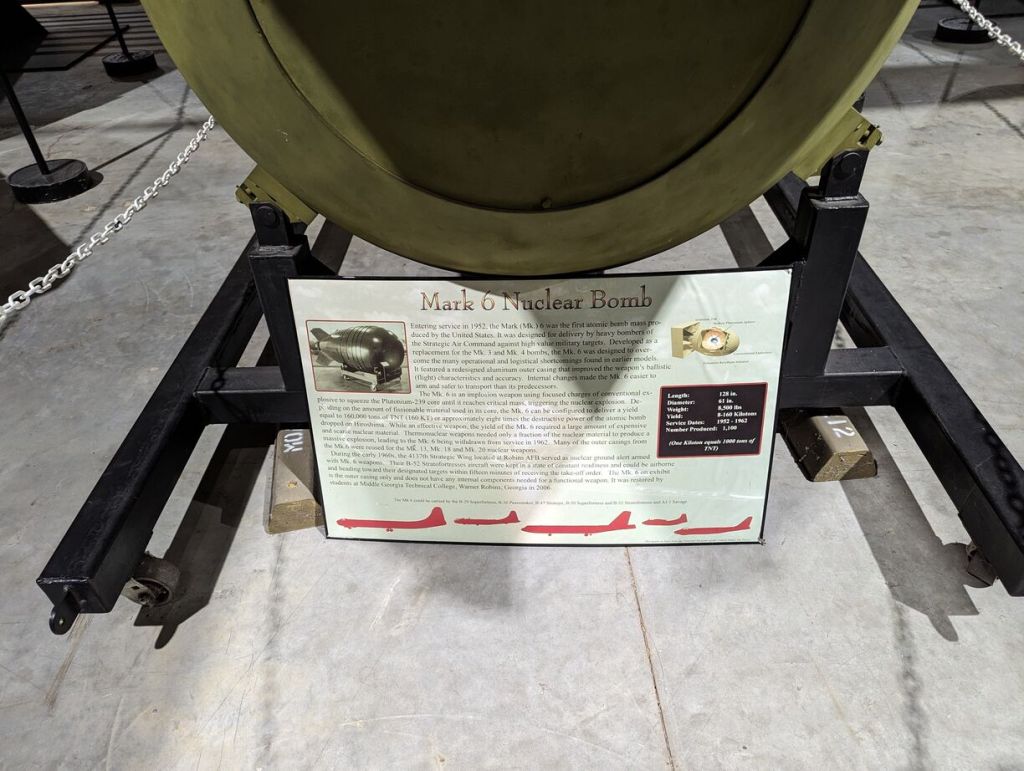
The Museum of Aviation is HUGE! There are four buildings (some with multiple floors) full of planes, drones, helicopters, support vehicles, equipment, and exhibits. There is a VR experience and other interactive exhibits. The four buildings are surrounded by additional aircraft that you can walk around (I walked 1.6 miles while I was there). Admission is free (but donations are accepted).
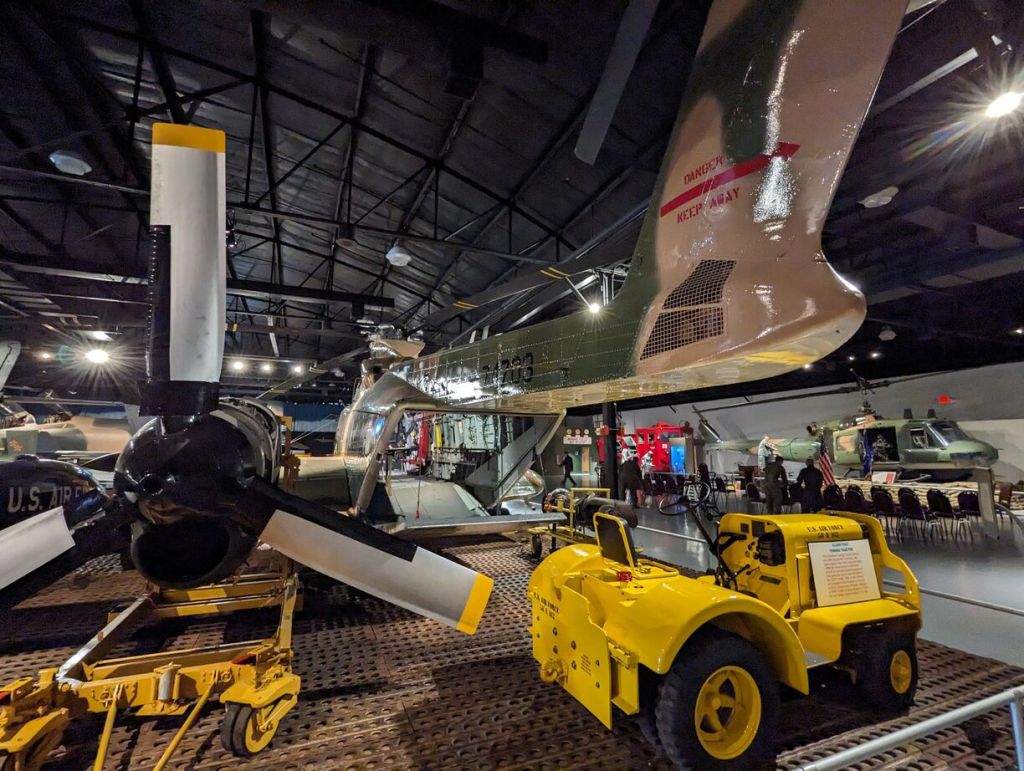
The museum is staffed by experienced volunteers/retired servicemen who are friendly and glad to talk and answer questions. They are also doing restoration work in the exhibit areas.
I was chuffed by the whole experience!
If you are an aircraft enthusiast, you owe it to yourself to visit here.
Below, I’m posting some of the hundreds of photos that I took there.
McDonnell Douglas F-15 Eagle on Pedestal Outside
McDonnell Douglas F-15 Eagle Wheels Down and Service Compartments Open In Main Building
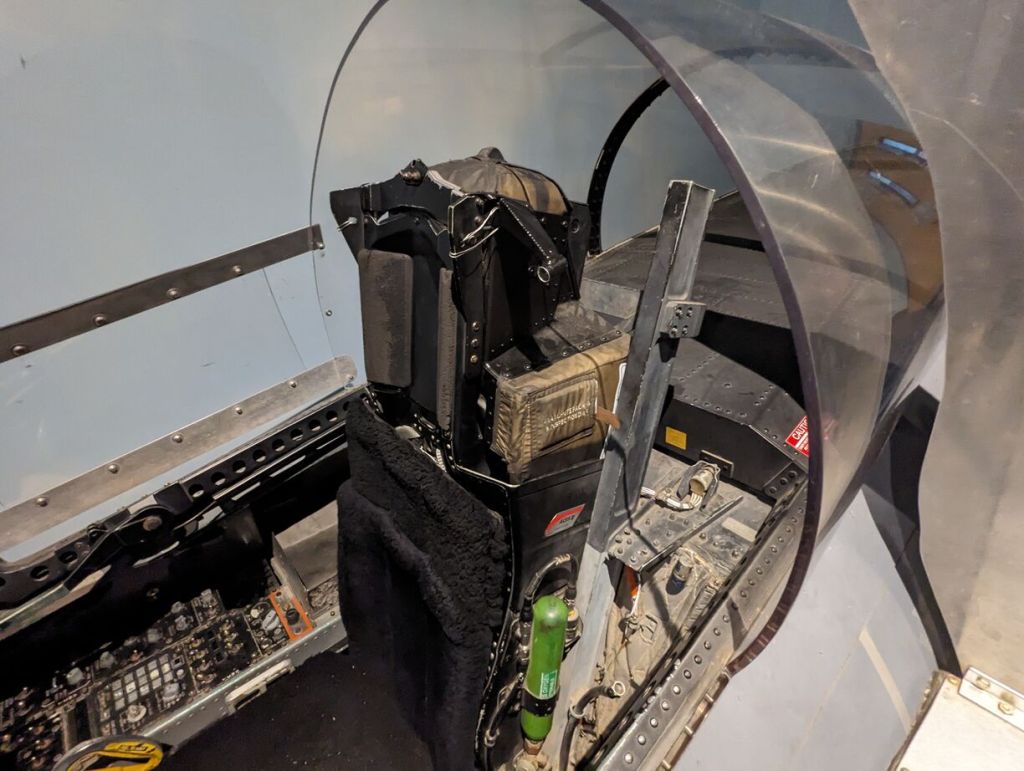
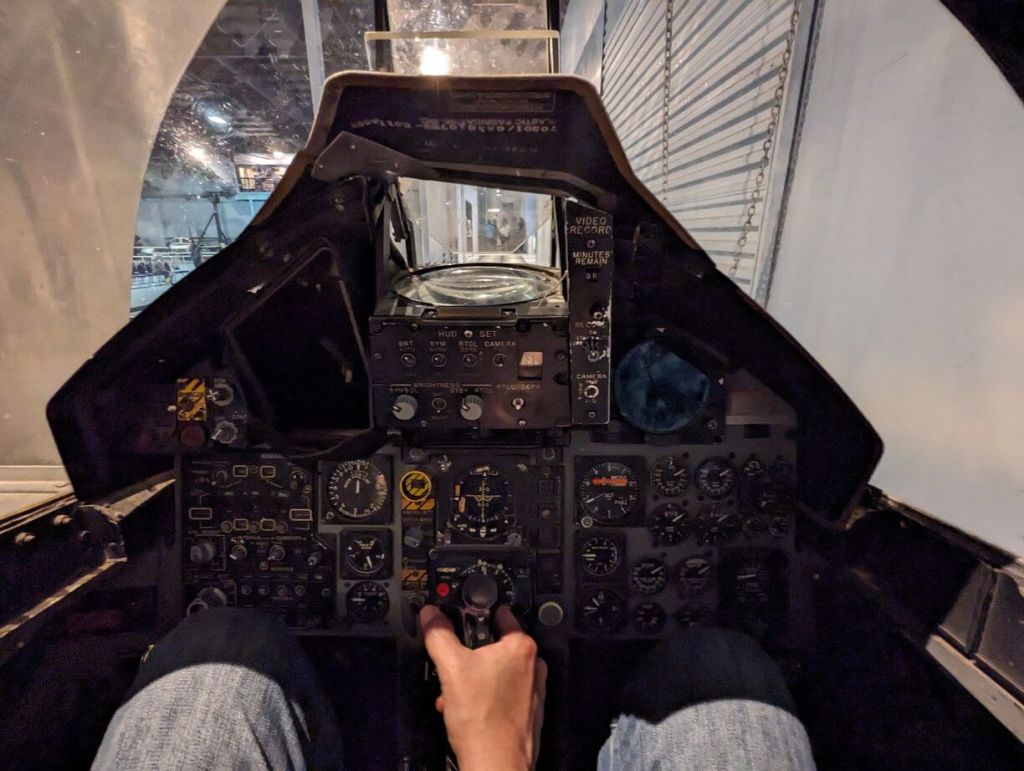
McDonnell Douglas F-15 Eagle Cockpit
Pratt & Whitney F-15 Engine
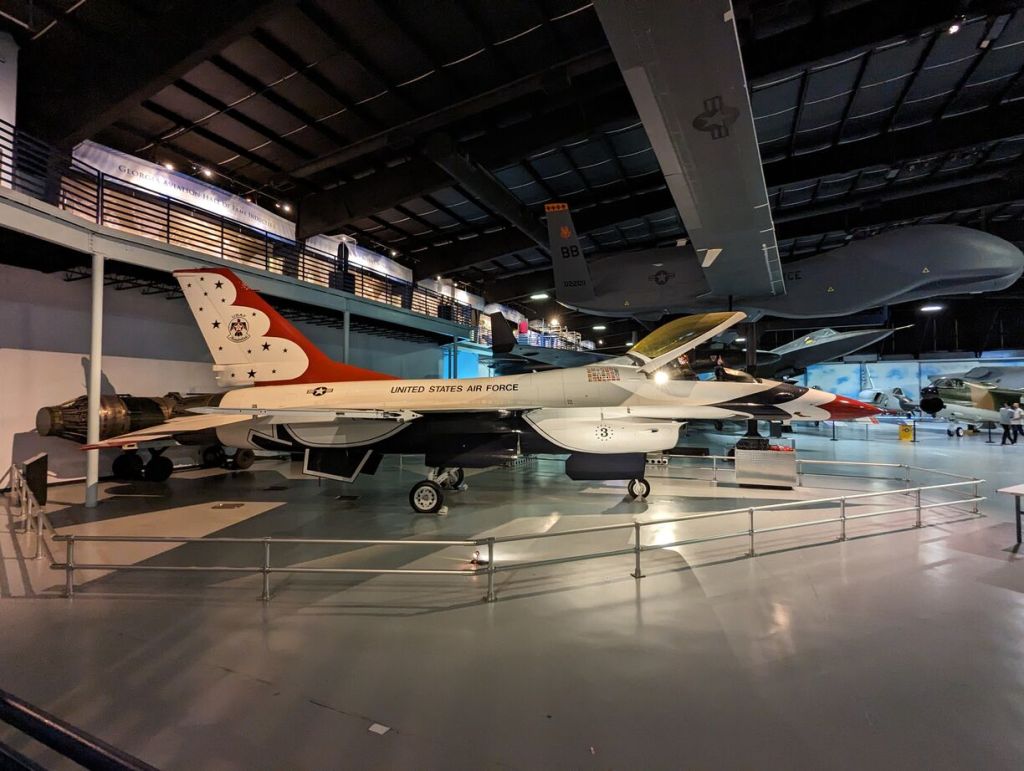
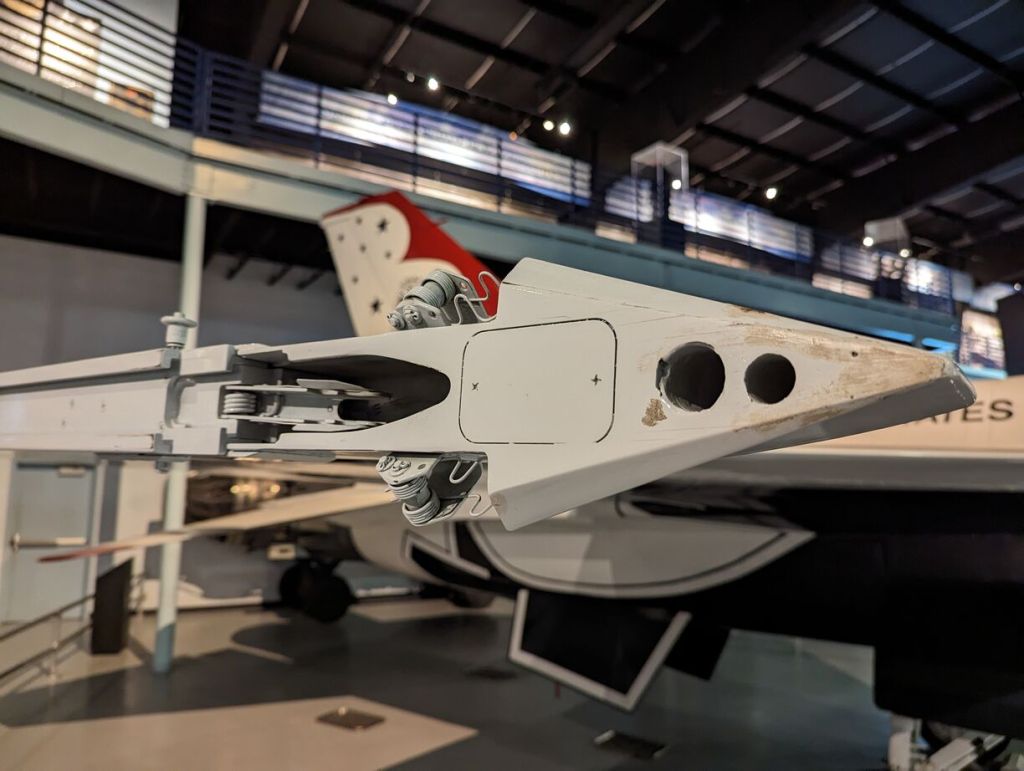
General Dynamics F-16 Fighting Falcon (Thunderbirds)
Northrop Grumman RQ-4 Global Hawk
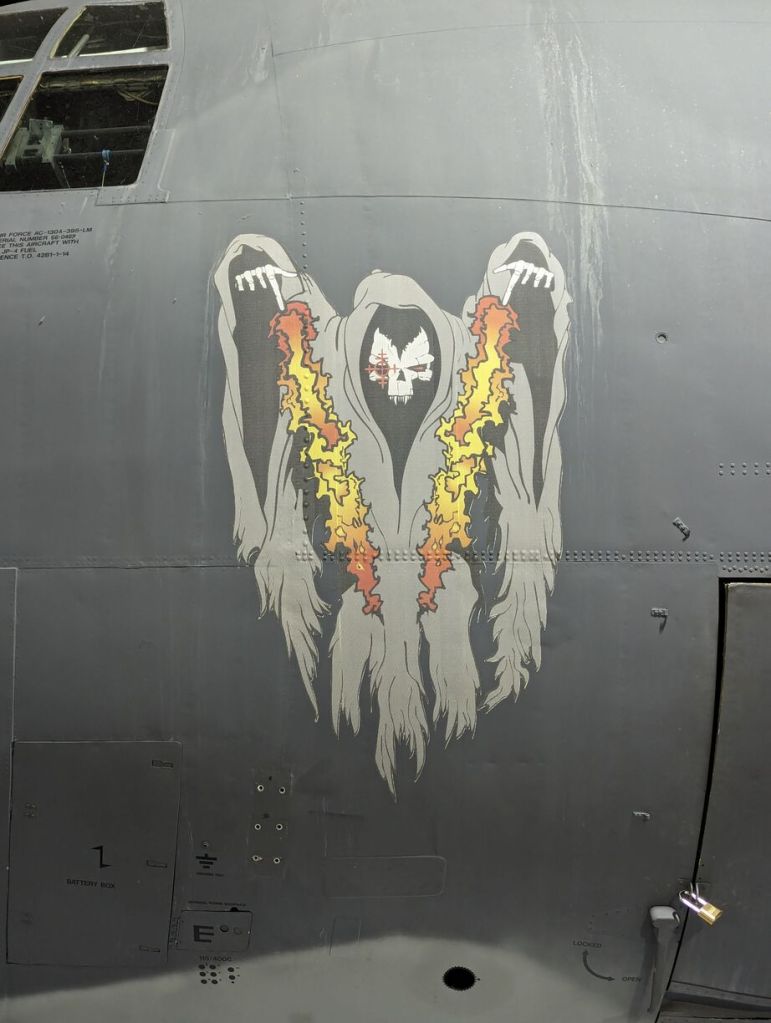
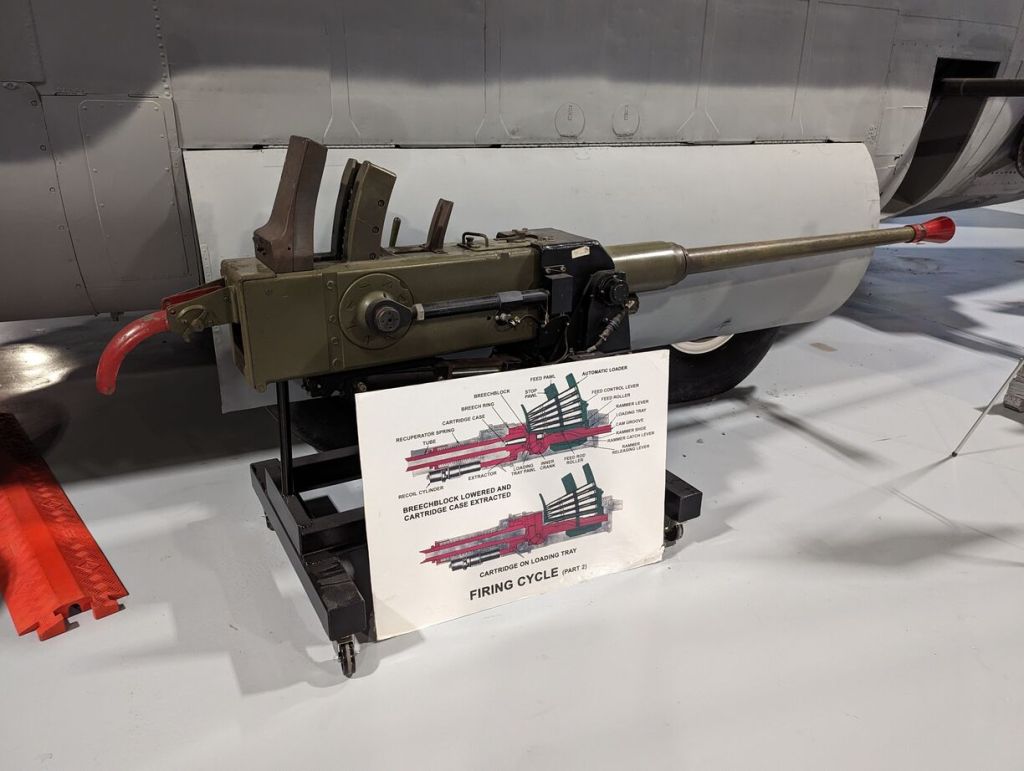
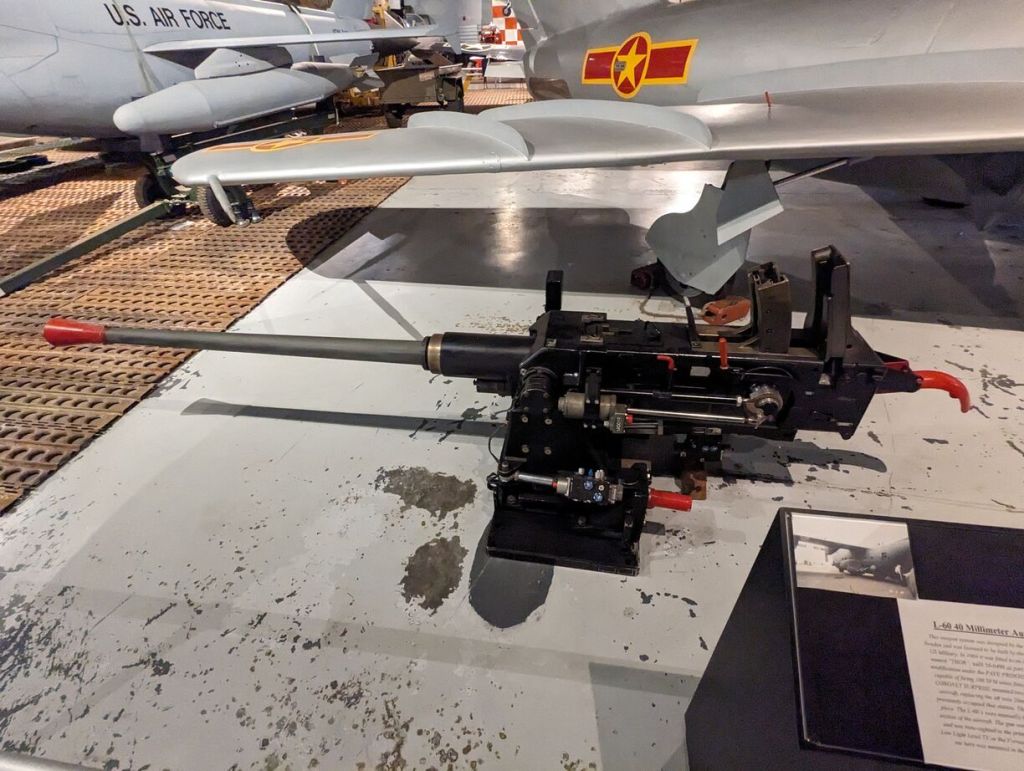
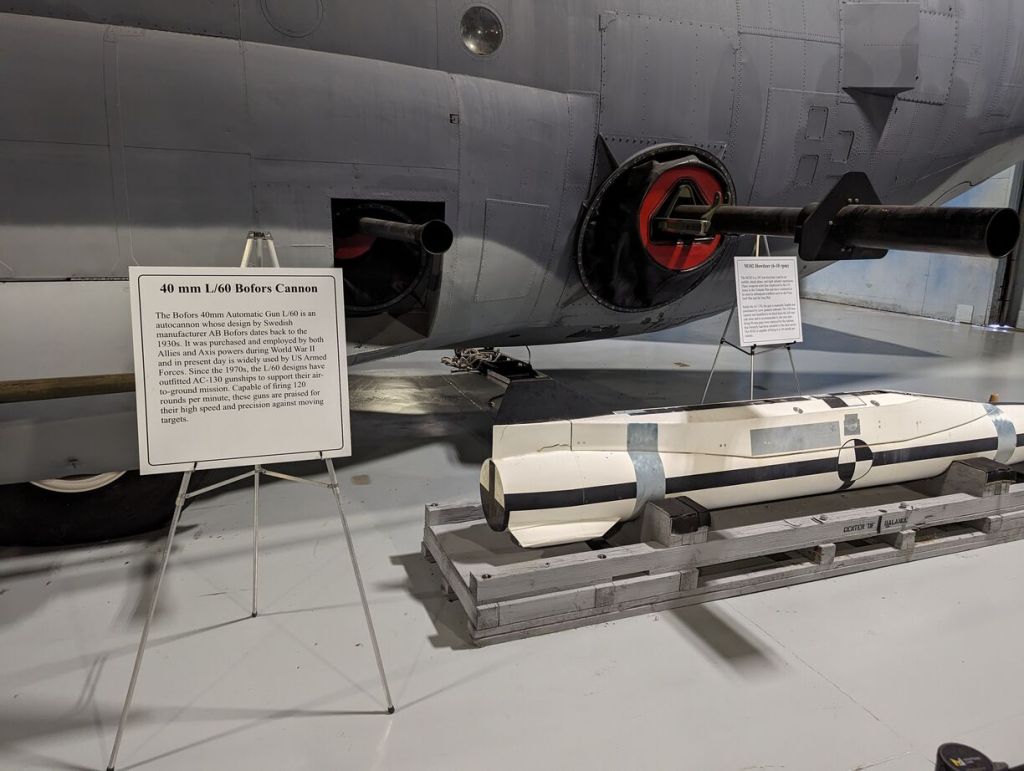
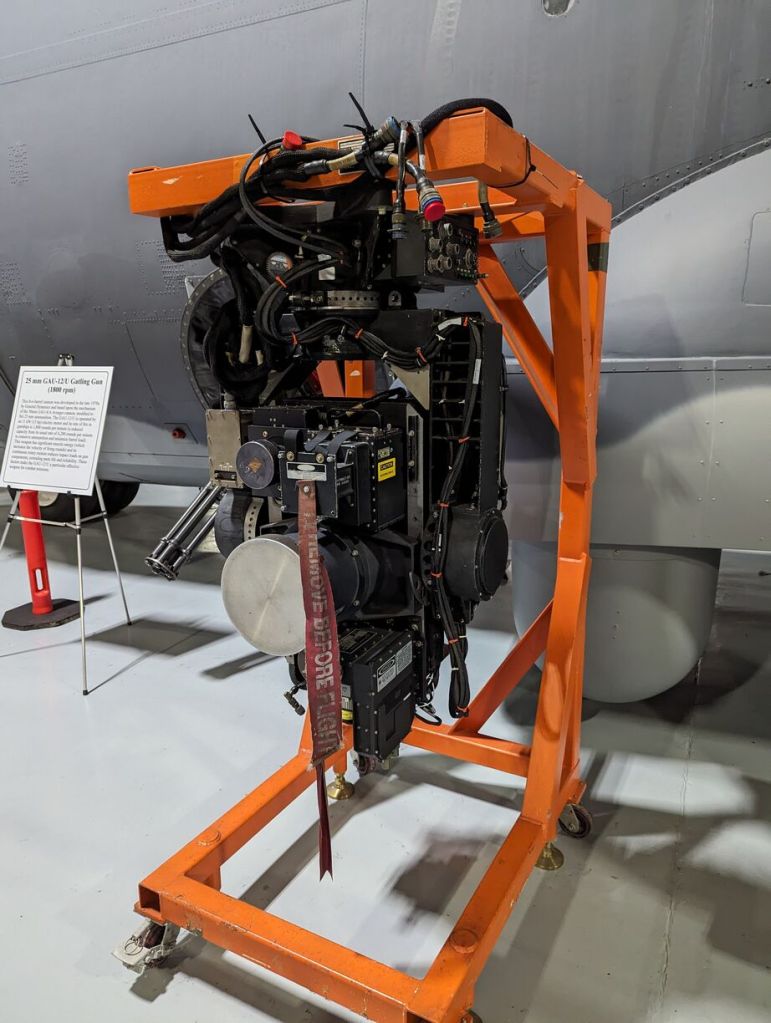
Lockheed C-130 Hercules and Its Weapons and Equipment
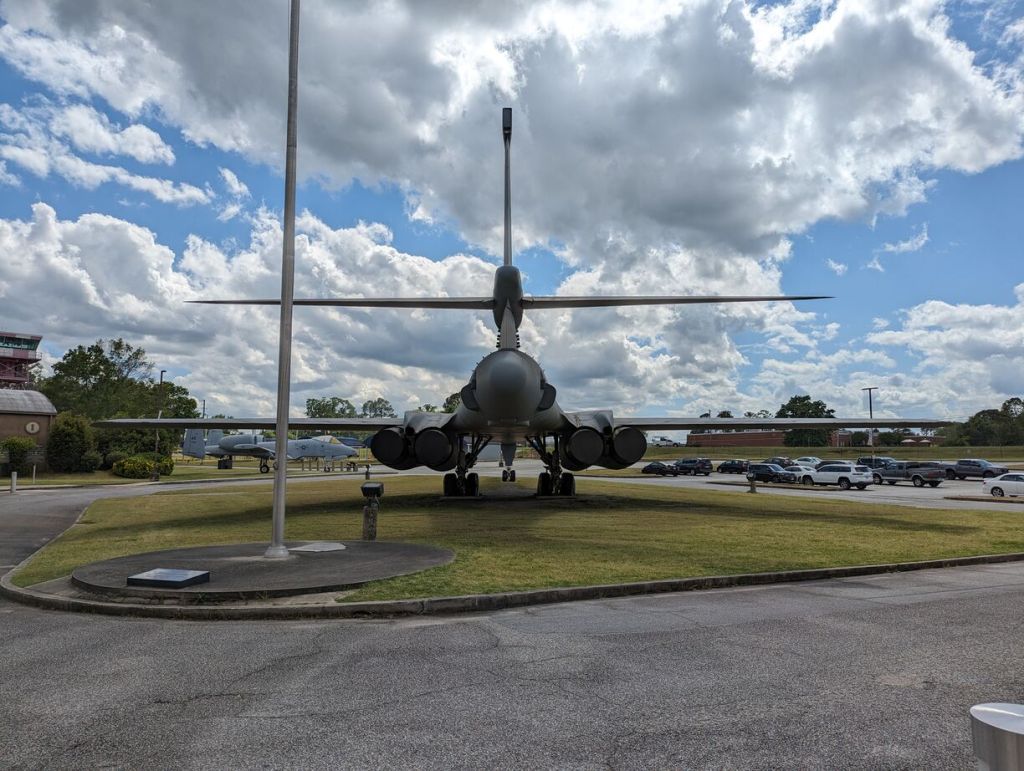
Rockwell B-1 Lancer
Boeing B-52 Stratofortress
Fairchild Republic A-10 Thunderbolt II
McDonnell Douglas F-4 Phantom II
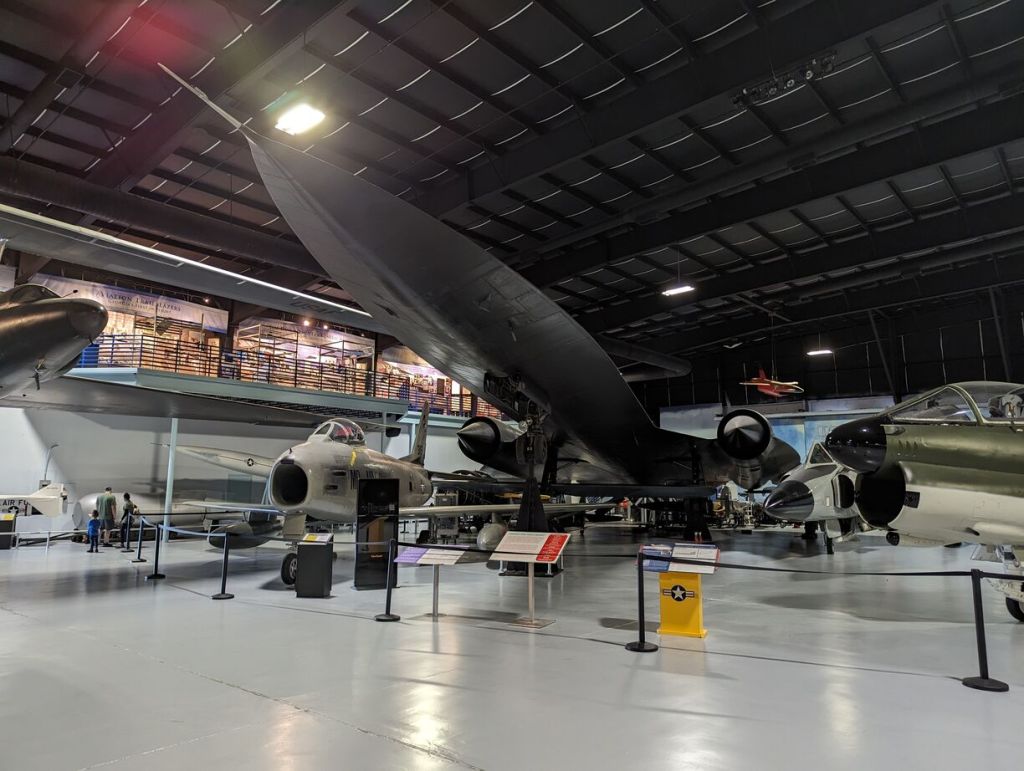
Lockheed SR-71 Blackbird
Lockheed U-2
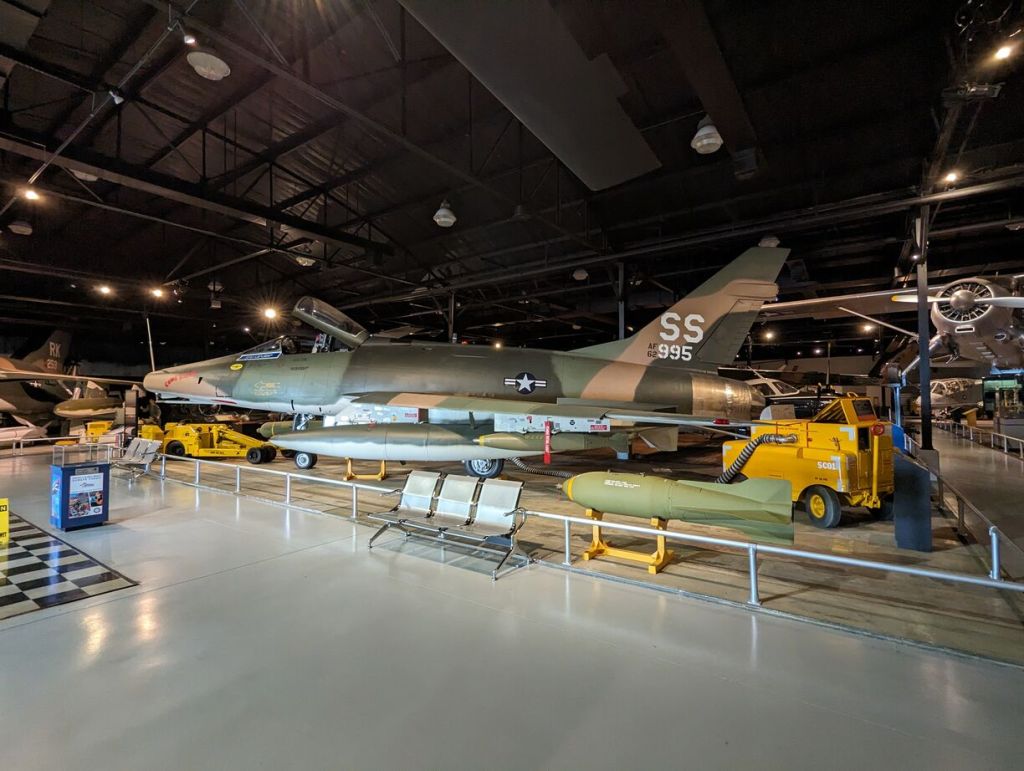
Republic F-105 Thunderchief
Convair F-102 Delta Dagger and Convair F-106 Delta Dart
McDonnell F-101 Voodoo
McDonnell RF-101
North American F-100 Super Sabre
Republic F-84 Thunderjet
North American F-86 Sabre
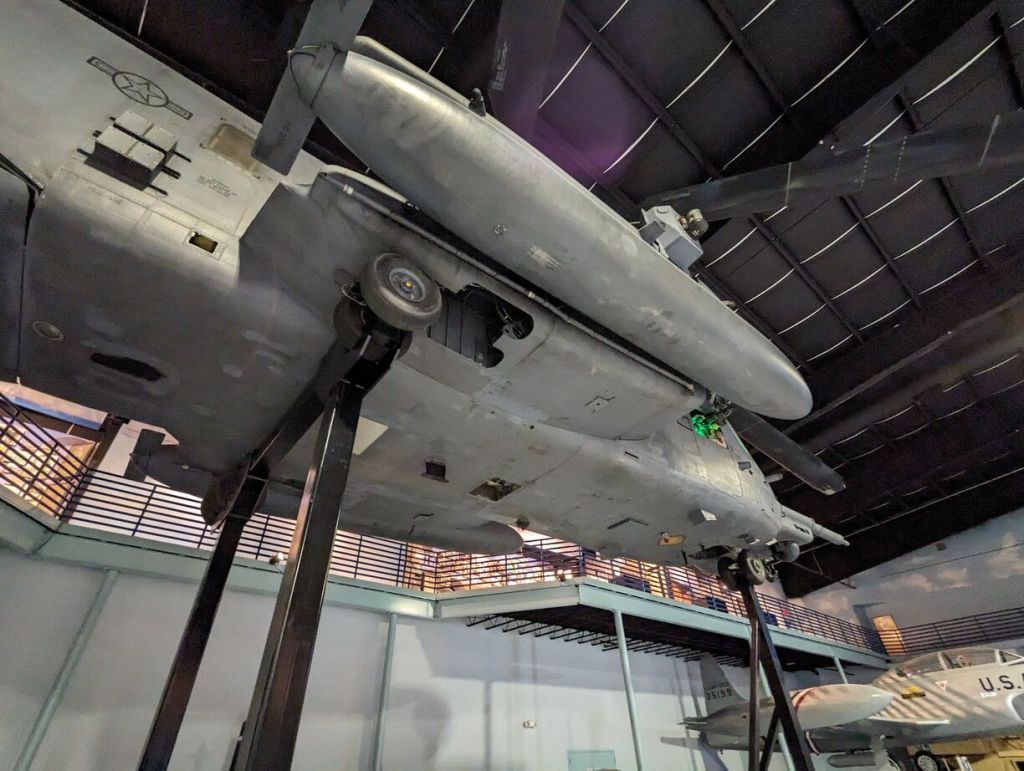
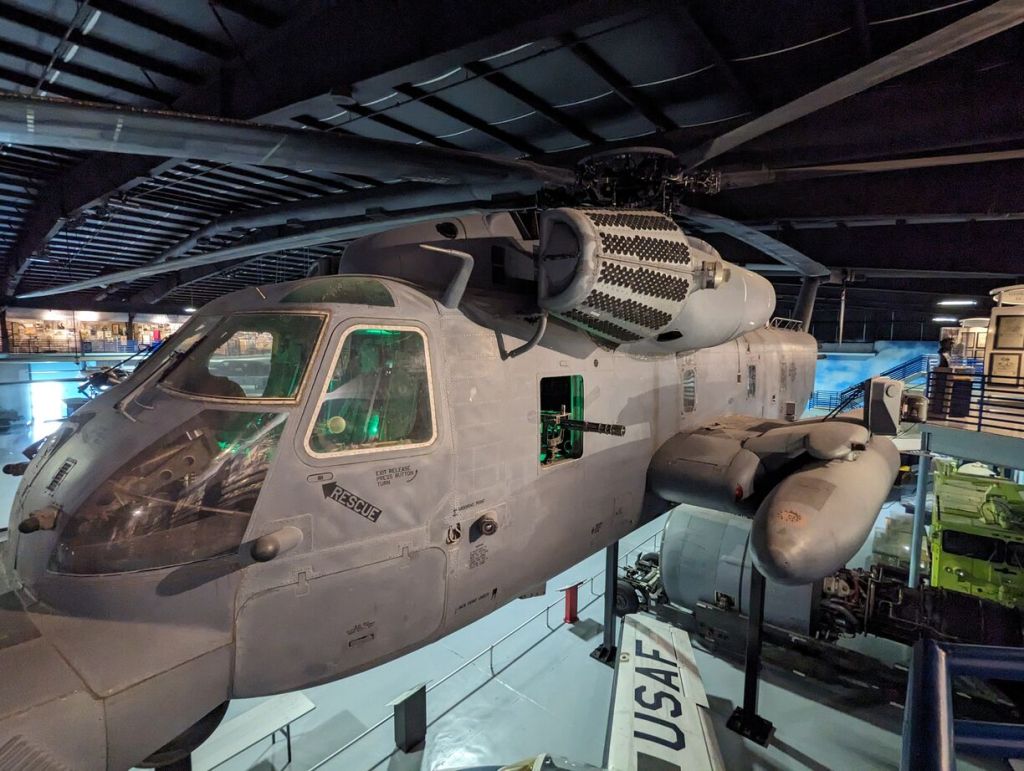
Sikorsky MH-53M Pave Low IV
Sikorsky HH-3E Jolly Green Giant
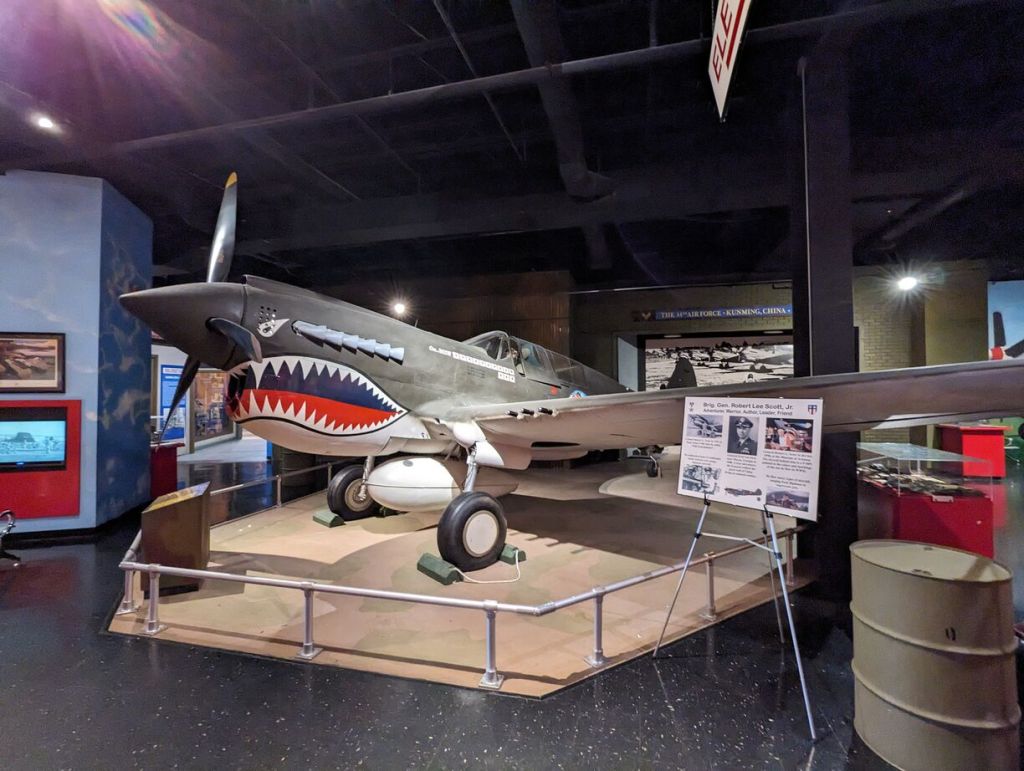
Curtiss P-40 Warhawk
North American P-51 Mustang
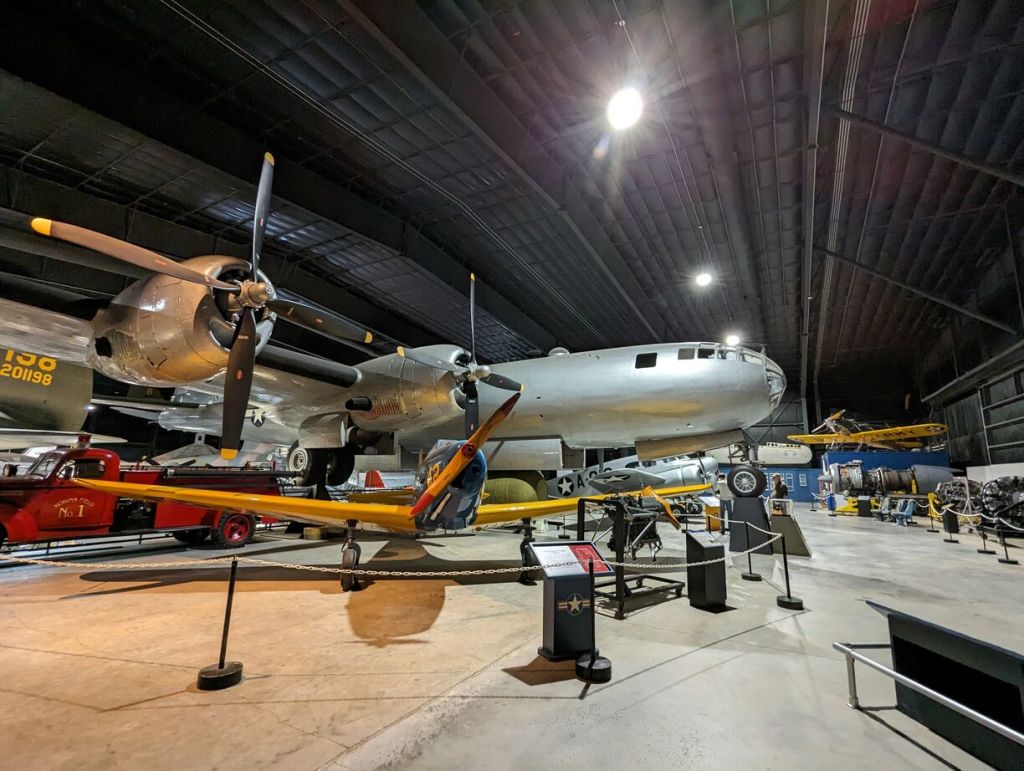
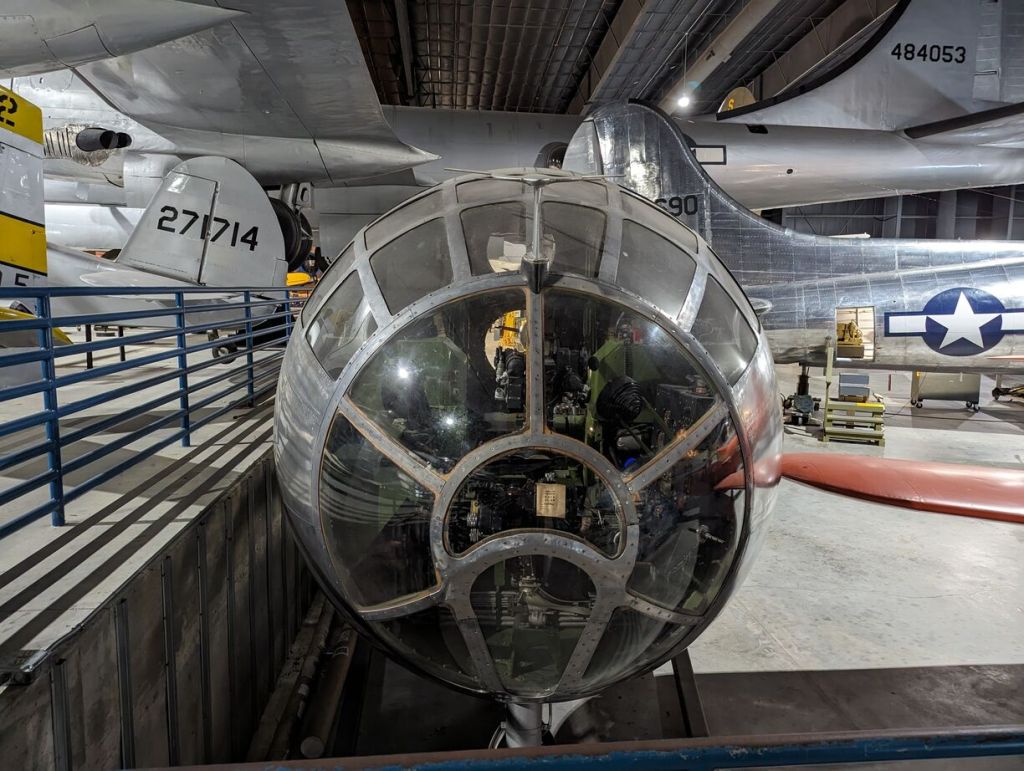
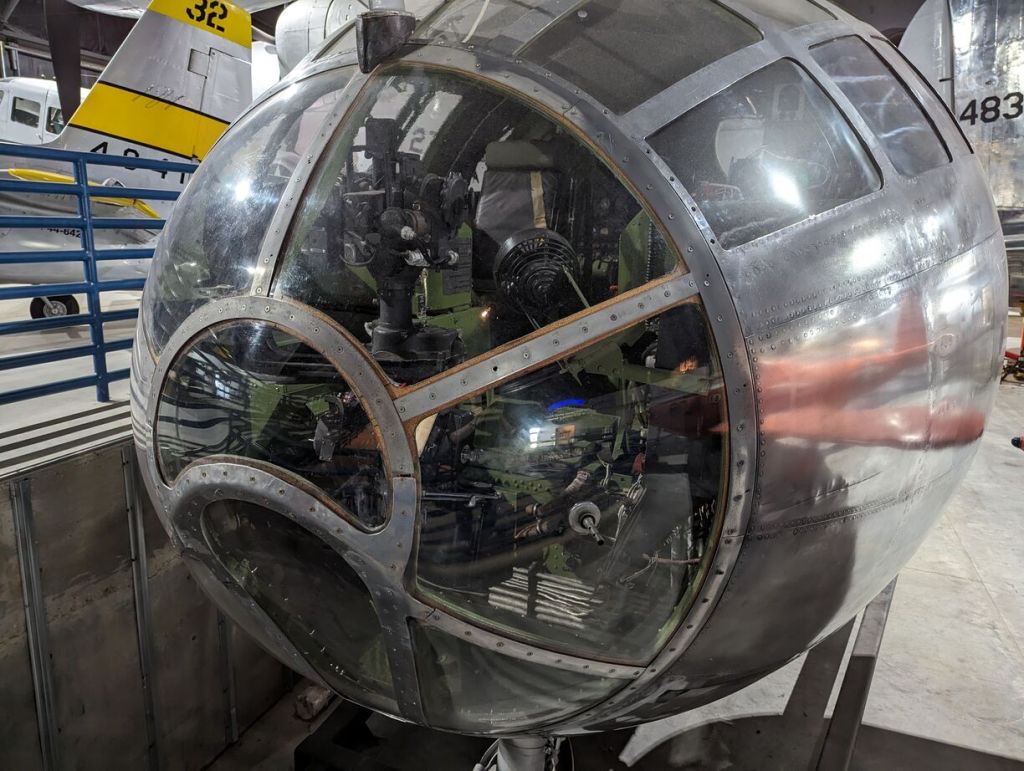
Boeing B-29 Superfortress
Curtiss JN Jenny with Snoopy (Maybe his Sopwith Camel was being serviced!)
A bag is a form of technology that helps us move our things from place to place so that we can get our daily work done. Every bag has affordances and constraints. Unfortunately, I find myself running up against what I see as unbalanced trade-offs in these affordances and constraints for my particular circumstances.
I don’t begrudge a tool’s constraints. In fact, these constraints can be quite liberating. For example, Thomas Lux, my former poetry professor at Georgia Tech, would purposefully give his students specific constraints for a week’s assignment: there can be only so many words, there can be only so many lines, there must be the color green, etc. He explained that these constraints open up possibilities that would not have existed had he not instructed us to create a new work of poetry based around these constraints. Put another way, while affordances are the explicitly designed ways and interfaces for using a technology, constraints can open up new, unforseen possibilities along the lines of William Gibson’s important observation: “the street finds its own use for things.”
Of the bags that I do own, I’ve unstitched a lot of the fluff on my small Timbuk2 messenger, and I’ve unriveted and cut the unnecessary branding and features of my STM Aero 13 backpack. I’ve made them more usable for me, but I come to realize that I didn’t like how large they are for everyday use. Certainly, if I’m going to the store for groceries, a larger bag is better (my stock Jansport Super Break II is usually deployed for these missions), but I’m thinking about the gear that I carry everyday.
So, my bag problem came to be one about just the needed size for the things that I carry everyday. I should explain that these are the things that I carry to and from work. This is about a 2 mile round trip walk. This makes weight and comfort a prime consideration. Also, as I think is true for many instructors, if a large enough bag is available, I tended to bring a lot of work home with me in the form of books and stacks of papers. However, my interaction with this material often was simply via osmosis instead of material-in-hand engagement. I would carry things home with an intention of using the materials and then returning them to campus later, but this often didn’t happen. Life gets in the way (or simply exhaustion–probably from lugging 10 pounds of student work a mile down Court Street), and the books and papers would be returned via a return trip to be used ultimately on campus. Thus, I wanted an EDC bag that would obviate the possiblity of using it for carrying these kinds of materials. Also, I thought that this change might turn me to using my tech gear in a new way–digitizing and scanning only the most important and pressing work to carry home on a device or upload to the cloud.
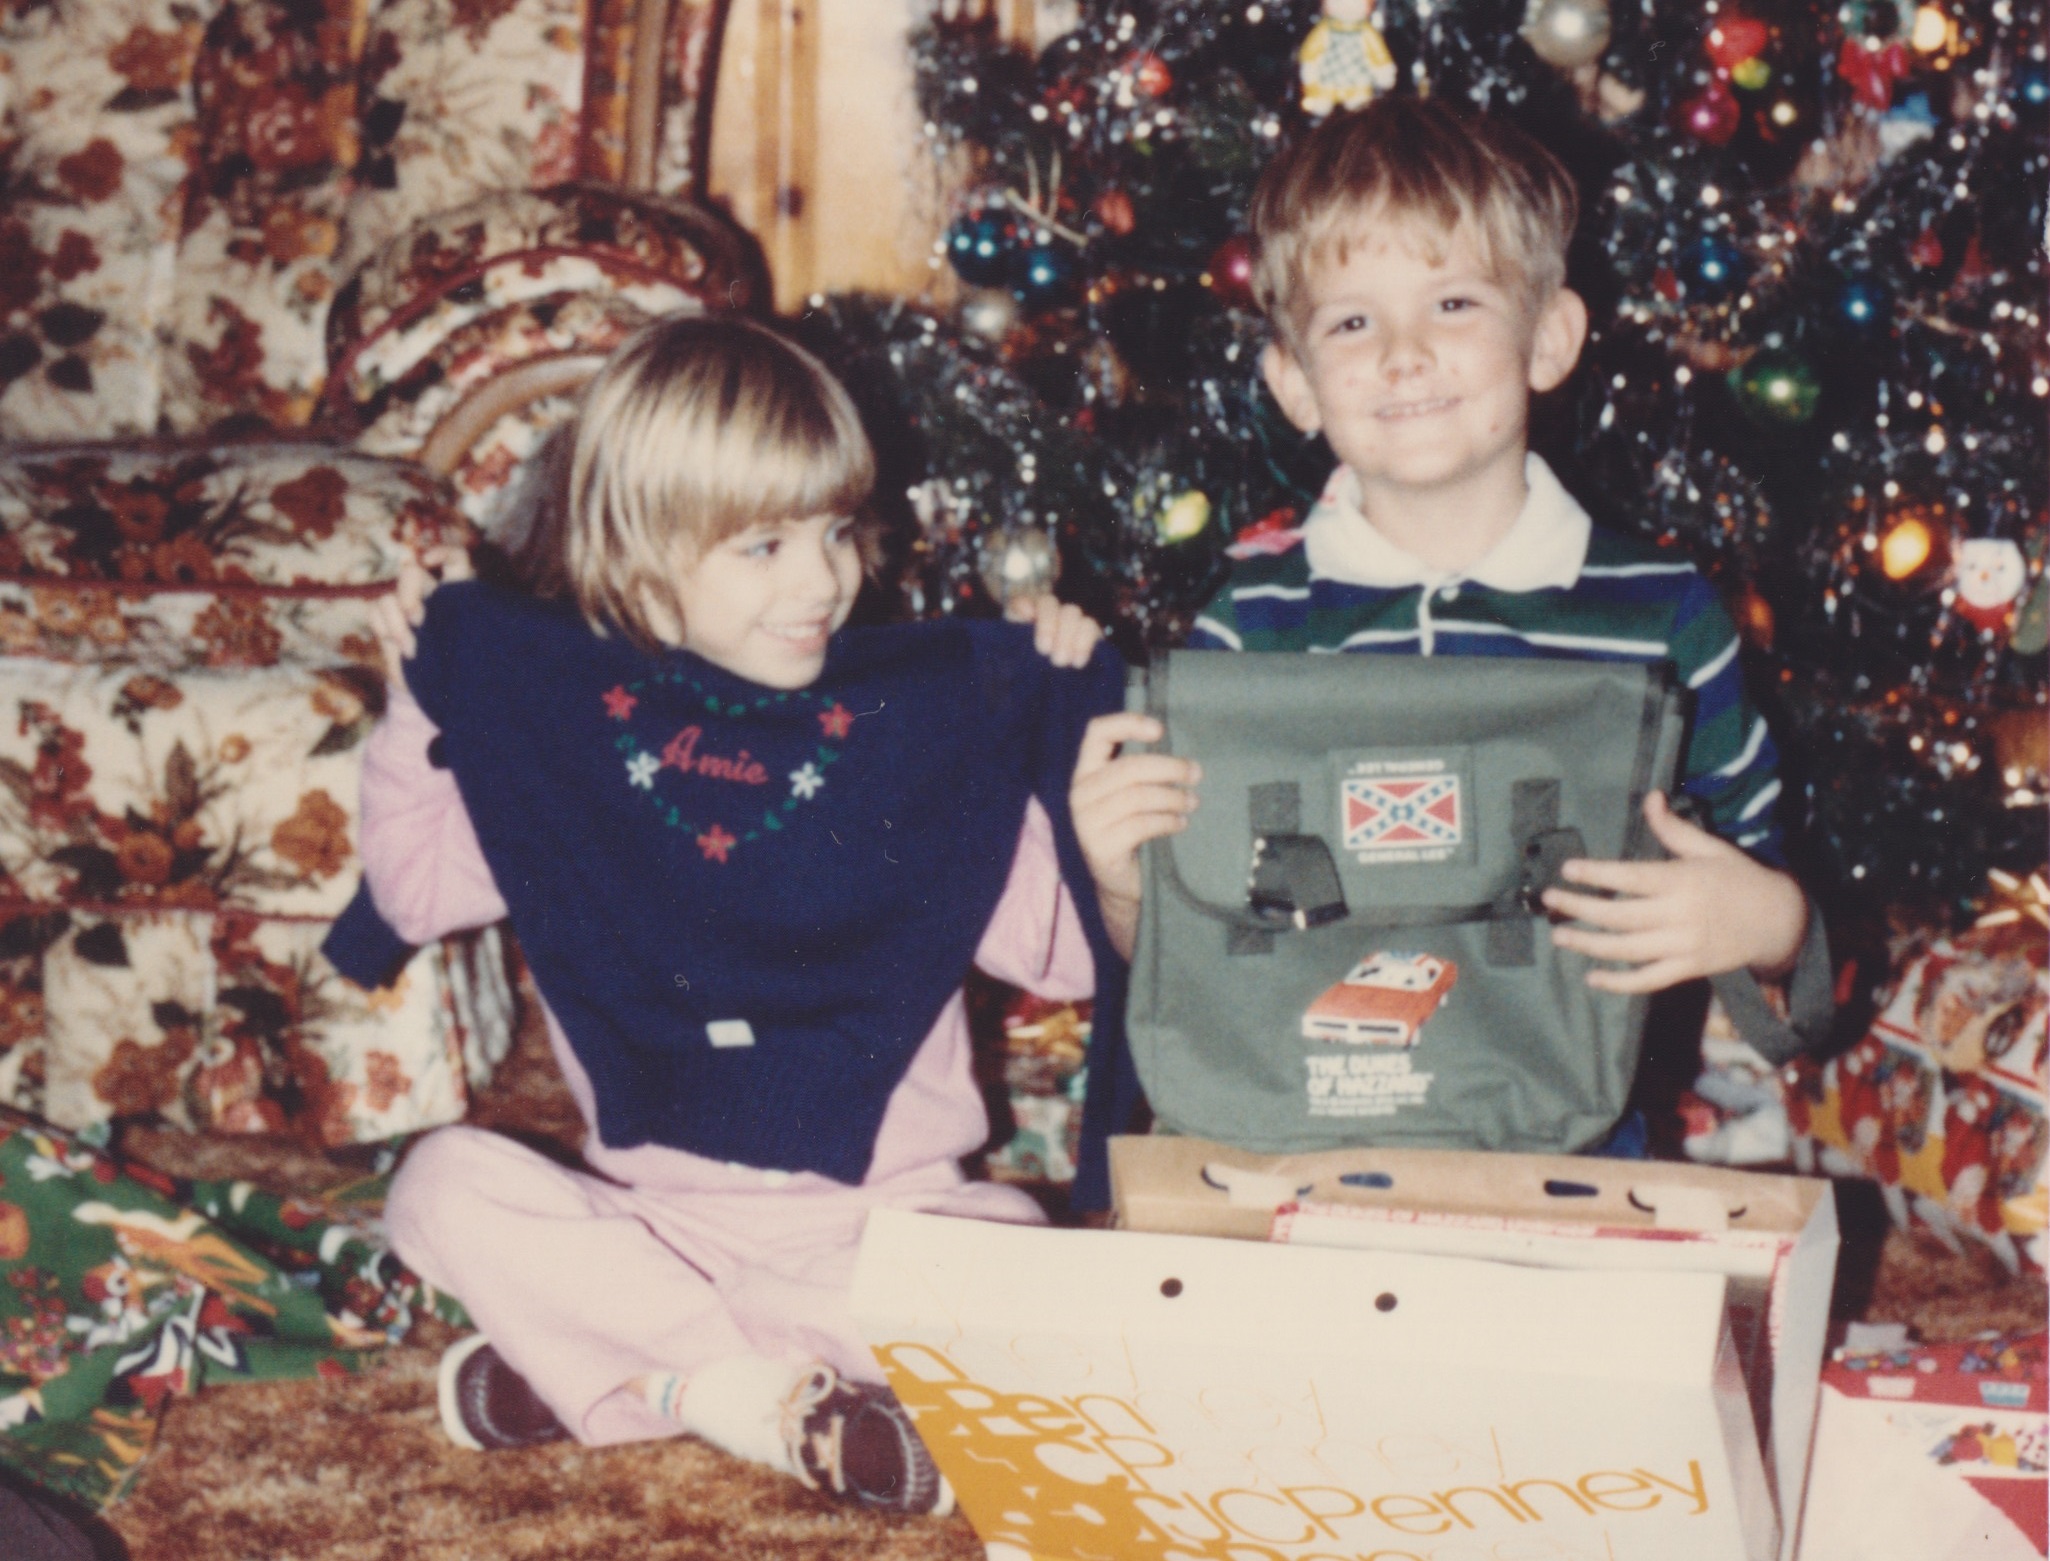
As you’re probably familiar with, the character Indiana Jones made famous the anachronistic British Mk VII gas mask bag (the bag did not yet exist during the period of the first three Indy films). When I was a kid, my cousin Amie and her folks gave me one of my most precious gifts–a Dukes of Hazard shoulder bag. I wore it everywhere and it always contained my most essential kit–toys, candy, and a leather whip. Yes, I fancied this bag as my Indy bag. When its strap broke, I tied my best knot to keep on adventuring with it. Looking through old photos like the one above when I received it, I was reminded about how much I liked its size and simplicity.
In my searches, a name kept popping up: Magnoli Clothiers. It is an outfit based in New Zealand that specializes in making clothing and prop reproductions from film and television (and other bespoke tailoring services, too). Many folks online–especially in forums discussing Indiana Jones–recommended their reproduction of Indy’s bag called the British Mk VII Satchel. I figured that its low cost justified trying it out. Also, I liked that it didn’t include a shoulder strap. Magnoli Clothiers offers an add-on leather strap, which would make the Mk VII satchel match Indy’s customized look (the original Mk VII bag has a built-in canvas shoulder strap). For me, however, I decided to get a 55″ Rothco General Purpose Nylon Strap. It is adjustable and has metal hooks on either end to mate with the customized metal rings on either side of Magnoli Clothiers’ Mk VII satchel.
The British Mk VII satchel measures about 11″ x 11″ x 3″. It has a number of compartments. The front-most pocket holds an Apple iPad Mini 4 with Smart Cover and a Muji A5 notebook. The large middle compartment is open at the bottom, but there is a divider making the left side slightly larger than the right. I put my 16 oz. Zojirushi thermos on the right and my lunch/supper fixings (usually MREs) on the left. Rolling about in the bottom of this compartment, I leave my pens, pencils, pocket knife, flashlight, eye drops, and Advil. In the back of the back against your body are two small pockets–my phone goes into one of these and my business cards in the other. Sewn between these pockets is a small pouch that holds a 1 oz. hand sanitizer bottle perfectly.
Over the past two weeks, I’ve been having great success with the British Mk VII satchel. Its affordances (It carries my essential things to and from work) and its constraints (Its smaller volume made me change my workflow to be honest with my carry-home workload and essentially carry less to and from work) have worked out very positively for me. I’m curious about how it will hold up in the long term, but its already received bumps and brushes on the street, train, and campus without any appreciable wear. If you are looking for a small bag for essentials, drink, food, and personal electronics, I highly recommend the British Mk VII satchel.
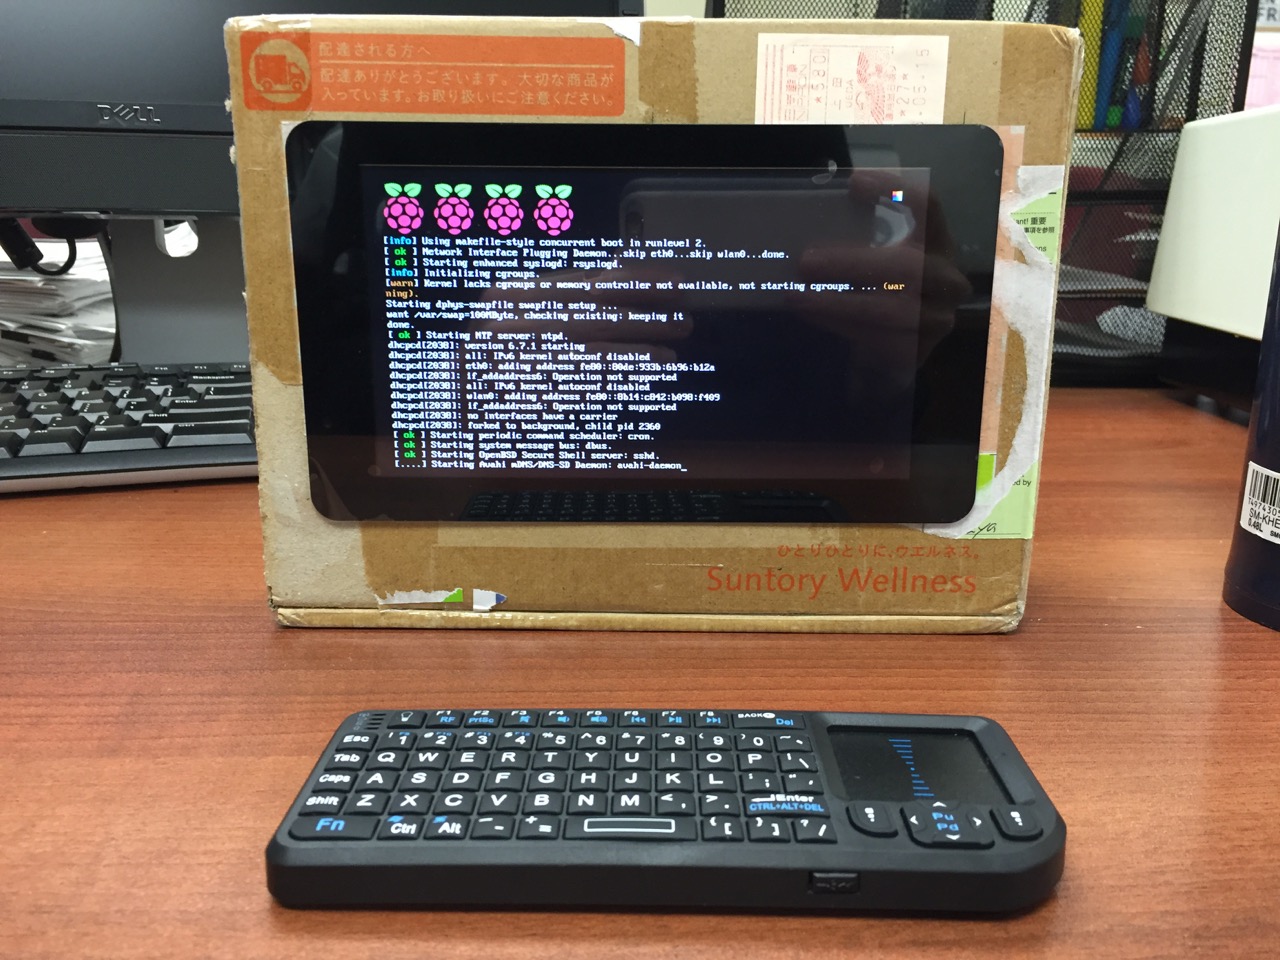
My Cardboard Box Raspberry Pi 2, Model B with 7″ Touchscreen Display and wireless keyboard.
This guide demonstrates how to install Raspbian on a Raspberry Pi 2, Model B, connect the Raspberry Pi to a 7″ Touchscreen LCD, and integrate the computer and touchscreen in a cardboard box (which doubles as a case and storage for battery, keyboard, and cables).
I got interested in the Raspberry Pi, because it has many capabilities for learning: kitting out a computer, installing a Linux-based operating system, programming interactive software, and building with electronics. In particular, I am interested in how the Raspberry Pi can be used to create interactive software and be a platform for digital storytelling (which figures into one of the upcoming classes that I will be teaching at City Tech–ENG 3760 Digital Storytelling).
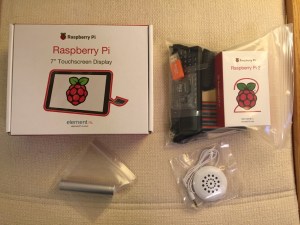
My haul from Tinkersphere.
Instead of buying my kit online, I wanted to shop local to get started. Originally, I considered going to Microcenter, which is near where I live in Brooklyn. Unfortunately, they were sold out of the touchscreen display that I wanted. Instead, Y and I took a train into Manhattan and visited Tinkersphere where one of their helpful staff guided me to the things on my digital grocery list. I purchased Tinkersphere’s pre-made Raspberry Pi 2 kit, a 7″ Touchscreen LCD display, a battery pack (in retrospect, I should have purchased two of these, which I will discuss below), and a mono speaker with 1/8″ plug.
Contents of Tinkersphere’s Raspberry Pi 2, Model B kit.
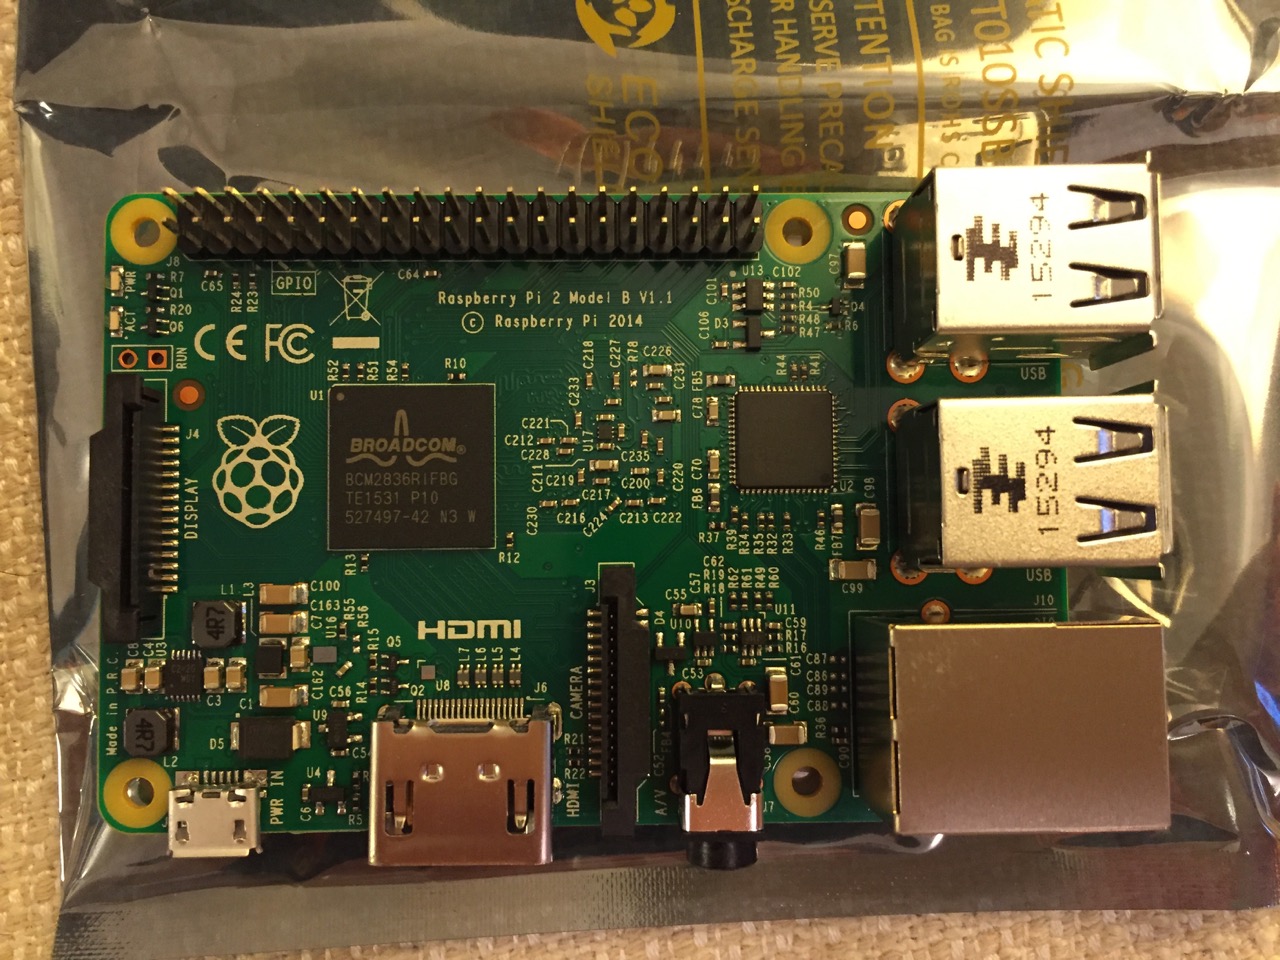
Tinkersphere’s Raspberry Pi 2, Model B kit includes all of the basic equipment needed to begin working with this tiny computing platform. The kit is built around the Raspberry Pi 2, Model B computer with a 900MHz quad-core ARM Cortex-A7 CPU, 1GB RAM, 4 USB ports, 40 GPIO pins, HDMI port, ethernet port, combined 3.5mm audio jack and composite video, camera interface (CSI), display interface (DSI), micro SD card slot, and a VideoCore IV 3D graphics core. Additionally, the kit includes a wireless keyboard/trackpad, USB wifi adapter, 8GB micro SD card with NOOBS (the easy to use Raspbian installer), USB micro SD card reader, breadboard, wires, and 5v power supply.
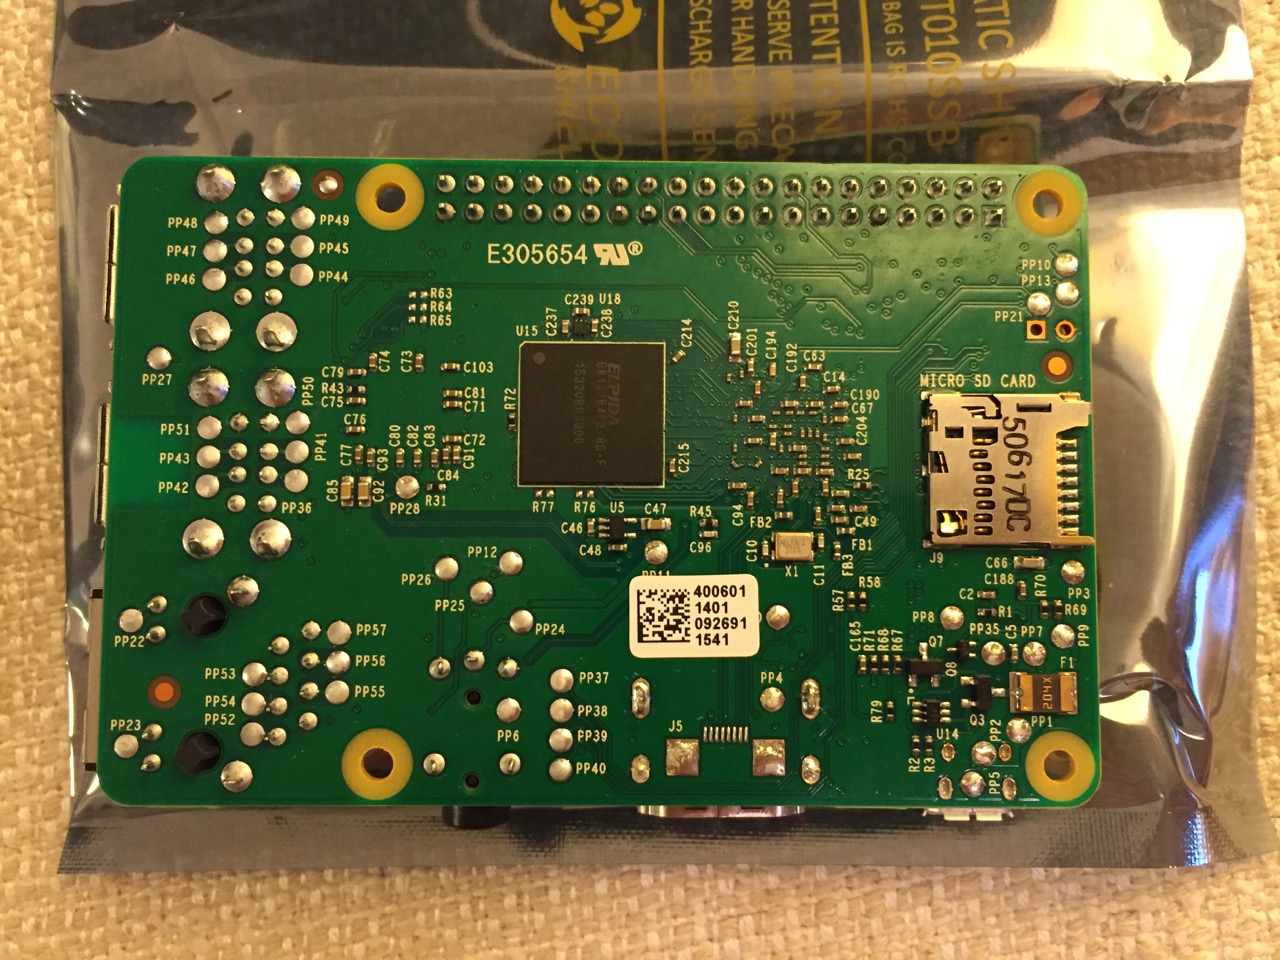
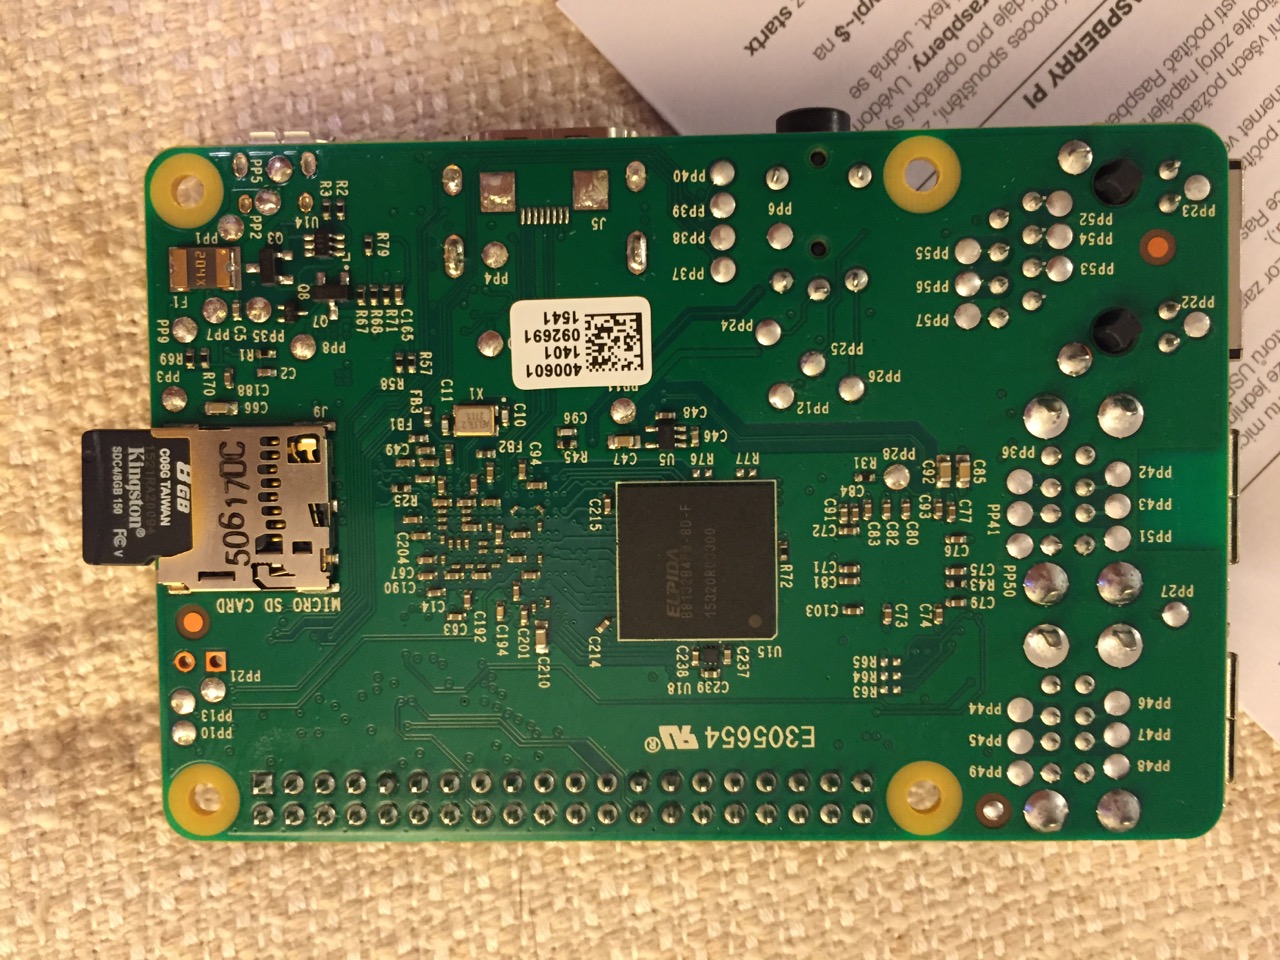
To begin the setup, we should orient ourselves with the Raspberry Pi. This is the Raspberry Pi 2, Model B computer viewed from the top and the bottom:
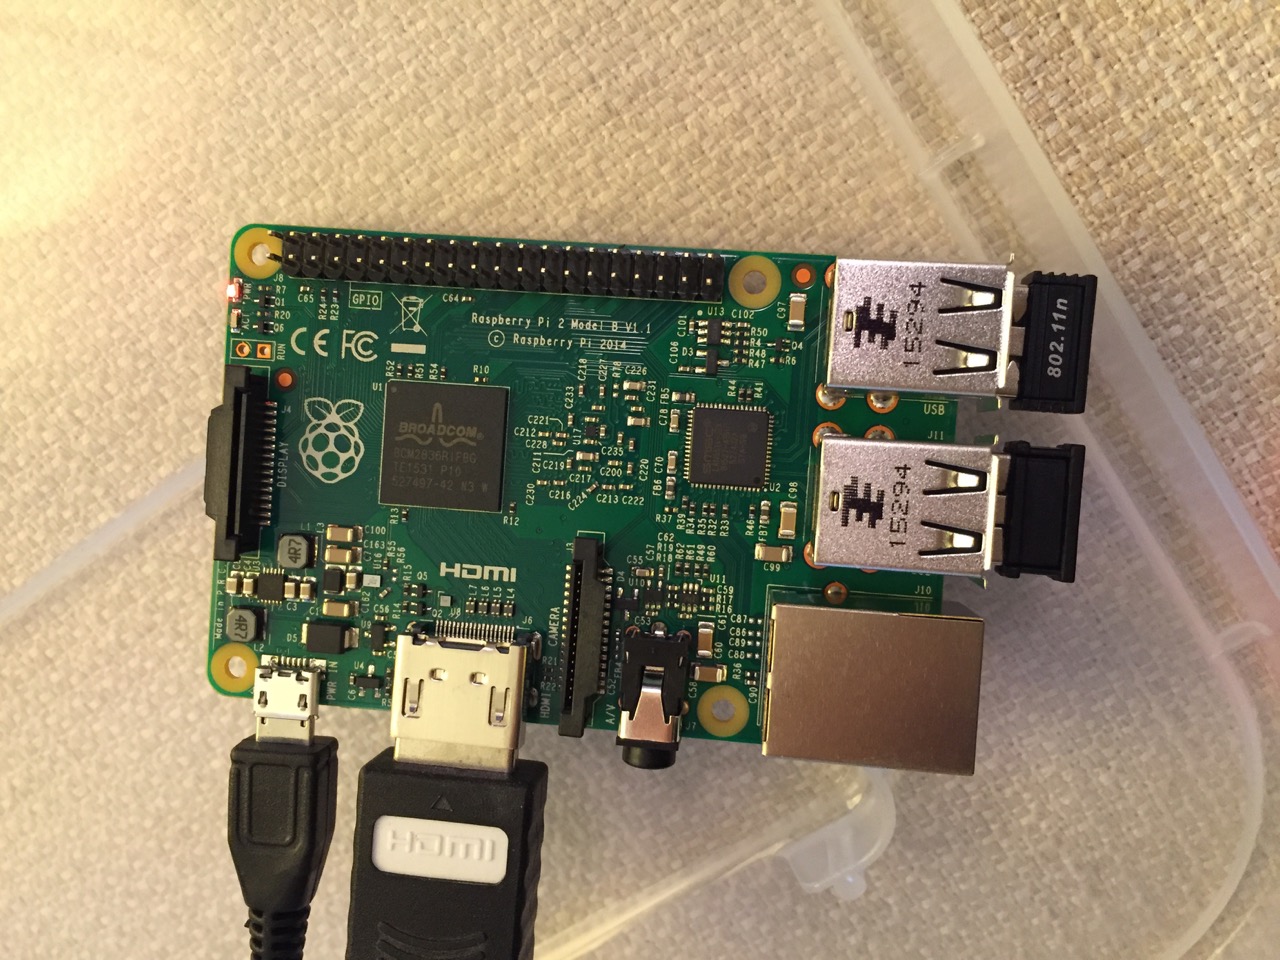
Raspberry Pi 2, Model B, Top View.
Raspberry Pi 2, Model B, Bottom View.
The first thing that we need to do is insert the micro SD card with a copy of NOOBS pre-copied. If you need a copy of NOOBS for your own micro SD card, you can download it from here and follow the instructions here for formatting and copying the files from a Mac or PC to the micro SD card. The Raspberry Pi’s micro SD card slot is located on the bottom side of its circuit board. A micro SD card goes in only one way which allows you to press it in. If correct, the card should “click” and stay as seen in the photos below.
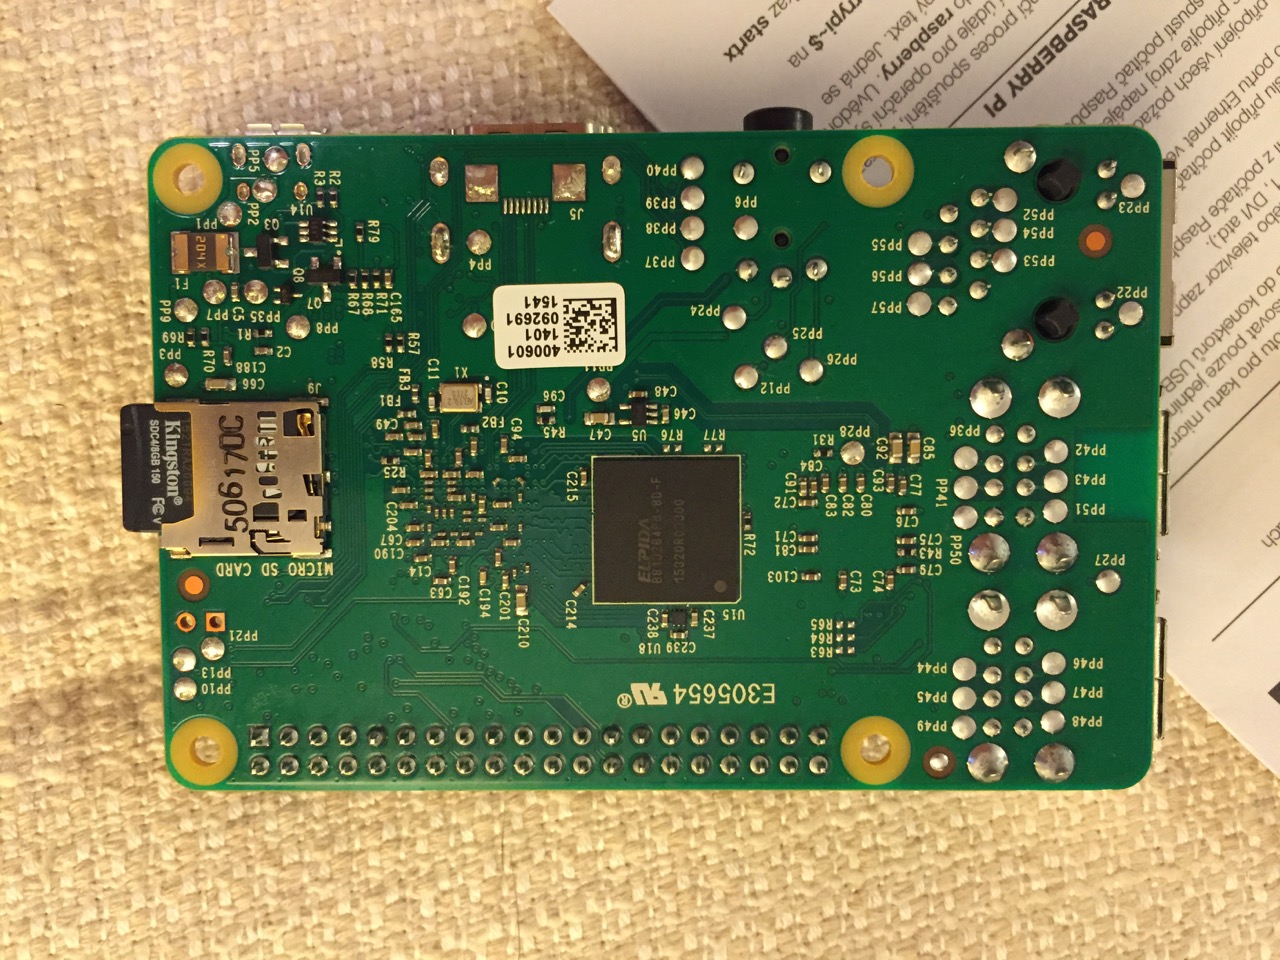
Insert the micro SD card like this.
Press the micro SD card in and it will stay in place with a “click.”
The Raspberry Pi connected from left to right: micro USB power input from 5v power supply, HDMI, wireless keyboard/trackpad receiver, and wifi adapter.
Next, connect the Raspberry Pi to a display (such as a TV) with HDMI, and plug in the wifi adapter and wireless keyboard into two available USB ports. Alternatively, you can connect the Raspberry Pi to the Internet via ethernet and to a wired keyboard and mouse. Then, connect it to the 5v power supply. As soon as it is plugged in, the Raspberry Pi is turned on and operational. It will begin to boot from the micro SD card’s NOOBS installer, which will guide you through the process of installing Raspbian. See the images below to see what this looks like and what choices you should make for a basic installation.
NB: While we could have connected the 7″ Touchscreen Display to the Raspberry Pi before beginning the installation, the current version of NOOBS would not detect and use the touchscreen display. It is necessary for Raspbian to be installed and updated before the 7″ Touchscreen Display will be recognized and used as the Raspberry Pi 2’s primary display.
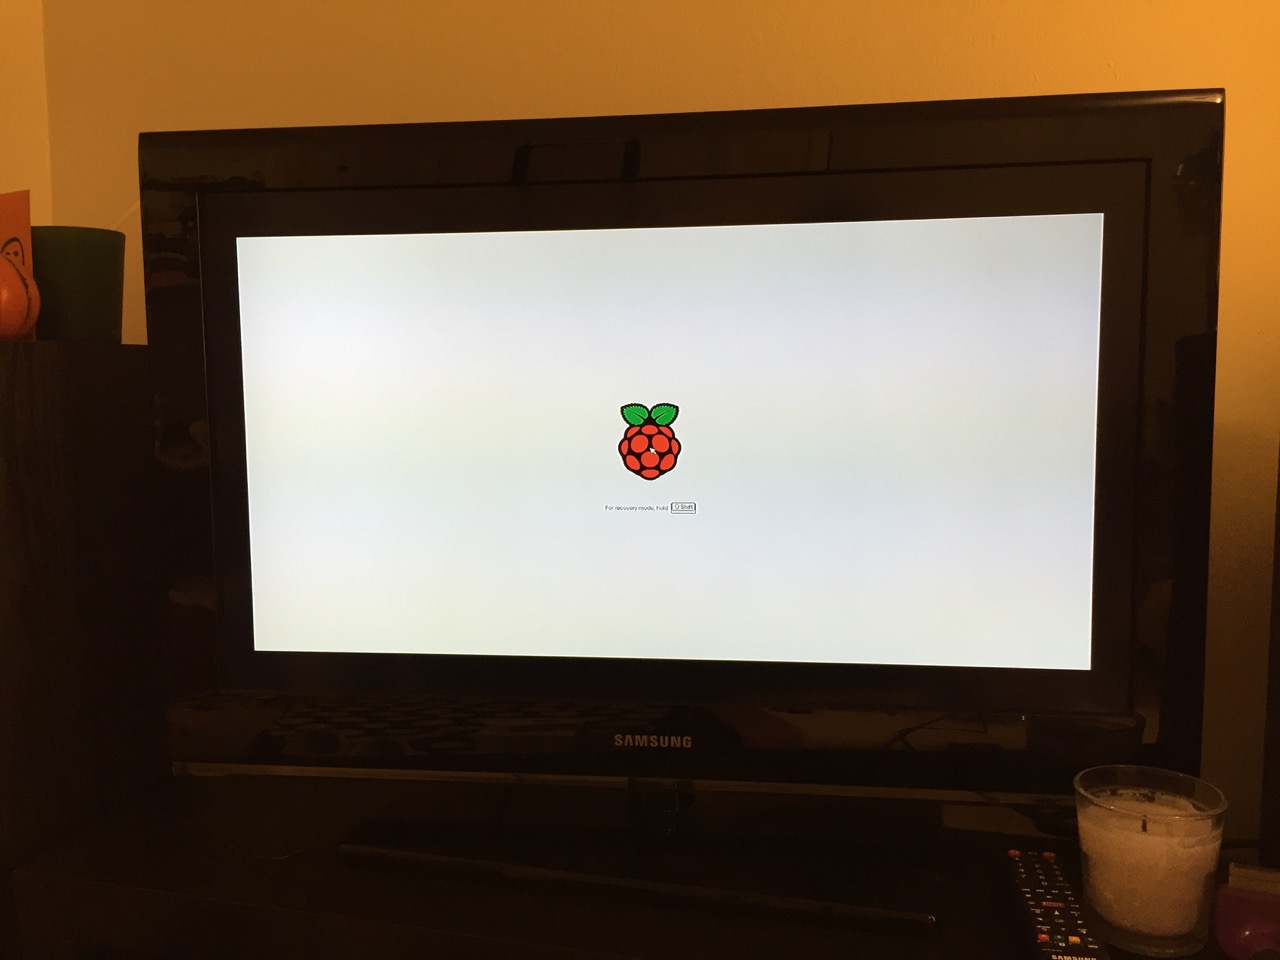
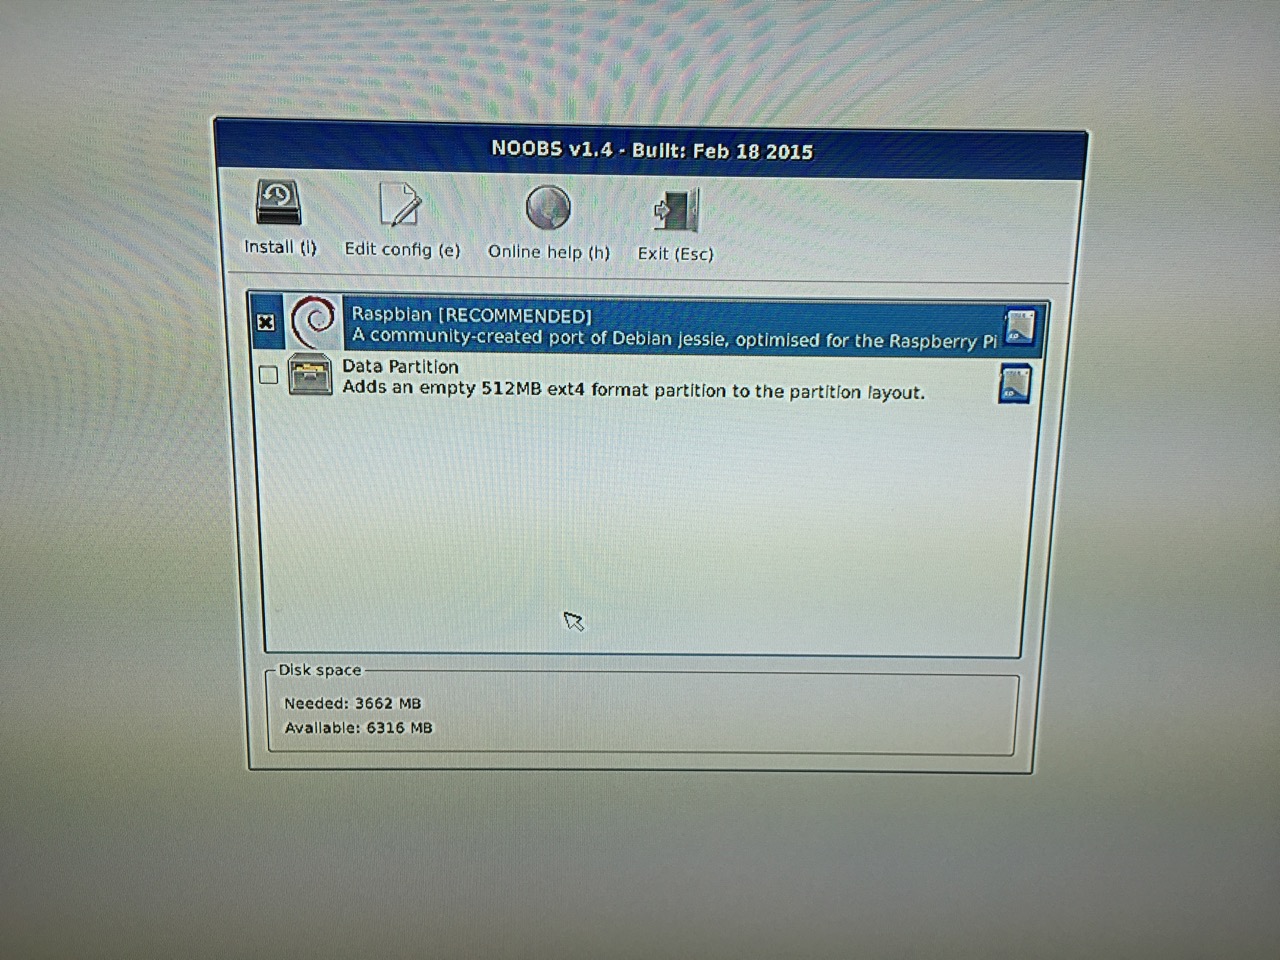
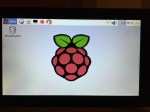
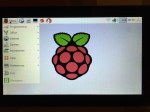
NOOBS boot screen with the Raspberry Pi logo.
The NOOBS installer asks what you would like installed. Place a check next to Raspbian.
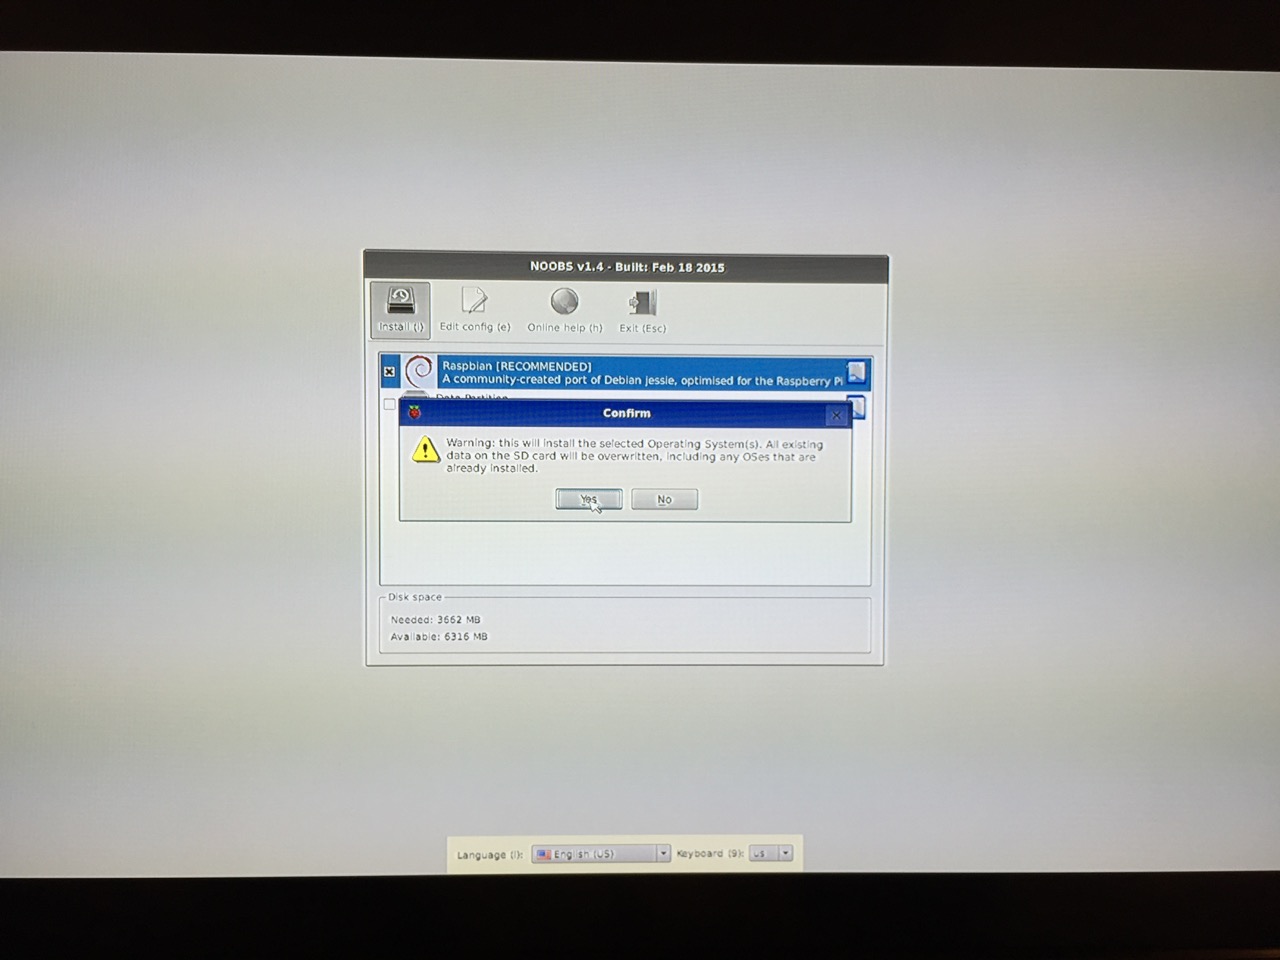
The NOOBS installer will ask that you confirm your choice. If you haven’t already done so, choose US keyboard and locationalization at the bottom of the screen before proceeding. Then, confirm.
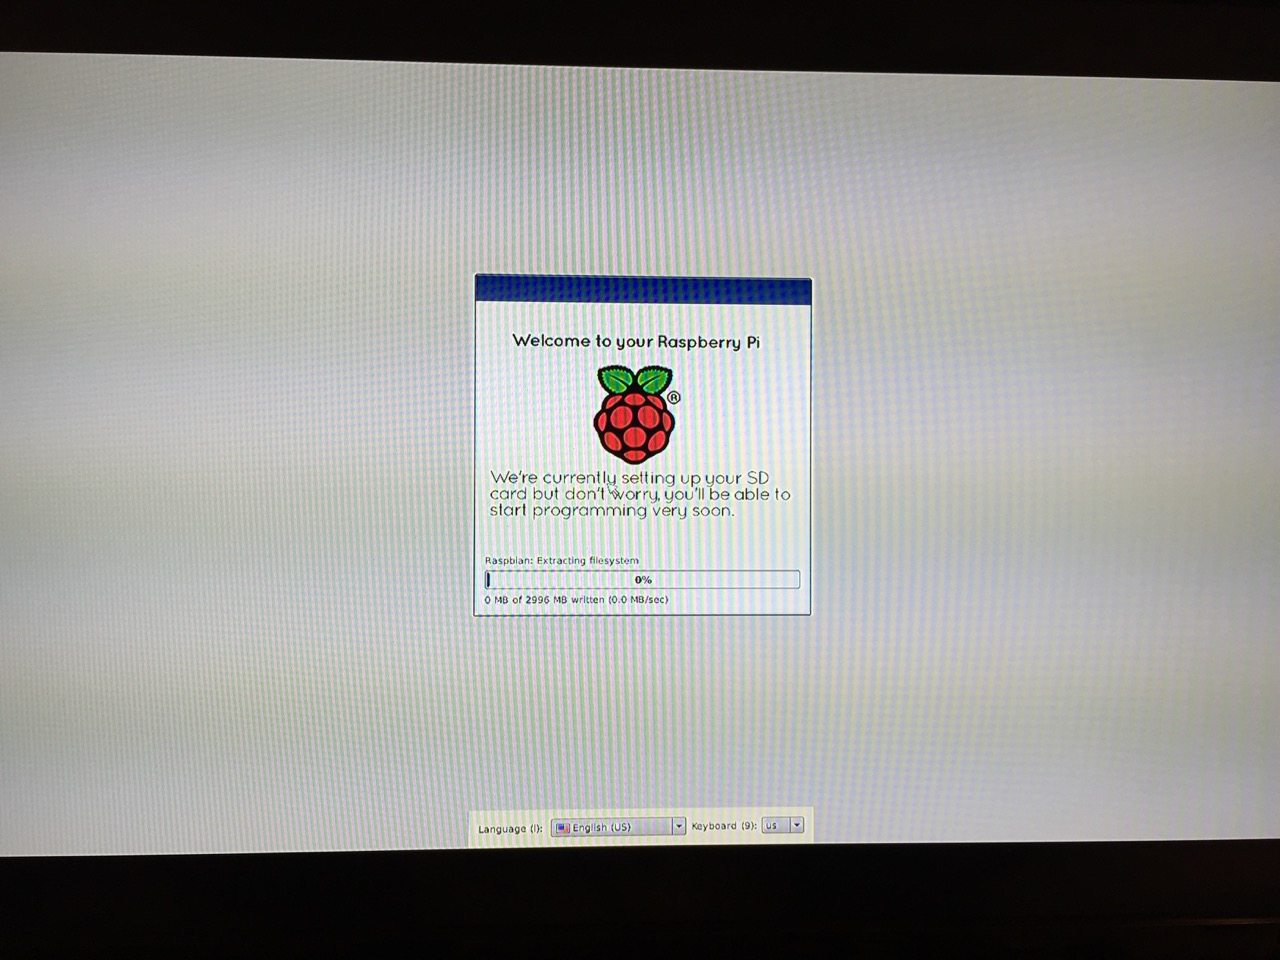
The installation will proceed and complete. With the micro SD card that I have and without overclocking the Raspberry Pi, it took about 20-30 minutes for the installation to complete.
After rebooting following the installation, the raspi-config tool launches. This program gives the user easy access to many configuration options for the Raspberry Pi including how it should boot (automatically login and load xwindows, or boot to a command prompt login), and if you would like to overclock the Raspberry Pi for additional performance (use this option with caution–you will likely want to add heat sinks and increased ventilation if you overclock the system). I configured my Raspberry Pi to operate at normal speed and to boot to the command line with login.
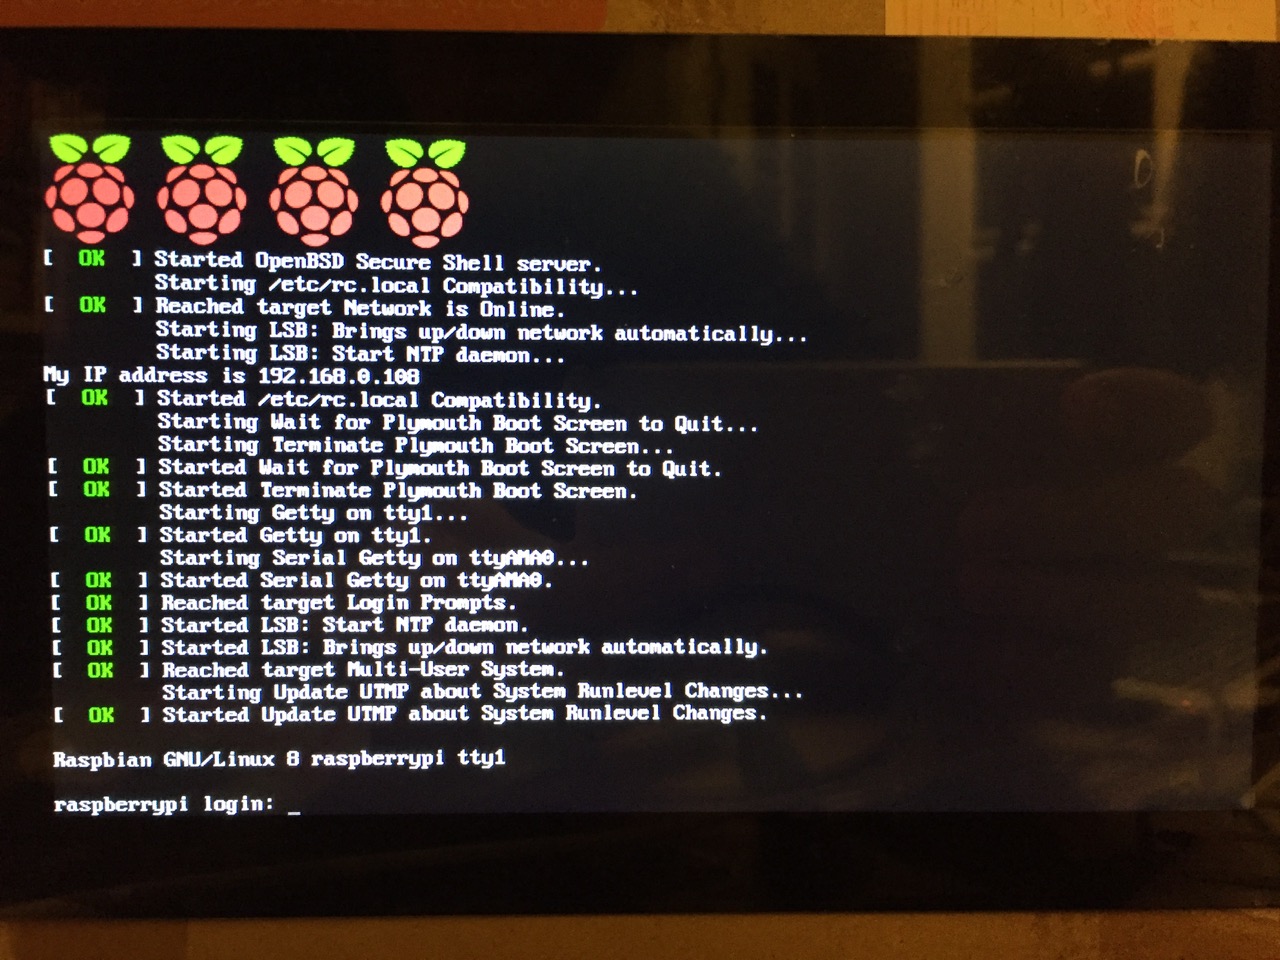
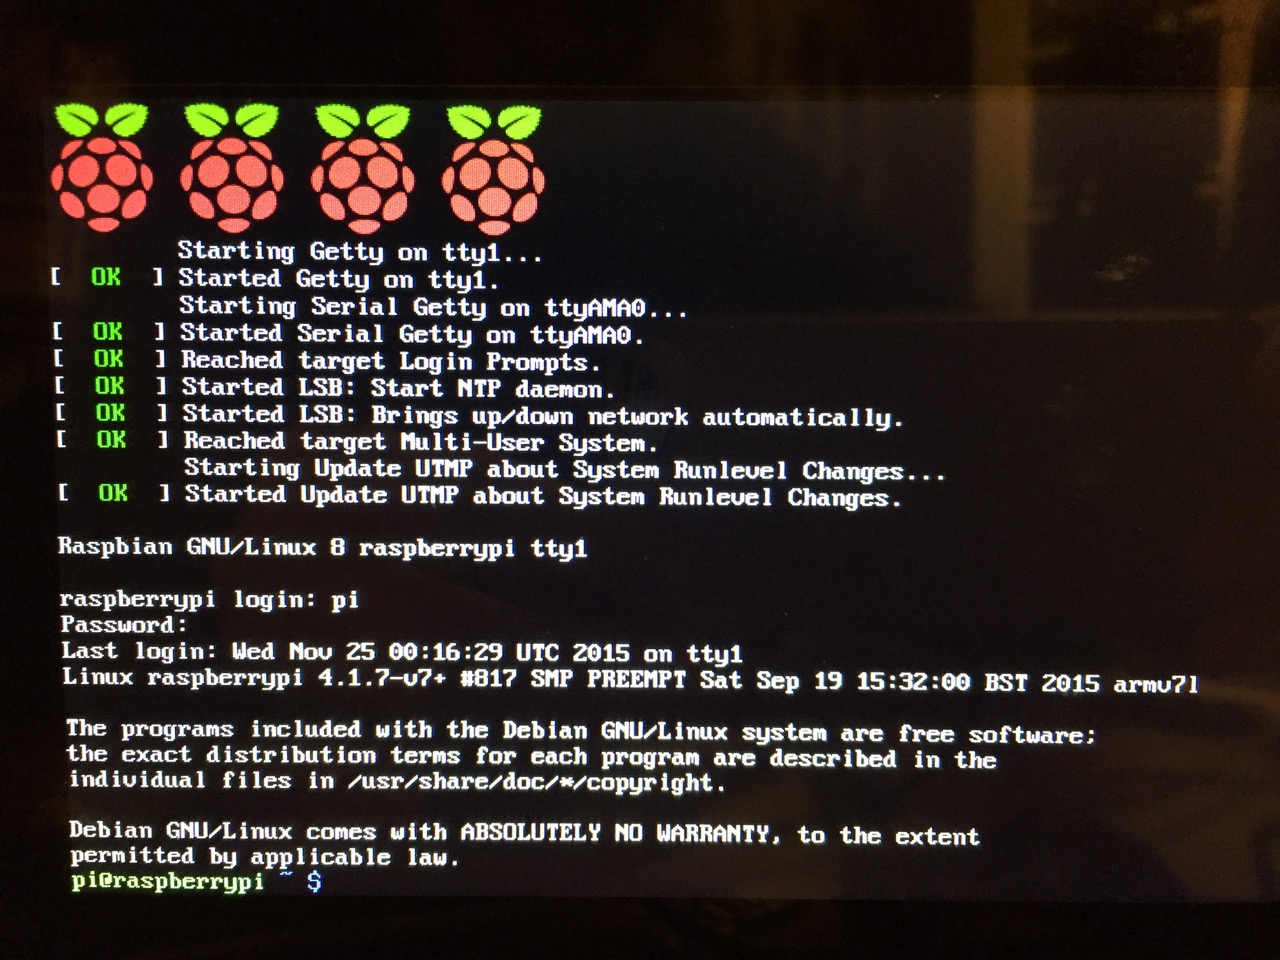
After booting into Raspbian, the first thing that you see is the login prompt.
The default login for the Raspberry Pi is username “pi” and password “raspberry”. Type each of these credentials in when asked followed by pressing the Enter key. Then, you will find yourself at the command line interface (CLI).
Before setting up the 7″ Touchscreen Display, we need to update Raspbian. To do this, first type: “sudo apt-get update”. If prompted to install anything because it will take a certain amount of space, simply type “y” and press “Enter”.
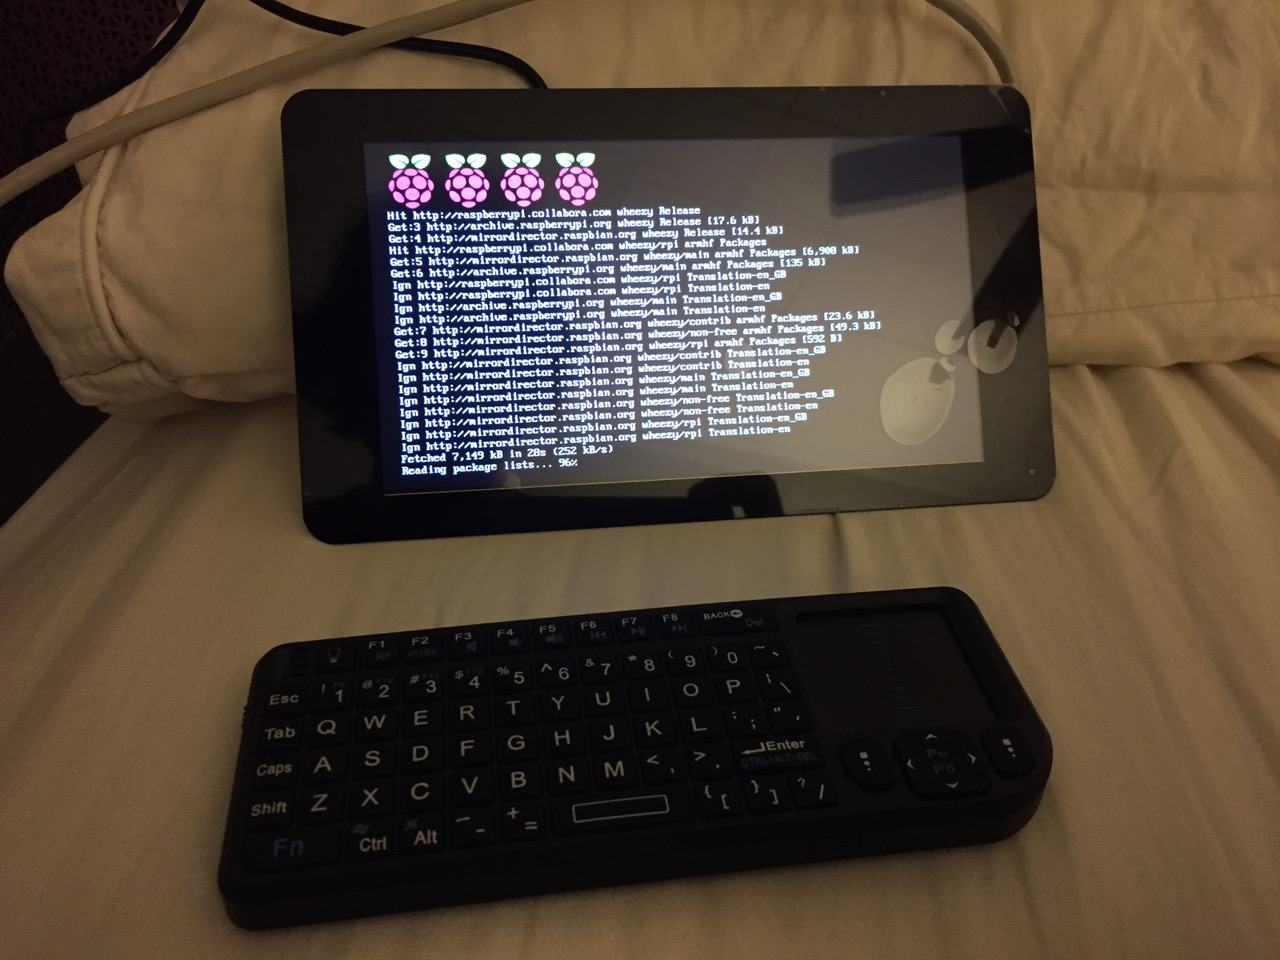
Entering a command at the prompt in Raspbian’s CLI.
To explain what this command means, “sudo” runs a command as superuser, or the user that is all powerful on a linux system. The command that you want to run as superuser is “apt-get,” which is a package manager, or a manager of software packages that run on your Raspberry Pi. “update” is a modifier for “apt-get,” and its purpose is to tell “apt-get” to update its index of available software packages with what is stored on the remote software repository (where your Raspberry Pi is downloading its software from).
After the update operation completes and you return to the command prompt, type: “sudo apt-get upgrade”. Similarly, agree to the prompts with “y” and “Enter”. The “upgrade” modifier to “apt-get” tells it to upgrade the software based on what it learned when updating its index with the previous command. Thus, when you run these two commands, you should run the update command first (learn) and the upgrade command second (act on what was learned).
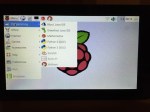
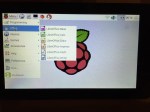
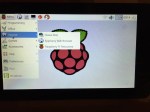
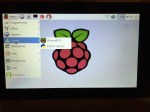
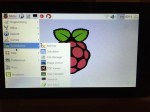
To launch into Raspbian’s X11, type “startx”. Inside X11 or xwindows, you will find many of the GUI-based software that really makes the Raspberry Pi sing: Scratch, Python, Mathematica, and more. If you have never used X11, it works a lot like Windows 95/98 except that the Start Menu bar is at the top of the screen instead of at the bottom and “Start” is replaced by “Menu.” Some quick launch apps are directly available to be launched with a single click from the start bar (such as Terminal, the Epiphany web browser, and Wolfram Mathematica) while all of the installed X11 programs are available from the “Menu.” Below are images of the Raspbian desktop and navigating through some of the default programs available.
To easily install additional software, you can install the Synaptic Package Manager, which simplifies finding and installing software packages by wrapping package management in an easy-to-use GUI. From inside X11, open Terminal and type “sudo apt-get install synaptic”. This will install Synaptic, which you can open by clicking on Menu > Preferences > Synaptic Package Manager (more info on this and other Raspberry Pi stuff on Neil Black’s website).
When you done browsing around, you can click on the and choose to shut down. After a few moments, your display should show a blank screen and the activity lights on the back of the Raspberry Pi (red and green) should only be showing a solid red. At that point, unplug the micro USB 5v power adapter. If you are ready to install the 7″ Touchscreen Display, unplug the HDMI cable, too.
In the images below, I demonstrate how to assemble the 7″ Touchscreen Display and connect it to the Raspberry Pi. I followed the excellent instructions available on the official Raspberry Pi website, which also details how to install the Matchbox virtual keyboard for using the touchscreen without a keyboard.
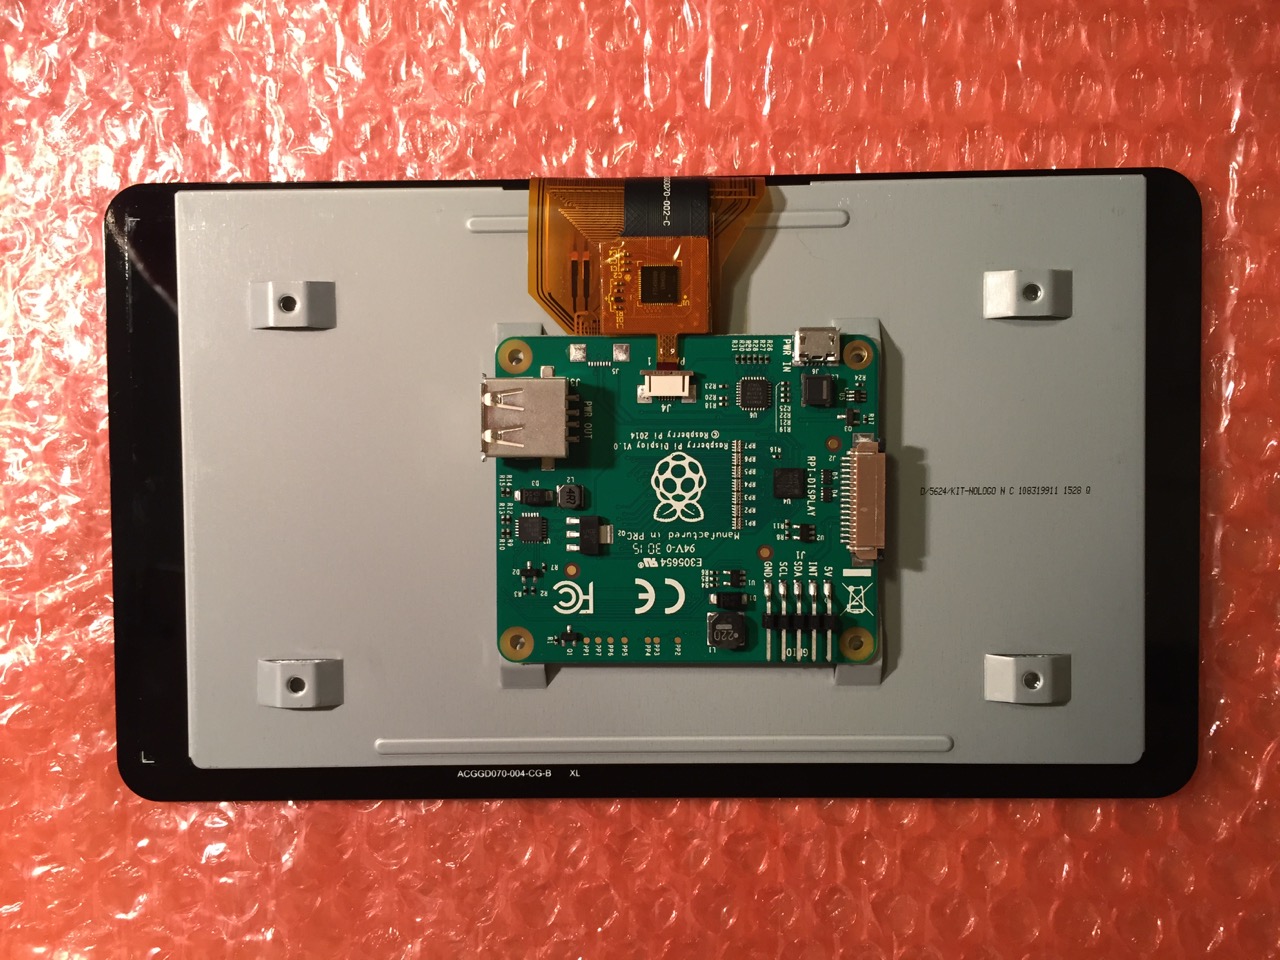
To begin connecting the 7″ Touchscreen Display to the Raspberry Pi, place the screen facing down.
Screw in the standoff posts to hold the display controller card to the display. Connect the display and touchscreen wires as described on the official installation guide.
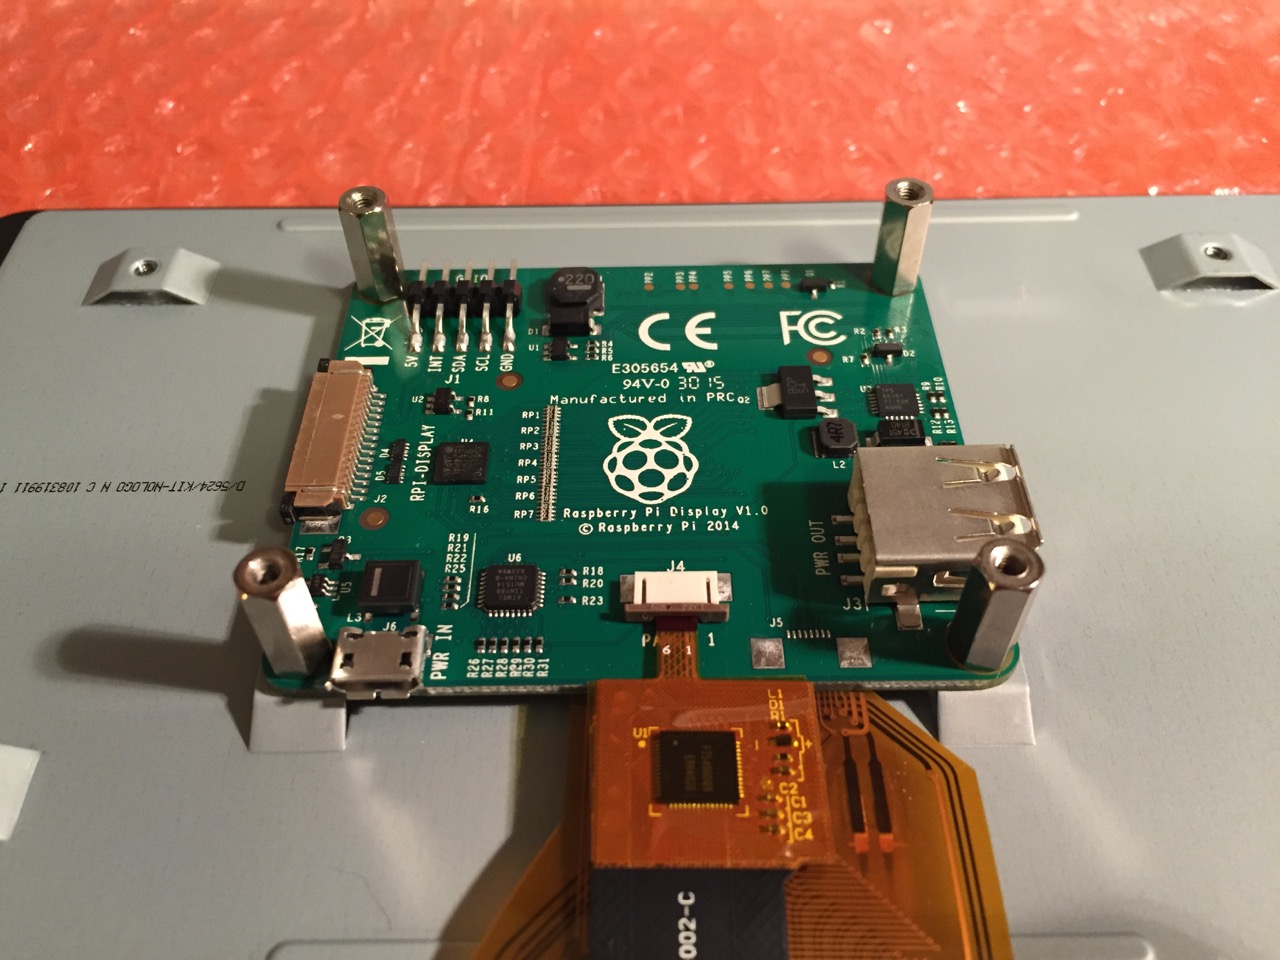
Insert the display cable to the video input on the controller card.
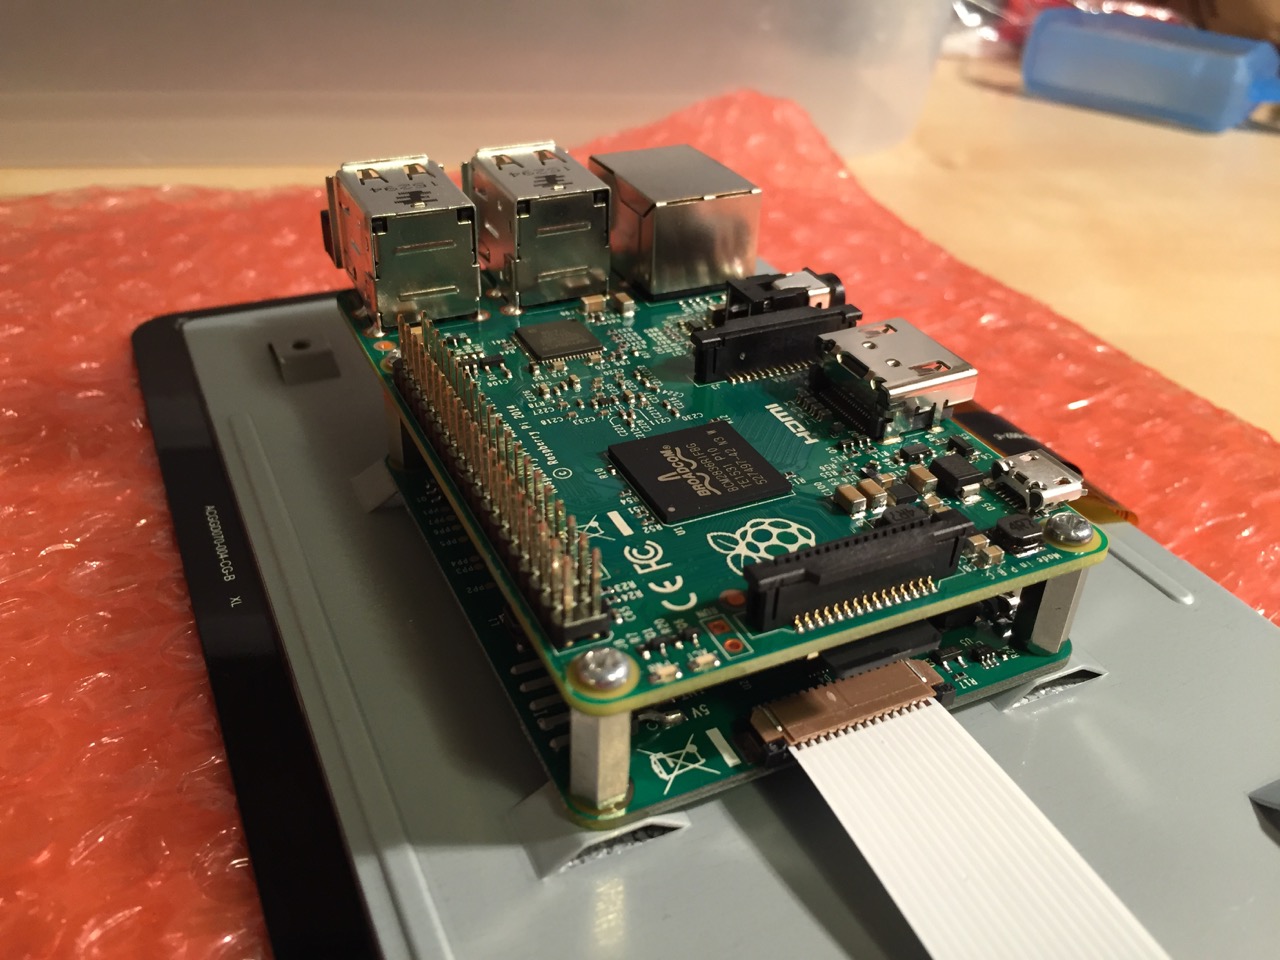
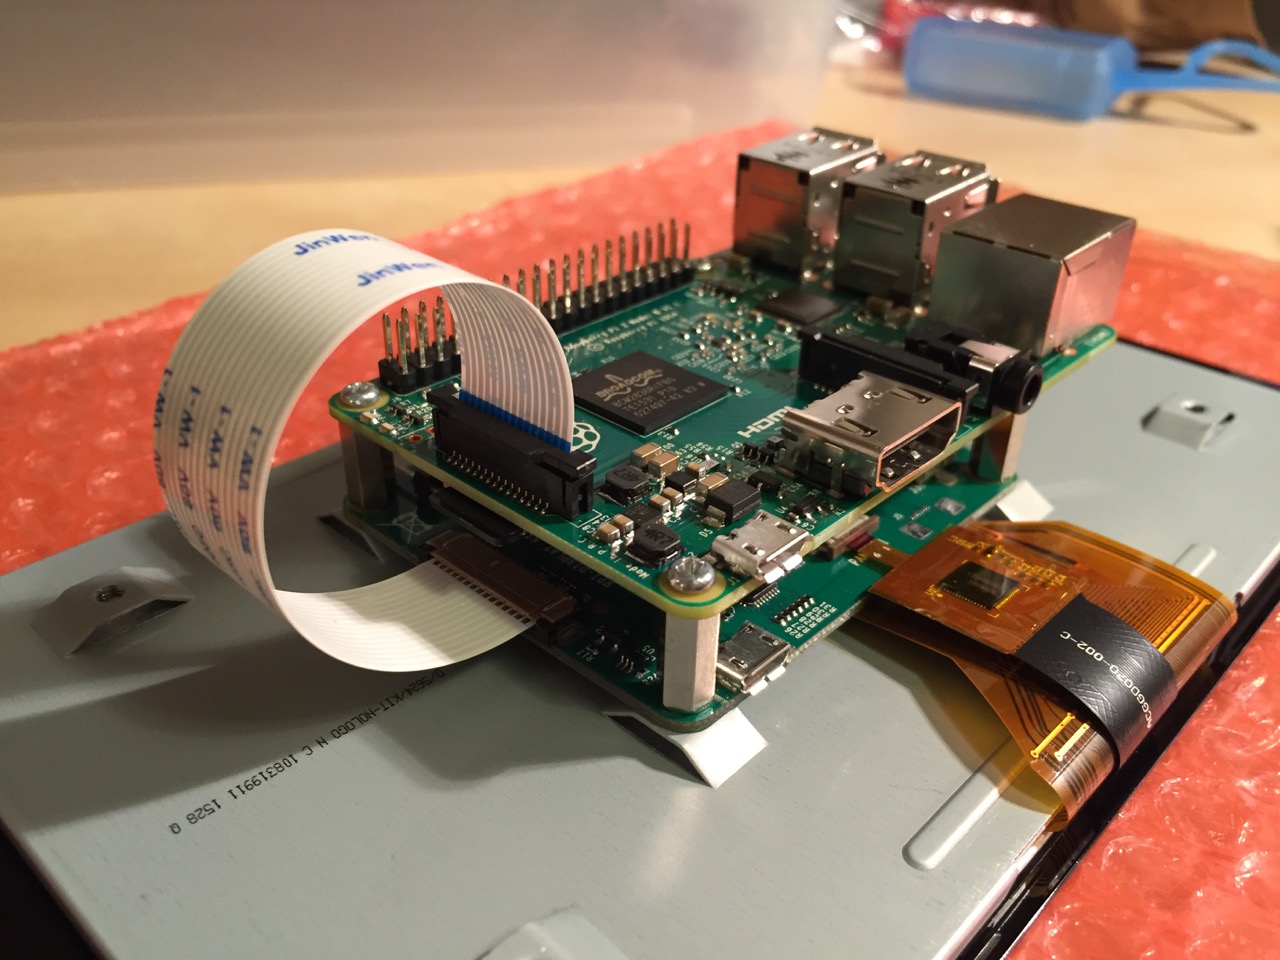
Place the Raspberry Pi above the display controller card and attach with the supplied screws that screw into the top of the standoff posts.
Connect the other end of the display cable into the output connector on the Raspberry Pi.
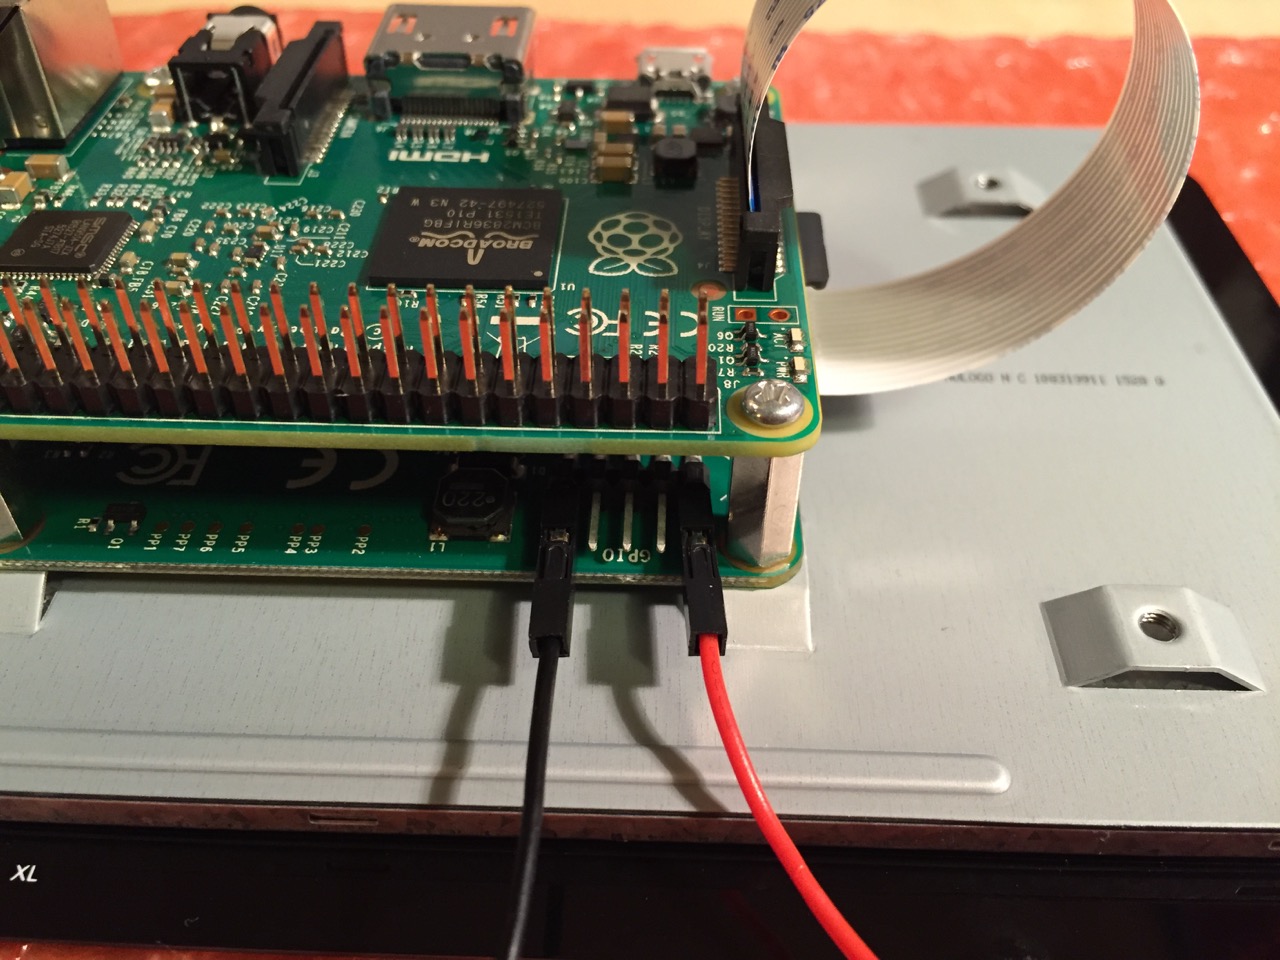
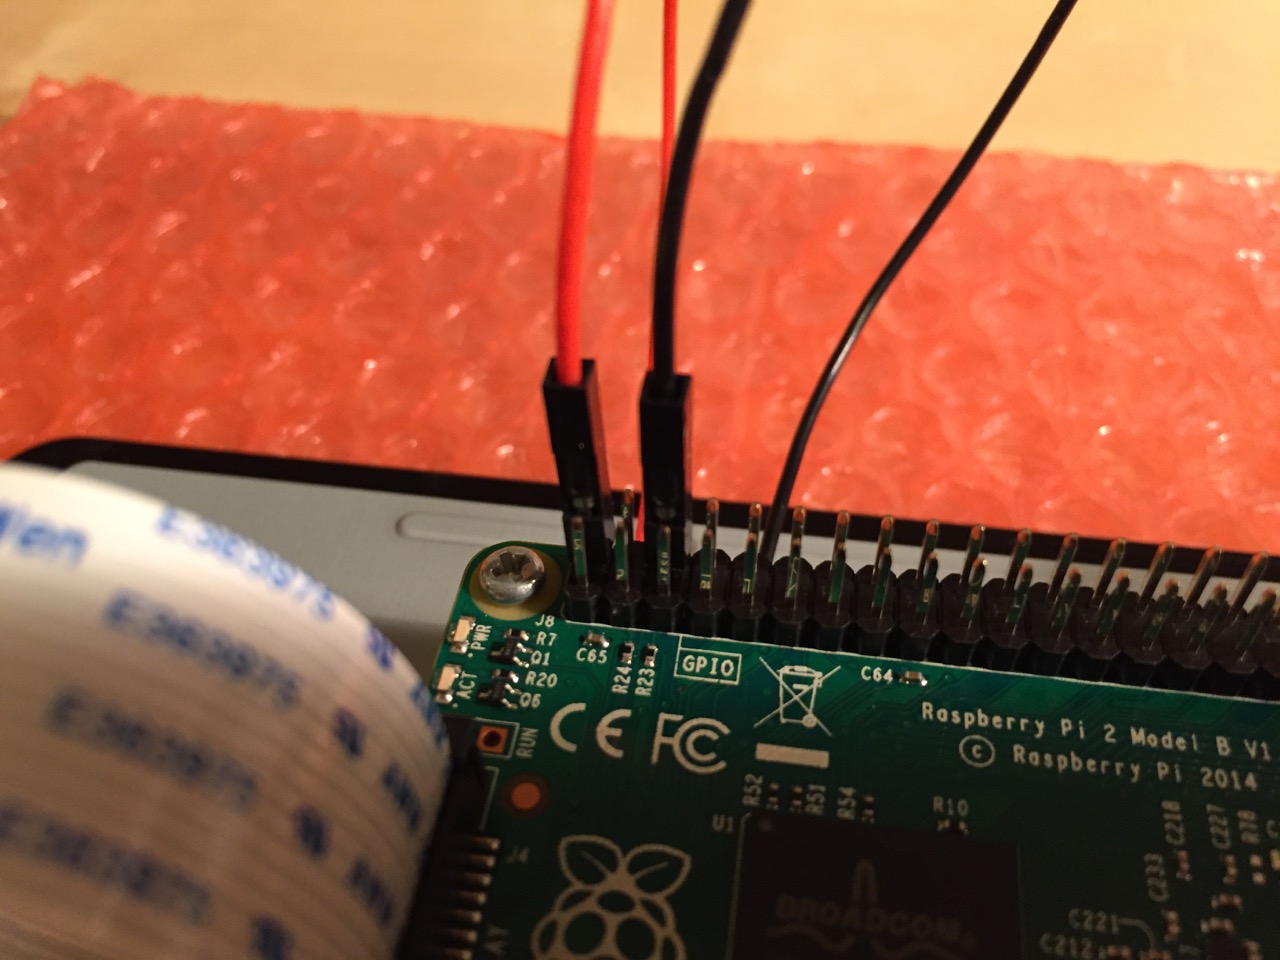
Use the supplied jumper wires to connect connect the power input of the display controller card…
…to the power output leads on the GPIO pins on the Raspberry Pi. This is one of three possible powering configurations–the other two involve USB.
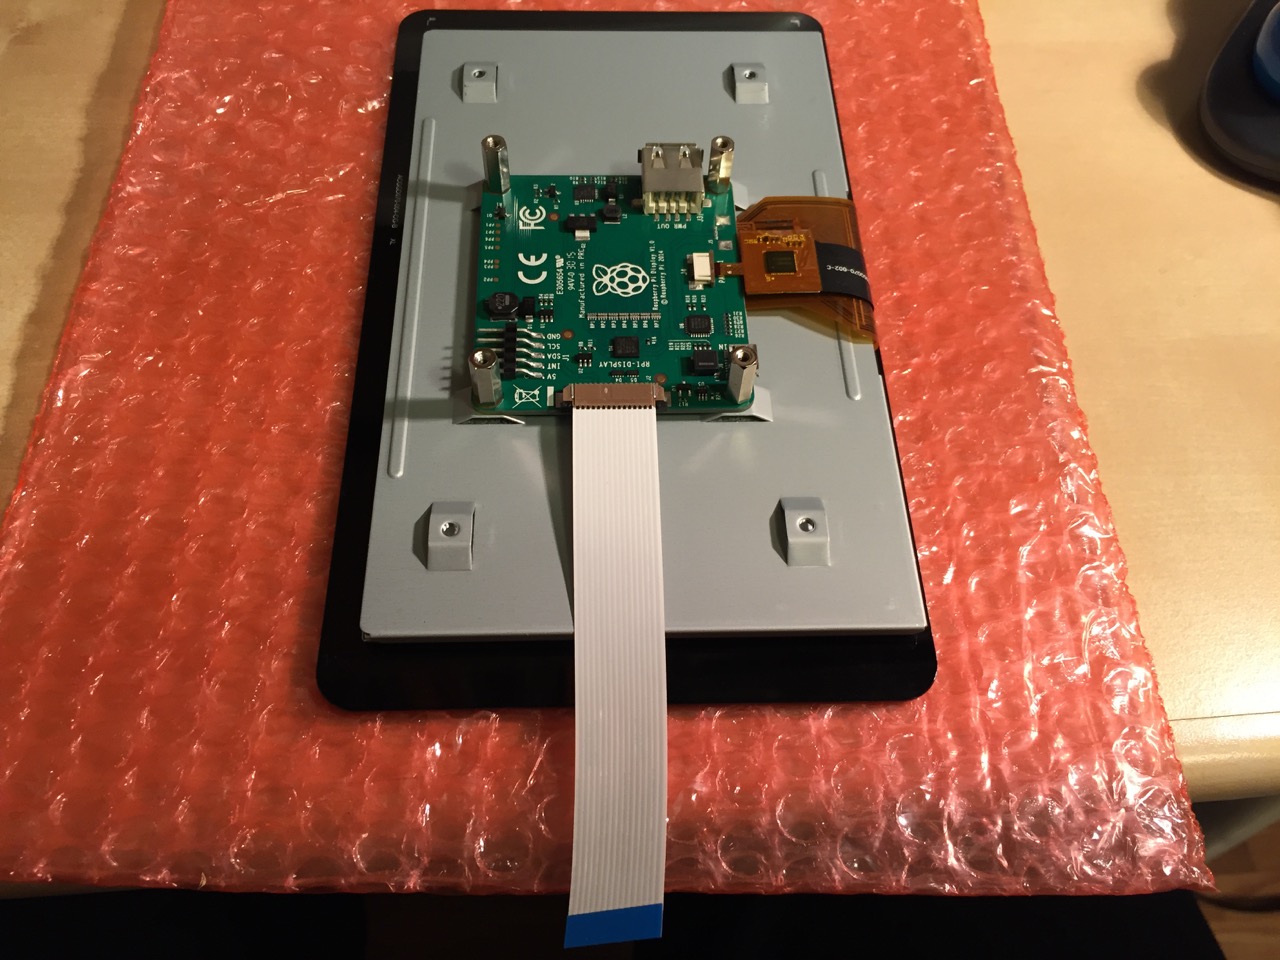
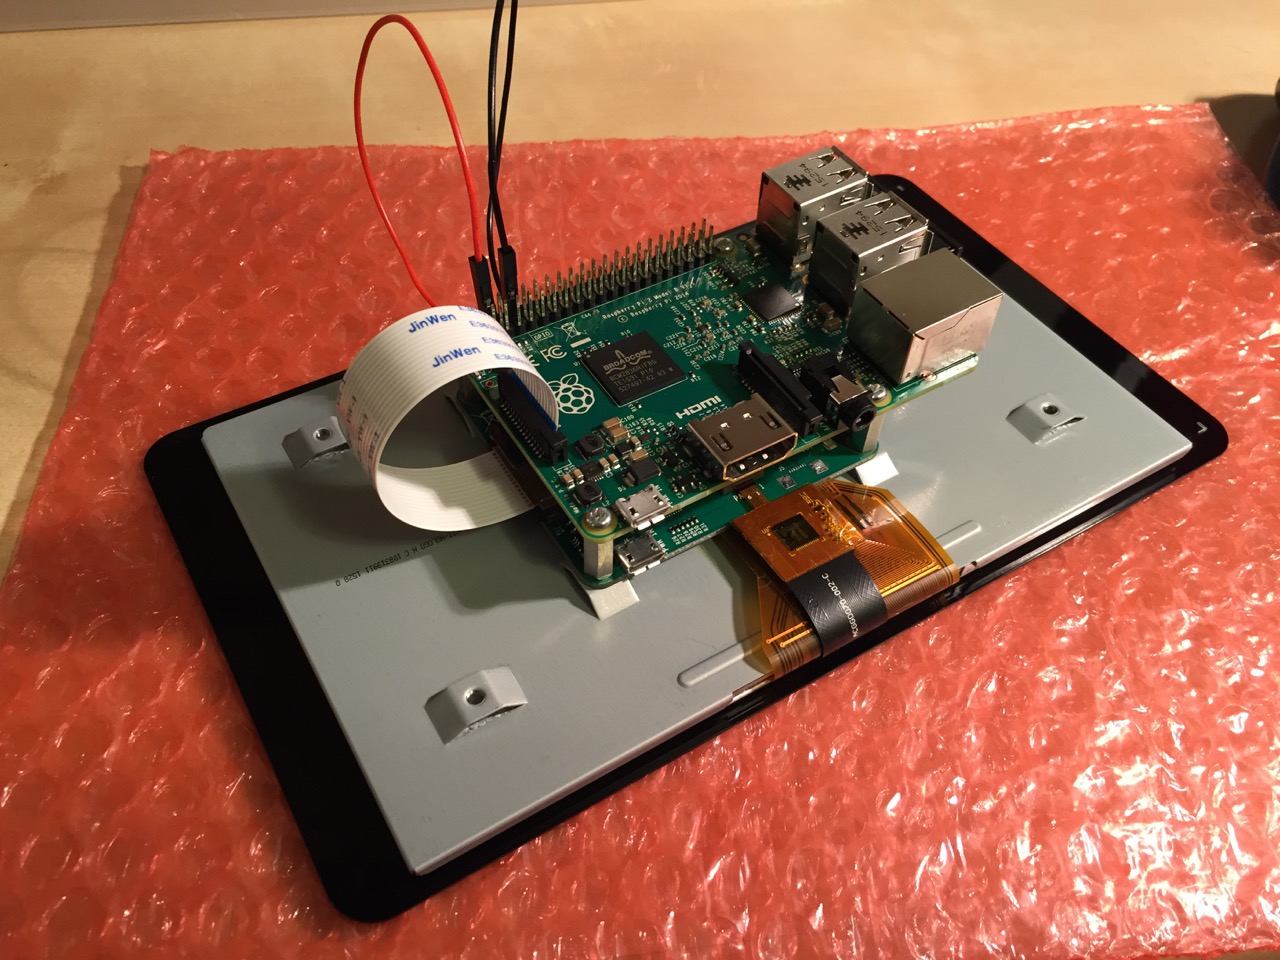
This is the rear of the 7″ Touchscreen Display assembled with the controller card and Raspberry Pi.
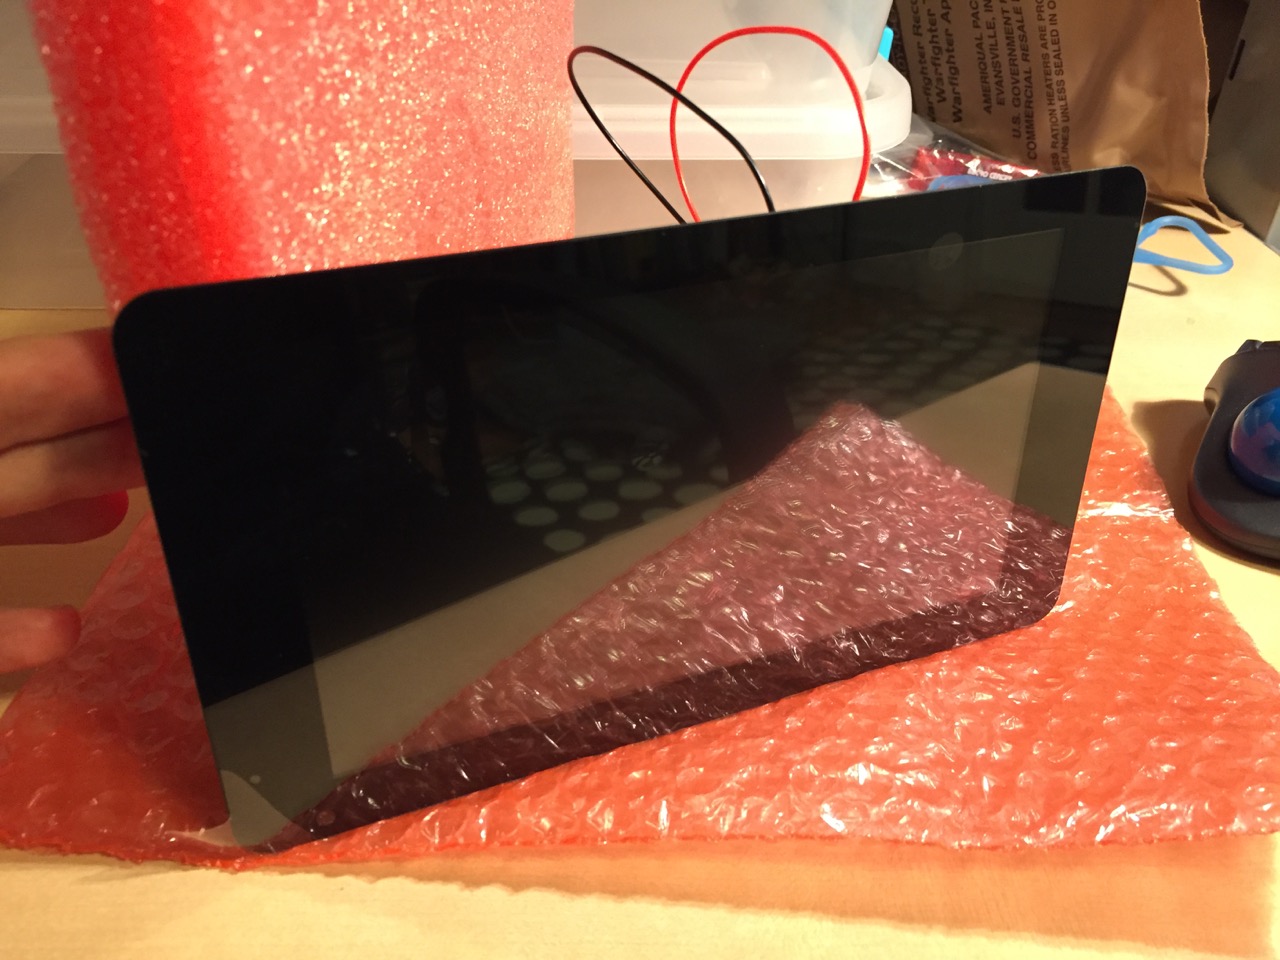
This is the front of the 7″ Touchscreen Display with the power leads sticking out from behind.
This is the Raspberry Pi powered up again with the 7″ Touchscreen Display.
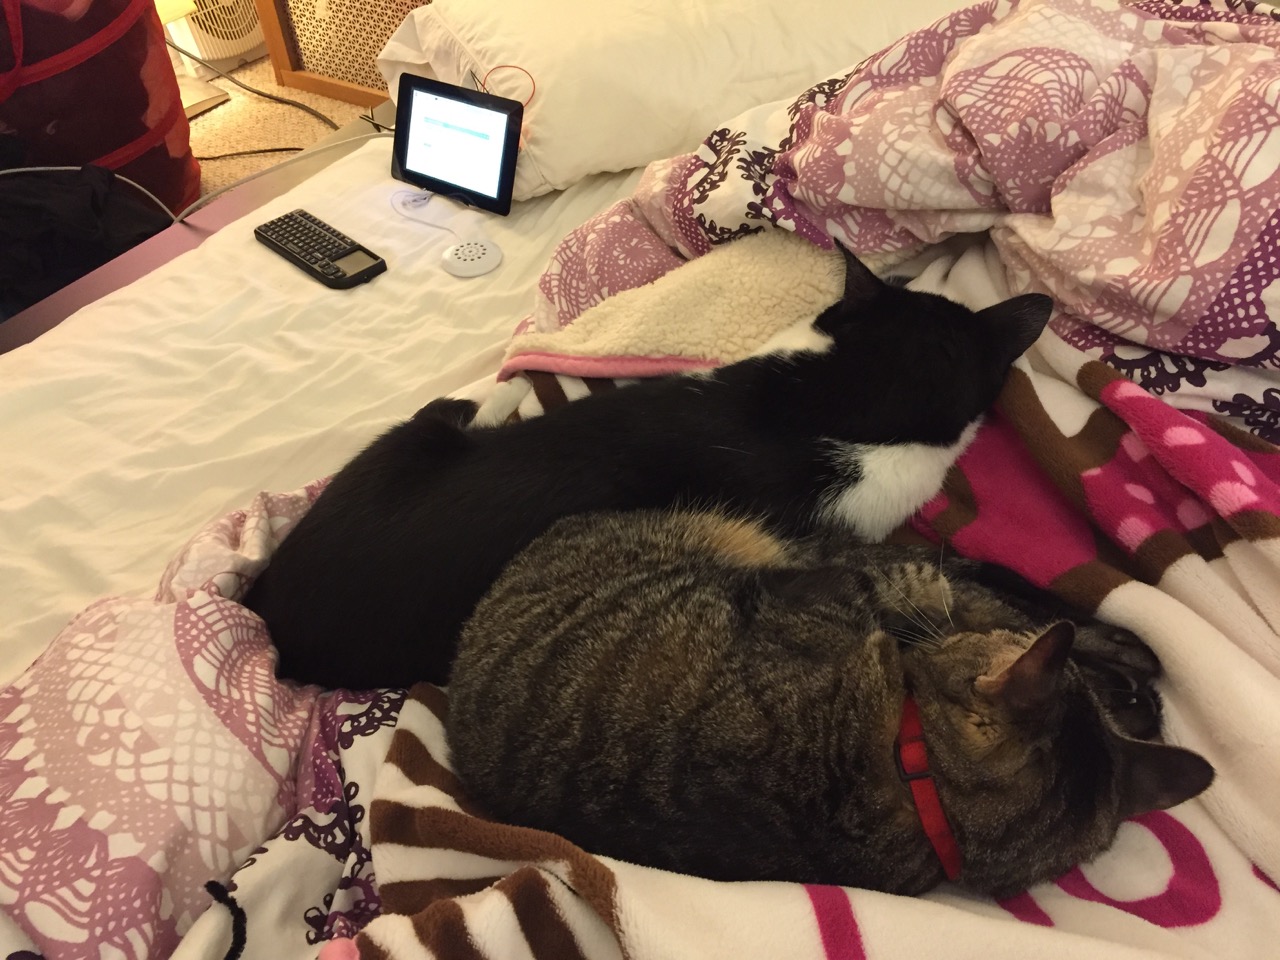
Mose and Miao had lost interest in the project by this point.
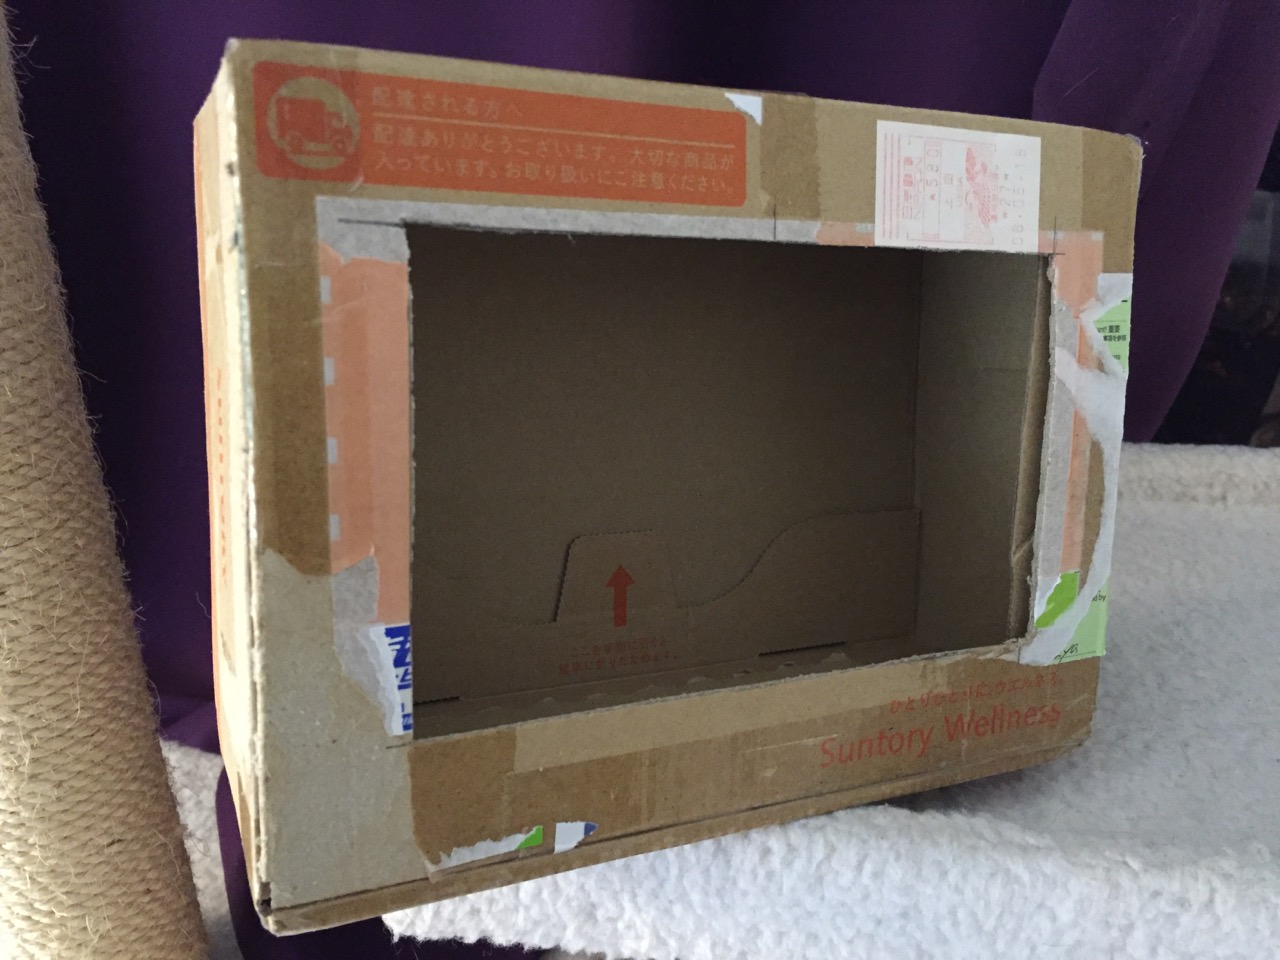
To complete the project, I cut a hole into a Suntory shipping box from Japan that is the exact same size as the 7″ Touchscreen Display box, which would work well, too. It is works well for holding up the Raspberry Pi and storing its accessories when I go between home and work.
Of course, you can use the Raspberry Pi with or without a case depending on your needs. I used the Suntory cardboard box from Japan for practical reasons (thinking: William Gibson: “the street finds its own use for things”–it’s a good size, on-hand, and looks cool) and research reasons (thinking about my work on proto-cyberpunk and the hidden nature of computing, which is an idea explored in my previous blog post about the poster that I created for the 13th annual City Tech Poster Session).
I have run the computer and touchscreen from the 5v battery that I purchased from Tinkersphere, but I get a graphics warning that the Raspberry Pi is under voltage (a rainbow pattern square persists in the upper right corner of the display whether in the CLI or xwindows). I might get a second battery to run the display alone, which would help me troubleshoot if the battery that I have now is actually outputting enough voltage and amperage needed by the Raspberry Pi alone. In the meantime, I am running everything at my desk with the 5v power adapter, which provides ample power for the Raspberry Pi and 7″ Touchscreen Display.
In the future, I would like to use the Raspberry Pi in a writing or technical communication course. There are many ways to leverage the technology: problem solving, writing about process, creating technical documents such as reports and instructions, using the Raspberry Pi as a writing/multimodal composing platform, digital storytelling with tools that come with the Raspberry Pi, and more. These ideas are built only around the Raspberry Pi and its software. A whole other universe of possibilities opens up when you begin building circuits and integrating the Raspberry Pi into a larger project.
The basic cost of entry with the platform is $30 for the Raspberry Pi 2, Model B and a few dollars for an 8GB micro SD card. If you have access to a display with HDMI, a USB keyboard and mouse, and ethernet-based Internet access, you can get started with Raspberry Pi almost immediately. For a future grant application, I am imagining a proposal to purchase the basic needed equipment to use Raspberry Pi in an existing computer lab. I can bring the kits to each class where students can use them on different assignments that meet the outcomes for that course but in an engaging and challenging way that I think they would enjoy and would be beneficial to them in ways beyond the immediate needs of the class.
On this last point, I am thinking of working with digital technology in an a way many of my students will not have had a chance to before, feeling a sense of accomplishment, learning from one another on team-based projects, experiencing a sense of discovery with a computing platform that they might not have used before, and of course, communicating through the process of discovery in different ways and to different audiences. This might be something that you’re interested in, too. Drop me a line if you are!


")