Columbus Park, flanked by Borough Hall, Kings County Superior Court, and the Cadman Plaza US Post Office (the building in the background of the photo above), has been invaded by a hip giant metal robot sculpture. It’s Rappin’ Max Robot with a foot propped up on his larger-than-life boombox. The character first appeared in Eric Orr’s Rappin’ Max Robot comic book. It was built by Welder Underground, which according to the dedication plaque is “a Brooklyn-based nonprofit that teaches young adults to become certified welders and metal fabricators by partnering with established artists to build large-scale public artworks.” Coming full circle, Eric Orr, Jr. was one of the Welder Underground apprentices who worked on the project. I was happy to see this unexpected addition to the park around the corner from City Tech. In fact, I would like to see more hip hop robots. Let’s get the giant robot hero from The Beastie Boys’ “Intergalactic” music video put up near Adam Yauch Park (RIP M.C.A.).
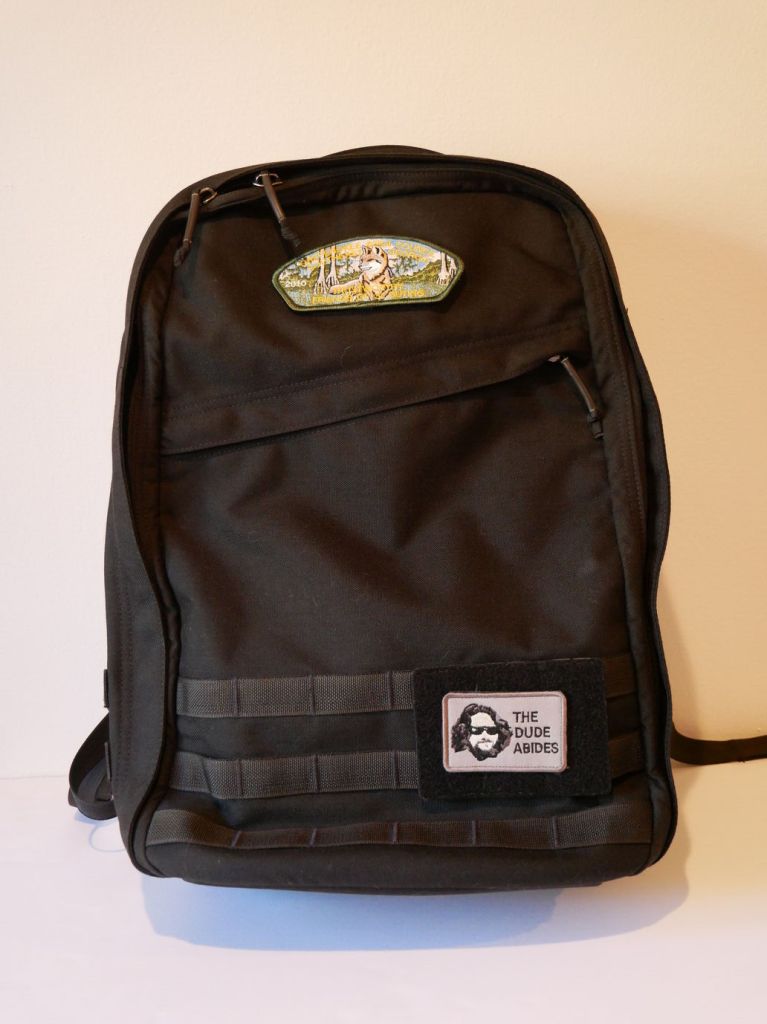
As I’ve documented here, here, and here, I continue searching for the perfect backpack. While there may not be one backpack that checks all of my boxes, I think that the GoRuck GR1 (26L) checks the most.
I purchased the larger 26L version of the GR1 before the fall semester began. It is the most expensive backpack that I’ve ever purchased, but its design, materials, construction, and “Built in the USA” provenance supported the price.
My original intended use for it was to carry my 16″ Lenovo ThinkPad P1 Gen 4 laptop, charger, water bottle, coffee thermos, and papers to and from the City Tech campus.
Then, after my dad was released from the hospital after a back problem, it became a travel companion for overnight train rides to-and-from NYC (along with a simple barrel duffel bag). It carried my laptop, charger, 8″ Samsung Tab Active3 tablet, its charger, an MRE and snacks, 1 liter of water, overnight clothes, and 1 quart Ziploc bag for toiletries.
So far, it has excelled in both work commuting and long distance train travel. It holds my gear, it’s easy to organize, and it’s constructed tough.
Below are photos of its pockets and their use.
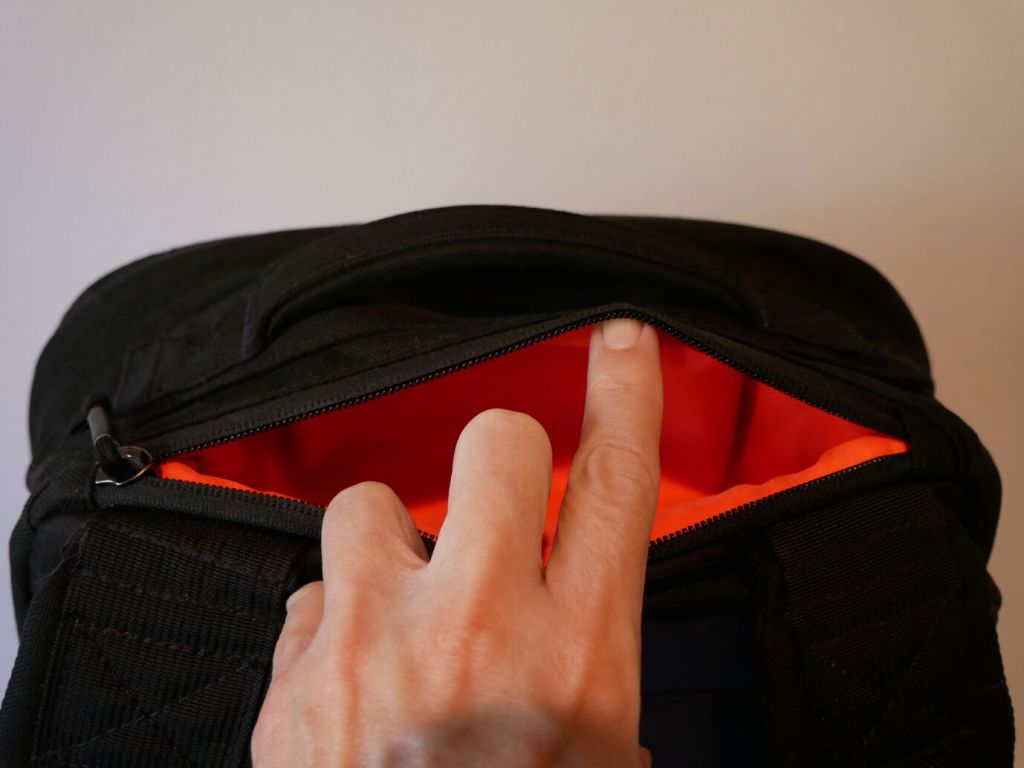
Between the shoulder straps and top hand grab is a pocket that holds my RayBan sunglasses in their case and my reading glasses in a smaller plastic case.
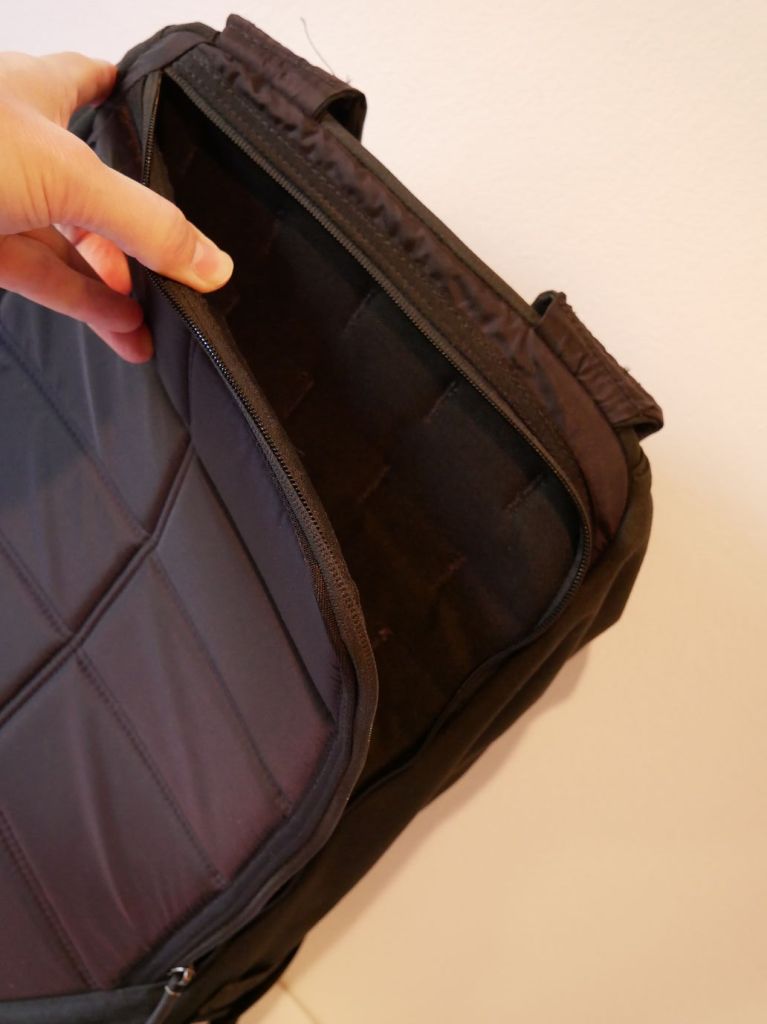
The back of the backpack supports breathing and features a smoother synthetic material than the body of the backpack. It’s advertised as being less aggressive on clothes, which I can confirm.
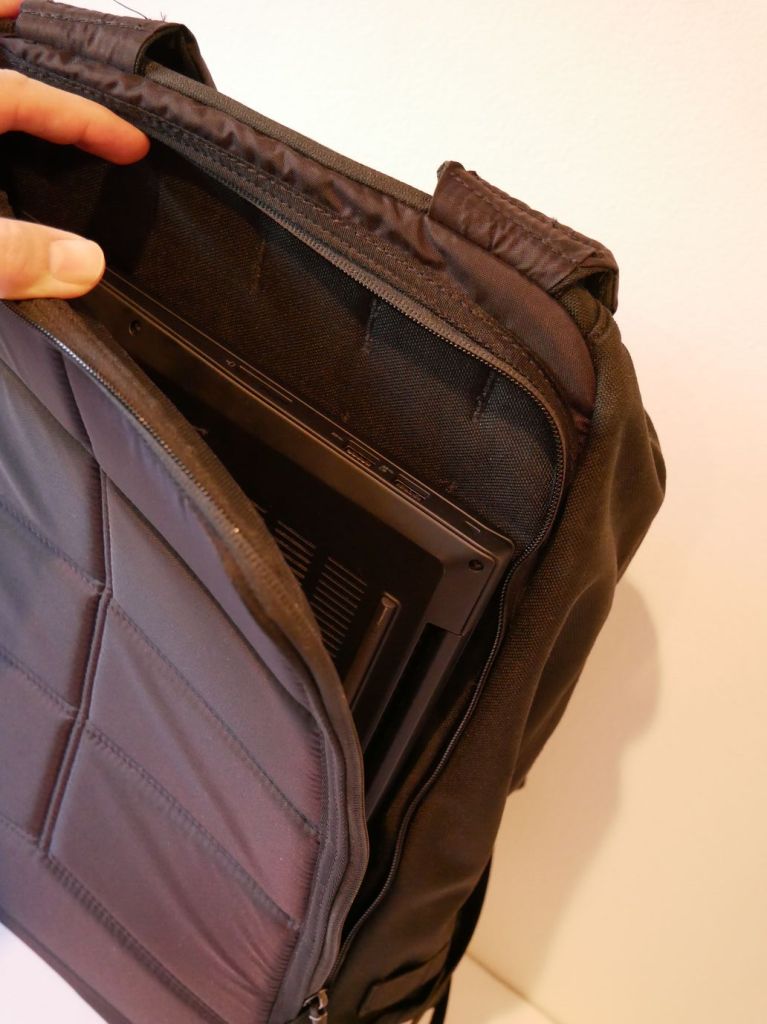
Flipping the shoulder straps around makes the “bomb proof” laptop sleeve more easily accessible. It is advertised as holding up to a 16″ laptop.
You can see above that the laptop sleeve does indeed hold my 16″ Lenovo ThinkPad P1 Gen 4 with room to spare on its width (i.e., the height of the pocket in relation to the backpack) and just a hair of extra space for its depth (i.e., the width of the pocket in relation to the backpack).
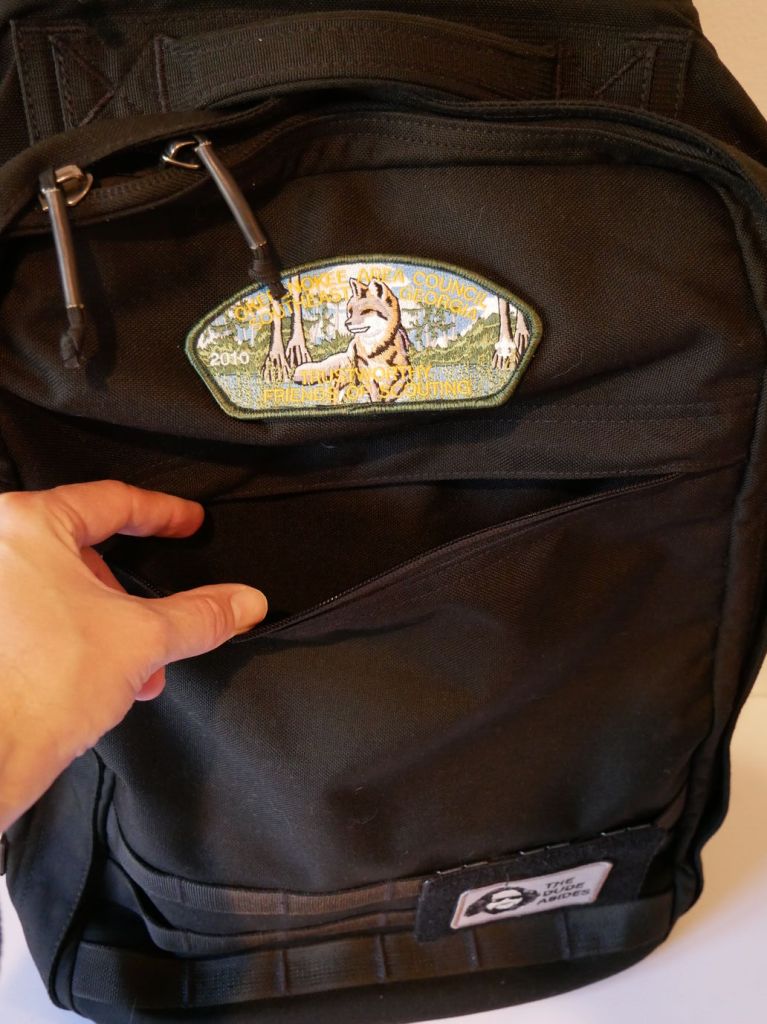
The front zippered diagonal pocket extends from the zipper to the bottom of the pack. It can hold a lot! I keep an Apple Airtag and pocket knife in there. The top of the pack has a 2″ x 3″ hook-and-loop patch area, which I attached one of my Scouting patches to. I added a 3.5″ x 4.5″ hook-and-loop MOLLE panel to the bottom area of my GR1 where I affixed my “The Dude Abides” patch.
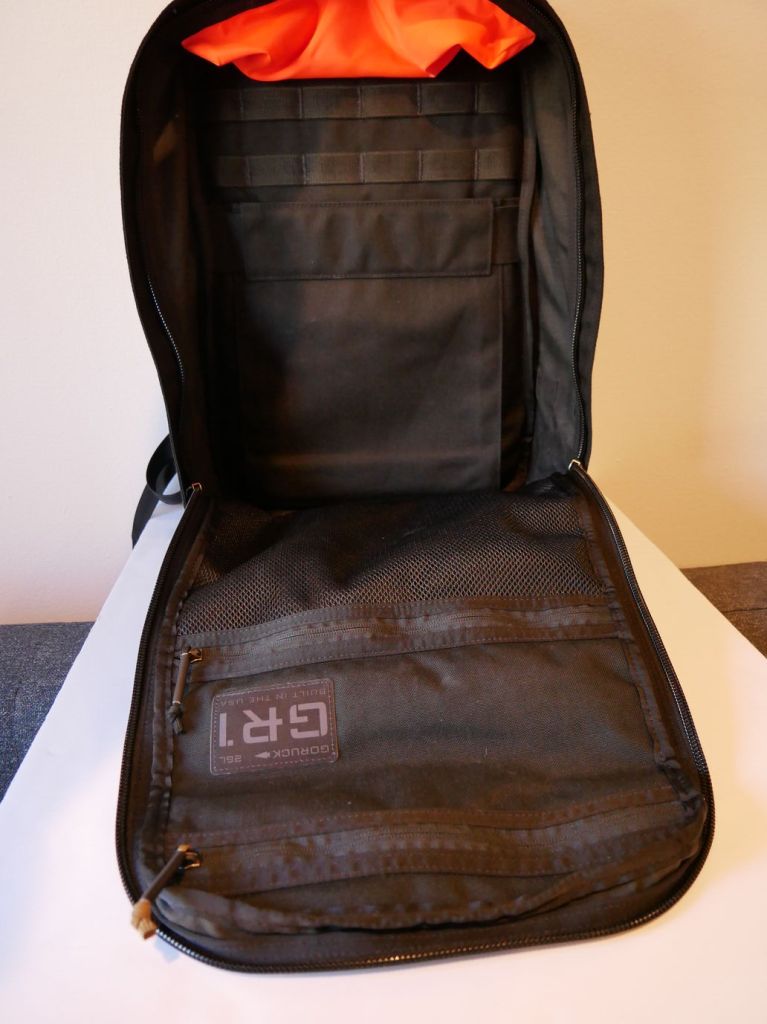
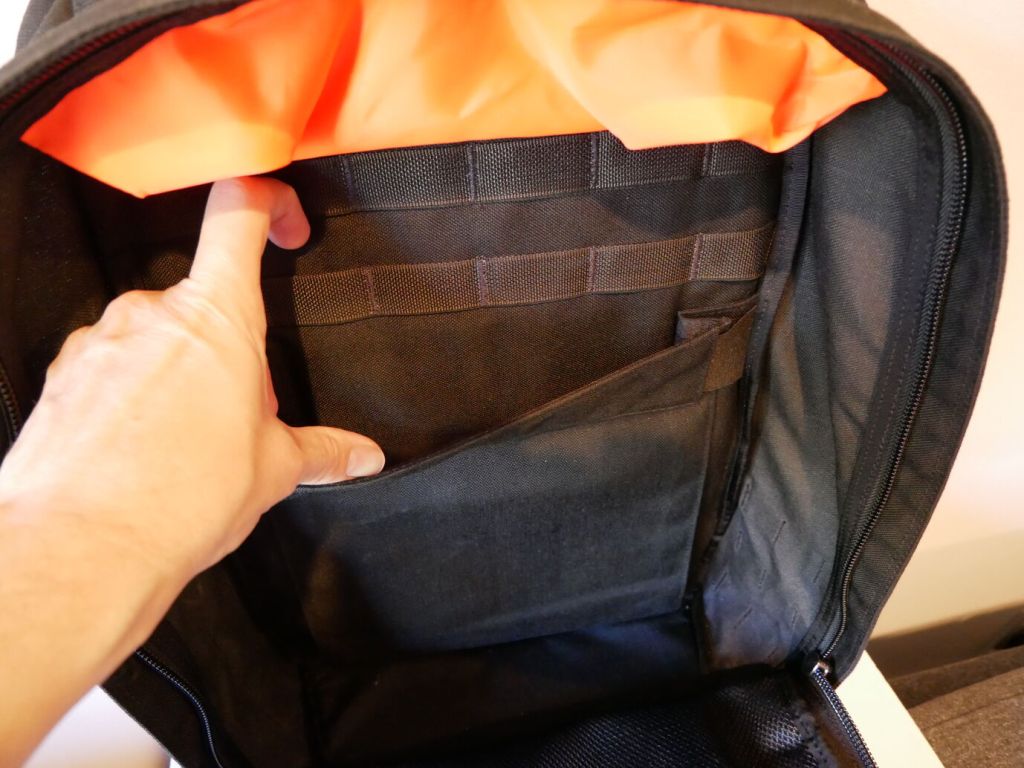
In addition to the MOLLE attachments on the outside of the pack, there is more MOLLE inside for pouches or hook-and-loop panels.
On the back interior of the GR1, there’s an elastic panel that can hold a smaller laptop or tablet. I used it to hold my 8″ Samsung Galaxy Tab Active3 in a hard case with plenty of room to spare.
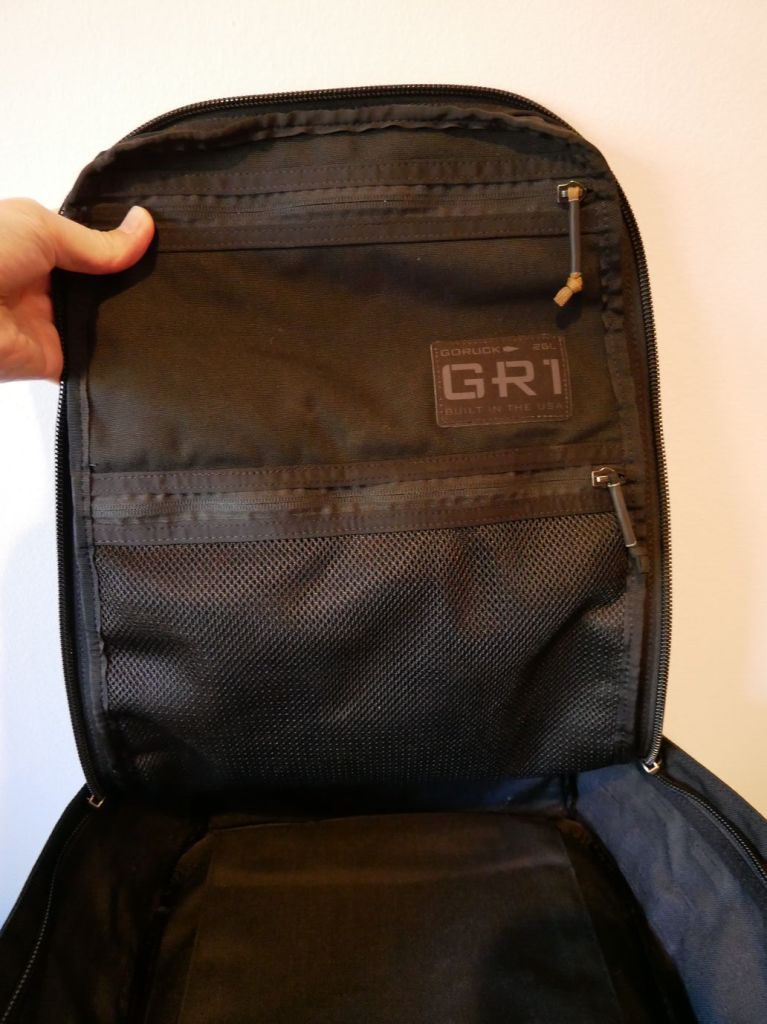
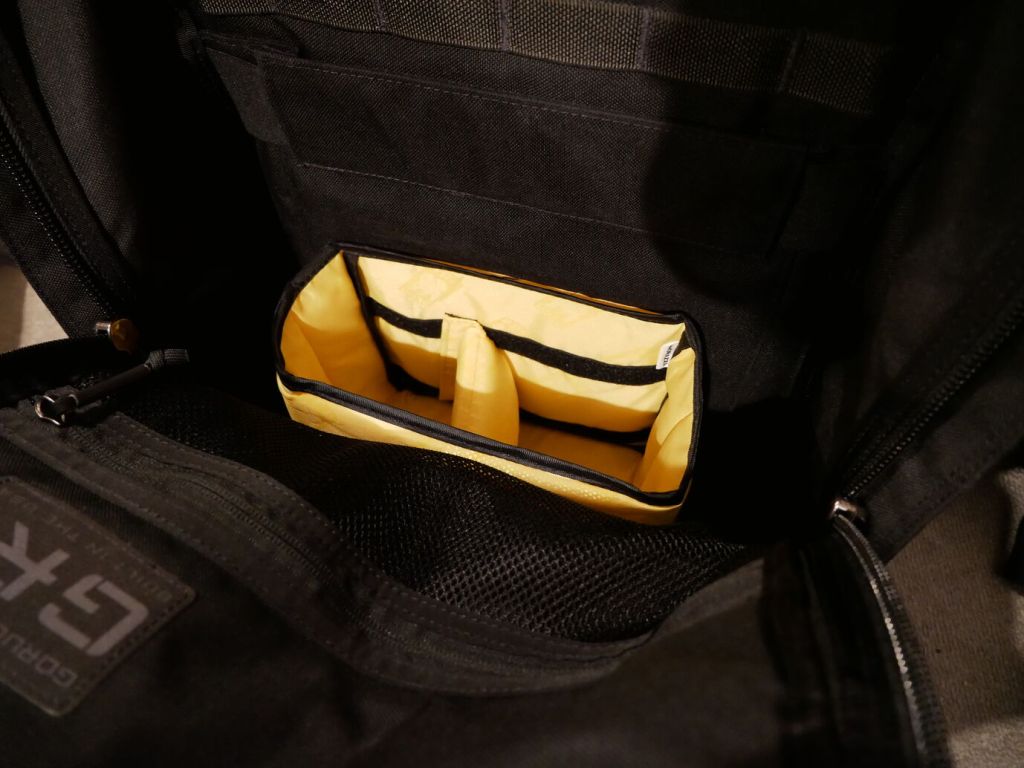
The front flat interior has two zippered pouches. The top one is smaller but opaque. The bottom one is larger but its contents viewable thanks to the netting.
To help with organizing my gear, I dropped the larger half of the yellow, padded Ape Case Cubeze Duo (ACQB 41) with one divider in the bottom of the pack. This creates four areas in the bottom of the pack to keep things from banging around–a thermos, two water bottles, and charging brick for the Lenovo laptop.
The GR1 doesn’t come with a sternum strap, but I haven’t found that it needs one while walking or climbing stairs. Having one less strap to undo or get caught while dangling is okay with me. It’s also easy to put on and take off. However, depending on my load–specifically with the 16″ Lenovo, I bend over to put on my shoes before donning the pack so that I don’t put too much pressure on the laptop within the pack against my arched back.
I’m very happy with the GR1 and look forward to carrying it in the days ahead.
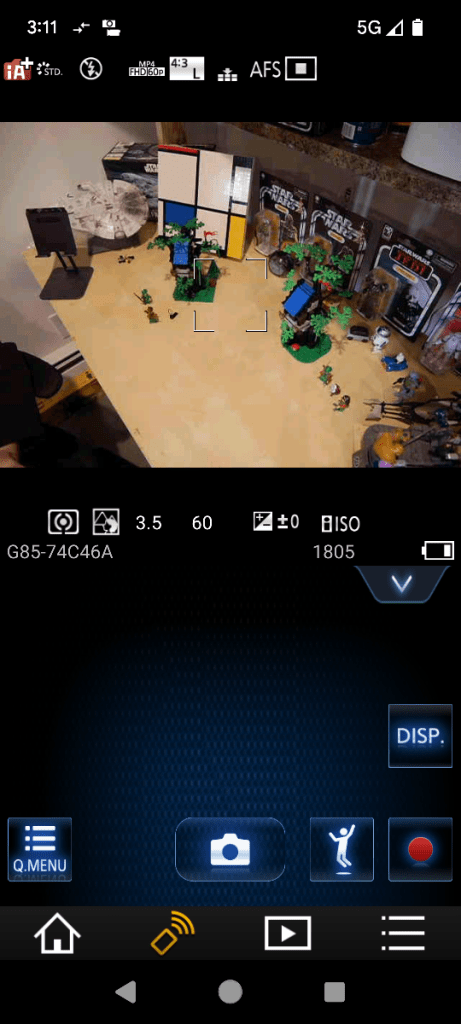
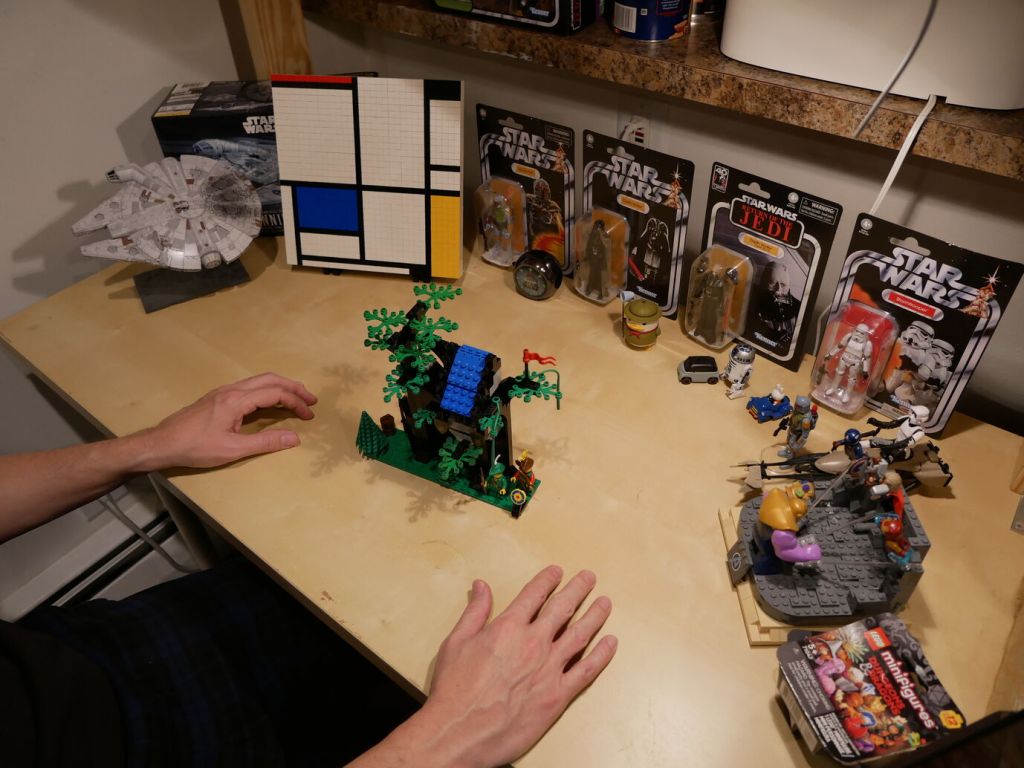
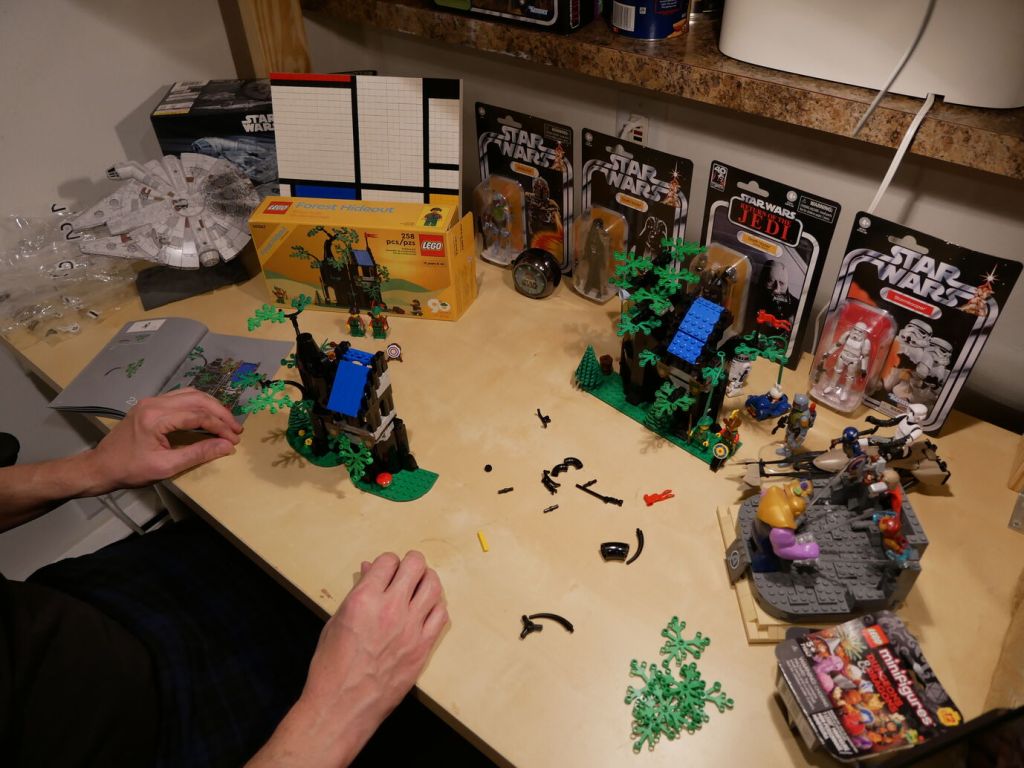
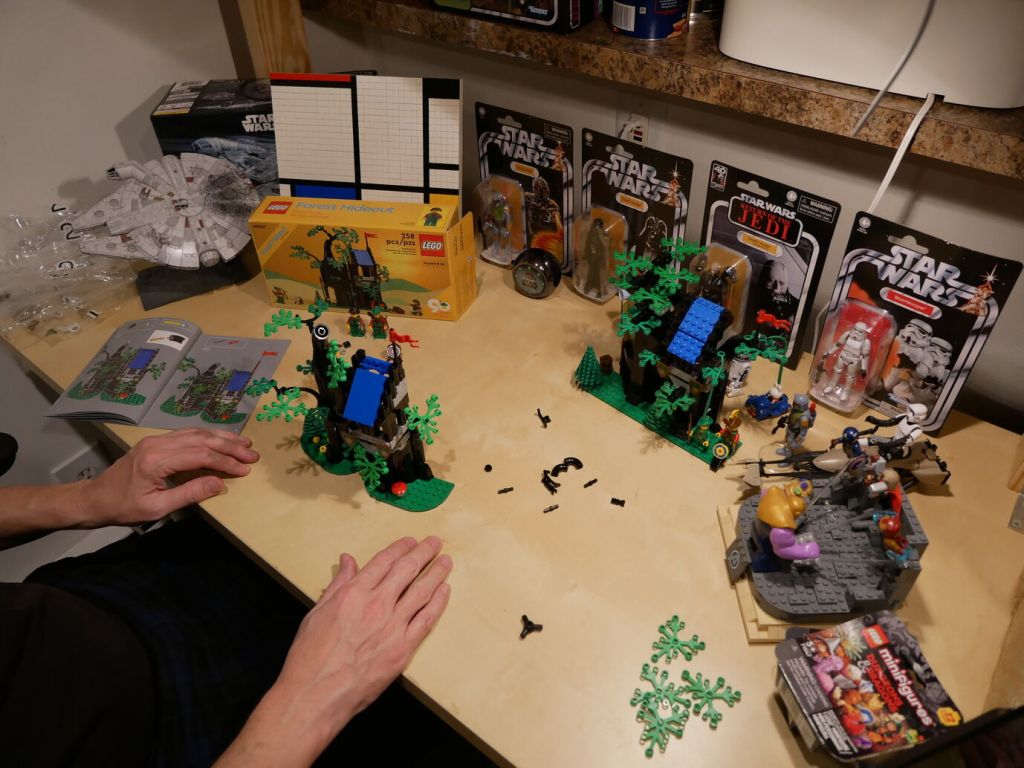
I’ve had this Panasonic Lumix DMC-G85 camera for awhile, but I’ve never had a reason to setup its Wi-Fi remote control feature until I began thinking about taking photos for the post that I published yesterday comparing the builds of LEGO’s Forestmen’s Hidenout (6054) and Forest Hideout (40567). I didn’t want to have to get up to active the shutter each time I took a picture, and I wanted to be in the photos as the builder. Using my smartphone as a remote control of the camera configured with timed shutter release allowed me to take the photos that I had in mind.
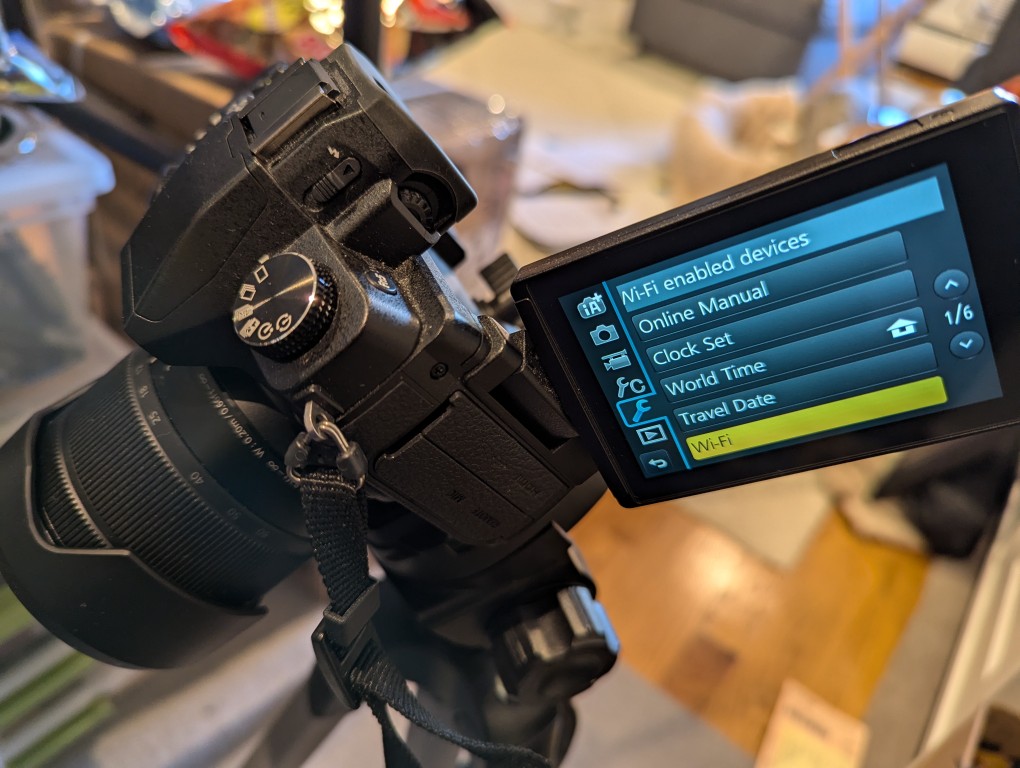
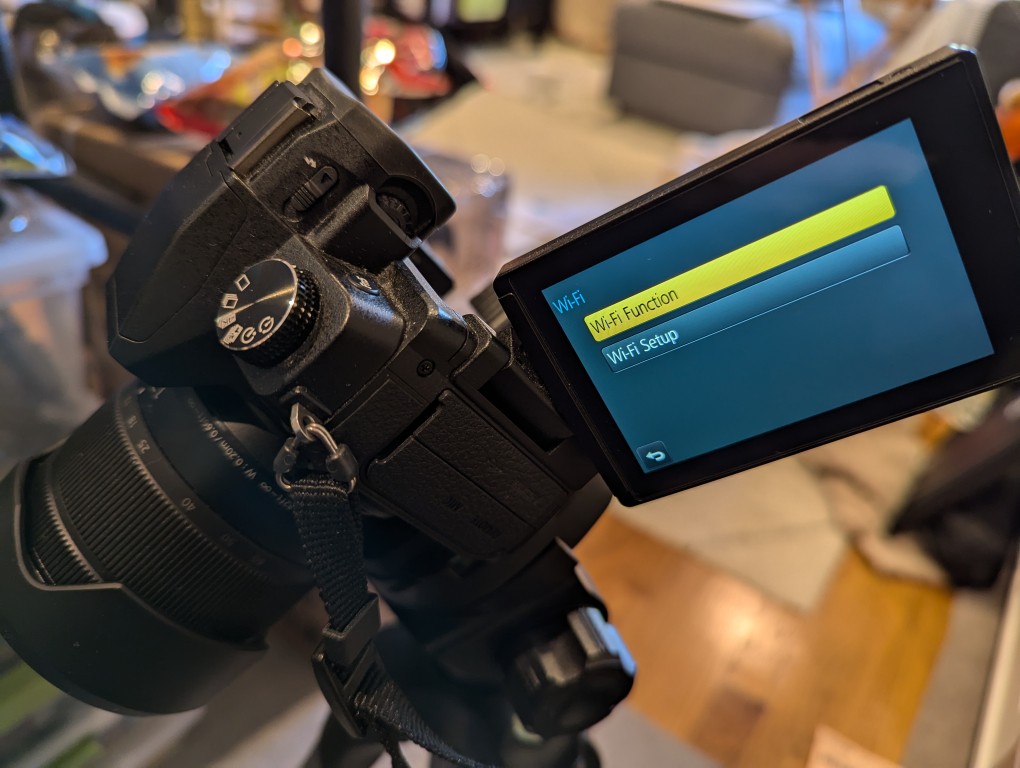
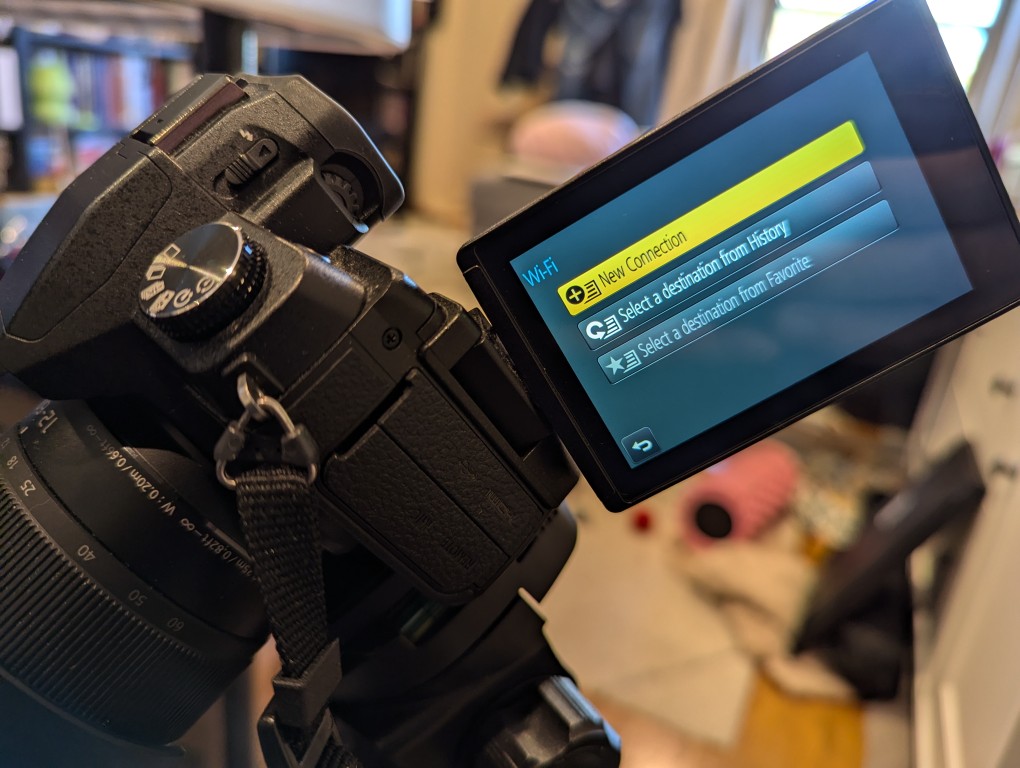
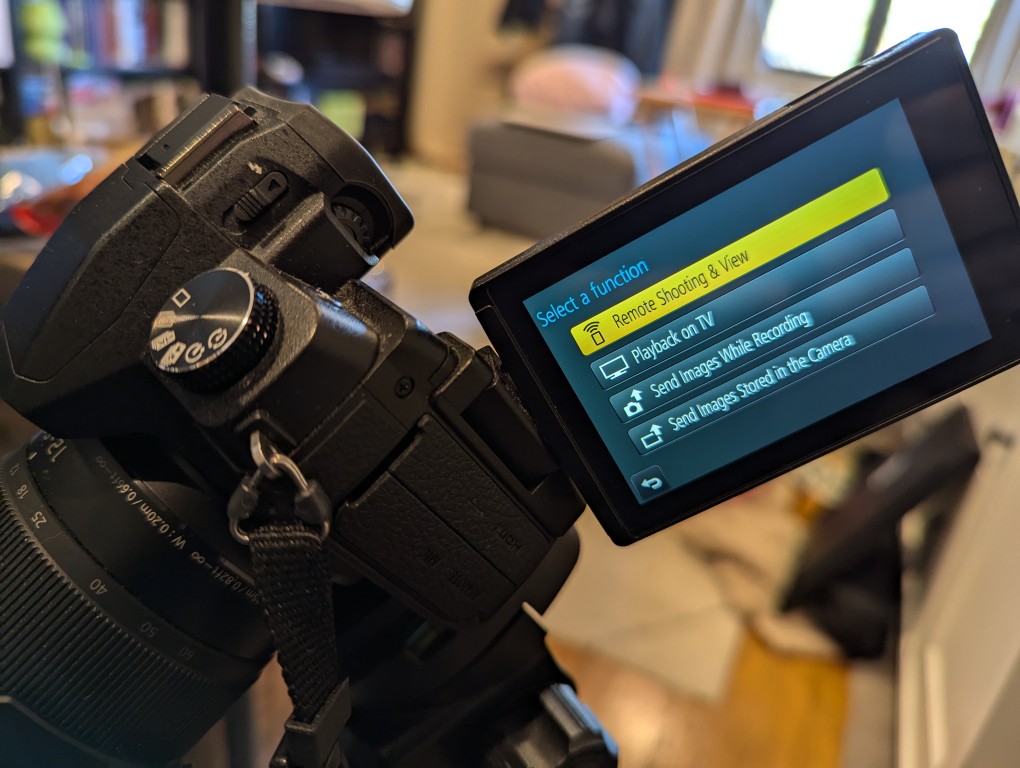
The basic version of setting up remote control for the camera is shown in the photos below. First, on the camera, open the menu > setup/wrench > Wi-Fi > Function > New Connection > Remote Shooting.
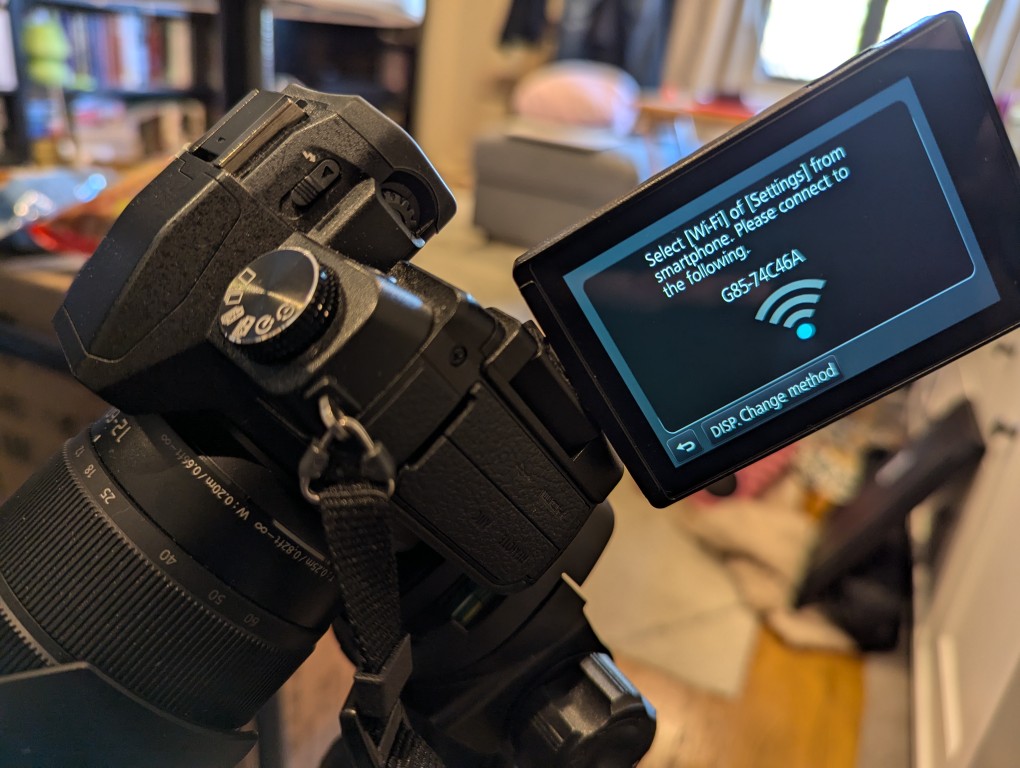
After connecting your smartphone to the displayed Wi-Fi network, install and open the Panasonic Image App.
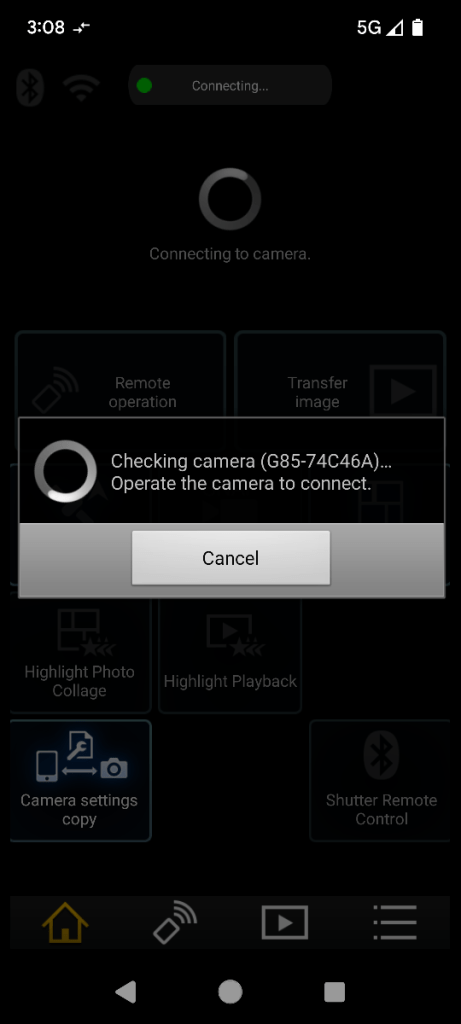
After agreeing to the terms of service, click on the area on the left for “Remote Operation.” When it attempts to connect, it will prompt you to “Operate the camera to connect.” Back on the camera, click the button on the display to accept the connection.
Then, you will see what your camera sees on your smartphone’s screen. There are controls for adjusting the camera and activating the shutter.
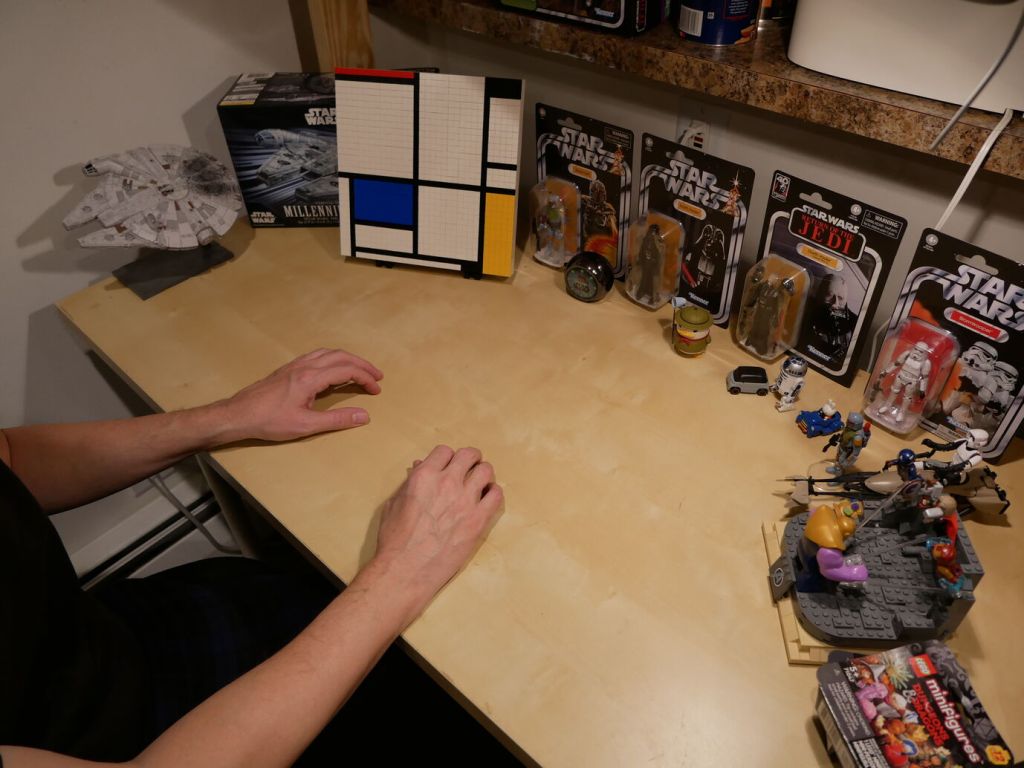
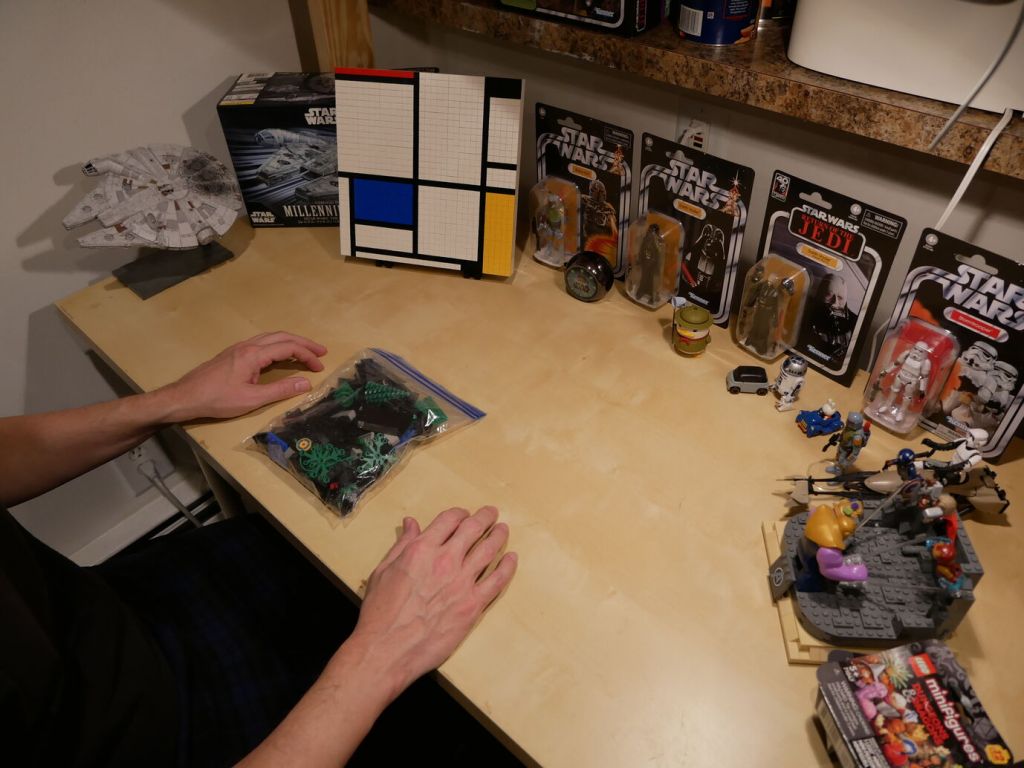
So that I could capture my hands working with LEGO, I set my camera’s shutter timer to 2 seconds. This means when I would click the camera icon/shutter release in Panasonic Image App, there would be a 2 second countdown during which I could put my hands back into the scene before the shutter was released.
When I take night sky photos again, I will definitely use Panasonic Image App to control the camera so that I can avoid vibration induced by my pressing the shutter release button.
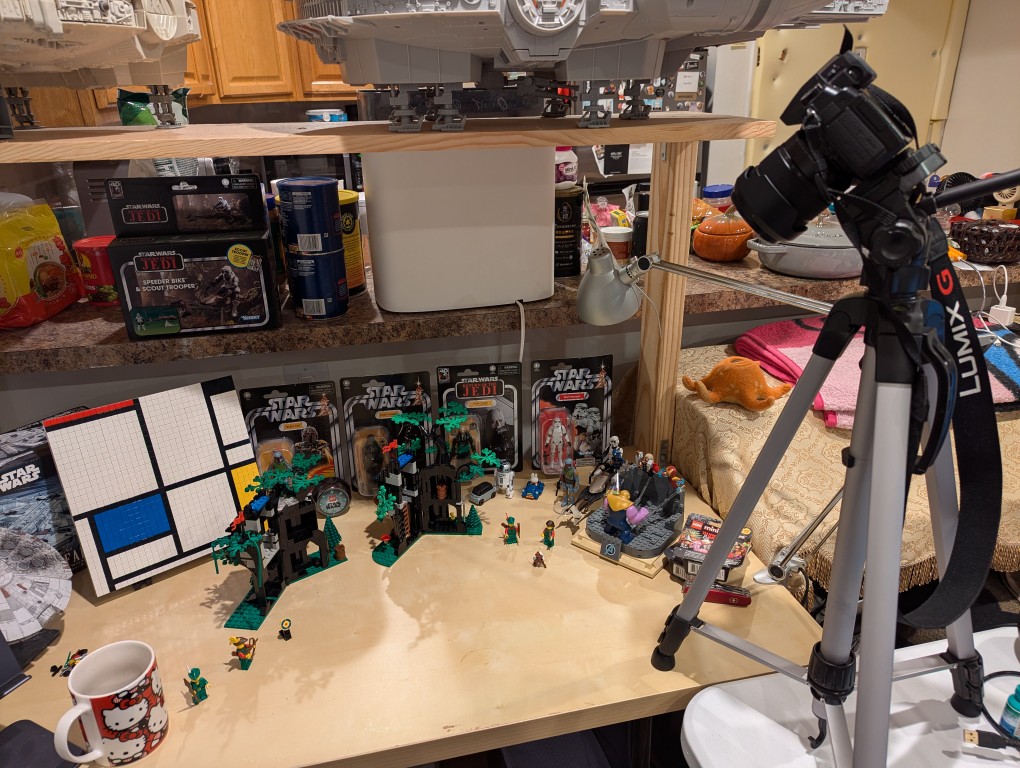
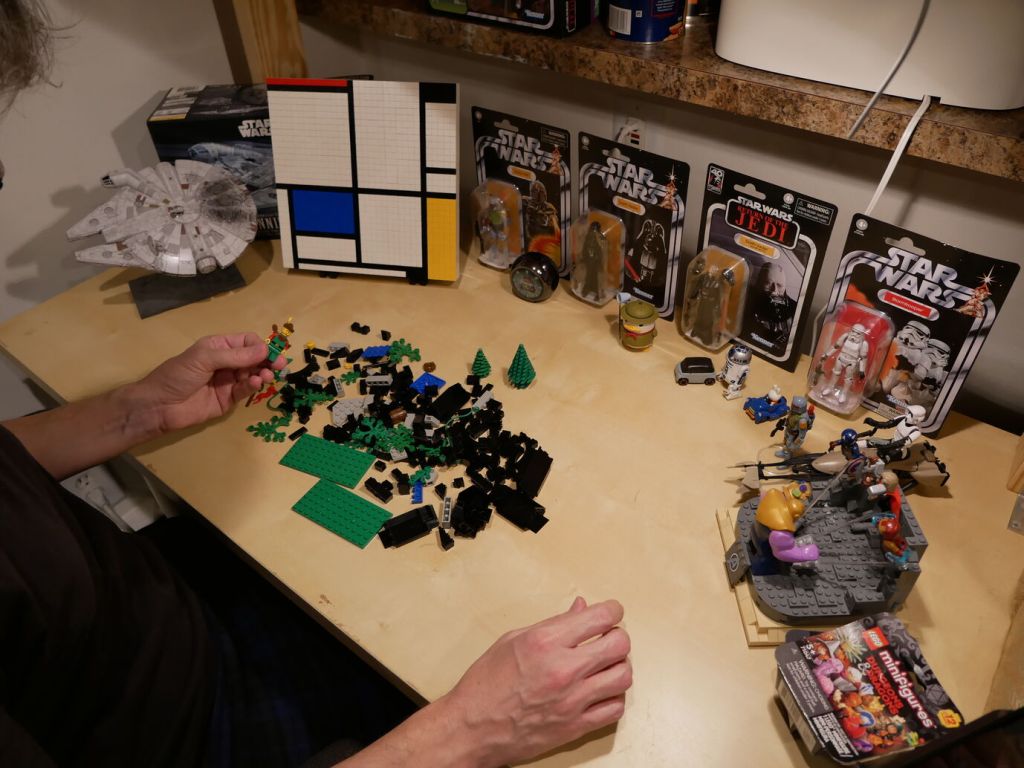
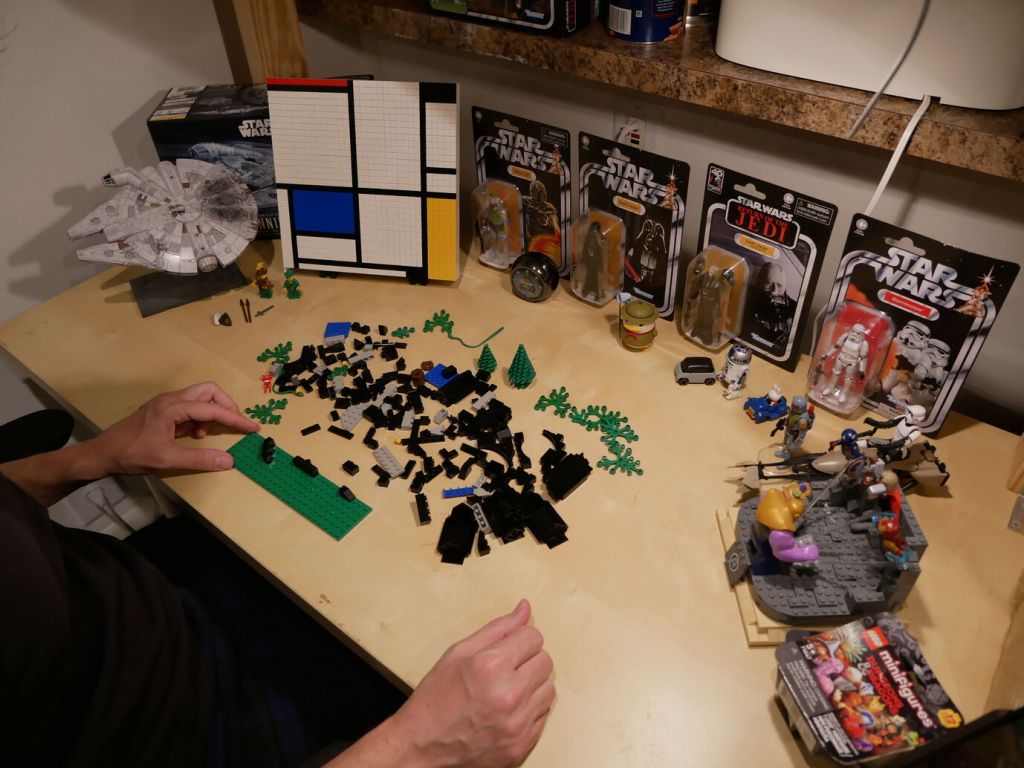
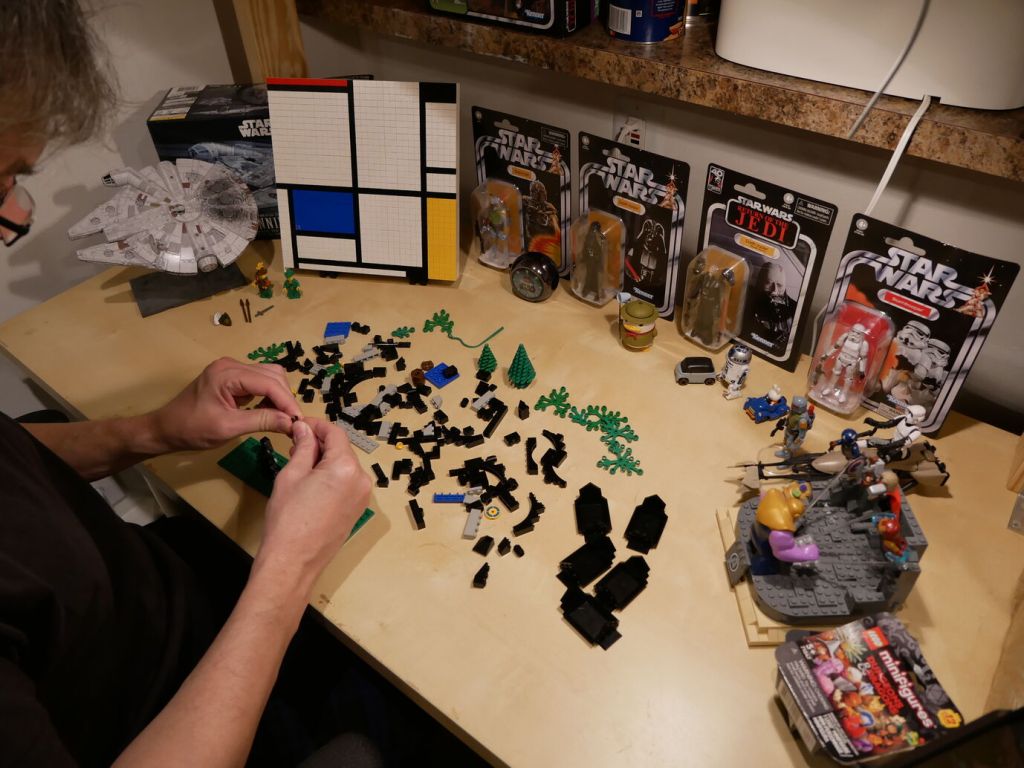
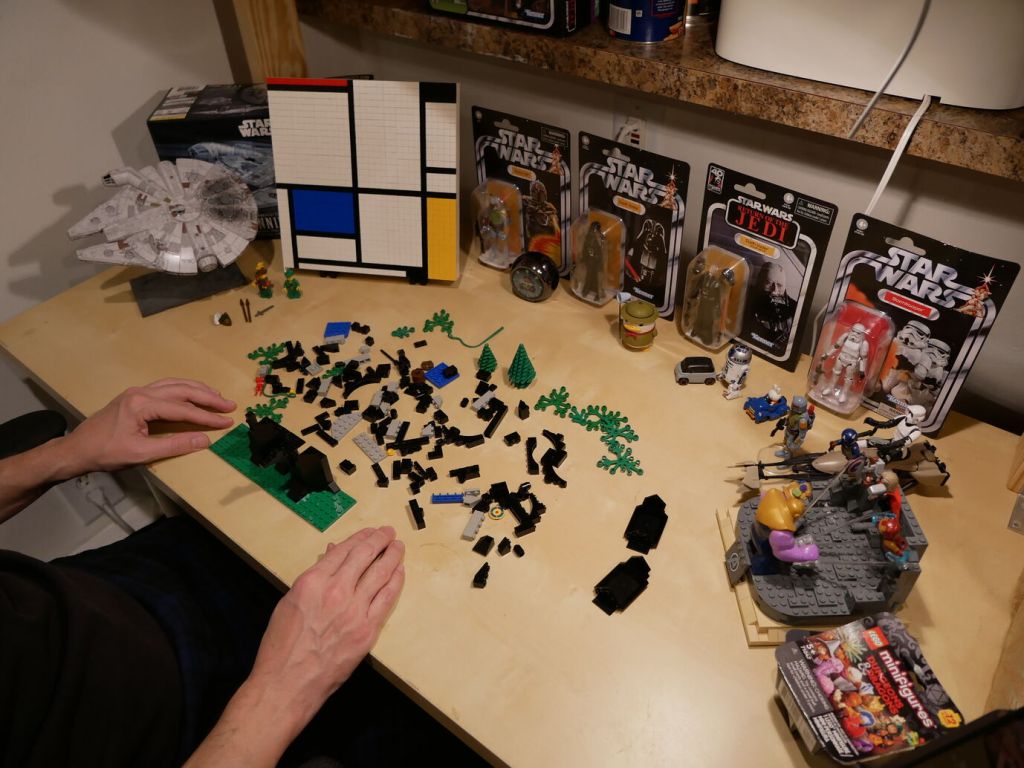
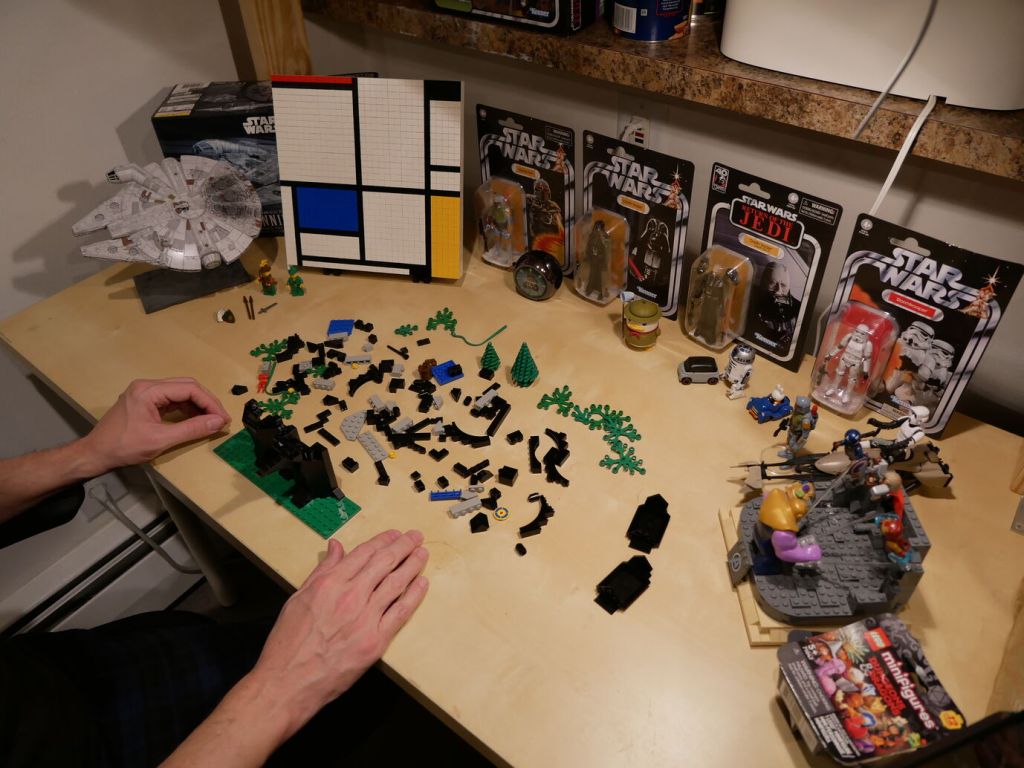
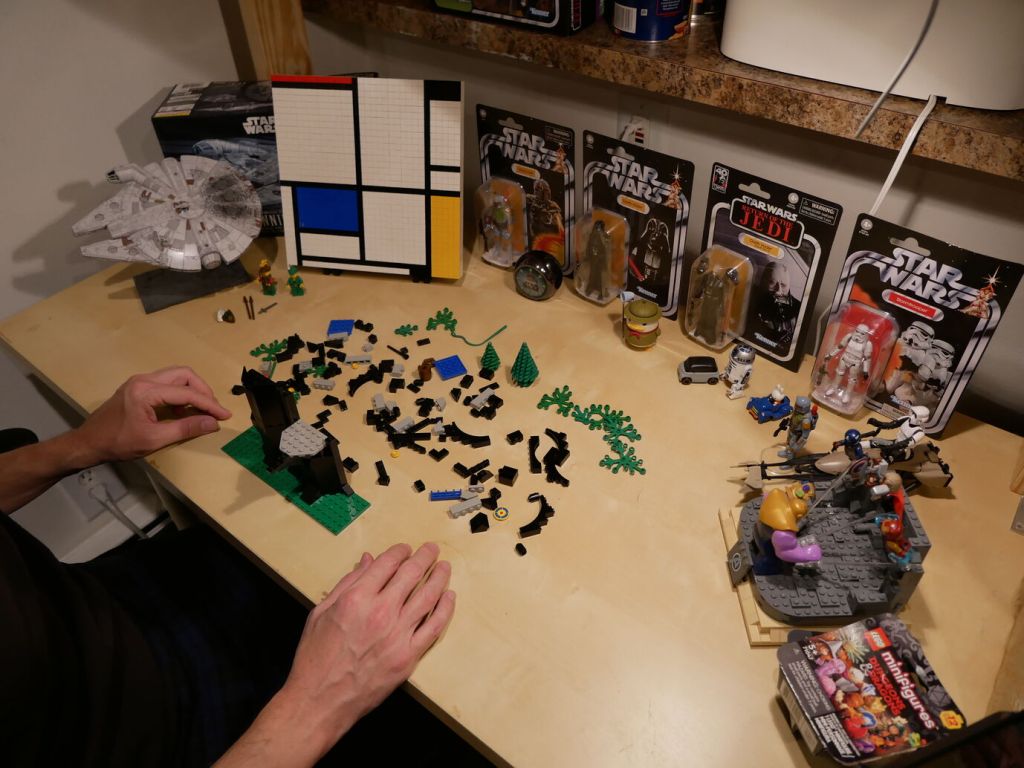
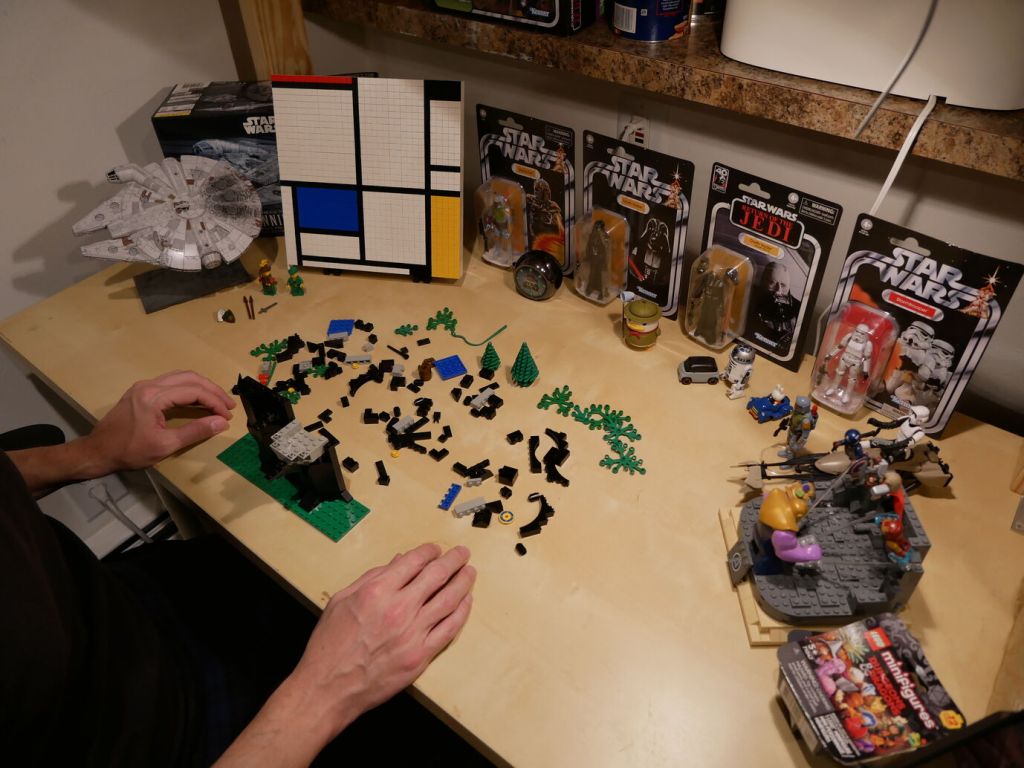
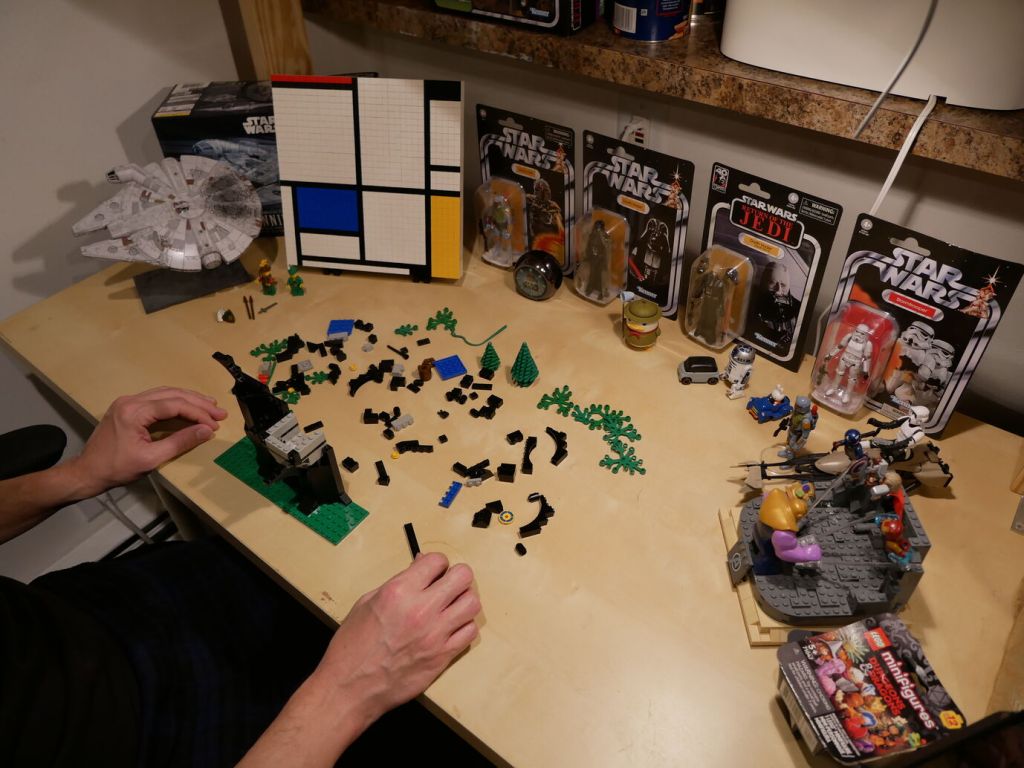
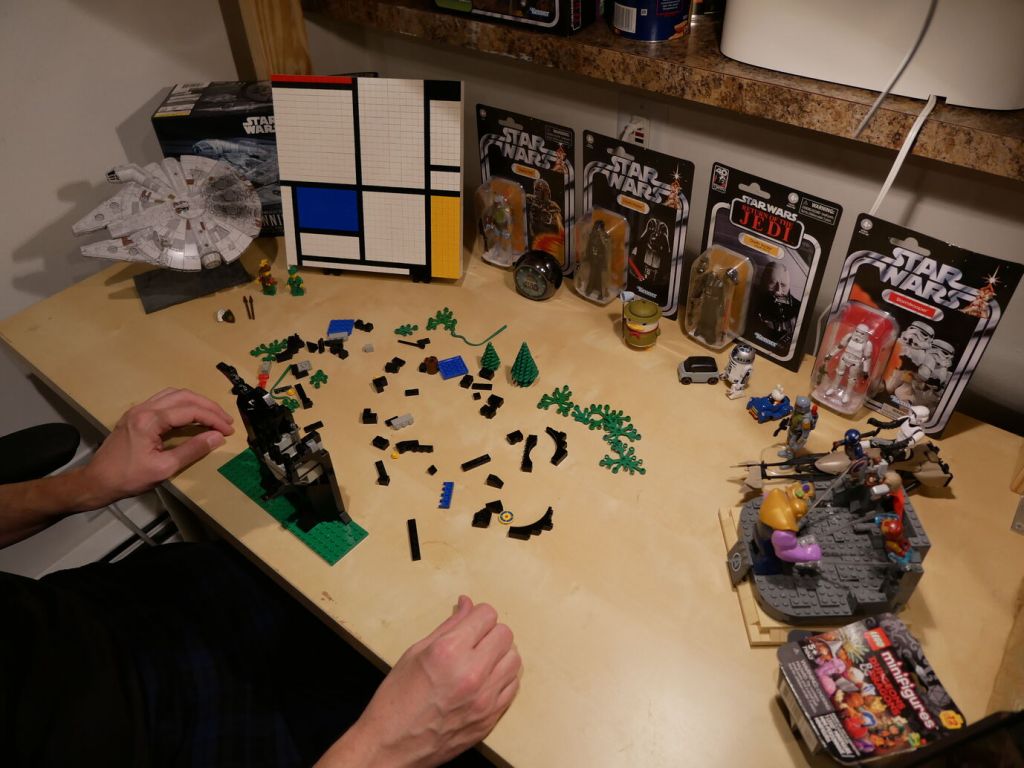
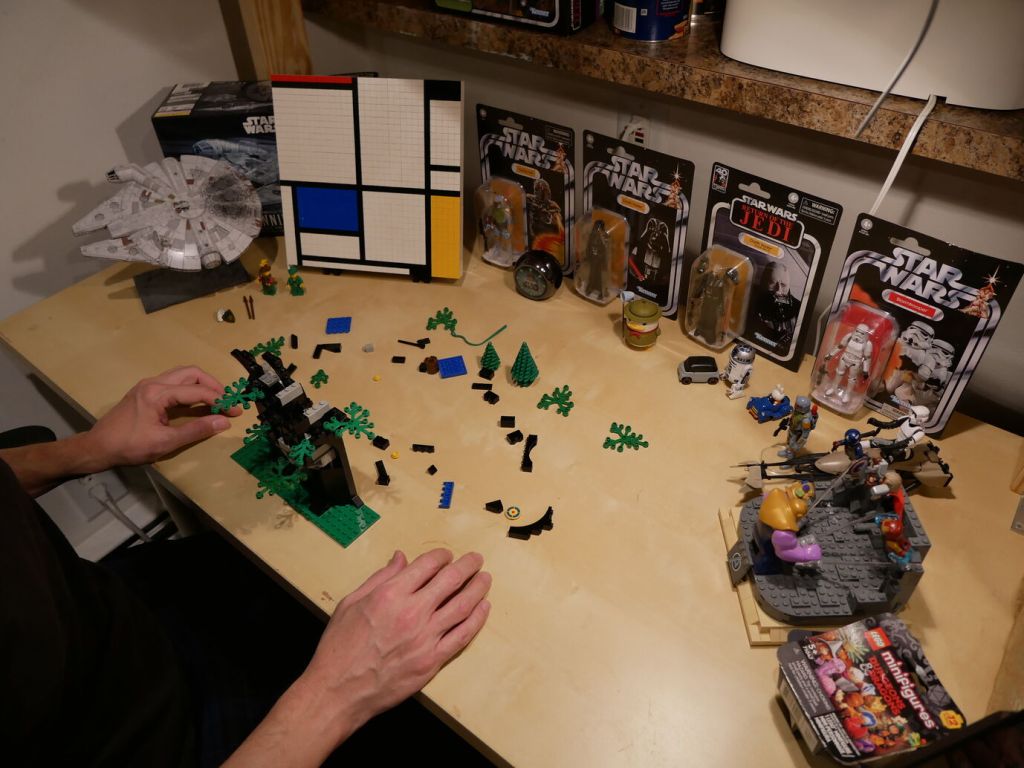
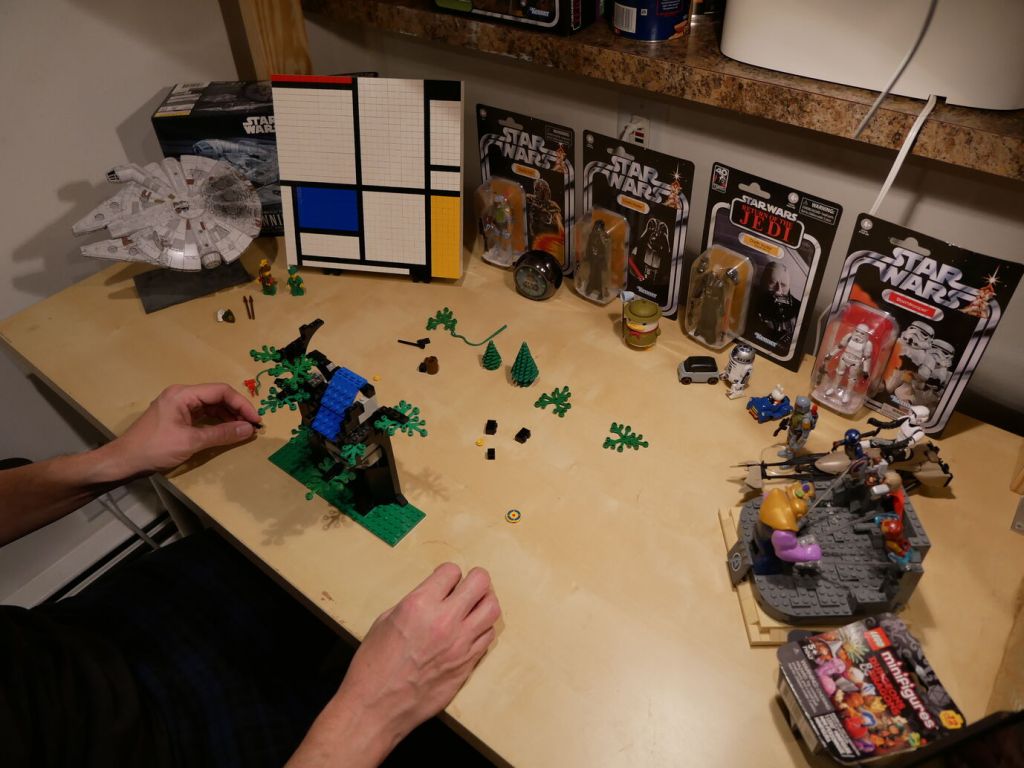
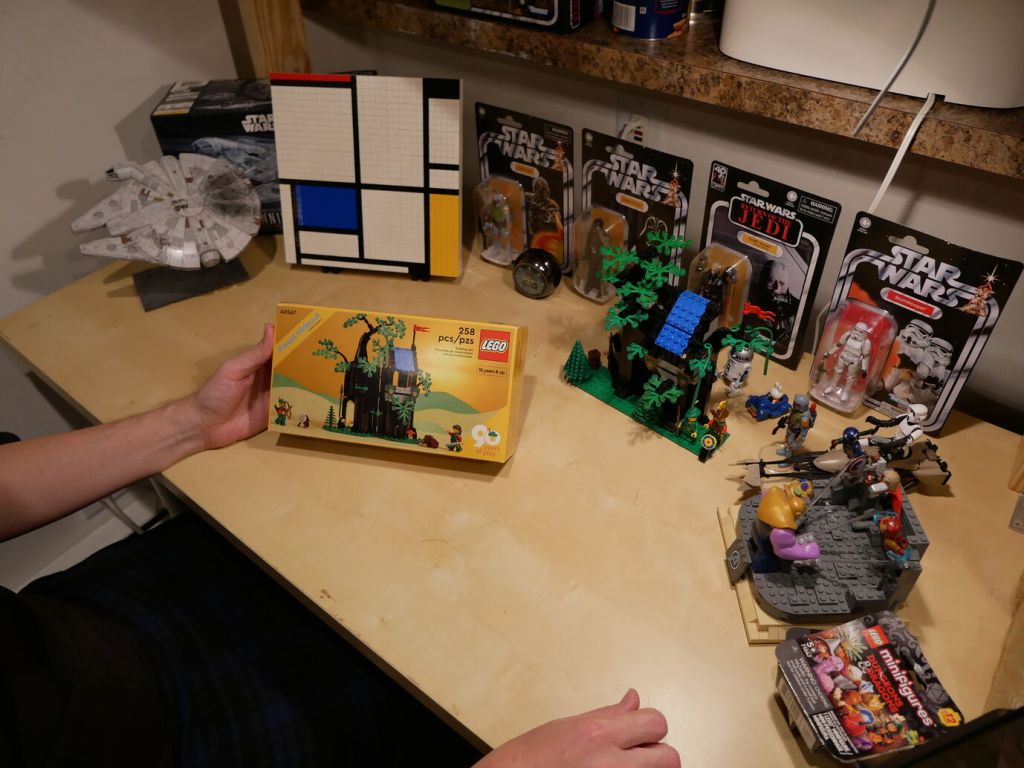
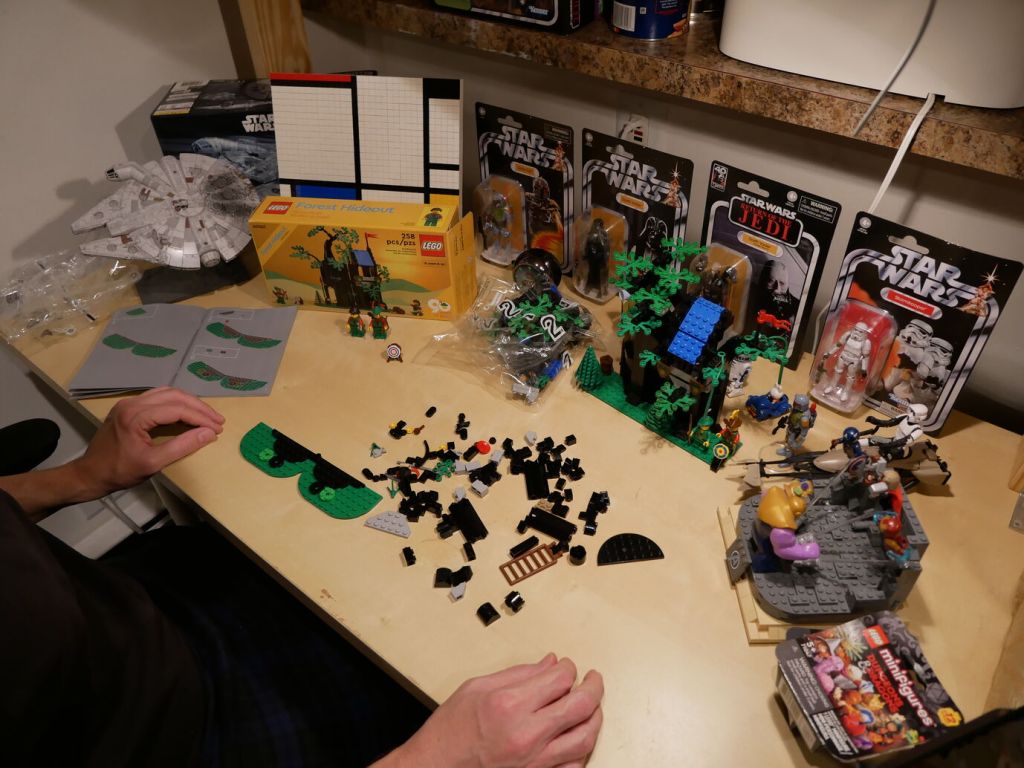
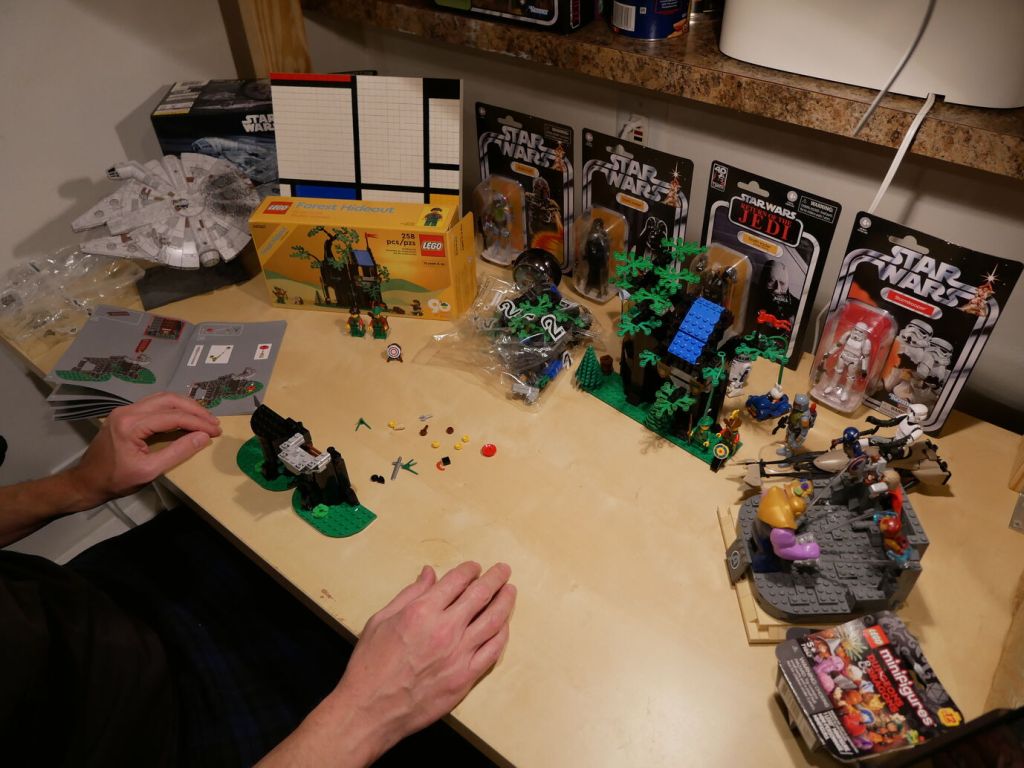
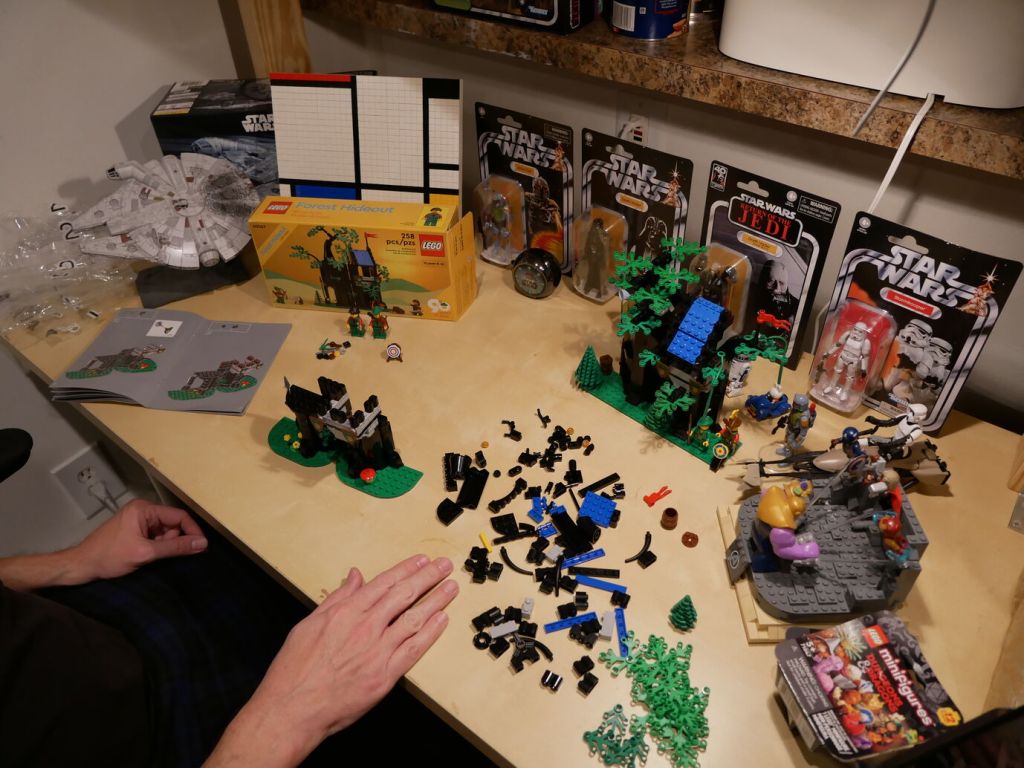
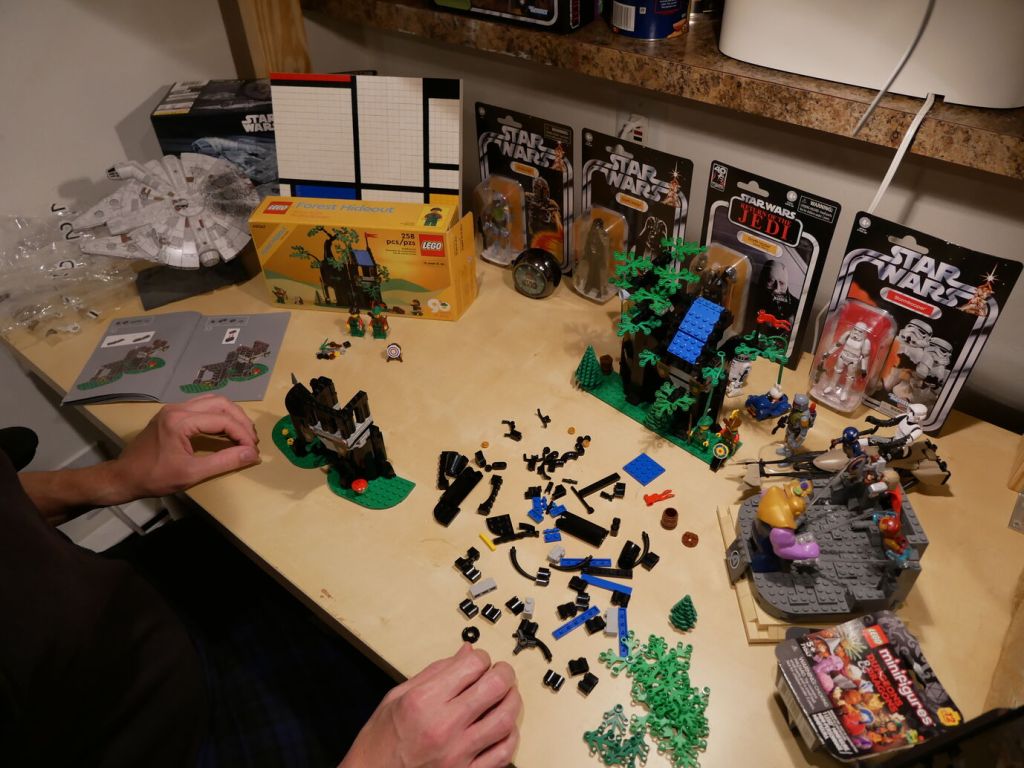
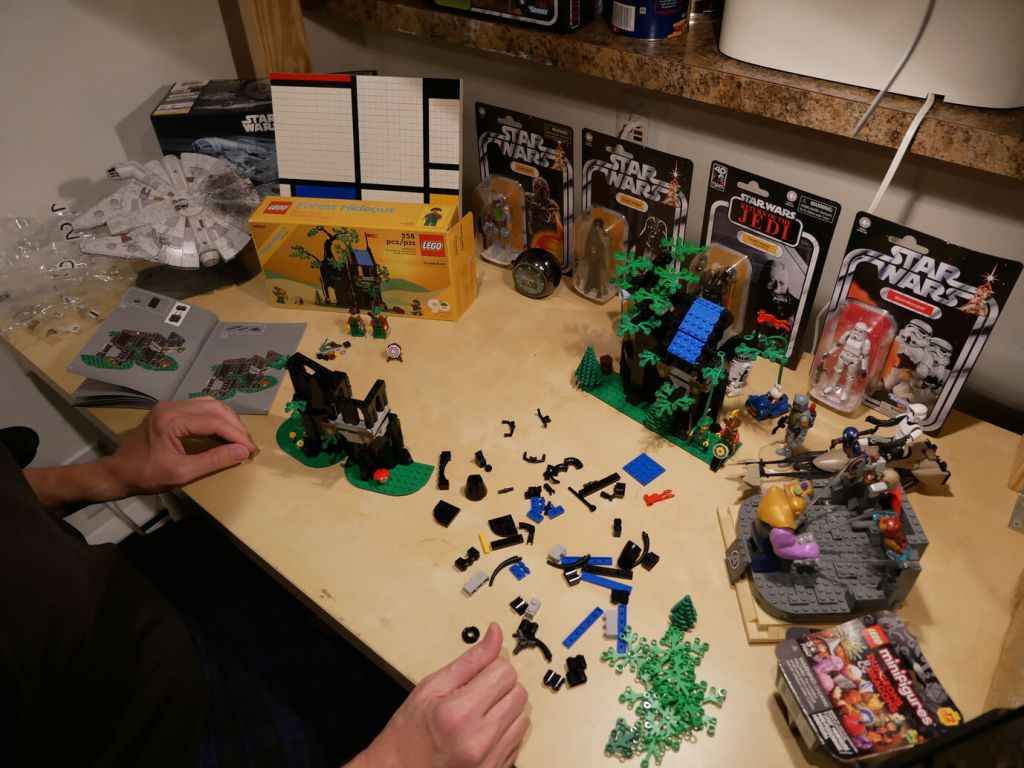
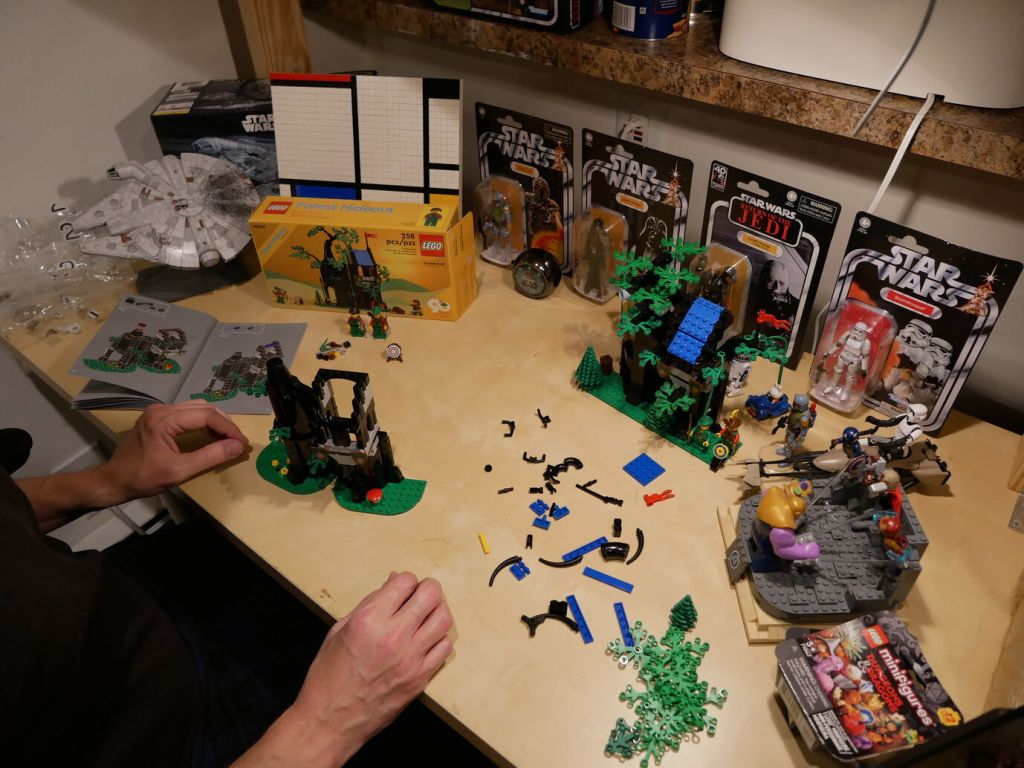
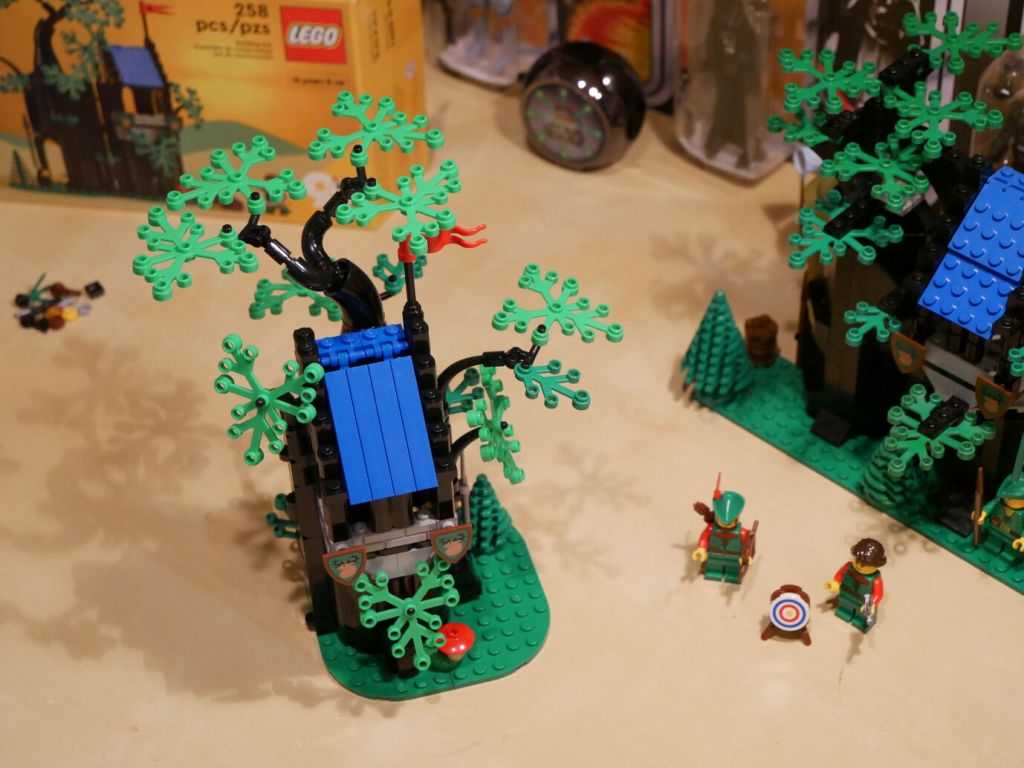
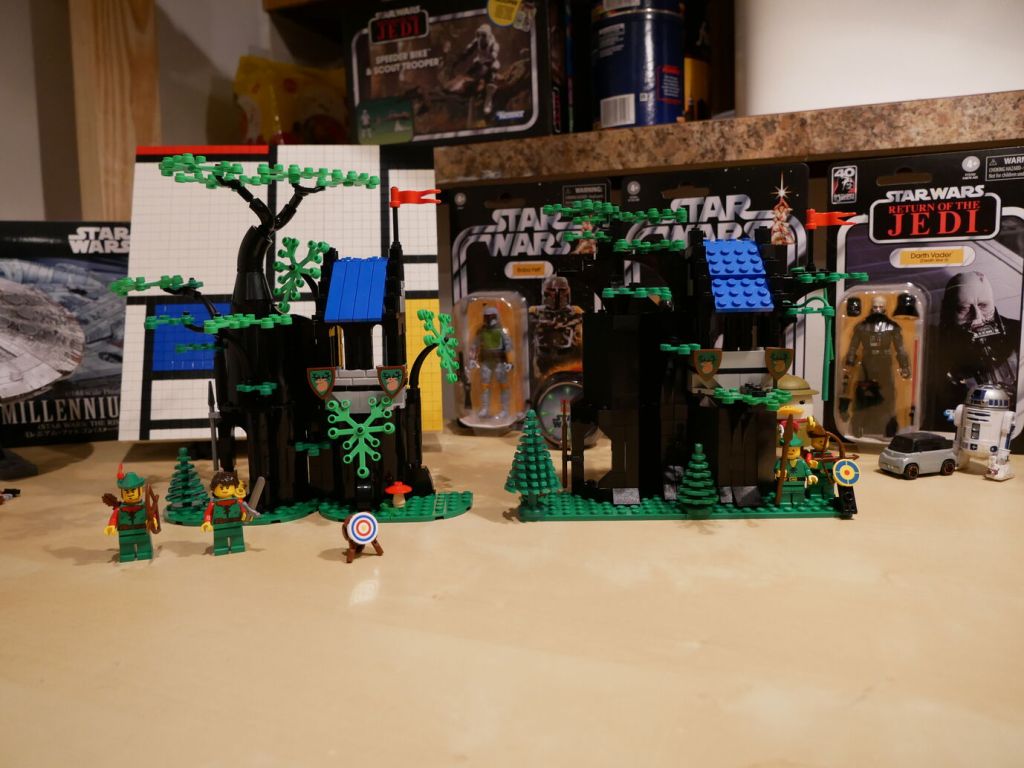
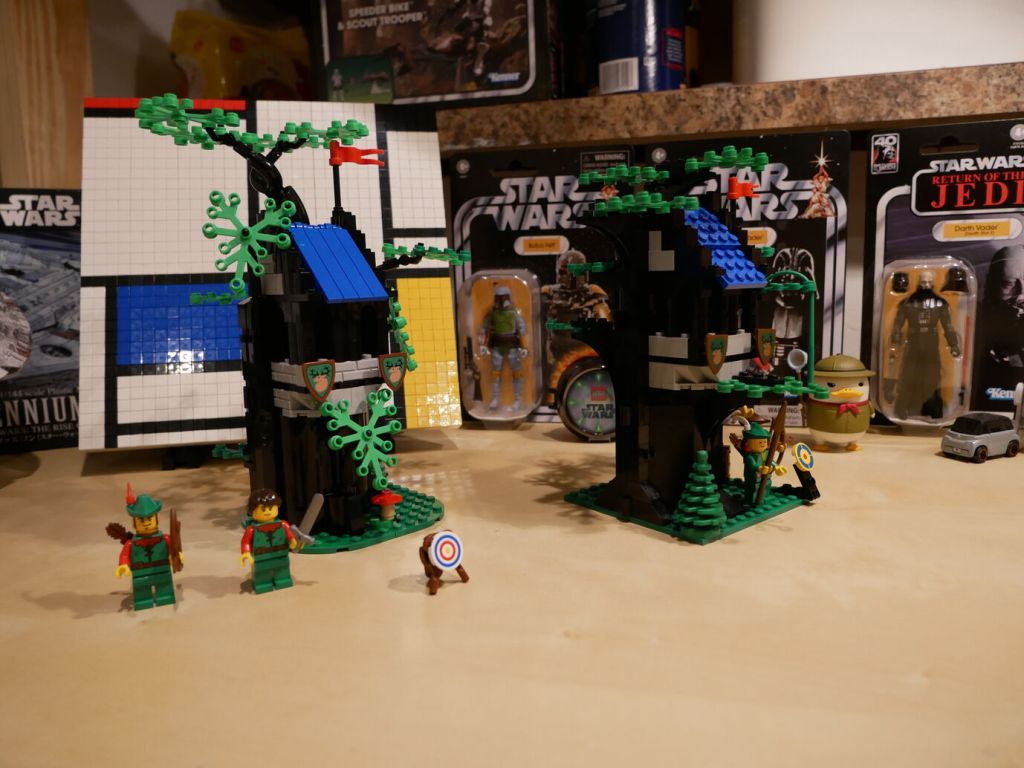
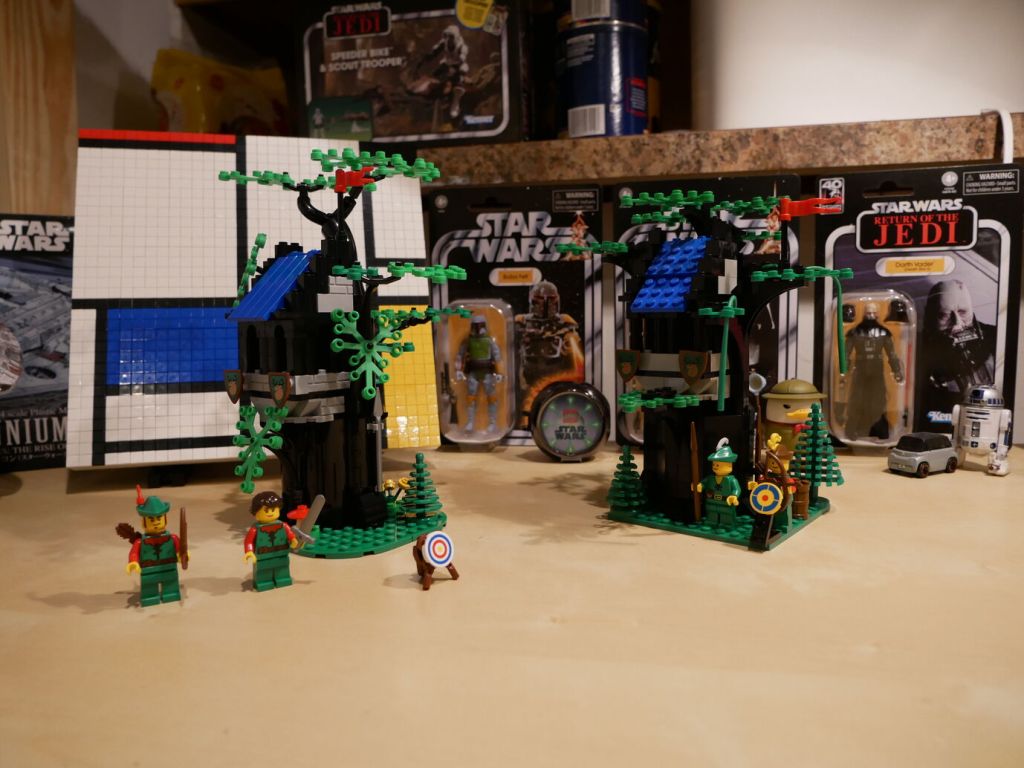
One of my favorite LEGO sets when I was younger was LEGO’s Forestmen’s Hideout (6054) from 1988. In 2022, LEGO released a Gift with Purchase (GWP) set that updates the 6054 set with modern bricks and design called Forest Hideout (40567). I’ve had Forest Hideout sitting on a shelf for the past two years. When Y asked me recently if I was ever going to put it together, it got me thinking about the original 6054 set. I began watching auctions on eBay for a good deal on a complete set (a boxed original was out of the question due to its much higher cost). Eventually, I found a complete set of 6054 for a reasonable price. After receiving it in the mail, I sat down to build both sets back-to-back and record it with my Panasonic Lumix DMC-G85 camera set to 2 second timer and controlled by the Panasonic Image App on my Pixel 6 phone (I’ll show how to set that up in a future post).
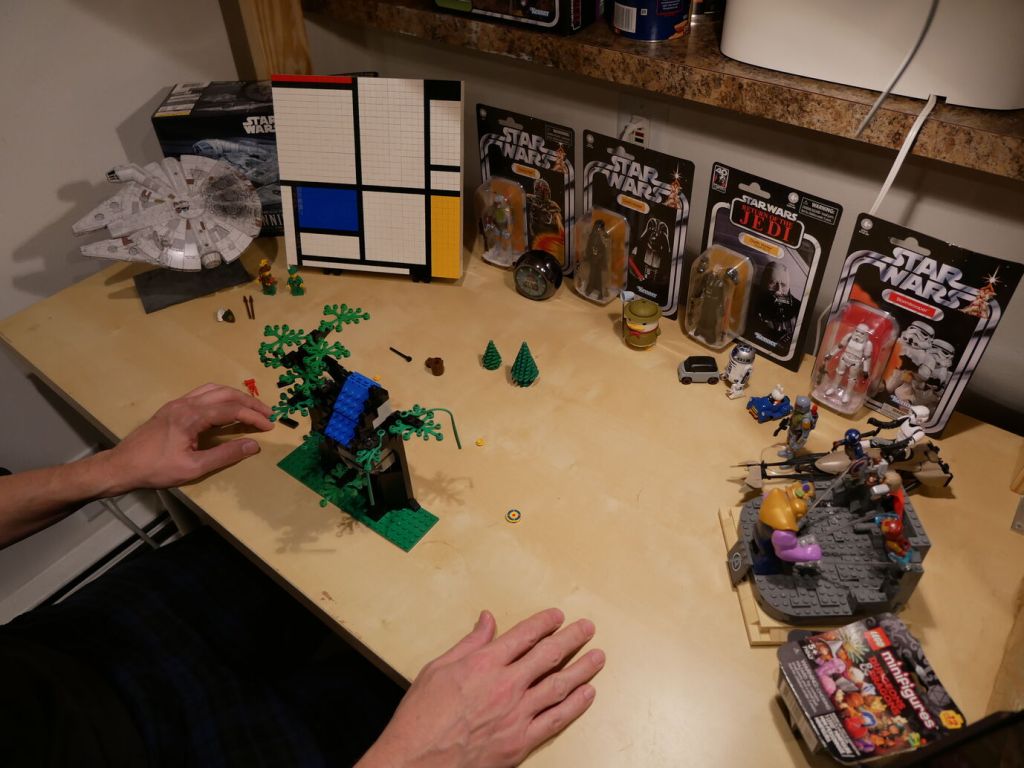
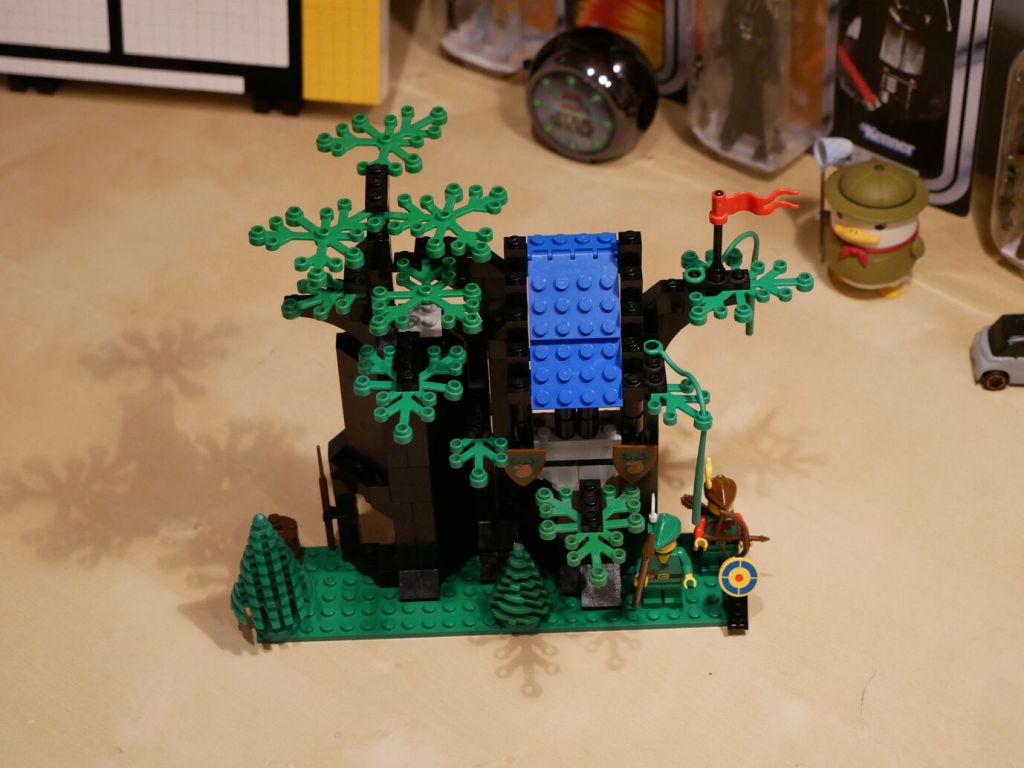
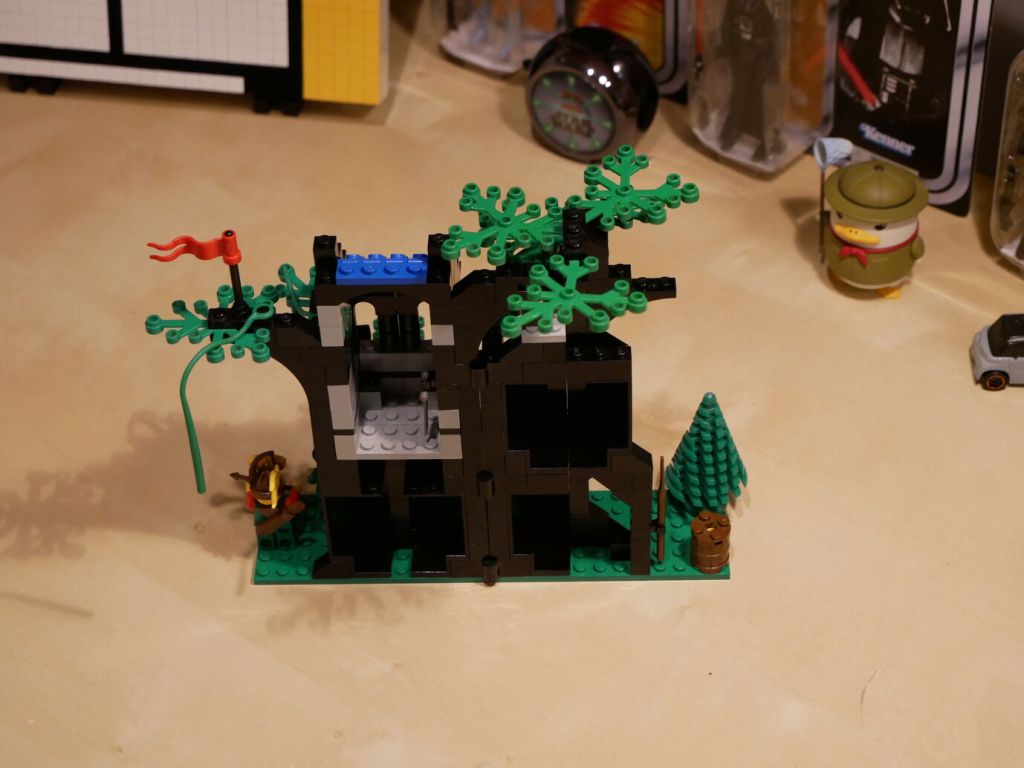
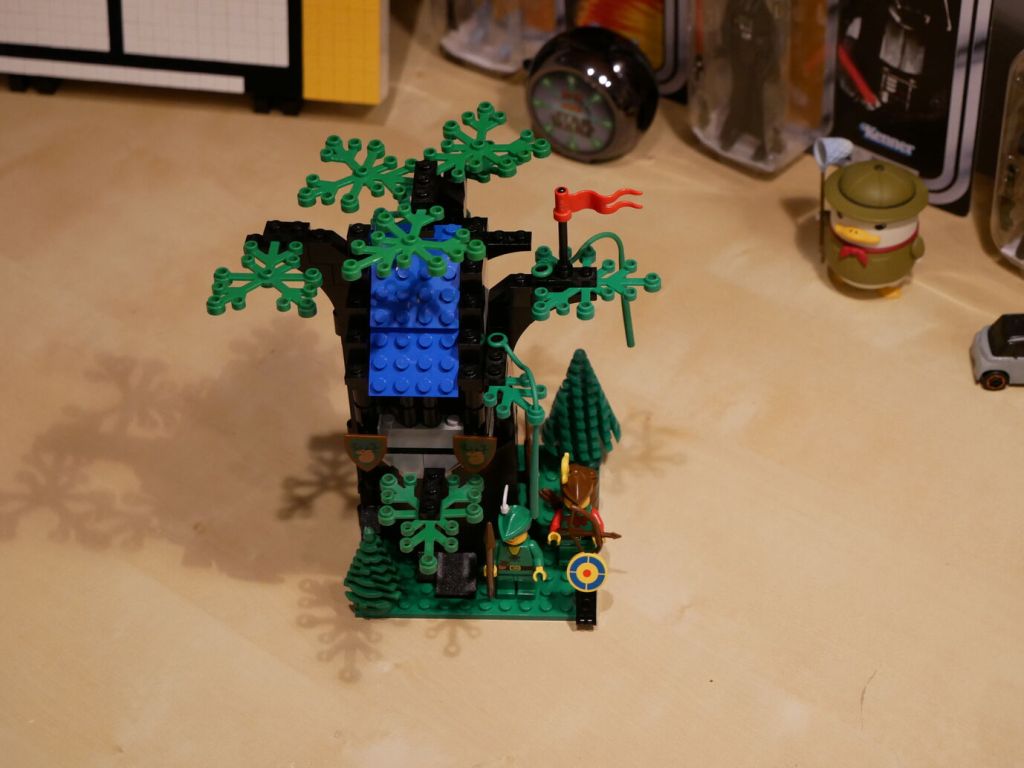
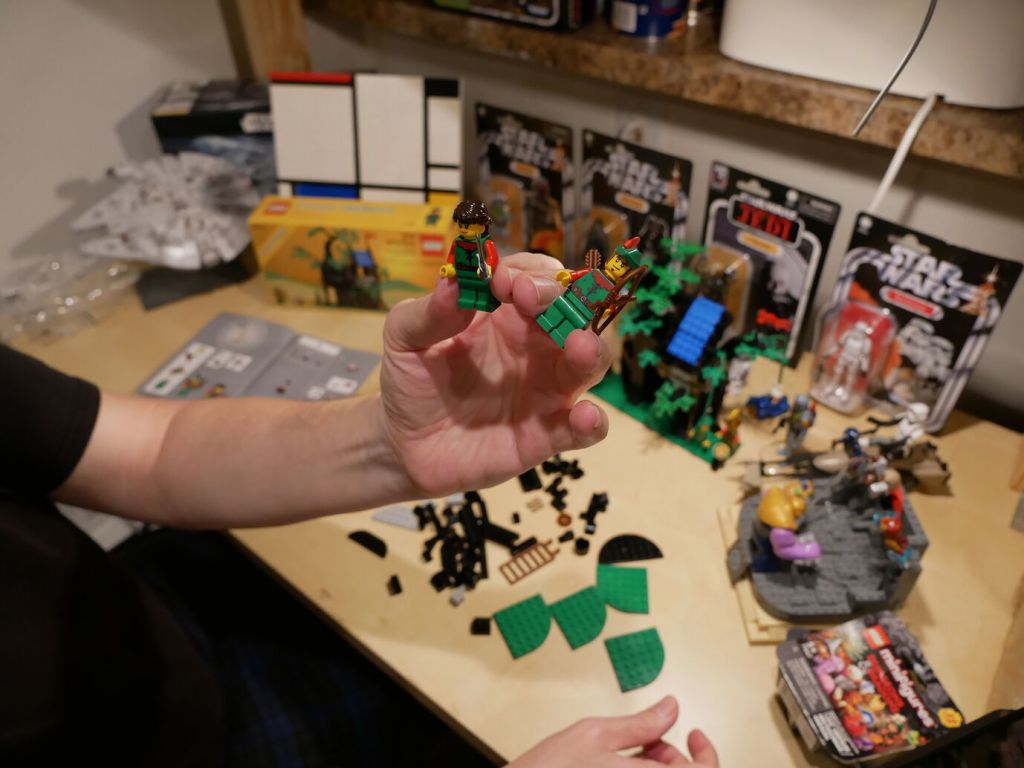
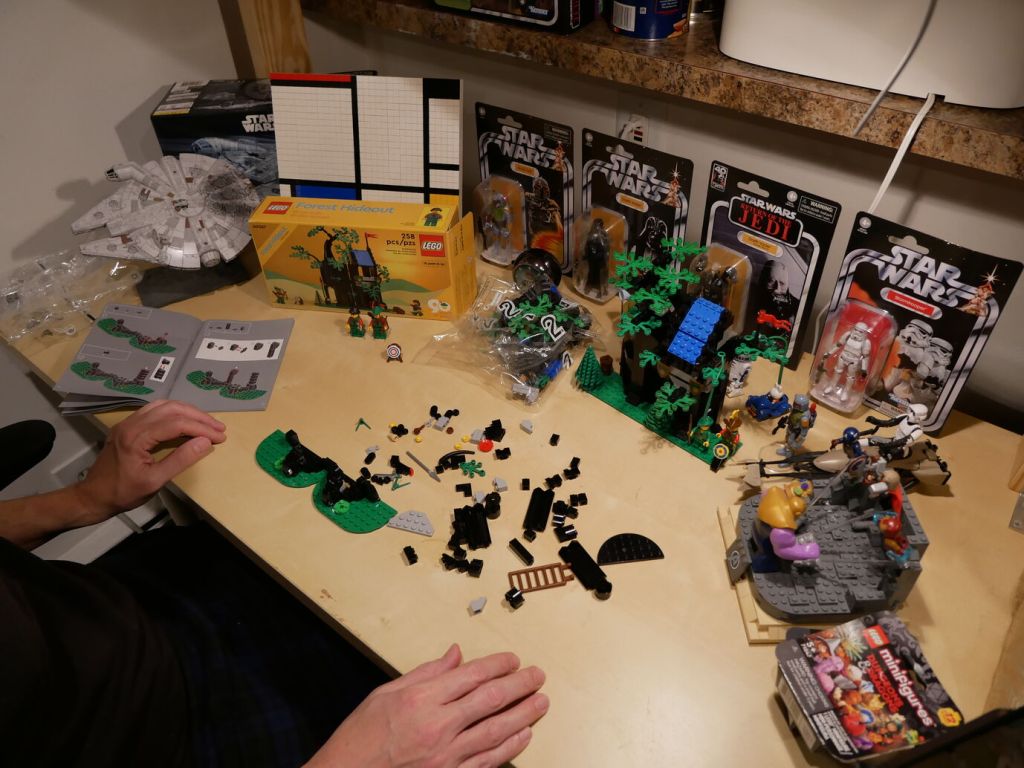
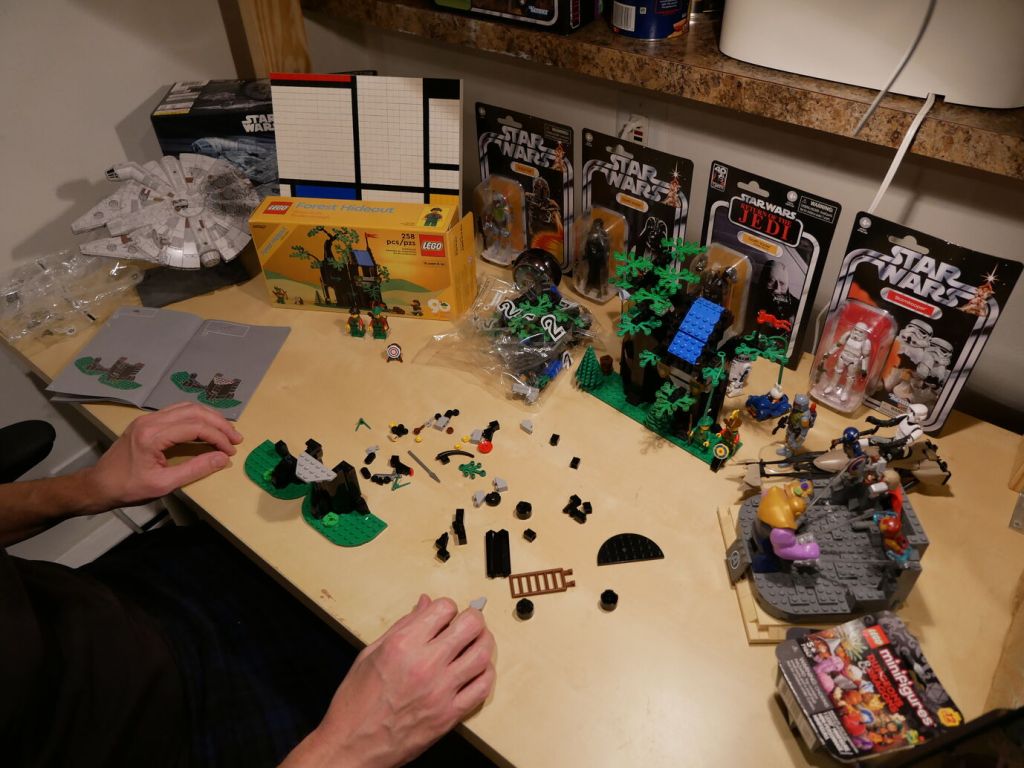
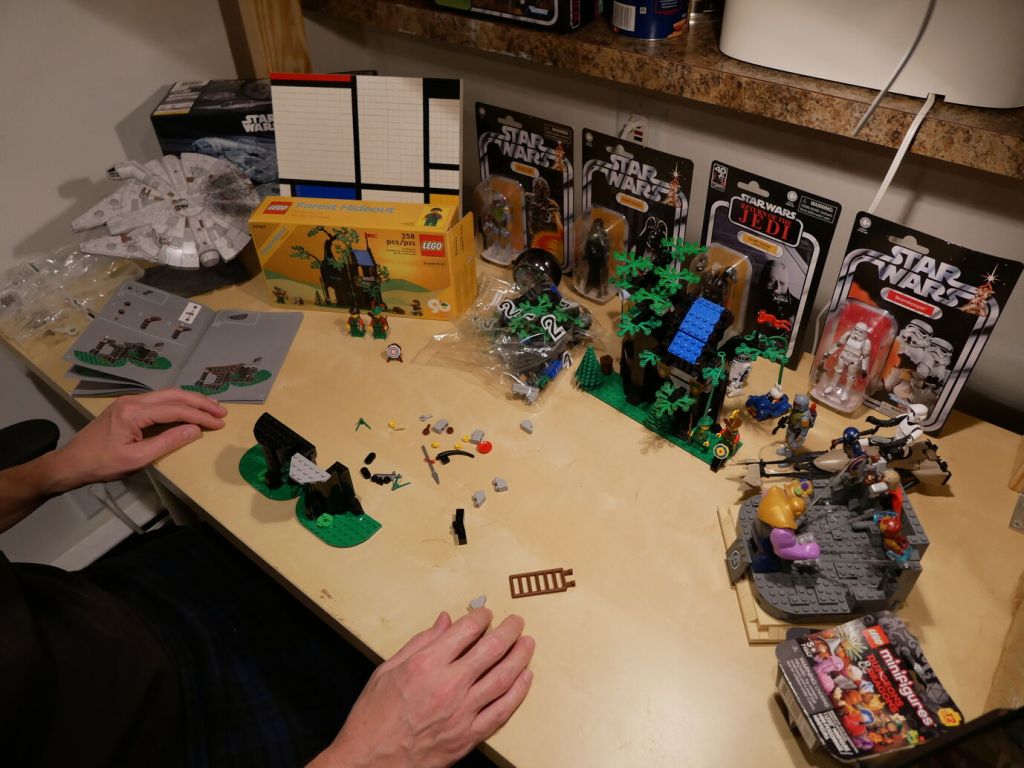
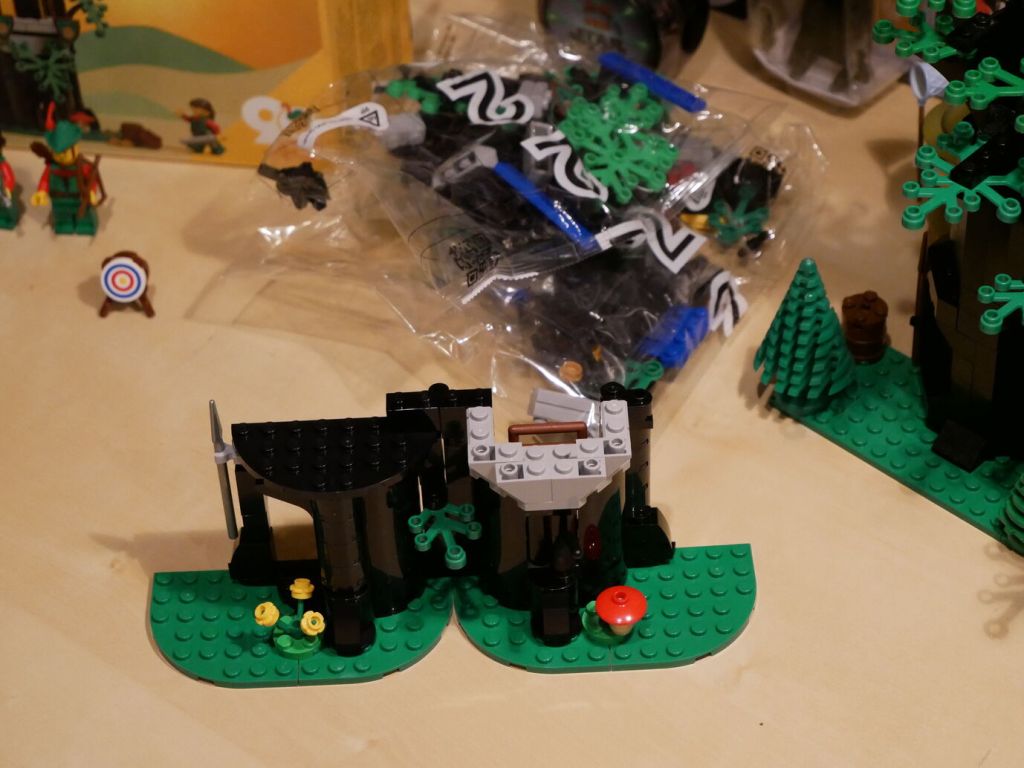
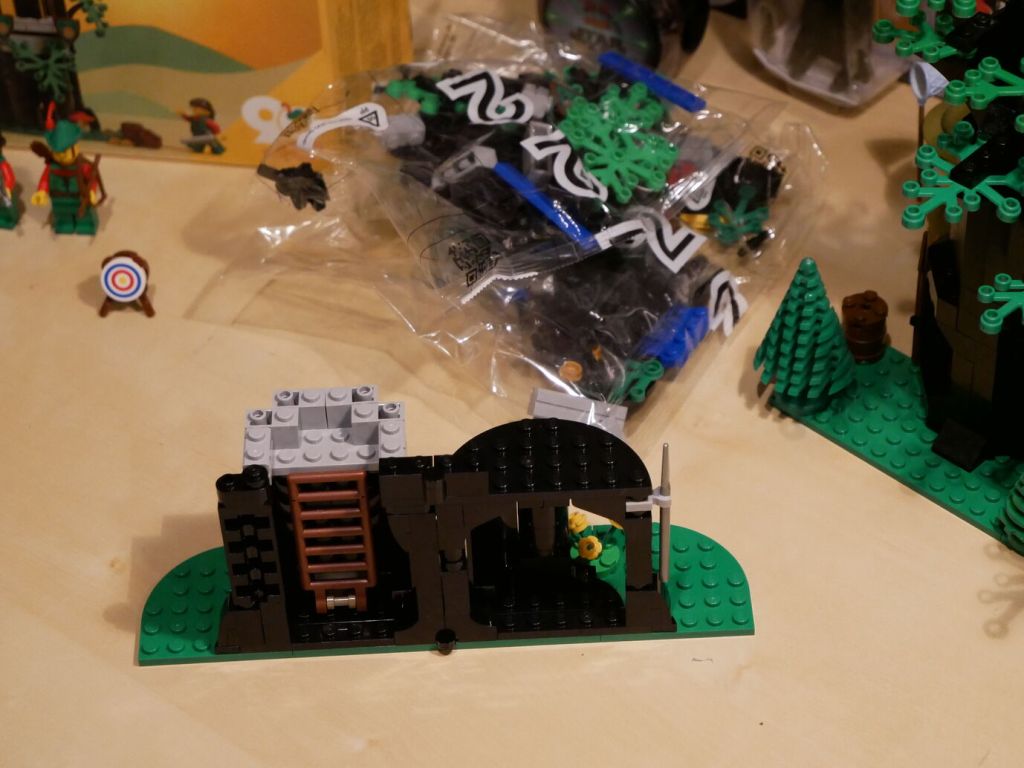
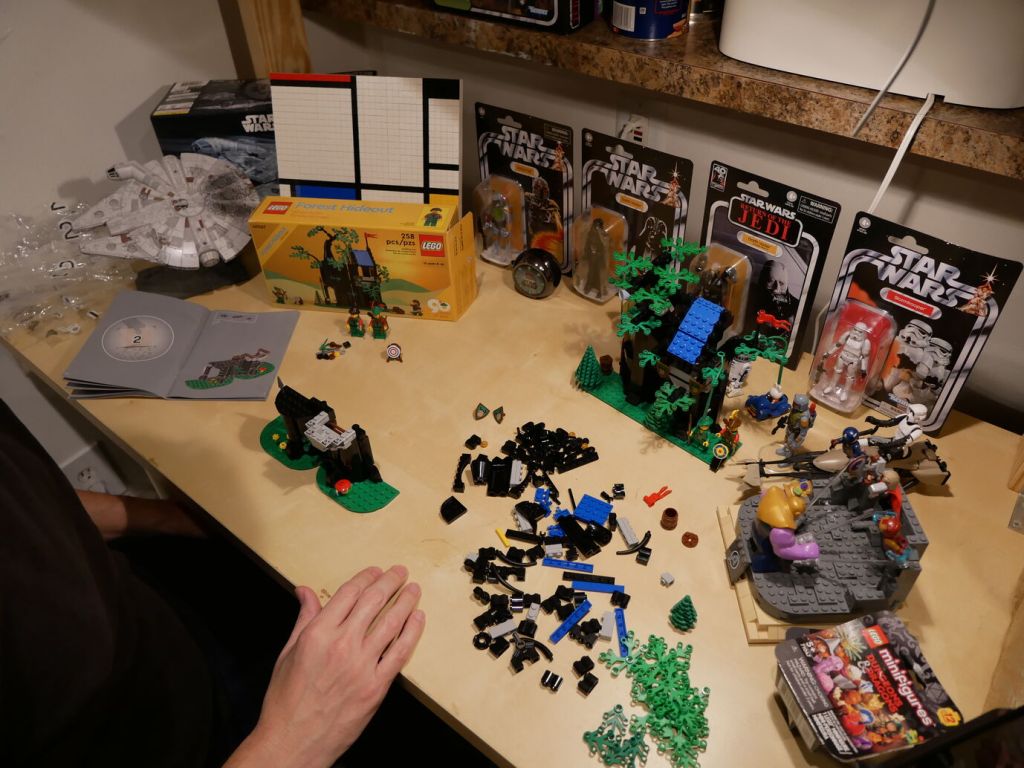
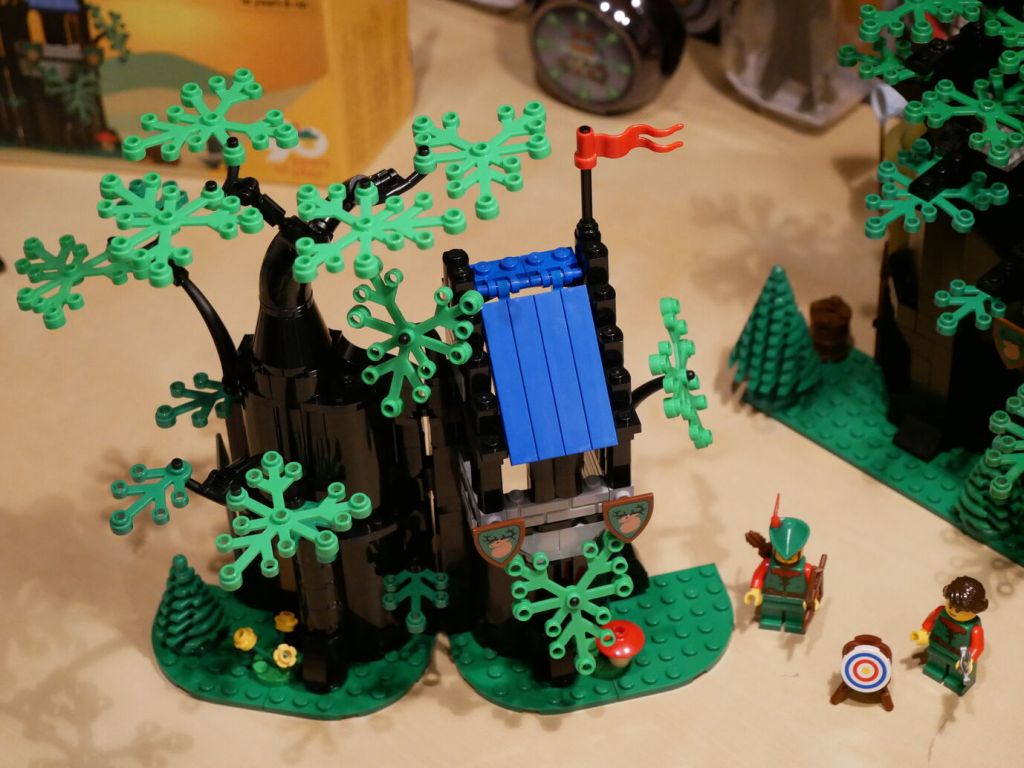
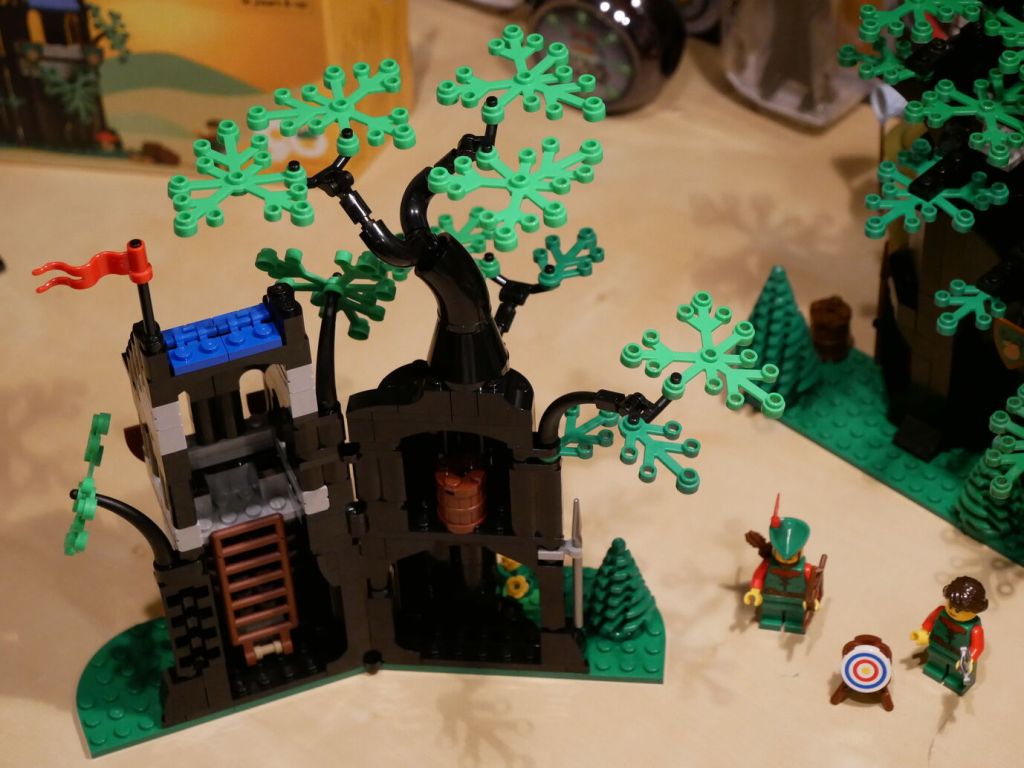
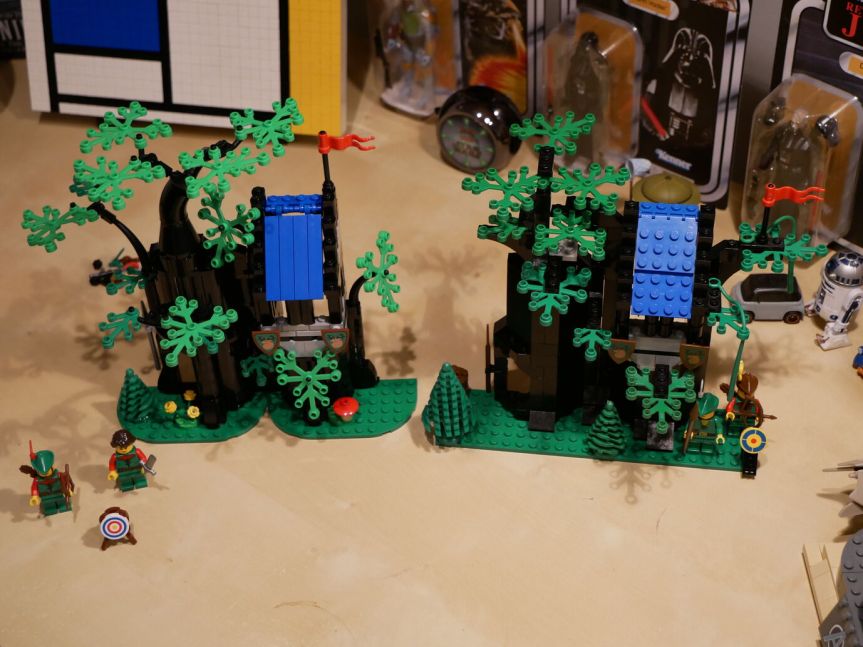
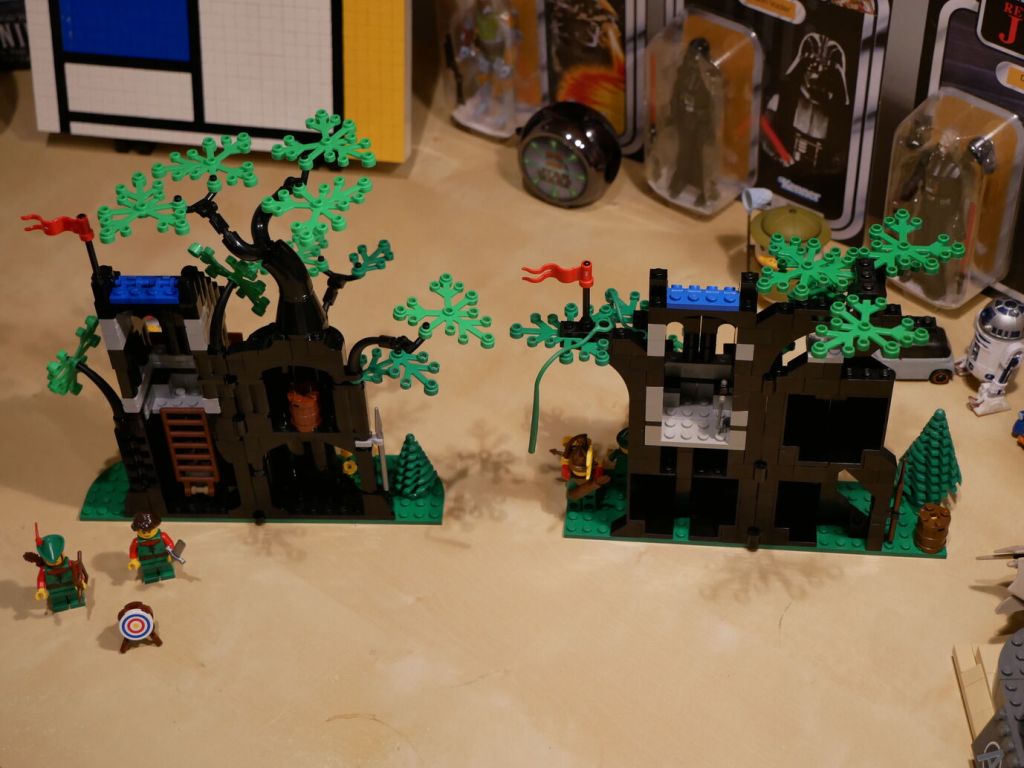
Forest Hideout (40567) has 258 pieces, which is 64 more than the 194 pieces in Forestmen’s Hideout (6054). While the tree branch and leave elements are the same, the tree’s main structure is constructed differently in the two sets. The original relied on Black Panel 3 x 3 x 6 Corner Wall pieces for most of the tree’s main trunk structure. These larger elements reduced the part count of the original. The updated version used a combination of Black Cylinder Half 1 x 2 x 1 and Black Cylinder Quarter 2 x 2 x 5 with 1 x 1 Cutout to create the tree trunk. While there are no vines for swinging in the new version as in the first, the update includes an internal ladder for minifigures to climb to into hideout. 6054 includes two smiling minifigures with hats while 40567 includes a male with hat and female with long hair minifigures.
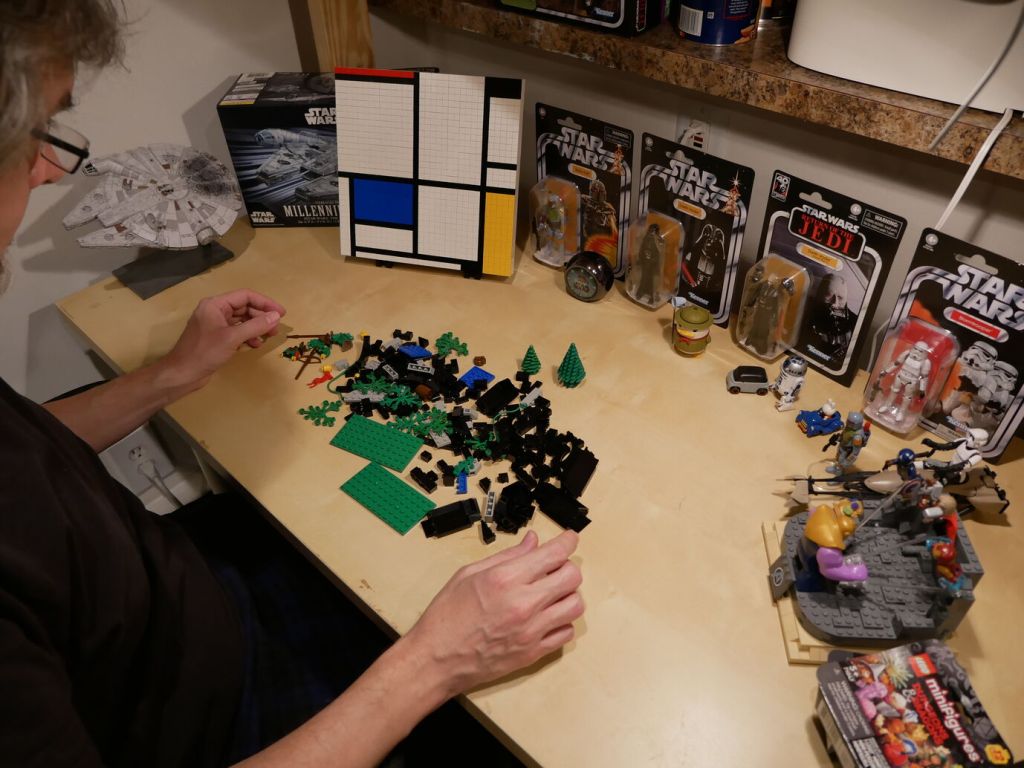
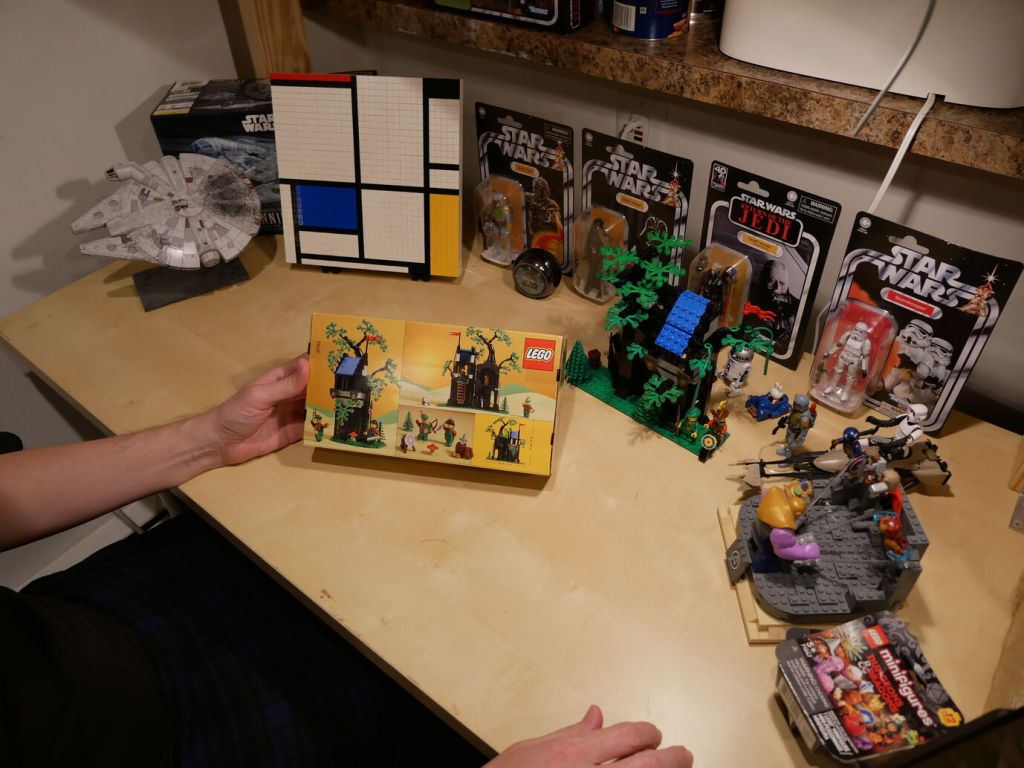
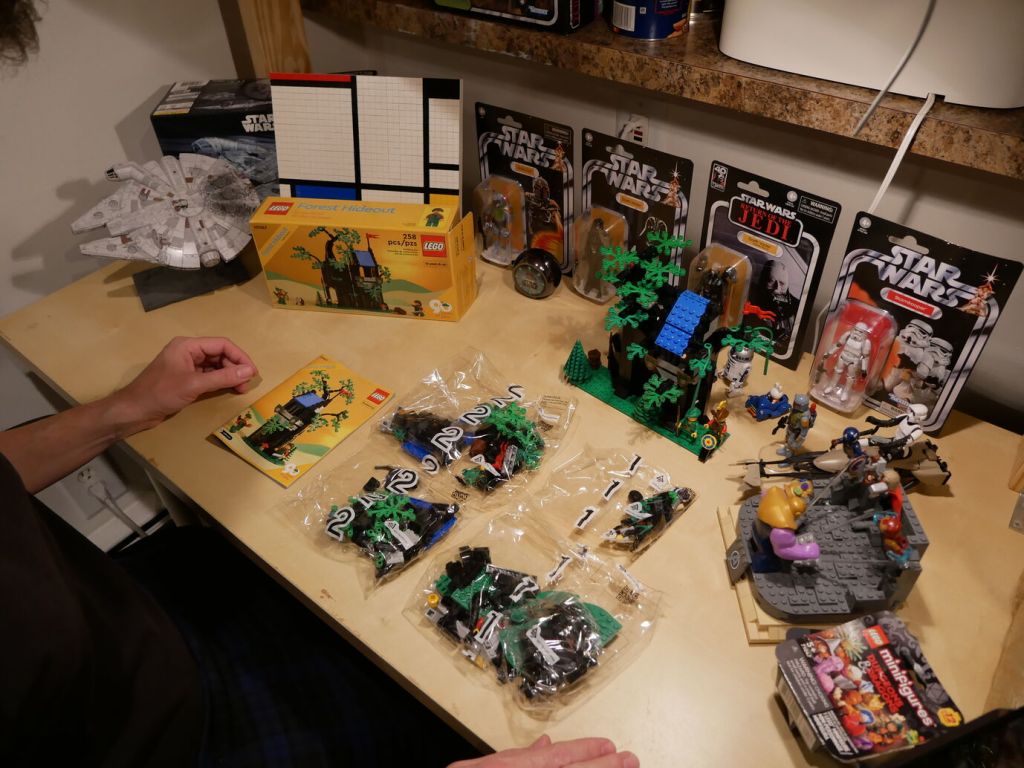
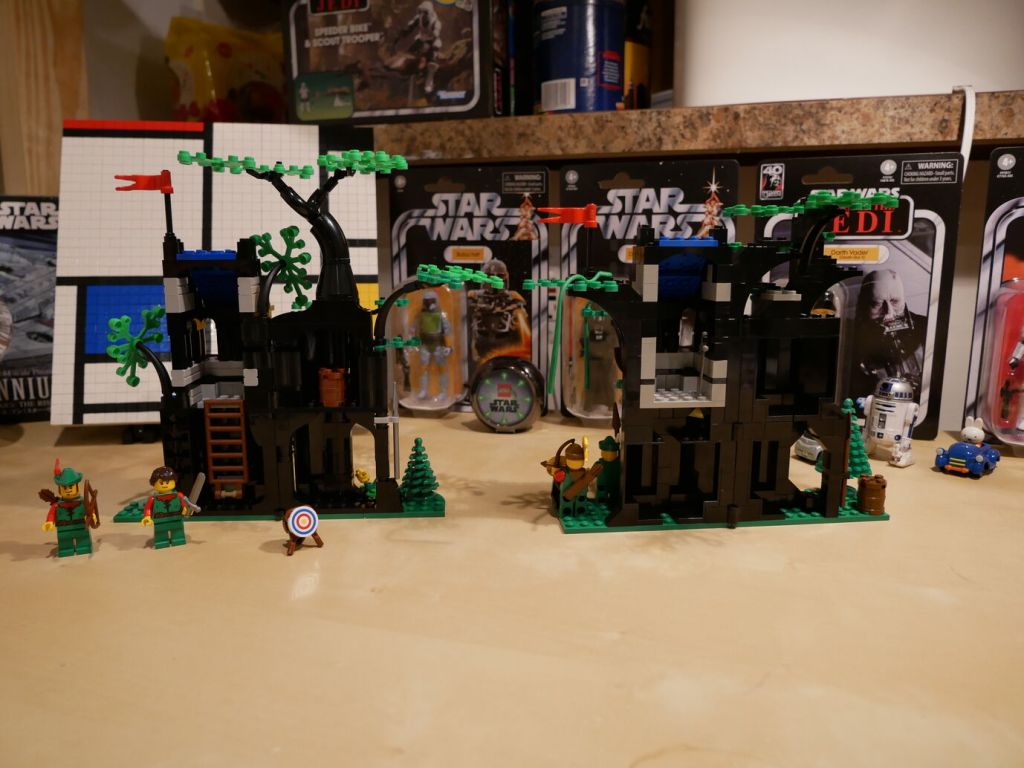
Below, I show an over-the-shoulder view of the building process for each set and then side-by-side comparisons of the completed build of both sets. I used a scanned copy of the 6054 instructions to assemble it, which was displayed on my computer screen out of the frame on the right. Since I hadn’t opened 40567 until this build, it included the original set of instructions, which is seen in the photos.