As I wrote about here, I swapped my homebuilt Intel i7-7700 computer for a Lenovo IdeaCentre 5 with an AMD Ryzen 7 4700G and upgraded the new system’s cooling solution to a Silverstone AR11 heatsink and fan.
For the most part, I have been happy with the AR11’s cooling performance in most of my workflow. However, there were occasional temperature spikes as high as 80C, especially when running software that utilizes all eight cores. And, when higher temperatures were reached after a sustained workload, it took some time before a lower idle temperature in the 30-40C range was reached.
I hypothesized that the AR11 could perform better if it had more airflow (the AR11 comes with a Silverstone-branded 92mm x 92mm x 15mm fan that has straight blades and is nearly silent) and if it had better thermal conductivity (I had used the included disposable packet of thermal grease) between the CPU lid and the AR11’s four heat pipes.
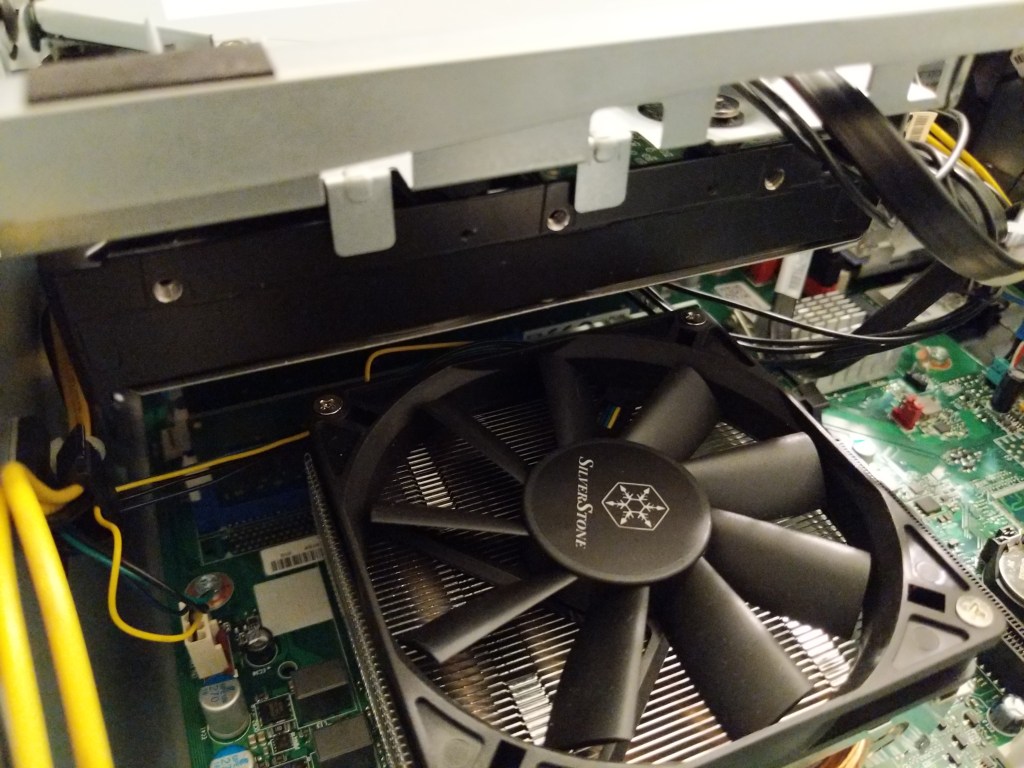
However, I had some limitations to consider. As you can see below, there is only about 15mm of space between the stock AR11 fan and my 3.5″ Western Digital hard disk.
This amount of space would permit me to replace the 15mm tall Silverstone fan with a larger 25mm tall fan. I chose the Noctua NF-A9 PWM after reading so many people sing their praises for Noctua’s products and considering how this fan’s maximum airflow of 78.9 m³/h and static pressure of 2.28 mm H₂O, which make it a good fan for moving air over a heatsink.
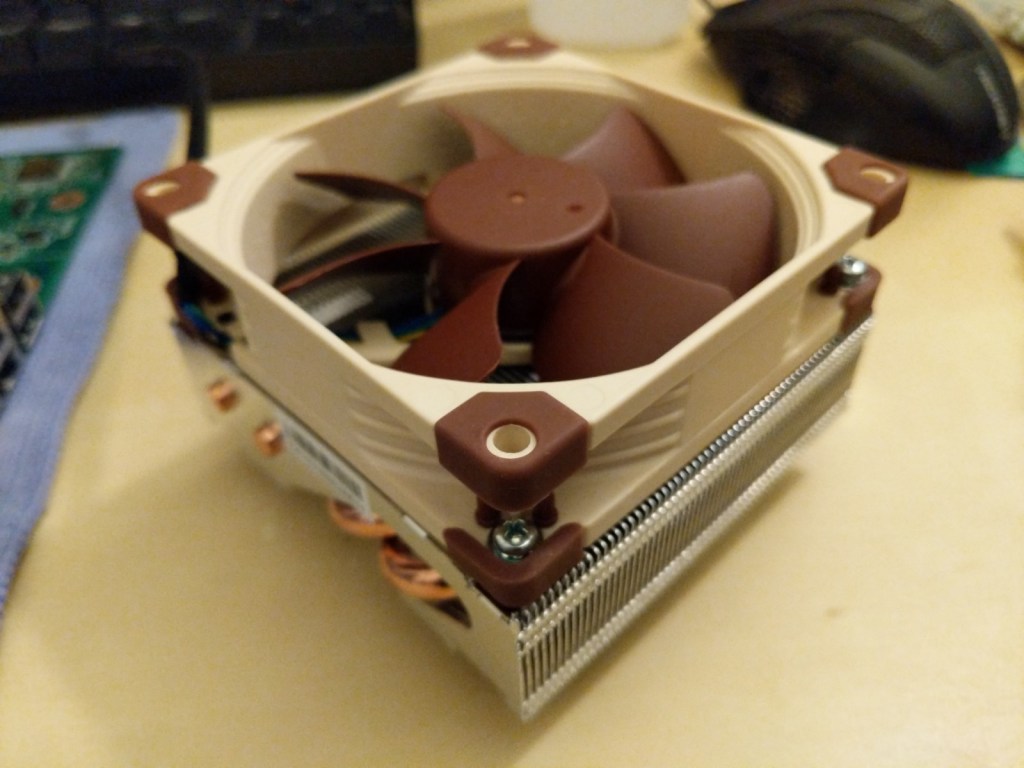
After removing the four screws holding the Silverstone fan to the top of the AR11 heatsink, I attached the Noctua NF-A9 with four fine-thread 3/8″ screws that I had on-hand. I attached the fan so that it would push air down and through the fins of the heatsink.
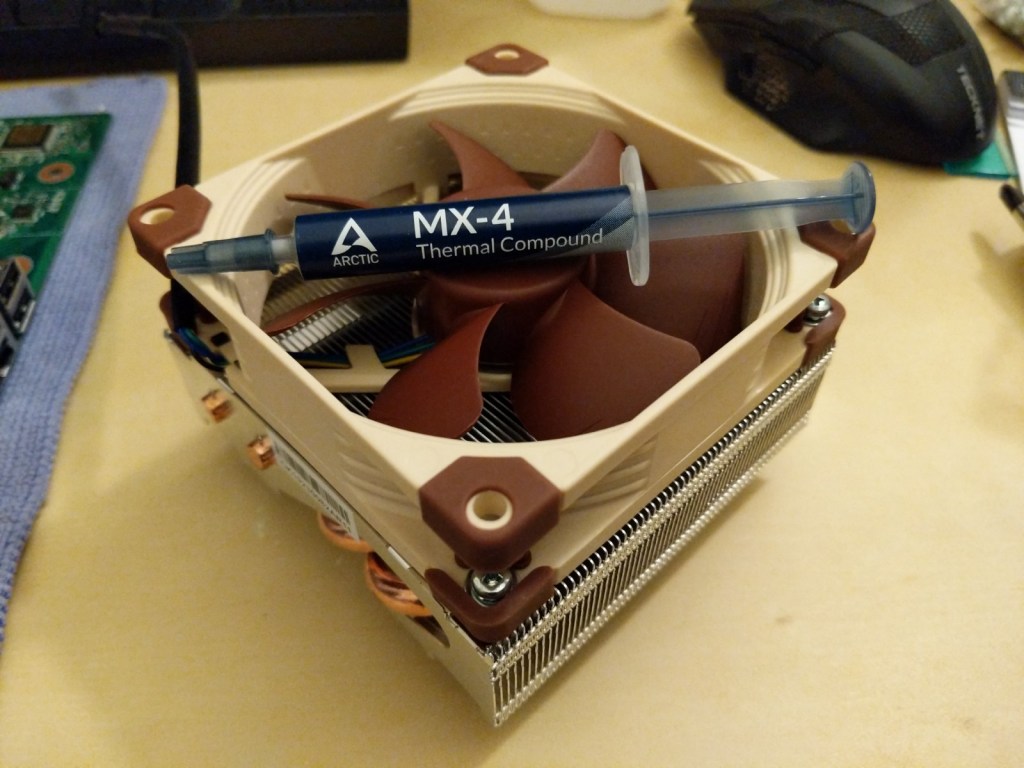
When I had first removed the stock AR11, I had to clean the Silverstone thermal compound off. First, I wiped off the excess with a paper towel, and then, I used cotton swabs dipped in isopropyl alcohol to clean off any residue. I continued cleaning until the swabs remained clean and the metal surfaces of the Ryzen 7 lid and AR11 heatpipes were immaculately clean. With these contact surfaces clean, I applied a very small pea sized amount of Arctic MX-4 thermal compound, which I had read performed very well and was on sale at the time, to the top of the Ryzen 7 lid. I painted the top of the lid with the thermal compound using an old credit card so that there was a very, very thin layer of compound across the top. Finally, I placed the AR11 on top of the Ryzen 7 CPU and affixed the nuts under the motherboard to pull the two together. As you can see in the image above, there is no excess thermal compound extruding out and absolutely no space left between the cooler and the CPU.
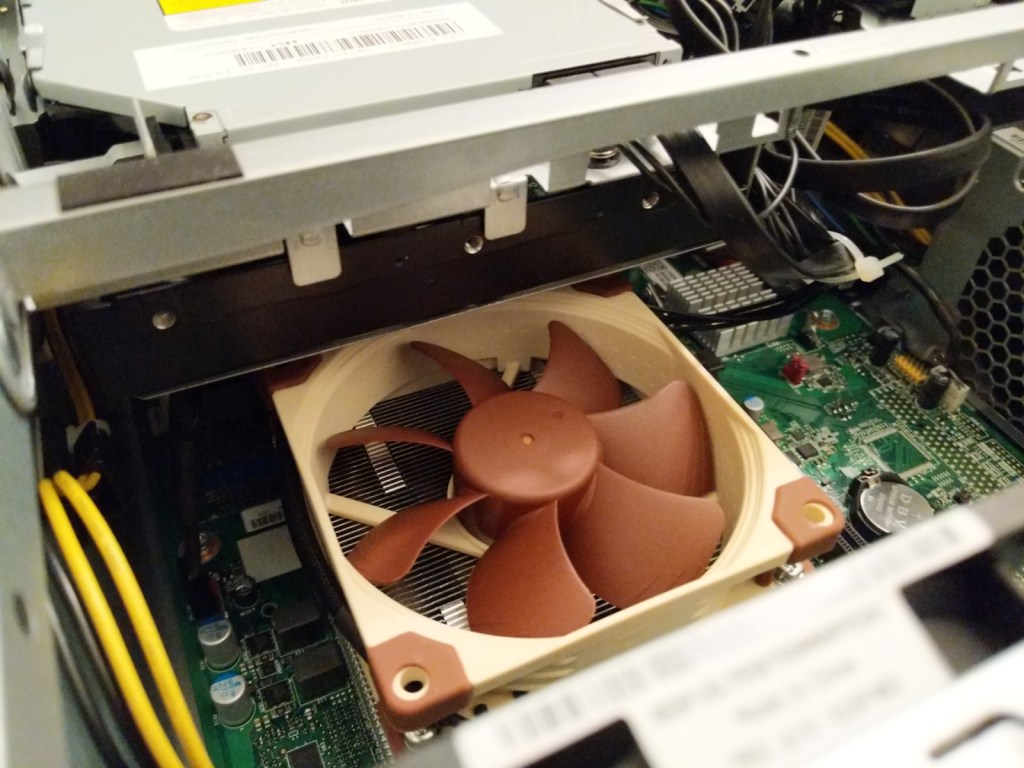
After reassembling the Ideacentre, there is about 5mm of space between the Noctua fan on the AR11 and the 3.5″ hard drive (see image above).
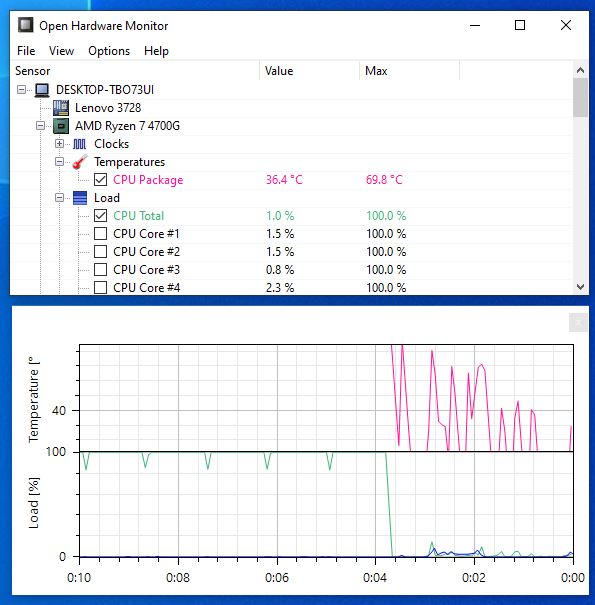
After rebooting, I ran Cinebench r23‘s multicore benchmark to max out the CPU. Before replacing the fan and thermal compound, Open Hardware Monitor reported a max temperature of 80C and the Cinebench score was 11,352. After replacing the fan and thermal compound, the max temperature was 69.8C and the Cinebench score was 11,446!
Needless to say, I am happy about the results of this inexpensive upgrade to my computer’s cooling system.
There are three caveats that I should mention in closing.
First, Lenovo’s BIOS has only two fan control settings for its PWM fan headers on the motherboard. These are “Performance,” which I have been using since I first got it–on the stock cooler and the AR11, and “Experience,” which should adjust system fan speeds according to rising or lowering temperatures. Since I want maximum cooling, I am leaving it on the “Performance” setting, but this has the side effect of an audible difference between the Silverstone (virtually silent) and Noctua (noticeable fan noise).
Second, some folks online recommend applying the thermal compound to the AR11’s heatpipes instead of the CPU lid. I didn’t do this, because the heatpipes extend across the Ryzen 7 CPU on two sides. Also, the milled fins between the heatpipes should make contact with the CPU lid, too. I wanted to make sure there was as much heat transfer as possible over the entire face of the Ryzen 7’s lid. Therefore, I applied the thin layer of thermal compound to the entire lid before installing the AR11.
Third, and finally, the AR11 is made for Intel 115x applications. I’m only using it with my Ryzen 7, because Lenovo seems to use the Intel 115x cooling solution hole pattern on both their Intel and AMD motherboards. Also, Lenovo’s chassis-integrated CPU backplate limits what kinds of headsinks that I can easily install. The AR11 uses bolts that don’t require a backplate. When I purchased it, I was unsure if another impressive cooler, the ID-Cooling IS-60, would fit (I think it would not). However, other low profile coolers that might fit within the IdeaCentre 5’s tight interior, such as the Noctua NH-L9x65 and Scythe Big Shuriken 3, use a backplate for installation. The built-in chassis backplate can be removed–the top part is glued down but removable, and the chassis ‘bump’ that hold it in place potentially could be cut out with a Dremel-type tool (but this might not be necessary depending on the thickness of the backplate used.
