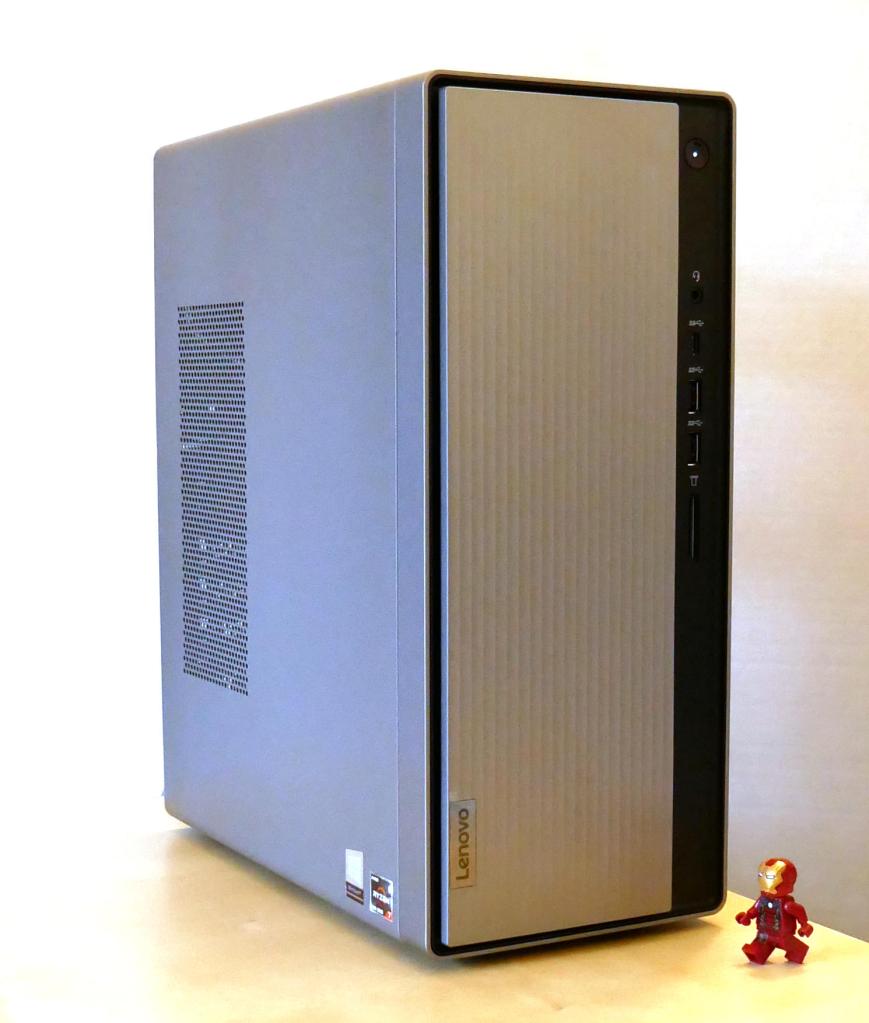
After spending the last year getting to know my i7-7700 PC that I had built several years ago better than I had ever known it before due to the shift to remote work and distance learning, I came to think that I needed a new computer that was better suited to my needs in the current situation. After a lot of research and patience price hunting, I replaced my old computer with the Lenovo IdeaCentre 5 with a Ryzen 7 4700G CPU pictured above.
As an English professor at the New York City College of Technology, CUNY who teaches classes asynchronously with weekly posted video lectures anchoring each class, a lot of my time goes into planning, shooting, and editing these lectures in addition to designing course sites, writing syllabi, adding content and assignments, and corresponding with students via email.
Overall, my i7-based computer supported my work admirably except for the final step of rendering my edited videos into single files before uploading them to my YouTube channel. For a two-hour-long lecture, the rendering time could be as long as 30 minutes. While not excessive, I knew that a newer computer with a CPU with more cores and threads than the 4-core/8-thread CPU that I had built several years ago would render the videos much more quickly.
I didn’t want to reinvest in my desktop setup unless I could afford to double the performance of my current setup (a rule of thumb that I picked up from my friend Mark). As a point of reference, the i7-7700 has an average CPU Mark of 8,617. Considering the price and long-term support of Intel and AMD’s platforms, including the cost of a new CPU, motherboard, and RAM, I focused on AMD’s Ryzen 7 3700X and OEM-only Ryzen 7 4700G, both of which seemed to fit the bill with CPU Mark scores of 22,804 and 19,863 respectively. The lower cost of processors and motherboards combined with higher out-of-the-box RAM speed support and a commitment to supporting multiple CPU generations across motherboard chipsets via the AM4 socket also weighed in AMD’s favor.
While I could reuse my PC’s case, power supply, and drives, I thought about how much room the i7’s Corsair Carbide Series 100R case, which I had purchased earlier in the pandemic to accommodate a large video card, takes in my small closet-sized work area (approximately 18.5″ x 7 7/8″ x 17″ or 2477 cubic square inches). My cramped work environment led me to lean toward a pre-built system using the OEM-only Ryzen 7 4700G, because these systems, primarily made by HP and Lenovo for sale in the USA, are relatively tiny desktop PC systems.
Additionally, the Ryzen 7 4700G’s integrated graphics are nearly as strong as the discrete graphics in the Radeon RX 550 video card that I had in the i7-7700 system. This would mean that I didn’t need to have a discrete video card if I went with a 4700G-based system.
Another plus for the Ryzen 7 4700G is that it supports dual-channel DDR4-3200 RAM out of the box without a need to overclock the RAM (and having a motherboard that supports this function). Having fast RAM is essential for my workloads and it is needed even more so if I am relying on integrated graphics, which would share the RAM with the operating system and applications.
However, I didn’t want to overspend on a pre-built system with a 4700G processor. I knew from tracking computer prices that there had been deep cut sales on HP’s 4700G system (an incredible $450) around Black Friday 2020 and early in 2021. In fact, my friend Mark in Atlanta had worked on such a system for a friend of his family, and he filled me in on his experiences with upgrading its RAM and heat-sink and fan (HSF).
Ultimately, I choose the Lenovo IdeaCentre 5 with Ryzen 7 4700G system, because commenters online seemed to have stronger out-of-the-box experiences with it than that HP Desktop M01-1024. In particular, the Lenovo IdeaCentre 5 with a 4700G CPU included two sticks of DDR4 memory (which enables dual channel, as opposed to a single stick not in a dual channel configuration) and two drives (one SSD and one HDD). Also, I was impressed by my experience with a Lenovo ThinkPad, including its long life and build-quality, which I hoped would carry over with the IdeaCentre-line of desktops.
The Lenovo IdeaCentre 5 came with 16GB (2x8GB) DDR4-3200 RAM, a 256GB M.2 SSD, and a 1TB HDD. Its small footprint (13.5″ tall x 11″ deep x 5.75″ wide or 854 cubic square inches–almost 1/3 the volume of the Corsair 100R case!) saved space in my office, too. As I needed to begin working right away with the new system before making any upgrades, the Lenovo system seemed like the right way to go for me. Though, it took me about a month of price watching on Lenovo’s official eBay store before they lowered the price to an acceptable $560.69 with free shipping.
Below, I’m recording some of my experiences with the Lenovo IdeaCentre 5, including installing Linux Mint, upgrading the RAM, swapping out hard drives, installing an aftermarket heat-sink and fan, accounting of the costs involved, and concluding with a look ahead.
Installing Linux Mint
Since late last year, I’ve been using Linux Mint as my daily driver. My long-term issues with Microsoft Windows 10 and its data collection and forced upgrade regime, and frustration with Apple’s direction immediately before and certainly after Steve Jobs’ passing led me to switch to Linux where I have more control over my computer, my data, and the software that I use. Using Linux, I can get my work done without feeling that my computer isn’t mine, I’m being spied on, or I’m locked into a corporation’s walled garden.
The software that I use on Linux Mint supports my workflow great. For recording my weekly lectures, I use Google Slides (for the background), OBS Studio (to capture part of my screen with my webcam video overlayed), and Shotcut (to edit the video before uploading to YouTube). Also, I use open-source software, including LibreOffice (word processing and spreadsheet use), GIMP (image editing), Audacious (music playback), Firefox (web browsing), Thunderbird (email), Handbrake (trancoding), and SMPlayer (video playback), as well as proprietary software, including Wolfram Mathematica (mathematical modeling) and Zoom (video conferencing and online event management). While I could install Microsoft Office and Adobe Acrobat and run them in Linux via WINE, but I have found that their web-based, online counterparts work remarkably well when it is absolutely necessary that I use them.
Perhaps the biggest reason why I prefer Linux over Mac OS X and Windows 10 is how well the Linux operating system does disk and file system specific things like handling large numbers of files and nested directories. Throughout my career, I have collected copious notes, articles, and other research data that are organized in many nested folders, each potentially containing thousands of files. Mac OS X and Windows 10 would bog down when opening these directories of files. Searching through these files was also an ordeal with Apple and Microsoft’s offerings despite some third-party tools that made things better. Linux file systems and open-source tools give me far more control over my files both in handling and searching them, which helps me do my research more efficiently. Some of the search tools that I use include grep, Catfish, and Recoll.
Installing Linux Mint was a snap on the Lenovo IdeaCentre 5 with a Ryzen 7 4700G CPU. On my old PC, I used balena Etcher to burn a copy of the installation media for Linux Mint 20.1 on a USB drive. Before installing Linux, I backed up the Windows 10 installation media to a separate USB drive in case I needed to reinstall Windows on the Lenovo for some reason. Then, I rebooted the Lenovo, went into the BIOS, changed the boot order so that it would load the USB drive first and disabled SecureBoot, which causes problems with some Linux drivers for the WiFi card and other hardware. Continuing with the bootup process, I directed Linux Mint to launch the desktop so that I could see that everything worked before installing. Everything did work out of the box except for high resolution graphics, which I figured might be due to the older long-term support kernel that might not have drivers for the 4700G’s integrated graphics. So, I erased the m.2 SSD, installed Linux Mint, and after booting in successfully with the 5.4.0 kernel, I updated to the 5.8.0 kernel, which solved the graphics issue and restored 2560×1440 resolution on my 32″ MSI Optix MAG322CQRV monitor.
Maxing Out the RAM and Swapping the HDD
After receiving the Lenovo IdeaCentre 5 and testing out its stock capabilities, which were impressive compared to my i7-7700, I installed its first major upgrades: swapped the 16GB (2x8GB) DDR4-3200 RAM for 32GB (2x16GB) DDR4-3200 RAM, and swapped its included 1TB HDD (a Western Digital Blue) for my 4TB HDD (also a Western Digital Blue).

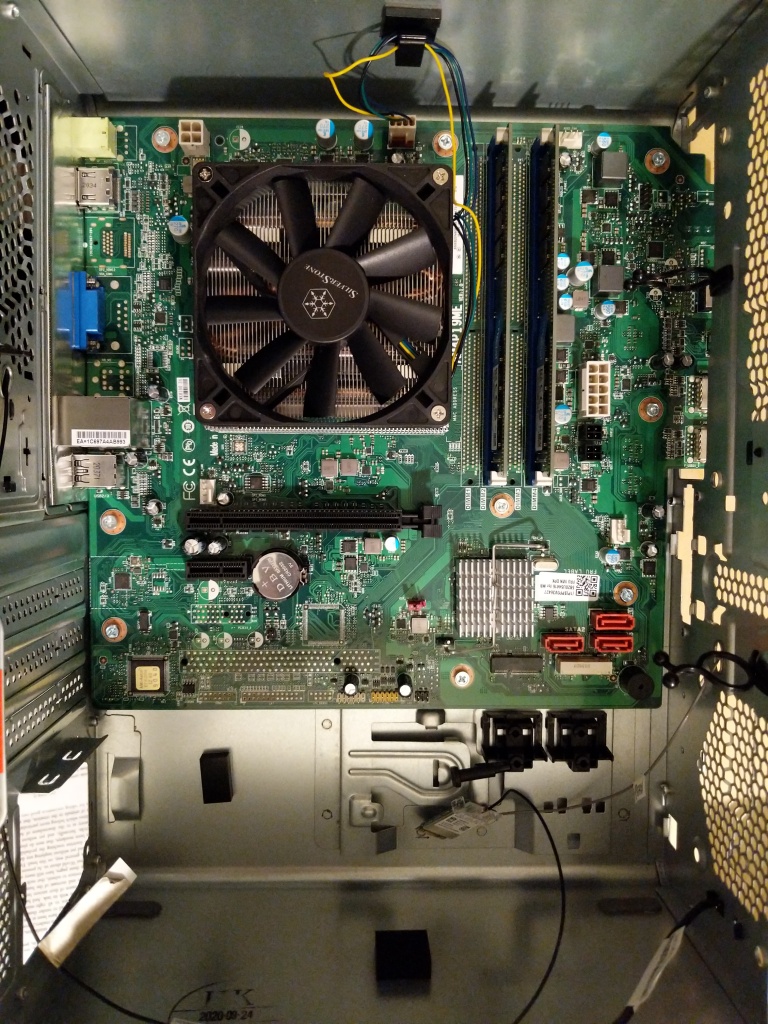
After taking out two screws on the back of the case, I slid the side panel off, which exposed the computer’s components–motherboard, CPU, RAM, PSU, and drive cage (to the left above). Before opening the drive cage to locate the RAM underneath, there are three plastic tabs on the front panel that need to be lifted to release the panel and then it can be unhooked on the opposite by swinging the panel open-and-out. To open the drive cage, there is a metal tab now exposed after removing the front panel. Press the tab down and the cage slides forward and then up.

The stock Lenovo RAM is a matched pair of SK Hynix 8GB DDR4-3200 RAM (HMA81GU6CJR8N CL22 Single Rank). This is good RAM, but I wanted to max out what this system could use, so I ordered a 32GB Crucial Kit (16GBx2) DDR4-3200 (CT2K16G4DFD832A CL22 Dual Rank x8 Unbuffered). As with any other desktop system, it was easy enough to replace the RAM. First, the tabs on both sides of a stick of RAM are depressed, which lifts the DIMM out of the slot. Pull the stick of RAM out, place the new RAM in the slot–paying attention to the placement of the DIMM’s notch (the RAM goes in only one way)–and press down until the tabs fold in and lock into place.

While I had the case open, I also swapped the stock 1TB HDD with my 4TB HDD from my i7-7700 PC. This involved several steps due to how tight the drive cage assembly is designed. First, the DVD-R drive has to be removed, which exposes the screws underneath holding the HDD in place. After disconnecting the SATA data and power cables, I removed the screws and vibration pads, pulled out the 1TB drive, put in the 4TB drive, replaced the screws and vibration pads, connected the cables, and reinstalled the DVD-R drive. Then, the drive cage can be swung back into place and locked, and the front panel can be notched and snapped into place, and finally, the side panel slid into place and screwed down.
Installing the Silverstone Argon Series AR11 HSF
After using the Lenovo IdeaCentre 5 for a month, I noticed that the video editing software Shotcut would would bog down about halfway through rendering an hour-long video. Using CPU-X as root, I saw the CPU temperature rise to 72C and then the CPU voltage and CPU clock rate would decrease to lower the temperature. When the temperature decreased, the voltage and clock rate would creep up again. This feedback cycle would persist through the rendering process.
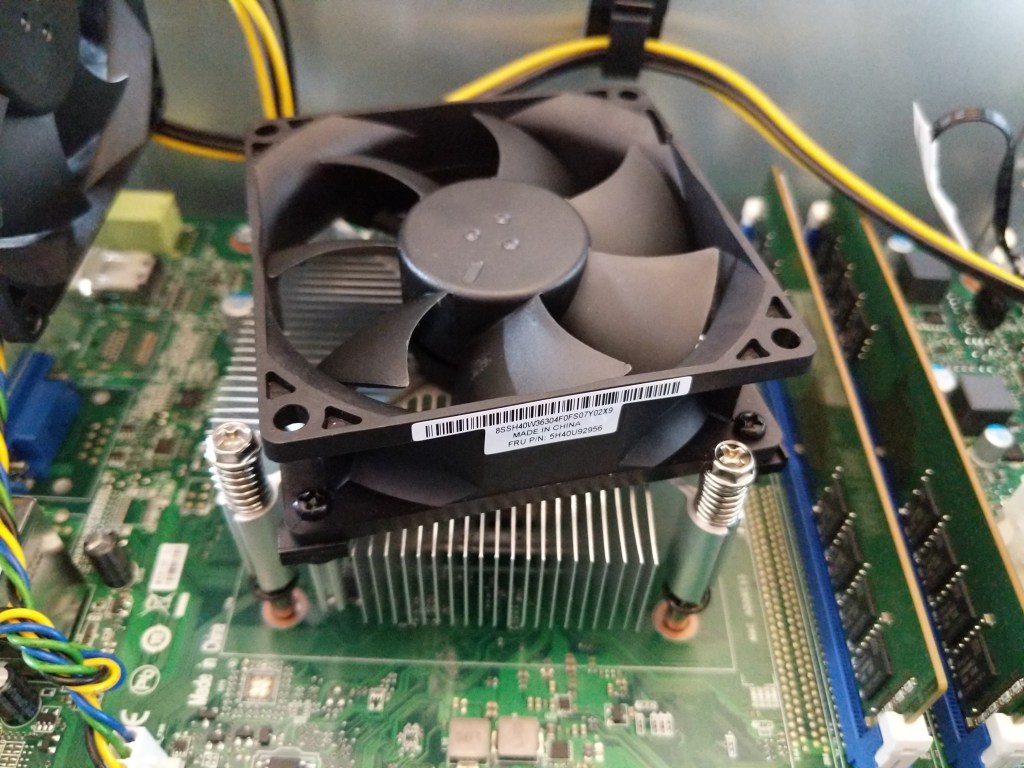
Lenovo, perhaps to cut costs by standardizing heatsink and motherboard designs, uses what they rate as a 65watt TDP (thermal design power) heatsink and fan (HSF). It’s made out of extruded aluminum with an offset 80mm, 4-pin fan mounted on top to blow air through the heatsink’s fins. What’s interesting about this part’s design is that its mounting hardware is for an Intel 1151 socket hole pattern instead of AMD’s AM4 socket, which the Ryzen 7 4700G processor uses.
My guess is that Lenovo sells many more computers with Intel CPUs than AMD CPUs, so even when they design a product that uses AMD parts, they design the motherboard and cooling solution to reuse the same hole pattern and heatsink fan as their Intel-based products.
While Lenovo’s HSF was rated for the 65watt TDP of the 4700G CPU, it didn’t seem capable of displacing the heat generated when the CPU was under a sustained load. This led me to replace Lenovo’s HSF solution with an aftermarket HSF that had a higher TDP.
Unfortunately, there were some constraints that I had to work around. First, as mentioned above, the cooler had to support a 1151 hole pattern. Second, the drive cage in the IdeaCentre 5 case overlaps the CPU area of the motherboard. This limits the height of the cooler to about 55-60mm (this was my best measurement due to taking it with Lenovo’s HSF installed). At the upper end of this range, it would be very tight, and airflow into the HSF might be restricted. Also, if a larger HSF with a wider fan were installed, it might not permit the installation of a 3.5″ HDD in the underside of the drive cage.
Ultimately, I decided to purchase the Silverstone Argon Series AR11 heatsink and fan.

It is only 47mm tall, but it features four heat-pipes that make direct contact with the CPU. Included in its height is the 15mm tall 92mm x 92mm fan, which should supply more air flow at the same rpm as the 80mm fan on the Lenovo-made HSF.


And, it has a 95 watt TDP rating, which means that it should give the 4700G’s 65 watt TDP some cooling headroom.

It included four nuts with spacers and a pouch of thermal compound.
To remove the Lenovo HSF and install the Silverstone AR11, I had to completely remove the motherboard from the case.
I could see that the Lenovo HSF was secured to (what I thought) was a backplate with threaded lugs that the spring-mounted screws on the four corners of the HSF would screw into. Since the Ideacentre 5’s case has the motherboard-side of the case riveted to the chassis, I had to remove the motherboard as I couldn’t see what the underside of the motherboard looked like from the other side (as you can in many aftermarket/hobbyist cases). Before dealing with the motherboard and the HSF, I began disconnecting all of the cables running to the motherboard, removing the drive cage, and removing the front-side frame around the USB connectors and the power button module.
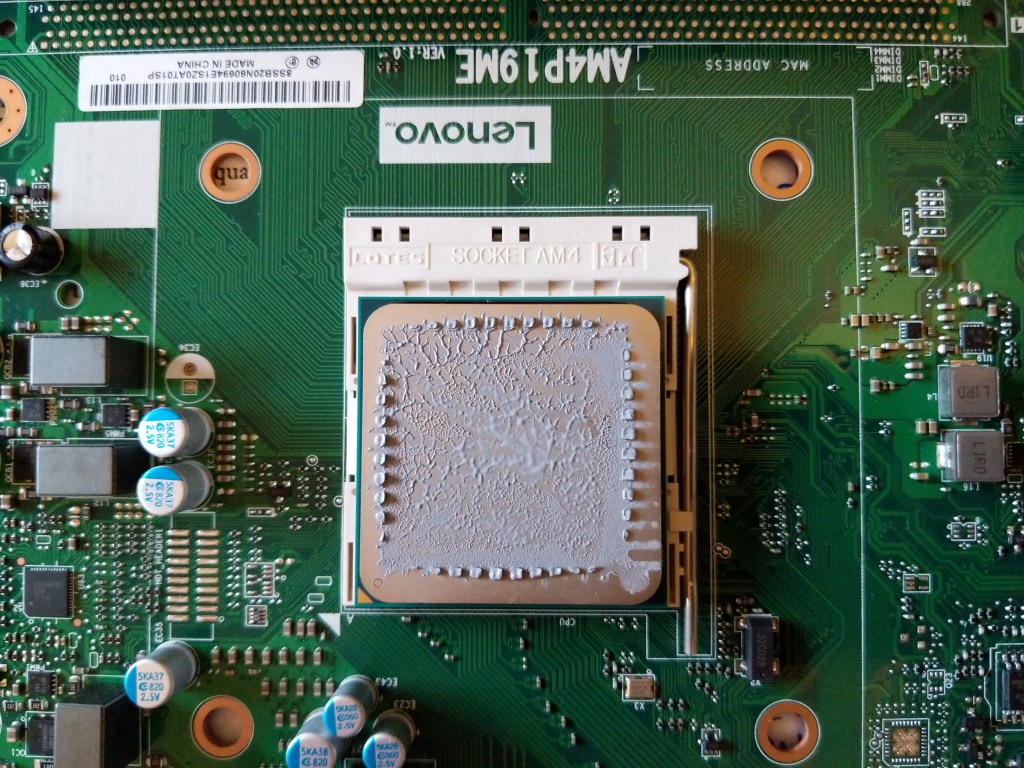
Then, after removing all of the screws holding the motherboard to the chassis, I discovered that the motherboard wouldn’t budge. I had not yet removed the HSF, but it dawned on me that the HSF screws were connected to what I hoped were easily removable stand-offs beneath the motherboard. I would soon learn that this wasn’t the case. But, first, I removed the HSF to expose the 4700G covered in thermal compound underneath, which I cleaned off with a paper towel, a few Q-tips, and alcohol.

Underneath the motherboard, I found four stand-offs built into the chassis that were used to secure the HSF. I think that this design is a cost-saving measure on Lenovo’s part, because it might reduce a step or simplify the installation of the cooling solution during assembly of the PC.
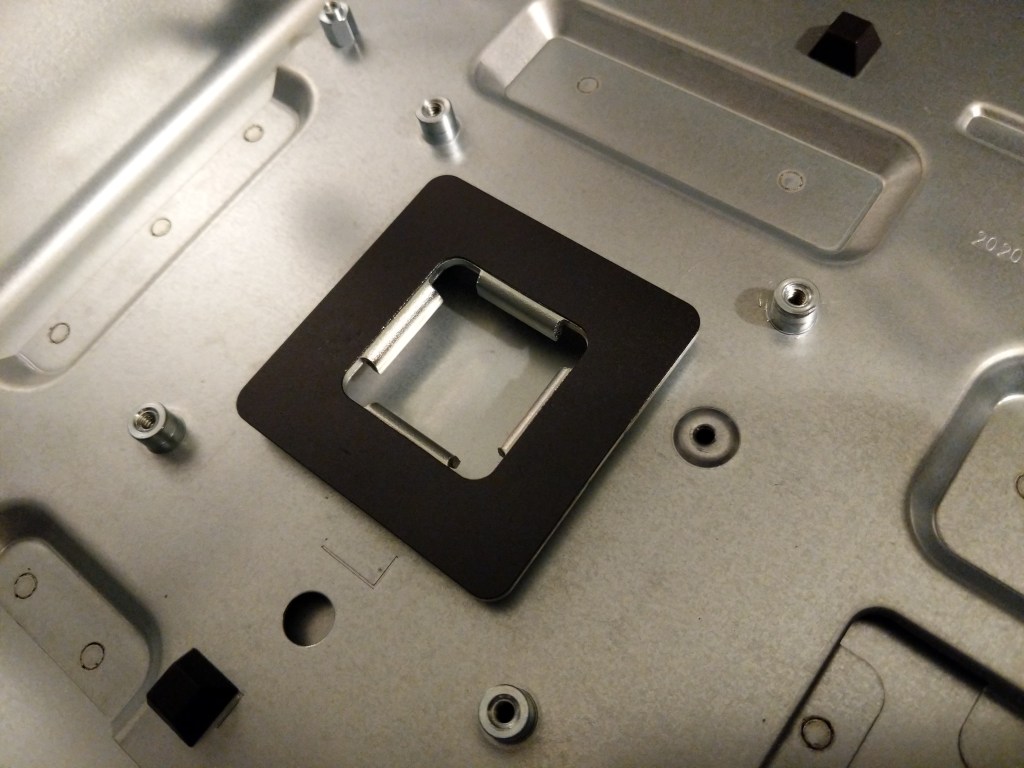
Nevertheless, these four stand-offs were in the way of the nuts that would hold the SilverStone AR11 to the motherboard, so they had to be removed.
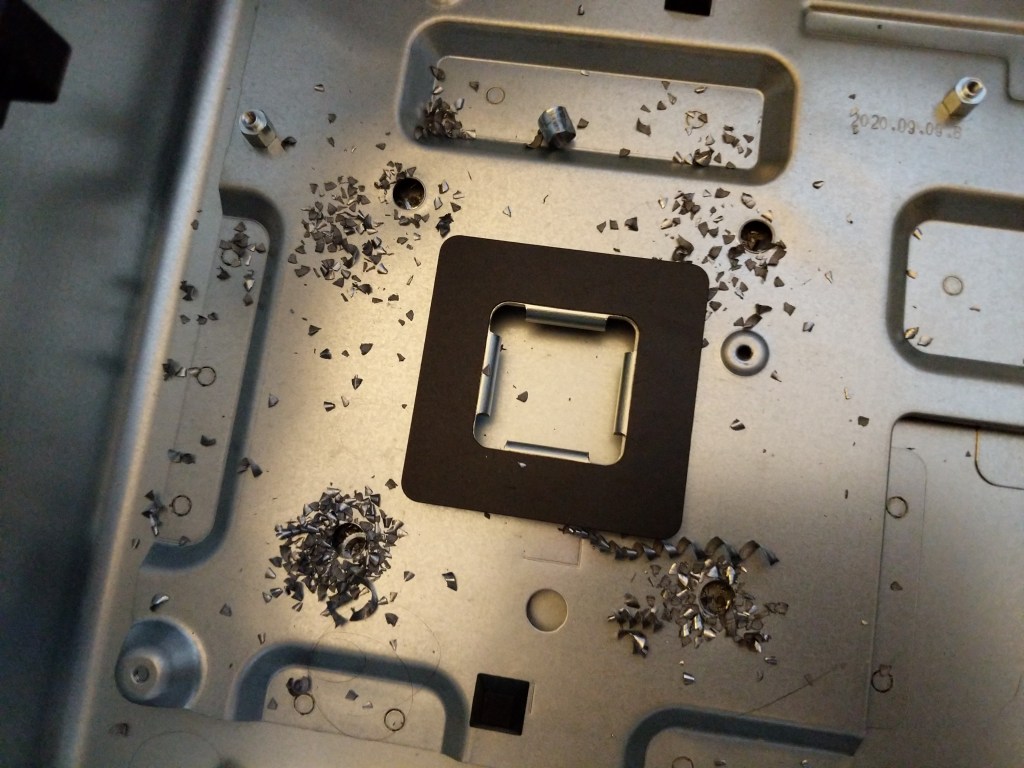
Thankfully, I was able to drill out each of these standoffs with a 1/4″ drill bit. Drilling each out, left a thin-walled bushing and it popped out the rivet underneath.

I was able to vacuum the metal shavings, which left four clean holes in the chassis.
With nothing obstructing my work now, I proceeded to install the AR11 HSF on the 4700G. I applied the included thermal compound to the 4700G and smoothed it with an old credit card. Then, I positioned the AR11 over the 4700G and through the four mounting holes. Carefully holding the AR11 in place with one hand, I used my other hand to flip the motherboard over. Balancing the motherboard on the AR11, I threaded each nut with spacer on the protruding studs from the AR11’s mounting hardware. I tightened the nuts slowly in a four bolt torque pattern until it was secure. Then, I reinstalled the motherboard with the new AR11 mounted into the IdeaCentre 5’s case.
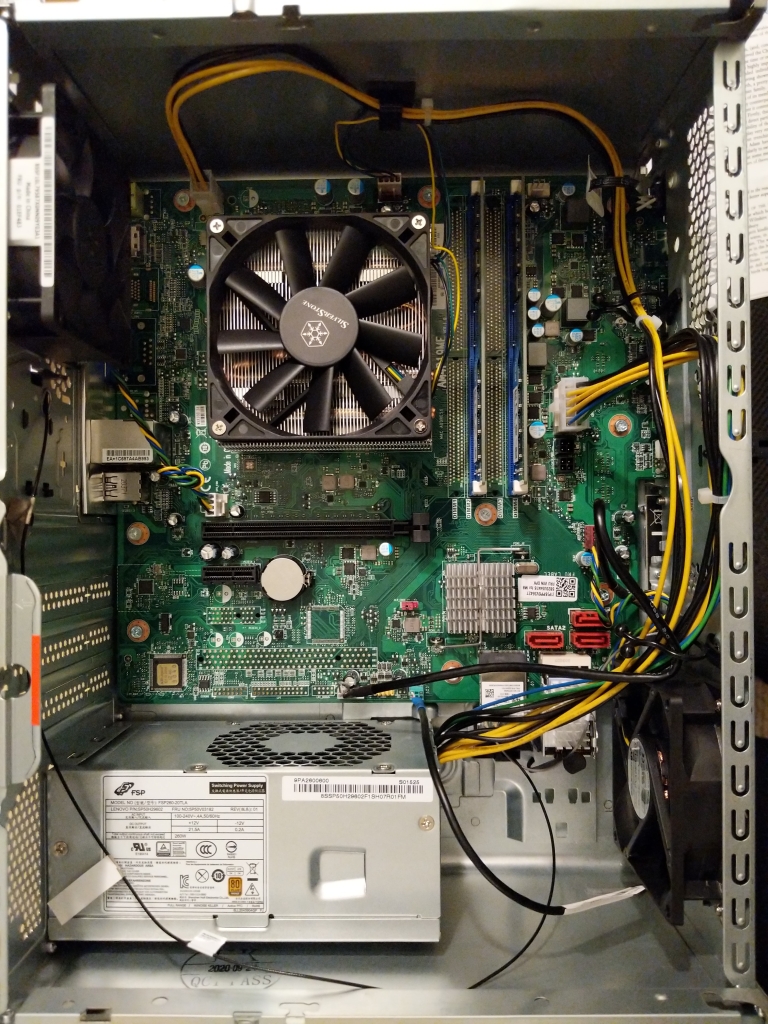
While I had everything exposed inside the IdeaCentre 5 case, I canibalized the 80mm fan from the original Lenovo-supplied HSF and mounted it as an intake fan in the front of the case (lower right above). The exhaust fan (upper left above) came mounted with the computer. Both use 4-pin power connectors. The motherboard supports one 4-pin CPU HSF connector and three 4-pin case fan connectors.
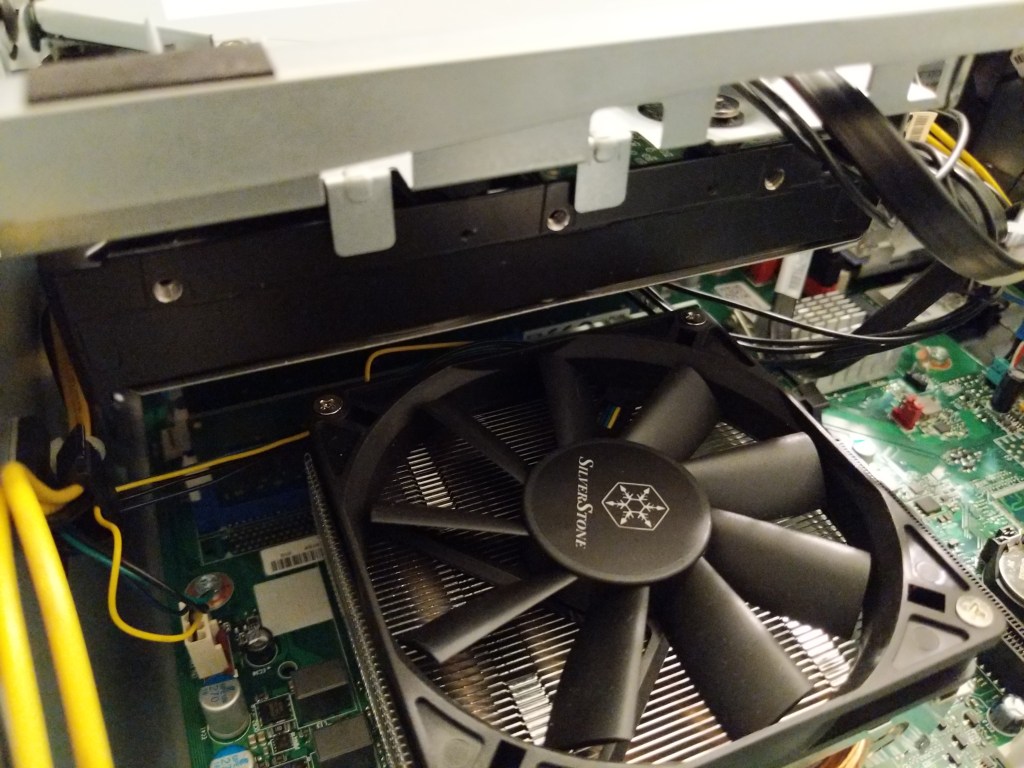
With the drive cage re-installed, there is a safe clearance of about 10mm between the AR11 and the 3.5″ HDD installed above it in the drive cage.


With everything reassembled, the Lenovo fired up without any issues, and psensor reports lower minimum temperatures (24C after, 31C before) and lower maximum temperatures (60C after, 65C before). When I record this coming week’s lectures in Science Fiction and Technical Writing, I will have a better idea about whether the AR11 keeps the temperatures low enough to avoid excessive clock rate throttling during extended load times.
Calculating the Cost
As a computer enthusiast and retrocomputing preservationist, I wish that I could keep all of my old computers.
Unfortunately, the costs of living prohibit my holding on to everything. As such, I needed to sell my i7-7700 PC and its components, and sell/repurpose parts from the Lenovo IdeaCentre to lower the overall cost of switching to a new computer system.
Below, I am including a tally of my costs and profits surrounding the new system. The new components cost $777.67 (excluding tax), but I was able to sell my old PC and some components for $529.00. This makes the final cost for the new computer to be $248.67.
Purchases

Lenovo IdeaCentre 5 Desktop, Ryzen 7 4700G, AMD Radeon Graphics, 16GB
$560.69

Crucial 32GB Kit (16GBx2) DDR4 3200 MT/s (PC4-25600) CL22 DR x8 Unbuffered DIMM 288-Pin Memory - CT2K16G4DFD832A
$168.99

Silverstone Argon Series (AR11-USA) Intel Socket LGA1150/1151/1155/1156 Compatible
$47.99

==========

Total $777.67


-$300 (thanks to Patrick for getting this for his daughter)
i7-7700 PC, 16GB RAM, 480GB SSD, 1TB HDD (the HDD was from Lenovo PC)

-$99
SK Hynix 16GB (2x8GB) DDR4 3200 RAM Kit HMA81GU6CJR8N CL22 Single Rank (from Lenovo PC)

-$110
MSI Radeon RX 550 AERO ITX 2G OC 2GB PCIe Graphics Card (from i7 PC)

-$20
Creative Sound Blaster Audigy FX PCIe 5.1 Sound Card [SB1570] (from i7 PC)

==========

$248.67
Looking Ahead
One of my goals in purchasing a pre-build system with a Ryzen 7 4700G processor was ultimately to get one of these OEM-only CPUs. In the USA, the options are few for purchasing one–either order it online from an overseas seller or buy a pre-built system that comes with one. In a sense, the latter turns into a shucking situation like many people have done for years with Western Digital external USB hard drives and now others are doing with pre-built systems that come with a video card. The market and pricing drive computer hobbyists to do things that save them a buck or land them a hard-to-find component. For me, this system serves this purpose in the long run. For the time being, I plan to run the 4700G in the Lenovo IdeaCentre 5, but if/when component prices return to saner price points, I would like to build a new system with a motherboard that can do more with the 4700G and its system RAM than the extremely limited Lenovo-made AM4 socket motherboard.
My needs change depending on the work that I happen to be doing at any given time. I imagine that I might get a dedicated graphics card again in the future, but I have no interest in dealing with the scarcity and market-inflated prices right now. I realize that there are a number of forces at play that are driving up prices, including the pandemic’s effects on workers, their families, and supply chains, ensuing component part scarcity, high demand among computer users working, learning, and playing remotely from home, and high demand among cryptocurrency miners. As we dig ourselves out of the pandemic, I think the former issues will sort themselves out. However, as we’ve seen before, cryptocurrency’s built-in blockchain inefficiencies and the proof-of-work concept that underlies their systems continues to wreak havoc on the cyclical graphics card market while simultaneously damaging the environment through its outsized and ever increasing energy needs. Crypto-mining doesn’t appear to be going anywhere, so it’s an issue that we need to collectively deal with before it virtually absorbs the graphics card market and inaugurates a new industrial-market revolution with detrimental environmental costs.
