Category: Computers

  • Intel NUC 6I5SYH Hardware Review, BIOS Update, and Fedora 25 Installation Guide

    Before Thanksgiving 2016, I purchased an Intel NUC 6I5SYH ($319.99 on sale at Microcenter, late-November 2016) to serve as my new home desktop computer. This review/guide is based on my initial setup of the 6I5SYH.

    The Intel NUC 6I5SYH is a small form factor (SFF) bare-bones personal computer from Intel’s “Next Unit of Computing” line.

    The 6I5SYH includes an enclosure (approximately 4 1/2″ wide x 4 3/8″ deep x 2″ tall), motherboard with a soldered i5-6260U CPU (Skylake, or 6th-gen architecture–1.9GHz up to 2.8GHz Turbo, Dual Core, 4MB cache, 15W TDP), wall-mount power adapter with multi-country AC plugs, and VESA mount bracket.

    The 6I5SYH’s motherboard supports the i5’s integrated Iris 540 graphics over a built-in HDMI 1.4b or Mini DisplayPort 1.2, and it includes 2x USB 3.o ports (back), 2x USB 3.0 ports (front and one supports charging), 2x USB 2.0 headers (on motherboard), IR sensor, Intel 10/100/1000Mbps ethernet, Intel Wireless-AC 8260 M.2 (802.11ac, Bluetooth 4.1, and Intel Wireless Display 6.0), headphone/microphone jack (front, or 7.1 surround sound via HDMI and Mini DisplayPort/back), and SDXC slot with UHS-I support (left side).

    The 6I5SYH requires the user to supply a hard drive or SSD, and RAM. For permanent storage, it has internal support for an M.2 SSD card (22×42 or 22×80) and SATA3 2.5″ HDD/SSD (up to 9.5mm thick). For memory, it supports dual-channel DDR4 SODIMMs (1.2V, 2133MHz, 32GB maximum) across two internal slots.

    For my 6I5SYH’s RAM, I installed one Crucial 8GB DDR4 2400 BL SODIMM ($44.99 on sale at Micro Center, late-November 2016), and for its SSD, I installed a Silicon Power S60 240GB SATA3 SSD ($67.99 on sale on Amazon, December 2015). Excluding the costs of a monitor, keyboard, and trackball, this system cost $432.97.

    After first assembling the 6I5SYH with its RAM and SSD, I booted it and went into the BIOS (press F2 at the boot/Intel screen) to check its BIOS version. Based on everything that I had read about this and past Intel NUCs, it is always advisable to have the most up-to-date BIOS installed. Sure enough, it reported having BIOS 0045, and a newer BIOS had been released (0054) according to the Intel Download Center page for the 6I5SYH.

    I downloaded the new BIOS binary file to a FAT-formatted USB flash drive on my Mac, inserted the USB flash drive into a front USB port on the NUC, pressed F7 to update BIOS, and followed the prompts. After confirming the BIOS had updated, I turned the 6I5SYH off by holding down the power button on its top plate.

    Next, I used the Fedora Media Writer for Mac OS X to create a bootable USB flash drive of Fedora 25 Workstation using the same flash drive that I had used to flash the 6I5SYH’s BIOS.

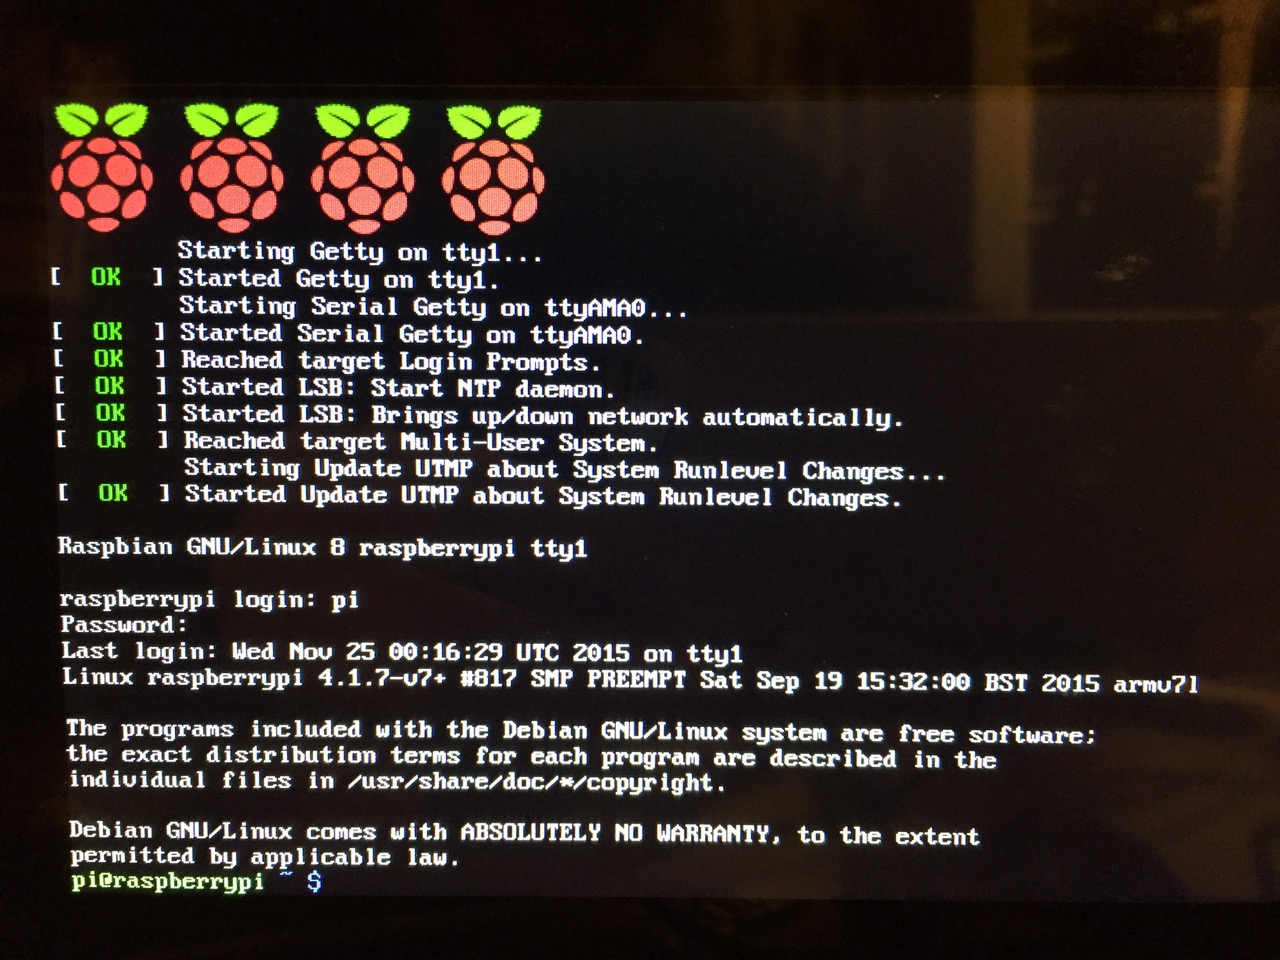
    After the media creation was completed, I inserted my Fedora 25 bootable USB flash drive into a front USB port of the 6I5SYH, powered it on, pressed F10 for the boot menu, and followed the prompts. If you need an installation guide for Fedora 25 check out the Fedora Documentation here, or if you need a screenshot walkthrough of installing Fedora 25, check out this guide.

    After installing Fedora 25 with full disk encryption, I installed updates and began installing additional software. The guides here and here offer great advice (there are others for “what to do after installing fedora 24” that have useful info, too) on what to install and configure after a fresh installation of Fedora. Some that I recommend include Gnome Tweak Tool (available within Software app), Yum Extender (DNF) (available within Software app), VeraCrypt, and VLC. Remember to install RPM Fusion free and nonfree repositories–directions here, too.

    So far, Fedora 25 has performed wonderfully on the 6I5SYH! Out of the box, the graphics, WiFi, Bluetooth, USB ports, and SD card reader have worked without error. I am using a Mini DisplayPort to VGA adapter to connect the 6I5SYH to a less expensive VGA-input LCD monitor. I am watching 1080p Rogue One trailers without a hiccup, and I listen to Beastie Boy MP3s while doing work in GIMP or LibreOffice. I have not yet fully tested virtualization or emulation (consoles or vintage computing)–these are my next steps.

    The 6I5SYH is snappy about doing work, and it is quiet nearly always except when it first boots up (and the fans spin up high momentarily). For the features, size, and price, I highly recommend the 6I5SYH as a desktop replacement that runs Fedora 25 and common Linux programs quite well!

  • Working Bibliography for Digital Fabrication Module of “A Cultural History of Digital Technology” at City Tech

    This is a 3D print of a Mandelbulb that I created with Mandelbulb3D, Fiji, and meshlab.
    This is a 3D print of a Mandelbulb that I created with Mandelbulb3D, Fiji, and meshlab.

    I’m an NEH Fellow for City Tech’s “A Cultural History of Digital Technology” project. It brings together faculty from across the college to design humanities-course modules and a new course proposal that brings the six modules together. I am contributing to the Digital Fabrication Module of the course curriculum that the team will develop.

    I put together the following bibliography of Science Fiction, critical work, video games, and software as part of my contribution to the project and the upcoming curricular work. Following my bibliography, I have included the preliminary viewings and readings for this module (which were selected before I joined the project as a fellow) for those interested in learning more about these topics.

    Working Bibliography

    Fiction: 3D Printing (chronological)

    Heinlein, Robert A. “Waldo.” Astounding Science Fiction Aug. 1942: 9-53.

    Smith, George O. “Identity.” Astounding Science Fiction Nov. 1945. 145-180.

    Russell, Eric F. “Hobbyist.” Astounding Science Fiction Sept. 1947: 33-61.

    Sheckley, Robert. “The Necessary Thing.” Galaxy Science Fiction June 1955. 55-66.

    Clarke, Arthur C. The City and the Stars. Harcourt Brace/SFBC, 1956.

    Stephenson, Neal. The Diamond Age, or, A Young Lady’s Illustrated Primer. Bantam Spectra, 1995.

    Gibson, William. All Tomorrow’s Parties. Viking Press, 1999.

    Brin, David. Kiln People. Tor, 2002.

    Marusek, David. Counting Heads. Tor, 2005. [expansion of his novella We Were Out of Our Minds with Joy, 1995].

    Doctorow, Cory. “Printcrime.” Nature vol. 439 (12 Jan. 2006): 242.

    Sterling, Bruce. “Kiosk.” The Magazine of Fantasy and Science Fiction Jan. 2007: 68-113.

    Doctorow, Cory. Makers. HarperVoyager, 2009.

    Stross, Charles. Rule 34. Ace Books, 2011.

    Hamilton, Peter F. Great North Road, Macmillan UK, 2012.

    Gibson, William. The Peripheral. G.P. Putnam’s Sons, 2014.

    Newman, Emma. Planetfall. Roc, 2015.

    Robinson, Kim Stanley. Aurora. Orbit, 2015.


    Fiction: Fractals (chronological)

    Langford, David. “Blit.” Interzone Sept./Oct. 1988: 40-42.

    Rucker, Rudy. “As Above, So Below.” in The Microverse. Ed. Byron Preiss. Bantam Spectra, 1989. 334-340.

    Shiner, Lewis. “Fractal Geometry.” in The Edges of Things. WSFA Press, 1991. 59.

    Anthony, Piers. Fractal Mode. Ace/Putnam, 1992. [second novel in his Mode series].

    Di Filippo, Paul. “Fractal Paisleys.” The Magazine of Fantasy and Science Fiction May 1992: 72-106.

    Charnock, Graham. “On the Shores of a Fractal Sea.” in New Worlds 3. Ed. David Garnett. Gollancz, 1993. 125-136.

    Luckett, Dave. “The Patternmaker.” in The Patternmaker: Nine Science Fiction Stories. Ed. Lucy Sussex. Omnibus Books, 1994. 3-18.

    Pickover, Clifford A. Chaos in Wonderland: Visual Adventures in a Fractal World. St. Martin’s Press, 1994.

    Turzillo, Mary A. “The Mandelbrot Dragon.” in The Ultimate Dragon. Eds. Keith DeCandido, John Betancourt, and Byron Preiss. Dell, 1995. 167-172.

    Williamson, Jack. “The Fractal Man.” 1996. in At the Human Limit. Haffner Press, 2011. 187-204.

    Leisner, William. “Gods, Fate, and Fractals.” in Strange New Worlds II. Eds. Dean Wesley Smith, John J. Ordover, and Paula M. Block. Pocket Books, 1999. 166-183.

    Thompson, Douglas. Ultrameta: A Fractal Novel. Eibonvale Press, 2009.

    Patrice, Helen. “Mandelbrot Universe.” Dreams & Nightmares no. 92 (May 2012): n.p.

    Strasser, Dirk. “The Mandelbrot Bet.” in Carbide Tipped Pens: Seventeen Tales of Hard Science Fiction. Eds. Ben Bova and Eric Choi. Tor, 2014. 365-378.


    Non-Fiction (chronological)

    Snow, C.P. The Two Cultures and the Scientific Revolution. Cambridge UP, 1961.

    Rucker, Rudy. “In Search of a Beautiful 3D Mandelbrot Set.” RudyRucker.com. 5-14 Sept. 1988 (revised 24 Sept. 2009).

    Hayles, N. Katherine. How We Became Posthuman: Virtual Bodies in Cybernetics, Literature, and Informatics. University of Chicago Press, 1999.

    Thurs, Daniel Patrick. “Tiny Tech, Transcendent Tech: Nanotechnology, Science Fiction, and the Limits of Modern Science Talk.” Science Communication vol. 29, no. 1 (Sept. 2007): 65-95.


    Video Games (chronological)

    Rescue on Fractalus!, https://en.wikipedia.org/wiki/Rescue_on_Fractalus! and https://archive.org/details/a2_Rescue_on_Fractalus_1985_Lucasfilm_Games_cr_Blade.

    .kkrieger, http://web.archive.org/web/20120204065621/http://www.theprodukkt.com/kkrieger.

    No Man’s Sky, http://www.no-mans-sky.com.


    Software

    KPT Bryce 1.0 (1994), https://www.youtube.com/watch?v=MY8GPU5osx4 and https://www.youtube.com/watch?v=ZGLjPYgs8bg and http://kai.sub.blue/en/frax.html and http://fract.al.

    The Mandelbrot Set in HTML5 Canvas and Javascript, http://tilde.club/~david/m/.

    Julia Map, http://juliamap.googlelabs.com/.

    FracalLab, http://hirnsohle.de/test/fractalLab/.

    Paul Lutus, The Mandelbrot Set, http://arachnoid.com/mandelbrot_set/index.html.


    Preliminary Viewings

    NOVA, “Fractals: Hunting the Hidden Dimension,” http://www.pbs.org/wgbh/nova/physics/hunting-hidden-dimension.html.

    Benoit Mandelbrot TED Talk, Fractals and the Art of Roughness, https://www.ted.com/talks/benoit_mandelbrot_fractals_the_art_of_roughness?language=en.


    Preliminary Readings

    Devlin, Keith. The Language of Mathematics: Making the Invisible Visible. W. H. Freeman, 1998. 188-220.

    Flake, Gary. The Computational Beauty of Nature: Computer Explorations of Fractals, Chaos, Complex Systems, and Adaptation. MIT Press, 1998. 59- 110.

    Mandelbrot, Benoit. The Fractal Geometry of Nature. W.H. Freeman, 1983. 4- 38.

    Mandelbrot, Benoit. Fractals: Form, Chance, and Dimension. W.H. Freeman, 1977.

    Samuel, Nina. ed. The Islands of Benoit Mandelbrot: Fractals, Chaos, and the Materiality of Thinking. Bard Graduate Center, 2012.18-56.


  • How to Build a Cardboard-Box Raspberry Pi 2, Model B Computer with a 7″ Touchscreen LCD Display with Some Thoughts on Pedagogy

    IMG_1049
    My Cardboard Box Raspberry Pi 2, Model B with 7″ Touchscreen Display and wireless keyboard.

    This guide demonstrates how to install Raspbian on a Raspberry Pi 2, Model B, connect the Raspberry Pi to a 7″ Touchscreen LCD, and integrate the computer and touchscreen in a cardboard box (which doubles as a case and storage for battery, keyboard, and cables).

    I got interested in the Raspberry Pi, because it has many capabilities for learning: kitting out a computer, installing a Linux-based operating system, programming interactive software, and building with electronics. In particular, I am interested in how the Raspberry Pi can be used to create interactive software and be a platform for digital storytelling (which figures into one of the upcoming classes that I will be teaching at City Tech–ENG 3760 Digital Storytelling).

    IMG_1013
    My haul from Tinkersphere.

    Instead of buying my kit online, I wanted to shop local to get started. Originally, I considered going to Microcenter, which is near where I live in Brooklyn. Unfortunately, they were sold out of the touchscreen display that I wanted. Instead, Y and I took a train into Manhattan and visited Tinkersphere where one of their helpful staff guided me to the things on my digital grocery list. I purchased Tinkersphere’s pre-made Raspberry Pi 2 kit, a 7″ Touchscreen LCD display, a battery pack (in retrospect, I should have purchased two of these, which I will discuss below), and a mono speaker with 1/8″ plug.

    Tinkersphere's Raspberry Pi 2, Model B kit contents.
    Contents of Tinkersphere’s Raspberry Pi 2, Model B kit.

    Tinkersphere’s Raspberry Pi 2, Model B kit includes all of the basic equipment needed to begin working with this tiny computing platform. The kit is built around the Raspberry Pi 2, Model B computer with a 900MHz quad-core ARM Cortex-A7 CPU, 1GB RAM, 4 USB ports, 40 GPIO pins, HDMI port, ethernet port, combined 3.5mm audio jack and composite video, camera interface (CSI), display interface (DSI), micro SD card slot, and a VideoCore IV 3D graphics core. Additionally, the kit includes a wireless keyboard/trackpad, USB wifi adapter, 8GB micro SD card with NOOBS (the easy to use Raspbian installer), USB micro SD card reader, breadboard, wires, and 5v power supply.

    To begin the setup, we should orient ourselves with the Raspberry Pi. This is the Raspberry Pi 2, Model B computer viewed from the top and the bottom:

    Raspberry Pi 2, Model B, Top View.
    Raspberry Pi 2, Model B, Top View.


    Raspberry Pi 2, Model B, Bottom View.
    Raspberry Pi 2, Model B, Bottom View.

    The first thing that we need to do is insert the micro SD card with a copy of NOOBS pre-copied. If you need a copy of NOOBS for your own micro SD card, you can download it from here and follow the instructions here for formatting and copying the files from a Mac or PC to the micro SD card. The Raspberry Pi’s micro SD card slot is located on the bottom side of its circuit board. A micro SD card goes in only one way which allows you to press it in. If correct, the card should “click” and stay as seen in the photos below.


    Insert the micro SD card like this.
    Insert the micro SD card like this.


    Press the micro SD card in and it will stay in place with a "click."
    Press the micro SD card in and it will stay in place with a “click.”


    The Raspberry Pi connected from left to right: micro USB power input from 5v power supply, HDMI, wireless keyboard/trackpad receiver, and wifi adapter.
    The Raspberry Pi connected from left to right: micro USB power input from 5v power supply, HDMI, wireless keyboard/trackpad receiver, and wifi adapter.

    Next, connect the Raspberry Pi to a display (such as a TV) with HDMI, and plug in the wifi adapter and wireless keyboard into two available USB ports. Alternatively, you can connect the Raspberry Pi to the Internet via ethernet and to a wired keyboard and mouse. Then, connect it to the 5v power supply. As soon as it is plugged in, the Raspberry Pi is turned on and operational. It will begin to boot from the micro SD card’s NOOBS installer, which will guide you through the process of installing Raspbian. See the images below to see what this looks like and what choices you should make for a basic installation.

    NB: While we could have connected the 7″ Touchscreen Display to the Raspberry Pi before beginning the installation, the current version of NOOBS would not detect and use the touchscreen display. It is necessary for Raspbian to be installed and updated before the 7″ Touchscreen Display will be recognized and used as the Raspberry Pi 2’s primary display.


    NOOBS boot screen with the Raspberry Pi logo.
    NOOBS boot screen with the Raspberry Pi logo.


    The NOOBS installer asks what you would like installed. Place a check next to Raspbian.
    The NOOBS installer asks what you would like installed. Place a check next to Raspbian.


    The NOOBS installer will ask that you confirm your choice. If you haven't already done so, choose US keyboard and locationalization at the bottom of the screen before proceeding. Then, confirm.
    The NOOBS installer will ask that you confirm your choice. If you haven’t already done so, choose US keyboard and locationalization at the bottom of the screen before proceeding. Then, confirm.


    The installation will proceed and complete. With the micro SD card that I have and without overclocking the Raspberry Pi, it took about 20-30 minutes for the installation to complete.
    The installation will proceed and complete. With the micro SD card that I have and without overclocking the Raspberry Pi, it took about 20-30 minutes for the installation to complete.

    After rebooting following the installation, the raspi-config tool launches. This program gives the user easy access to many configuration options for the Raspberry Pi including how it should boot (automatically login and load xwindows, or boot to a command prompt login), and if you would like to overclock the Raspberry Pi for additional performance (use this option with caution–you will likely want to add heat sinks and increased ventilation if you overclock the system). I configured my Raspberry Pi to operate at normal speed and to boot to the command line with login.

    After booting into Raspbian, the first thing that you see is the login prompt.
    After booting into Raspbian, the first thing that you see is the login prompt.


    The default login for the Raspberry Pi is username “pi” and password “raspberry”. Type each of these credentials in when asked followed by pressing the Enter key. Then, you will find yourself at the command line interface (CLI).

    Raspbian's CLI.
    Raspbian’s CLI.

    After logging in, you have a Linux command prompt (here is a list of helpful file system commands).

    Before setting up the 7″ Touchscreen Display, we need to update Raspbian. To do this, first type: “sudo apt-get update”. If prompted to install anything because it will take a certain amount of space, simply type “y” and press “Enter”.

    Entering a command at the prompt in Raspbian's CLI.
    Entering a command at the prompt in Raspbian’s CLI.

    To explain what this command means, “sudo” runs a command as superuser, or the user that is all powerful on a linux system. The command that you want to run as superuser is “apt-get,” which is a package manager, or a manager of software packages that run on your Raspberry Pi. “update” is a modifier for “apt-get,” and its purpose is to tell “apt-get” to update its index of available software packages with what is stored on the remote software repository (where your Raspberry Pi is downloading its software from).

    After the update operation completes and you return to the command prompt, type: “sudo apt-get upgrade”. Similarly, agree to the prompts with “y” and “Enter”. The “upgrade” modifier to “apt-get” tells it to upgrade the software based on what it learned when updating its index with the previous command. Thus, when you run these two commands, you should run the update command first (learn) and the upgrade command second (act on what was learned).

    To launch into Raspbian’s X11, type “startx”. Inside X11 or xwindows, you will find many of the GUI-based software that really makes the Raspberry Pi sing: Scratch, Python, Mathematica, and more. If you have never used X11, it works a lot like Windows 95/98 except that the Start Menu bar is at the top of the screen instead of at the bottom and “Start” is replaced by “Menu.” Some quick launch apps are directly available to be launched with a single click from the start bar (such as Terminal, the Epiphany web browser, and Wolfram Mathematica) while all of the installed X11 programs are available from the “Menu.” Below are images of the Raspbian desktop and navigating through some of the default programs available.

    To easily install additional software, you can install the Synaptic Package Manager, which simplifies finding and installing software packages by wrapping package management in an easy-to-use GUI. From inside X11, open Terminal and type “sudo apt-get install synaptic”. This will install Synaptic, which you can open by clicking on Menu > Preferences > Synaptic Package Manager (more info on this and other Raspberry Pi stuff on Neil Black’s website).

    When you done browsing around, you can click on the and choose to shut down. After a few moments, your display should show a blank screen and the activity lights on the back of the Raspberry Pi (red and green) should only be showing a solid red. At that point, unplug the micro USB 5v power adapter. If you are ready to install the 7″ Touchscreen Display, unplug the HDMI cable, too.

    In the images below, I demonstrate how to assemble the 7″ Touchscreen Display and connect it to the Raspberry Pi. I followed the excellent instructions available on the official Raspberry Pi website, which also details how to install the Matchbox virtual keyboard for using the touchscreen without a keyboard.

    To begin connecting the 7" Touchscreen Display to the Raspberry Pi, place the screen facing down.
    To begin connecting the 7″ Touchscreen Display to the Raspberry Pi, place the screen facing down.


    Screw in the standoff posts to hold the display controller card to the display. Connect the display and touchscreen wires as described on the official installation guide.
    Screw in the standoff posts to hold the display controller card to the display. Connect the display and touchscreen wires as described on the official installation guide.


    Insert the display cable to the video input on the controller card.
    Insert the display cable to the video input on the controller card.


    Place the Raspberry Pi above the display controller card and attach with the supplied screws that screw into the top of the standoff posts.
    Place the Raspberry Pi above the display controller card and attach with the supplied screws that screw into the top of the standoff posts.


    Connect the other end of the display cable into the output connector on the Raspberry Pi.
    Connect the other end of the display cable into the output connector on the Raspberry Pi.


    Use the supplied jumper wires to connect connect the power input of the display controller card...
    Use the supplied jumper wires to connect connect the power input of the display controller card…


    ...to the power output leads on the GPIO pins on the Raspberry Pi. This is one of three possible powering configurations--the other two involve USB.
    …to the power output leads on the GPIO pins on the Raspberry Pi. This is one of three possible powering configurations–the other two involve USB.


    This is the rear of the 7" Touchscreen Display assembled with the controller card and Raspberry Pi.
    This is the rear of the 7″ Touchscreen Display assembled with the controller card and Raspberry Pi.


    This is the front of the 7" Touchscreen Display with the power leads sticking out from behind.
    This is the front of the 7″ Touchscreen Display with the power leads sticking out from behind.


    This is the Raspberry Pi powered up again with the 7" Touchscreen Display.
    This is the Raspberry Pi powered up again with the 7″ Touchscreen Display.


    Mose and Miao had lost interest in the project by this point.
    Mose and Miao had lost interest in the project by this point.


    To complete the project, I cut a hole into a Suntory shipping box from Japan that is the exact same size as the 7" Touchscreen Display box, which would work well, too. It is works well for holding up the Raspberry Pi and storing its accessories when I go between home and work.
    To complete the project, I cut a hole into a Suntory shipping box from Japan that is the exact same size as the 7″ Touchscreen Display box, which would work well, too. It is works well for holding up the Raspberry Pi and storing its accessories when I go between home and work.

    Of course, you can use the Raspberry Pi with or without a case depending on your needs. I used the Suntory cardboard box from Japan for practical reasons (thinking: William Gibson: “the street finds its own use for things”–it’s a good size, on-hand, and looks cool) and research reasons (thinking about my work on proto-cyberpunk and the hidden nature of computing, which is an idea explored in my previous blog post about the poster that I created for the 13th annual City Tech Poster Session).

    I have run the computer and touchscreen from the 5v battery that I purchased from Tinkersphere, but I get a graphics warning that the Raspberry Pi is under voltage (a rainbow pattern square persists in the upper right corner of the display whether in the CLI or xwindows). I might get a second battery to run the display alone, which would help me troubleshoot if the battery that I have now is actually outputting enough voltage and amperage needed by the Raspberry Pi alone. In the meantime, I am running everything at my desk with the 5v power adapter, which provides ample power for the Raspberry Pi and 7″ Touchscreen Display.

    In the future, I would like to use the Raspberry Pi in a writing or technical communication course. There are many ways to leverage the technology: problem solving, writing about process, creating technical documents such as reports and instructions, using the Raspberry Pi as a writing/multimodal composing platform, digital storytelling with tools that come with the Raspberry Pi, and more. These ideas are built only around the Raspberry Pi and its software. A whole other universe of possibilities opens up when you begin building circuits and integrating the Raspberry Pi into a larger project.

    The basic cost of entry with the platform is $30 for the Raspberry Pi 2, Model B and a few dollars for an 8GB micro SD card. If you have access to a display with HDMI, a USB keyboard and mouse, and ethernet-based Internet access, you can get started with Raspberry Pi almost immediately. For a future grant application, I am imagining a proposal to purchase the basic needed equipment to use Raspberry Pi in an existing computer lab. I can bring the kits to each class where students can use them on different assignments that meet the outcomes for that course but in an engaging and challenging way that I think they would enjoy and would be beneficial to them in ways beyond the immediate needs of the class.

    On this last point, I am thinking of working with digital technology in an a way many of my students will not have had a chance to before, feeling a sense of accomplishment, learning from one another on team-based projects, experiencing a sense of discovery with a computing platform that they might not have used before, and of course, communicating through the process of discovery in different ways and to different audiences. This might be something that you’re interested in, too. Drop me a line if you are!

  • Before Cyberpunk: Science Fiction and Early Personal Computing (for the 13th City Tech Poster Session)

    ellis-40x31_poster-template-landscape

    For the New York City College of Technology, CUNY’s 13th Annual Research Poster Session, I created the poster embedded above to illustrate my current research on pre-cyberpunk science fiction (SF) about computing and personal computing. The poster discusses my focus and provides a timeline with SF about computing matched with key technological innovations that made the personal computing revolution in the late-1970s possible.

    What I am interested in is the fact that William Gibson’s “cyberspace” captured the popular imagination about the metaphorical place where computing, processing, navigating, interacting, and communicating occurs, but some of the very good SF about computing that predates Gibson’s coining the term cyberspace failed to leave an indelible impression. Certainly, these stories were read and circulated, but the reach of their images and metaphors seem to have been limited in scope as compared to Gibson’s writing.

    One of the ideas that I have had since creating the poster is that the idea of hidden computing or outlaw computing is something central to Vernor Vinge’s “True Names.” This, of course, features large in Gibson’s fictions, and it is the image that I am looking for in other SF of this transitional era.

    At the poster session, I will carry my Raspberry Pi-based touchscreen-computer-in-a-Suntory-box-from-Japan to demonstrate the idea of hidden computing. I will post a step-by-step instruction post soon about assembling the Raspberry Pi-based computer and offer some additional thoughts about how I would like to use them in my technical communication classes.

    In this post, I want to provide some of my notes and links to relevant resources as a record of the initial research that I did in preparation of this poster. It is my hope that it might lead to conversations and collaborations in the future.


    Fiction Sources

    Murray Leinster’s “A Logic Named Joe” (1946): Home computers connected to a large scale network. [Couldn’t fit within poster dimensions, but a significant work that needs mentioning.]

    Isaac Asimov’s “The Fun They Had” (1951): Children discovering a print book are agog at what it represents while their classroom/desktop teaching computers flash mathematical fractions at them. [Couldn’t fit within poster dimensions, but another important work in this genealogy.]

    Poul Anderson’s “Kings Who Die” (1962): Human-computer interface, according to Asimov and Greenberg in The Great SF Stories #24, “one of the first stories to address this question” (69).

    Daniel F. Galouye’s Simulacron-3 (1964): Also published as Counterfeit World. Adapted as Welt am Draht/World on a Wire (1973). Simulated reality for artificial beings programmed to believe (except in the case of one character) that they are real and living in the “real world.”

    Philip K. Dick’s A Maze of Death (1970): A crew in a disabled spacecraft while awhile their remaining lives in a computer generated virtual world.

    John Brunner’s The Shockwave Rider (1975): Computer programming and hacking. First use of the term “worm” to describe a type of self-propagating computer program set loose on the computer network. Protagonist as outlaw.

    [Five year gap during the personal computing revolution. Were the SF writers playing with their new personal computers?]

    John M. Ford’s Web of Angels (1980): The “Web” is a communication and computing network connecting humanity. “Webspinners” are an elite group of programmers who can manipulate the Web in unique and unexpected ways. Protagonist as outlaw.

    Vernor Vinge’s “True Names” (1981): Computing power hidden from view of a watchful government–literally under the floor boards. Early MMORPG/virtual reality experience of what was later called cyberspace. Protagonist as outlaw.

    Damien Broderick’s The Judas Mandala (1982): First SF to use the terms “virtual reality” and “virtual matrix.” Protagonist as conspirator/outlaw?


    Nonfiction Sources

    Cavallaro, Dani. Cyberpunk and Cyberculture: Science Fiction and the Work of William Gibson. New Brunswick, NJ: Athlone Press, 2000. Print.

    Ferro, David L. and Eric G. Swedin. Eds. Science Fiction and Computing: Essays on Interlinked Domains. Jefferson, NC: McFarland, 2011. Print.

    Kay, Alan C. “A Personal Computer for Children of All Ages.” ACM ’72 Proceedings of the ACM Annual Conference – Volume 1. New York: ACM, 1972. n.p. Web. 18 Nov. 2015.

    Mowshowitz, Abbe. Inside Information: Computers in Fiction. Reading, MA: Addison-Wesley, 1977. Print.

    Murphy, Graham J. and Sherryl Vint. Beyond Cyberpunk: New Critical Perspectives. New York: Routledge, 2010. Print.

    Slusser, George Edgar and TA Shippey. Eds. Fiction 2000: Cyberpunk and the Future of Narrative. Athens: University of Georgia Press, 1992. Print.

    Stableford, Brian. Science Fact and Science Fiction: An Encyclopedia. New York: Routledge, 2006. Print.

    Timeline of Computer History. Computer History Museum, 2015. Web. 18 Nov. 2015.

    Warrick, Patricia. The Cybernetic Imagination in Science Fiction. Cambridge: MIT, 1980. Print.


  • Collaborative, Vintage Computing Writing Project for ENG 1133 Specialized Communication for Technology Students at City Tech

    R to L: Commodore 64, TRS-80, TI-99/4A, and Atari 800.
    R to L: Commodore 64, TRS-80, TI-99/4A, and Atari 800.

    In ENG 1133 Specialized Communication for Technology Students at City Tech this semester, I am rolling out a new major project focusing on creating documents based on a specific vintage computer. This project is an offshoot of my archival retrocomputing research (latest update here).

    As in my other technical communication-based classes, I prefer students have an opportunity to learn how to write certain kinds of technical and business documents in a collaborative setting. They obtain the double benefit of learning the document genre and conventions while also negotiating collaborative writing practices that they will encounter in the workplace.

    For this project, in teams of 4-5 students, they will create agendas, minutes, a research report, a bid/proposal, single-sourced documents (tri-fold brochure and owner’s manual), a document testing report, and a presentation. The documents that each team creates will be based on what they learn about a specific vintage computer. I assigned teams to one of four vintage computers that I obtained from Stan Kaplan at City Tech: Commodore 64, Radio Shack TRS-80, Atari 800, and Texas Instruments TI-99/4A (using a double integer sequence from random.org in front of the class). A copy of the assignment can be downloaded here: ellis-jason-eng1133-project2-2015-fall, and the class syllabus can be downloaded here: ellis-jason-eng1133-syllabus-2015-fall.

    In addition to using library resources, students are encouraged to use Archive.org’s vast retrocomputing resources, holdings, and interactive features.

    I am looking forward to learning from my students’ research and seeing their documents emerge from their collaborations.