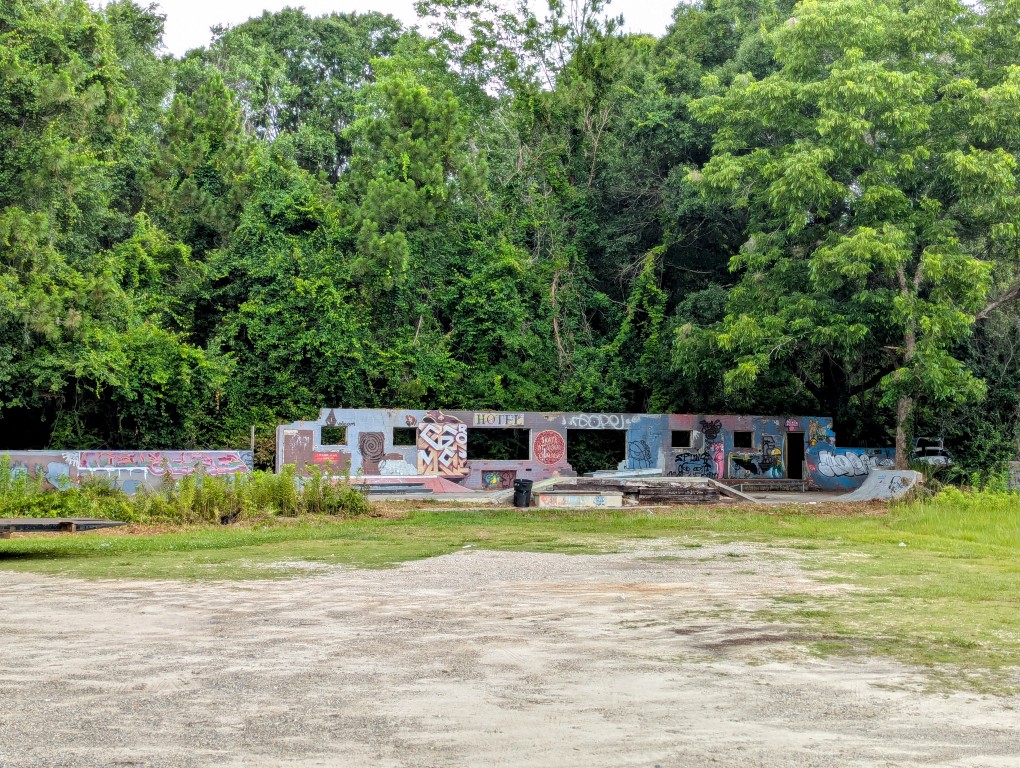
Behind the Gold House Restaurant at 135 N Main St. in Nahunta, Georgia, there’s a small skatepark with mini ramps, curbs, and other surfaces to skate. It’s right on the edge of a thick wooded area.
Behind the Gold House Restaurant at 135 N Main St. in Nahunta, Georgia, there’s a small skatepark with mini ramps, curbs, and other surfaces to skate. It’s right on the edge of a thick wooded area.
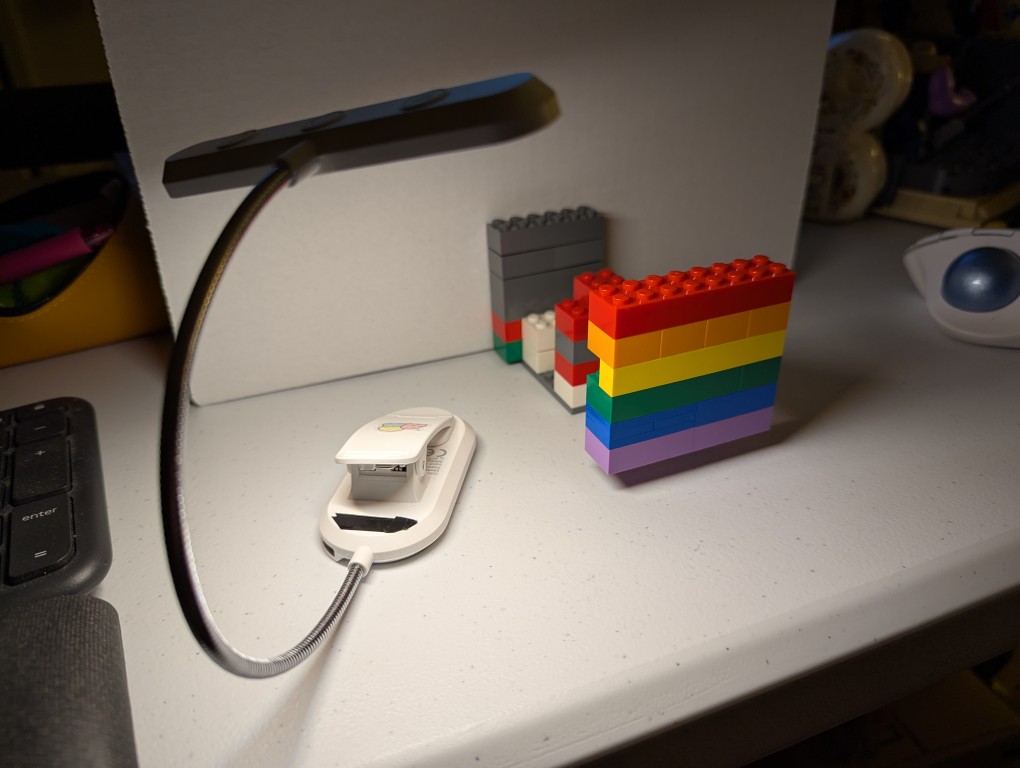
On Monday, I posted happy wishes for Pride Month with a photo that I made of a LEGO Pride Flag.
To create the photo, I first dug through my boxes of LEGO to find 8 stud wide bricks that matched as close as possible to the Rainbow Flag’s approximation of ROYGBIV: red, orange, yellow, green, blue, and purple.
My first shots had the flag resting on the table some distance in front of a white cardboard box, which served as a neutral background. For lighting, I held a USB rechargable book reading light belonging to Y just above my smartphone to avoid casting a shadow from the camera.
I didn’t like how these turned out, because the flag was kind of boring just sitting there. So, I thought about levitating it like in Monday’s post.
To levitate the flag, I built a counter-weighted assembling of 6-stud wide bricks with an armature that connected behind the yellow bricks in the Pride Flag. I built this armature one brick higher than the flat to give it the illusion of floating in midair.
I mentioned this to my students the other day, but I wasn’t able to find a photo of what I was talking about. Now I have, so I’ll show it to them in class tomorrow.
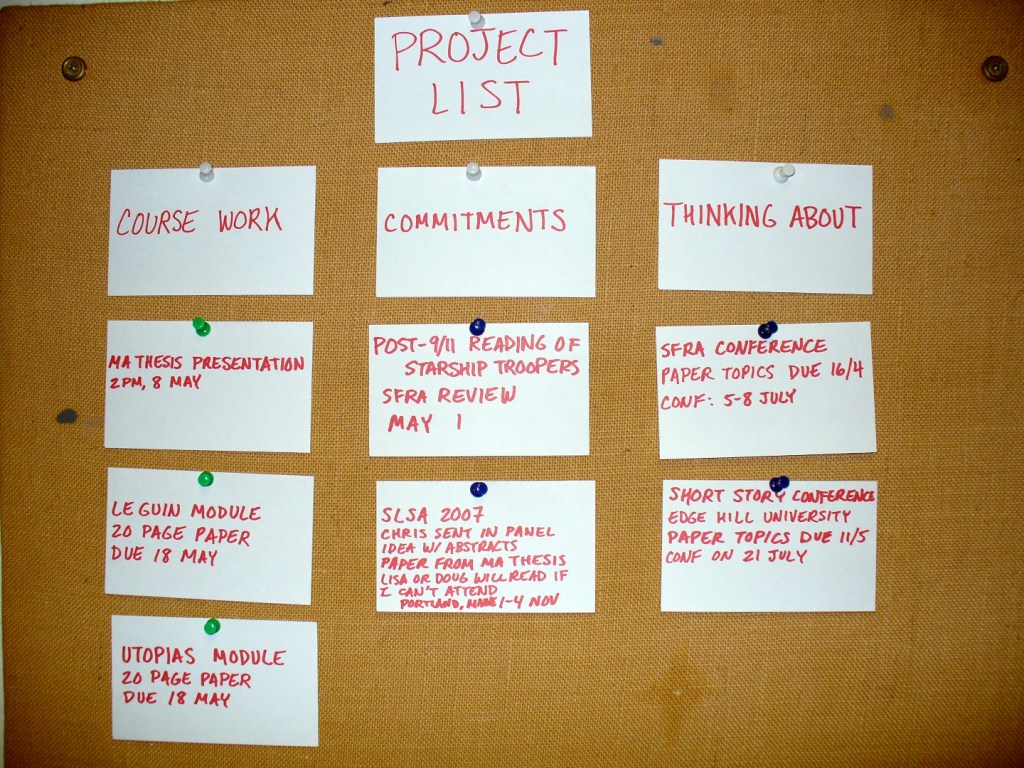
This is my project board while I was an MA student at the University of Liverpool. My monk’s cell had a felt-covered corkboard that I repurposed as a project scheduler by writing upcoming work and ideas on 3″ x 5″ index cards and pinning them into one of three columnar categories: Course Work, or assignments and readings in my classes; Commitments, or work product deliverables like writing a book review or preparing a conference presentation; and Thinking About, or projects and ideas that I was considering but hadn’t committed myself to yet.
This board was the key to my academic success at that time, because it gave me a way of tracking the work that I had coming up and I could see at a glance from my desk what needed to be prioritized to keep my output going.
Over time, the board became quite full of index cards. It was always satisfying to take a card off the board when that task had been completed.
Using a daily planner or a calendar app can serve a similar purpose. Whatever method and tool that works best for you, make a commitment to stick with it so that it can keep you on track for success.
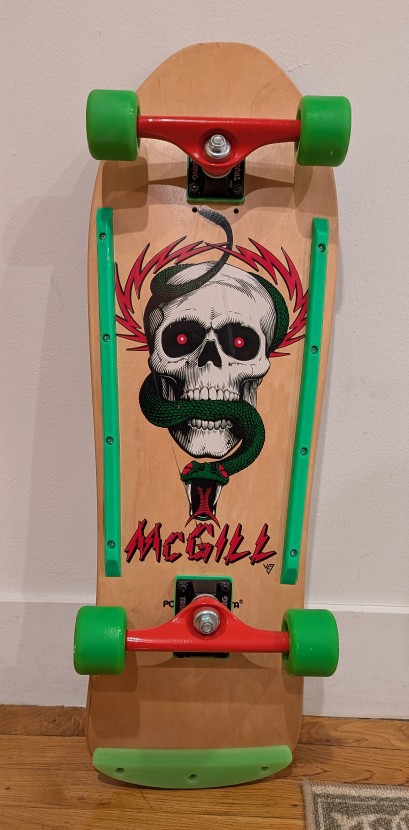
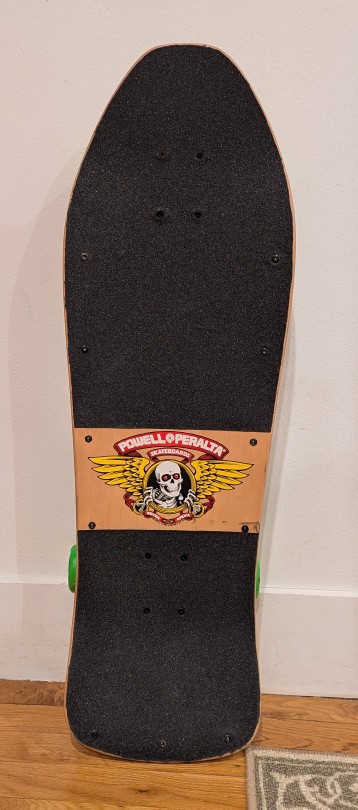
Before the tariffs (are a tax) and plummeting markets, I wanted to liquidate some of my belongings to have more cash on hand because [waves hand]. As a part of that, I sold my prized possession: a 1989 Powell Peralta Mike McGill woodgrain complete skateboard this past weekend on eBay. It’s in transit to the buyer now.
My maternal grandmother and grandfather–Wilma and Papa Gerald–gifted me the McGill after I picked it out and its hardware from a full-page mail order ad in Transworld Skateboarding magazine. Everything arrived in a big, long box. I needed help to apply the grip tape and install the trucks, wheels, and bearings. I took it out to ride as soon as it was ready.
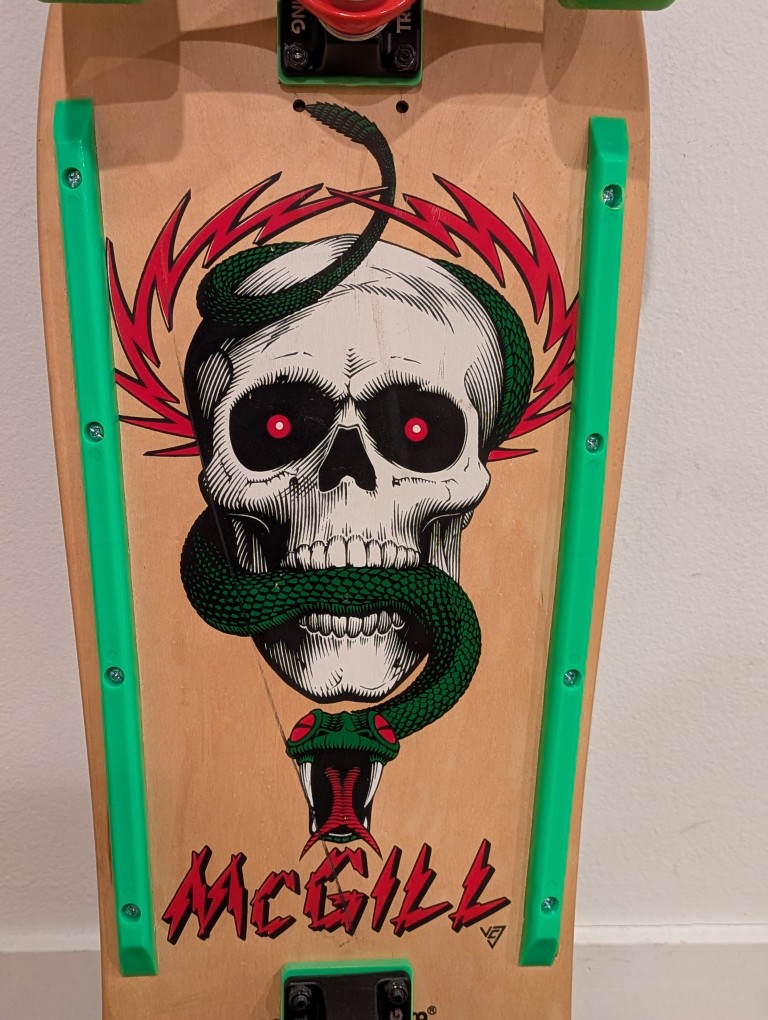
I loved the artwork of the skull and snake by Vernon Courtlandt Johnson. He did most of the major artwork for Powell Peralta during that era, including the “Ripper” logo on the top of the deck.
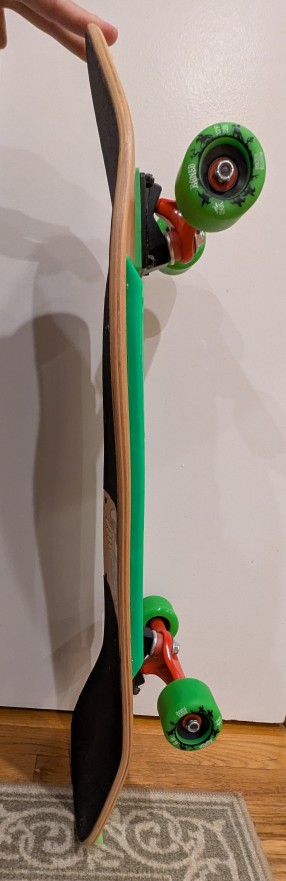
Due to the age of the skateboard deck and how it might have been stored over the years before I got it, it had developed a twist, which you can see in the picture above. While the deck is concave, toward the front of the deck, it can been seen to have a rightward twist toward the camera. It wasn’t too bad and for normal riding it probably wouldn’t be noticeable.
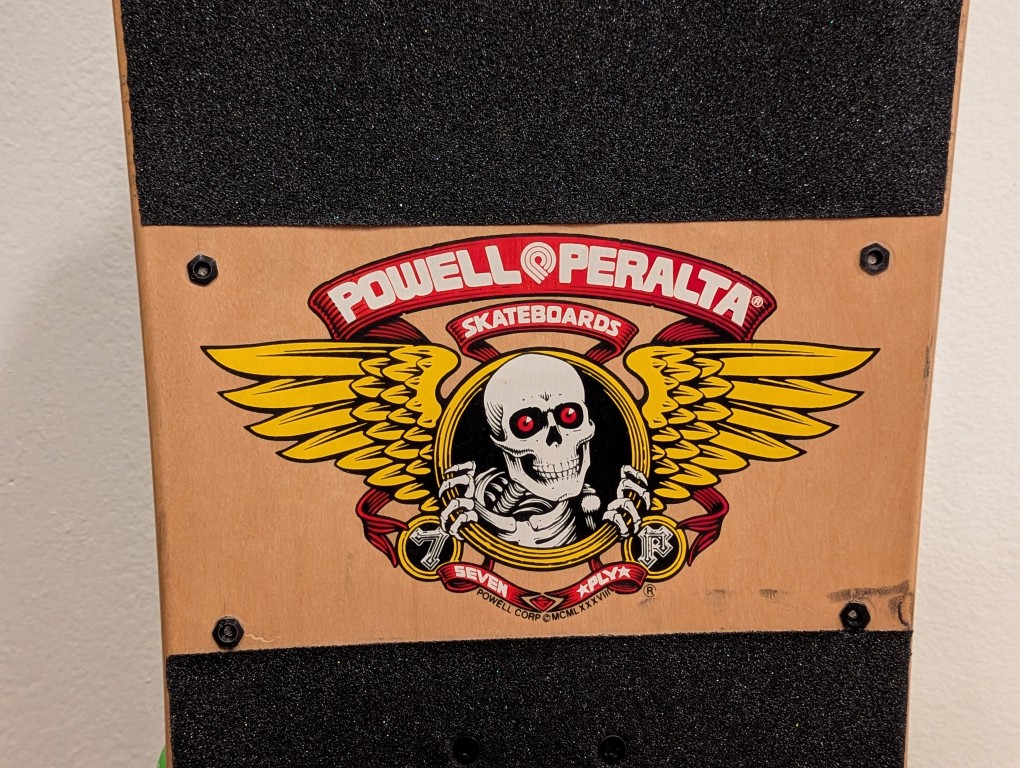
With this one that I assembled with new hardware, I applied the grip tap but left the Powell Peralta logo on the top of the deck exposed like I did with my original one.
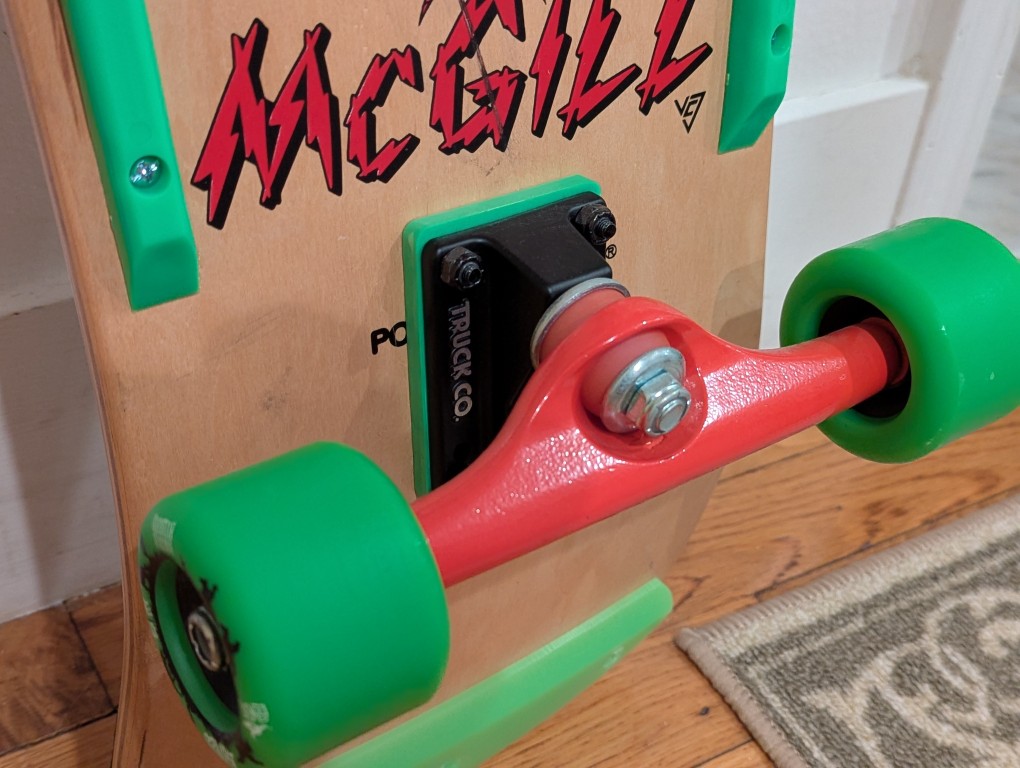
I got the same brand trucks like I used to have–Gullwing. However, I went with 9″ wide Shadows instead of the Pro III’s that I used to have. I figured that if I rode this skateboard, it would just be for leisurely getting around and therefore didn’t need something higher end. Going for a matching color scheme, I added 1/4″ risers in neon green.
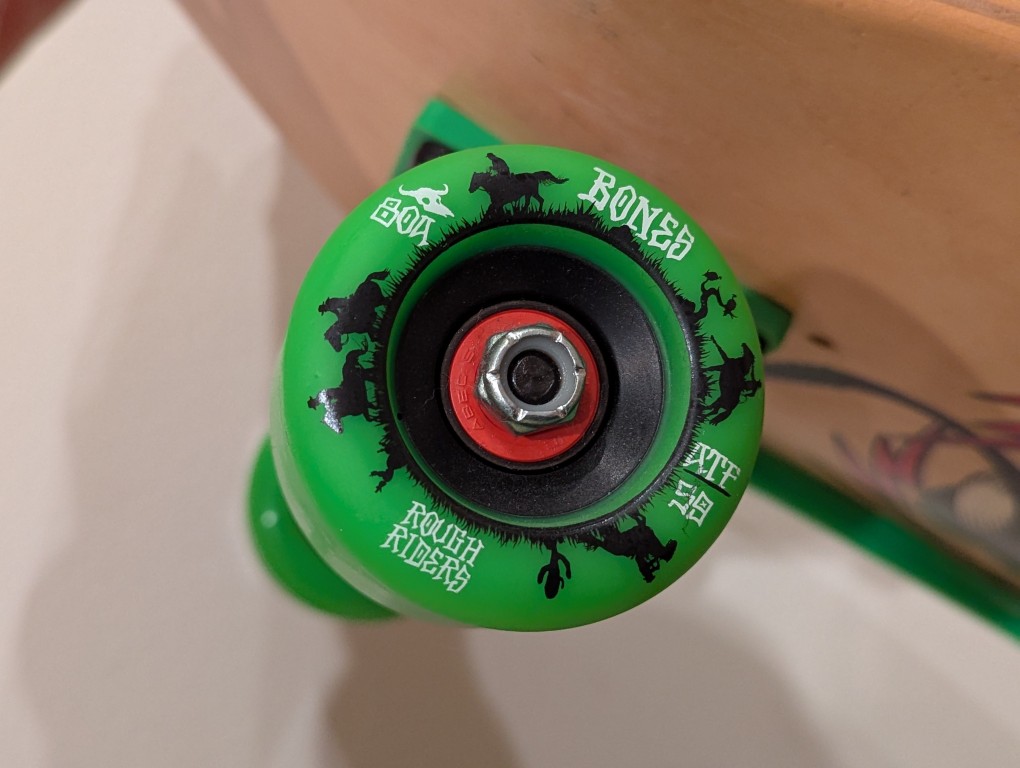
Again, thinking about how I might use this skateboard for riding on the street, I got large, soft wheels. These are Bones’ Rough Riders with a 80A hardness, 59mm diameter, and all-terrain formula. The bearings are generic ABEC5 with spacers in-between.
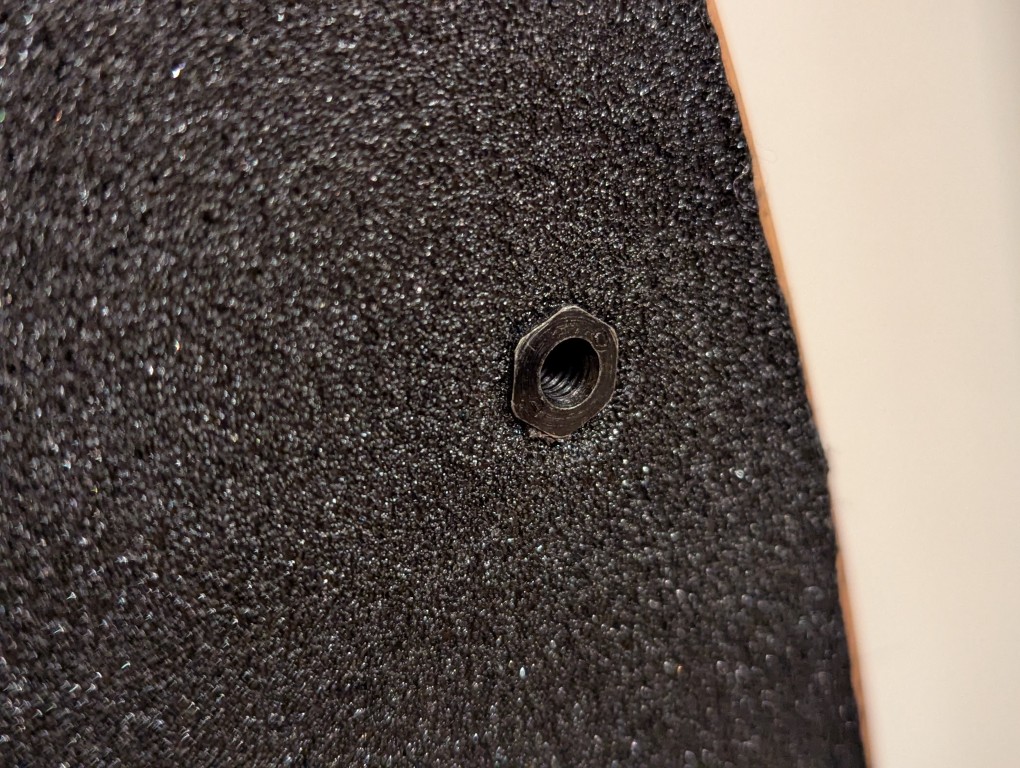
For the tail guard and rails, I installed them using “Rat Nuts” (aka T-Bolts or Sex Bolts) so that none of the hardware dug into the wood–the top sleeve passes through a hole and a screw meets it from the bottom. The rails were a generic brand with a hole pattern that matched those already on the board. The tail guard was an authentic Powell Peralta 9″ Tail Bone that I found for sale as new-old-stock.
I can’t for the life of me remember what happened to my original McGill. I might have given it away or sold it before going to college. I just can’t remember. Before I found this deck and kitted it out with all new hardware, I wrote about assembling a reissue of an earlier model McGill that had the bowl/fishtail shape but without the angled nose of the 1989 model (which I sold to help finance purchasing this original McGill some years ago).
It’s a good skateboard even being 36 years old. I hope that it brings happiness to its new owner.
Unfortunately for me, it feels like I can’t enjoy things like this in this life–not with things being so precarious and uncertain.
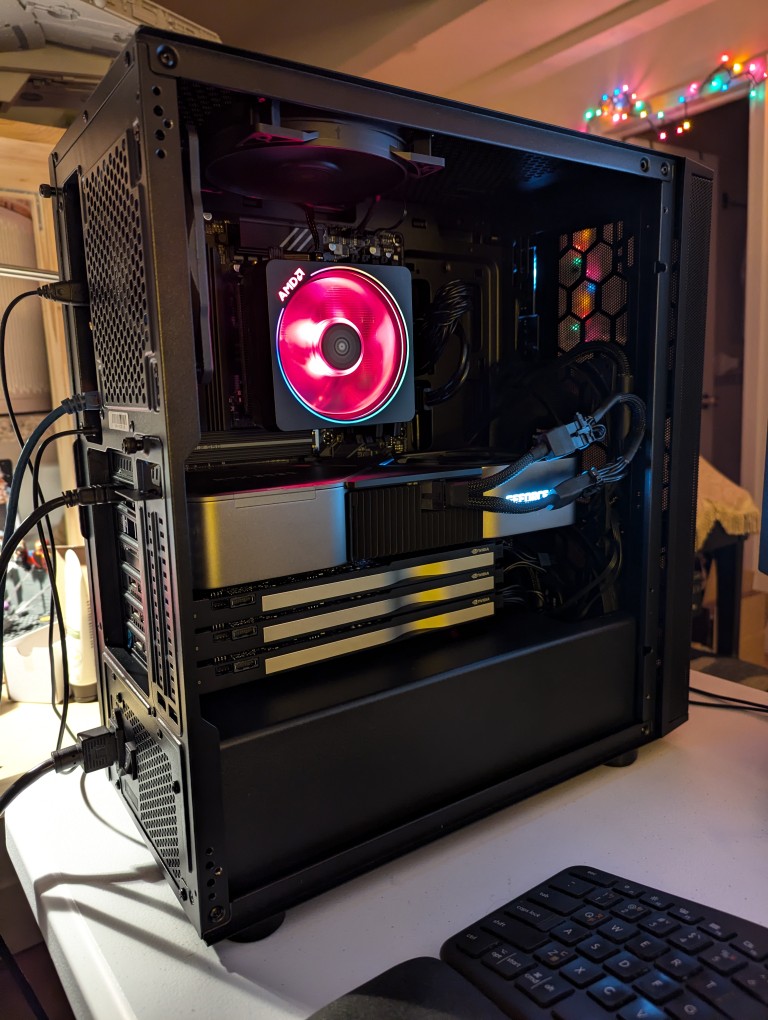
This past weekend, I got the final part that I needed to begin assembling my new AI-focused workstation. It took about a whole day from scrounging up the parts to putting it together to installing Debian 12 Bookworm. As you can see in the photo above, it’s running strong now. I’m installing software and testing out its capabilities especially in text generation, which without any optimizing has jumped from 1 token/sec on my old system to 5 token/sec on this system using a higher quantanized model (70B Q4_K_M to 70B Q6_K)!
The first thing that I needed to do with my old system was to remove the components that I planned to use in the new system. This included the NVIDIA RTX 3090 Founders Edition video card and two 2TB Samsung 970 EVO Plus nvme SSDs.
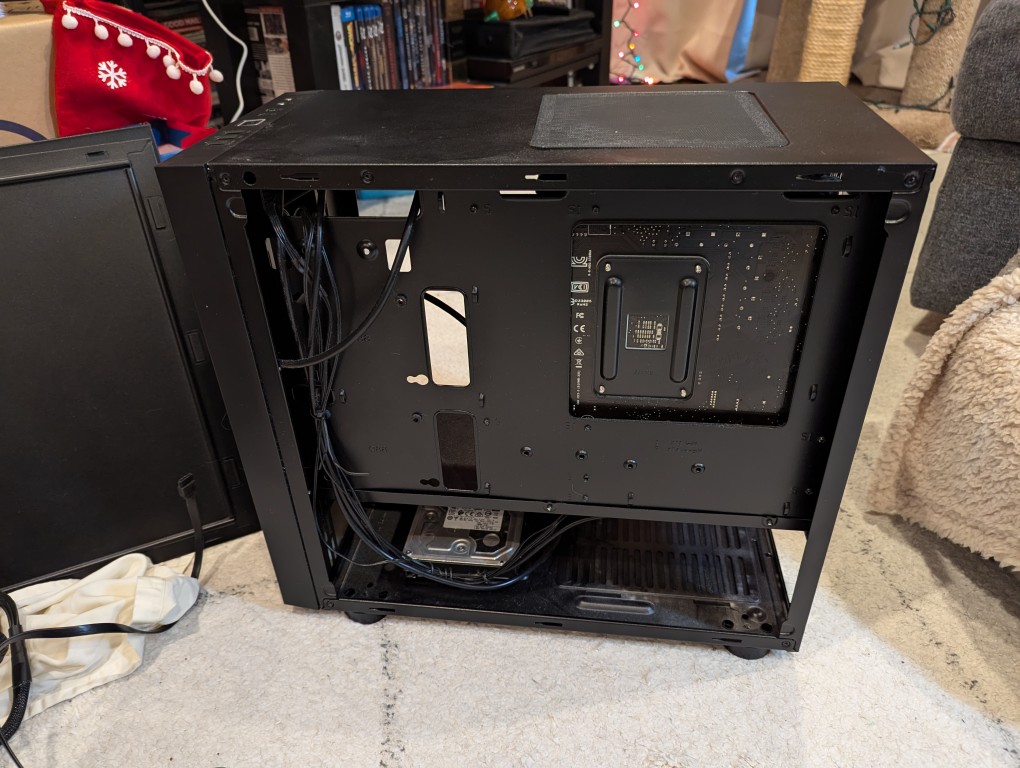
I almost forgot my 8TB Western Digital hard disk drive that I had shucked from a Best Buy MyBook deal awhile back (in the lower left of the old Thermaltake case above).
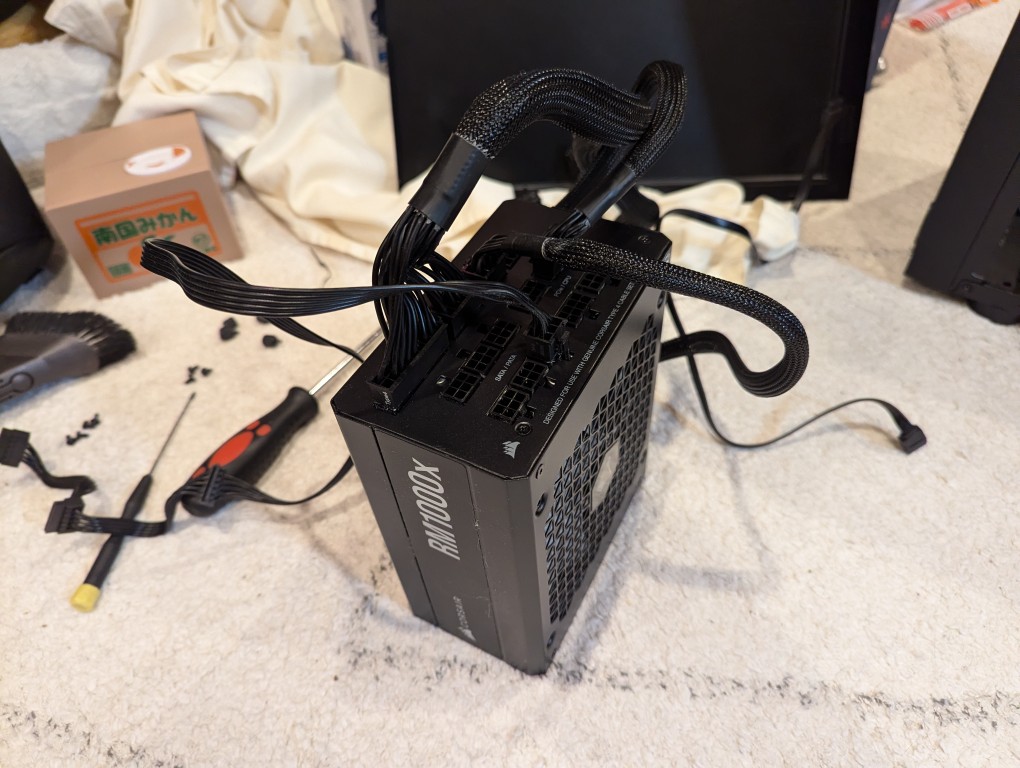
Finally, I needed the Corsair RM1000X 1000 watt power supply and its many modular connections for the new system’s four video cards.
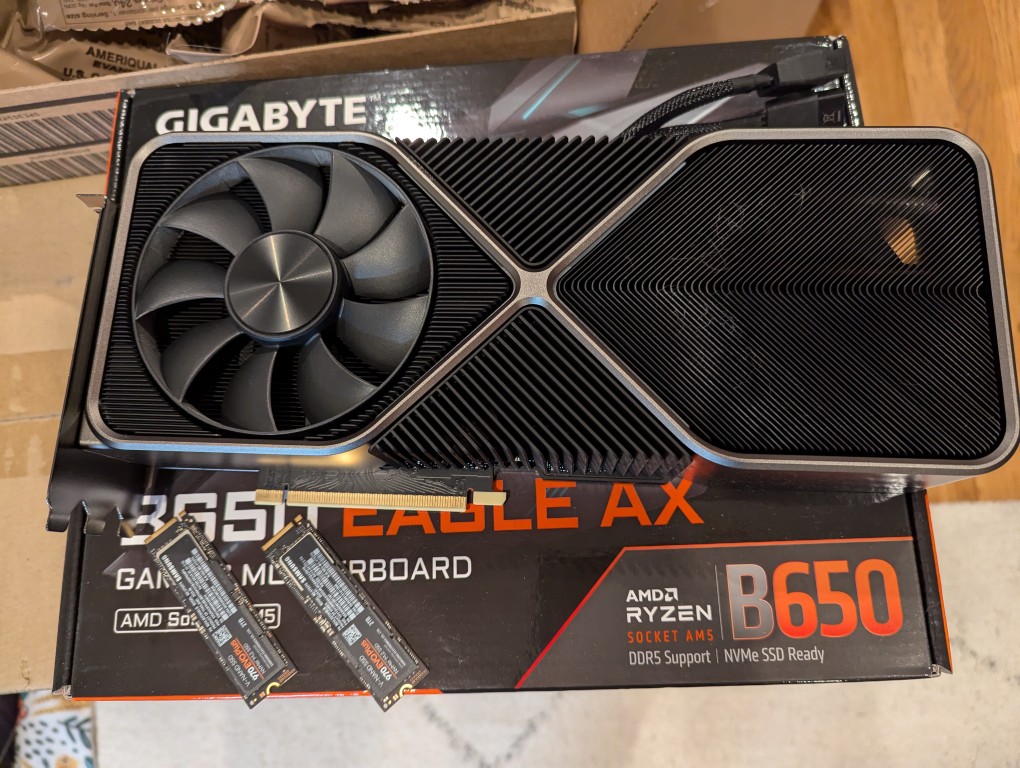
The new workstation is built around a Gigabyte B650 Eagle AX motherboard. I selected this motherboard, because it has a unique 16x PCIe slot arrangement–the top one has space for a three slot video card like my 3090, and its lower three slots would support the three NVIDIA RTX A4000 16GB workstation video cards that I had purchased off of eBay used. The lower slots do not run at full speed with 16 PCIe lanes, but when you are primarily doing AI inference, the speed that even 1x PCIe lanes provides is enough. If you are doing AI training, it is better to have a workstation-class motherboard (with Intel Xeon or AMD Threadripper Pro CPUs), because they support more PCIe lanes per PCIe slot than a consumer-based motherboard like this one is built to provide.
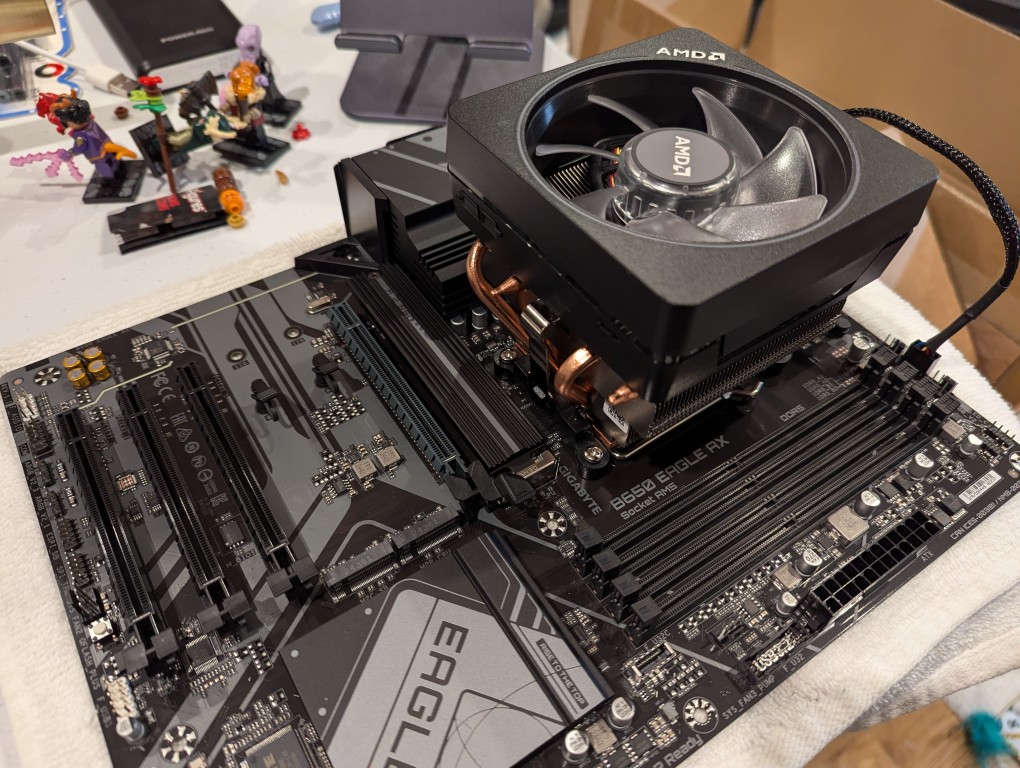
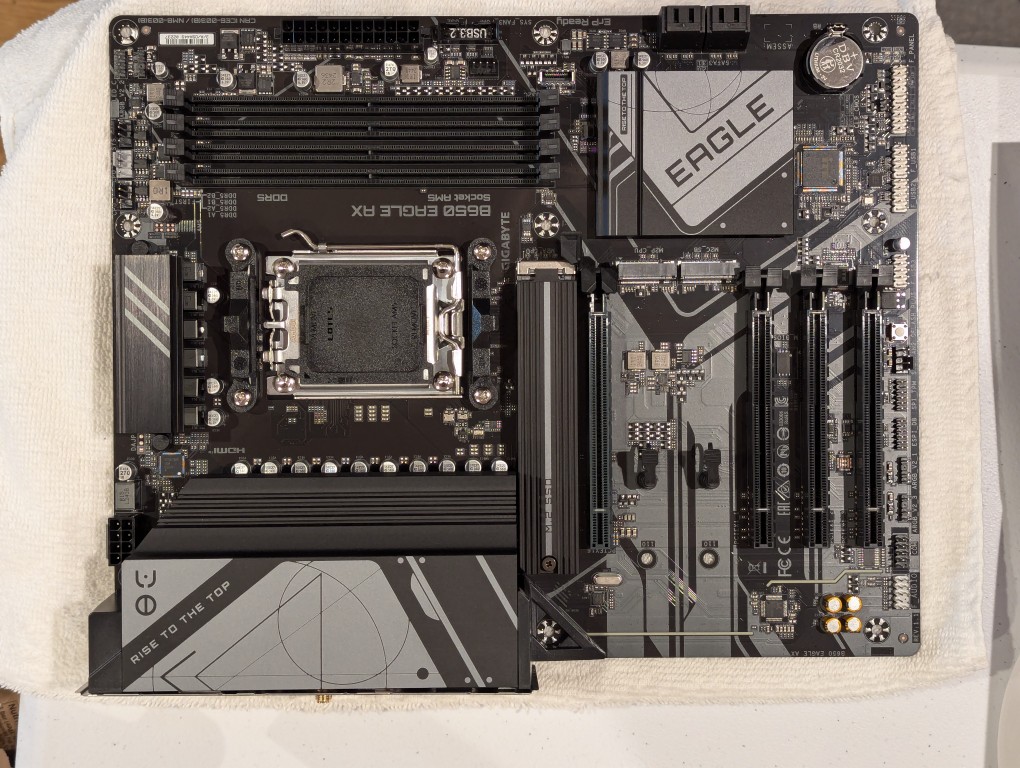
The first step with the new motherboard was placing it on a soft surface and installing the CPU. I purchased an AMD Ryzen 7 7700 AM5 socket CPU. It came with AMD’s Wraith Prism RGB Cooler, which is a four heat pipe low-profile CPU cooler. I don’t care for its RGB colors, but it reduced the overall cost and provides adequate cooling for the 7700, which isn’t designed for overclocking.
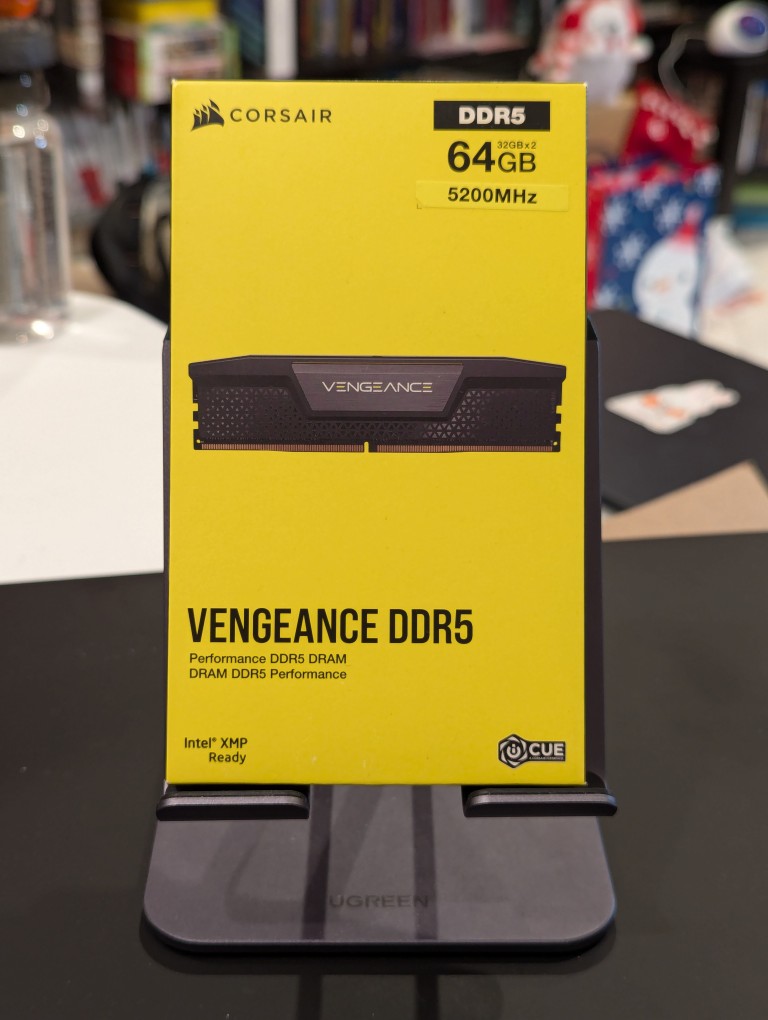
Next, I installed the RAM that I just received–64GB Corsair Vengeance DDR5-5200 RAM (32 GB x 2).
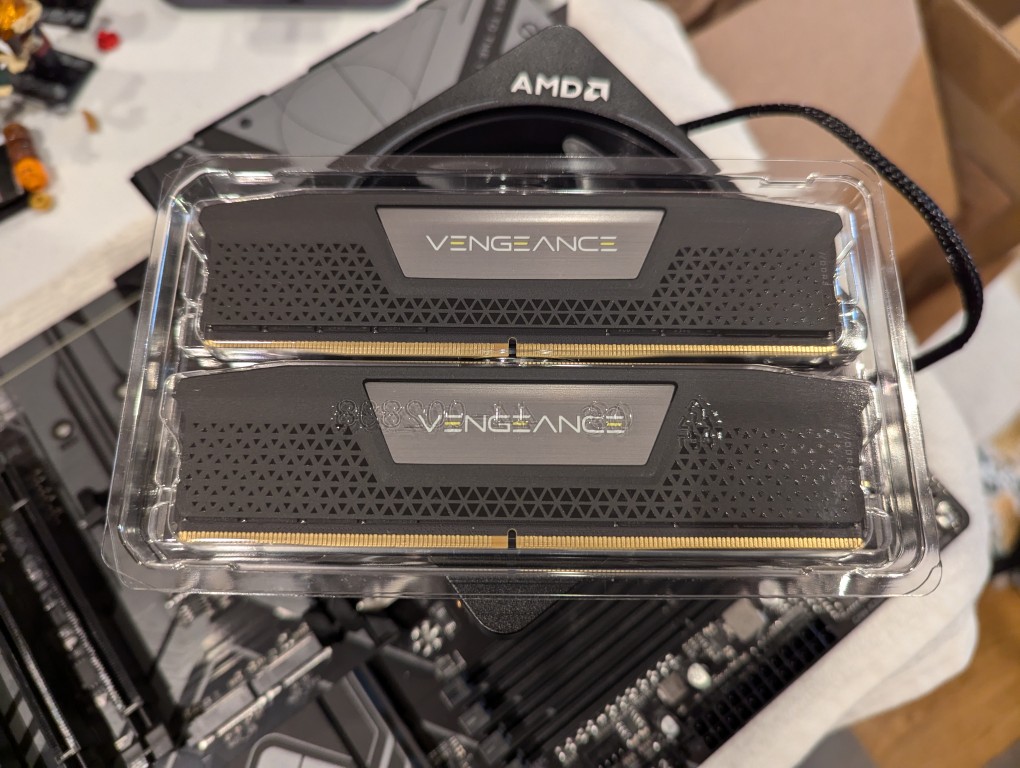
This RAM runs at the stock highest speed for the 7700 CPU (though, I had to manually change the multiplier to 52x in the BIOS as it was registering as only DDR5-4800–it passed memtest86+ at the higher setting without any errors). As you can see above, it has nice heat spreaders built-in.
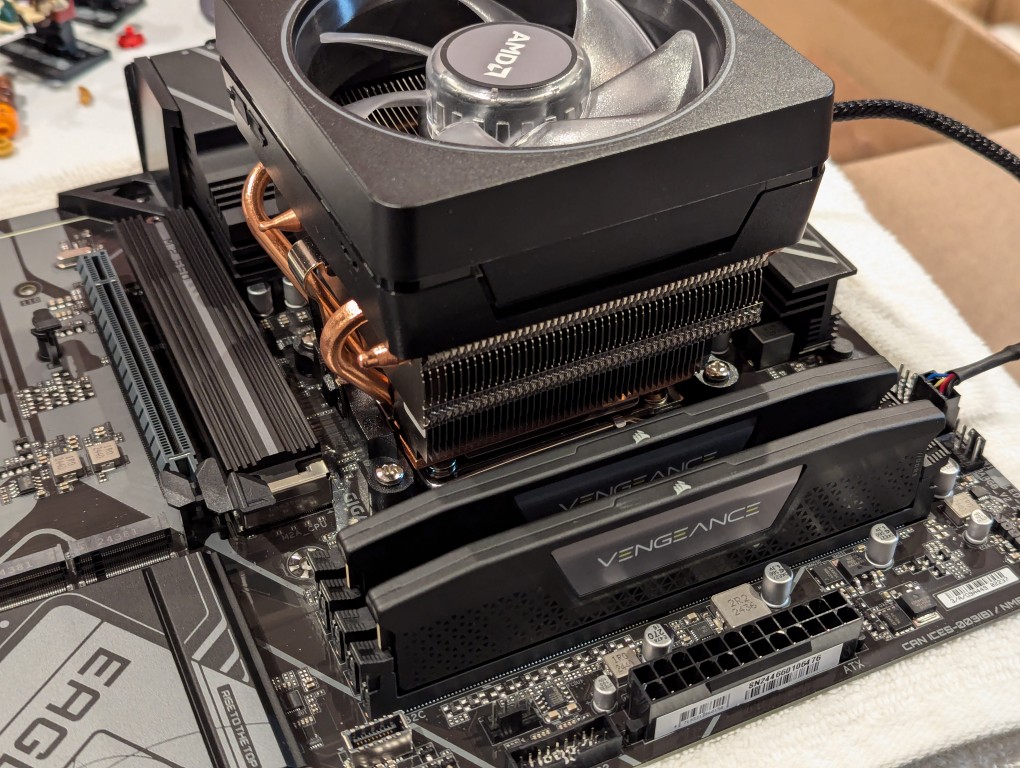
It’s important to note that I went with less RAM than my old system, because it’s well known that the AM5 platform and its current processors are not good at supporting higher RAM speeds for more than two RAM sticks. Since I’m focusing on doing inference with the video cards instead of the CPU (as I had done with the old system), I didn’t need as much RAM. Also, I figured that if I make the leap to a workstation-class CPU and motherboard, I can make a larger RAM investment as those systems also support 8-channel memory (more bandwidth, meaning faster inference) as opposed to the 2-channel memory (less bandwidth, slower CPU inference) on this consumer-focused motherboard.
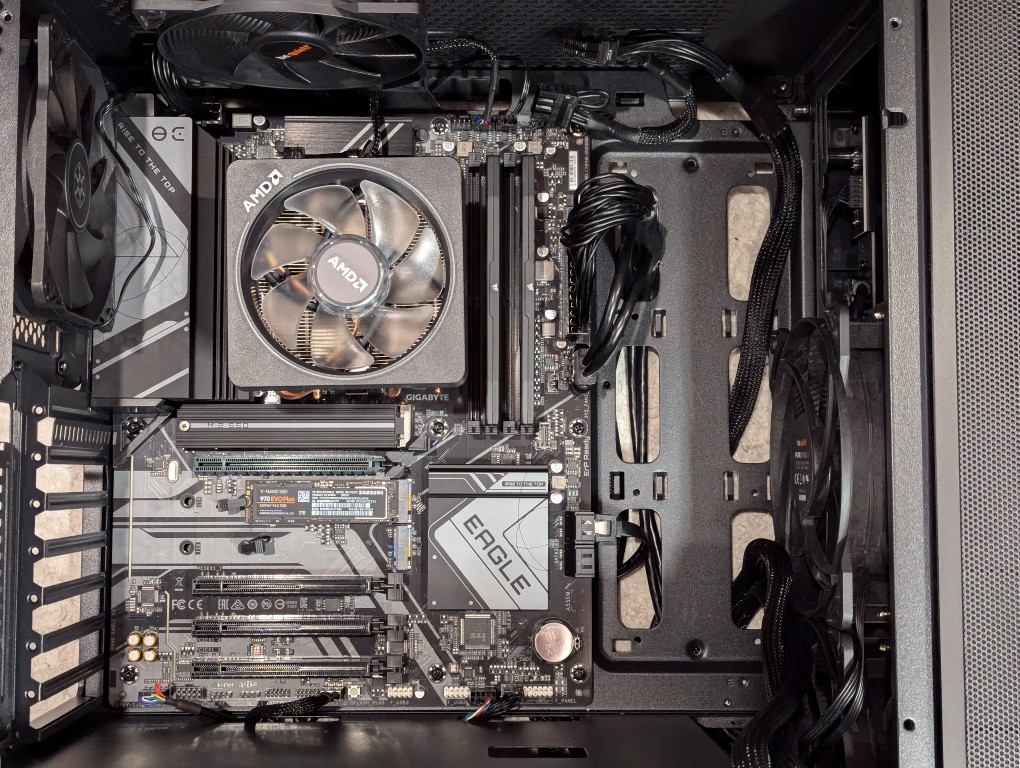
Then, I installed two Samsung nvme SSDs on the motherboard–one under the headspreader directly below the CPU in the photo above and one below the top PCIe slot before installing the motherboard in my new, larger Silverstone FARA R1 V2 ATX midtower case after adding the few additional standoffs that were needed for an ATX motherboard.
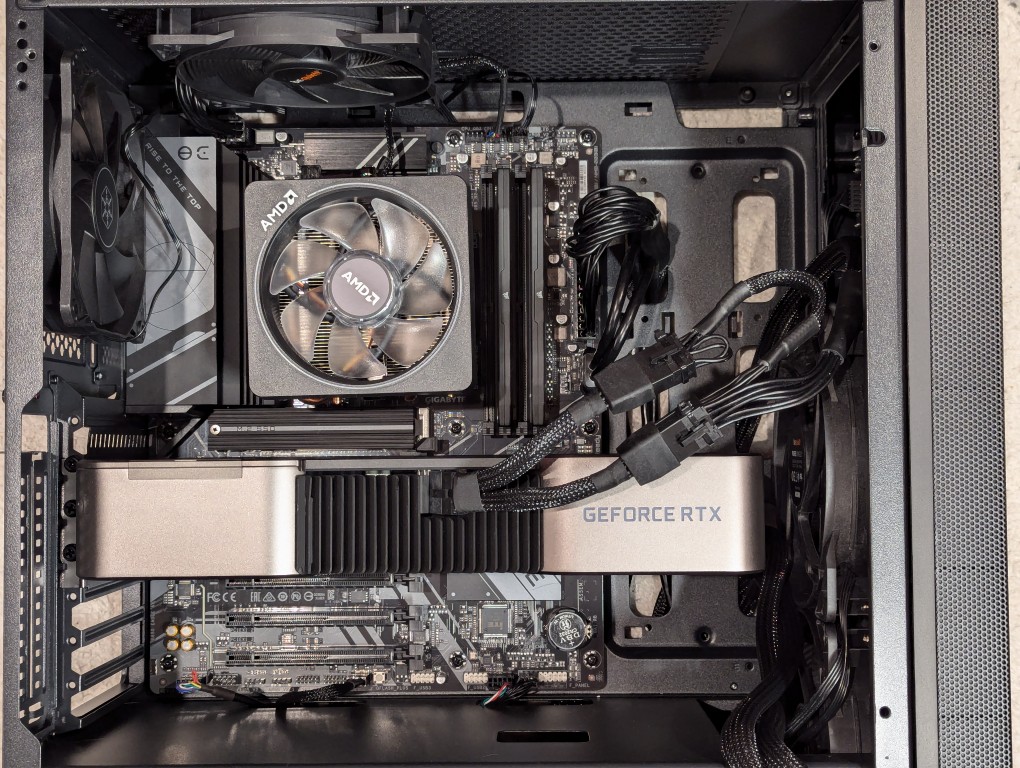
Out of frame, I installed the Corsair PSU in the chamber below the motherboard compartment after connecting the extra power cables that I needed for the three additional video cards. Then, I plugged in the 3090 video card and connected its two 8-pin PCIe power connectors.
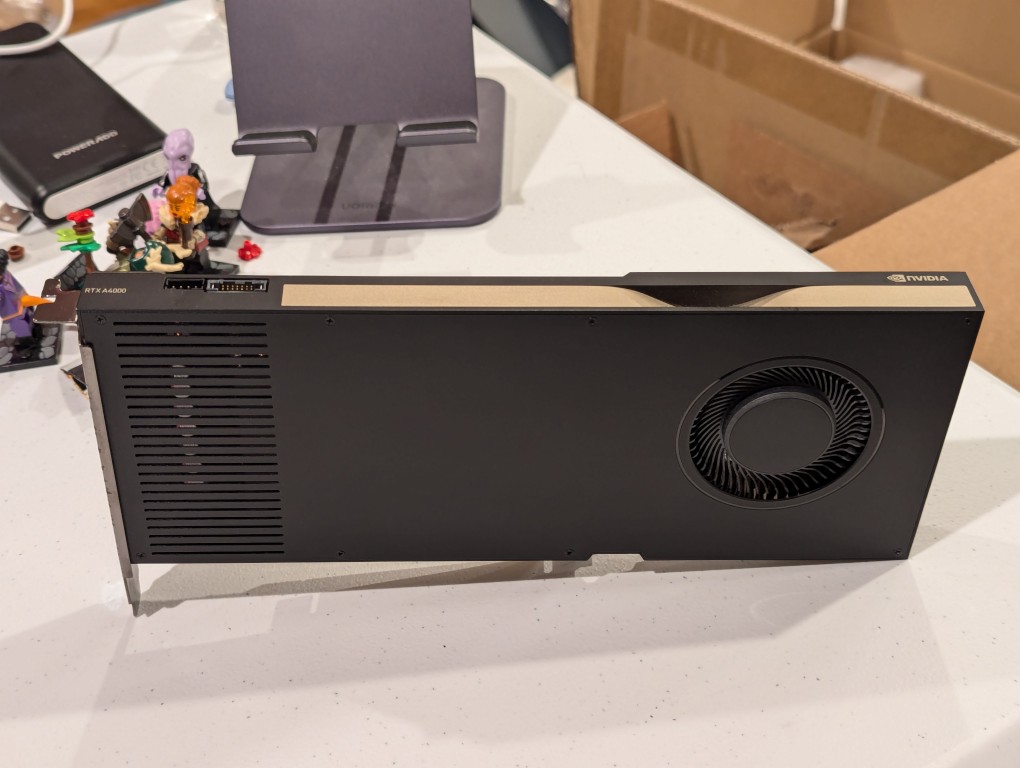
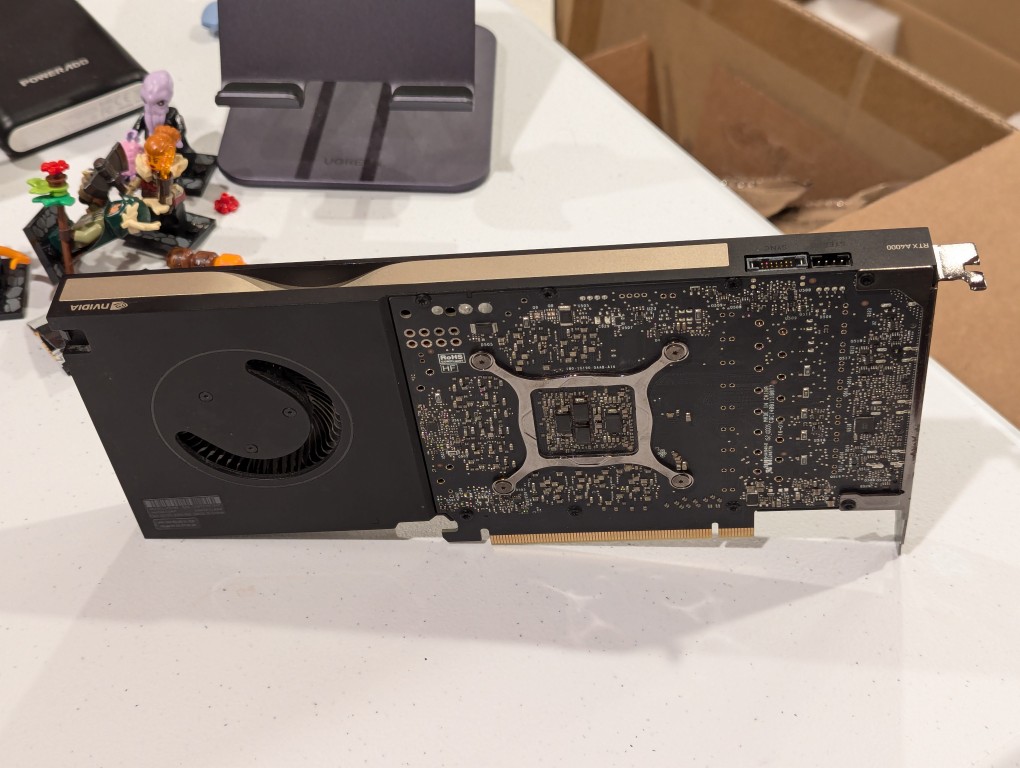
Then, I turned my attention to the three used RTX A4000 video cards that I got off of eBay. They are single slot PCIe cards with a 6-pin PCIe power connector built into the front of the card close to the top edge.
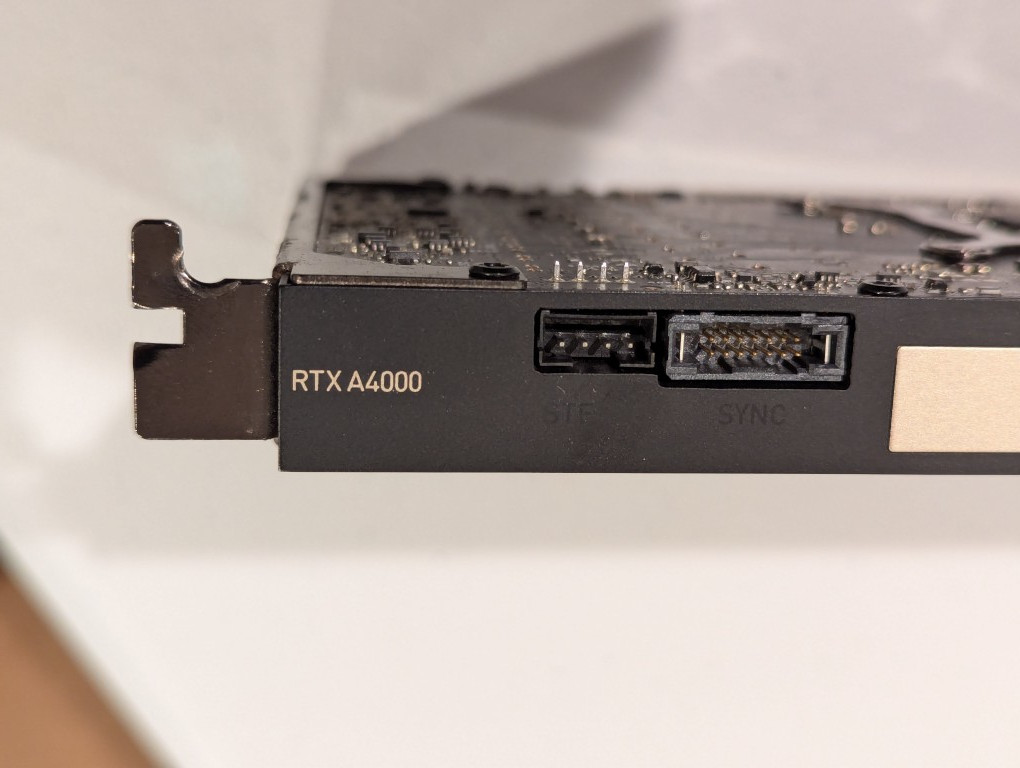
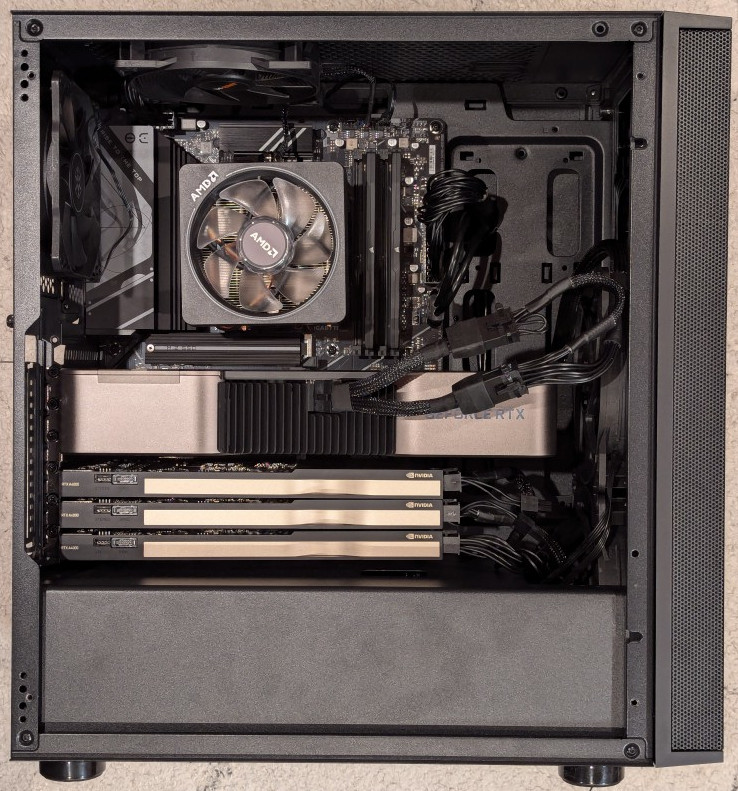
I installed the three RTX A4000s into the lower three slots and connected a 6-pin power cable to each one.
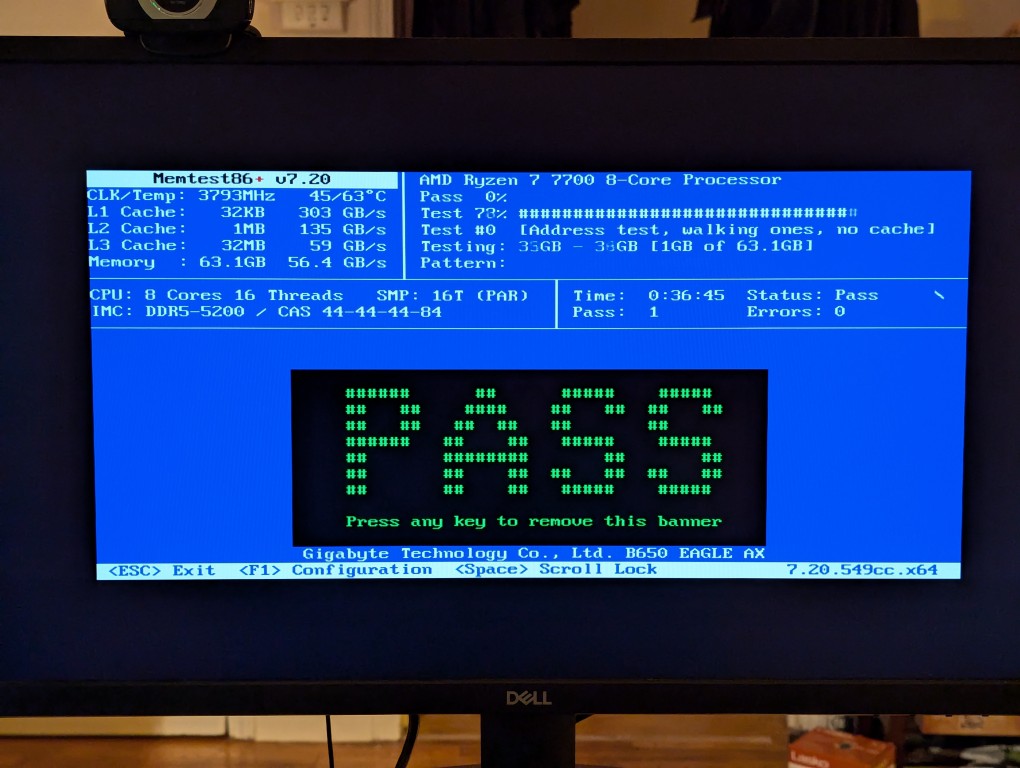
After double checking all of the connections, I powered up the system and booted from a thumbdrive loaded with memtext86+ after disabling Secure Boot in the BIOS. Before going to the trouble of installing an operating system, I wanted to make sure that the new RAM was error free.
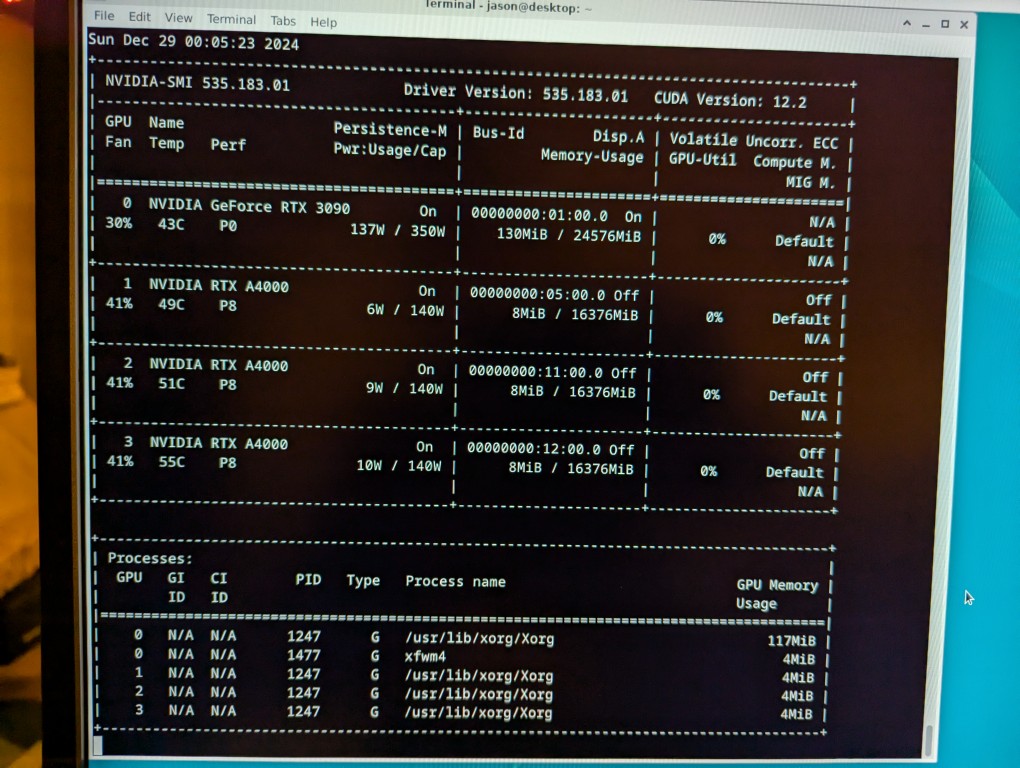
With the RAM checking out, I proceeded to boot from another USB thumb drive loaded with the Debian 12 Bookworm installer. I formatted one of the 2TB Samsung nvme SSDs as the boot drive (LVM with encryption), installed Debian 12, configured the non-free repos, installed the closed source NVIDIA drivers, and checked to make sure all of the video cards were being recognized. nvidia-smi shows above that they were!
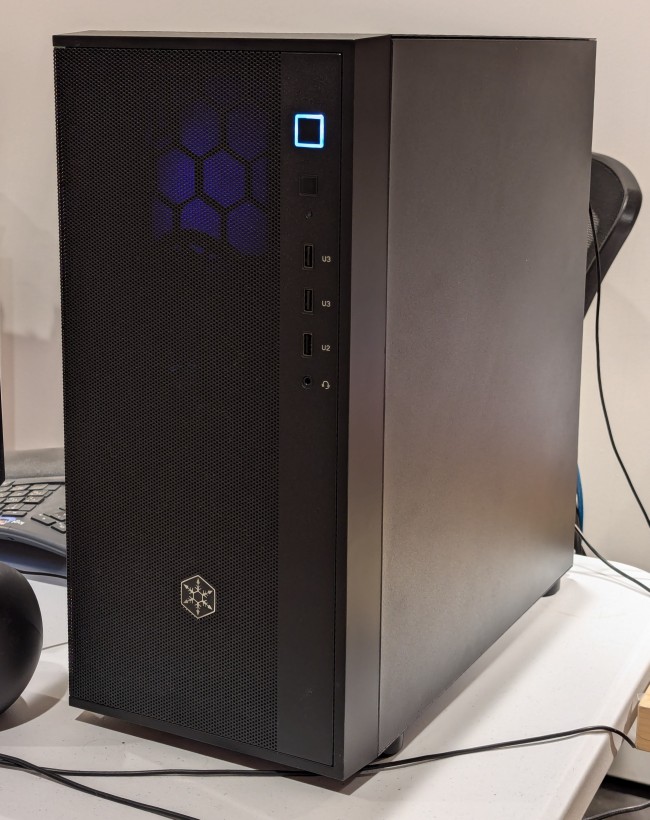
While testing it, I have it situated on my desk back-to-front, so that I can easily disconnect the power cable and open the side panel.
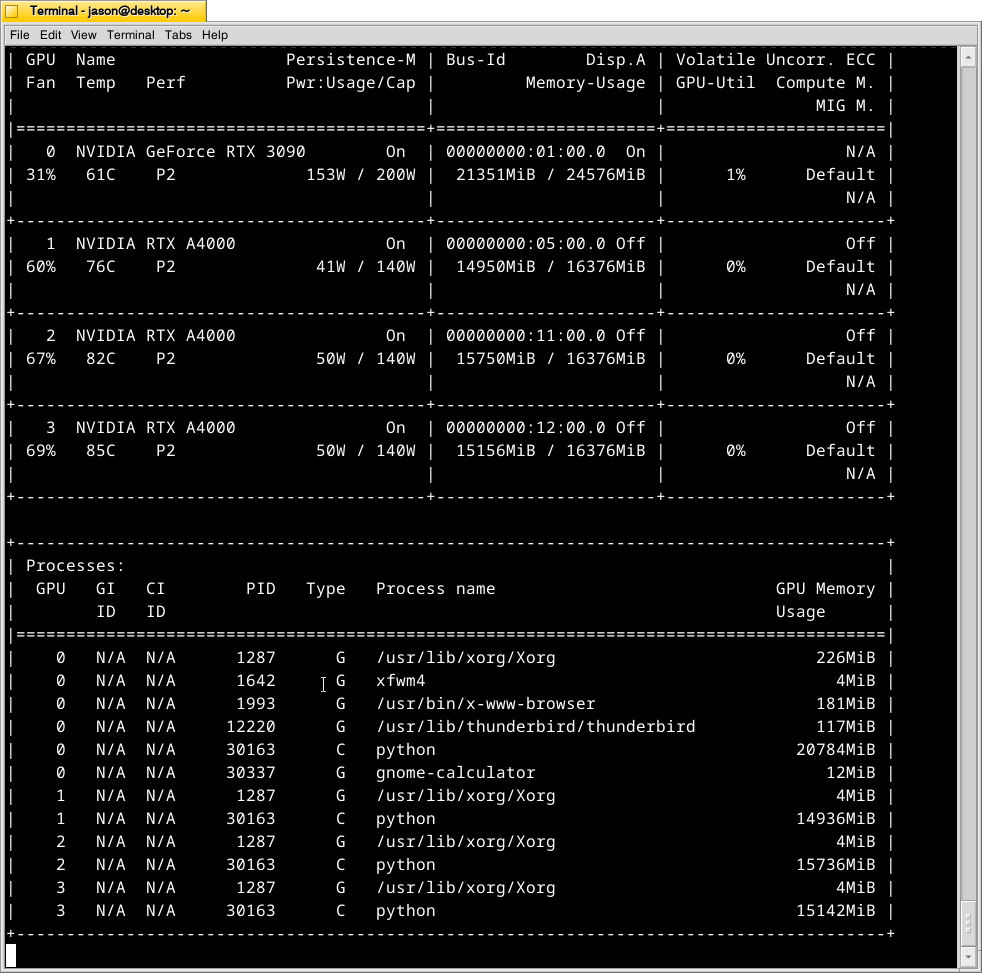
The immediate fix that I need to make is improving the cooling for the video cards–especially the three RTX A4000s that are tightly packed at the bottom of the case. Looking at the second column from the left under each video card named is a temperature measurement in Celsius on the nvidia-smi screen captured during a text generating session, each lower card is running hotter than the one above it: the 3090 at the top is reporting 61C, the A4000 beneath it is reporting 76C, the A4000 beneath it is reporting 82C, and bottom most A4000 is reporting 85C. Besides the fact that they are right against one another in the case, there are two other concerns. First, the PCI slot supports on the case are partially covering the exhaust vents on each card. Second, the cooler outside air might not be making it to A4000s as well as I would like even though there are two 140mm fans positioned in the front of the case bringing in cooler outside air, which is exhausted by a 120mm fan in the back above the video cards and a 120mm fan on the top of the case above the CPU cooler. One option is to drill a large hold in the side panel and mount a 120mm fan there to blow outside air directly onto the A4000 cards. Another option that I might try first is rigging a channel from the back of the case to the A4000s to blow air from a two slot port above the A4000 cards to the top edge of those cards. The latter will require less work, so I’ll try it first and see if it changes the temperatures at all.
