Category: Technical Communication

  • 2025 Toyota Camry Has Impressive Gas Mileage

    3/4 view of black late model toyota camry in a parking spot surrounded by other cars and shopping carts in background, parking lot ringed with trees with green leaves, blue sky with clouds above

    After visiting my folks for a couple of weeks in Georgia, I rented a car from Enterprise to drive back home to Brooklyn, because I wanted to load up on bulk-buy and shelf-stable grocery items that are difficult and/or expensive to purchase locally without a car.

    I had reserved a Toyota Corolla or similarly sized midsize car, but none were available when I arrived at the Savannah-Hilton Head Airport location. They upgraded me to the 2025 Toyota Camry shown above. It has a hybrid gas-electric drivetrain with an estimated 51 MPG fuel efficiency.

    This post reports on my experience with the Camry’s fuel economy over a long drive.

    Google maps screenshot of map from Savannah to Atlanta to Brooklyn, NY for 16 hr 59 min drive over 1,113 miles

    My four-day trip route was from Savannah to Atlanta where I would spend a day, then drive to Delaware, and finally arrive in Brooklyn where I would return the car to the Park Slope Enterprise location. Going from point-to-point, the drive took about 16 hours 59 minutes over 1,113 miles. But, I did a lot of city driving in Atlanta over one day. I estimate that I drove an extra 50 miles for a total of 1,163 miles.

    When I picked up the car, I already had about 100 pounds of grocery items that I loaded into the trunk and backseat. While in Atlanta, I added another 20 pounds of items to the car’s overall load. This is combined with my weight and the weight of fuel.

    3/4 view of black late model toyota camry in a parking spot surrounded by other cars and shopping carts in background, trees with green leaves and building in the background, blue sky with clouds above

    The Camry has three different driving “modes.” I set the mode to “Eco” as opposed to “Normal” or “Sport.” I adhered to the speed limit and avoided using high-RPM, passing gear driving except in a couple of situations.

    Over the entire trip, I purchased about 25 gallons of gas (returning the fuel level in the car to the same level that I received it), which yields a combined 46.52 MPG efficiency. Considering the awful traffic conditions in Atlanta (congestion, stop-and-go driving, low speed, etc.) and its fuel use, I suspect that my highway driving is much close to the estimated 51 MPG fuel economy.

    side view of black late model toyota camry in a parking spot surrounded by other cars and shopping carts in background, parking lot ringed with trees with green leaves, building in background, blue sky with clouds above

    I was happy about the fuel economy of the Camry on this trip–it reduced its pollution footprint and it saved me some money. It is impressive how a larger vehicle achieves better fuel economy than the best gas mileage of my old gas-powered Corolla.

    Driving the Camry was comfortable for the most part. This was the first car that I drove with a fob/start button combination. It took me a few minutes to figure out how to disable the lane following feature of its cruise control, which I was fighting against (making me think there was something wrong with the steering before disabling this feature). The seat material–I think faux leather–wasn’t breathable, which made it uncomfortable for sitting against over long periods of time.

    One big complaint that I have about the car that has nothing to do with fuel efficiency is Toyota’s radio accessed via its in-car screen. It is designed to present radio stations as a series of square icons that can be browsed by scrolling with your finger and tuned to by pressing. By accessing a station, there are tuning plus and minus buttons at the bottom of the station’s screen. All of these things–scrolling and pressing different areas of the screen to access a station or tune to a different frequency–are difficult to do safely while driving and maintaining attention to the road. The wrong areas are pressed leading one to cycle back through the process from the beginning by turning it off and re-accessing audio source > radio > station. To toggle through stations, I perched my right hand on the lower air vent below the screen and reached my index finger up to tap the station up and down buttons. It was awkward and frustrating. If automakers insist on using screens, there are situations like this where skeuomorphism and button placement and size should be consistent and easily used by the driver.

  • How to Update Your Linux Kernel on Debian Bookworm 12 to the Latest Available on Backports

    terminal screen with system info: jason@desktop:~$ screenfetch | lolcat
         _,met$$$$$gg.           jason@desktop
      ,g$$$$$$$$$$$$$$$P.        OS: Debian 12 bookworm
    ,g$$P""       """Y$$.".      Kernel: x86_64 Linux 6.12.32+bpo-amd64
   ,$$P'              `$$$.      Uptime: 10h 8m
  ',$$P       ,ggs.     `$$b:    Packages: 2323
  `d$$'     ,$P"'   .    $$$     Shell: bash 5.2.15
   $$P      d$'     ,    $$P     Resolution: 1920x1080
   $$:      $$.   -    ,d$$'     DE: Xfce
   $$\;      Y$b._   _,d$P'      WM: Xfwm4
   Y$$.    `.`"Y$$$$P"'          WM Theme: Haiku-Alpha
   `$$b      "-.__               GTK Theme: BeOS-r5-GTK-master [GTK2]
    `Y$$                         Icon Theme: BeOS-r5-Icons-master
     `Y$$.                       Font: Swis721 BT 9
       `$$b.                     Disk: 7.7T / 11T (75%)
         `Y$$b.                  CPU: AMD Ryzen 7 7700 8-Core @ 16x 5.389GHz
            `"Y$b._              GPU: NVIDIA GeForce RTX 3090, NVIDIA RTX A4000, NVIDIA RTX A4000, NVIDIA RTX A4000
                `""""            RAM: 9486MiB / 63916MiB

    If you’re like me, you might have newer computer hardware that isn’t fully supported by Linux kernel 6.1, which is installed with Debian Bookworm 12. Thankfully, Debian offers Backports, or newer software in testing in Trixie, the development name for Debian 13, that will eventually find its way into future Debian releases for use on an otherwise stable release of Bookworm.

    Updating to a newer kernel often brings more hardware compatibility. However, it’s important to remember that using a backport kernel can introduce potential compatibility issues with the software officially supported on Bookworm. Even if installing the latest kernel causes some issues, you can choose to boot from one of your older 6.1 kernels on your install as long as you don’t delete them (by using the apt autoremove command).

    I wrote this guide based on my experience installing Linux kernel 6.12 from Backports with the non-free firmware that my hardware needs to work. If you are trying to keep your system free from non-free software, you can omit those references in the instructions below.

    Before doing any changes to your Debian installation, remember to backup your files first. Saving important files in more than one media and storing it backups in different physical locations is best practice.

    After backing up your files, make sure your install is up-to-date with these commands:

    sudo apt update
    sudo apt upgrade

    After those updates complete, it’s a good rule of thumb to do a reboot to begin working with a clean slate.

    Next, add Debian Backports to /etc/apt sources.list. I used vi to do this:

    sudo vi /etc/apt/sources.list

    In vi, arrow down to the bottom line, type a lowercase “o” to add a blank line below the current line, type lowercase “i” to enter input mode, and type the following line into the document:

    deb http://deb.debian.org/debian bookworm-backports main contrib non-free non-free-firmware

    After double checking the added line, press the “Esc” key, and type “:wq” to write the file and quit vi.

    Now, you need to update apt again:

    sudo apt update

    After the completes, enter this command to install the latest kernel from backports along with the kernel’s headers and firmware that might be needed for your hardware (such as networking card, video card drivers, etc.).

    sudo apt install -t bookworm-backports linux-image-amd64 linux-headers-amd64 firmware-misc-nonfree

    It might take awhile for the installation to complete. If there are no errors, it should return you to your terminal prompt. If it did, reboot your computer to load the new kernel.

    After your computer boots up again, you can verify that you are running the latest kernel by entering this command:

    uname -r

    After installing the latest kernel, my computer reports this from the uname -r command:

    6.12.32+bpo-amd64
  • A Simple Moveable Platform for an Oscillating Spindle Sander

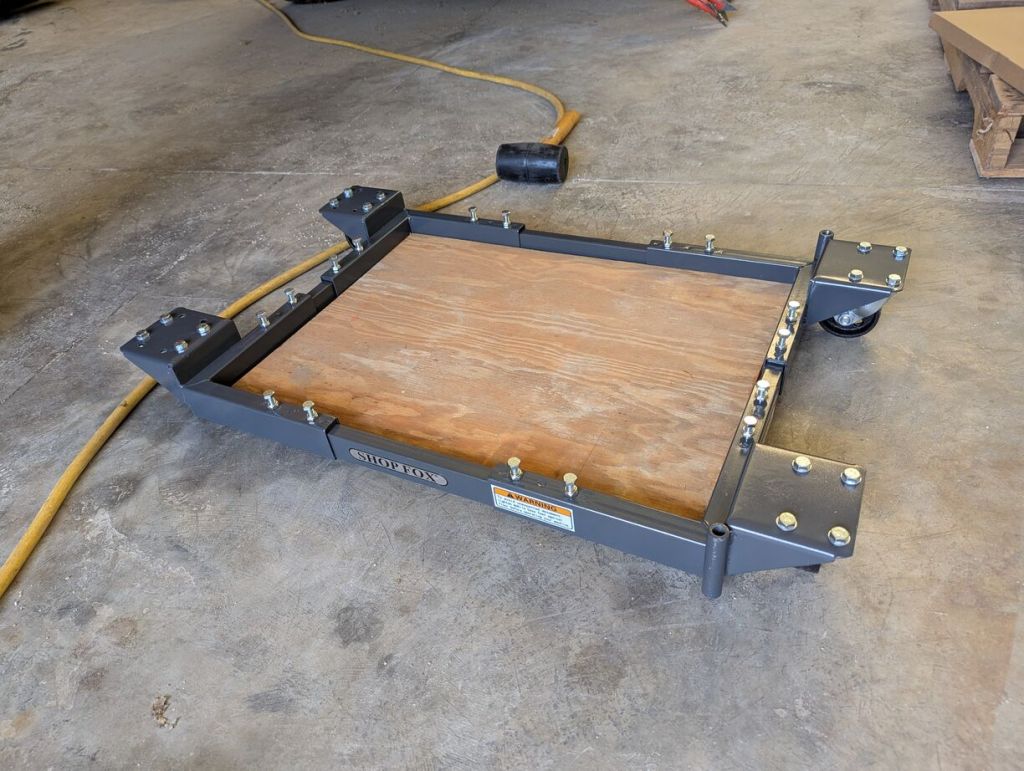
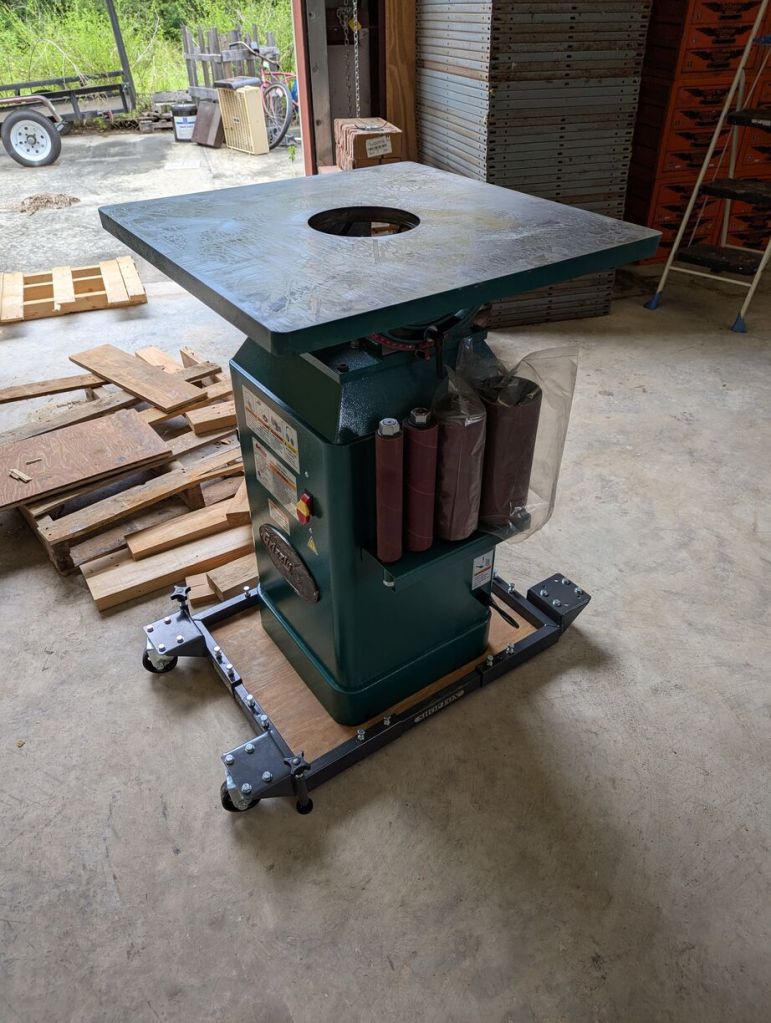
    Another project for my dad and I was setting up his Grizzly oscillating spindle sander, which had been sitting on a broken pallet for some time.

    He had a rolling Shop Fox equipment stand, but it was slightly too large for the sander’s base. So, we cut a piece of 3/4″ plywood to fill its support area and distribute the weight of the sander.

    Then, we layered some boards to create a ramp from the pallet the sander was on down to the Shop Fox equipment mover.

    When he’s ready to use the sander, the Shop Fox mover has floating feet that can be lowered to take the weight off the front caster wheels.

  • How to Lift and Lower Heavy Equipment with Car Screw Jacks

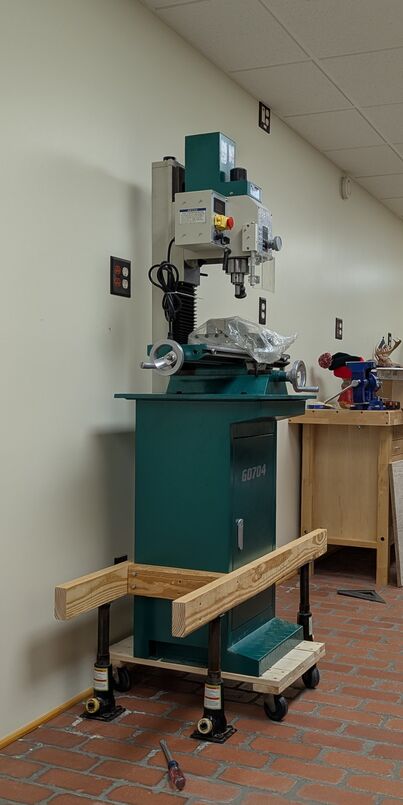
    My dad has a dozen or two of screw bottle car jacks that he used to press and hold every tongue-and-groove cypress board covering the walls and ceiling of the upper floors of their house. We made use of four of them to move two pieces of his heavy machinery into place in his shop.

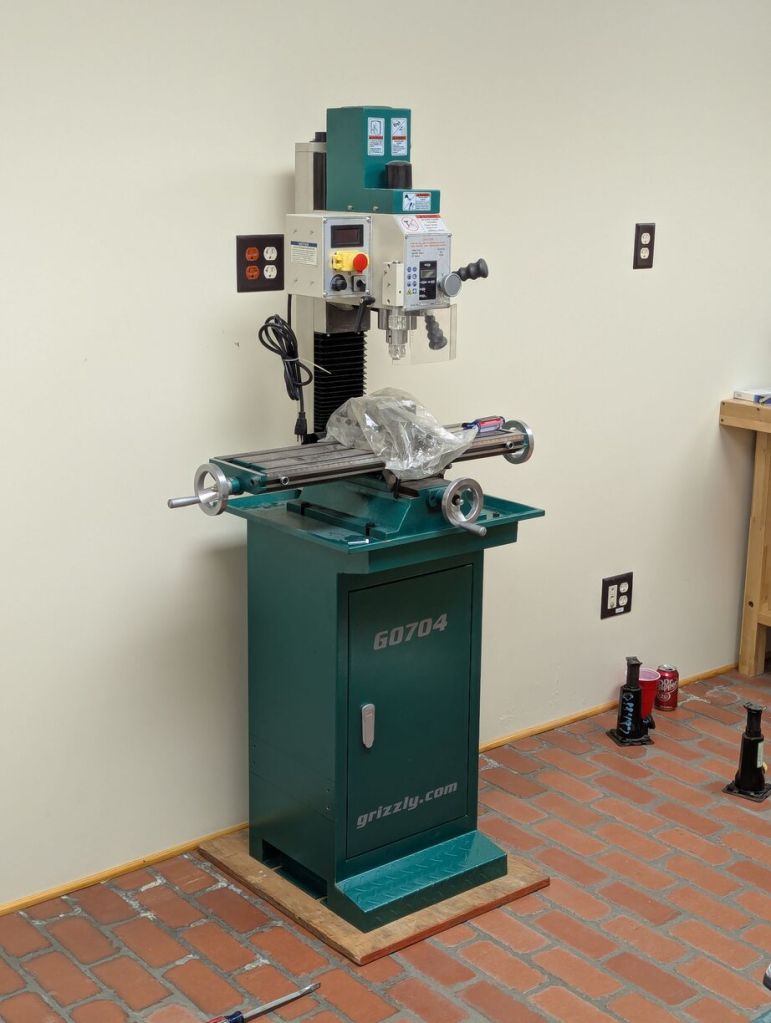
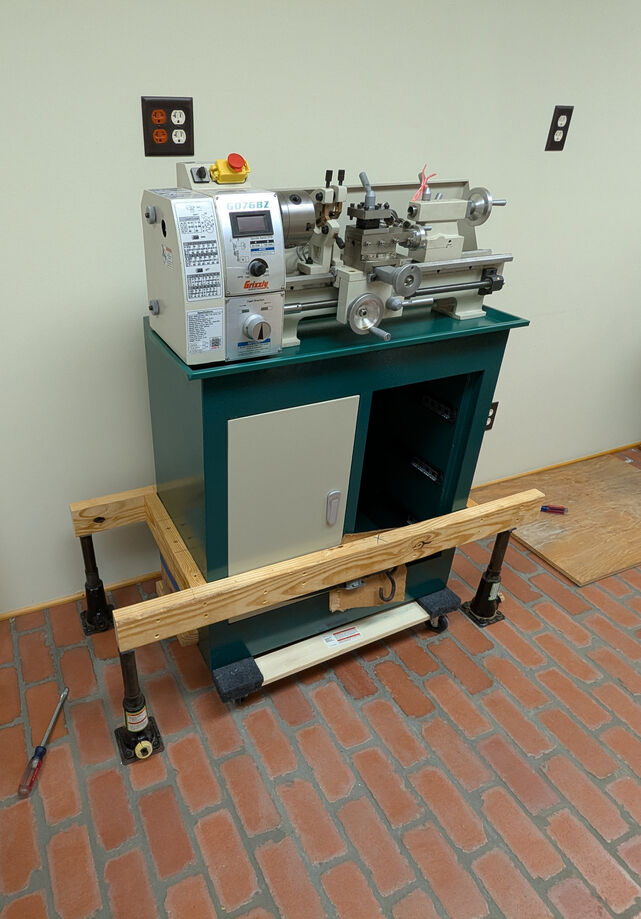
    Some time back, he purchased a milling machine and lathe from Grizzly. He had managed to get them into his shop on furniture movers. Of course, they can’t be run on those platforms, so we needed to find a way to place them flat on the shop’s floor.

    For the milling machine, which was heavier than the lathe, we drilled four holes through the metal cabinet and constructed a wood box with bolts going through the short sides of the wood box into the metal cabinet. We placed the four jacks under the long arms of the box, raised it a fraction of an inch to remove the furniture mover and then lowered the jacks until the cabinet rested on a 3/4″ plywood base that we cut to fit. Then, we removed the box from the cabinet after unbolting it and unscrewing the deck screws we had built the box with.

    If you do something similar to this, be mindful of the total reach/height of the jack and its minimum. We built the box around the cabinet at a height that allowed for a slight lift and enough lowering to allow the jacks to be removed after the cabinet was lowered.

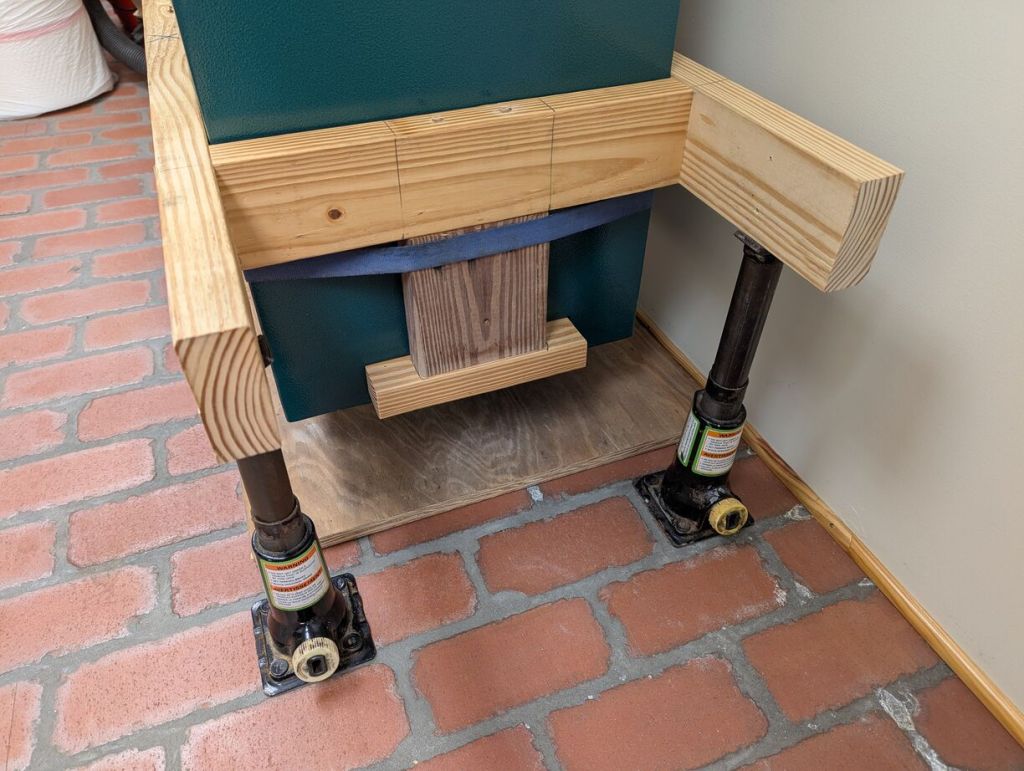
    For the lathe, we did something similar, except we couldn’t drill through its cabinet to bolt the box to the cabinet as we had done with the milling machine because it is double walled and could potentially create problems with bolt alignment (and we would need much longer bolts).

    With the lathe being lighter than the milling machine, we felt safe building the box around the lathe’s cabinet and adding two “tongs” that fit into the recesses at the bottom of the cabinet. To make sure the tongs remained in place, we put a tie strap around these and the cabinet.

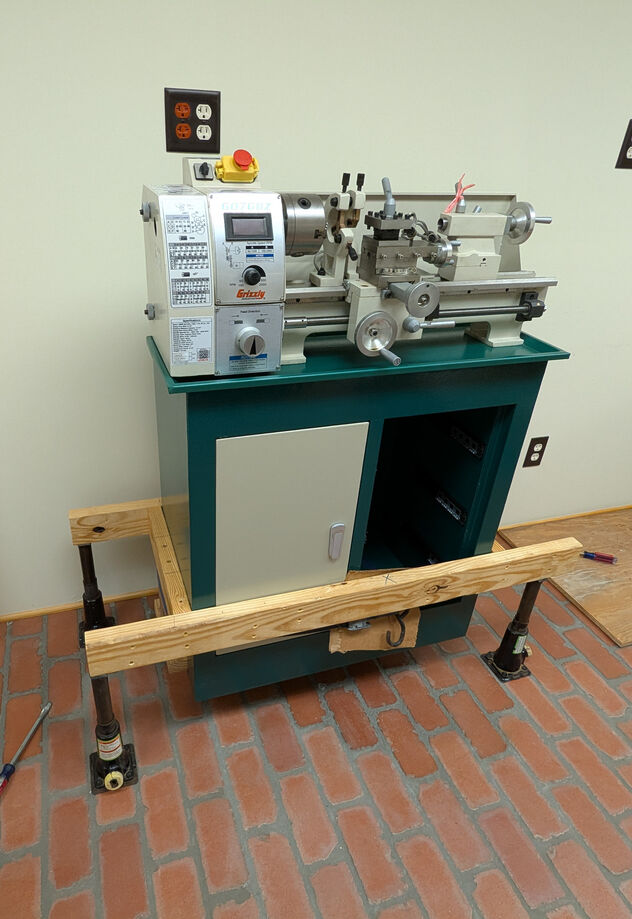
    We lifted the lathe slightly to remove the furniture mover.

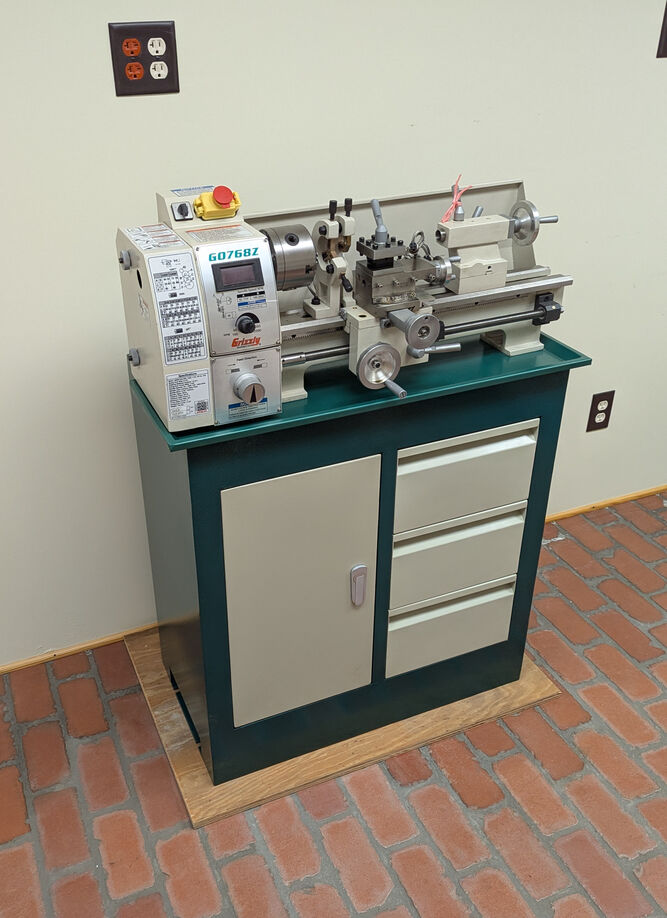
    And then lowered it onto a custom piece of plywood for it to rest on the floor.

    When you don’t have the muscle or manpower, use the tools at hand to get things done. As William Gibson writes, “the street finds its own use for things.”

  • How to Build a Moveable Workbench Out of a Wood Wire Spool

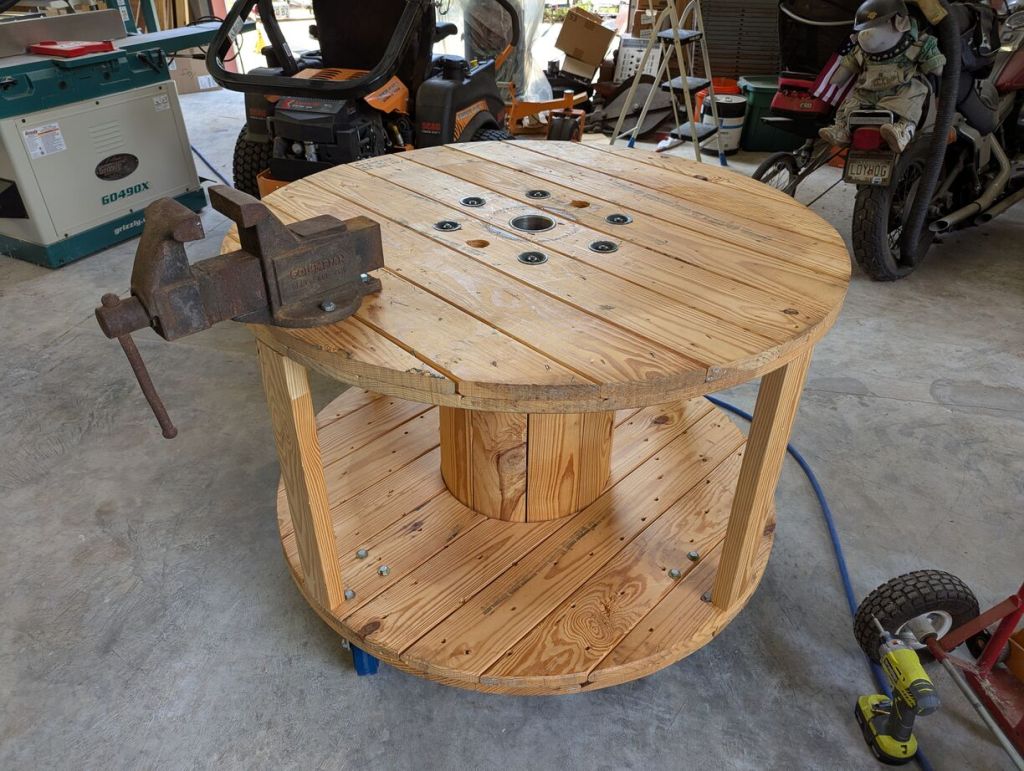
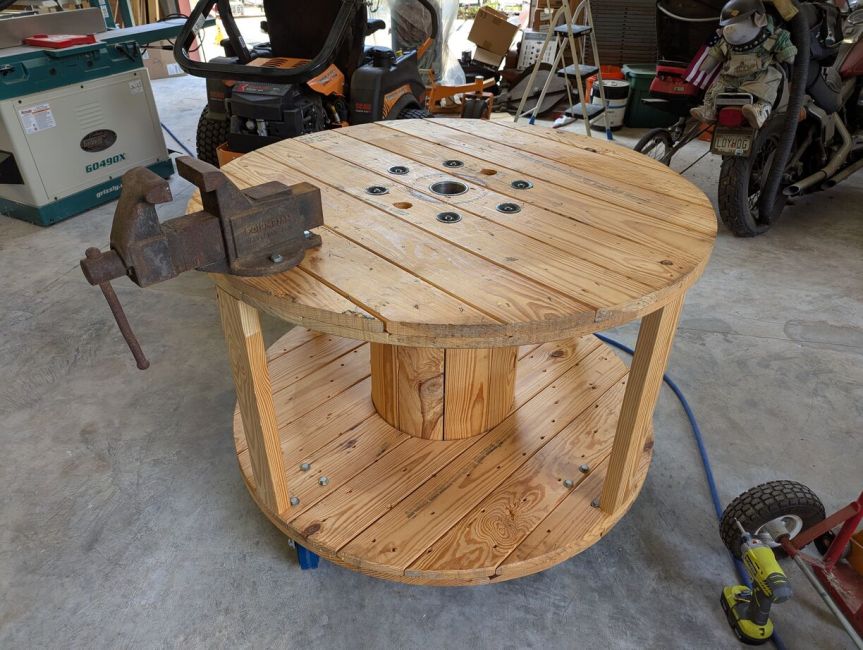
    round wood workbench on caster wheels with a metal vice mounted on top

    When I recently visited my folks in Georgia, one of my projects was helping my dad clean up his shop so that he could more easily work in it. Over the years, it had become more and more cluttered. Perhaps most urgently, many tools were strewn about on the floor. I proposed turning a 48″ diameter wood spool that he had gotten from an electrical supply company into a moveable workbench. While the spool would take up roughly the same space, it would create two surfaces for storing tools and getting work done at elbow height. And, giving him a place to put tools when not in use where he could get them without bending over, would be a positive development, too.

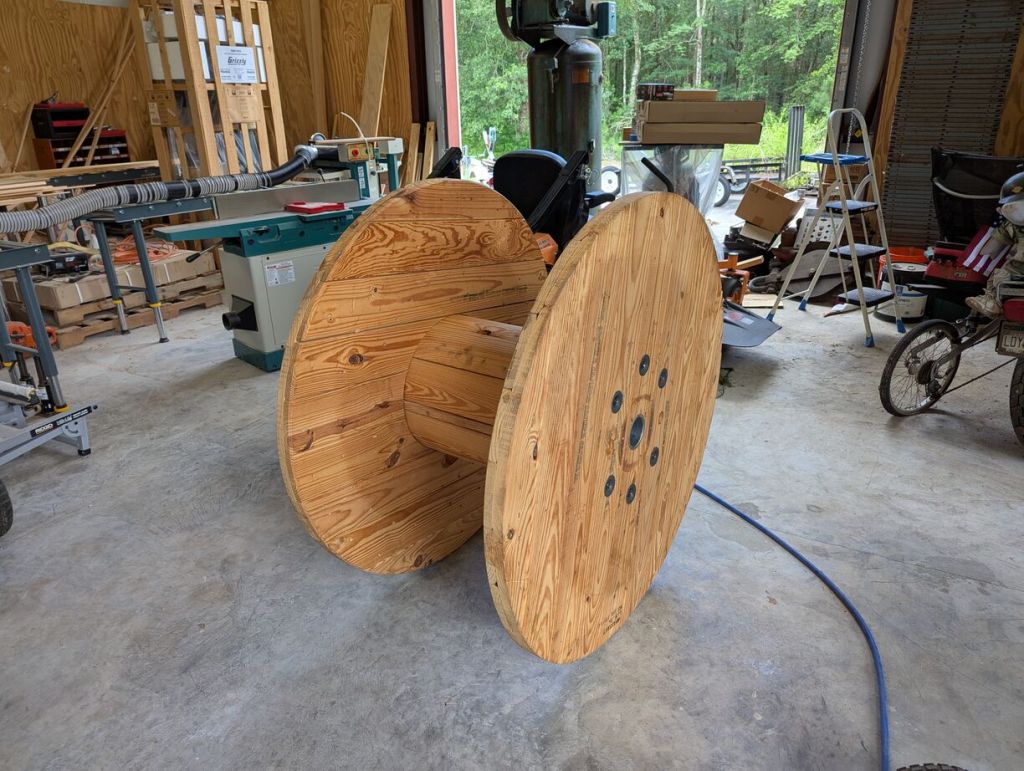
    48" wood spool for holding electrical wire

    The wood spool is approximately 48″ diameter and 28″ tall.

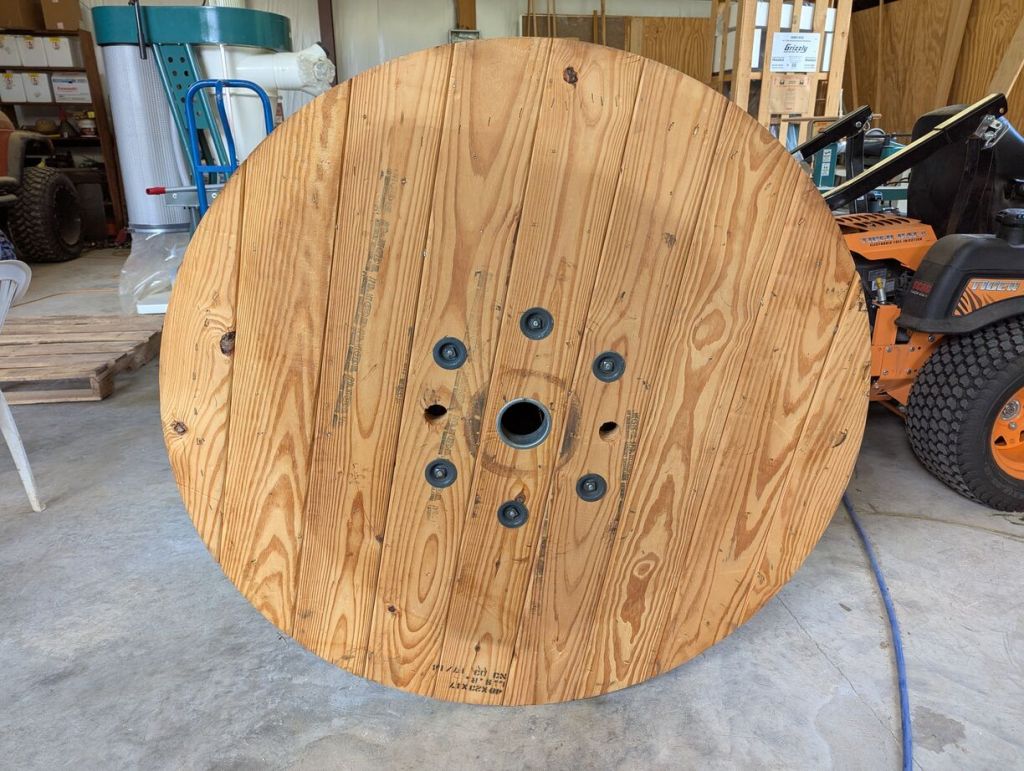
    top surface of round wood spool

    This side was cleaner and had no obvious problems for working on a roughly flat surface. It would be the top of the workbench.

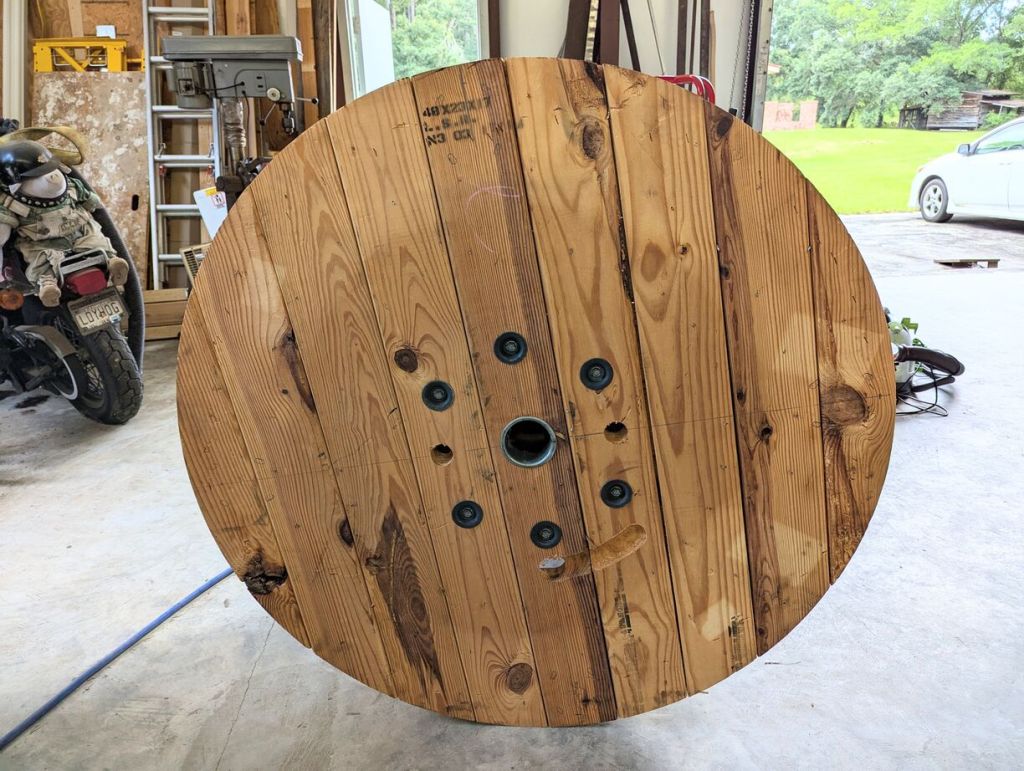
    bottom surface of wood spool

    We designated this side the bottom due to its rougher appearance and extra hole with arced routing (to secure the wire it once held?).

    set of four 6" caster wheels

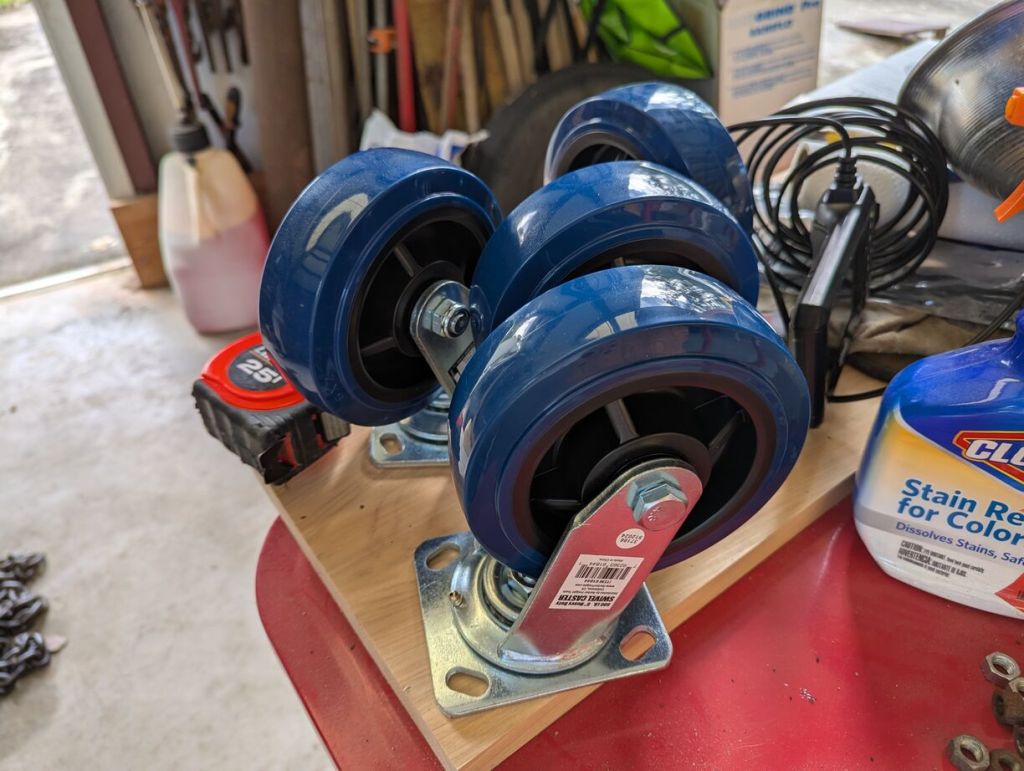
    We picked up four 6″ caster wheels with grease fittings from Harbor Freight. These measure approximately 7″ tall including the base. Connected to the spool, these wheels will give the completed workbench an approximately 35″ height.

    bolts, nuts, and washers on a red metal surface

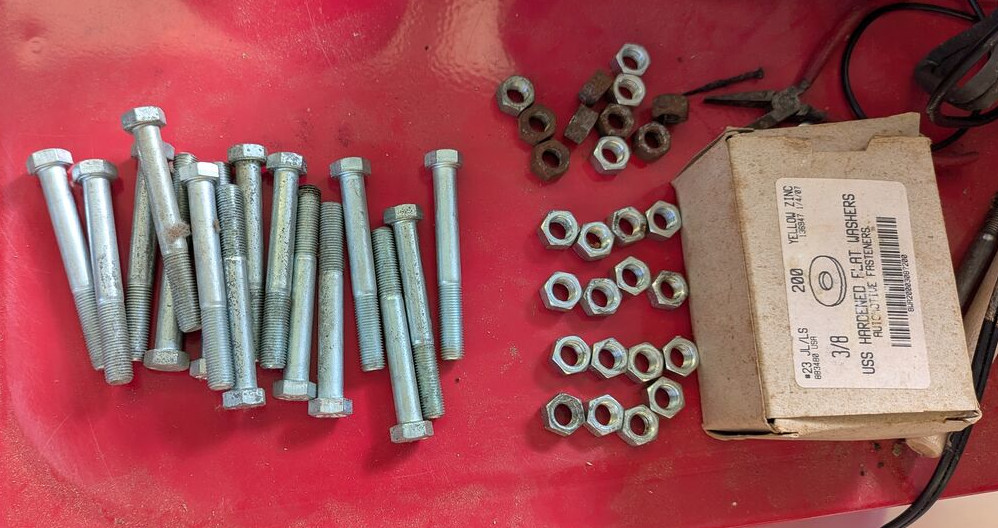
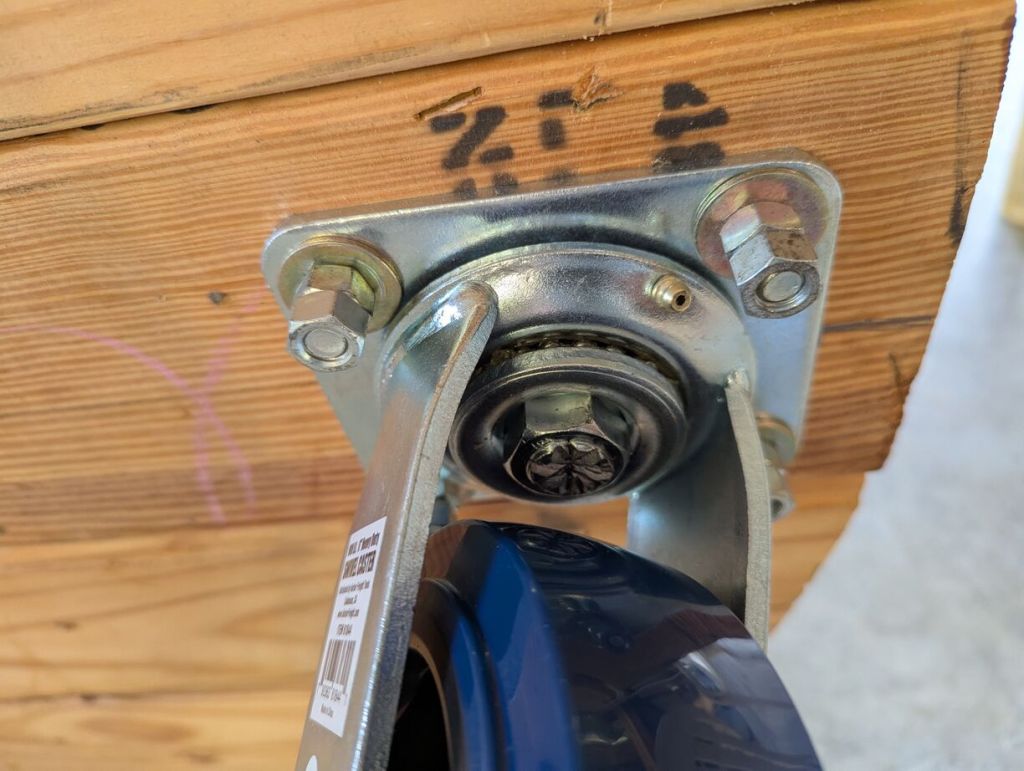
    After closing Ellis Auto Parts, my dad kept a lot of hardware that wasn’t sold, so we were able to find all of the bolts, nuts, and washers that we needed. To connect the wheels to the wood spool, we used 3/8″ x 3″ bolts with washers on top and bottom, and we used two nuts per bolt to lock the bolt (we couldn’t find any 3/8″ lock washers).

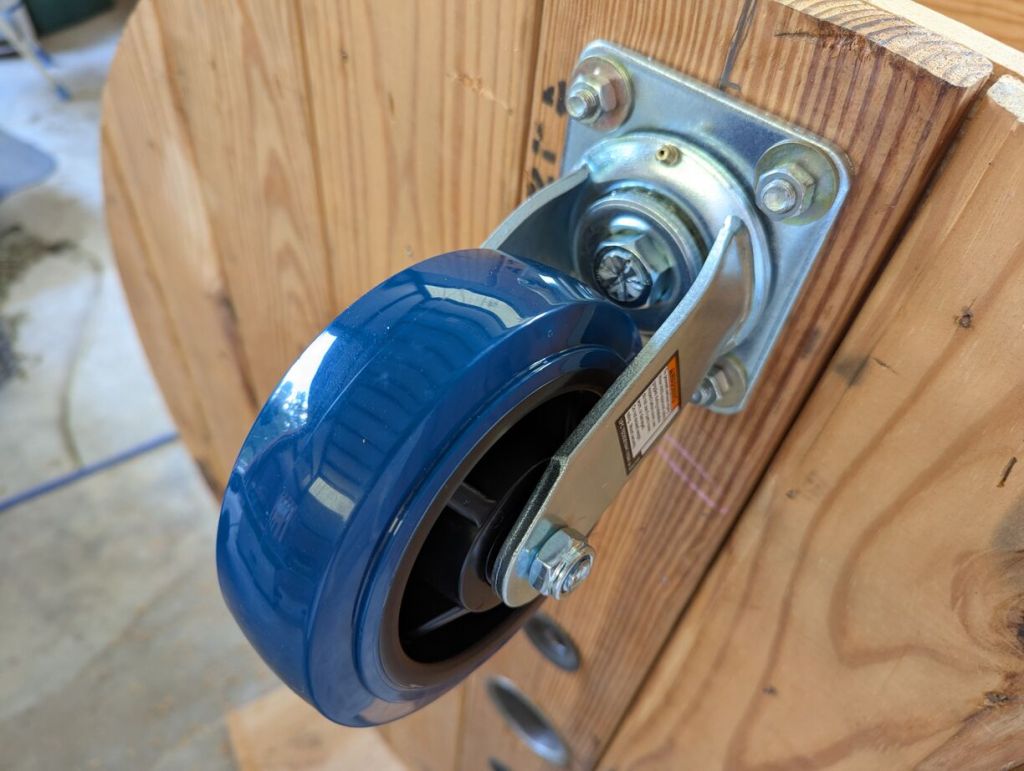
    caster wheel installed with one set of nuts before locking nuts installed

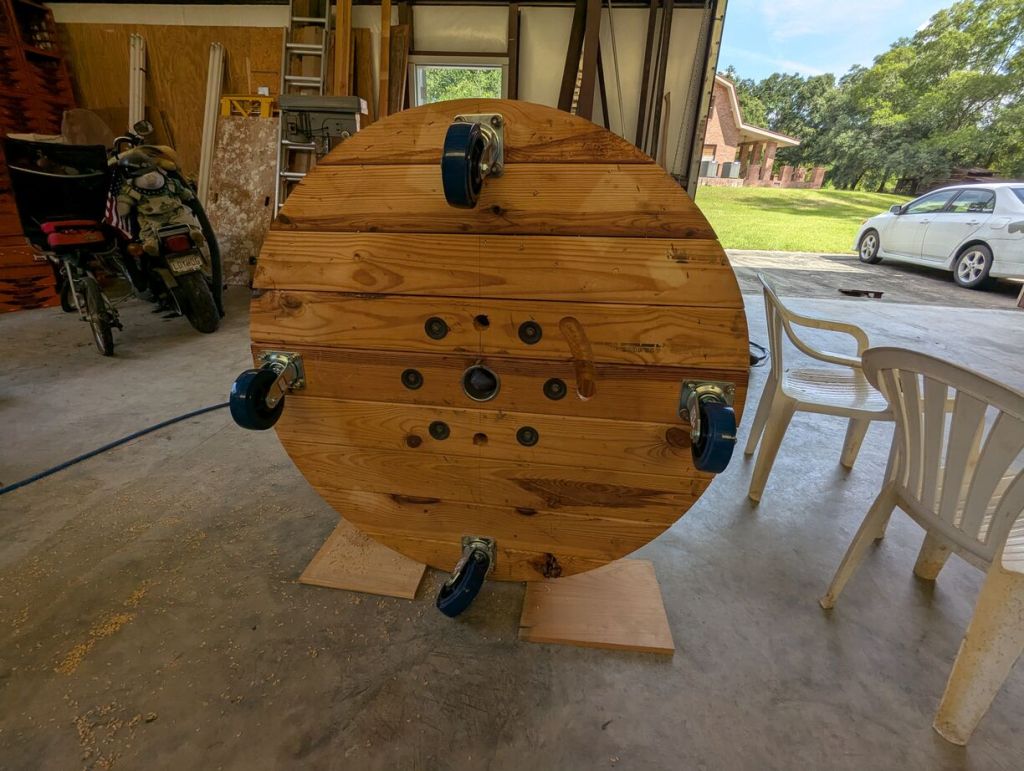
    To install the wheels on the bottom of the spool, I first selected one diameter line and marked it with a pencil. Using a square, I drew a perpendicular line through the center for the other two wheels. I knew that we were going to reinforce the workbench top with 2″ x 4″ boards cut to length, so I allowed enough room for drilling holes and driving screws through the spool ends into the 2″ x 4″s. I marked that distance (2″) from the outer edge along the diameter lines that I previously drew. Then for each wheel placement, I held a wheel where I had marked, centered it, and used a pencil to draw in the four holes at the corner of the caster wheel base.

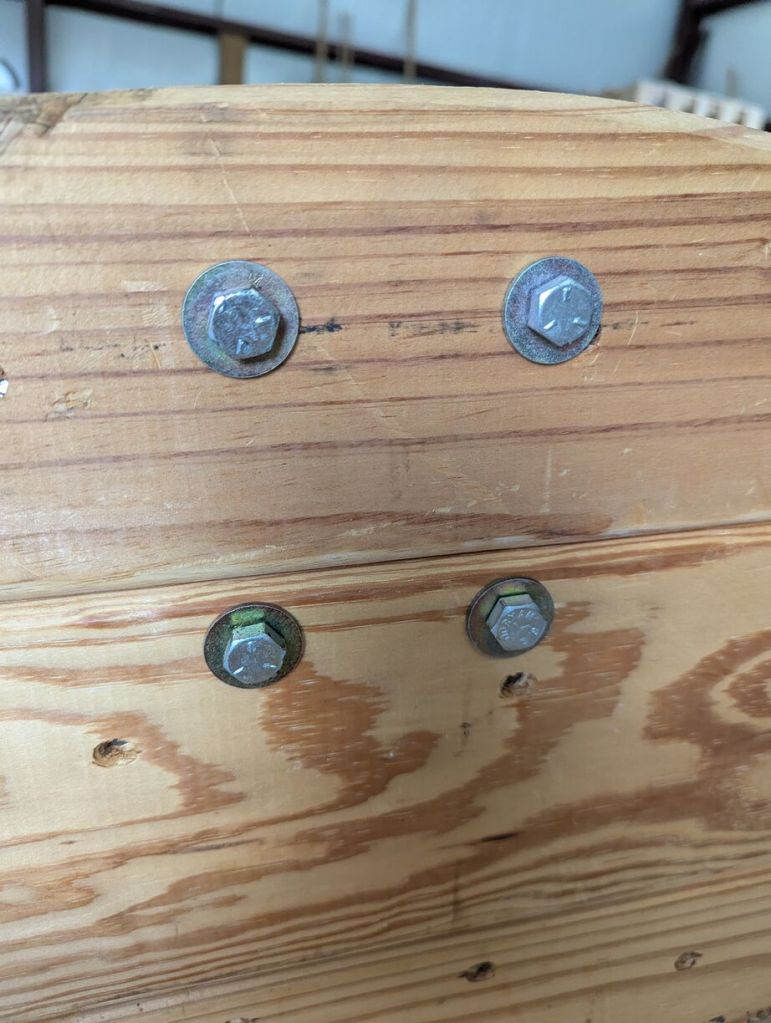
    closeup of bolts and washers through lower surface of workbench holding the wheels on

    I drilled the four holes with a 7/16″ bit and installed the wheels with the 3/8″ bolts with a washer on top, a washer on bottom, and two nuts per bolt.

    closeup of 2 sets of nuts on each bolt holding caster wheels on bottom of workbench

    Since we didn’t have 3/8″ lock washers, we opted to use two nuts on each bolt to lock them in place.

    workbench wheels are installed on bottom of round workbench

    With the wheels installed, we began installing the 2″ x 4″ supports inline with each wheel.

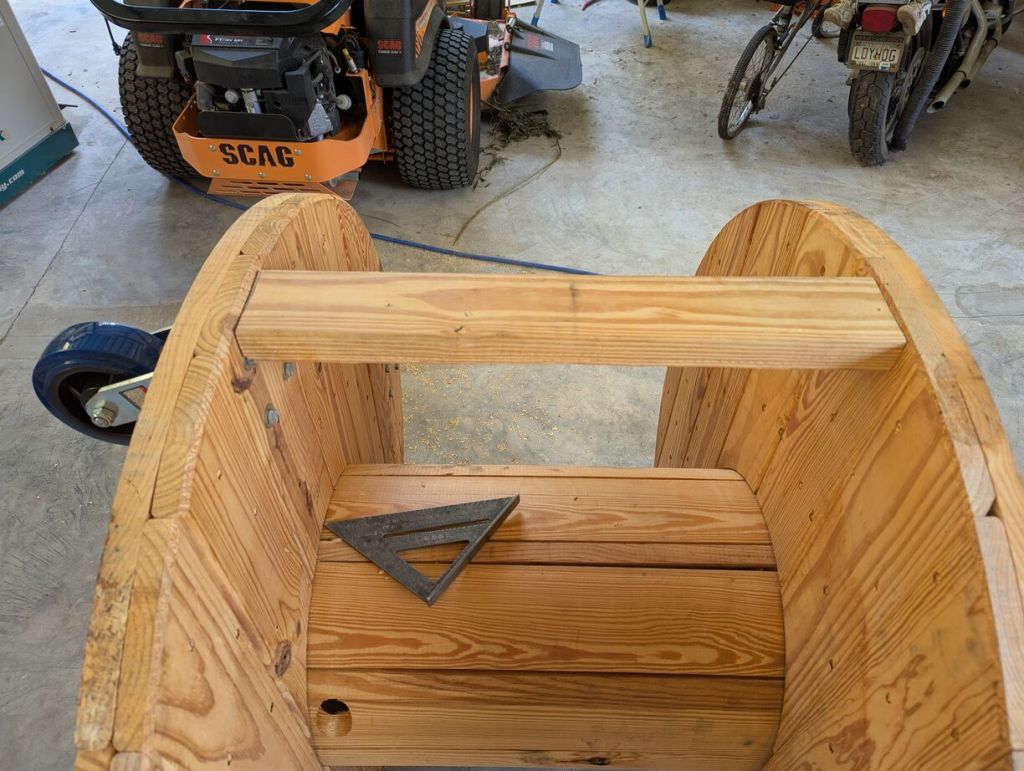
    fitting 2x4 before installing
    2x4 in place before installation

    Because the spool was built imperfectly, we cut each 2″ x 4″ support to length as needed. We cut them about 1/16″ – 1/32″ too long so that we could wedge them into place with a mallet for a tight fit.

    2x4 notched to allow space for bolts and washers

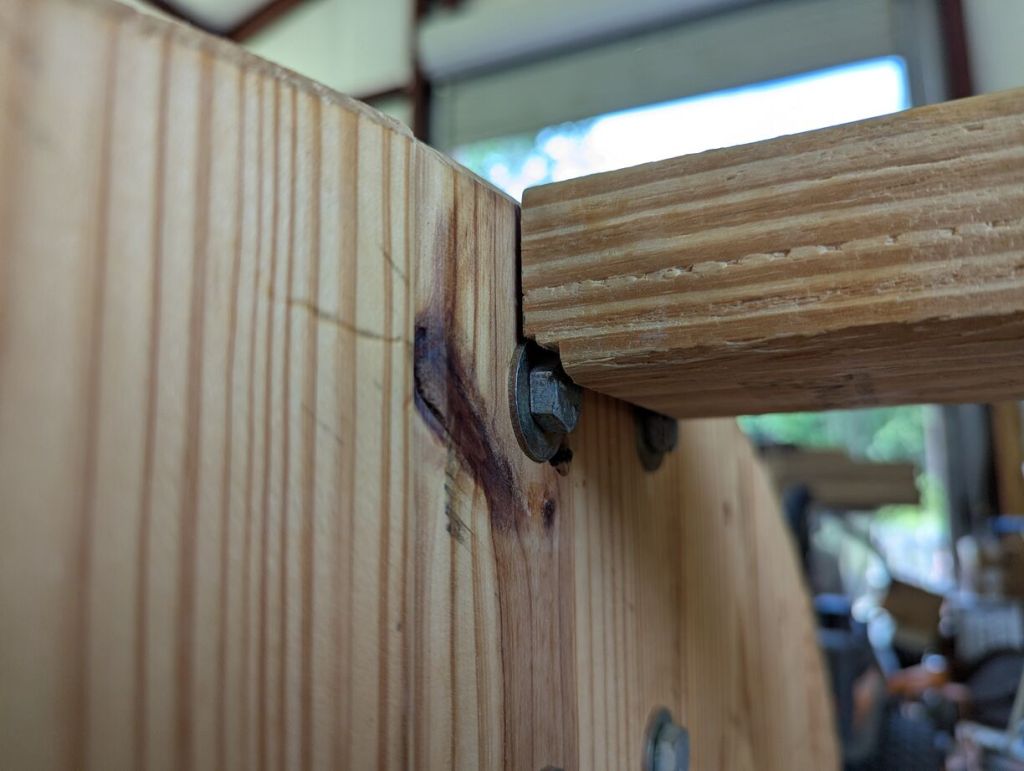
    Using a table saw, we cut notches as needed on each 2″ x 4″ support to clear the wheel’s bolt heads and washers.

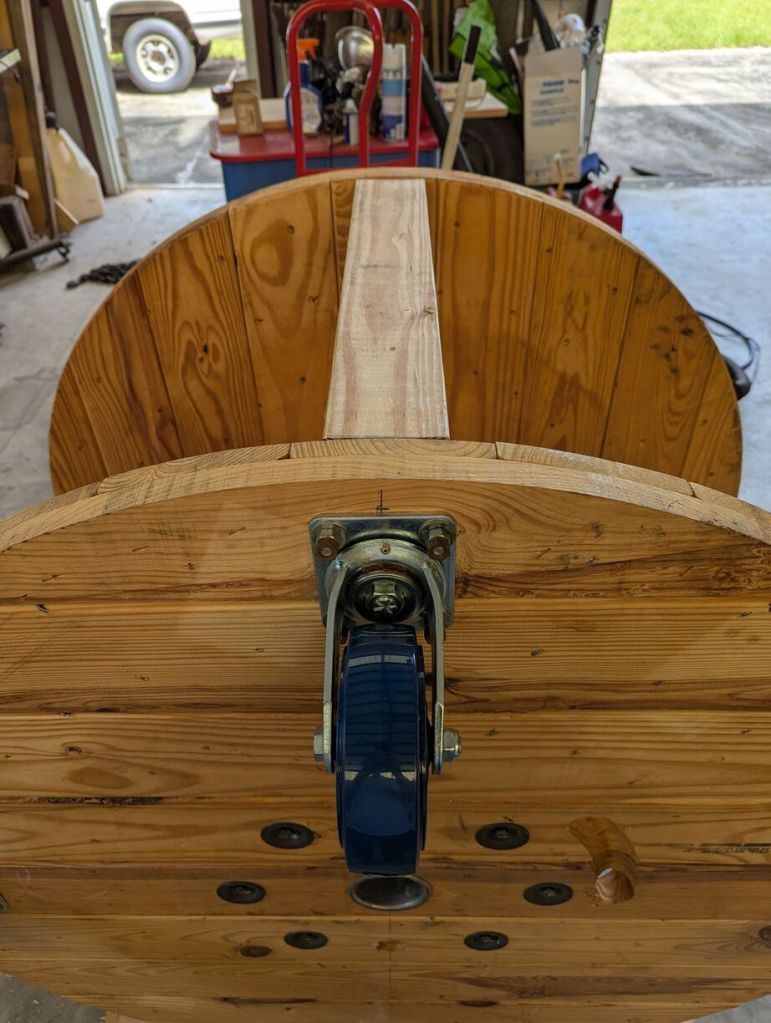
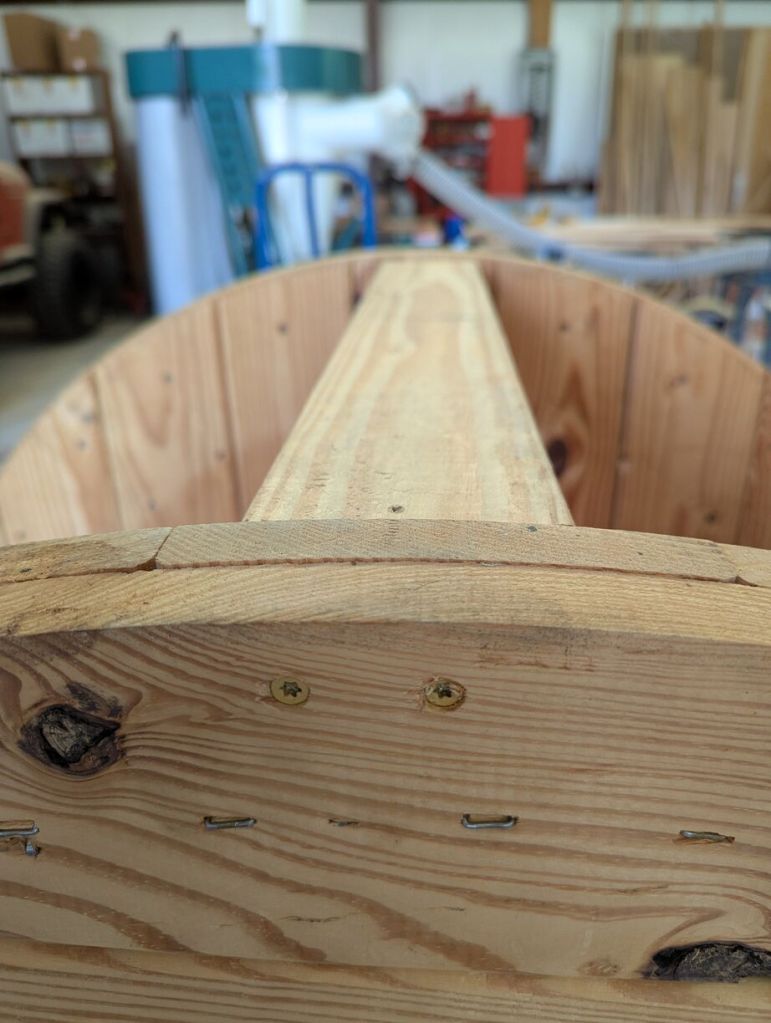
    closeup of screws driven through top surface of workbench into 2x4

    We pre-drilled two holes for each screw that would go through the top and bottom of the spool into the 2″ x 4″ boards. We used 3″ long deck screws to fasten the 2″ x 4″ boards in place.

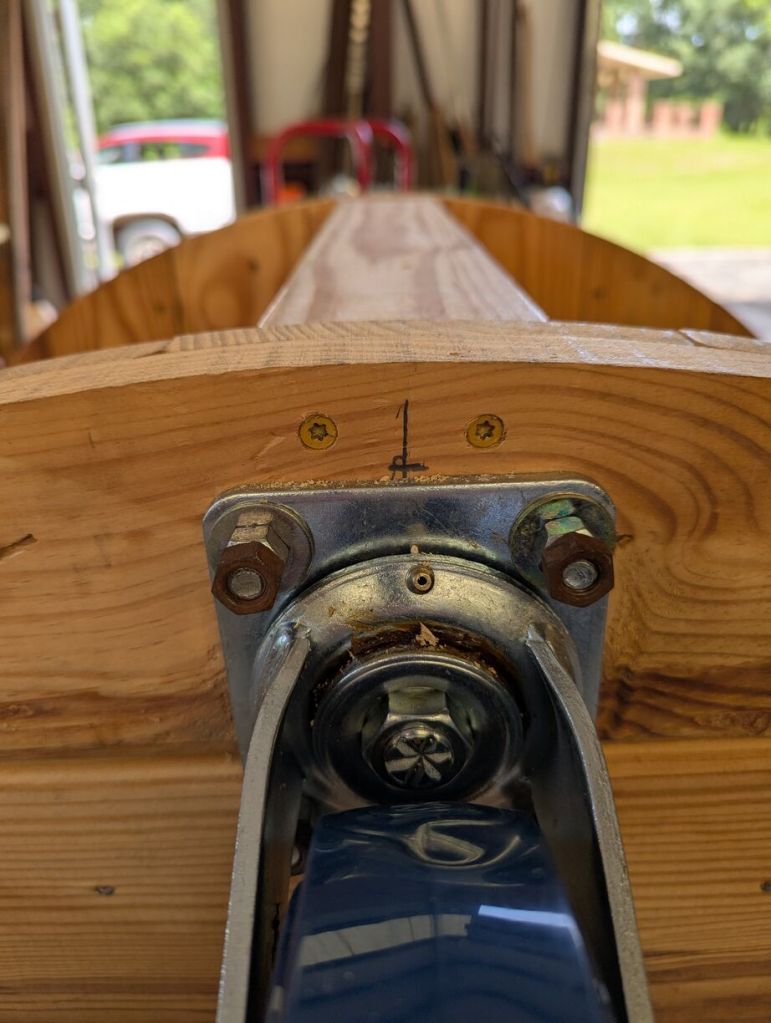
    closeup of screws above caster wheels driven into 2x4

    Each 2″ x 4″ is held in place by 3″ long deck screws that were driven in after pre-drilling holes for each.

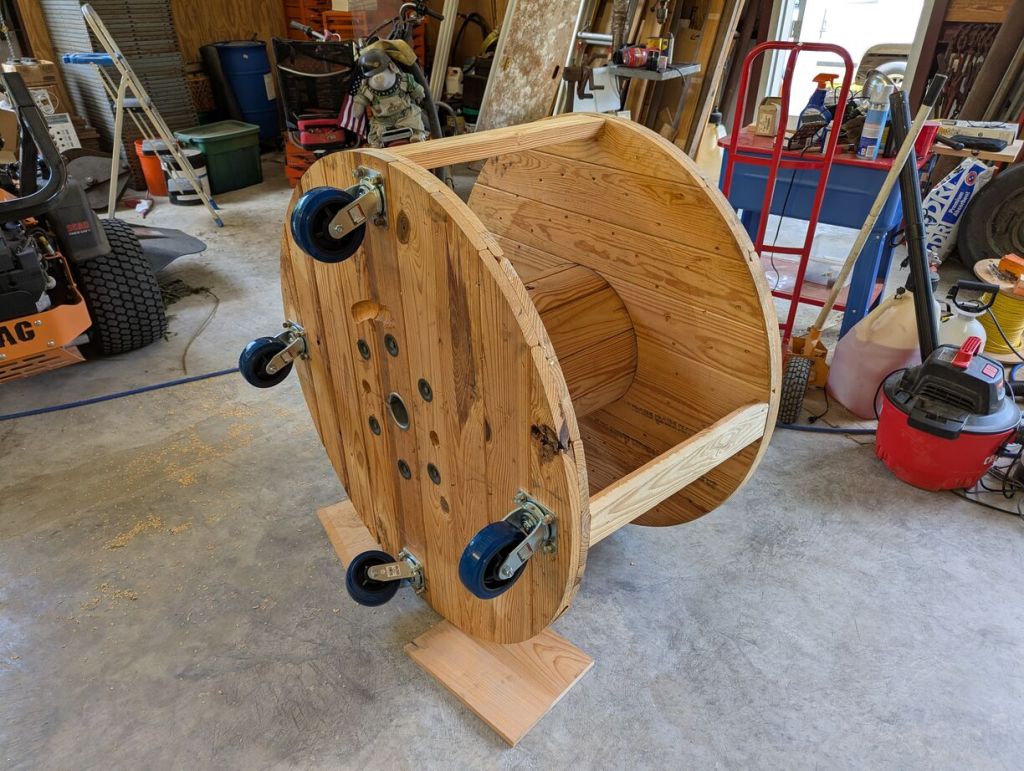
    round wood workbench on wheels on its side

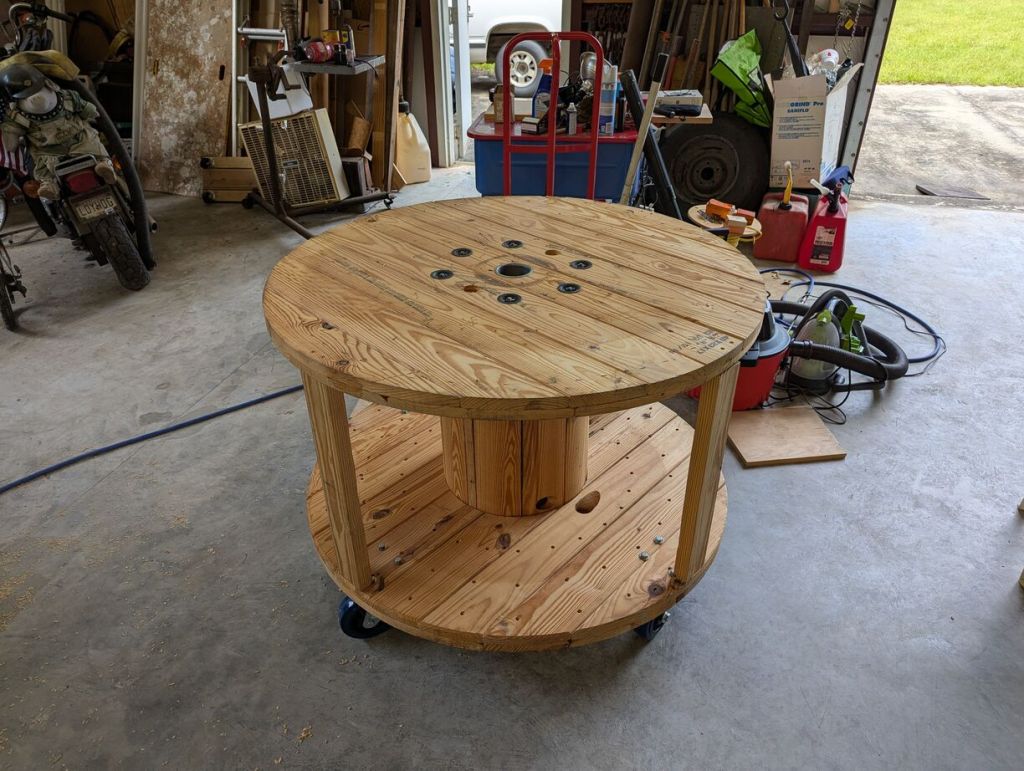
    With the wheels attached and the 2″ x 4″ supports installed, we tilted the workbench over.

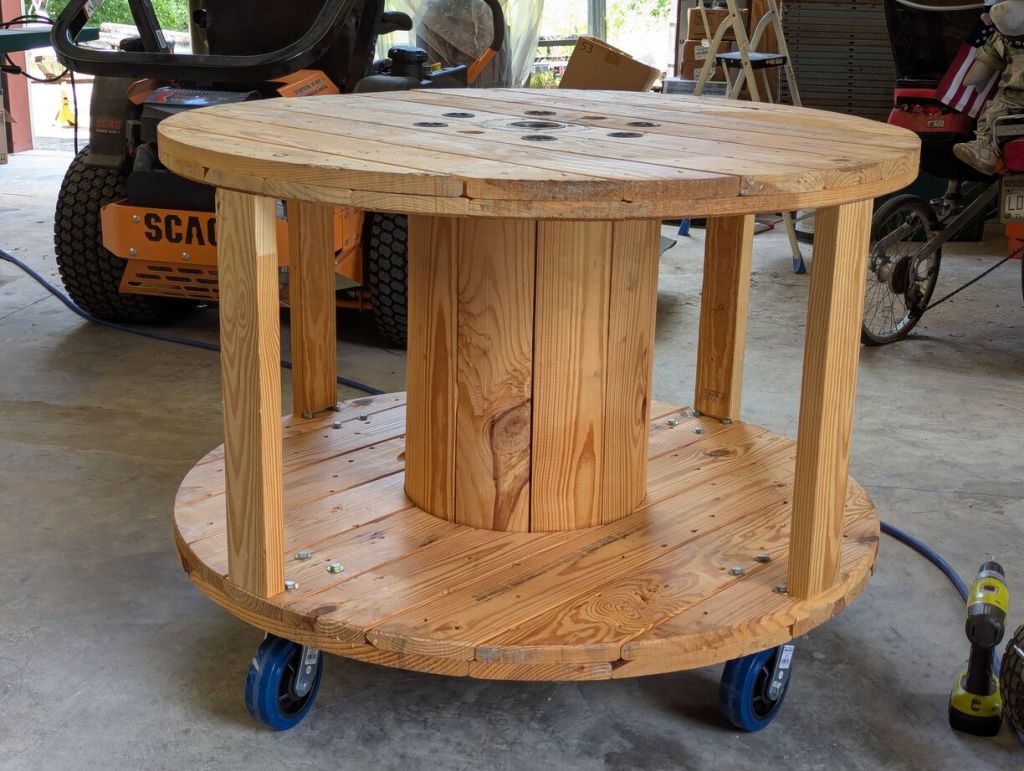
    round wood workbench on wheels
    round wood workbench on wheels

    The workbench rolls around effortlessly after being completed.

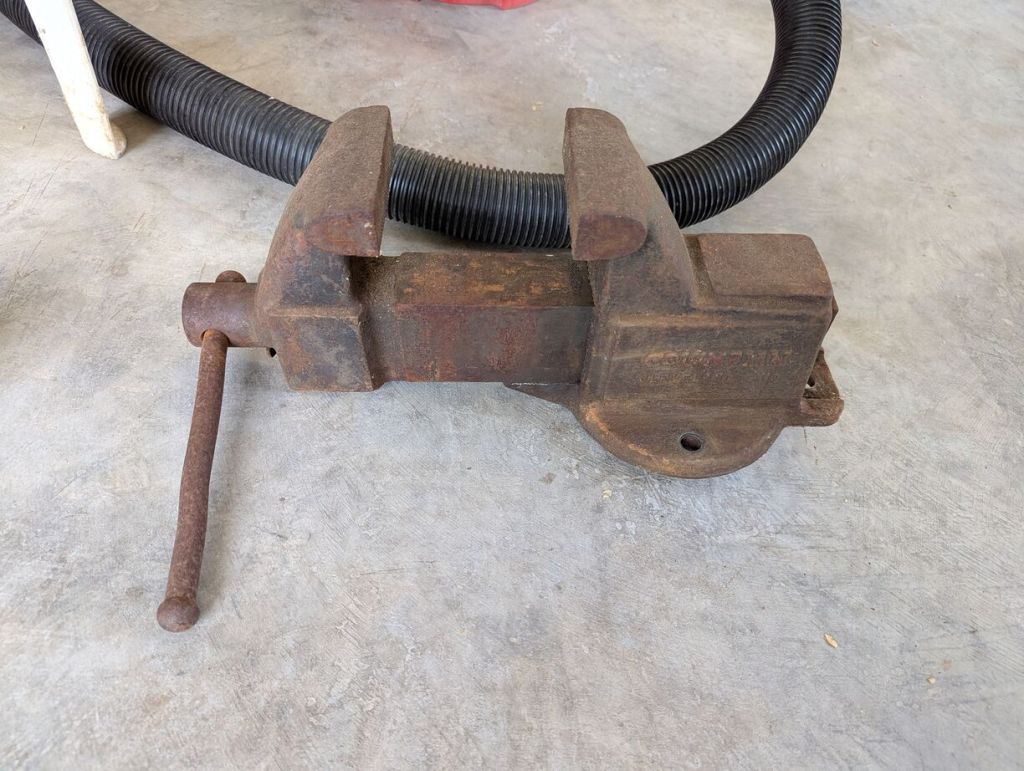
    large metal vice sitting on the concrete floor

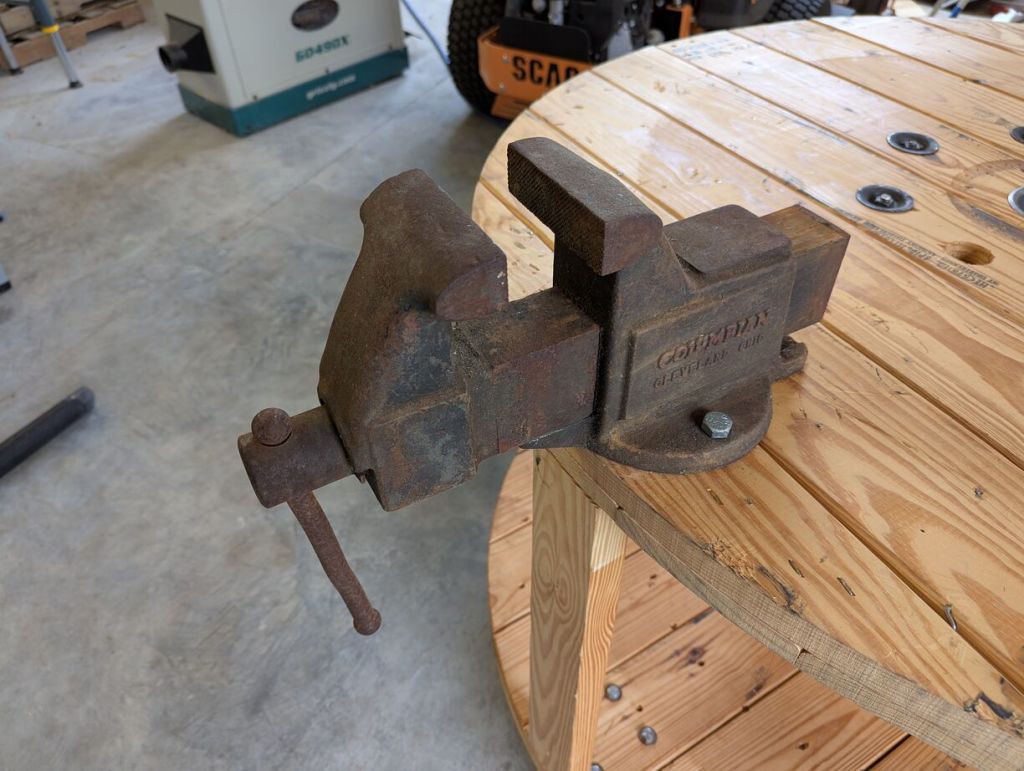
    My dad also had a Columbian vice manufactured in Cleveland, Ohio. It’s about as heavy duty as you can get. It would certainly help him with some work, so we decided to install it on the workbench above one of the 2″ x 4″ supports.

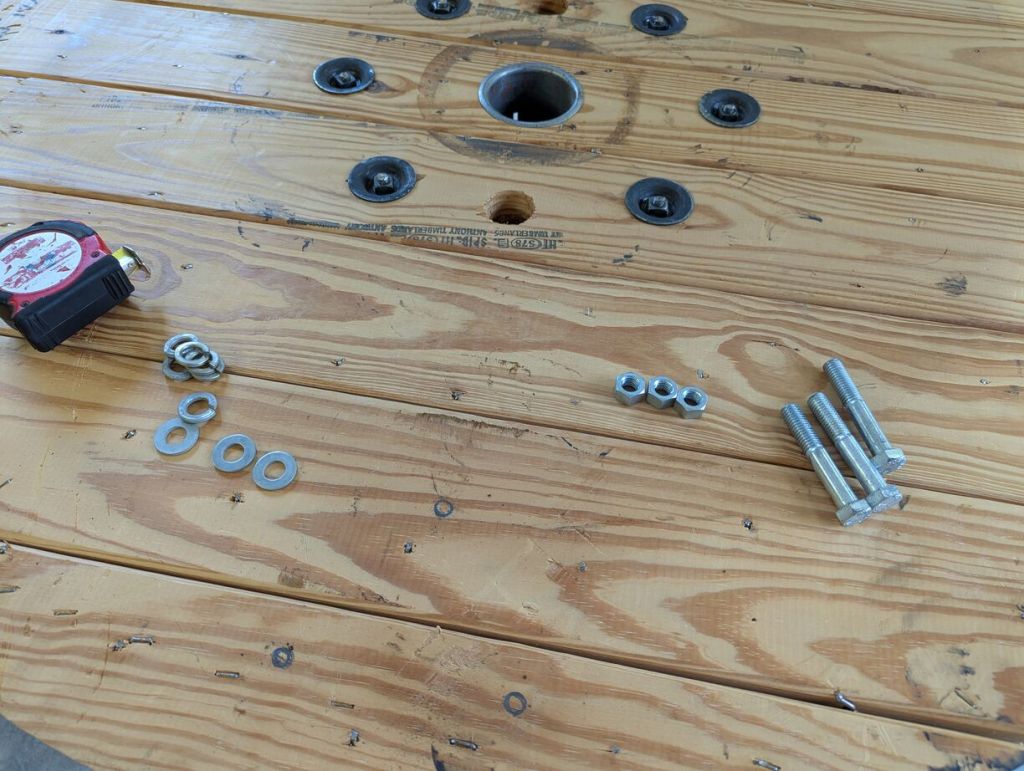
    bolts, nuts, washers, and lock washers on a wood surface

    For the vice, we used three sets of 9/16″ bolts, washers, lock washers, and nuts.

    vice mounted on top of round workbench

    I marked the location of the holes using the base of the vice as a pattern, drilled 5/8″ holes, and installed the bolts through the top and washers, lock washers, nuts on the bottom.

    round wood workbench on caster wheels with a metal vice mounted on top

    Our mobile workbench made out of a wood spool for holding heavy duty electrical wire is completed and ready for work.