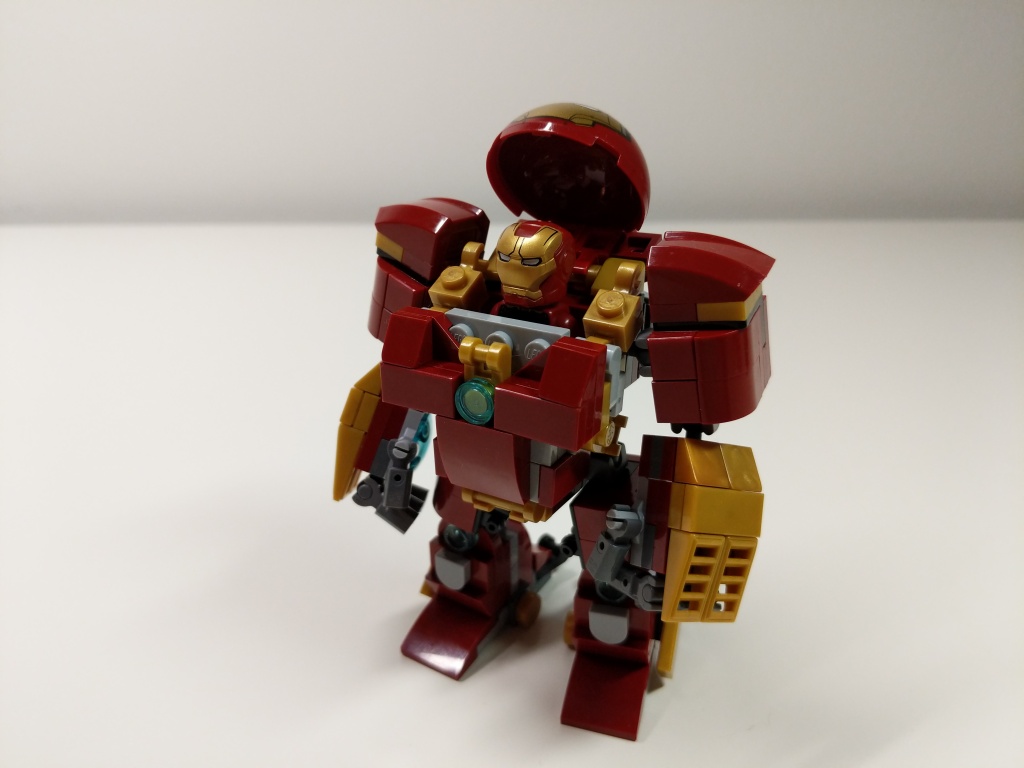
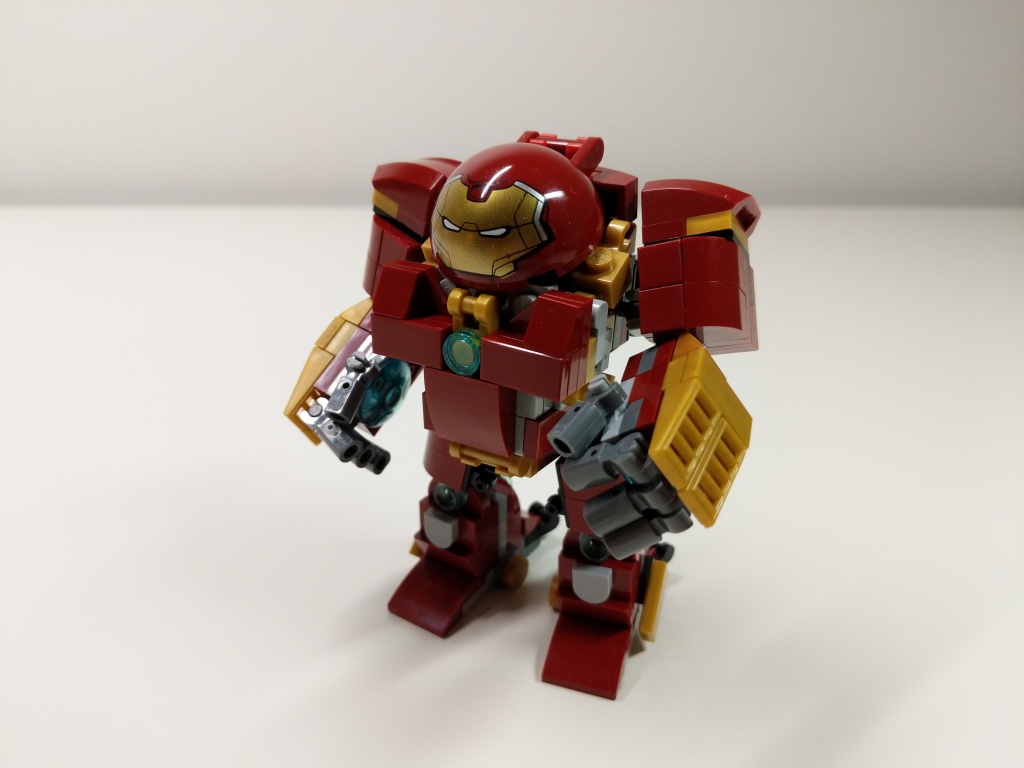
My Iron Man Hulkbuster Mark 44 Armor MOC with Iron Man Mark 43 Armor Minifigure.
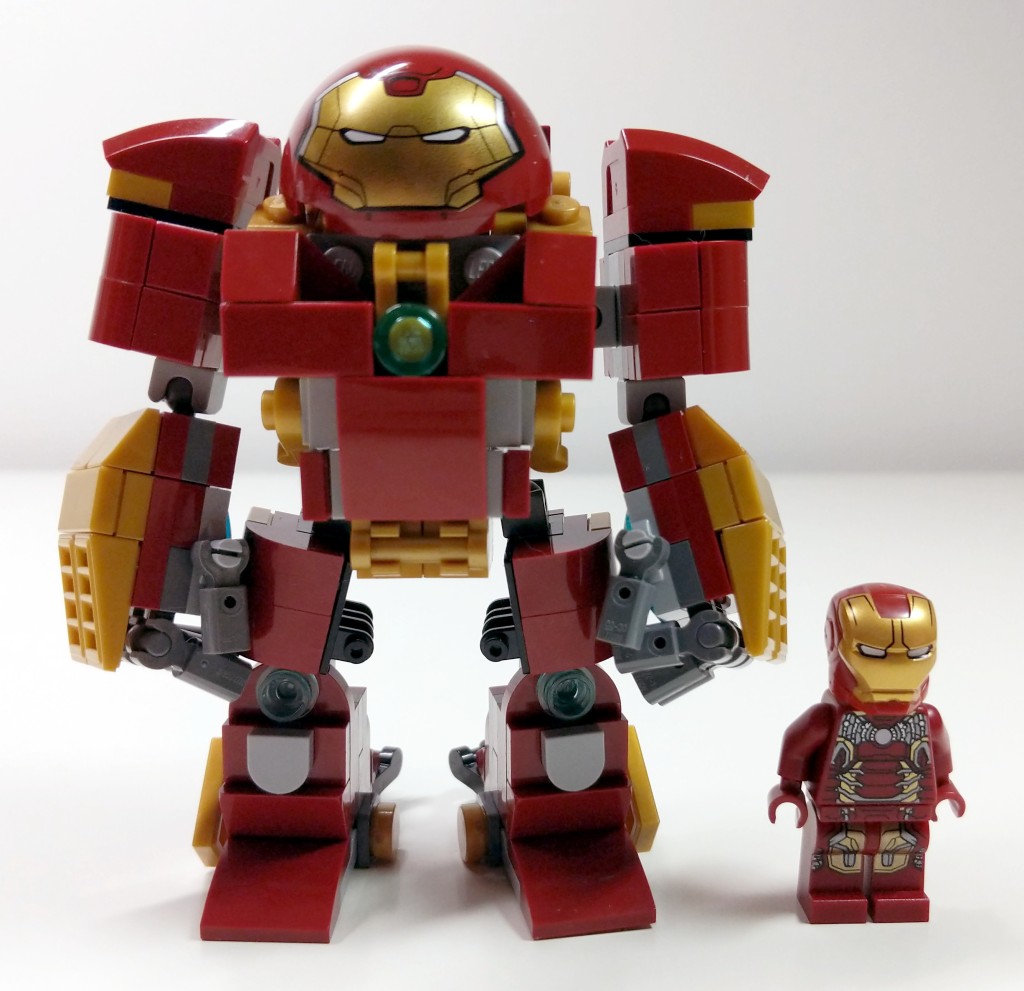
Continuing my recent post of past LEGO MOCs (my own creation), I wanted to share this minifig scale Hulkbuster armor for Iron Man that I built during the summer of 2019 as something more playable and scaled properly than 76105 The Hulkbuster: Ultron Edition pictured below.
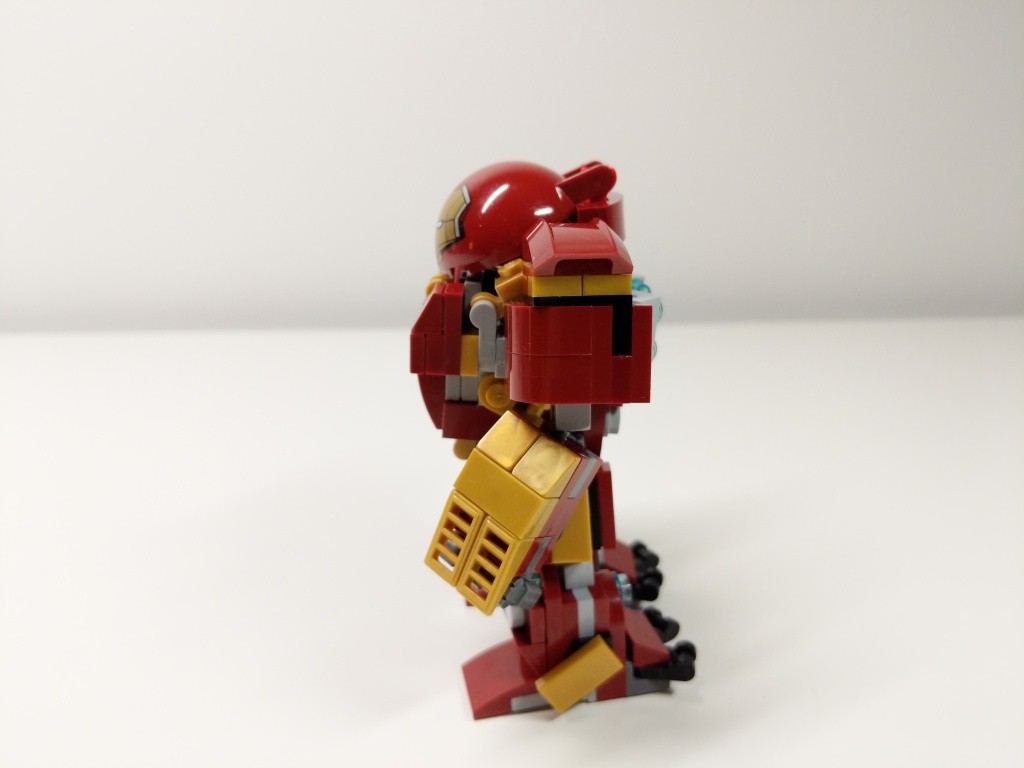
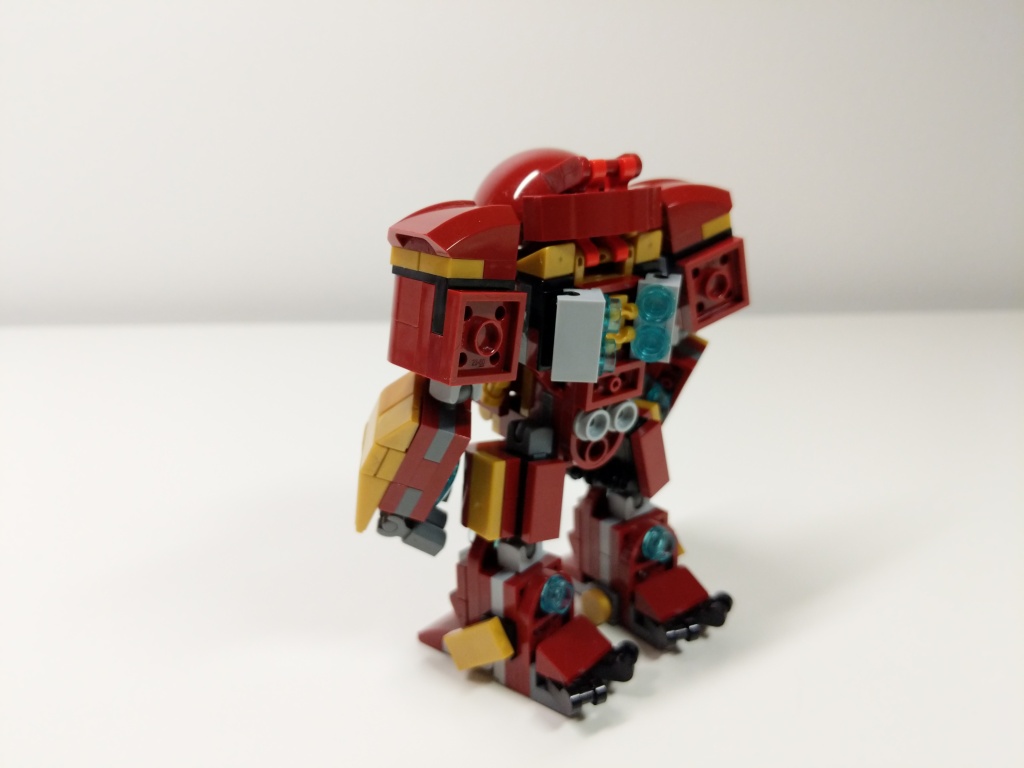
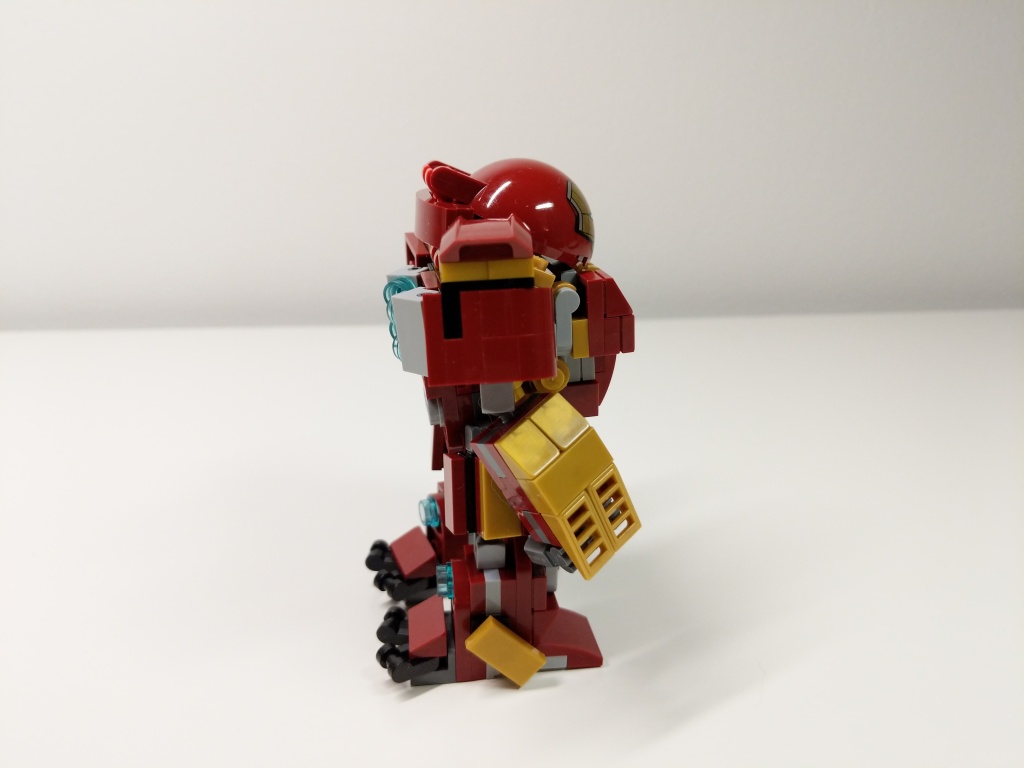
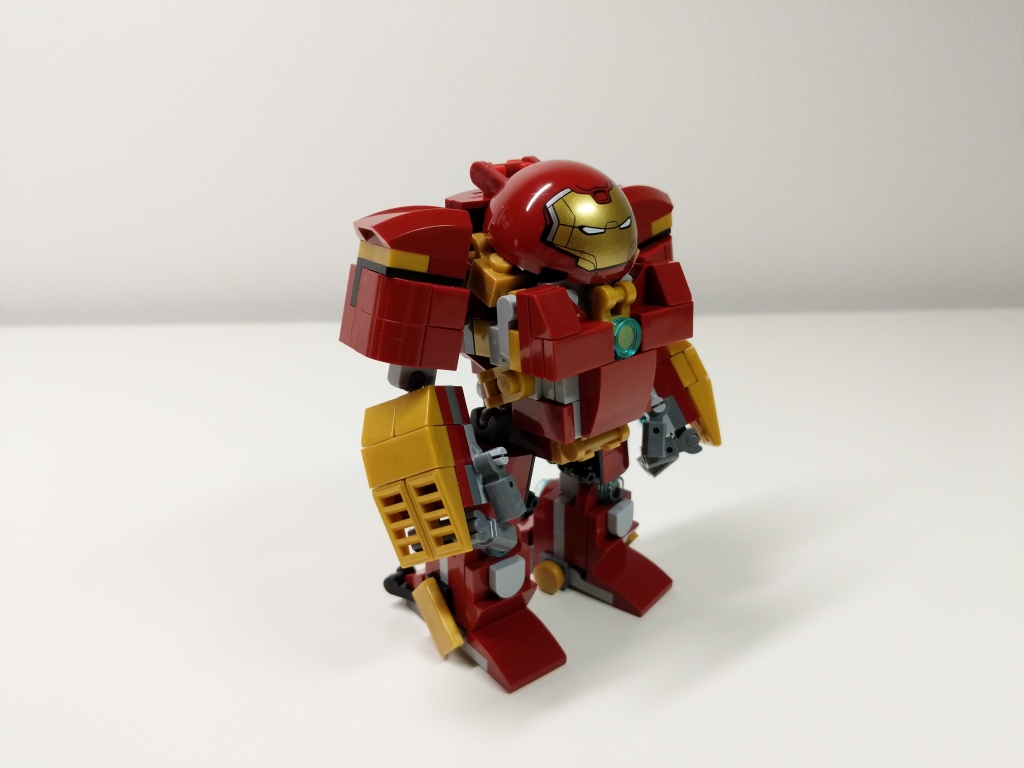
Iron Man’s Mark 44 Hulkbuster Armor is meant to put him on par with The Hulk in terms of strength and size. Considering the minifigure at the heart of the 76105 set, it is gargantuan in comparison to The Hulk. Therefore, I set a goal to build Hulkbuster armor that matched the mini-figure scale as closely as possible, encapsulate an Iron Man minifigure, and have more points of articulation than the smaller Hulkbuster armor in 76031 The Hulk Buster Smash (having a swivel waist like the 76105 Hulkbuster in this small size was beyond my skill).
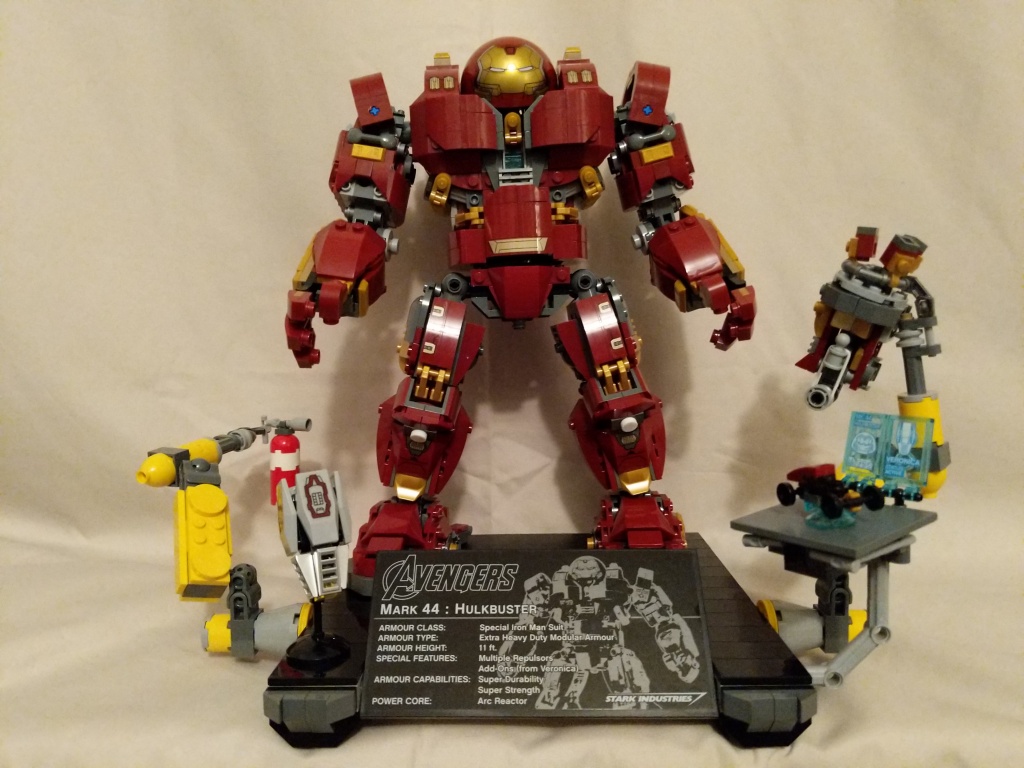
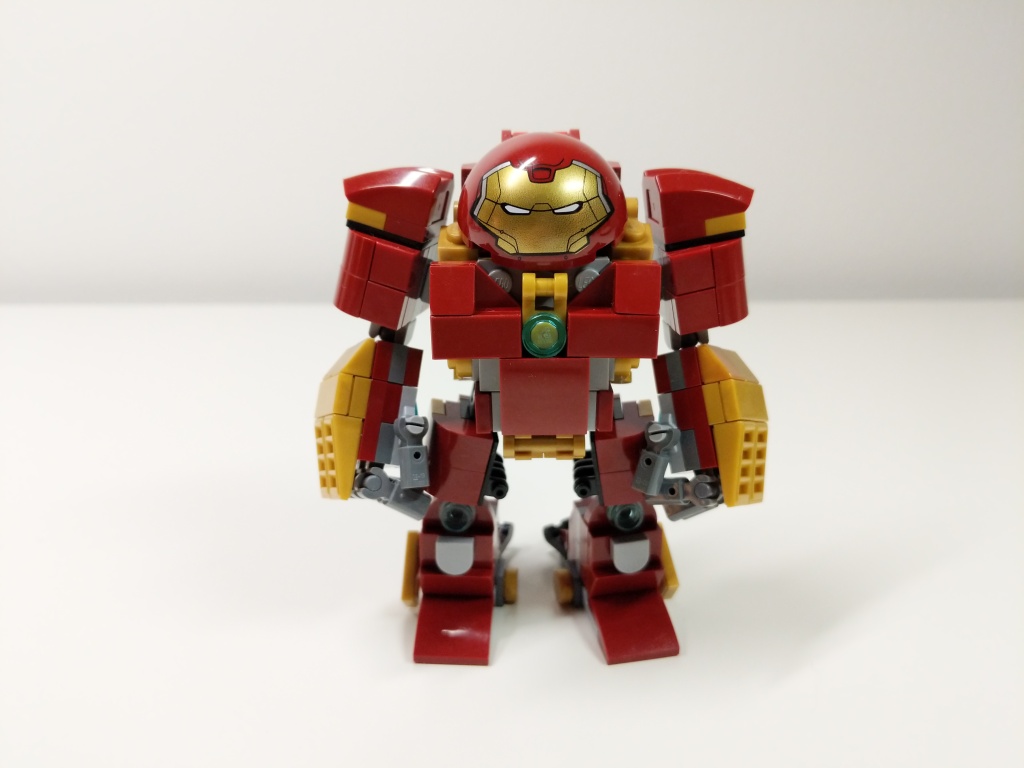
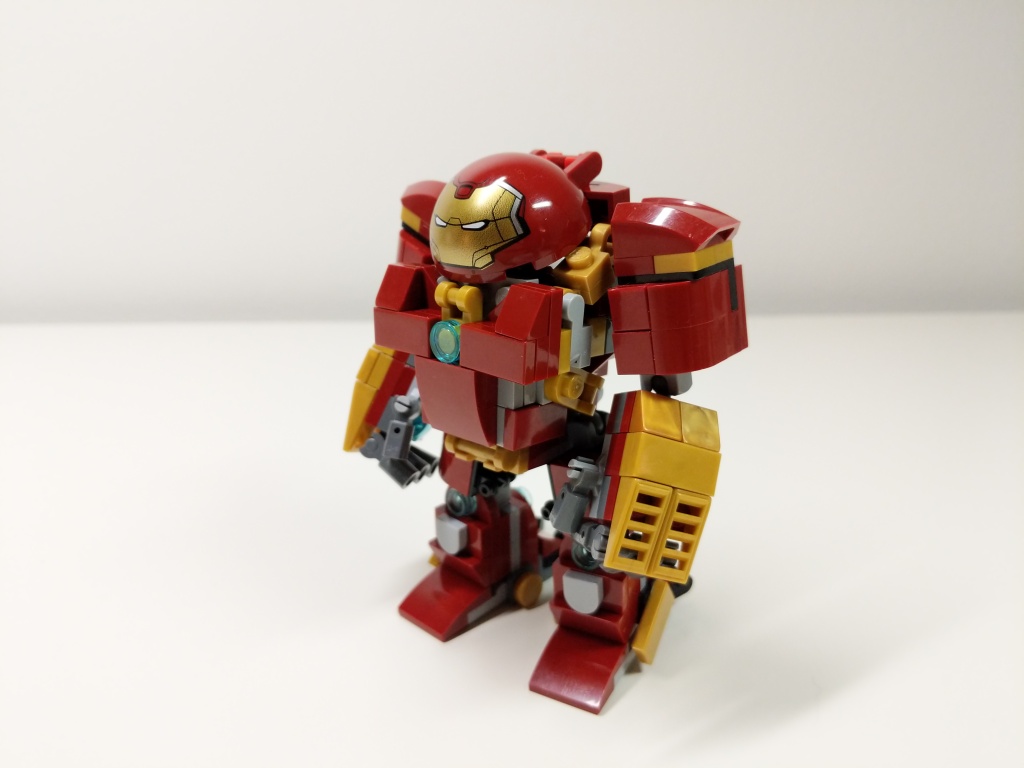
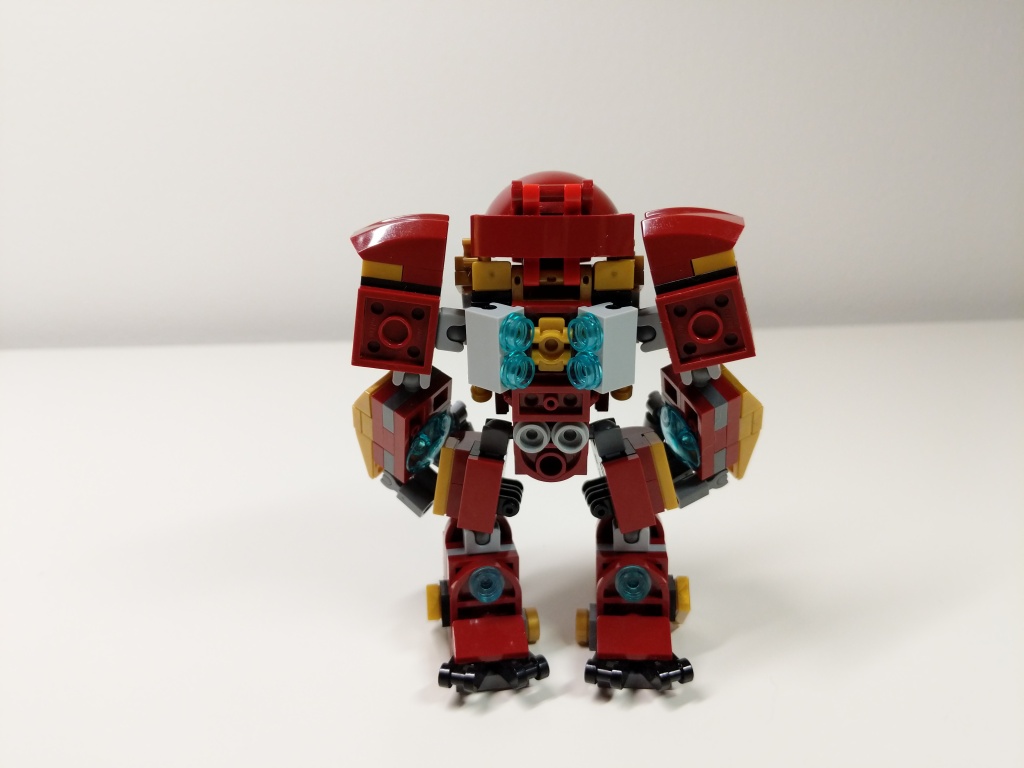
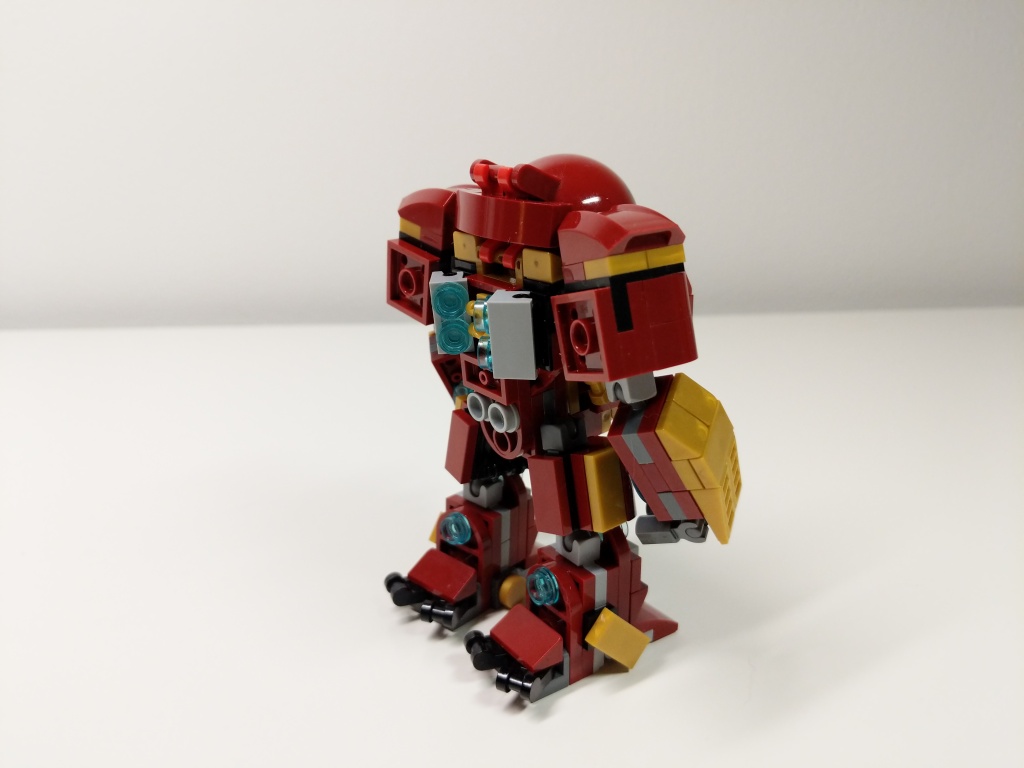
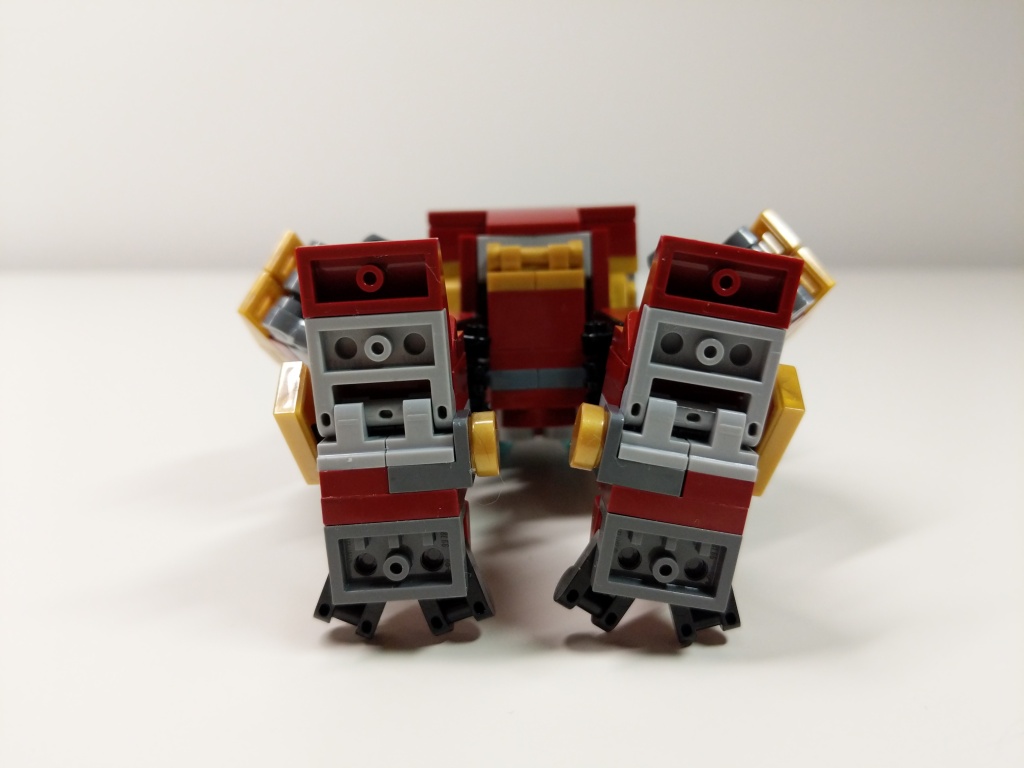
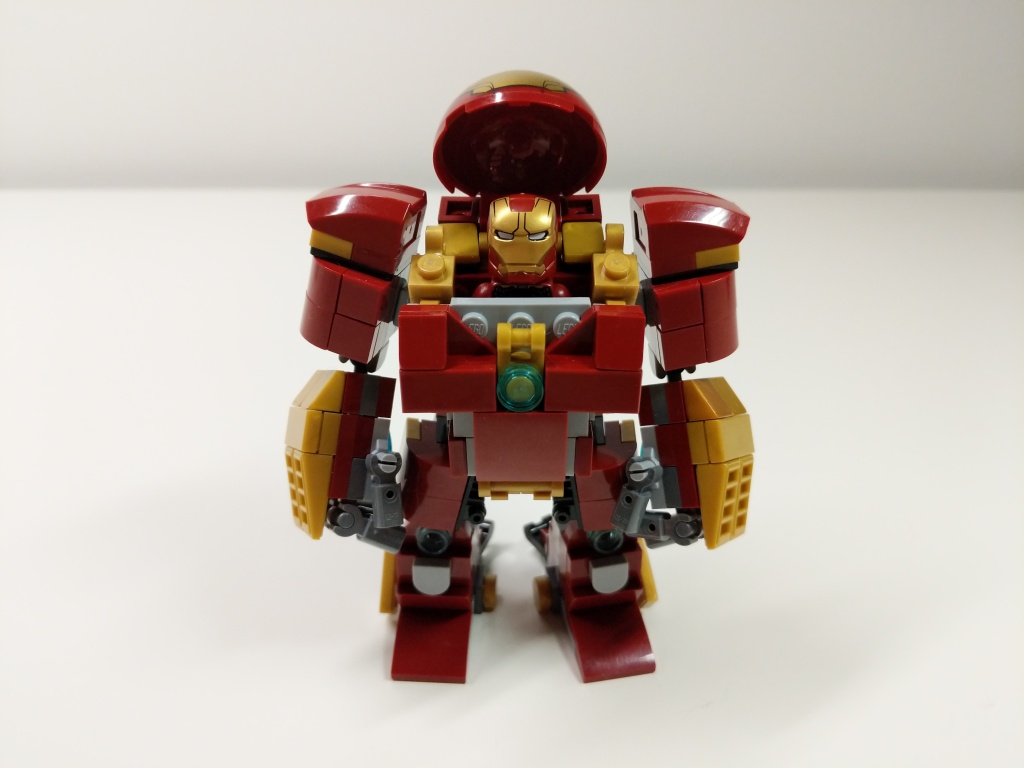
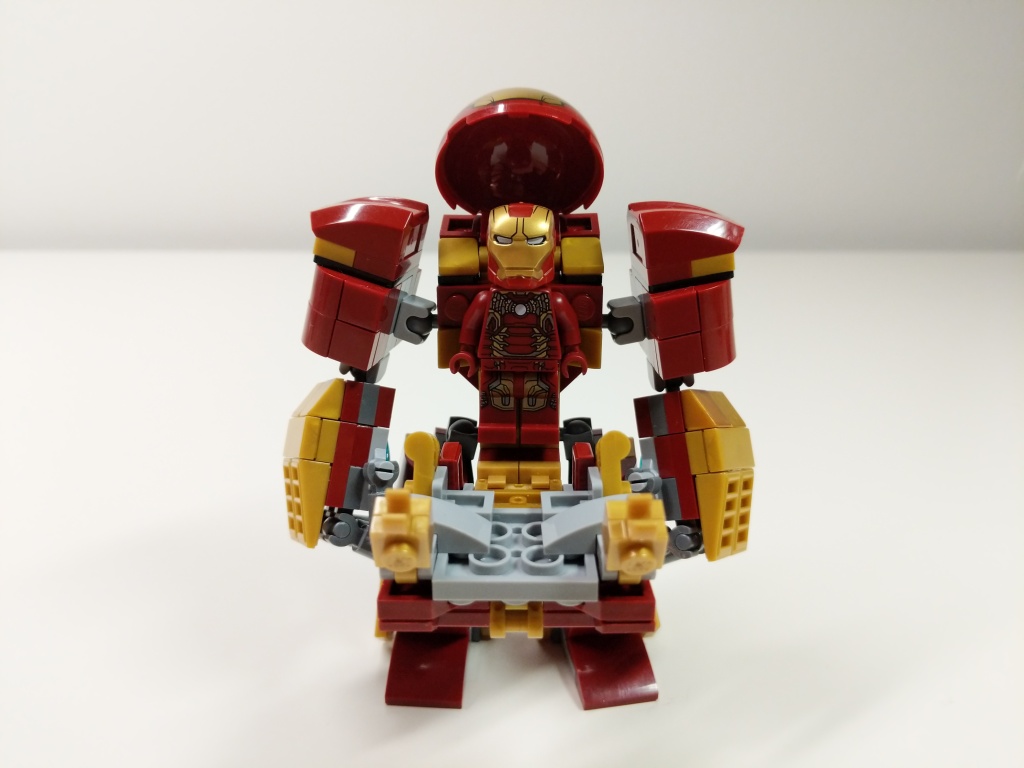
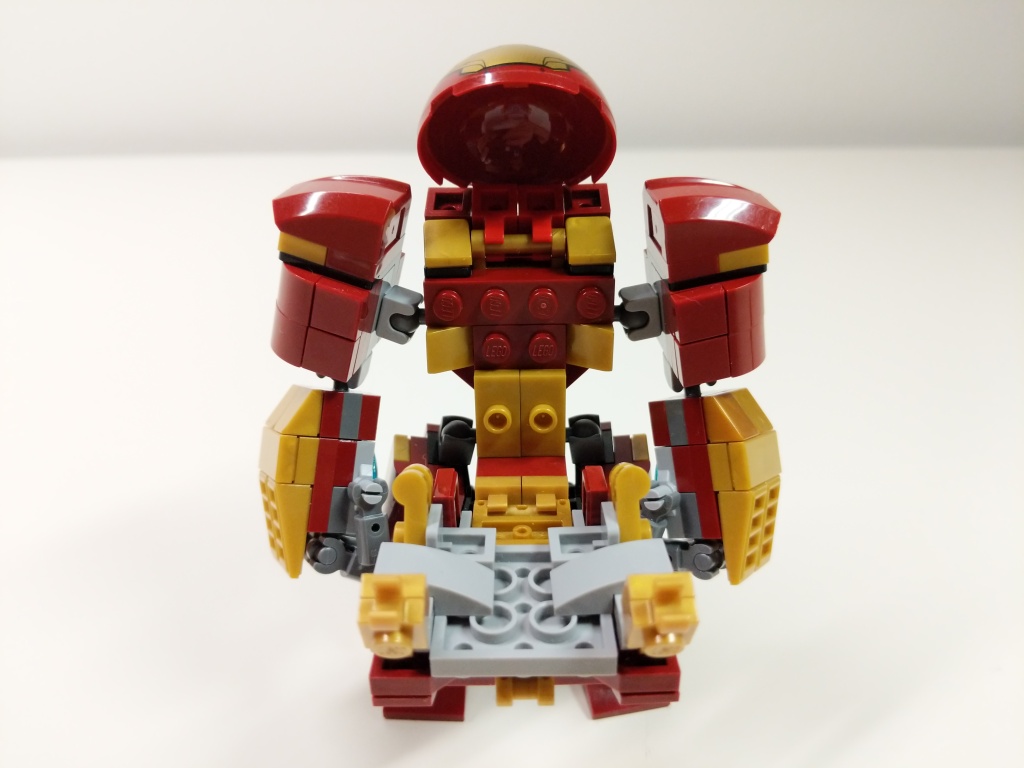
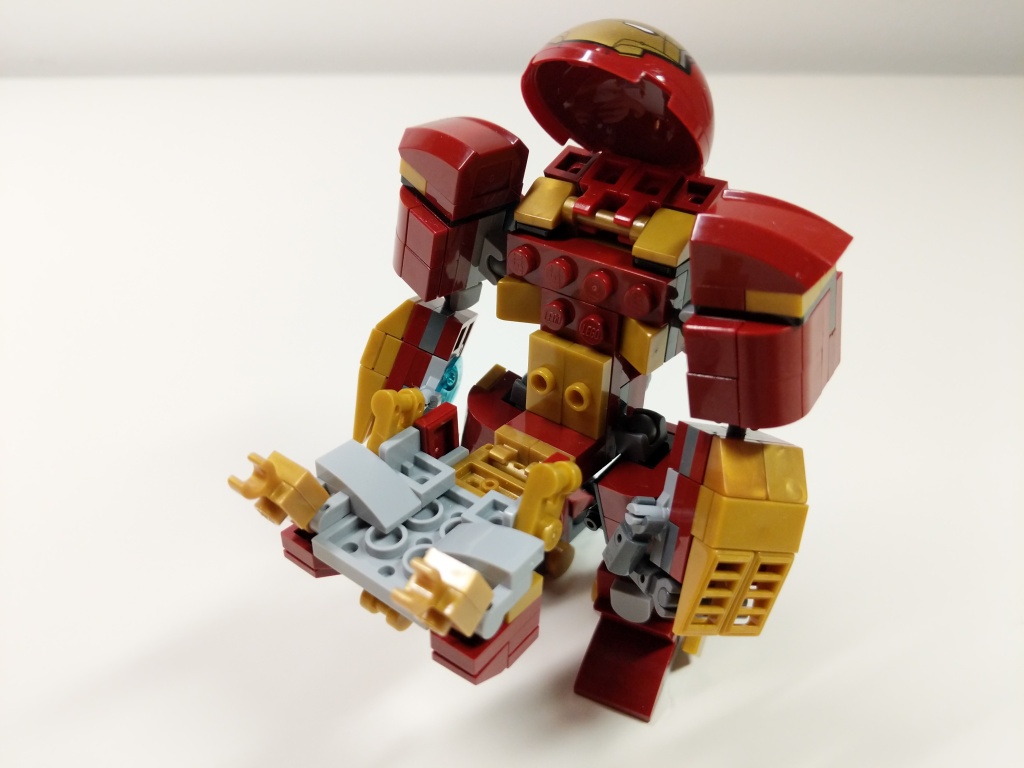
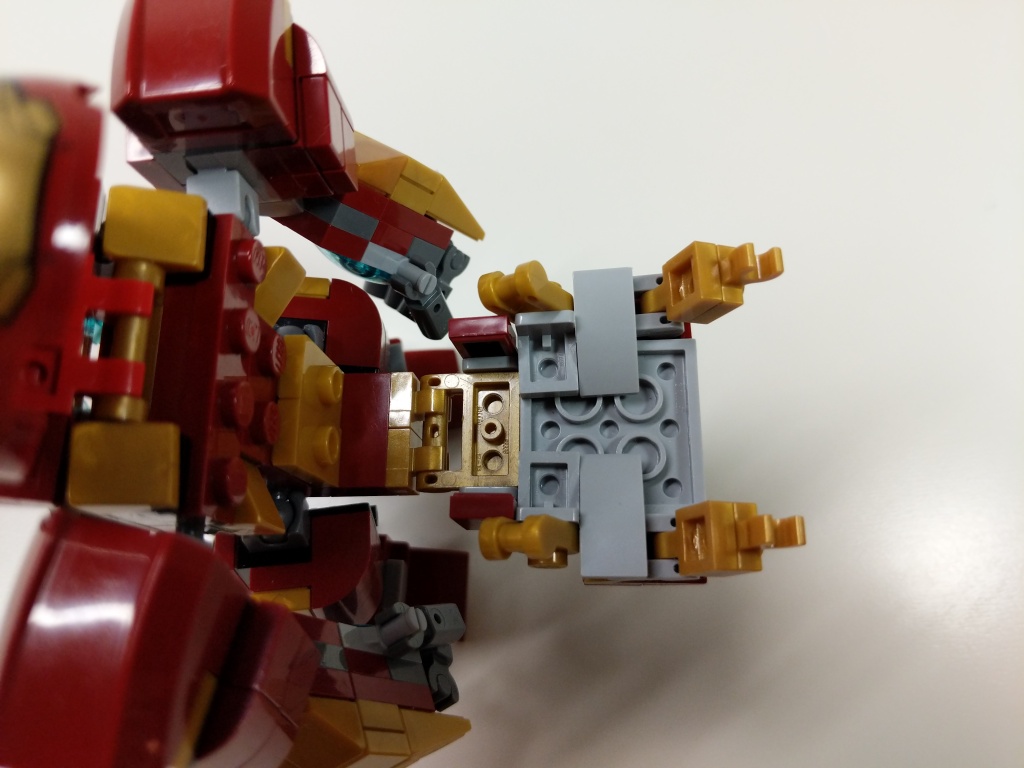
Igor in 76125 Iron Man Hall of Armor inspired the basic layout of Hulkbuster using the ball-joint connectors. The 5-stud wide chest piece with an arc reactor in the center and wrap-around elements is my favorite part of the build. Rotated views with a focus on key details are included below.
Given more specialized elements–especially in dark red and metallic gold–I think that I can continue to refine this model to pack as much detail as possible within its small size in comparison to its larger brethren.
I’ve been a big fan of the Marvel Cinematic Universe (MCU) since Robert Downey, Jr. donned the armor in Iron Man (2008). Following the thread of the story through 22 films that concluded with Iron Man’s ultimate sacrifice in Avengers: Endgame (2019) was staggering.
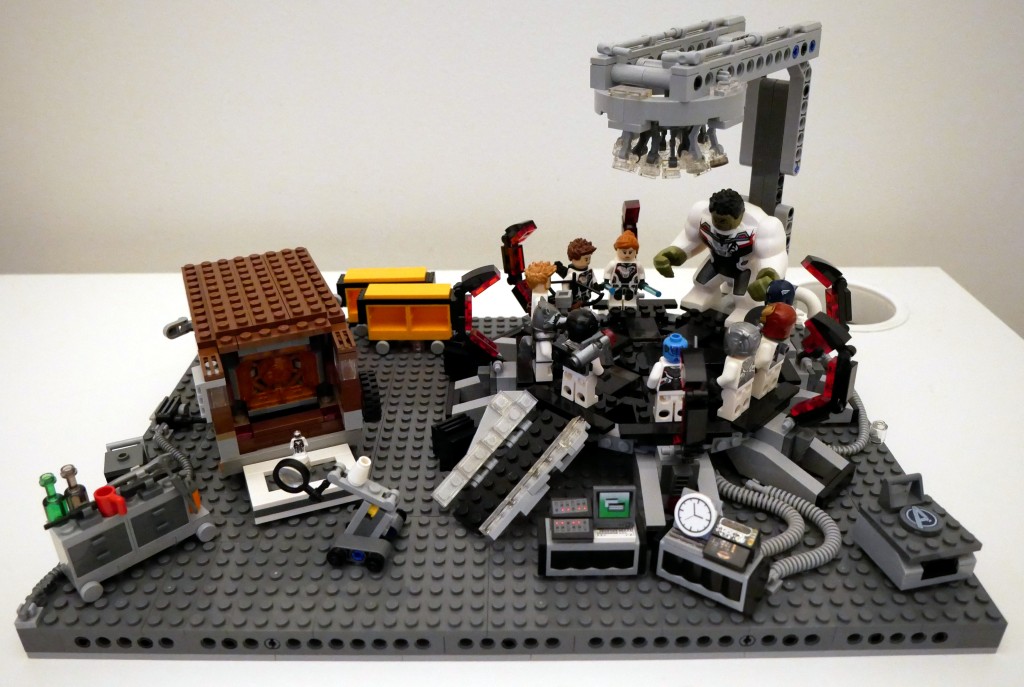
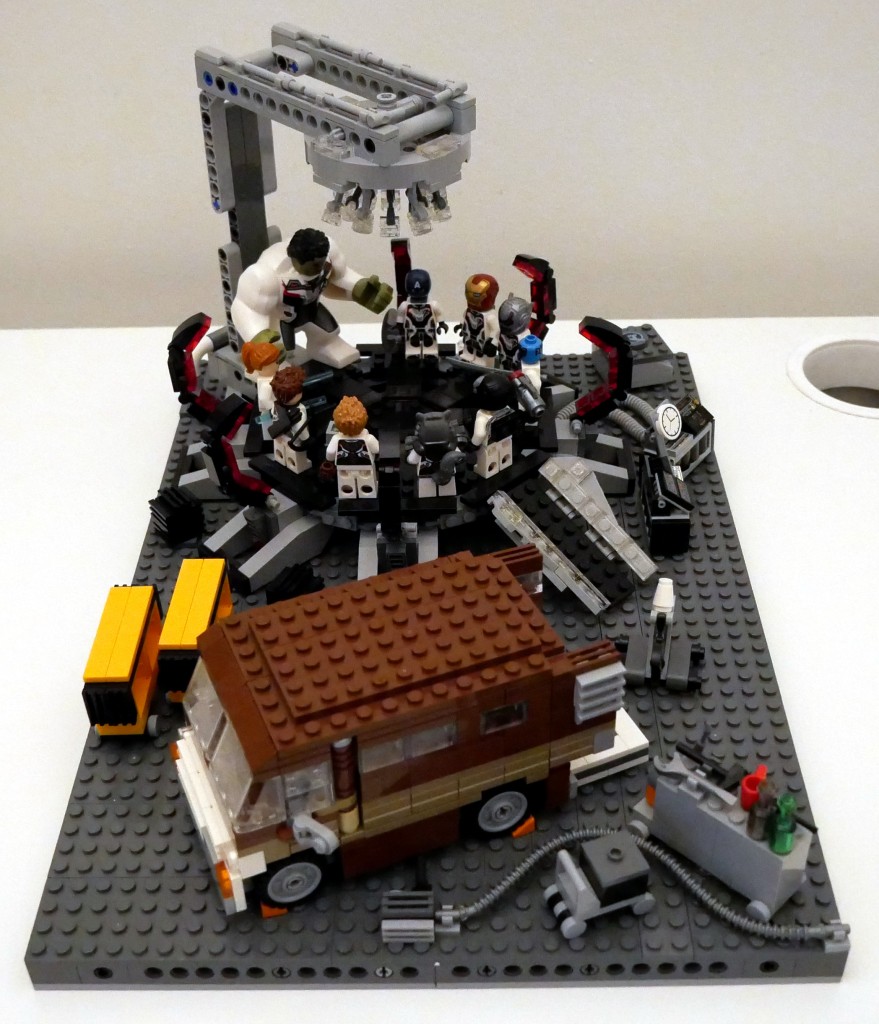
Shortly after watching that last film, I set to work on building this LEGO MOC (my own creation) scene from the Avengers Compound when they launch the “Time Heist” for a set of Infinity Stones. Unfortunately, I didn’t have enough bricks and elements to construct a proper superstructure of the hanger space that they used to build the time machine. Instead, I focused on elements found in the scene and incorporated some playability into the design. Rotated images of the full scene are below.
The key components of the set are the large quantum tunnel/time machine on the right, Luis’ van with the miniaturized quantum tunnel in the back, and a full set of Avengers wearing the Advanced Tech Suit (or Quantum Suit). The latter required purchasing LEGO sets 76124 War Machine Buster (for War Machine and Ant Man), 76144 Avengers Hulk Helicopter (Hulk and Black Widow), 76126 Avengers Ultimate Quinjet (Rocket, Thor, Hawkeye, and Black Widow), 76131 Avengers Compound Battle (mini Ant Man and Nebula), 76123 Captain America: Outriders Attack (Captain America), and 30452 Iron Man and Dum-E (Iron Man).
BTW: LEGO has ensemble film tie-in sets down pat by spreading characters across sets–including sets that don’t appear in the film–to maximize profile. I’ve experienced this before with Star Wars, Harry Potter, Lord of the Rings, and The Hobbit.
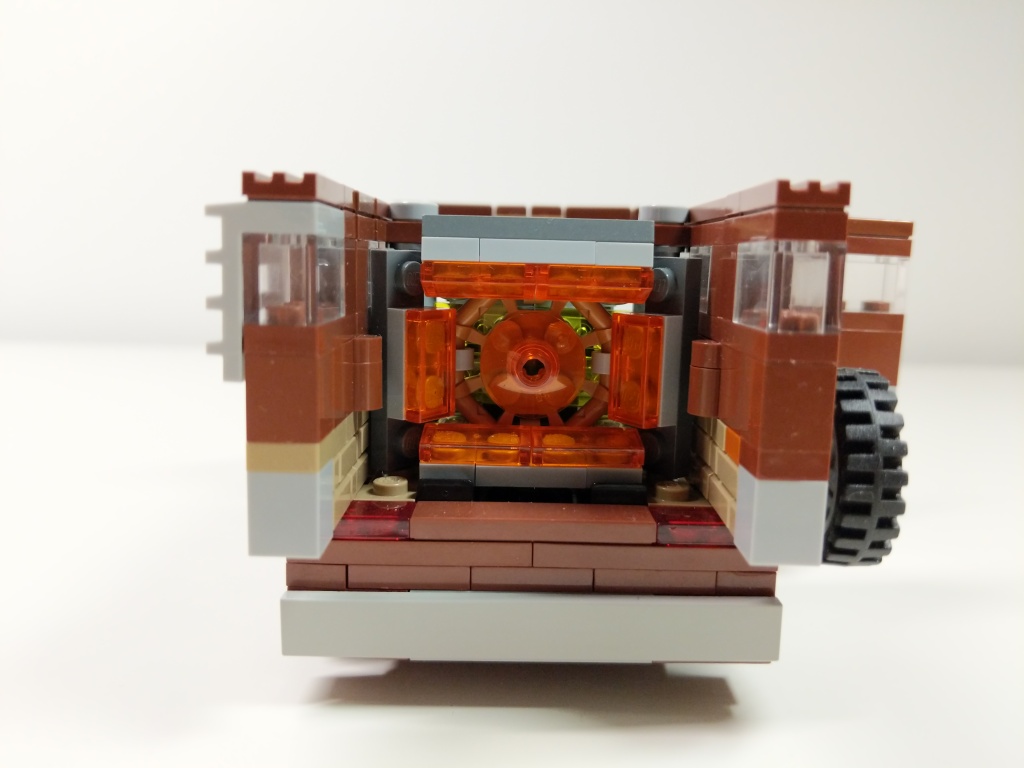
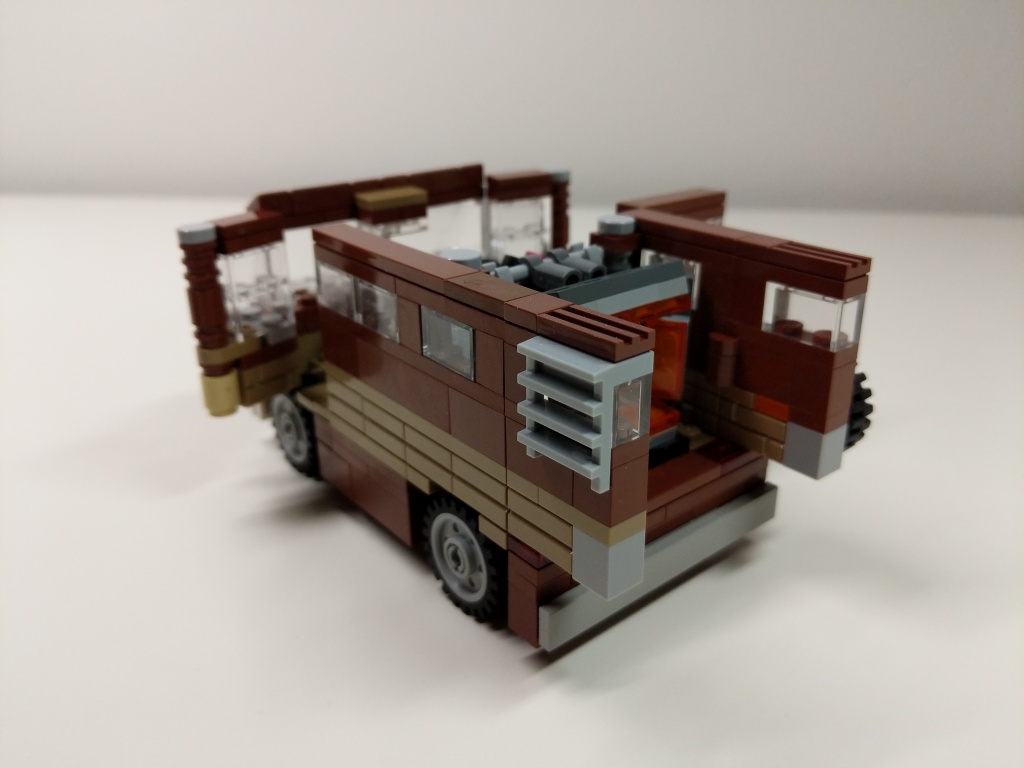
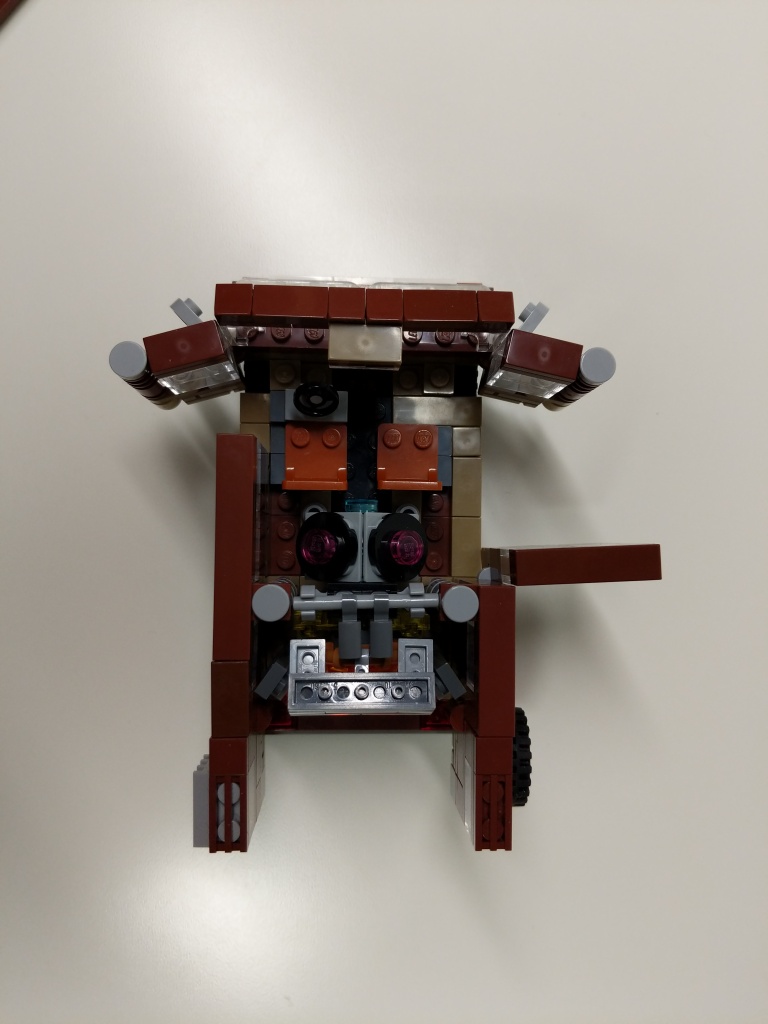
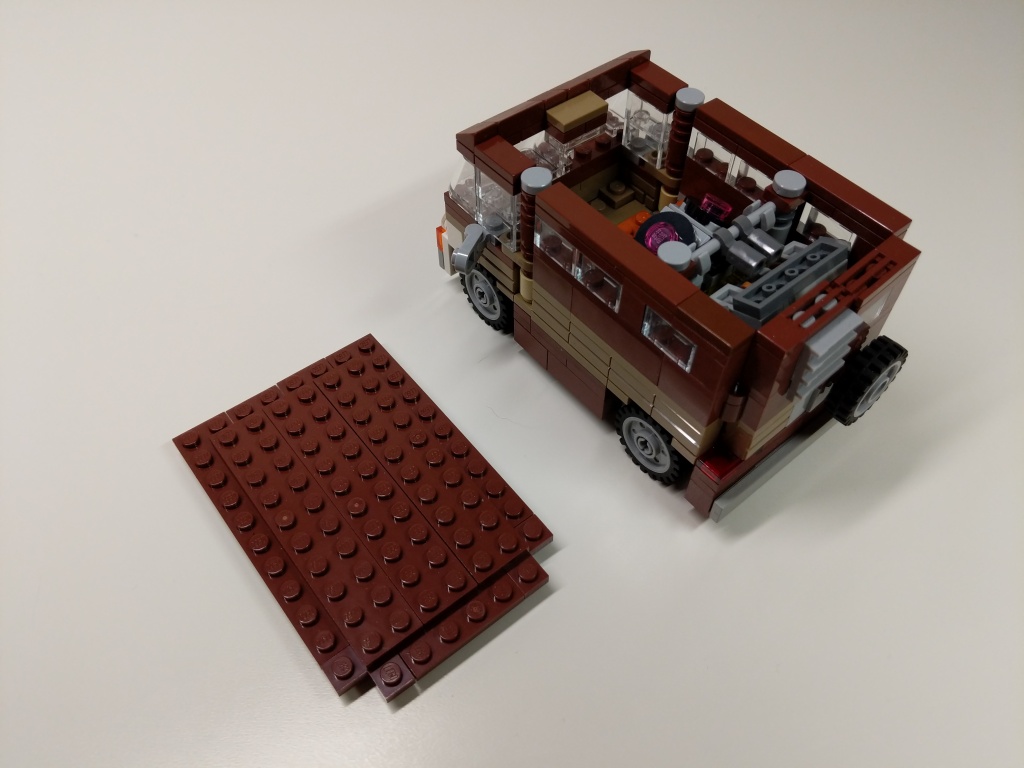
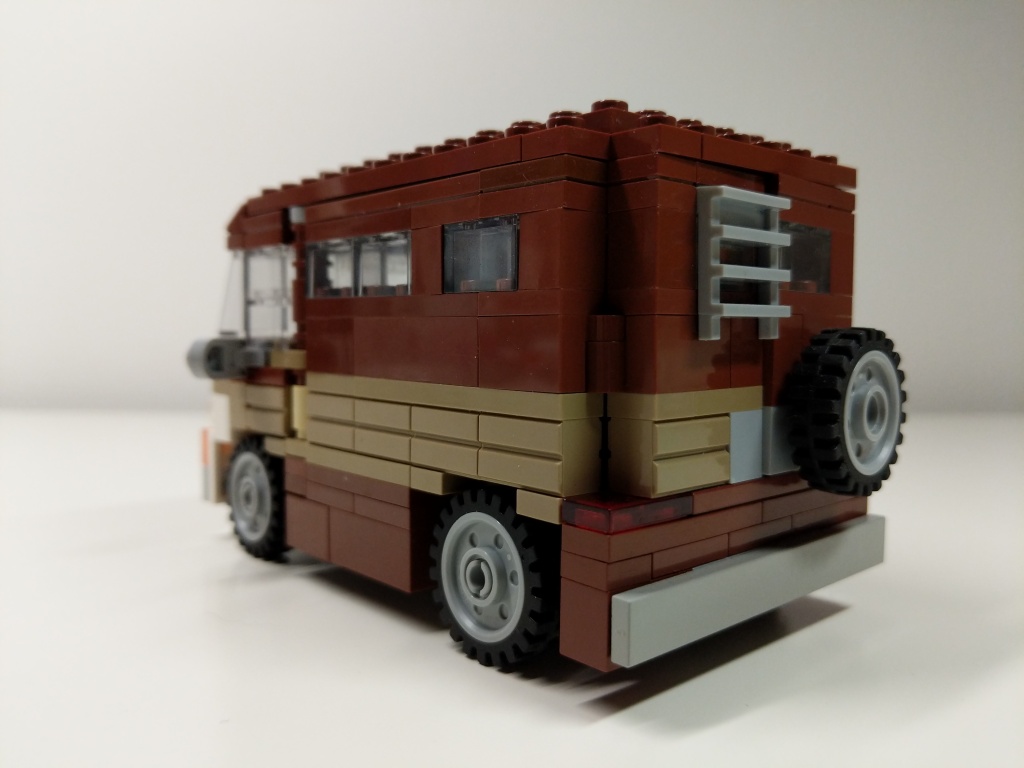
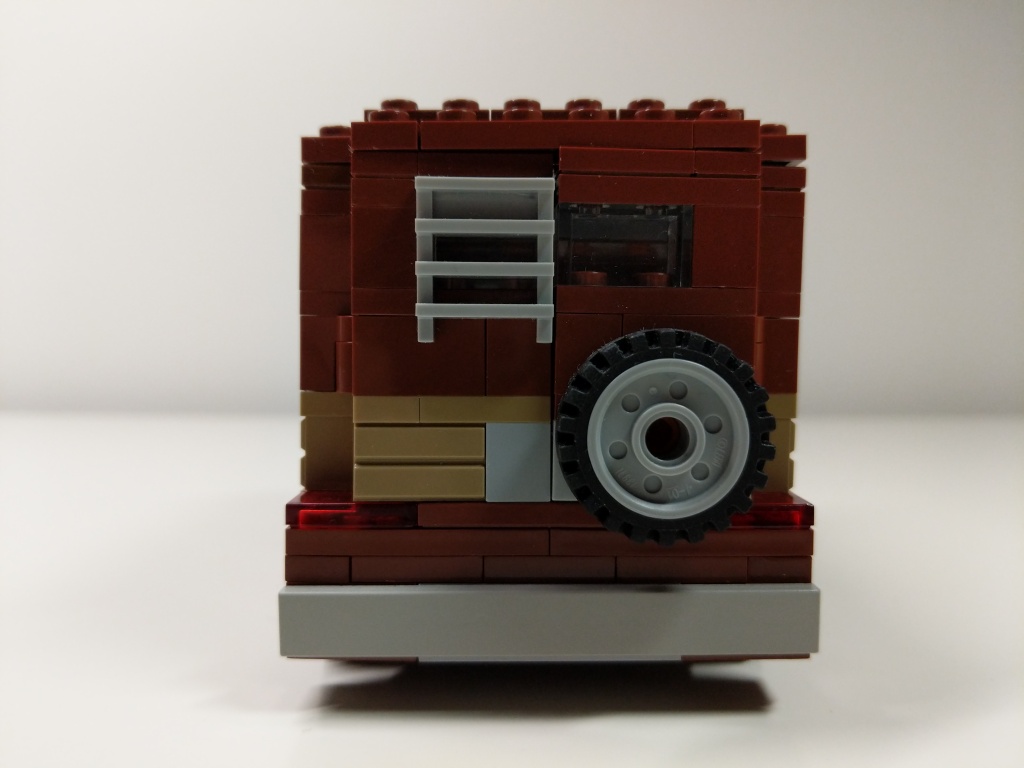
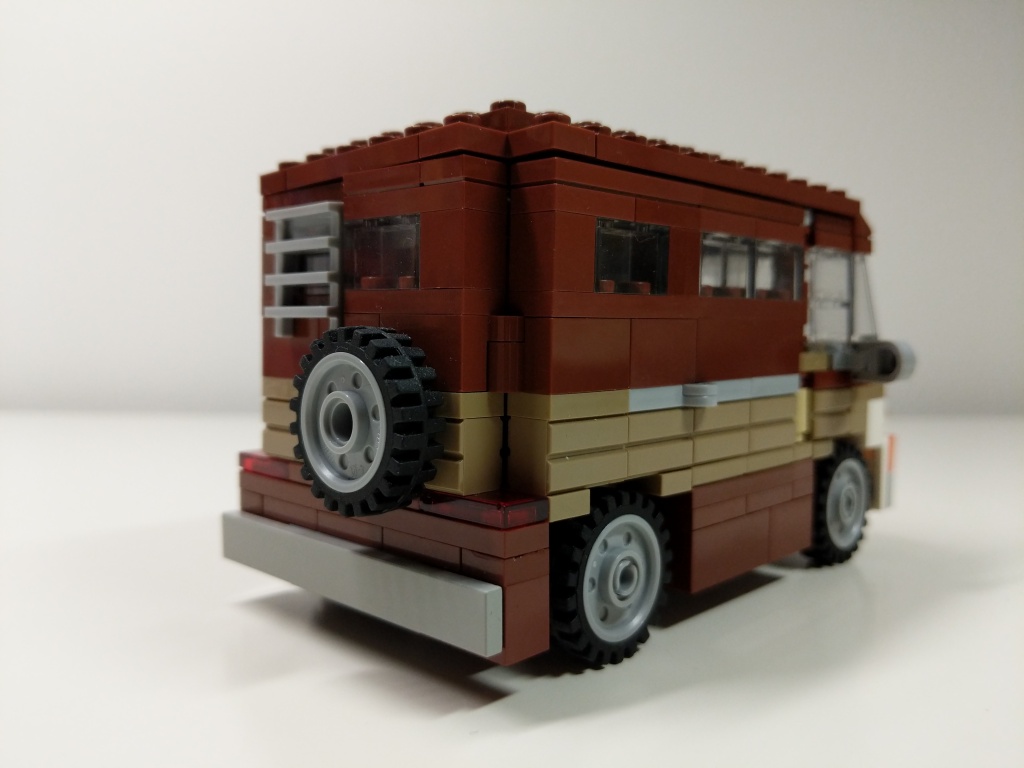
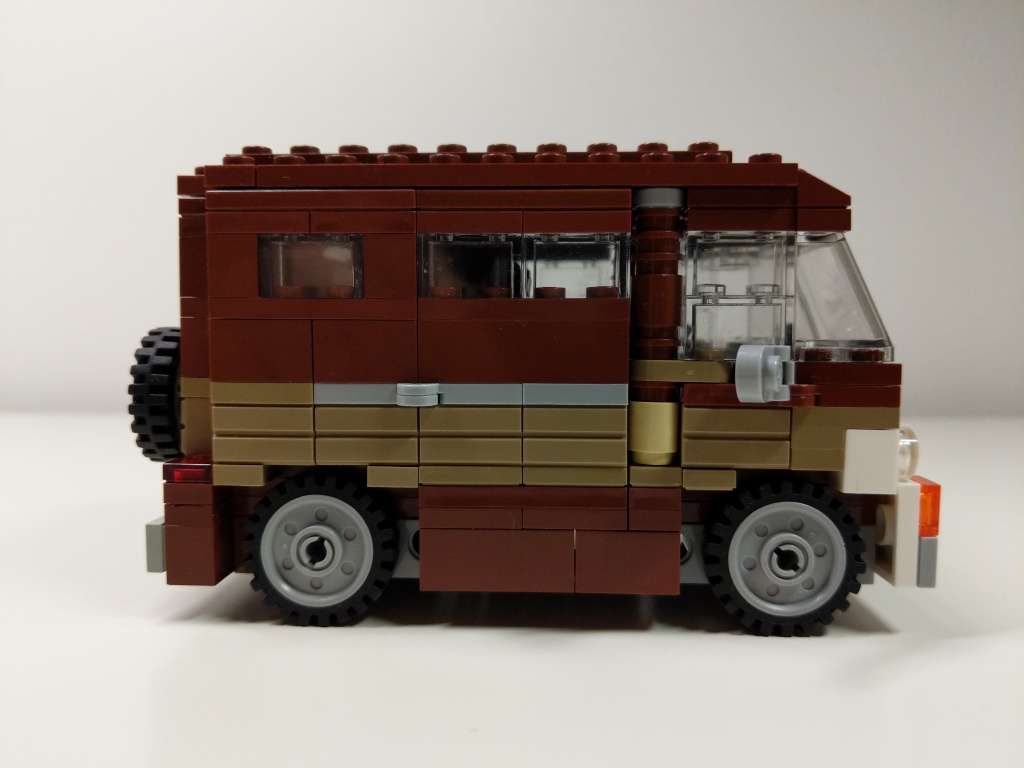
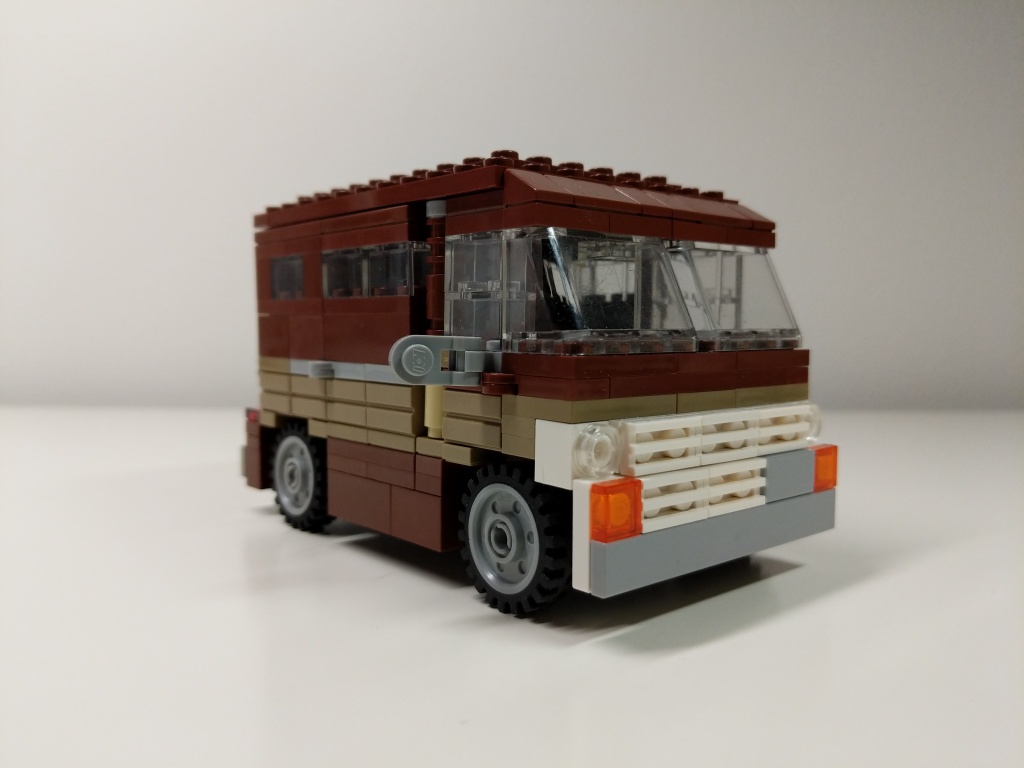
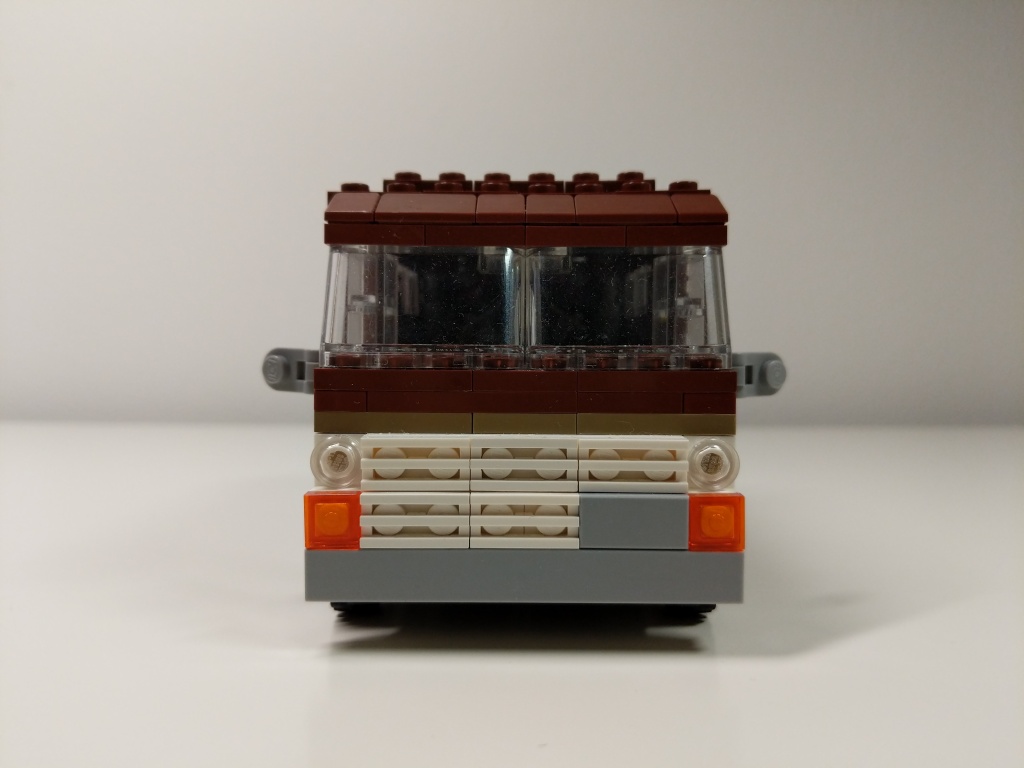
Luis’s Van
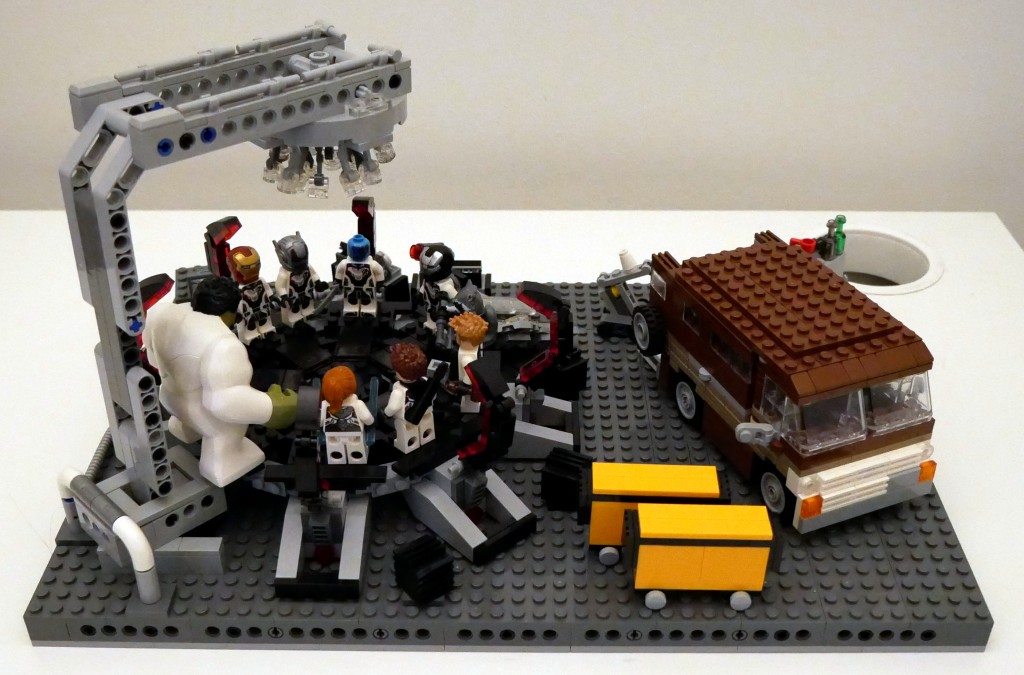
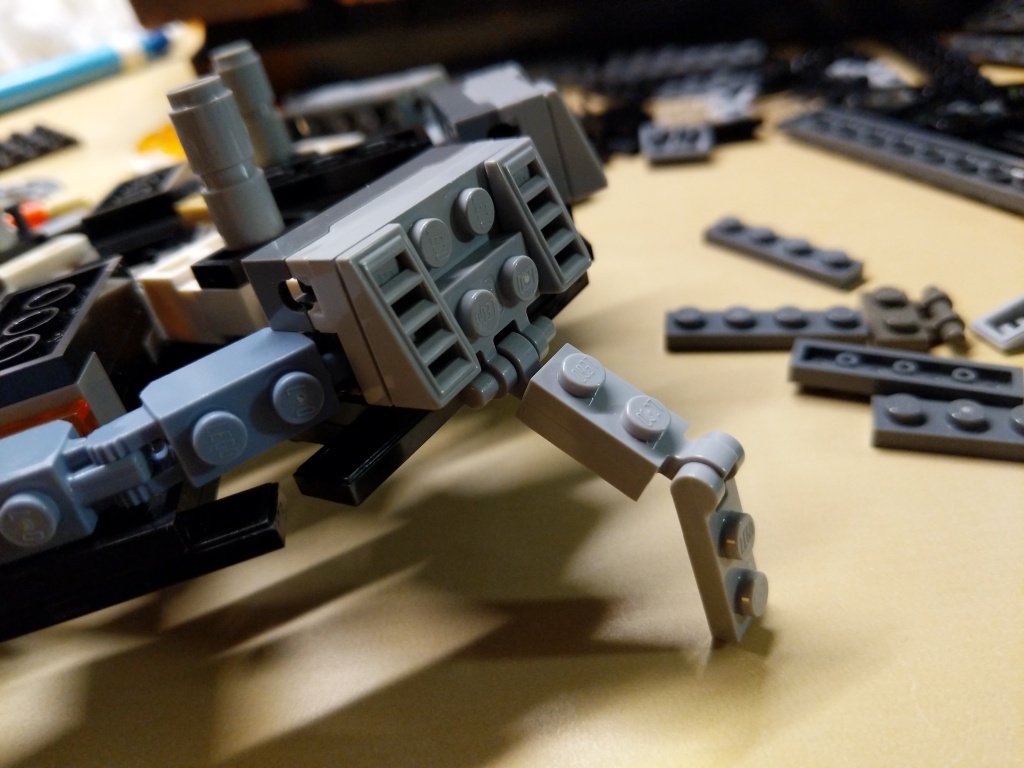
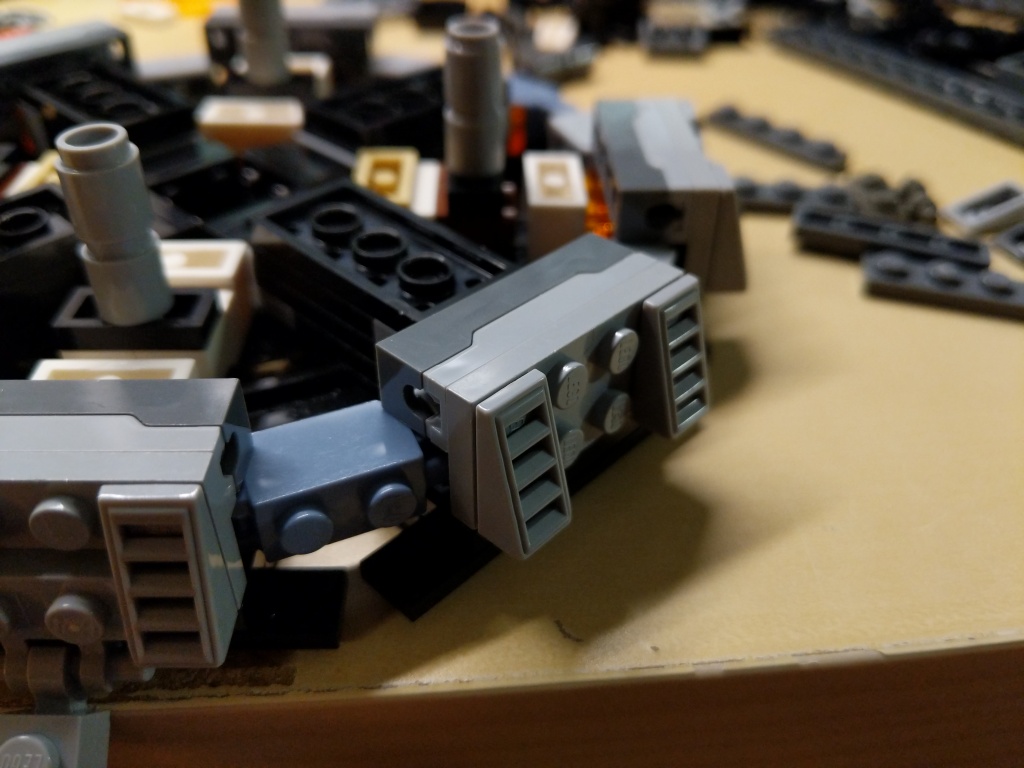
Luis’ van from Ant-Man (2015) and Ant-Man and the Wasp (2018) is a 1972 Ford Econoline. It held the miniaturized quantum tunnel that Scott Lang used to retrieve quantum energy to help stabilize Ava Starr/Ghost. After Scott returned from the Quantum Realm five years after Thanos’ snap via the Quantum Tunnel, he drove the van to the Avenger’s Compound where they used it to test Scott’s idea for a “Time Heist.” I designed this model of Luis’ van before LEGO released their 76192 Avengers: Endgame Final Battle set, which includes a 6-stud-wide version of Luis’ van. I wanted my version to be wide enough to sit 2 minifigures side-by-side comfortably, so I went with an 8-stud-wide design.
Quantum Tunnel
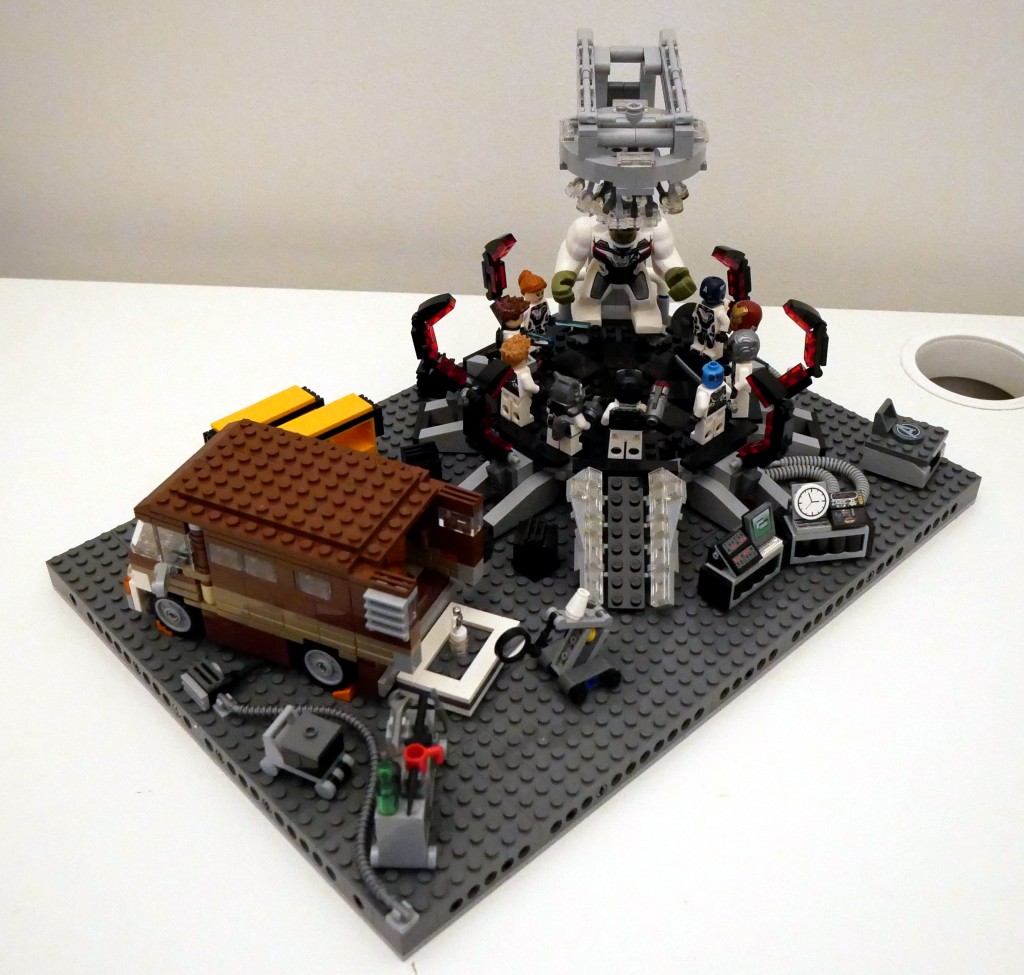
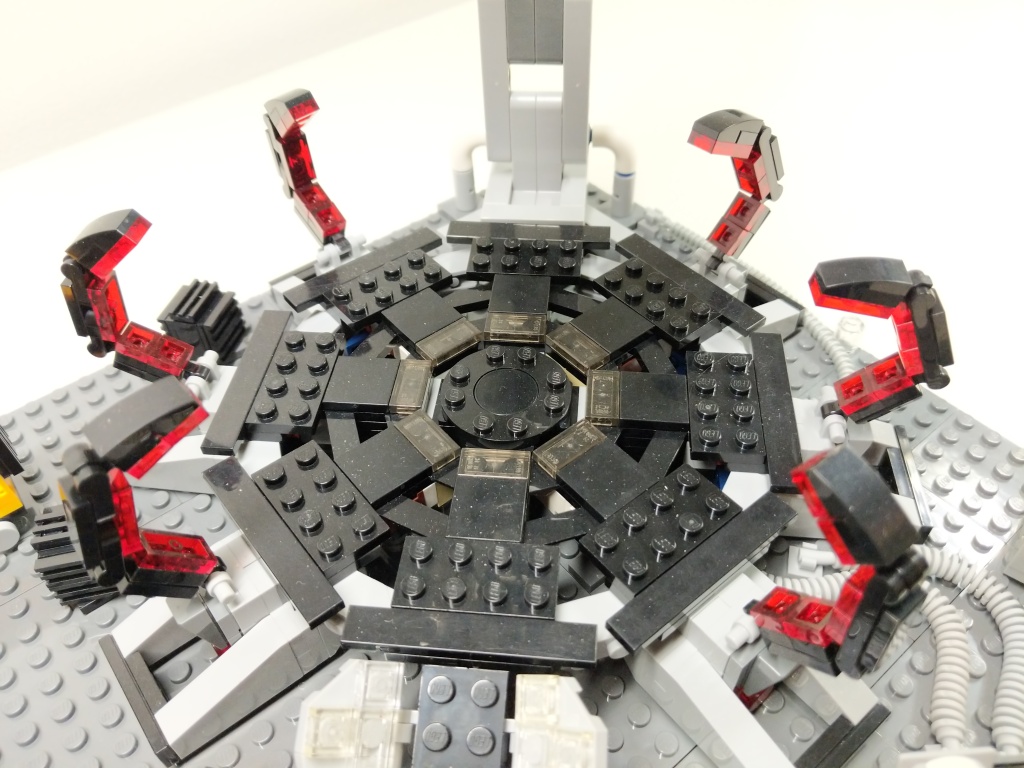
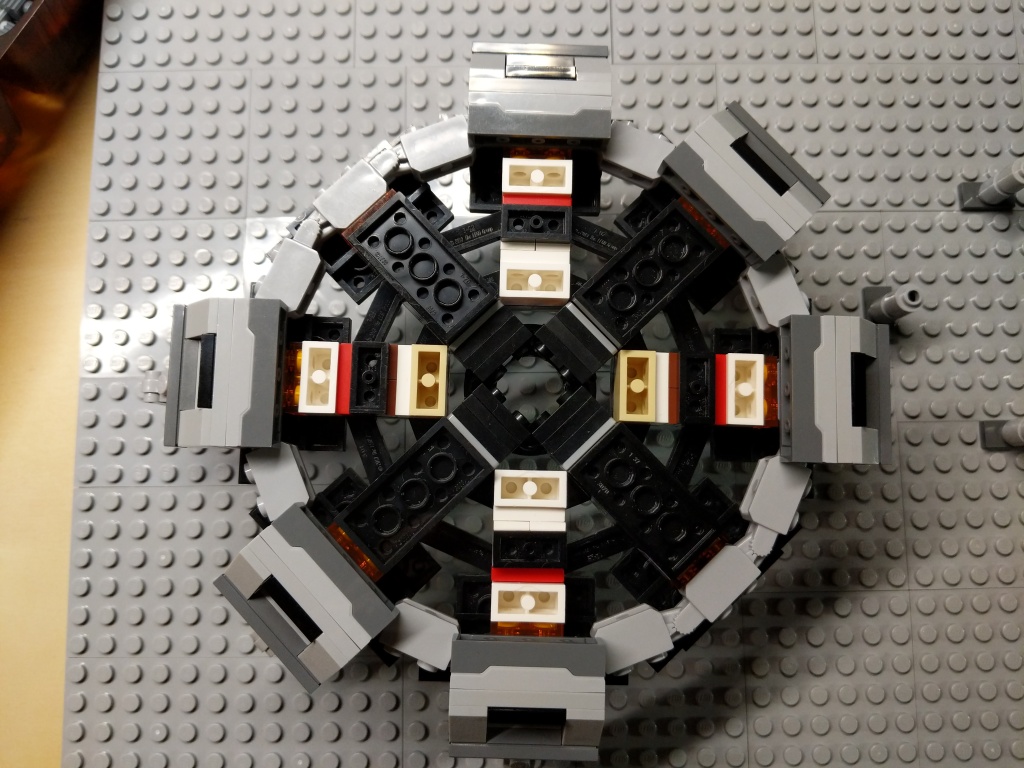
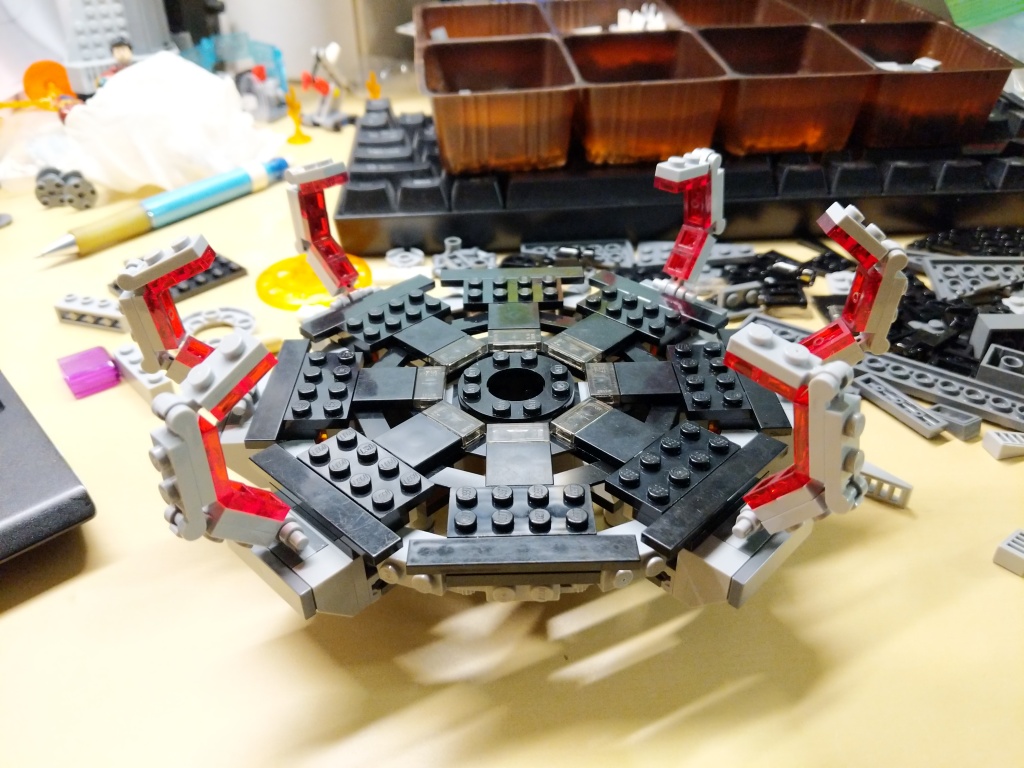
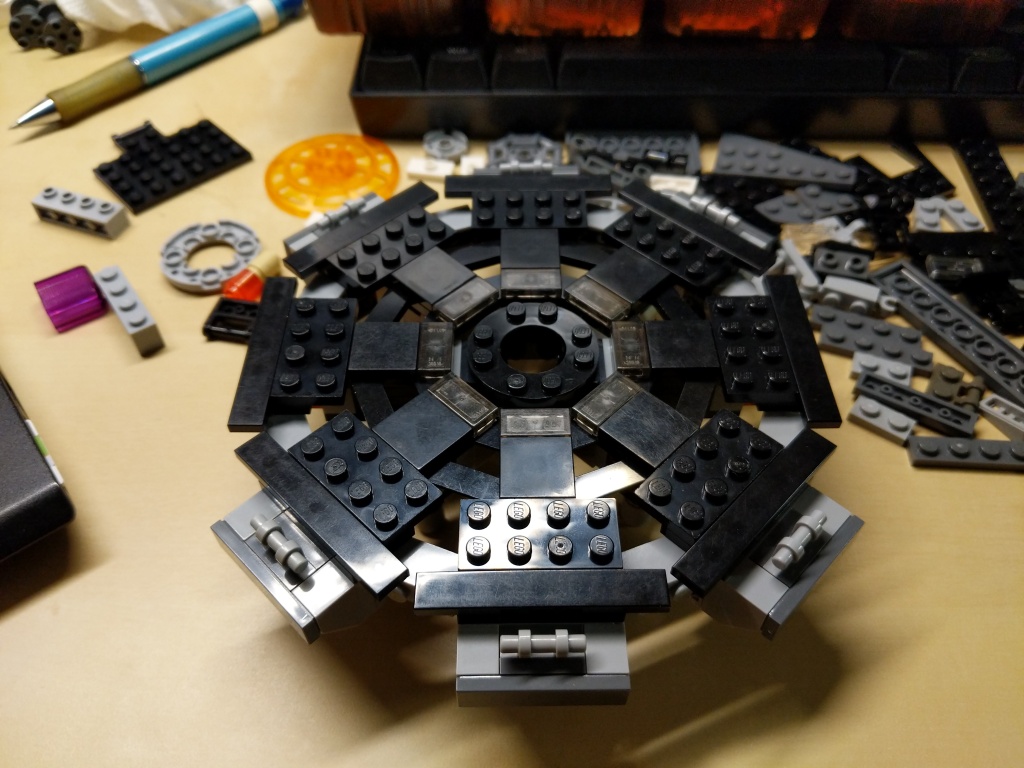
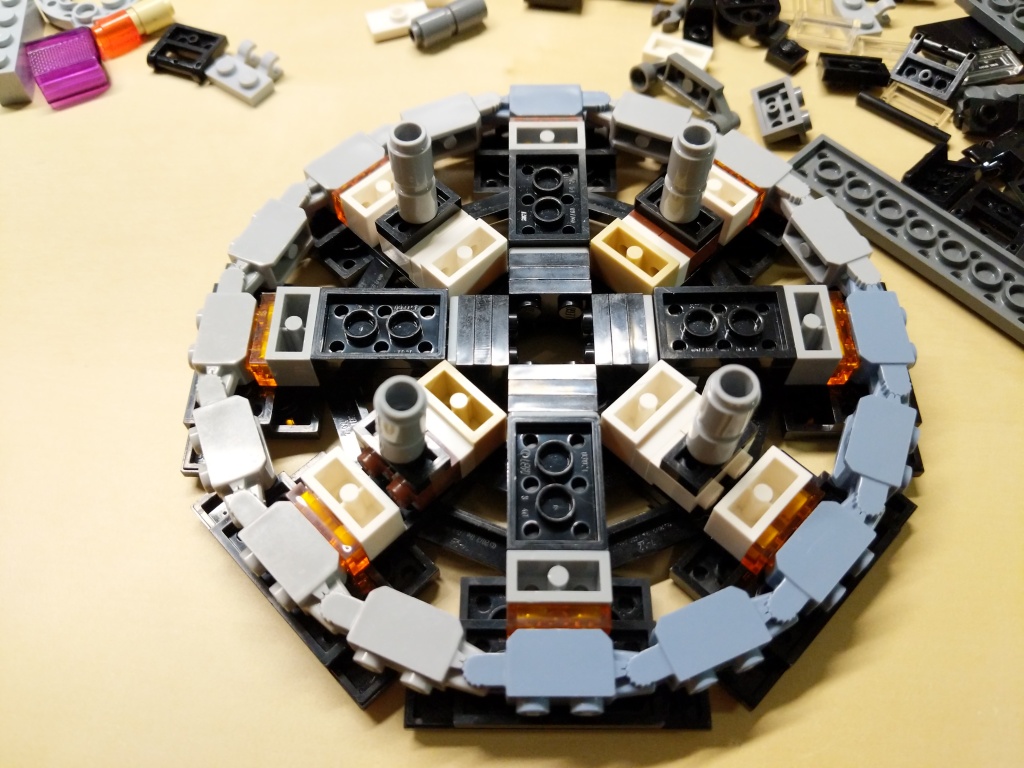
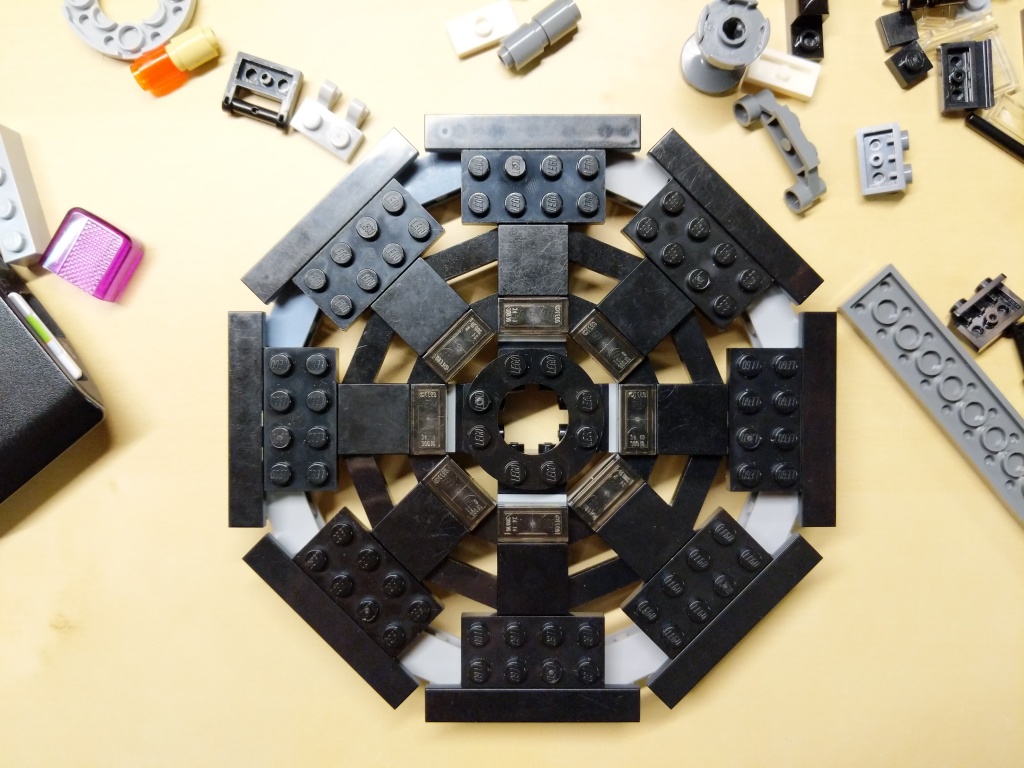
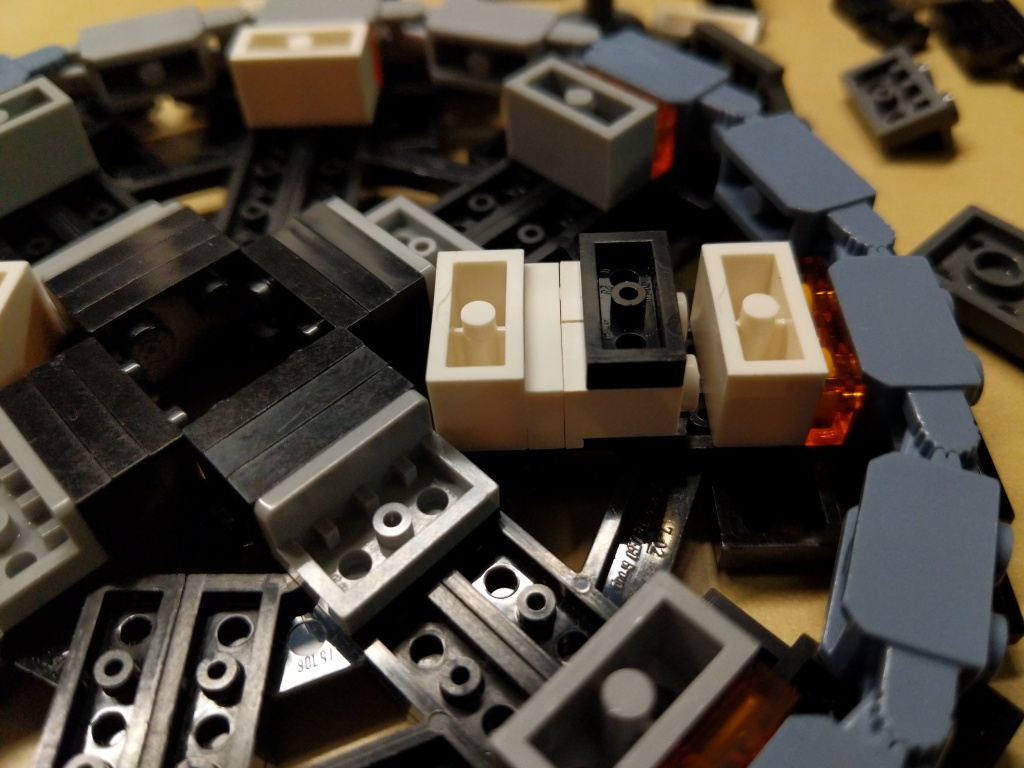
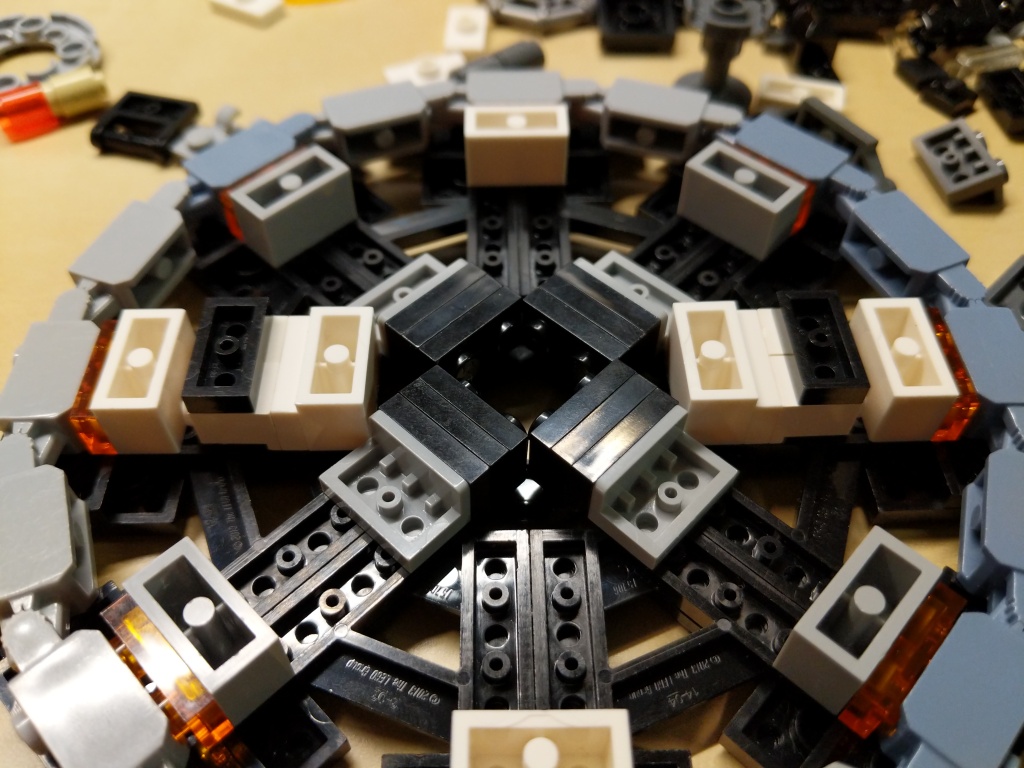
The Quantum Tunnel presented three challenges. First, it needed to be a circular platform. Second, it needed to accommodate all of the Avengers involved in the Time Heist (i.e., Captain America, Iron Man, Thor, Hulk, Hawkeye, Black Widow, War Machine, Rocket, Nebula, and Ant-Man). And third, it needed to resemble the thing in the film despite limitations of the LEGO medium and the number of available LEGO bricks.
Building the Quantum Tunnel made me rethink a lot of standard brick relationships and ratios to find the right combinations to create the round shape and have it line up with the stud pattern on the display base.
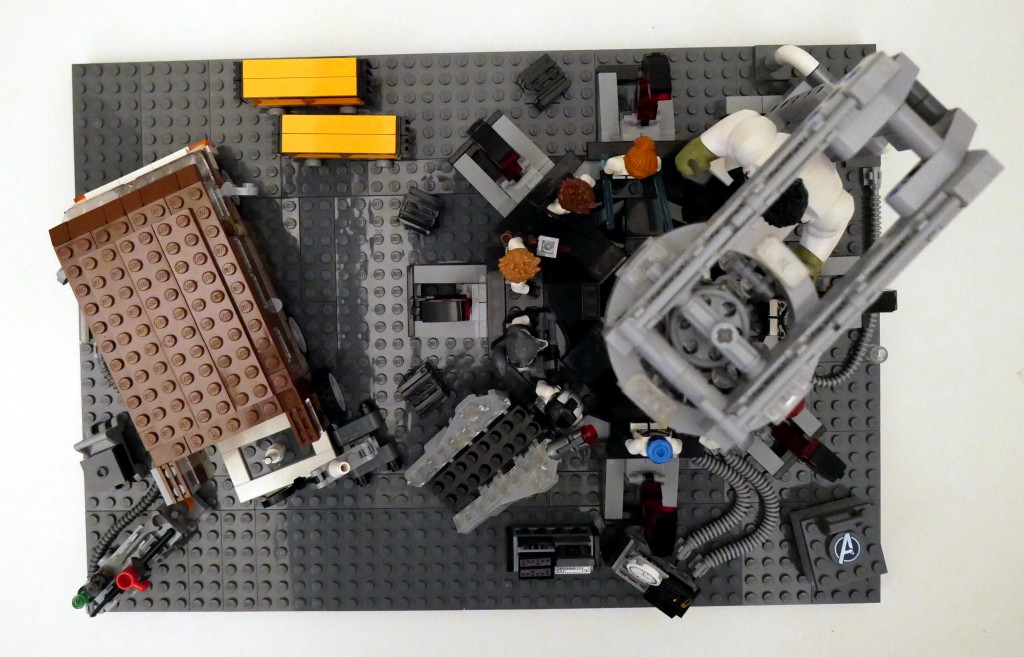
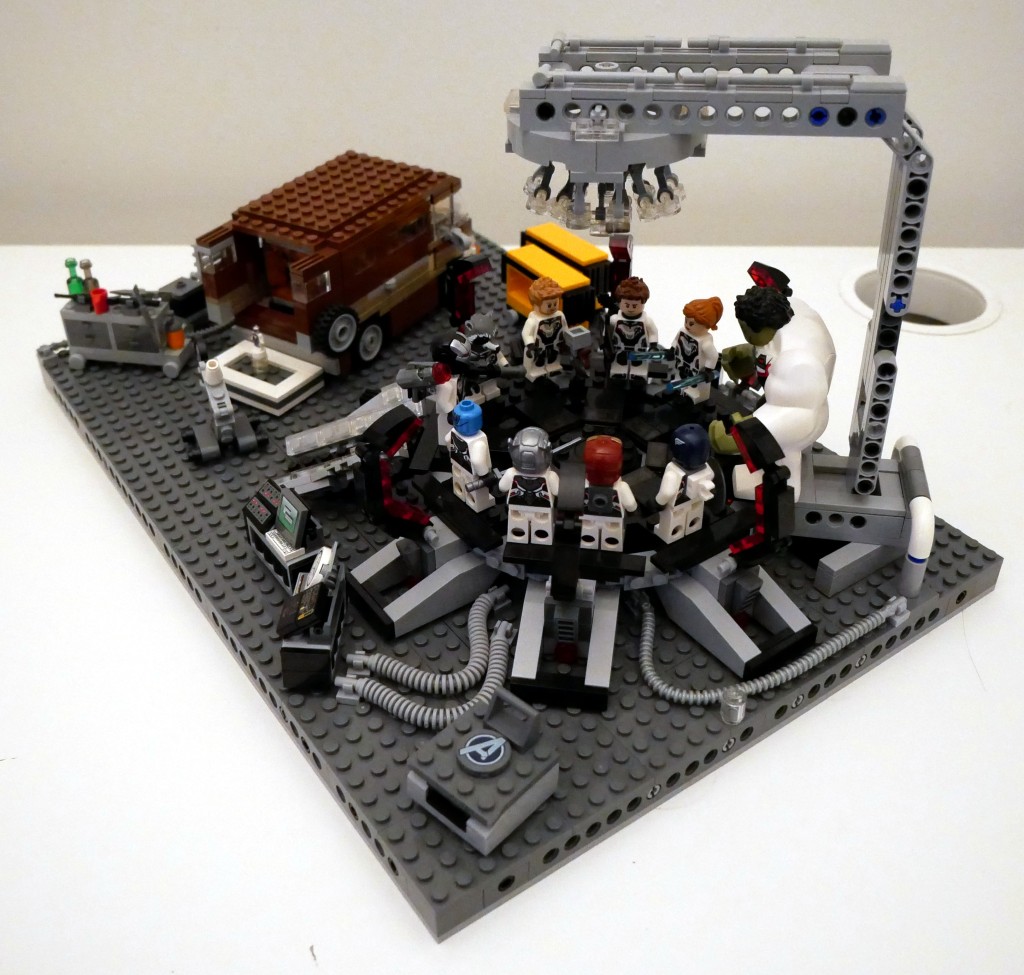
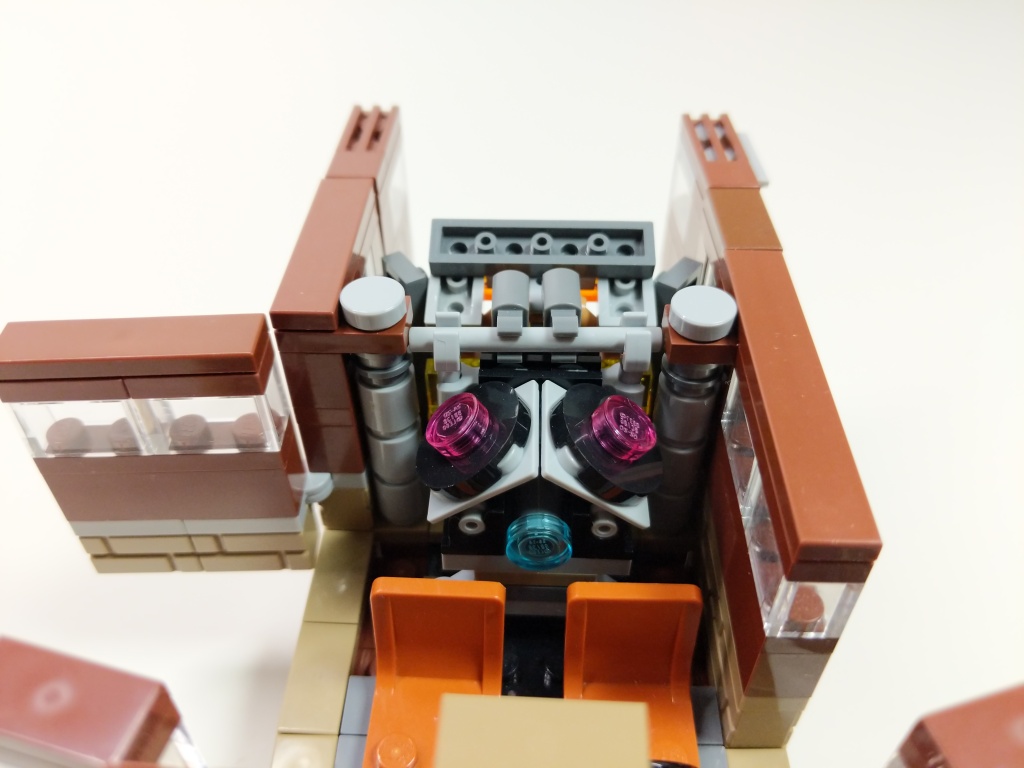
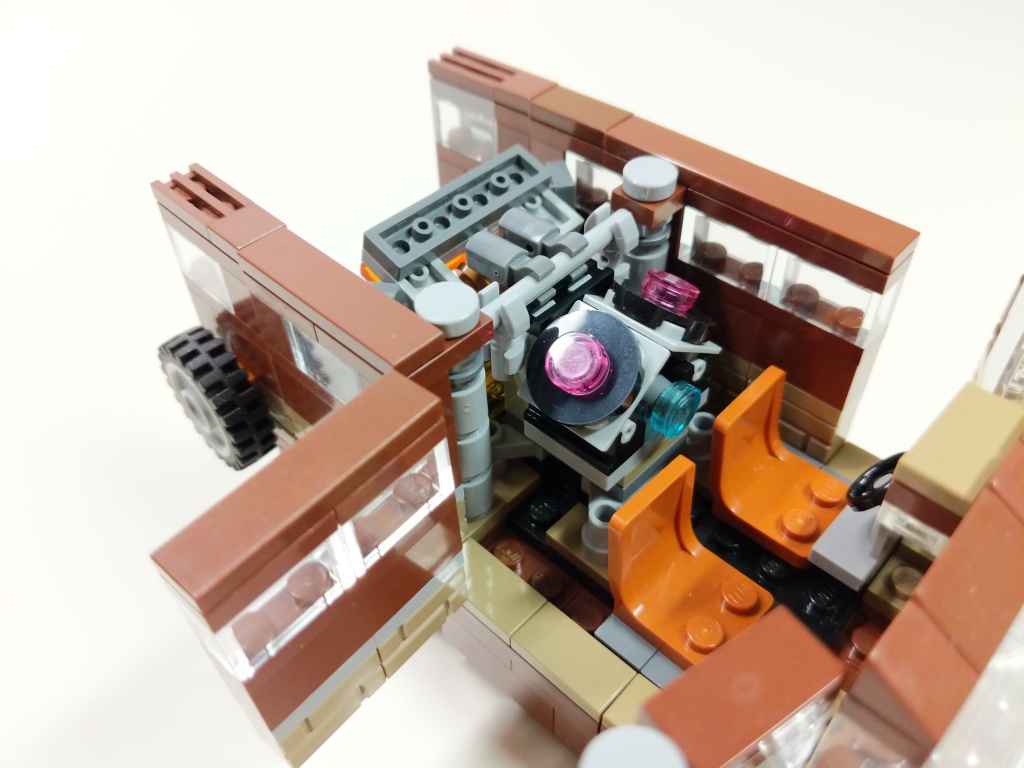
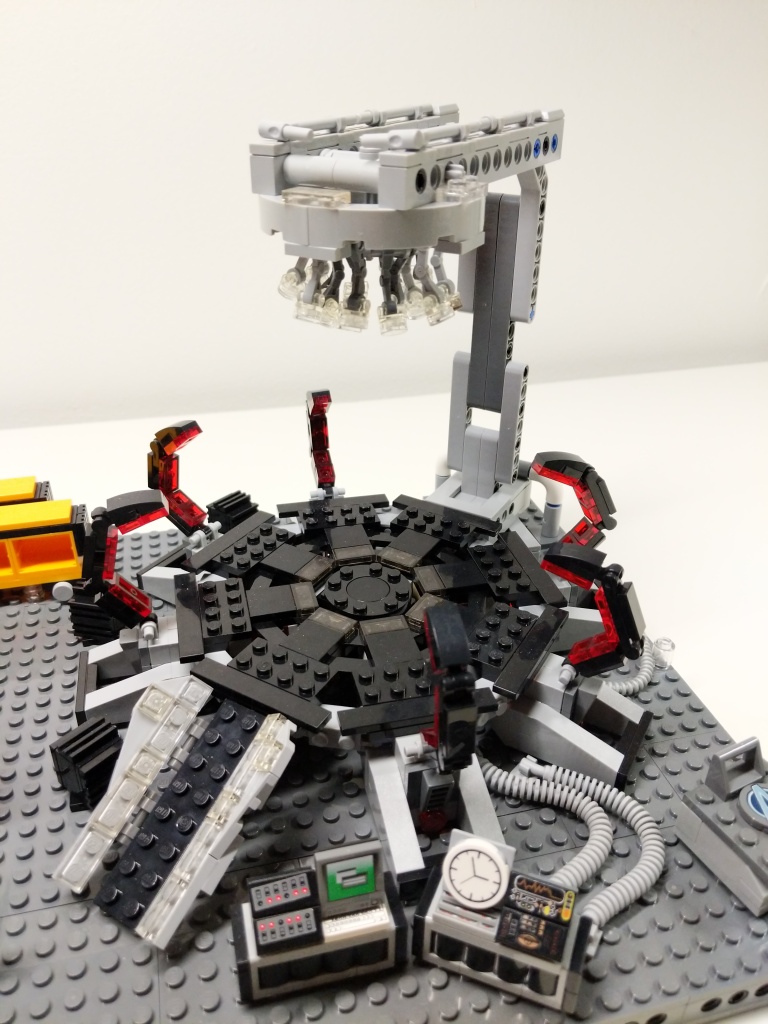
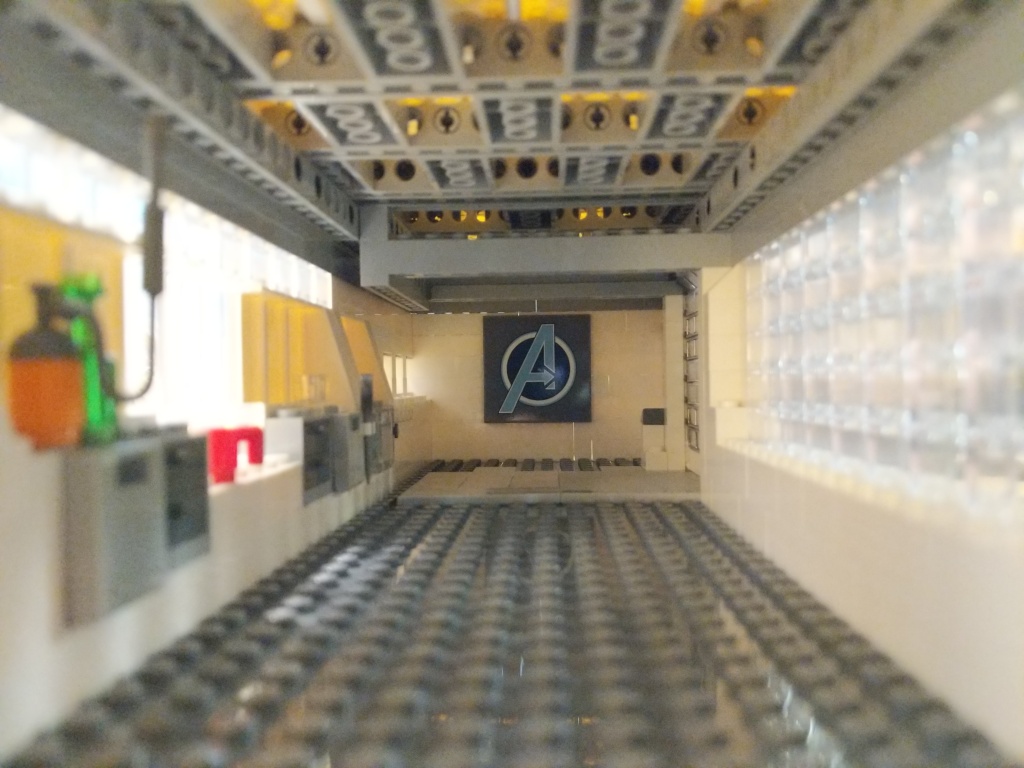
In a separate build, I created this interior model for the hanger portion of the Avenger’s Compound. It was wide enough to pull Luis’ van into it, but it wasn’t wide or tall enough to build the Quantum Tunnel. I wished that I had enough Technic elements to have built some kind of superstructure around the Quantum Tunnel model for the lensing component that goes into the ceiling of the Avenger’s Compound hanger. I had to compromise by building an armature to hang the lensing component over the Quantum Tunnel using all of the elements that I could scrounge.
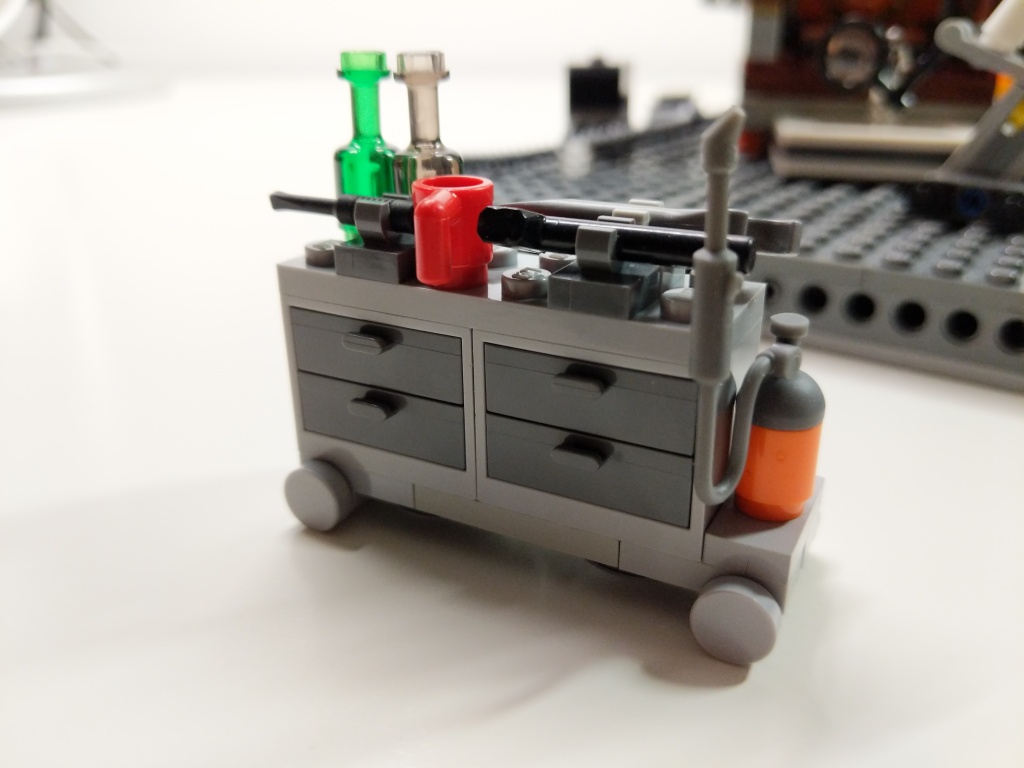
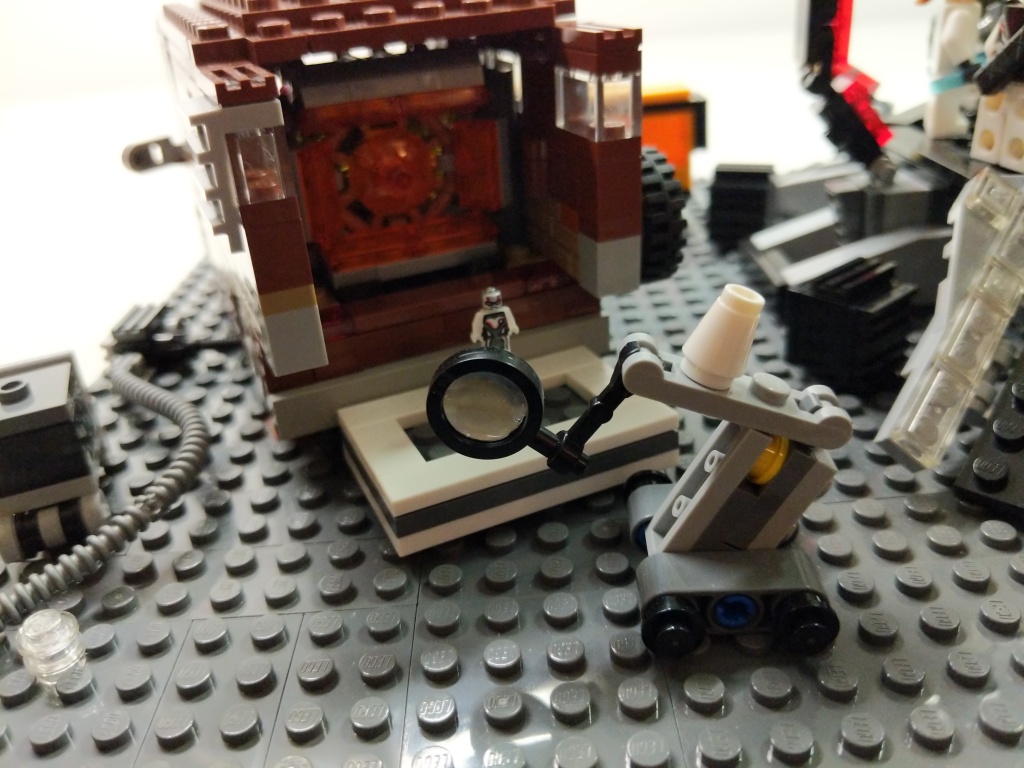
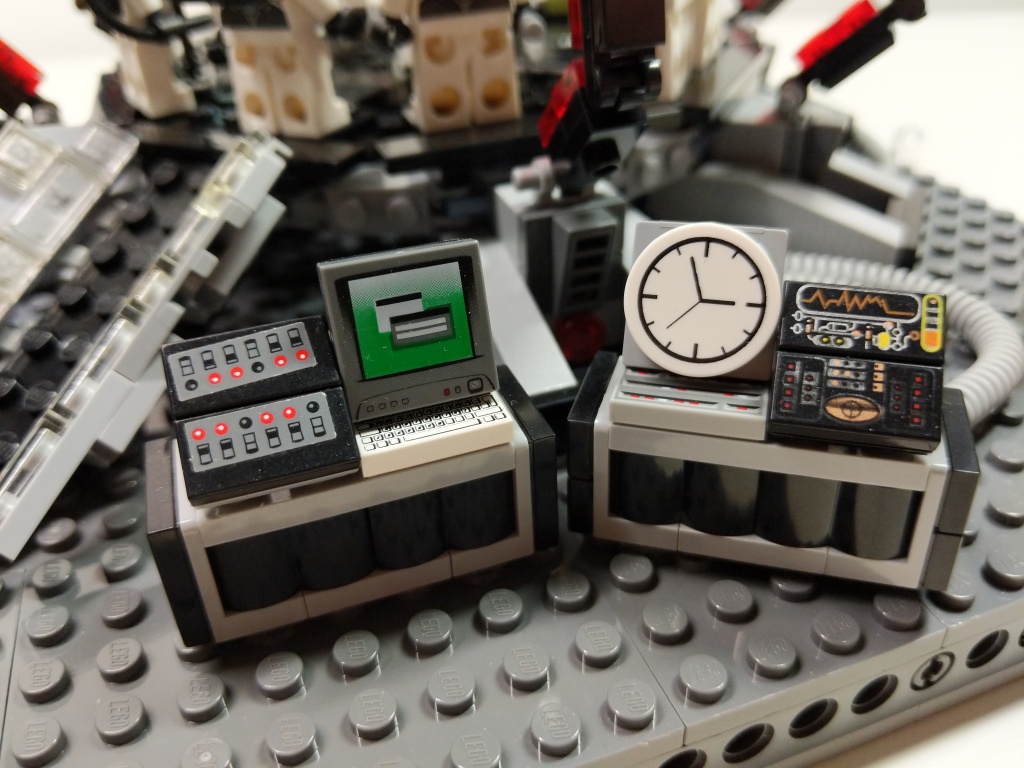
Supporting Components
To complete the build, I watched the film closely to see what kinds of equipment the Avengers had laying around while building and using the Quantum Tunnel. I tried to replicate these–Dum-E, computers, power equipment, tool and storage racks, and cabling.
Reflection
It feels like a lifetime ago when I built this model in 2019. I invested hours across many days through iterative building while looking at film screen captures. While I wish that my LEGO building skill was on the artistic or photorealistic building level of elite builders, my building acumen is more in the realm of playability. I think, what can I do with this, how does it work, how can I use this to tell a story? Given more time, few distractions, and greater access to brick variety and quantity, I wonder if I could take my building skill to the next level. Absent those things, I will keep building and see what I can accomplish with what I have. I haven’t built a MOC in the past year due to a lack of time, but I have something in mind that I might build soon, which I will document here. In the meantime, I have some other MOCs from the past that I plan to share here, too. Stay tuned!
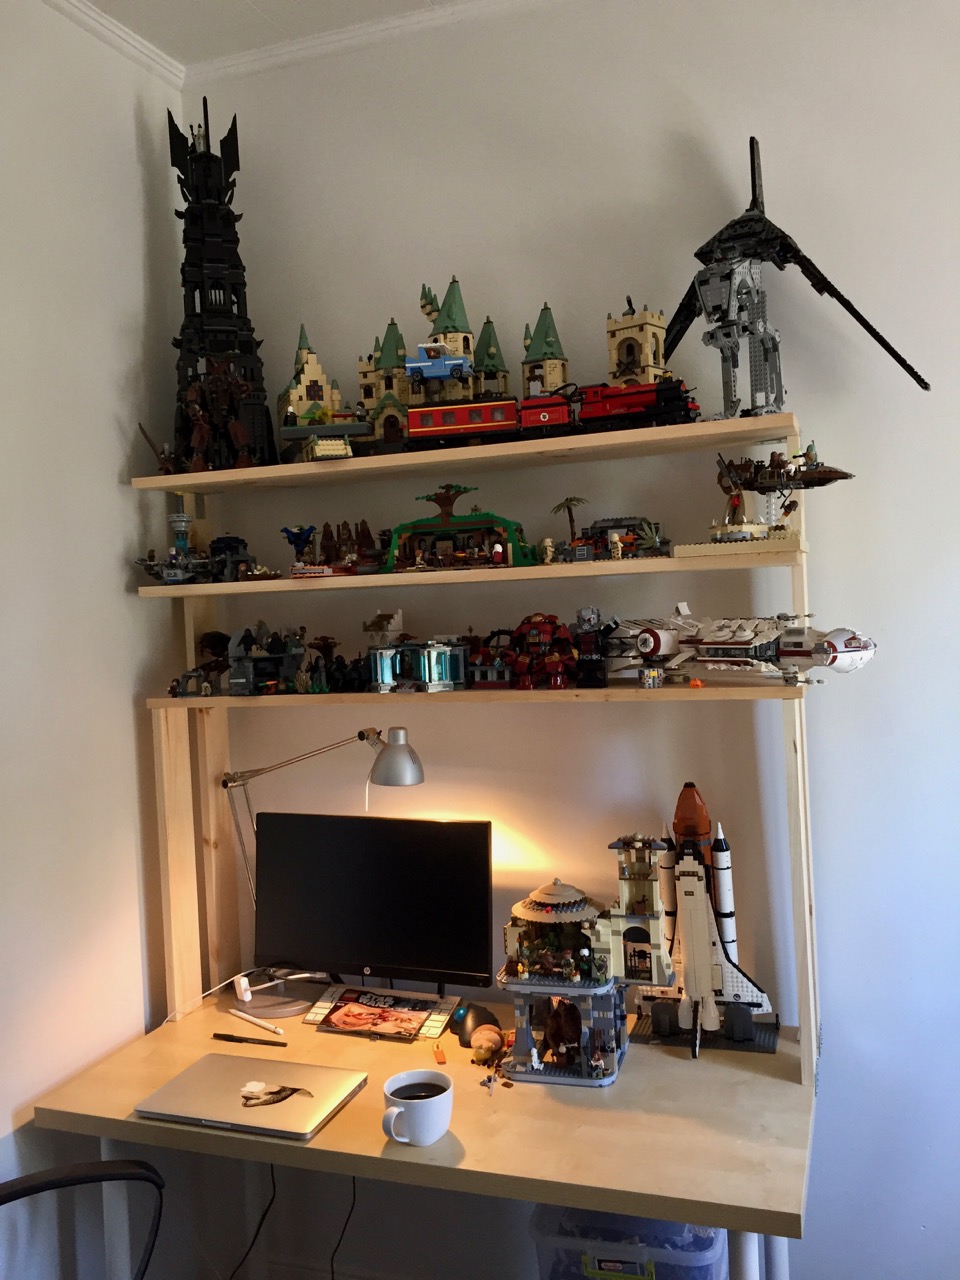
What began as a simple shelf to raise some of my LEGO sets off the workspace of my desk and rose to incorporate a higher shelf to accommodate more sets that I brought back from my parents’ home is now a three tier Franken-shelf.
It quickly became evident that I needed more shelf space for a few more sets that I had assembled. Also, I noticed that the 16″ space between the lower and upper shelves of the second phase construction was more than necessary. It seemed that 8″ headspace was required for most of my LEGO sets. So, I set about adding a third shelf between the lower and top shelves.
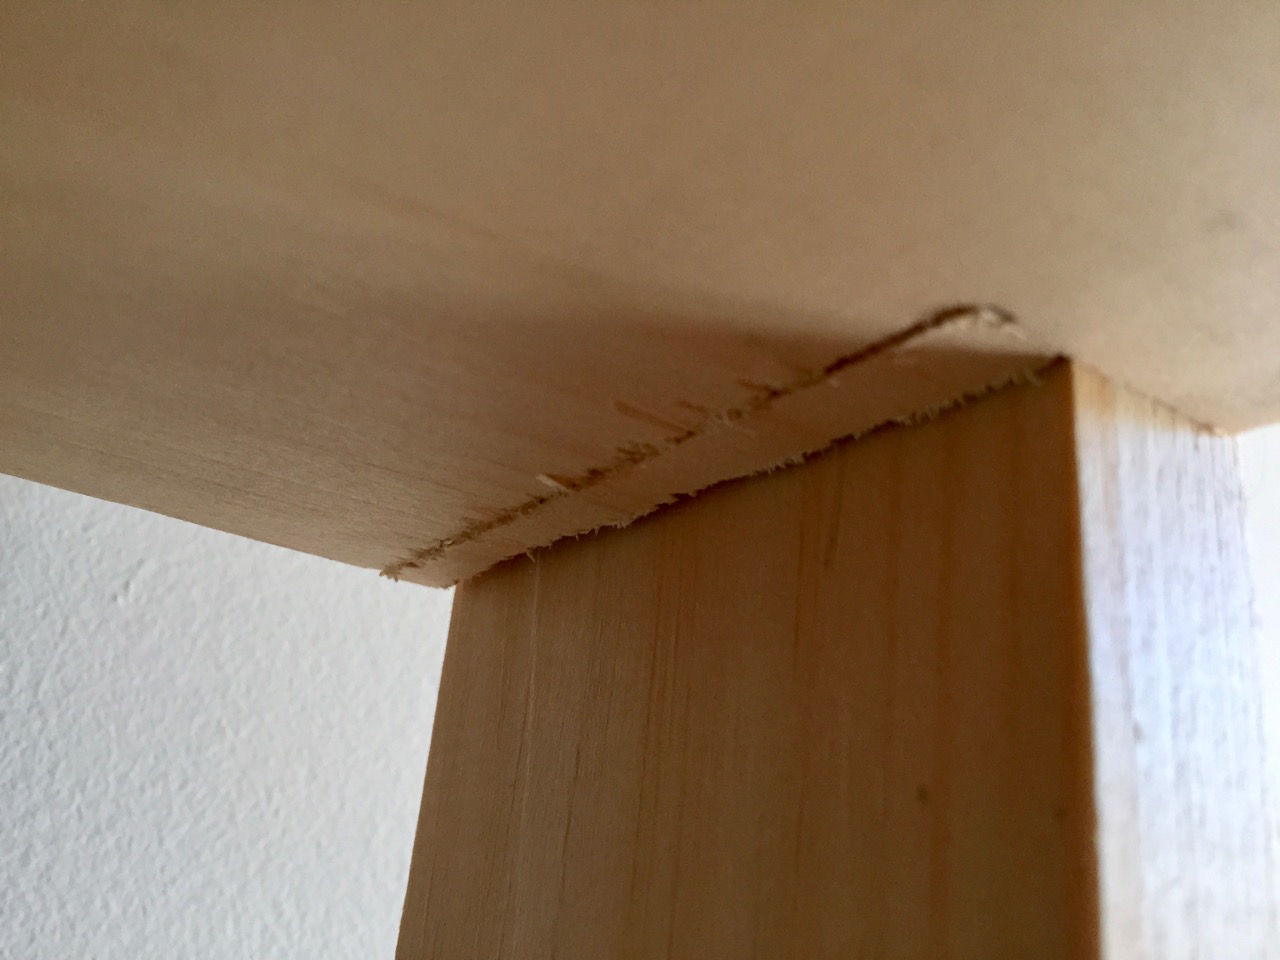
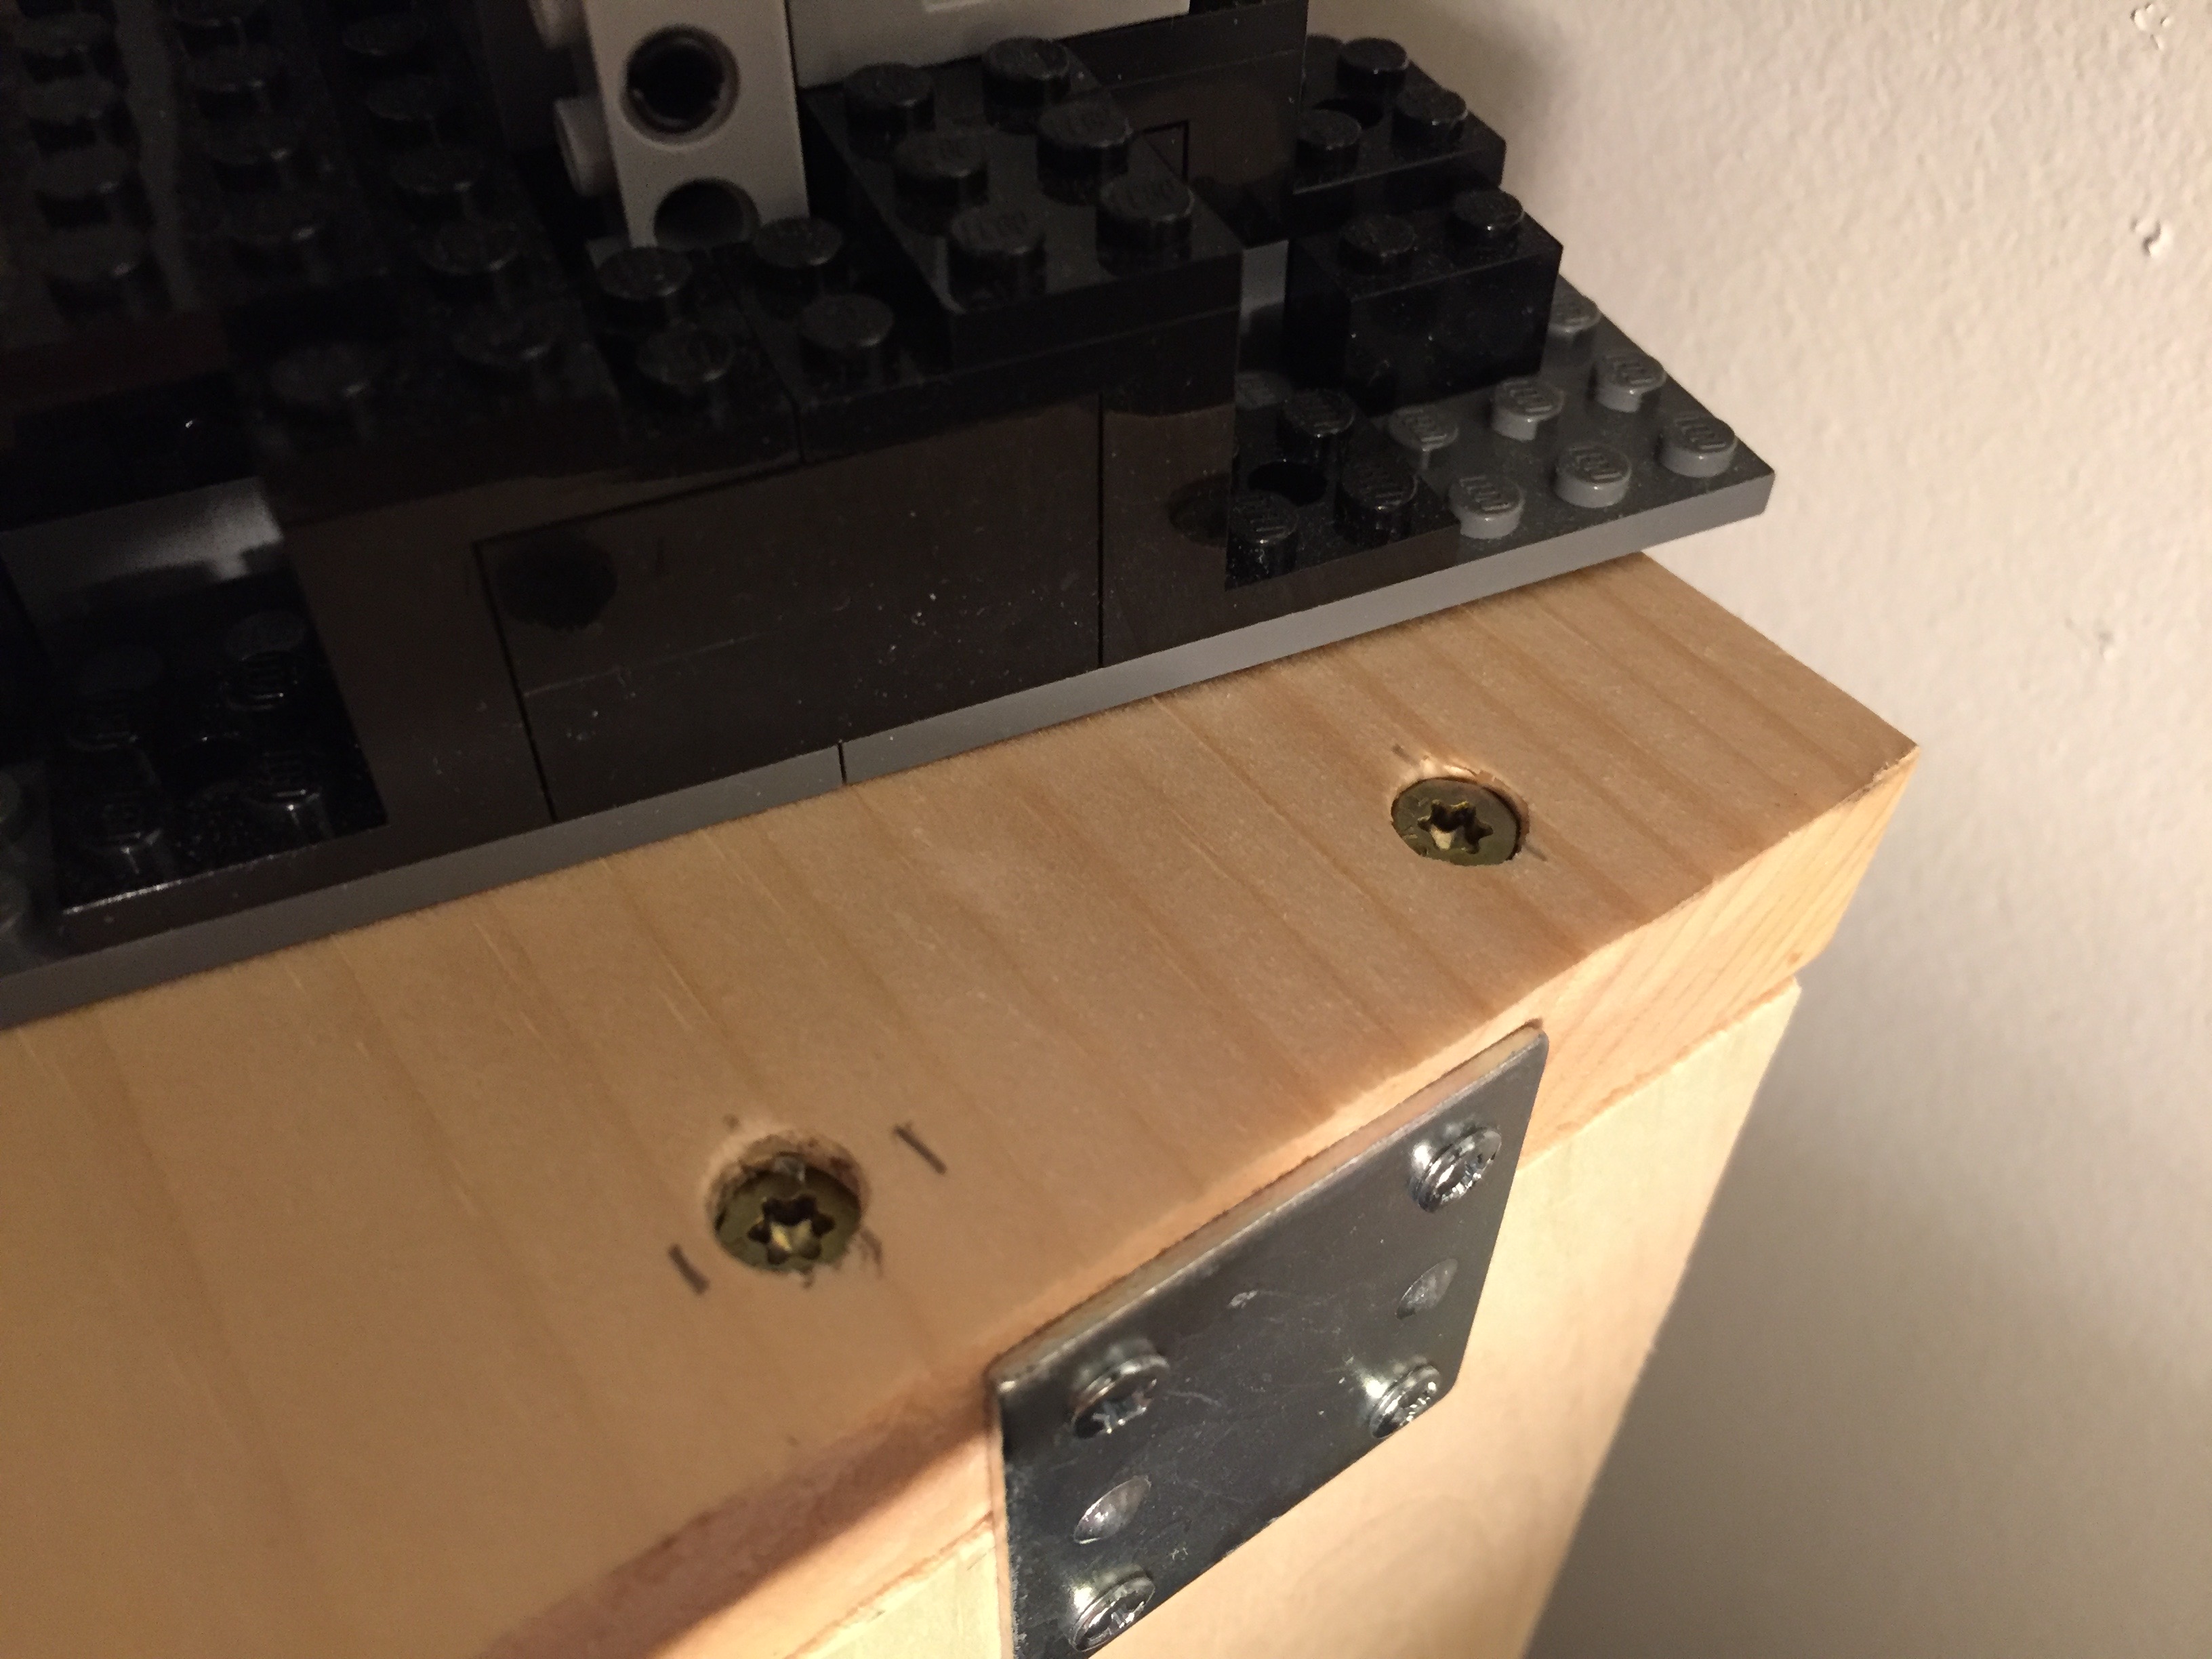
I decided to notch this 1″ x 10″ x 4′ shelf and install it only with deck screws through the upper shelf supports. I measured 46 1/2″ between the two supports and the 1″ x 4″ supports are 3/4″ thick. This is where I made a mistake with my initial cut. My measurements were correct, but during the 5 seconds that it takes for me to talk from my closet (where the desk is) to the living room where I had left my handsaw, my mind misremembered the measurement as 46″ between the supports. This meant that I cut 1/4″ more than needed on each side of the shelf! Luckily, I had a scrap piece of 1″ x 4″ board that I cut 1/4″ fillers from and glued into the notch to fill the missing material.
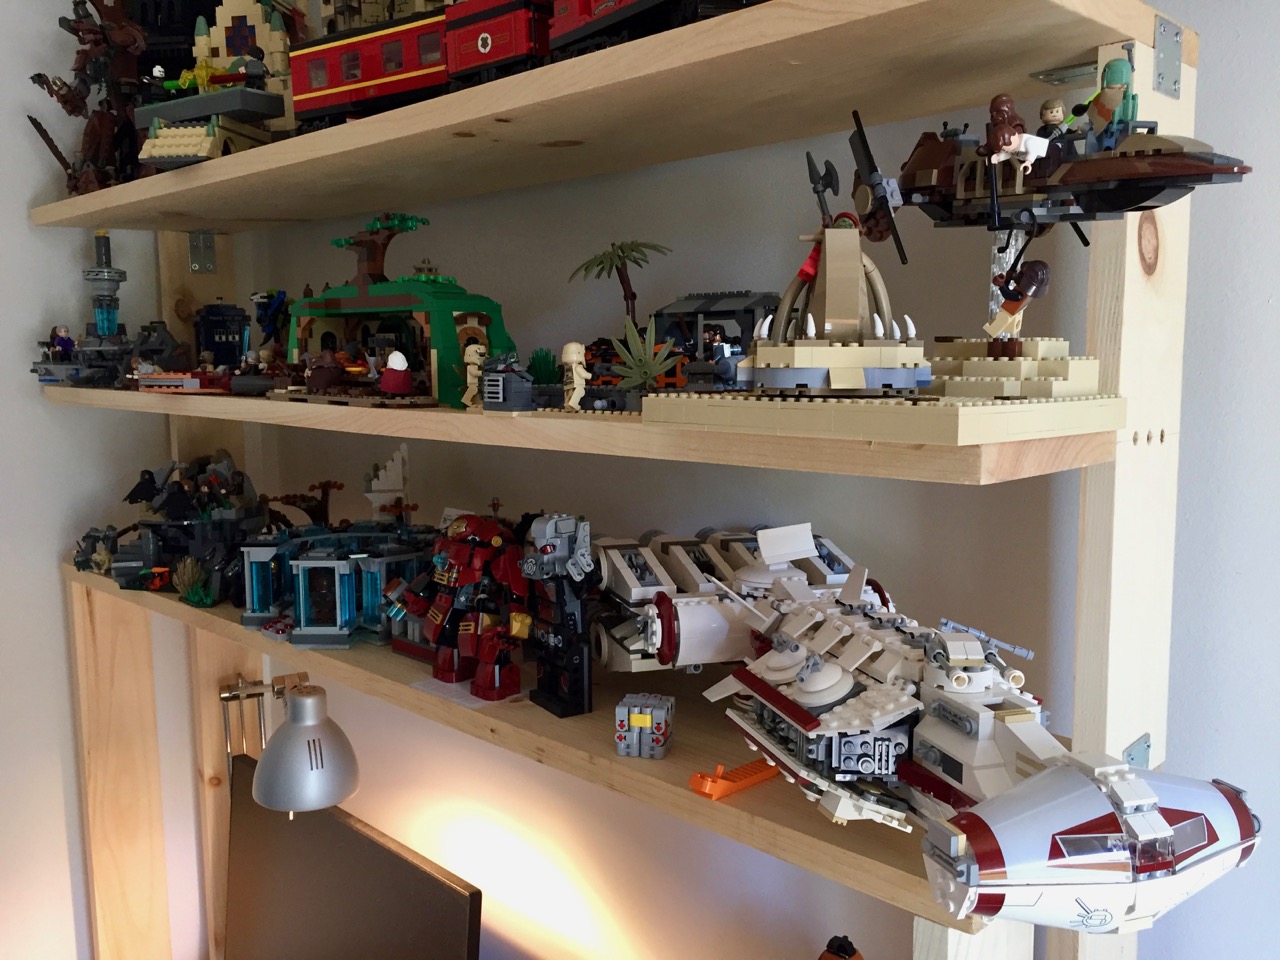
The shelf is centered on a line at 8″ between the top of the bottom shelf and the bottom of the top shelf, which is a distance of 16″.
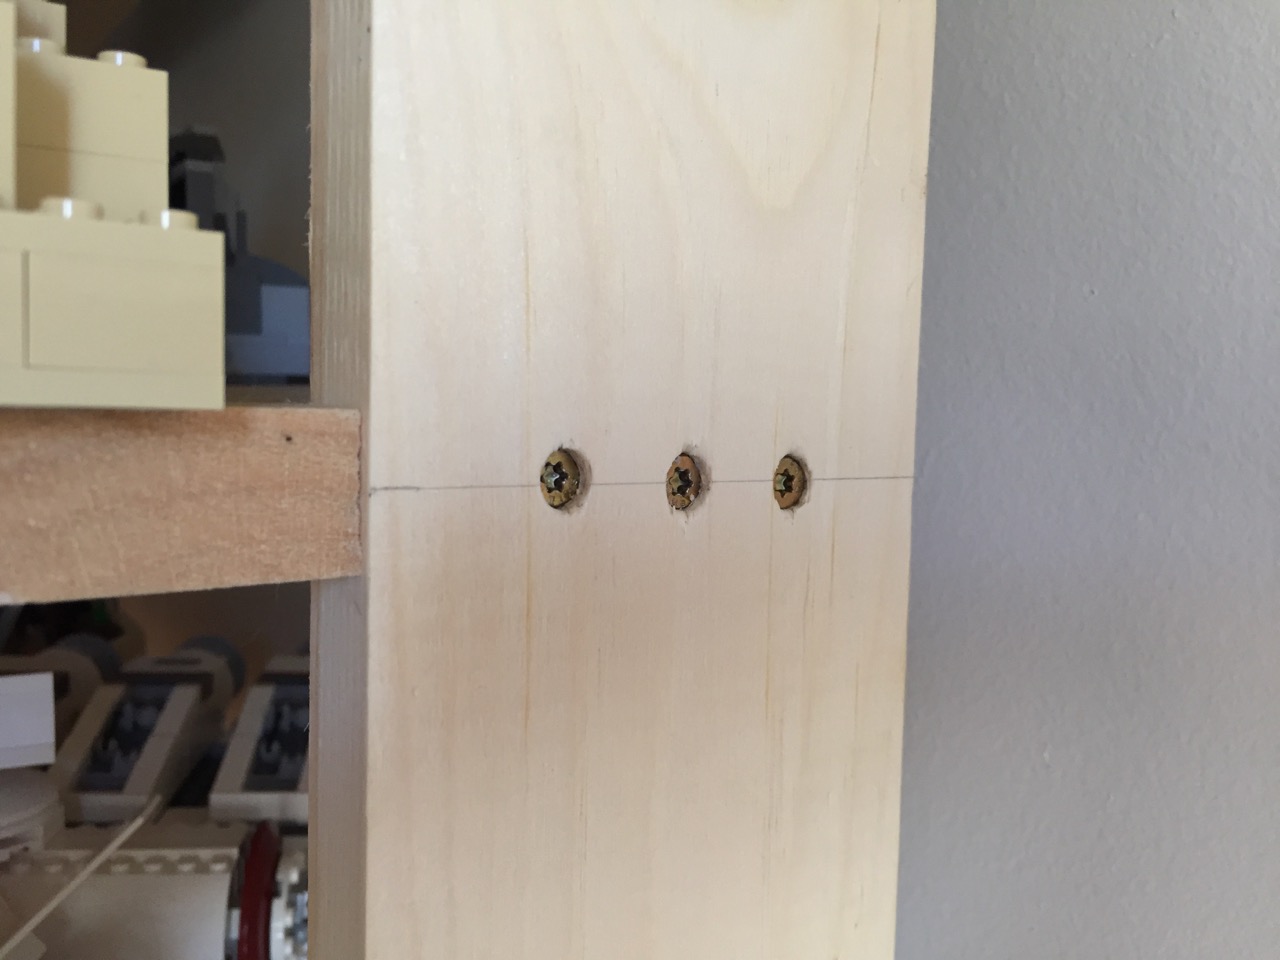
My deck screws extend through the supports and filler, and enter the shelf securely. They are spaced 1″ inside from either end and the third being in the middle (3/4″ from either end screw).
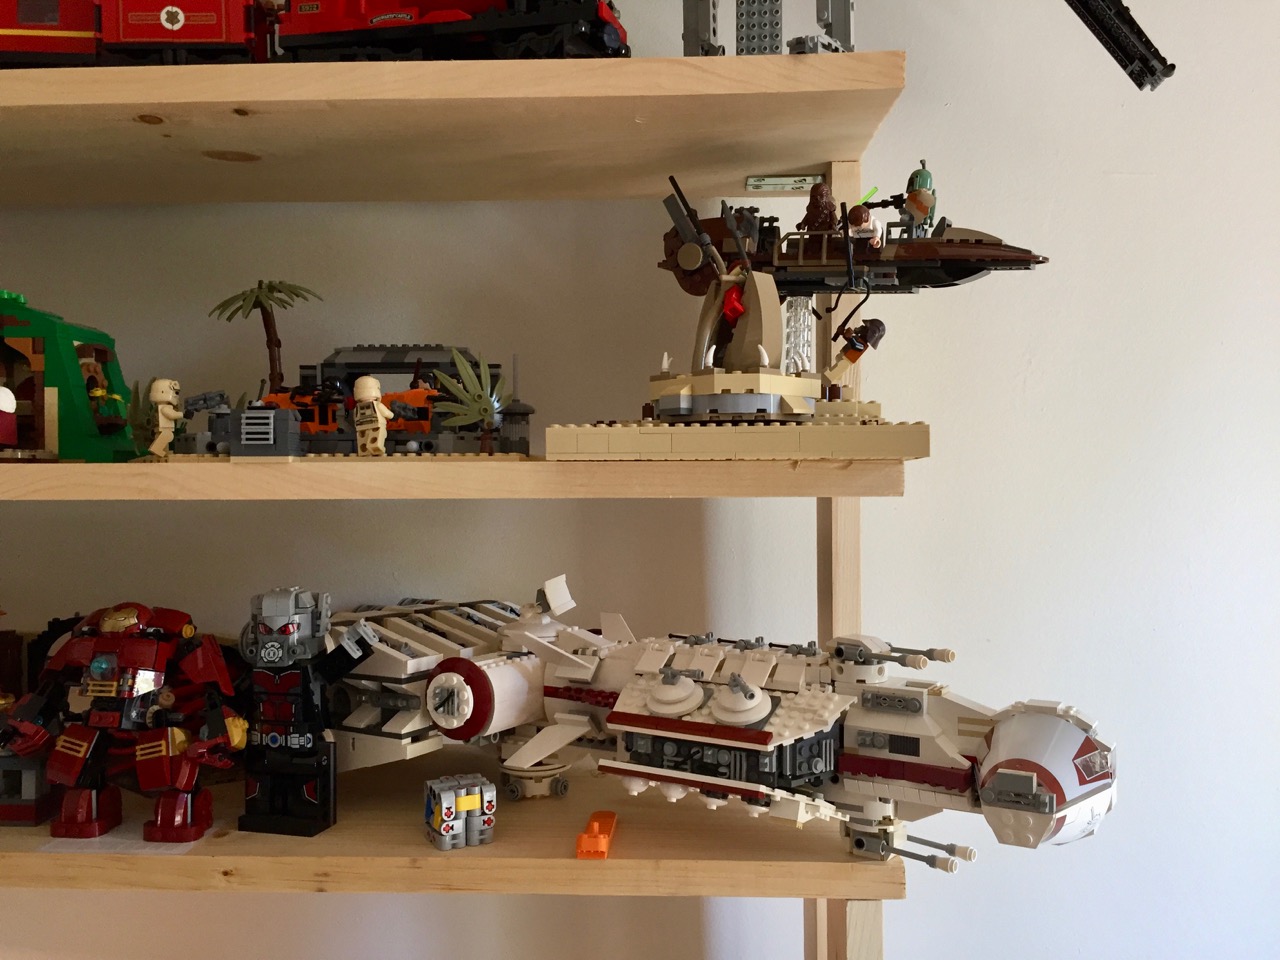
The new shelf easily accommodates a number of sets from Star Wars, Lord of the Rings, Harry Potter, and Doctor Who.
If I had planned out the shelves better than I had, I would have built the entire thing using only wood and deck screws (my previous blog posts explain how I used metal brackets and braces). This would have lowered the cost and it would have had a better craft appearance than horribly kludge-like. Nevertheless, it gets the job done–I can see my sets above and continue building on my clearer workspace below.
In my previous blog post, I documented a shelf that I built for my low-cost Ikea desk.
Since then, I brought back two checked bags full of LEGO from my parents’ home in Georgia where I had been storing it. I have not put all of these sets together or sorted the loose bricks into bins, but became quite clear after assembling 2/3 of the sets and two additional sets from eBay that I would need at least one more shelf.
To add another shelf, I needed to shore up the existing shelf and build up from it.
Two constraints to the height between the two shelves were the enormity of the Tower of Orthanc (10237) and the height of the room’s ceiling. I settled on a height of 16″ between the two shelves to allow enough room for medium- and small-sized sets on the lower shelf and larger sets (including Saruman’s lair) on the upper shelf.
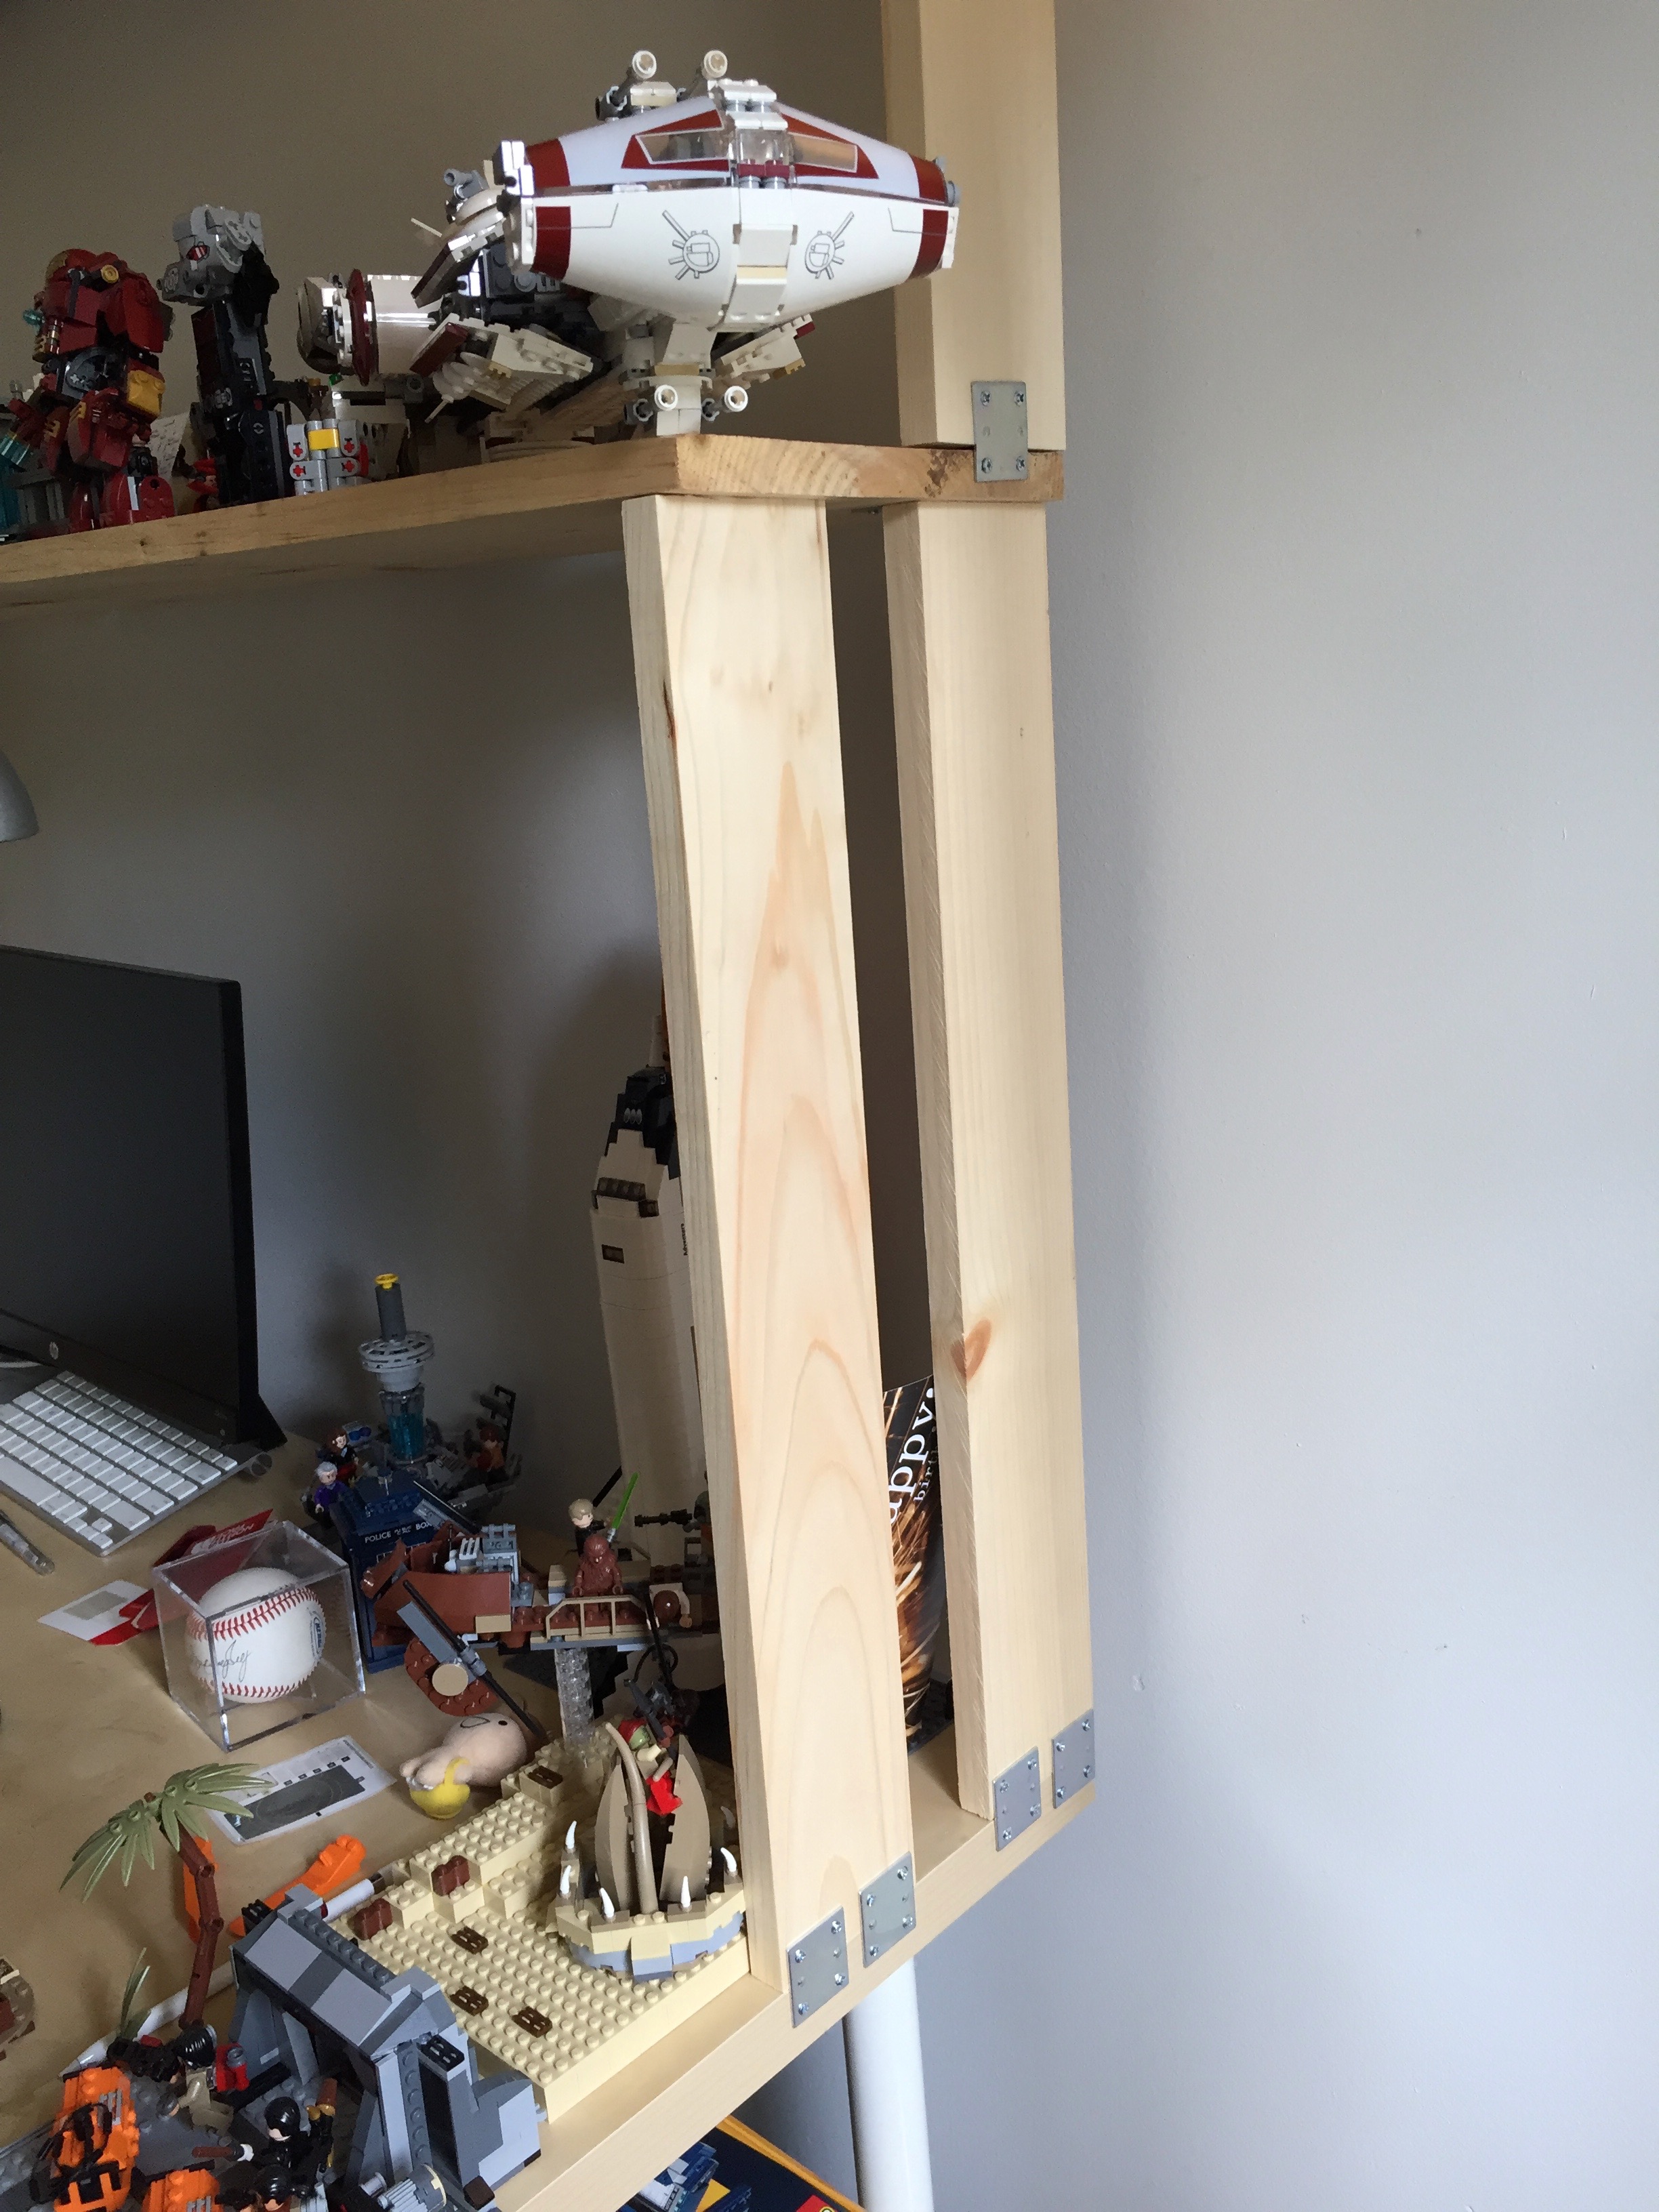
To add the new shelf, I needed to purchase one 1″x10″x4′ pine board (the shelf), two 1″x4″x4′ pine boards (one of these was cut in half to support the lower, existing shelf and the other was cut into two 16″ long lengths to support the upper, new shelf), two packs of 1 1/2″ braces, and two packs of 2″ brackets (the smaller brackets that I used for the original shelf were sold out at the local Lowes).
To shore up the lower shelf, I added a 24″ support to the front of the shelf. Originally, there was only one 24″ support at the back of the shelf, which was plenty for the needs of accommodating the few LEGO models originally put there. With the additional weight higher up from the new, upper shelf, I wanted to ensure that the lower shelf on which the upper shelf is built can sustain the weight and any torsion. I affixed each of these new, forward supports with two deck screws (pre-drilled) from the top of the shelf into the stop of the support. At the bottom, they are held in place with braces on the outside against the edge of the desk top.
The upper shelf has two 16″ supports that affix to the back of the lower shelf. The upper shelf is attached to the supports first with two deck screws (pre-drilled) from the top through the shelf and into the supports. On the outside, they are connected to the lower shelf by a brace on either side. The shelf is strengthened with a brace at the top, too.
On the inside, brackets are used where the support meets the lower shelf’s top and the upper shelf’s bottom. Instead of using the metal braces, I could have used wood braces–such as another 1″x4″x4′ board running underneath the shelf and cut 3/4″ on either end to accommodate the supports. A few deck screws from top and sides would have made the shelves even stronger. I wanted to avoid the shelves catching more light in my dark office than they could, so I opted to use the metal brackets, which should be strong enough for this installation.
Now that the new shelf is installed, I realize that I need another shelf! Maybe I can fit one in between the lower and upper shelf. As you can see above, I can’t go any higher on the upper shelf or Saruman will go through the roof!
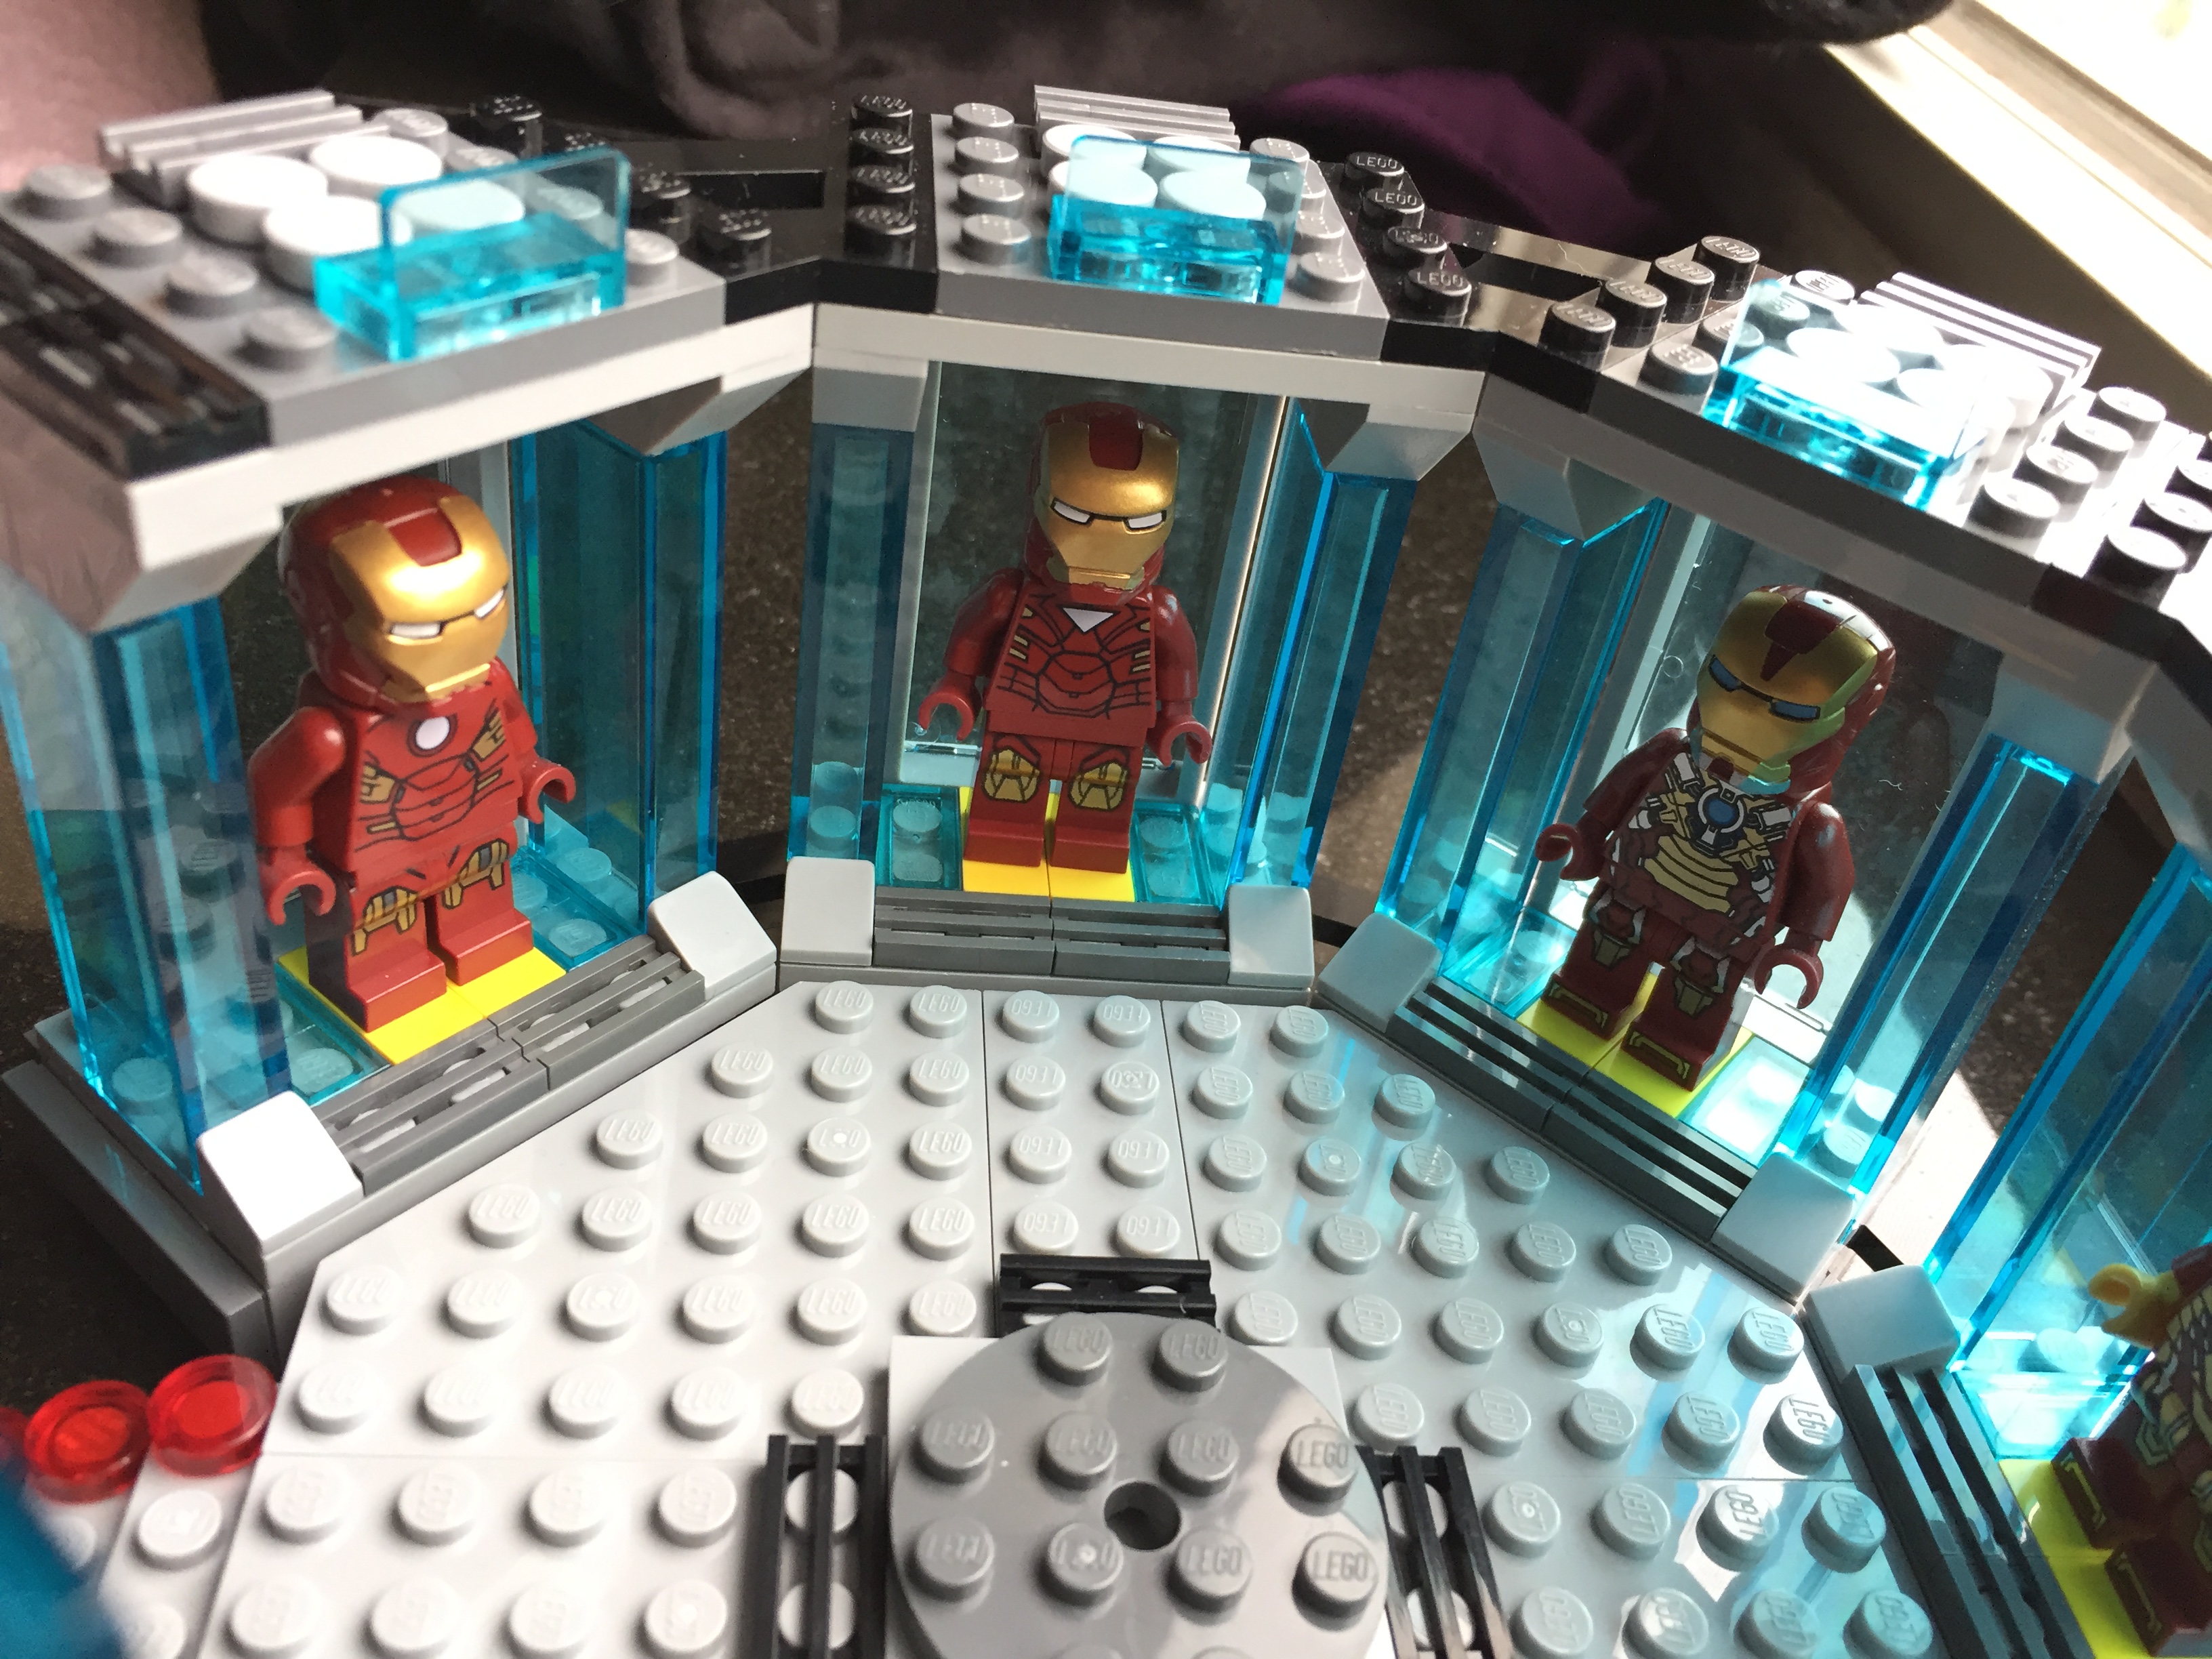
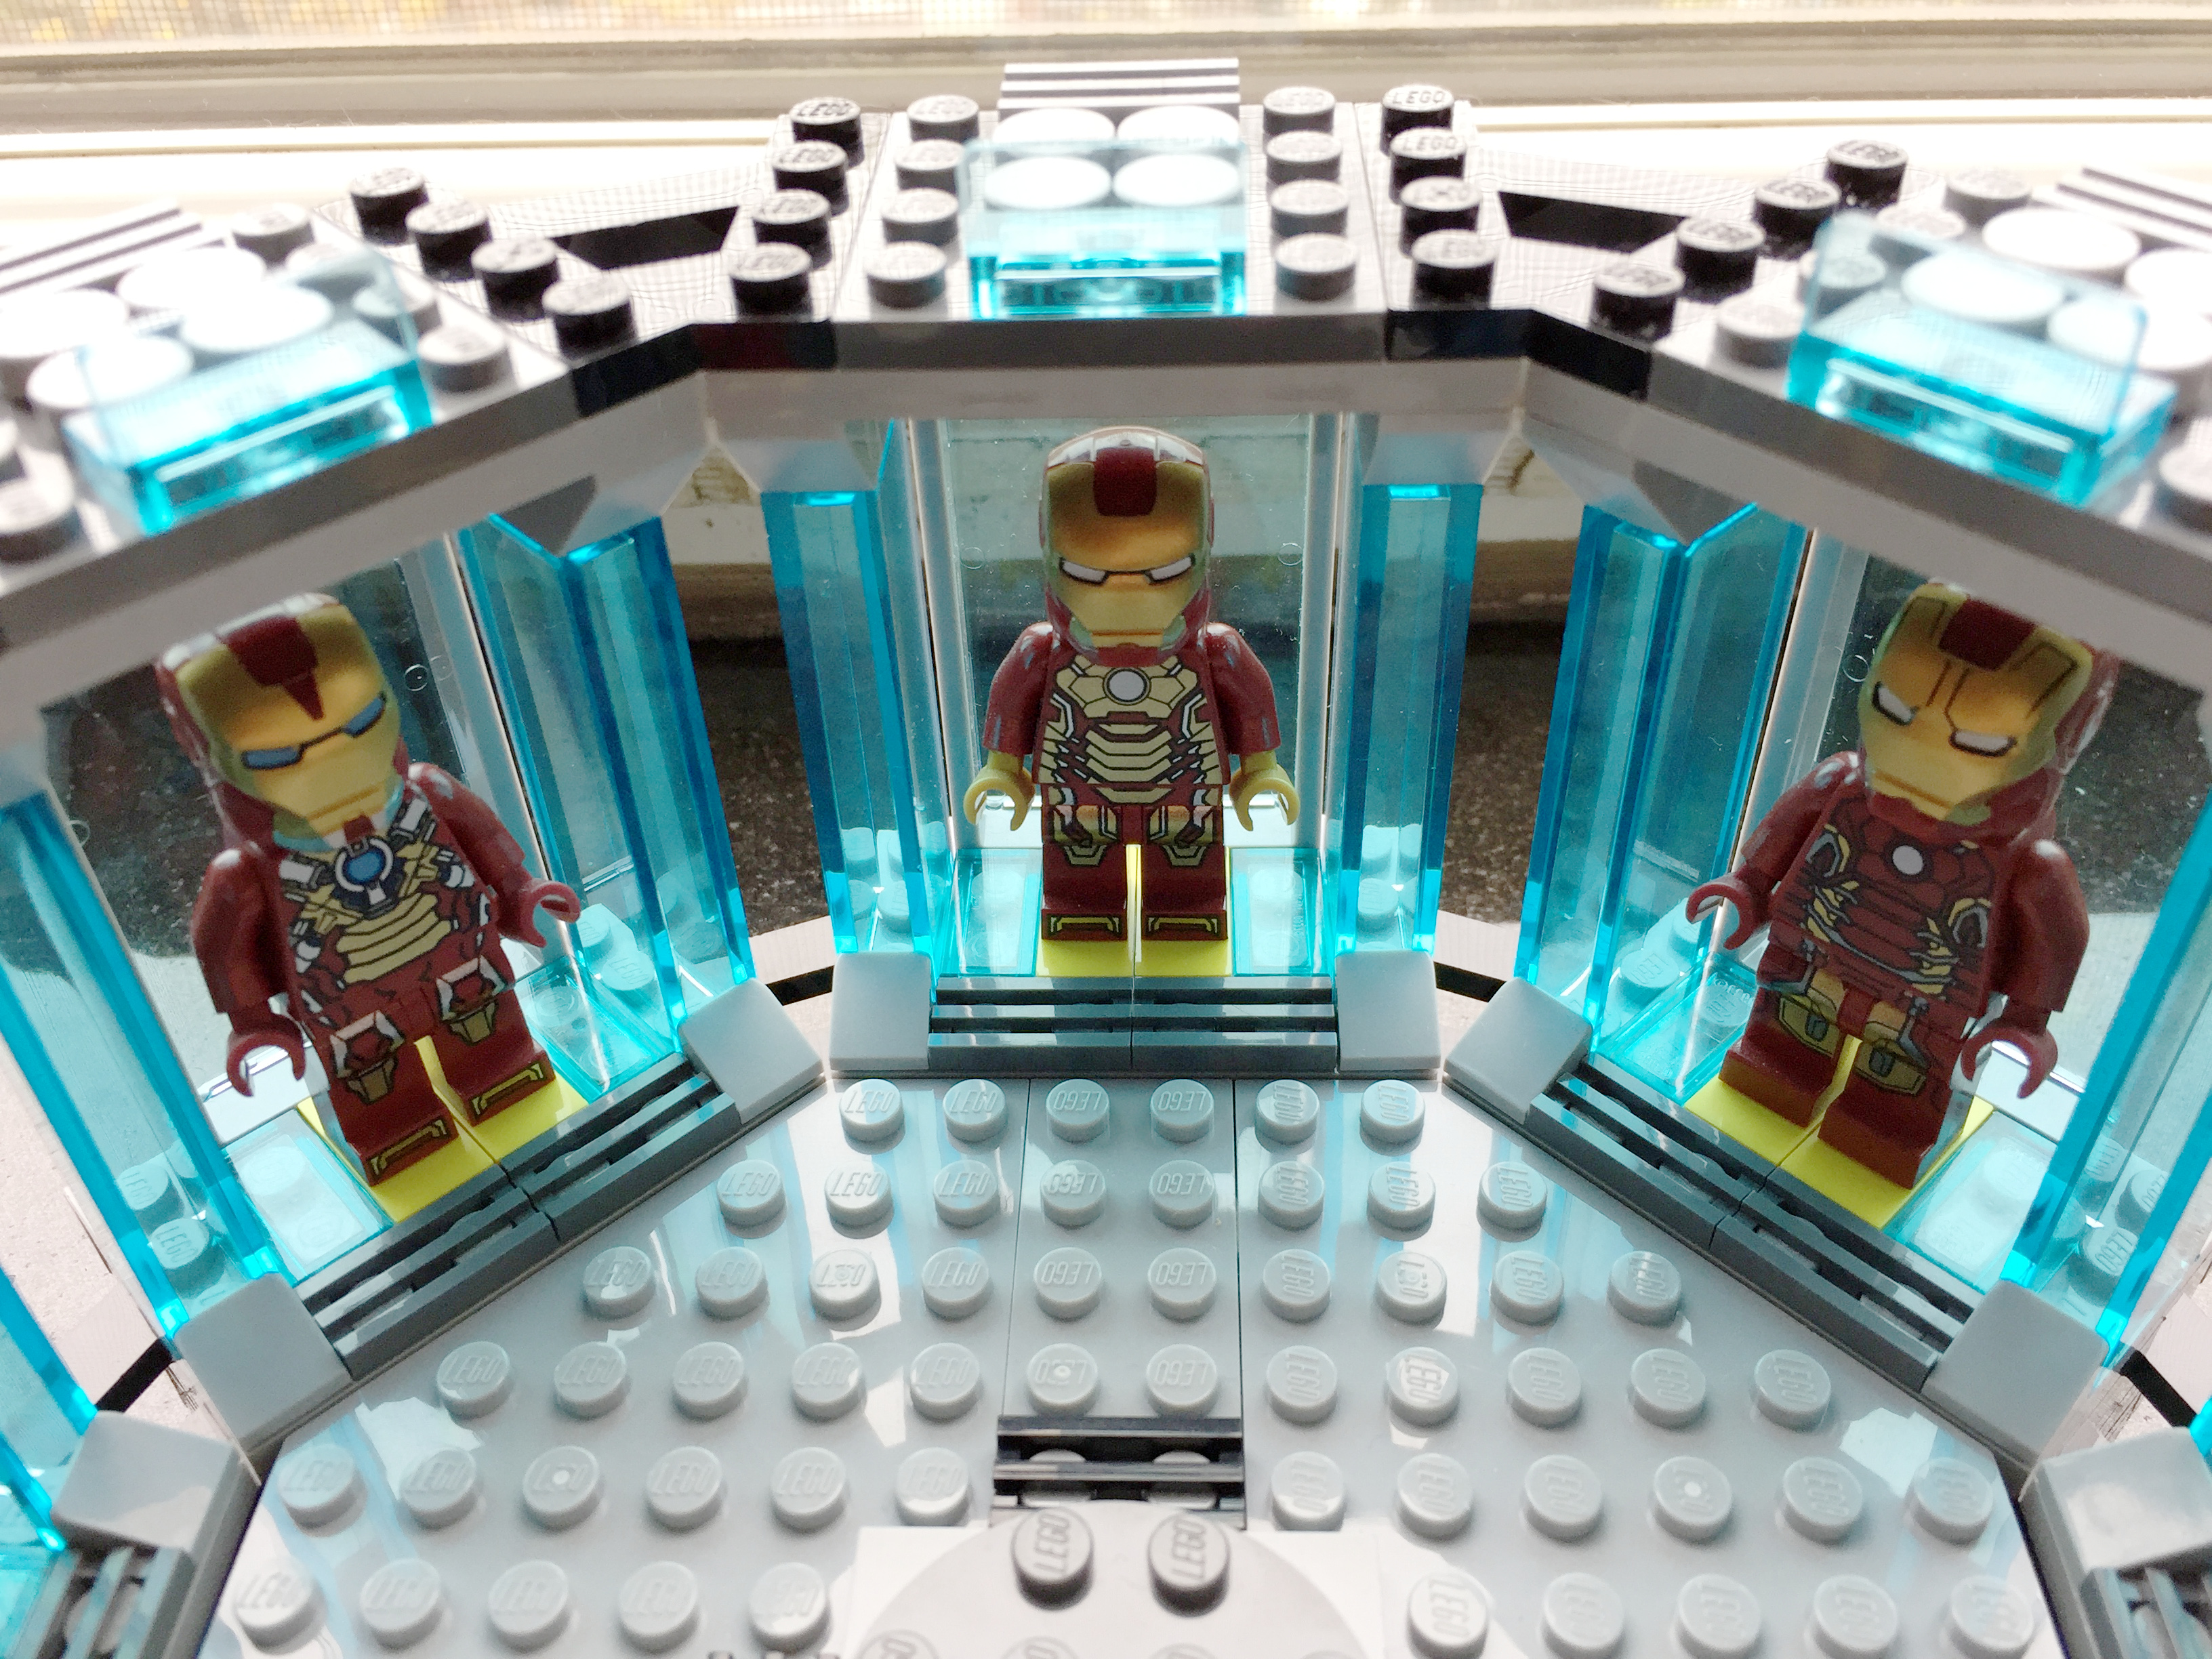
While continuing to sort my LEGO brick collection, I discovered four more Plate (A) 4M 45° pieces. With these special elements in-hand, I updated and expanded my LEGO Iron Man’s Hall of Armor, which I wrote about previously here.
I used a similar repetition for each armor suit pod, but I added one stud roof tiles (Roof Tile 1X1X2/3, Abs) at the base of each vertical transparent blue wall on either side of an armor suit.
Armors from left to right: Mark III (Iron Man film), Mark VI (Avengers), and Mark XVII “Heartbreaker” (Iron Man 3)
To complete the model, I needed Iron Man’s armor with the triangular arc reactor window from the first Avengers movie (Mark VI armor). I ordered the 30167 polybag on ebay from a seller in Brooklyn (interestingly, it takes longer for mail to arrive from within my city borough than it does from California or even Germany at standard postal rates!).
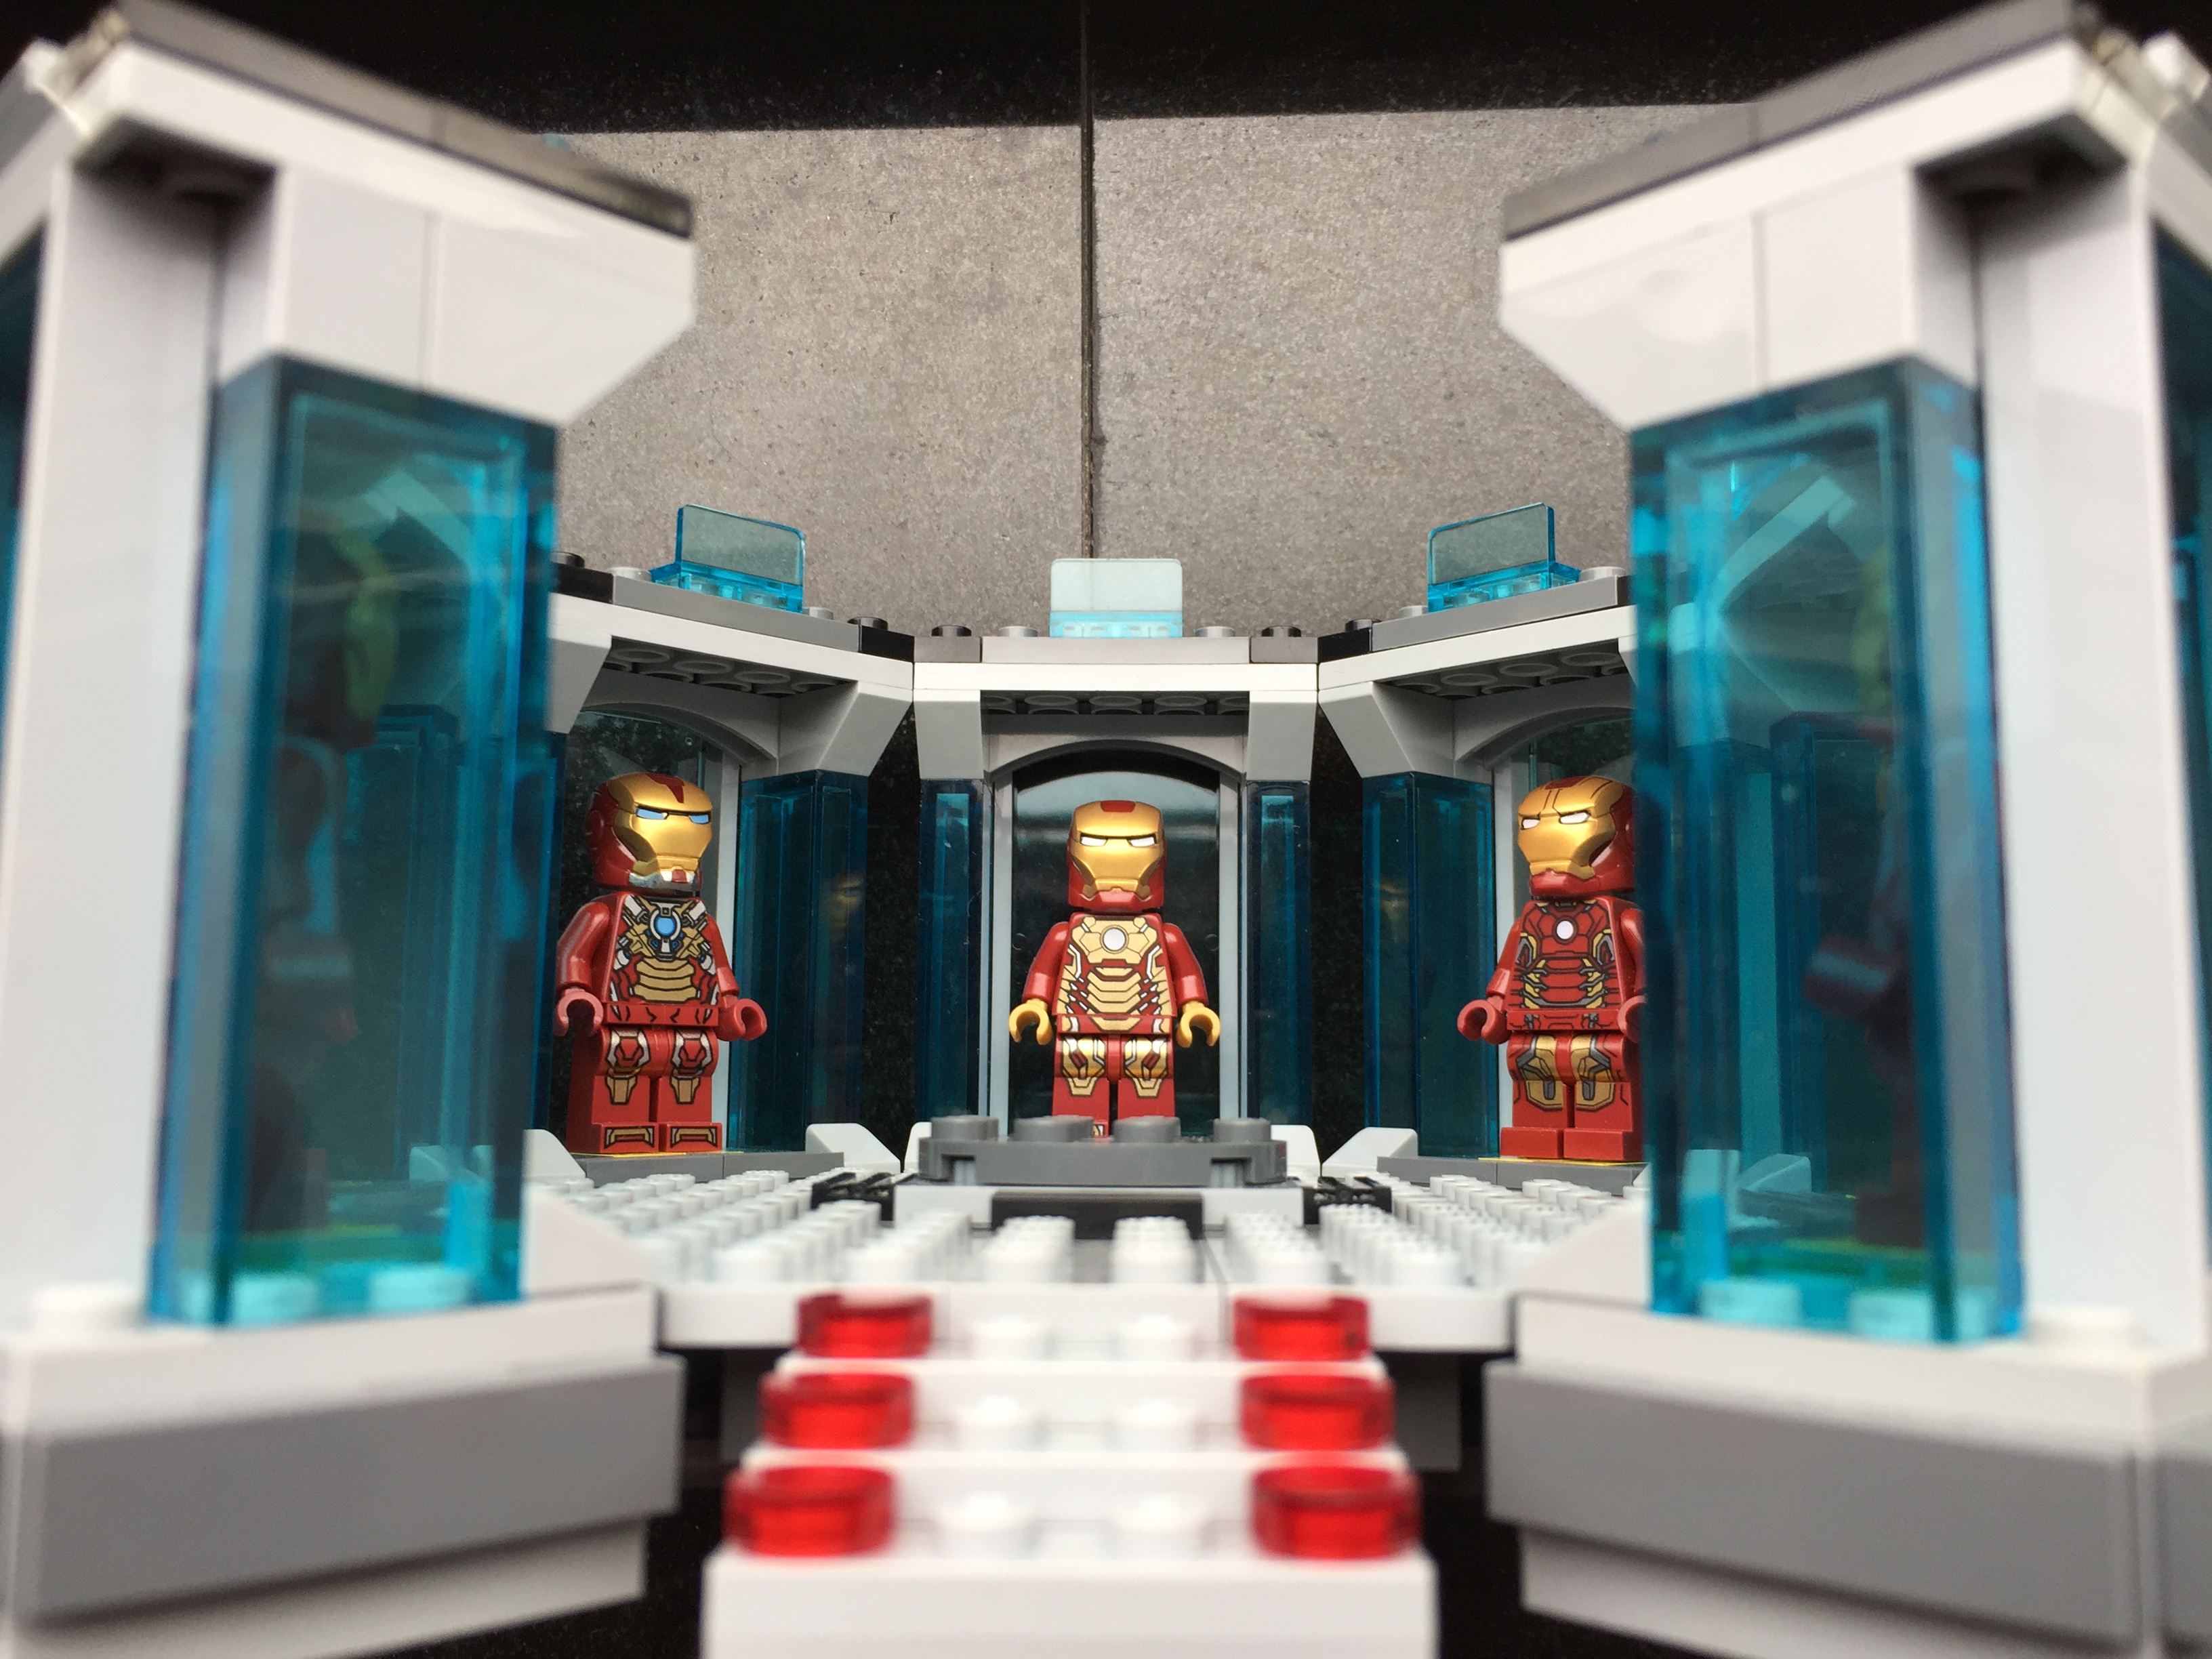
Armors from left to right: Mark XVII “Heartbreaker” (Iron Man 3), Mark XLII (Iron Man 3), and Mark XLIII (Avengers: Age of Ultron).
Armors from left to right: Mark XLIII (Avengers: Age of Ultron), Mark XLV (Avengers: Age of Ultron), and Mark XLVI (Captain America: Civil War).
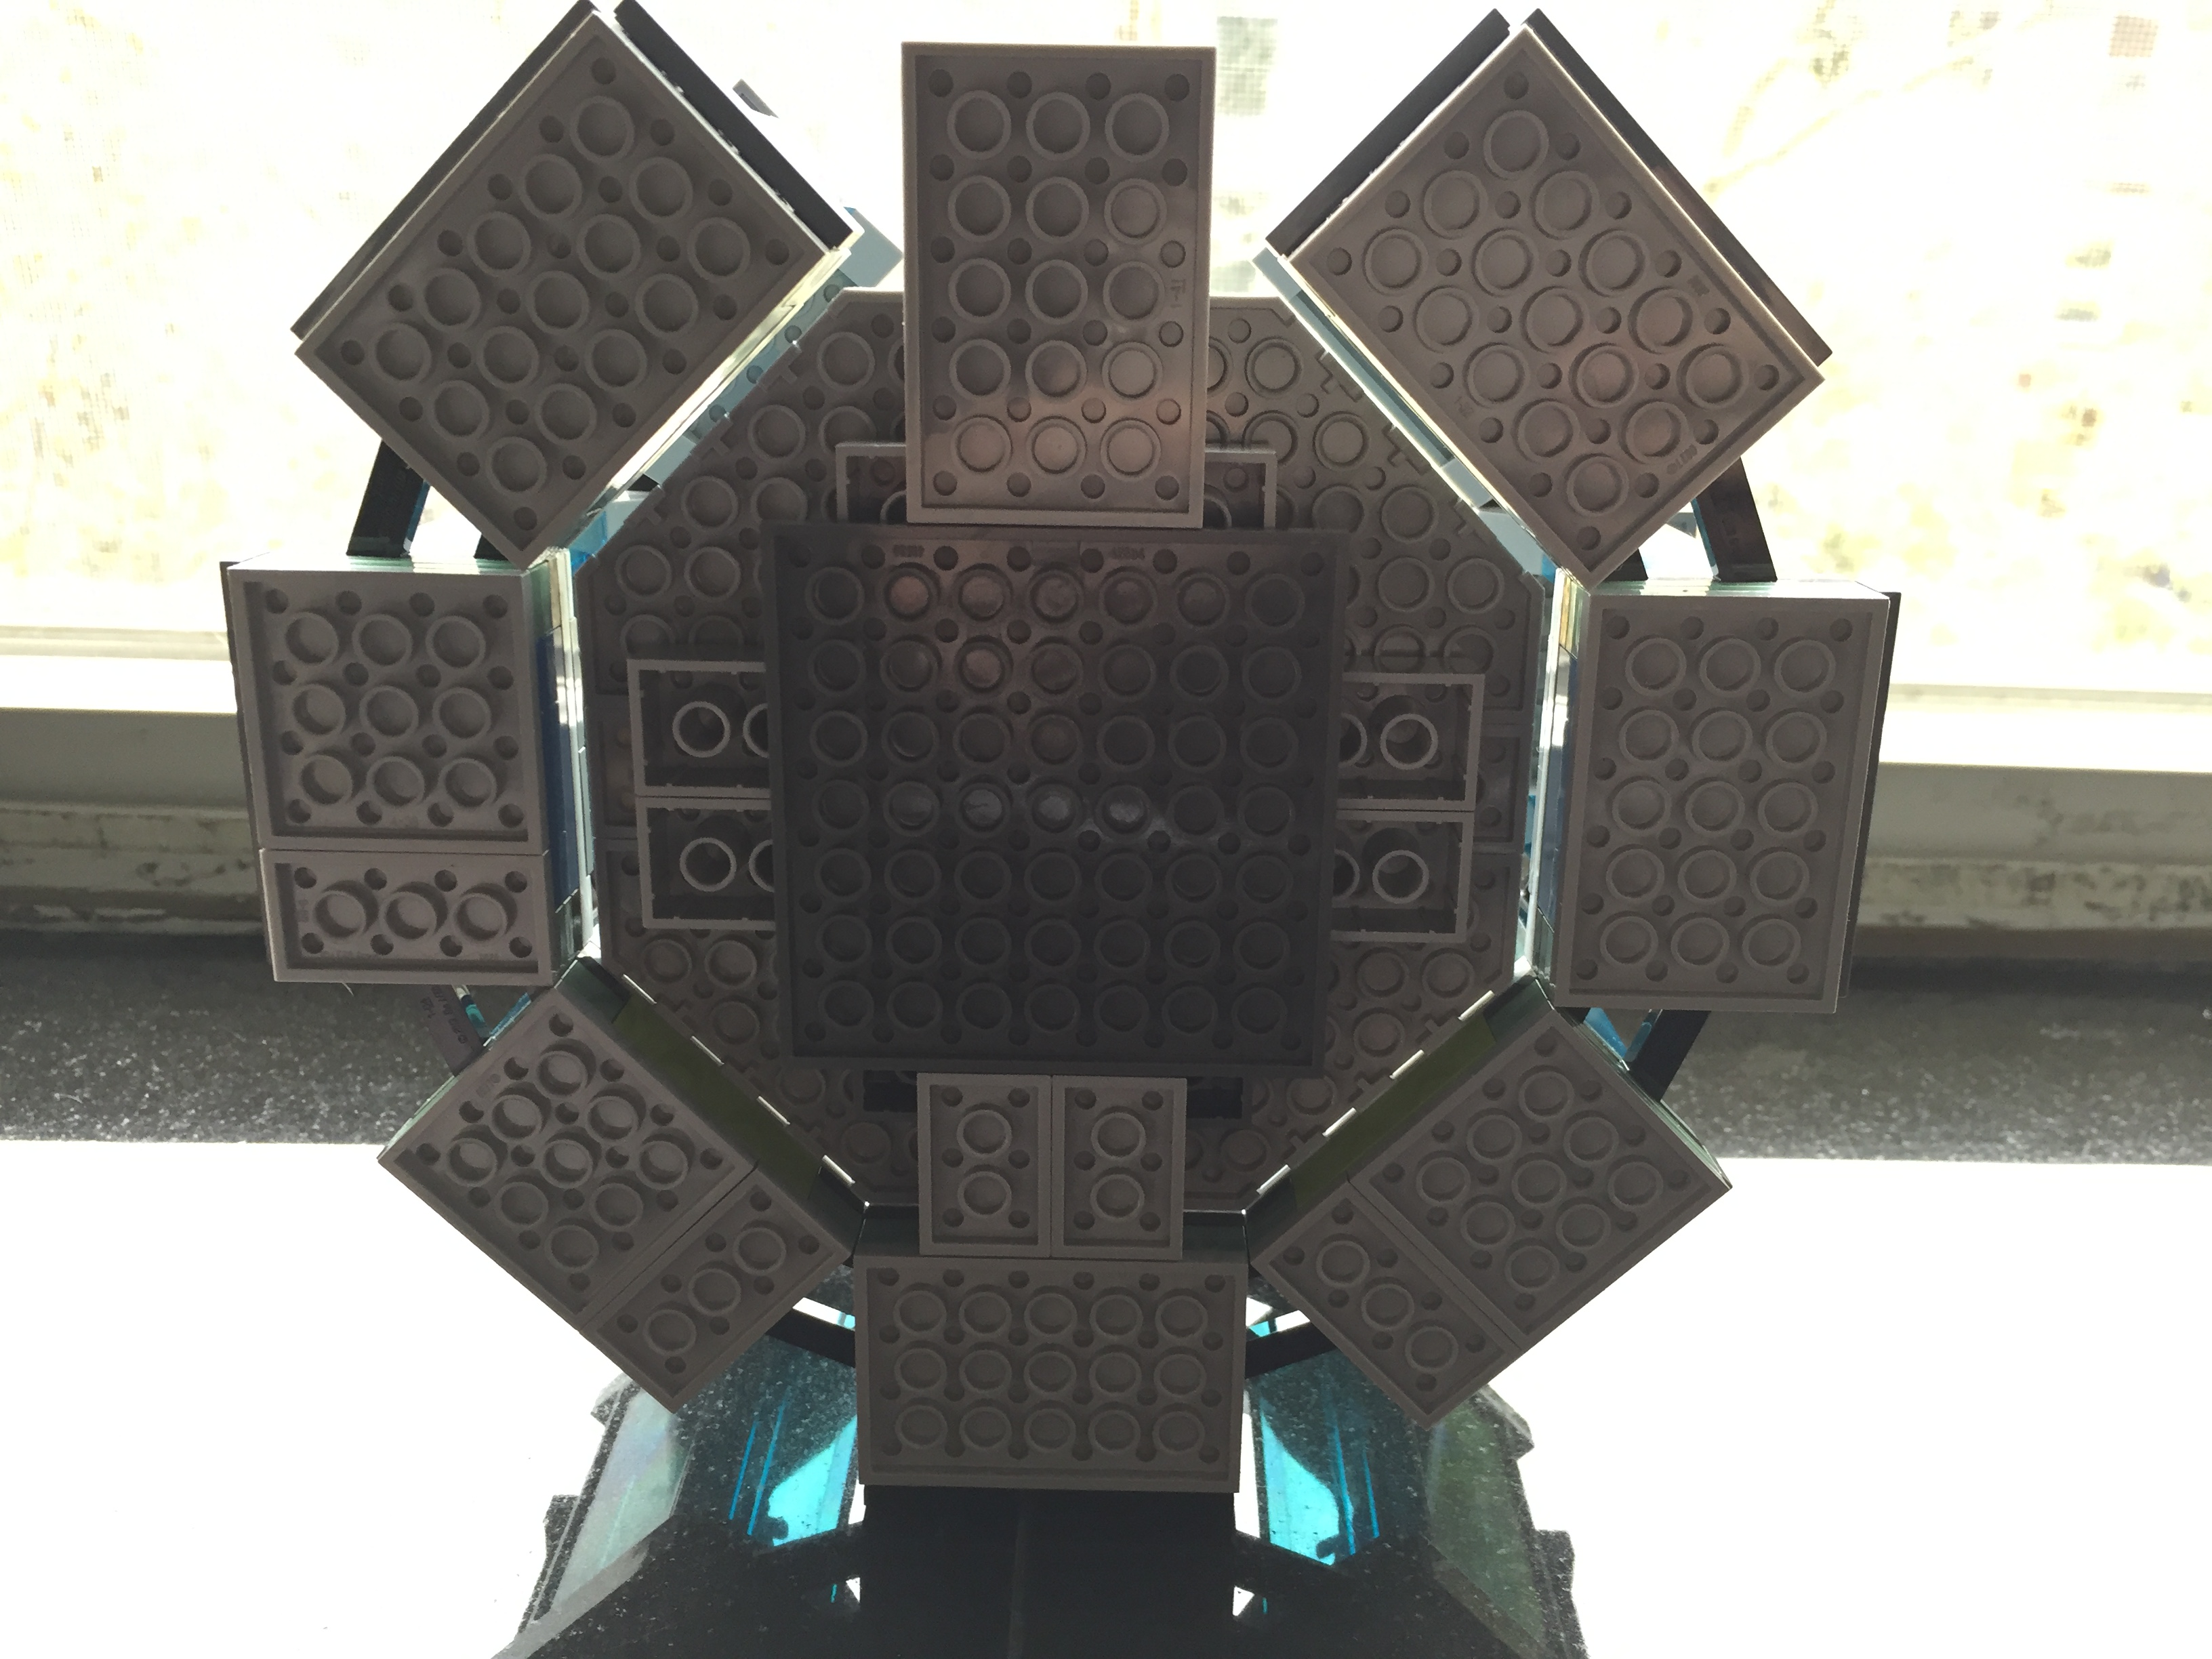
I needed to redesign the base, so I opted to give it a symmetrical support underneath and and a stairway entrance in the southward position. It connects to the circular armor pod assembly with Technics connector pegs and bricks under the northward armor pod. While the center platform makes a tight and neat fit to the upper three pods, its plate studs do not line up with the side or bottom pods (there is a slight gap of about 1/16 to 1/8 of an inch).
It is a sturdy model that can be lifted from any point. Due to its limited interior space and the size of my adult hands, it is difficult to remove and replace the Iron Man armor in each pod.
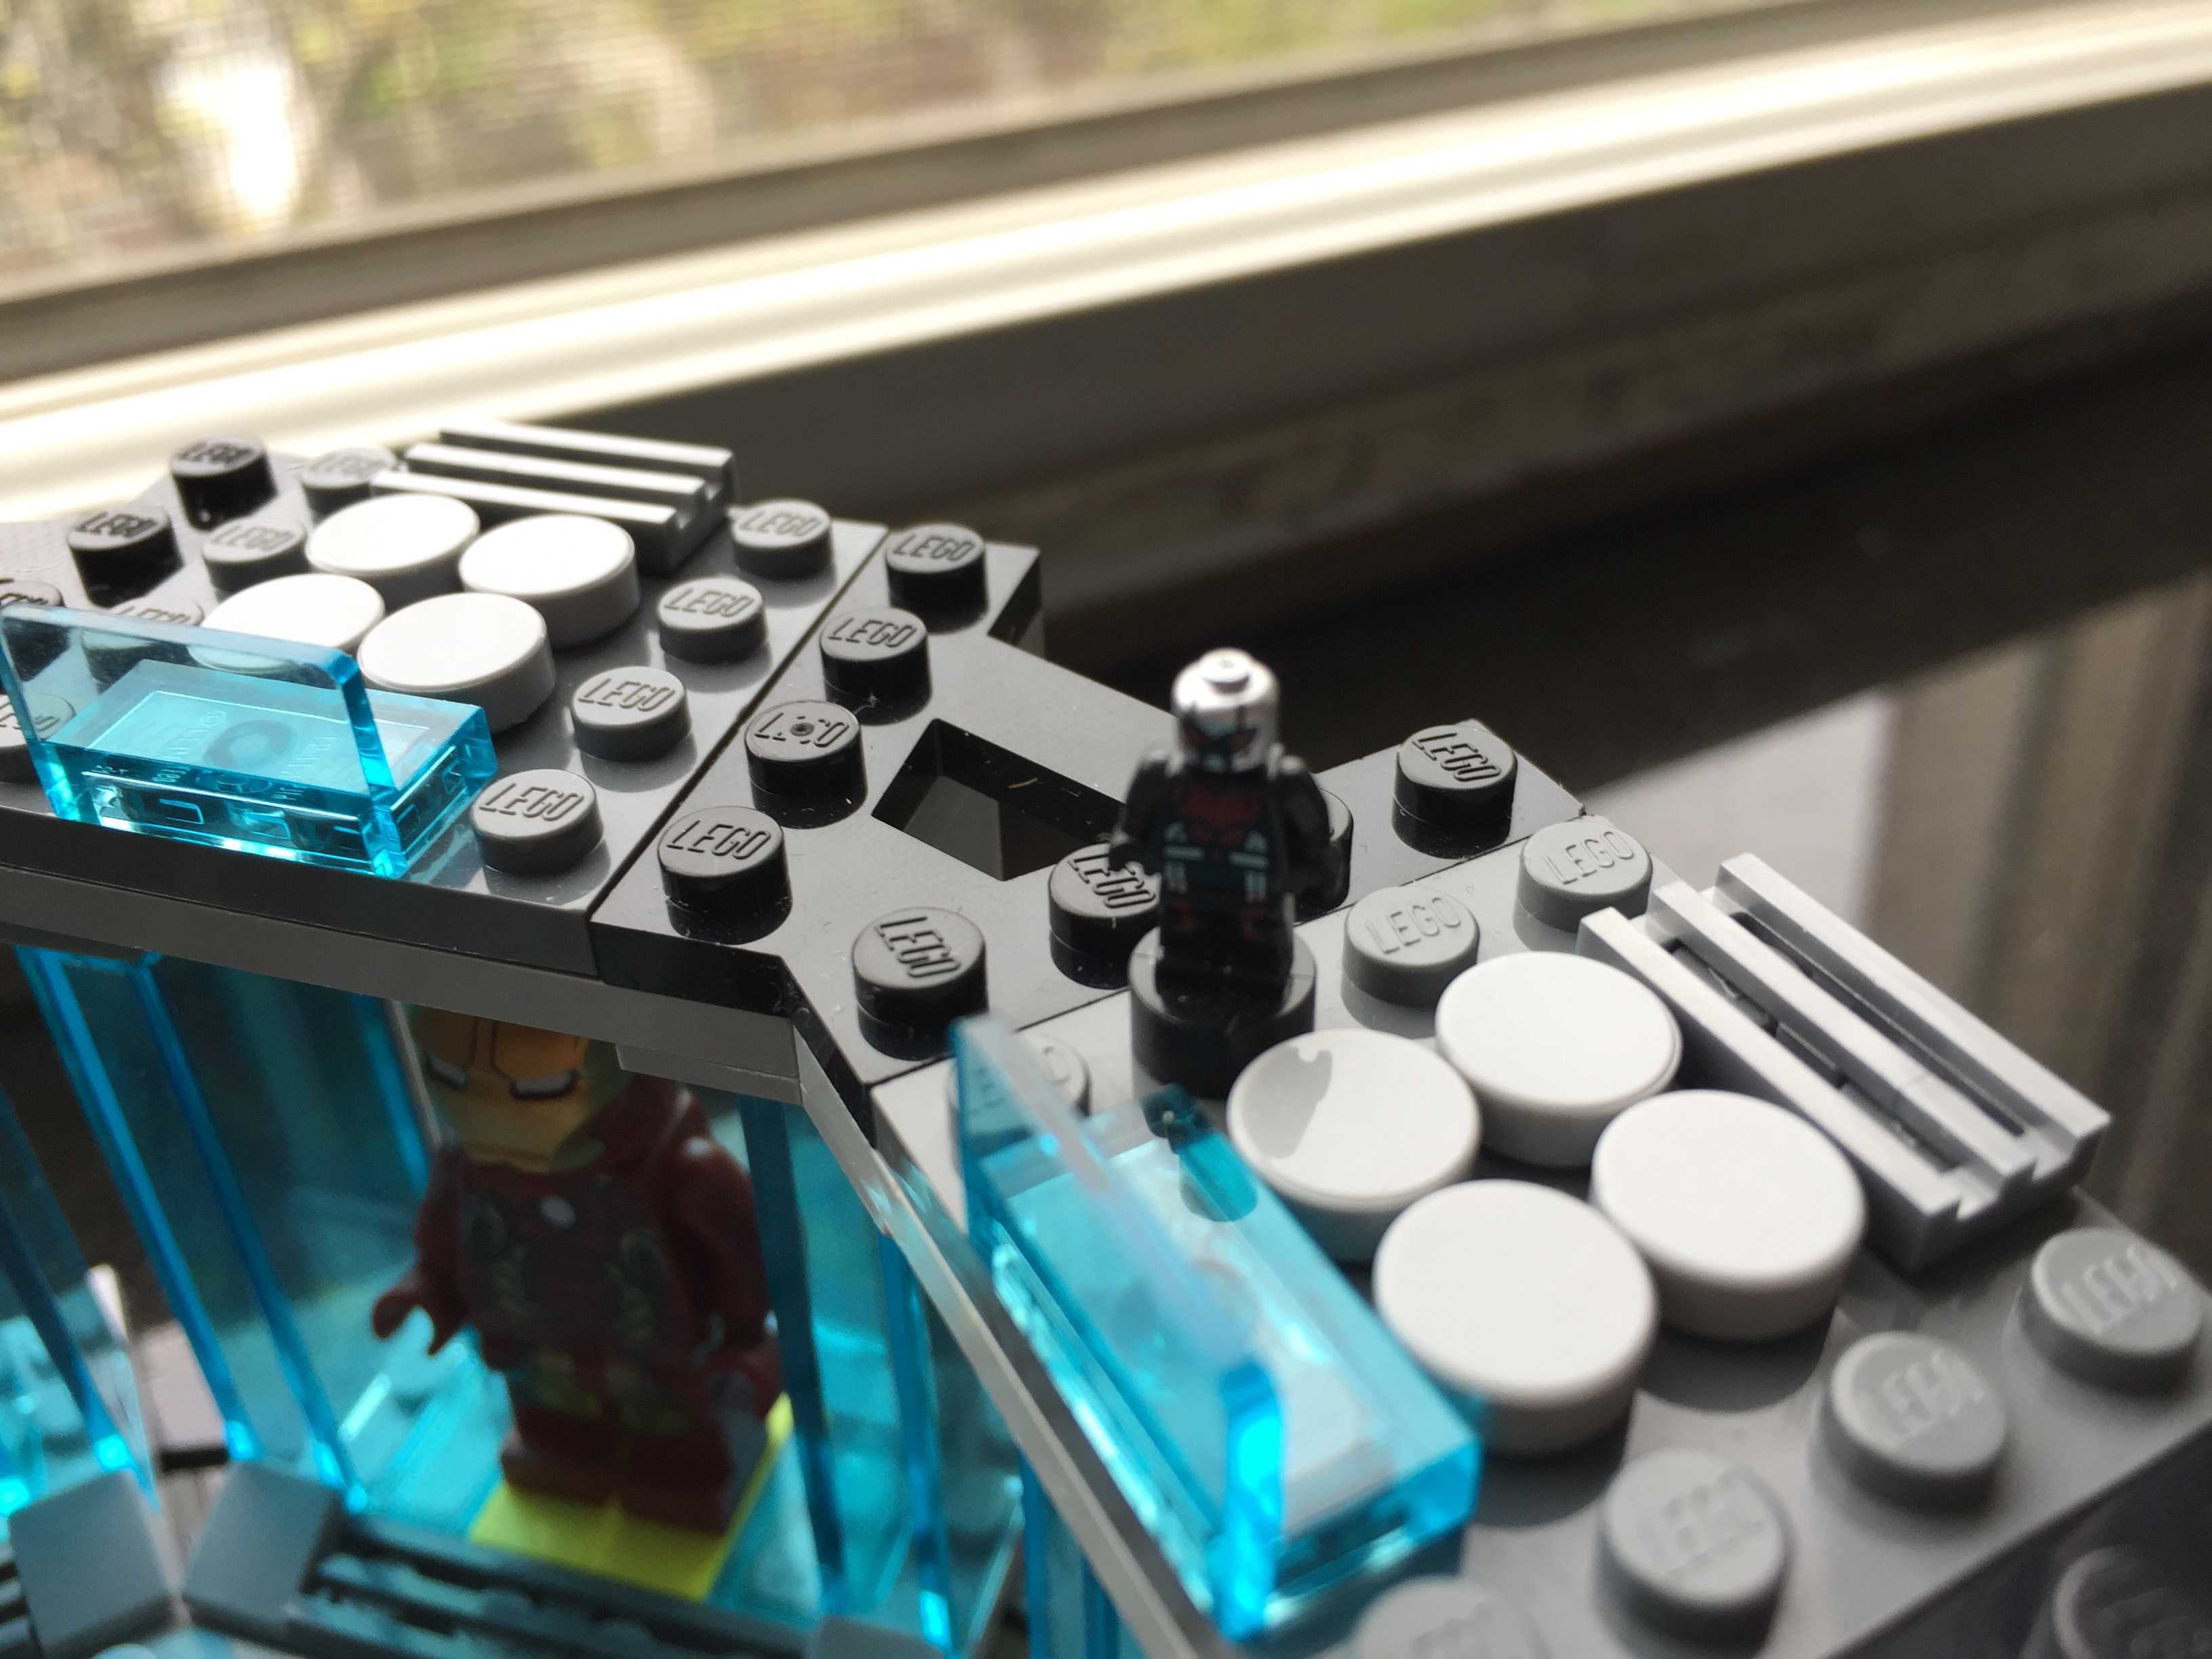
My next idea for the set is to elevate it by about its current height and create a crank-driven lift in the central platform for Tony Stark’s grand entrance. This will take some more planning and time. I’m sure that Ant Man will be watching my progress.


