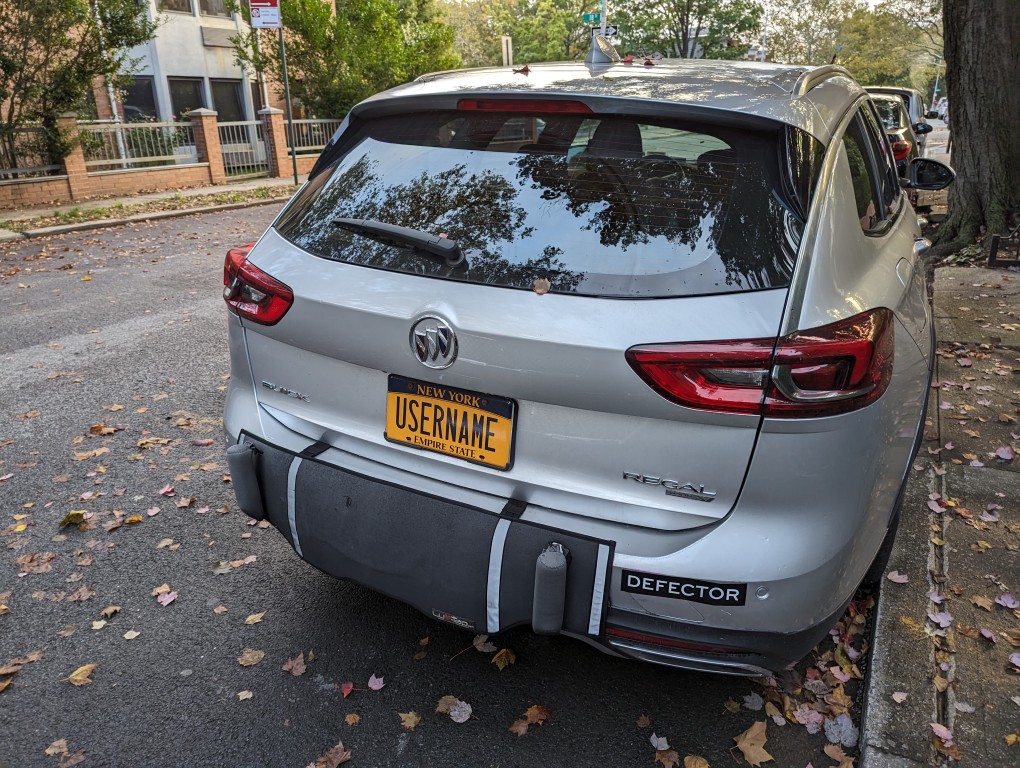
If I had a nickle for every time I’ve said, “Now, enter your username . . .”
If I had a nickle for every time I’ve said, “Now, enter your username . . .”

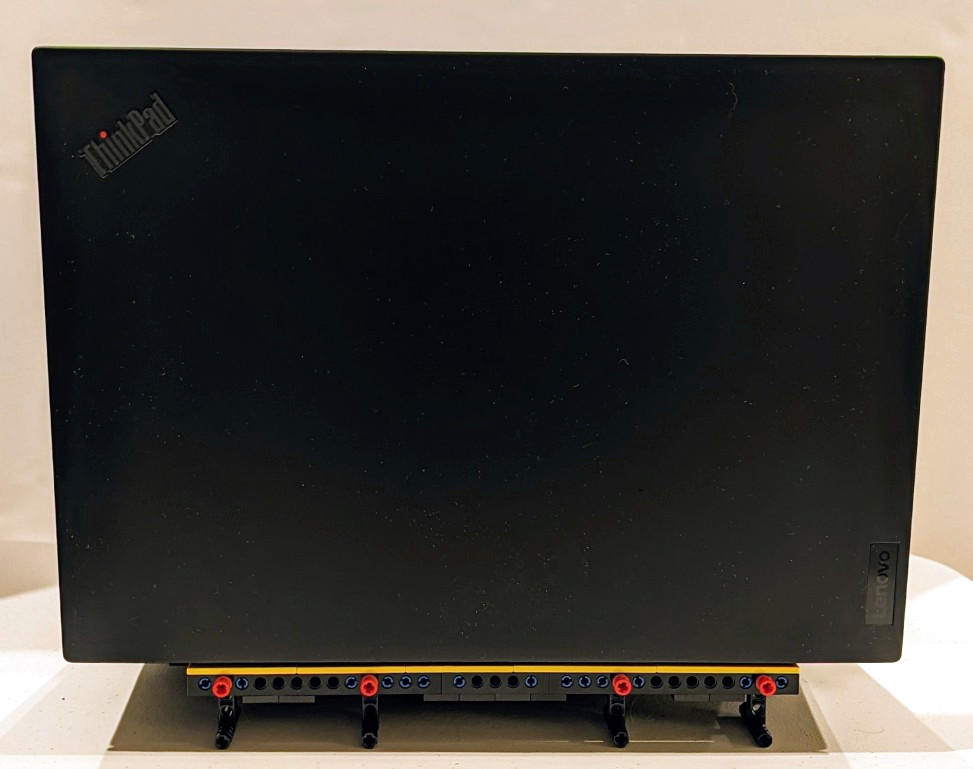
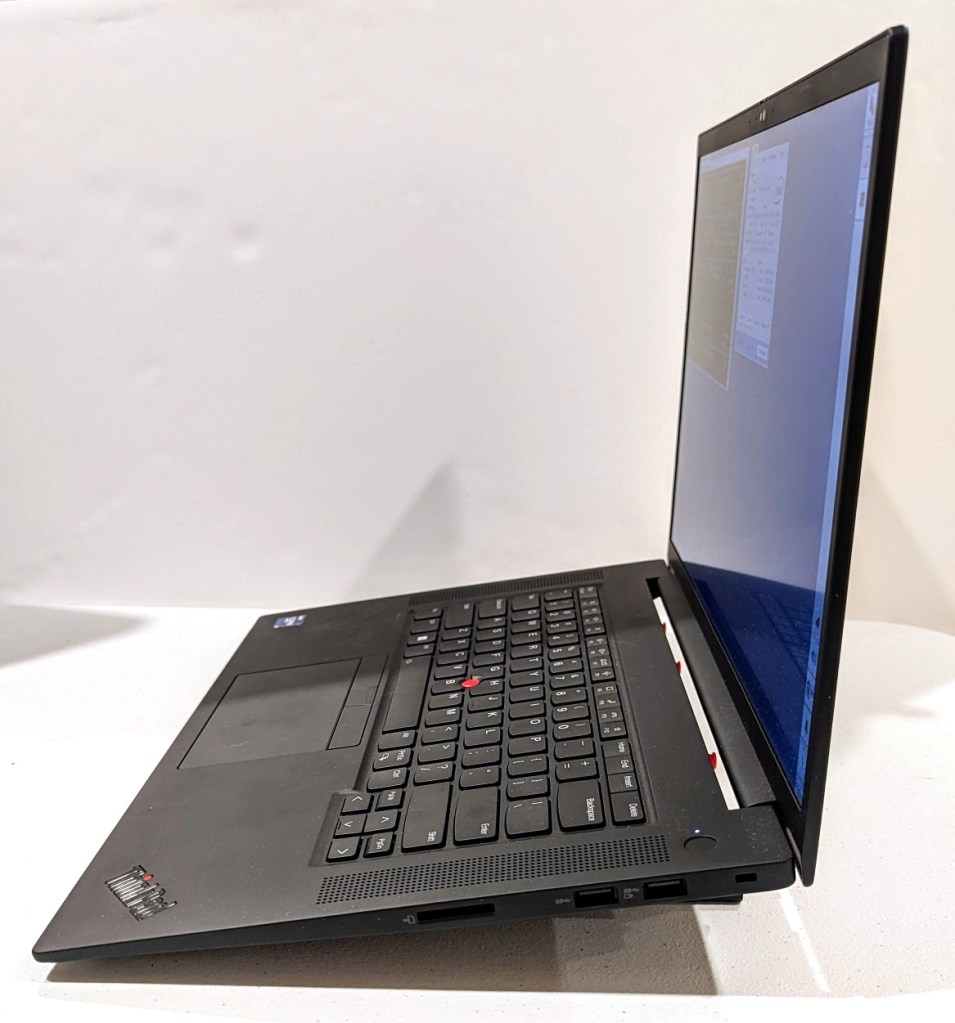
As I wrote about yesterday, my Lenovo ThinkPad P1 Gen 4 maintains lower temperatures when it has improved air flow under its body where the twin cooling fan intakes are. Without raising the laptop, the laptop’s support feet only give it about 3 mm of space underneath it, which chokes the intake fans. Since getting the laptop late last year, I’ve used a variety of at-hand objects–books and small boxes most often–to prop up the back of the laptop when I was stressing the laptop with a heavy workload.
I wanted a permanent solution, but the portable options available in retail are either bulky adjustable metal or plastic platforms or folding 4-point stands. The former takes up a lot of room and those with fans don’t always translate to lower temps, and the latter might not provide the support needed on the ThinkPad P1’s lengthy support foot at the rear of the laptop. So, I turned to LEGO to create a customized stand that gives the ThinkPad the support it needs while also being compact and easily carried in my backpack.
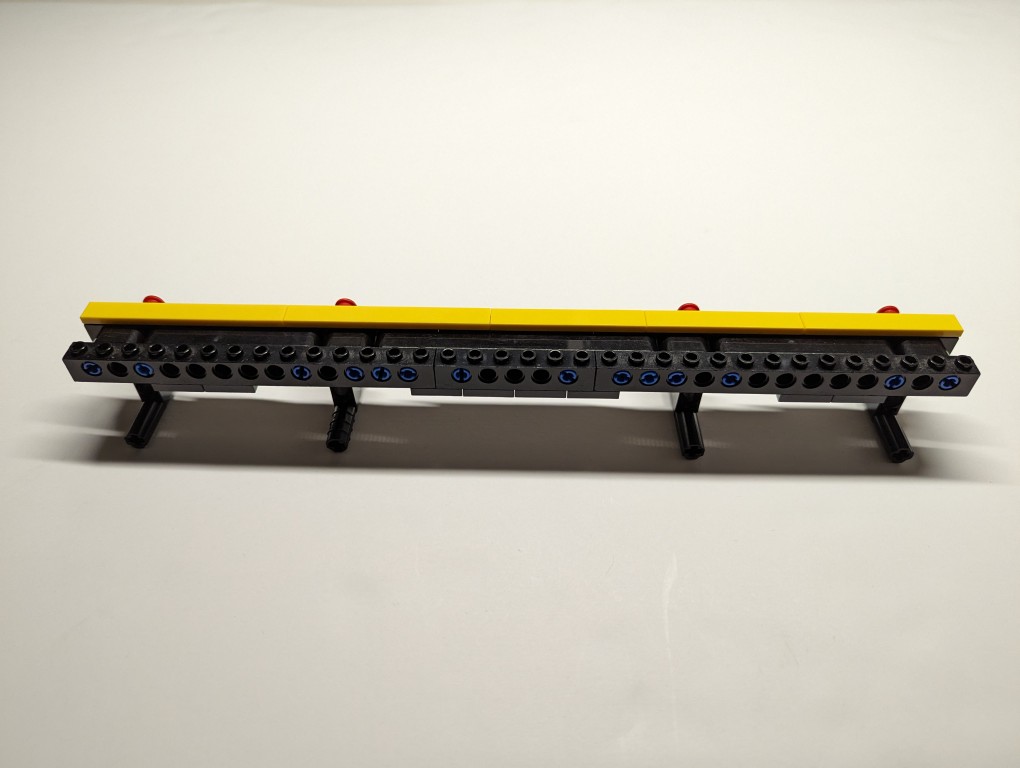
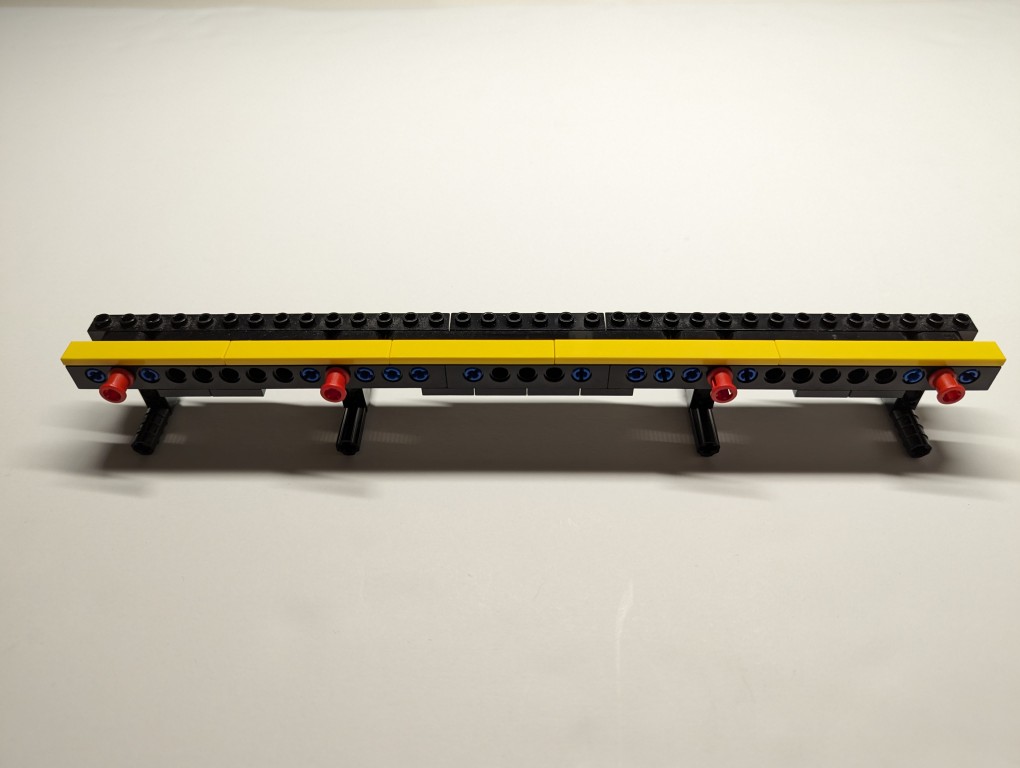
What I made to solve this problem mostly used LEGO Technic elements with some brick elements (plates to provide support underneath its joints and the bright yellow smooth plates on top to orient the stand and provide a stop against the ThinkPad’s support foot).
The ThinkPad’s support foot fits perfectly in the center of the stand without the studs toward the front or the flat plate in the back touching the laptop’s body.
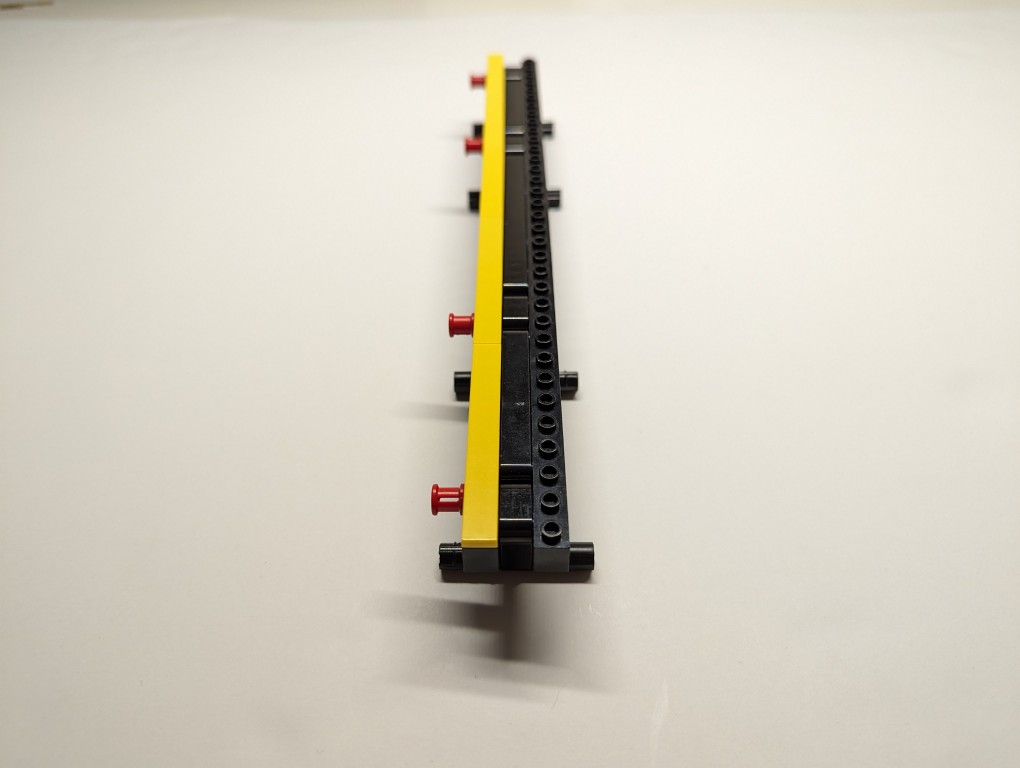
Essentially, the stand is built like a sandwich: the bread is the Technic bricks with holes on either side, and the filling is the Technic liftarms (straight and L-shaped). I used 3-stud wide pins to hold the sandwich together. The red pins are only used to provide stability to the support legs when they are deployed for use.
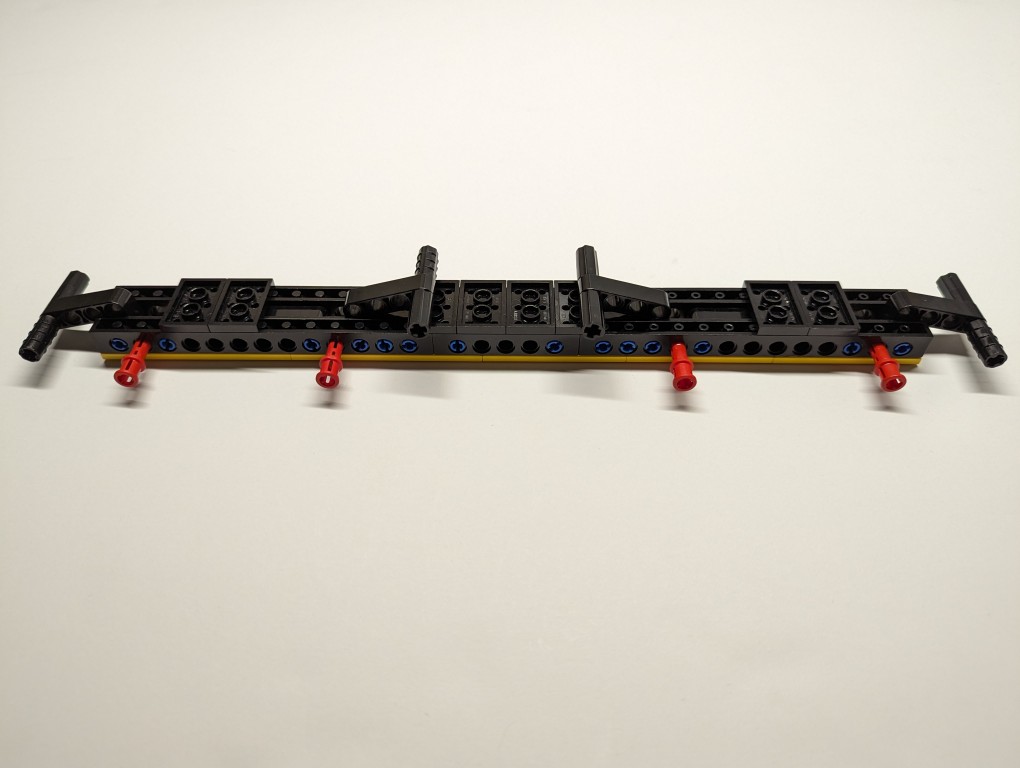
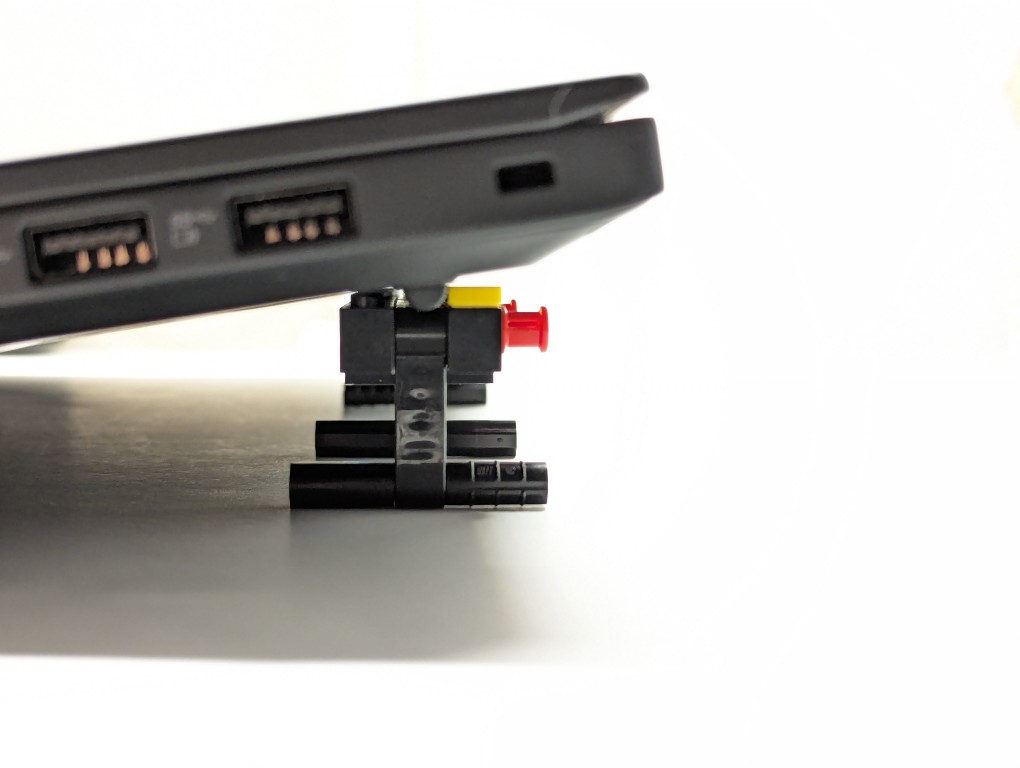
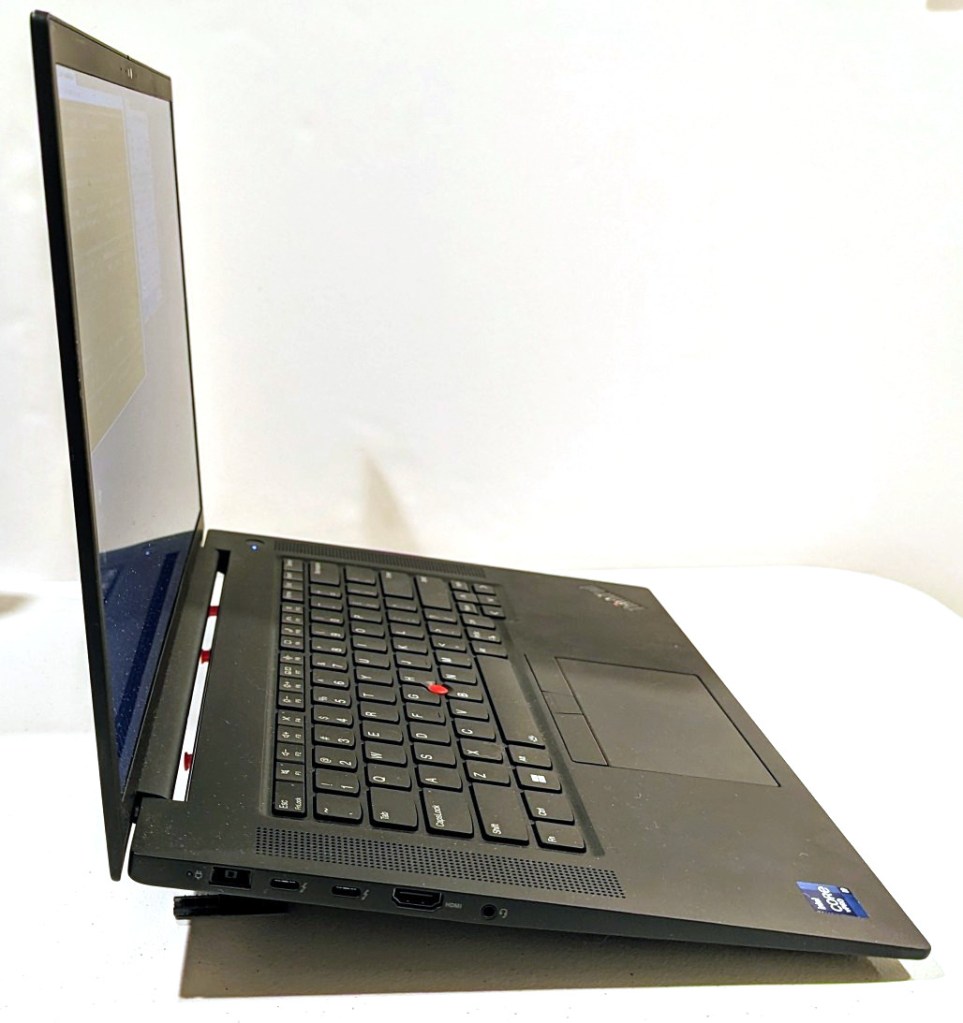
On the back of the stand, the red pegs can be partially pulled out and the feet folded.
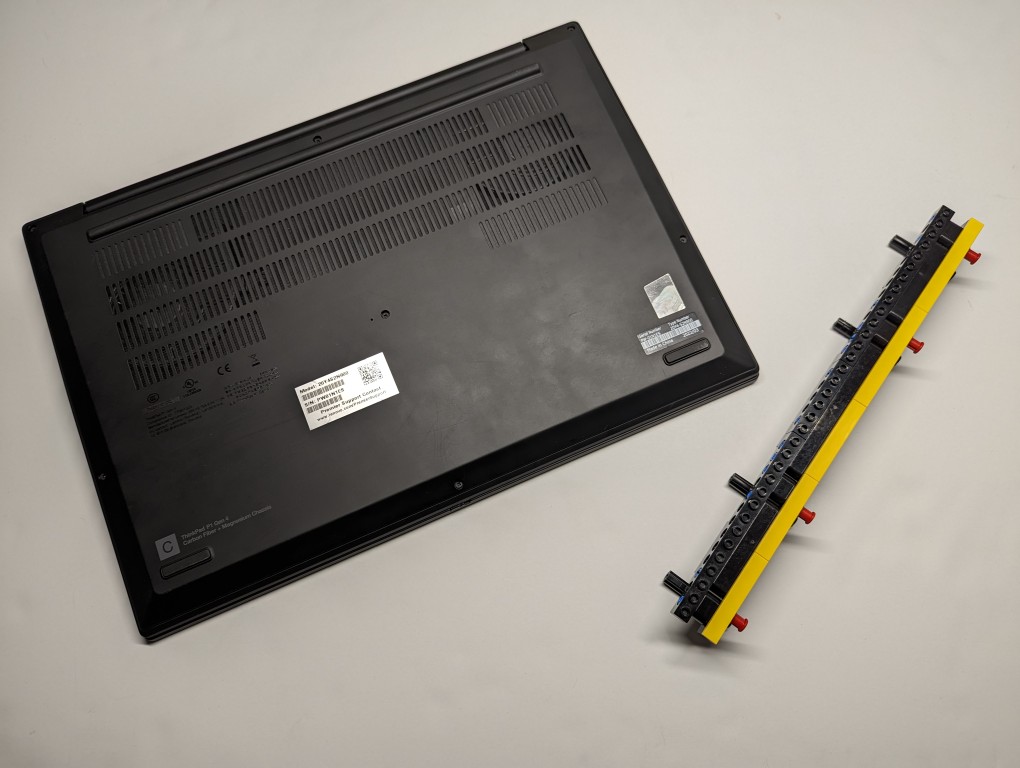
The LEGO stand completely covers the support foot at the rear of the laptop (seen at the top of the photo above). When folded, it easily slips into the backpack that I use to carry this ThinkPad.
LEGO is a versatile, rapid prototyping medium for building art, expressing ideas, and in this case, creating something practical to solve a specific problem.
If you have some LEGO bricks laying around idle, you might stop and think about what problem they might be able to solve for you!
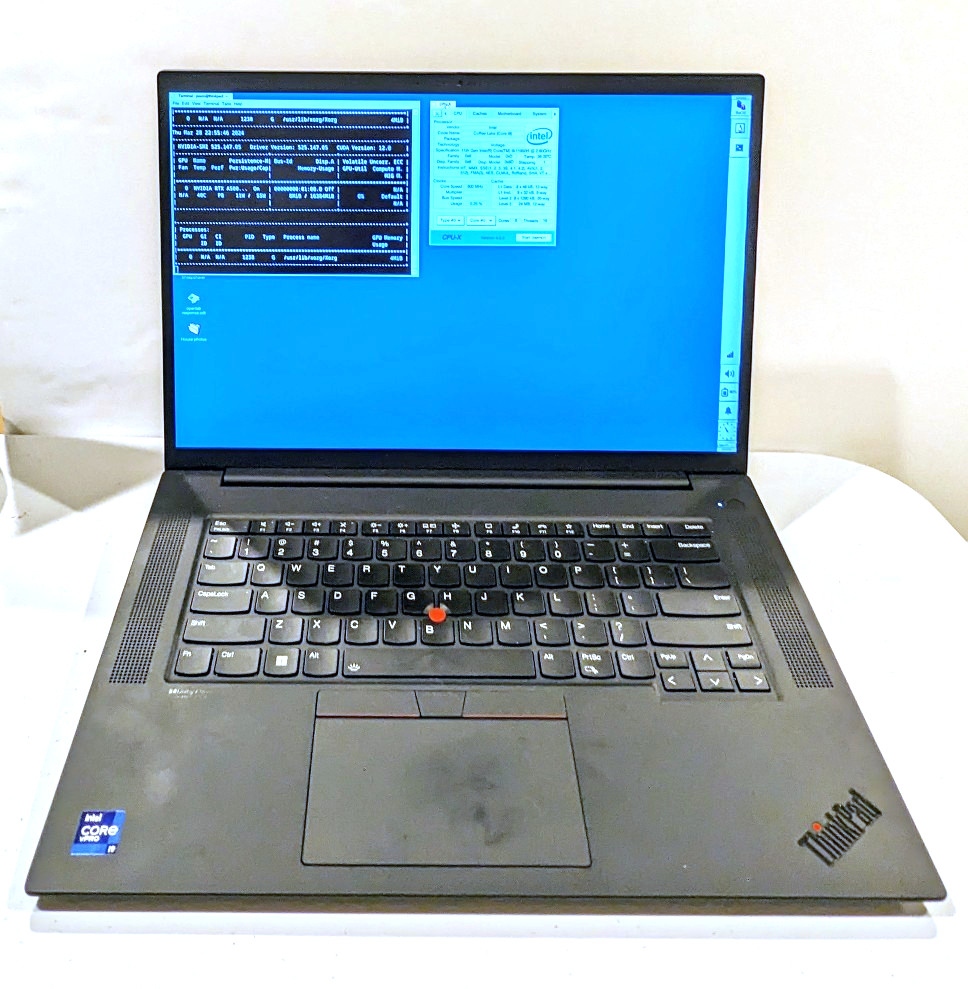
About halfway through my sabbatical, I needed to visit my parents in Georgia, but I also needed to continue working on my research projects. I didn’t feel safe about lugging my A6000 desktop computer (in checked baggage or shipping), so I followed my own advice and started looking for a used workstation-class laptop.
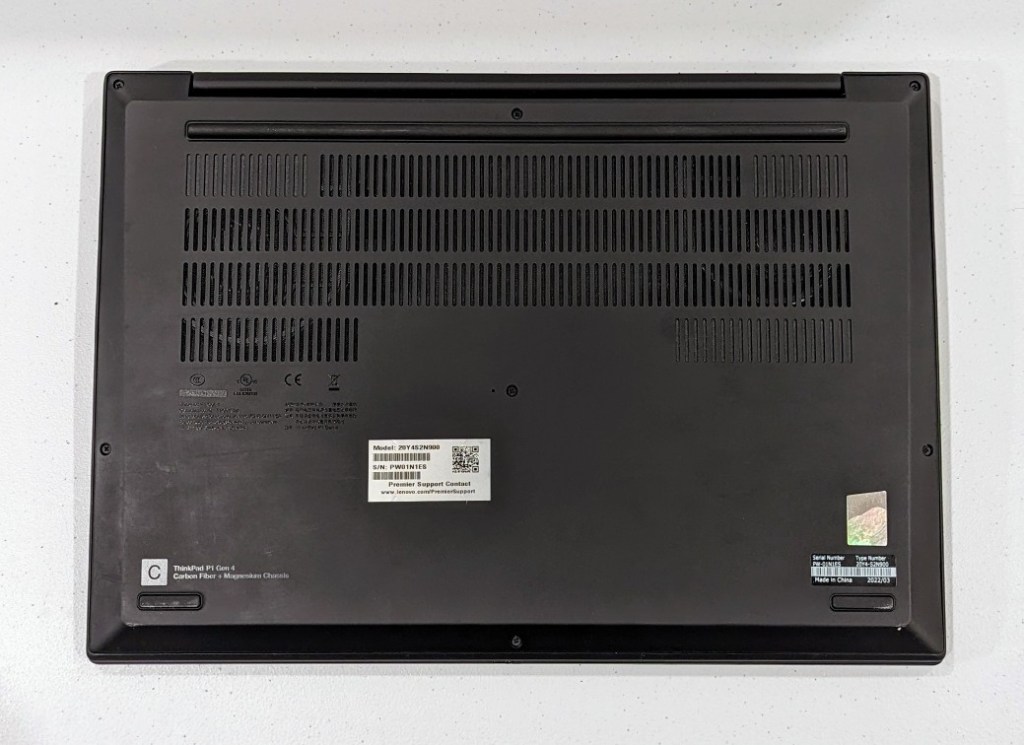
It took a few weeks, but I landed this awesome, practically new Lenovo ThinkPad P1 Gen 4 from a seller on eBay. It has a 16″ QHD+ screen (that I scale down to 1080p for my eyes), an i9-11950H (8 core/16 thread) CPU, 64GB DDR4 RAM, 2TB SSD, and an NVIDIA RTX A5000 16GB discrete video card (Stable Diffusion and llamacpp worked without any hiccups).
It plows through all of the work that I throw out at, but it does sound like a jet engine when its two cooling fans spin up. I have found that raising it off the desk by a couple of inches helps tremendously with cooling by increasing air flow. I had been using rigged up stands, but I built a special stand out of LEGO that I will show in detail tomorrow (but there’s a sneak peek in the photos below).
I can’t sing this laptop’s praises loudly enough! It works well with Debian 12 Bookworm, but it does have some issues with power saving/hibernation, which is a known issue and might have some work around that I haven’t tried yet.
The one thing that it can’t do without when doing GPU-focused work is it’s chonky 230 watt external power supply. I bring it with me when I know it will eat through its battery doing jobs. I recently upgraded my backpack to a Mystery Ranch 2-Day Assault Pack, which has a built-in sleeve that easily accommodates 16″ laptops like this one (but it can be tricky to use the laptop side egress slot due to the ThinkPad’s thickness).

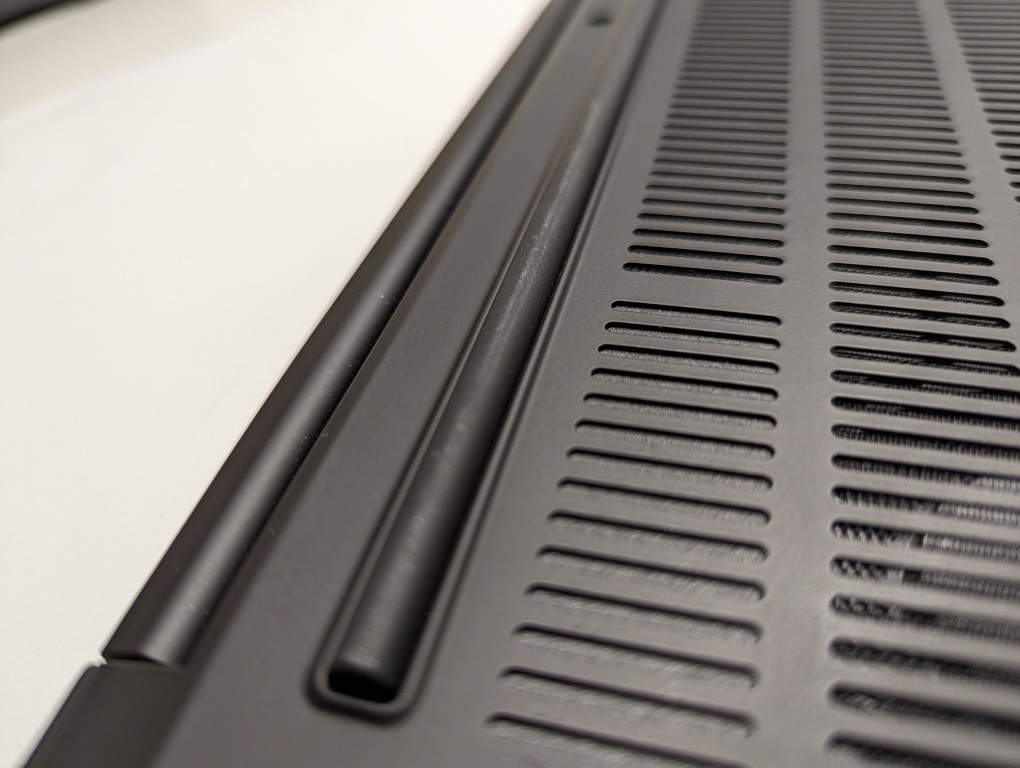
Thermaltake’s Versa H17 MicroATX PC mini tower case is an excellent minimalist case with a relatively small footprint. I chose this case, because it doesn’t have a side window or excessive RGB lighting. I wish that I could disable the power light, which is a bright, room illuminating blue, but I simply cover it with a microfiber cloth.
It’s designed to have air instake from the edges of the front face, which are covered with a fine grill, a 120mm opening at the rear bottom of the case with a magnetic dust filter for the PSU, and a larger approximately 3/4″ x 4″ opening at the bottom of the front plastic face assembly. The latter is a problem, because it’s basically a rectangular hole through which dust enters the entire case but especially in the shrouded PSU/disk zone in the bottom of the case.
While working recently on my desktop computer–swapping out video cards and installing a new SSD–I figured that I should do something about that air inlet. I used what I had on hand to create a DIY solution.
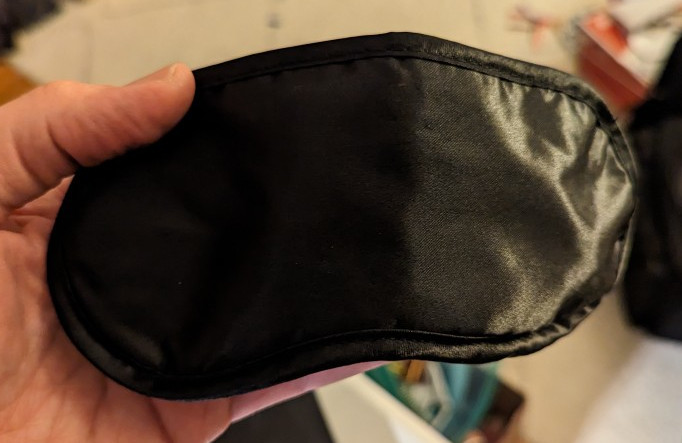
First, I took this airline supplied sleep mask. I could feel that it had foam underneath its outer fabric layer, which would work great for capturing dust before it enters the case. I used scissors to cut into the face of the mask within the sewn border.
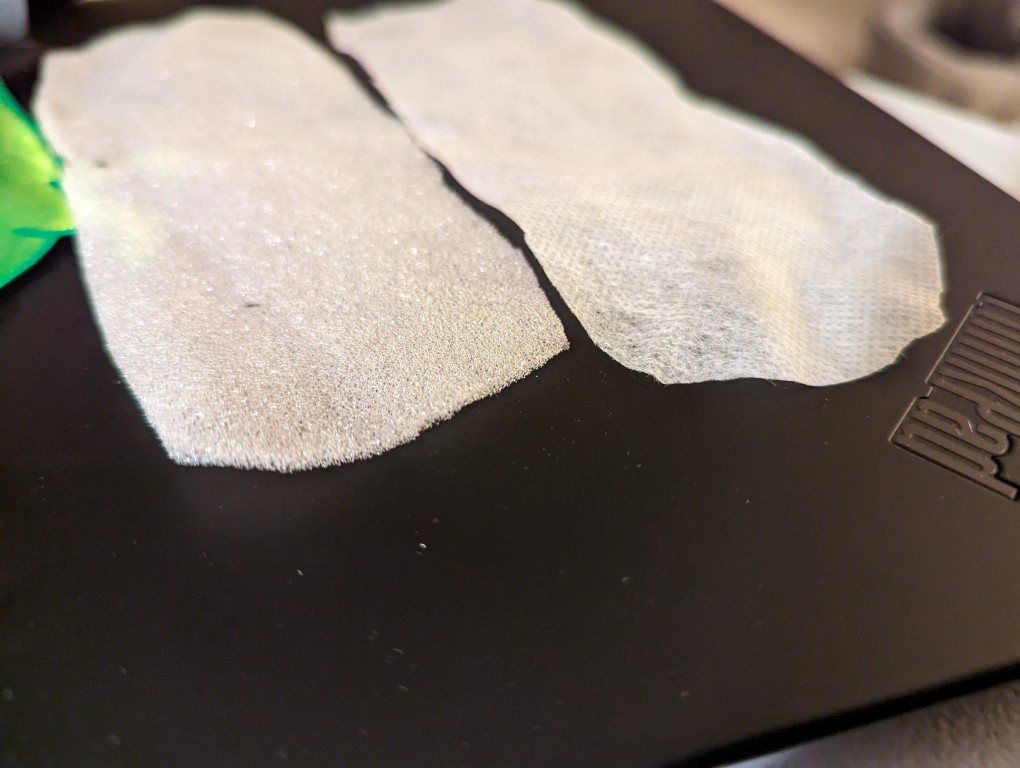
After cutting into the mask, I found two different kinds of material. On the left is a soft 1/16″ thick white foam and on the right is a thin cotton-like material that might also be used for face masks and personal protection equipment (PPE). For my project, I opted to use the thicker foam on the left. While it might not filter as much dust as the fabric on the right, I think it will give a better balance between airflow and filtration.
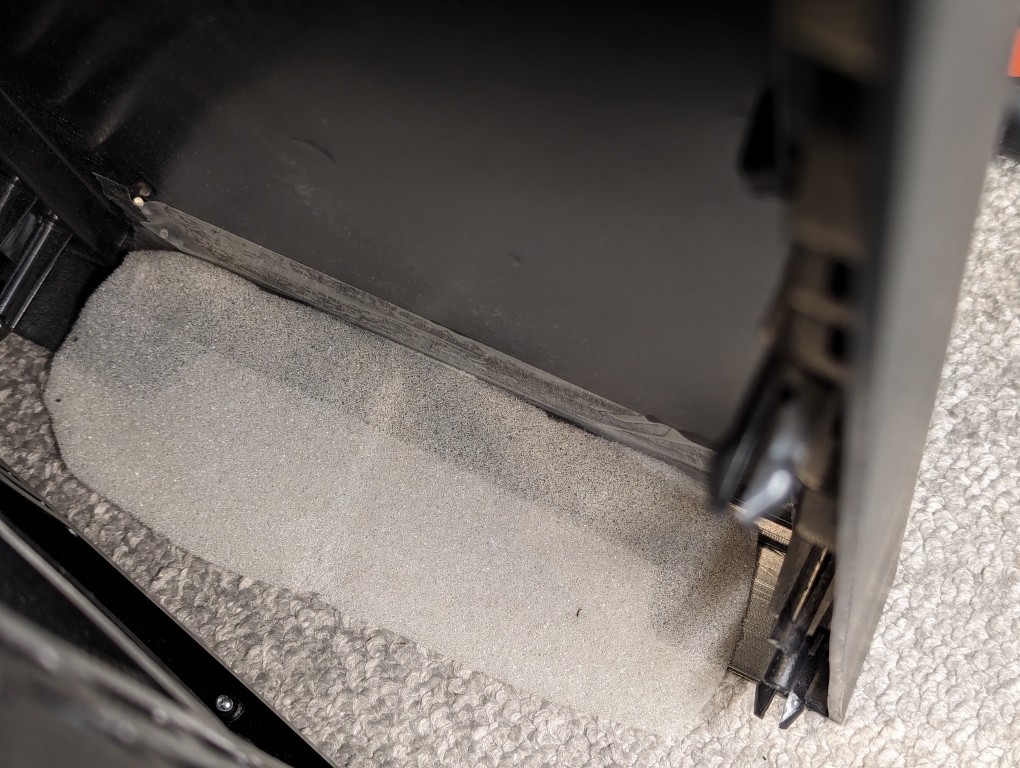
I pulled off the face of the Thermaltake Versa H17 case and taped the foam over the air inlet with a piece of packing tape.
After reattaching the face, the foam covers the air inlet. It might take a few tries to make sure the foam covers it completely. The use of additional tape on either end of the foam might help.
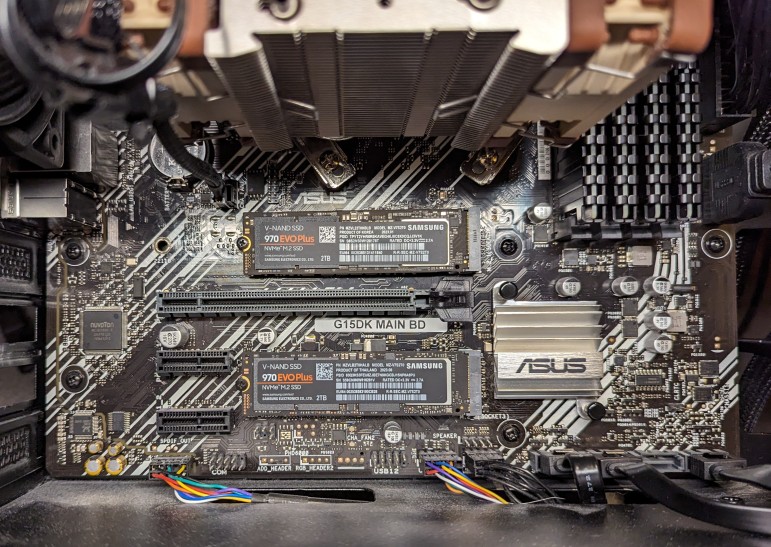
When the prices of flash memory prices plummeted last year, I upgraded my desktop’s boot drive to a 2TB Samsung 970 EVO Plus NVMe m.2 SSD (pictured in the top m.2 position in the photo above). This past week, I saw that Microcenter had the same drive on sale, so I picked up a second one (pictured in the bottom m.2 position in the photo above) to replace a 512GB Western Digital drive.
To install the new SSD in the bottom slot, I had to remove the video card, replace the SSD, and re-install the video card.
