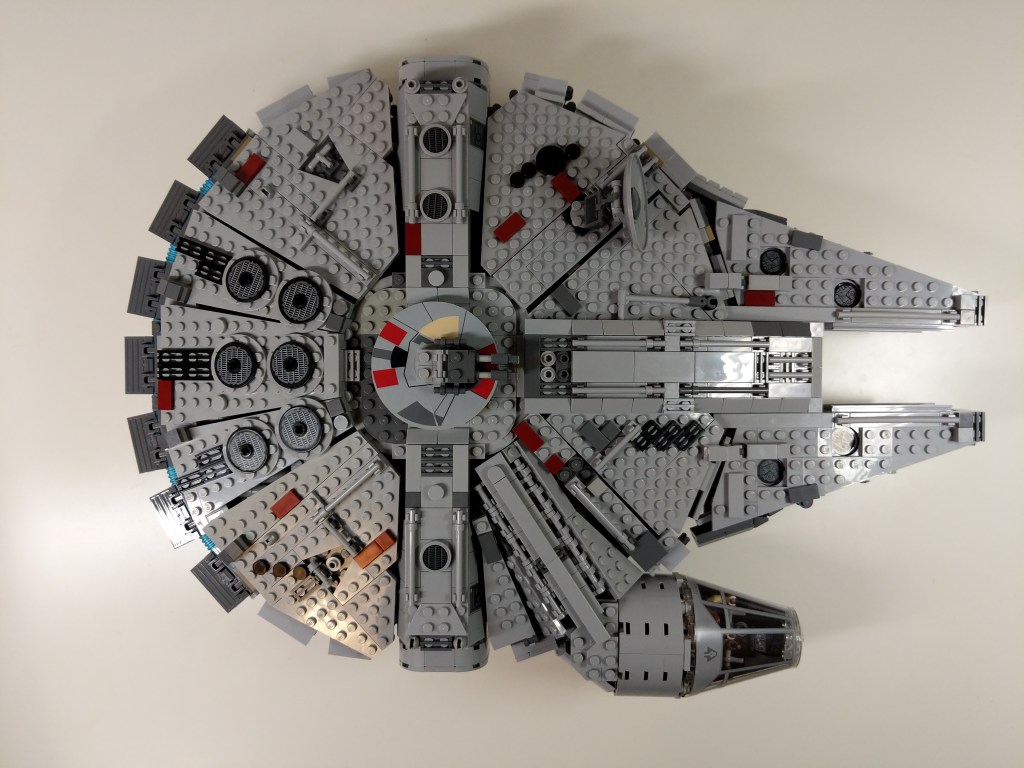
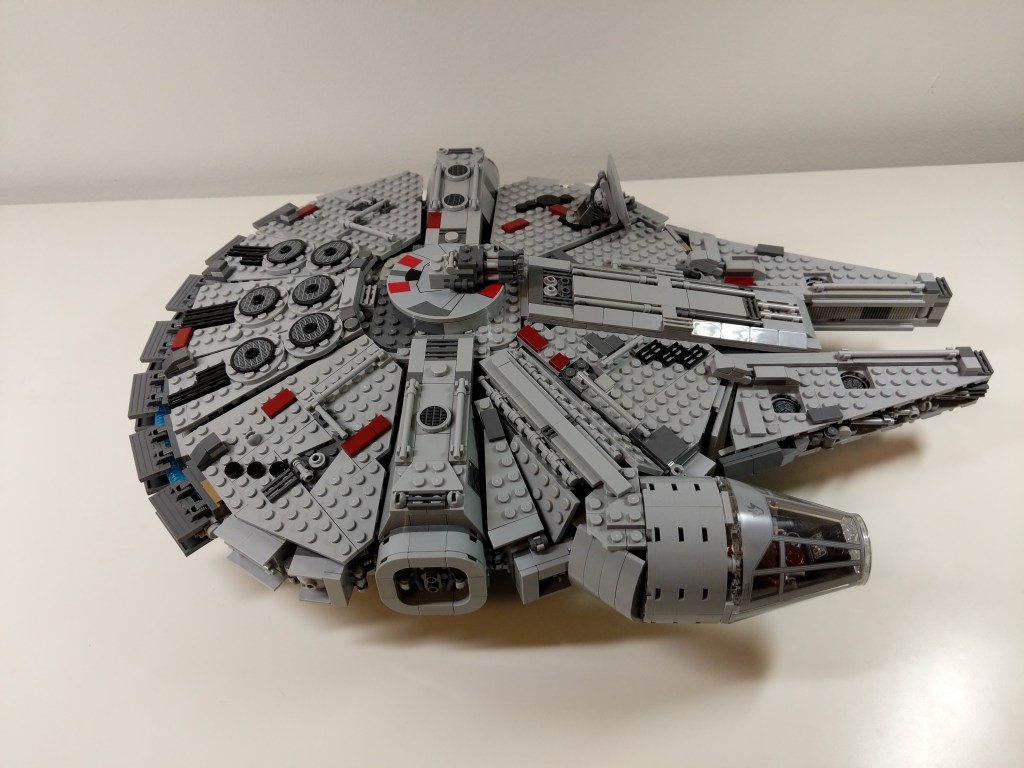
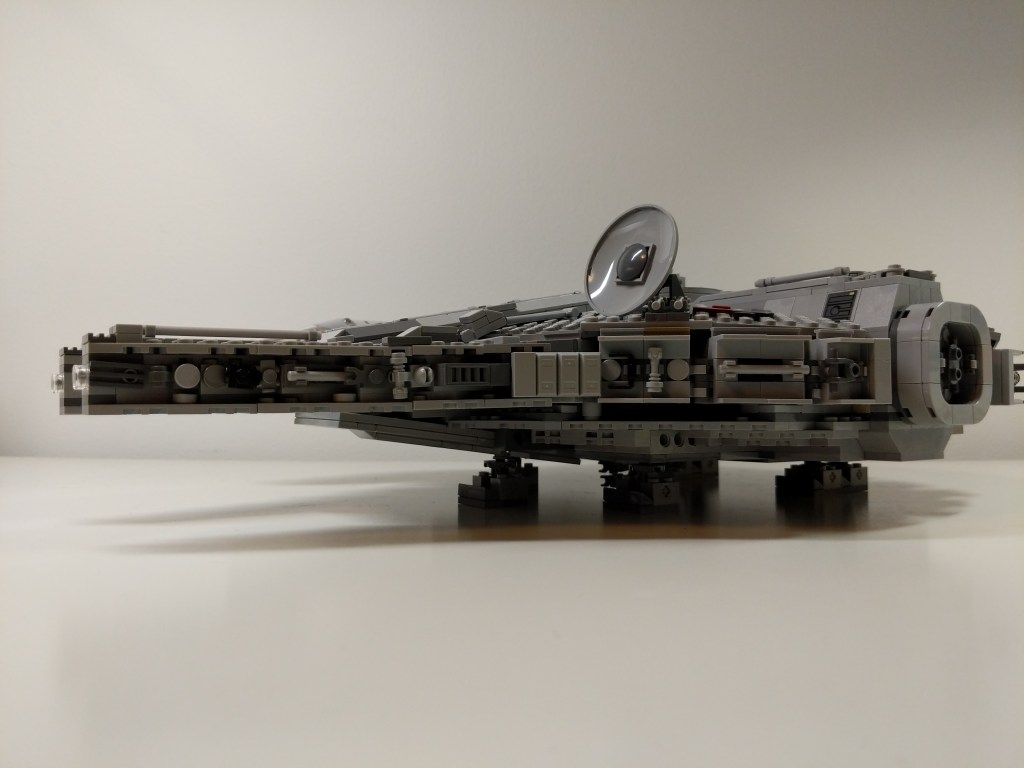
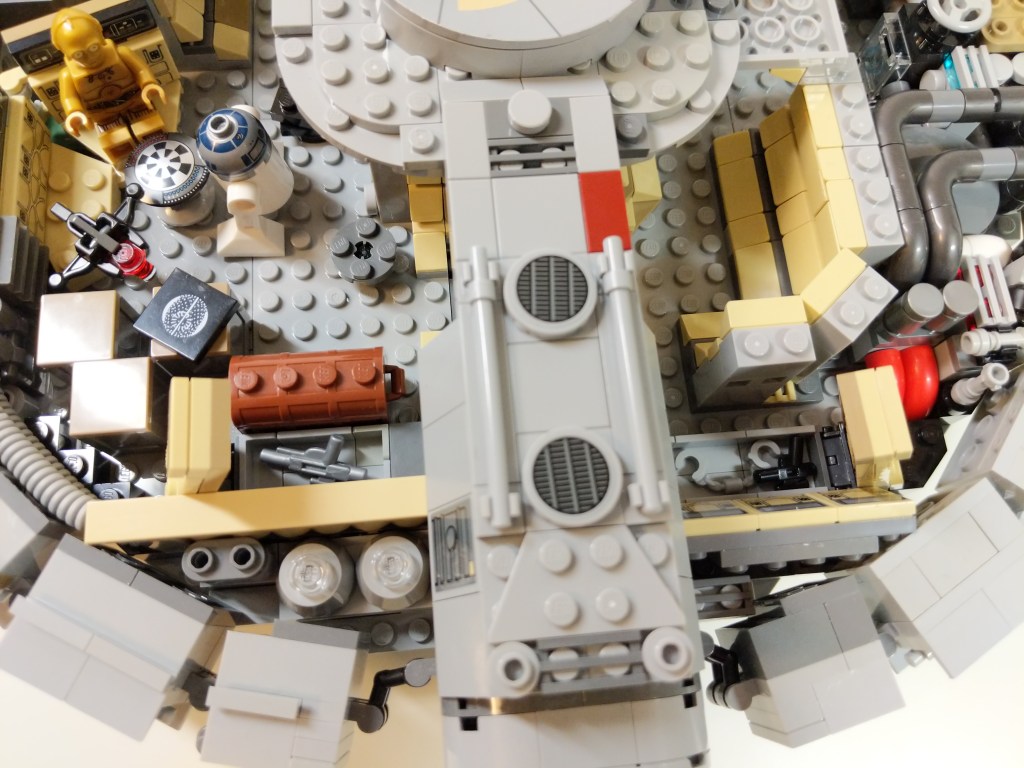
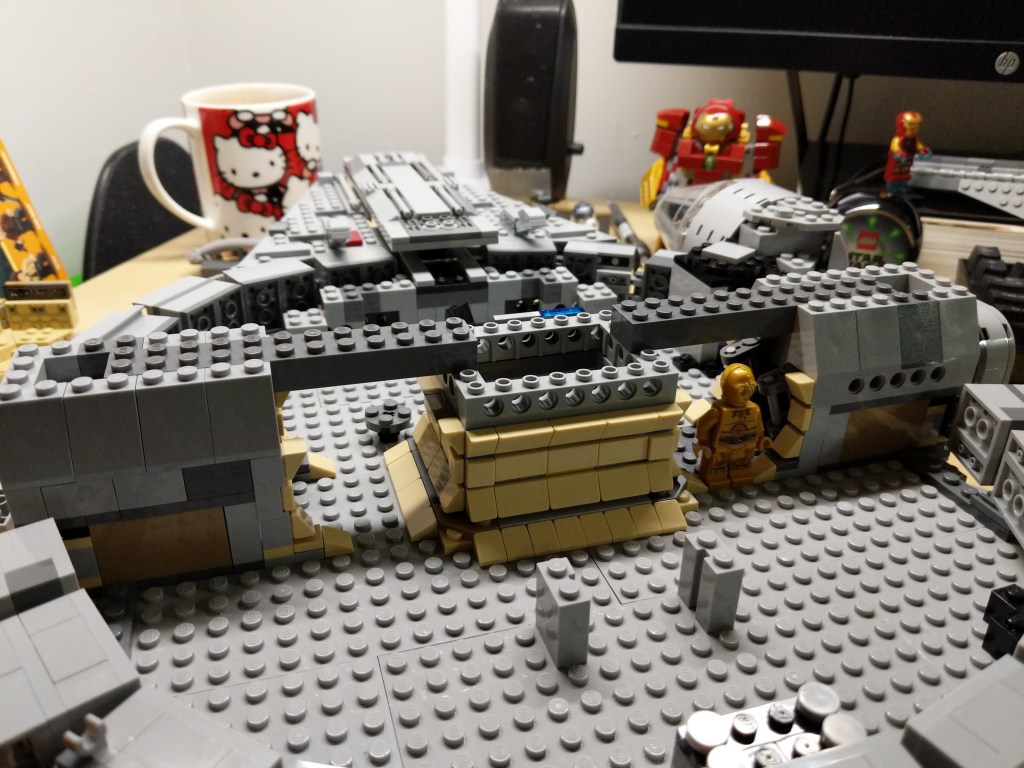
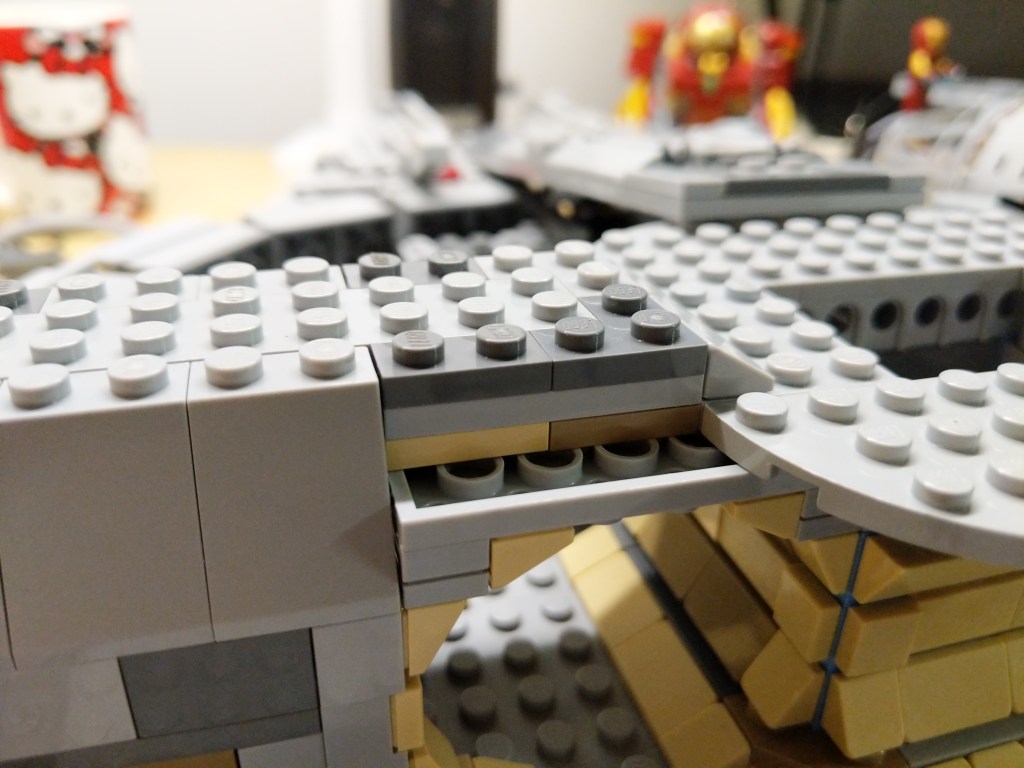
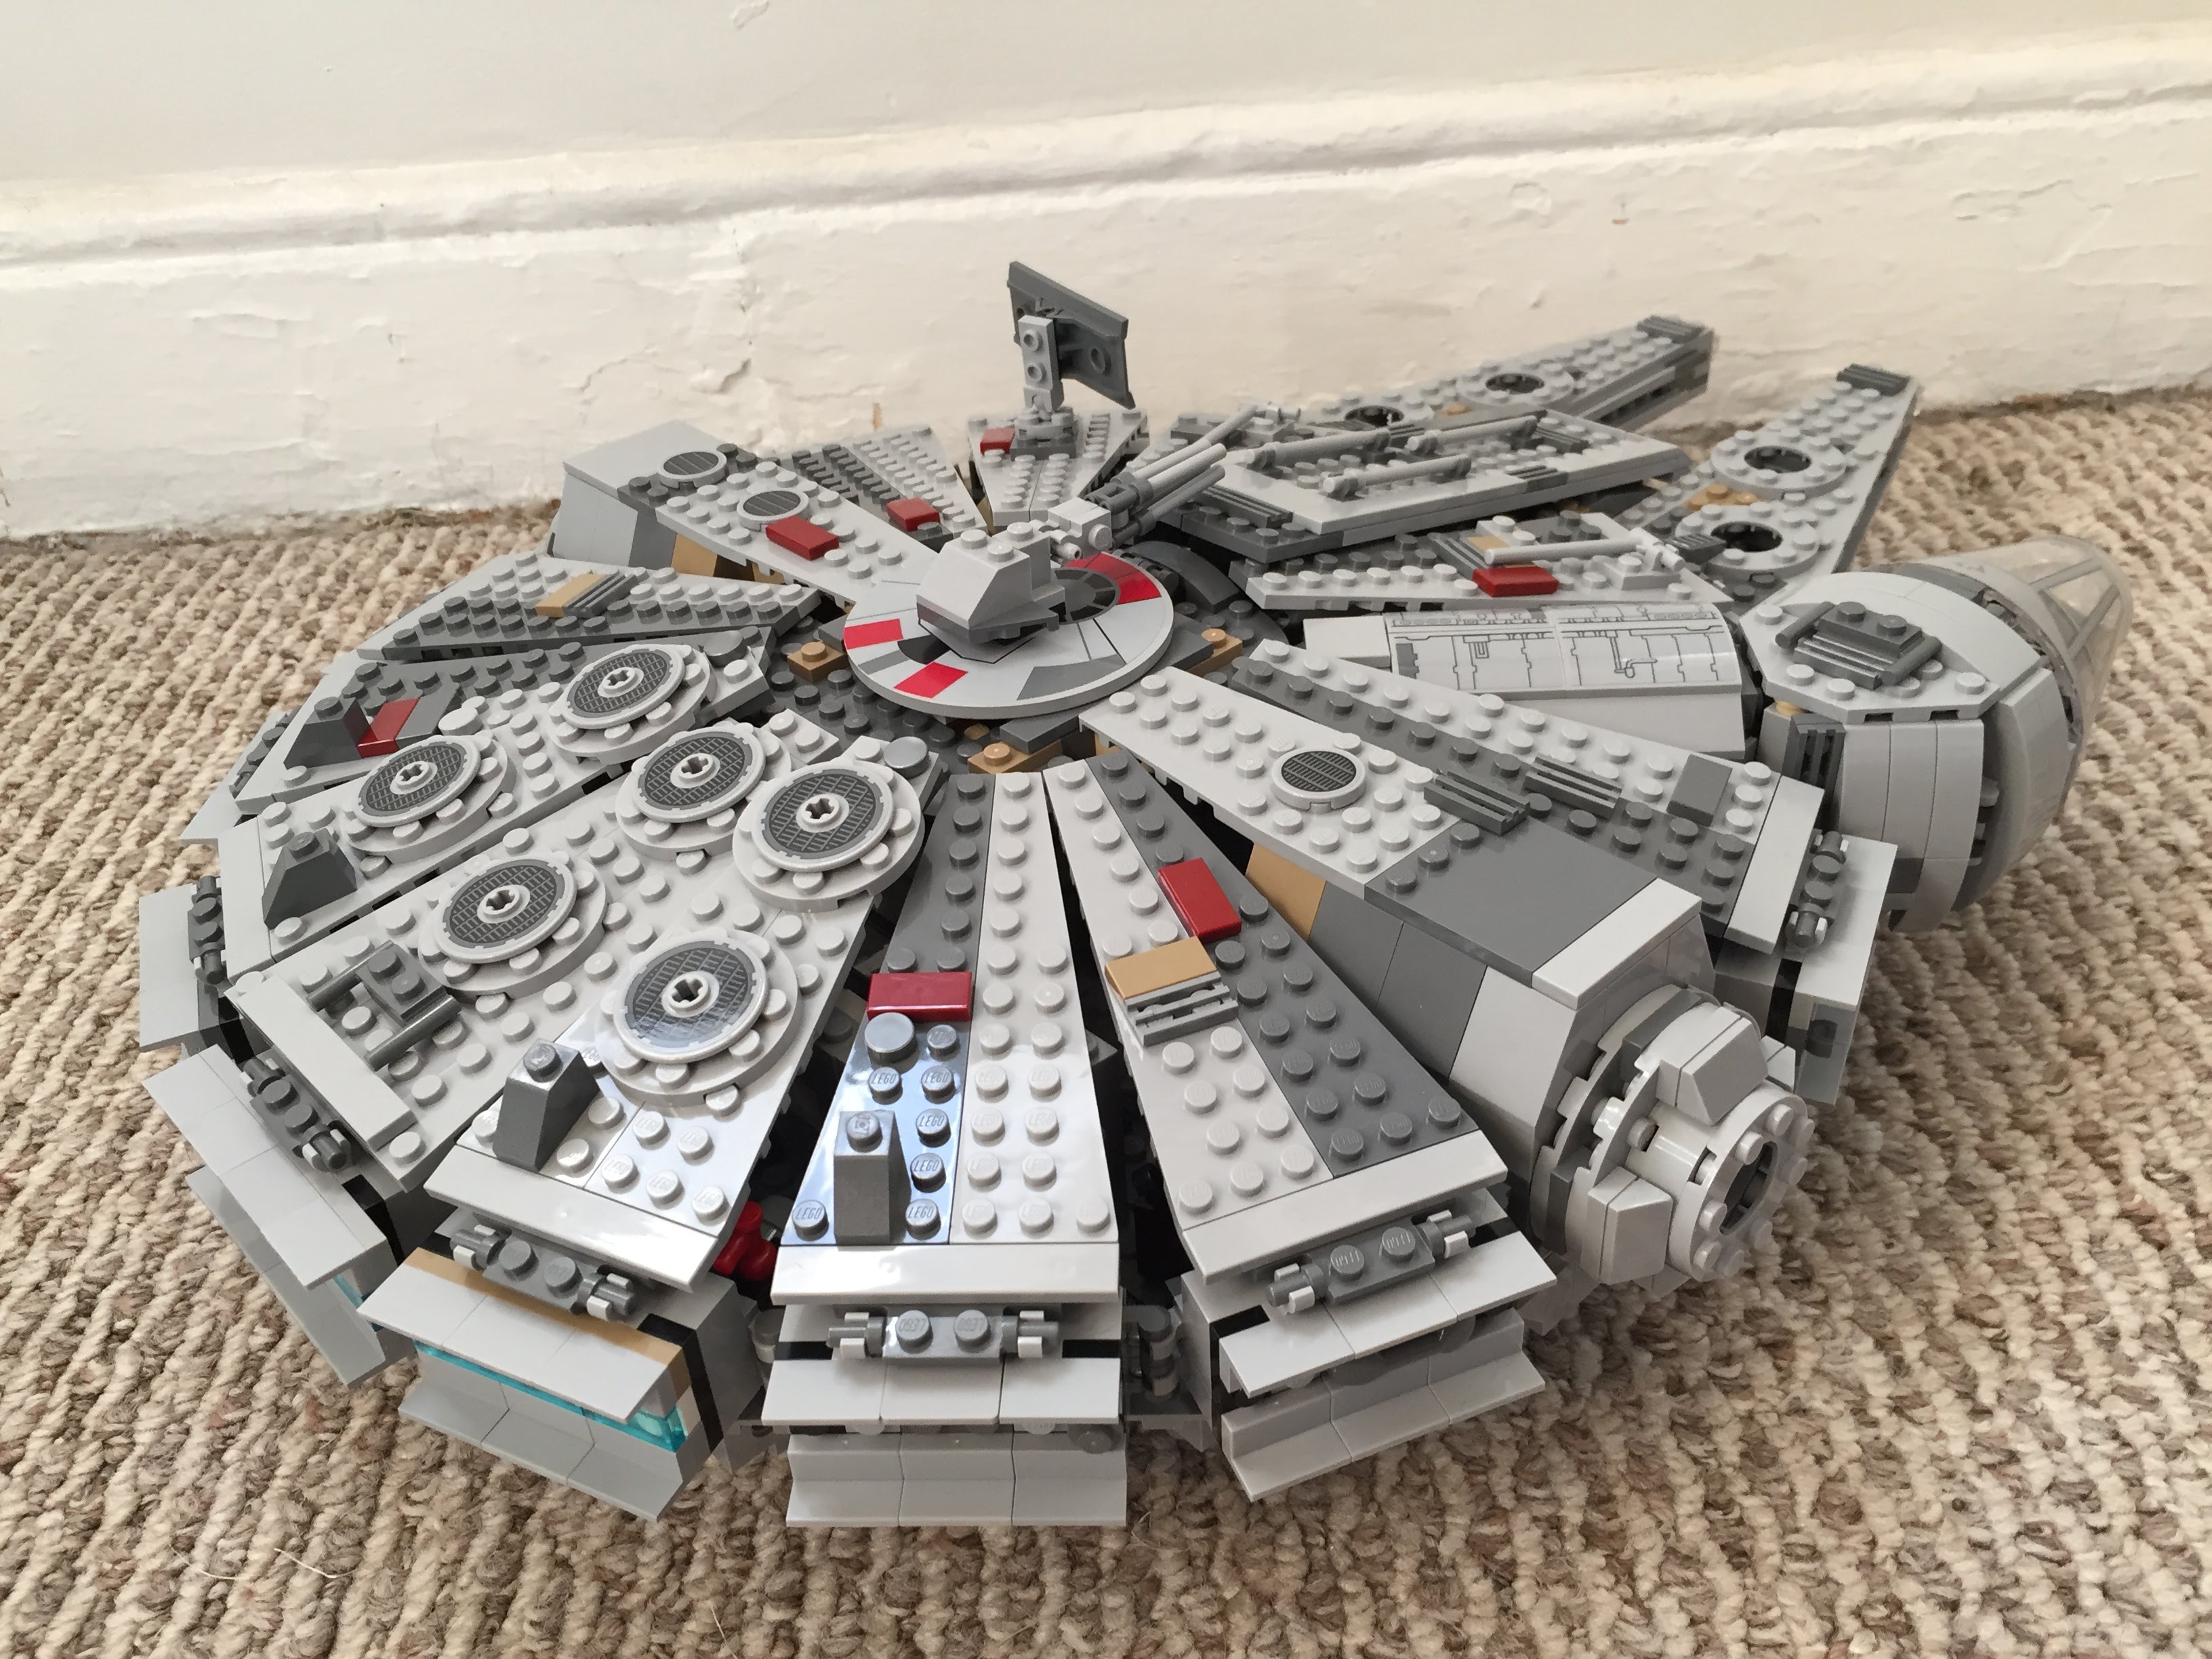
I’ve documented several of my LEGO Millennium Falcon MOCs and mods here (Last Jedi update), here (Force Awakens), here (Midi-Scale display), and here (7190 remodel). This time, I completely overhauled 75257 with a 4-person cockpit, detailed engine compartment, more round hallways, landing gear details, and a SNOT lower mandible slope with opening for center landing gear. There are more details to be found in the photos below.
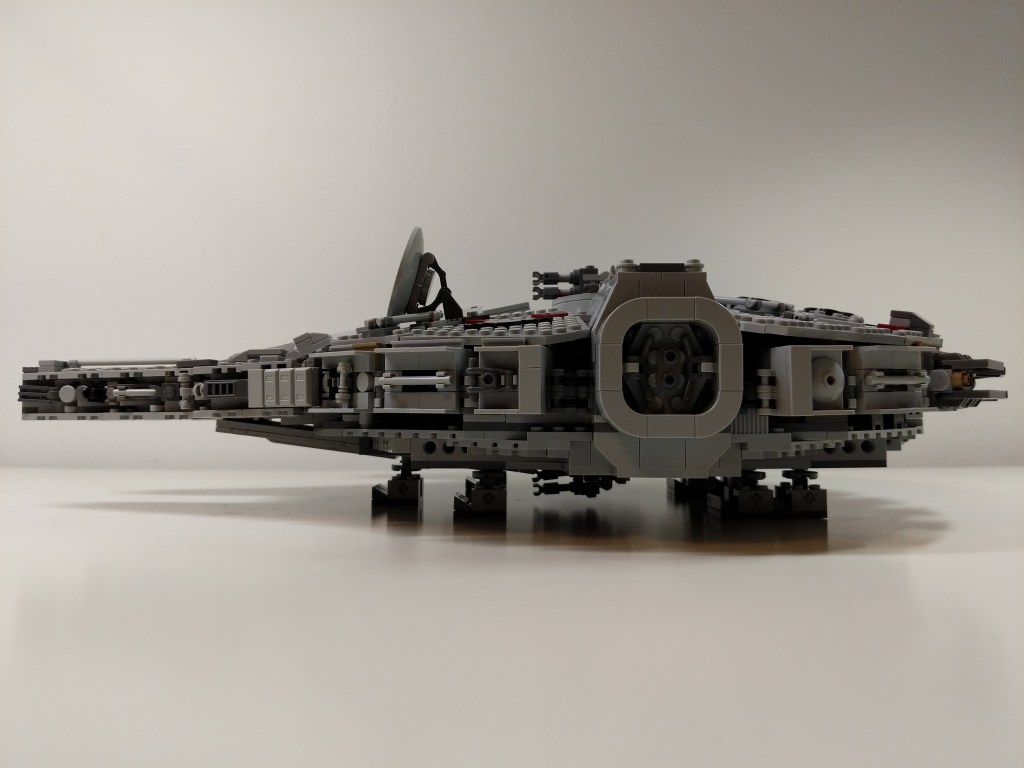
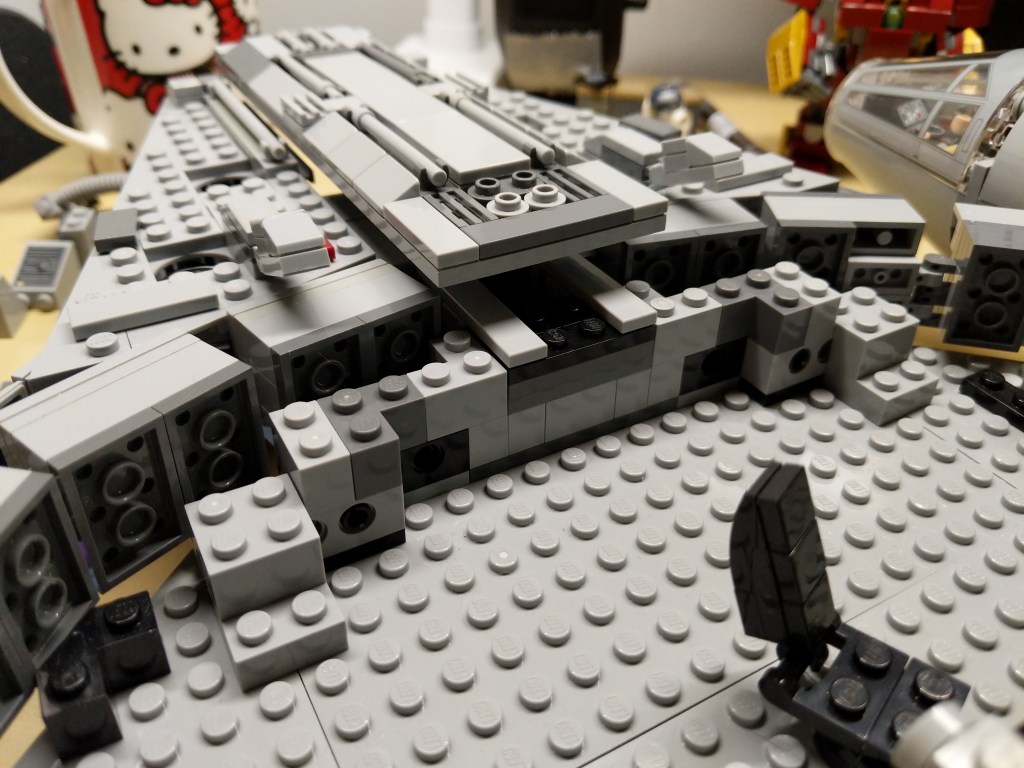
Exterior
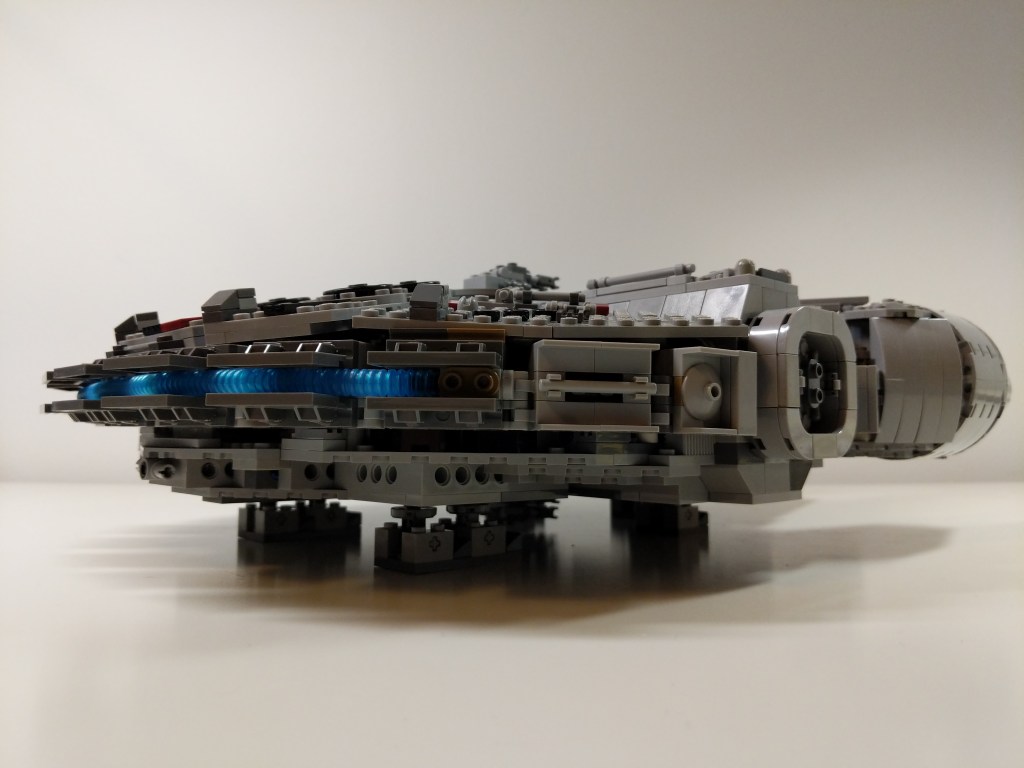
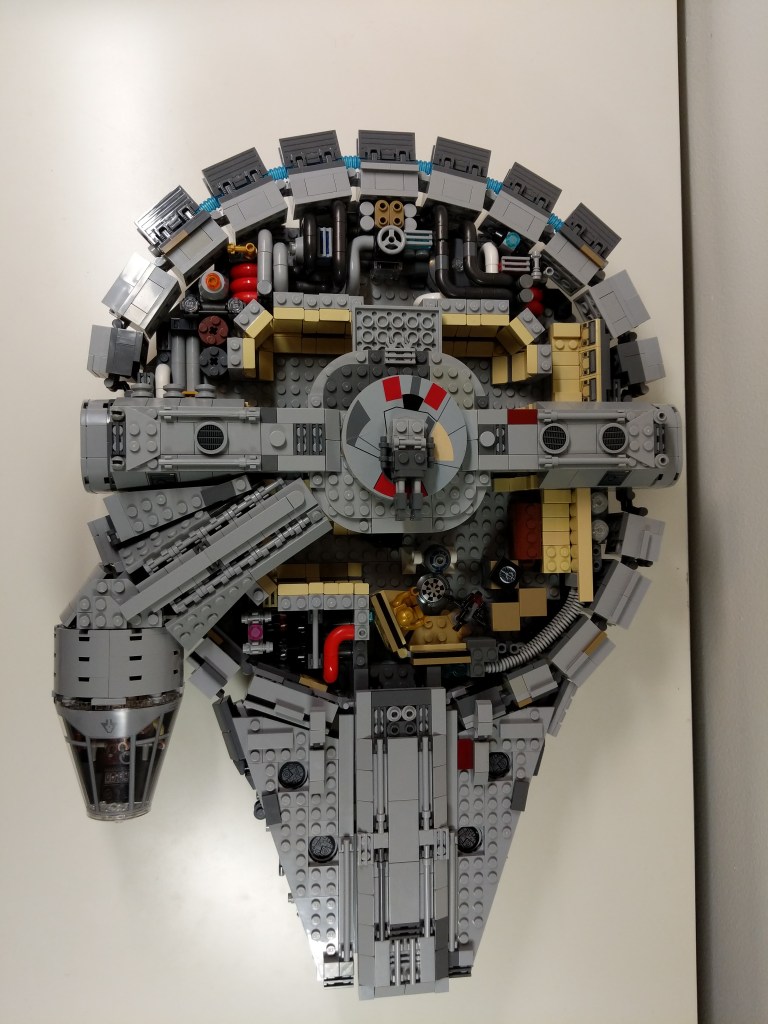
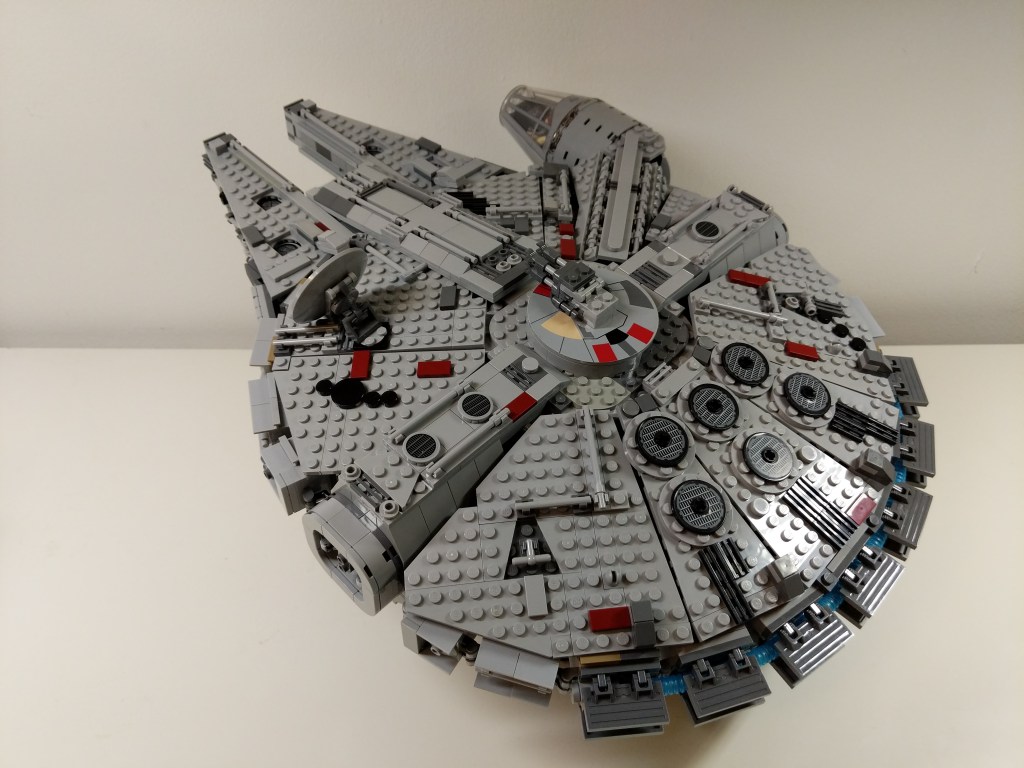
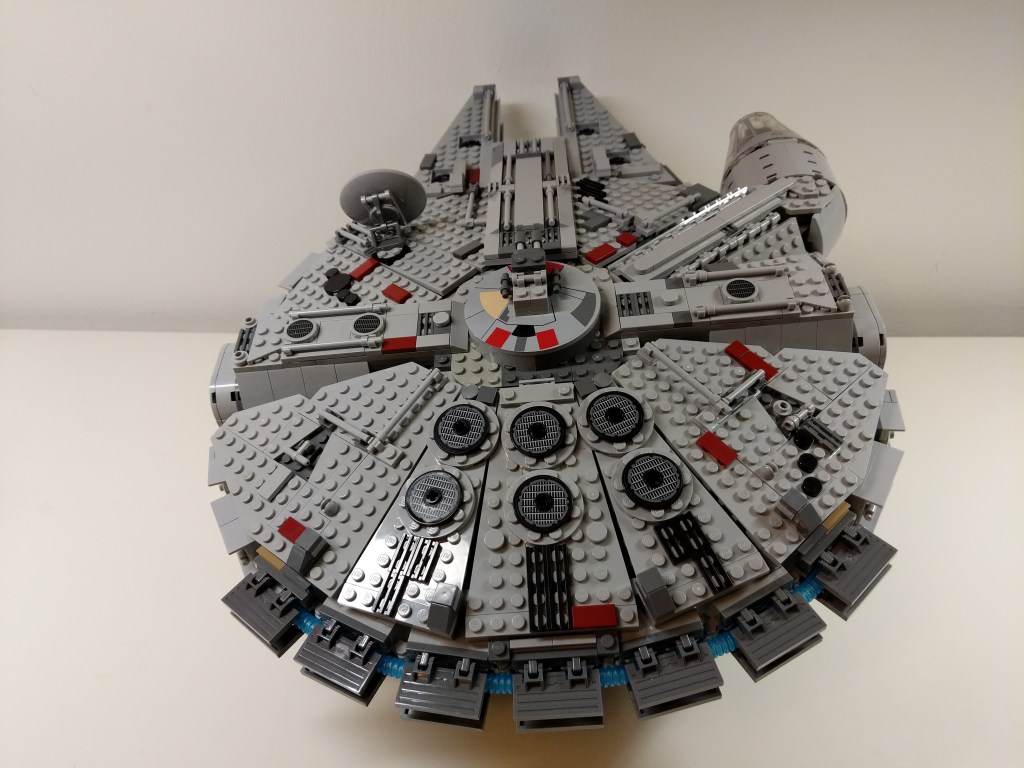
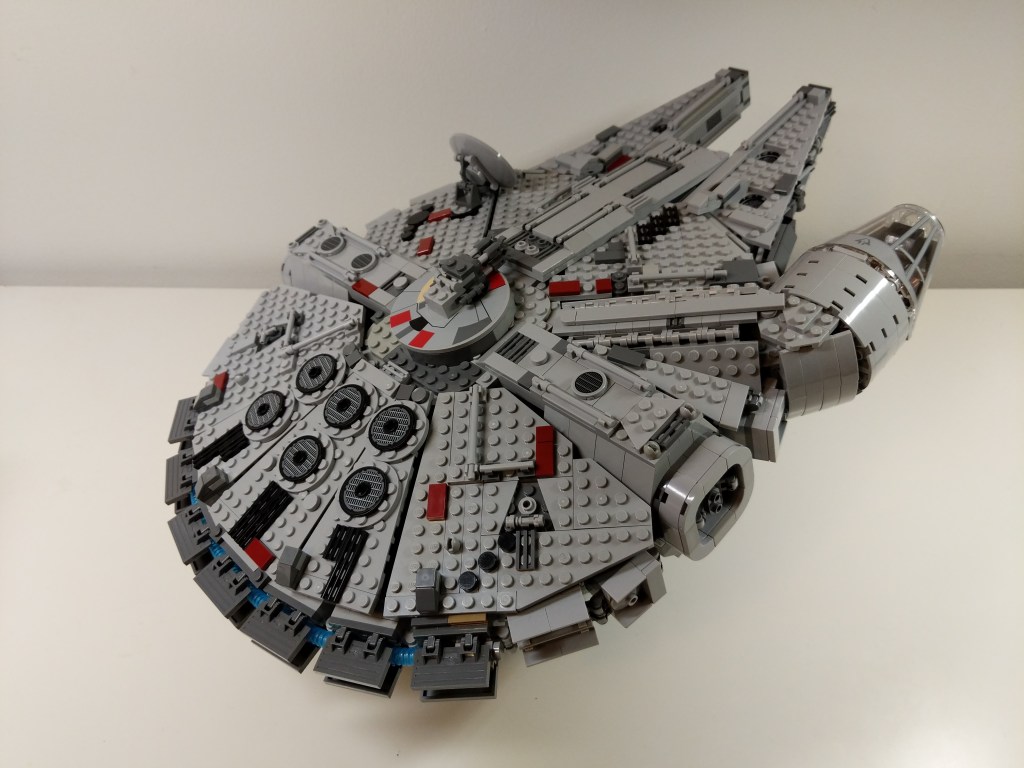
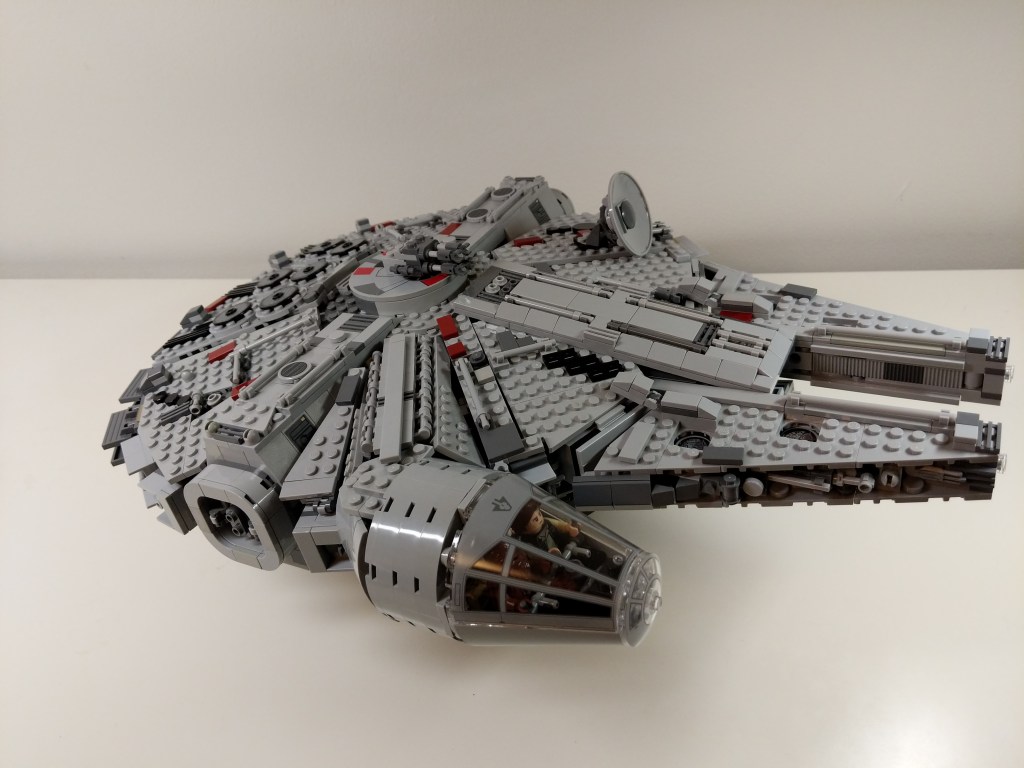
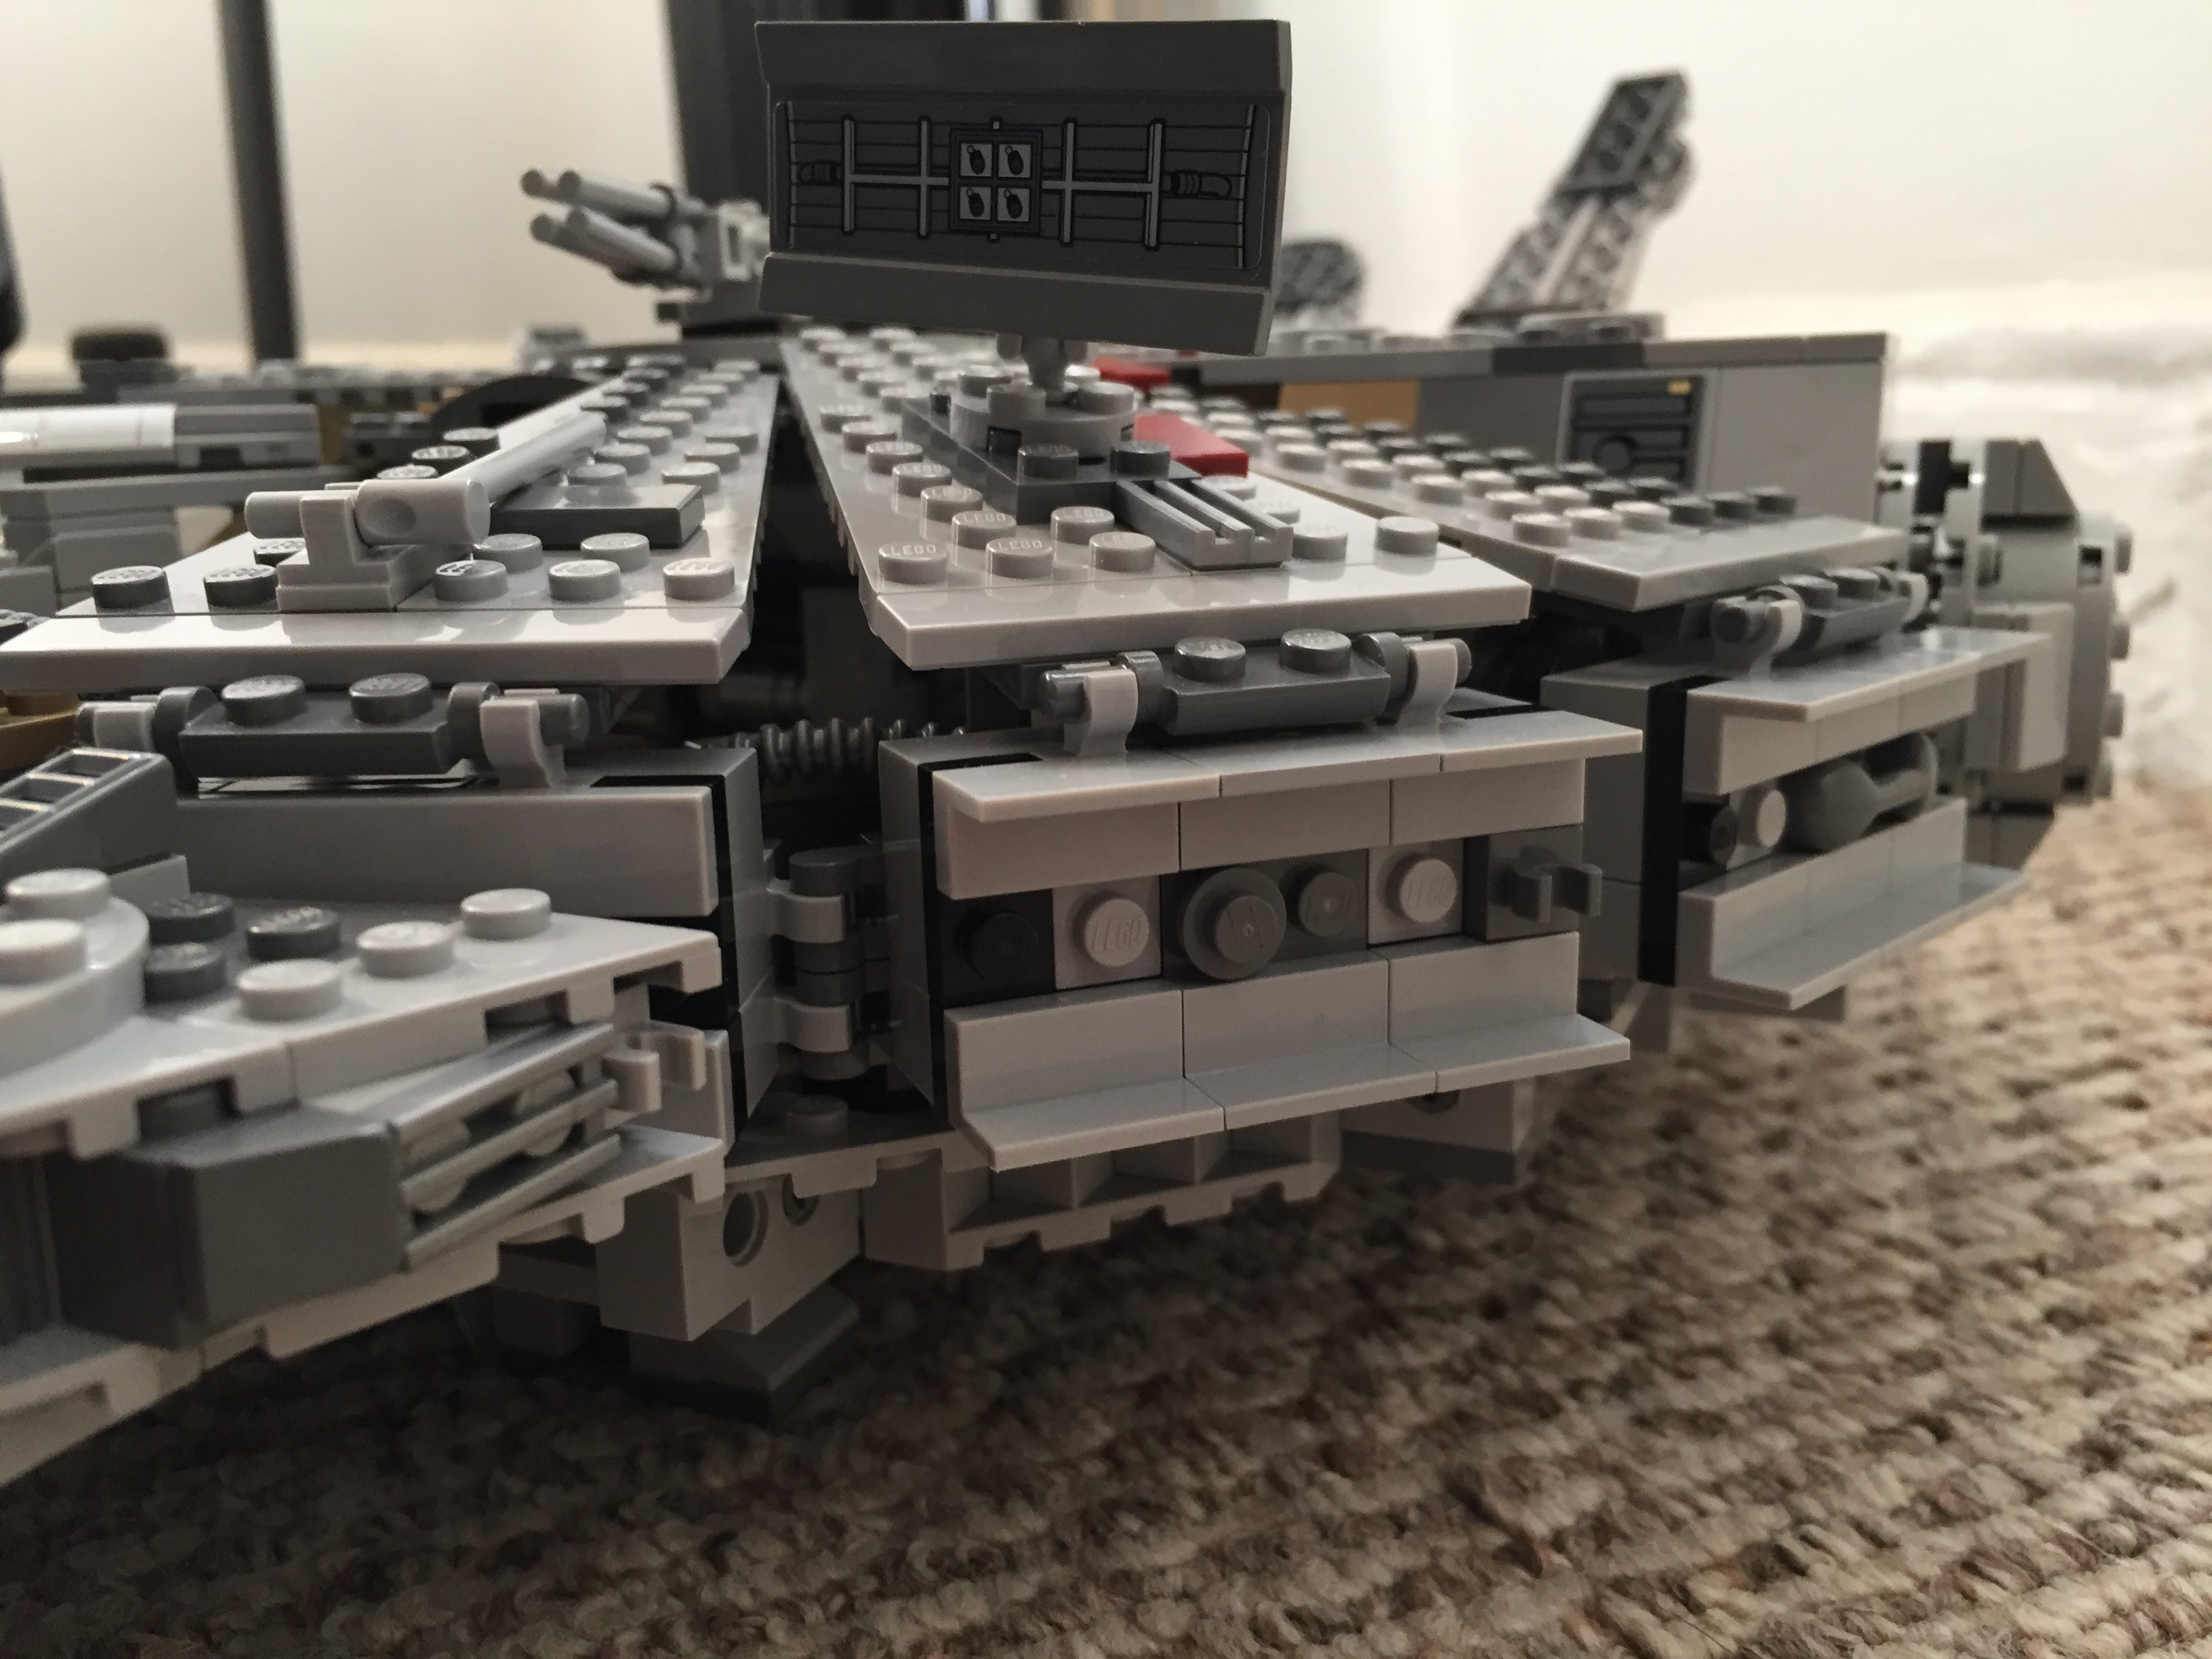
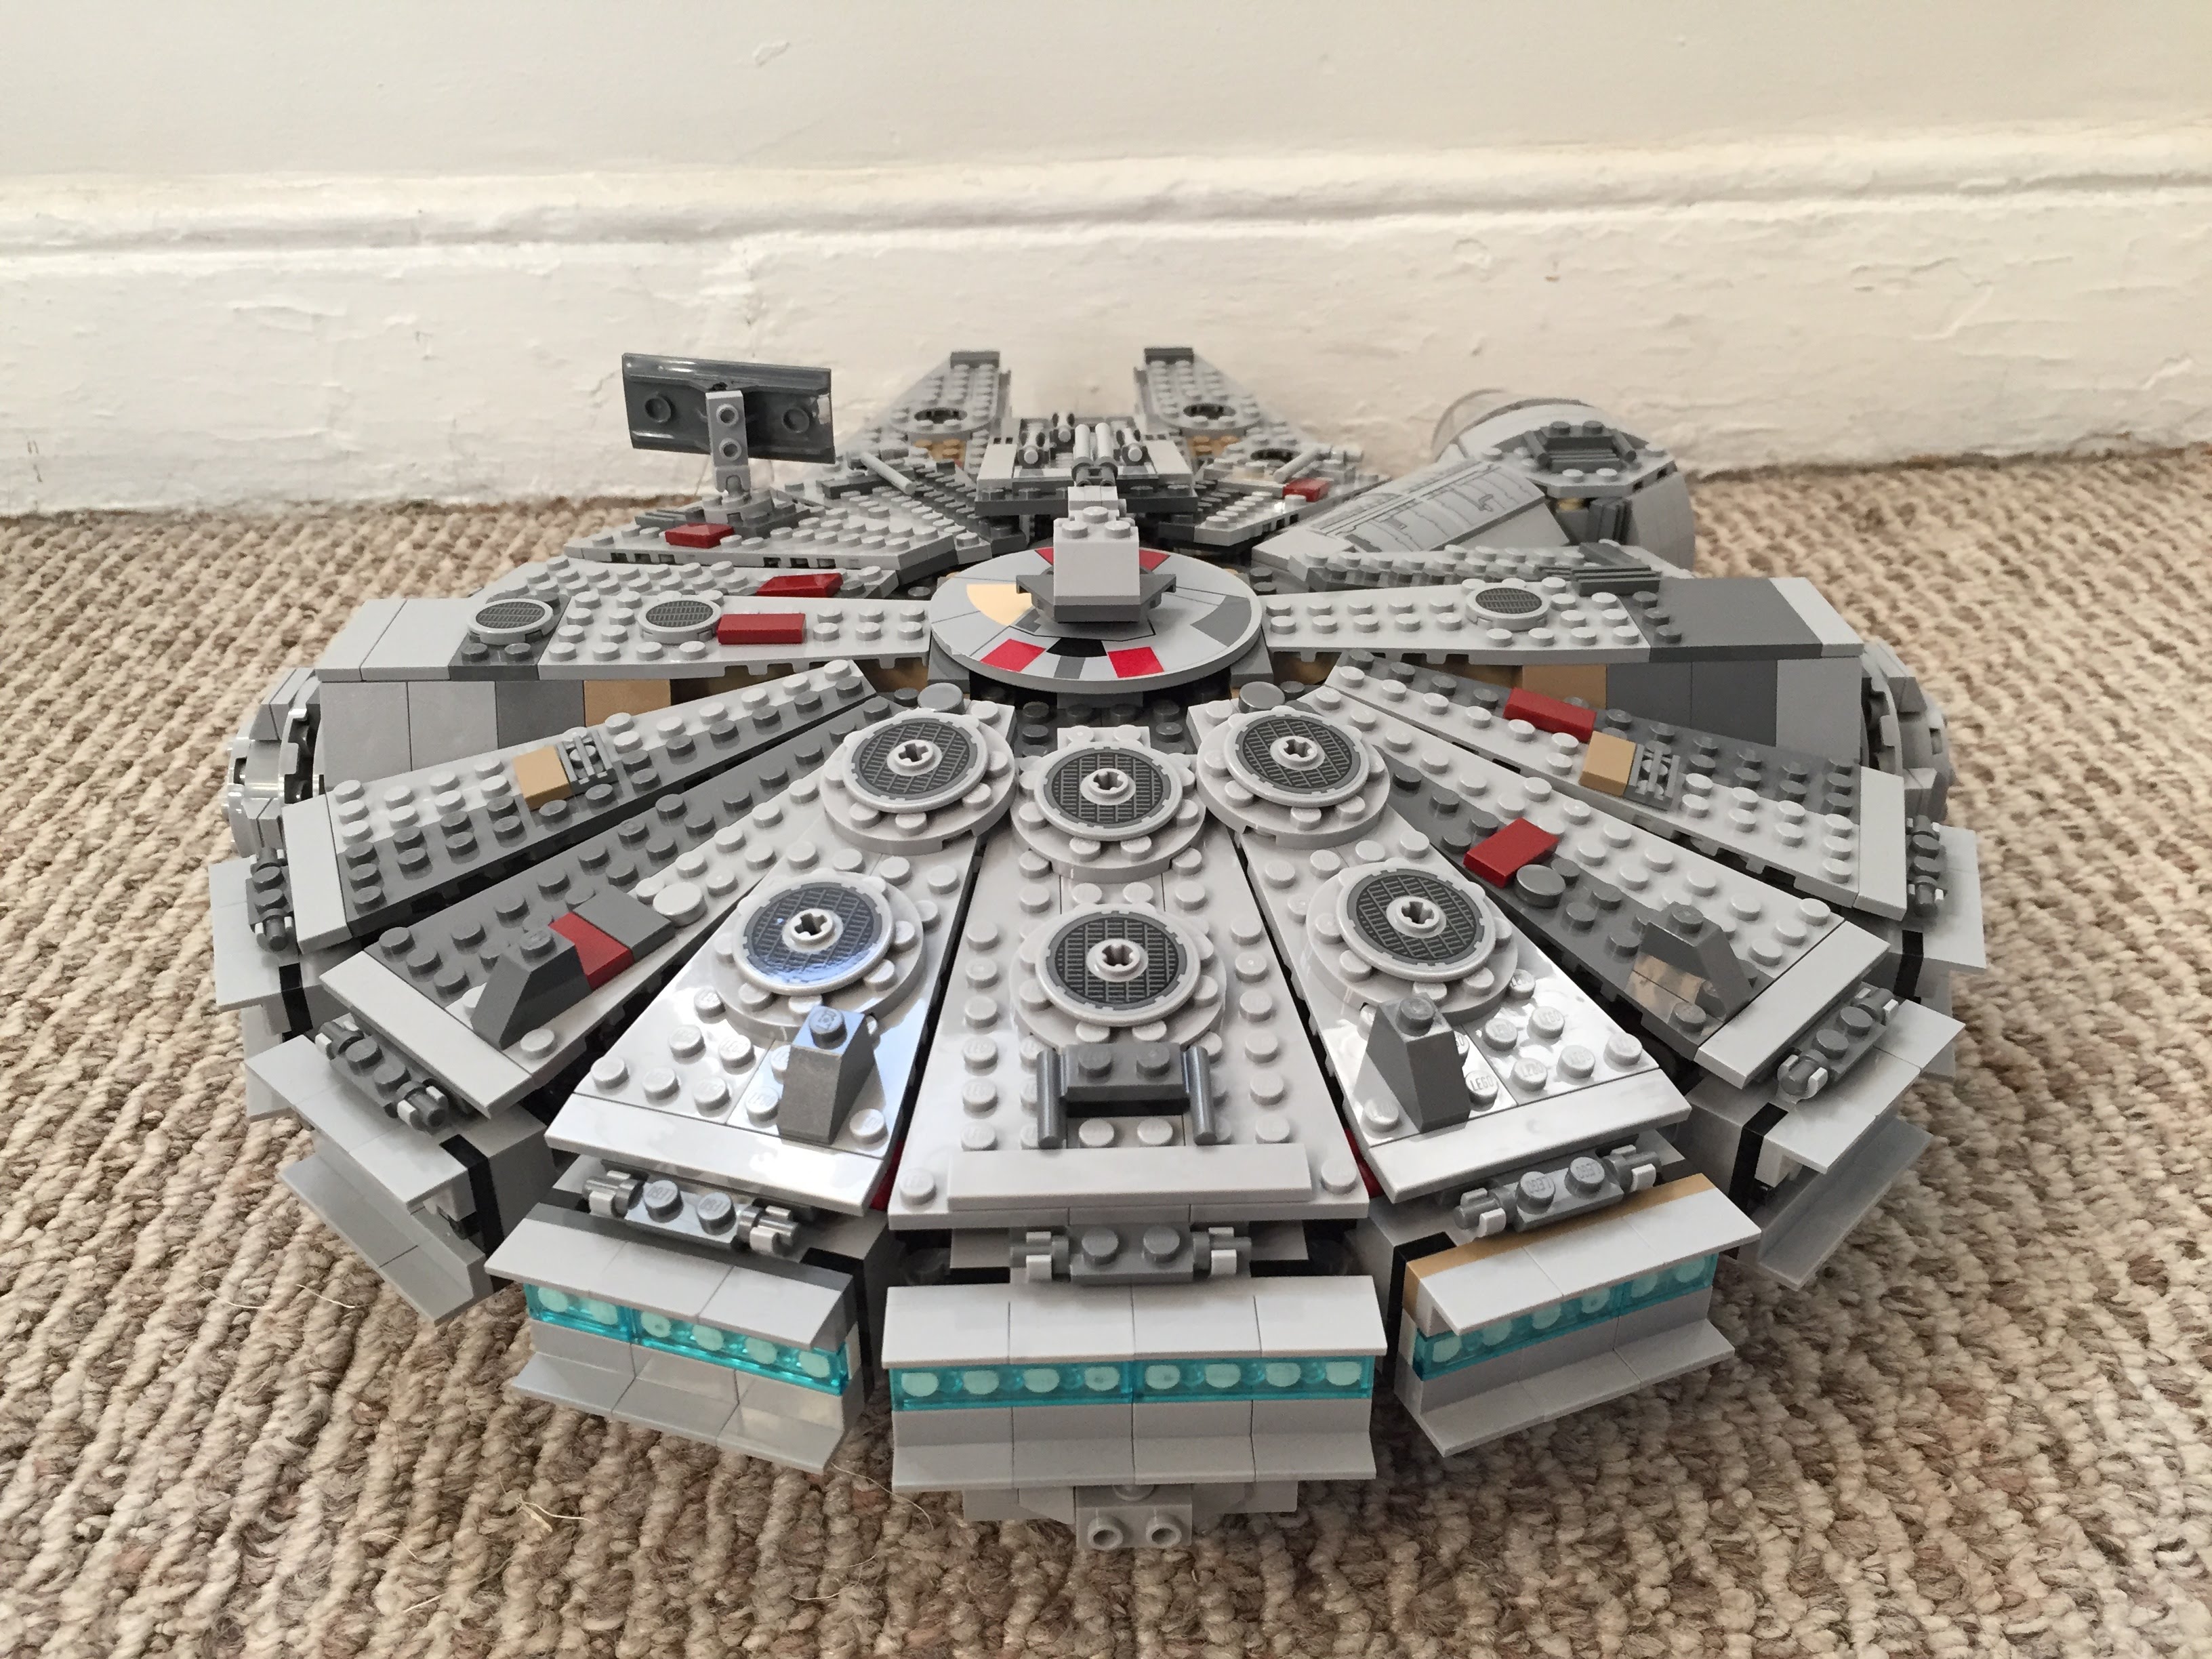
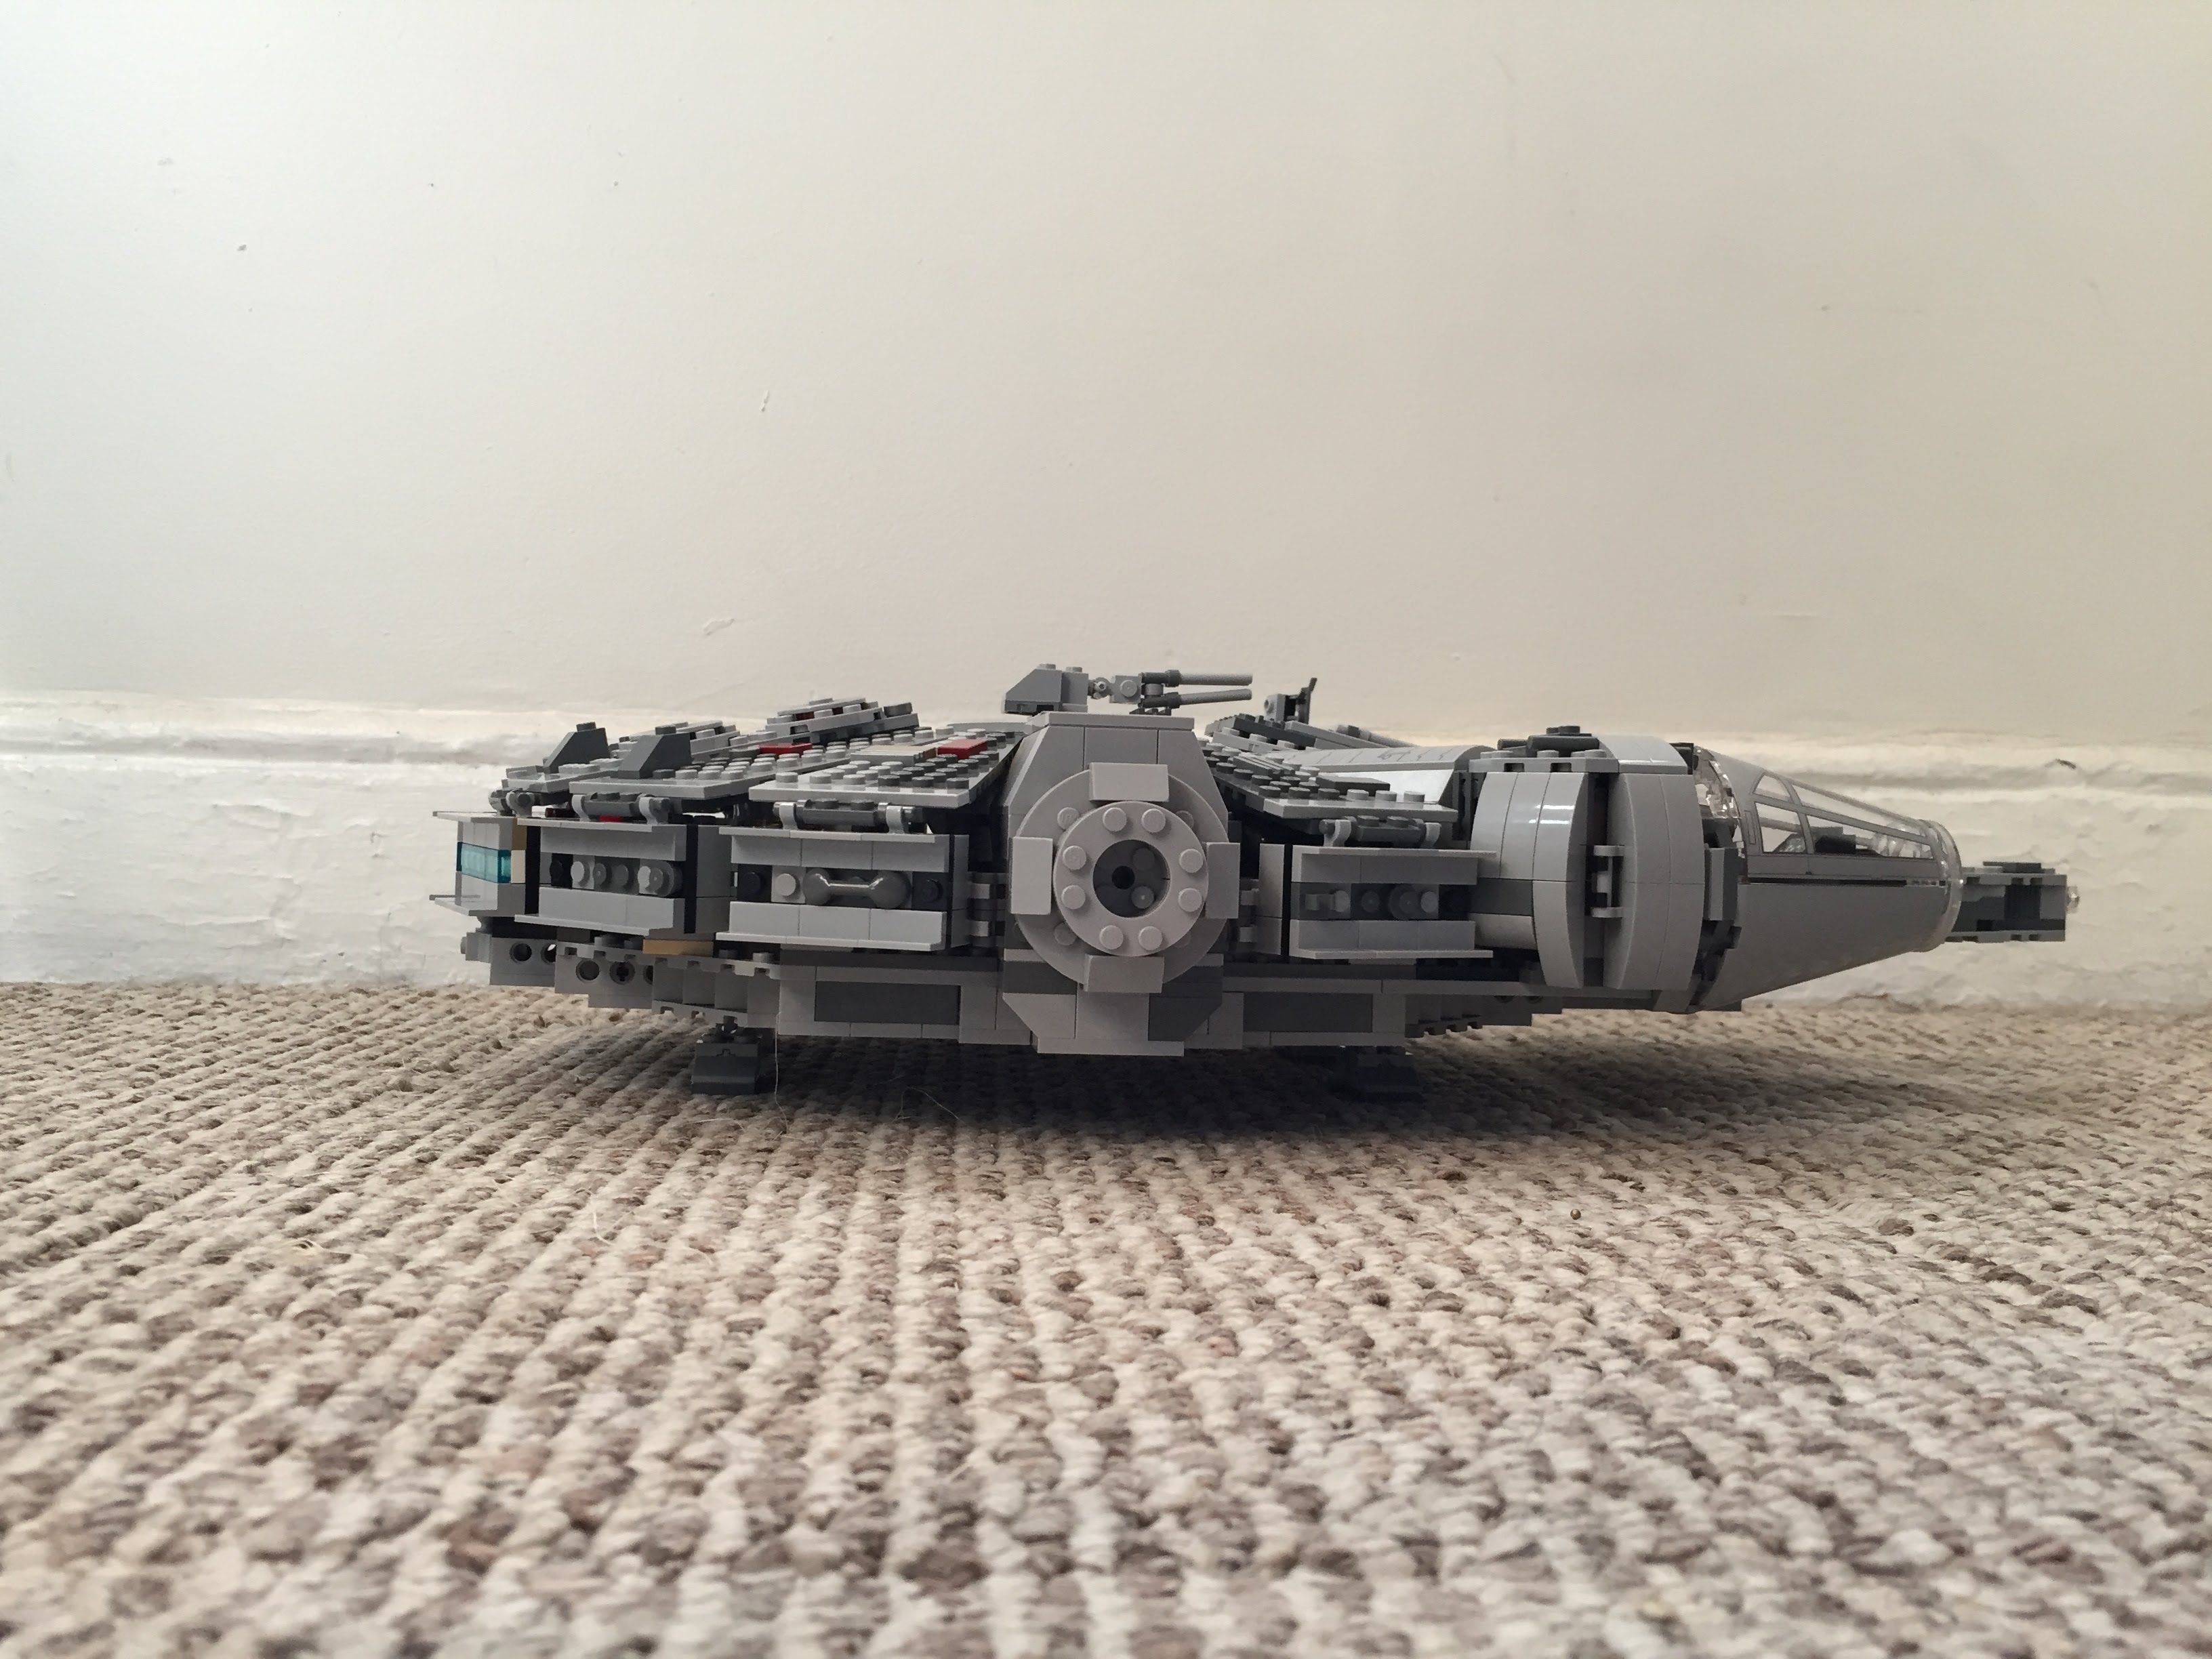
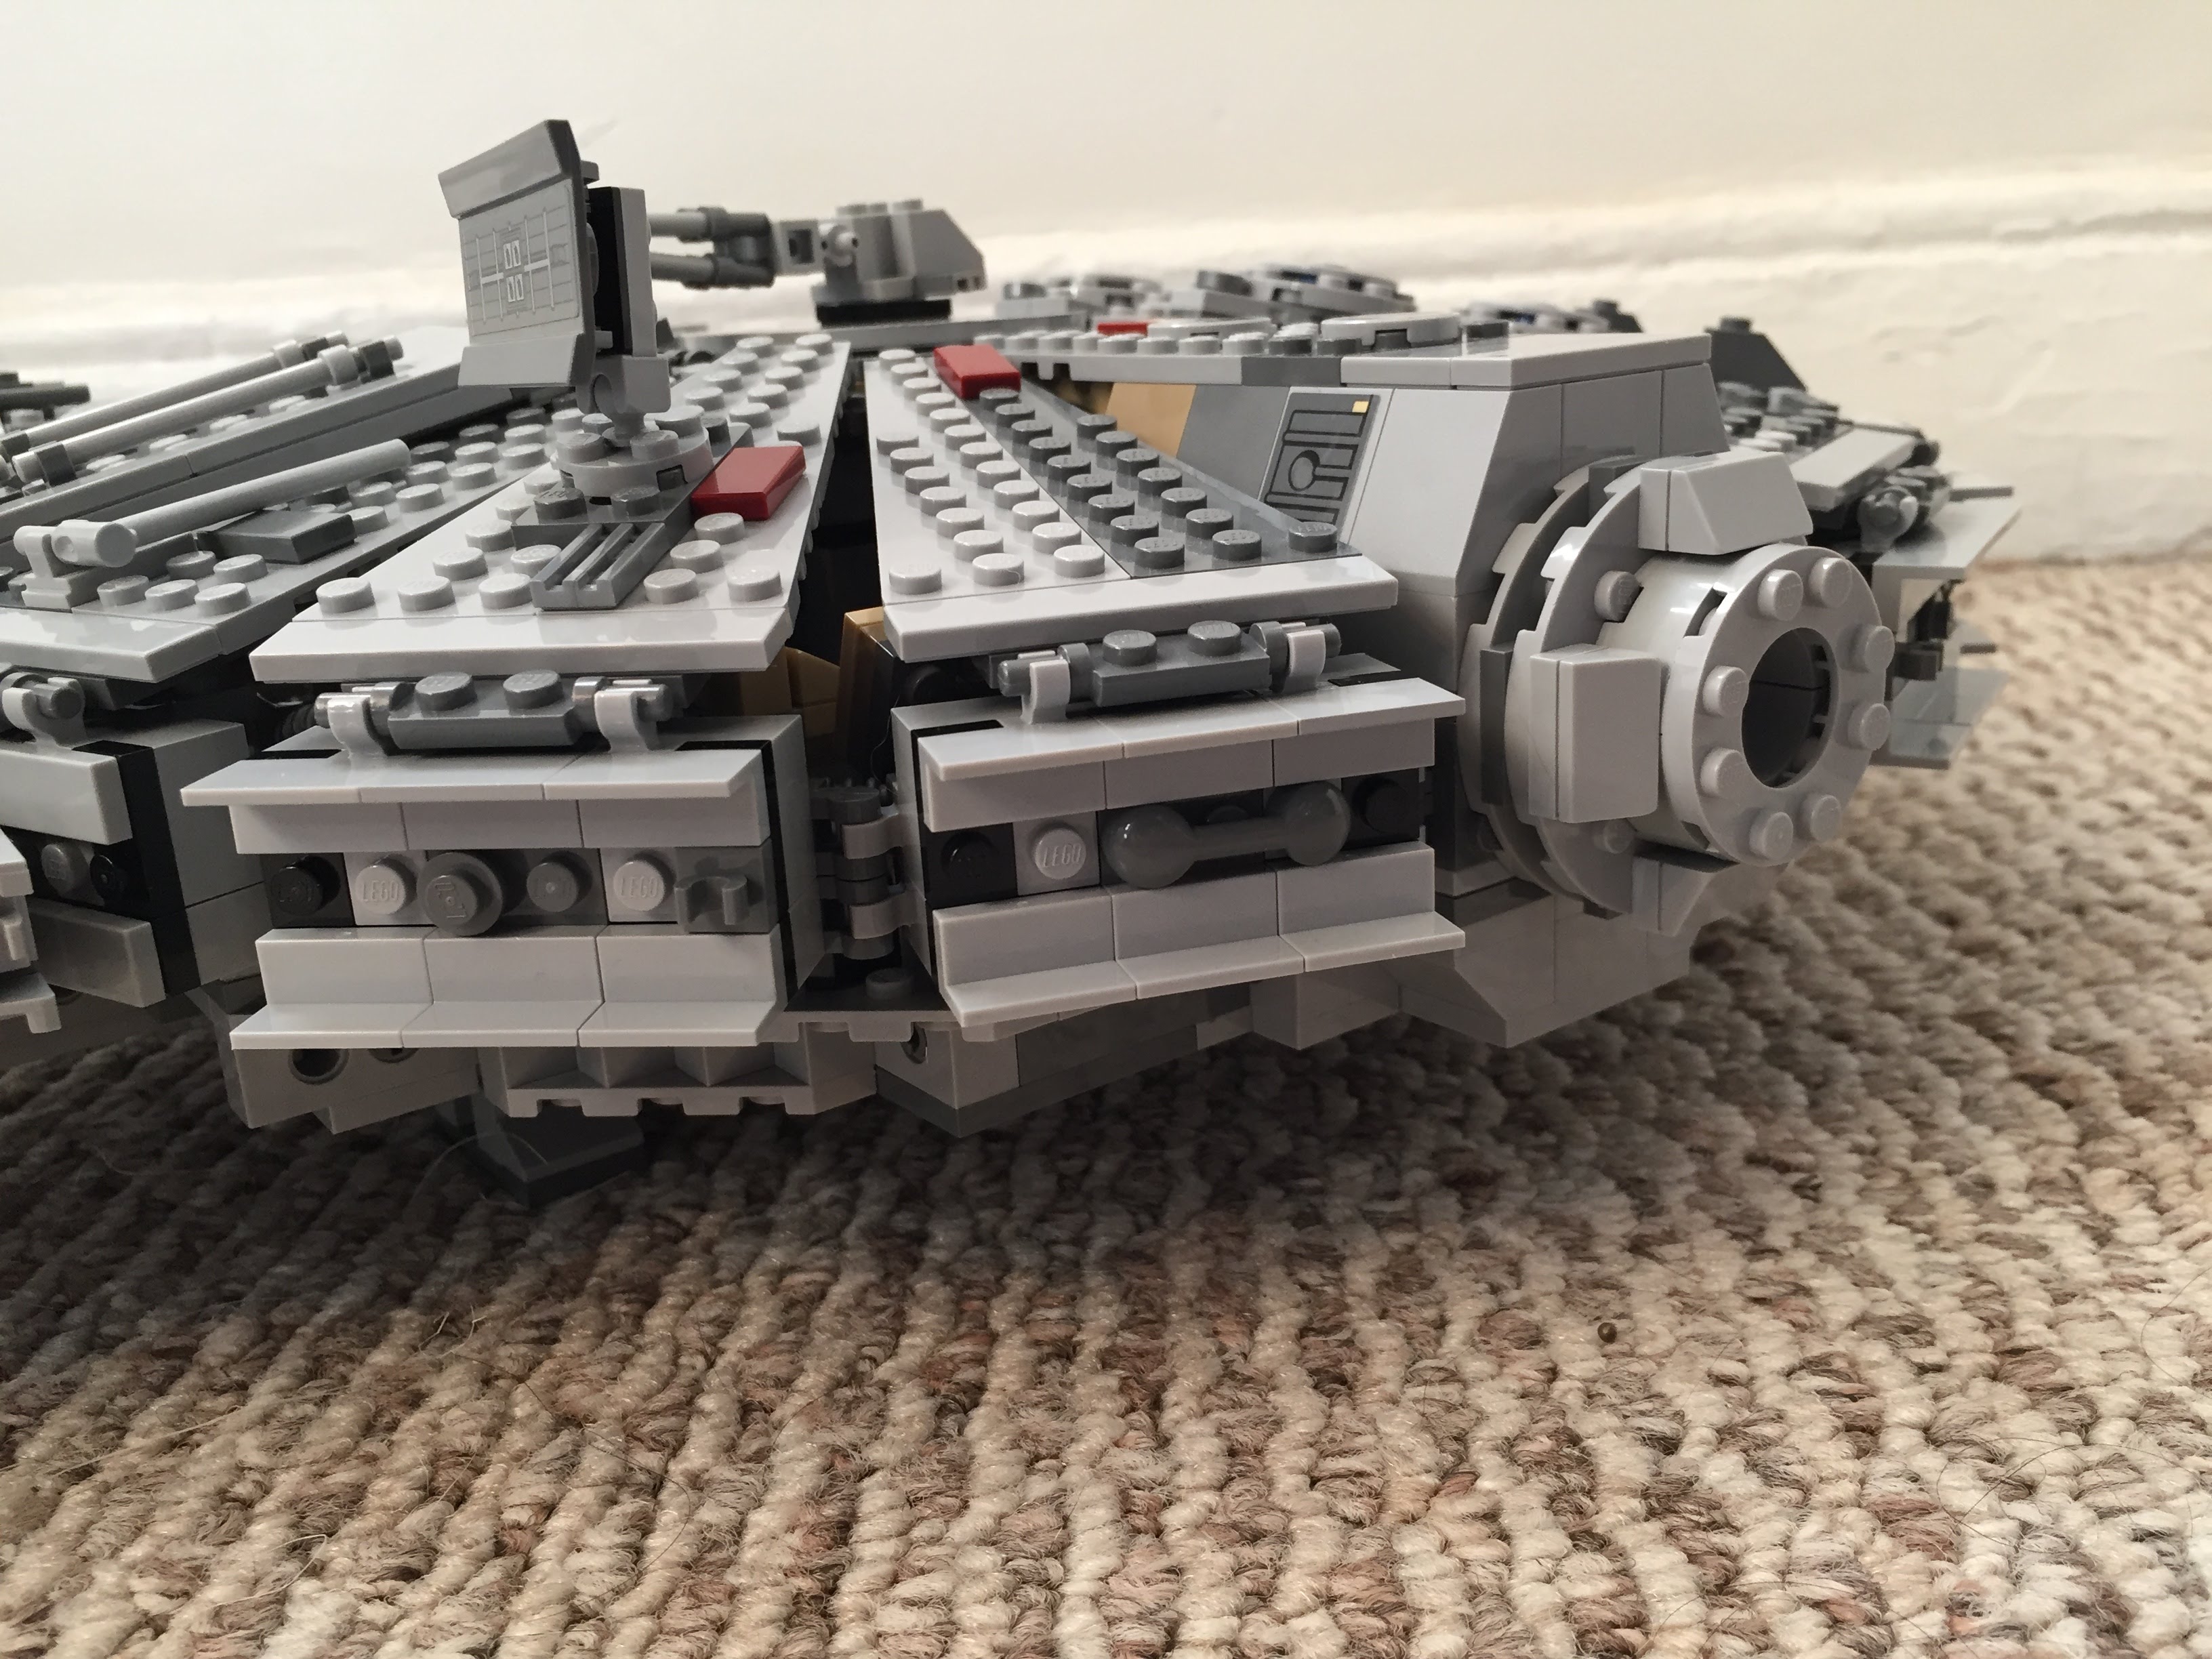
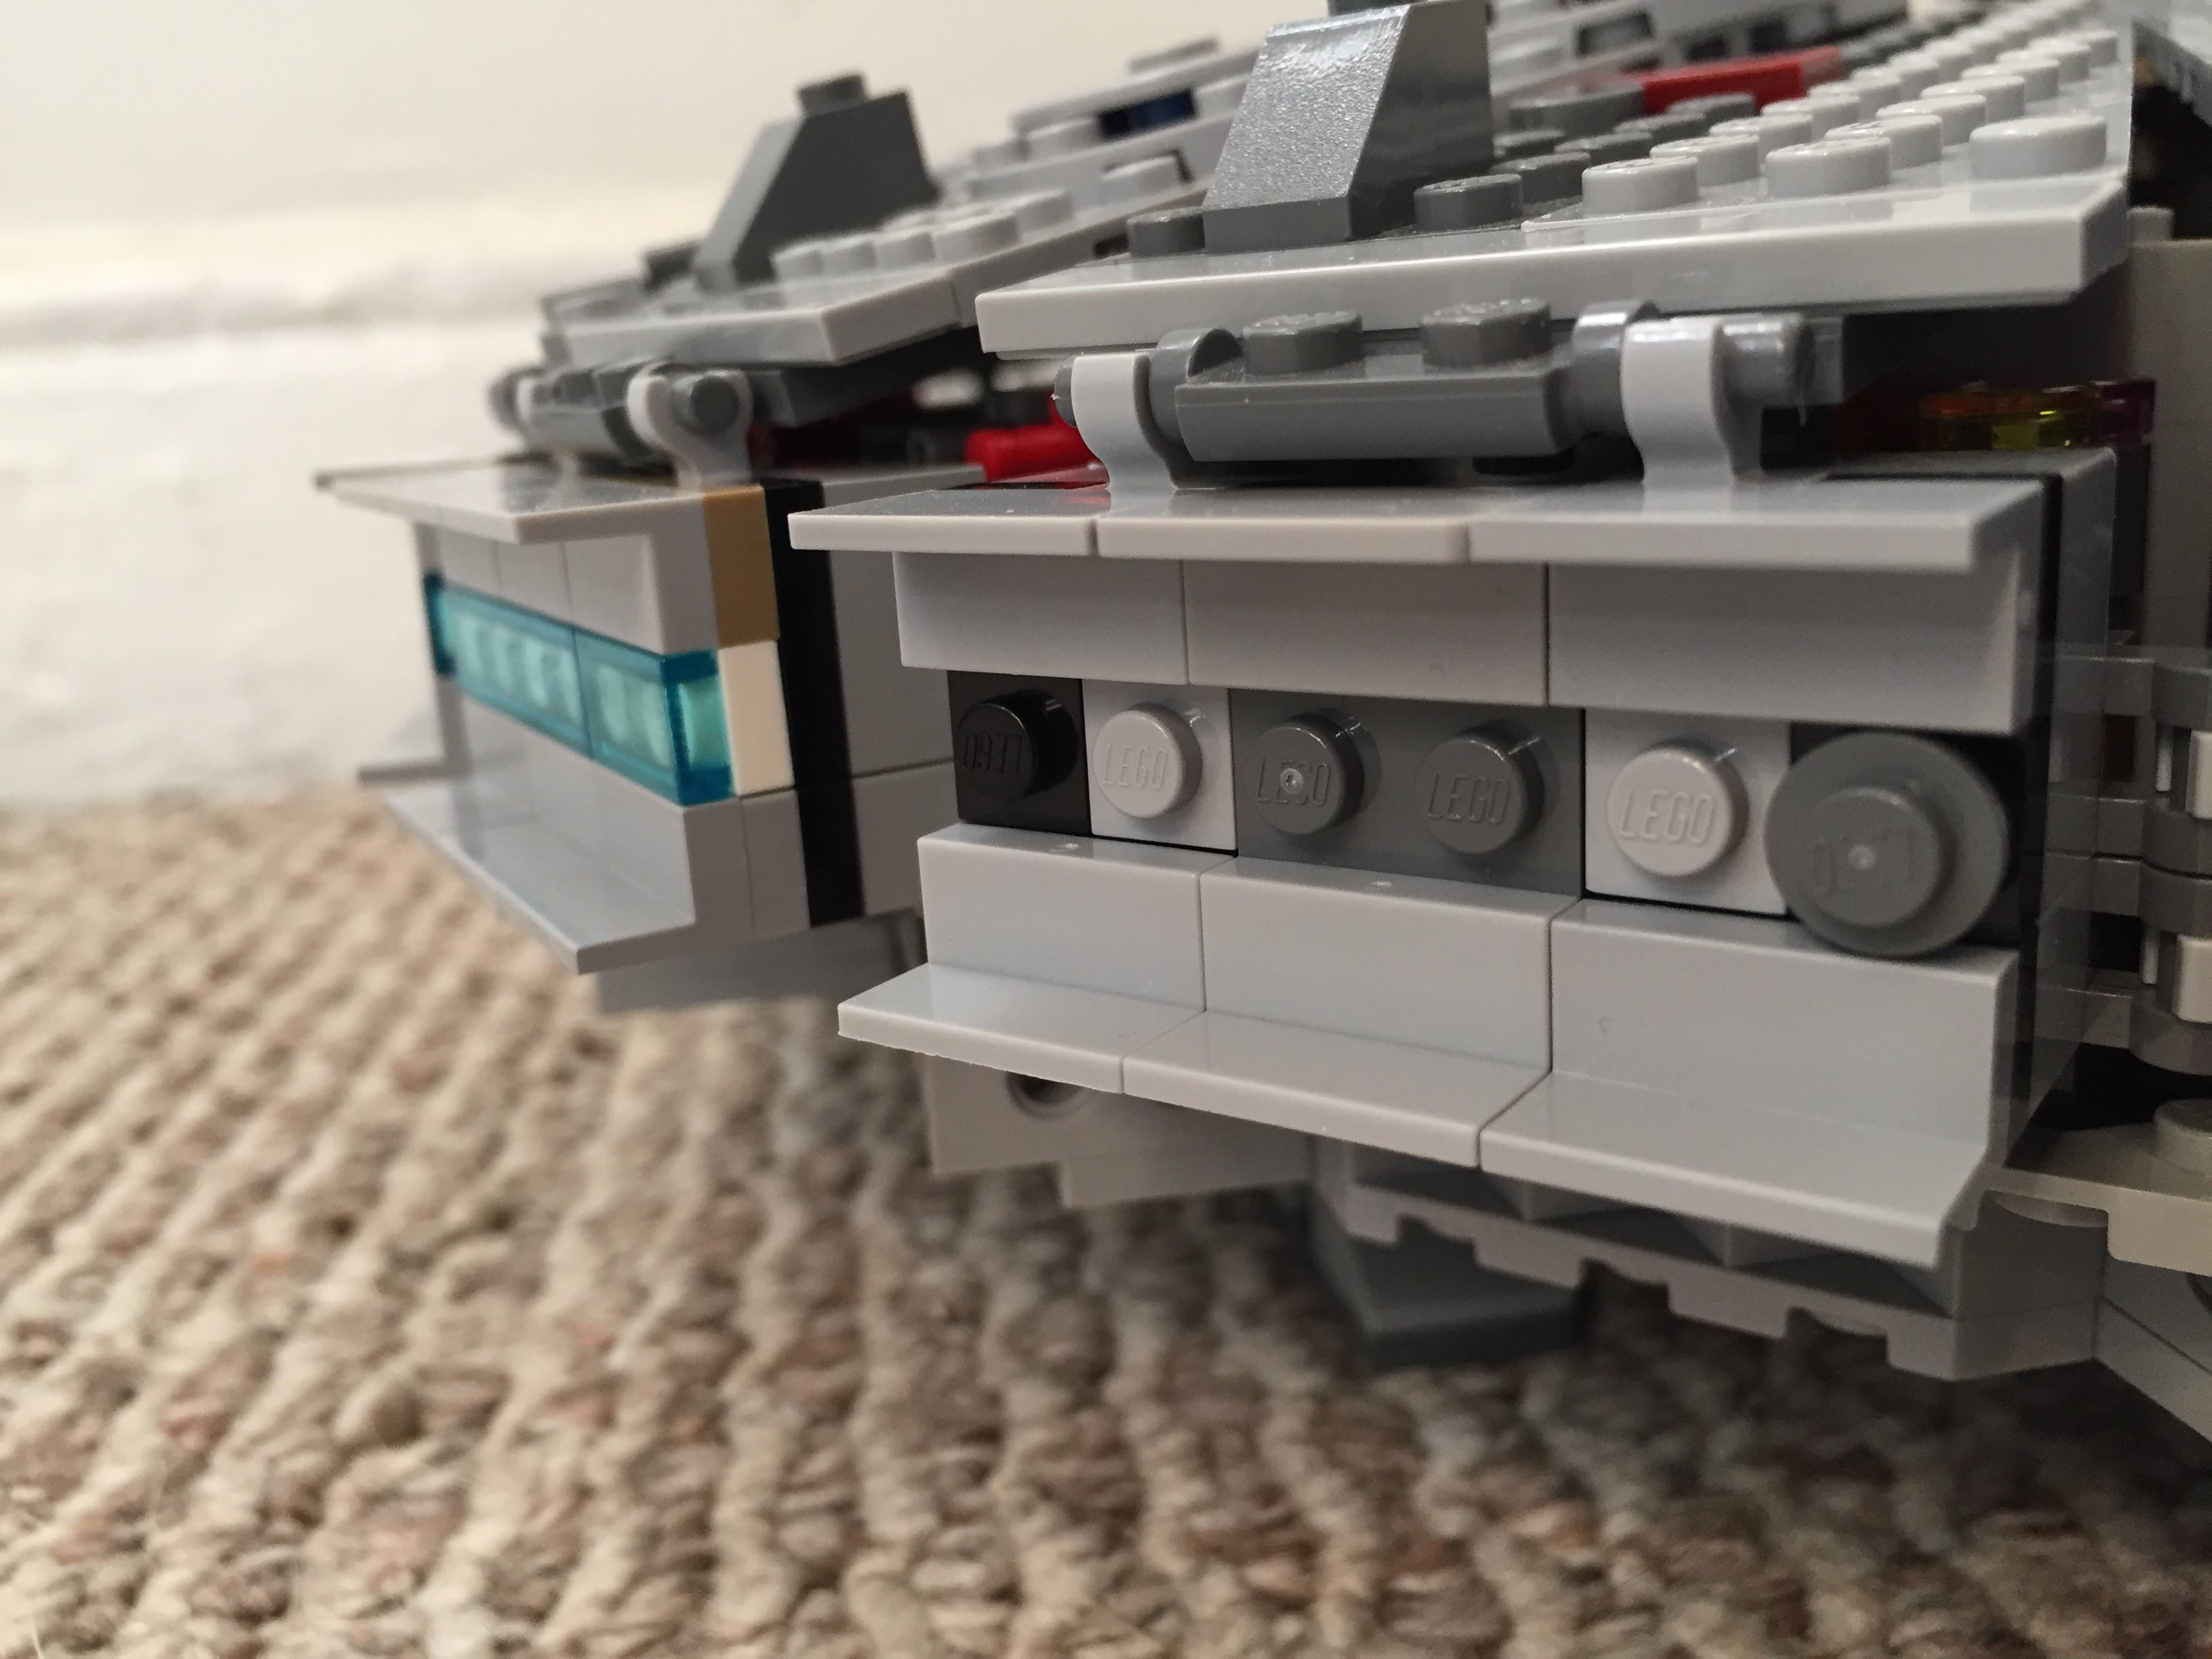
I added greebling, blast marks, and other details to make the Falcon appear as close to the cinematic model as I could giving the low fidelity and resolution of LEGO at this scale.
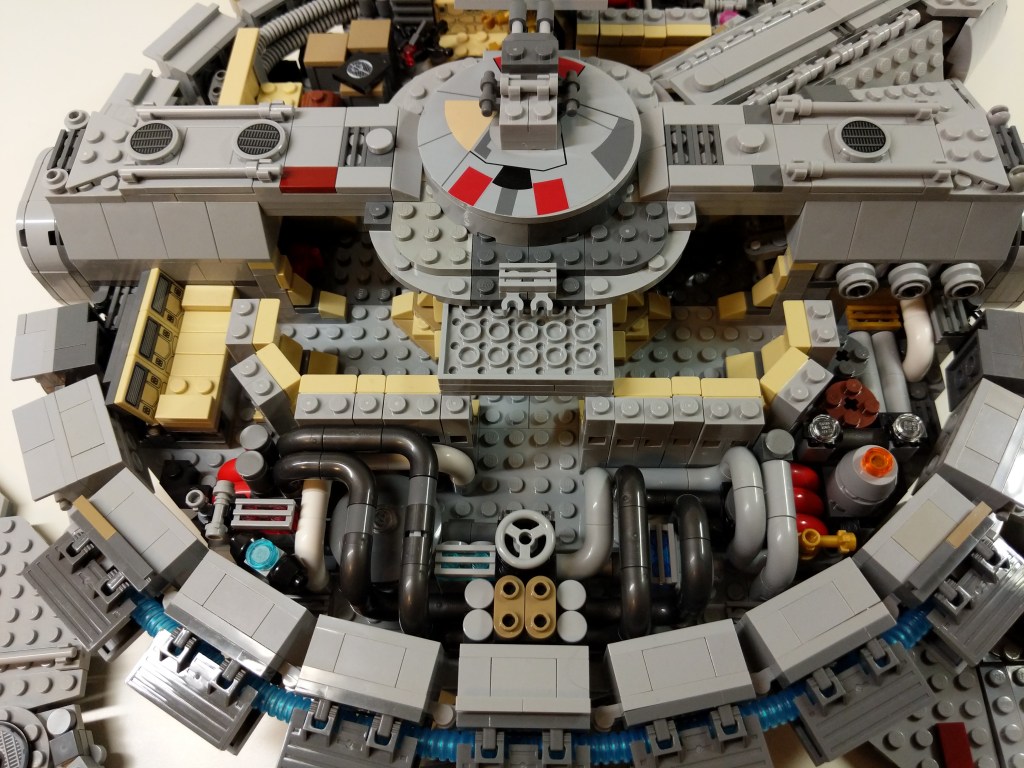
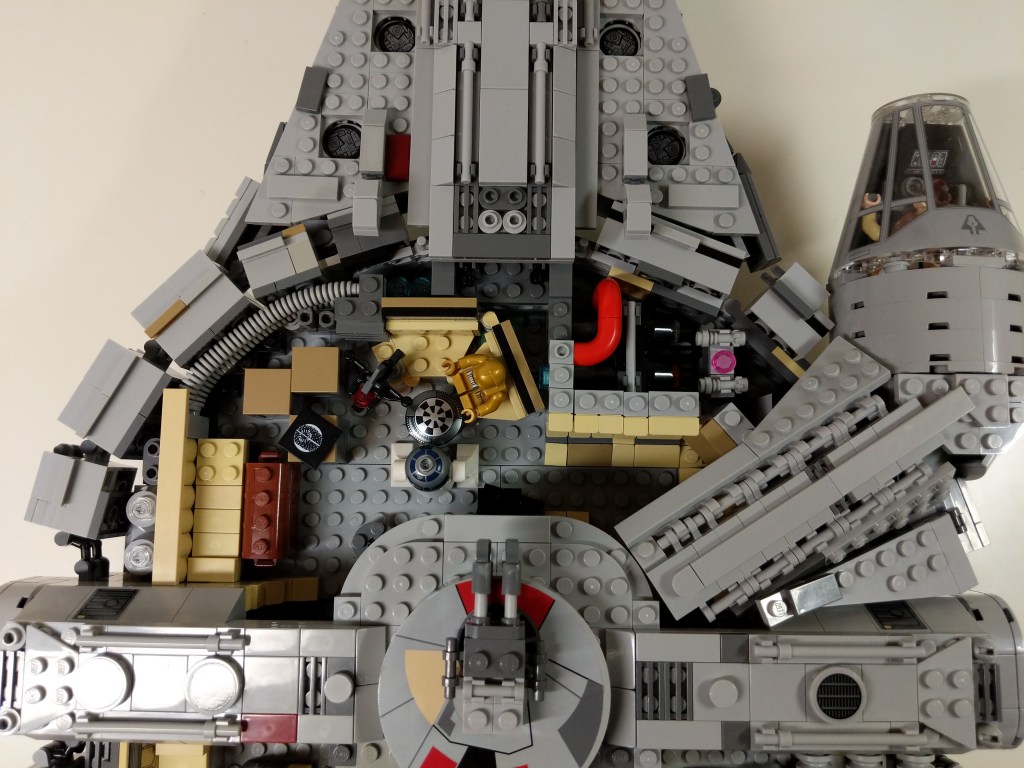
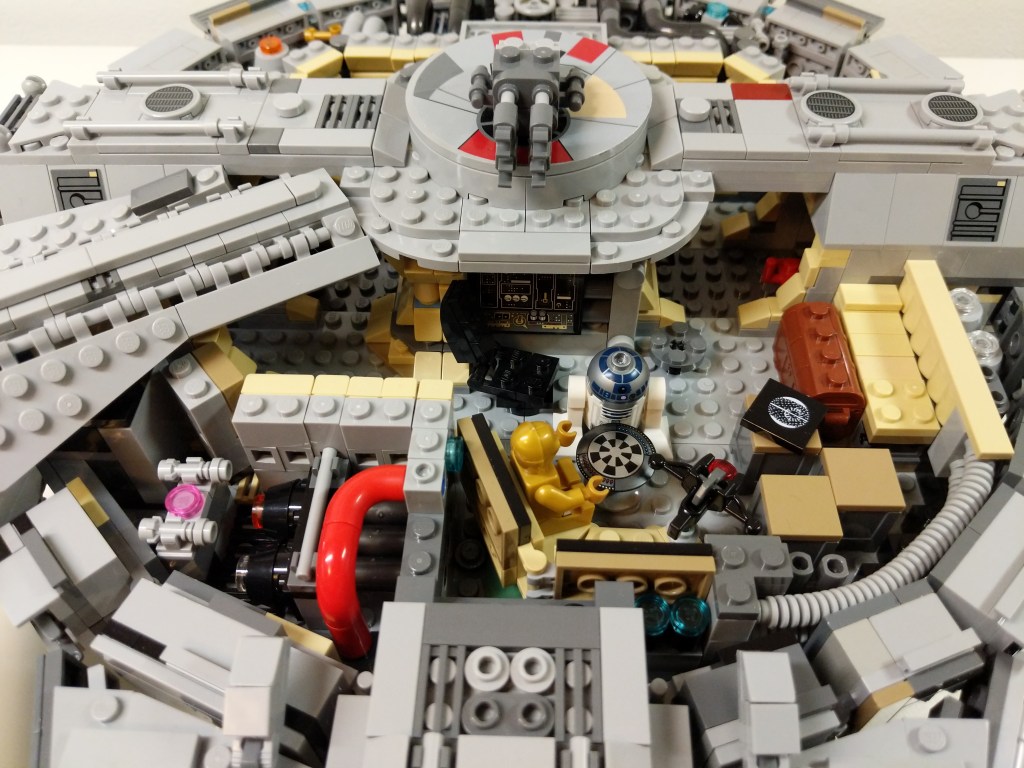
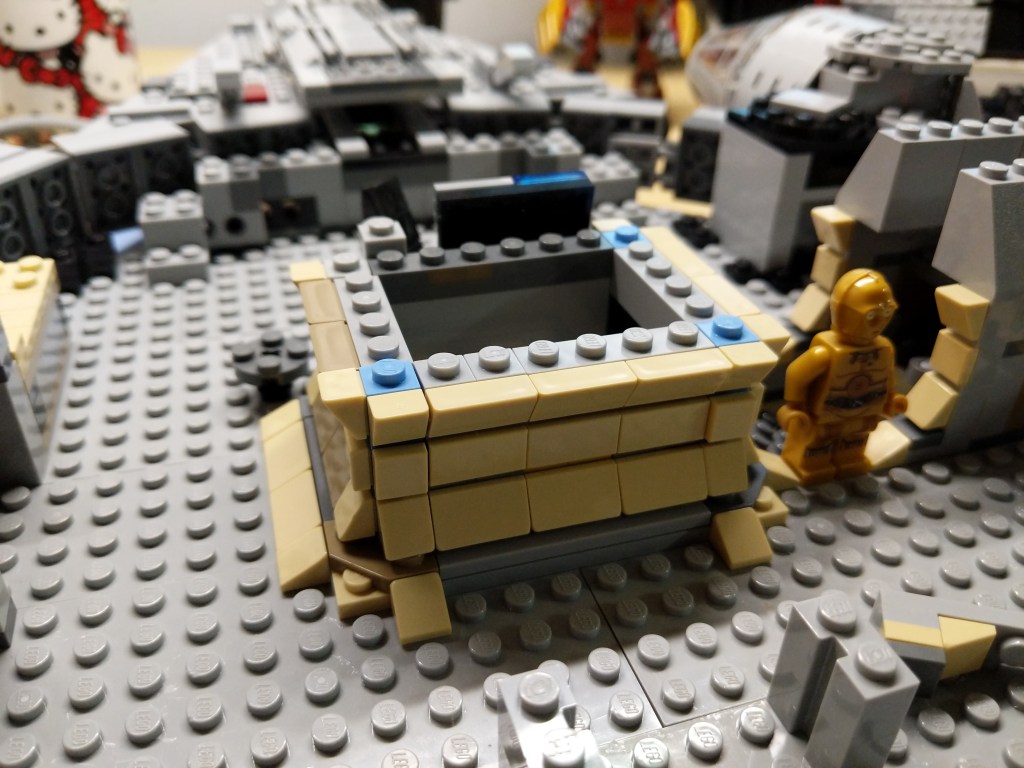
Interior
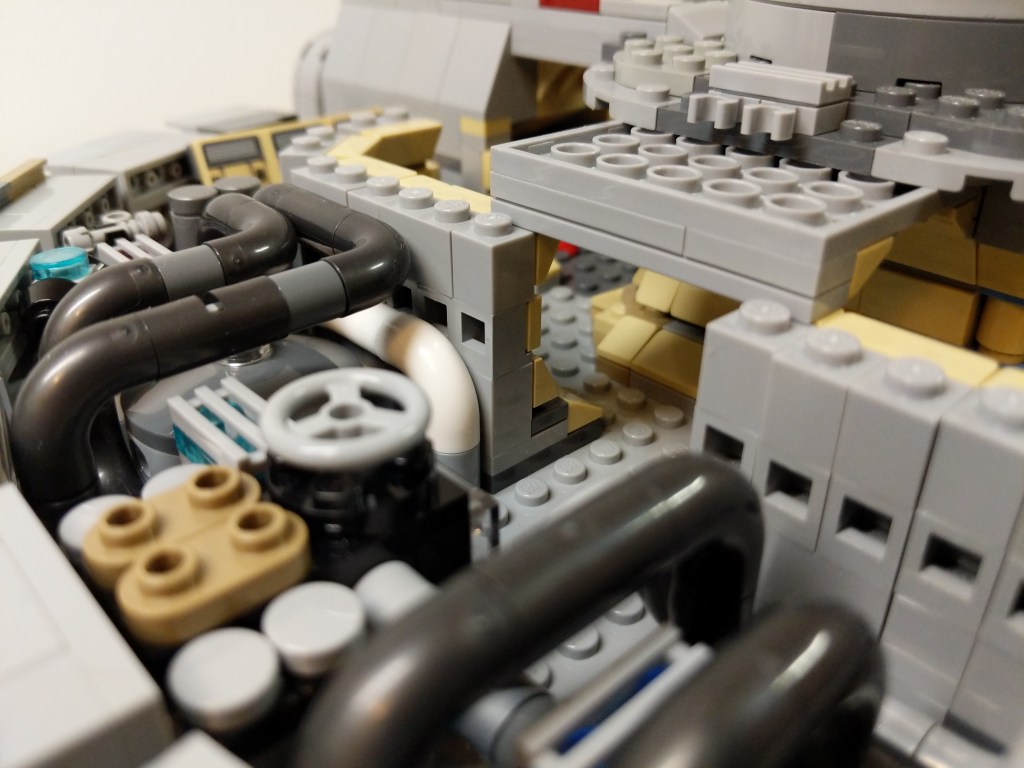
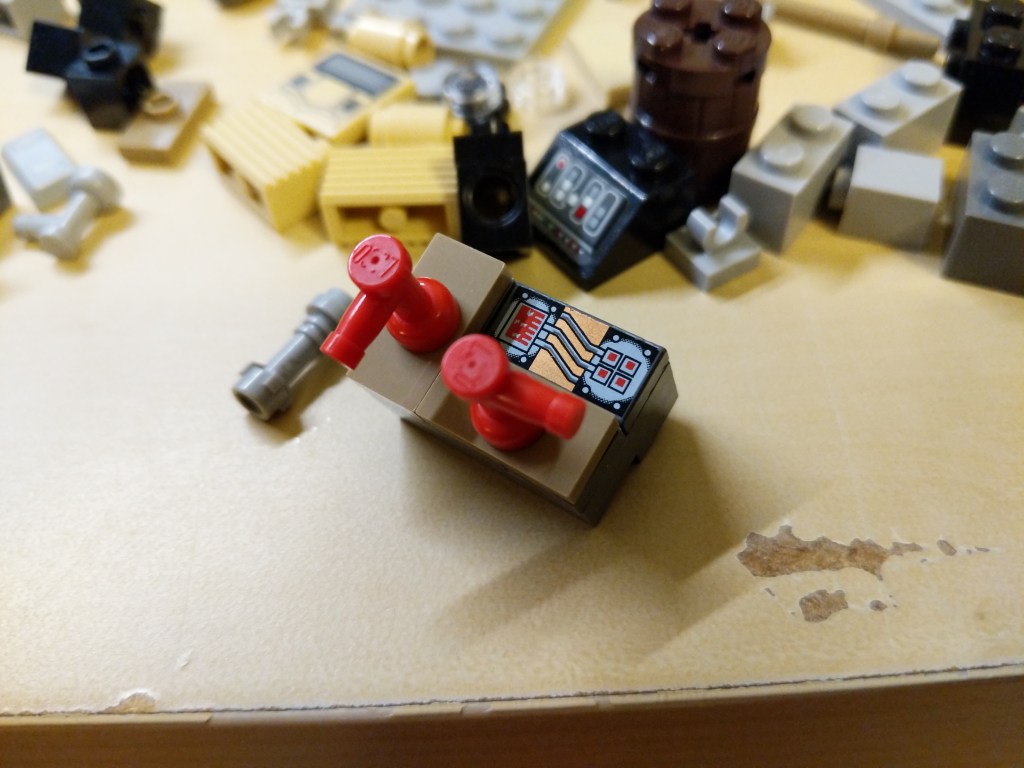
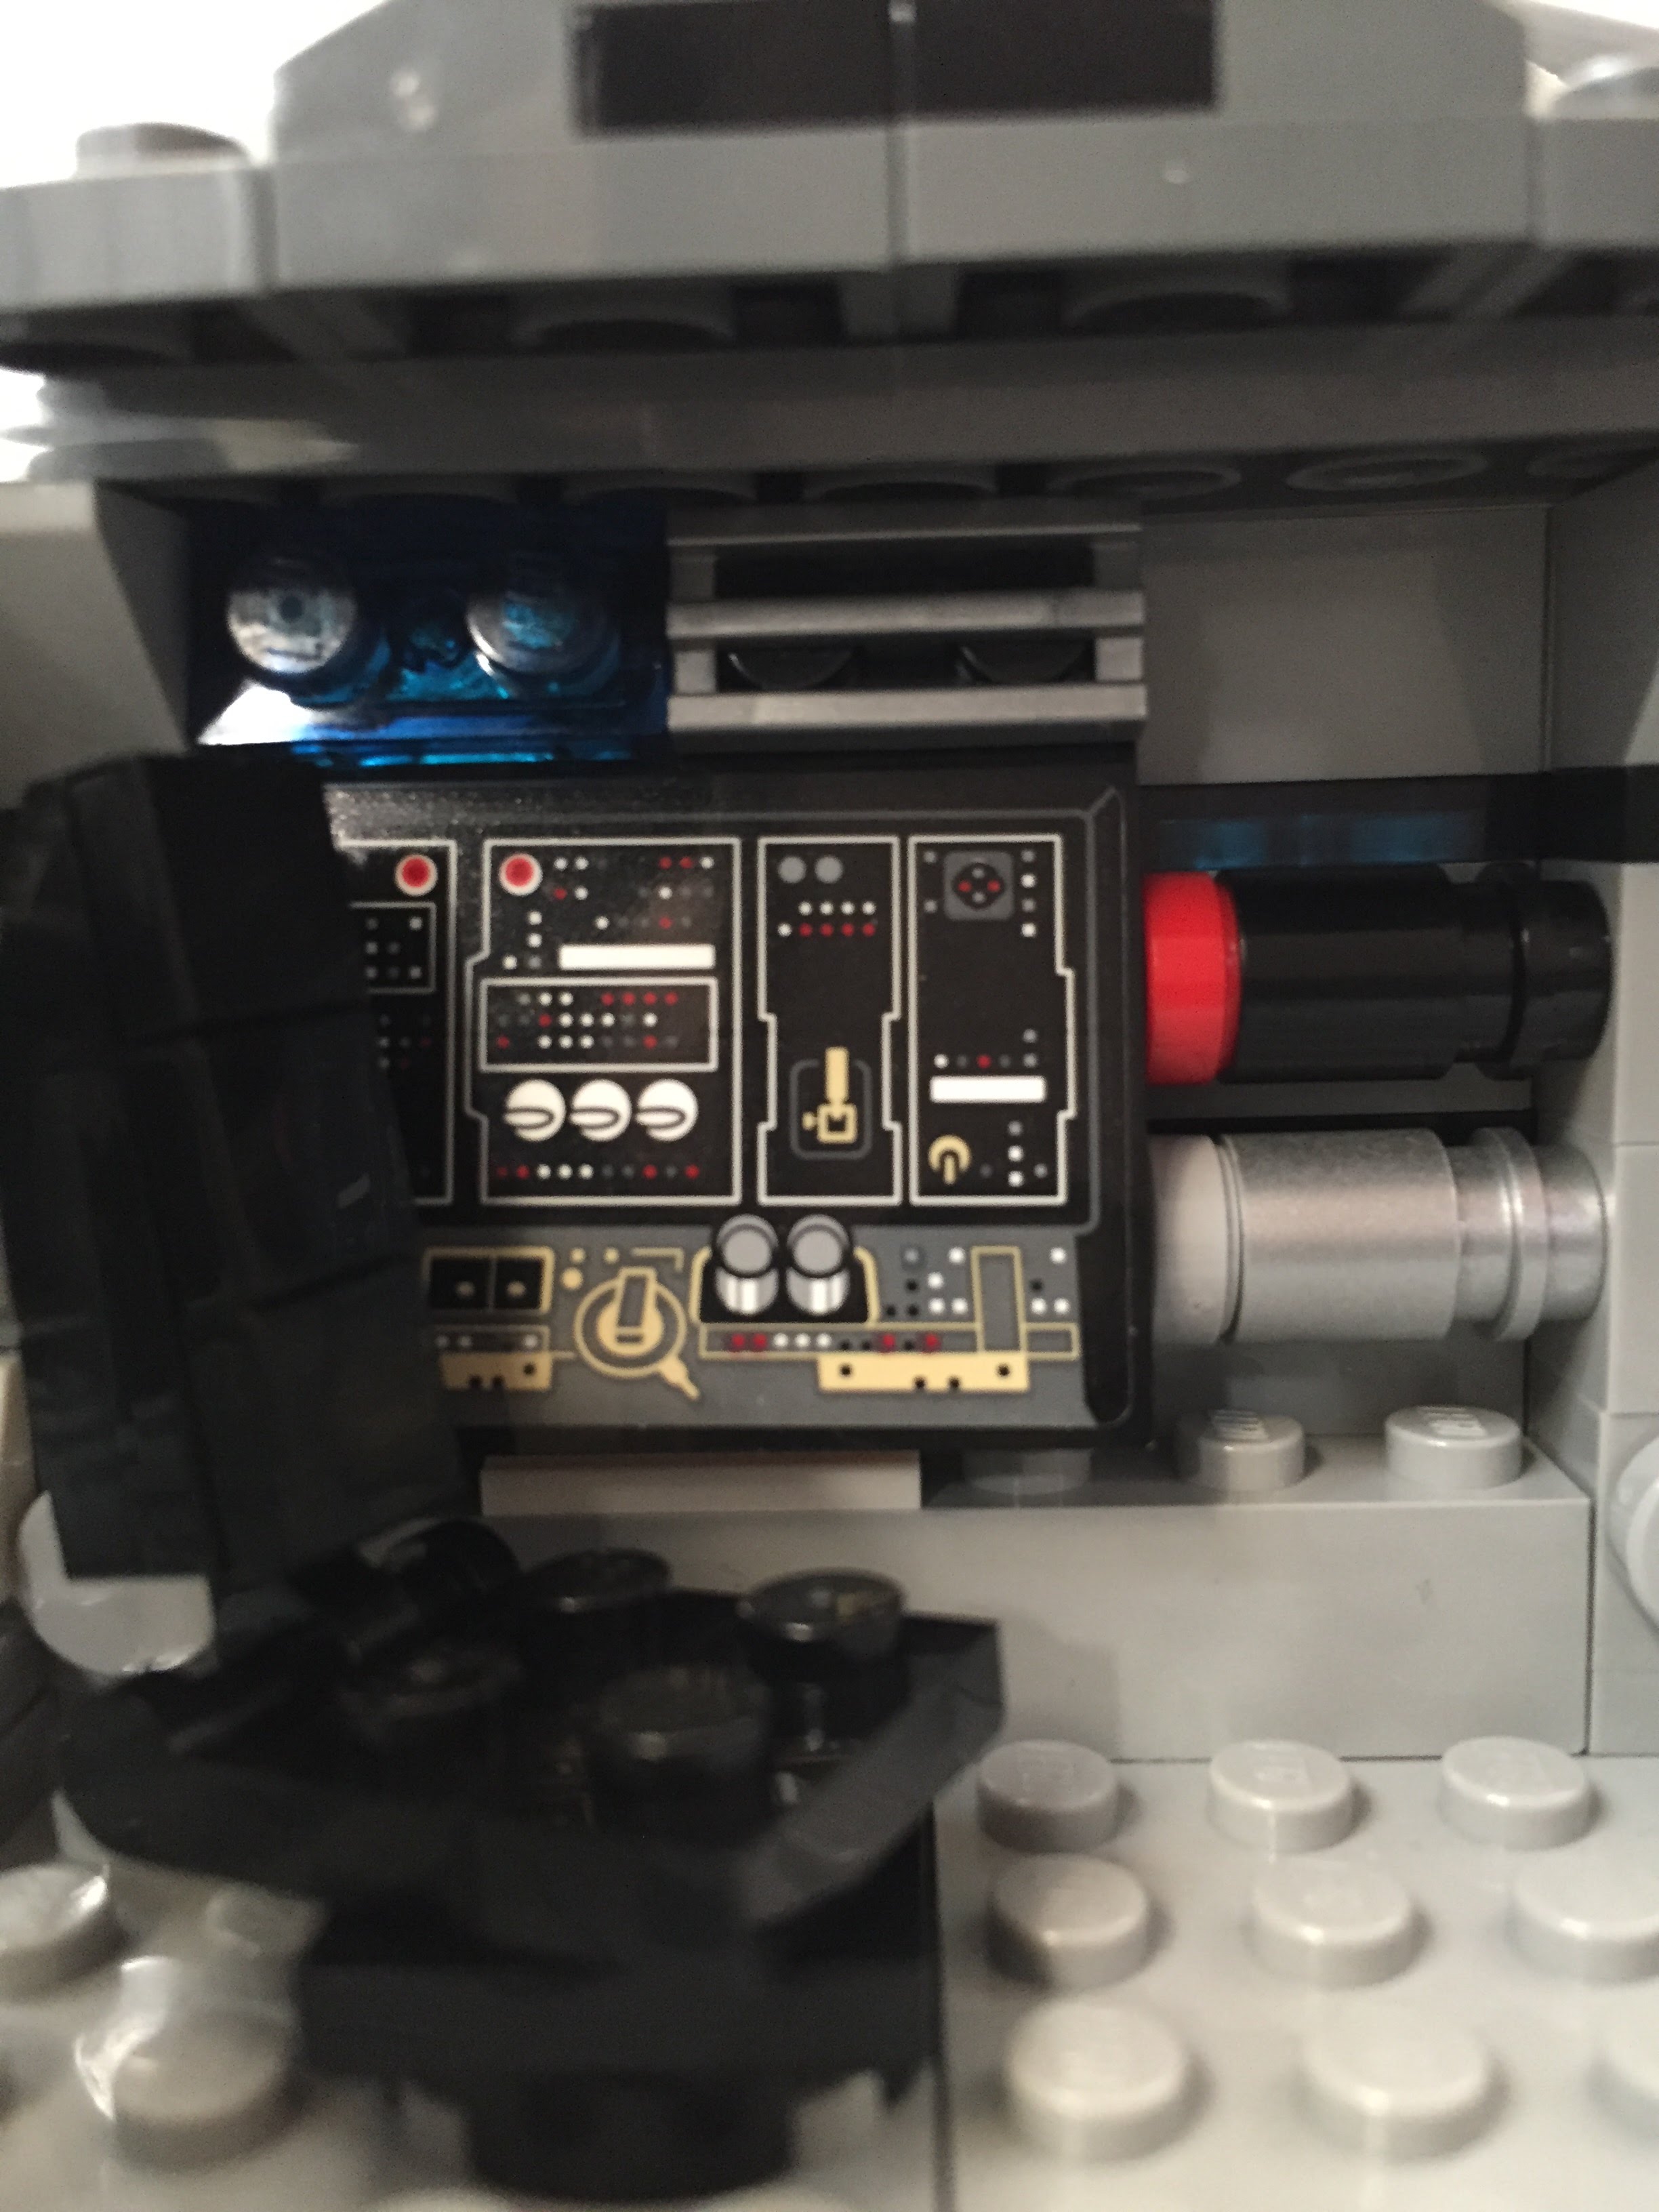
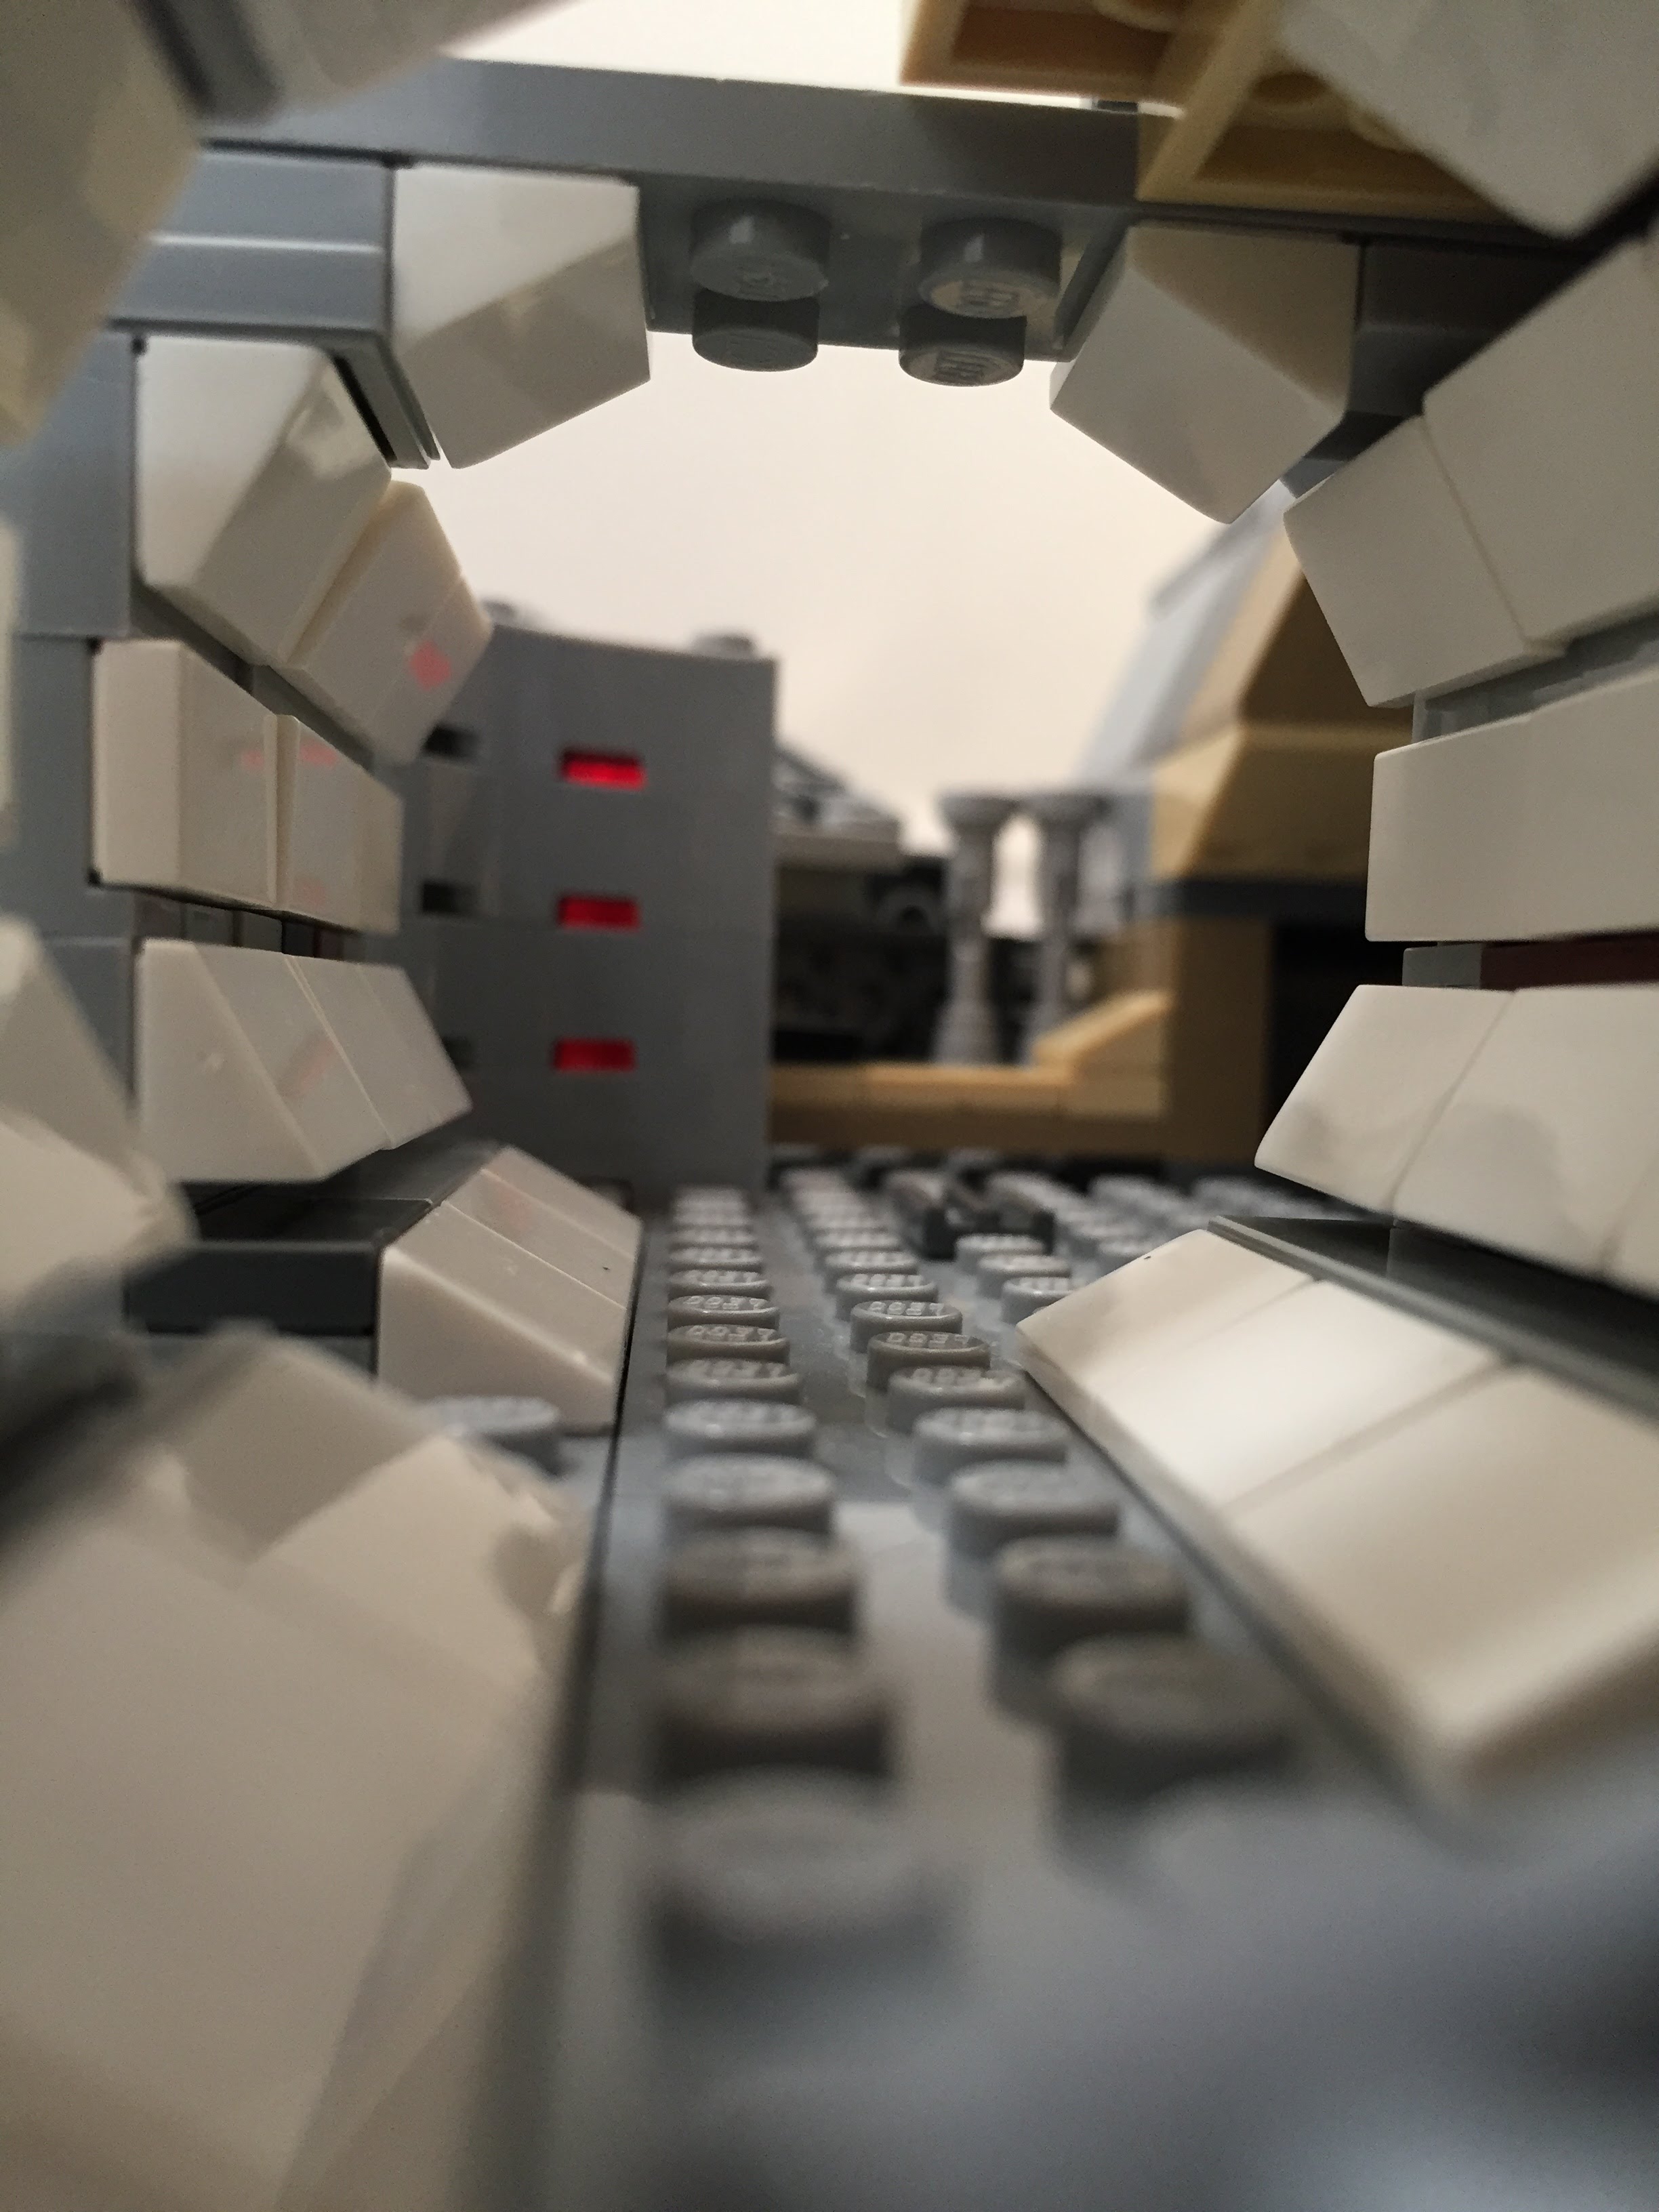
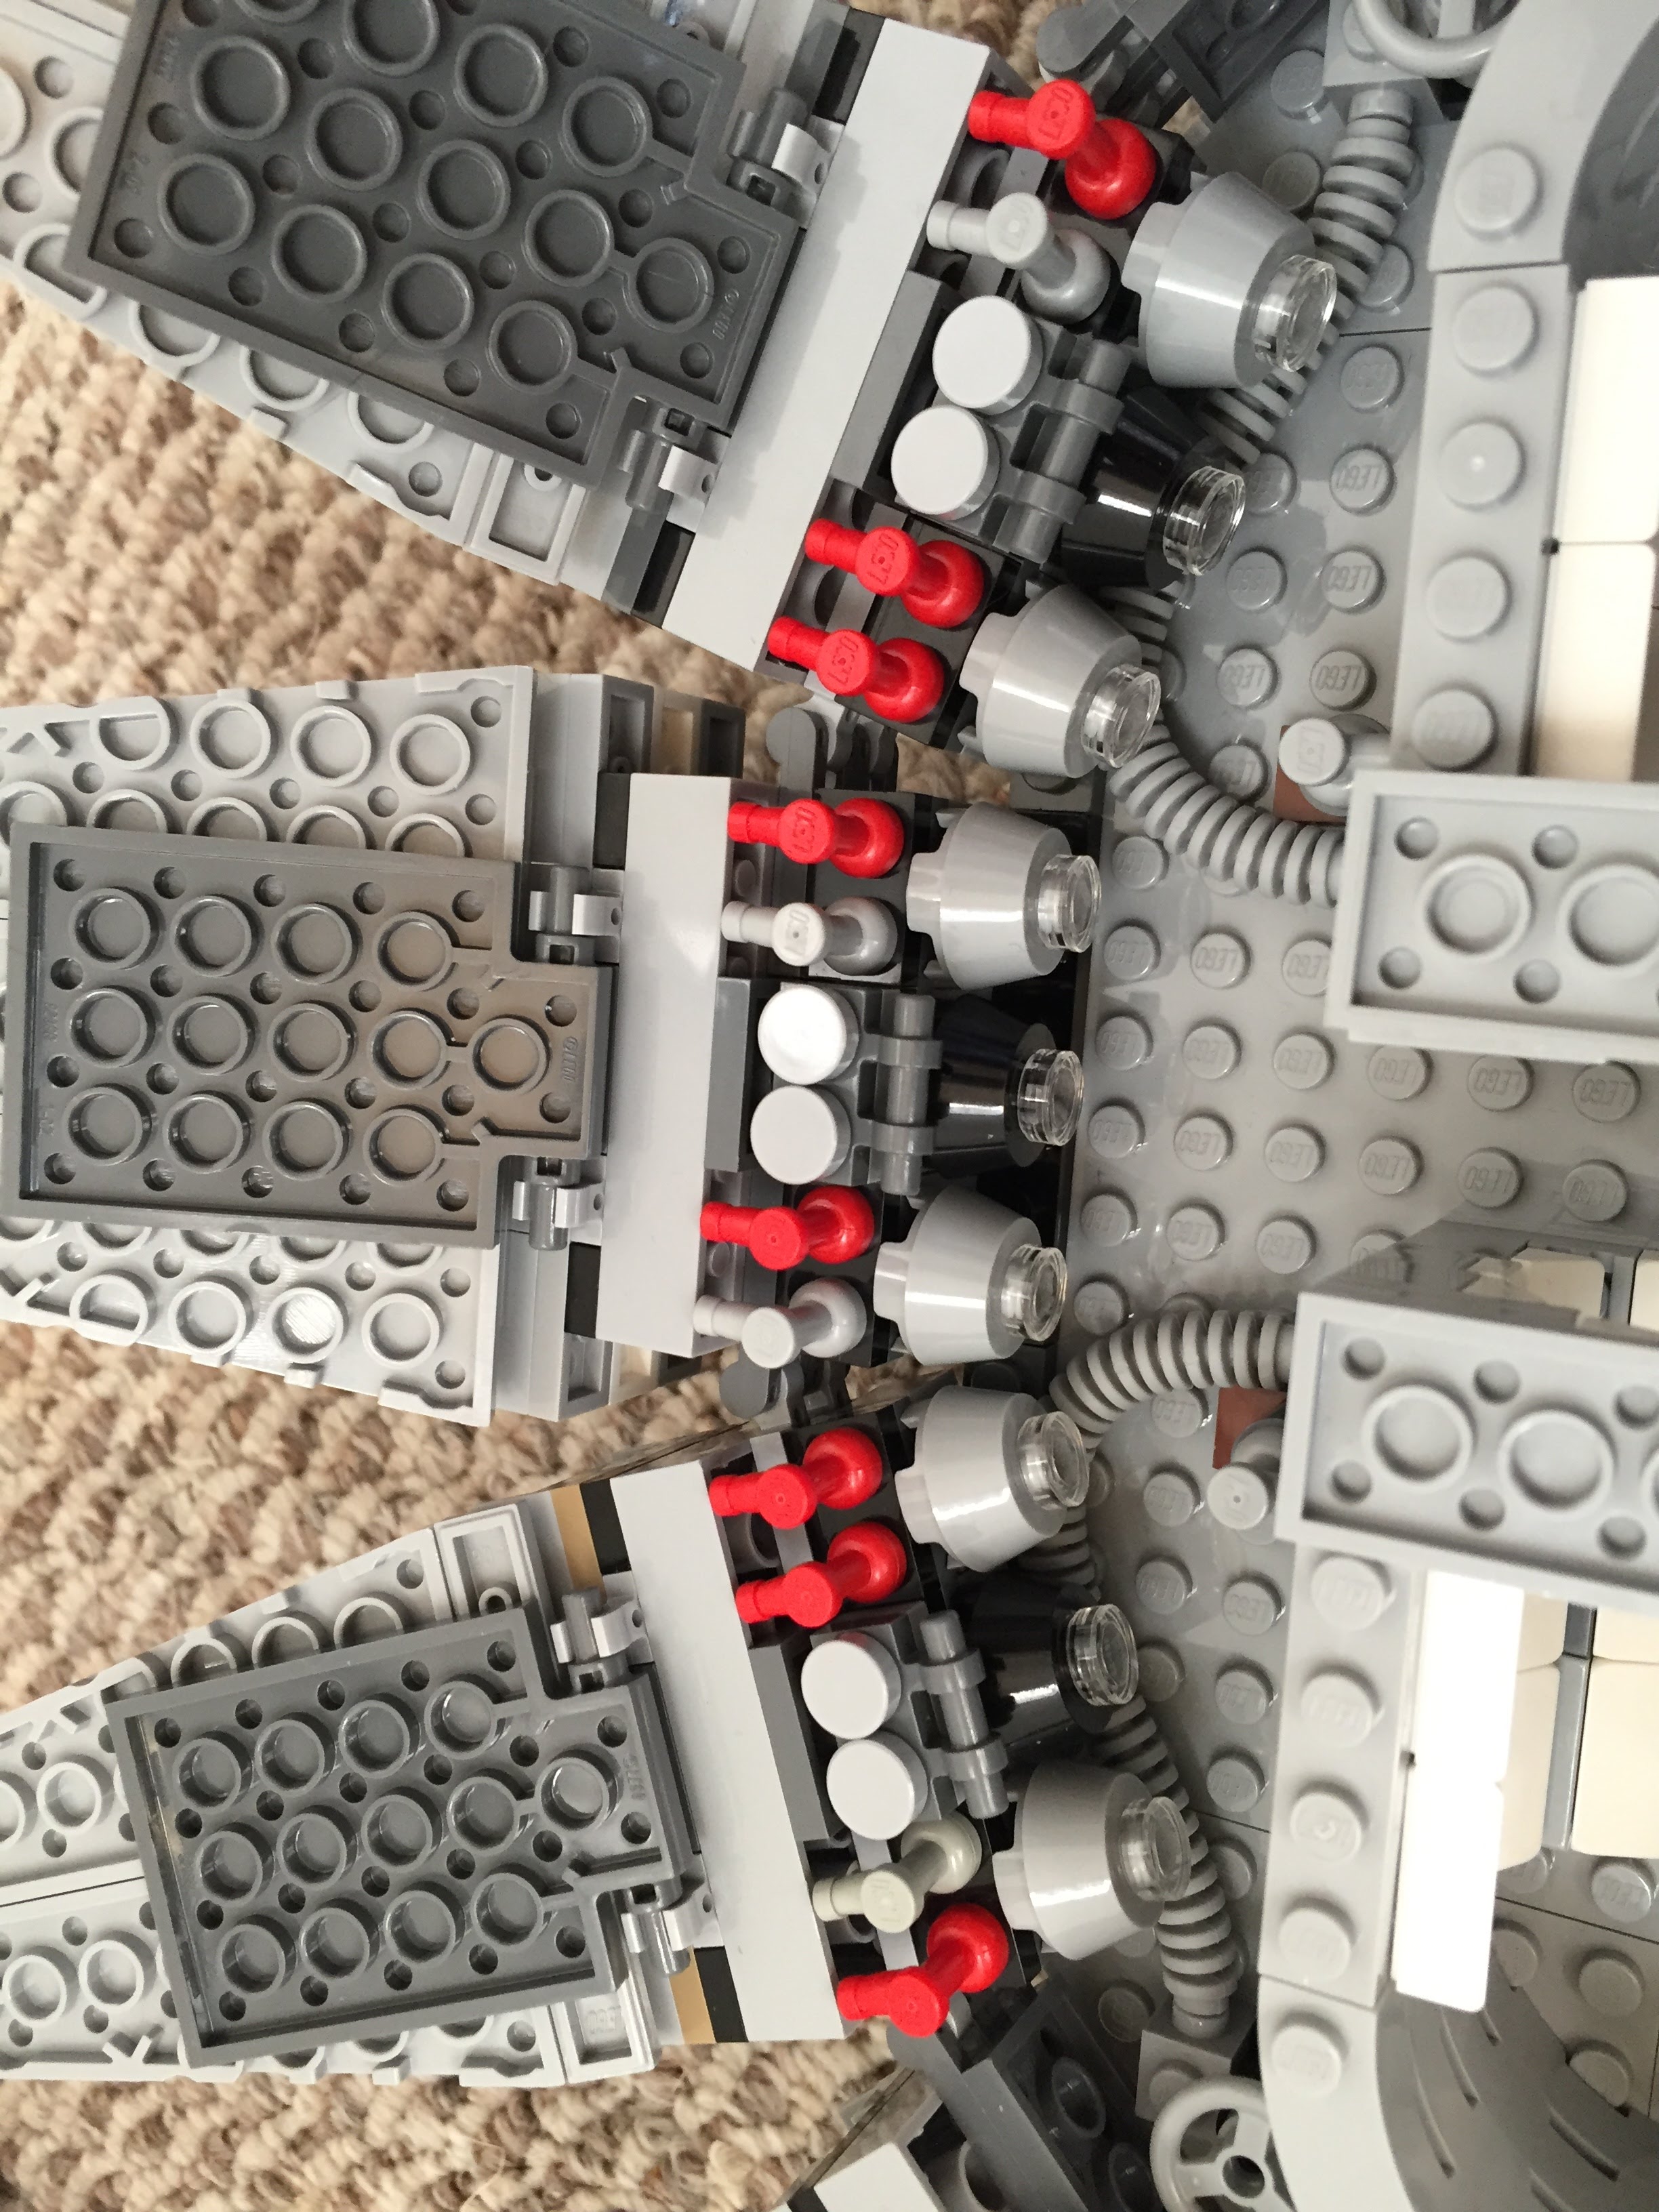
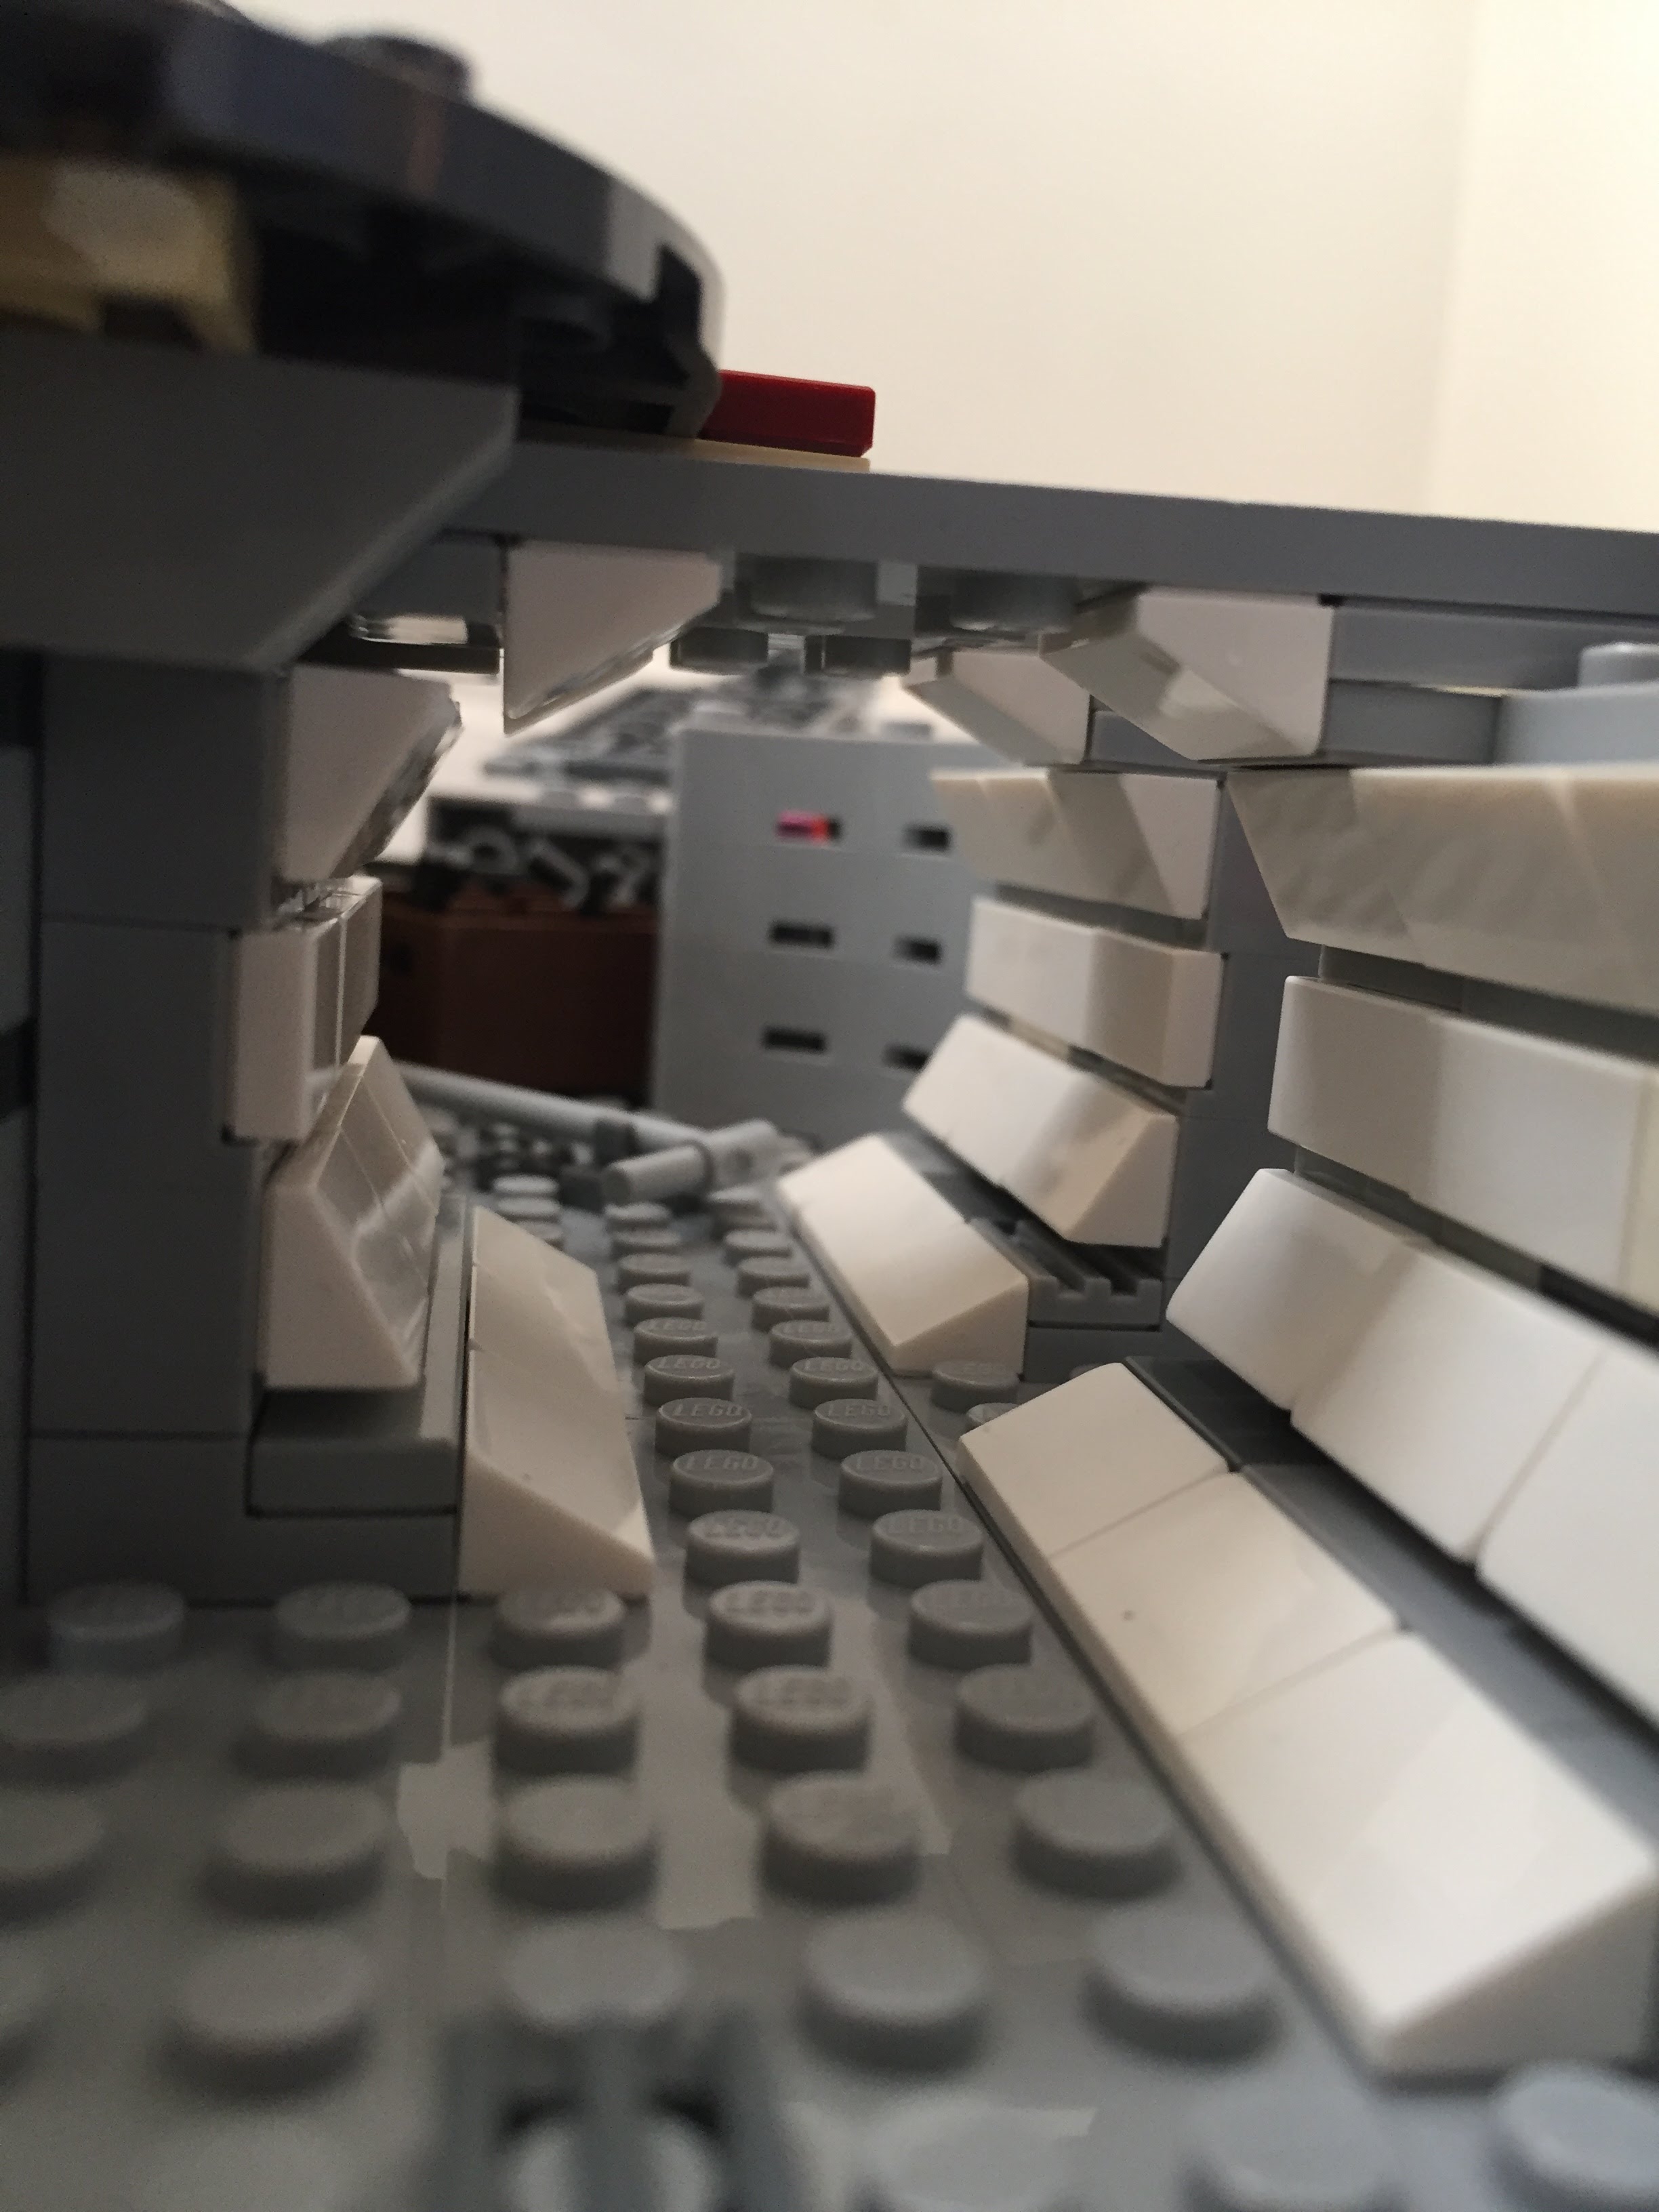
I wanted to include as much detail as possible–including detail hidden from view, like in the AMT/ERTL Cutaway Model of the Falcon. I made use of pipes–especially in the engine comparment–thinking of Han Solo’s repairs to the Falcon during the escape from Hoth in The Empire Strikes Back (1980). The pull-out gunner’s turret has an targeting computer display.
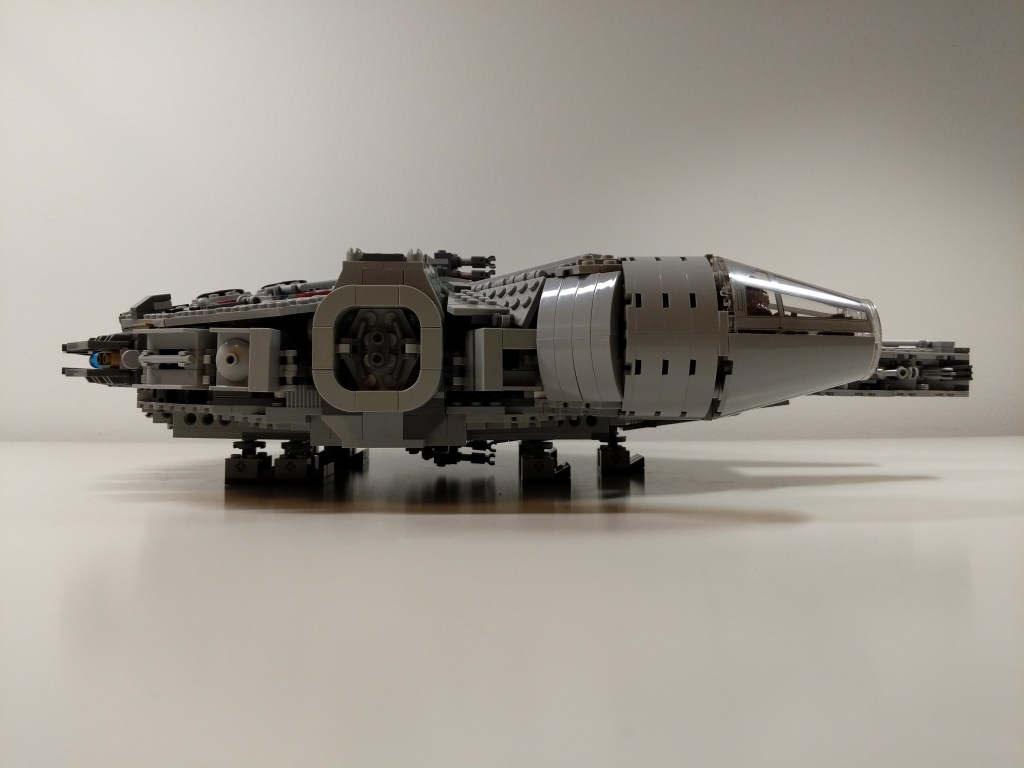
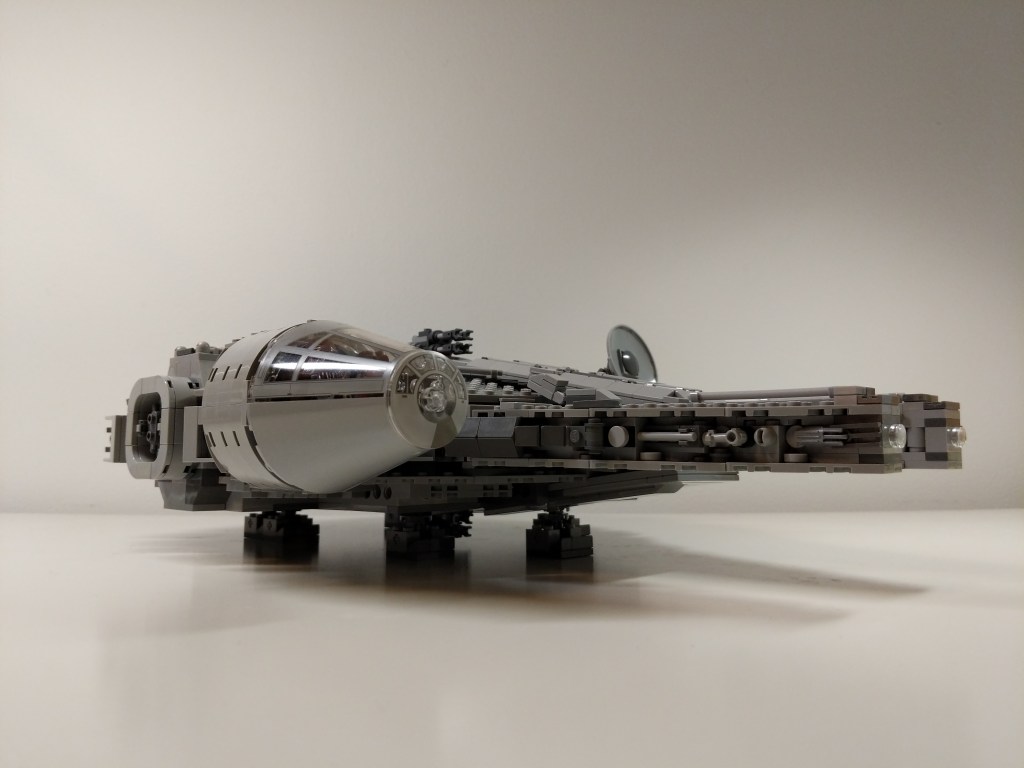
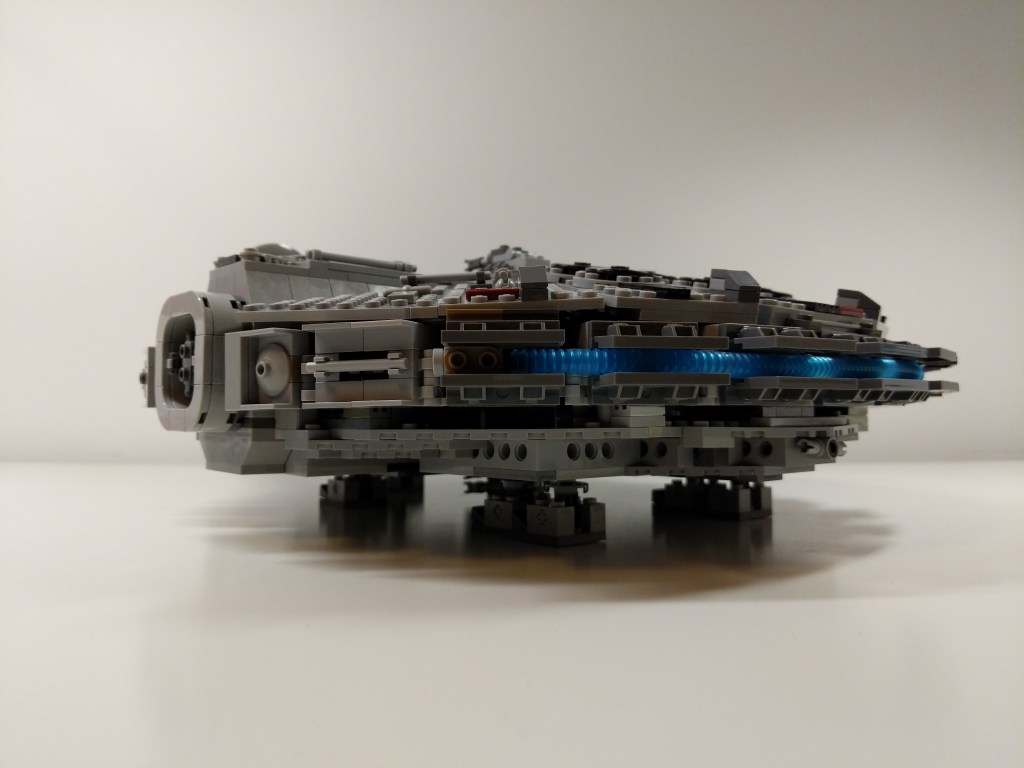
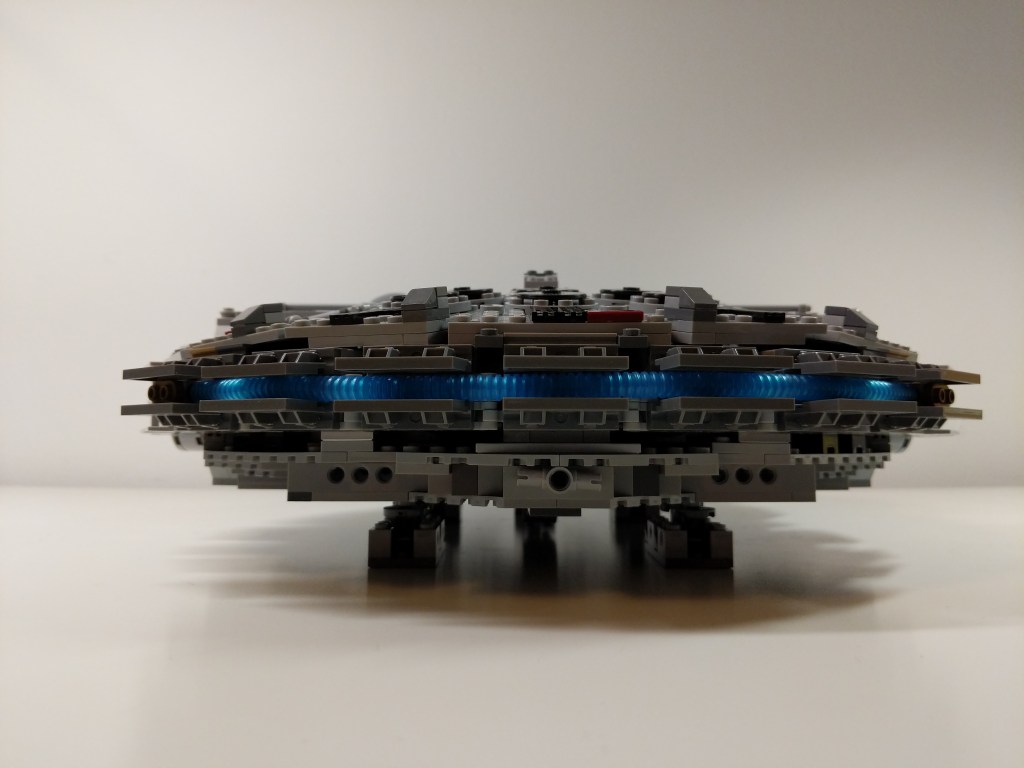
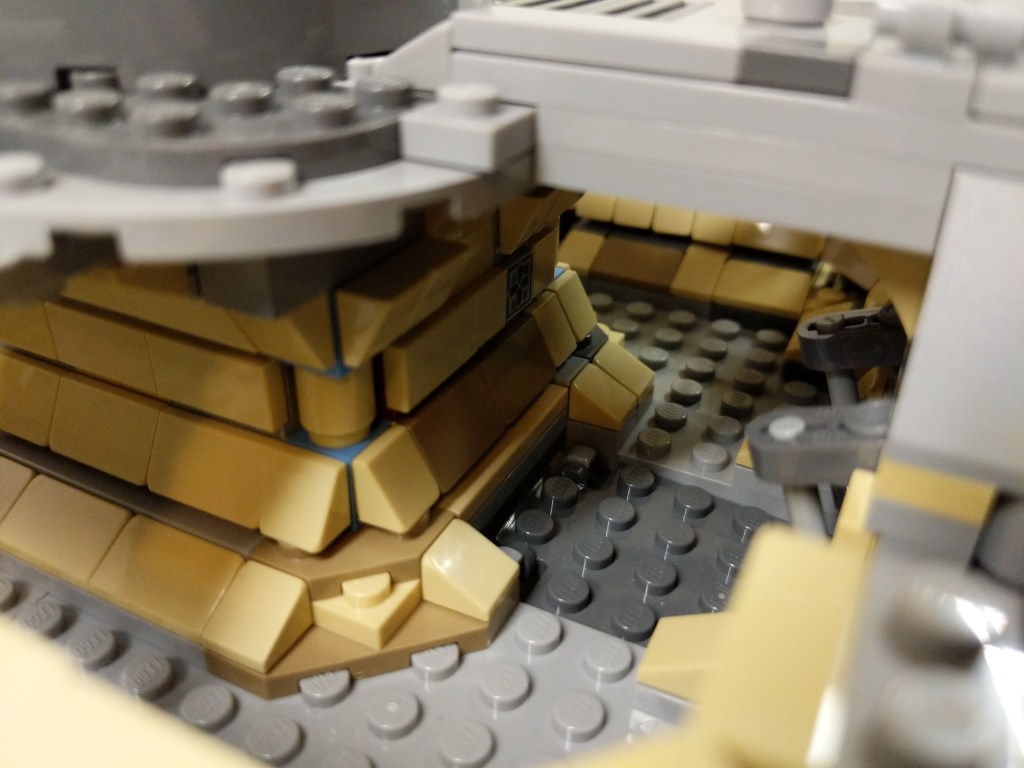
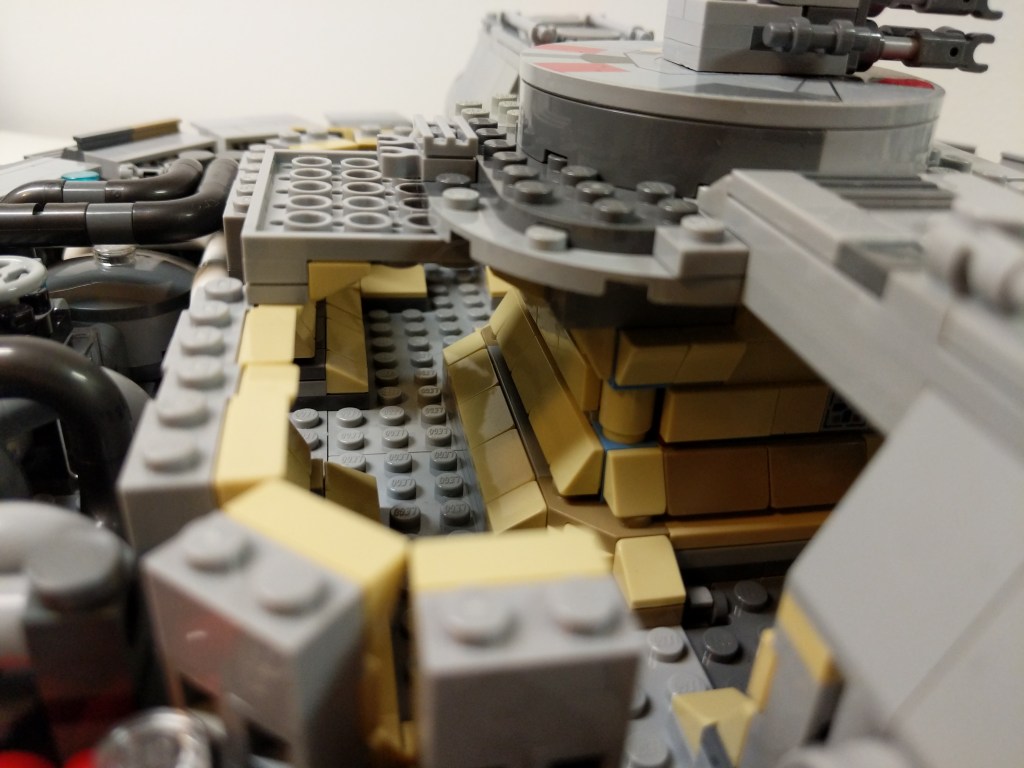
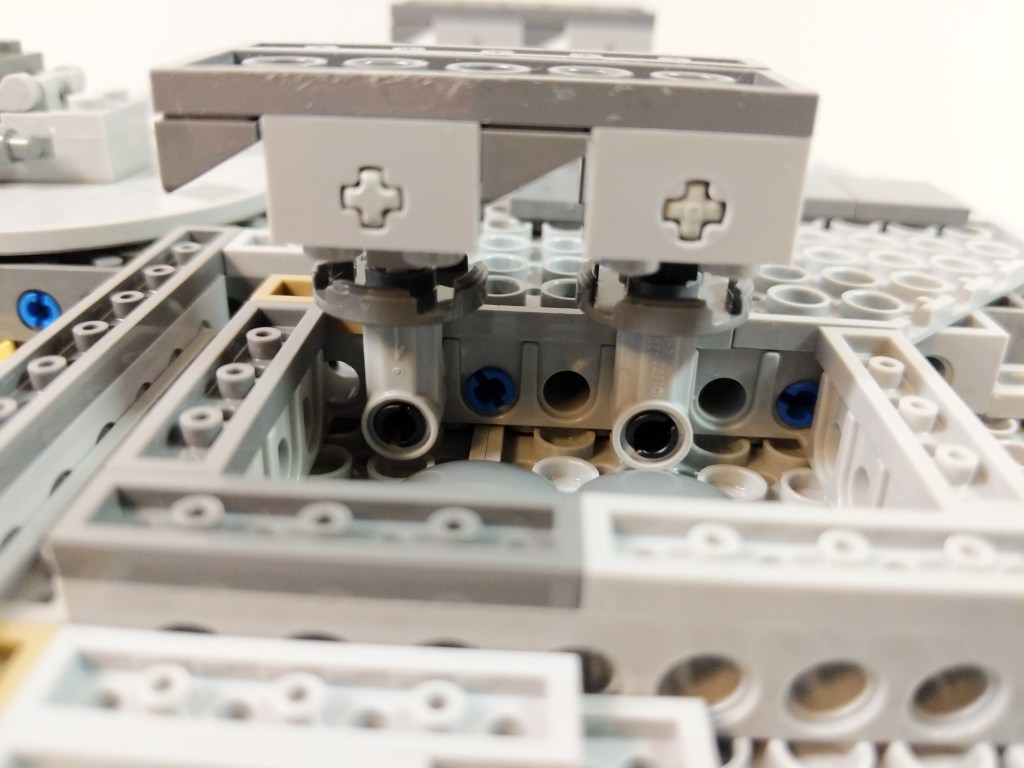
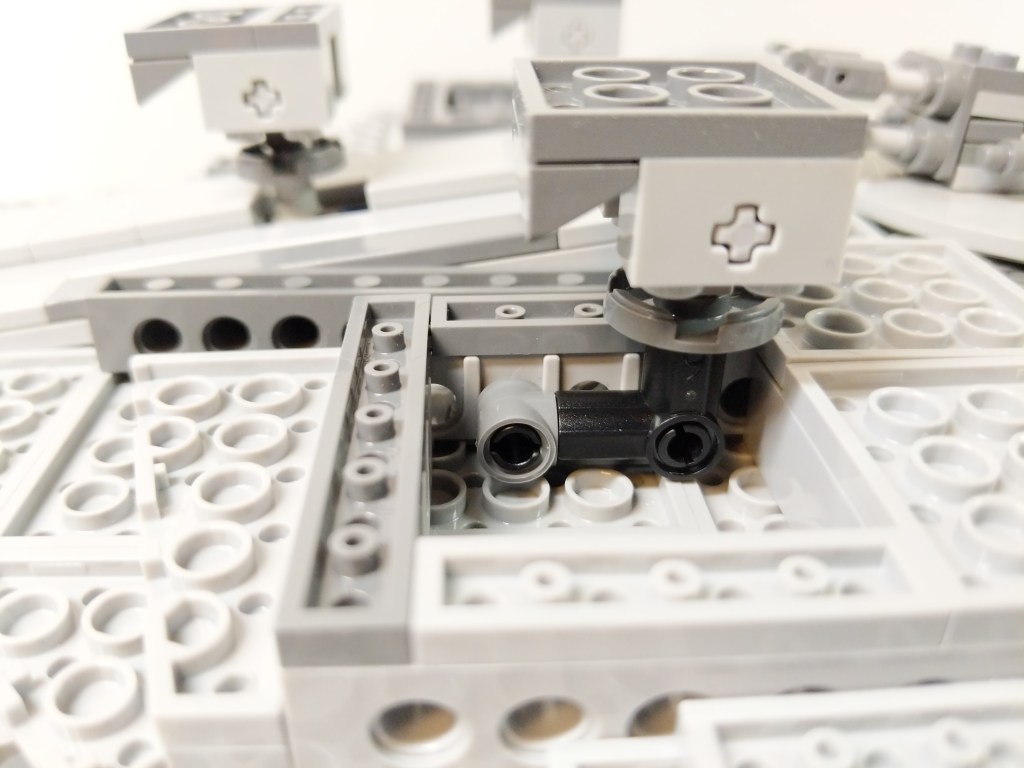
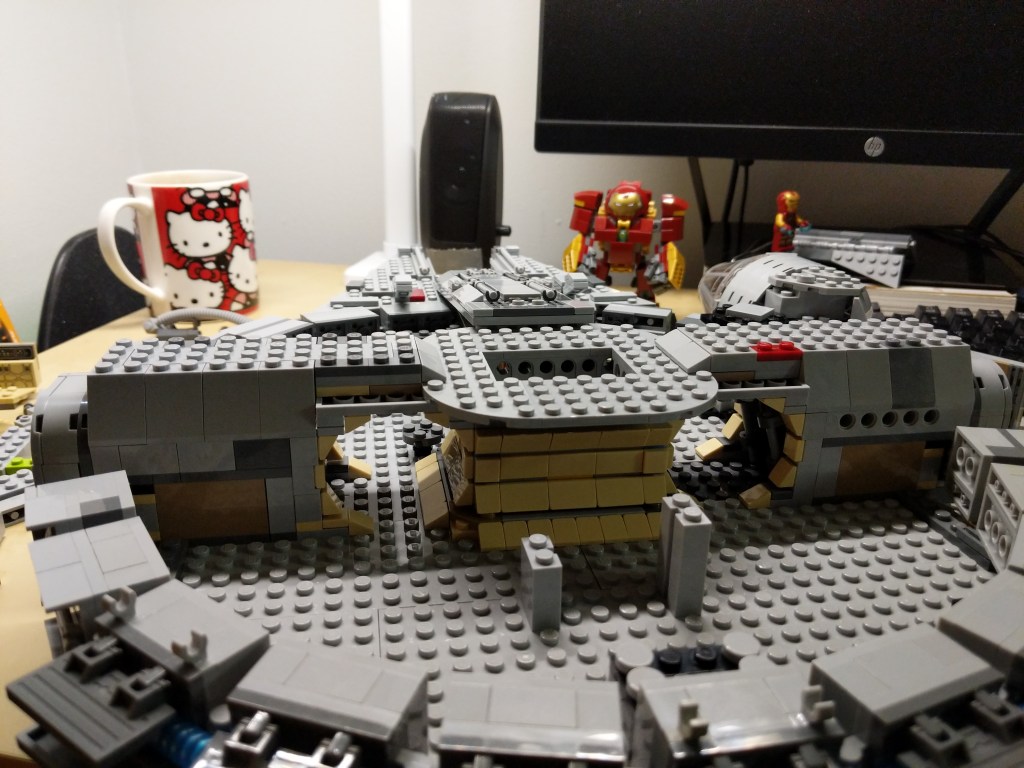
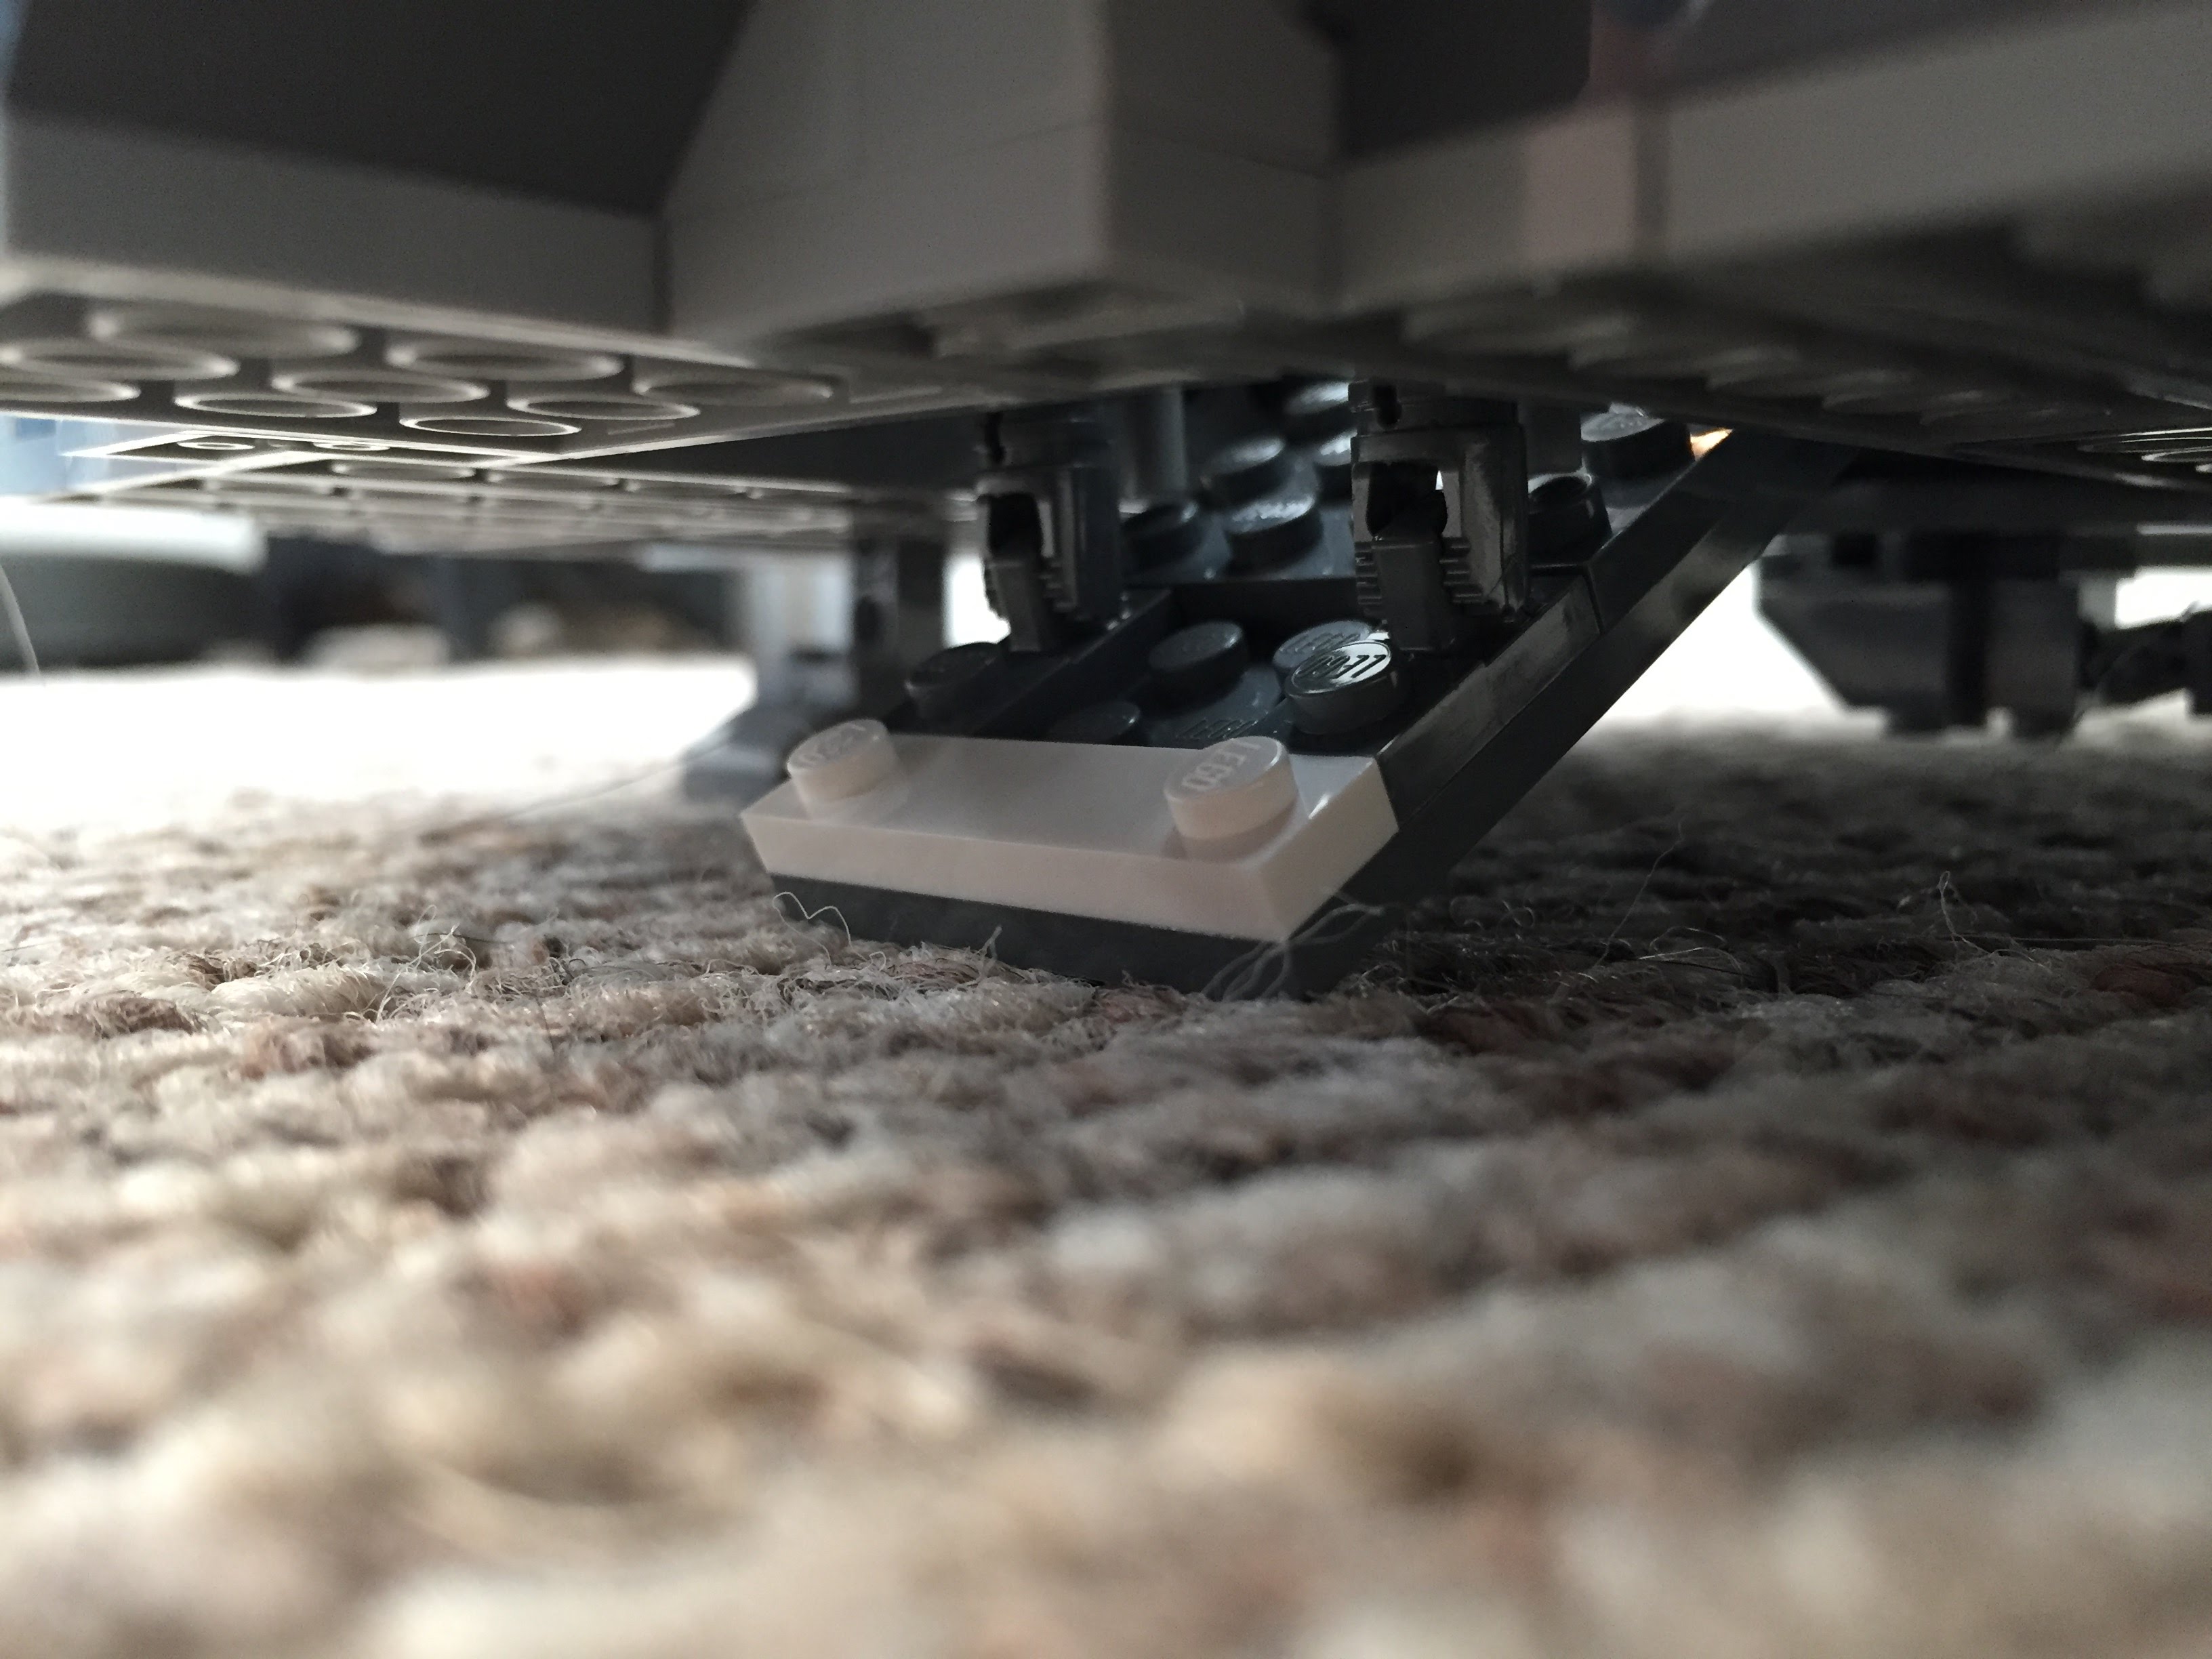
Landing Gear
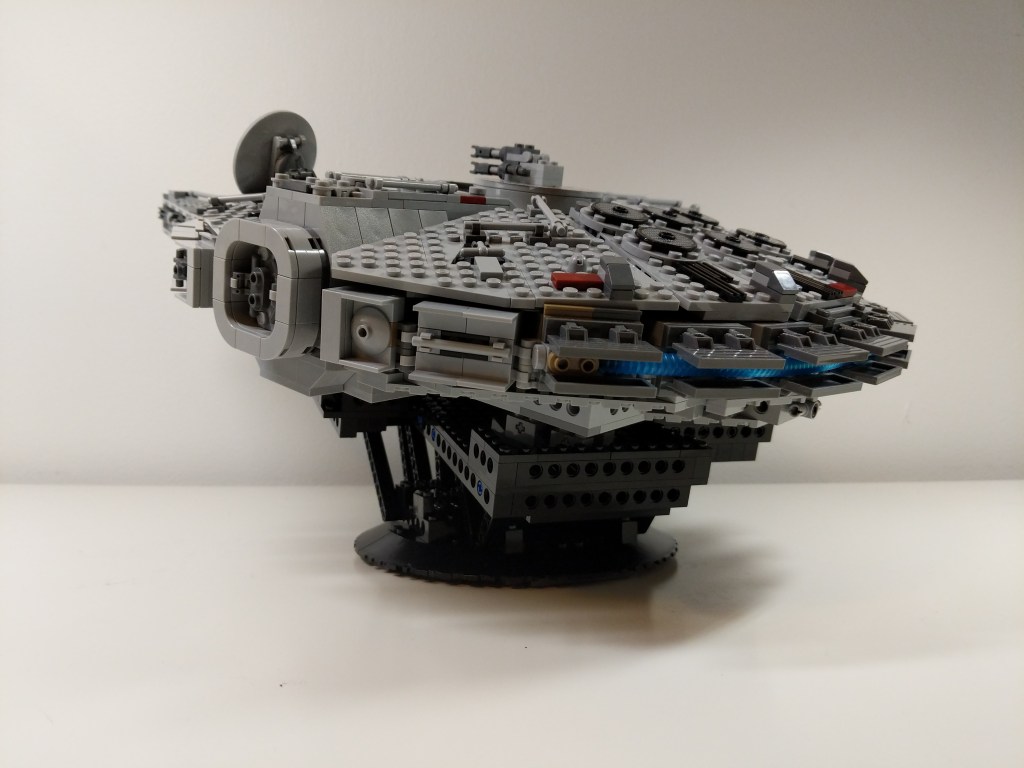
I wanted the landing gear to look as accurate as possible in this small scale while also providing ample support for this heavier model.
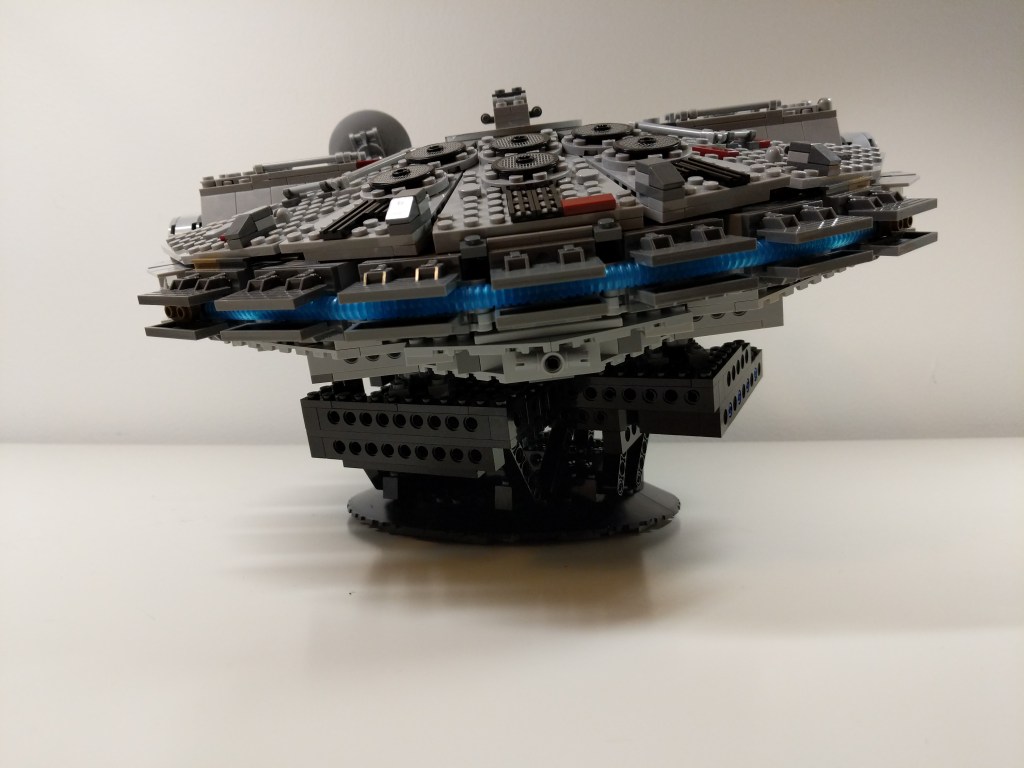
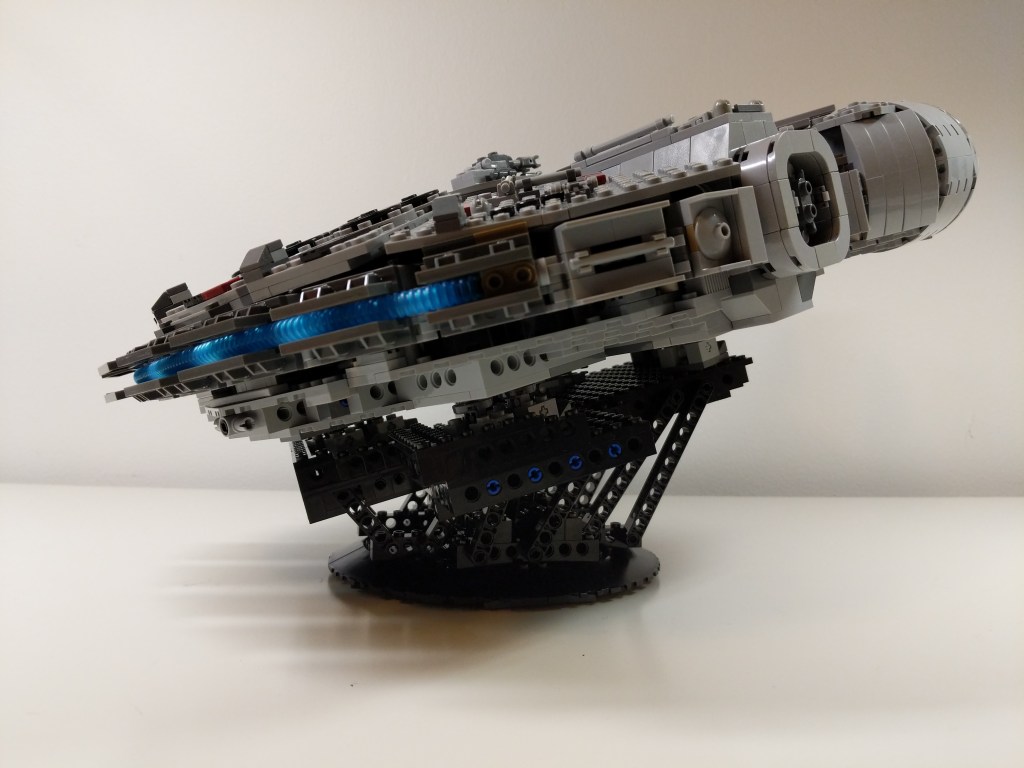
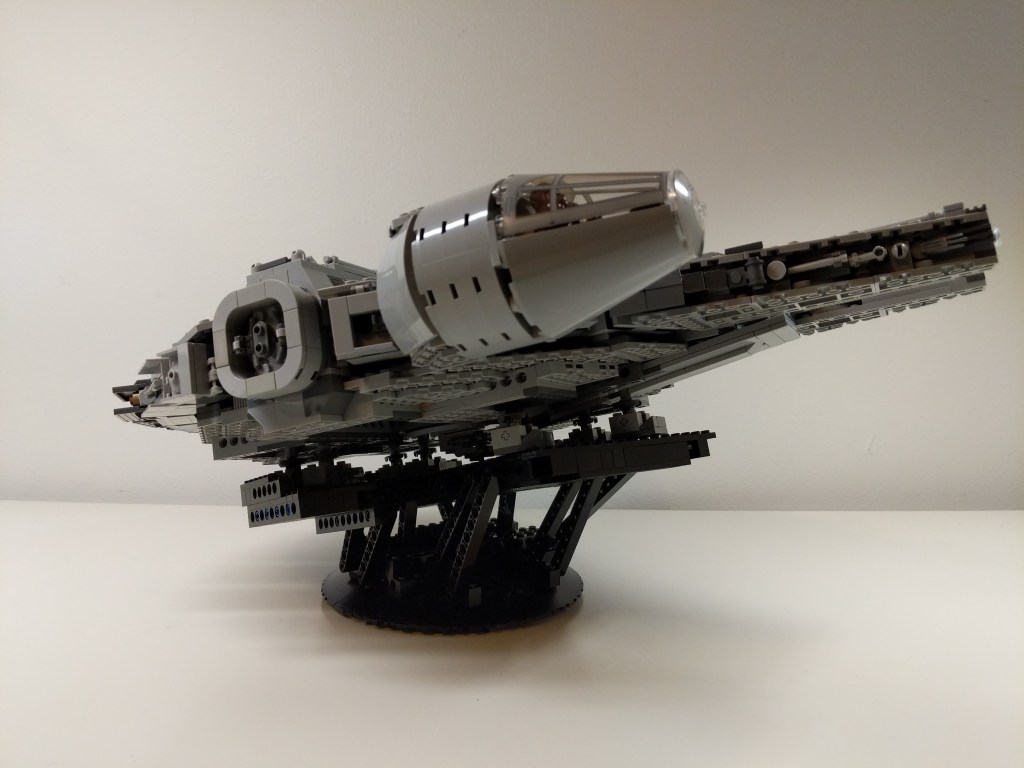
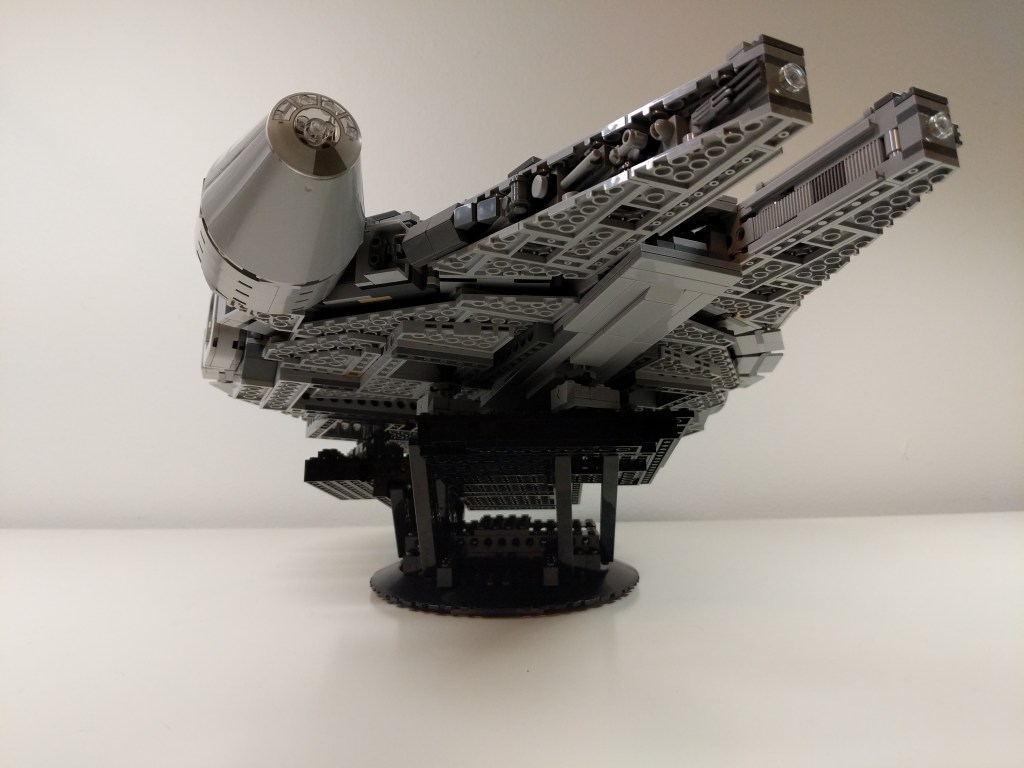
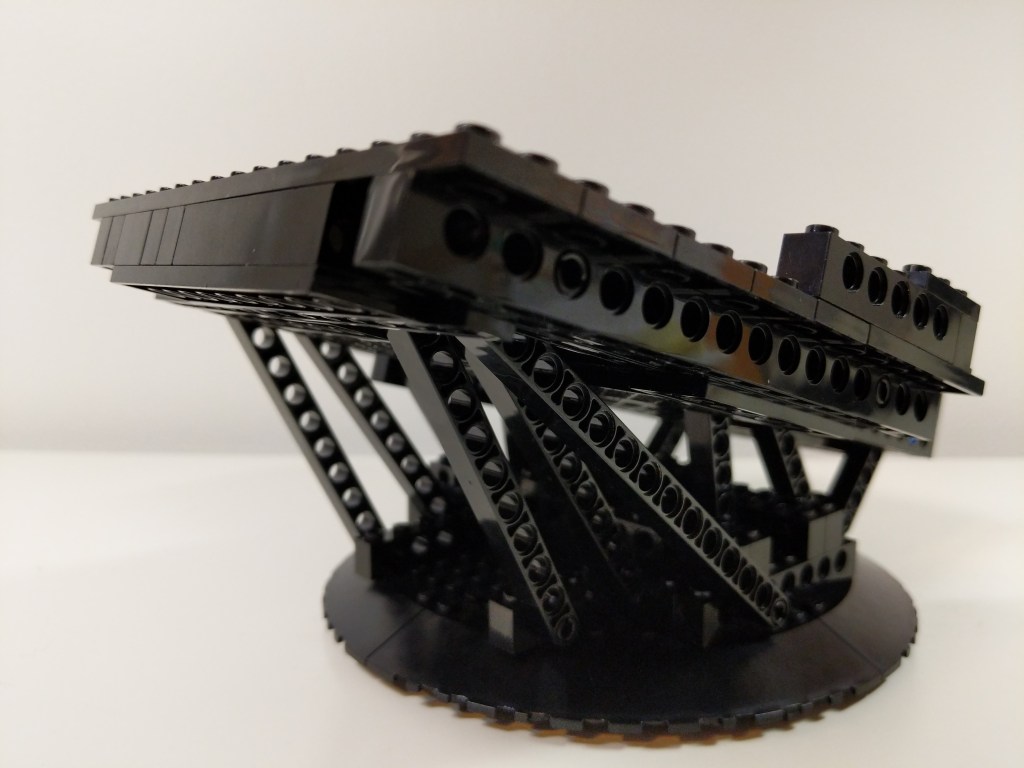
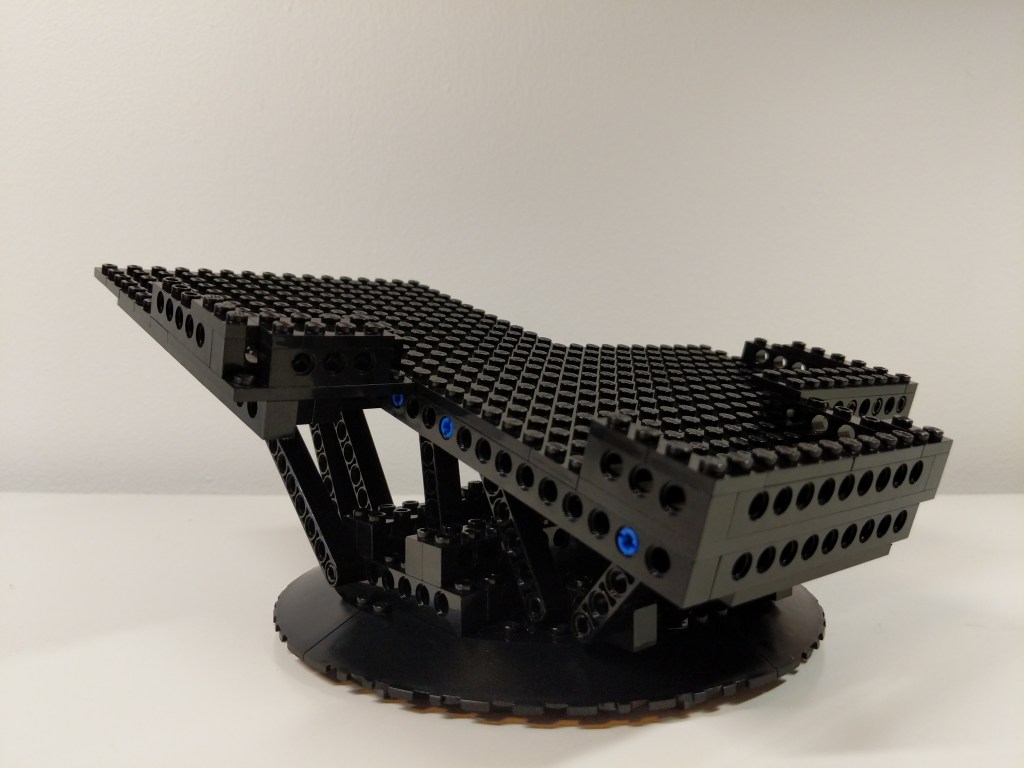
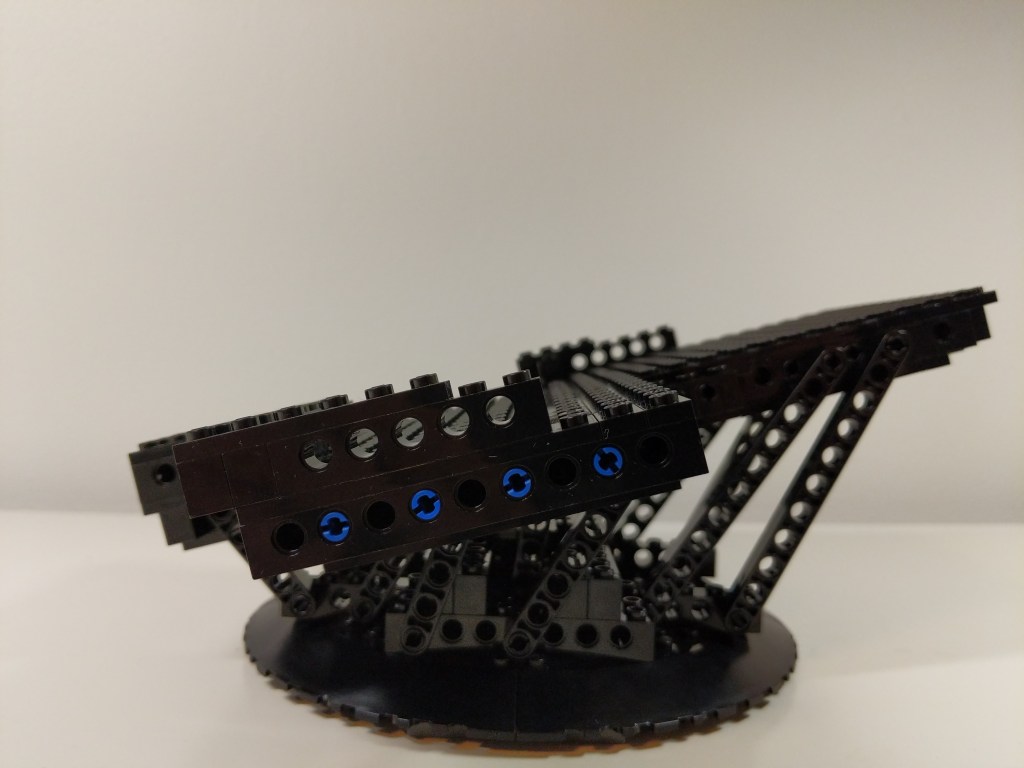
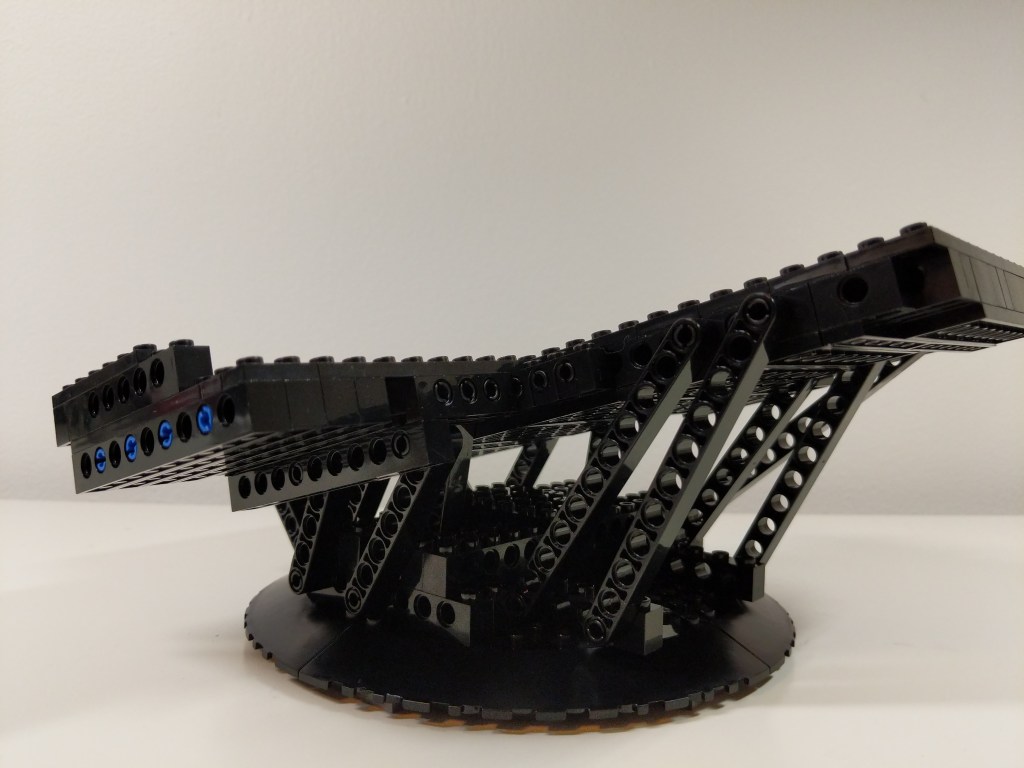
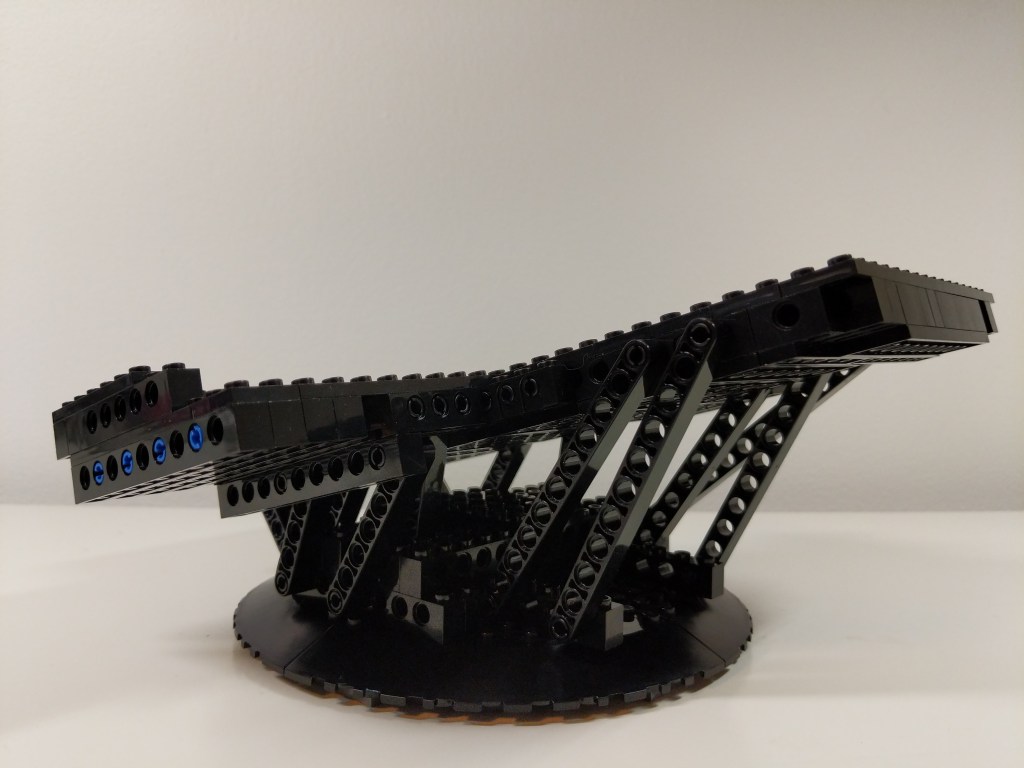
Display Stand
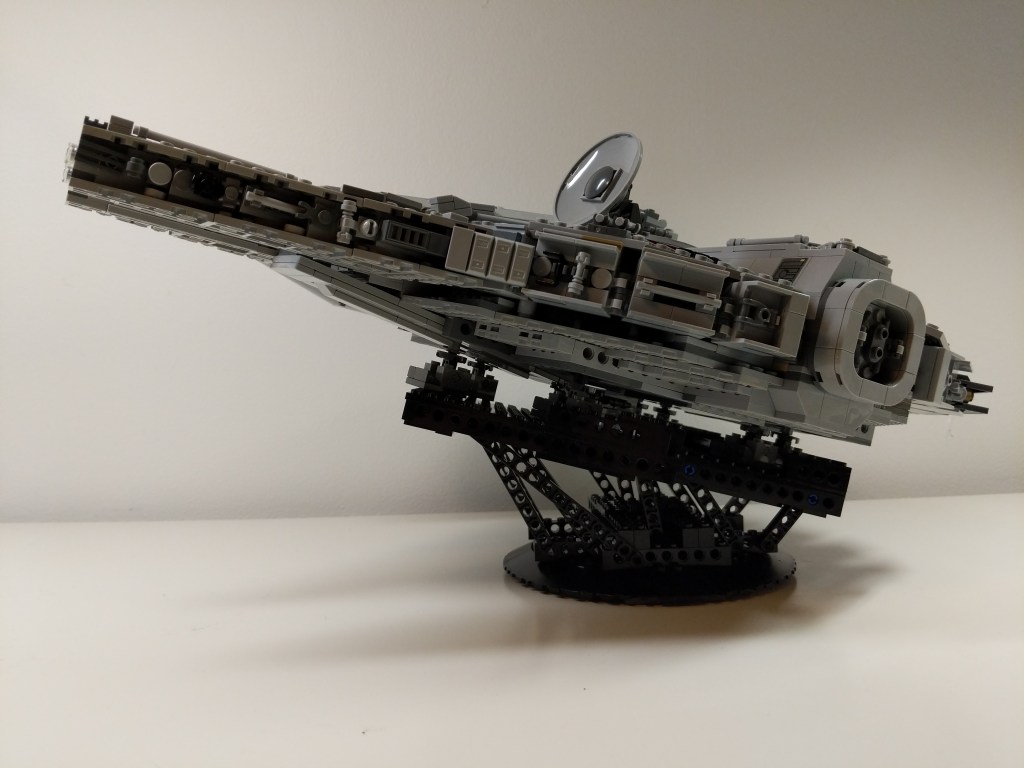
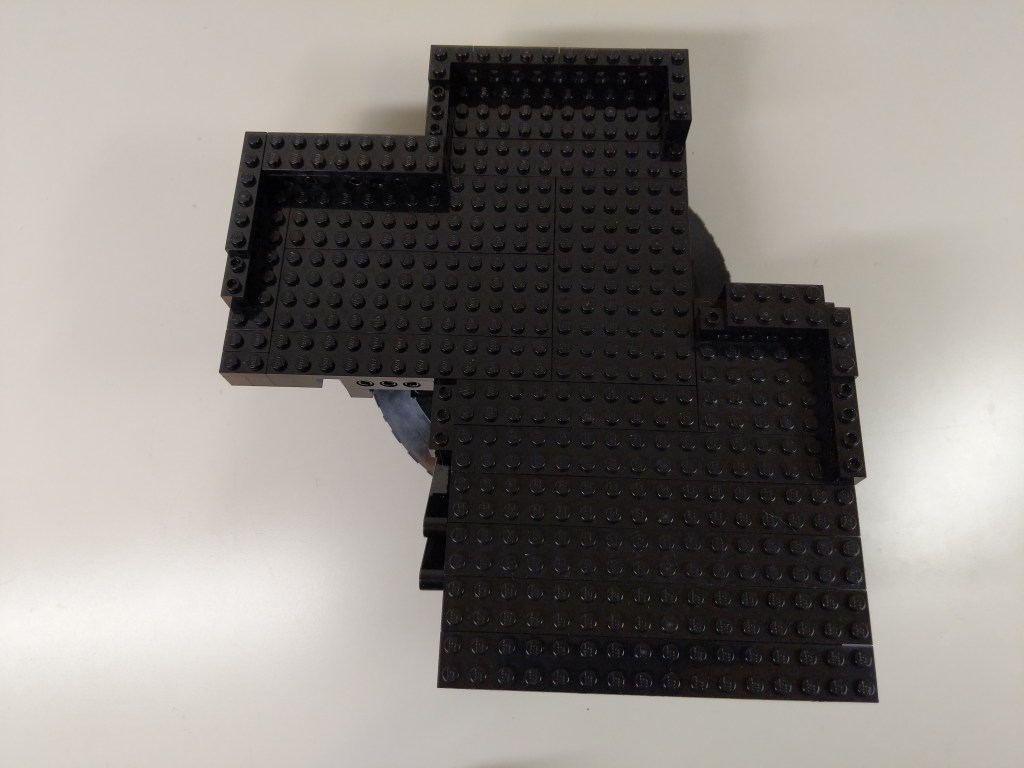
Also, I built an upward sloping display stand for the Falcon shown below. It’s shape combined with gravity locks the Falcon’s landing gear in place so that it can’t move in the display stand. It has a lot of Technic reinforcement due to the weight of the Falcon, which is more than the stock 75257 set.
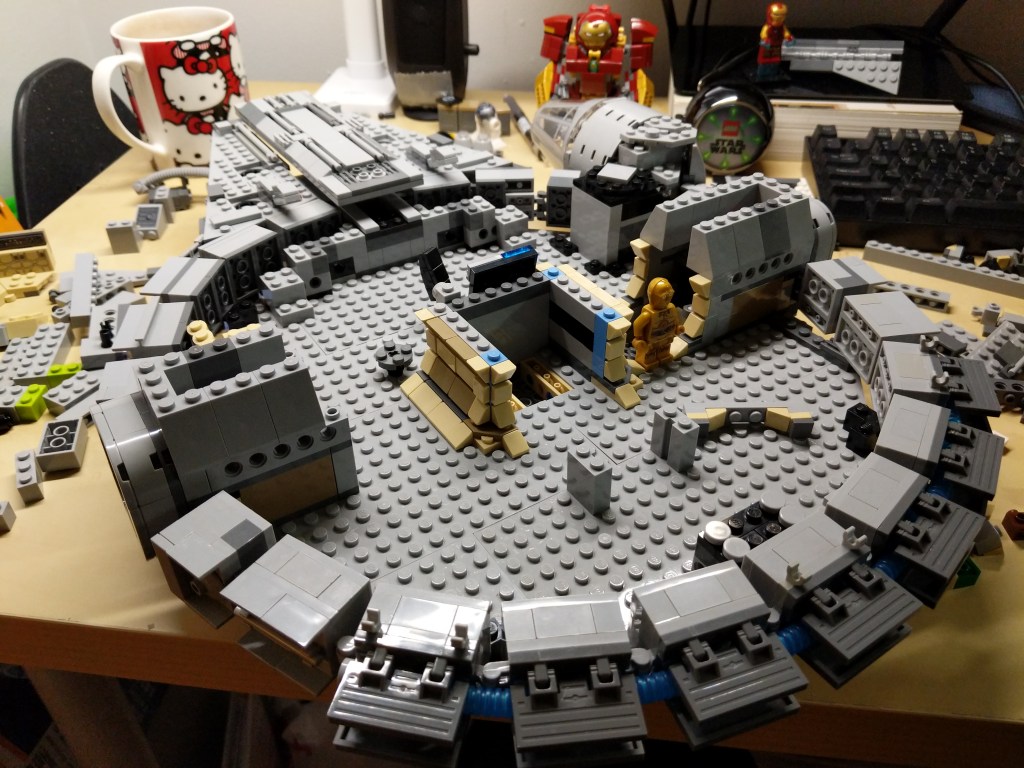
Yet Another Remodel
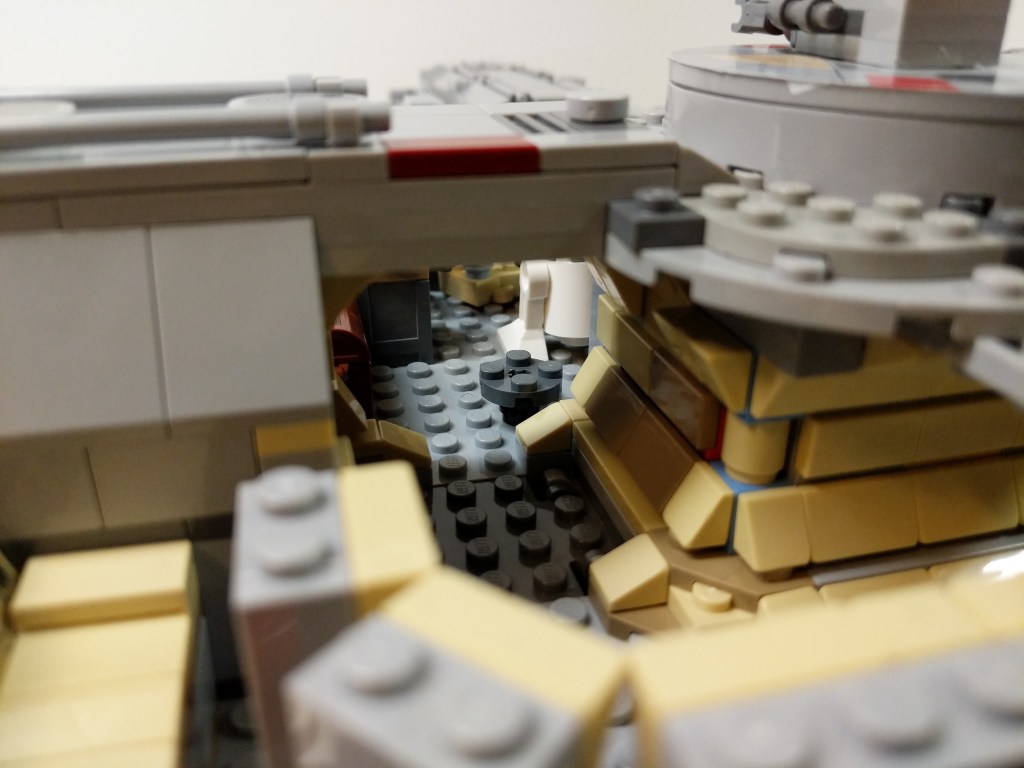
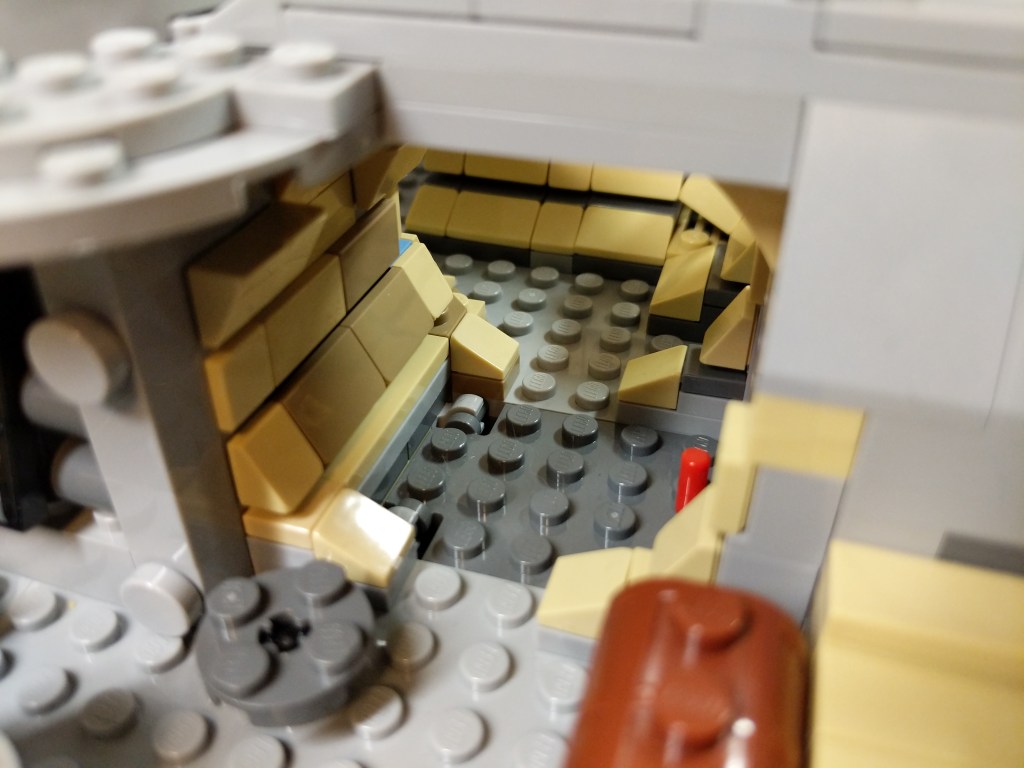
A few months later, I took another stab at the Falcon’s interior with an intention of making the rear passage way more circular and making the engine compartment less busy but with thought out detailing. I stripped down the interior and began again. True revision in practice (i.e., throw out your first draft and begin again).
Next Steps
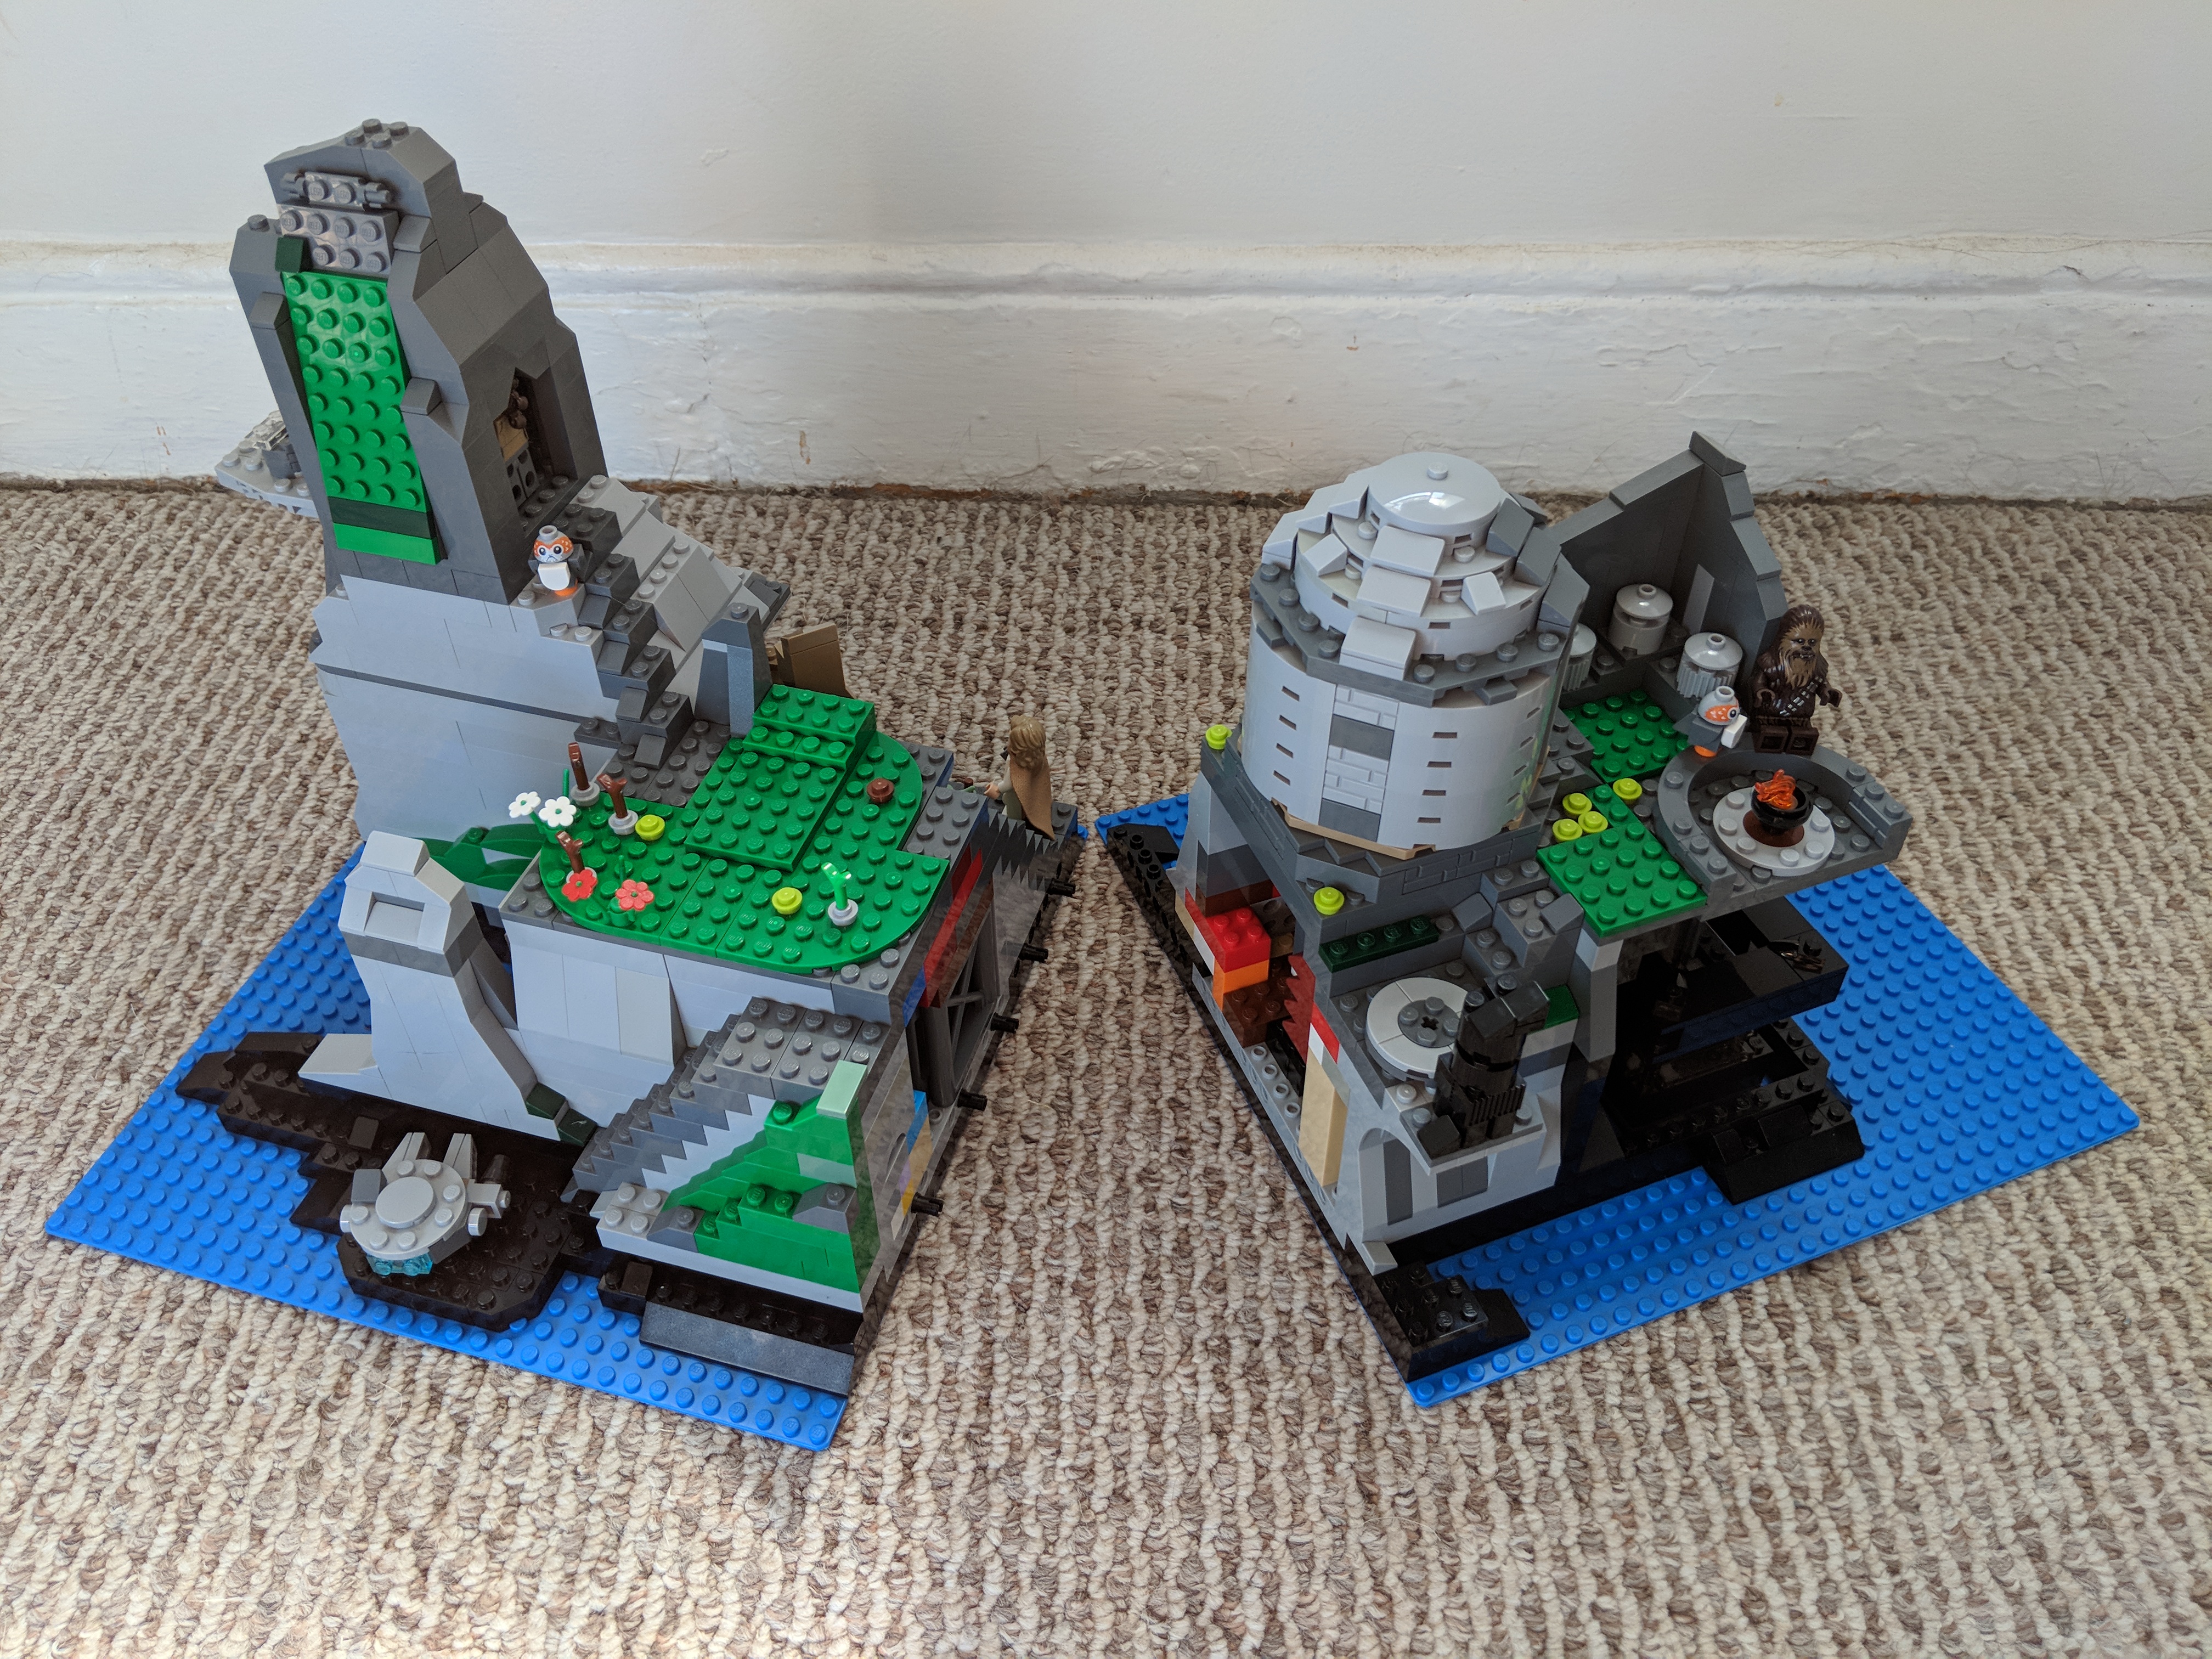
I disassembled this Falcon before Y and I moved to our new apartment in 2022. Since then, I’ve rebuilt 75105 (The Force Awakens) and 75257 (Rise of Skywalker) using the assembly instructions. They sit on either side of my desk at home. I have plans to build a larger Falcon of my own design that fits between the size of these playable sets and the much larger 75192 and 10179 sets. It will have a 2-stud side wall to give it a sleeker look than the chunky playable models. I’ll provide updates when this new build gets underway!
This week, I created the composite image above of the Millennium Falcon midflight among the stars. This most recent exercise in making was made possible by the Falcon model at the center of the composition that I assembled in June 2021 while healing from a broke toe.
I like to think about how one project links to another, how one kind of making supports another kind of making. Making and culture go hand-in-hand. One new thing makes possible countless new things given tools, materials, and know-how.
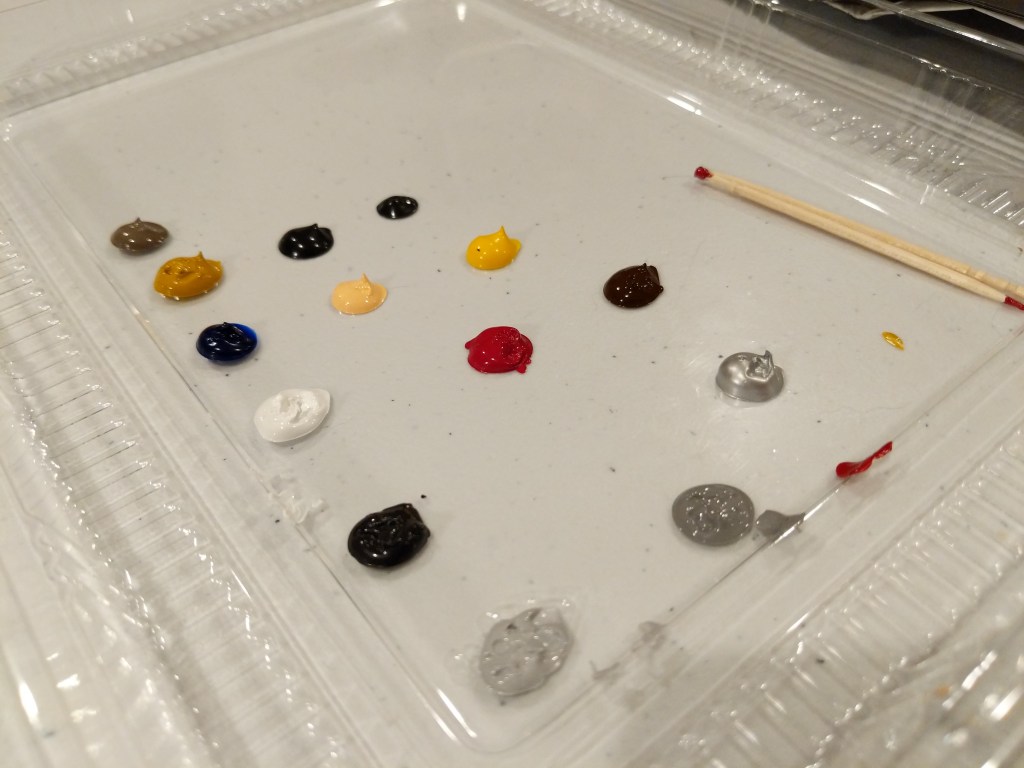
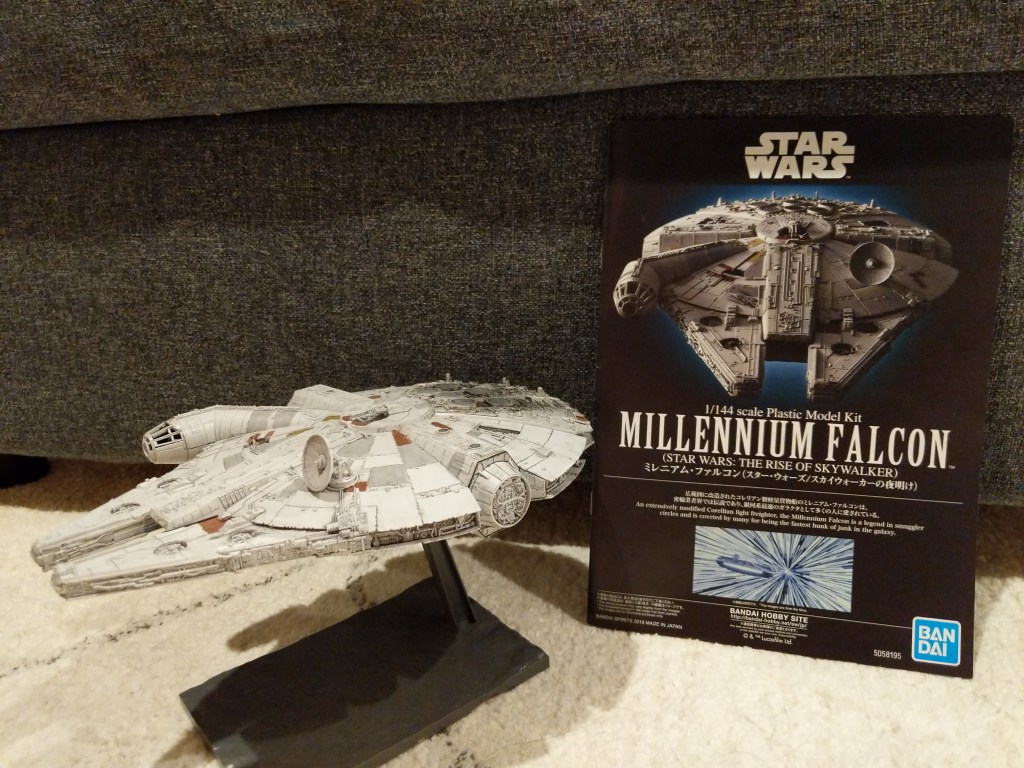
In this case, I assembled and painted a Bandai 1/144-scale Millennium Falcon plastic model set from Star Wars: The Rise of Skywalker. Proper assembly, though by no means professional, required tools (e.g., sprue cutter, paint brushes, and toothpicks), materials (e.g., plastic model glue, acrylic paints, and tape), and know-how (e.g., cutting, filing, gluing, and mixing paints and washes).
A year later, I created the science fictional composite image above. Its production required tools (e.g., Linux Mint-running desktop computer, GNU Image Manipulation Program, or aka GIMP, and the Internet), materials (e.g., the assembled model, a photo of the model in an orientation appropriate for the composite image, and a public domain photo of a star field), and know-how (e.g., an idea for what the finished product will look like, a workflow for using GIMP to achieve it, and an understanding of how to use GIMP’s affordances including layers, opacity, and filters for each stage of the workflow).
Assembling the Model
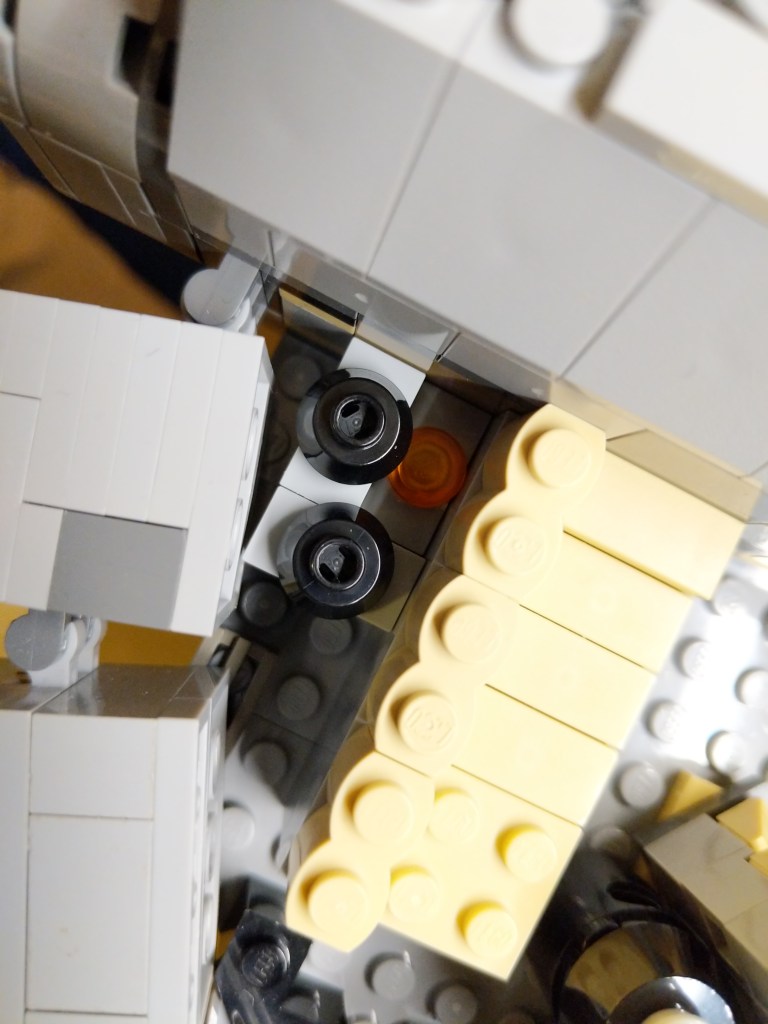
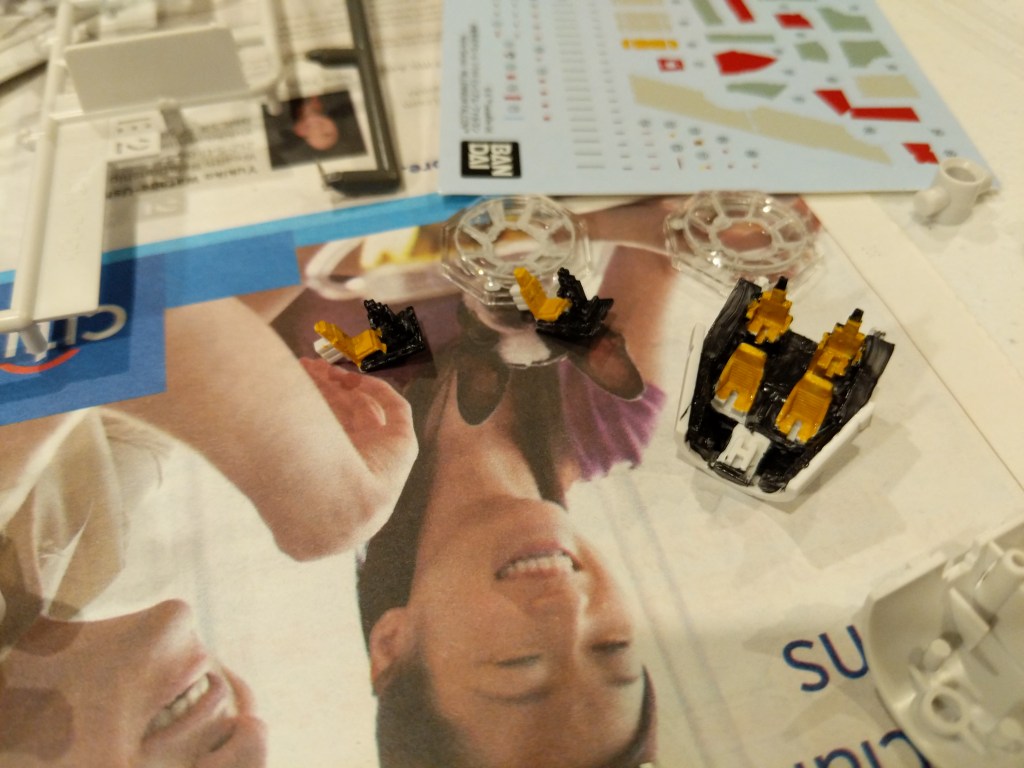
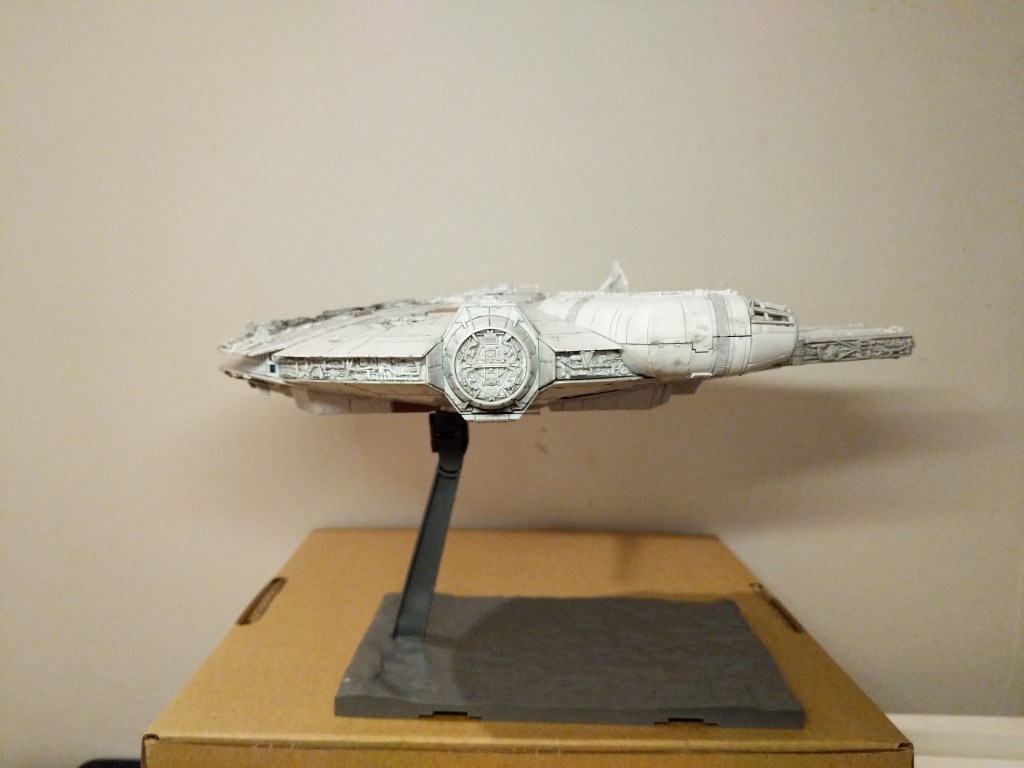
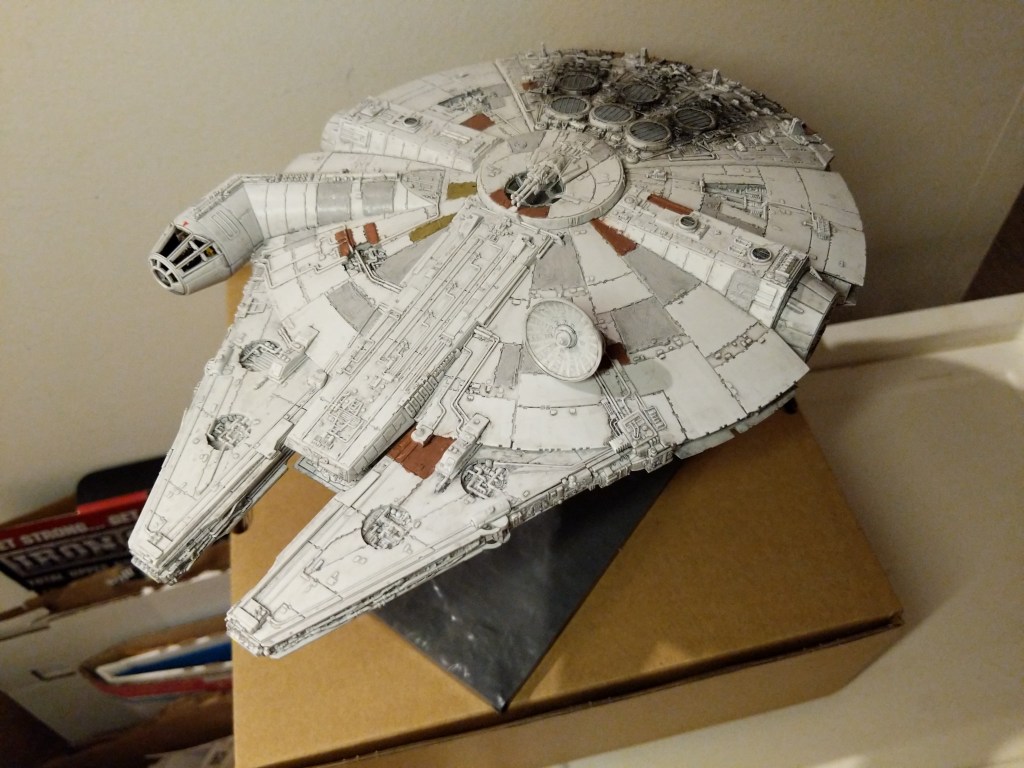
The completed Bandai 1/144 Millennium Falcon model is only about 9 1/4″ long. Hence, it and its constituent parts are very tiny. I built and painted the model over the course of a week. Given more time and equipment, I would have liked to have done a more professional job with lots of masking and airbrushed paint. Given my limitations, I decided to have fun and use what I had at hand to assemble and paint the model.
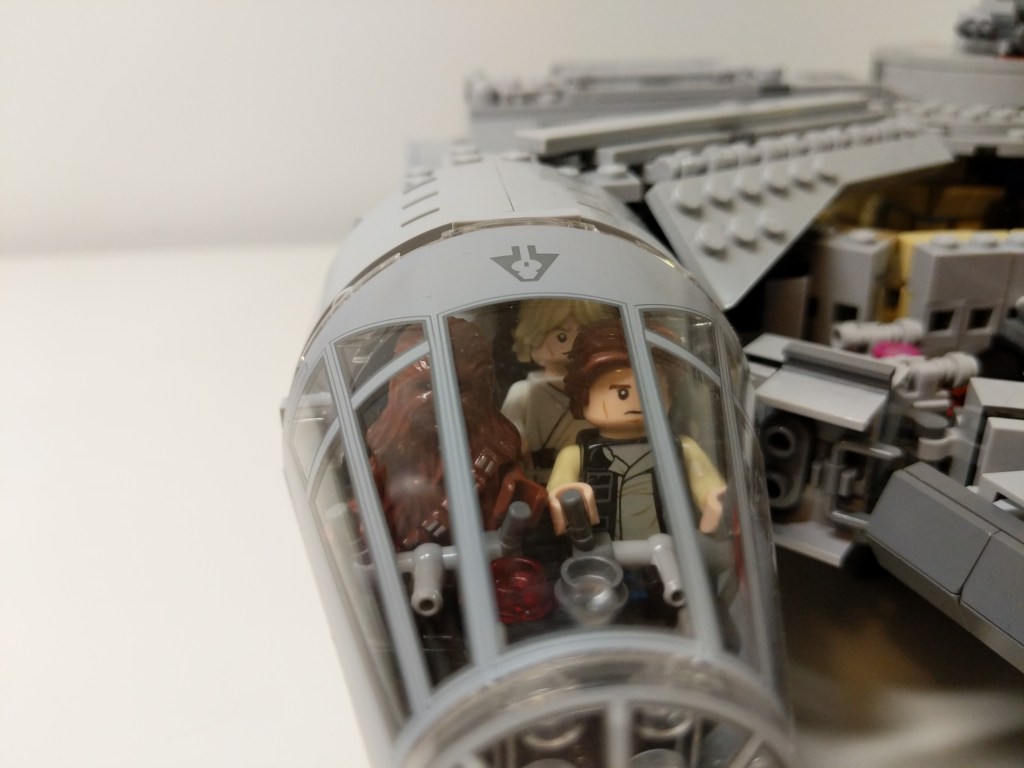
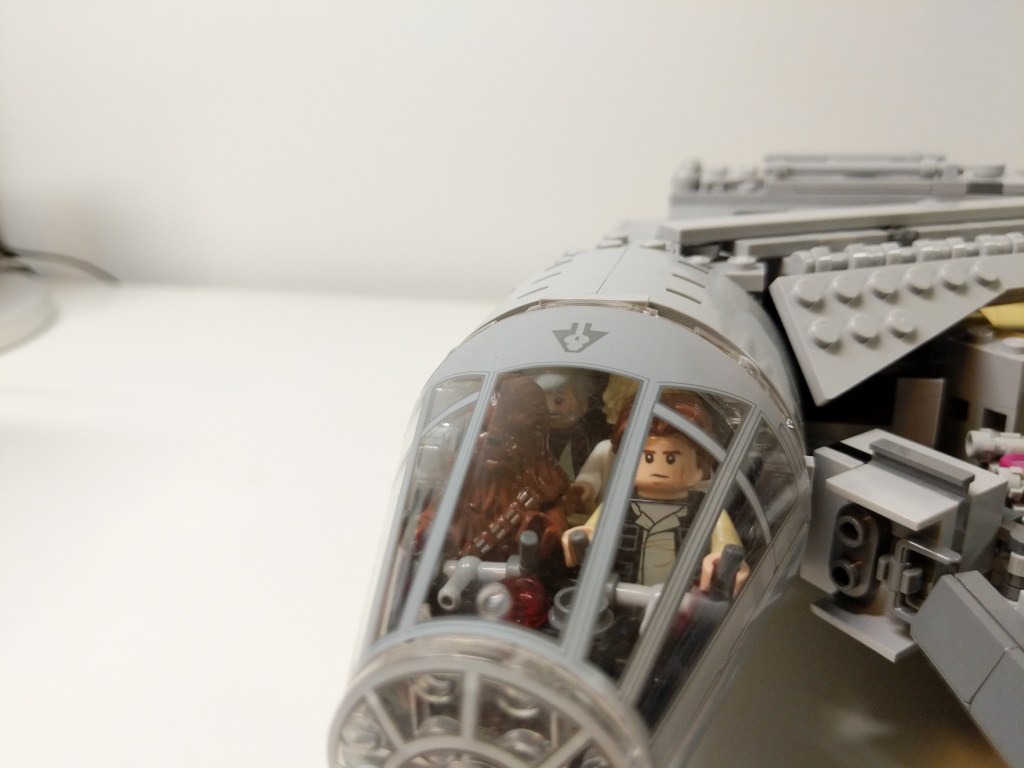
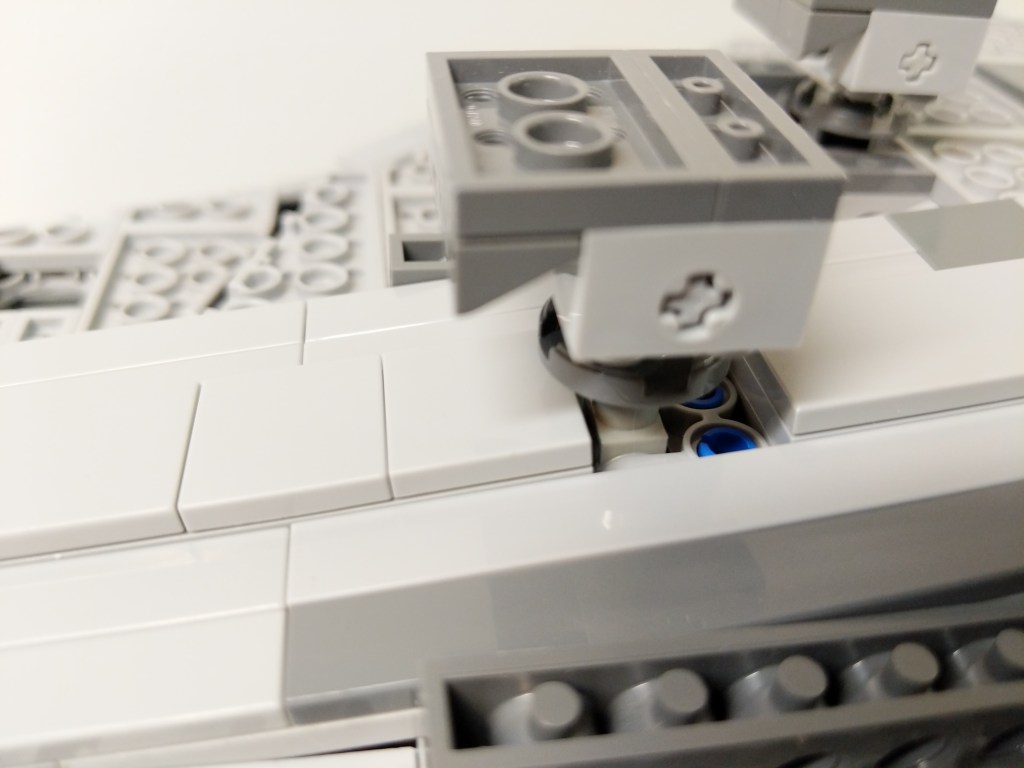
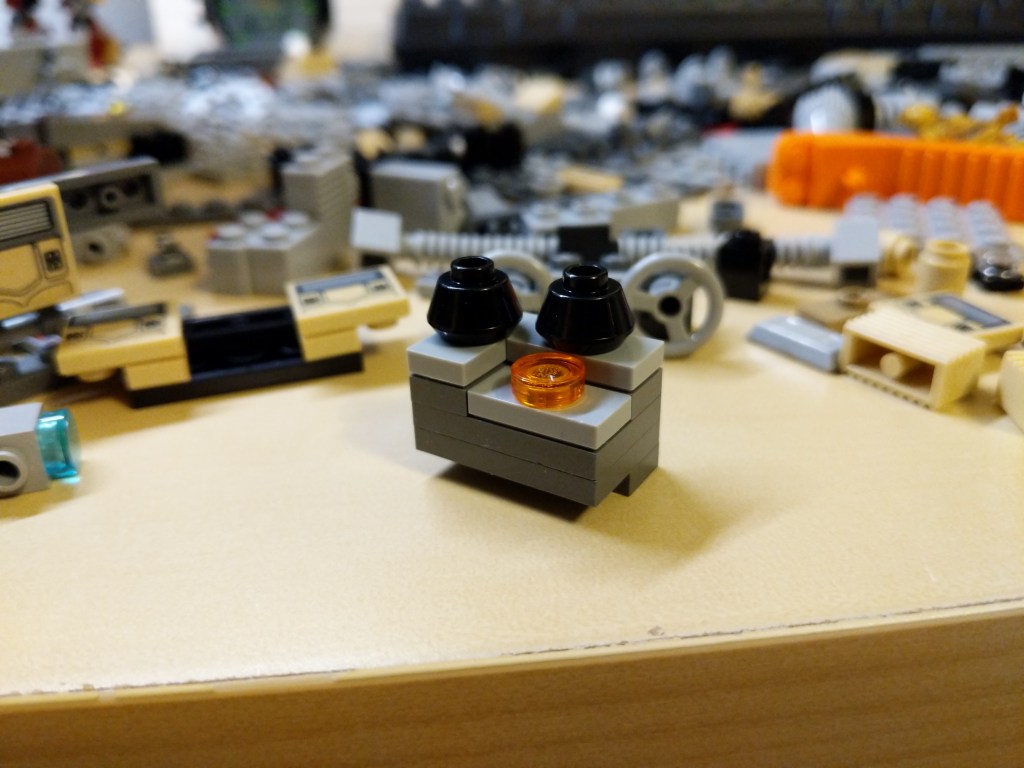
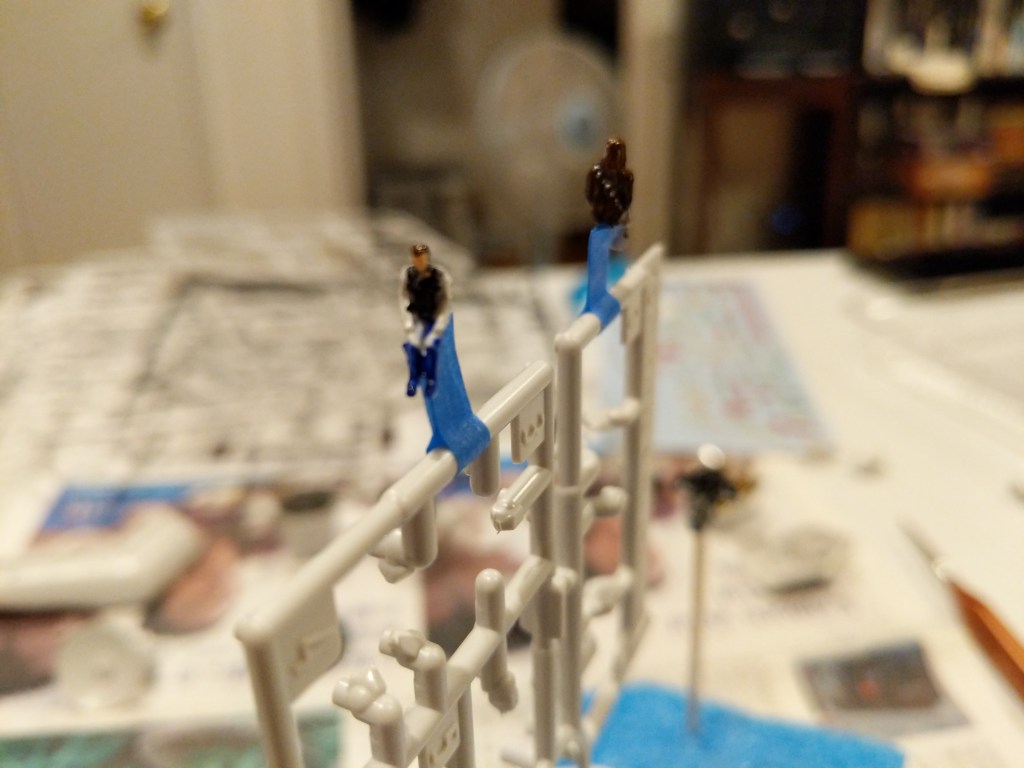
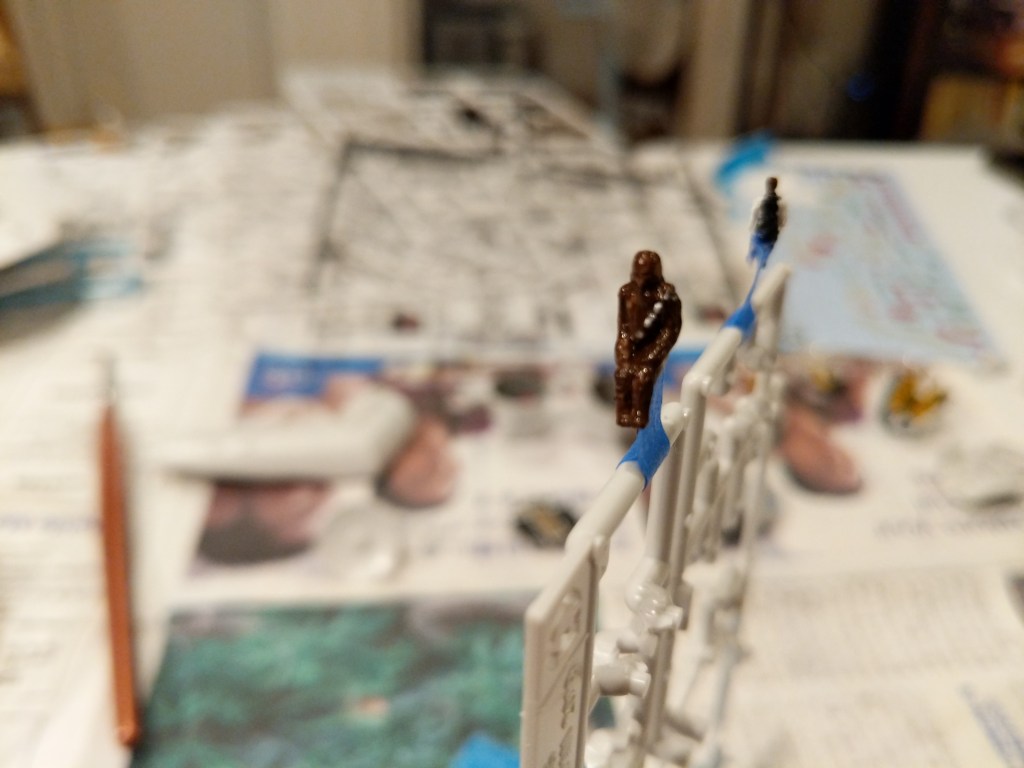
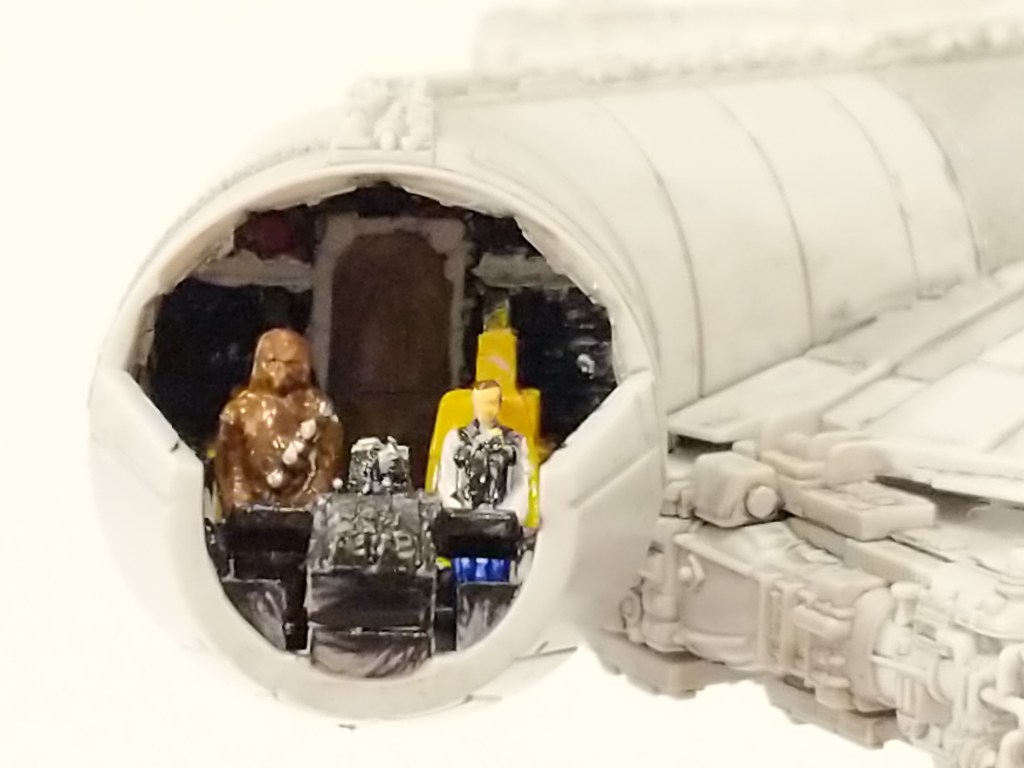
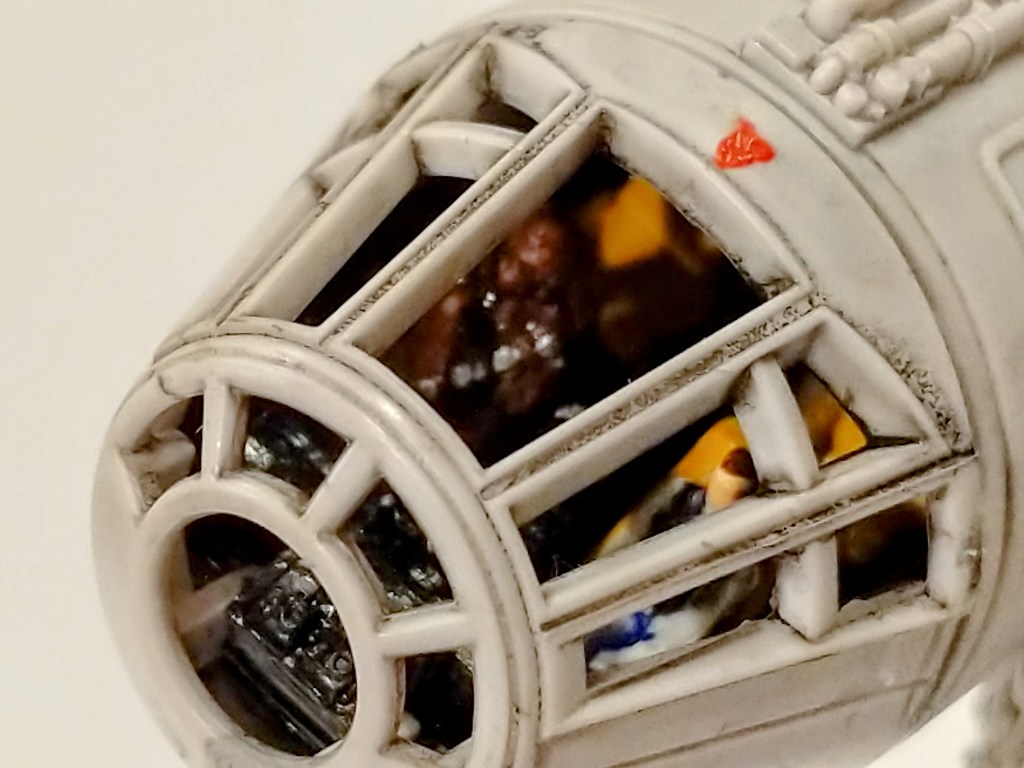
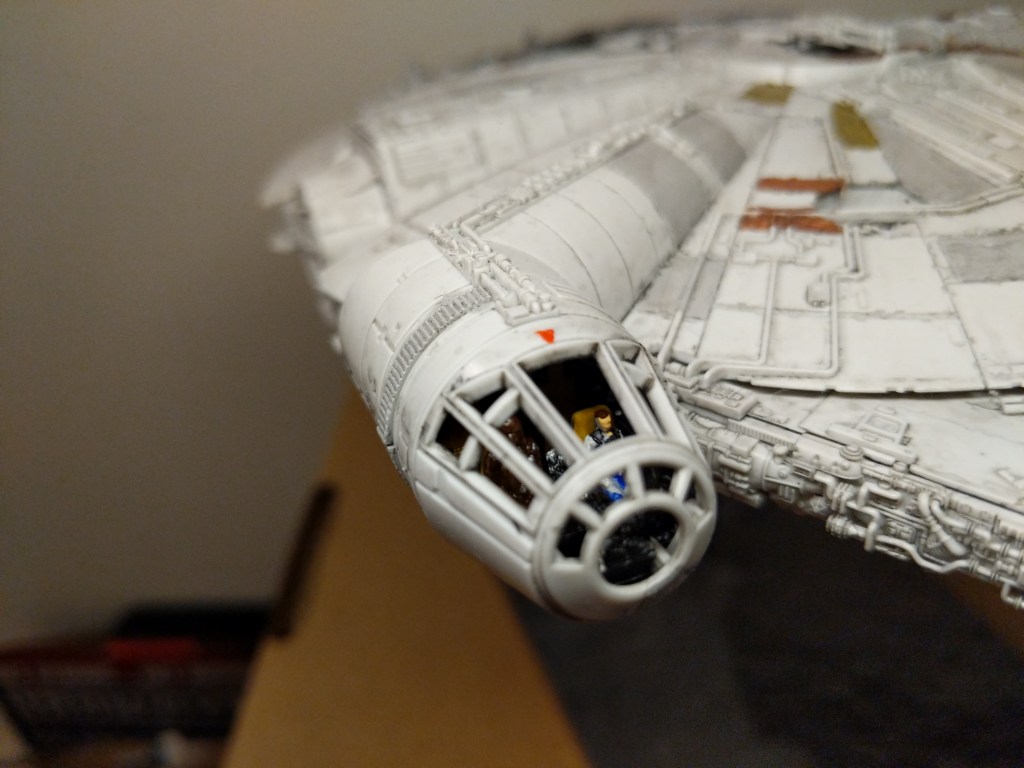
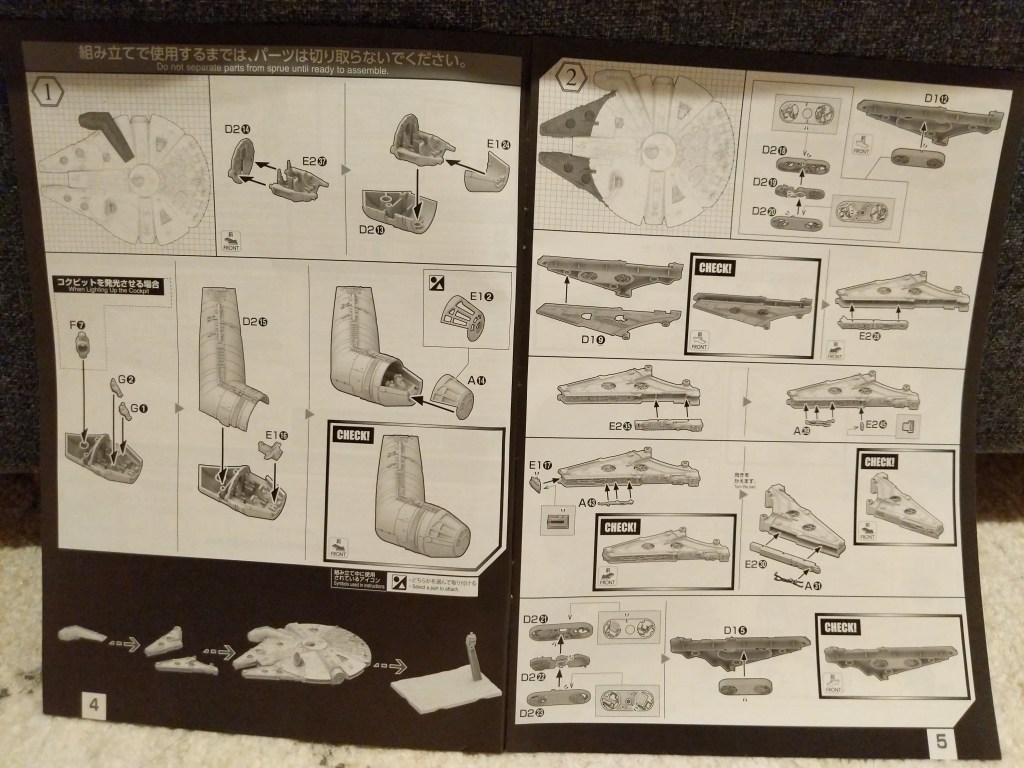
One example of the assembly process is pictured below. It involves the cockpit. Even though the model is sold as the Falcon from The Rise of Skywalker, it included Han Solo and Chewbacca figures, which I decided to use instead of the other cast miniatures. For these detailed elements of the model, I used a combination of toothpicks, very fine brushes, and dabs of paint to achieve the intended effect.
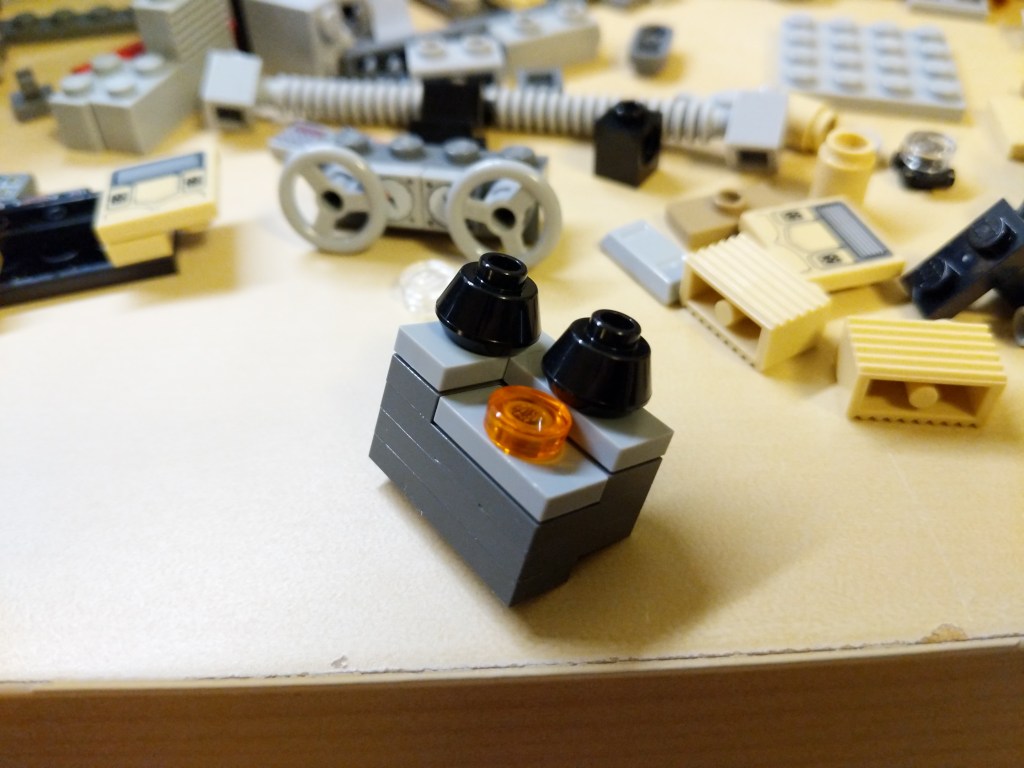
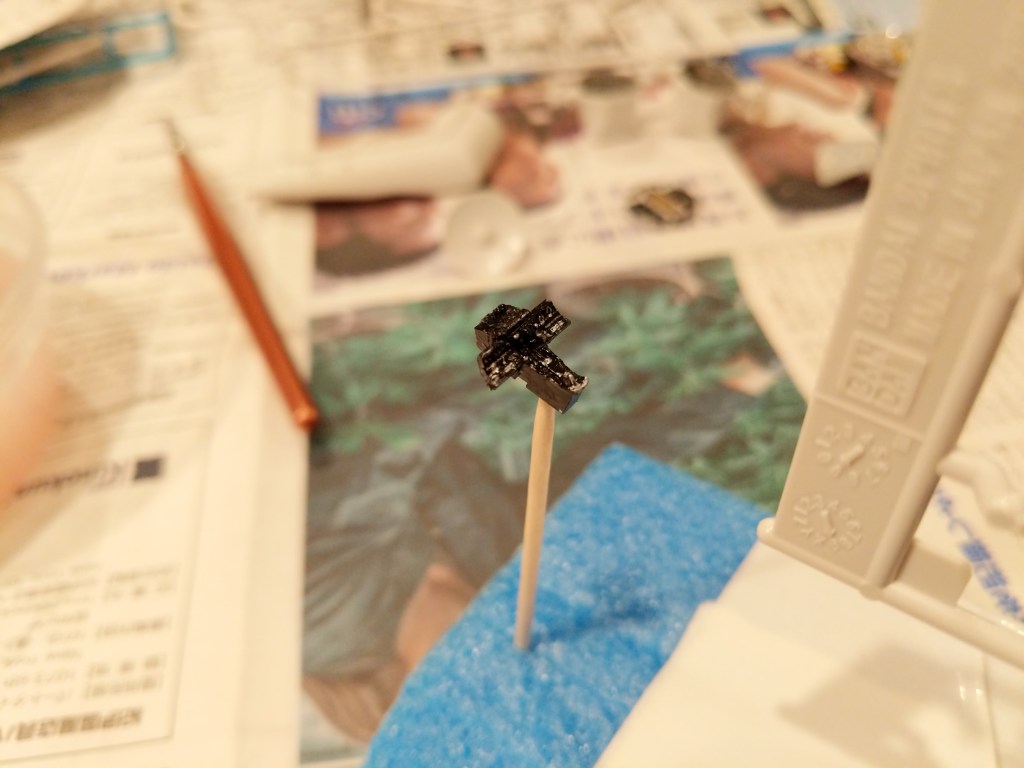
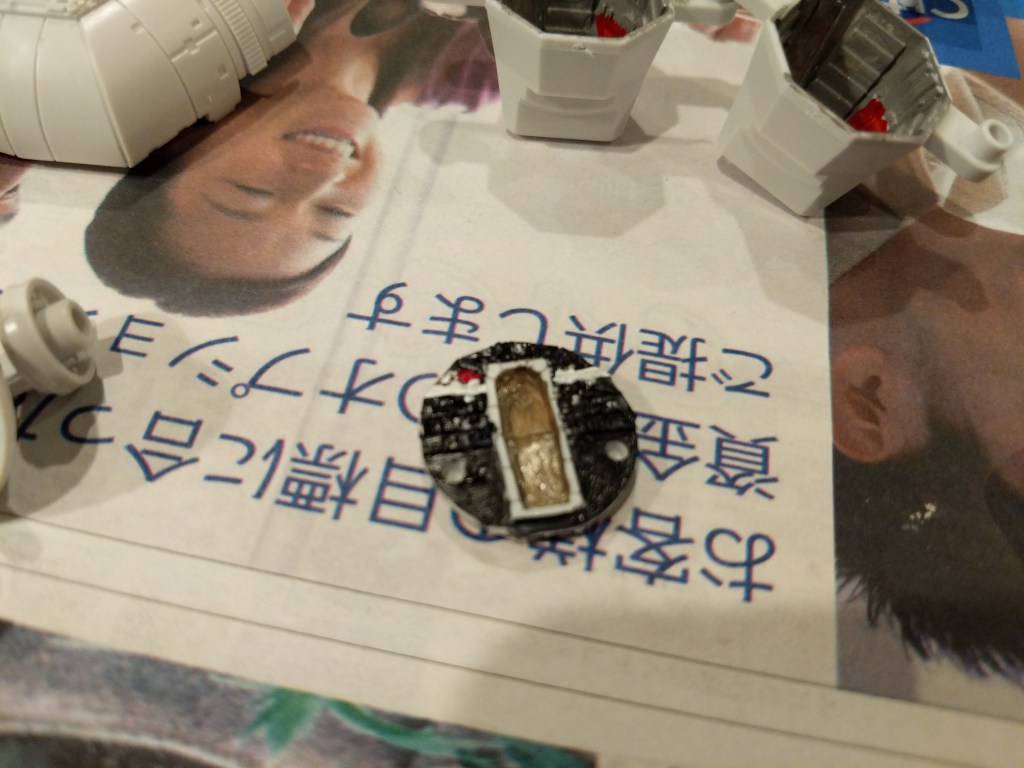
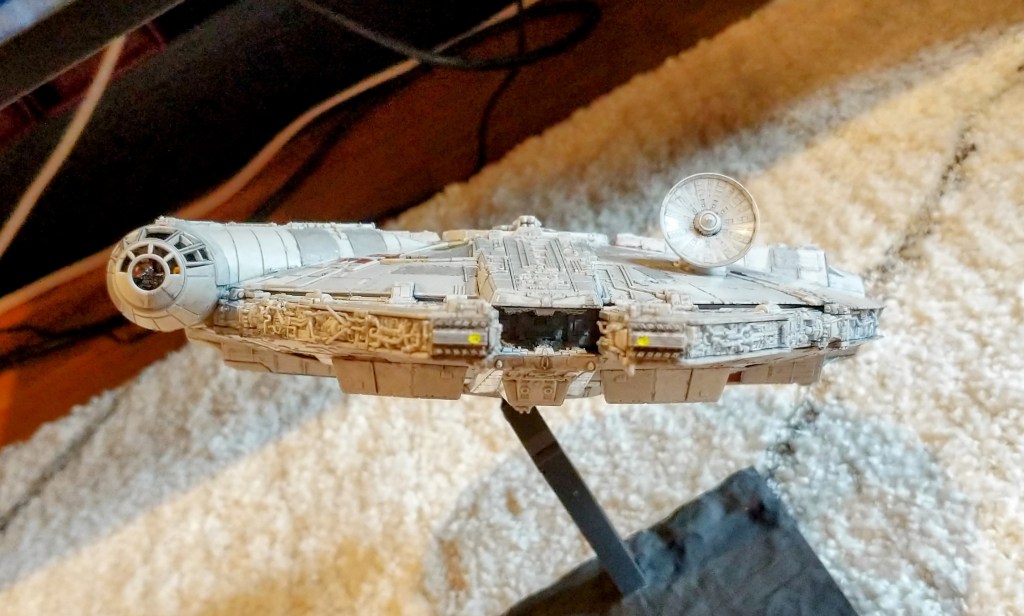
The pictures below show the assembled cockpit with shaky, imperfect paint application on the left and remnants of the dark wash that I applied to age and highlight lines on the model’s surface on the right.
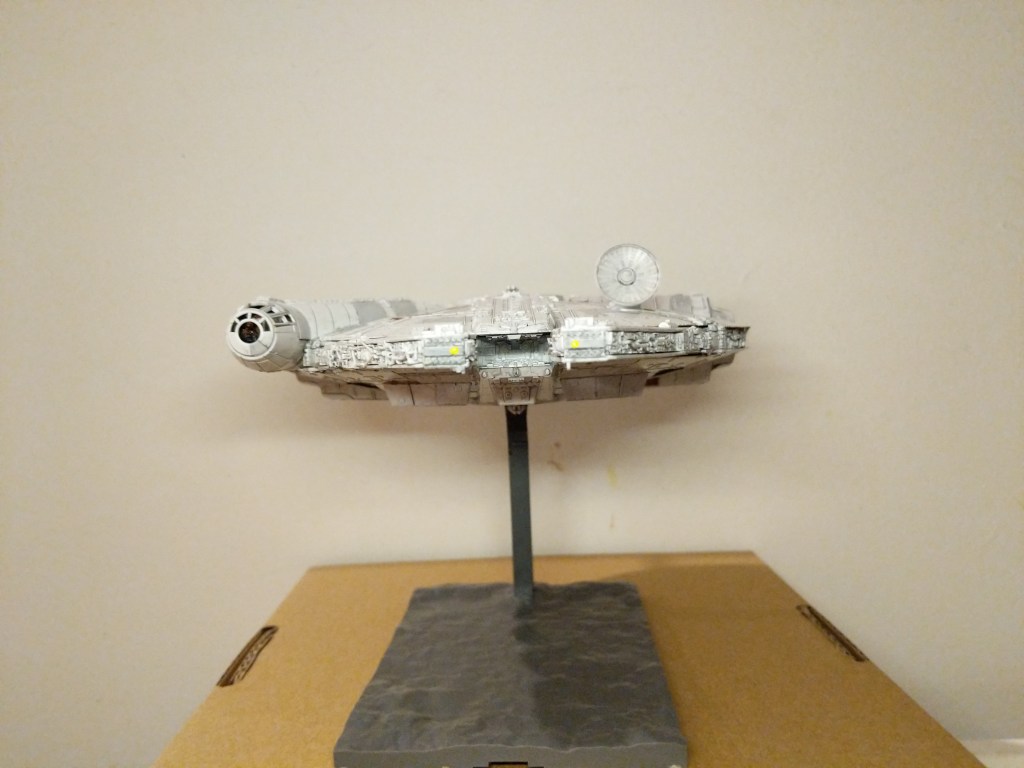
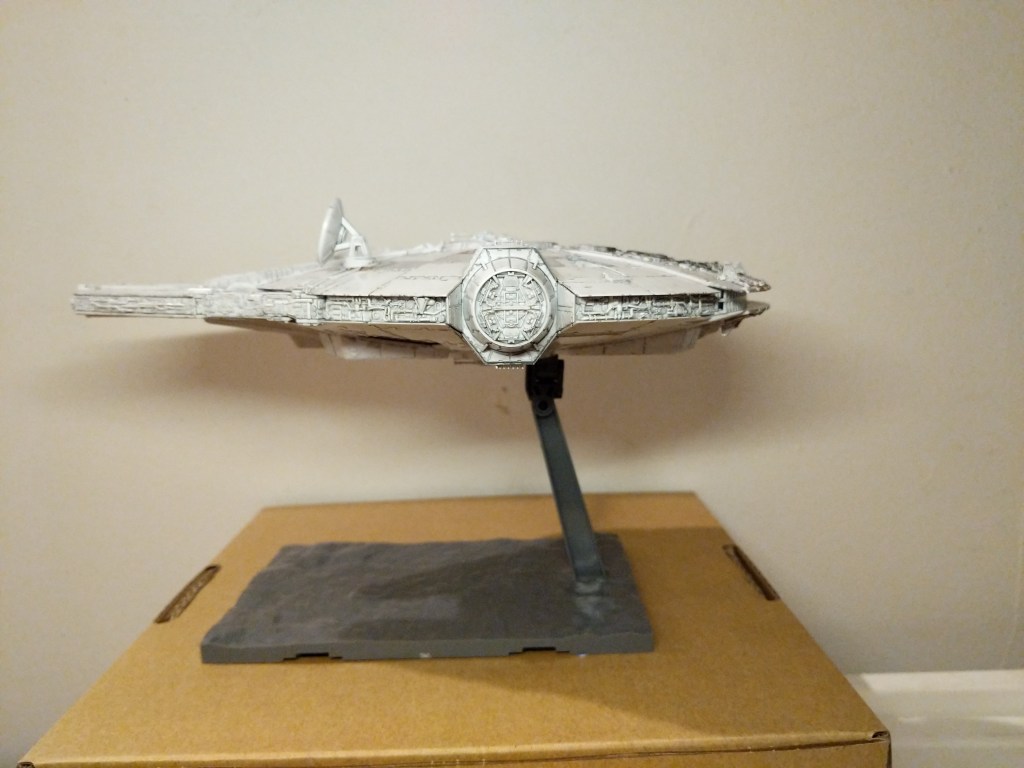
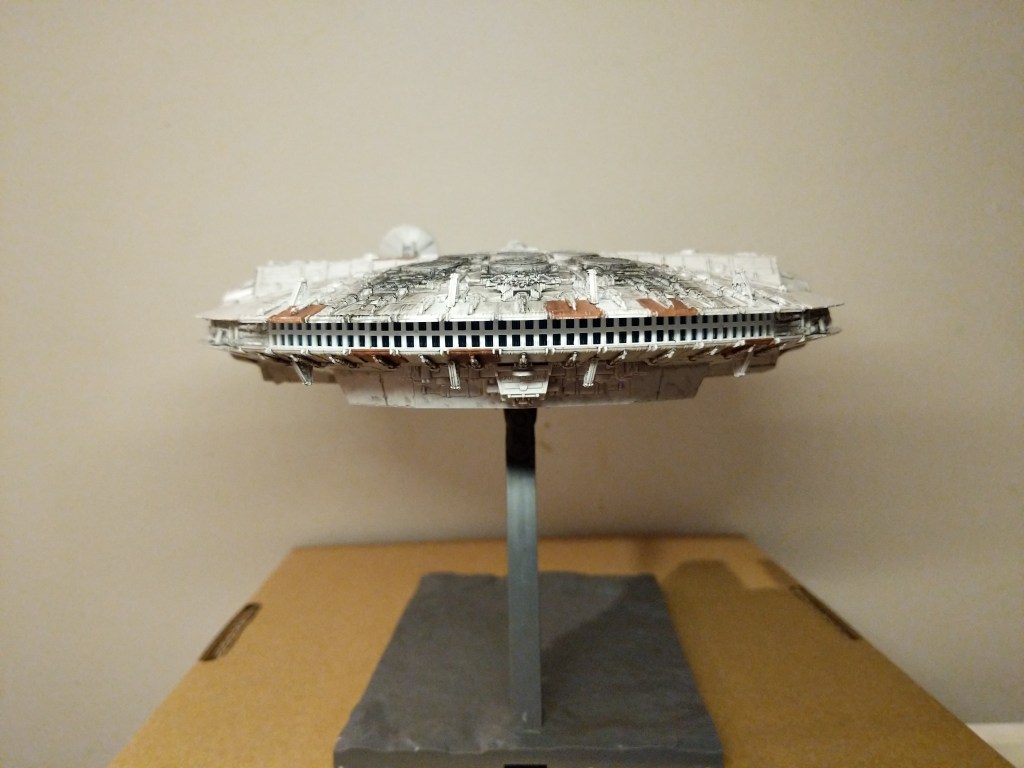
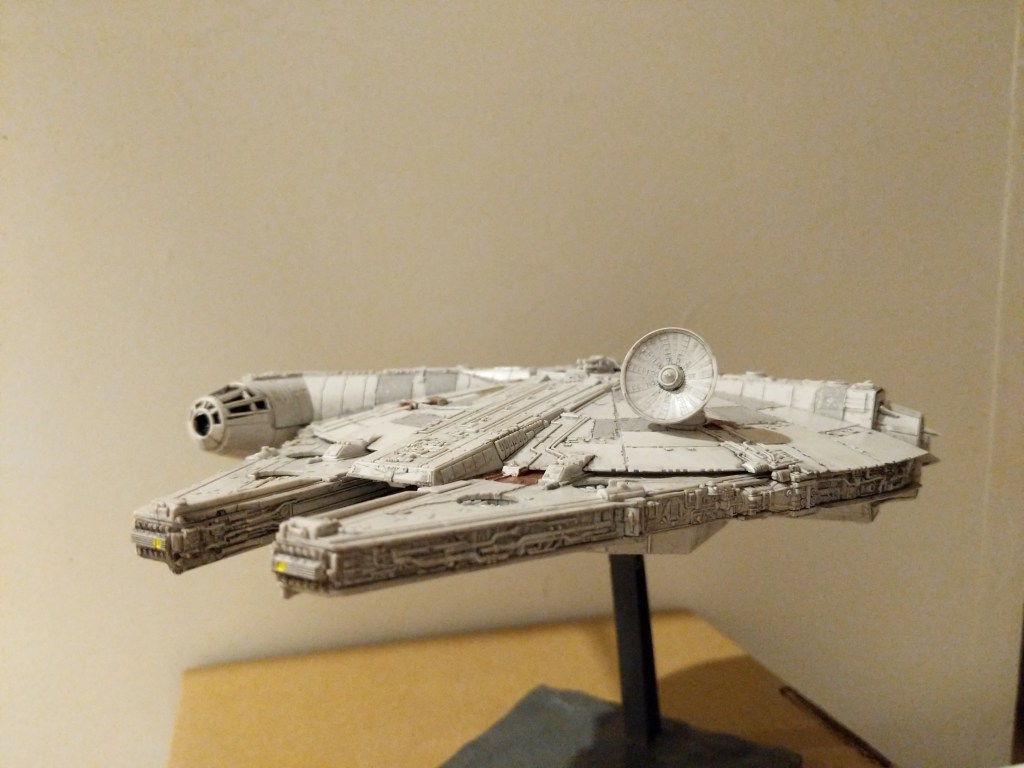
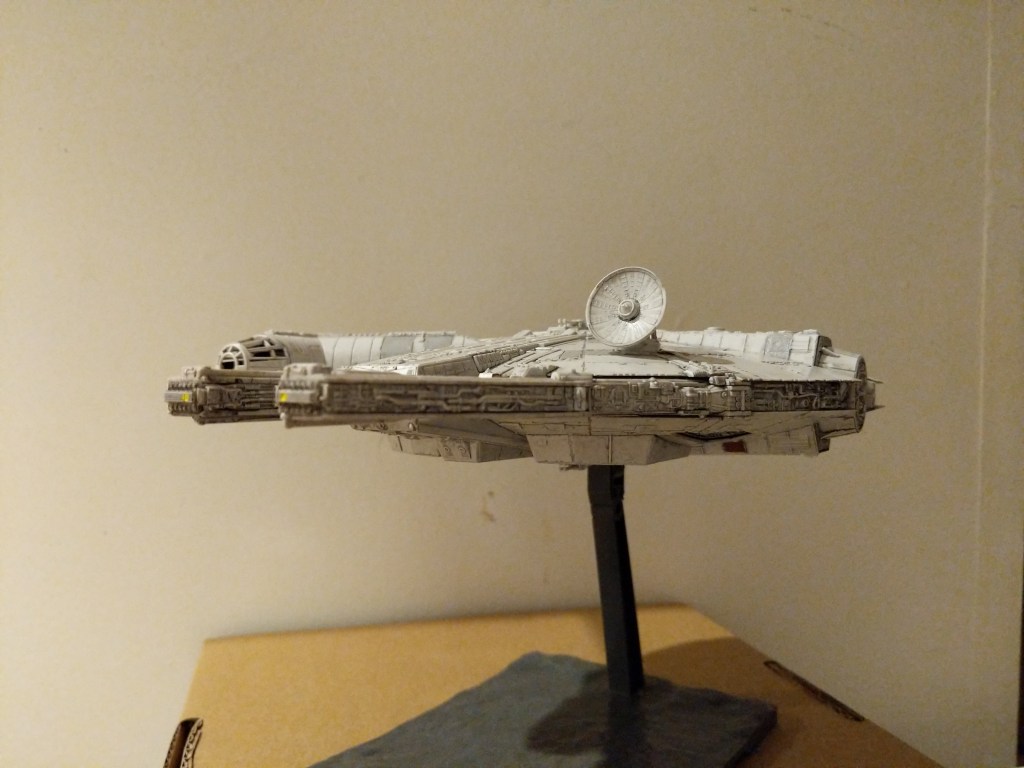
The photos below show the completed model perched on its included, adjustable stand.
Overall, Bandai’s model was expertly designed, easy to assemble, and highly respectful of its source material.
Creating the Composite Image in GIMP
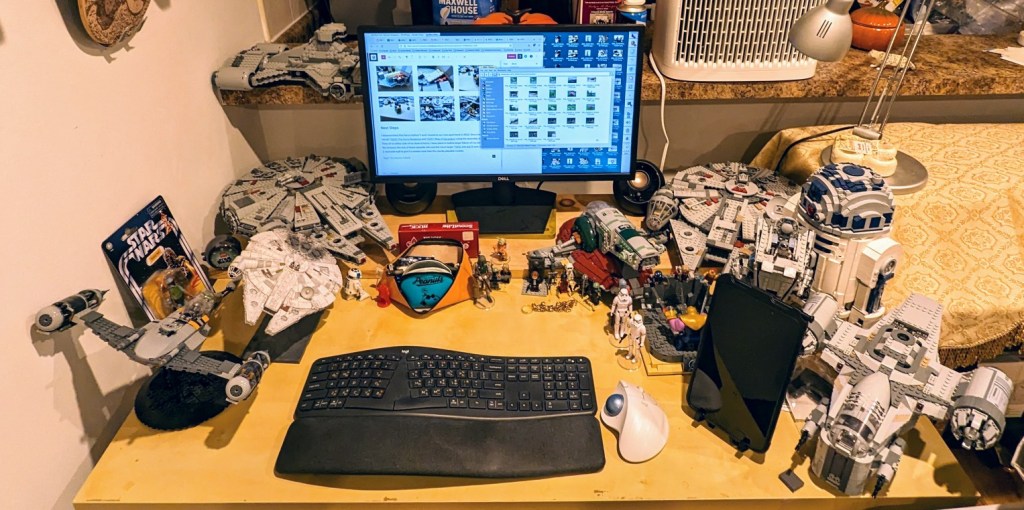
The Bandai 1/144-scale Falcon sits on my desk to the left of my keyboard between LEGO models of The Mandalorian’s N-1 and the Millennium Falcon from The Force Awakens (It’s safe to say that I aspire to have as cluttered and interesting workspace as Ray Bradbury has in the opening to Ray Bradbury Theater shown here). So, I see it everyday.
Recently, I was thinking wouldn’t it be fun to use it to create an in-flight image using the model. That stray thought picked up the thread from making the model and began creating a linkage to using the model to create something new–a fantastic image of the Falcon flying in outerspace.
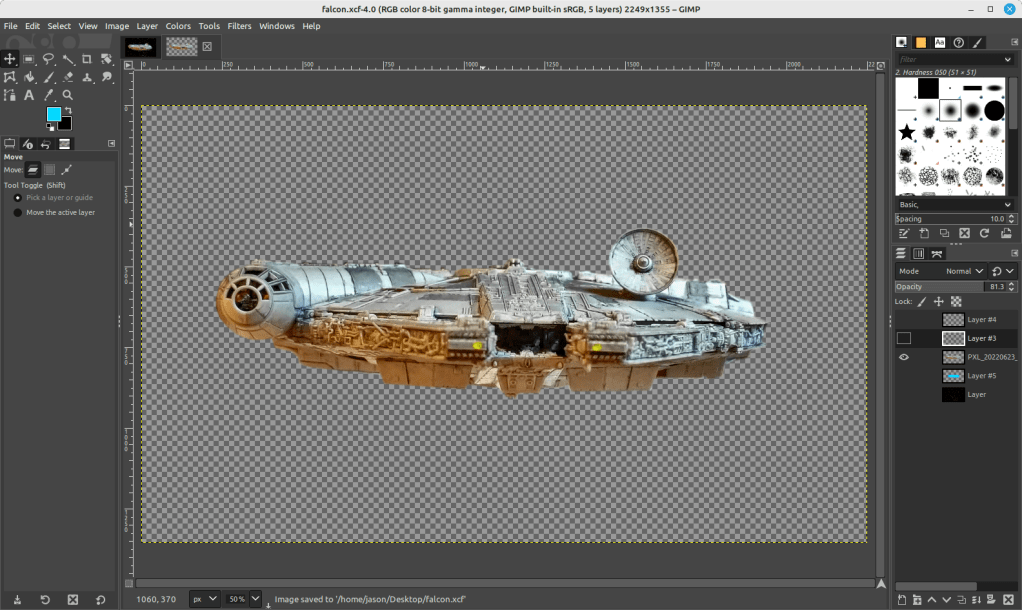
Looking through my photos, I selected the one below due to it’s orientation and composition within the photo’s rectangular frame.
I cut out the Falcon and added it to its own layer with a translucent background in GIMP. I selected all of the window areas in the cockpit and adjusted the brightness and contrast to make the interior a little more recognizable. Then, I adjusted the shadows and exposure to make the Falcon’s exterior “pop.” Next, I used the clone tool to copy matte colors to hide some of the shinier/mirrored spots (especially in the dish and in the panels directly beneath the dish). And, I used the clone and smudge tools to fill in a gap between top and bottom parts of the cockpit (the black line as seen above).
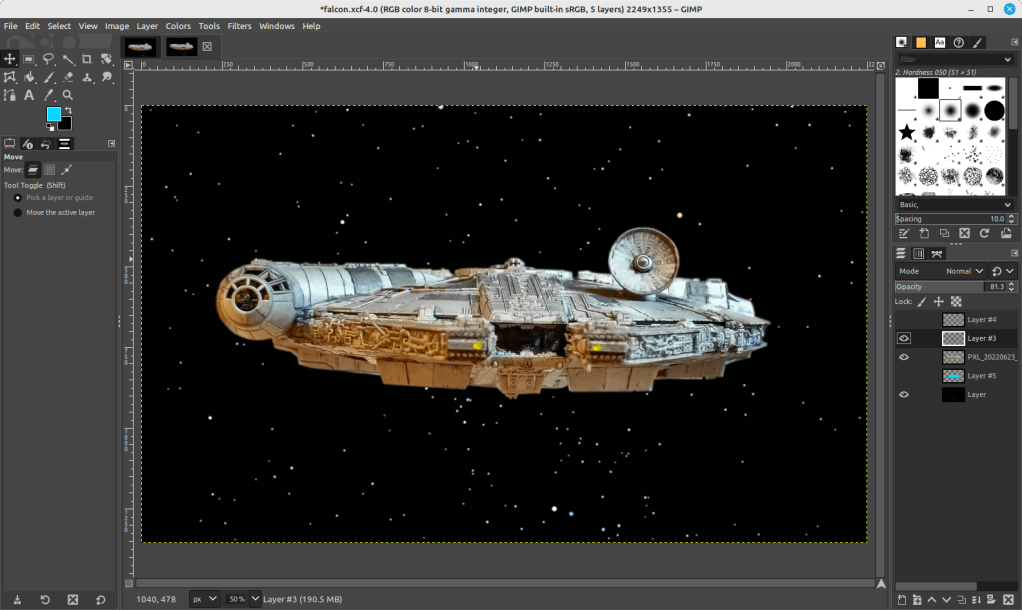
To put the Falcon in outer space, I created a base layer and pasted a star field image from NASA (found here).
On the ventral side of the Falcon, you can see that the sides of the lower mandible are catching light that throws off the image if we’re imagining one light source (e.g., a star–of course, there could be two stars, but most of the ventral side of the Falcon is in shadow, so I wanted to stick to that). So I selected those bright areas and then used the clone tool to copy that coloration from either side–the left side looks redder and the right side more neutral–onto its own layer. I set the clone tool to 50% opacity to control the shade as shown below.
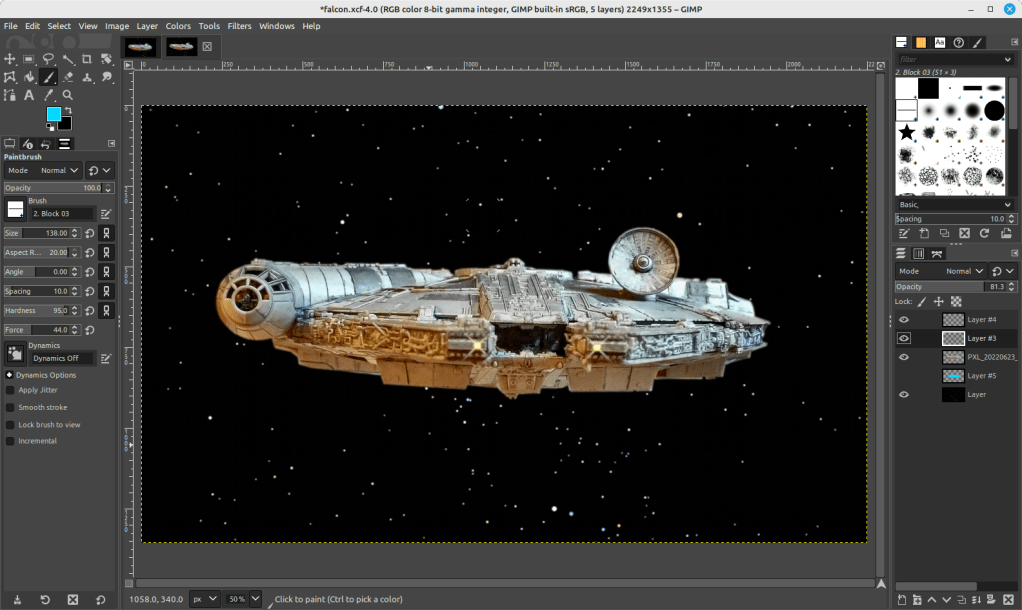
To make the scene appear more alive, I added layers for the headlights (a center circle of very bright yellow with crossed Block 03 brushes at 45 and 135 degrees for the diffraction spikes with a smidge of Gaussian blur).
And finally, the Falcon needs its engines, which I created with a large, single brush stroke with neon blue light (##04d9ff) with 95% hardness but only 44% force (not that kind!).
Conclusion
A plastic model building project from the past makes another project of science fictional image manipulation possible. Making in the present is linked to making in the past. This is the general work of culture–linkages up and down time, across geographies and nations, circuitous and not always obvious. This blog post is a microcosm of the macrocosmic work of inhabiting and building our culture. I suggest in closing that we should all reflect and chart these linkages. We might not be able to map them all, but those that we do, pays a debt of gratitude perhaps both ways–we in the present rely on that we are given from the past and the past lives on through the work that we do today.
Download the full size composite Falcon image here.
When I built my desktop PC last year, I opted for a low-end video card, because my graphics requirements were modest and it helped keep the cost of computer parts down. Since then, I’ve wanted to experience a better visual experience on my computer in games and graphics simulations, meaning more detail and effects, and higher frame rates at 1080p resolution.
Unfortunately, video card prices were outrageously inflated due to high demand from Etherium and other easy-entry cryptocurrency miners. With the welcome crash of electricity-wasting cryptocurrency markets and the anticipated announcement of a new generation of video cards from nVidia, the prices of video cards began to return to lower prices, which prompted me to begin looking for an upgrade.
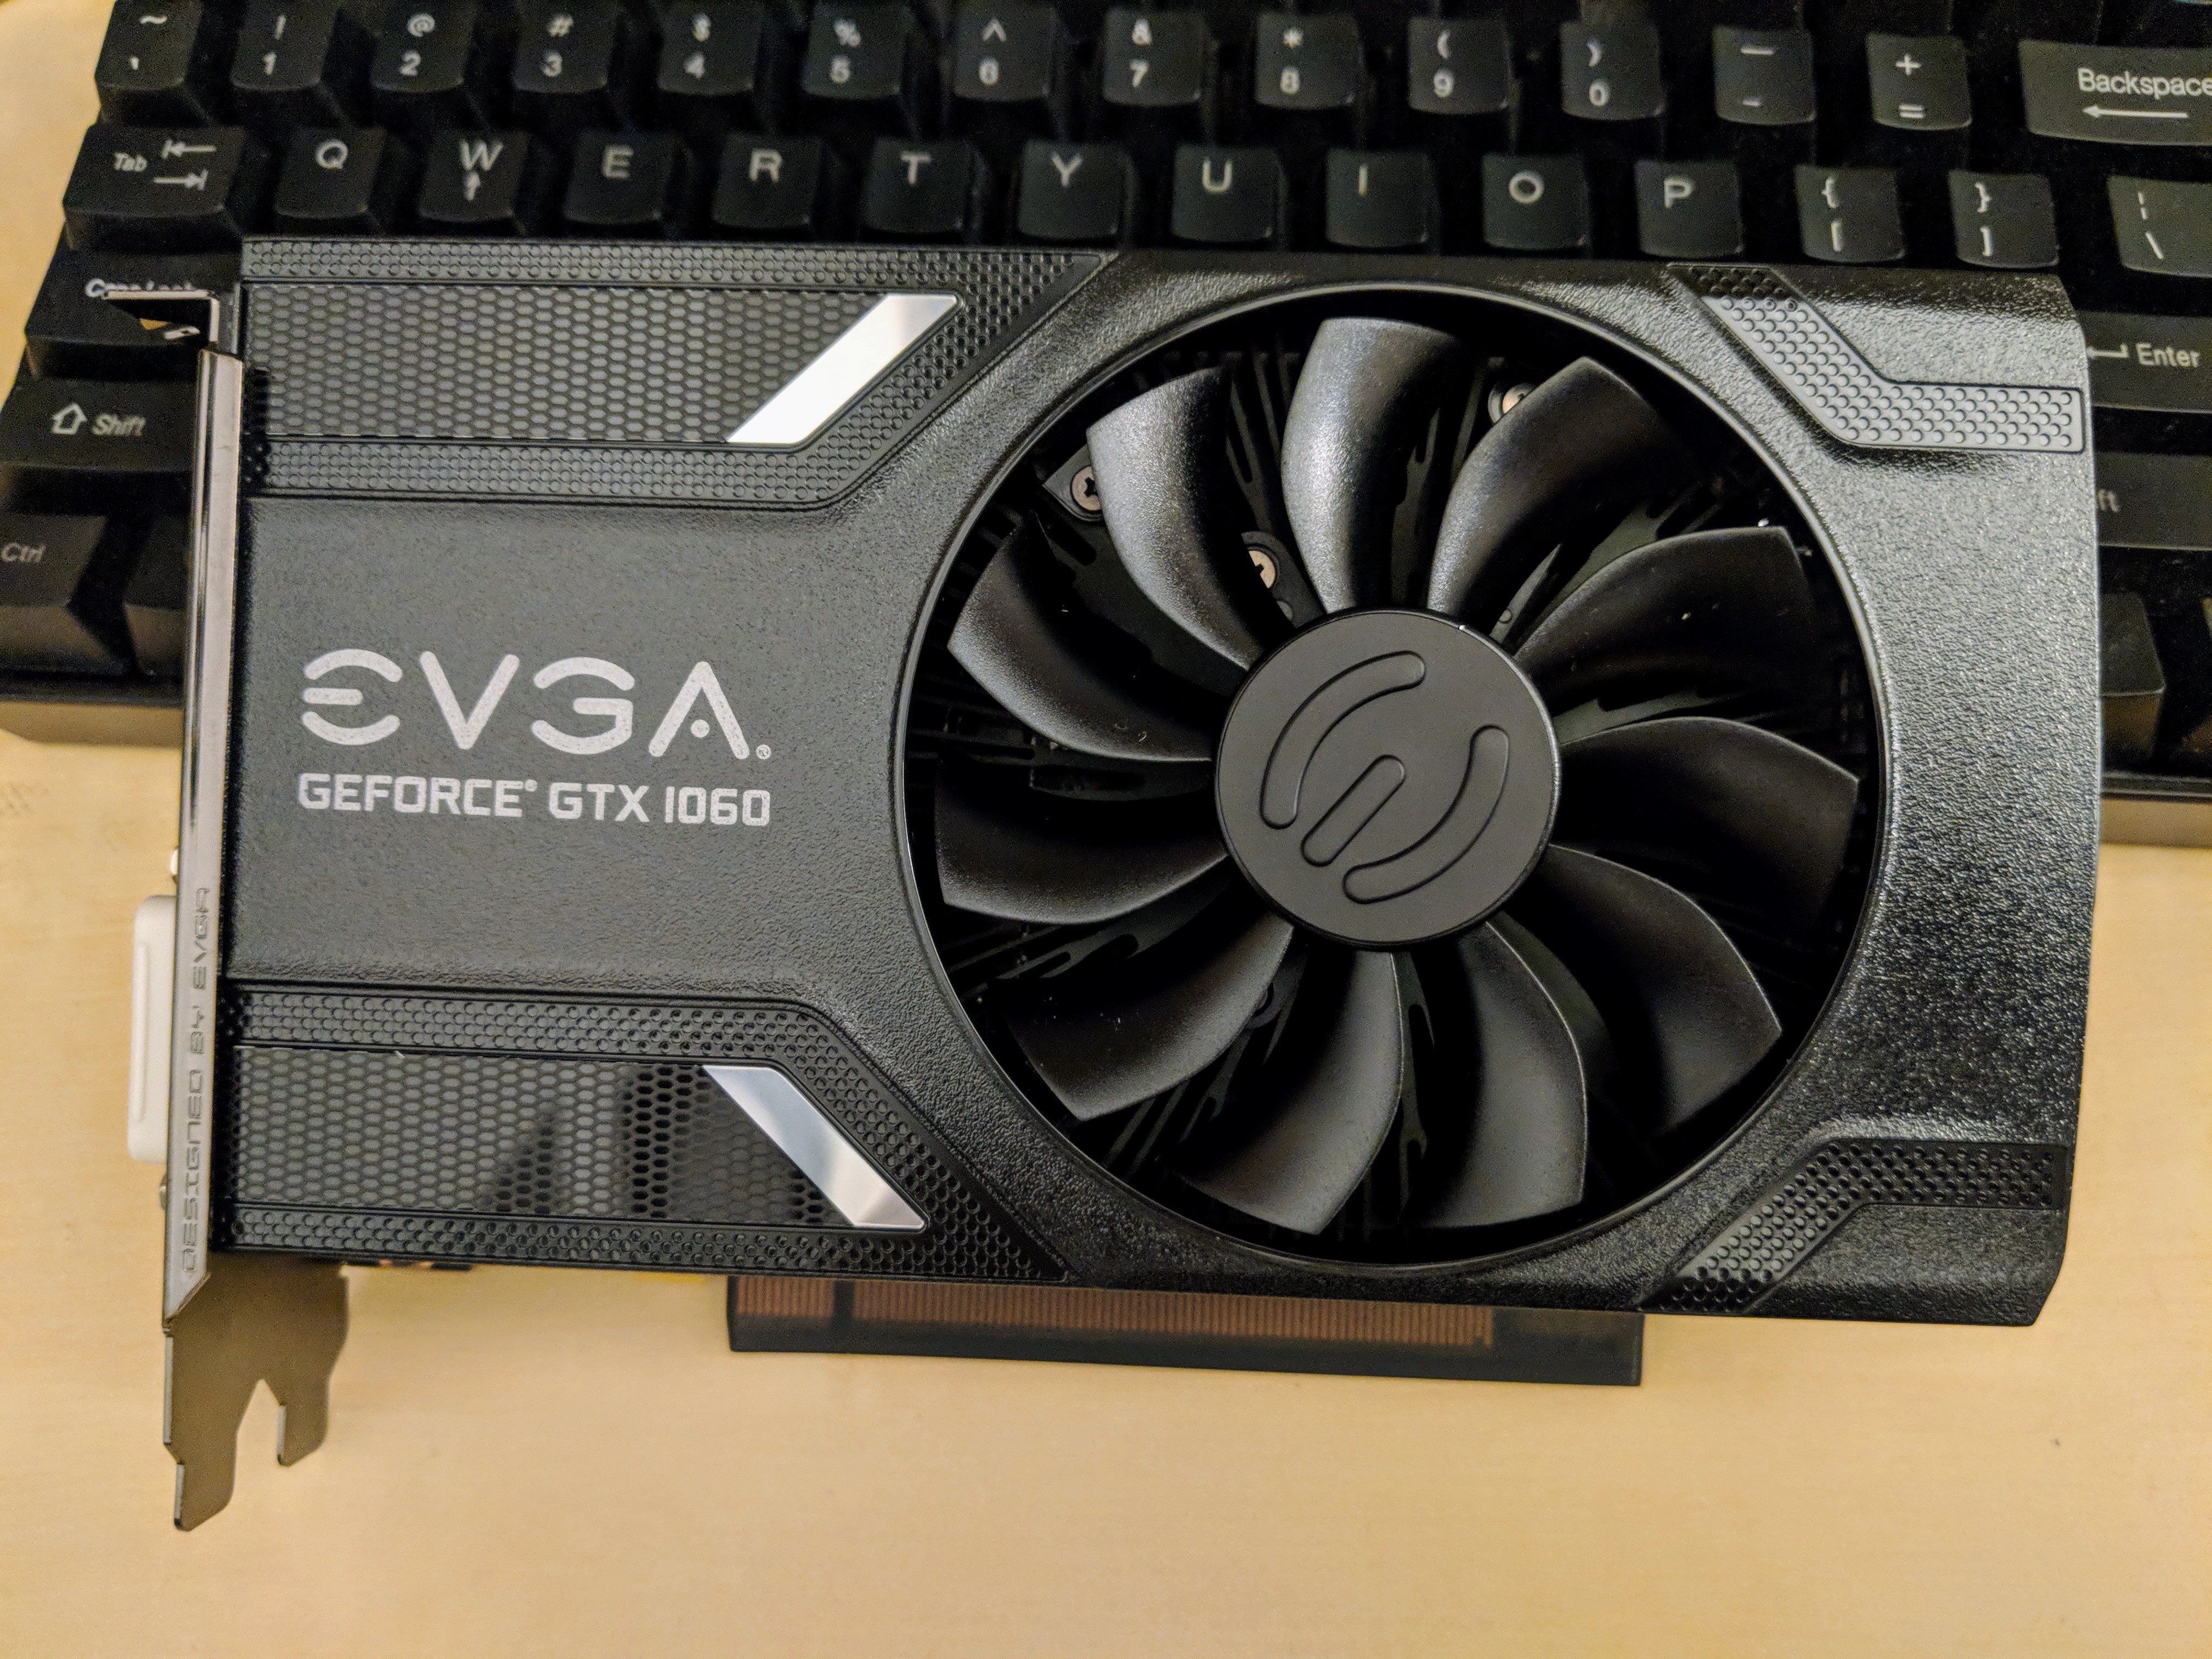
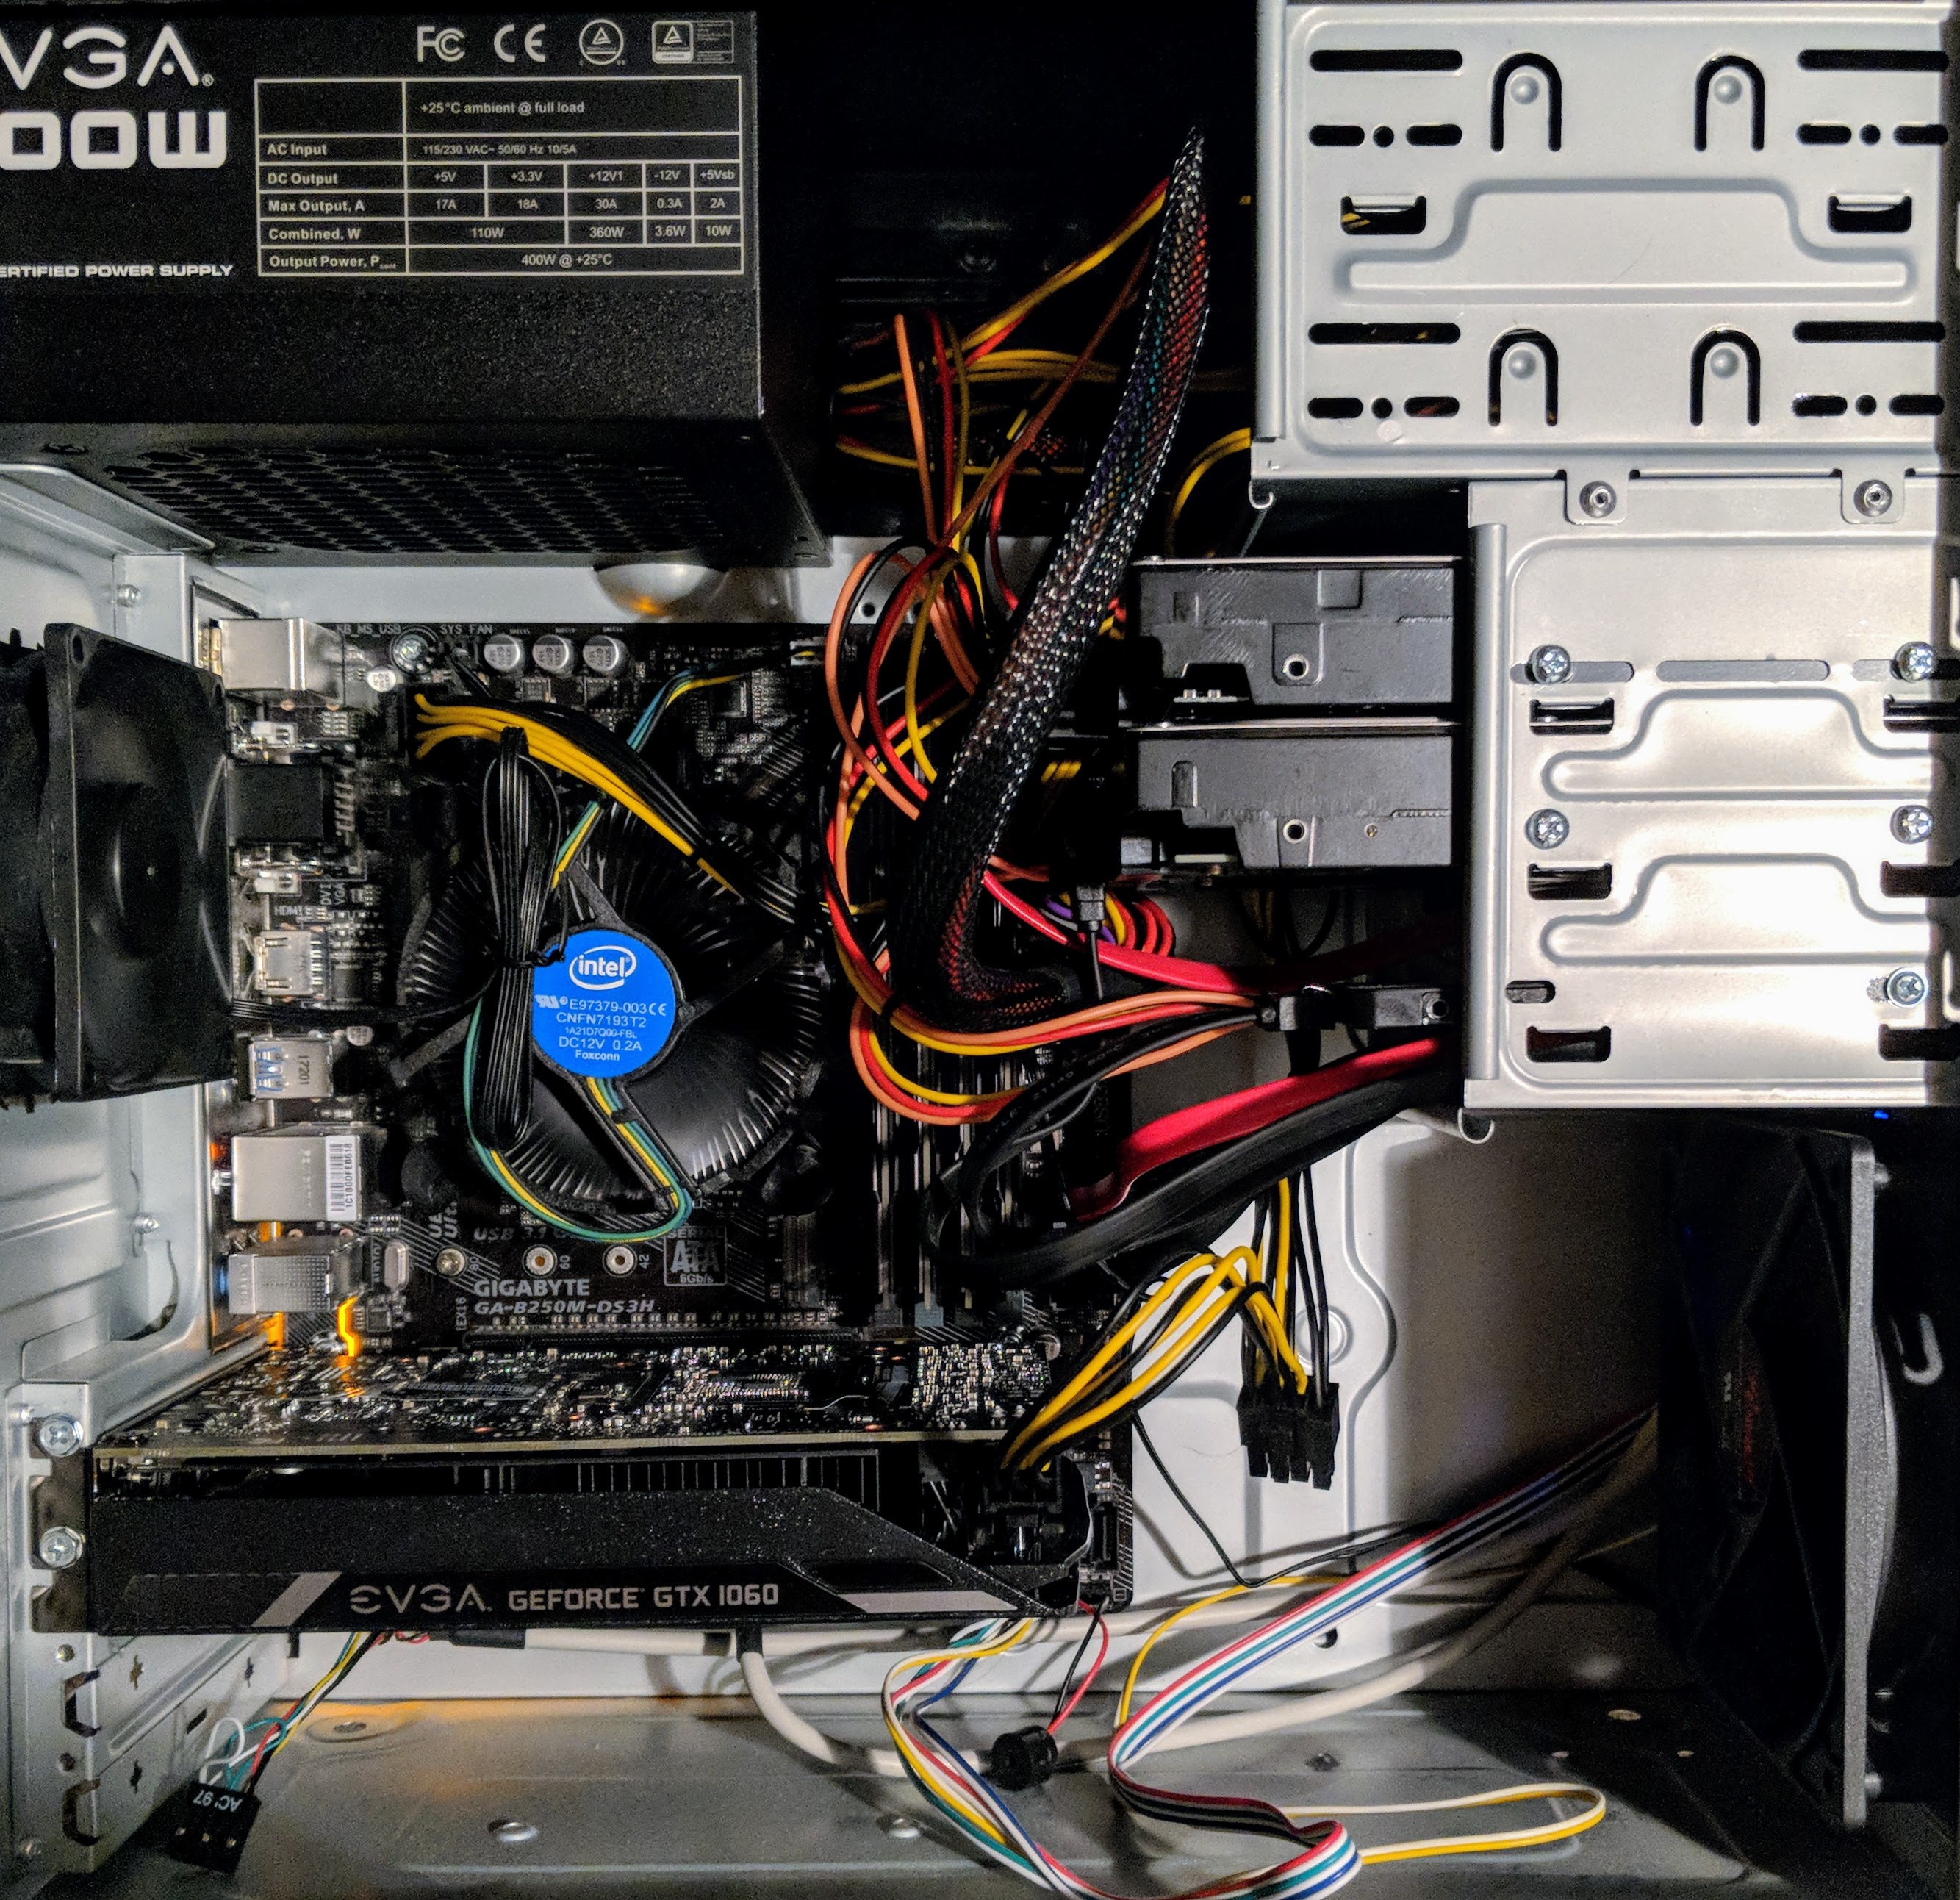
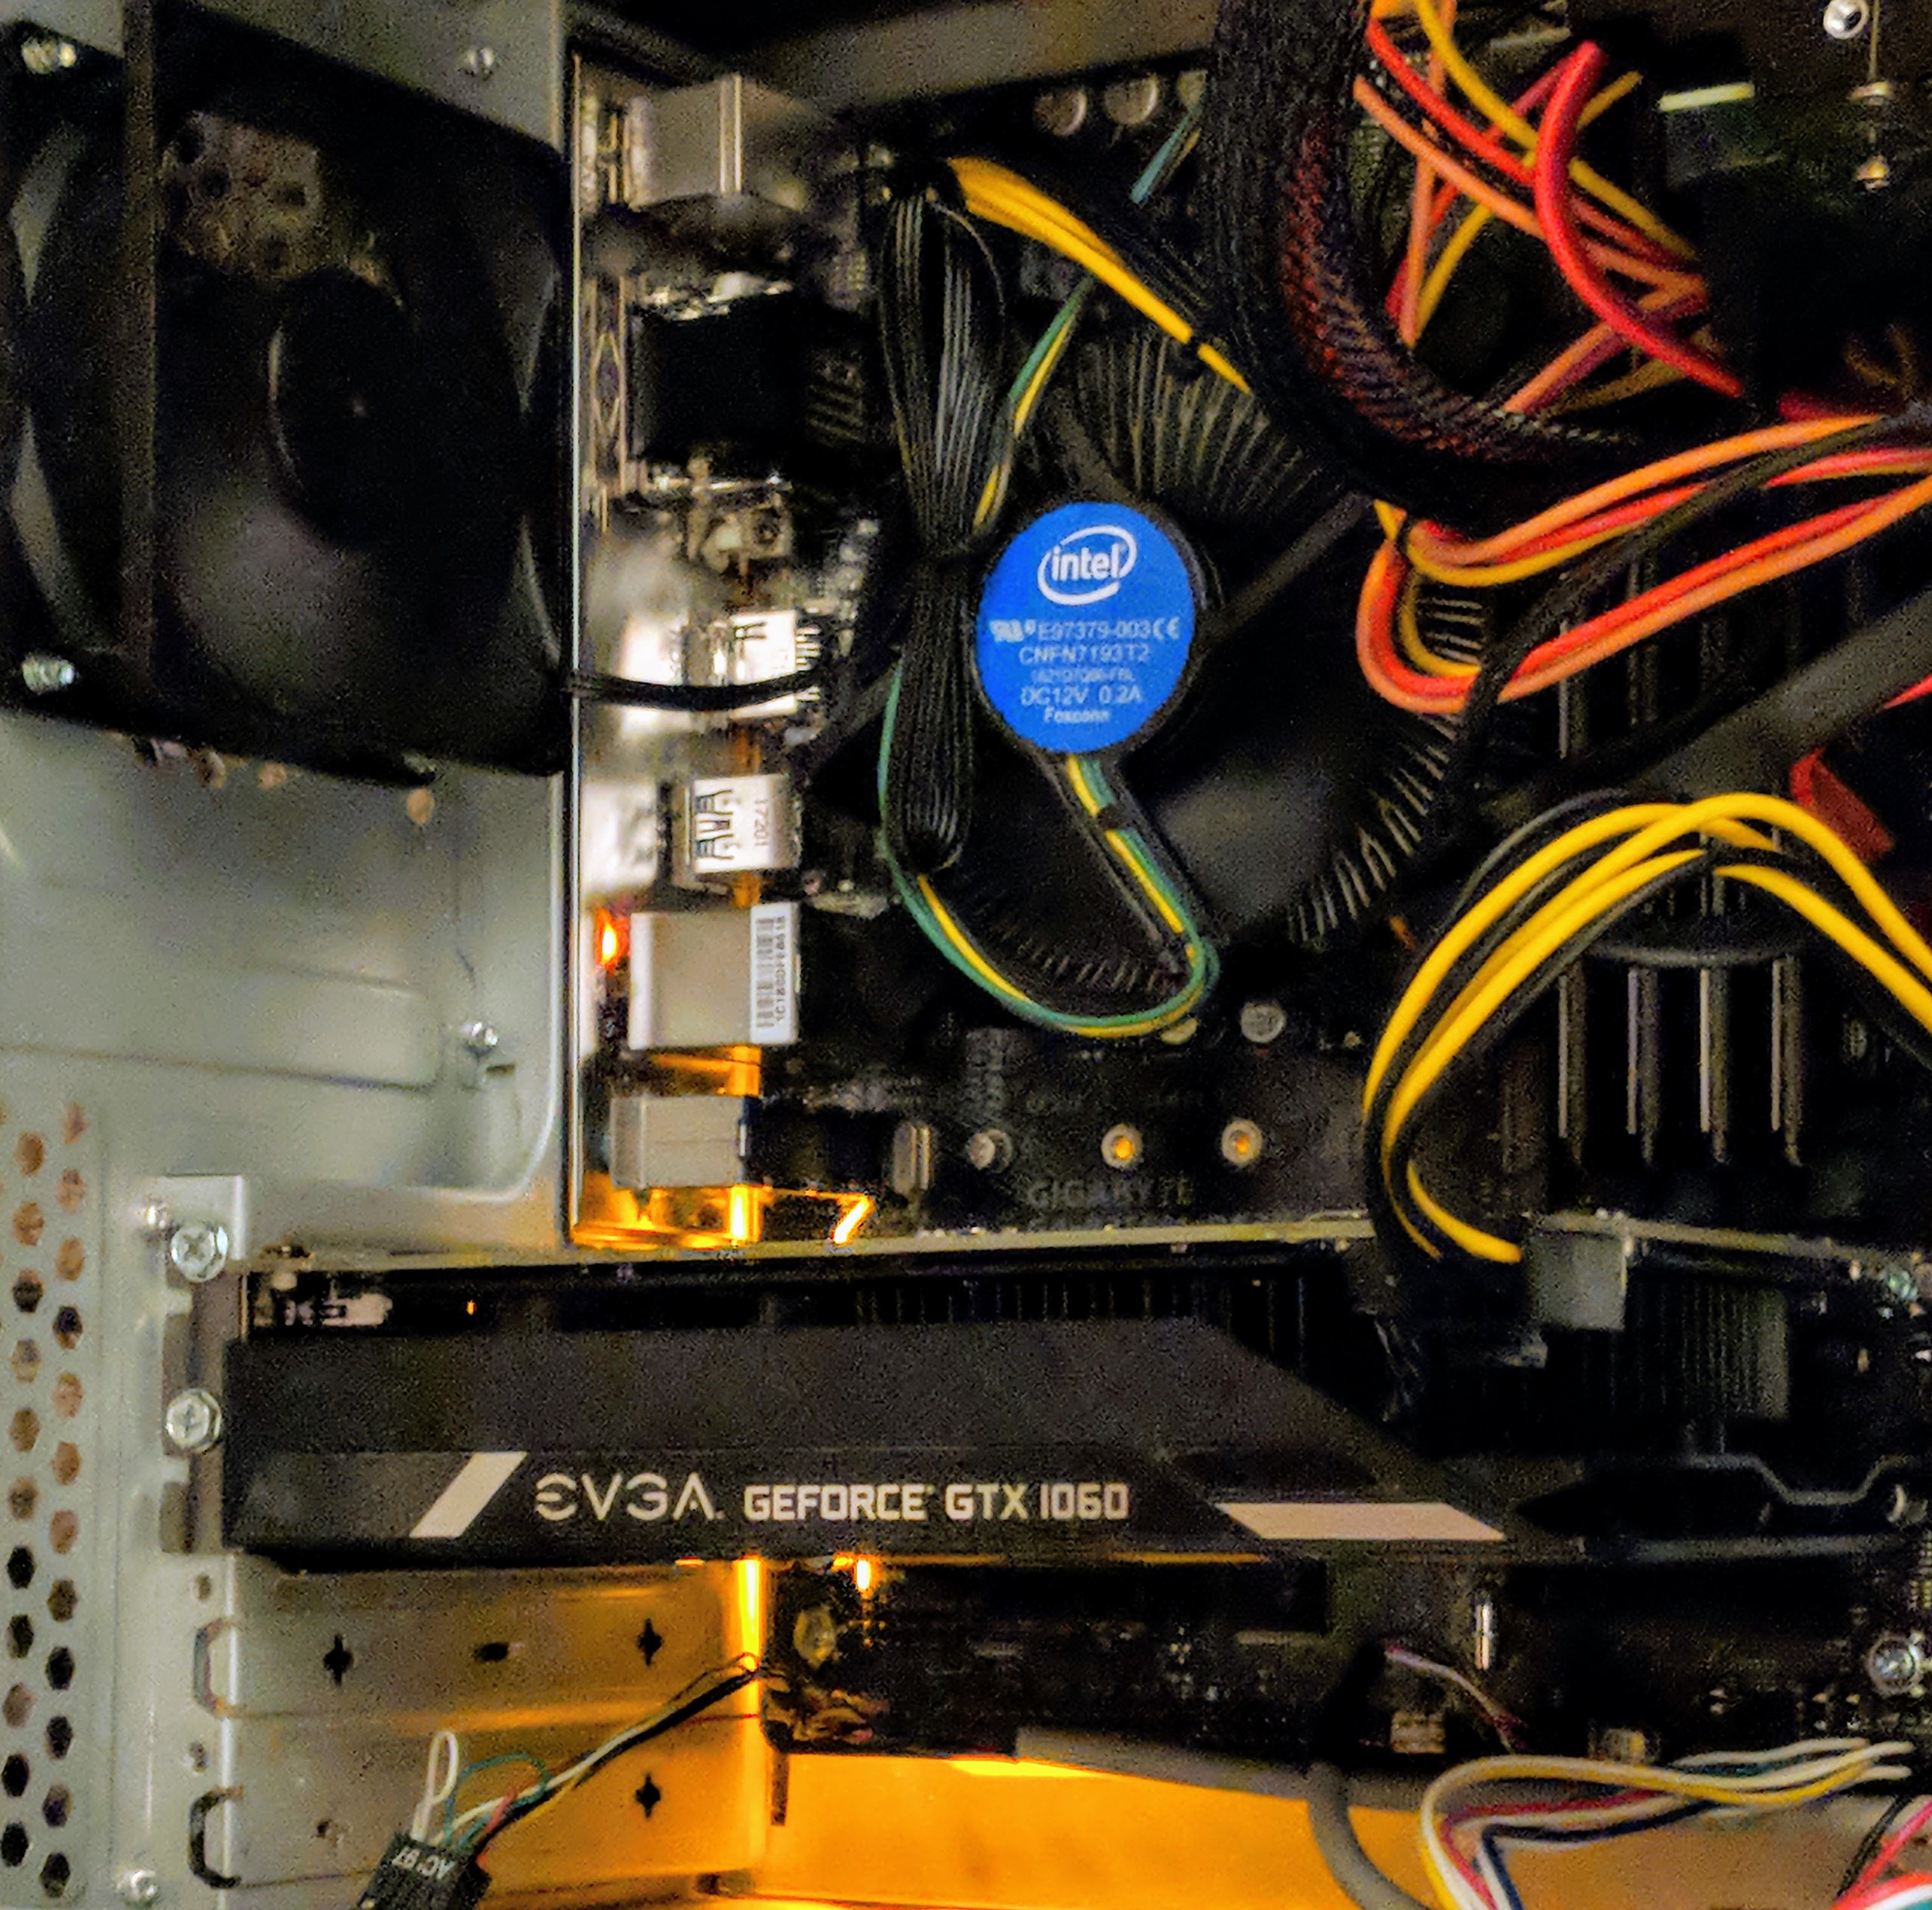
Considering that I have a 400-watt EVGA PSU and my monitor is 1080p, I focused on nVidia’s GeForce GTX 1060, because despite its Pascal architecture’s very modest power requirements (recommended 400 watt PSU and 6-pin PCIe auxiliary power), it pushes very high-quality graphics at 1080p resolution. While the 3GB model was less expensive than the 6GB model, I chose the latter, because it has more CUDA cores (1280 vs. 1152), more texture mapping units/TMU (80 vs. 72), and more streaming multiprocessors/SM (10 vs. 9). These enhancements coupled with twice as much GDDR5 video ram justified its slightly higher price for better performance and hopefully greater use lifespan. I went with EVGA’s single fan version of the 1060, because I have had good experiences with their products and I appreciate their streamlined, unostentatious, and quiet design on this video card.
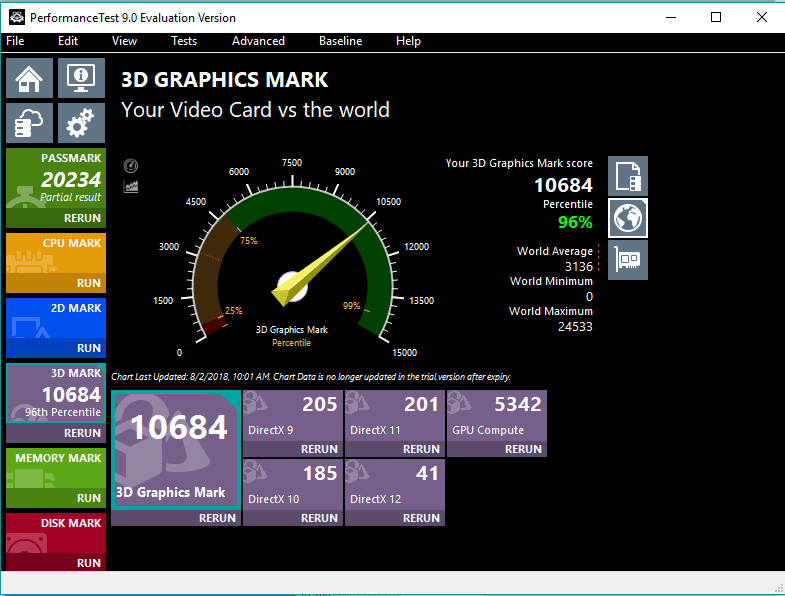
After purchasing the GeForce GTX 1060 6GB video card for $280 from Microcenter and installing it in my PC, I stress tested it and ran benchmarks to verify that everything was okay after the upgrade. As you can see above, it scored a 3D Graphics Mark of 10684, which is more than twice as high as the 3,954 scored by my old Radeon RX 550 4GB video card.
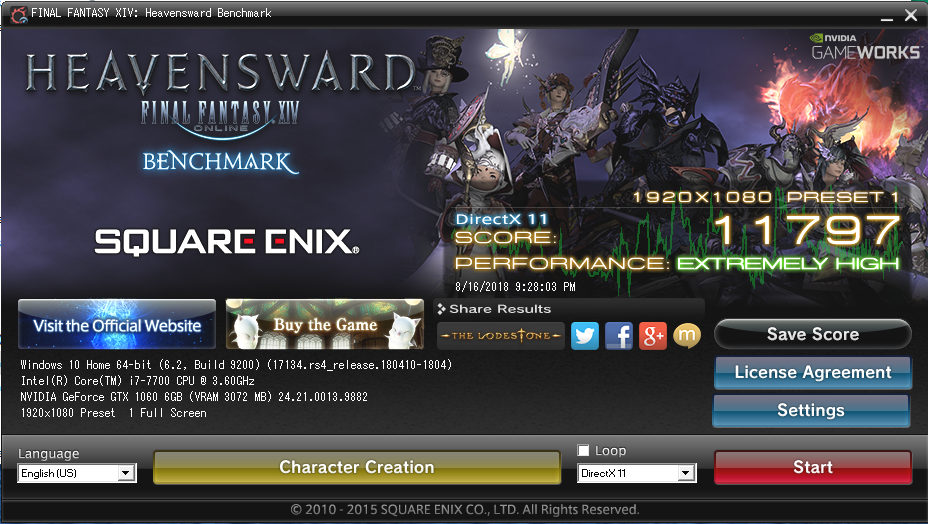
In the Final Fantasy XiV Heavensward benchmark, the GTX 1060 GB scored an 11,797 at 1080p, while the RX 550 4GB scored only 4,416 at the same resolution.
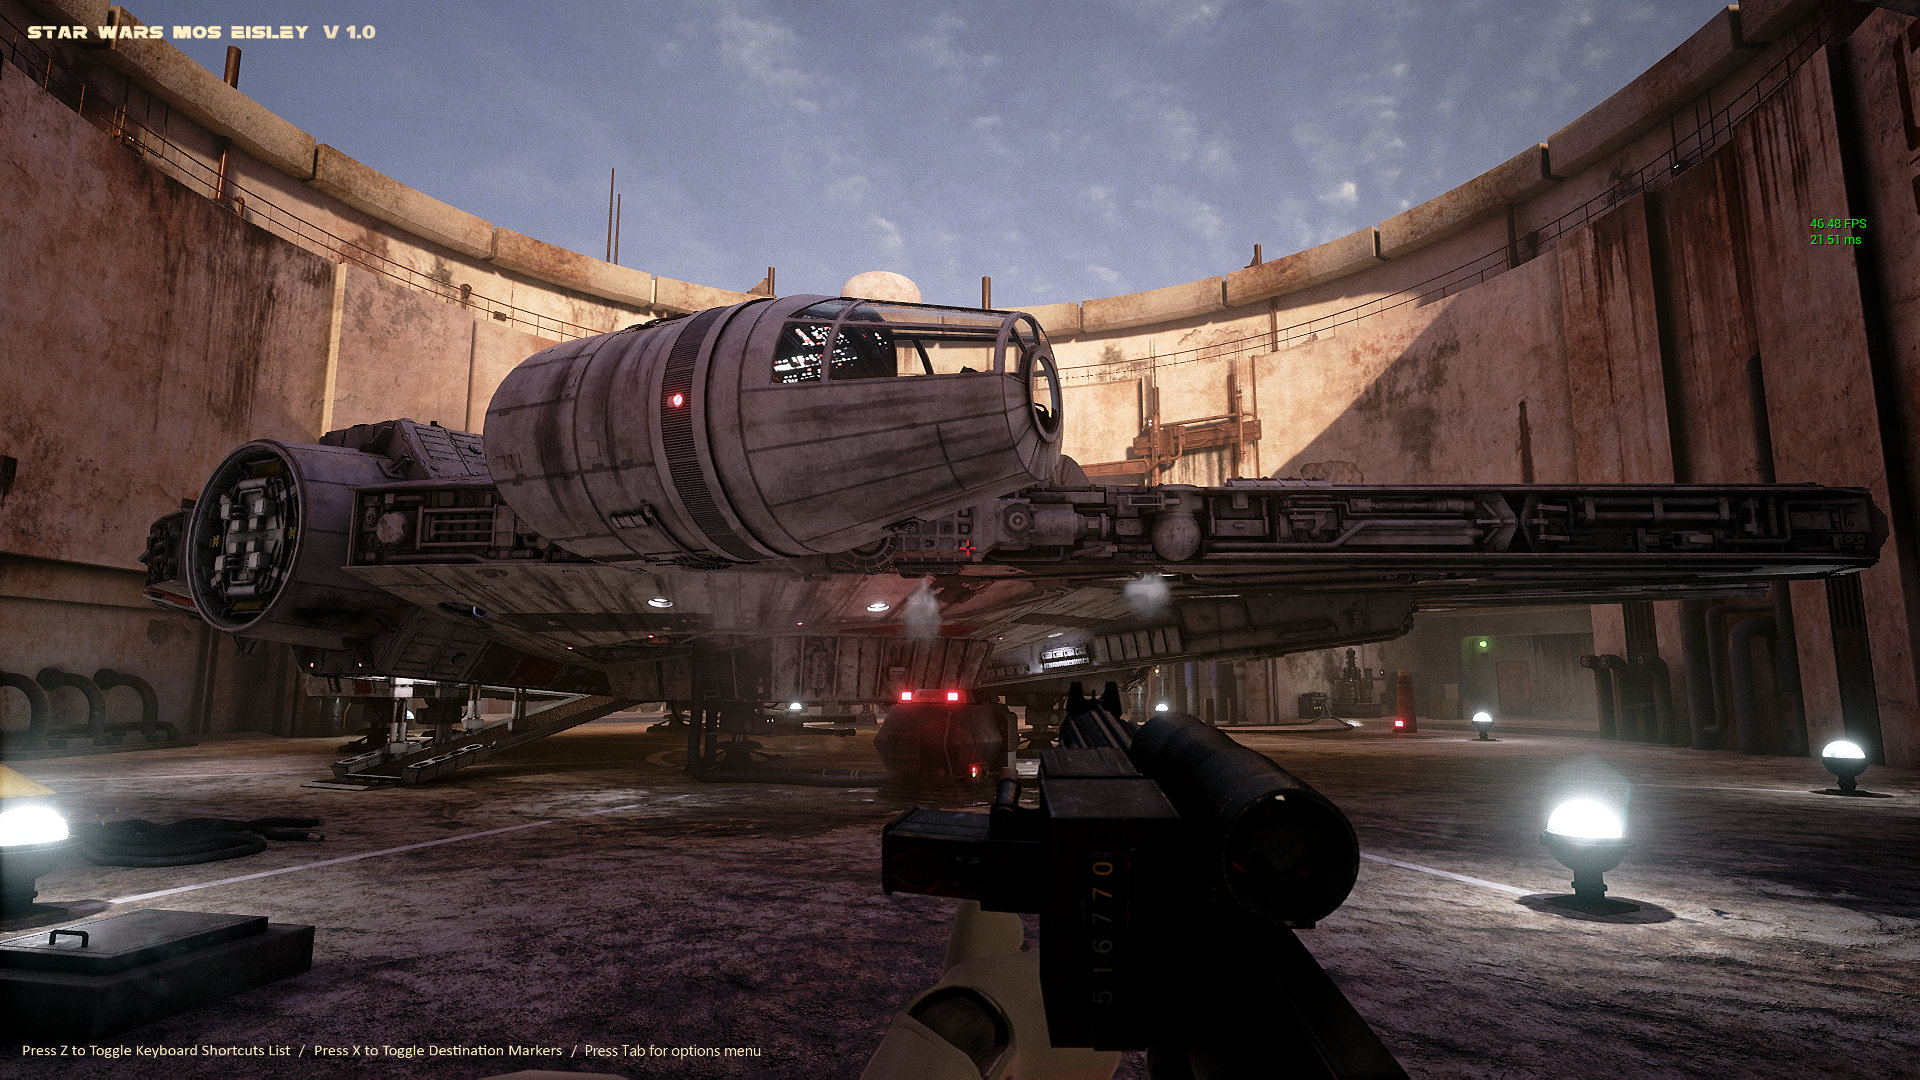
In the Docking Bay 94 Unreal Engine 4 simulation, I get well over 40 fps with the settings maxed out at 1080p. Read about how the simulation was made and find download links on 80 level.
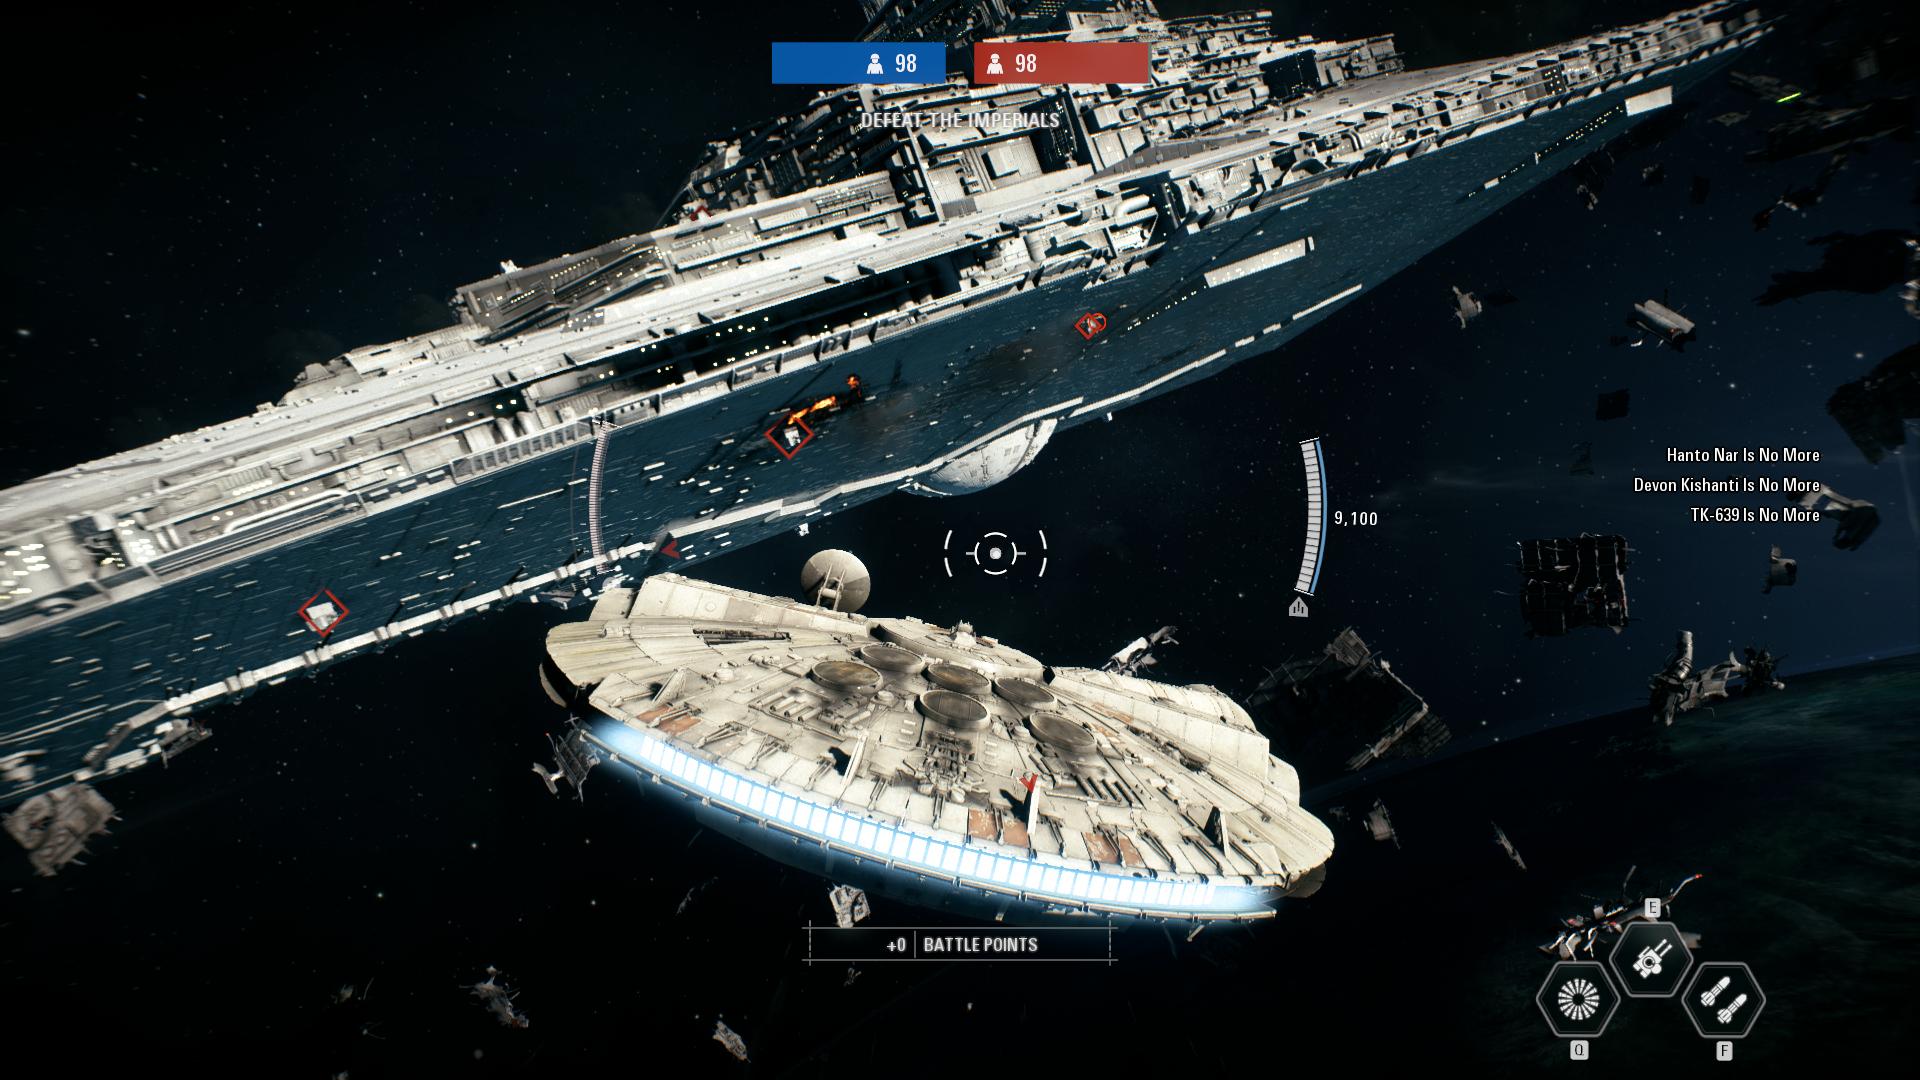
And, I get to fly the Millennium Falcon in EA’s Star Wars: Battlefront 2 video game. While the game’s graphics are amazing, I was reticent to purchase it after its launch debacle with in-game purchases and loot crates. Thankfully, EA backtracked on those things after the gaming and Star Wars fan communities collectively denounced these greedy and unethical practices.
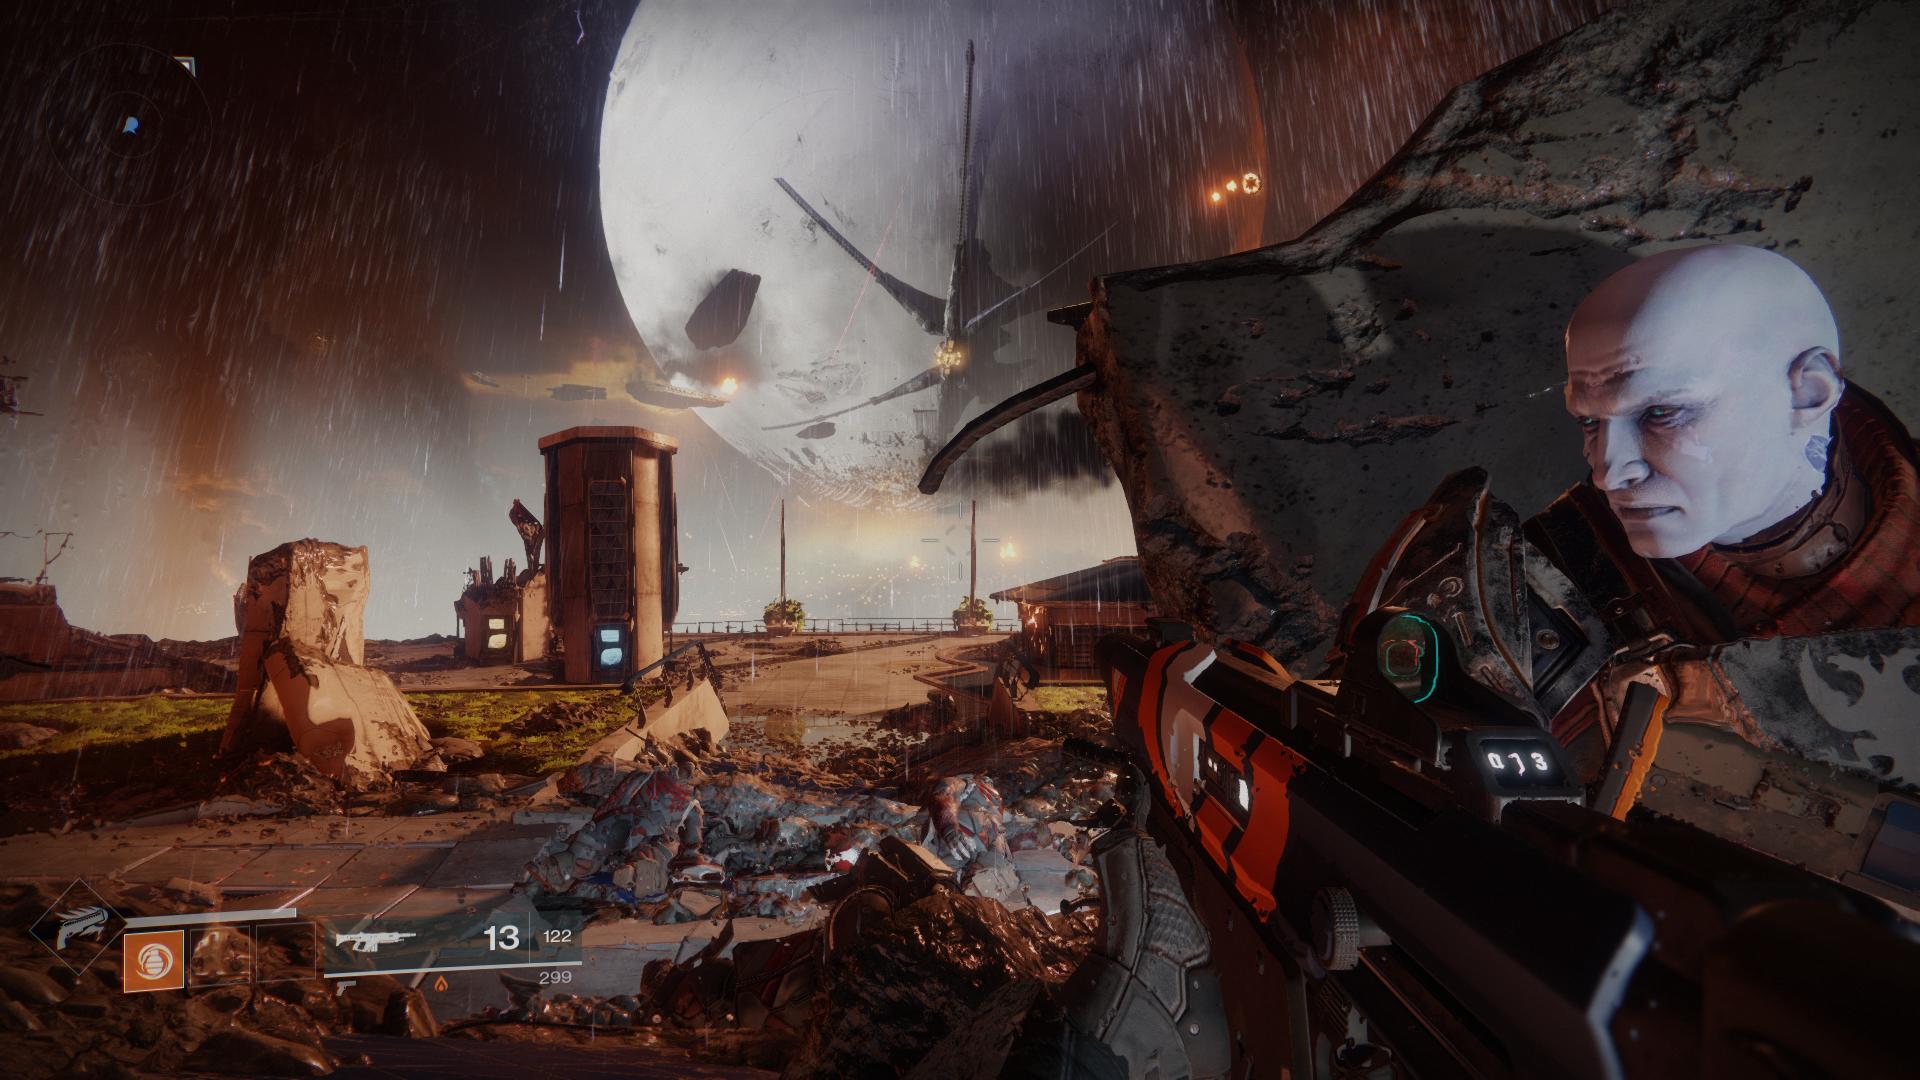
Finally, EVGA’s current video game promotion includes a free copy of Destiny 2 with the purchase of a GTX 1060 or higher video card. After redeeming my copy, I’ve played a little of it, and I like it. I’m a big fan of the original Halo by Bungie, and this game reminds me of that game without the story relying on a single archtype hero, such as Master Chief. In Destiny 2, you can create your own character based on class (Titan, Hunter, or Warlock), species, sex, and appearance. For my first experience in the game, I created a Hunter. The GTX 1060 6GB video card makes this game run smooth and look beautiful at 1080p.
Overall, I’m very glad that I made this upgrade to my PC. If you’re considering an upgrade now rather than waiting for nVidia’s recently announced RTX line of video cards, I strongly recommend the GTX 1060 6GB as a lower cost, high performance video card.
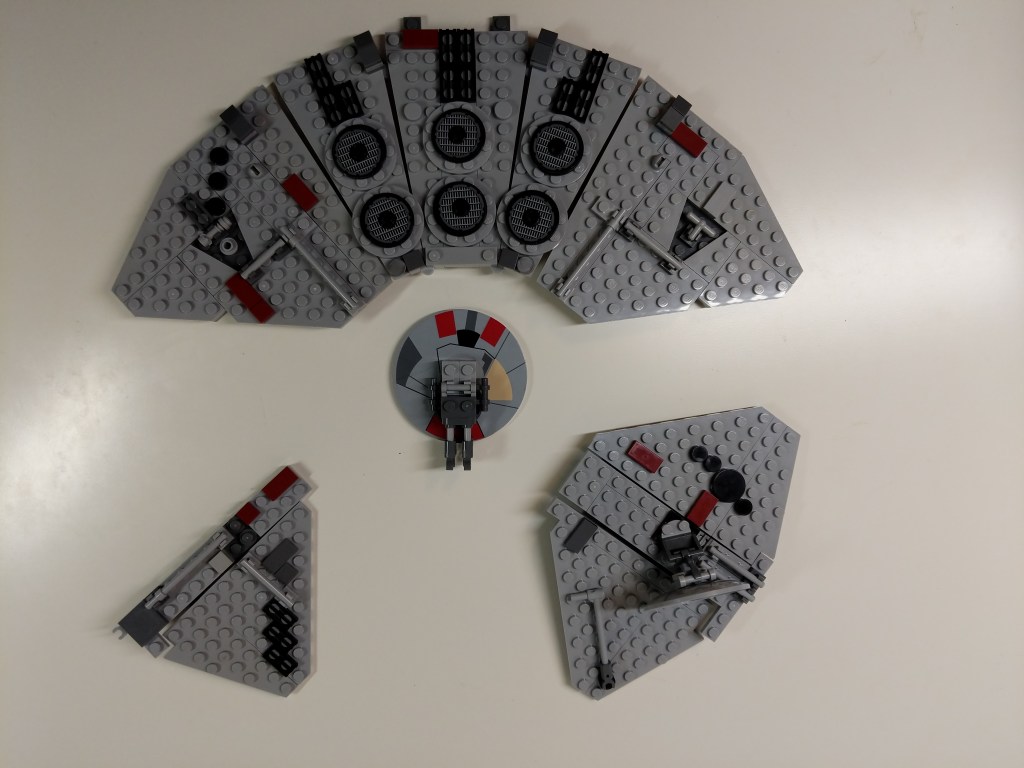
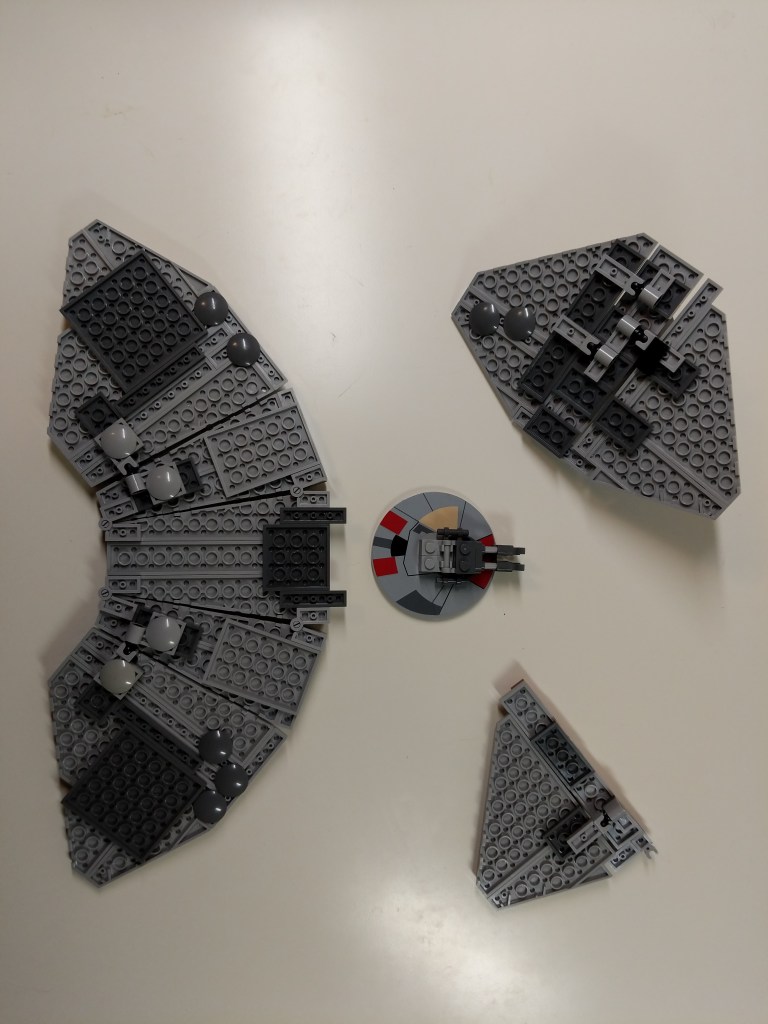
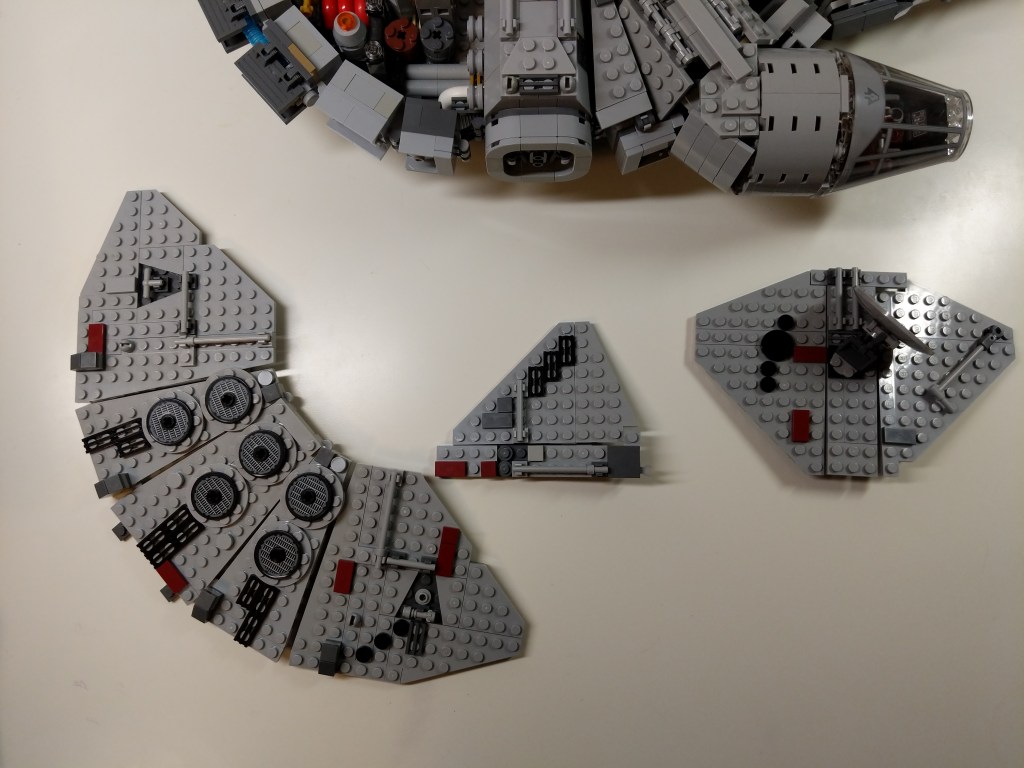
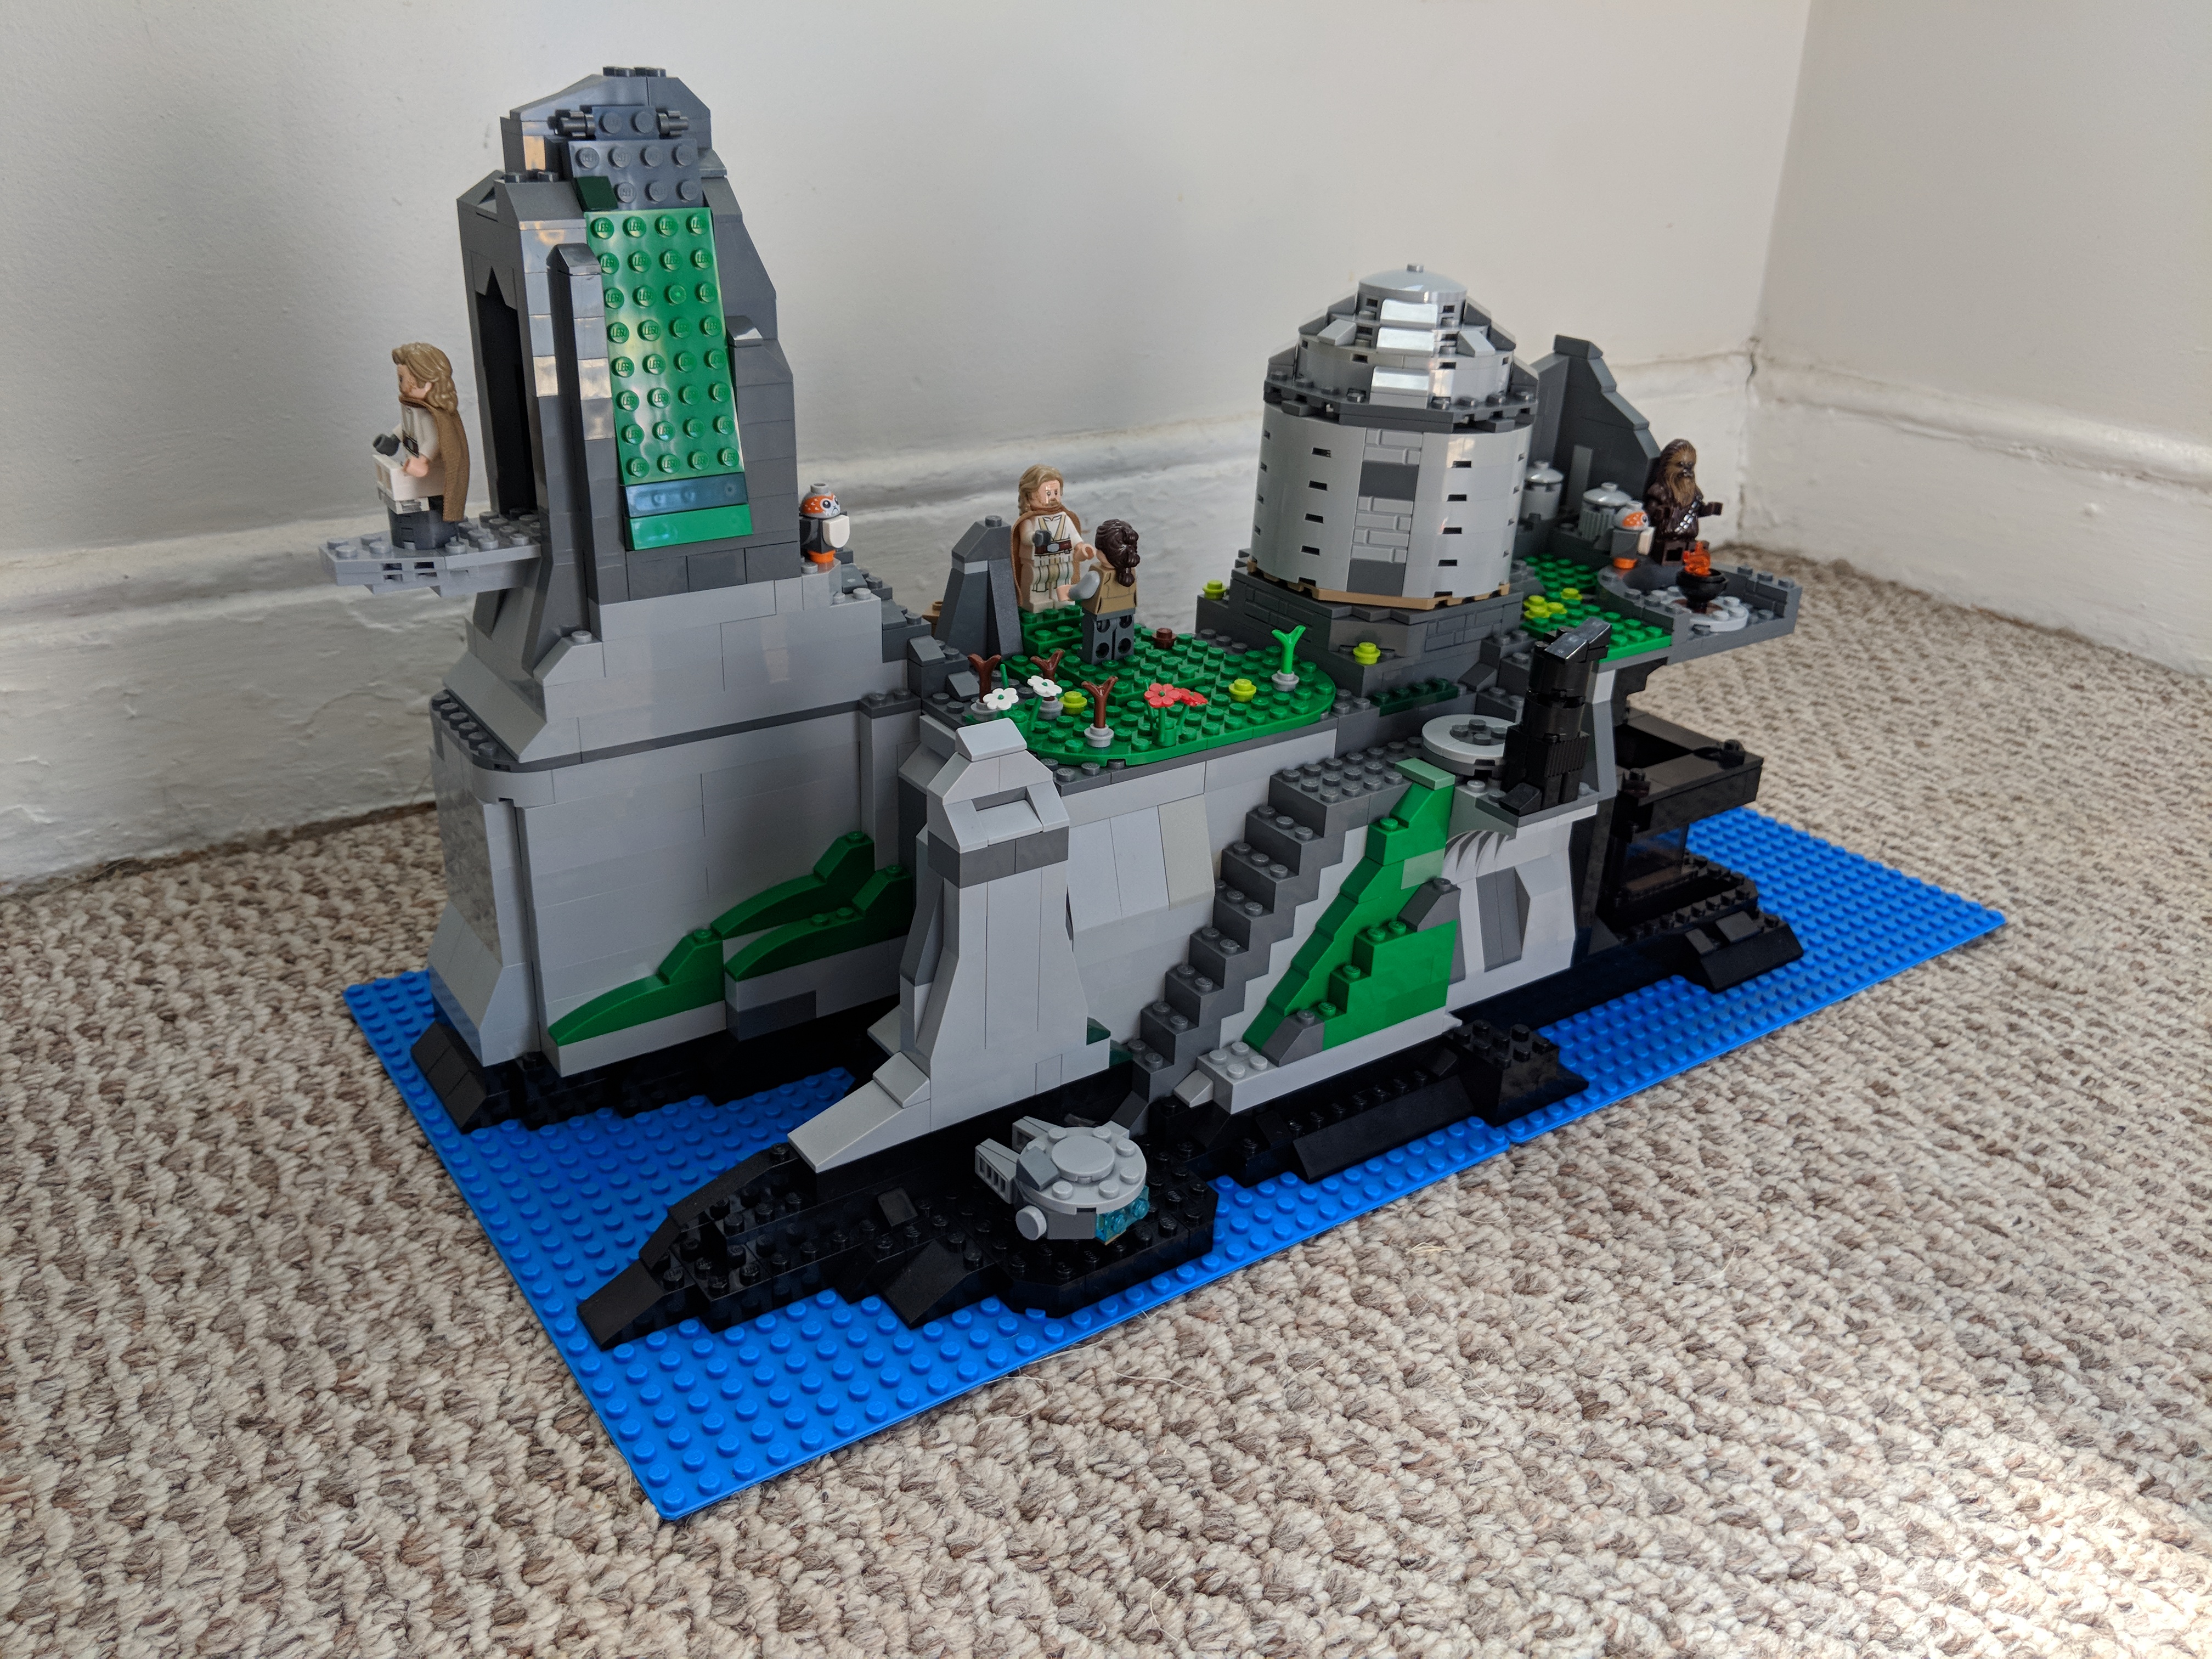
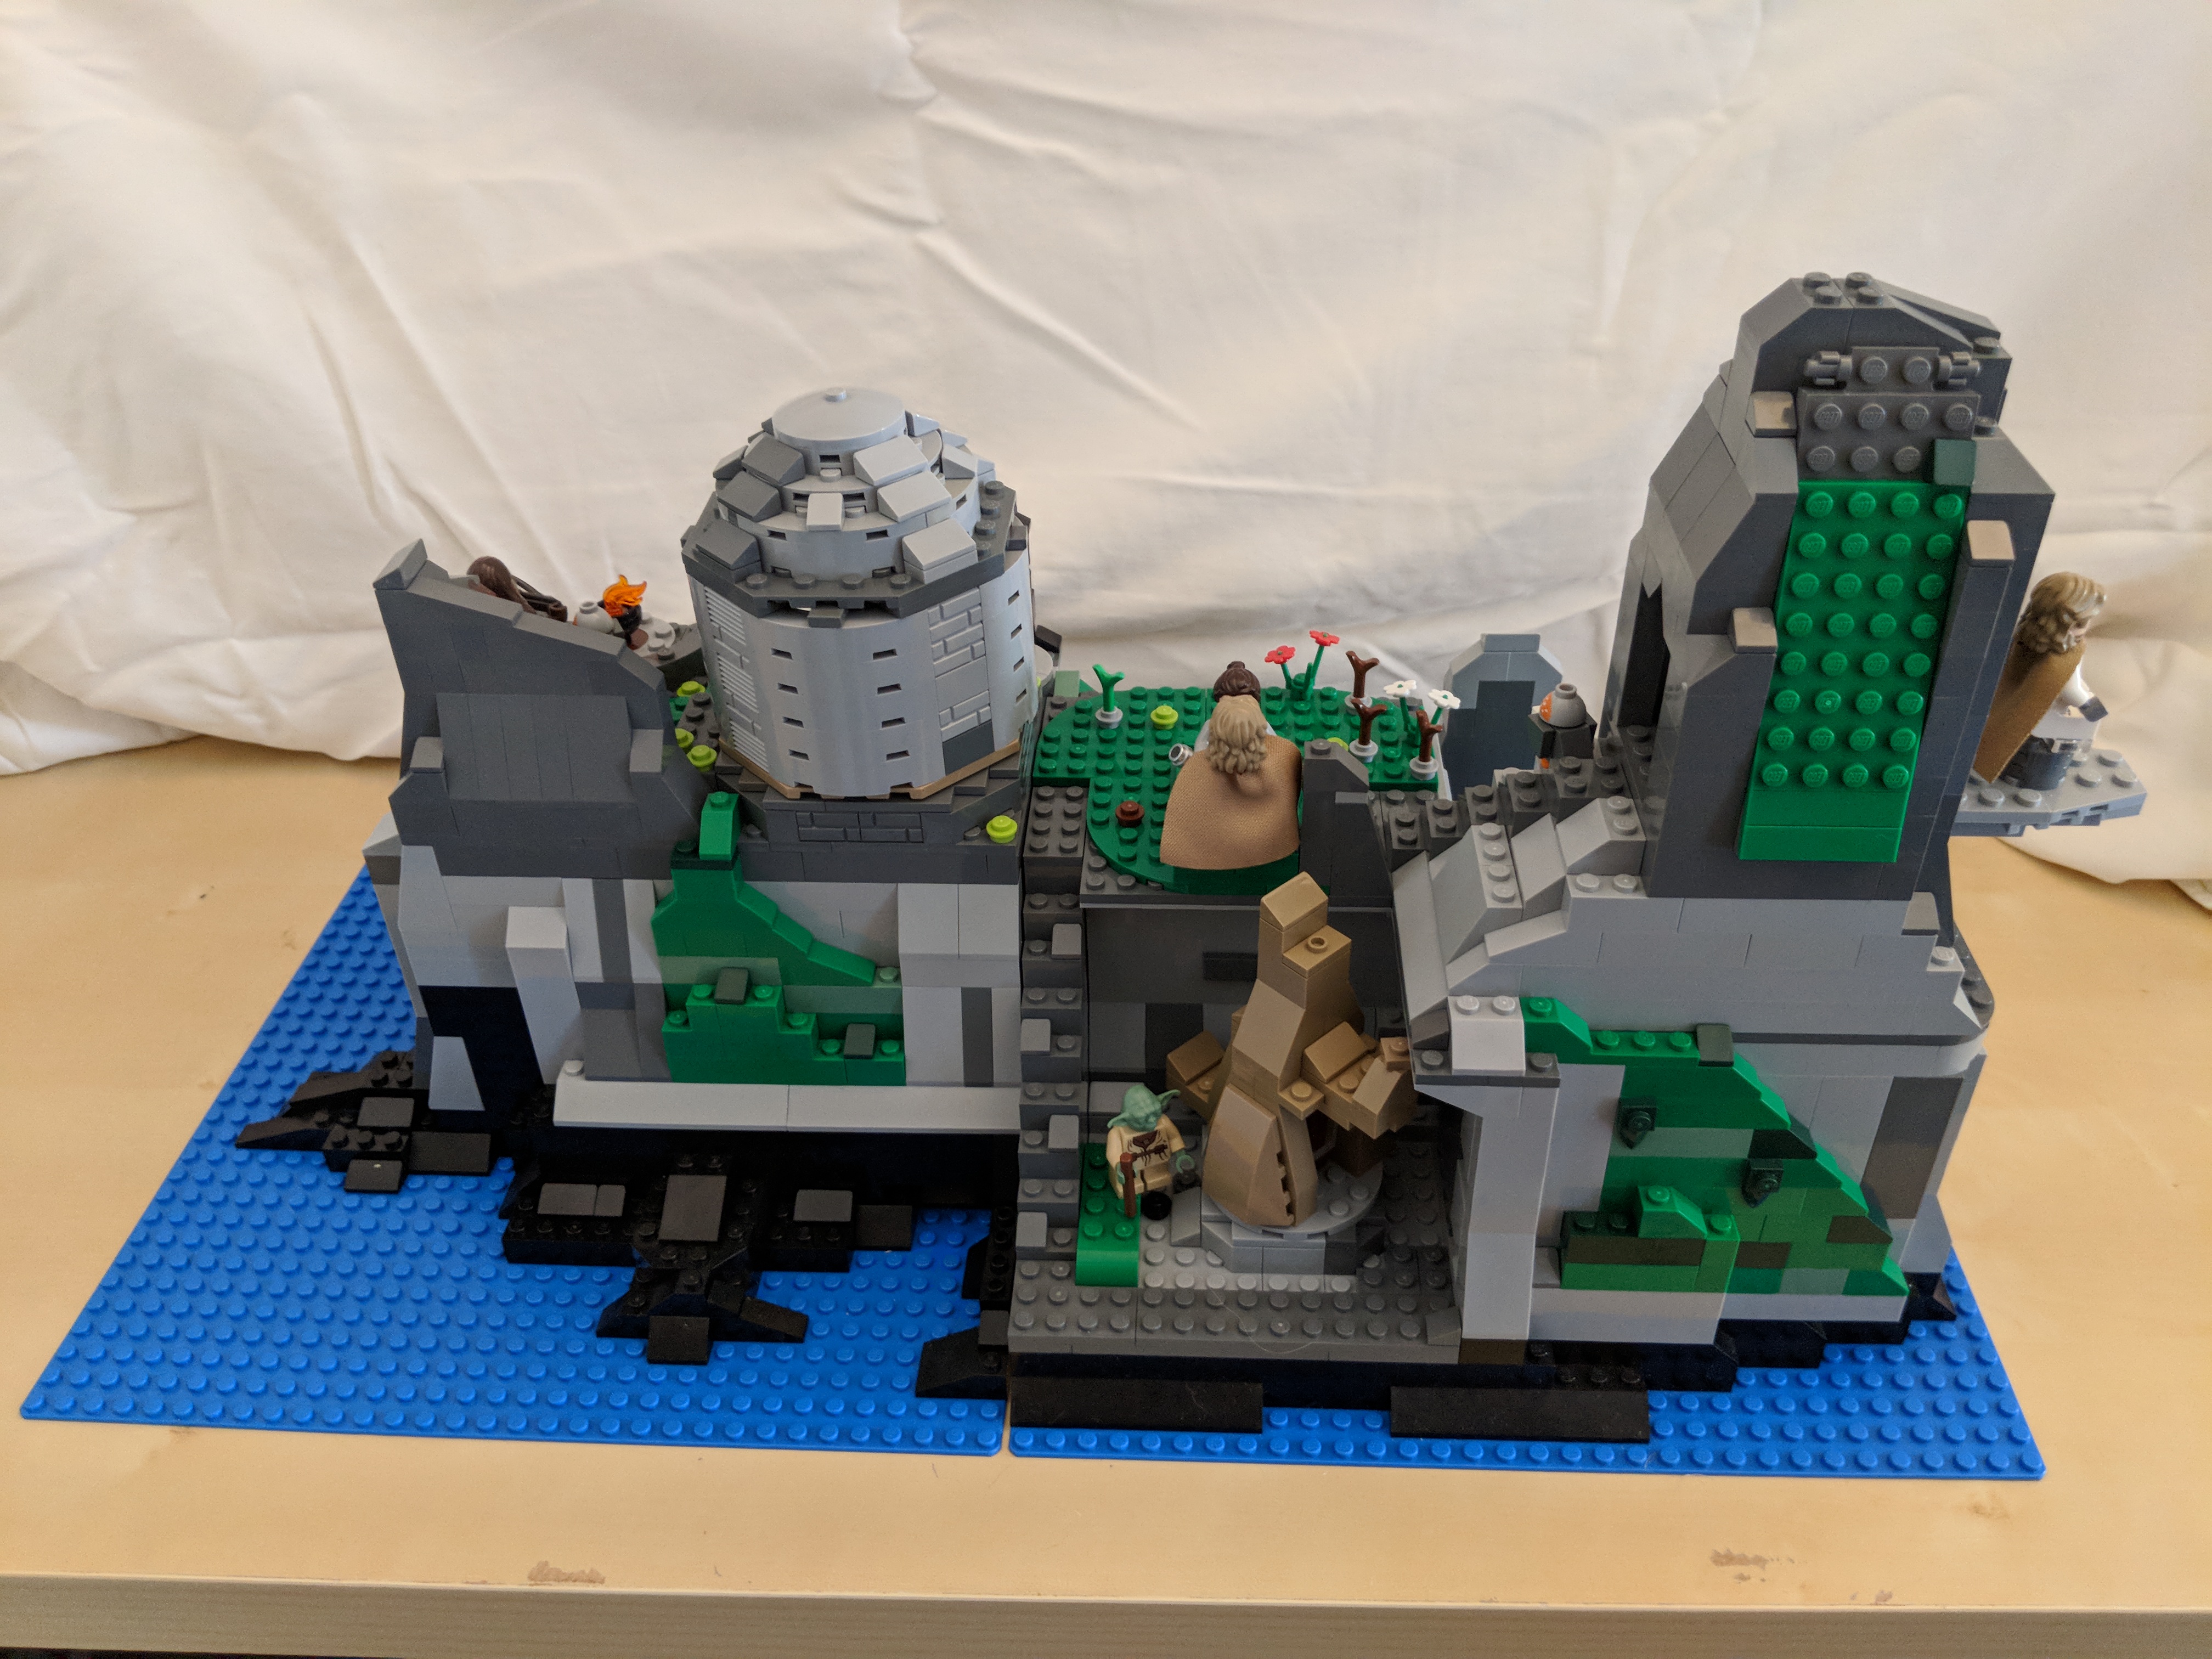
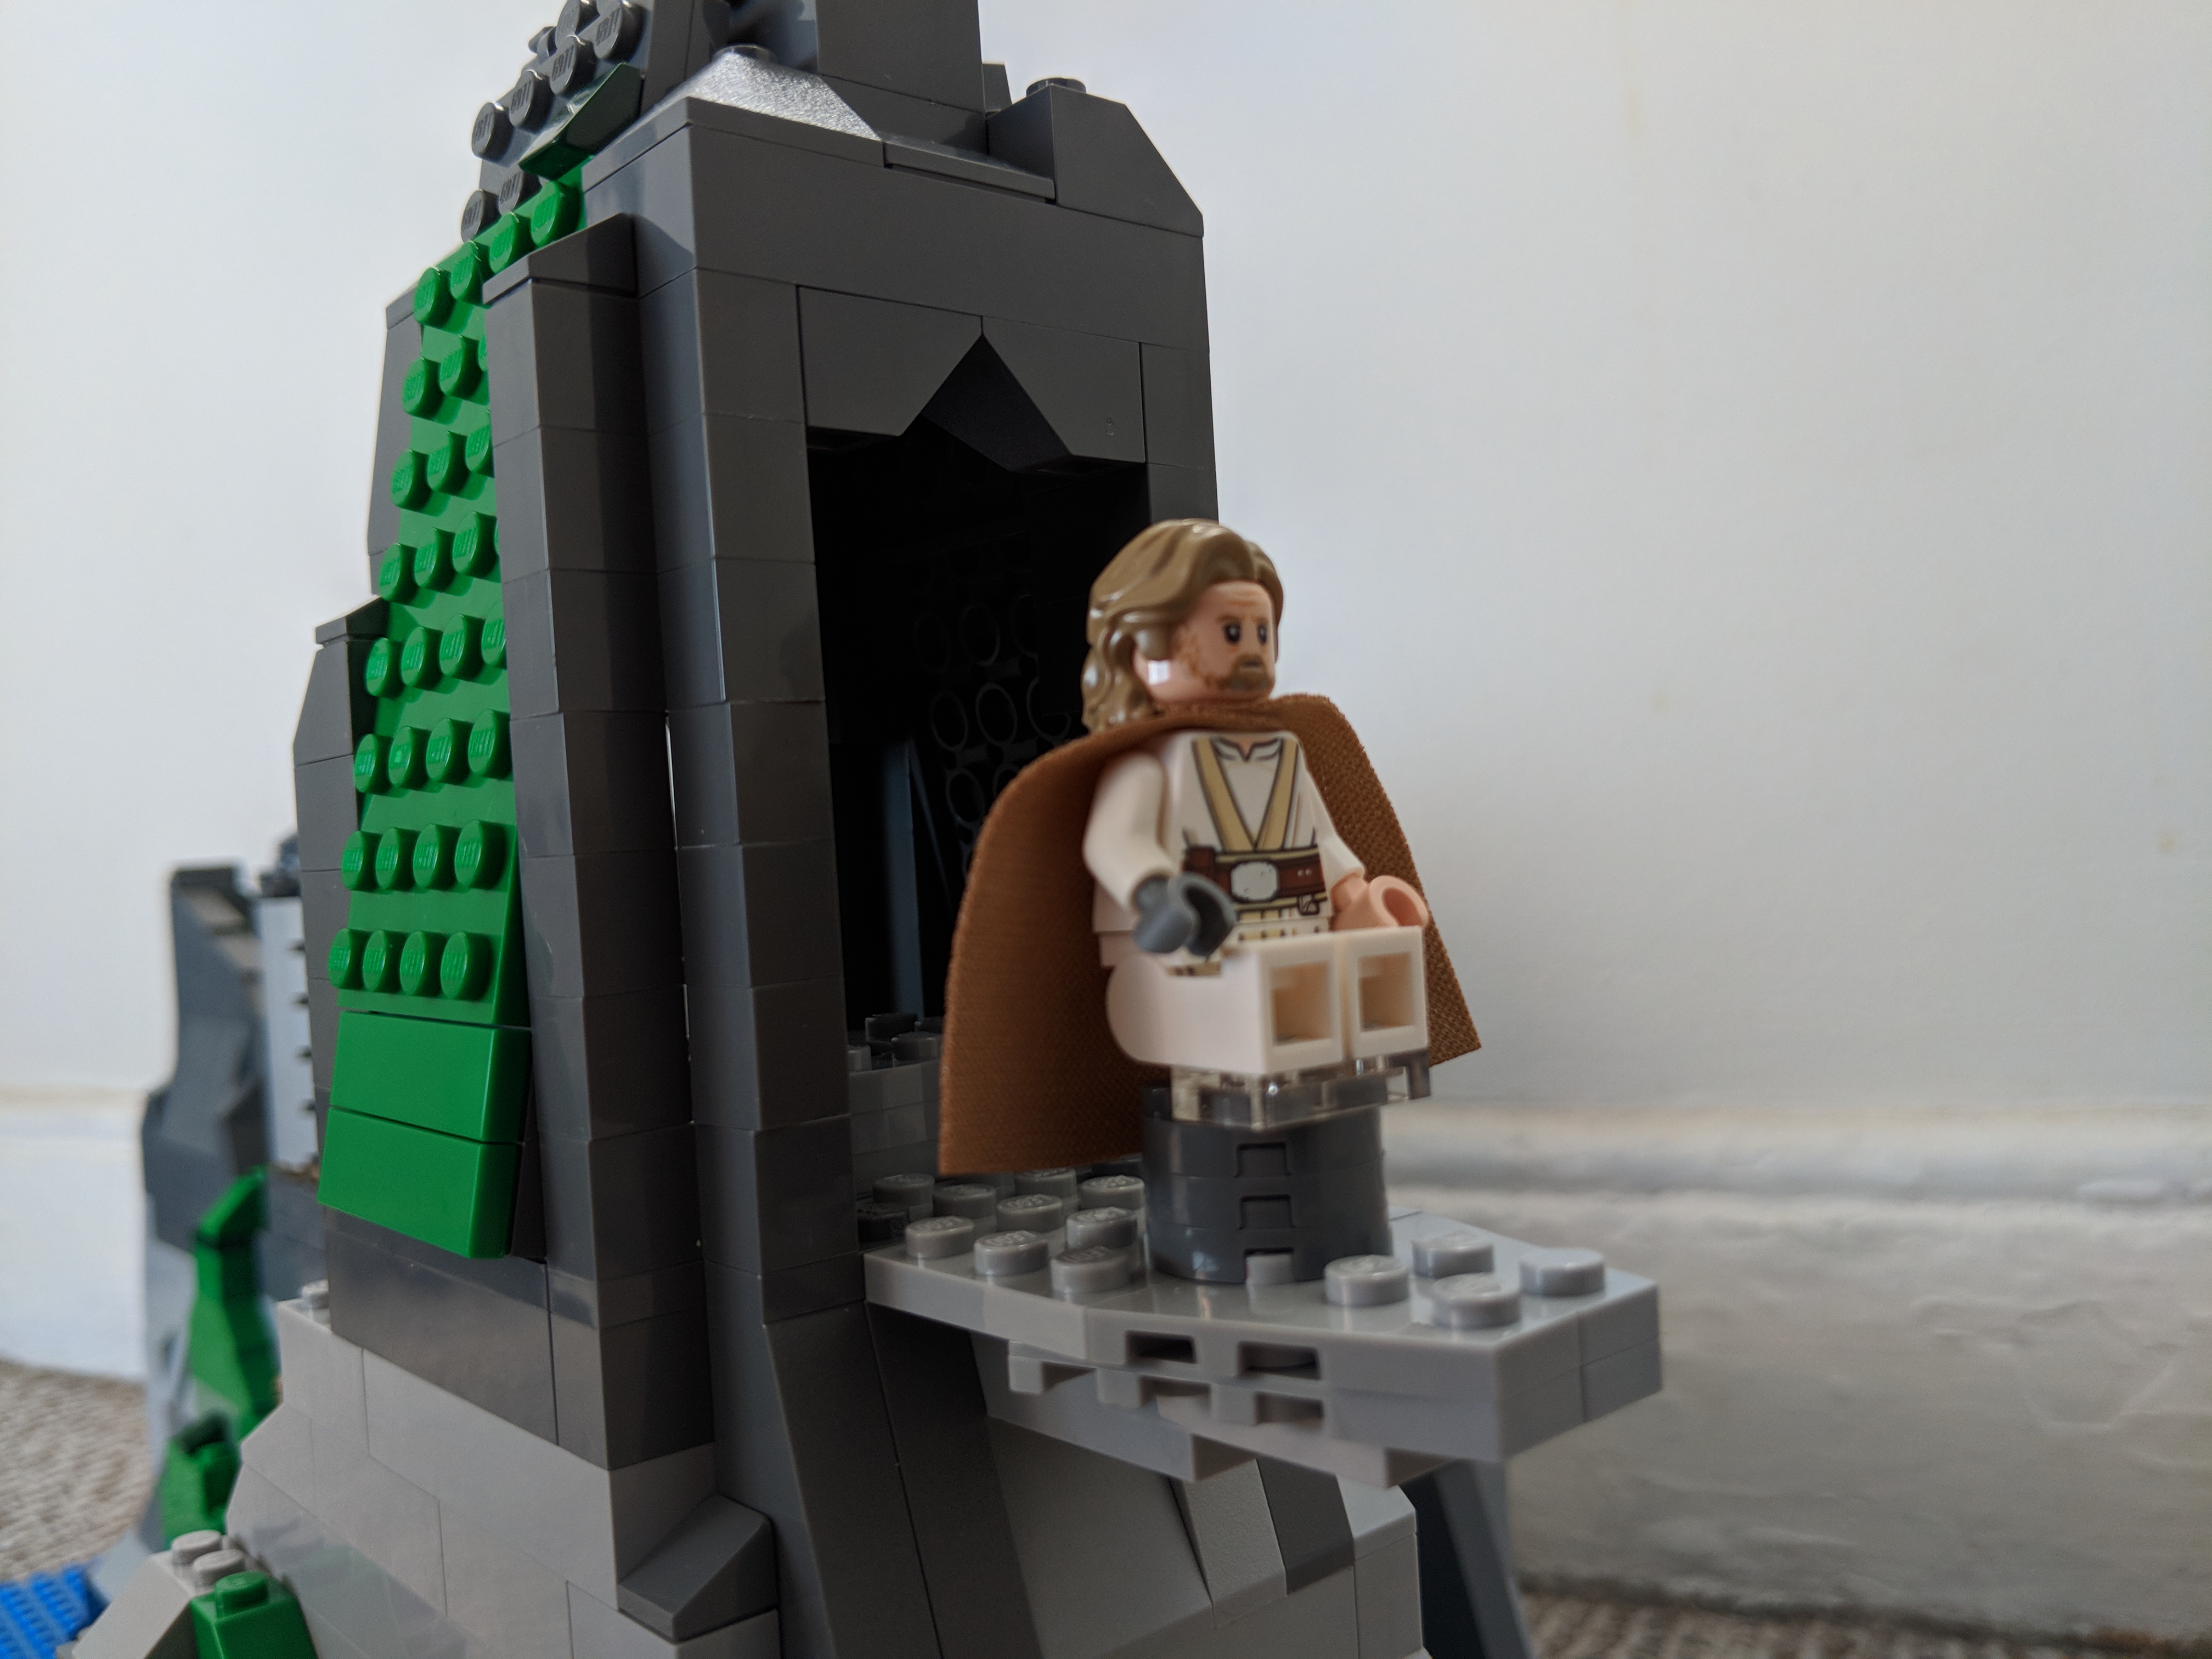
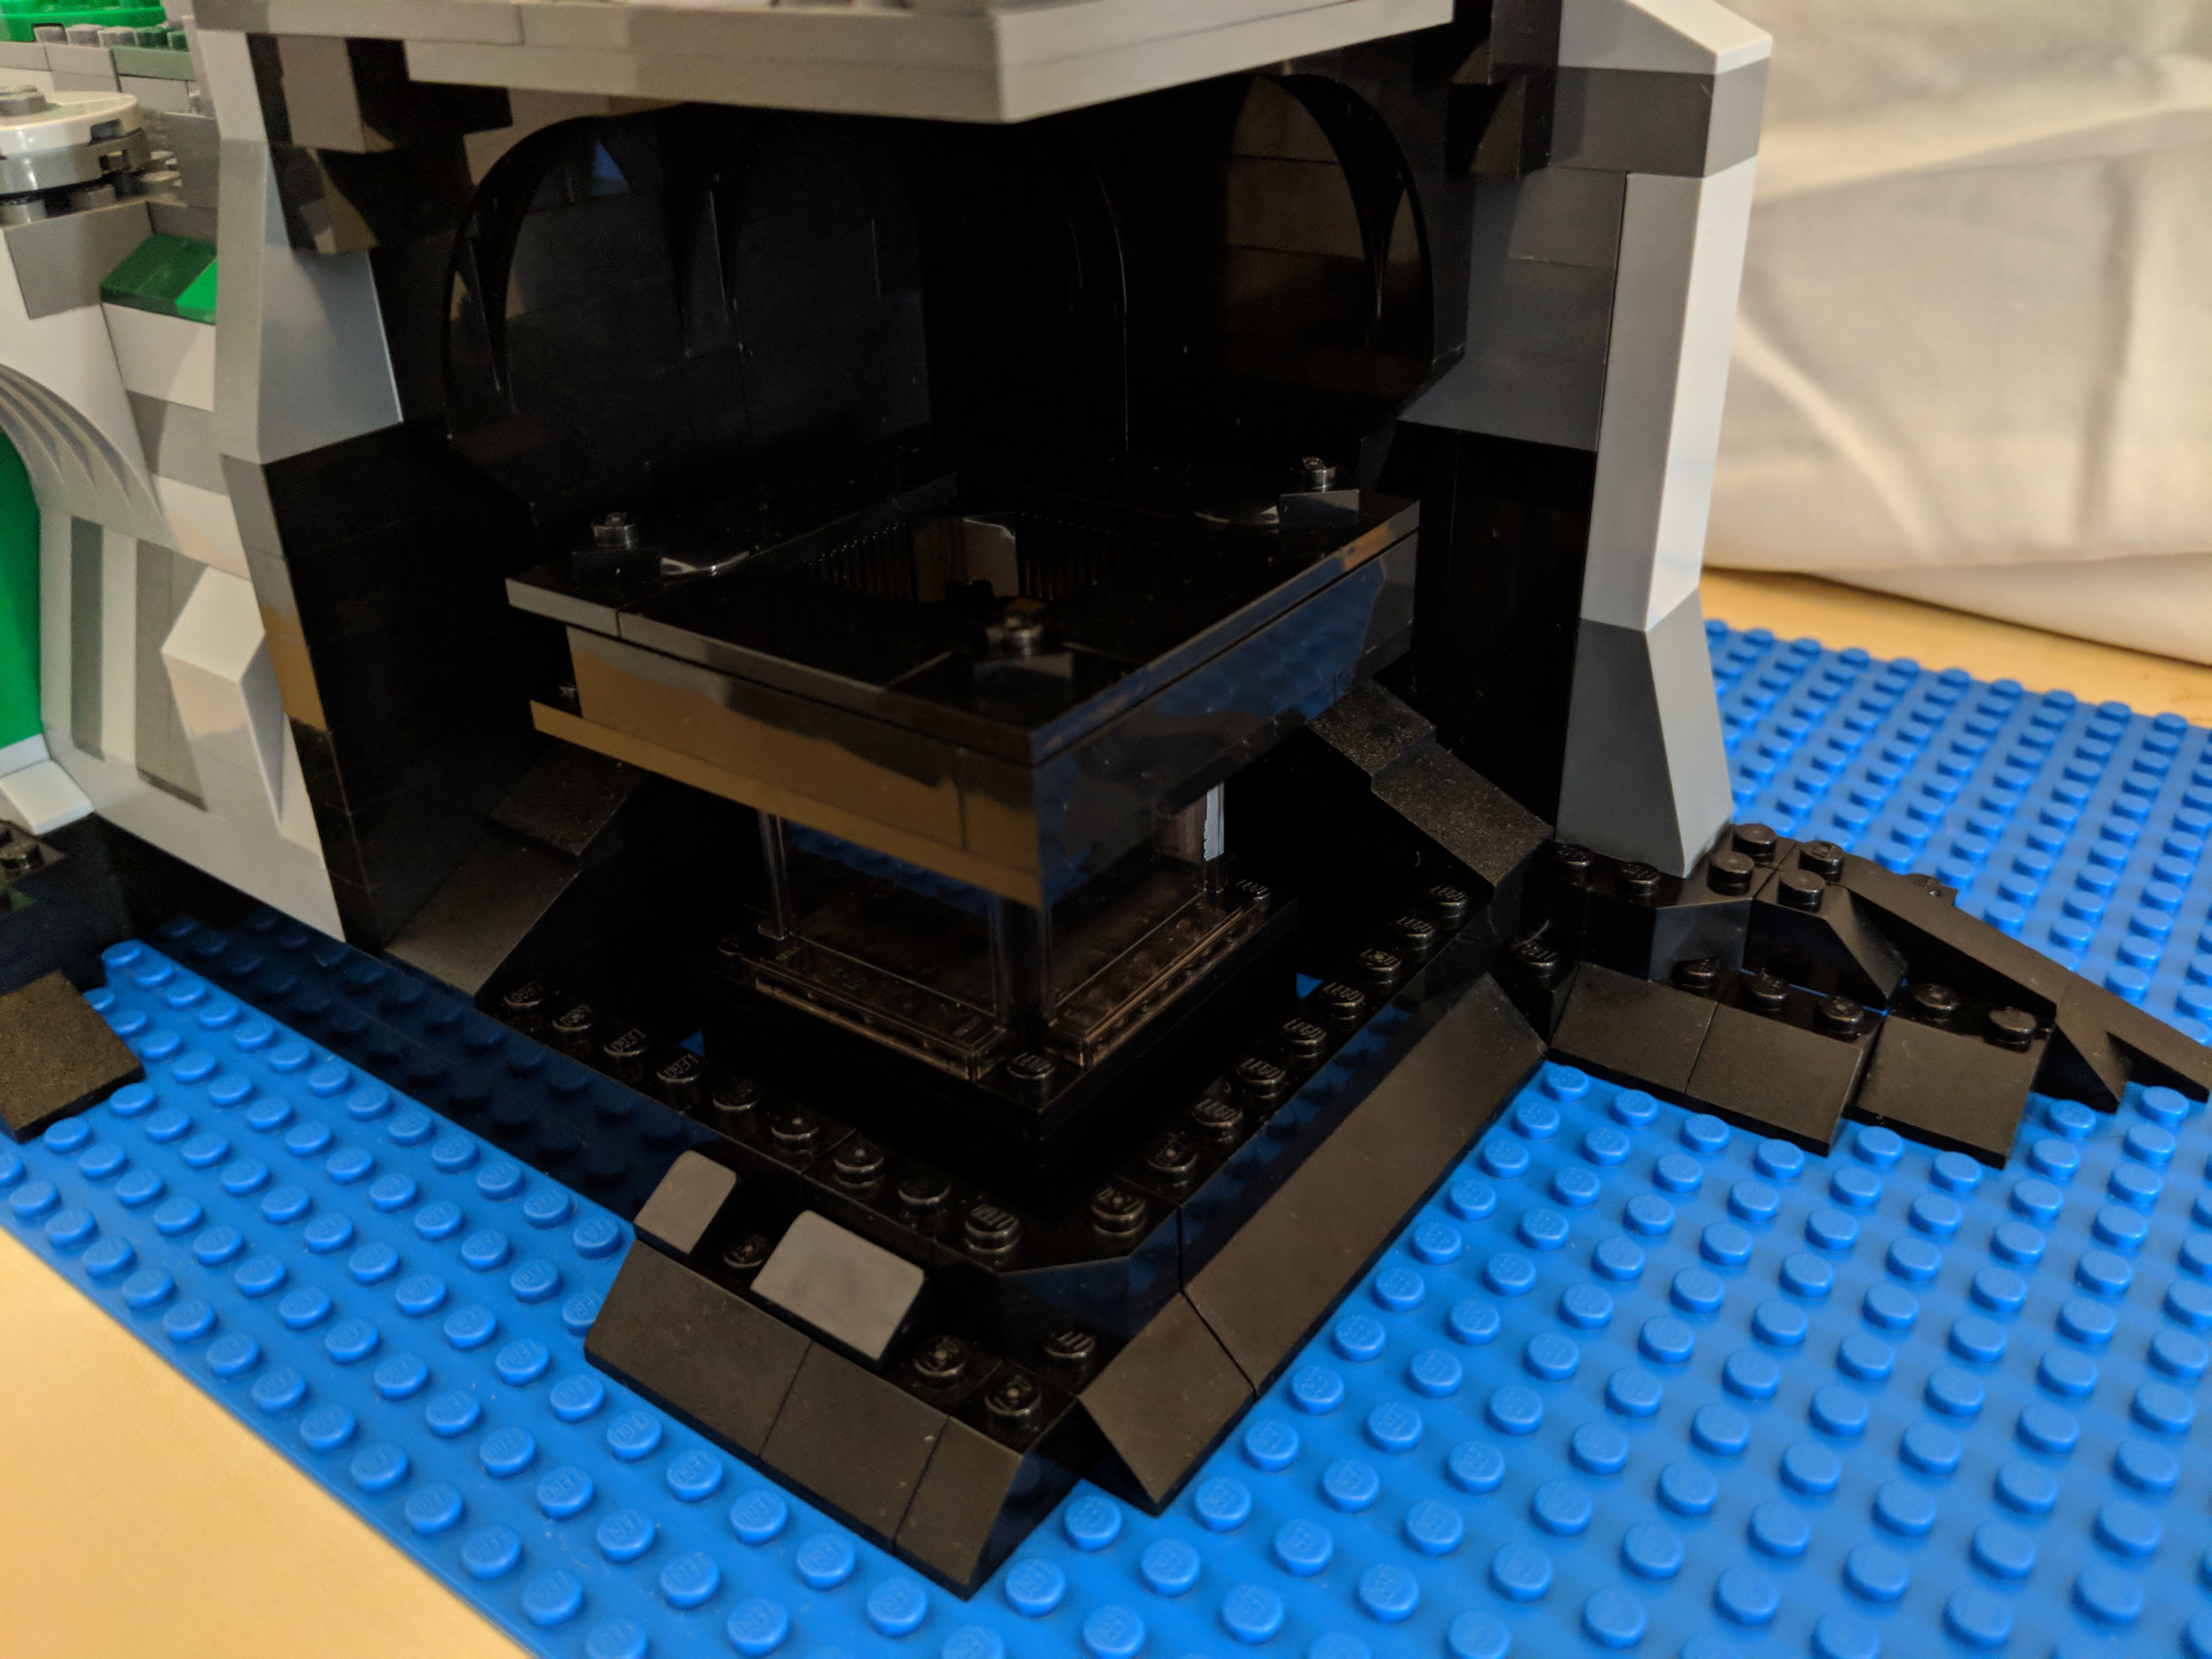
Inspired by LEGO’s Death Star playset, which is both enormous and scene-focused, I built a 64 x 32 stud MOC of Temple Island on Ahch-To from Star Wars: The Last Jedi. First glimpsed at the end of The Force Awakens and explored in the latest installment, Temple Island is the home of the first Jedi Temple, and it is where Luke Skywalker has been hiding away during the rise of the First Order under the leadership of Snoke and supported by Luke’s former pupil, Ben Solo or Kylo Ren.
As a LEGO playset, it has to balance accuracy, playability, and scale. For accuracy, I based the island’s shoreline on Ireland’s Skellig Michael, which is the location where these scenes were shot for the film. Also, the island’s topography were adhered to as closely as possible by having the north peak slightly lower than the higher south peak, and designing a middle valley between the two peaks, known as Christ’s Saddle on Skellig Michael. Each major scene involving Temple Island has been placed approximately where it would be on the island according to The Art of The Last Jedi and my observations of the film. And, each scene is scaled for play with LEGO minifigures, except where the Millennium Falcon lands along the shoreline, which would otherwise dwarf the island or require building a much larger model! For this element of the MOC, I used the Falcon included in last year’s LEGO Star Wars Advent Calendar (75184).
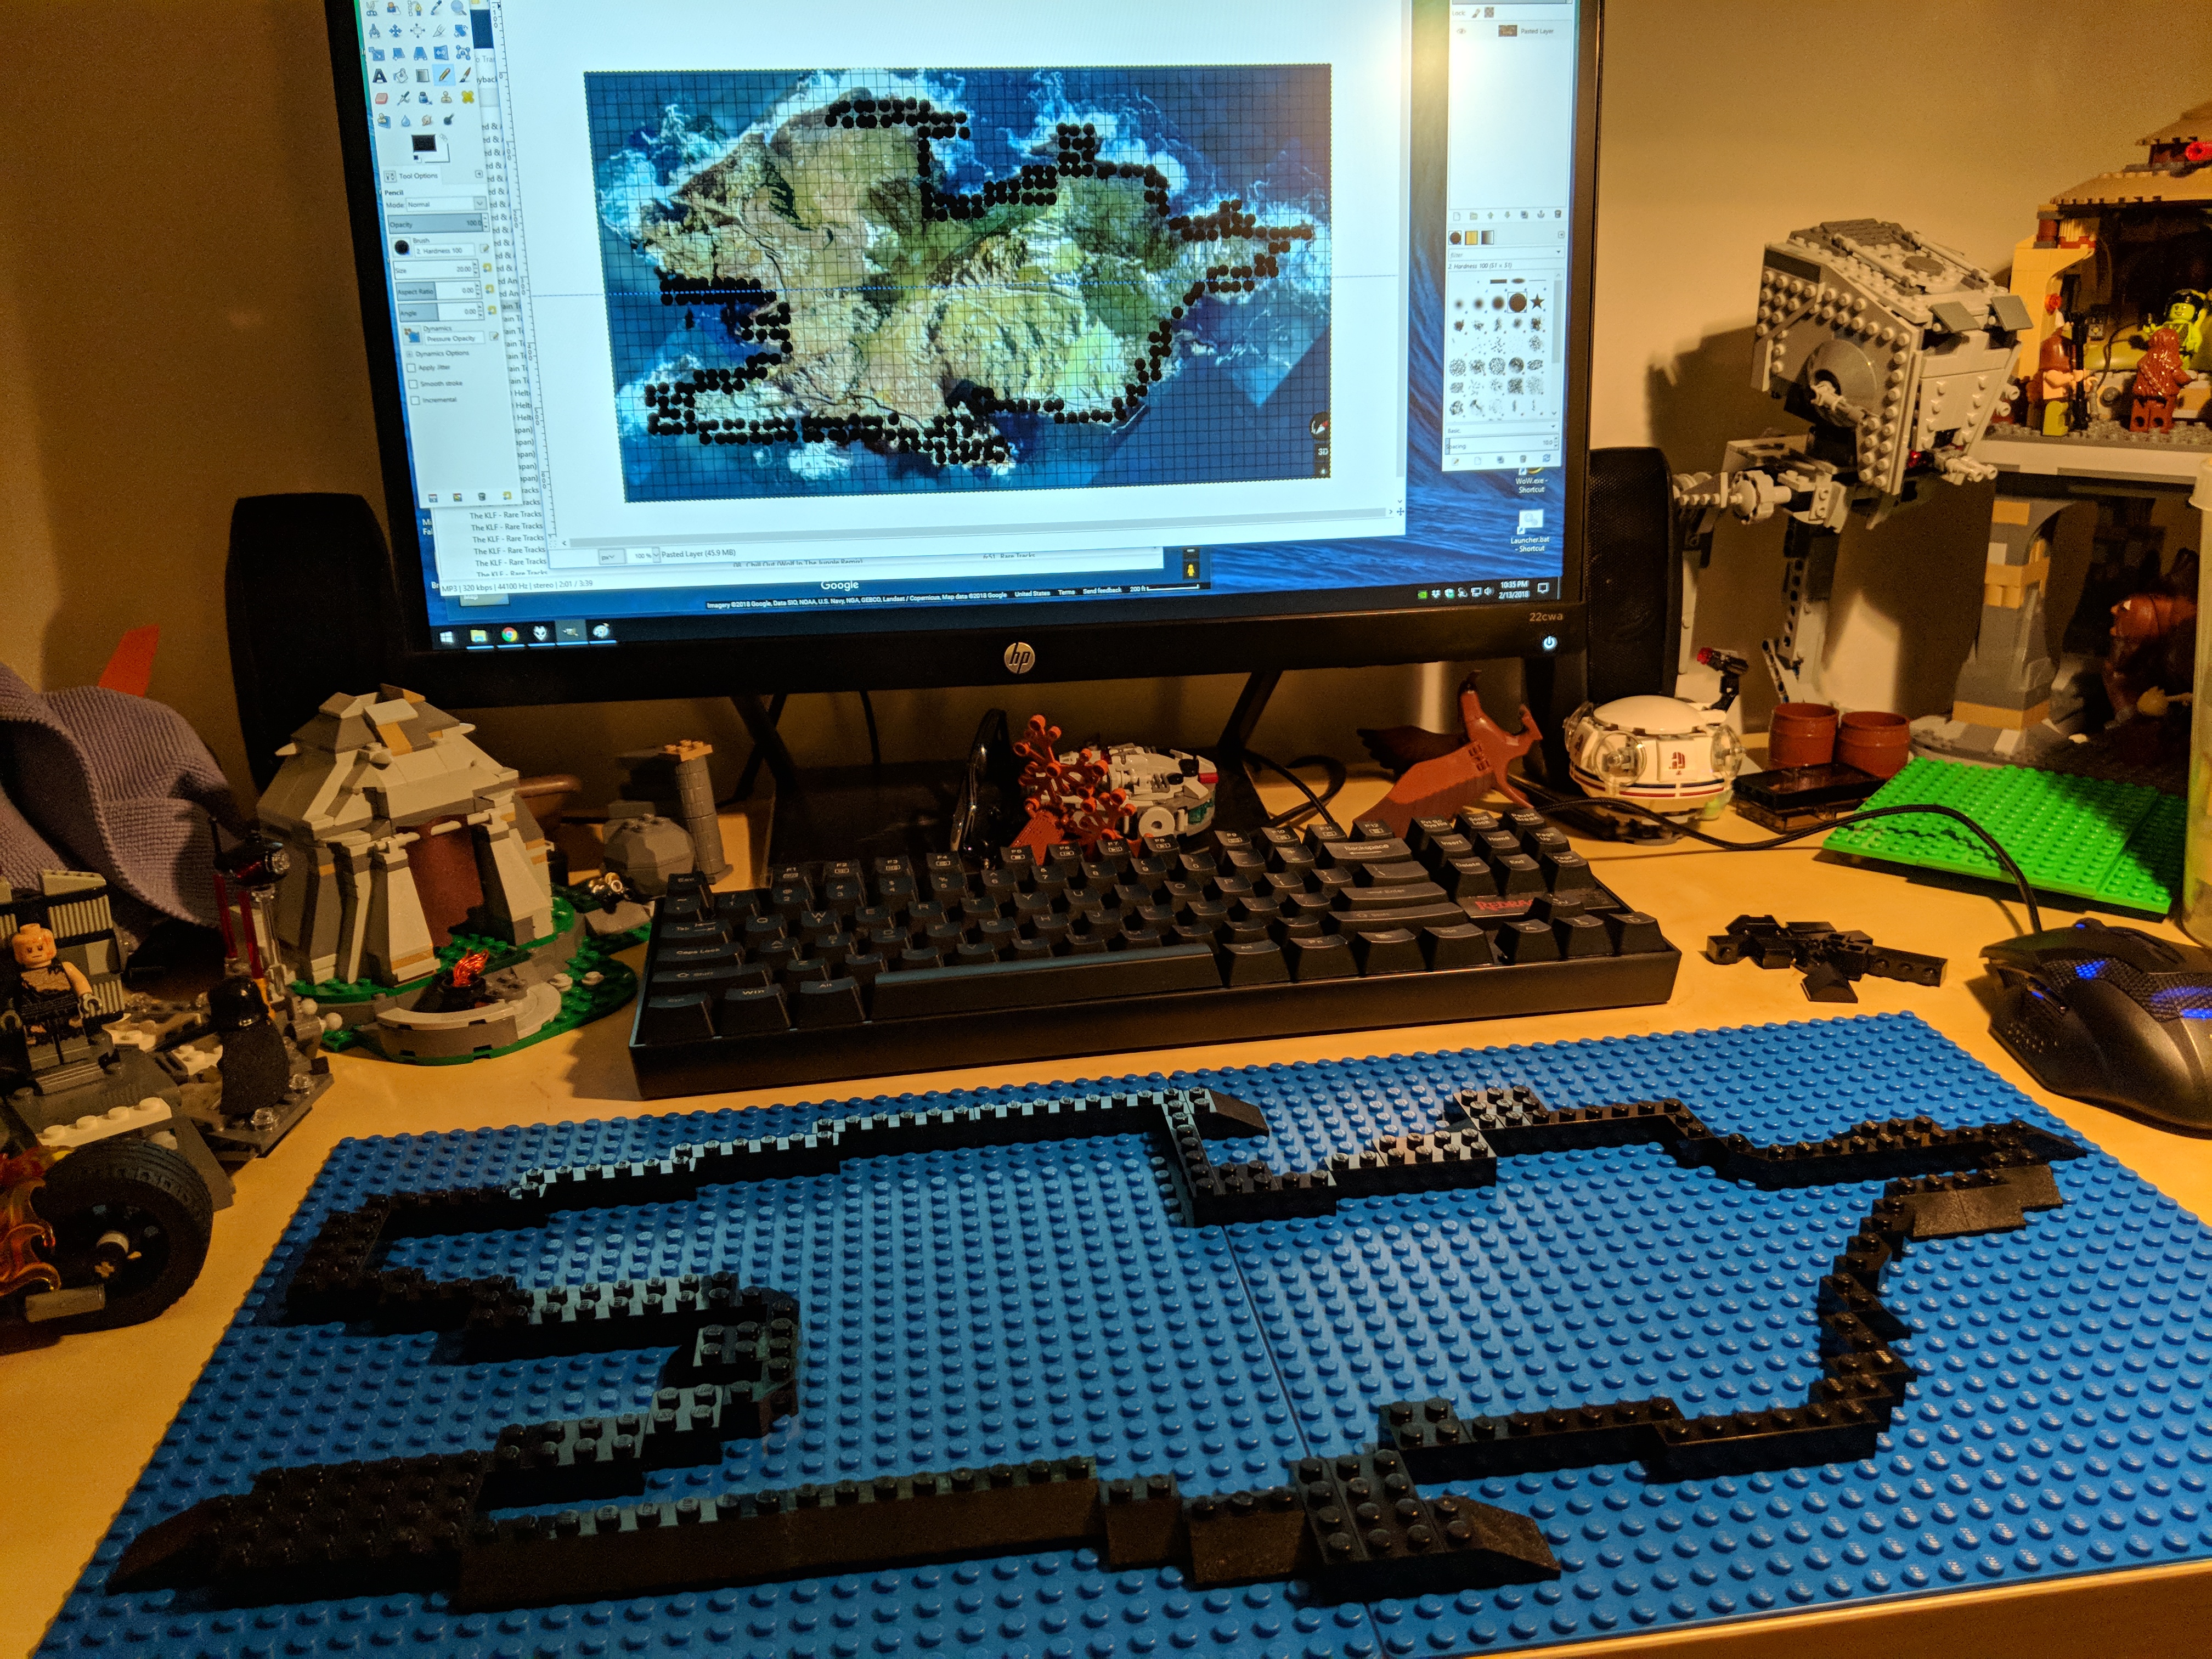
Including all prep time, this build took me about 40 hours. In addition to studying books and magazines that showed glimpses of Temple Island and its topography, I watched YouTube videos such as these: one, two, and three. I leveraged Gimp’s grid rendering to plan the overall design based on a Google Maps’ satellite image of Michael Skellig. Also, I purchased additional LEGO to supplement what I already had on-hand: two 32 x 32 stud blue base plates to construct the MOC on, one green Creative set (10708), and two LEGO Ahch-To Island Training sets (75200).
Below, I am including highlights from the construction process and the completed model. At the end, there are links to these albums with more photos of the MOC: Google Photos and Imgur.
Designing the Shoreline Using Google Maps, Gimp, and Generated Grid
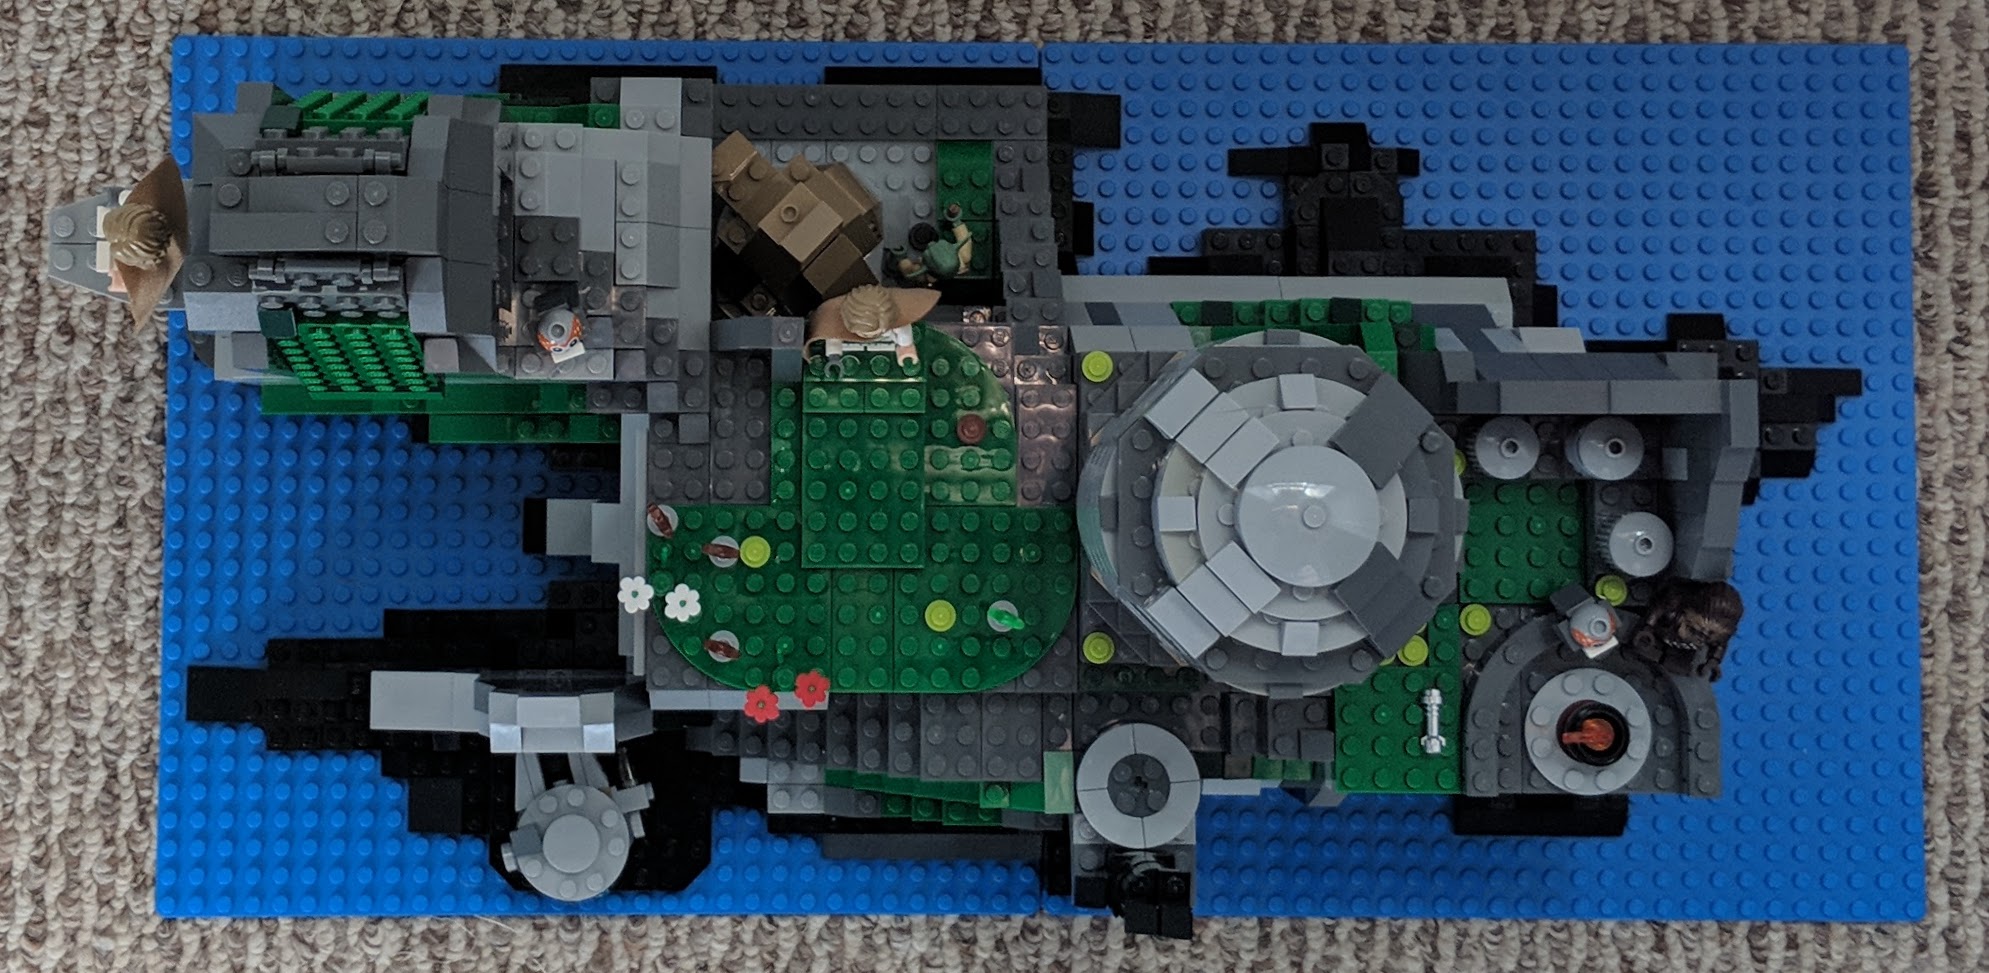
Top and Side Views of Temple Island
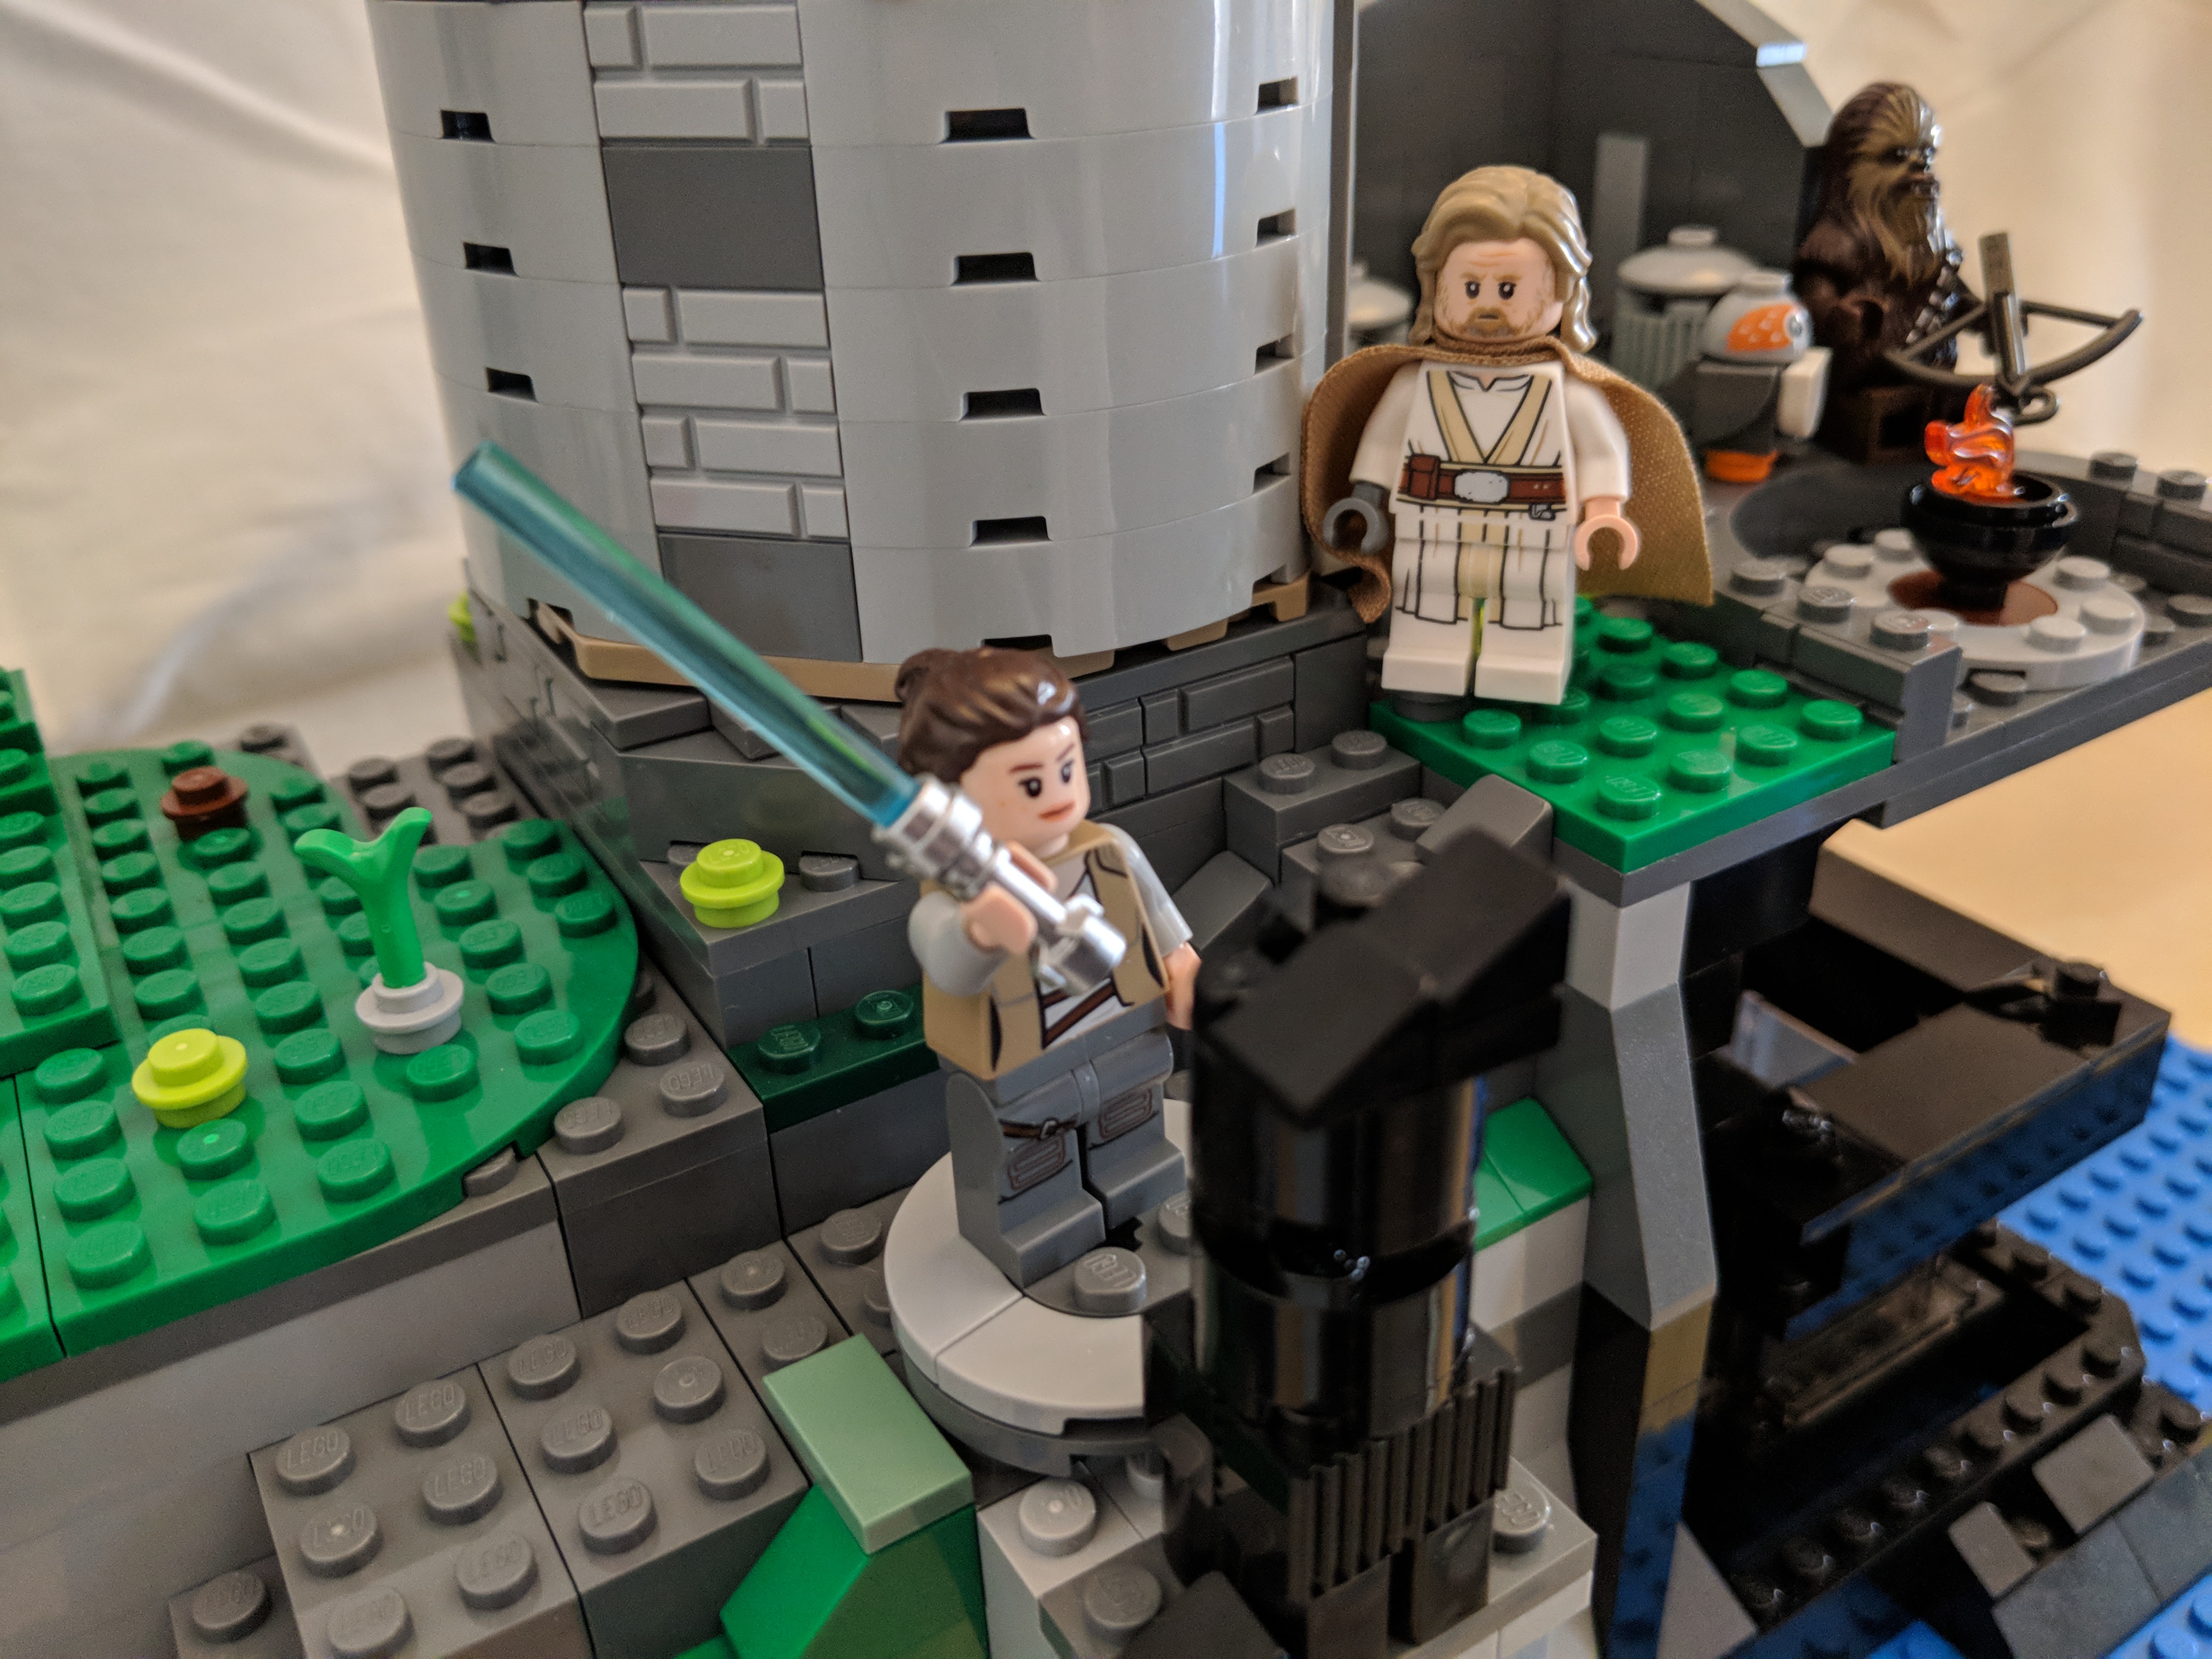
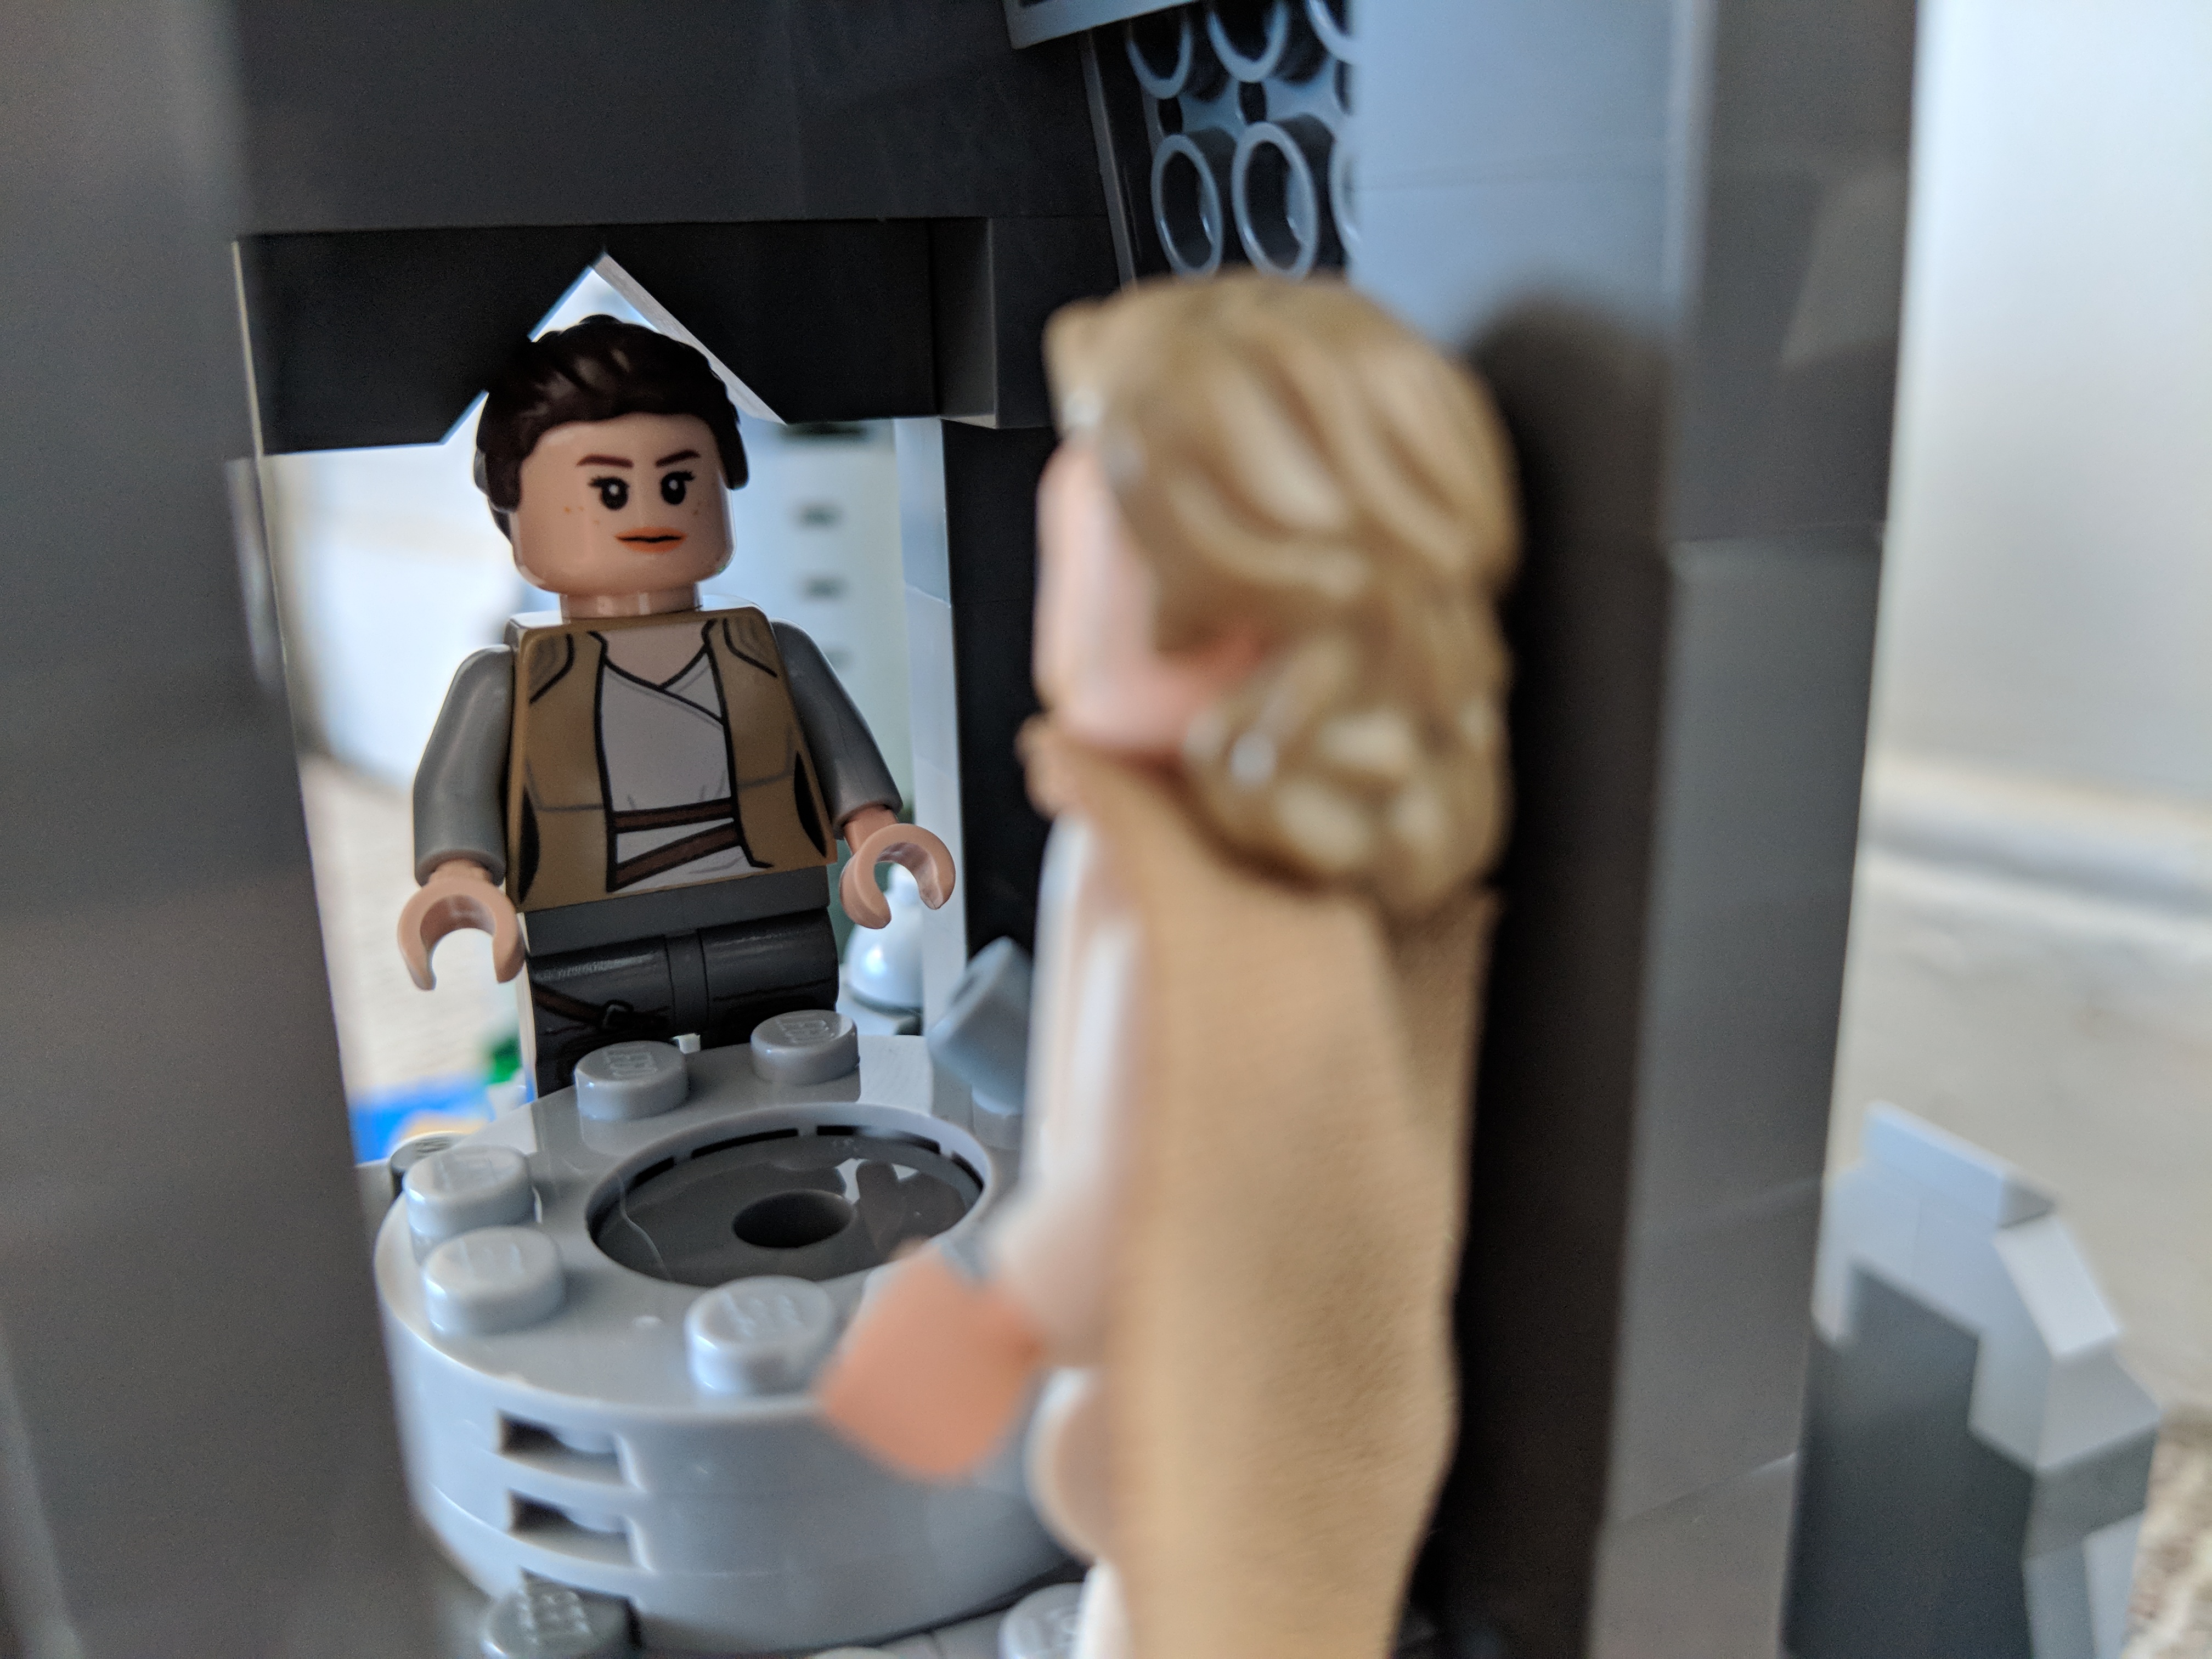
Rey’s First Encounter with Master Skywalker
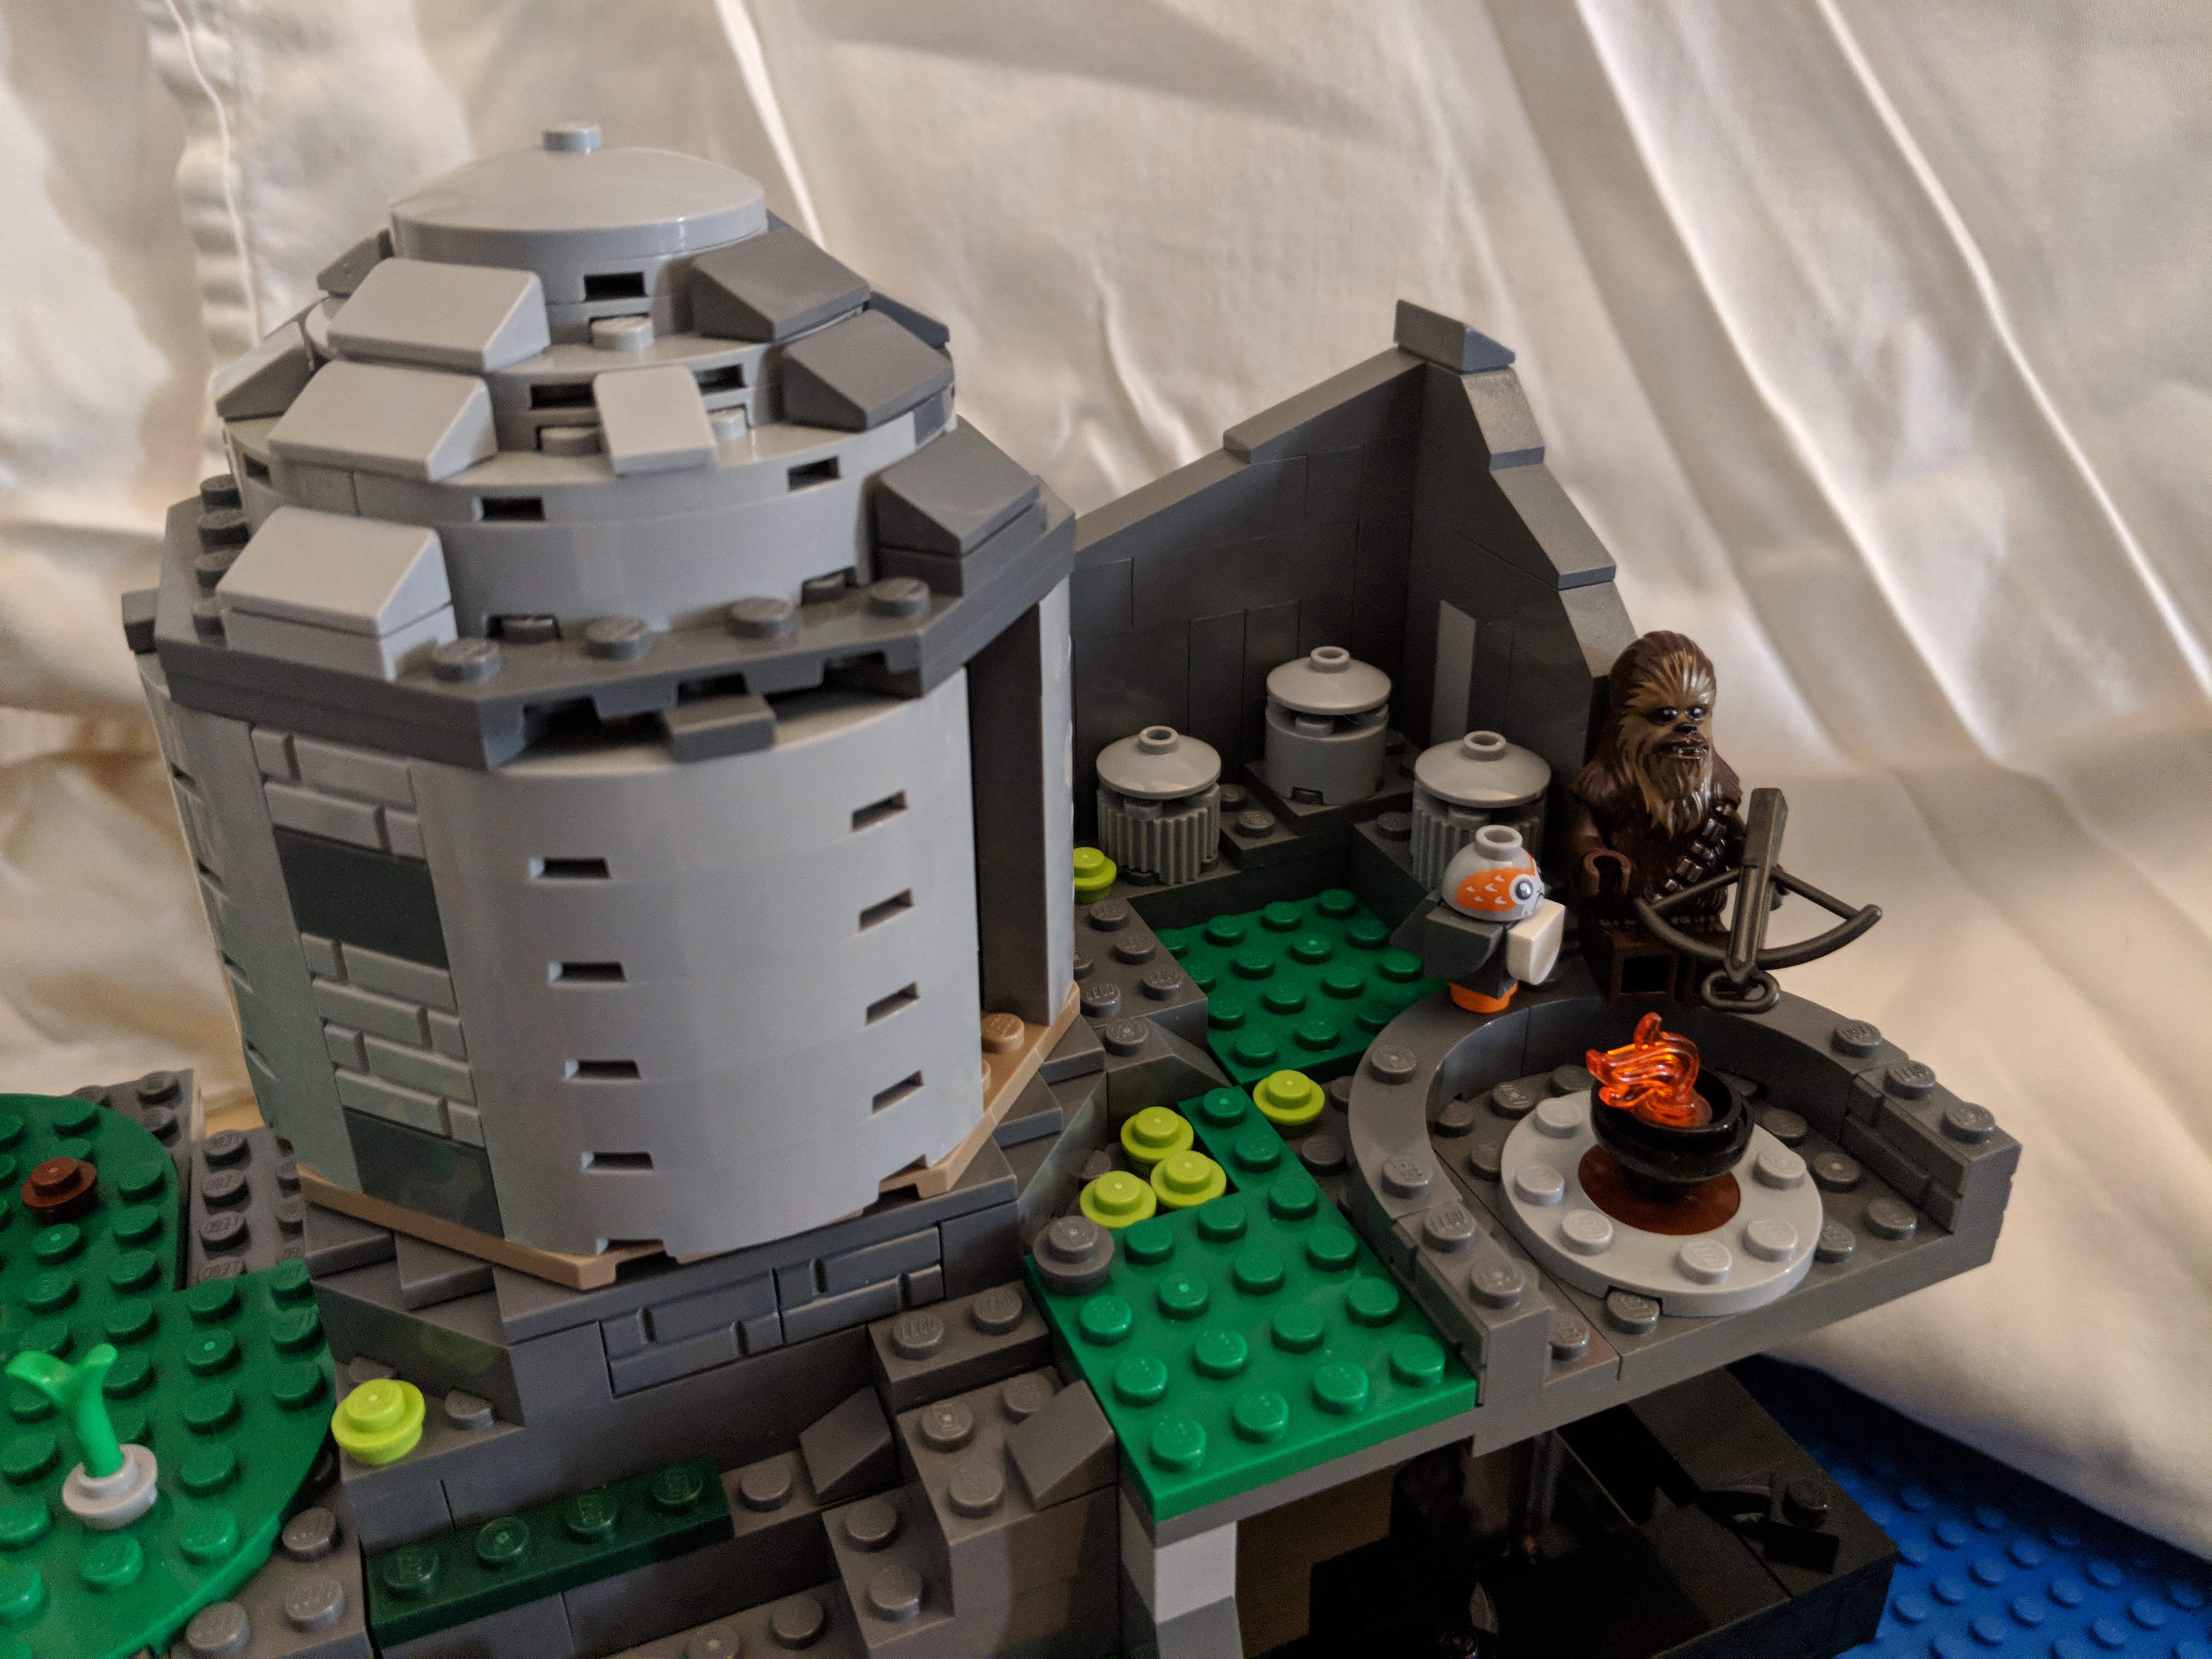
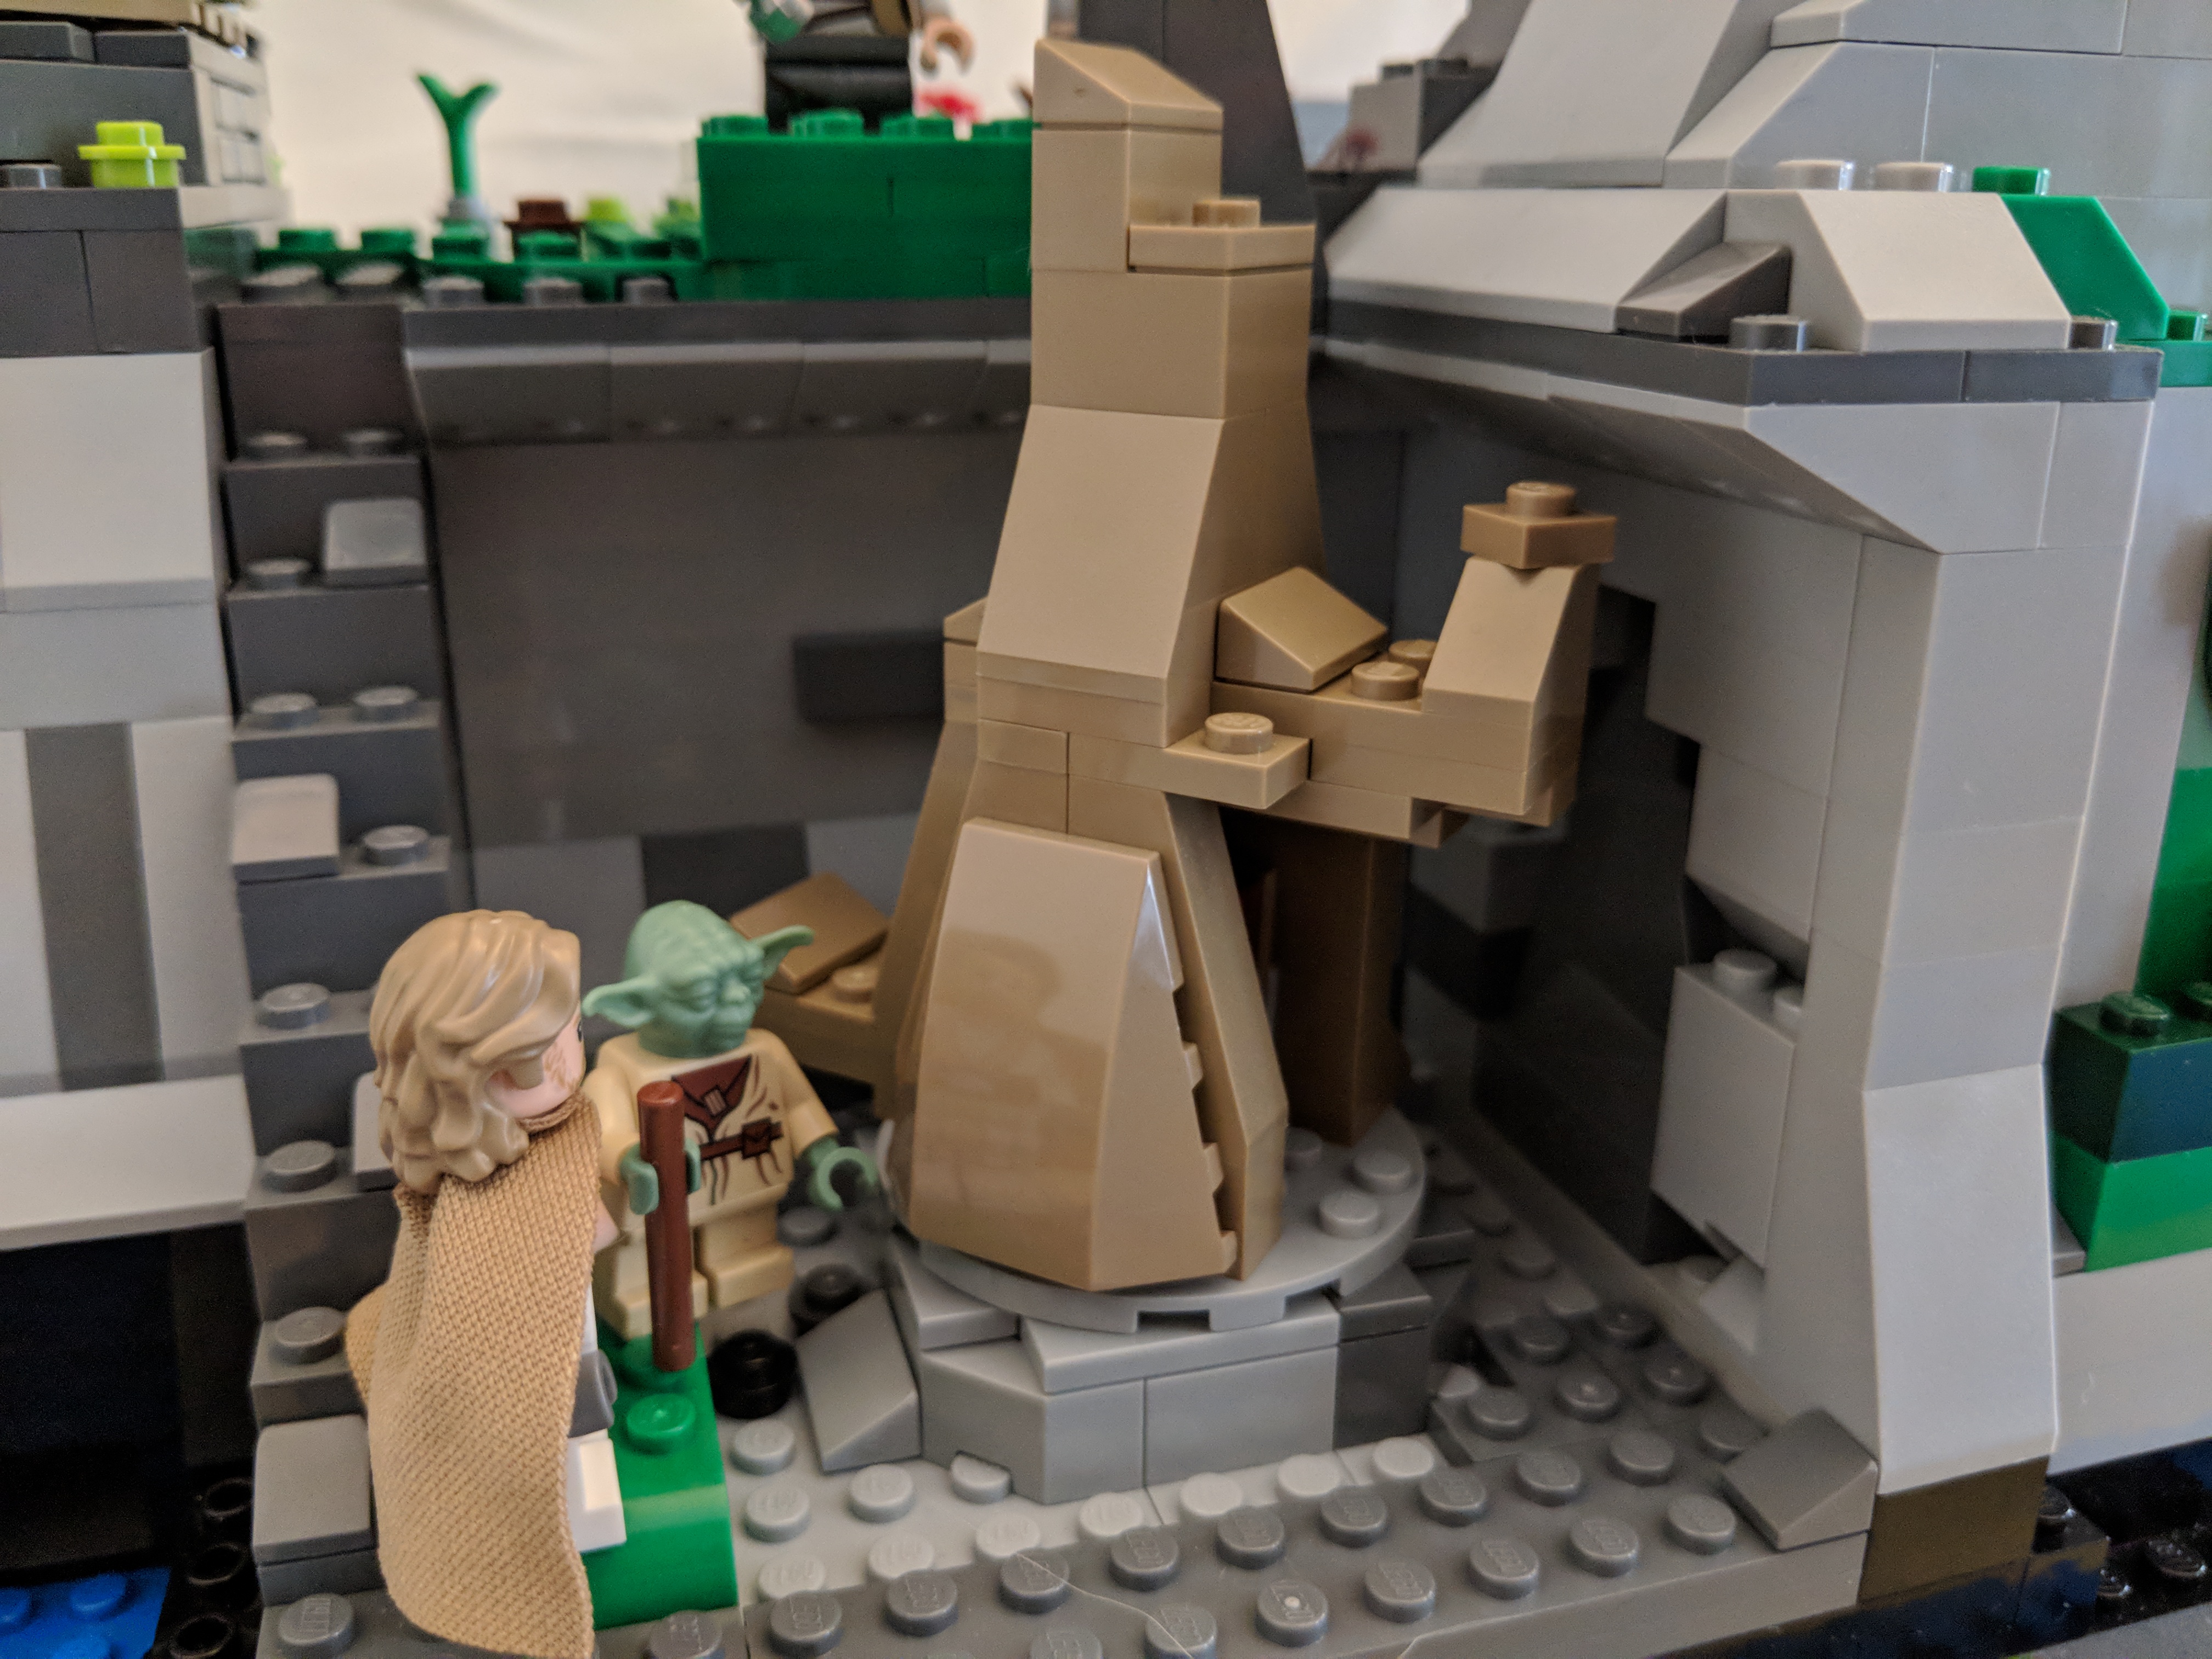
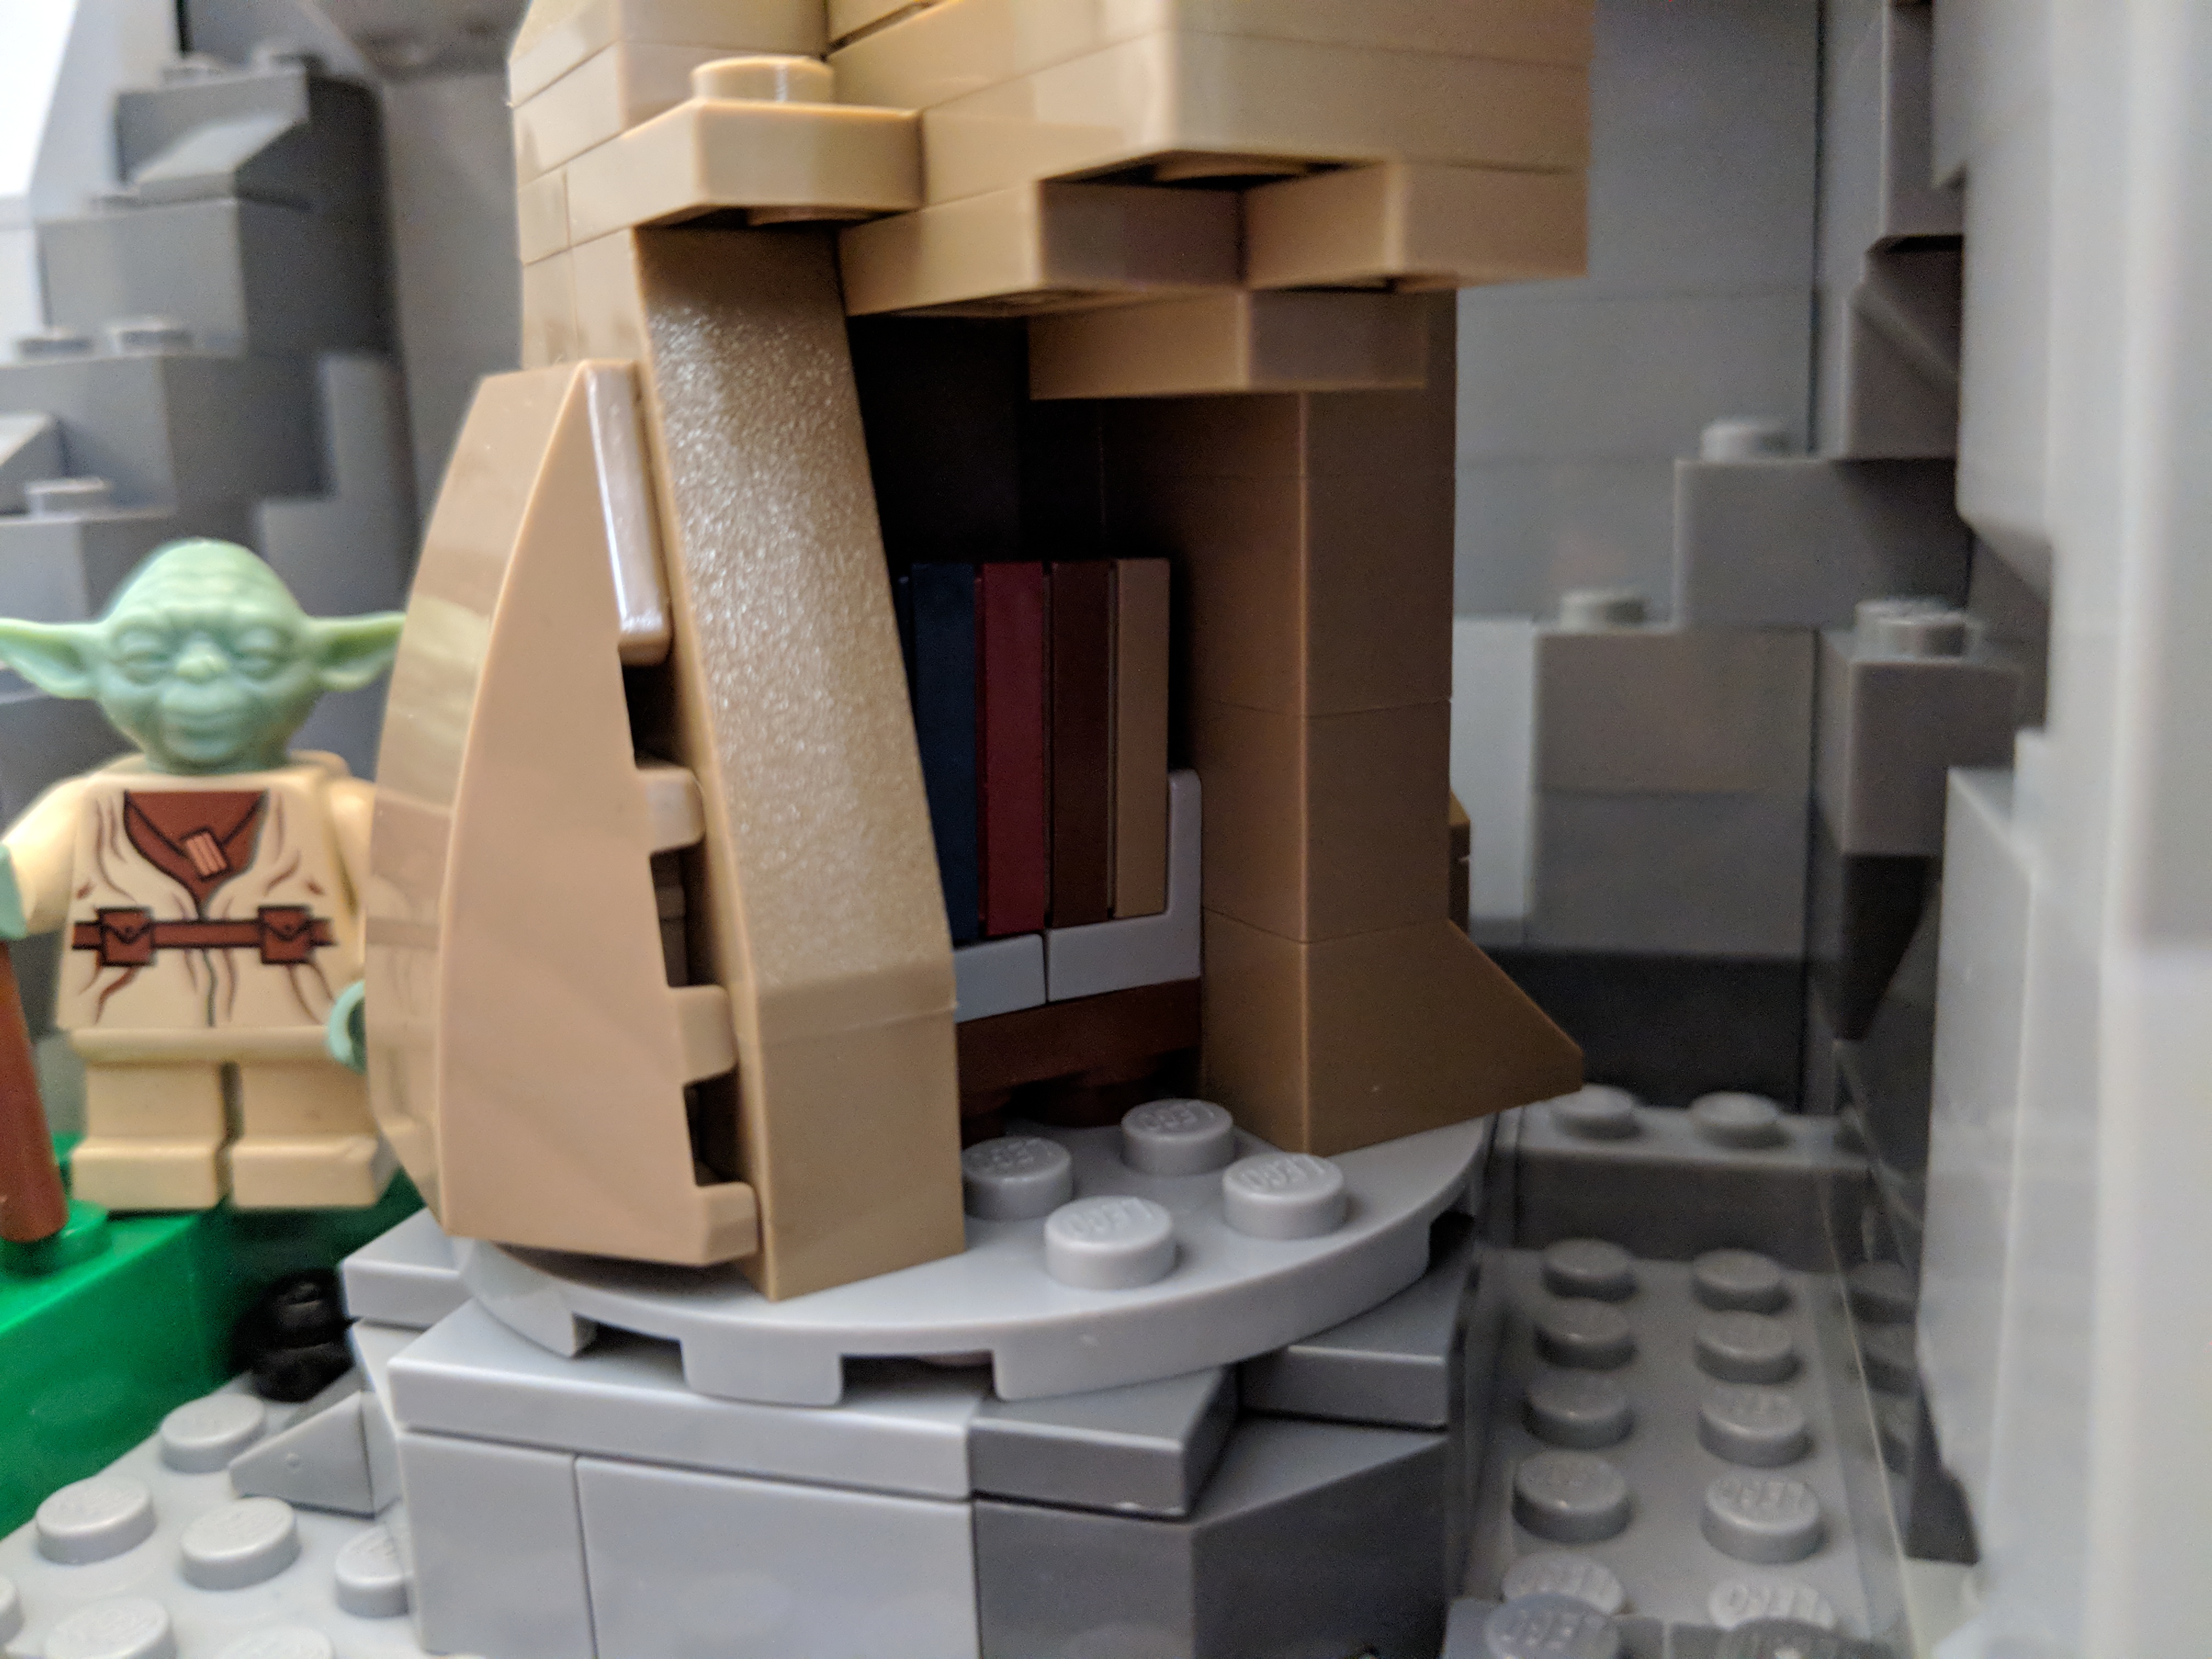
Luke Skywalker’s Hut and Village
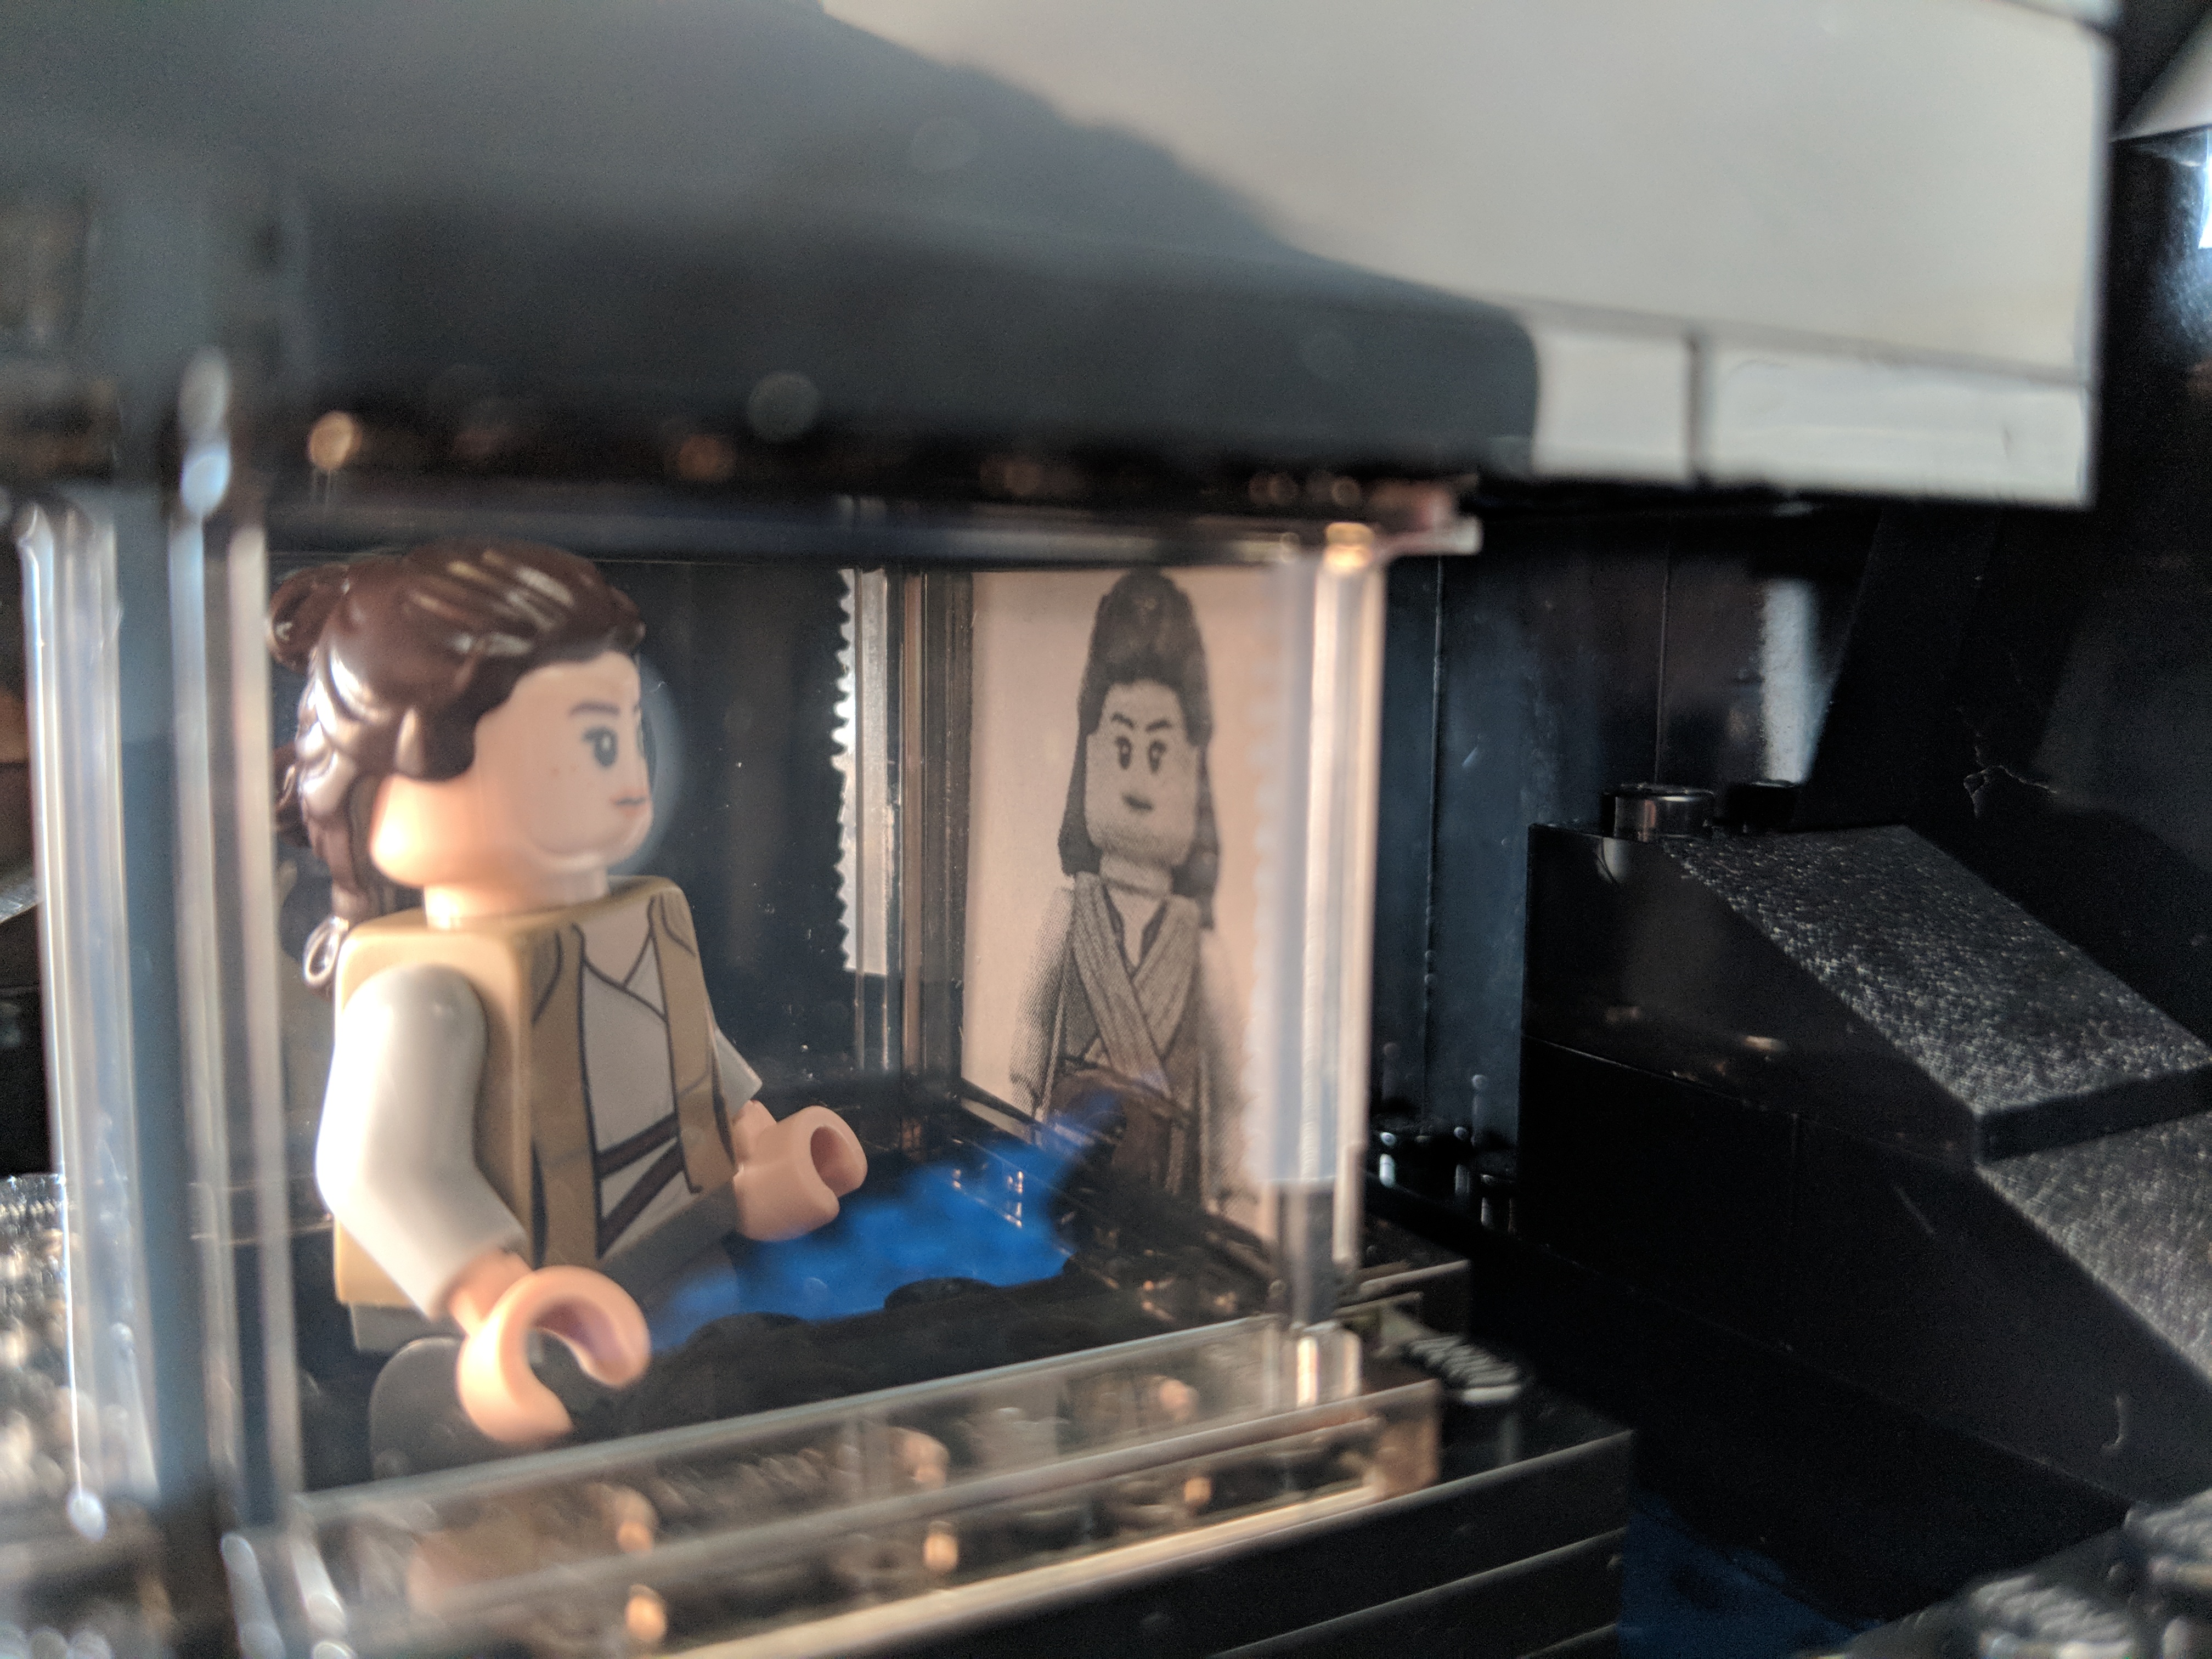
Rey’s Lightsaber Practice (at the Wailing Woman Rock)
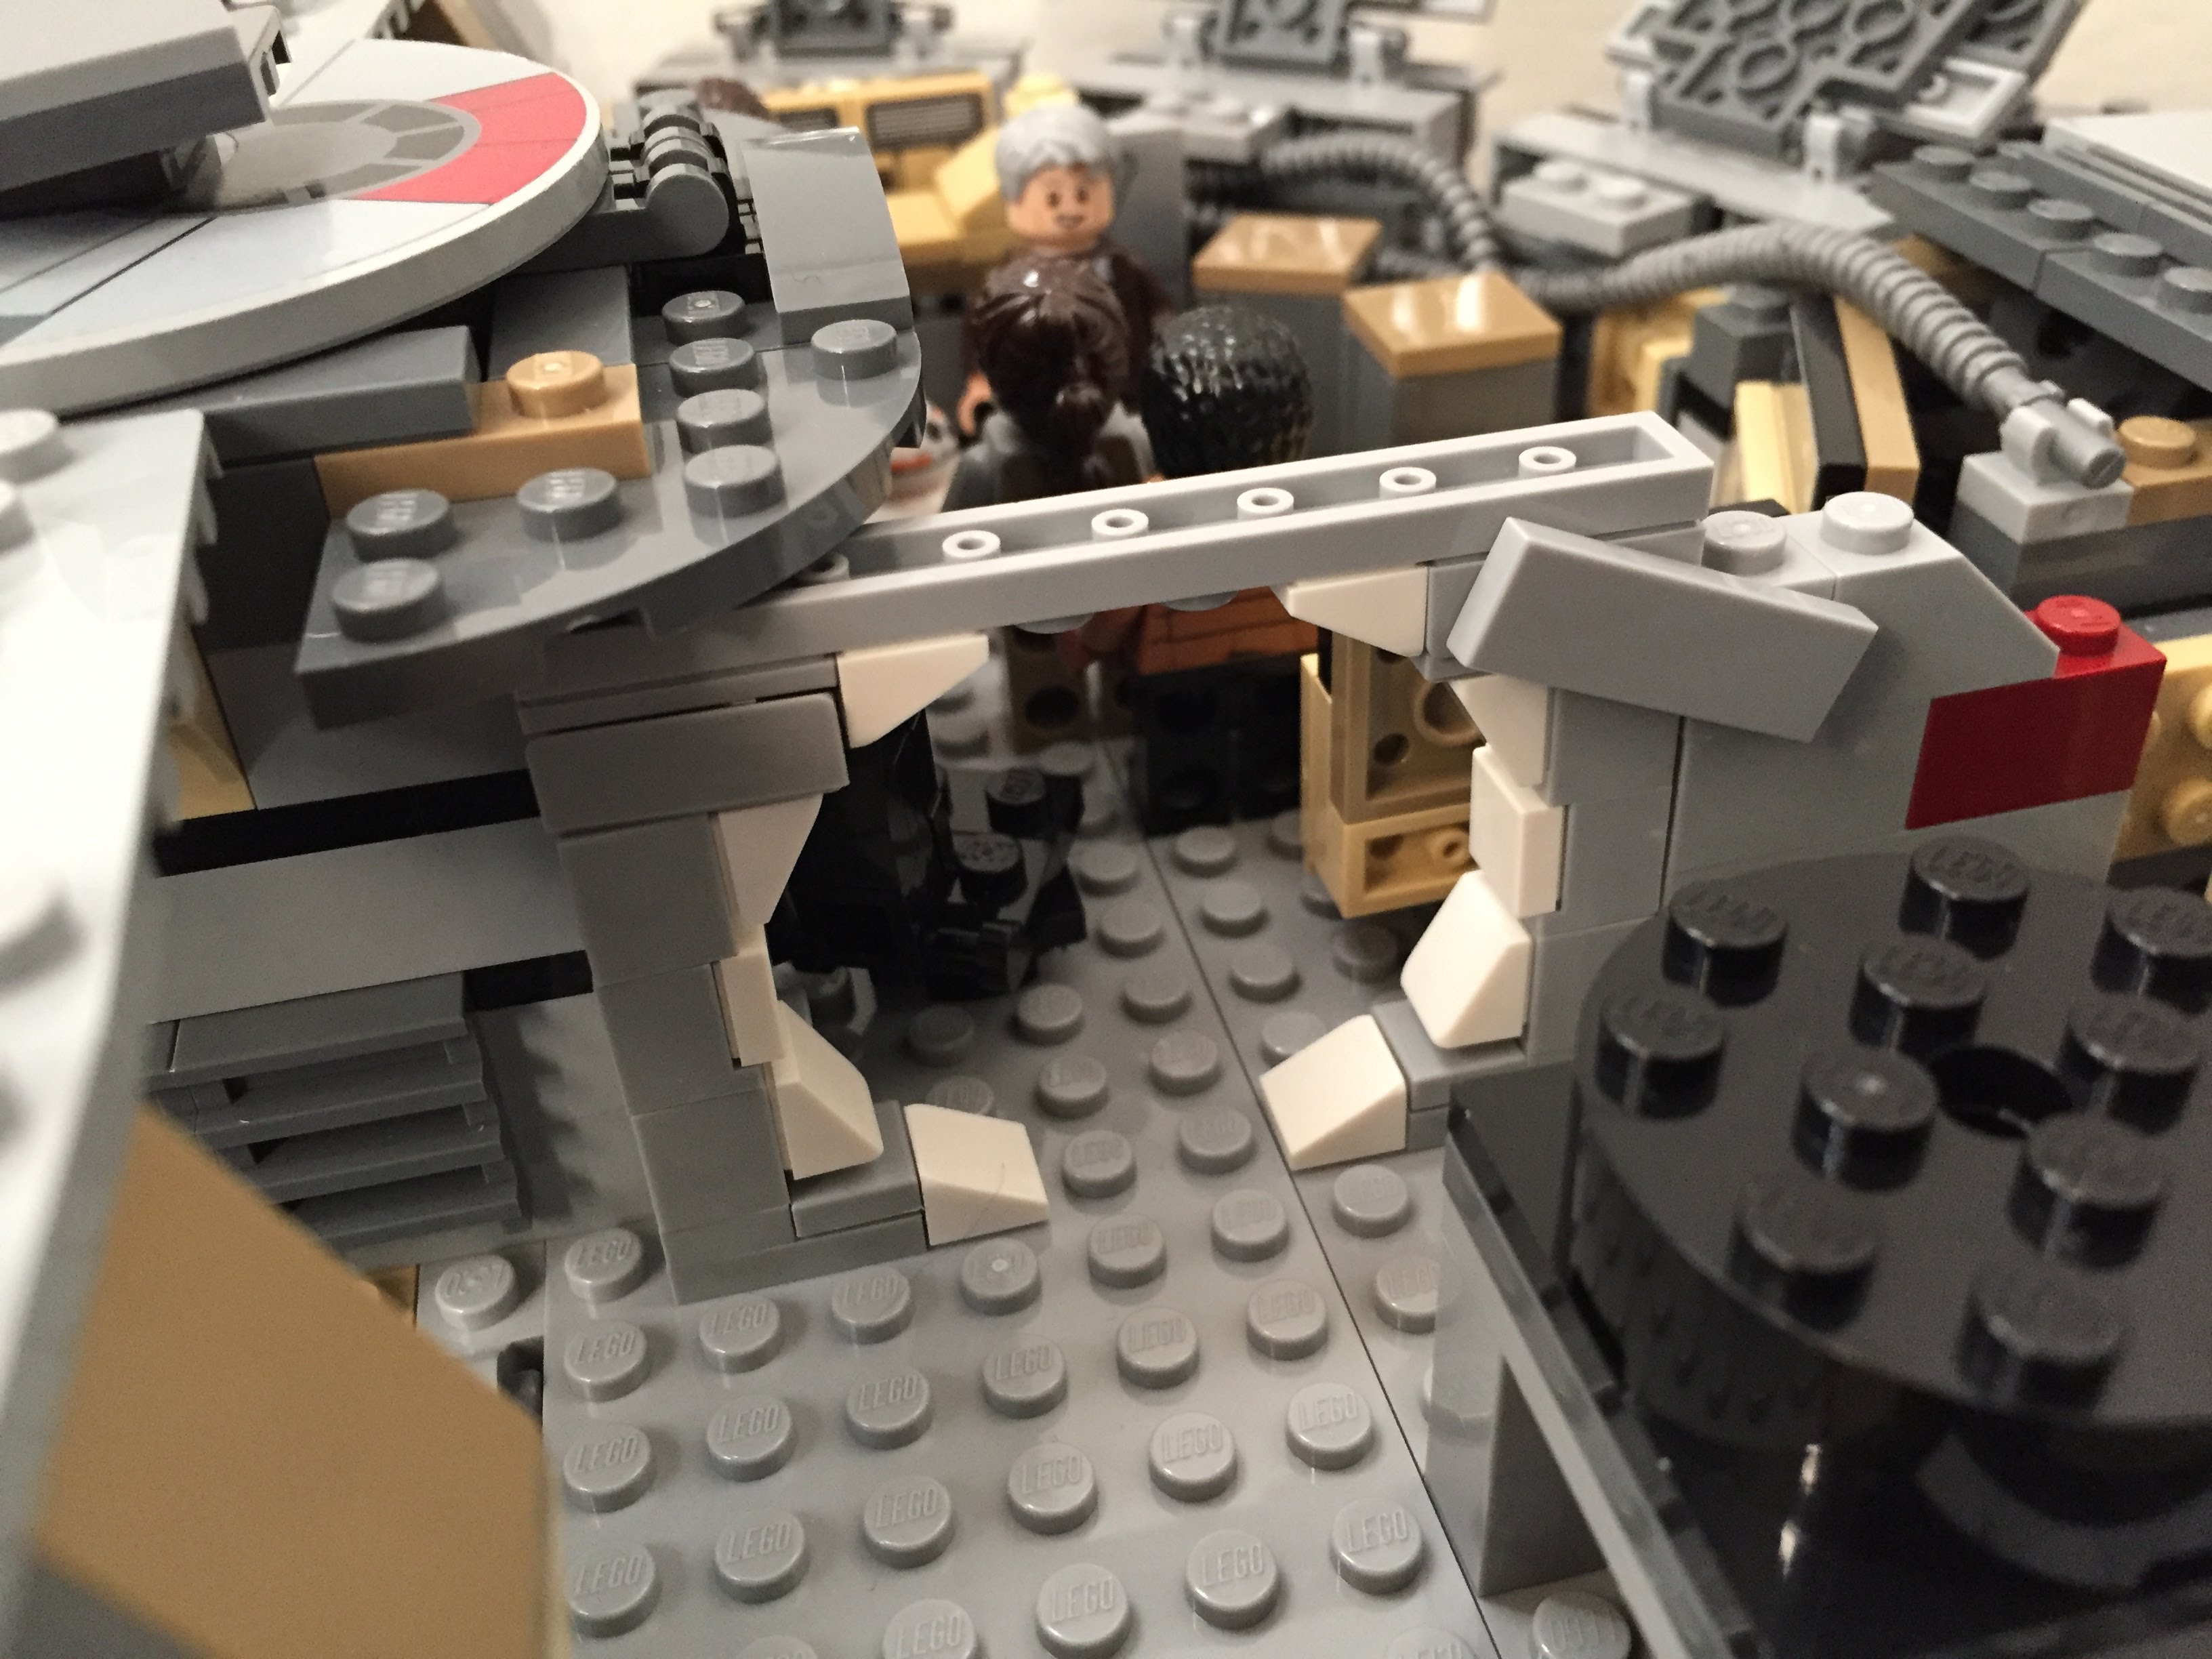
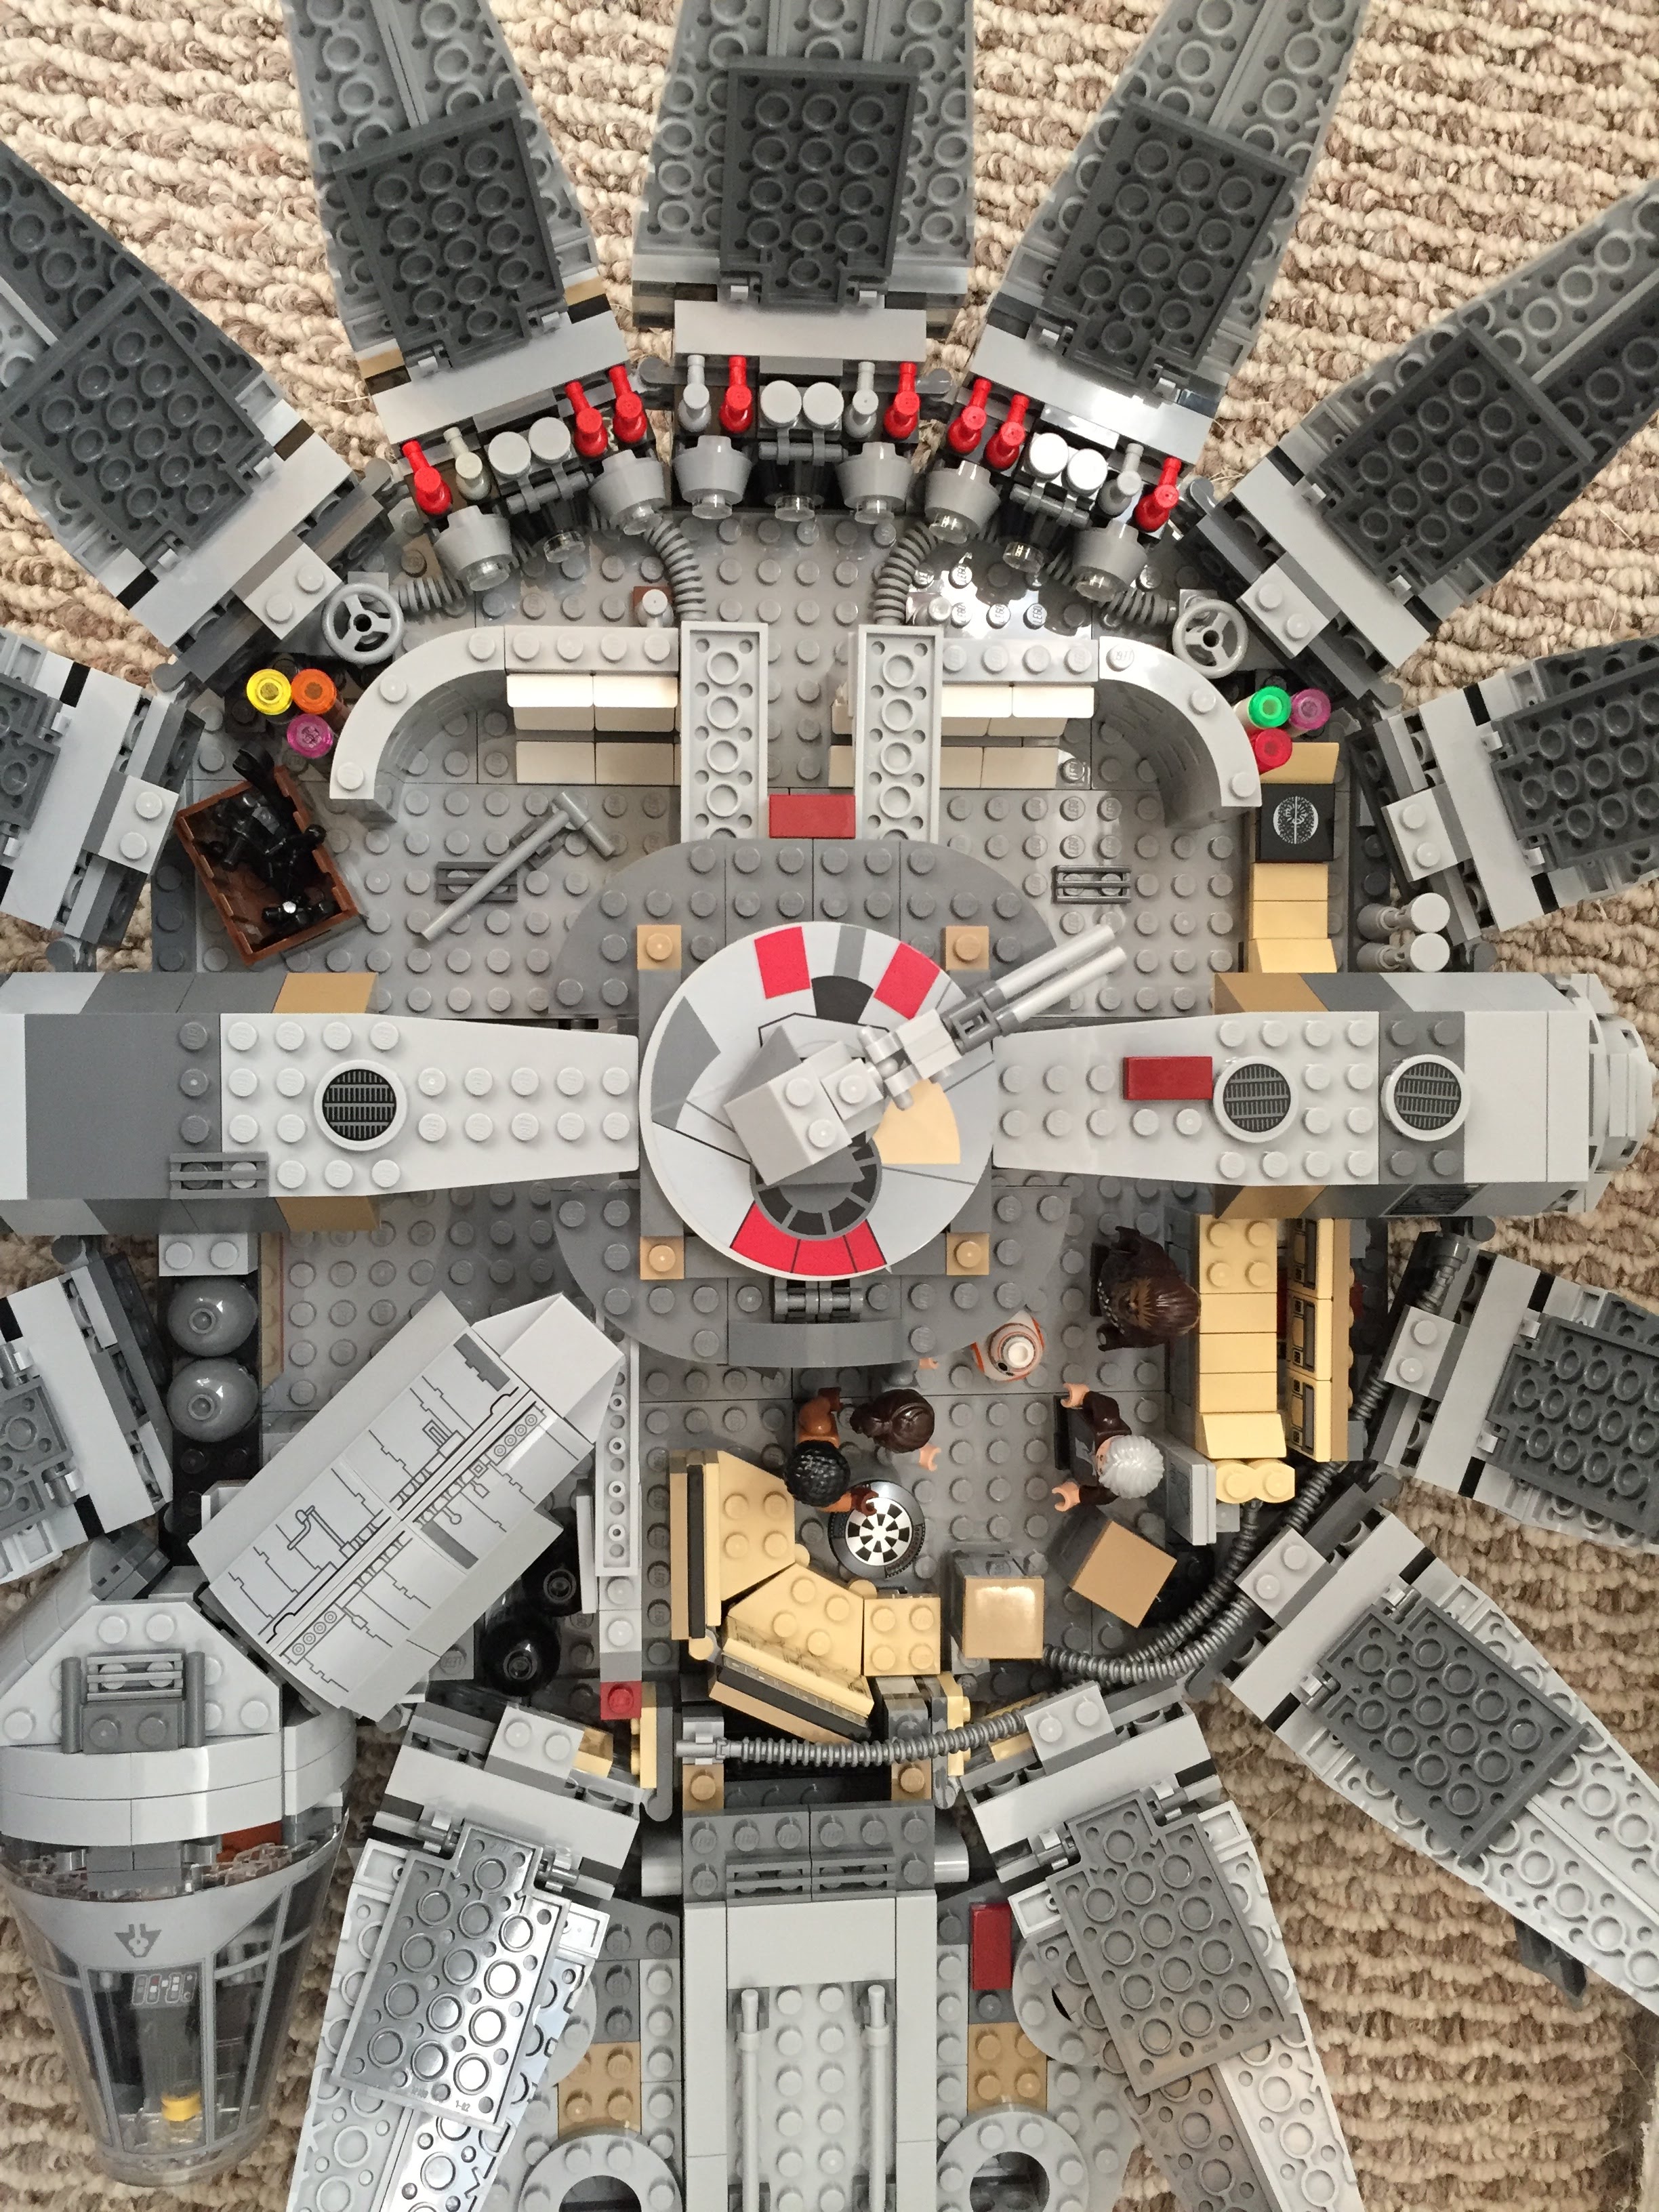
Over the years, I’ve built several customized LEGO Millennium Falcons (including here and here). I like taking the stock models and making them more screen accurate combined with imaginative embellishment. With this customization of a stock 75105 Millennium Falcon, I initially tried working this model that I had built about a year ago. However, I got really frustrated trying to work out how to implement some of the customizations that I had in mind. So, I disassembled the model and rebuilt it. Doing this helped me remember the logic of its design and construction, and it enabled me to rebuild some of its foundational features more easily than the piecemeal way I first attempted to do. The way that I did this rebuild also jumped around the instruction booklet, because the LEGO process of building is generally height-by-height across the whole model. I needed to focus on the modular aspects of the model, which is helped by building each module (circumferential ring, cockpit, docking ports, etc.). Due to rebuilding it from the ground up, this project took several days. Scroll through this blog post to view detailed photos and descriptions of this customization.
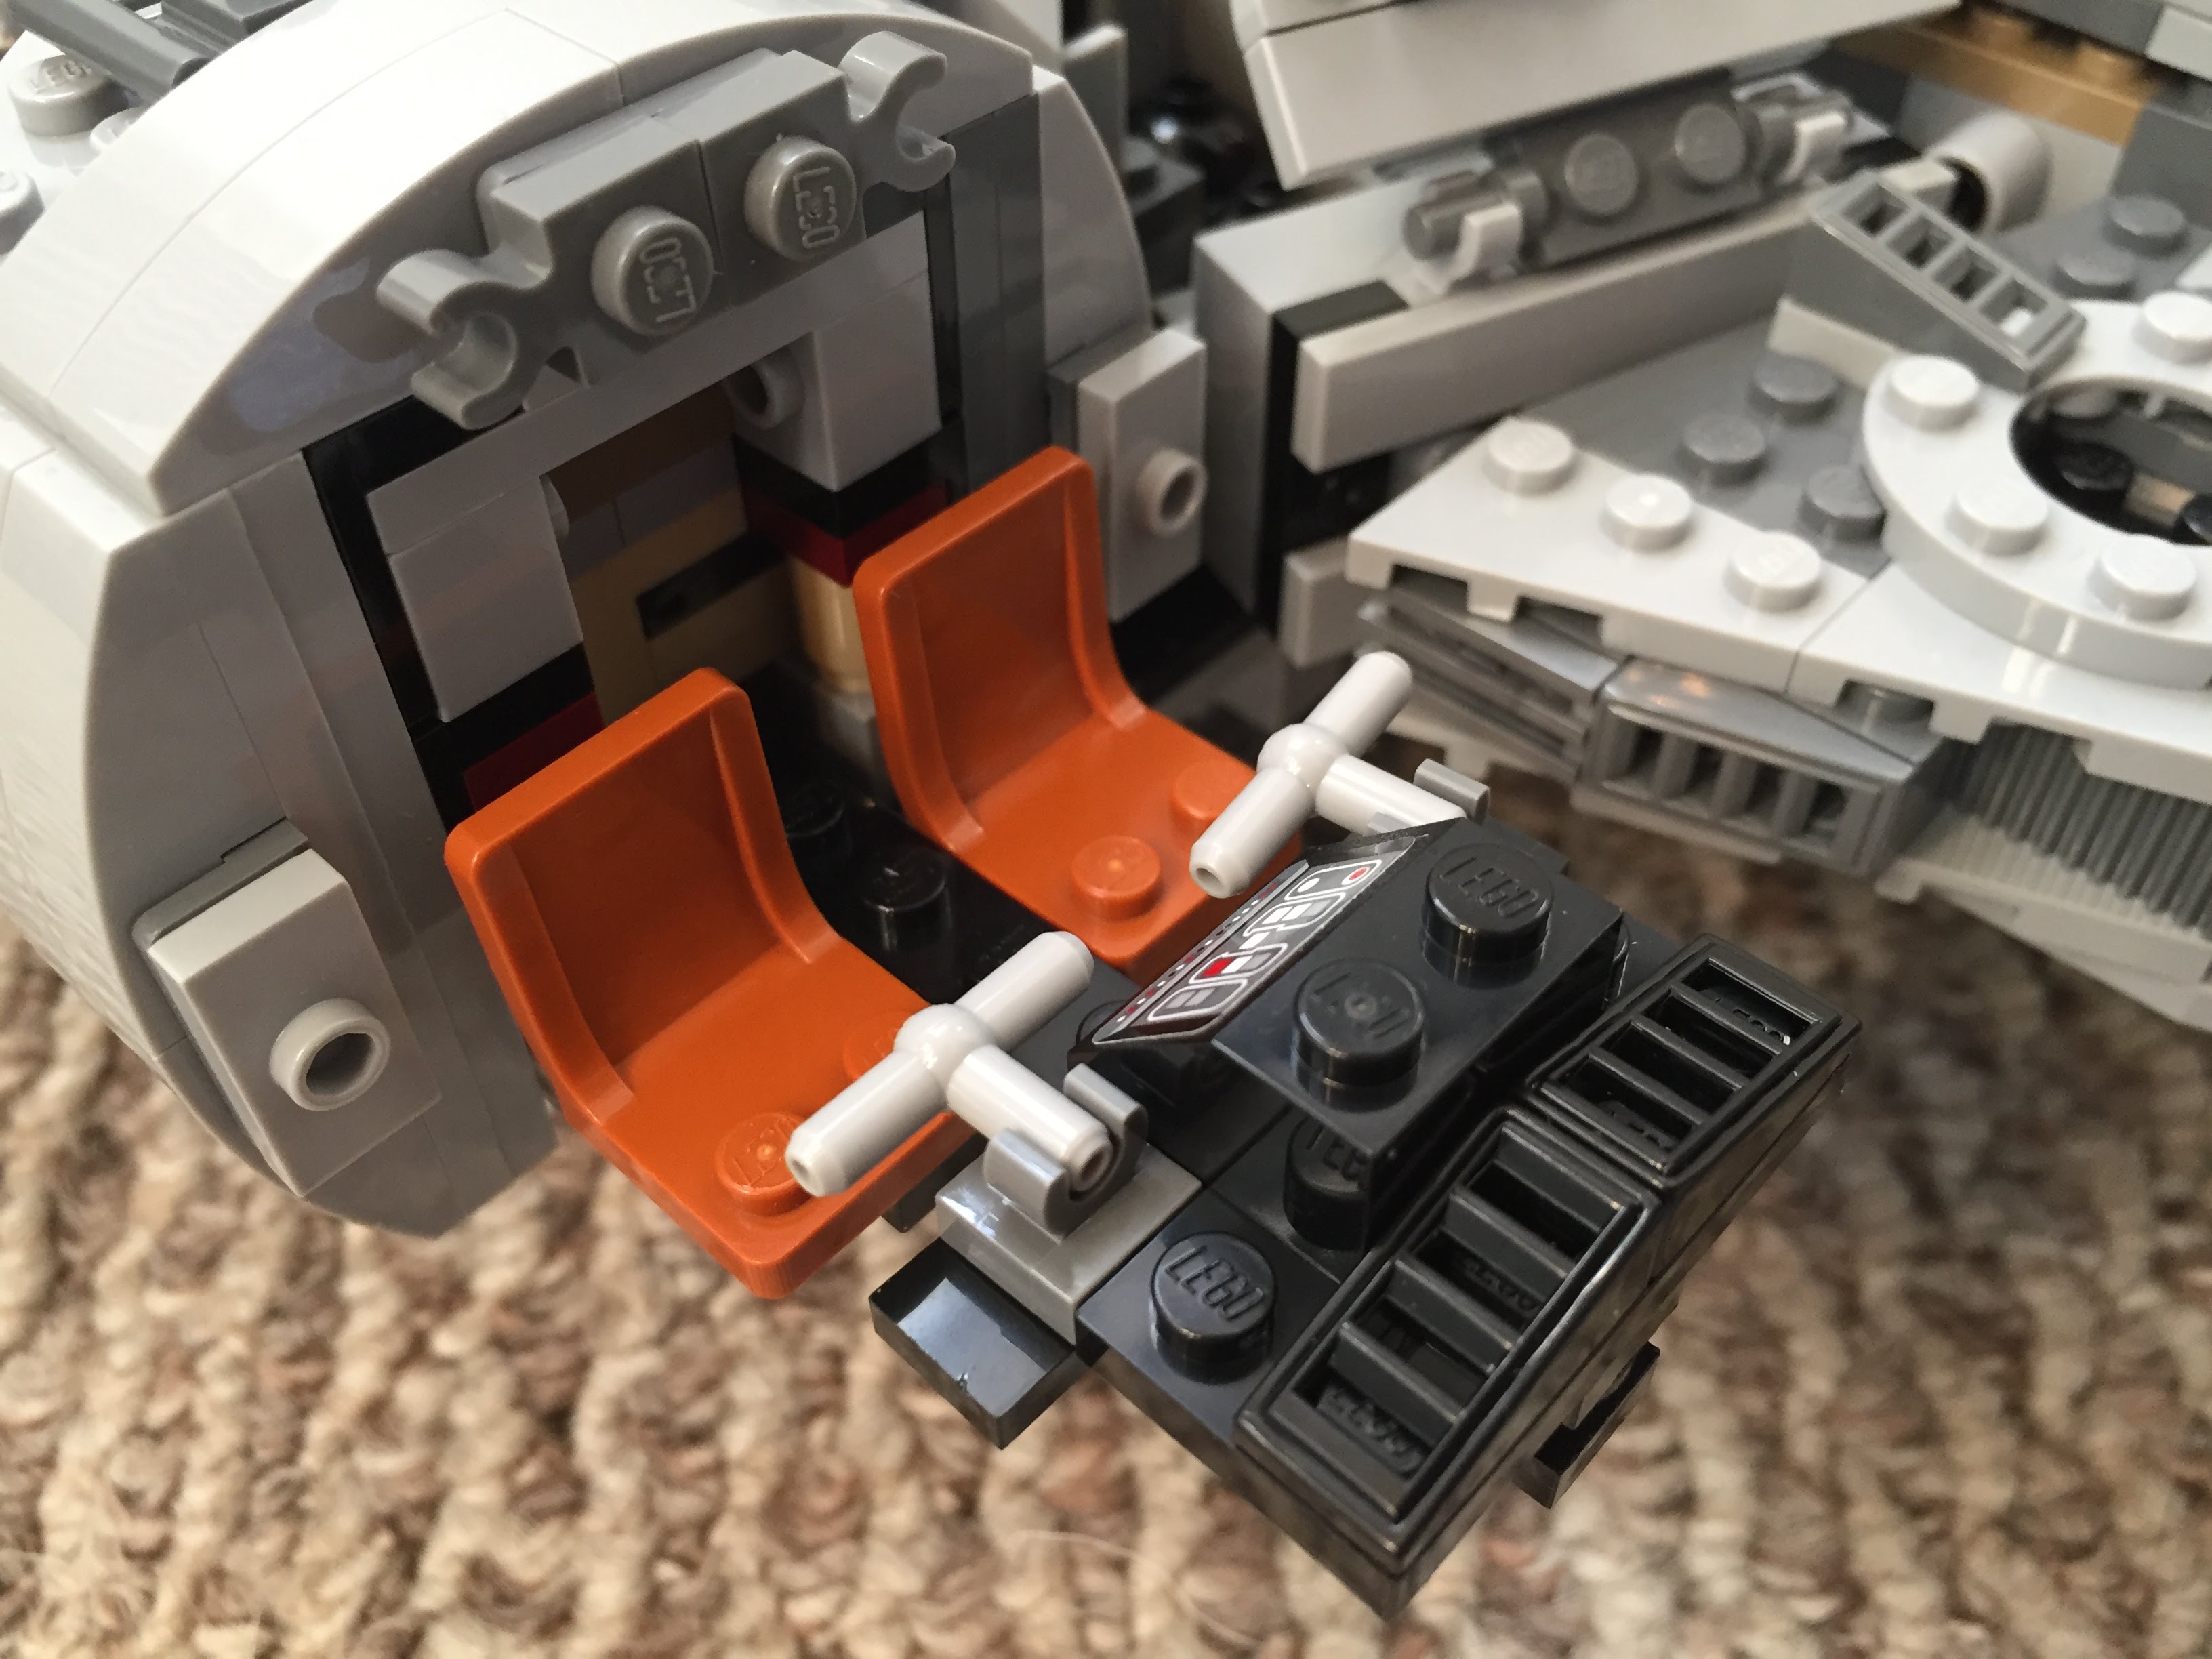
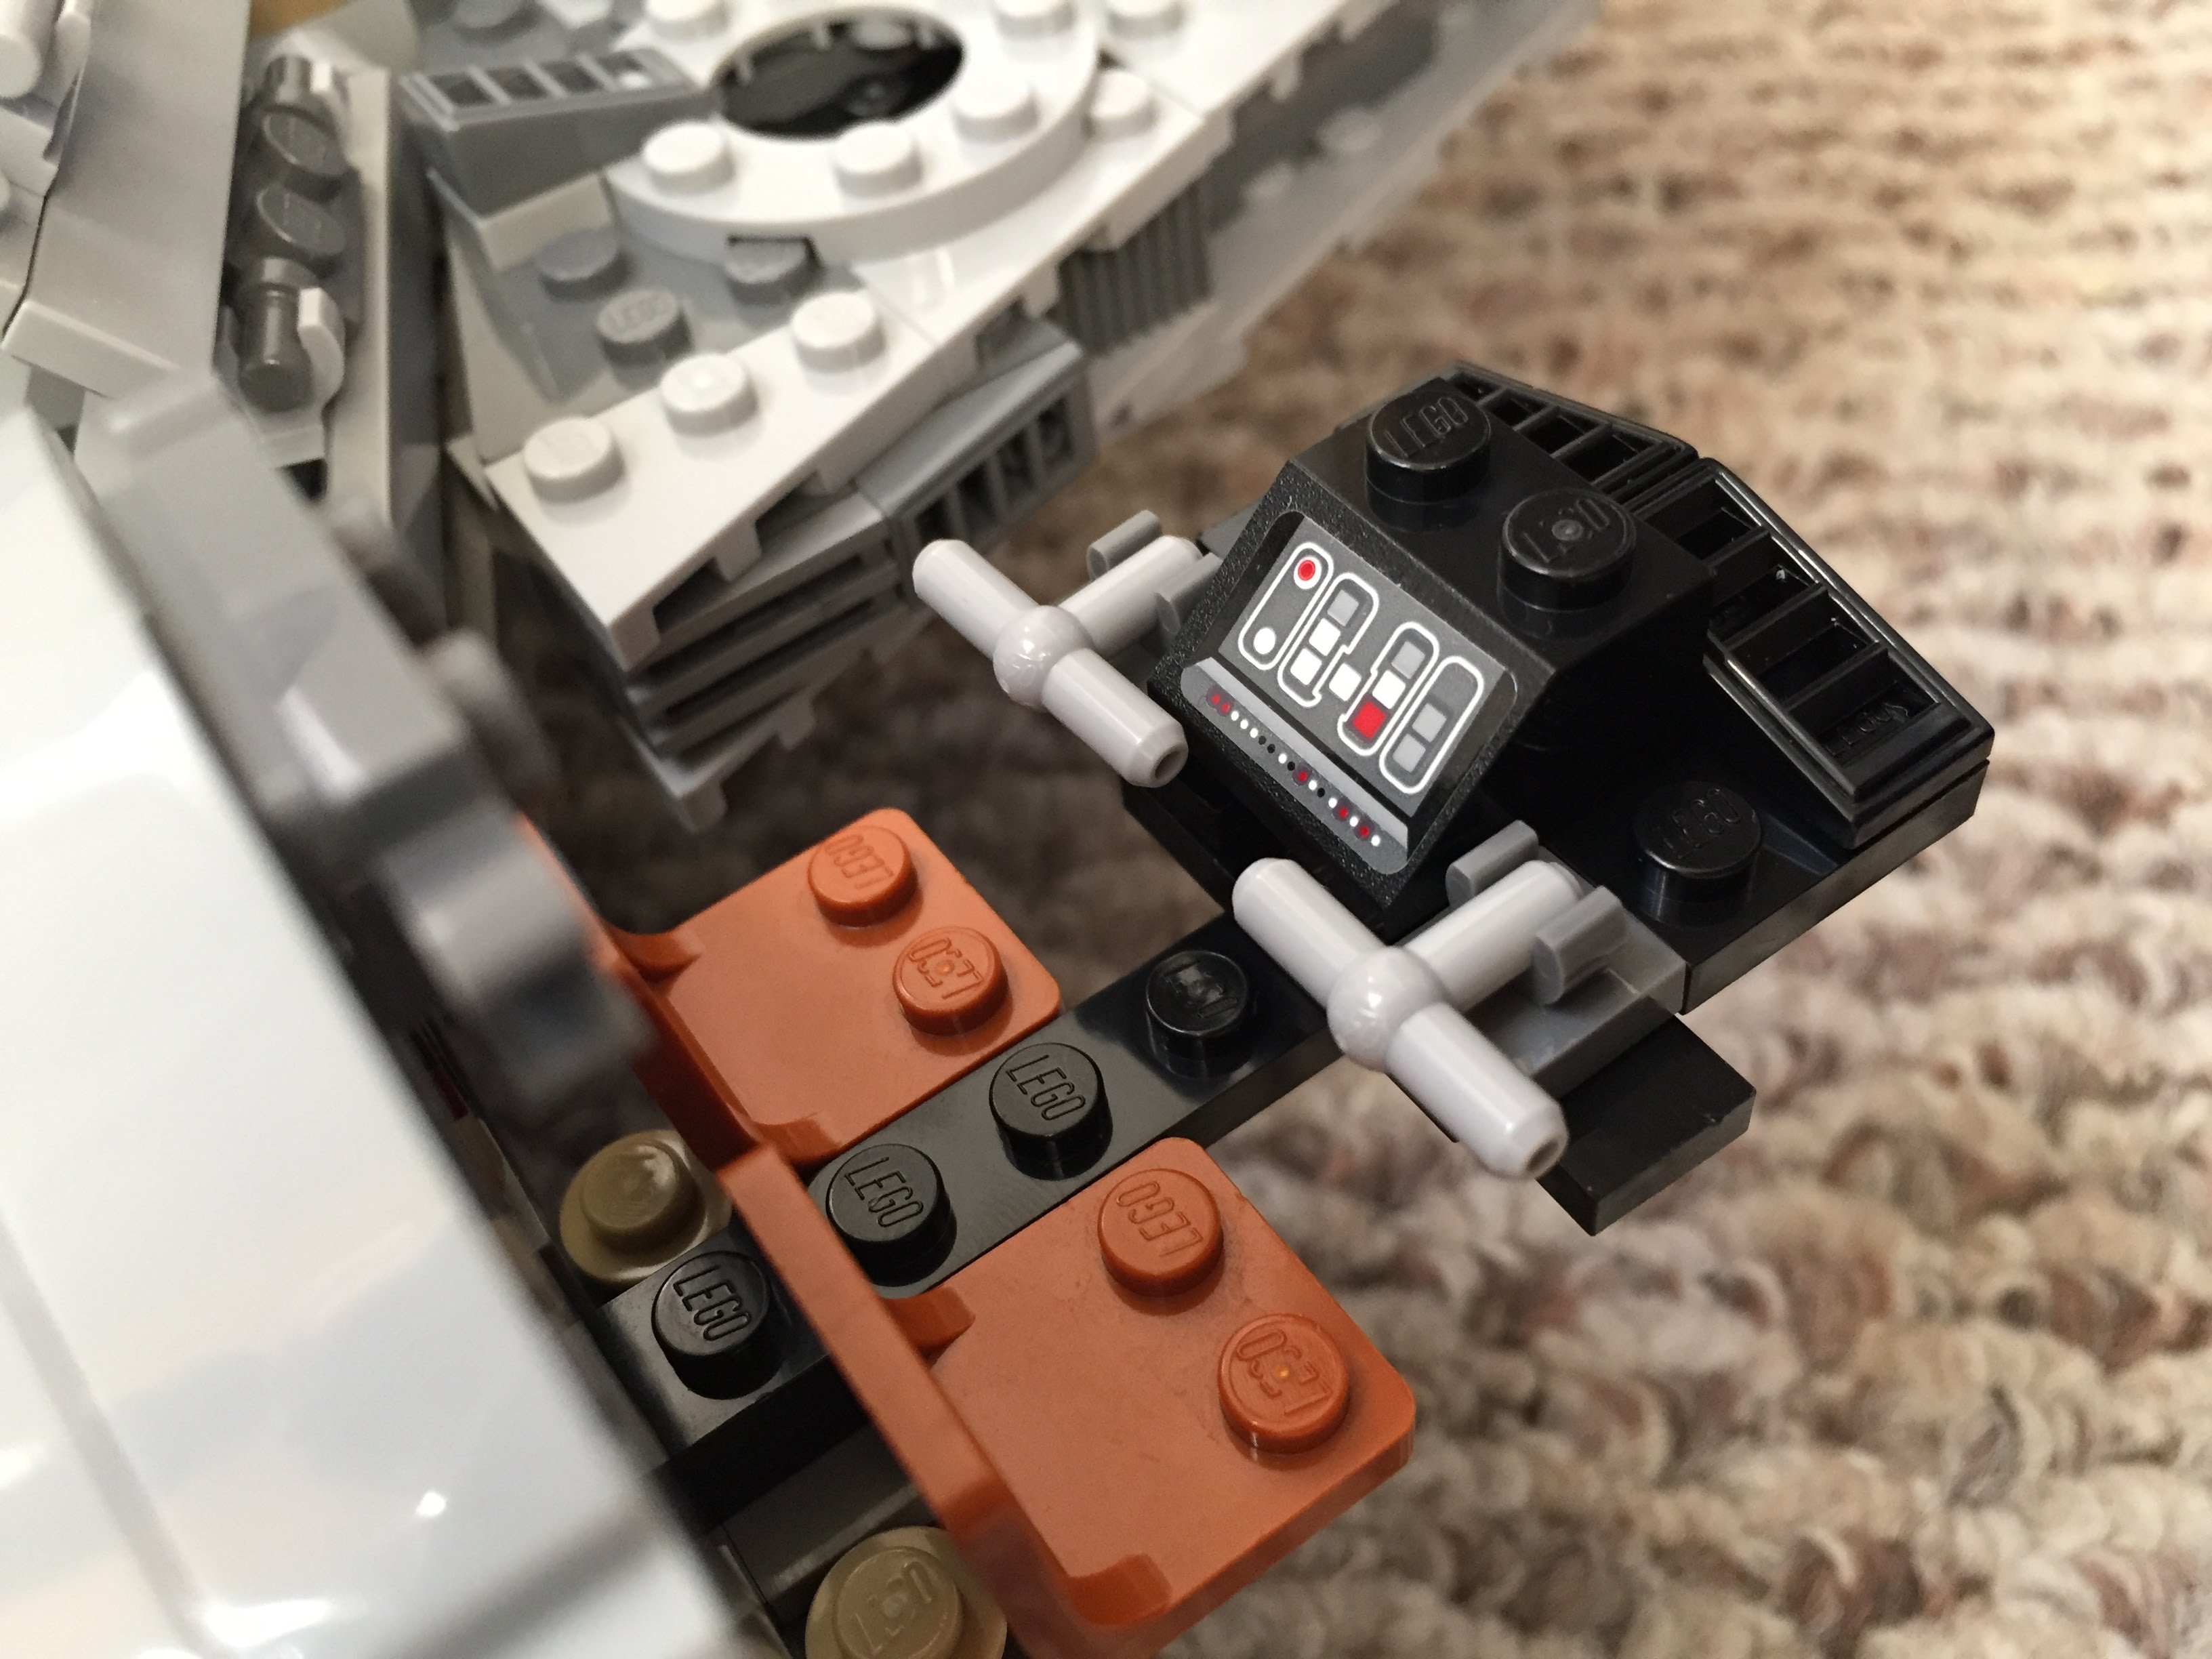
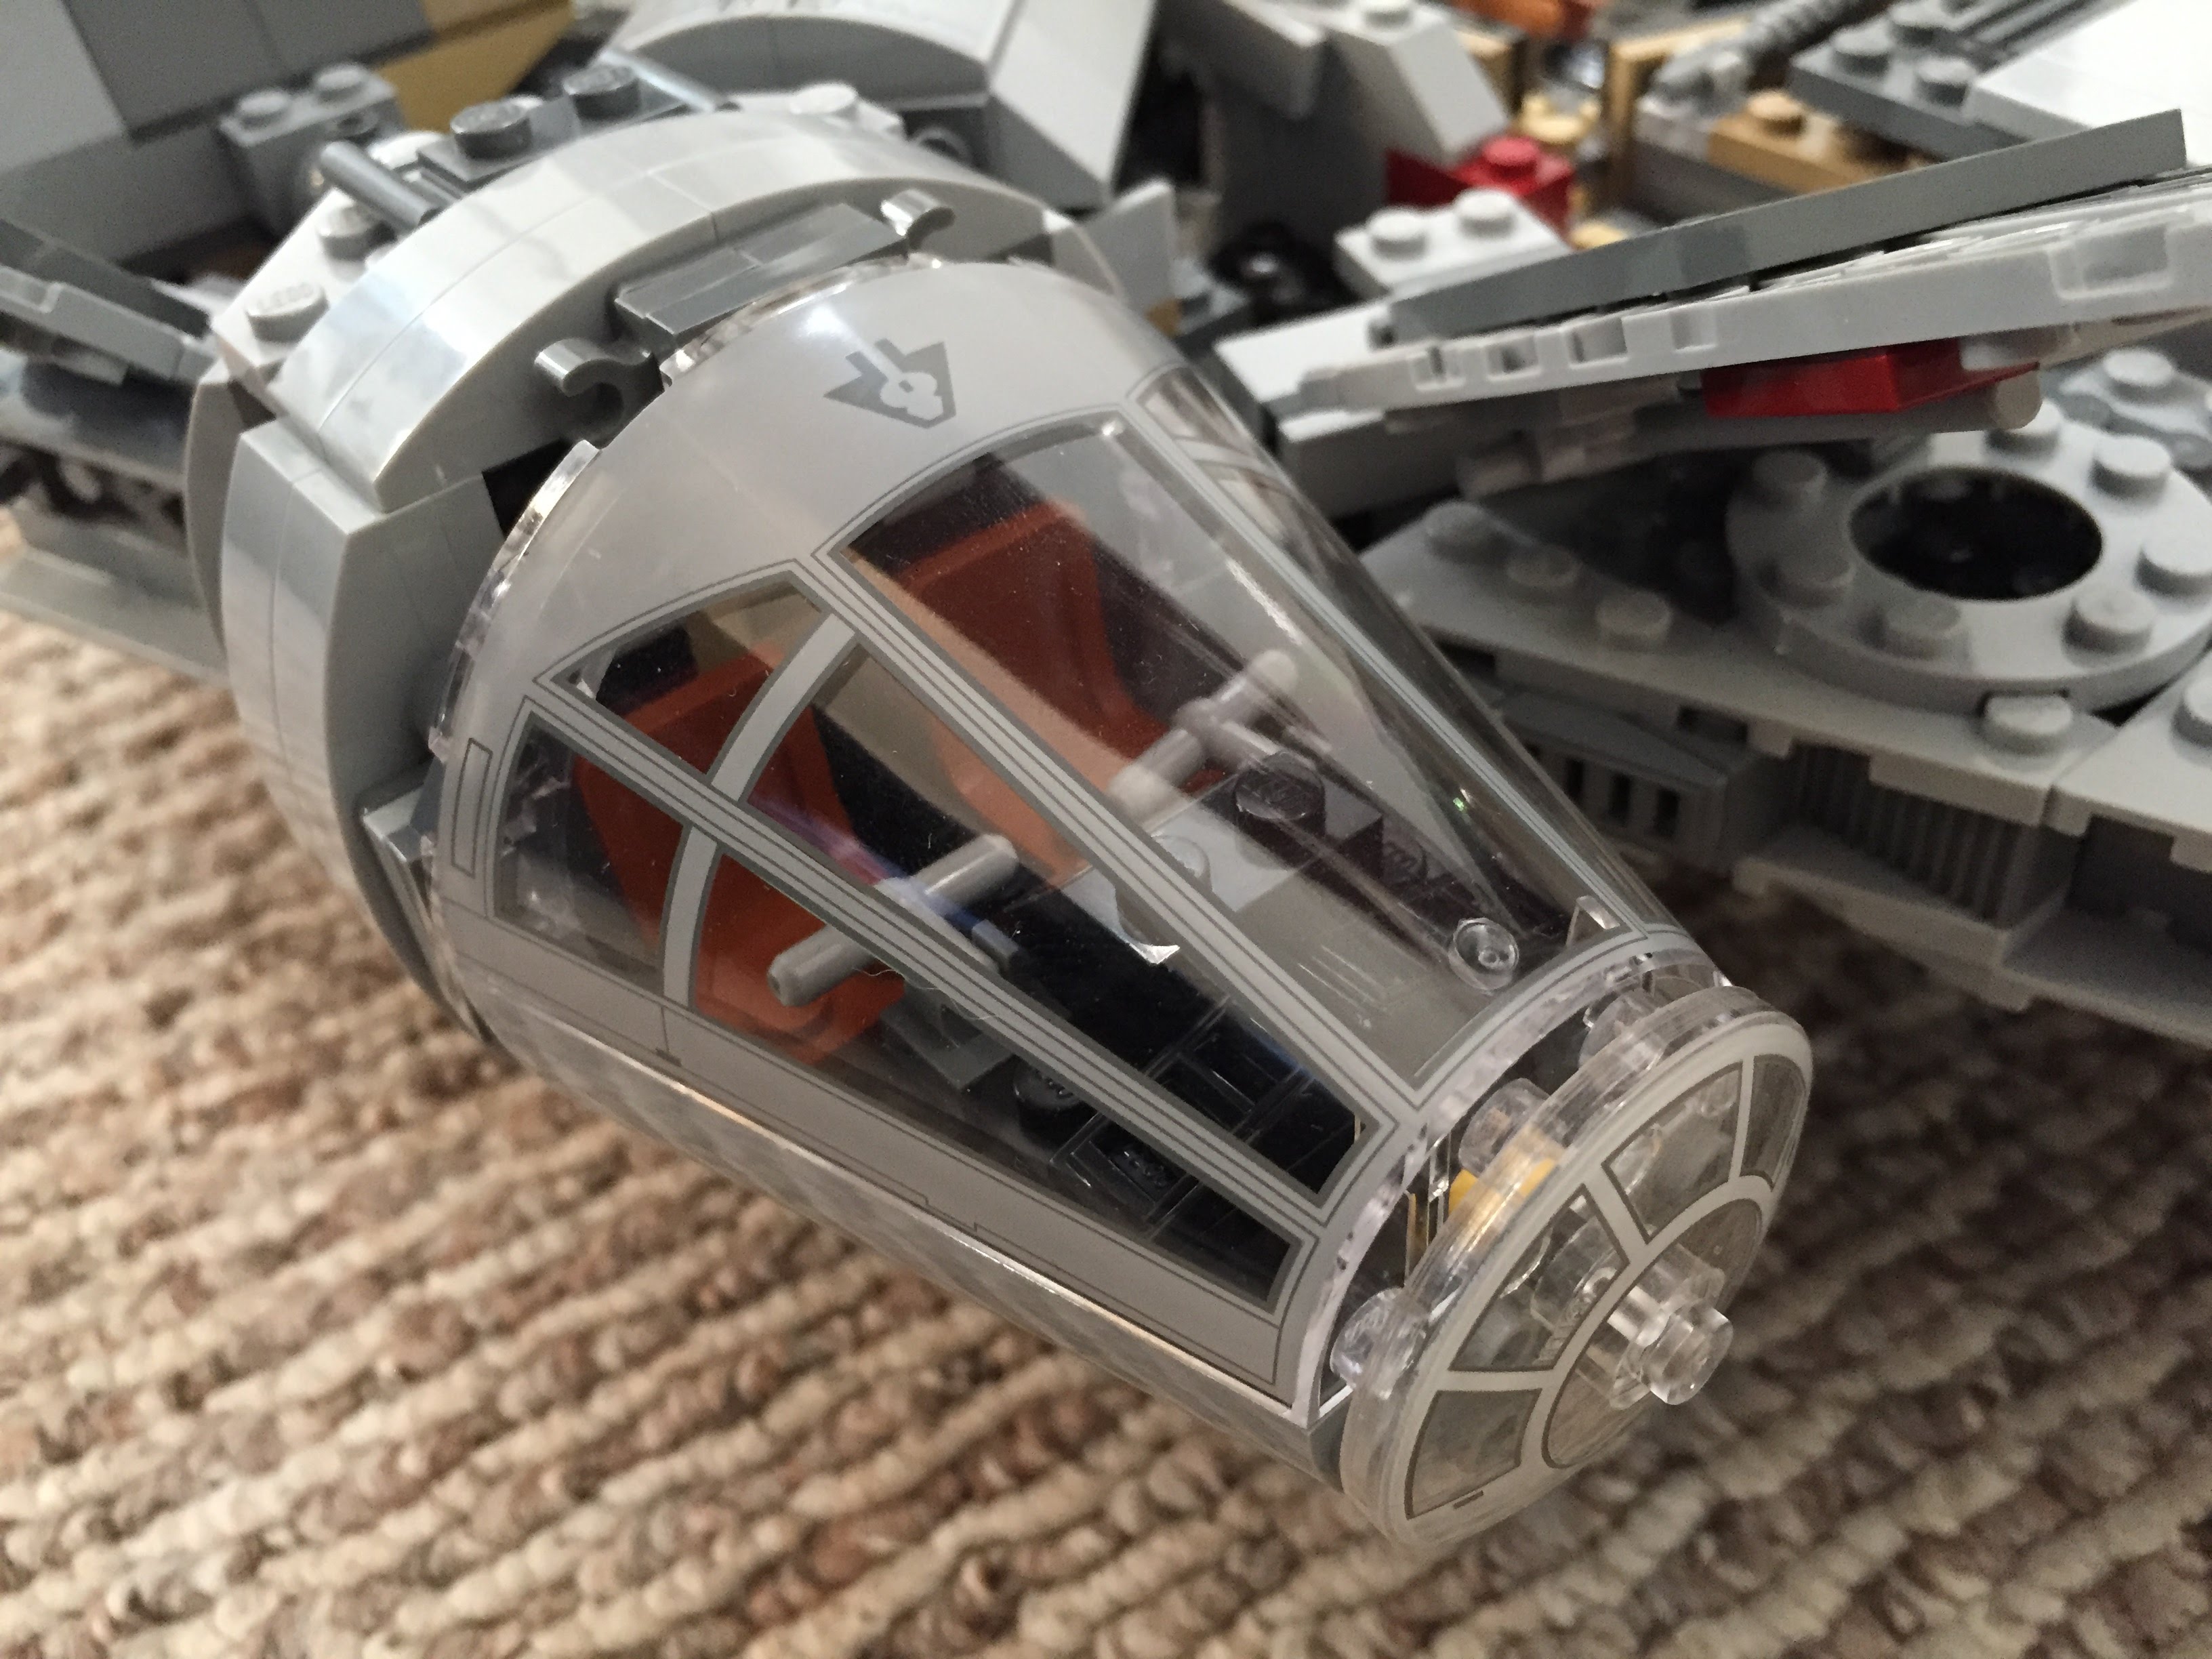
Cockpit and Mandible Details
Taking inspiration from Flail’s Millennium Falcon mods on Brickshelf, I rebuilt the cockpit with chairs and control sticks. This looks really nice, especially with the windows affixed. However, the chairs don’t work with Chewbacca’s minifigure. 75105 includes a Brick 1X4 W. 4 Knobs on either side of the fore mandibles. The side studs invite customization, so I added extra detail to these.
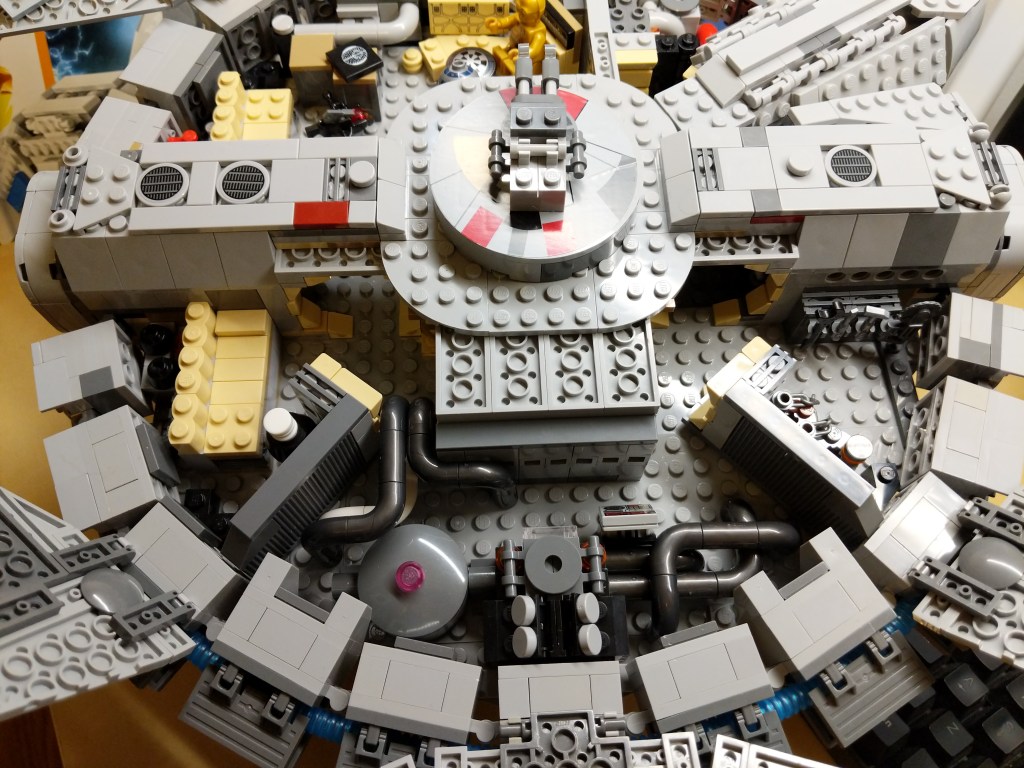
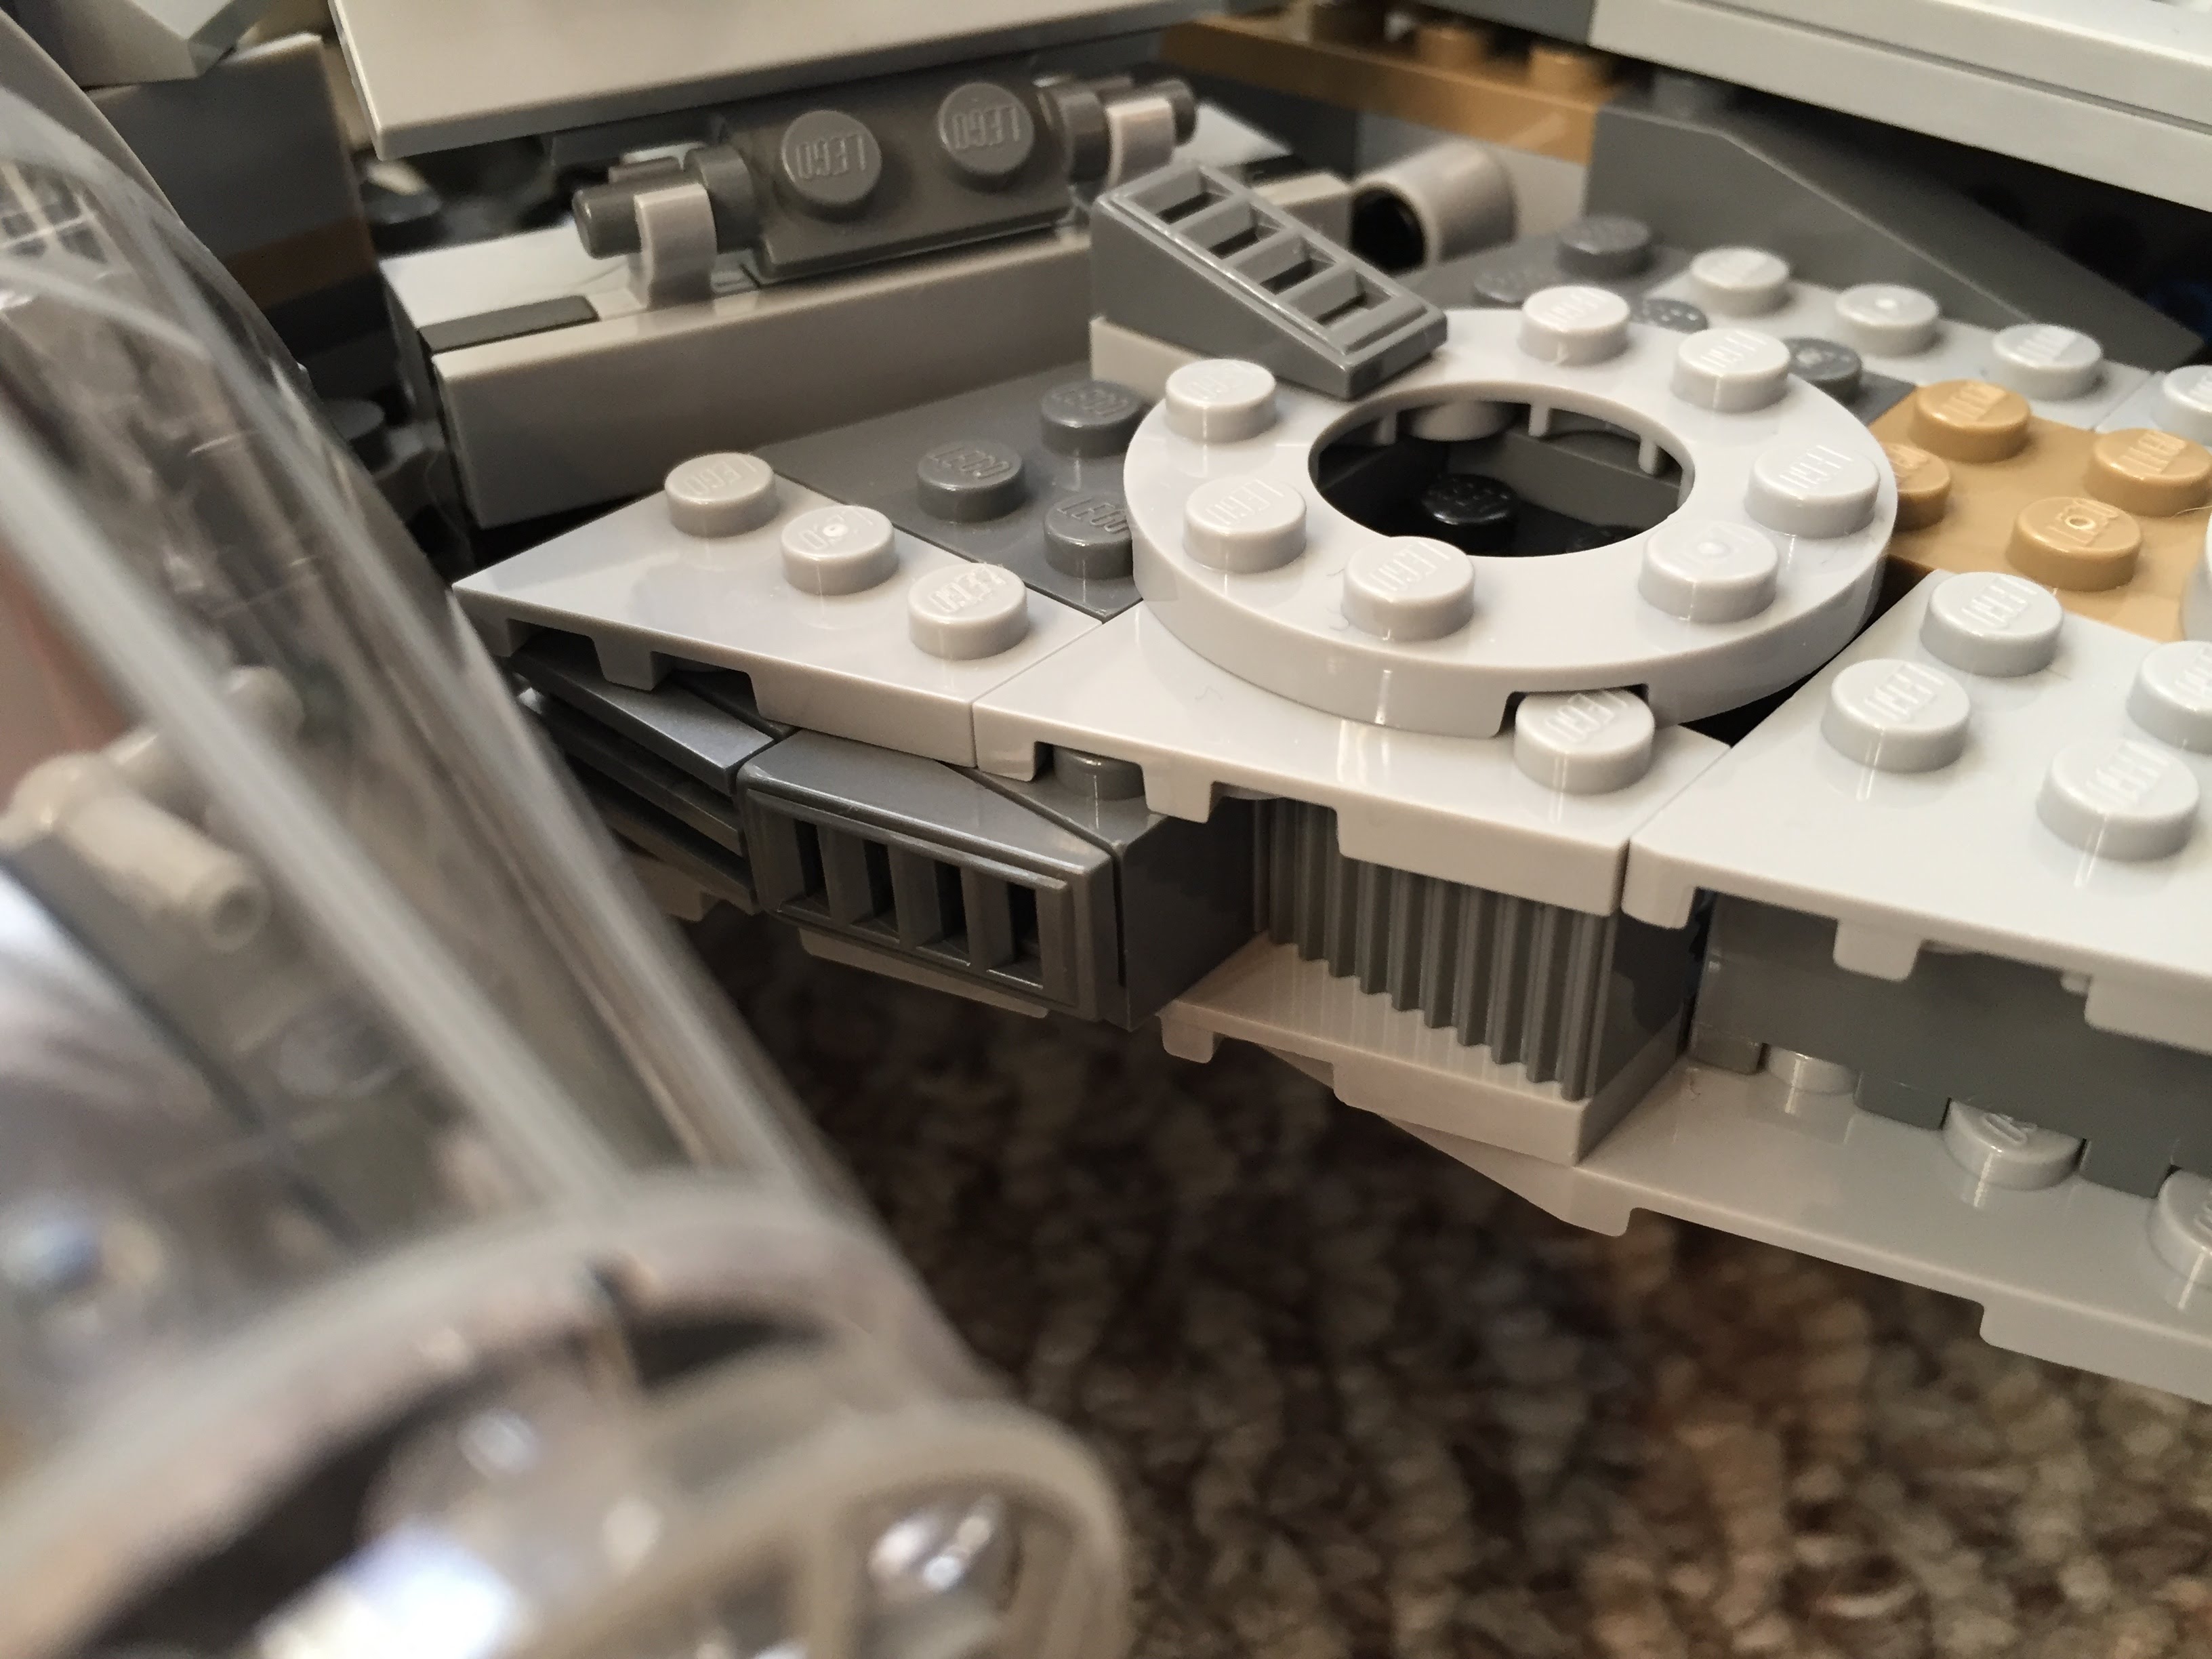
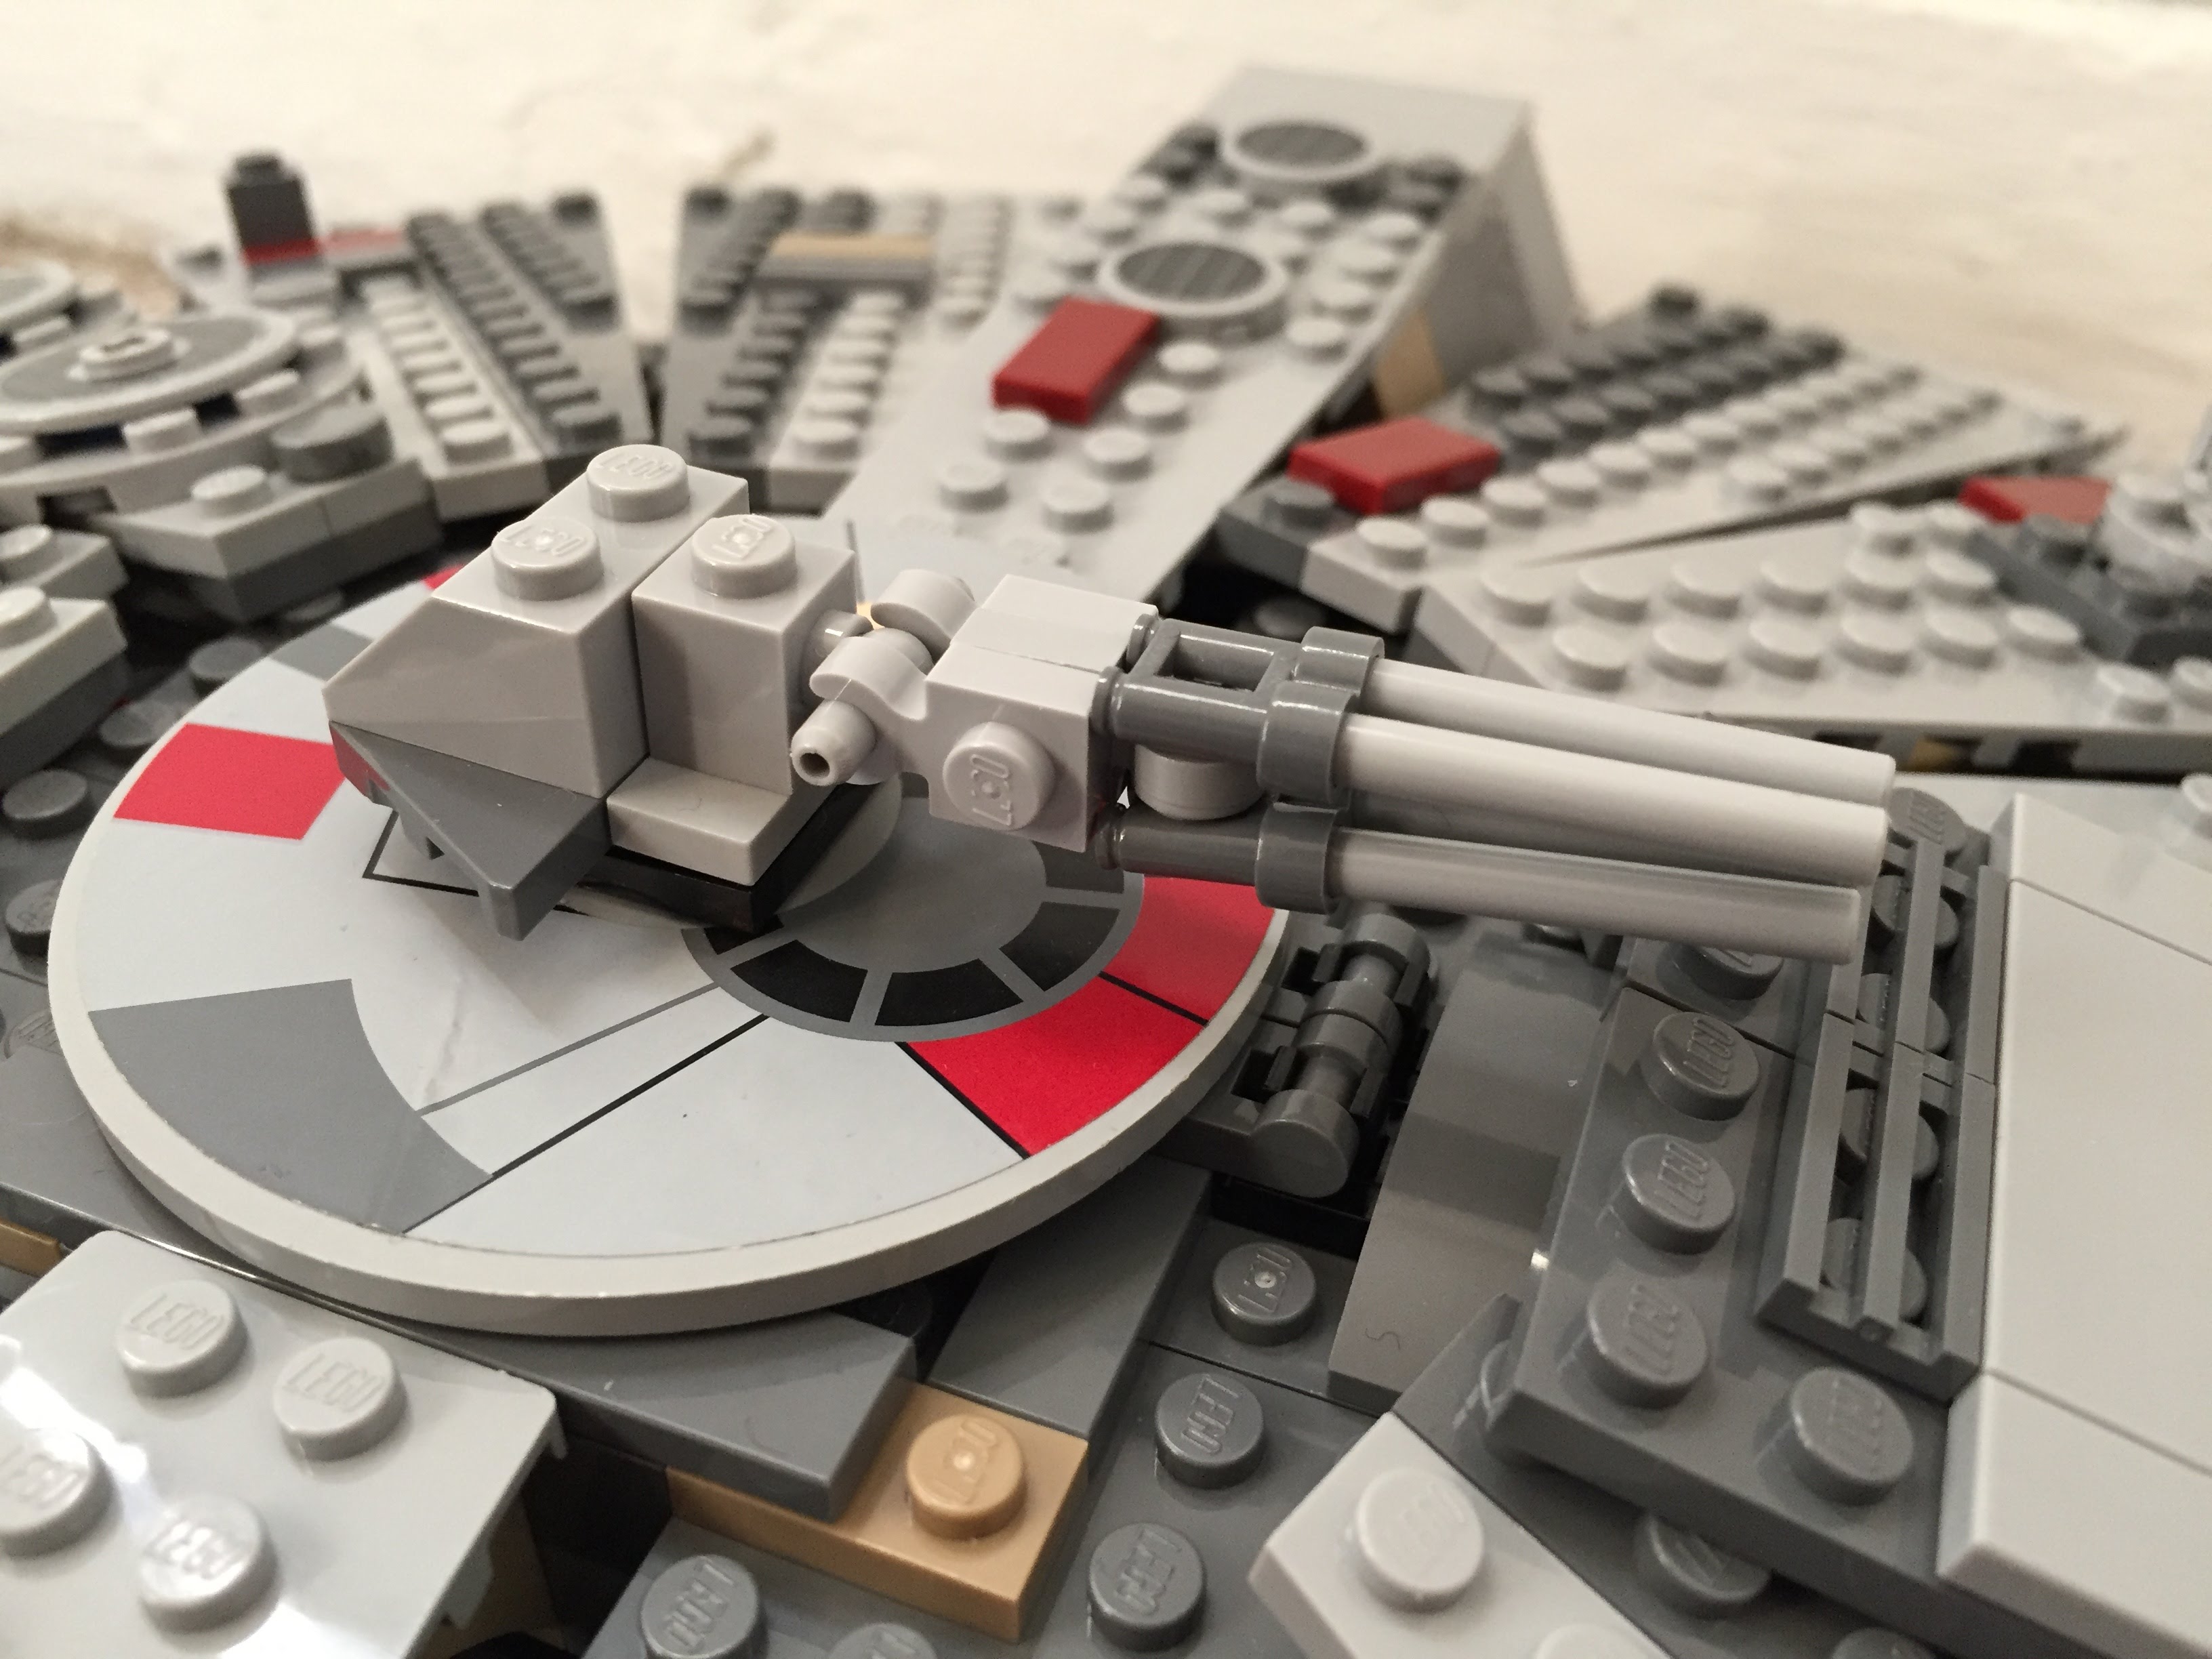
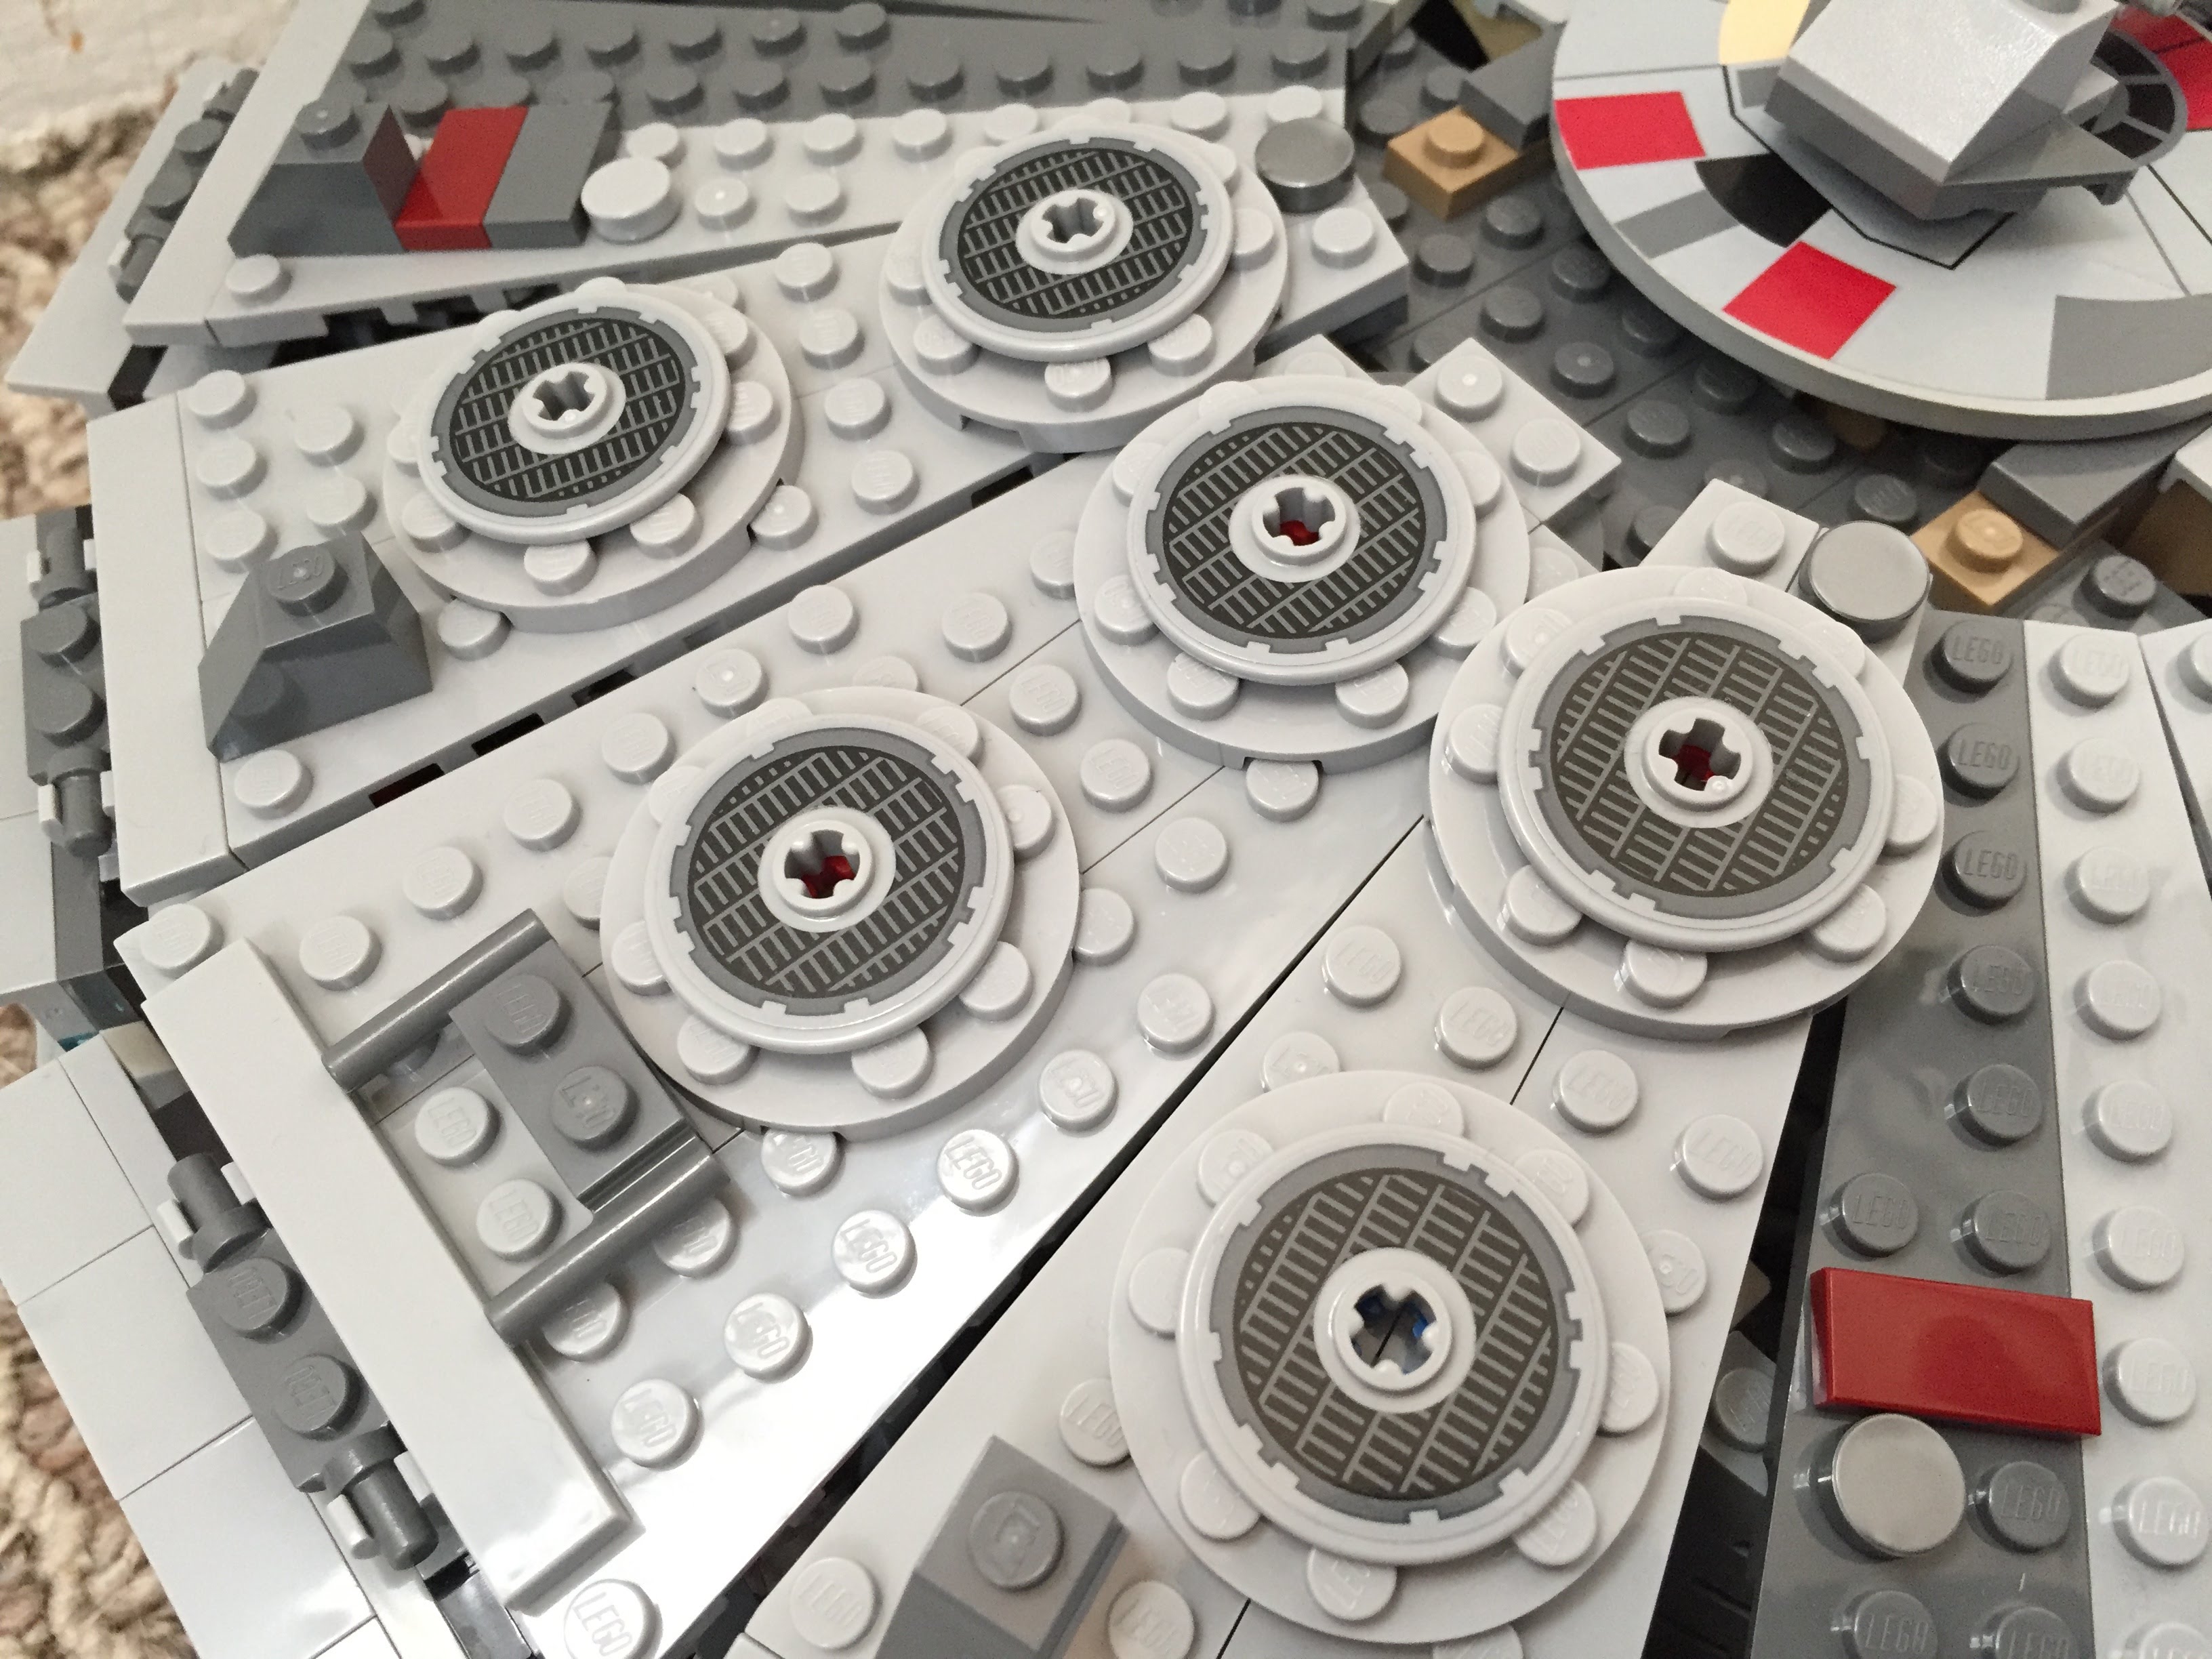
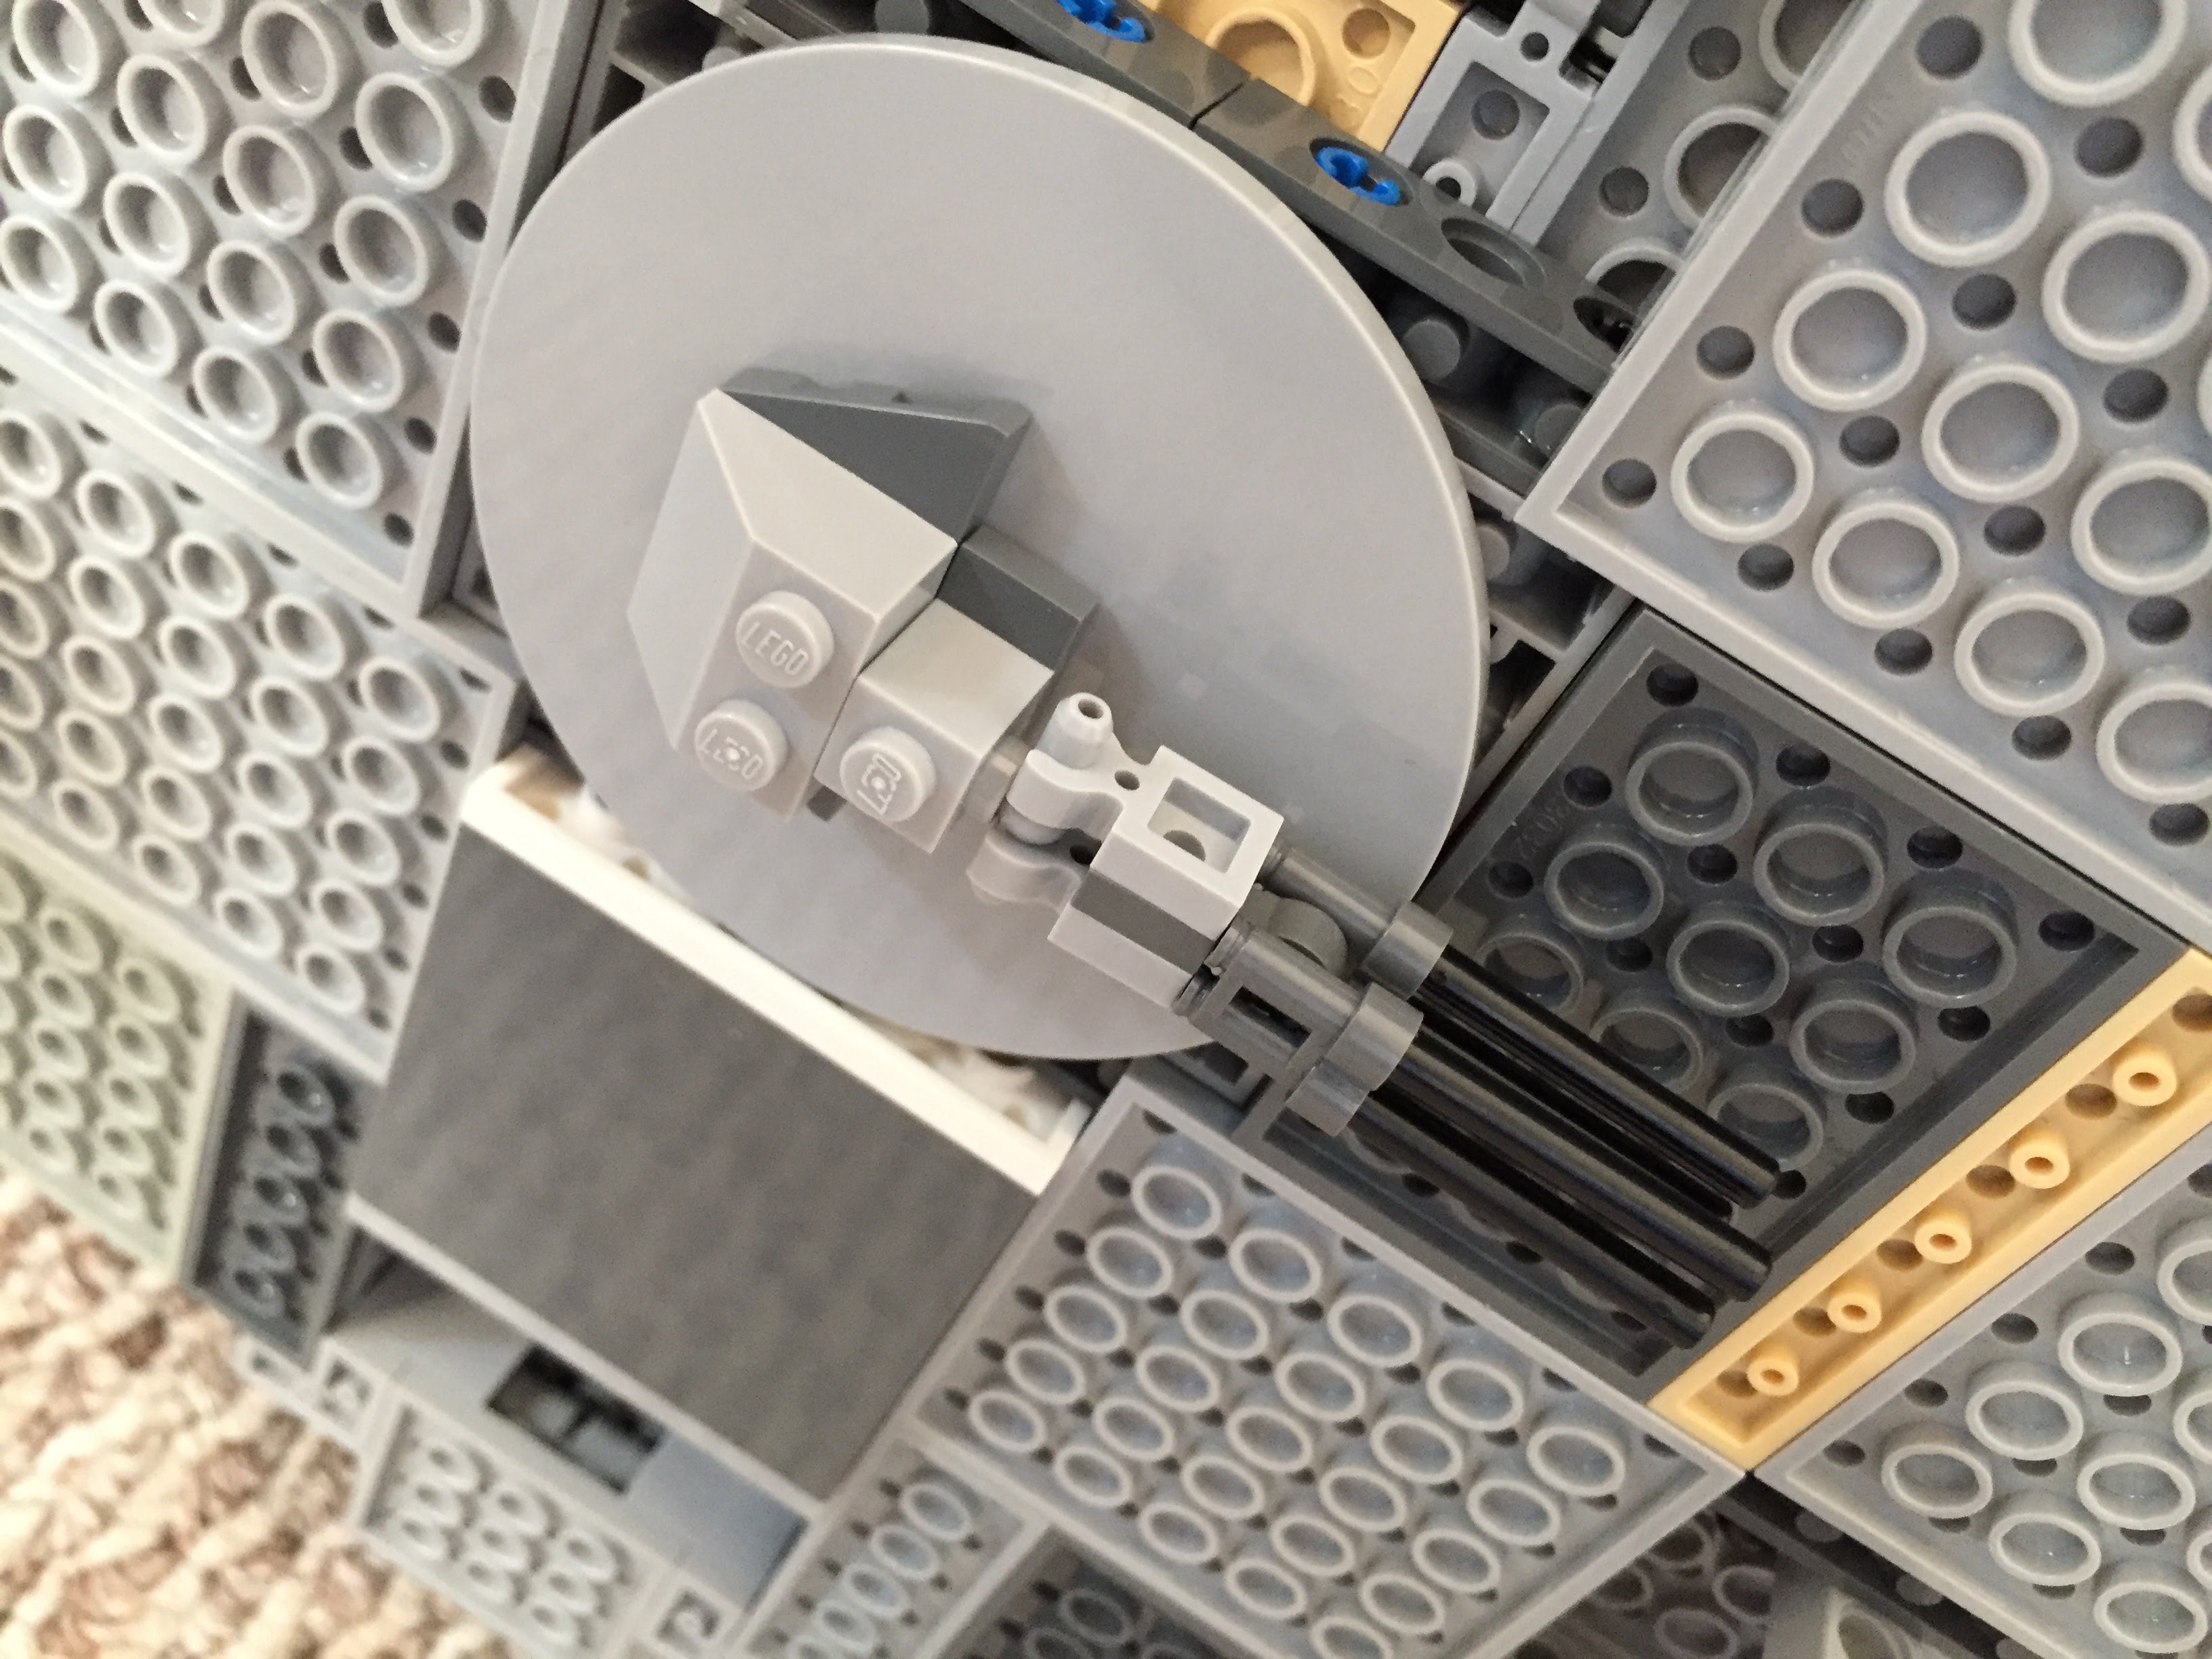
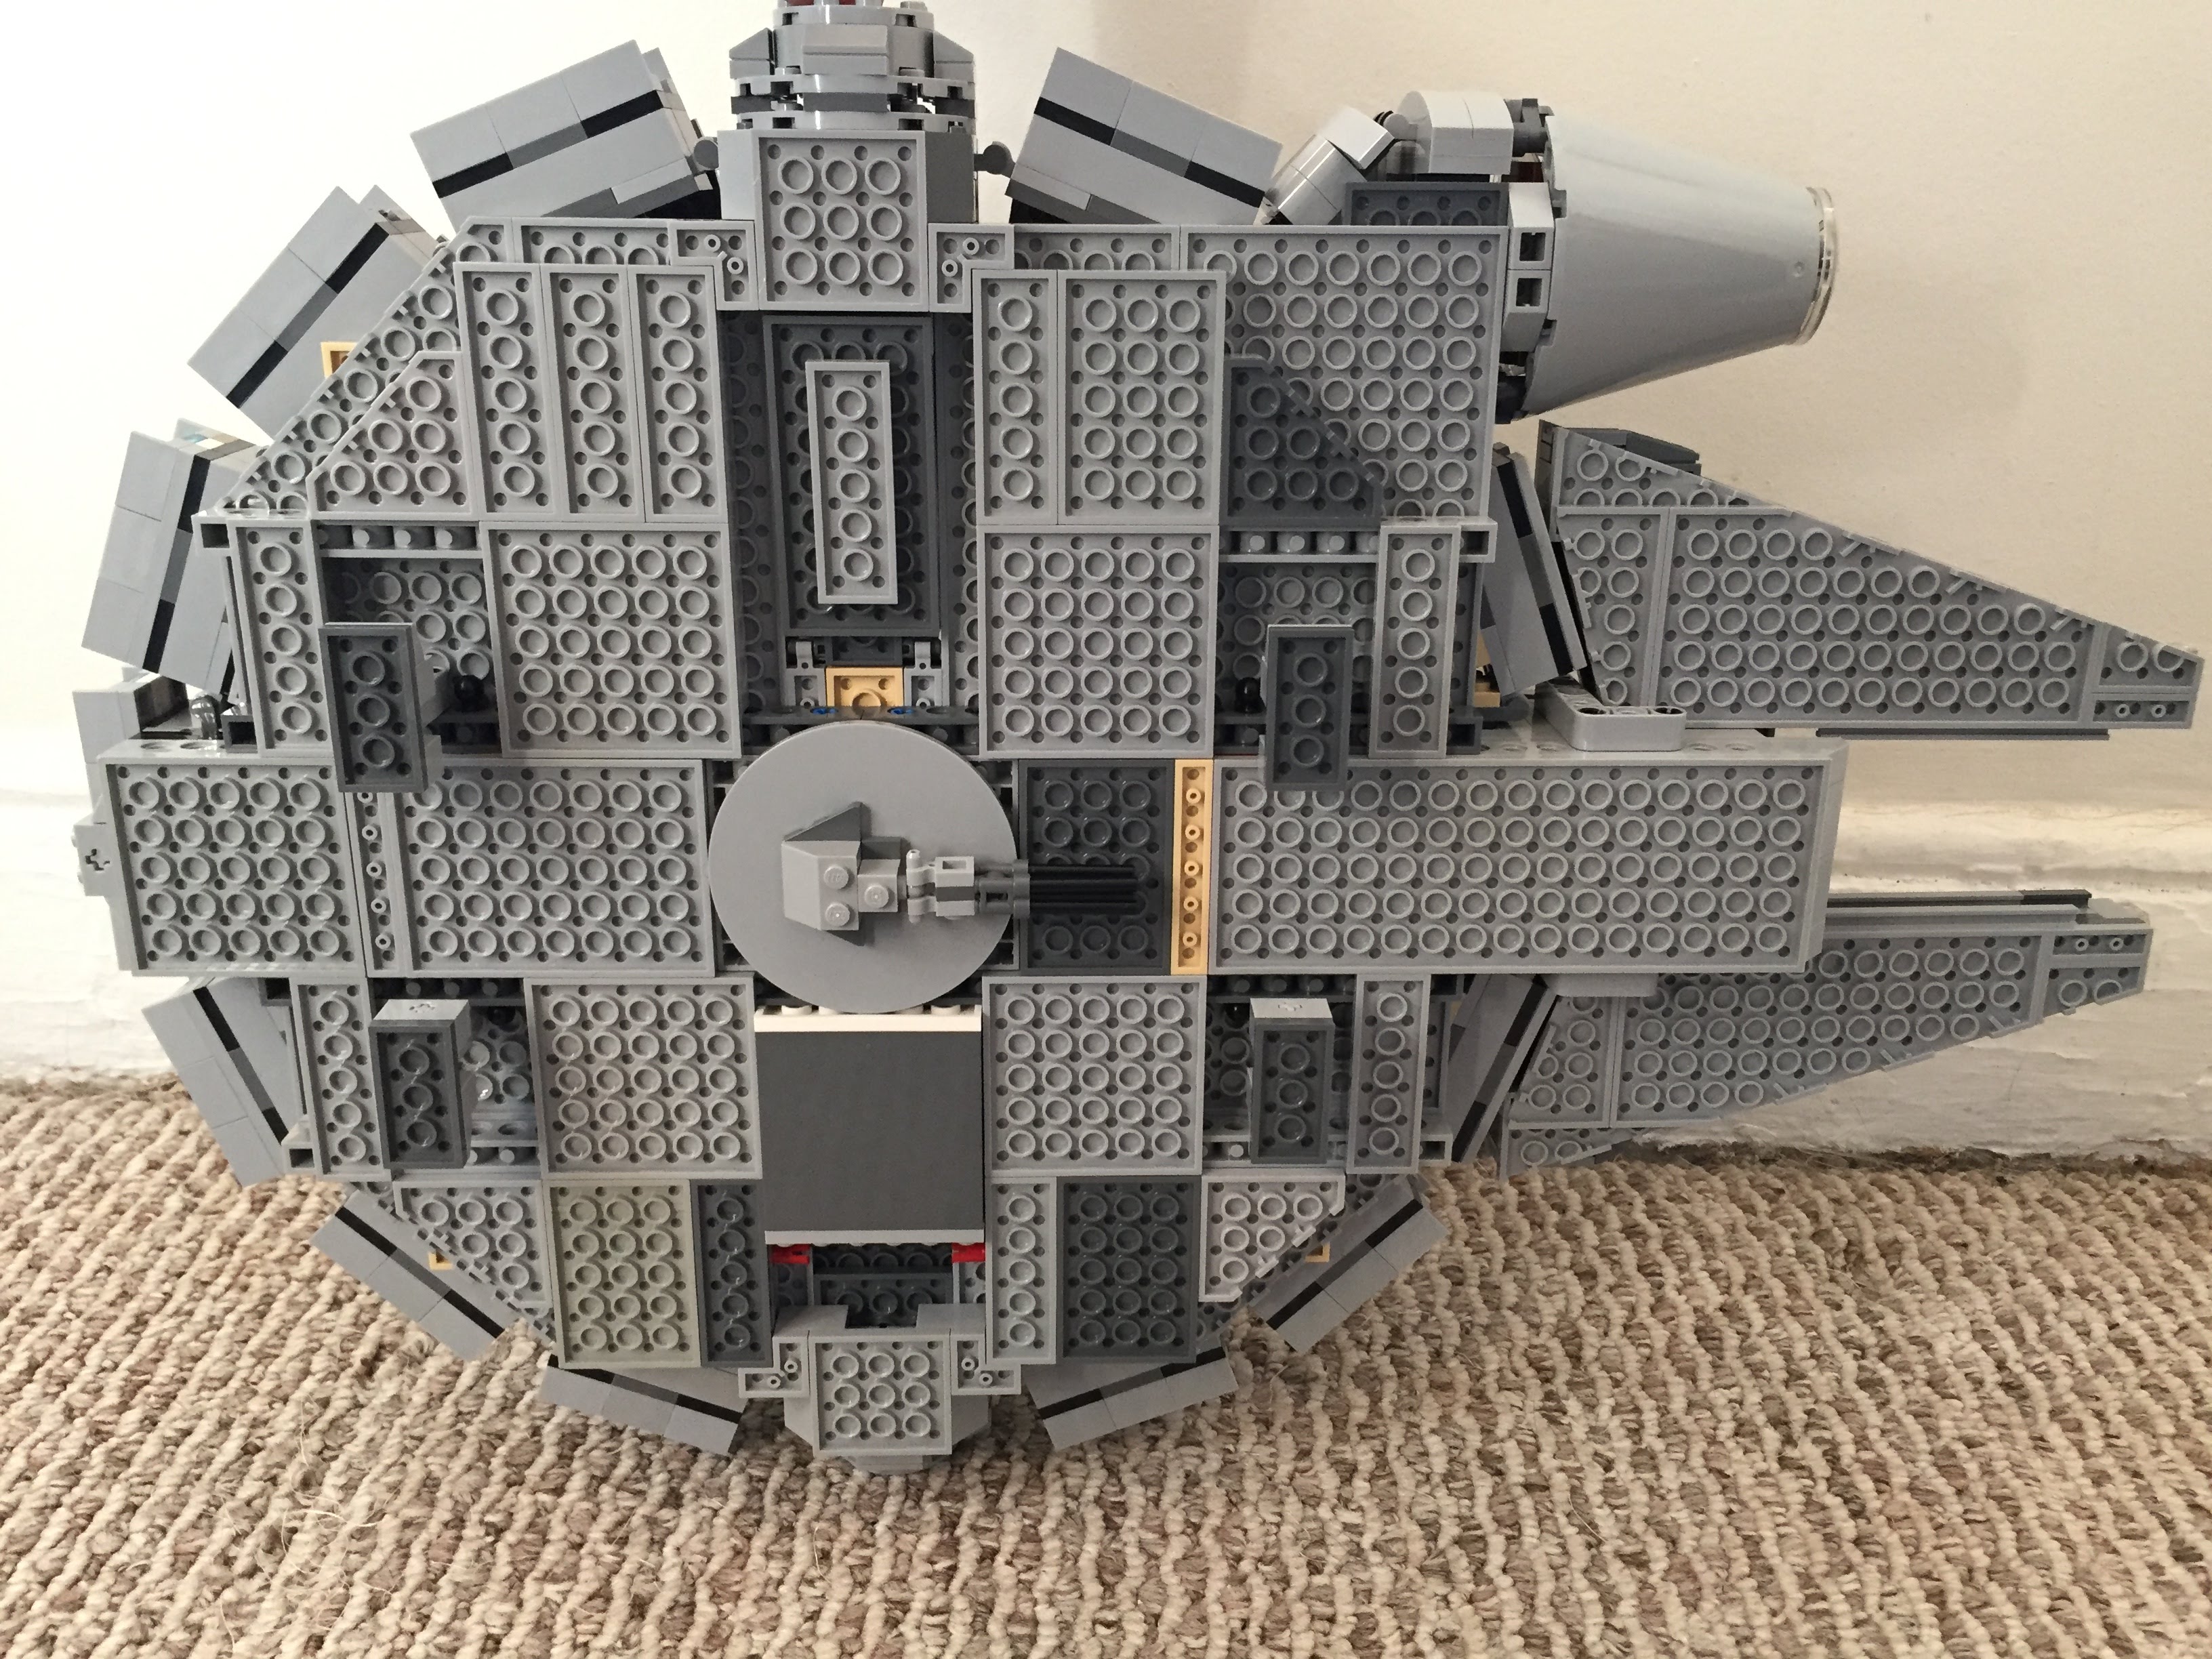
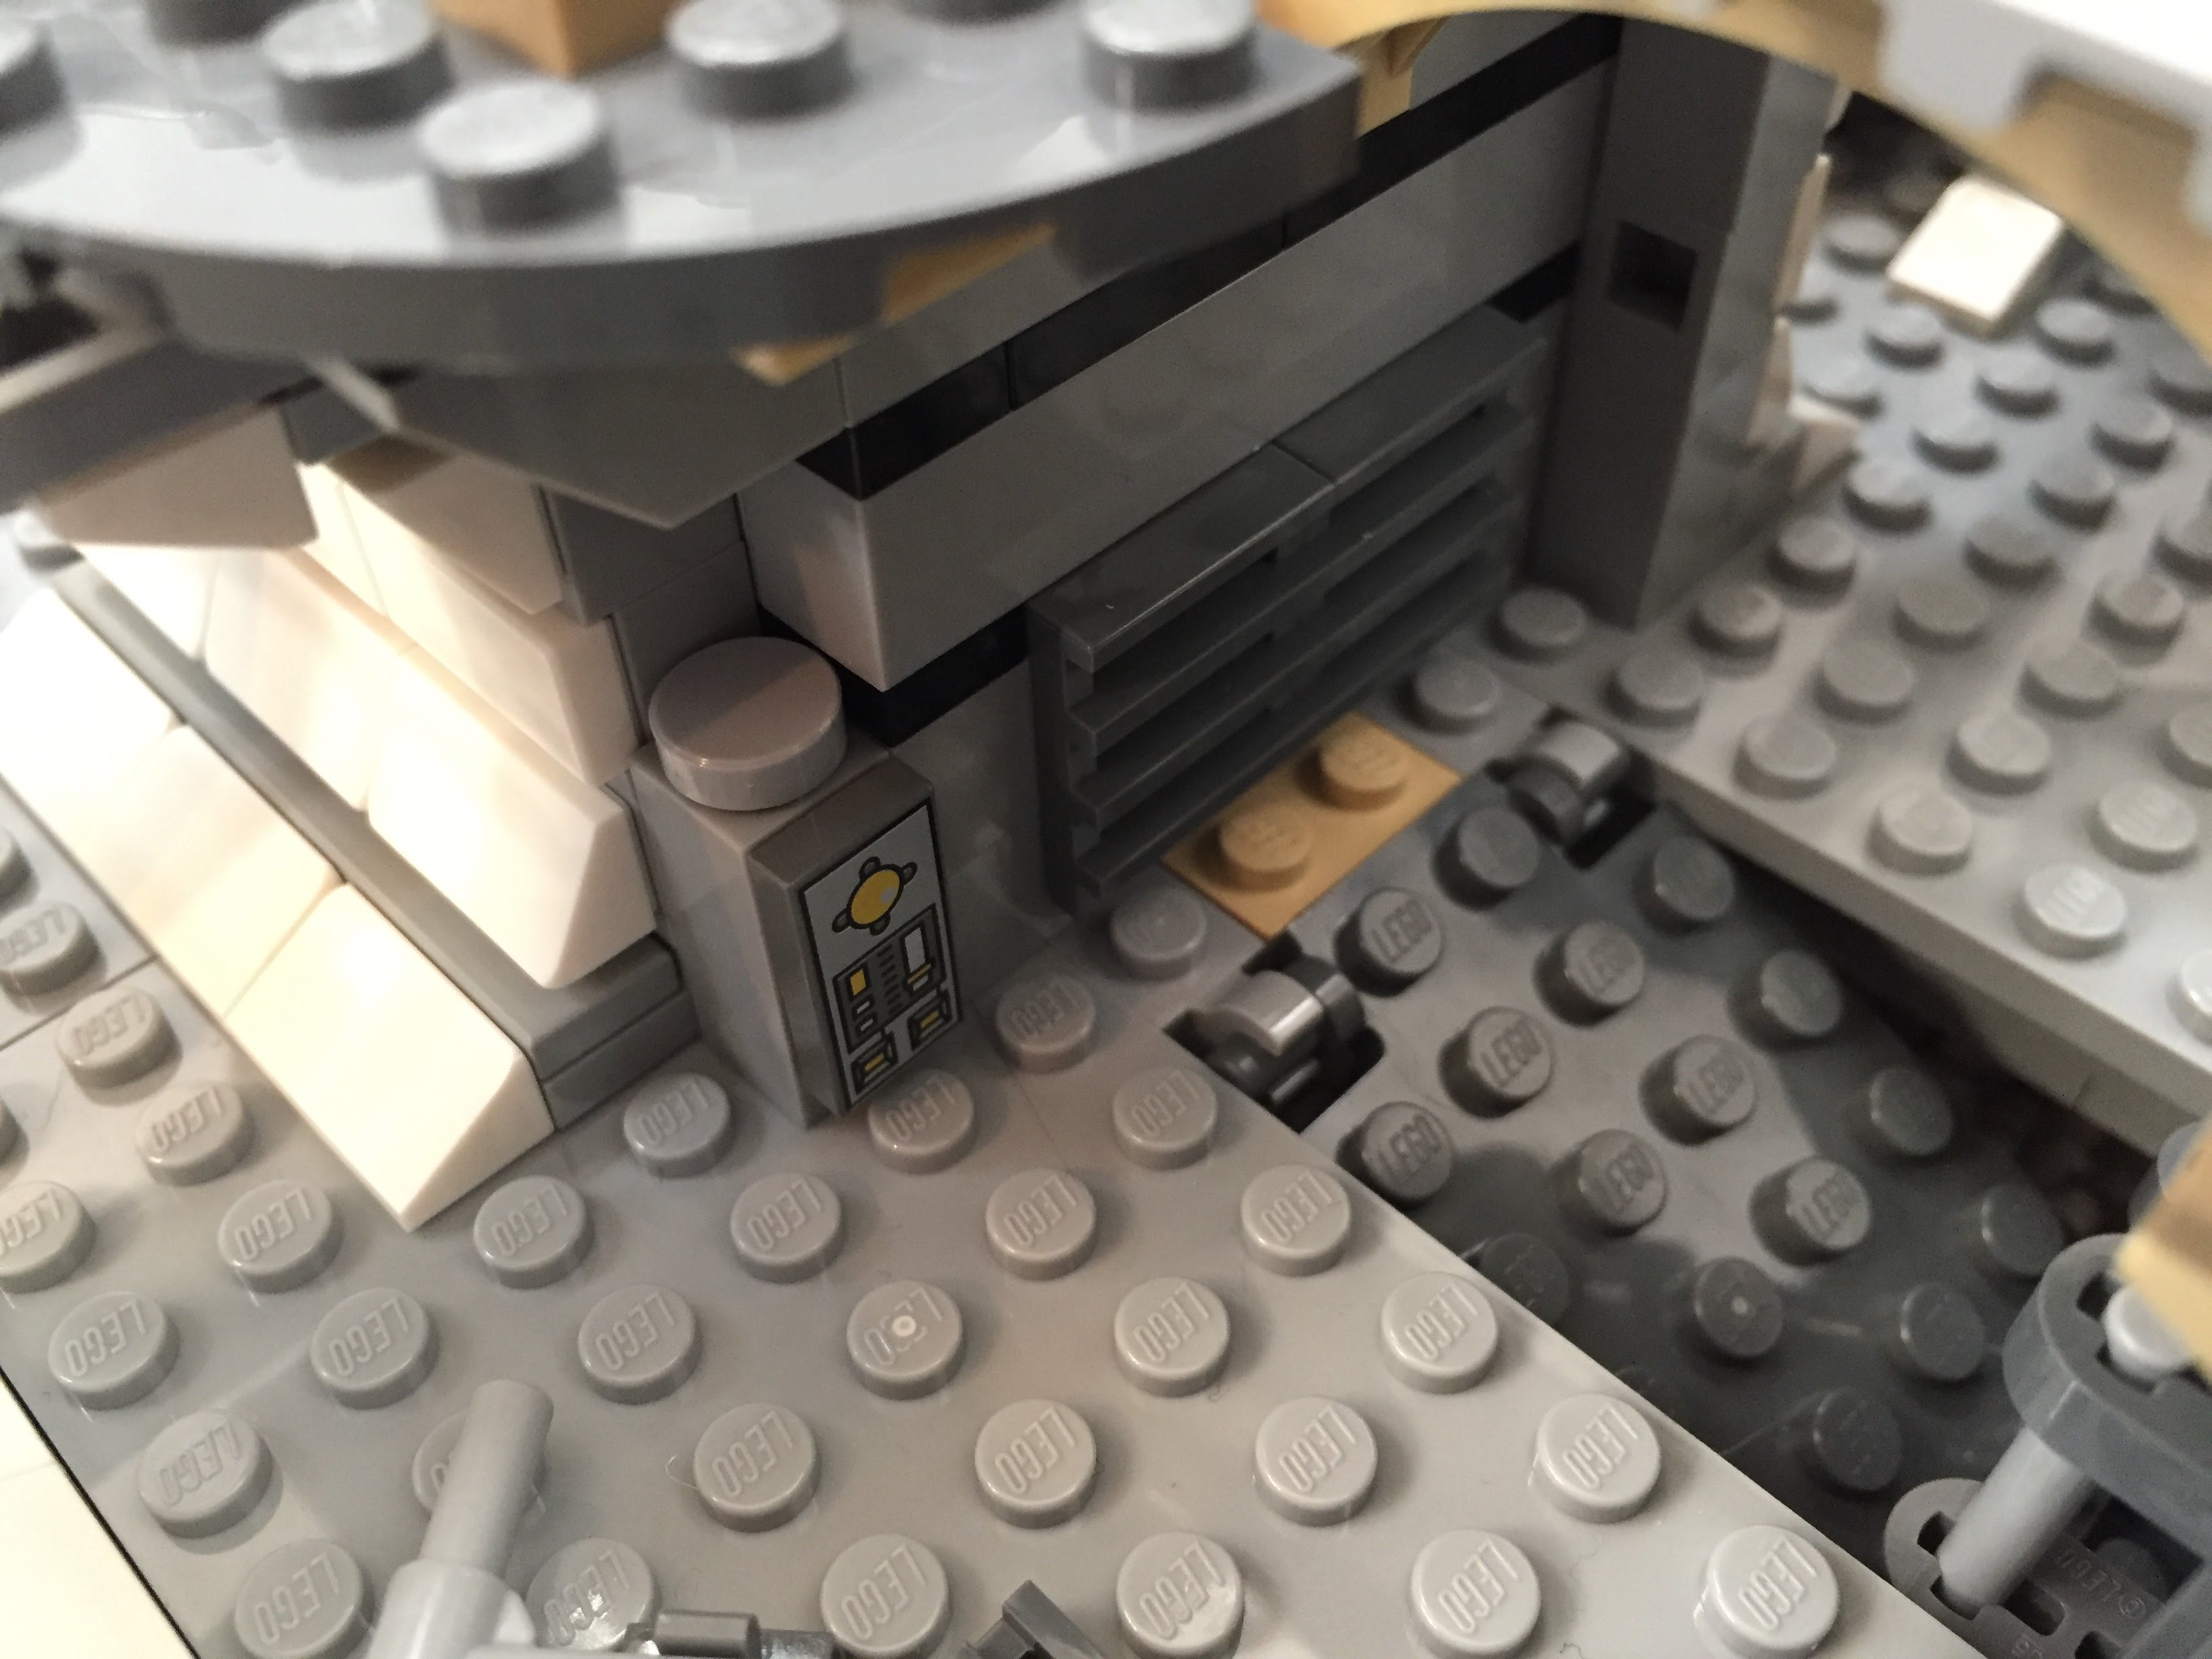
Gun Turrets, Dorsal Vents, and Ventral Covering
Inspired by Flail’s mods on Brickshelf again, I built these lower profile top and bottom guns. I beefed up the dorsal venting system by putting Plate Round 4X4 With Ø16Mm Hole with a Plate 2X2 Round in its center. The Disk Ø24 with vent sticker connects to the round plate in the center. The bottom of the falcon is buttoned up with plates covering the Technic support system–some of which I modified to remove the arm underneath the cockpit support system and added a staggered rounding to the four corners.
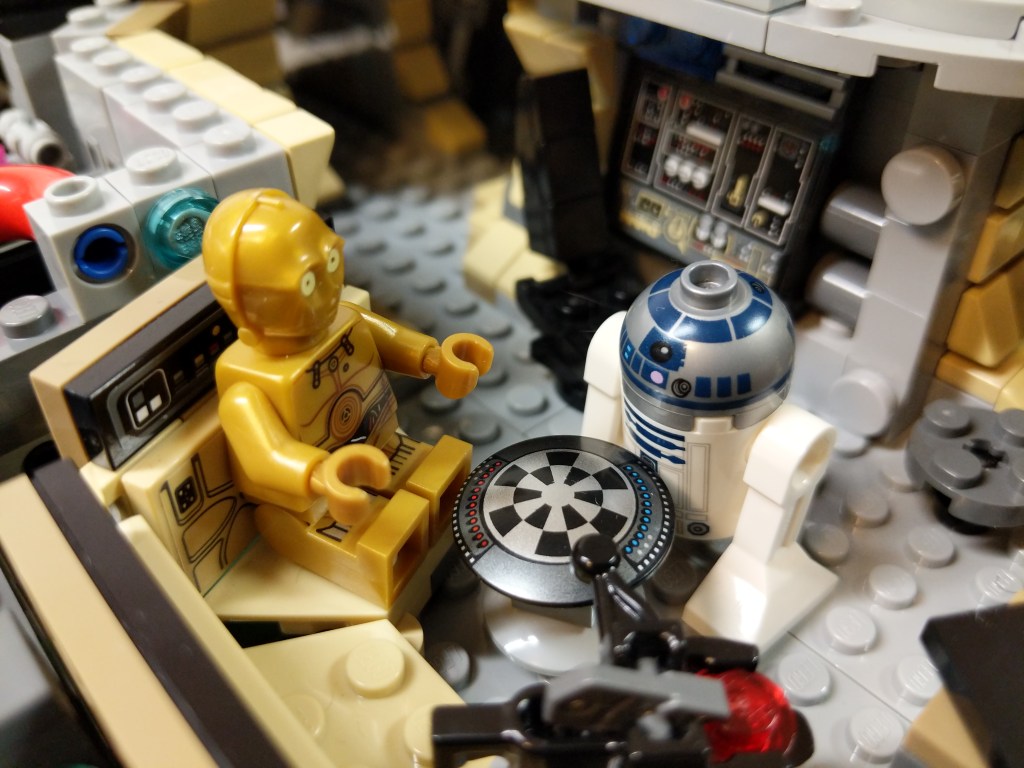
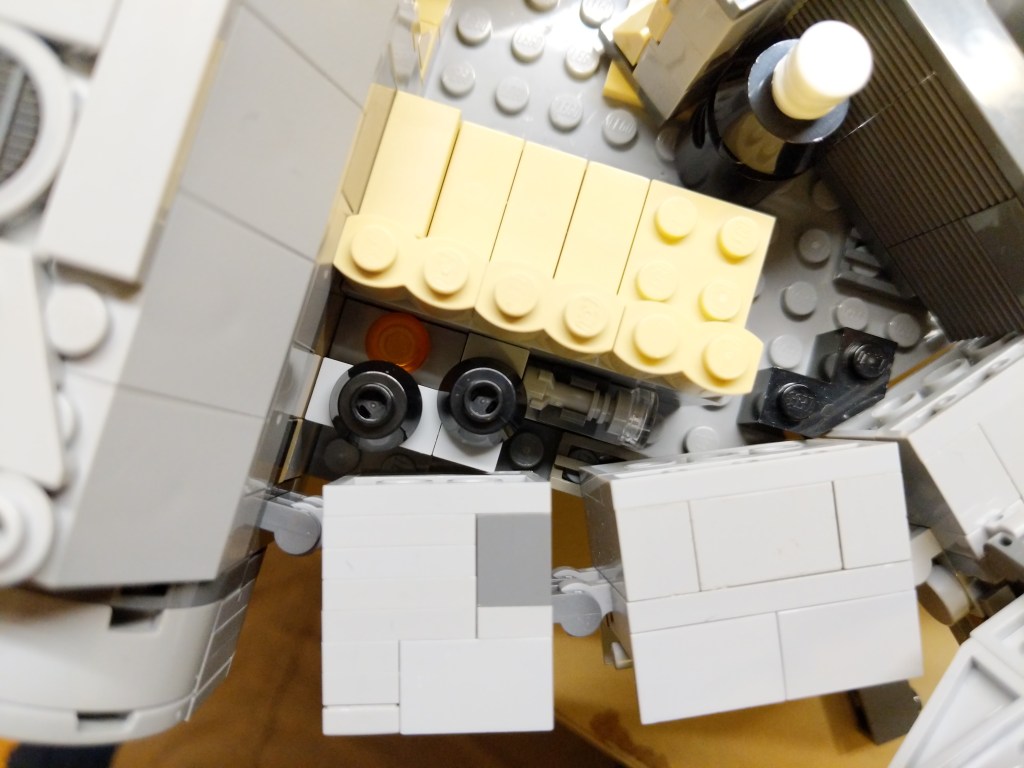
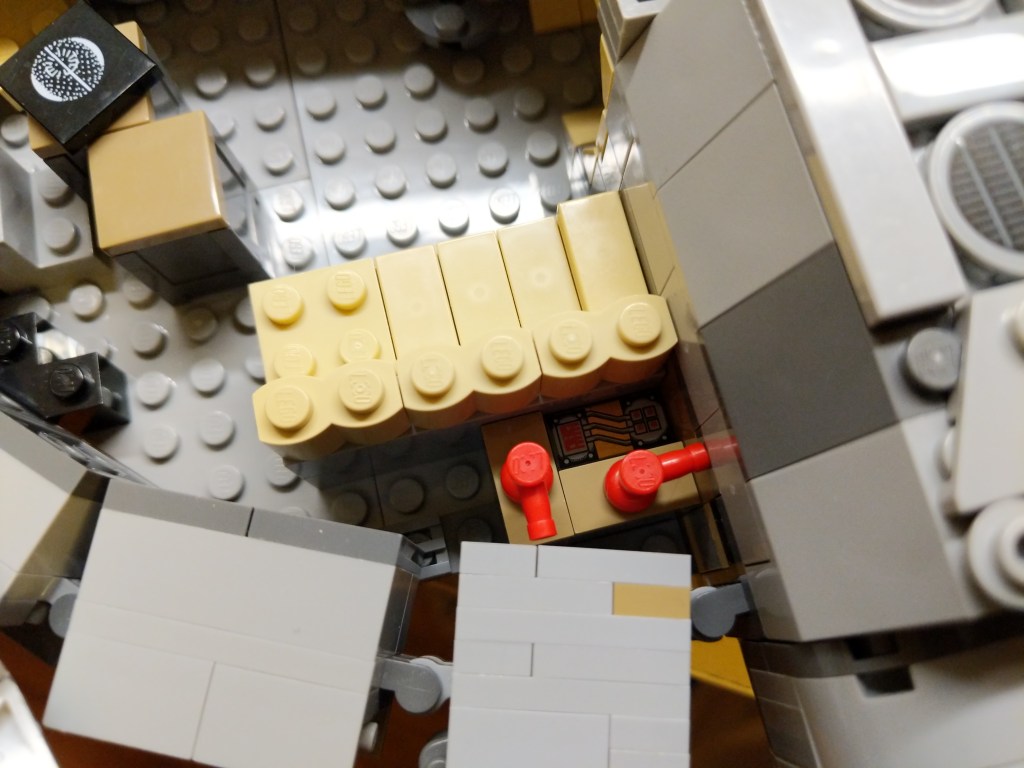
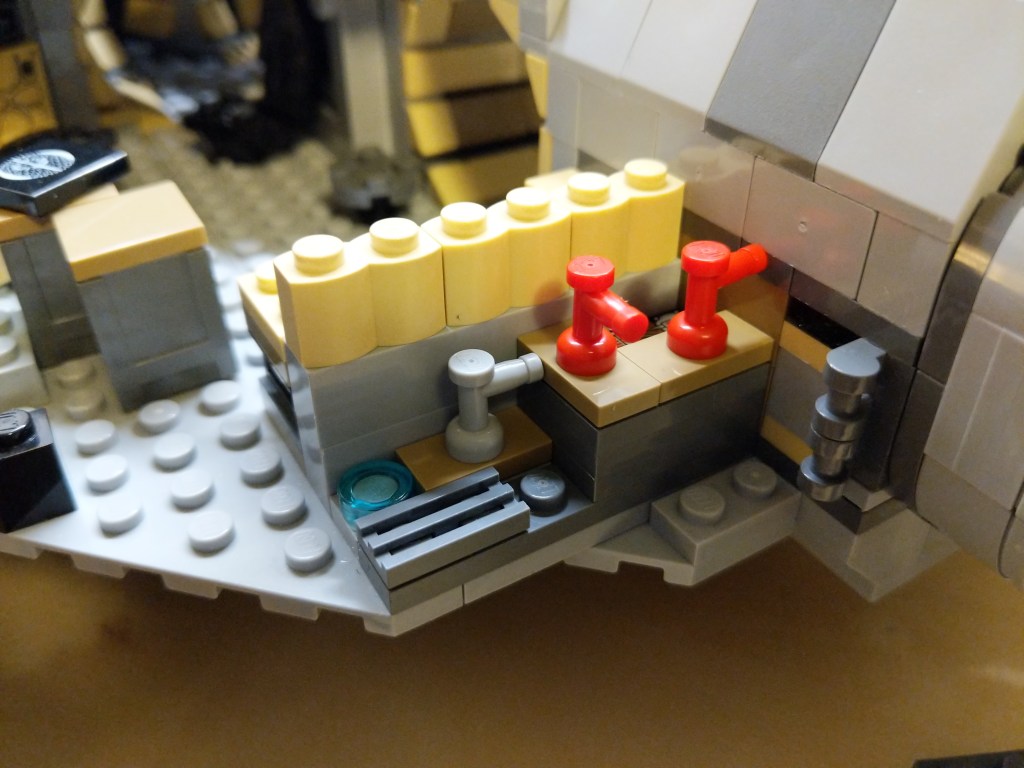
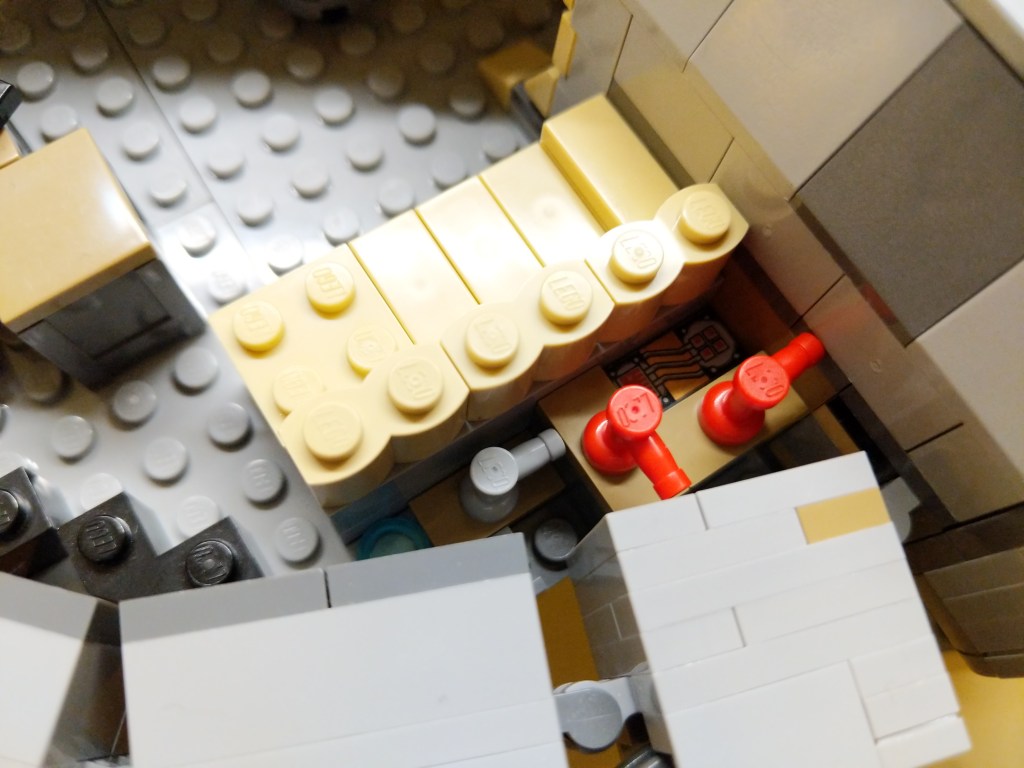
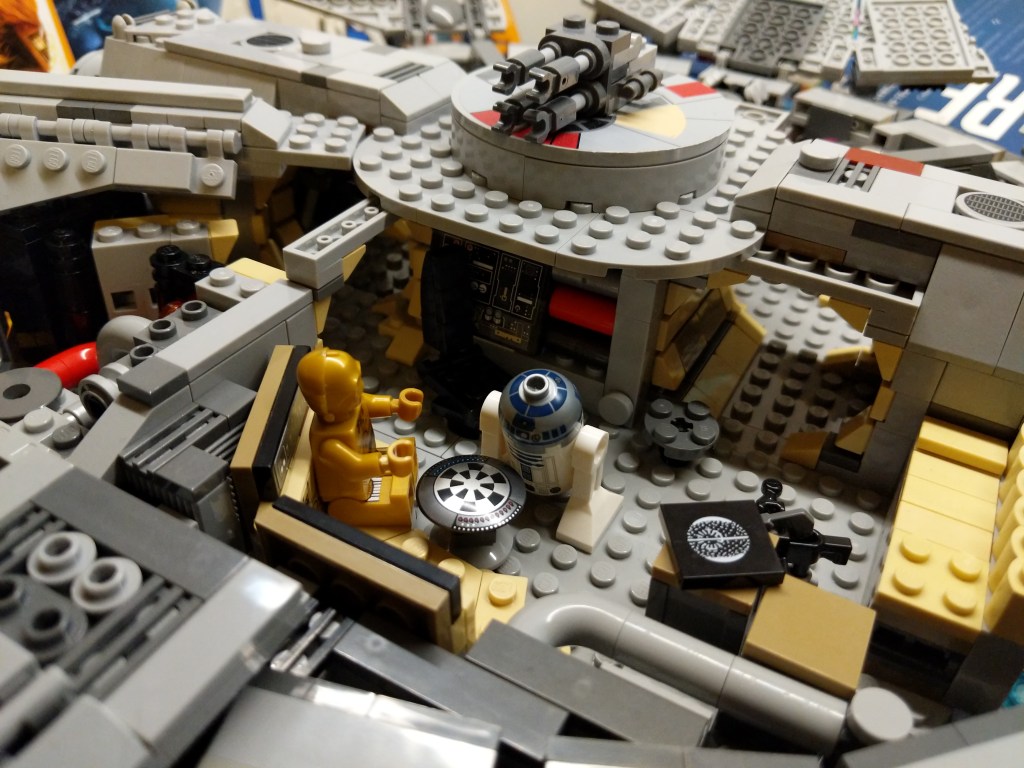
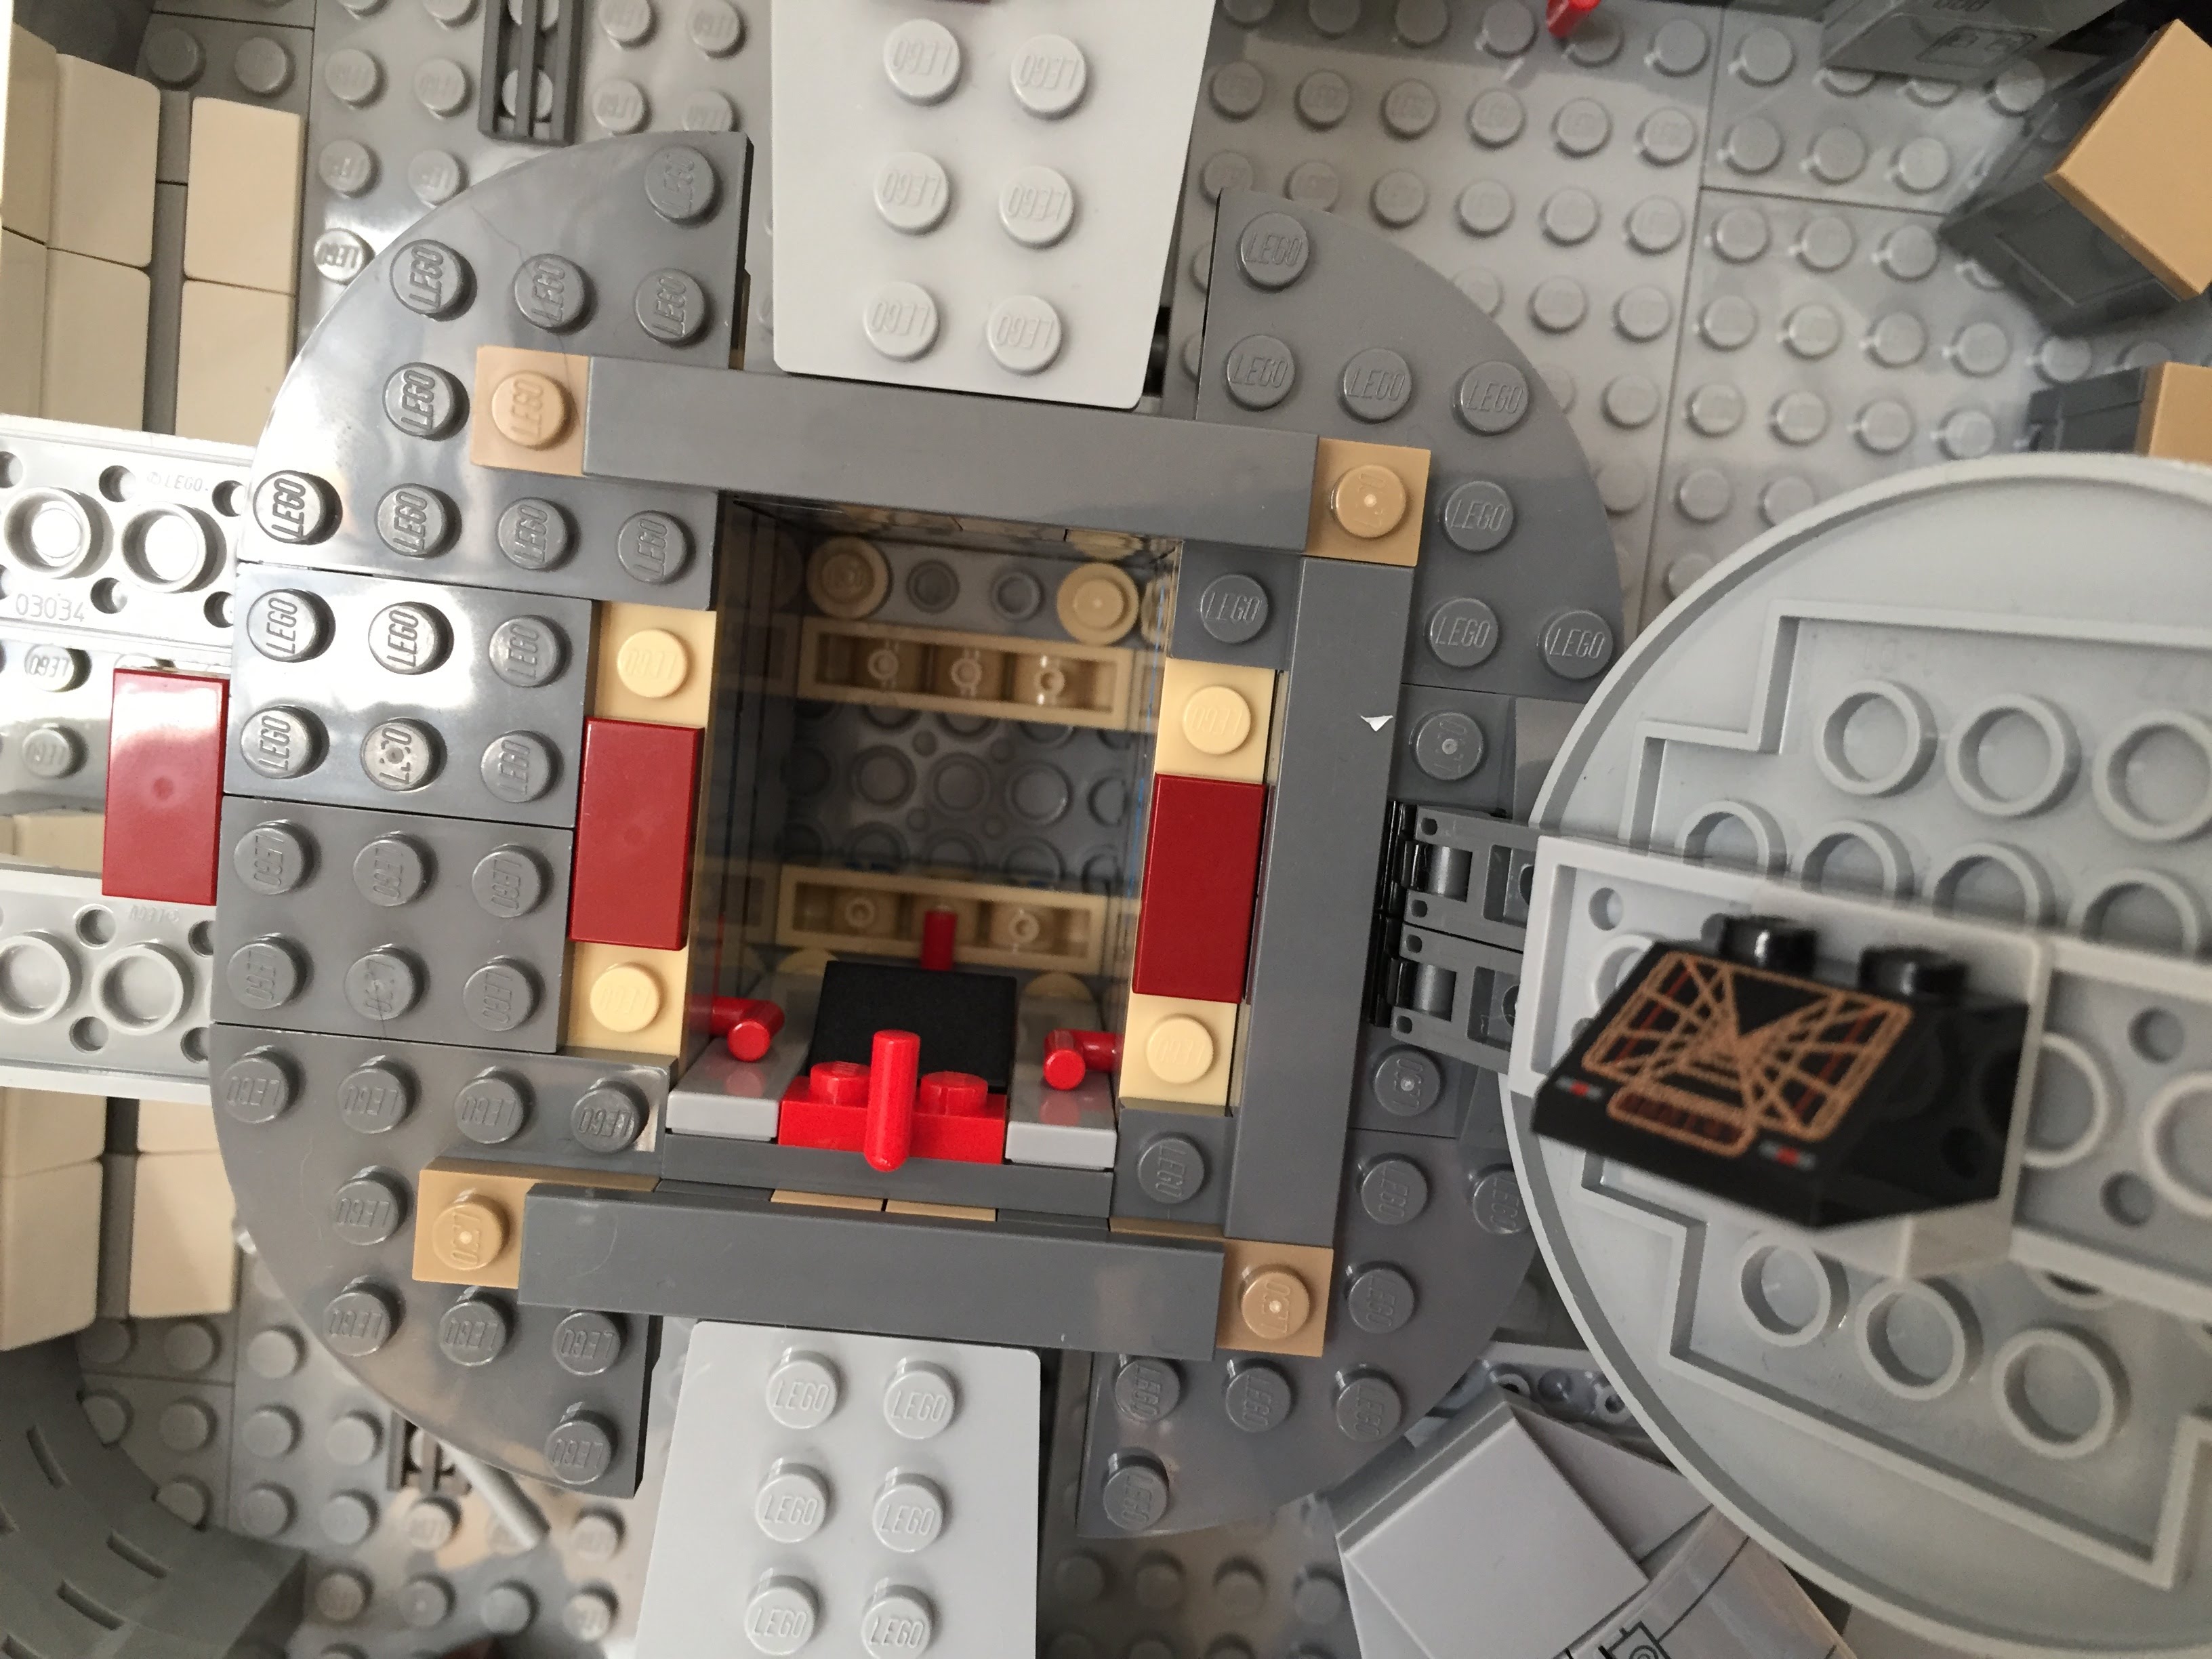
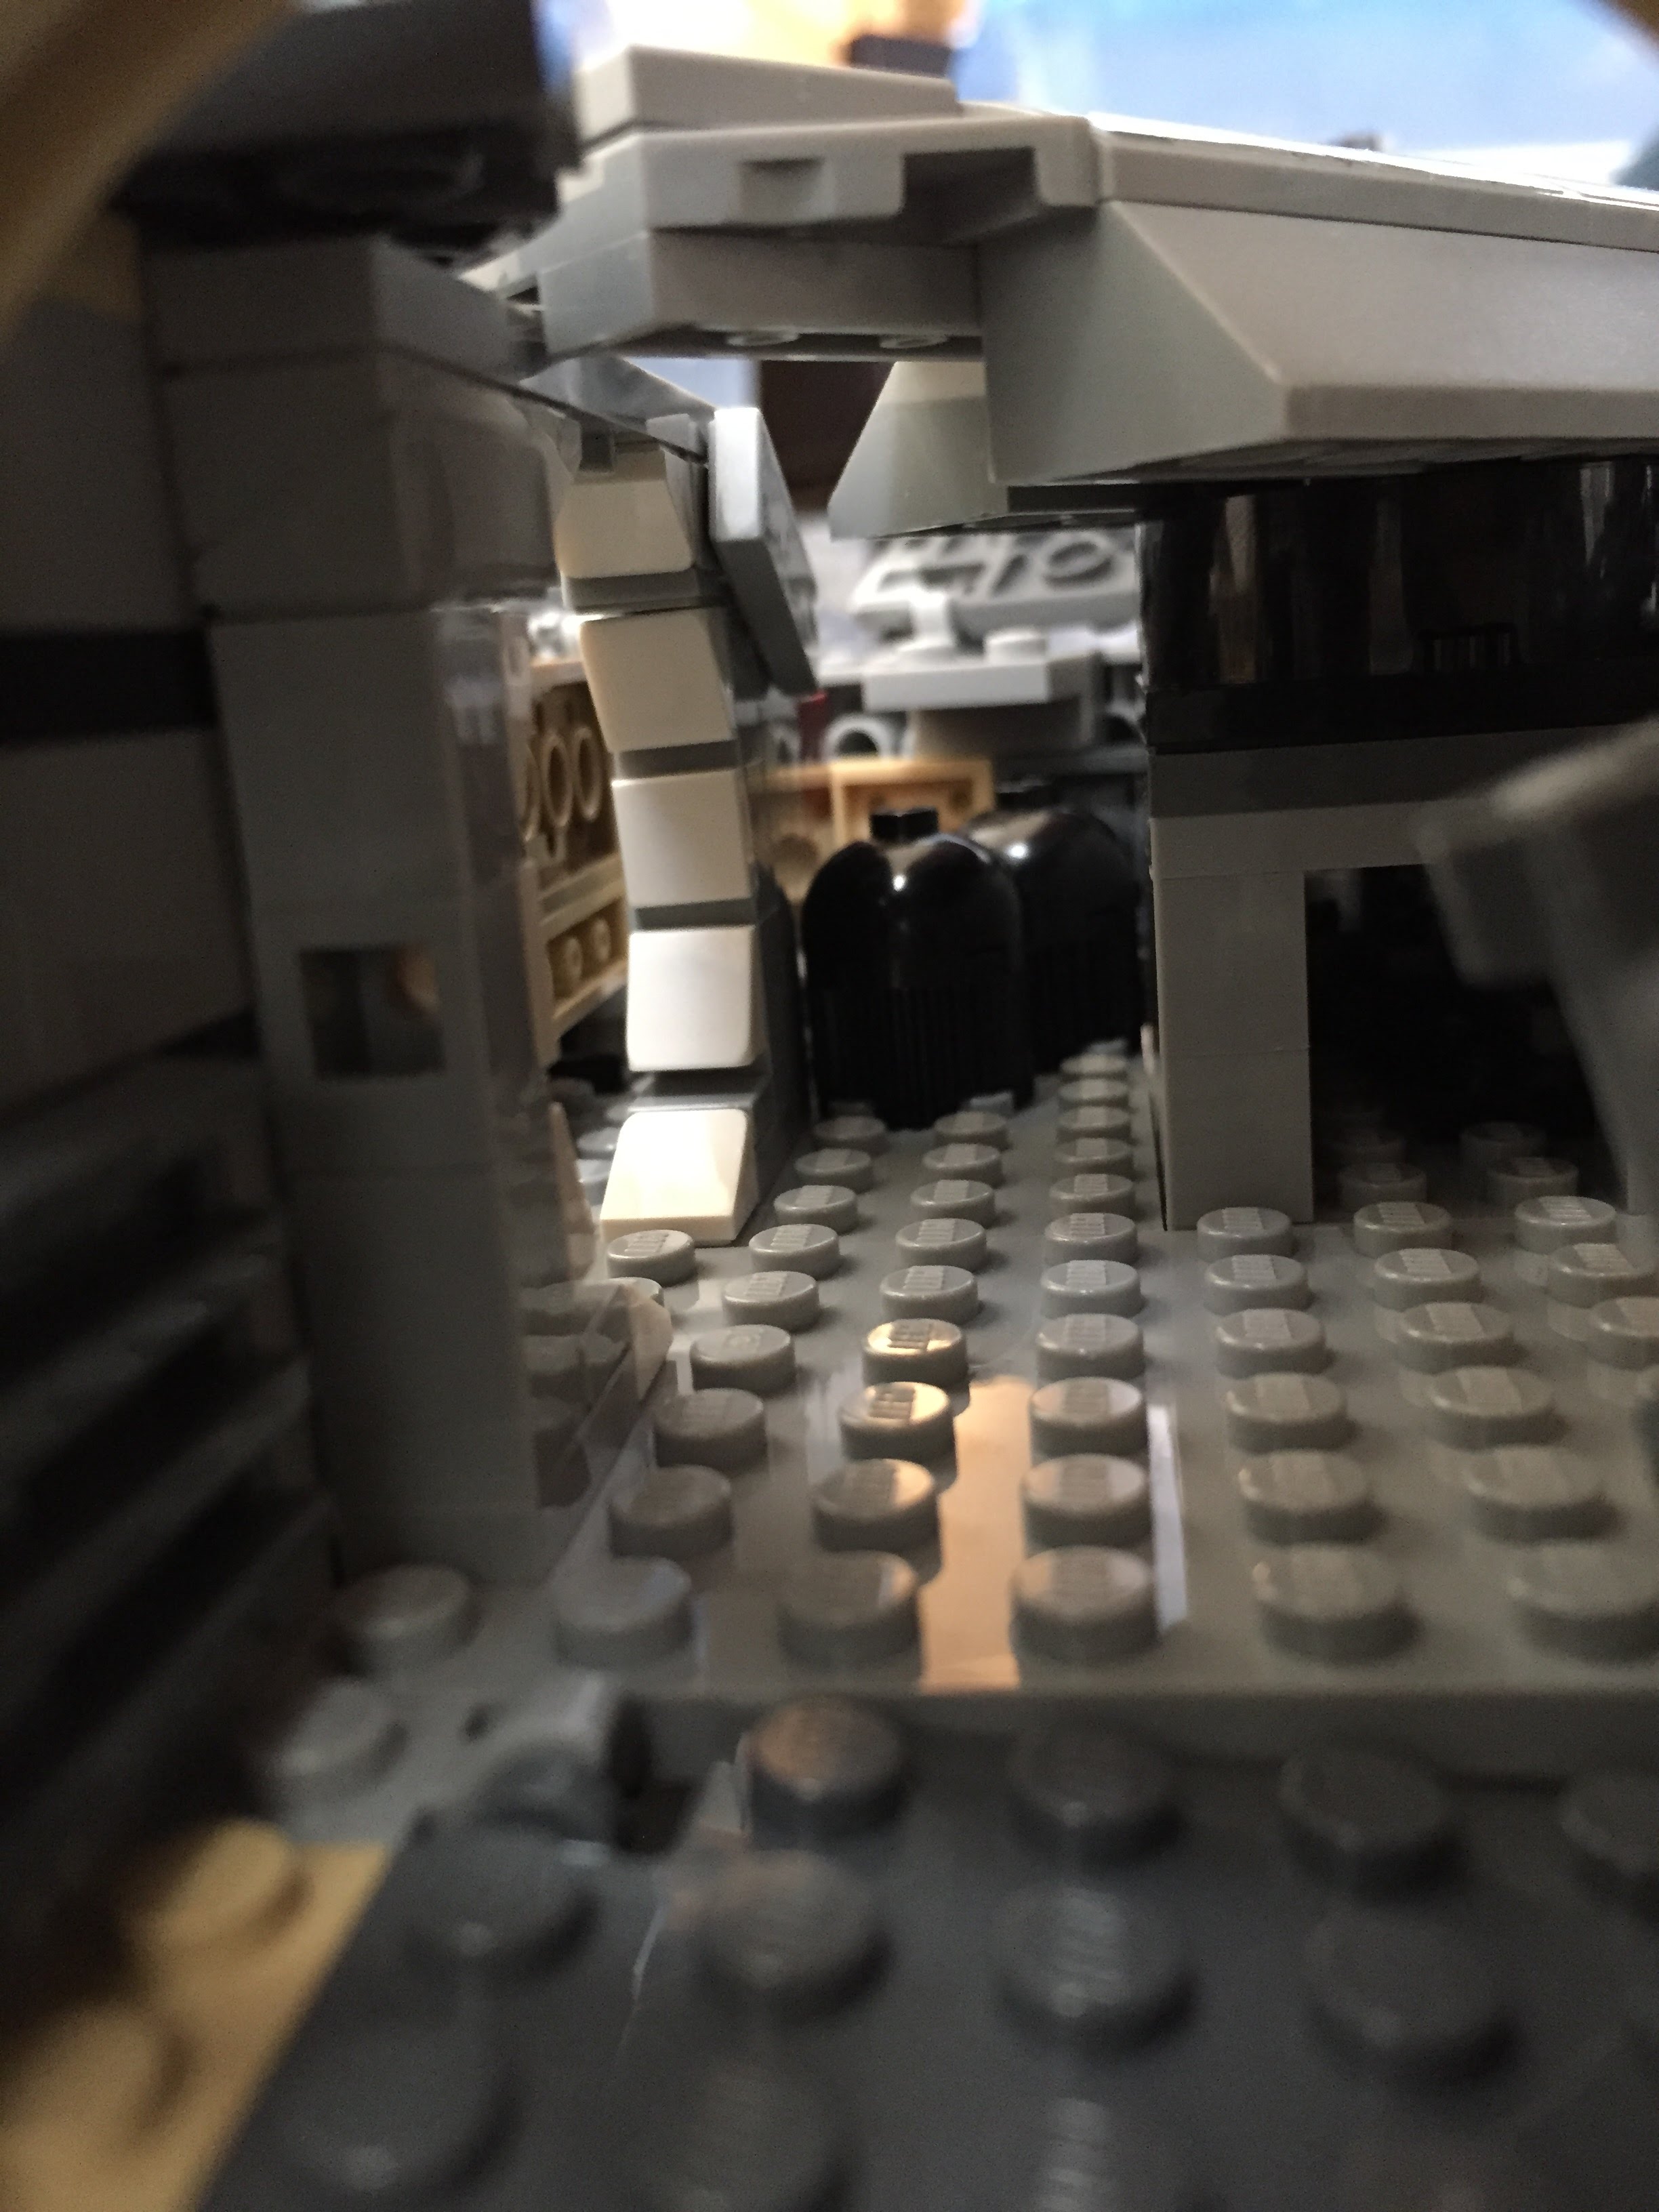
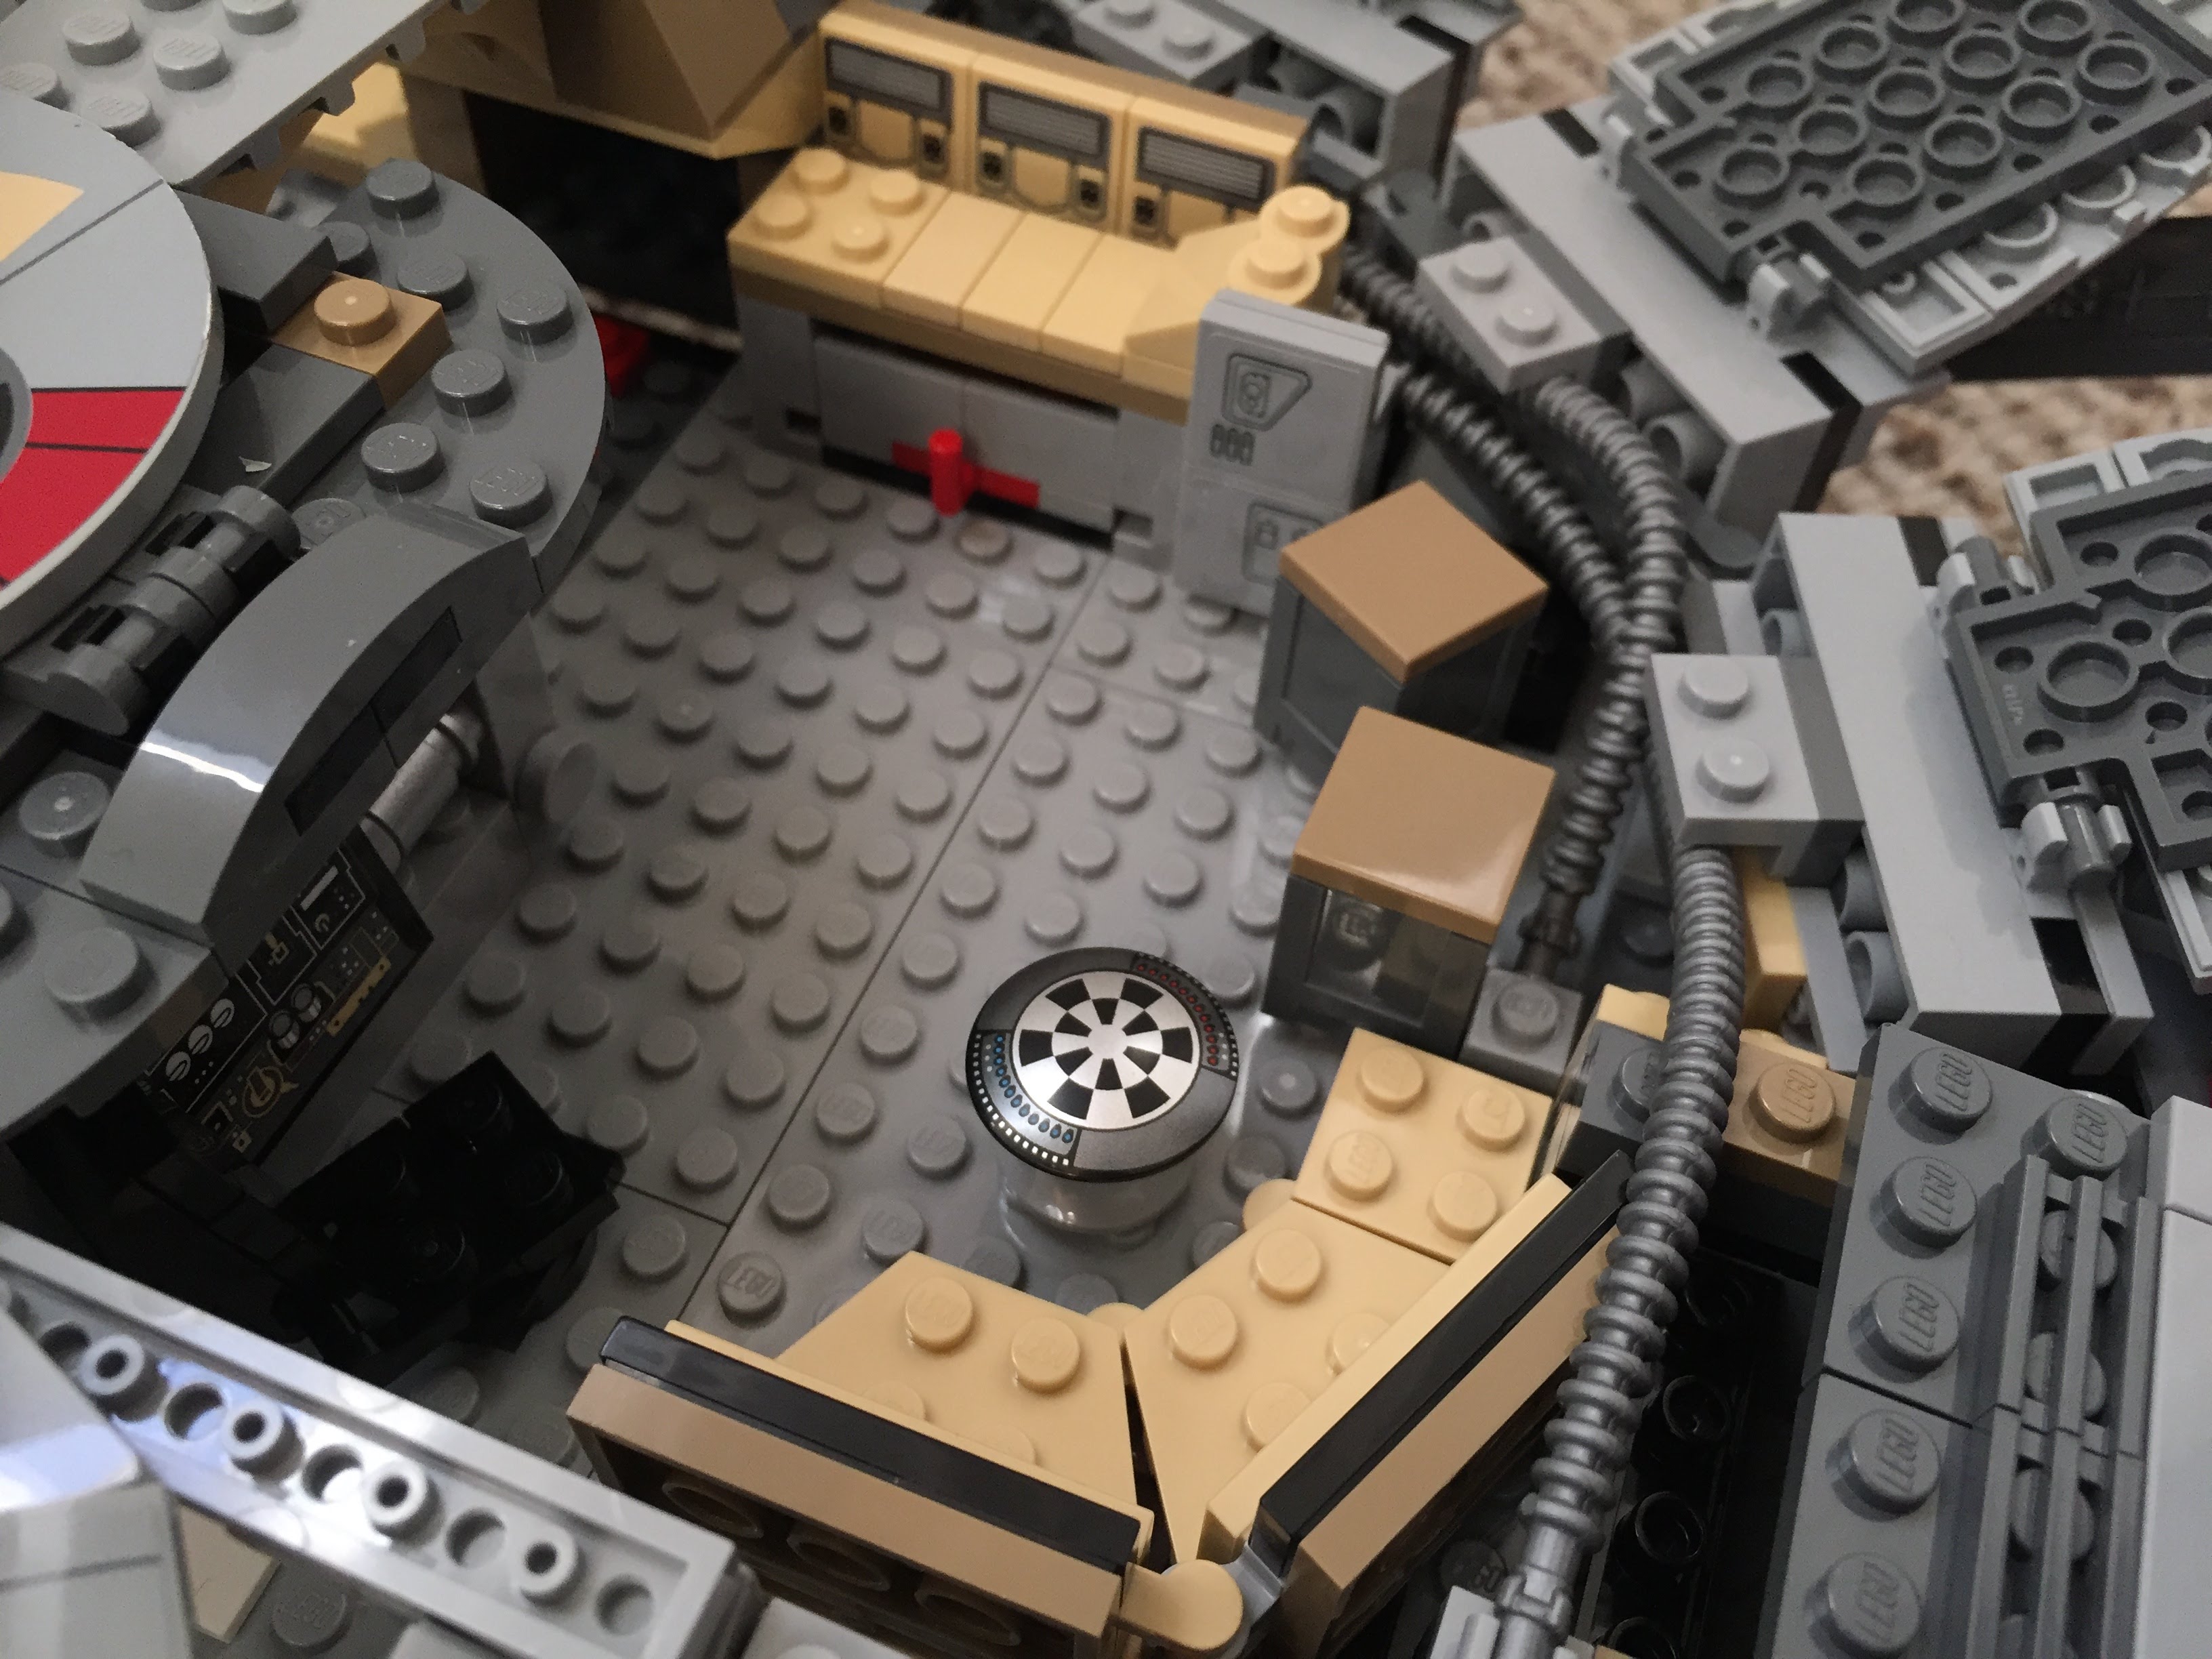
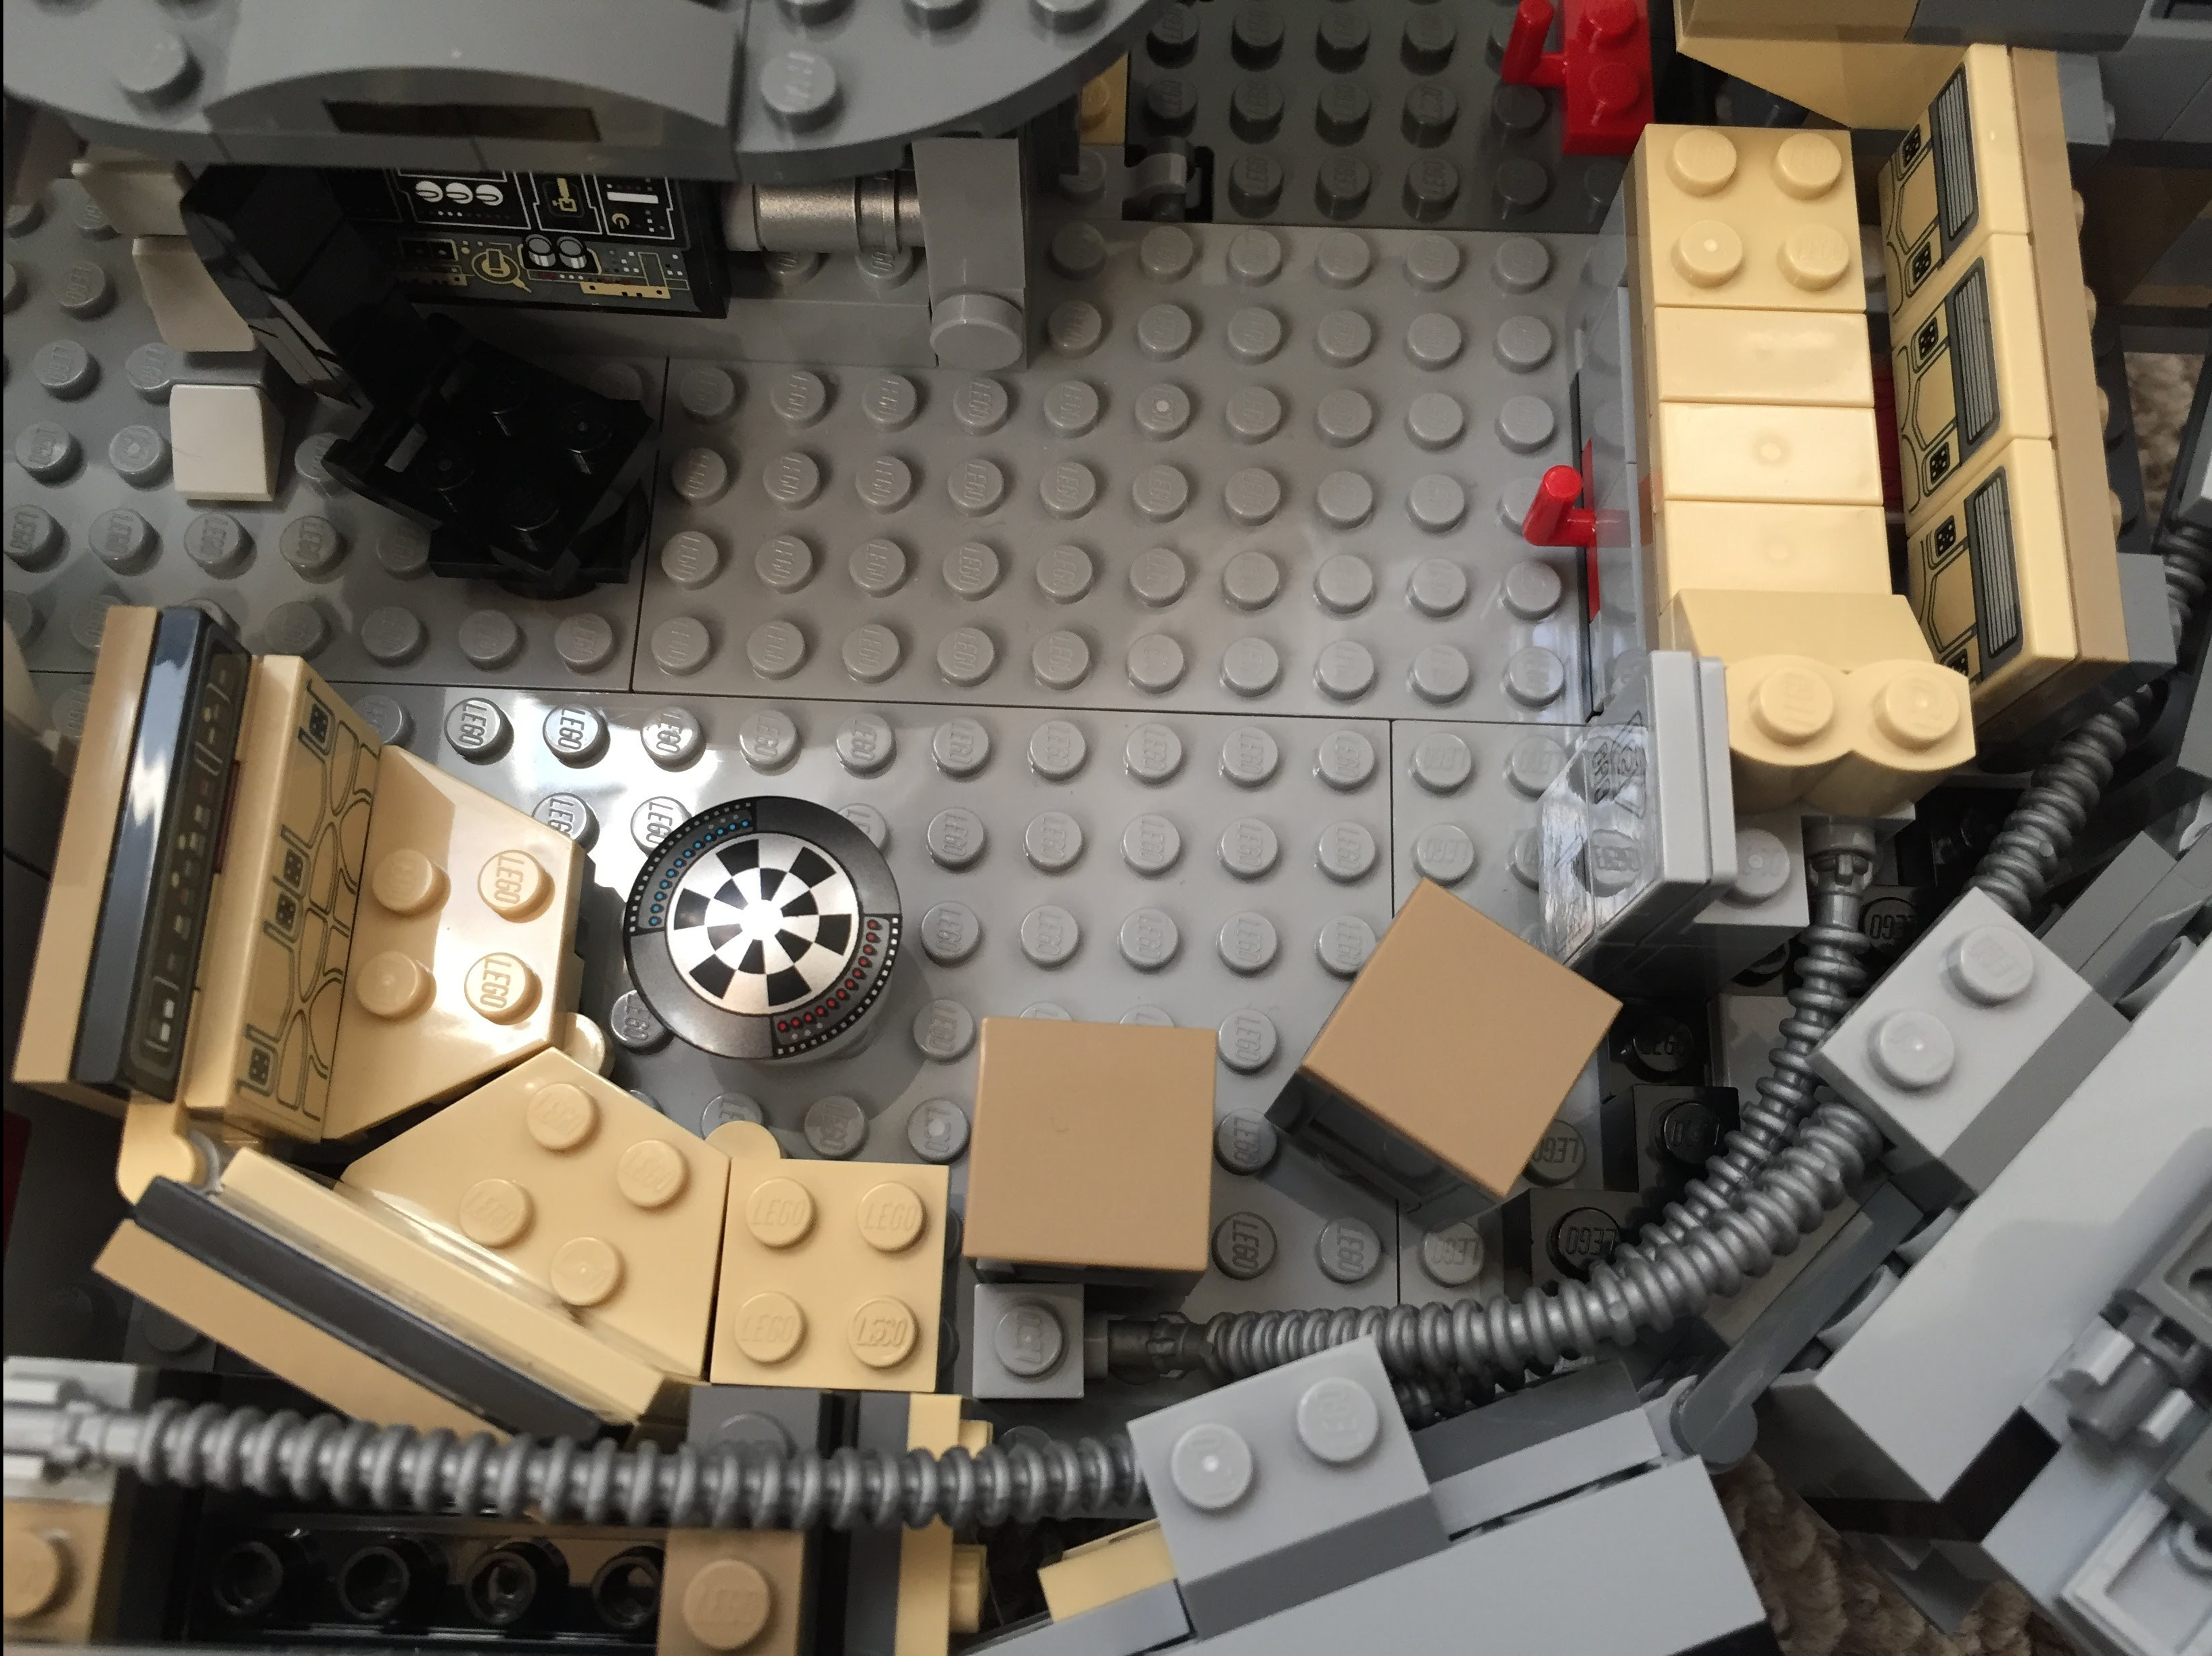
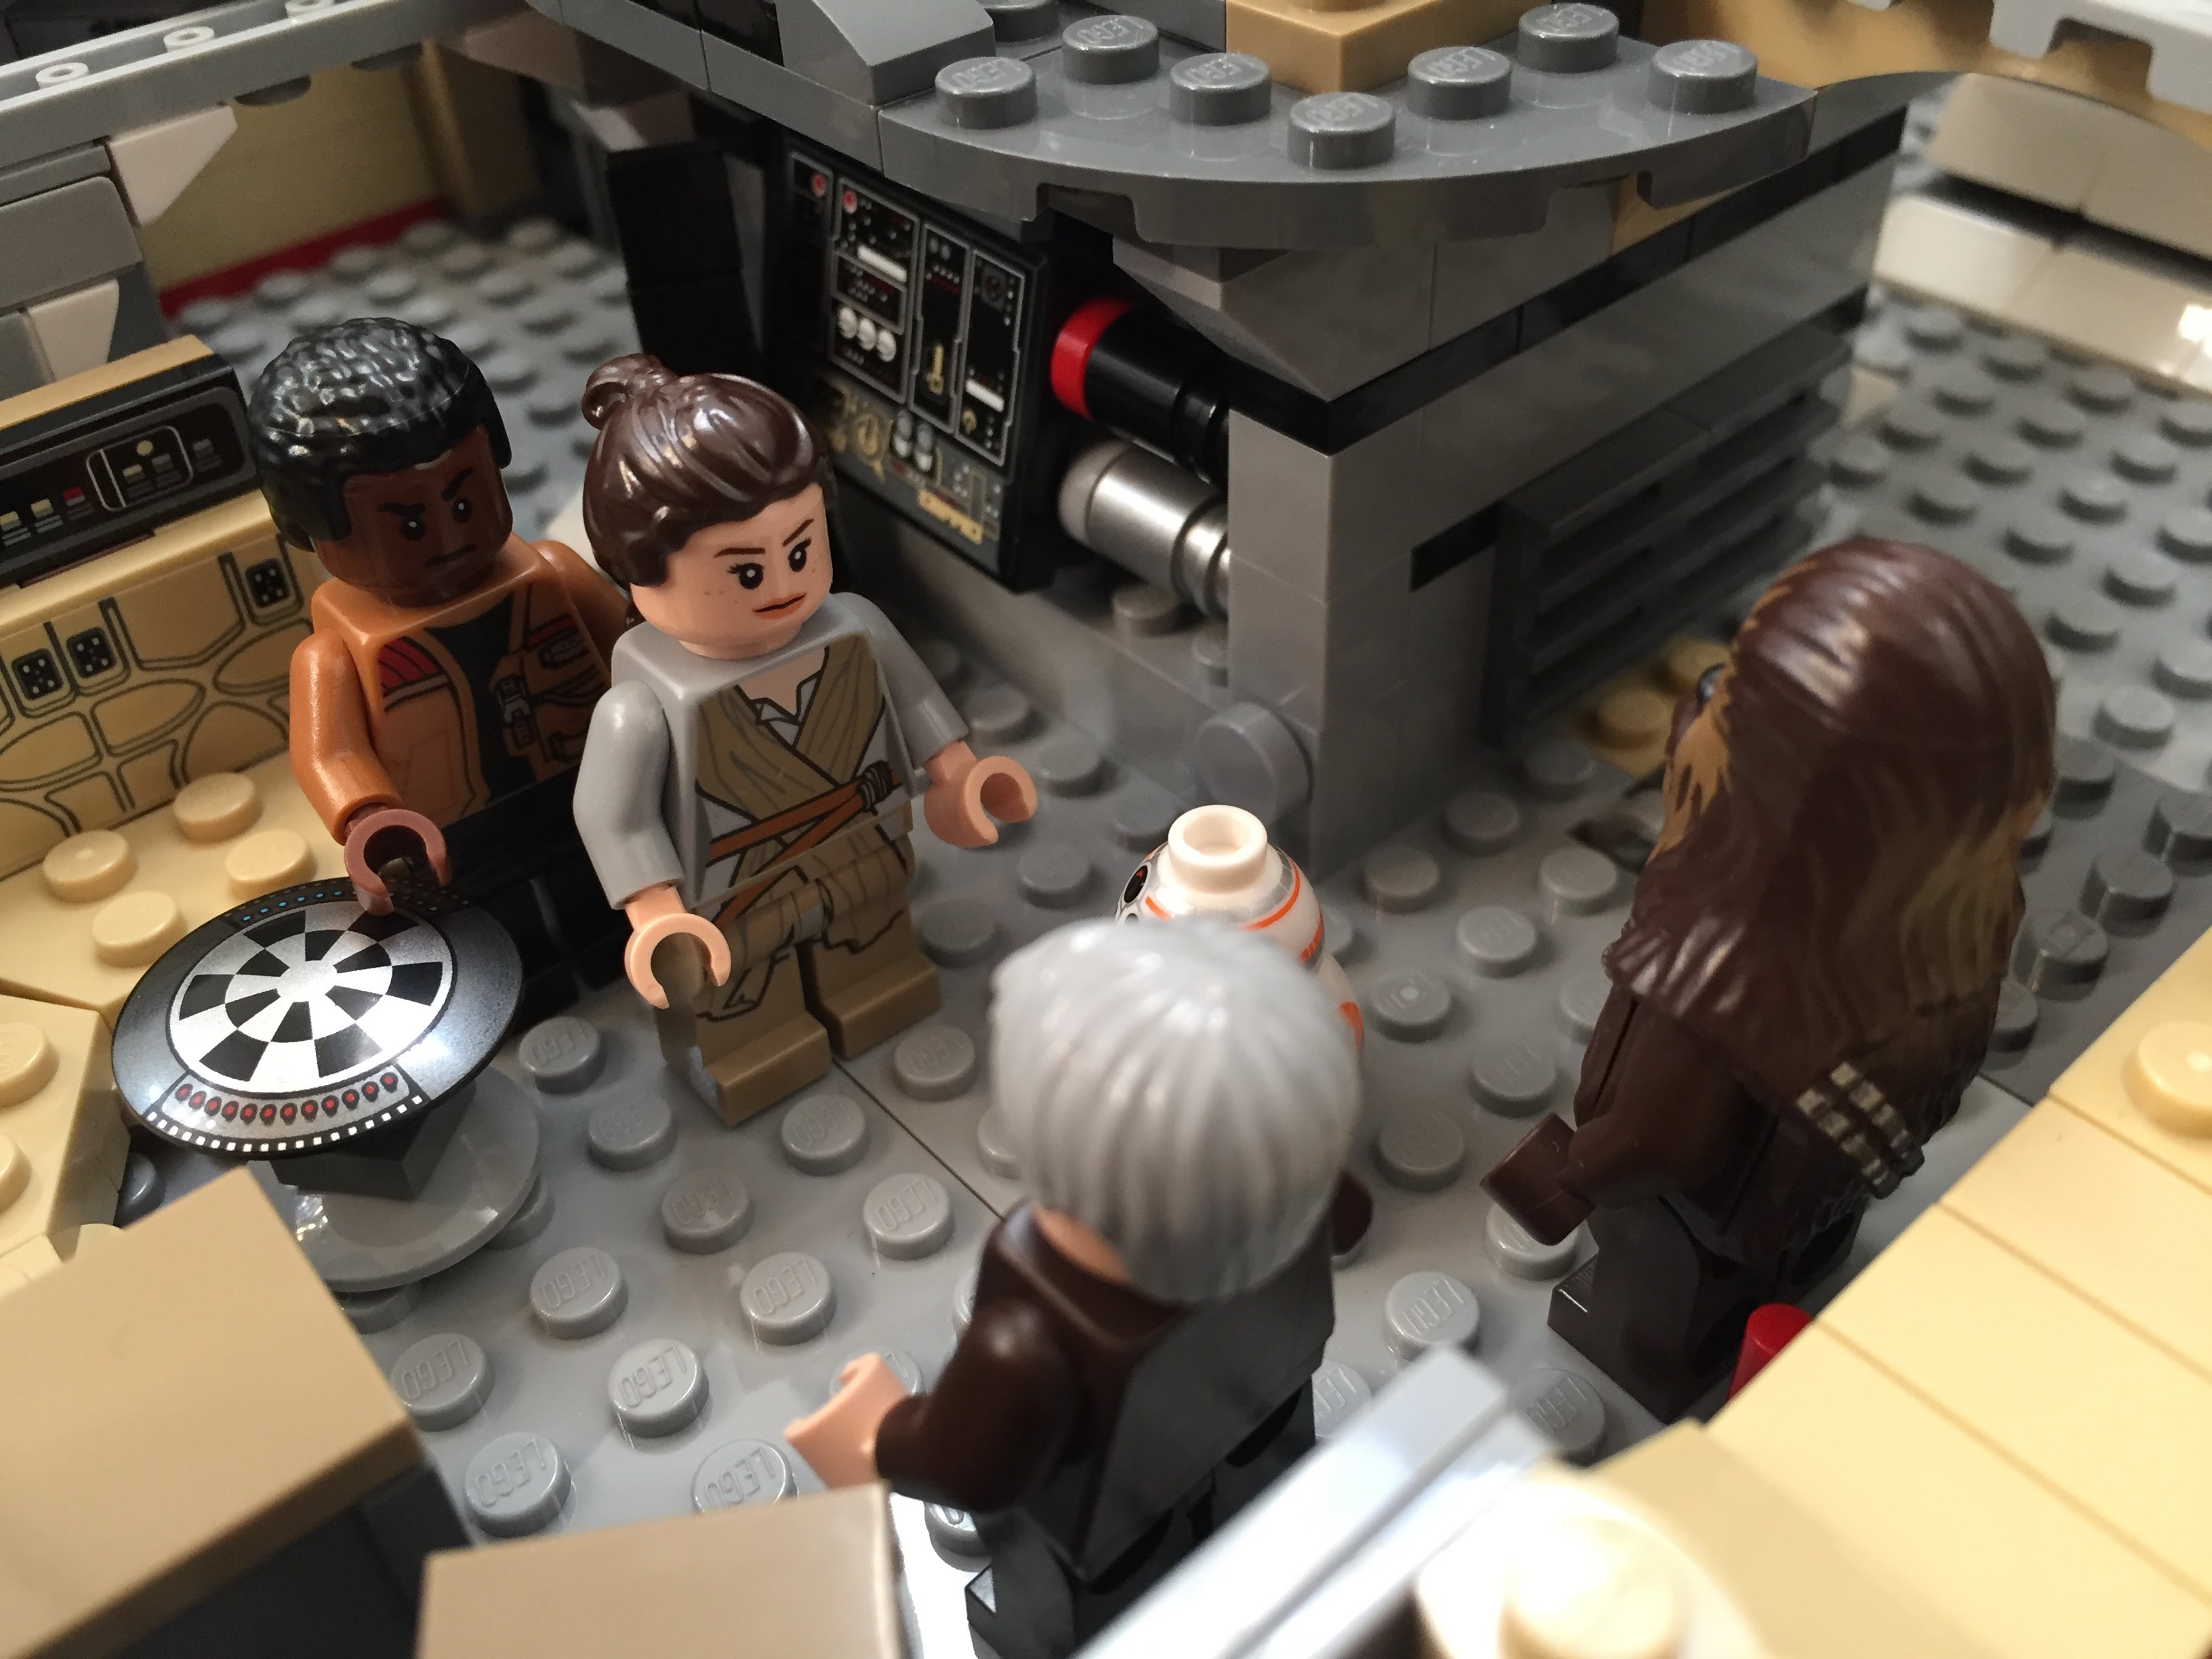
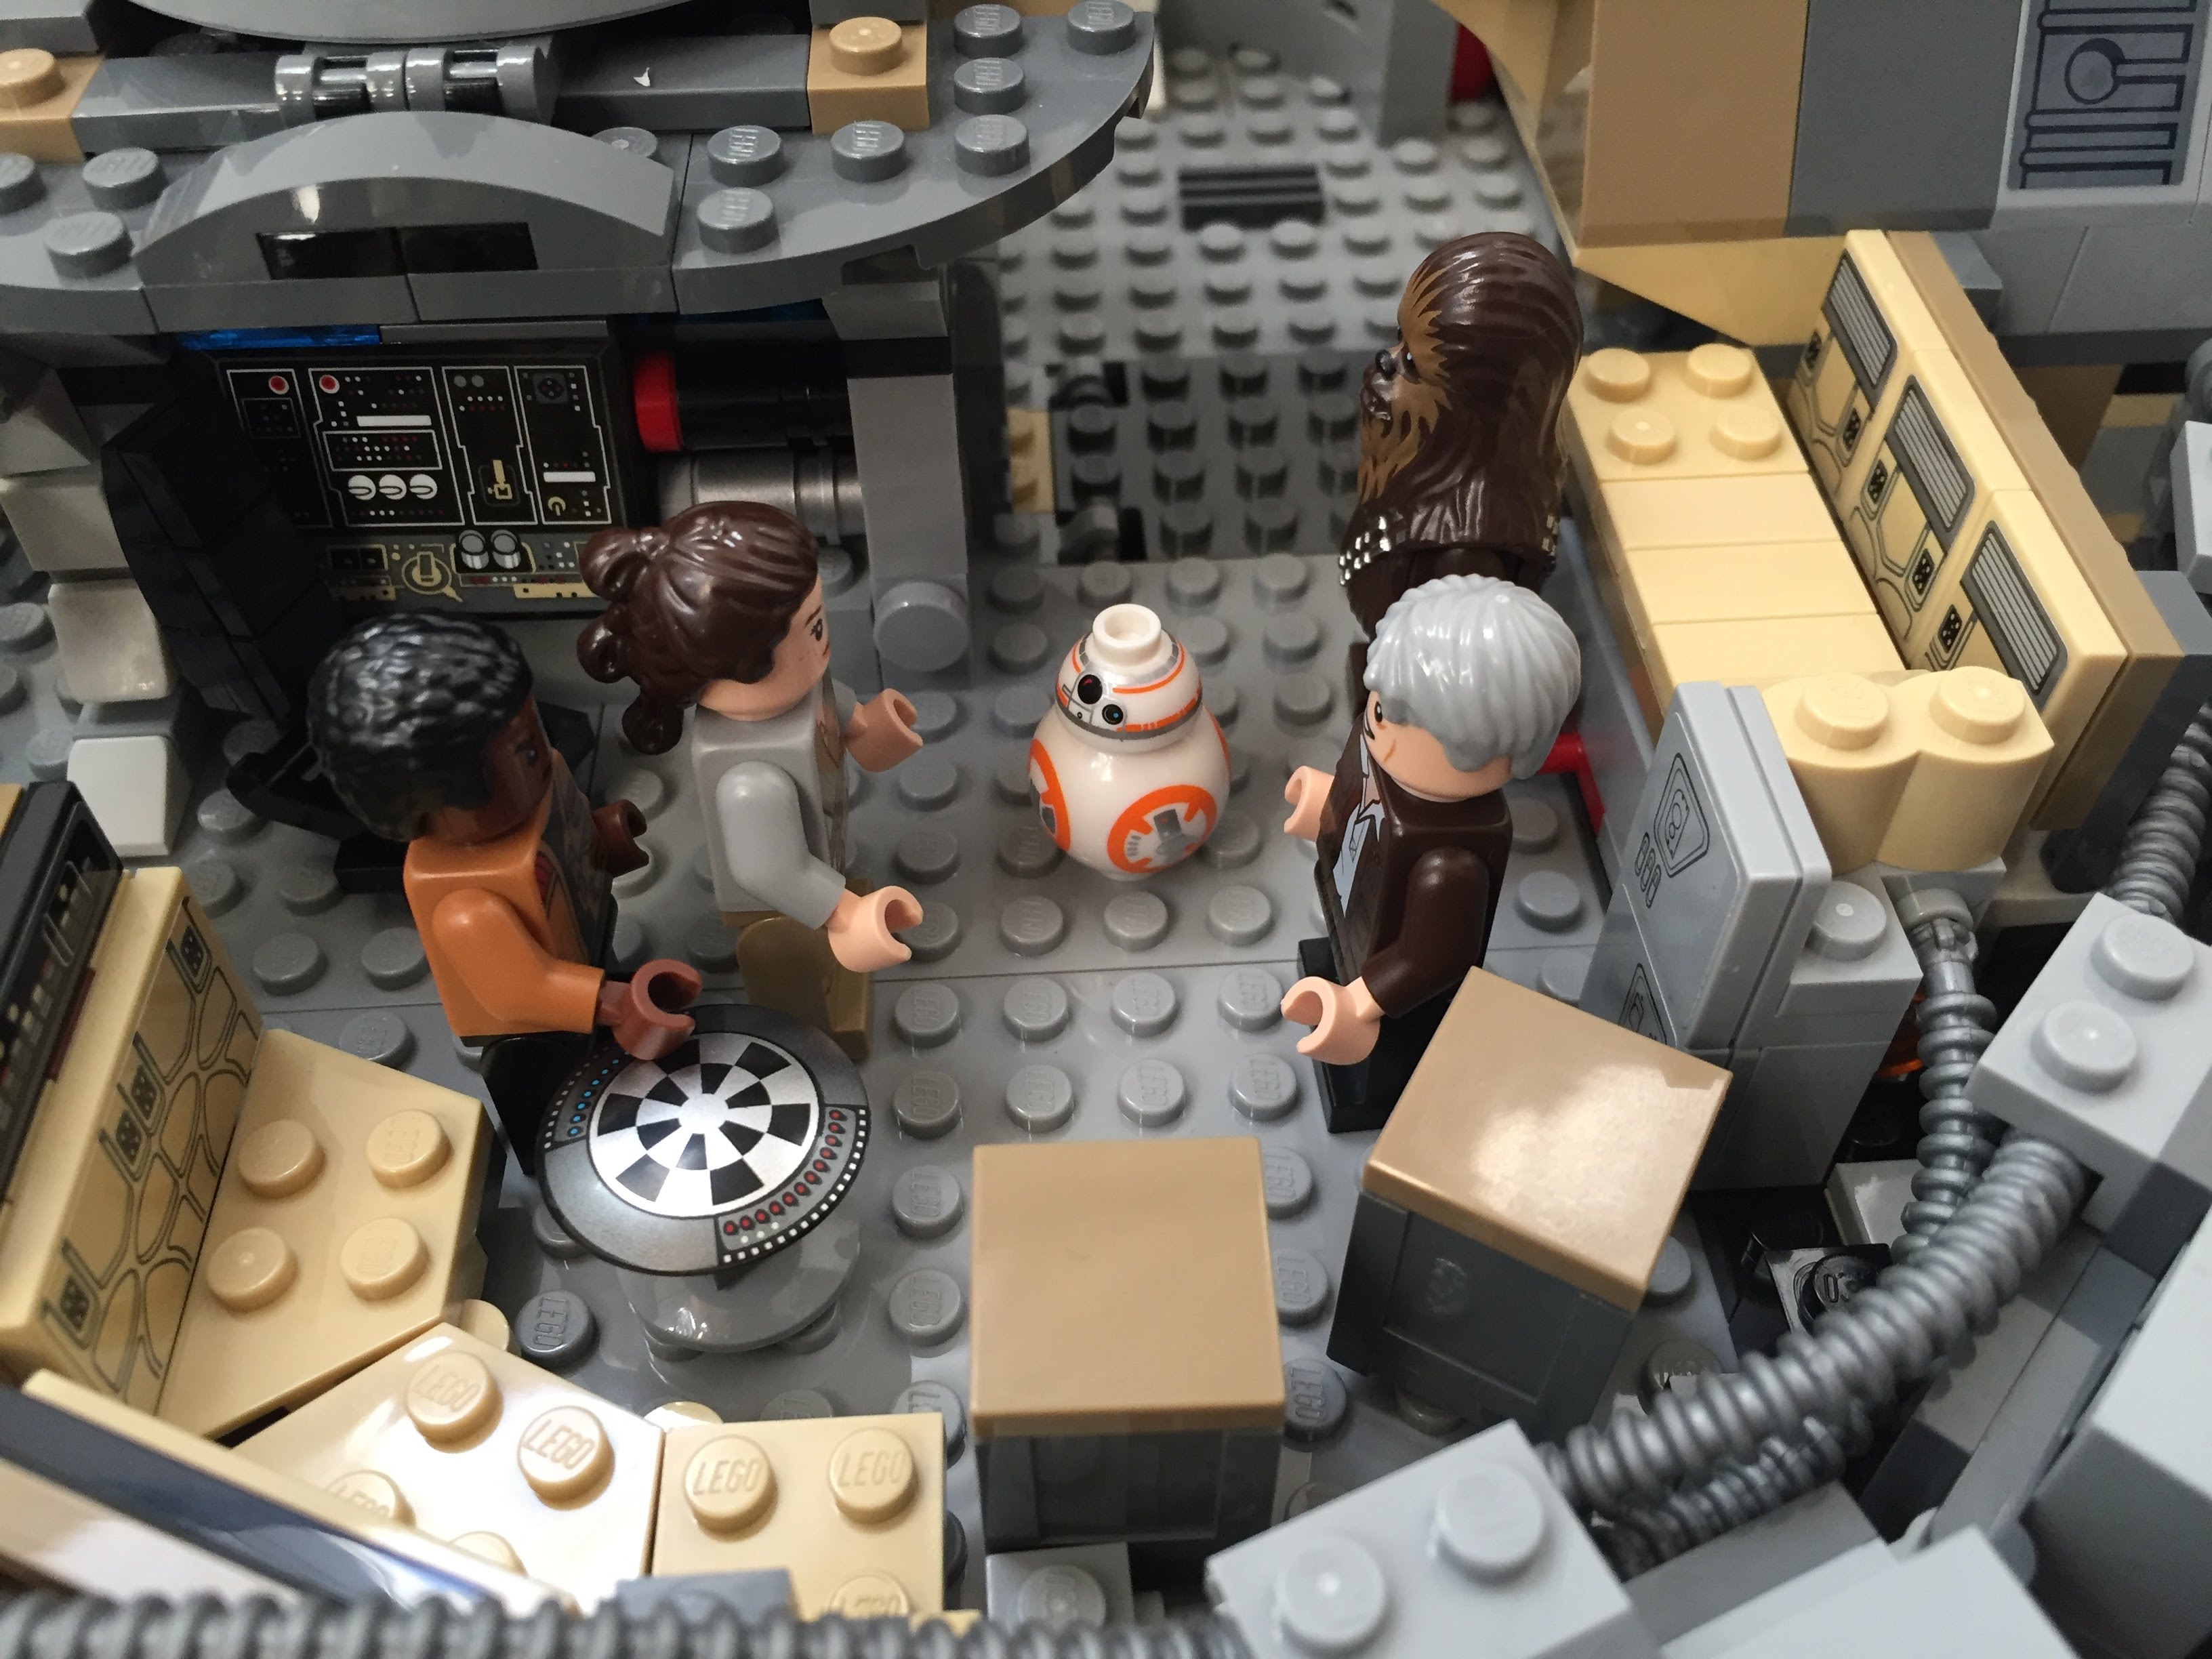
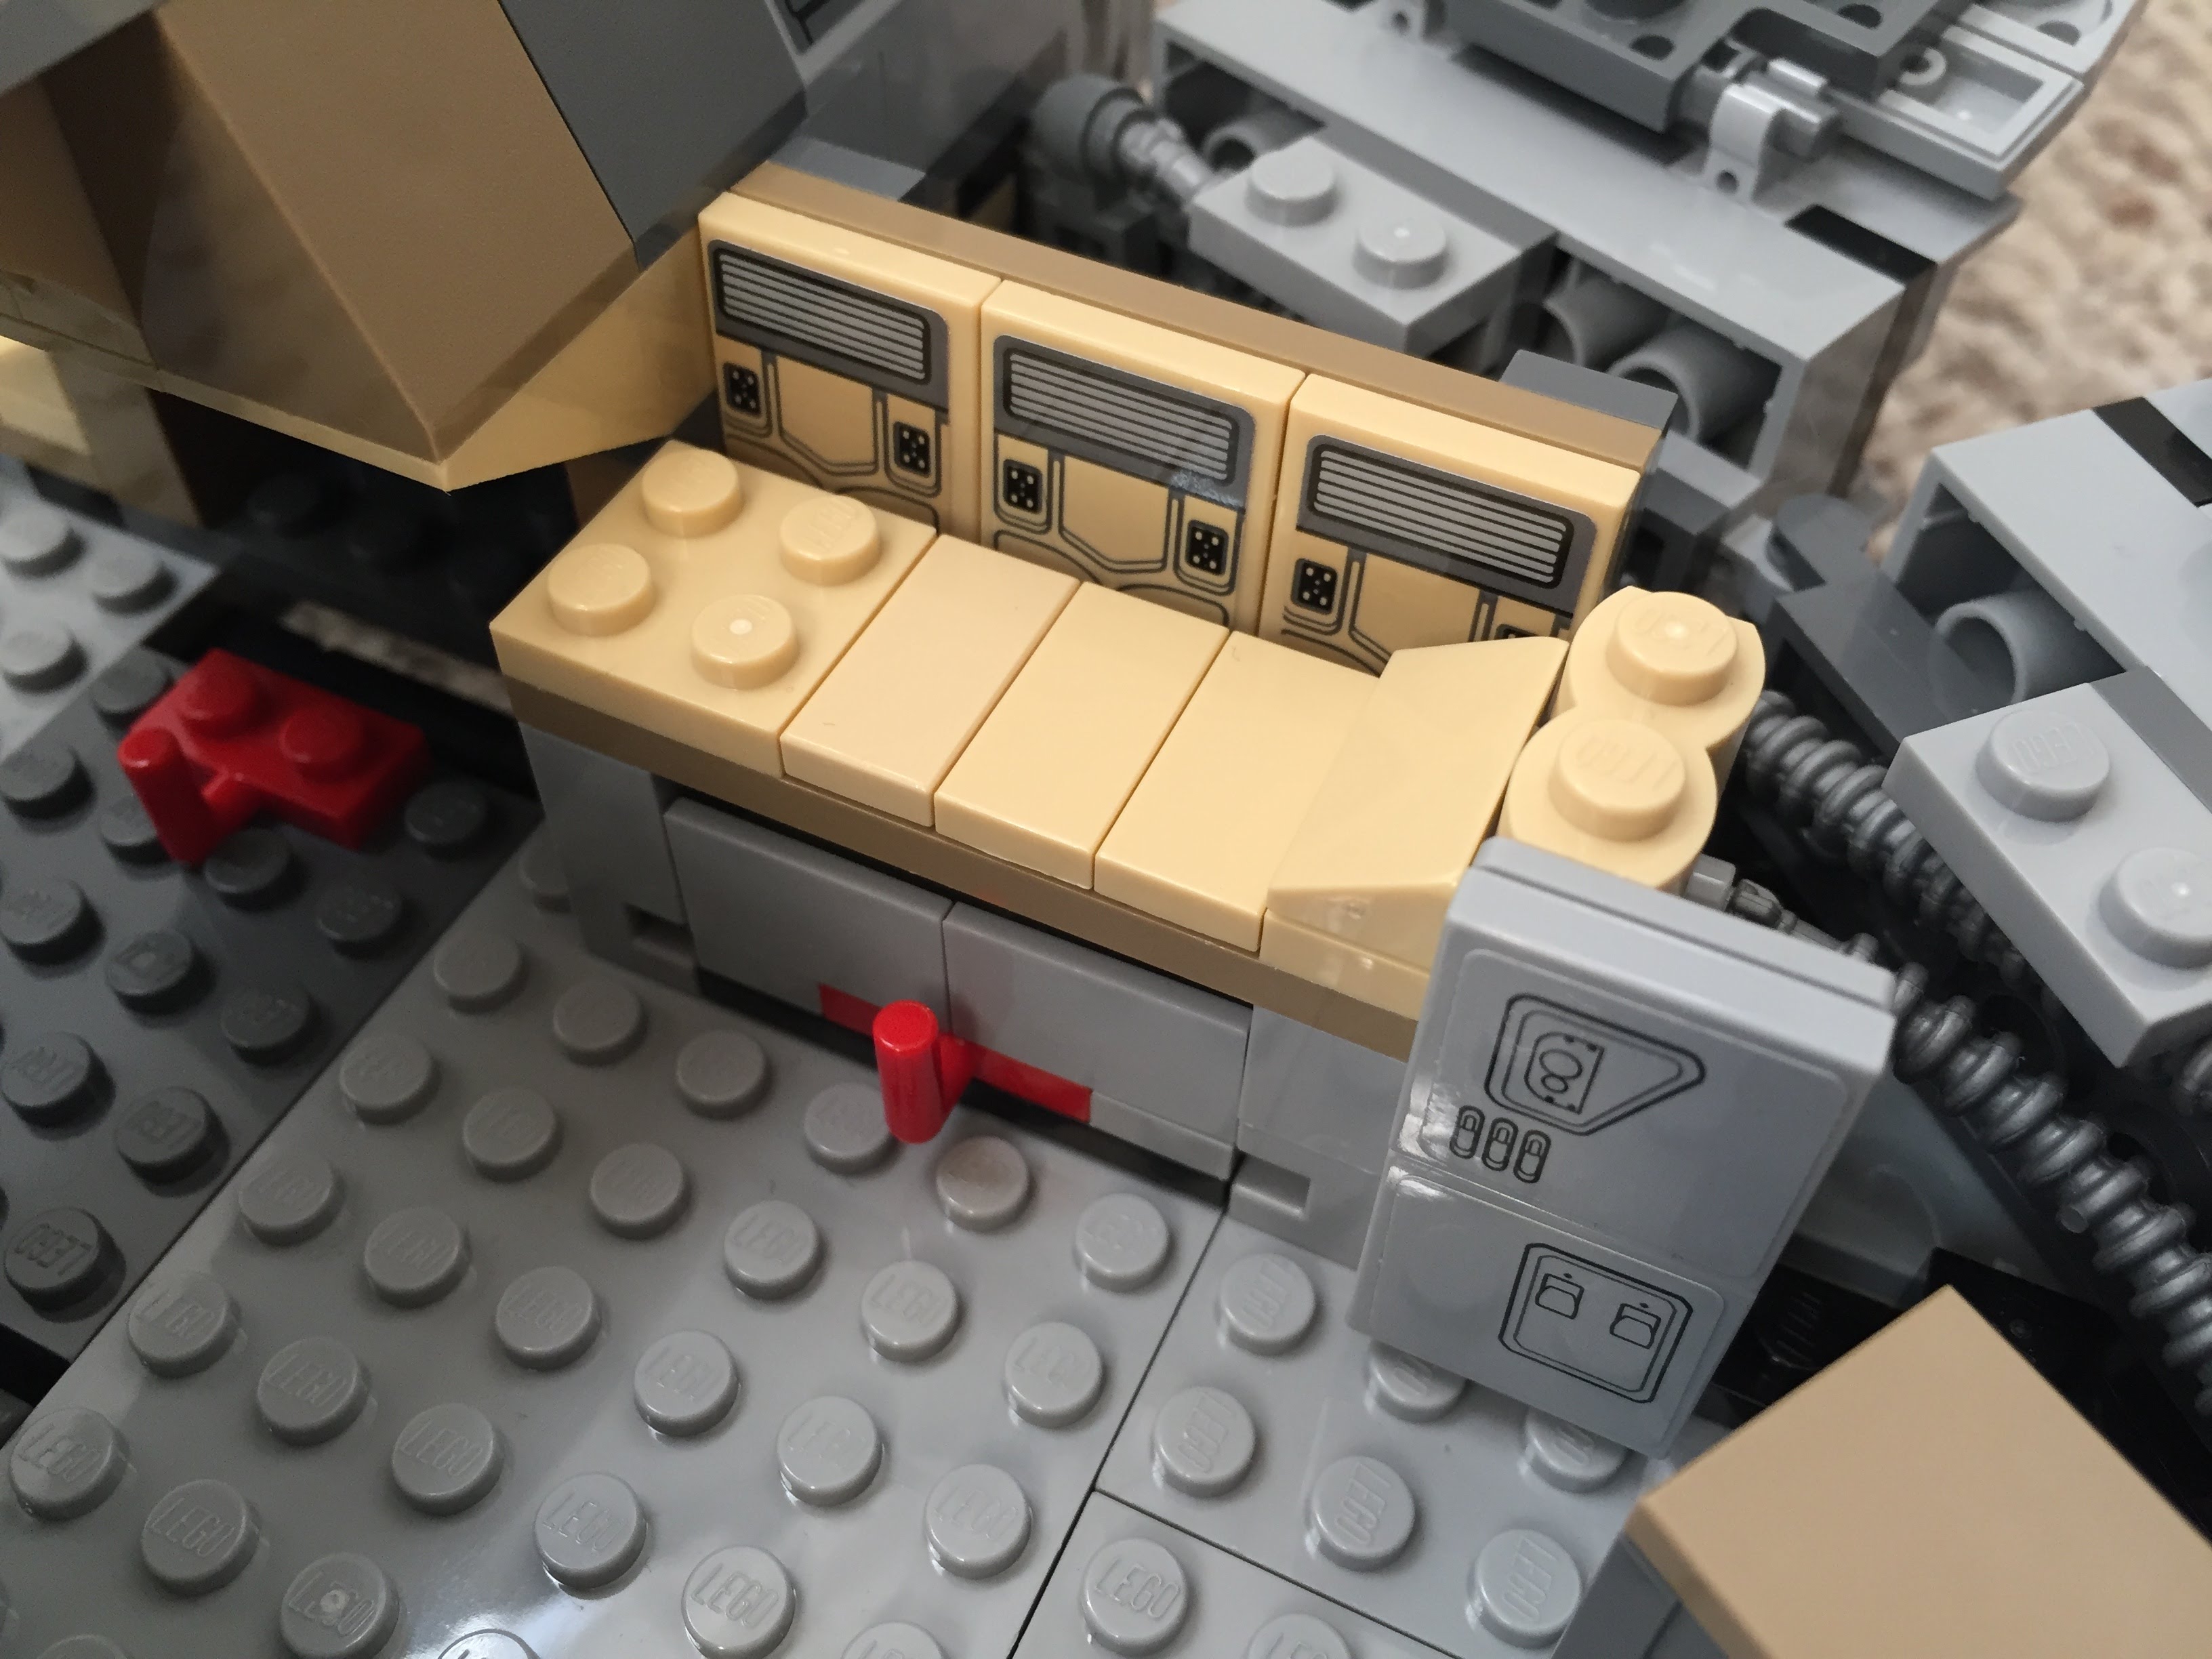
Main Hold Entrance, Nav Computer, and Dejarik Table
Using 1×1 roof tiles and an upside-down technique that I developed for a diorama of the Falcon’s main hold, I built this entrance into the main hold leading from the passage way from the entry ramp. The Dejarik Table and seating is borrowed from 75192. The Nav Computer area is very tight in the size of this model, so I couldn’t fit as large tubes adjacent to it as in the diorama linked above. Instead, I used two short tubes and moved the Nav Computer one stud to the left to accommodate the Falcon’s machinery. The main hold’s med bay is raised to accommodate a drawer, which I detail further at the end of this post to avoid The Last Jedi spoilers for anyone who hasn’t seen it yet.
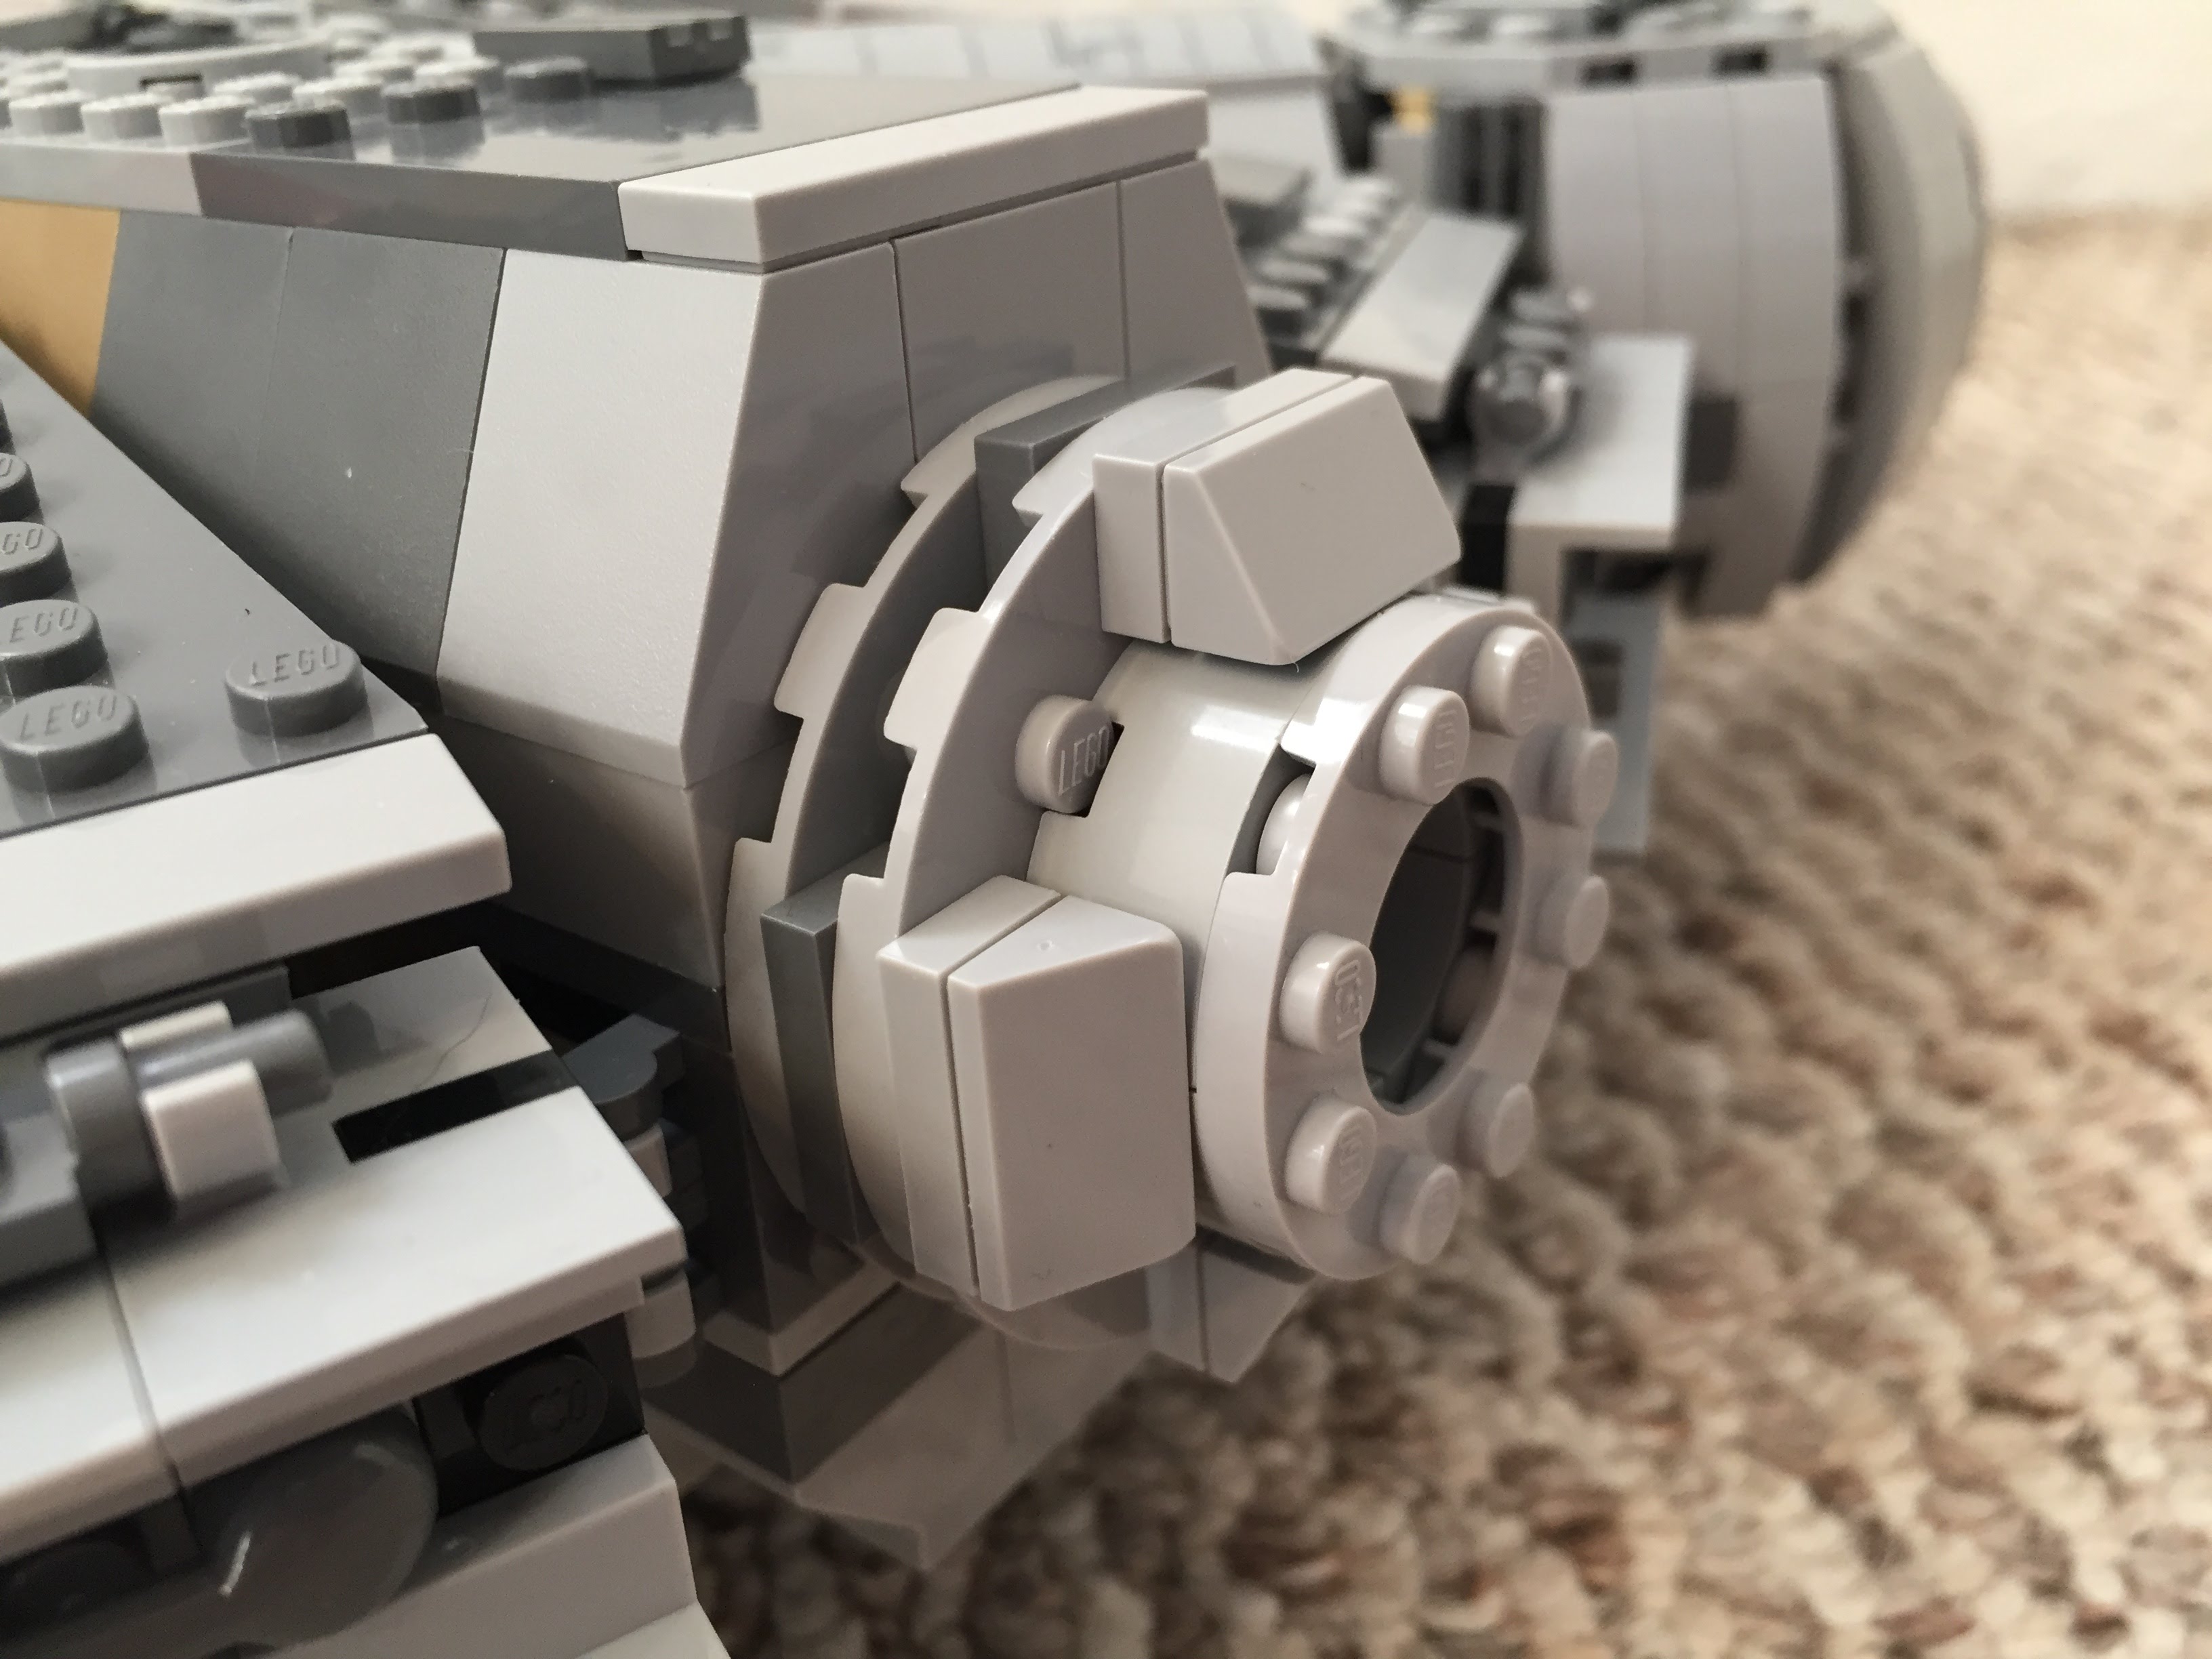
Port and Starboard Docking Ports
One disappointing aspect of the 75105 model is the docking ports. It sandwiches 1×2 plates between two Plate 6X6 Round With Tube Snap and covers that with two Plate 2X4X18°. The trouble with this design is that it doesn’t really show the cone-like taper of the docking ports. Earlier Millennium Falcon sets 4504 and 7965 did a better job with the docking ports. I decided to keep 75105’s sandwich to give the ports height, and then built up a capped tube circled by 1×2 plates each topped with a Roof Tile 1 X 2 X 2/3, Abs.
Wall Tile Extensions Around Circumference
The Millennium Falcon dorsal and ventral domed covering extends over the circumferential edge. The 75105 model comes with 1×6 flat plates to demarcate this edge overhang, but it doesn’t really look right. I picked up a lot of Wall Element 1X2X1 on Bricklink to replace these 1×6 flat plates. In addition to showing this circumferential trench around the edge of the Falcon, it gives the model an overall flatter look, which emphasizes the Falcon’s on-screen appearance.
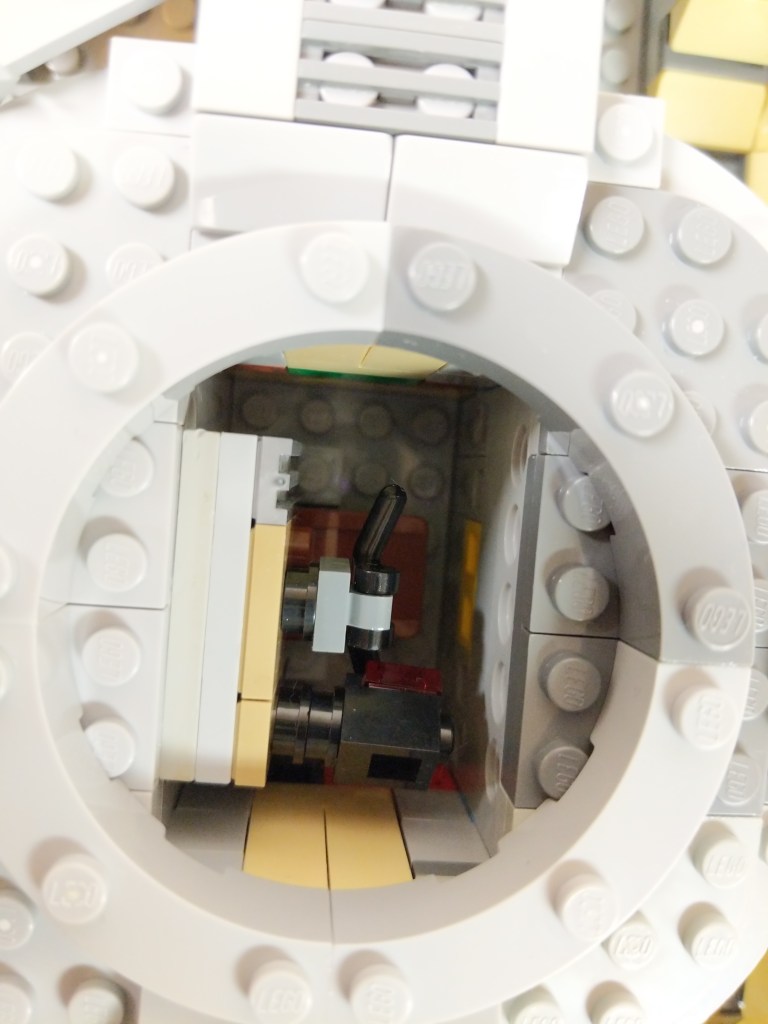
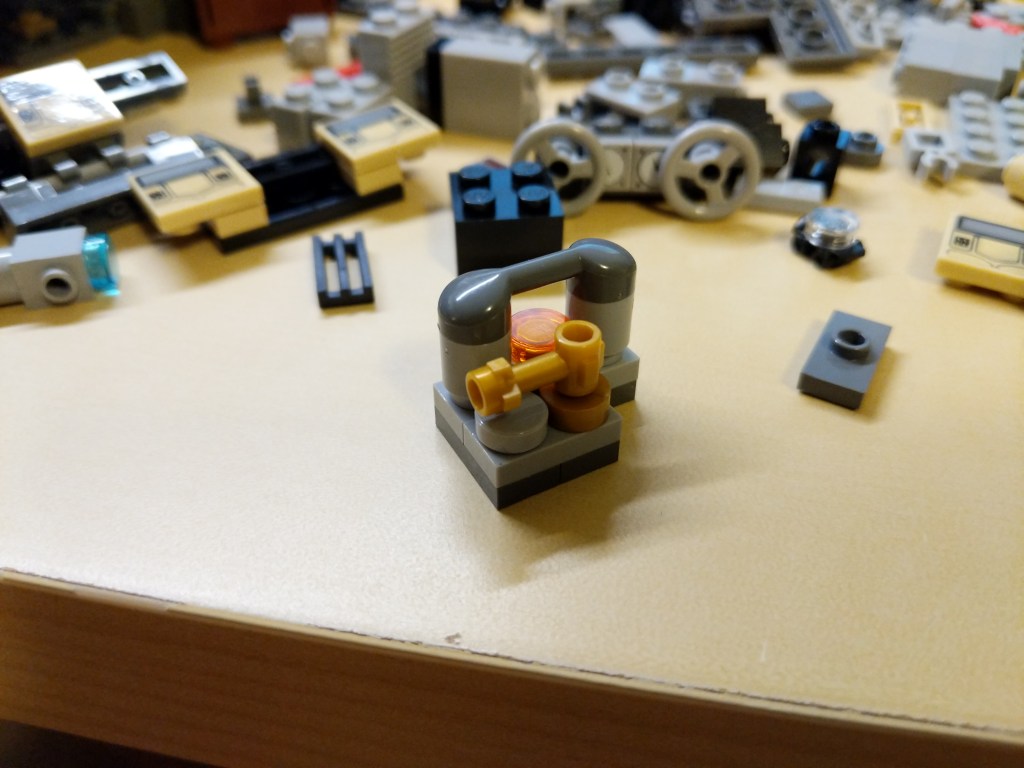
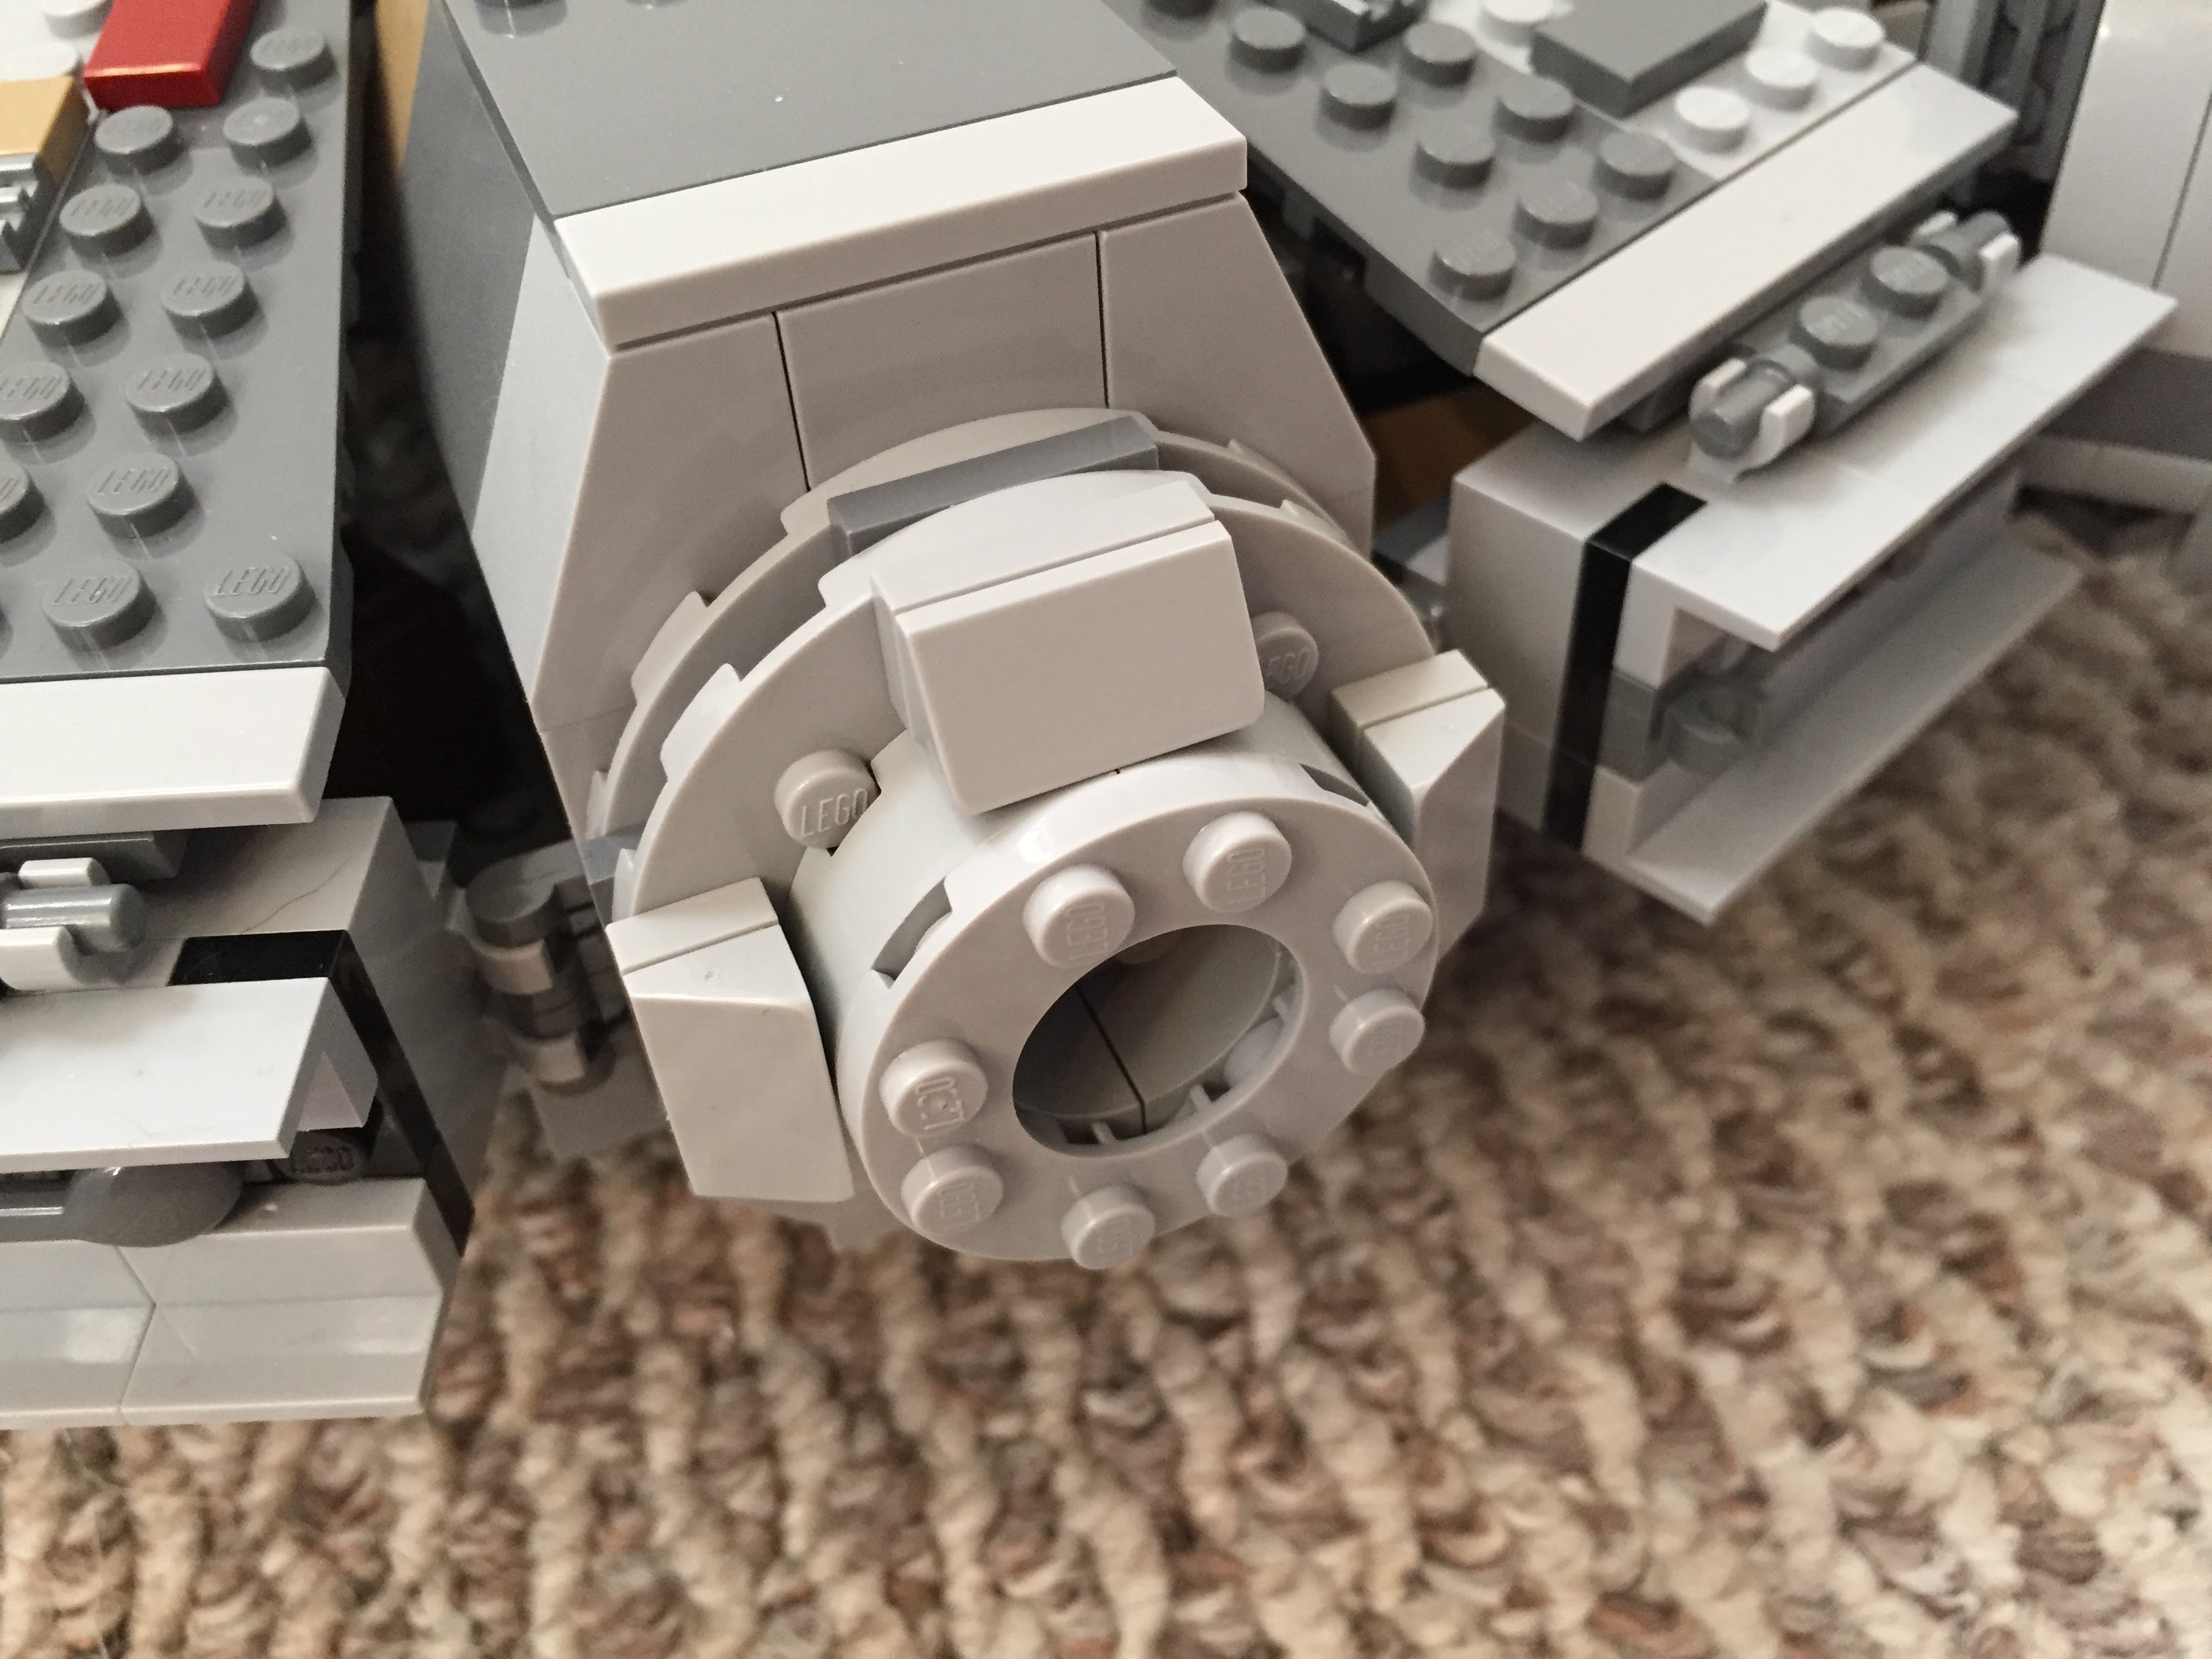
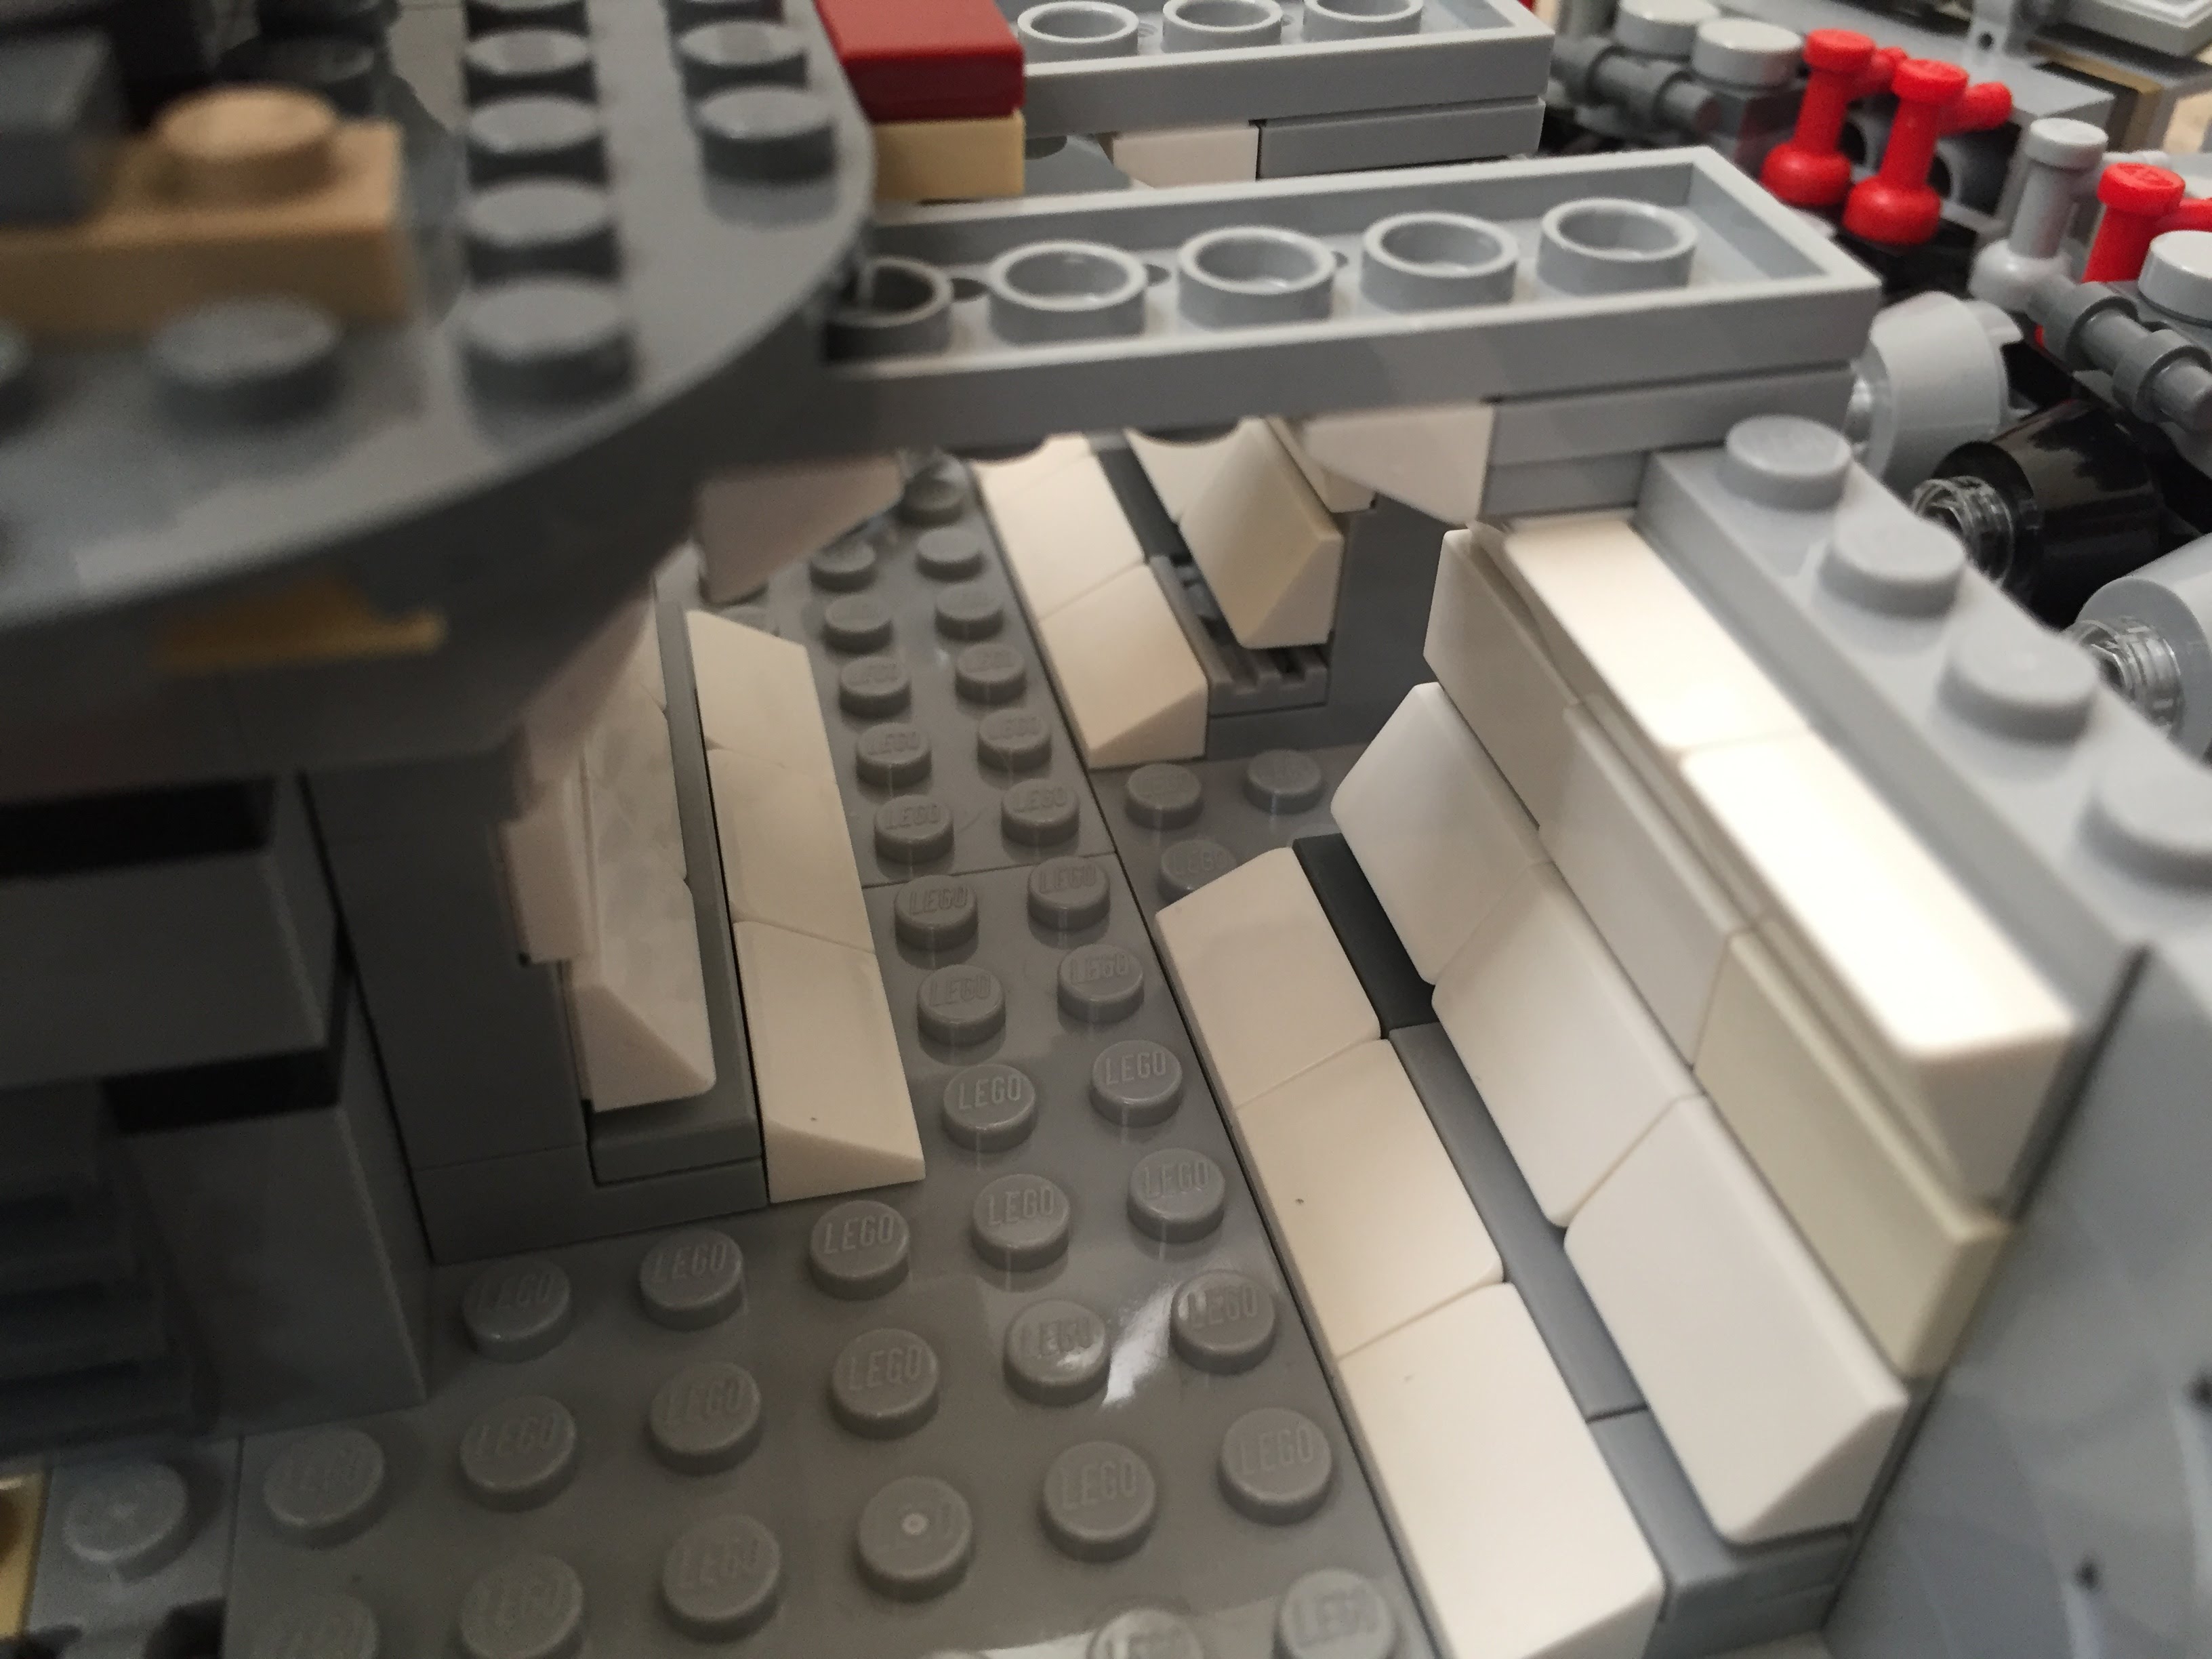
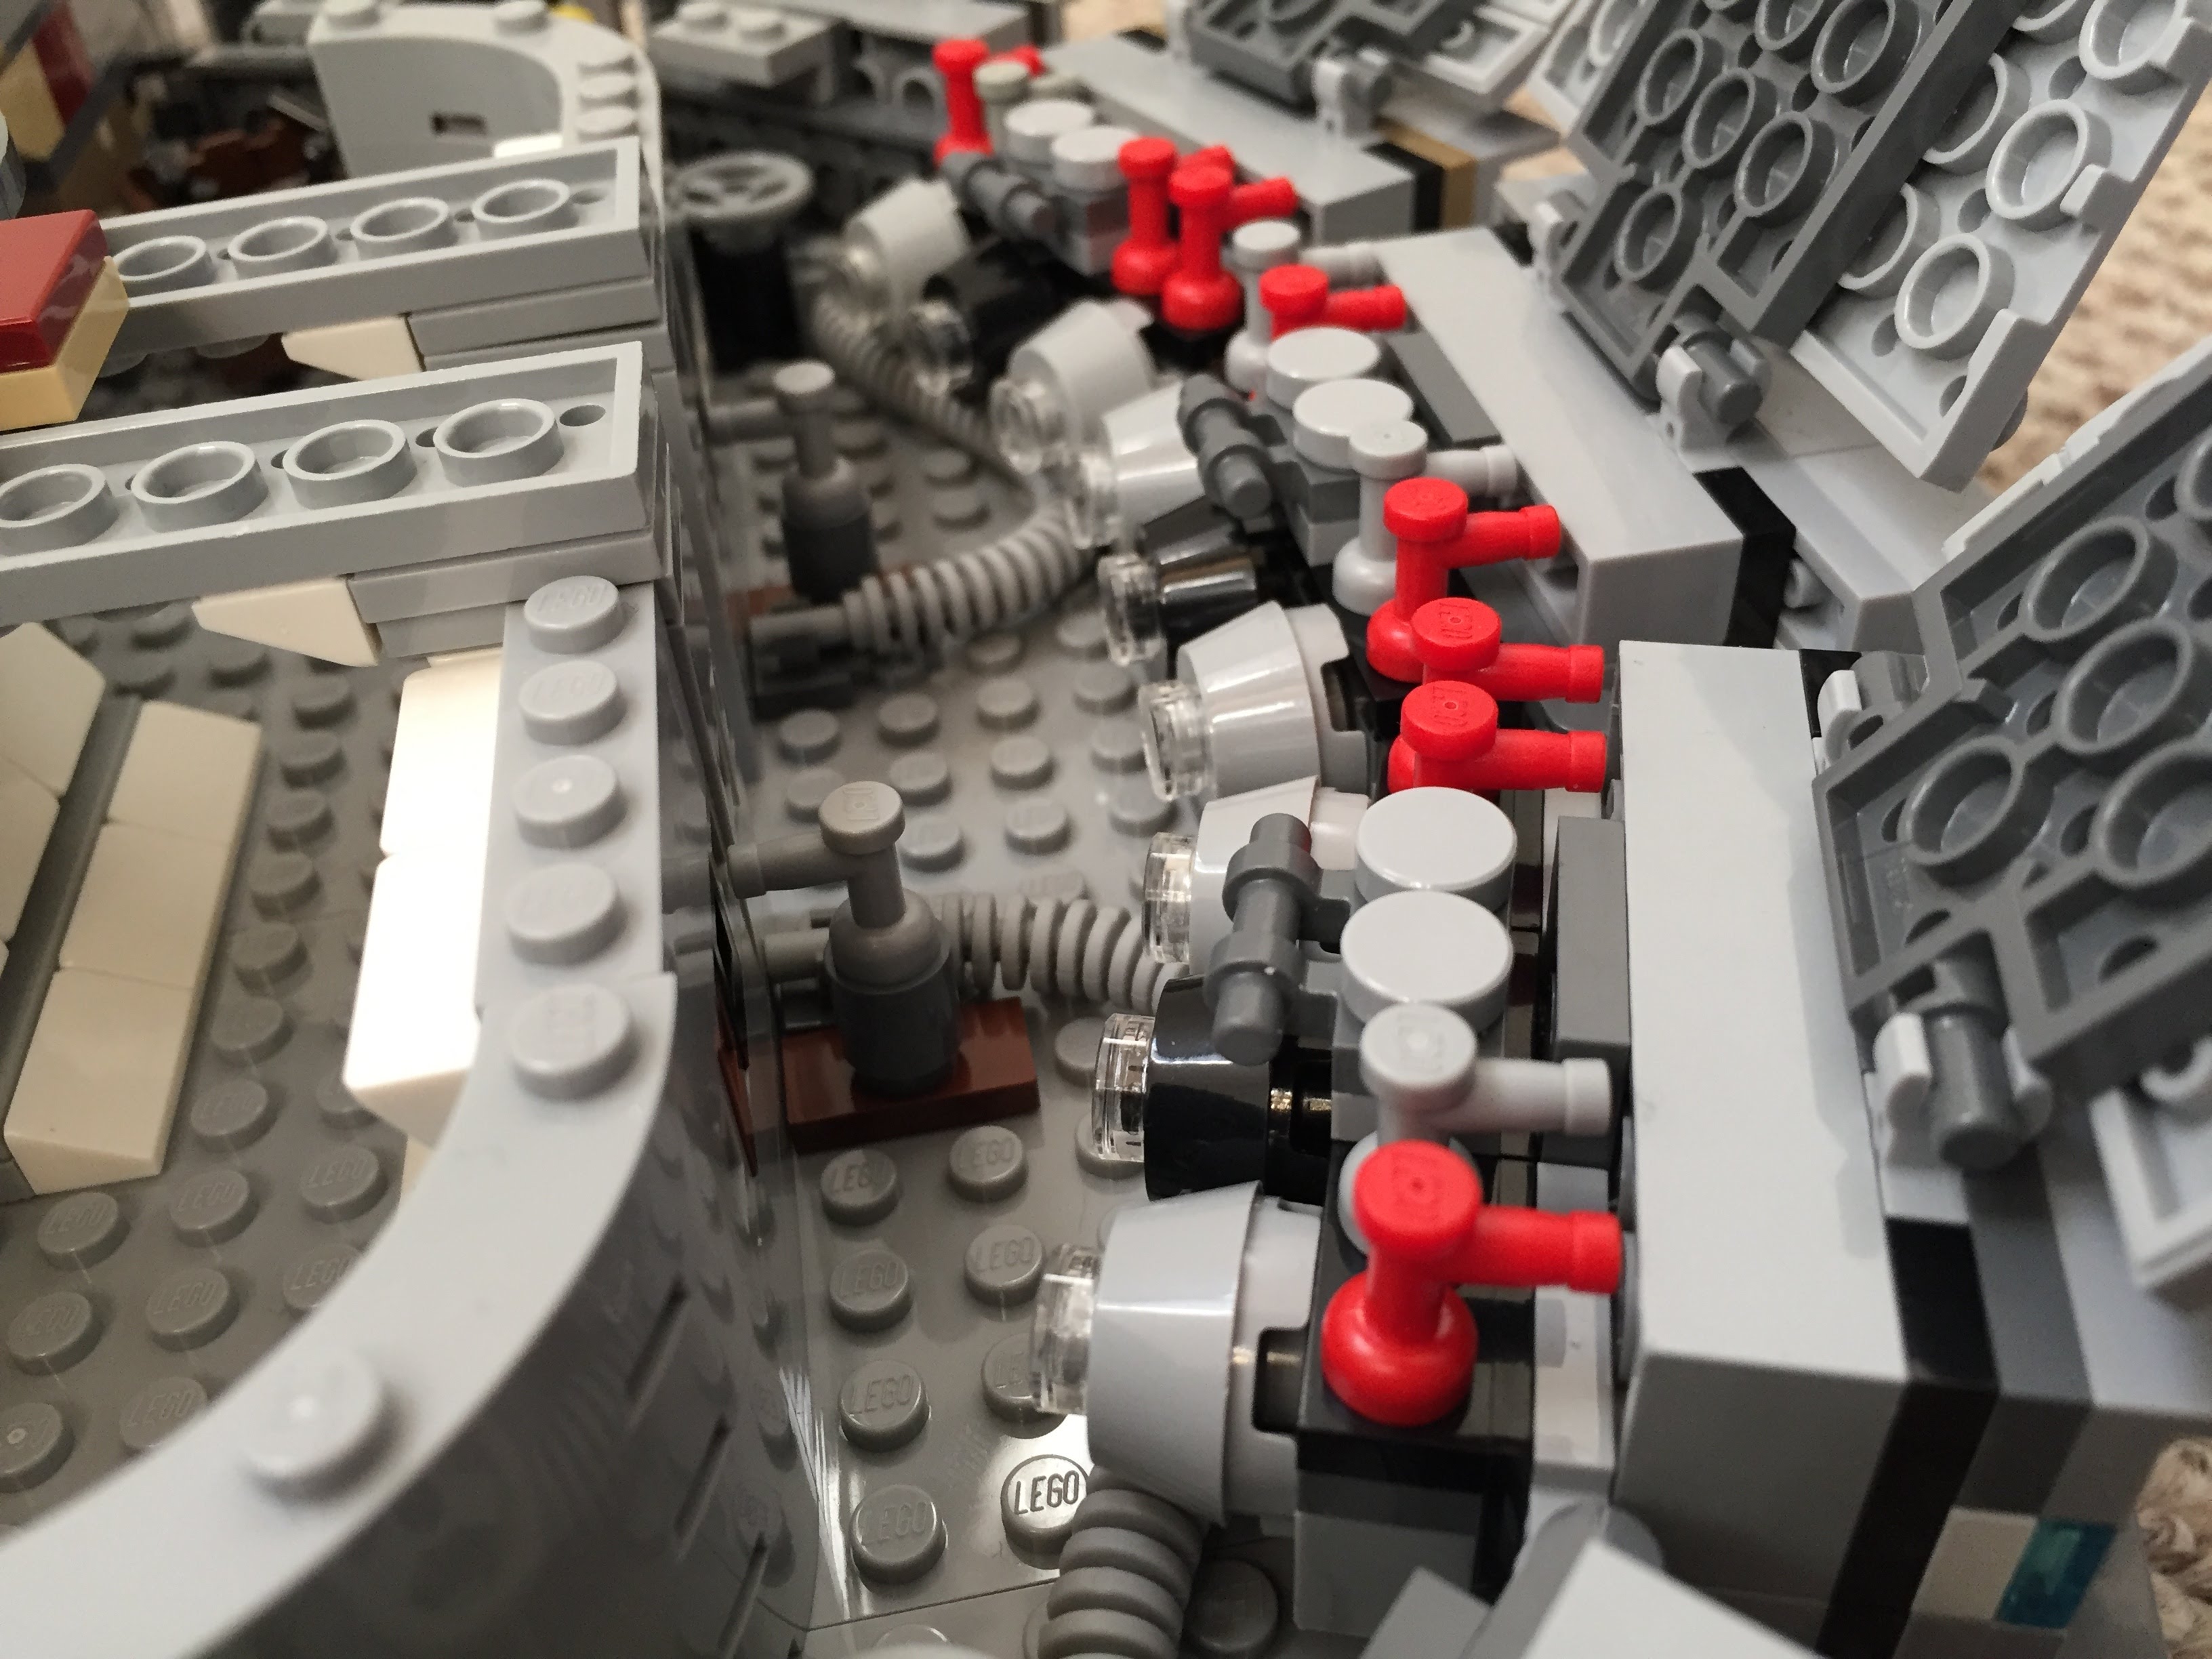
Engine Compartment
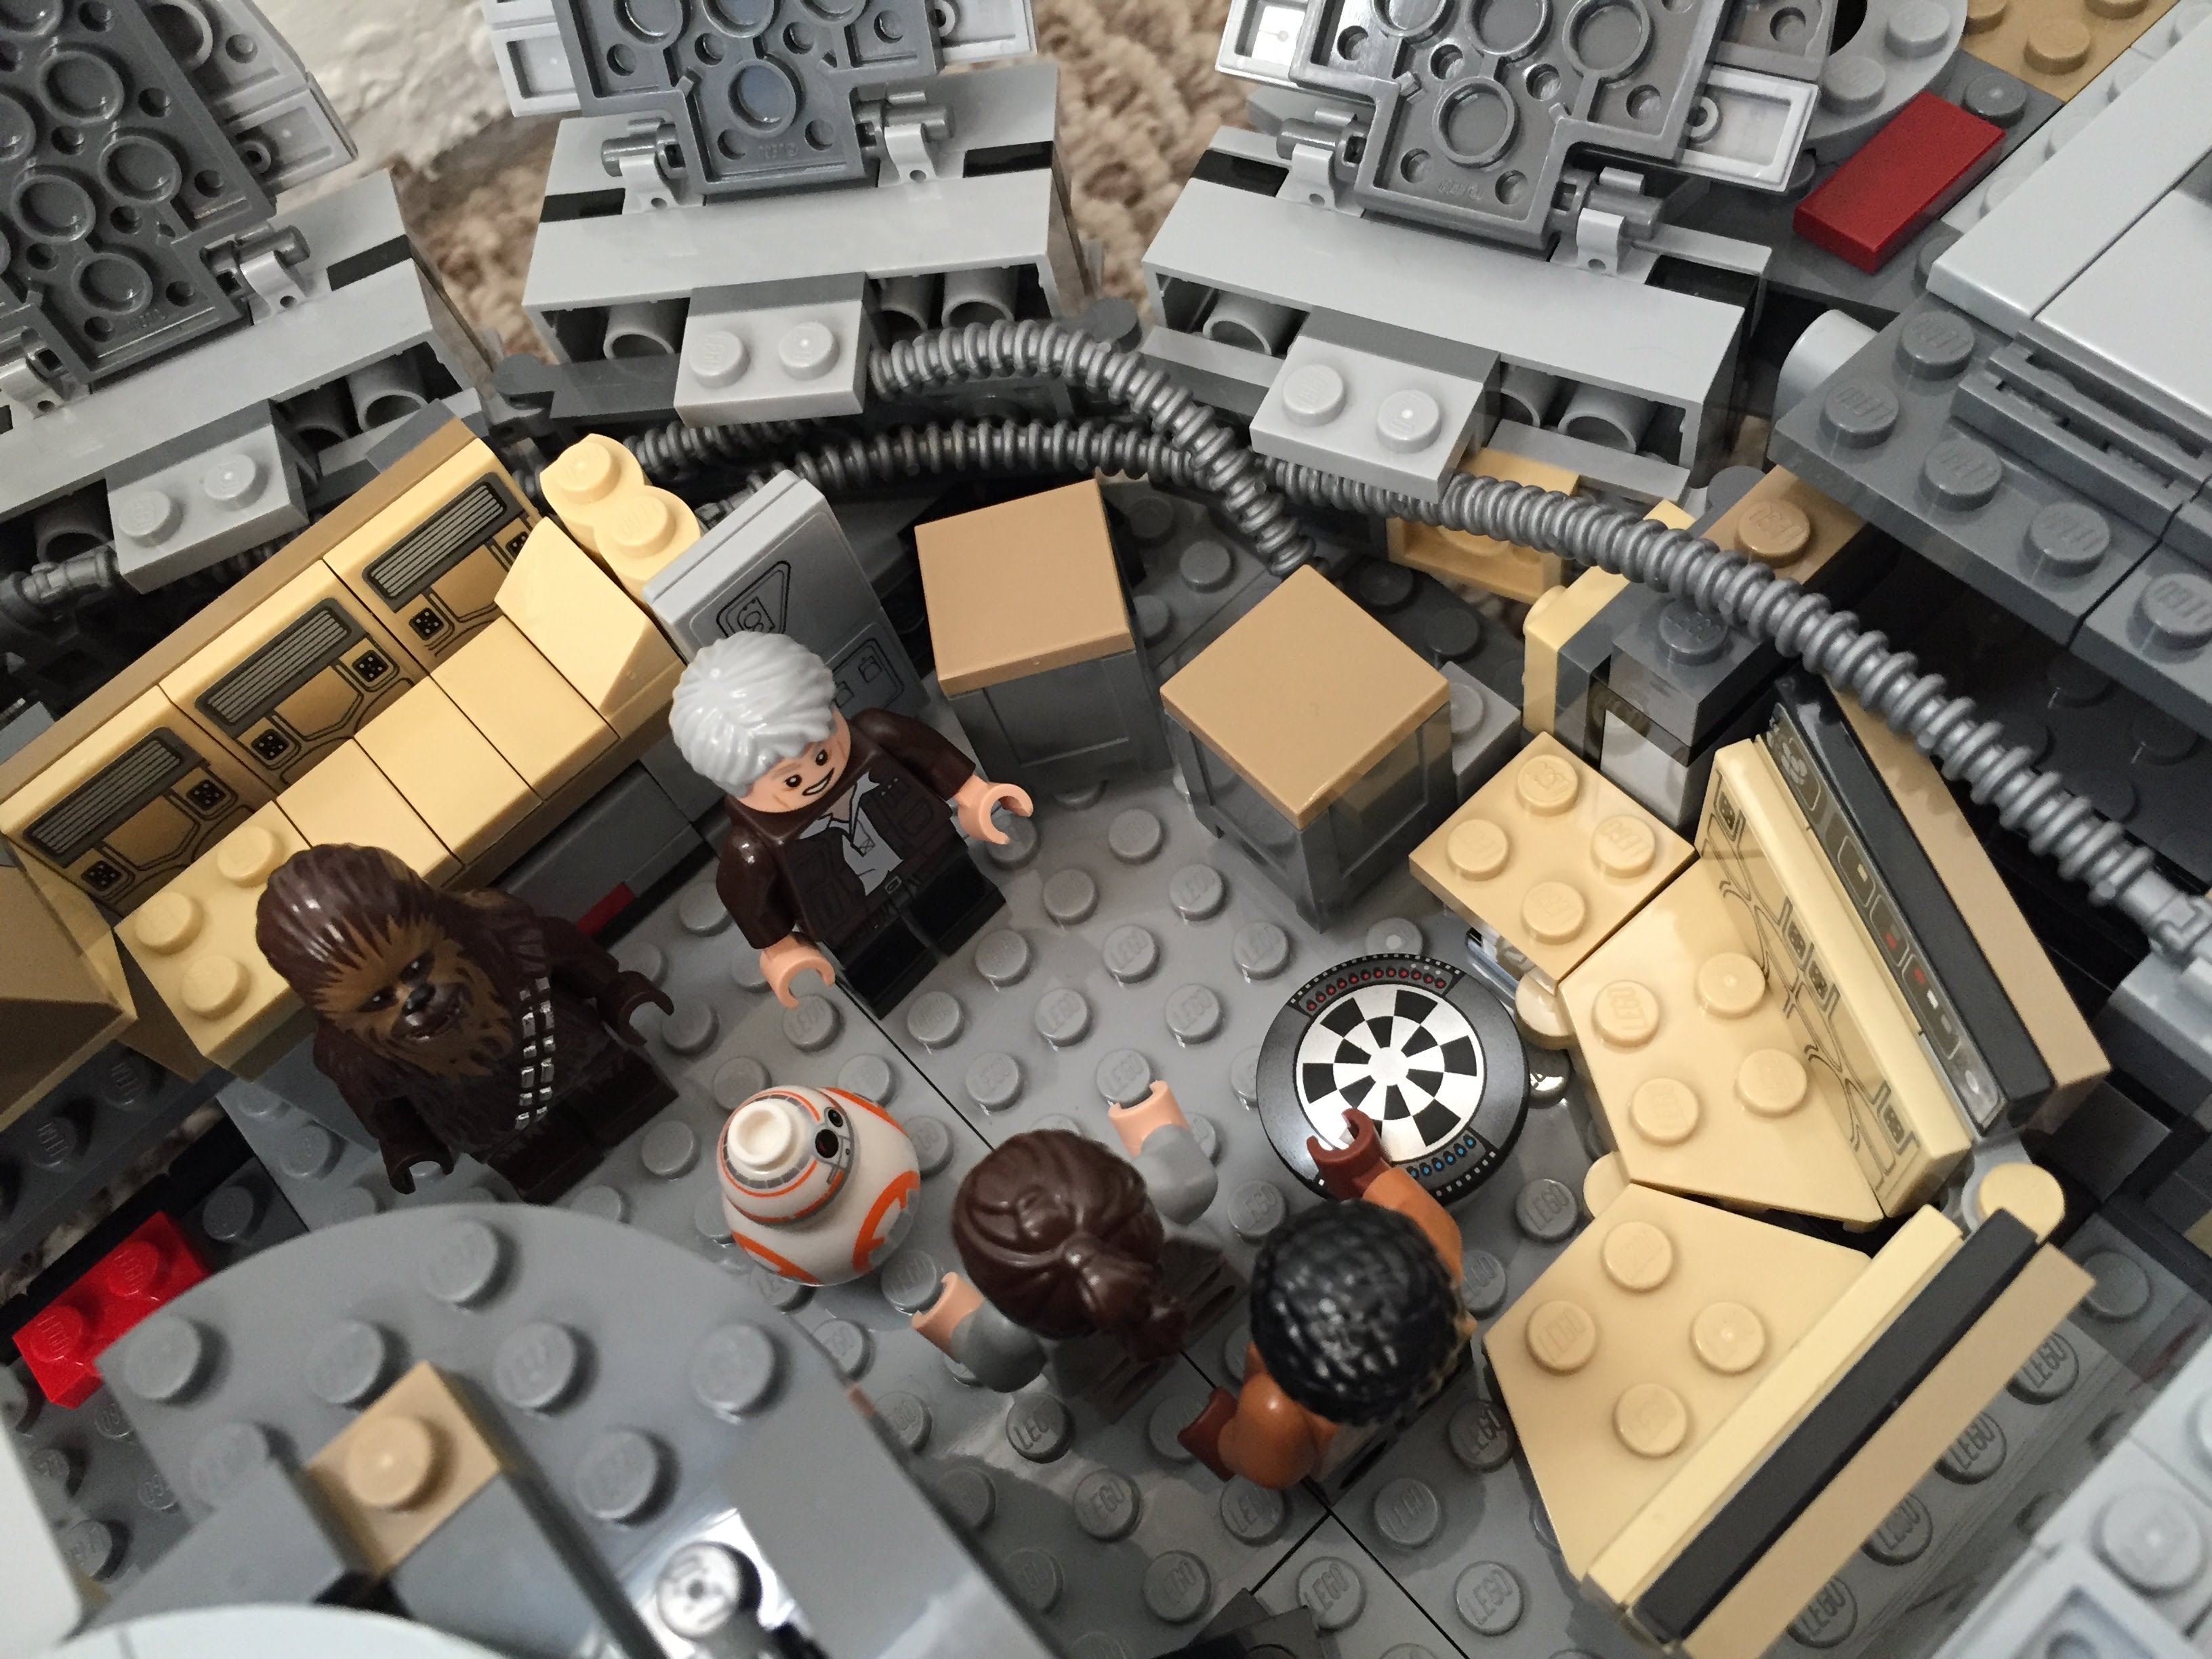
Instead of the Falcon having a monolithic motor, it seems more likely that it would have a segmented, modular aerospike engine. With this in mind, I designed the engine compartment to have a ring of engine modules with supporting hardware, cabling, and pipes. I created a larger, ringed passage way with an entrance way leading into the engine compartment.
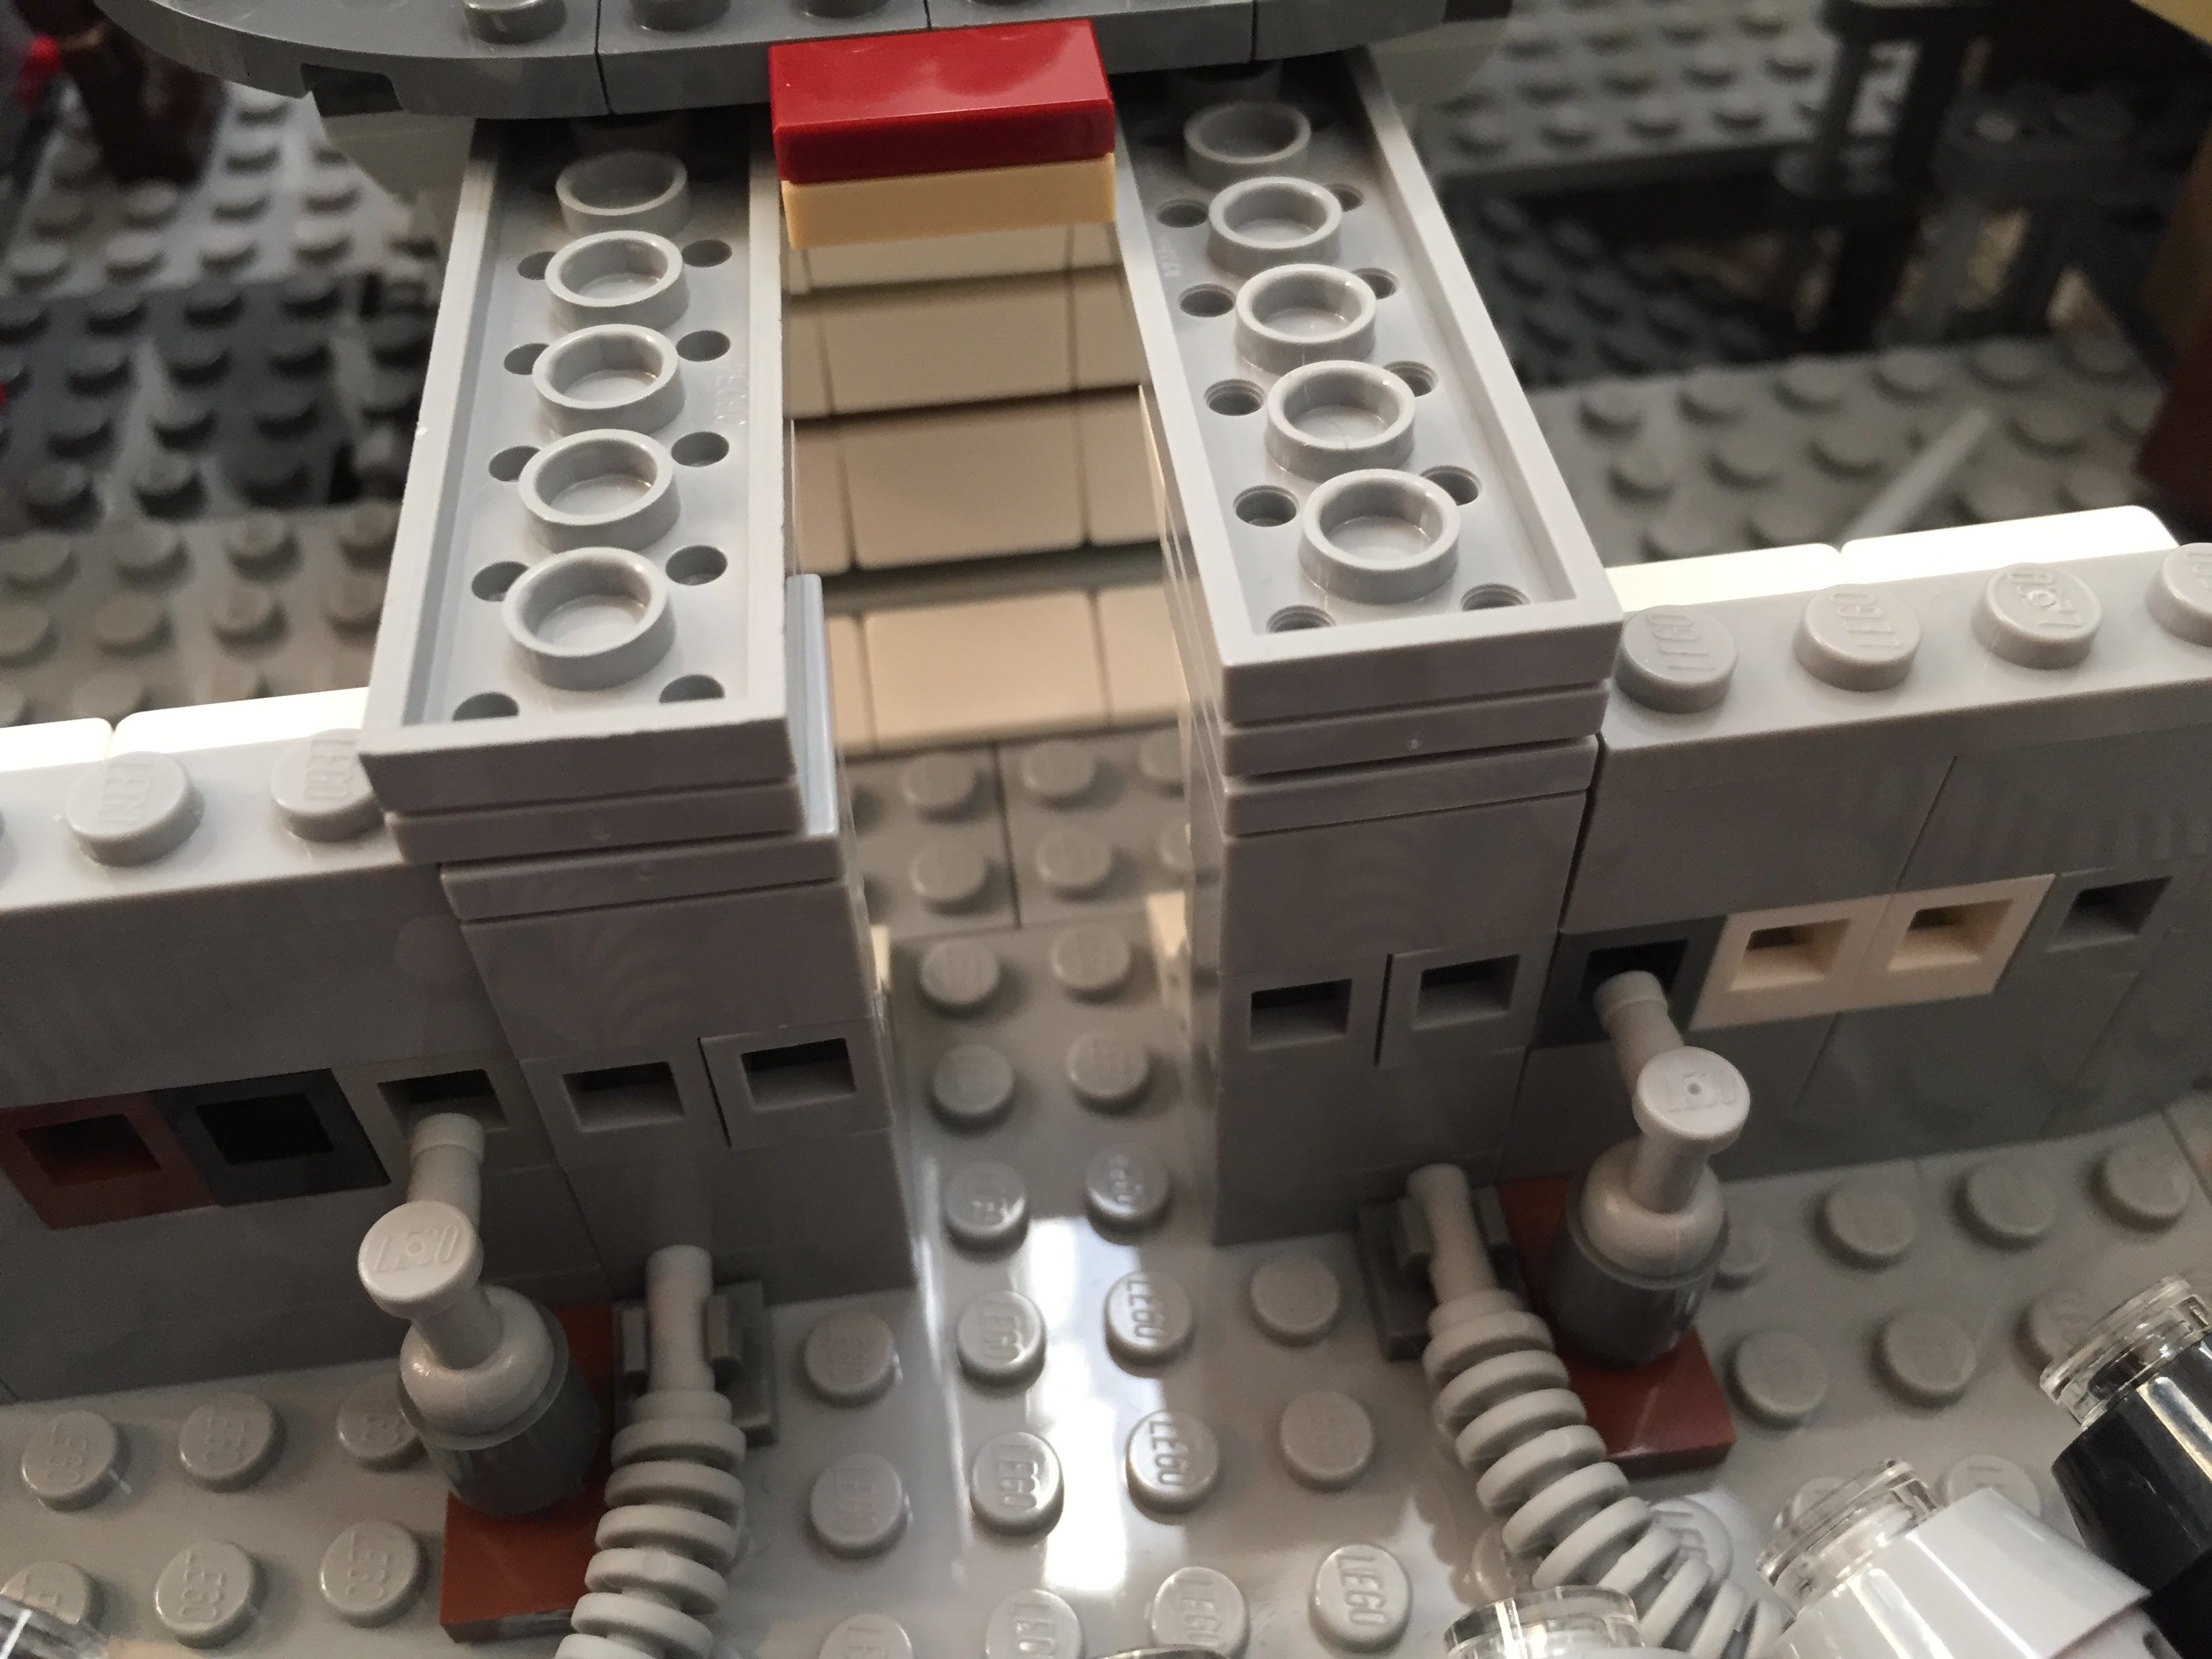
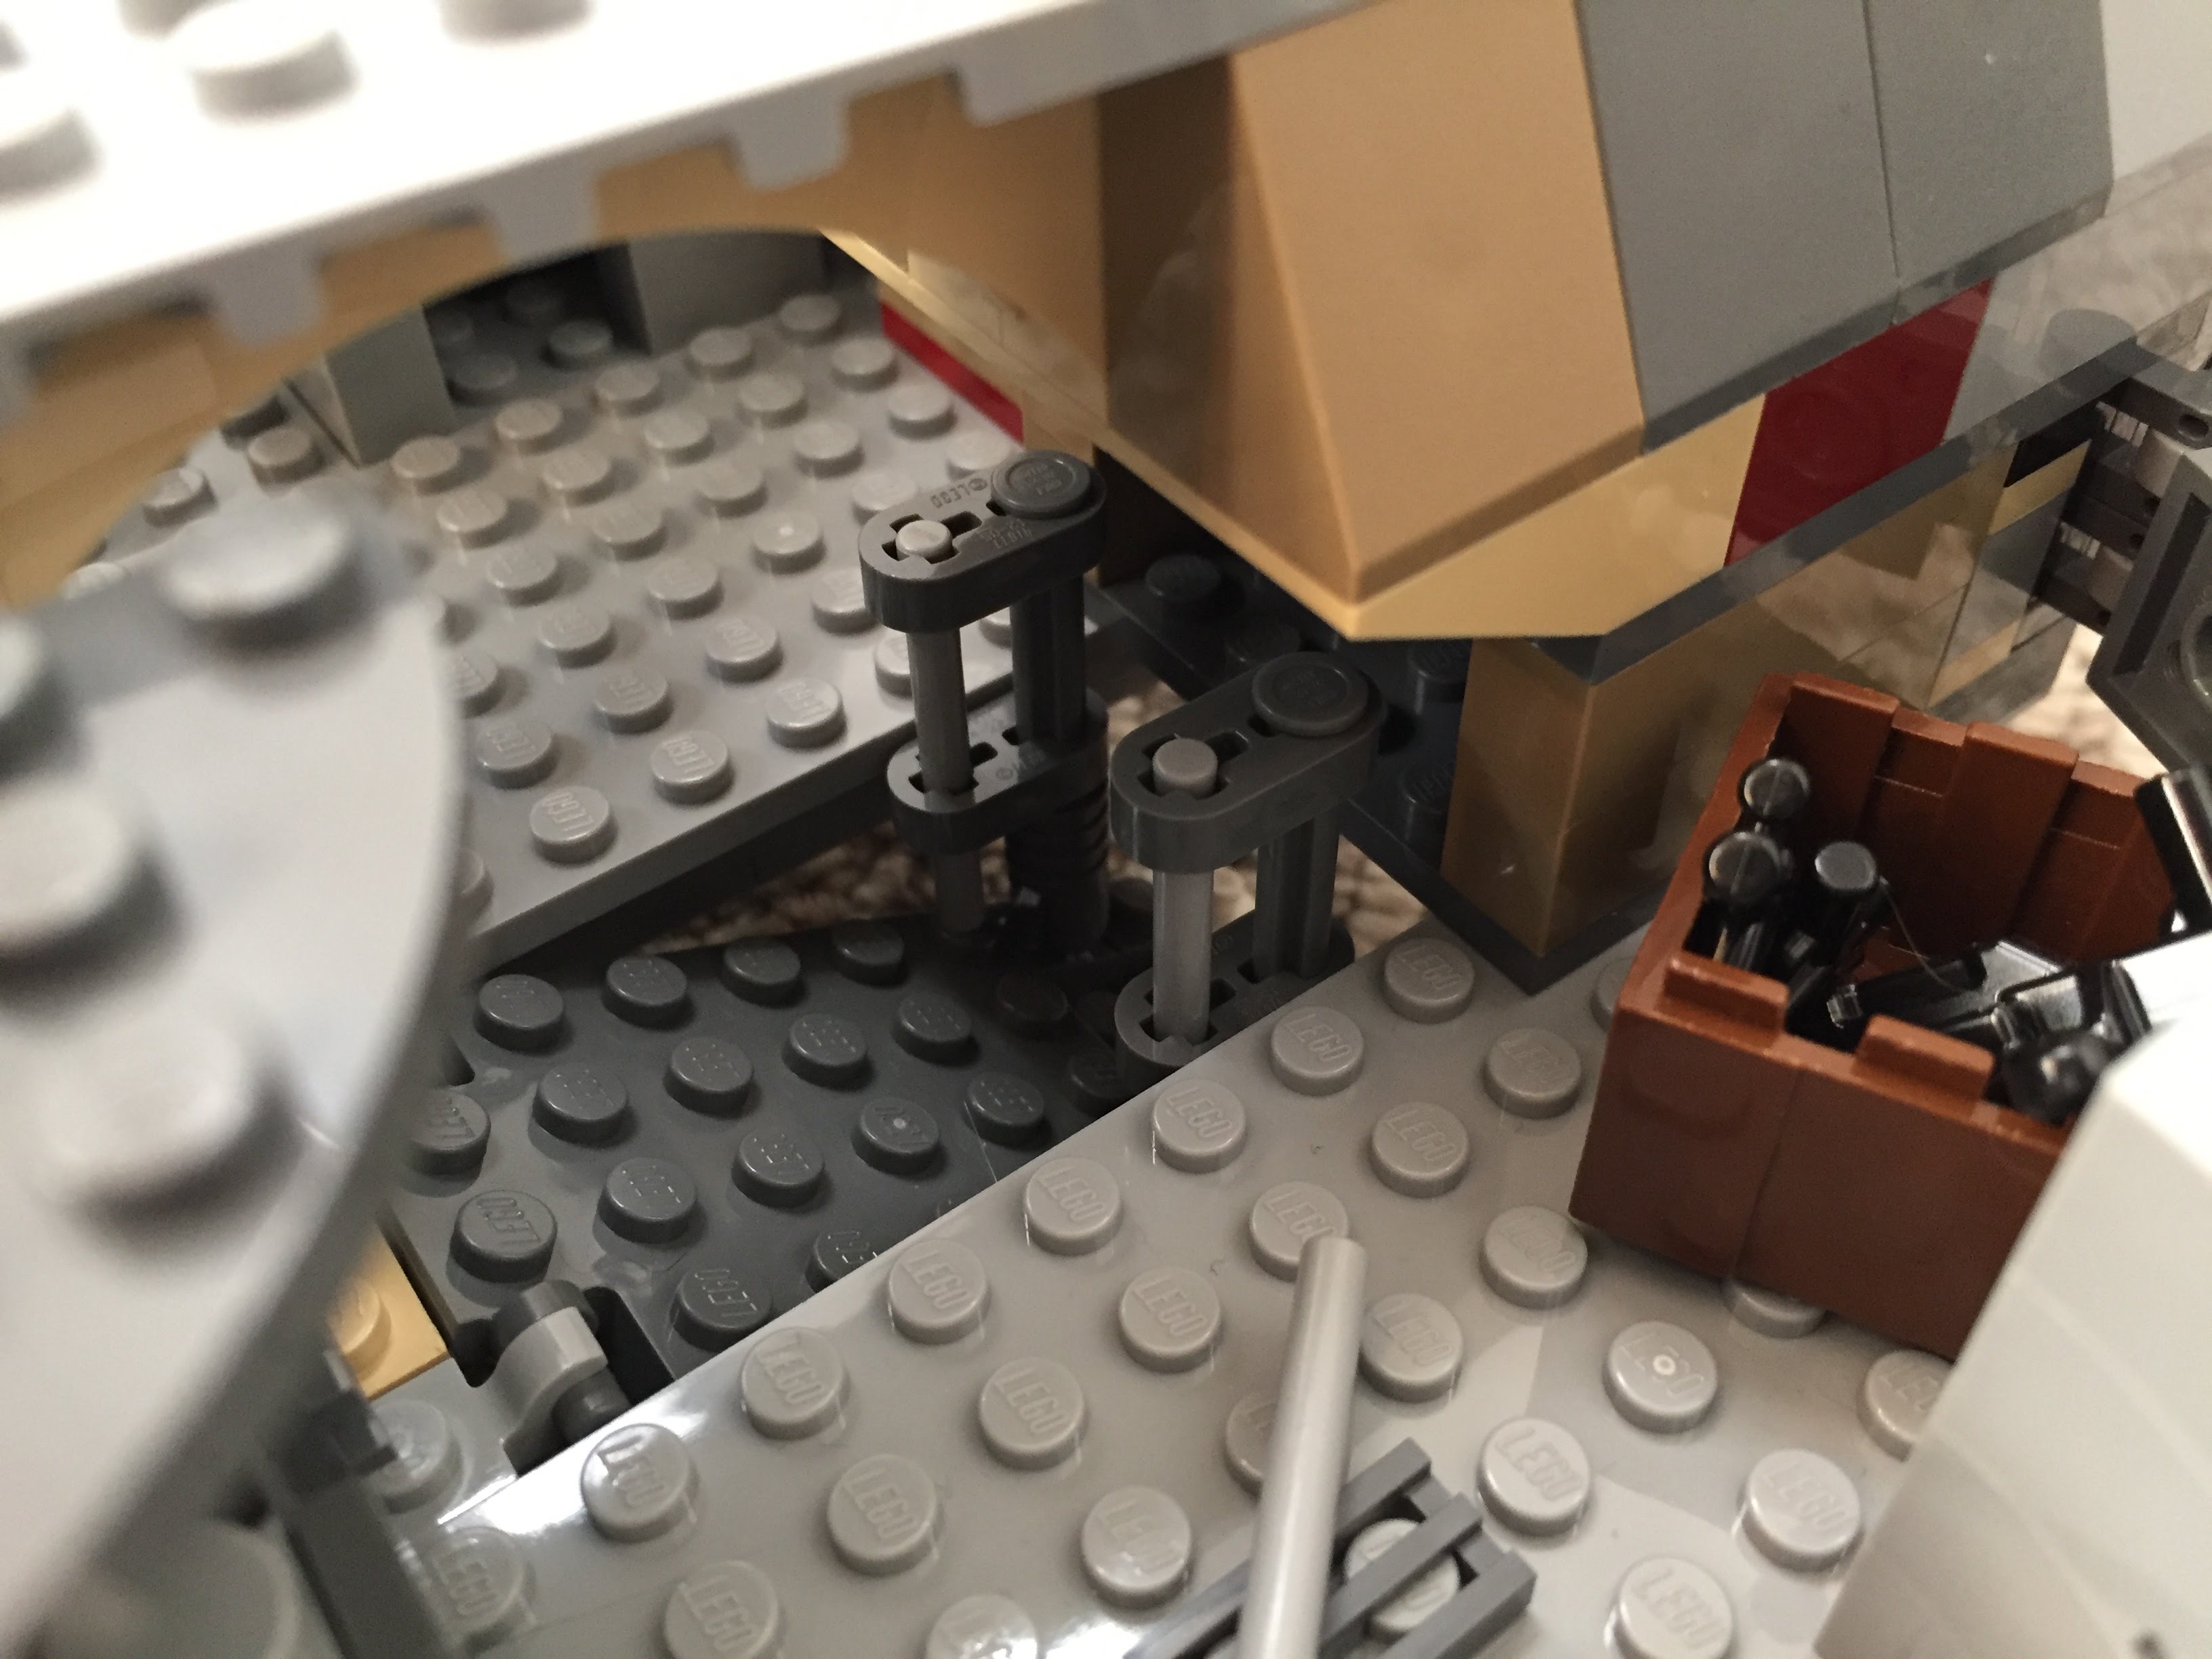
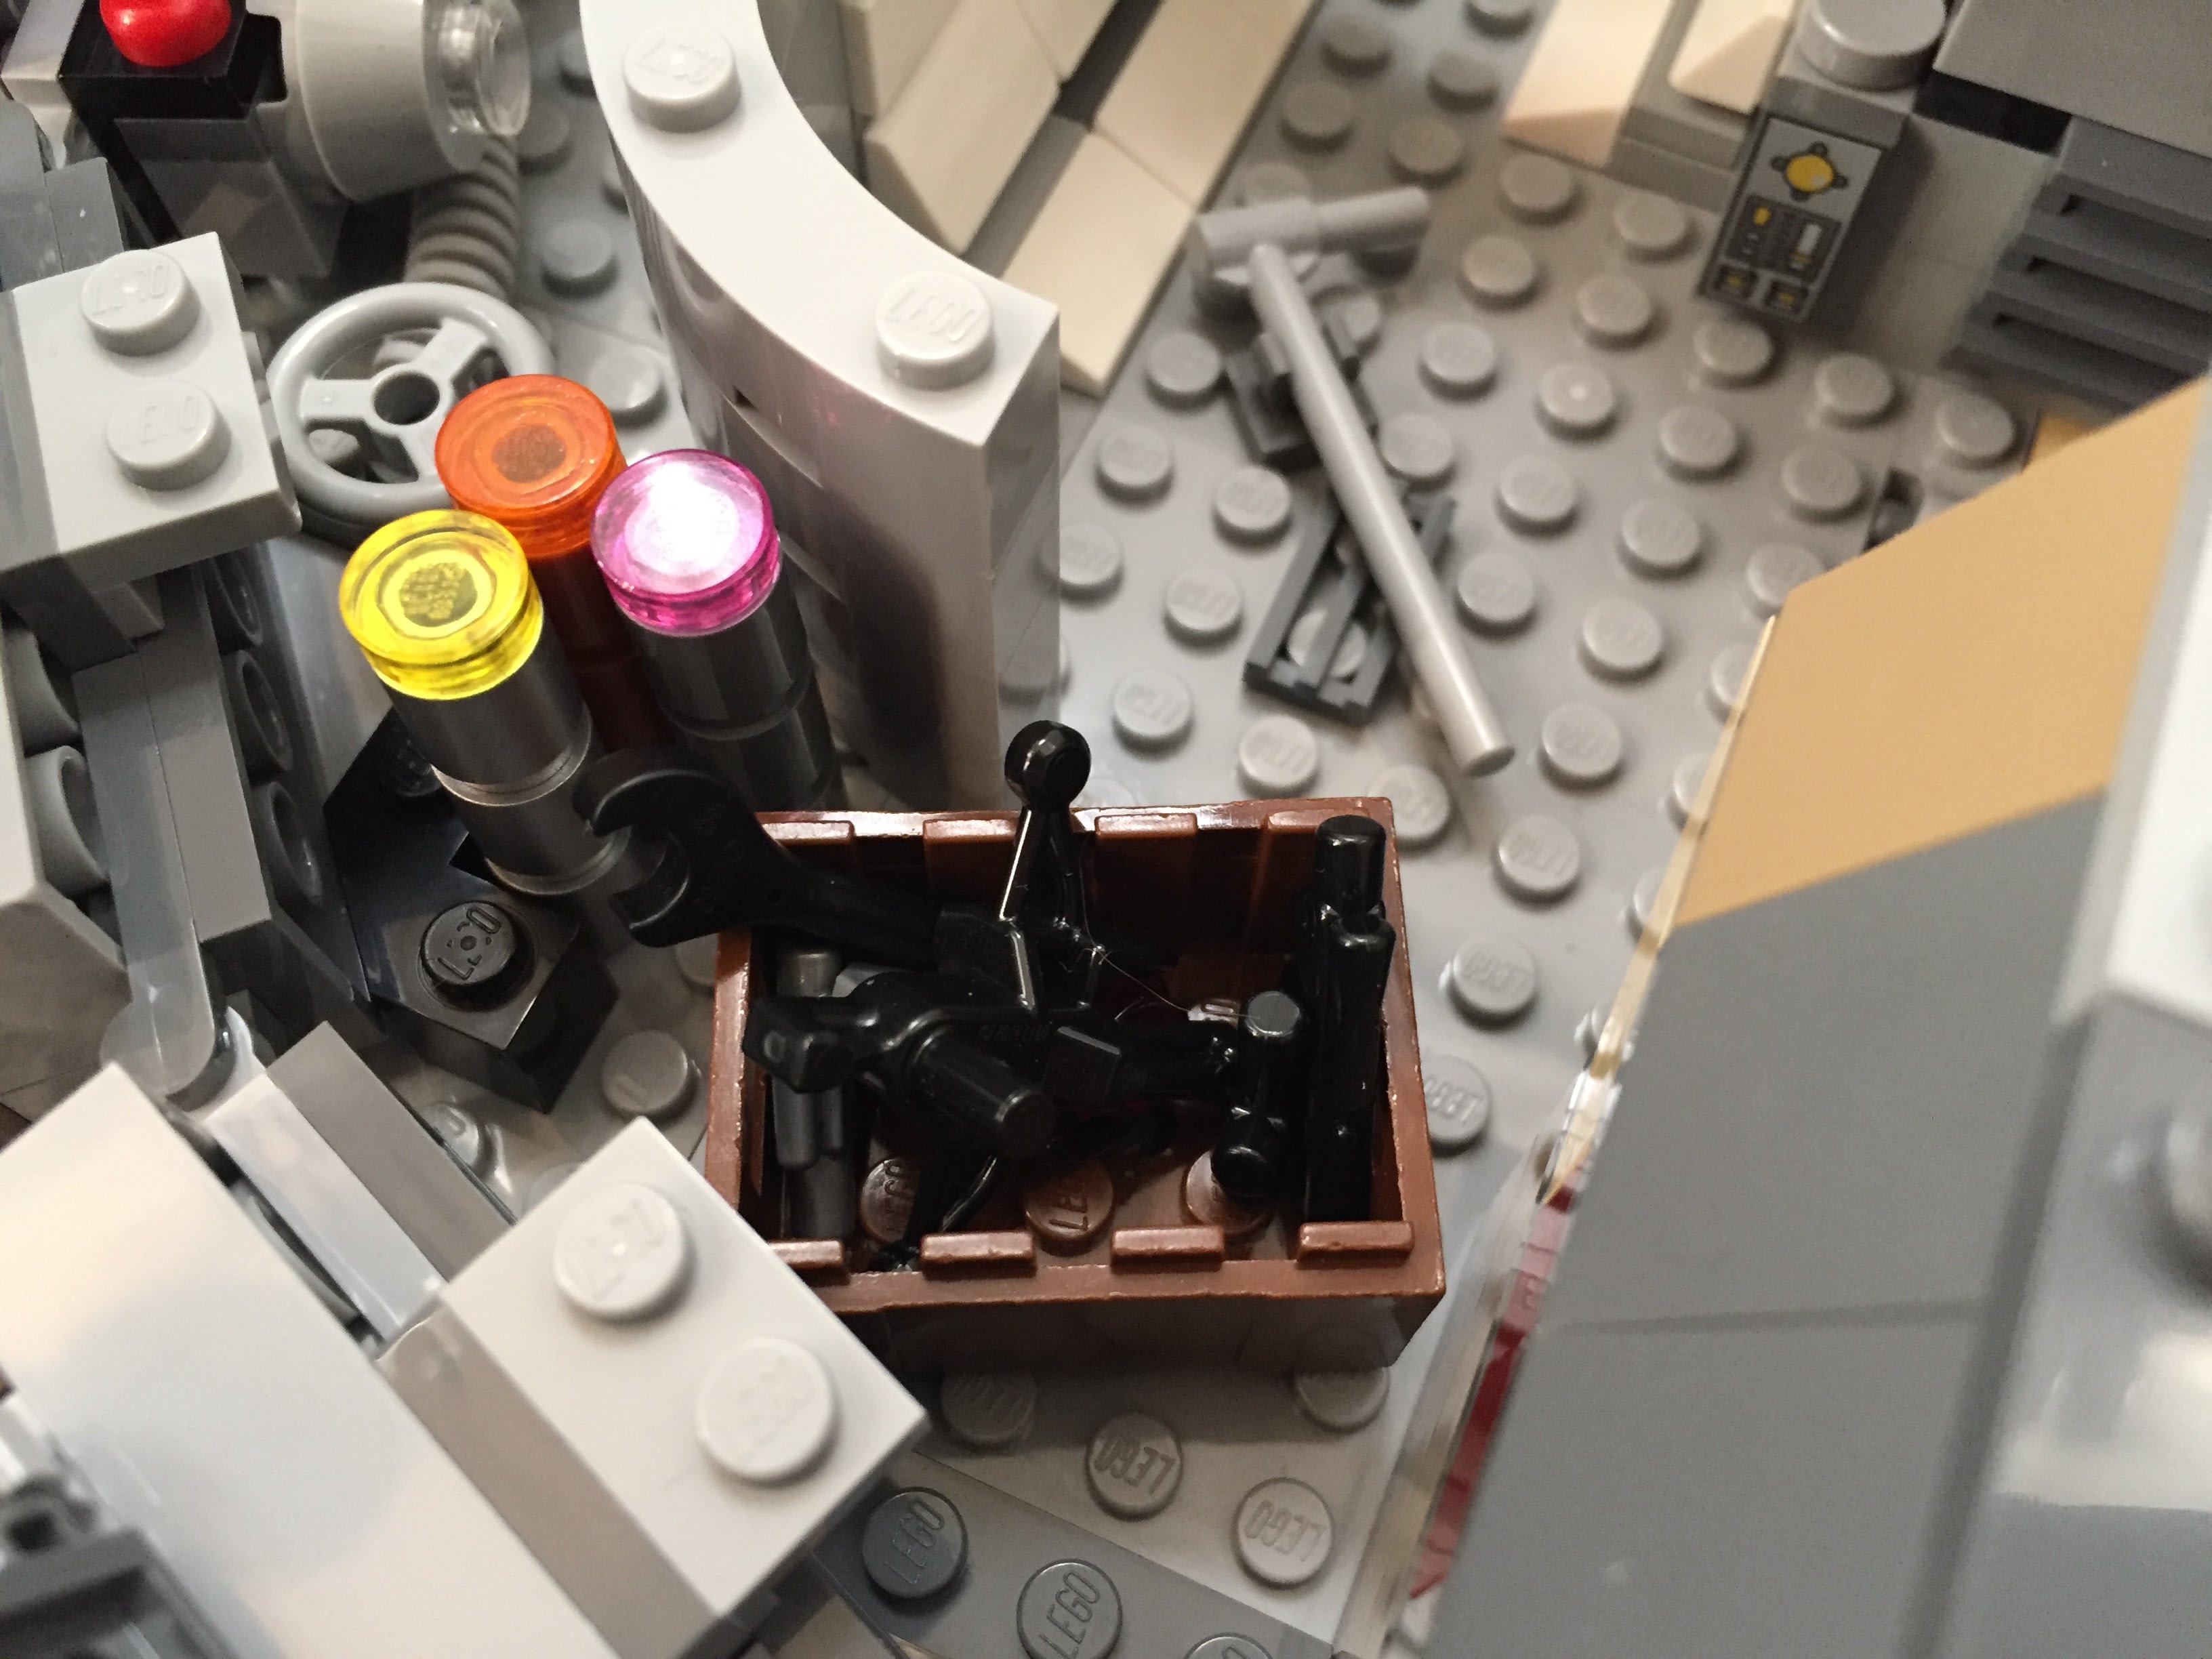
Entrance Ramp and Other Compartments
I stole the hydraulics from 75103: First Order Transporter and added to the Falcon’s entrance ramp (which makes the ramp look like the Kenner Millennium Falcon vehicle from the original Star Wars action figure line). Also, I shifted the entrance ramp one stud out from the central gunner turret assembly. There are two side compartments–one for storage with weapons in a crate, and one for another bunk (with a copy of the Death Star plans).
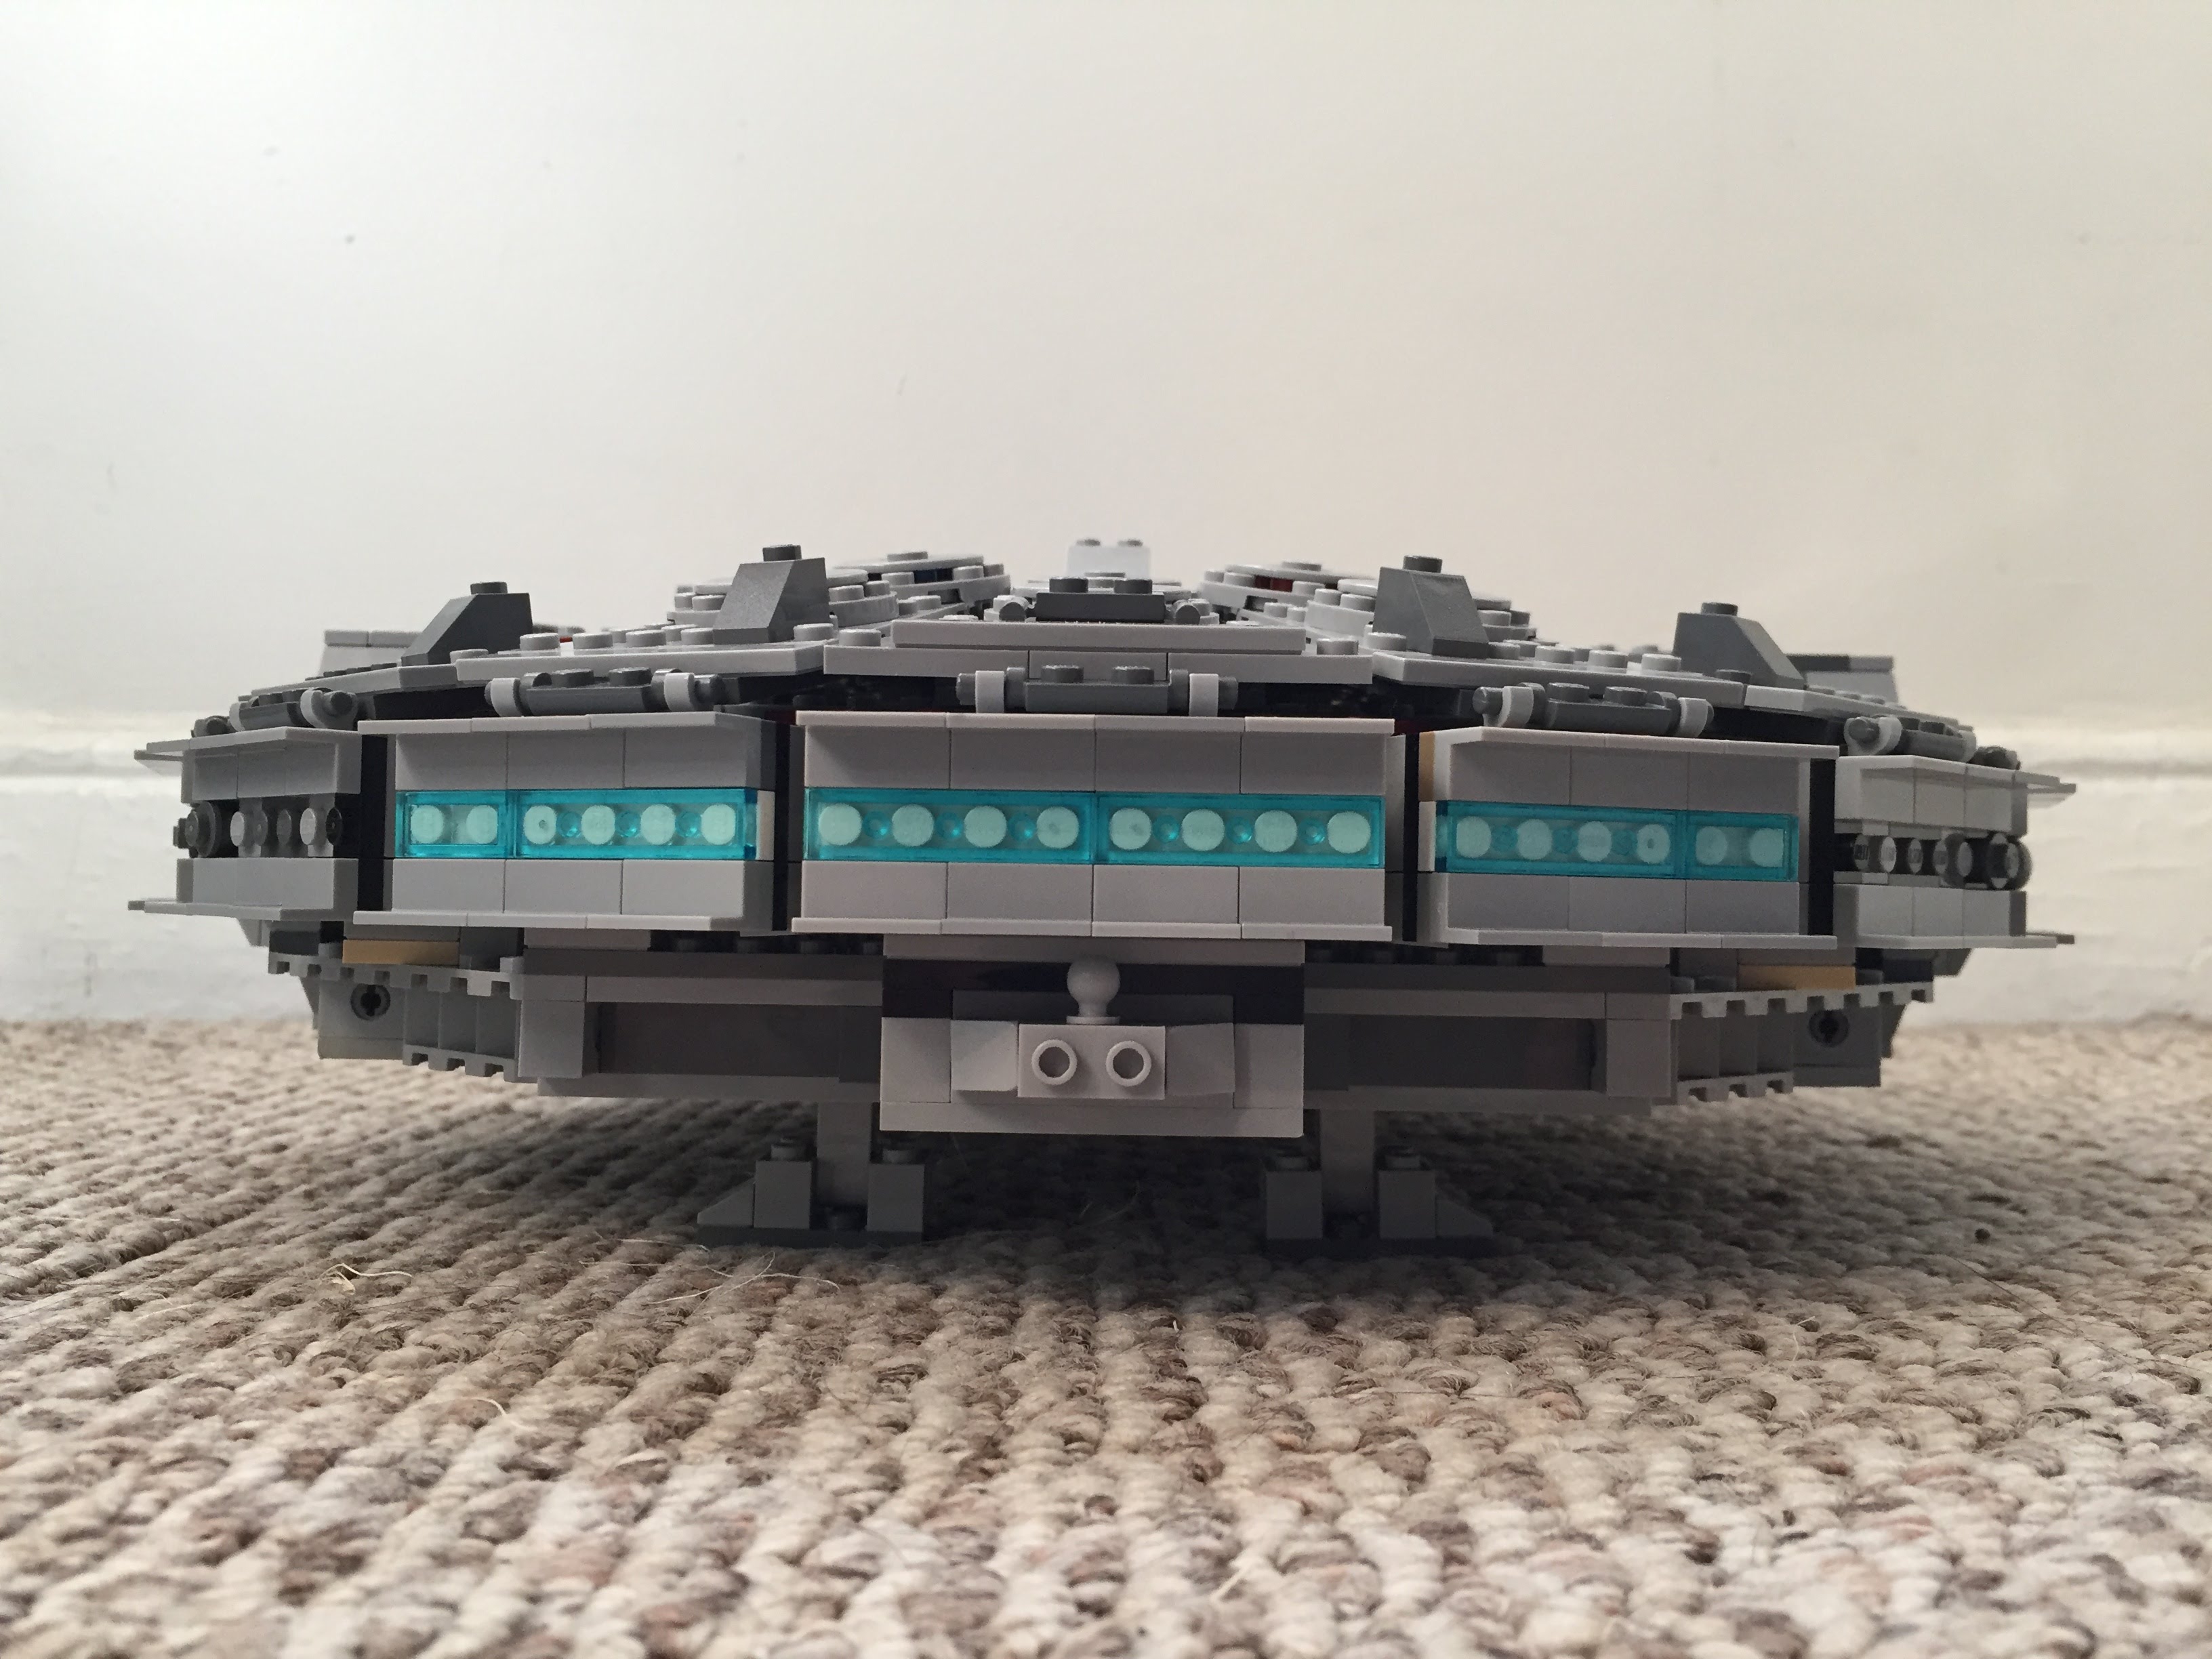
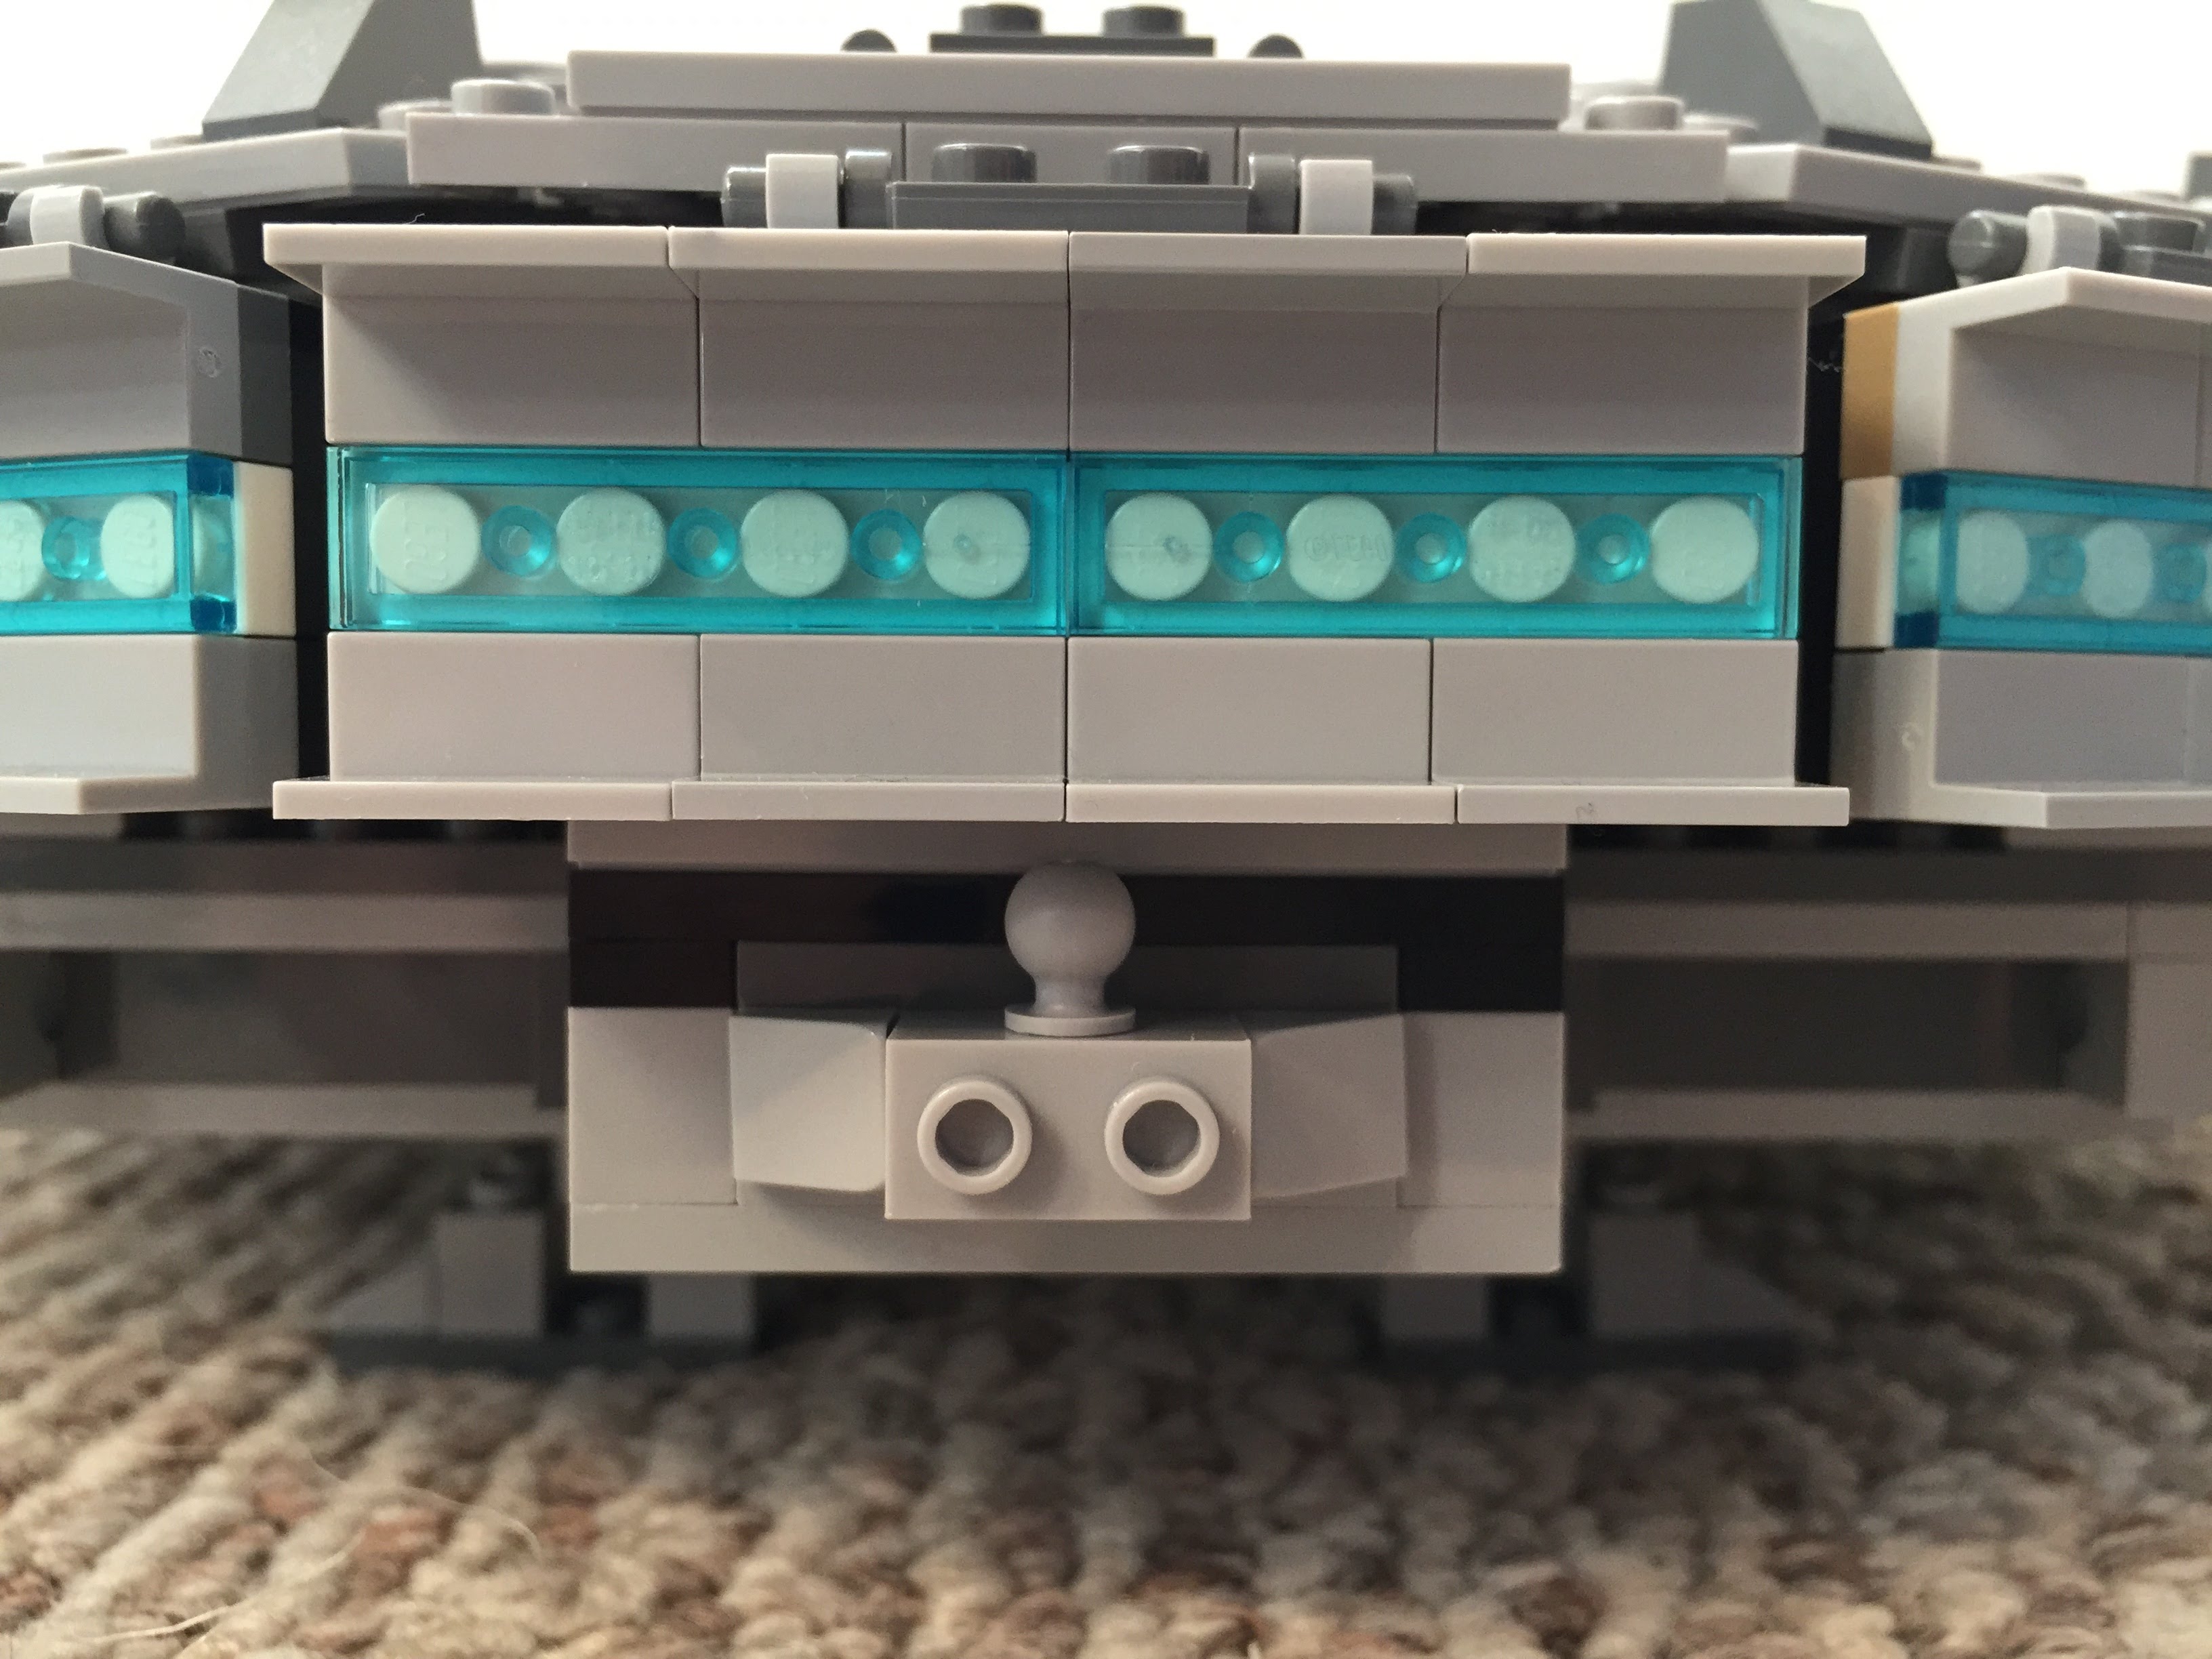
New Engine Exhaust and a Little Joke
Instead of using the ribbed, transparent blue tube that comes with 75105, I opted for white tile backgrounds covered by transparent blue flat tiles (1×2 and 1×4). As a hidden joke, I included a trailer hitch under the engines (isn’t the Millennium Falcon is a big rig in the stars?).
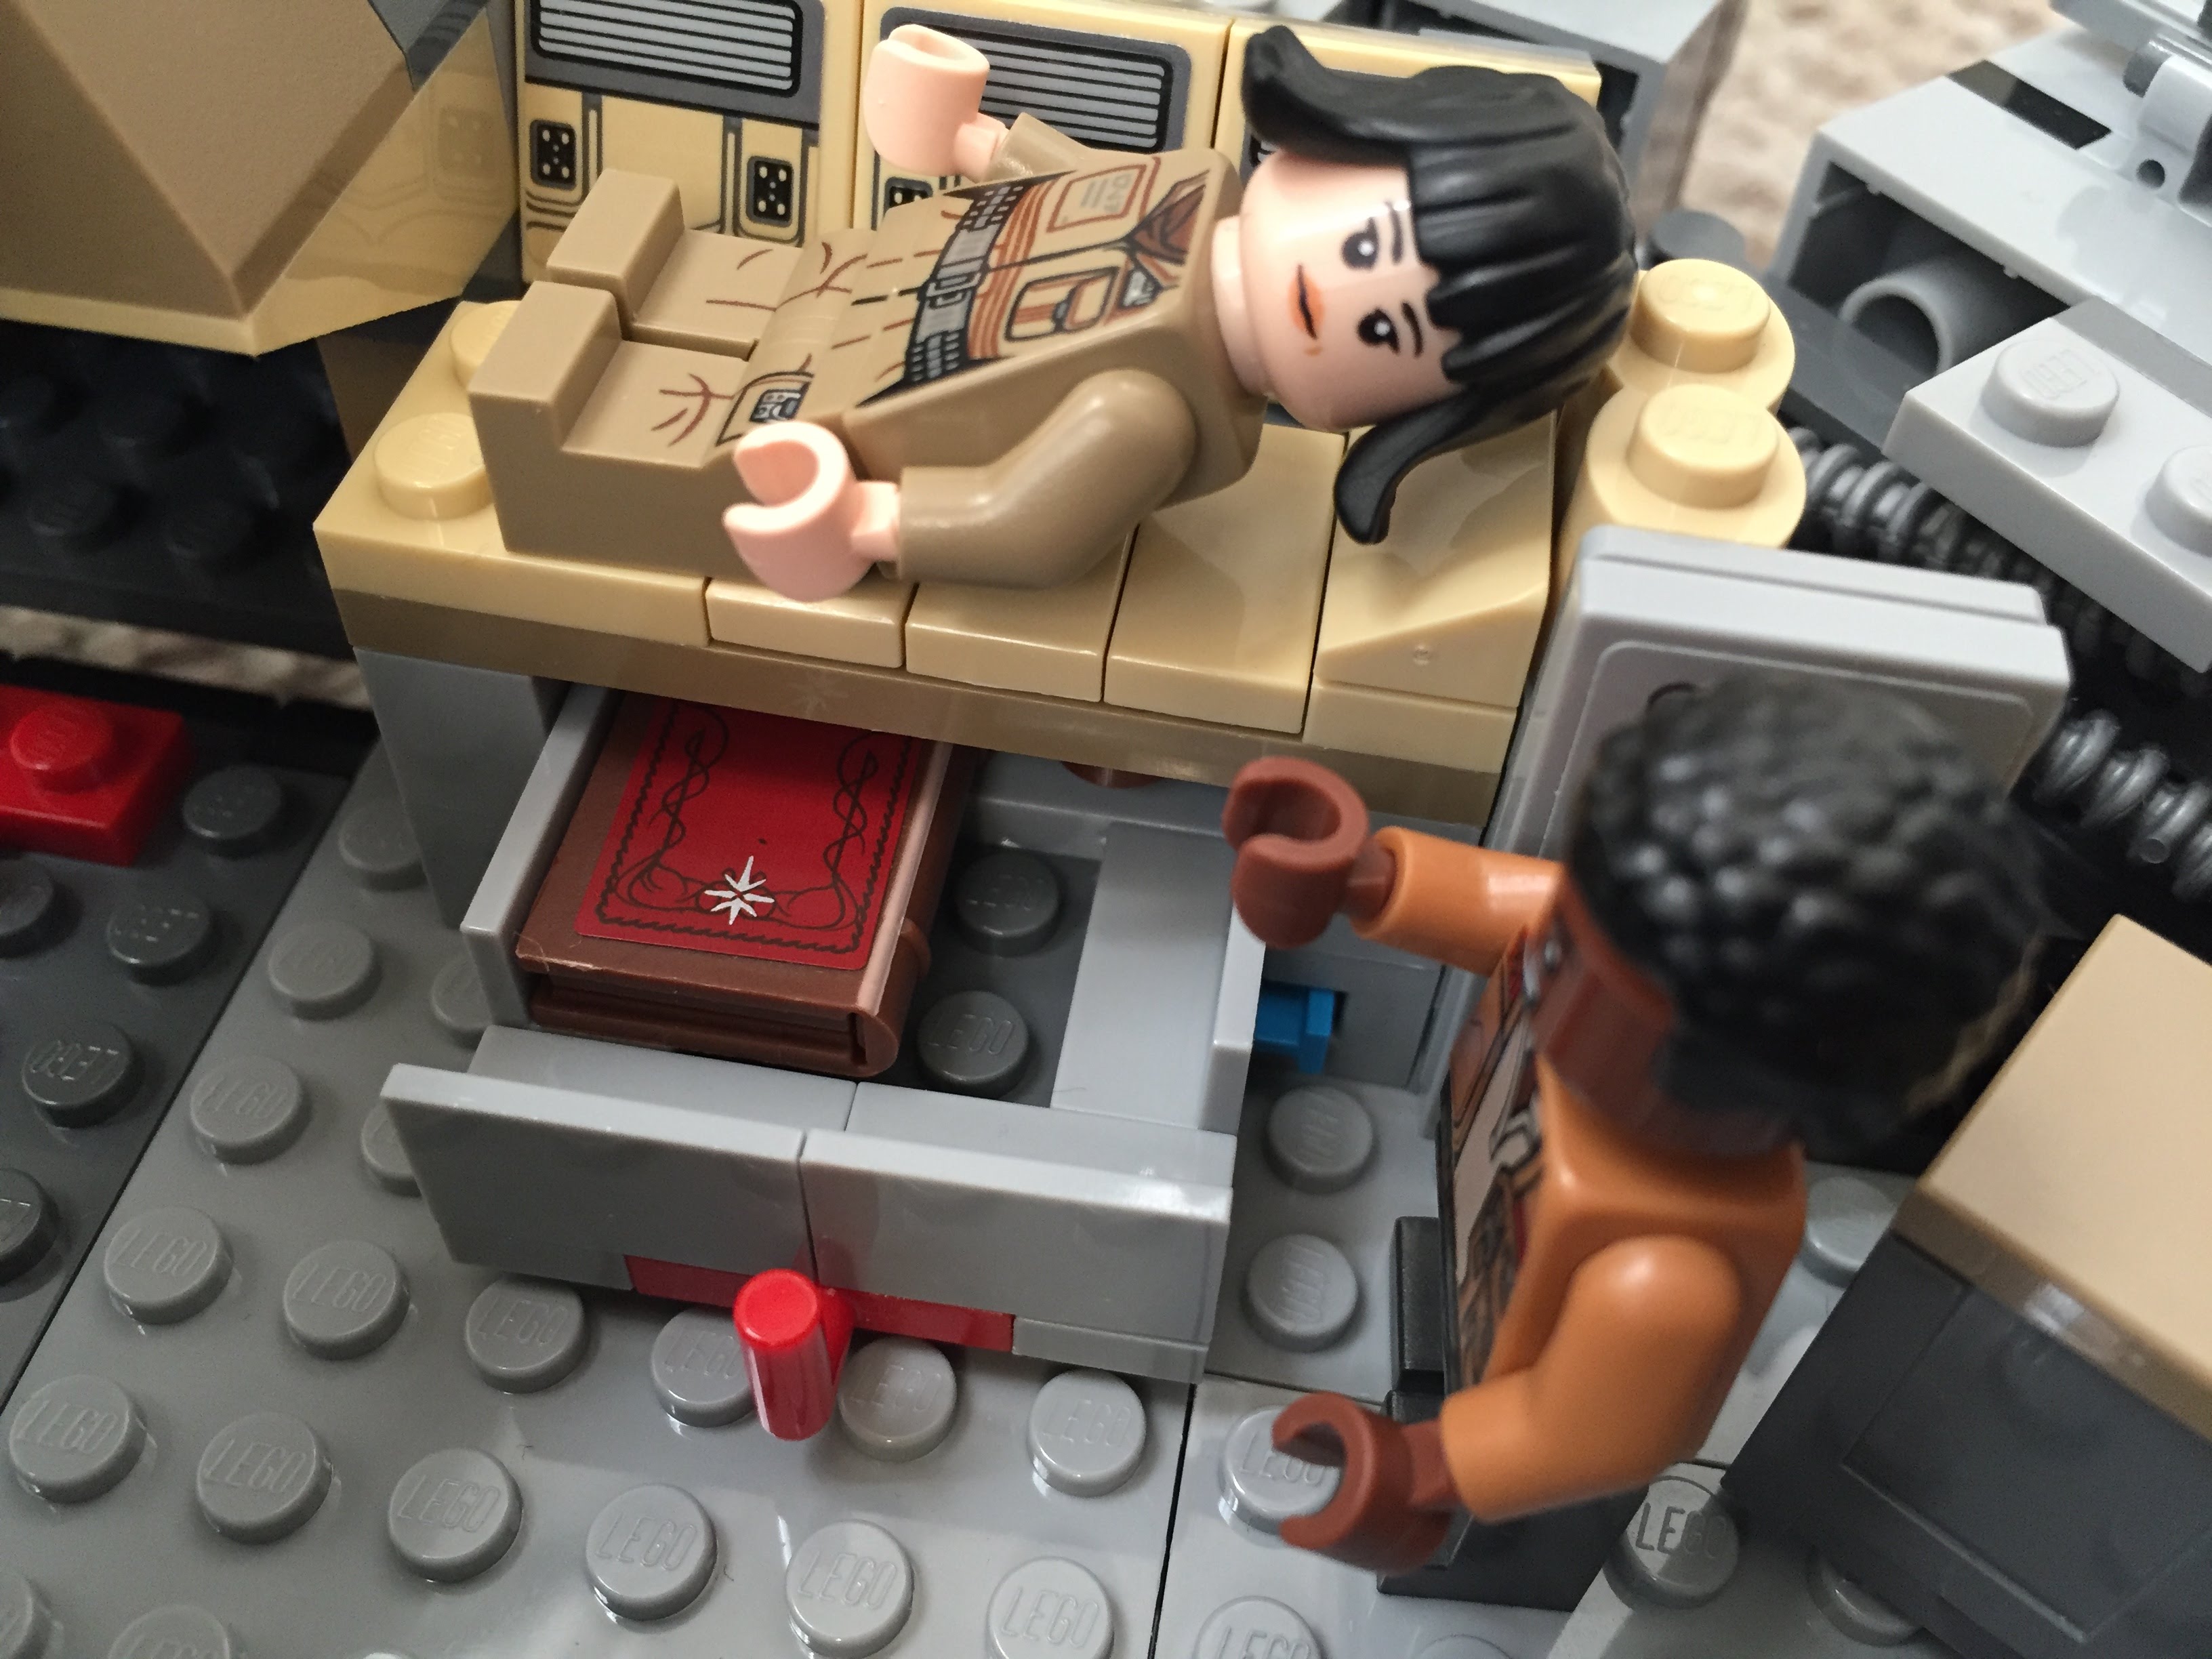
The Last Jedi Update
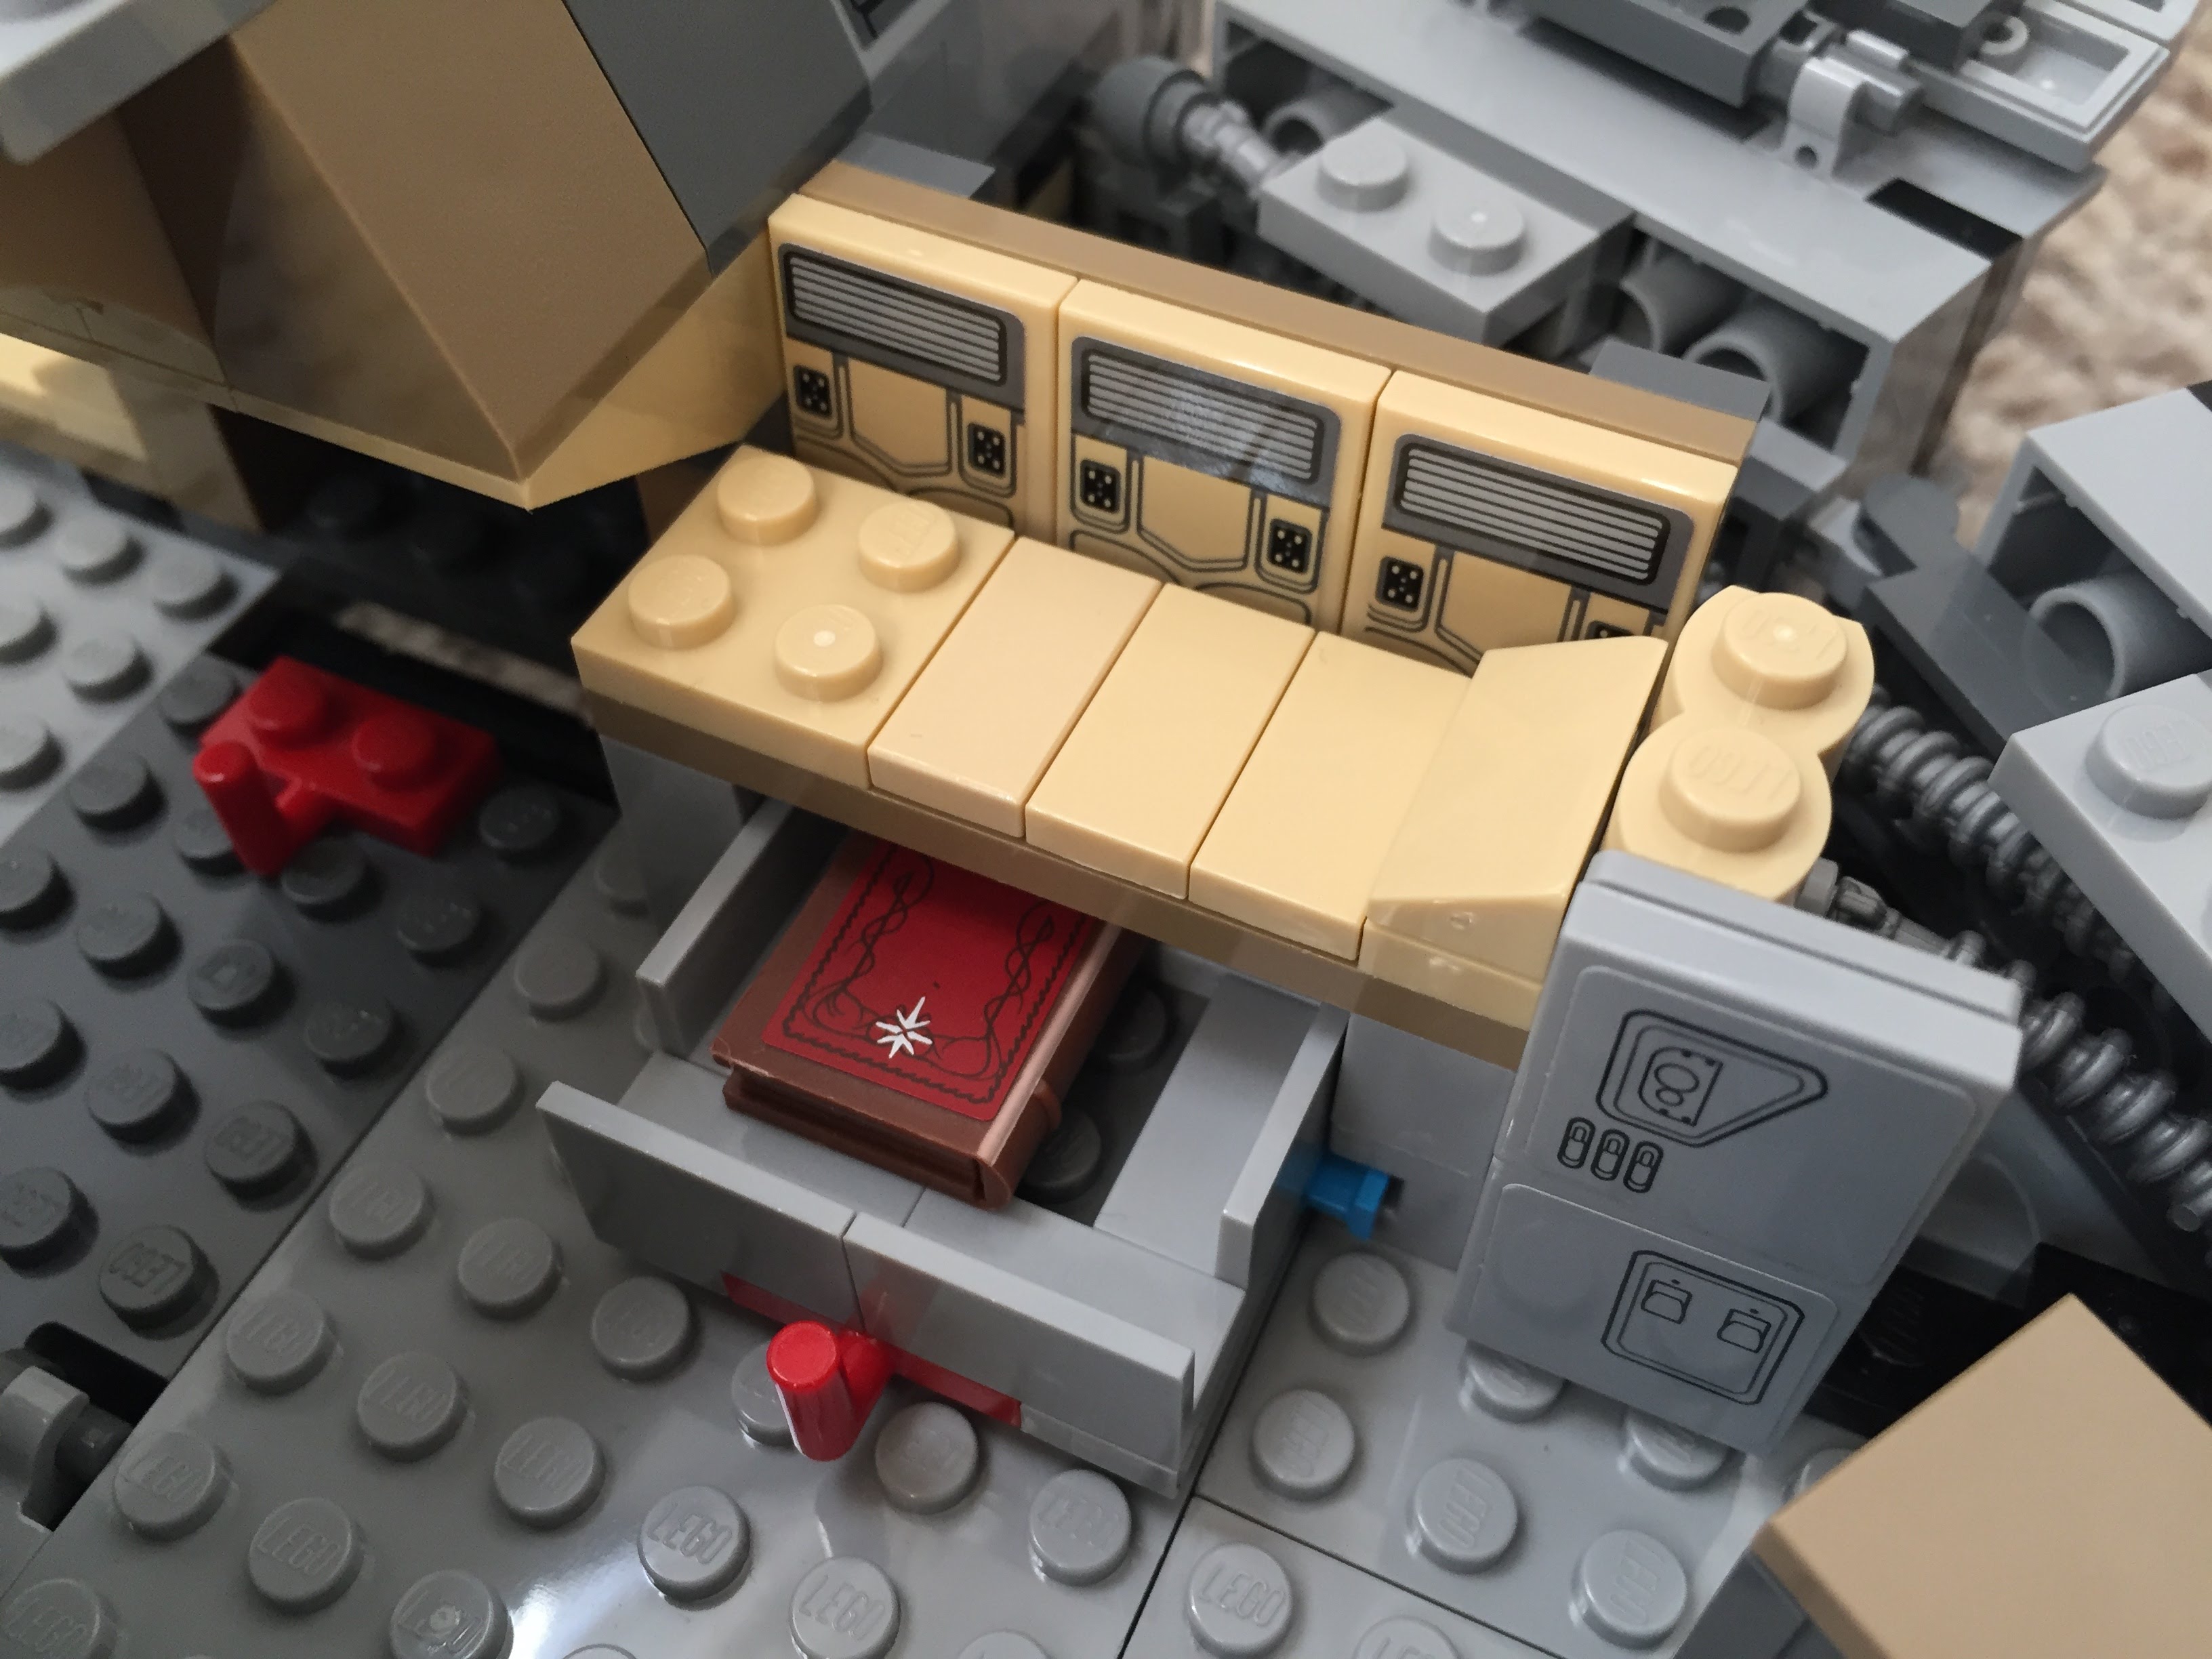
At the end of The Last Jedi, Finn puts Rose in the Millennium Falcon’s med bay in the main hold. The camera focuses on the drawer under the bed when Finn looks for a blanket. The audience realizes that the drawer also contains the Jedi books on Ahch-To. To represent this, I raised the med bay, added a drawer beneath, and included a book (from The Hobbit set #79003: An Unexpected Gathering).


