Tag: Writing

  • Kant Generator Pro 1.3.1, a Modular Text Generator Originally Made to Create Psuedo-Kantian Philosophical Writing

    Kant Generator Pro 1.3.1 folder and icon group on Macintosh System 7.5.5

    Continuing my exploration of non-artificial intelligence (non-AI) programs that can generate images (see KPT Bryce and Evolvotron) and text (see Electric Poet 1.6), I discovered this really innovative piece of text generating software by Mark Pilgrim called Kant Generator Pro 1.3.1 for Macintosh 68k computers.

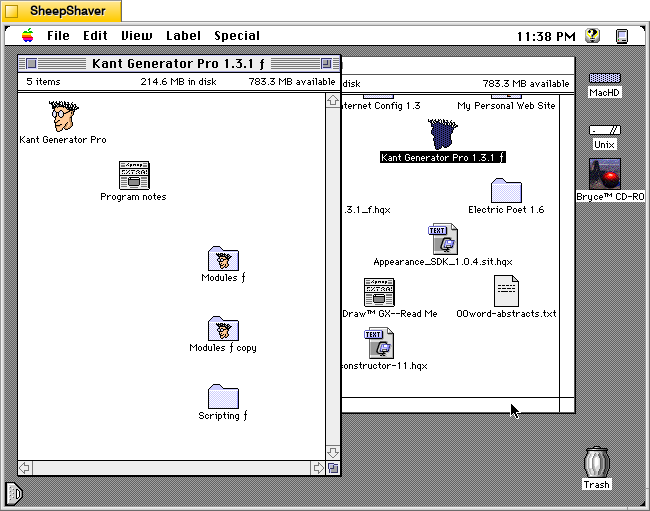
    The Kant Generator Pro folder, which includes the Kant Generator Pro application, Program Notes file, and folders for its text generating modules and scripting, is only 560K. The Kant Generator Pro application is 176K and it has a suggested RAM size of 1,024K. The copy that I downloaded from Macintosh Garden here had the minimum RAM size set at 512K and the Preferred size set to 11,024K.

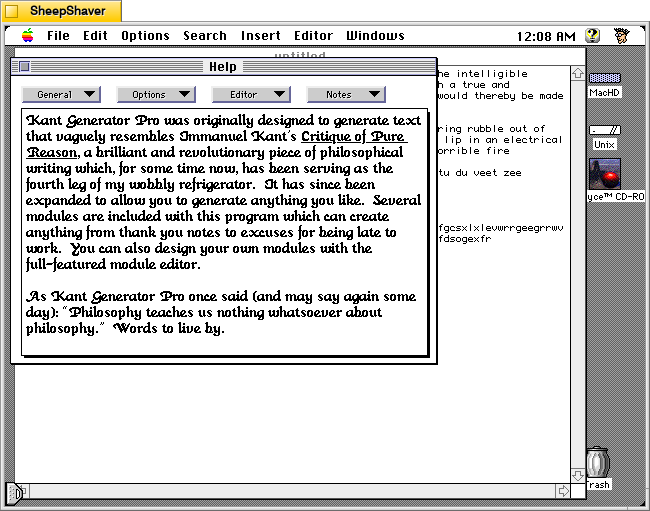
    According to the program’s built-in Help (shown in a screenshot down the page):

    Kant Generator Pro was originally designed to generate text that vaguely resembles Immanuel Kant's Critique of Pure Reason, a brilliant and revolutionary piece of philosophical writing which, for some time now, has been serving as the fourth leg of my wobbly refrigerator. It has since been expanded to allow you to generate anything you like. Several modules are include with this program which can create anything from thank you notes to excuses for being late to work. You can also design your own modules with the full-featured module editor. 

    And on a saved copy of Pilgrim’s personal website from 21 Dec. 1996, he writes the following about Kant Generator Pro:

    Purpose: to generate pseudo-Kantian philosophy based on Kant's vocabulary and sentence structure in the "Critique of Pure Reason". Anyone who has been subjected to Kant (voluntarily or otherwise) will appreciate the humor in the gibberish this program outputs. Also includes a module editor so you can create your own generation modules.
    
    Kant Generator is quickly becoming my most popular program (although it is still in third place behind Startup Screen Picker and Shutdown FX), especially among philosophy students, graduates, and professors. When I showed it (off) to my professor for my Kant course, he immediately started describing something he had written years ago to achieve a similar result, though by a completely different method. Other professors from across the country have praised it, saying they will use it in their introductory philosophy courses to 'stimulate interest in philosophy'. I guess every little bit helps.
    
    I am slowly but steadily adding more modules to Kant Generator Pro. Version 1.1 added a Husserl module, as well as "thank you" note module (which occurred to me while procrastinating writing my Christmas thank you notes). Version 1.2 added an "excuses" module, written by Mike W. Miller. Version 1.3 added a Swedish Kant module, which is just the original Kant module with all the references and instantiations converted into Swedish Chef talk. (Yes, I used the code from Chef, and yes, I automated the process to cycle through all the instantiations and convert them, and no, you can't have the code. Just what we need is people running around converting all their KGP modules to Swedish Chef, or WAREZ, or Fudd...) Version 1.3 also added scripting support; anyone who wants to set up a WWW page and call Kant Generator Pro with a CGI interface through AppleScript has my permission as long as you send me your CGI interfacing code.
    
    It's very exciting to have other people writing modules for Kant Generator Pro, if nothing else because it means I don't have to do anything for the program to keep improving. Suggestions for future philosopher modules (or anything else) are always appreciated, although I am reluctant to write modules of philosophers I haven't studied myself. Satire is the sincerest form of flattery, but also the most difficult... 

    The source code for Kant Generator Pro is also available bundled with the application in the Info-Mac repository here.

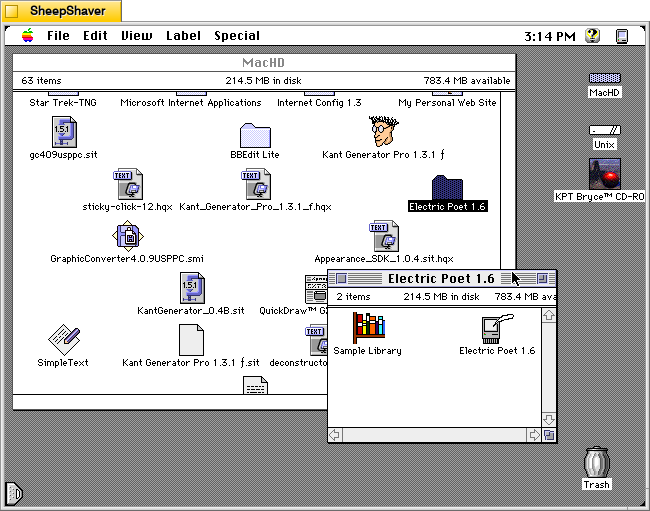
    Below, I’ll annotate screenshots of the application running on an installation of Macintosh System Software 7.5.5 on the PPC emulator SheepShaver hosted by Debian 12 Bookworm with the Xfce Haiku Alpha window theme active.

    Kant Generator Pro for Macintosh, Composing Window after launch

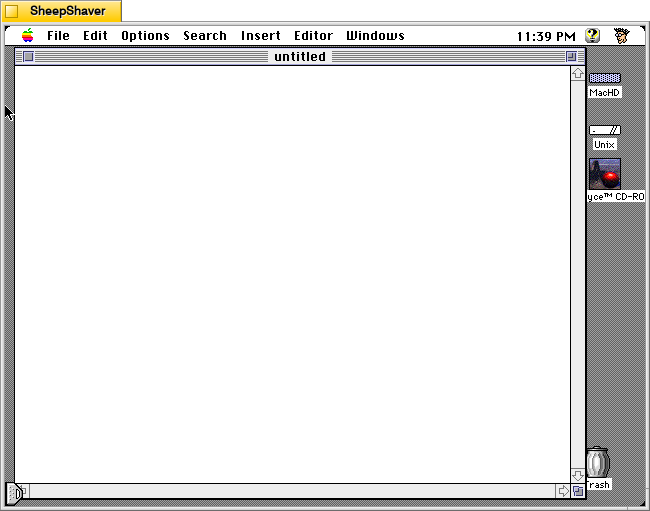
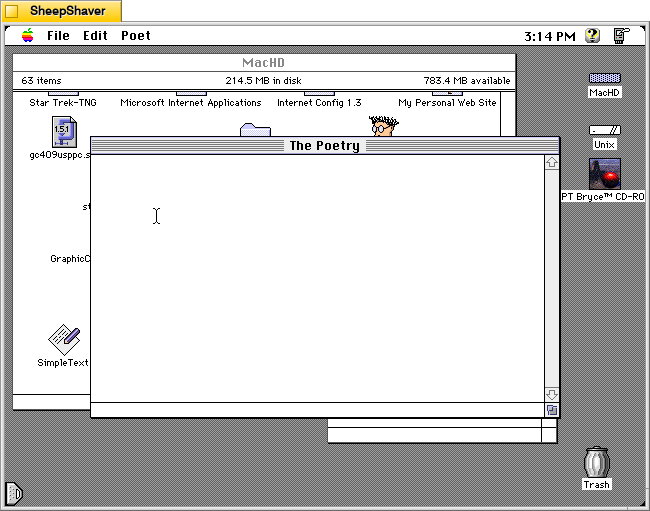
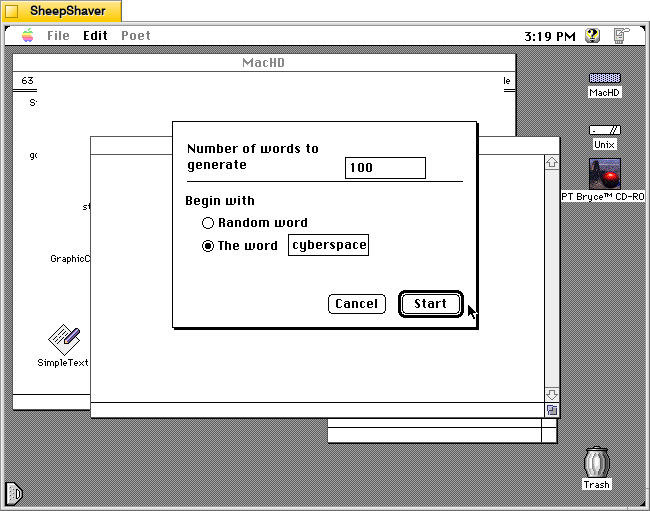
    After opening Kant Generator Pro, the user is presented with a text entry window much like in any text or word processing software. One can enter text, but to have the program generate text, one needs to use the menus: first, to select the text generation module from the Options menu, and then, to select from the type of text to generate from the Insert menu.

    Kant Generator Pro for Macintosh, Apple menu

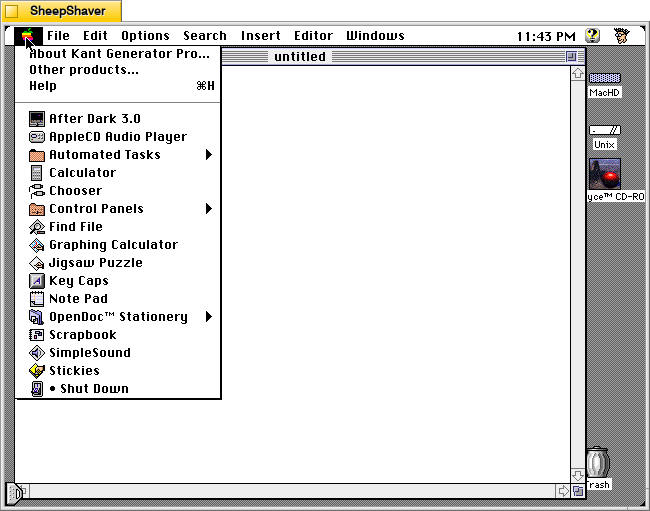
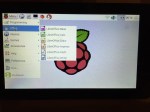
    Clicking on the Apple menu gives you options for About Kant Generator Pro, Other products, and Help.

    Kant Generator Pro for Macintosh, About window

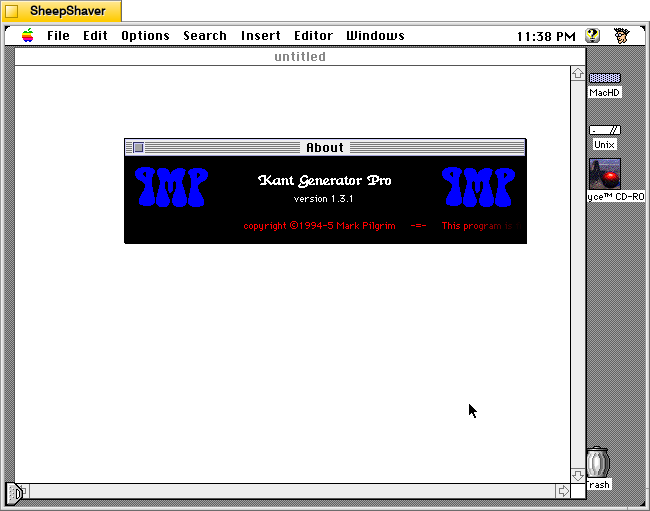
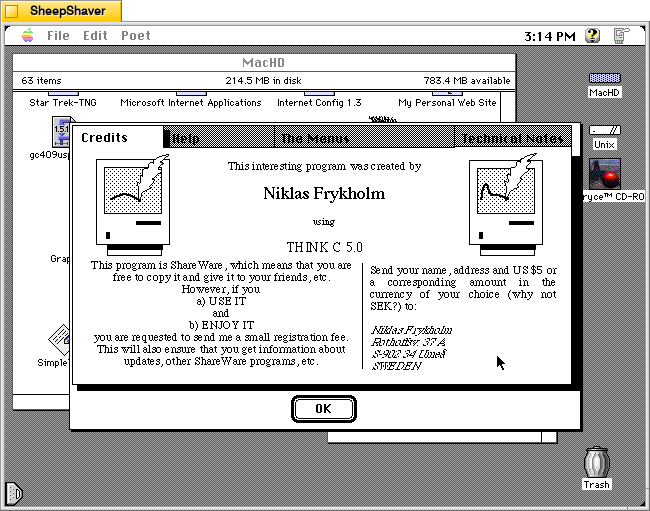
    Opening the About window from the Apple menu features a scrolling credits and copyright notice.

    Kant Generator Pro for Macintosh, Apple menu > Help

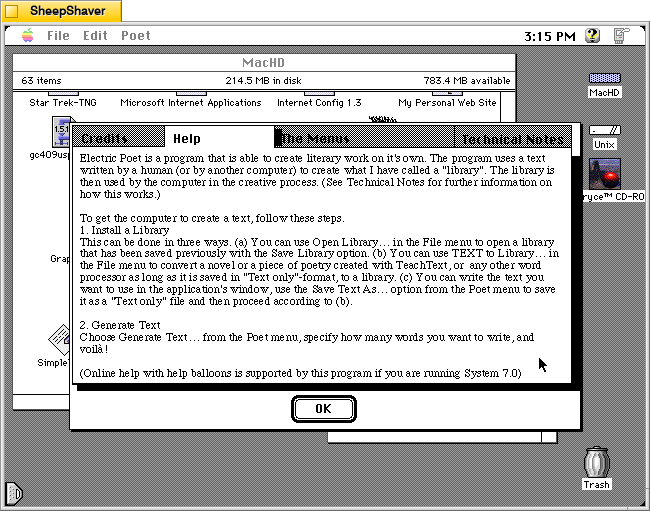
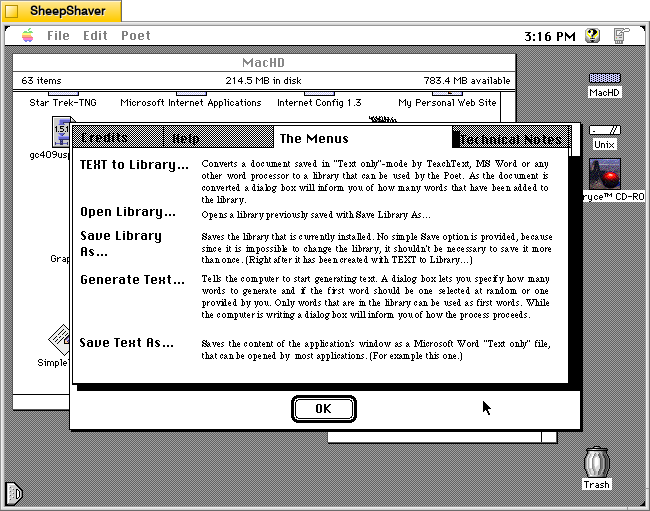
    Selecting Help from the Apple menu provides lots of useful information about how to use Kant Generator Pro to generate text, how to edit the modules that it uses for text generation, and technical information about the design of the program.

    Kant Generator Pro for Macintosh, Apple menu > Help > Editor > Getting Started

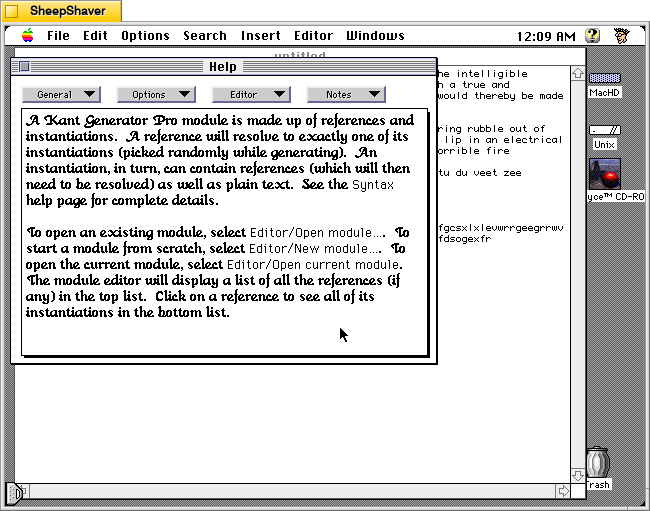
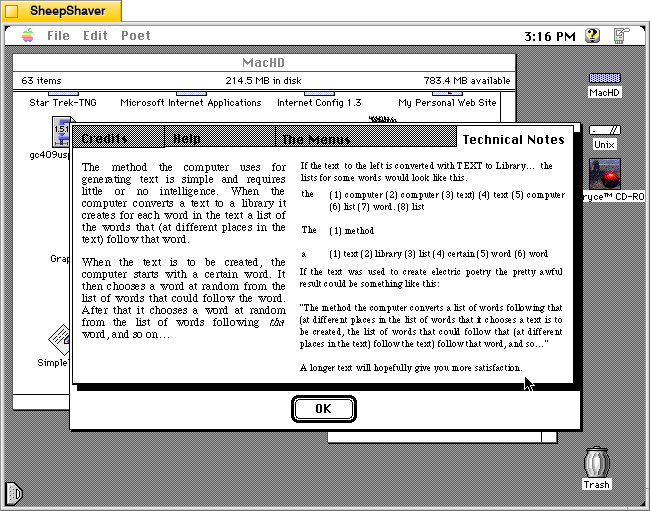
    Choosing Editor > Getting Started on the Help window shows the information displayed above. Like Electric Poet, which I wrote about yesterday here, Kant Generator Pro relies on randomness, but unlike Electric Poet, Kant Generator Pro relies on more structure in building relationships between words and strings of text by editing a given Module (like Electric Poet’s Library). But where Kant Generator Pro gets really interesting is in how the responses can be engineered while editing the Module to reference and nest references within references.

    Kant Generator Pro for Macintosh, File menu

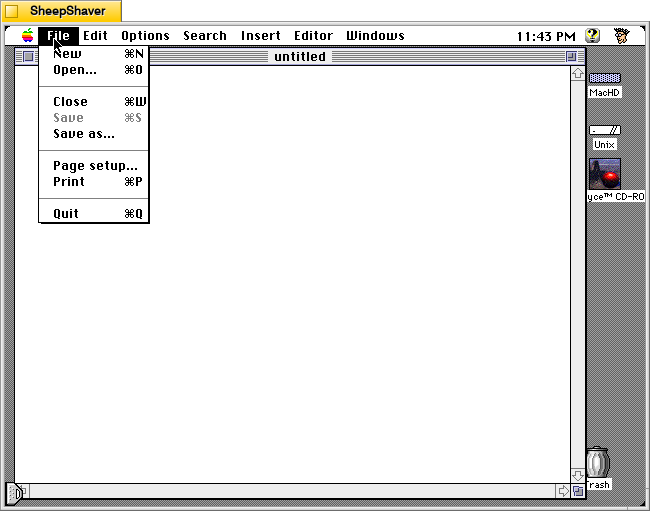
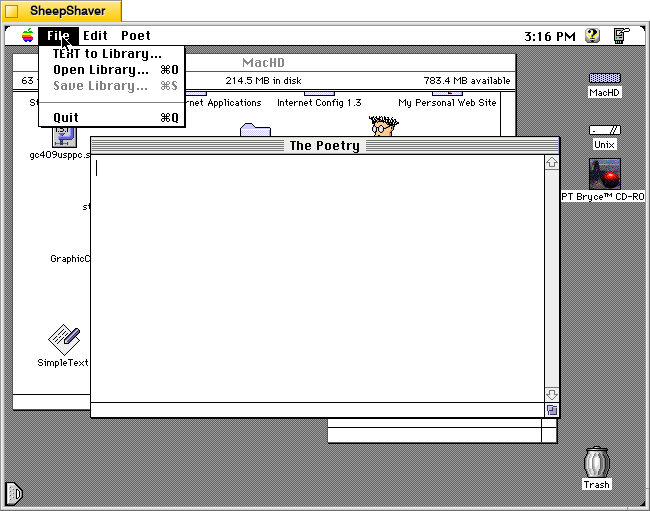
    The File menu gives you access to basic file operations.

    Kant Generator Pro for Macintosh, Edit menu

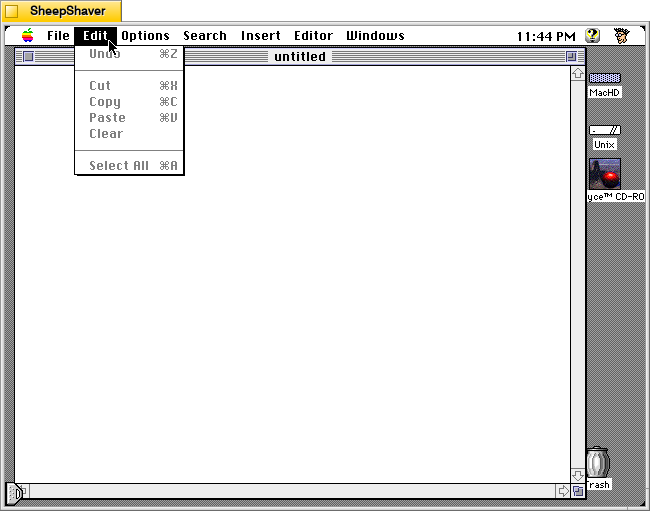
    The Edit menu has basic edit operations.

    Kant Generator Pro for Macintosh, Options menu

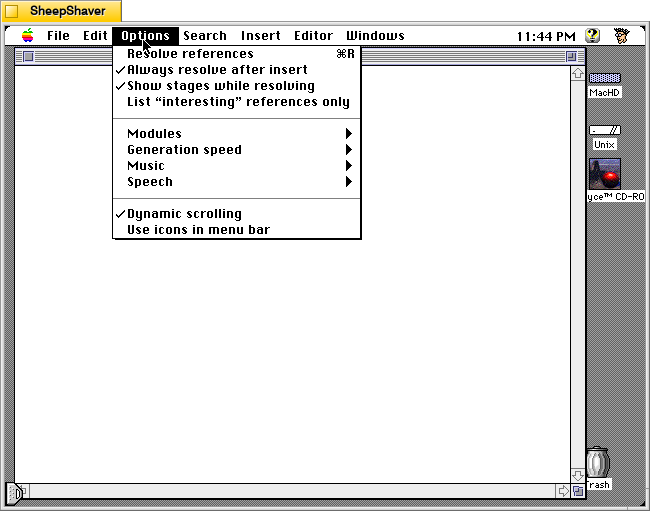
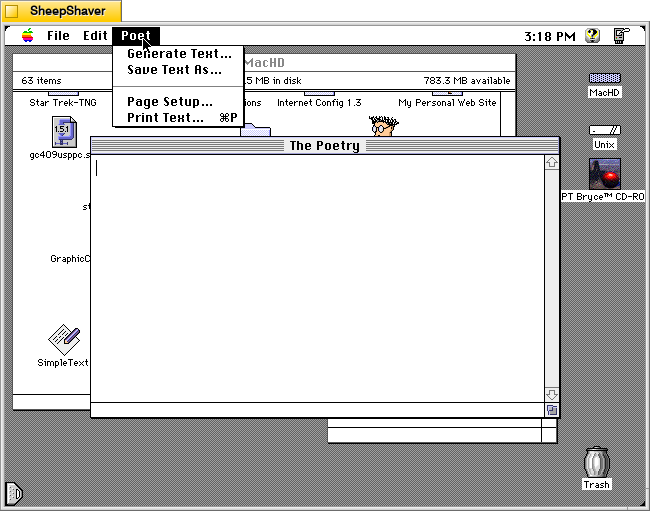
    The Options menu controls Kant Generator Pro’s primary feature–the Module used for text generation, but it also gives the user options for how fast it generates text, whether music is played or not while generating text, and to speak the generated text a voice with Apple’s Text-to-Speech technology.

    Kant Generator Pro for Macintosh, Options > Modules

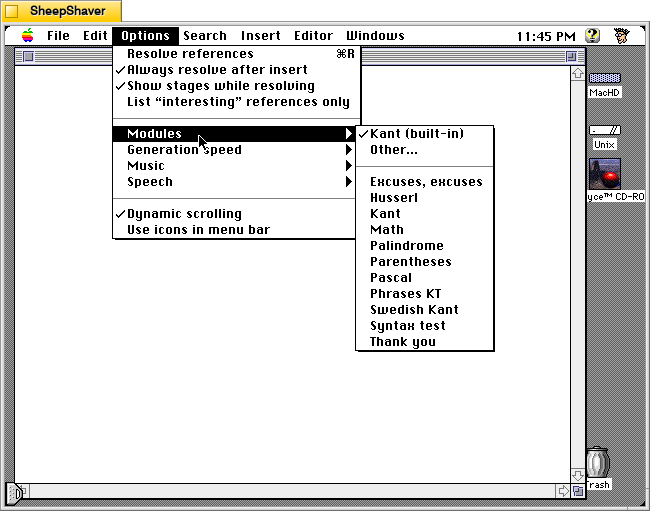
    In the Options menu > Modules, the user chooses the text generator module to use. The Program Notes file (dated 26 Jun. 1995) included with the application describes the included modules:

    Kant Generator Pro has the built-in capability to generate enormous amounts of Kantian gibberish, but if you'd like to play with generating your own text, it also lets you create, edit, and use external modules.  There are several modules included in this release:
    
    Kant: this is exactly the same as the built-in Kant module, except that you can edit it.  The most general reference is &section.
    
    Swedish Kant: this is the same as the Kant module, except that all references names and text have been converted to mock Swedish Chef (as featured in my program Dialectic, which should be available wherever you got this package).  The most general reference is &secshun.
    
    Husserl: a module which emulates Edmund Husserl, a 20th-century phenomenologist.  The most general reference is &section.
    
    Thank You: a module which generates thank-you notes for all occasions.  The most general reference is &thank-you-note.
    
    Excuses, excuses: a module which generates for excuses explaining exactly why you can't come to work.  The most general reference is &Yet-Another-Excuse.  Written by Mike W. Miller.
    
    Math: a module which generates algebraic equations using +, -, *, /, parentheses, and three variables X, Y, and Z.  The most general reference is &term.  Written by David Scheidt (the same friend who discovered that he had 19 copies of the GPL).
    
    Palindrome: a modules which generates palindromes (strings which spell the same backwards and forwards).  The most general (and only) reference is &palindrome.  Written by David Scheidt.
    
    Pascal: a module which generates syntactically correct statements in the Pascal programming language.  The most general reference is &pstate.  Written by David Scheidt.
    
    Parentheses: a module which generates strings of balanced parentheses.  The most general reference is &balanced-parens.  Written by David Scheidt.
    
    Syntax test: this is a sample module which gives examples of the different forms of syntax which Kant Generator Pro can deal with.  All the references are relevant, but you won't get much out of them unless you look at them in the module editor first.
    
    If you'd like to create your own modules, poking around with these should be enough to get you started.  There are several pages of help in the Kant Generator Pro application which talk about building modules, and I also support balloon help for all the menus.  If you're still confused, drop me a line (my e-mail address is in the application's help section) and I'll try to help.
    Kant Generator Pro for Macintosh, Options > Music

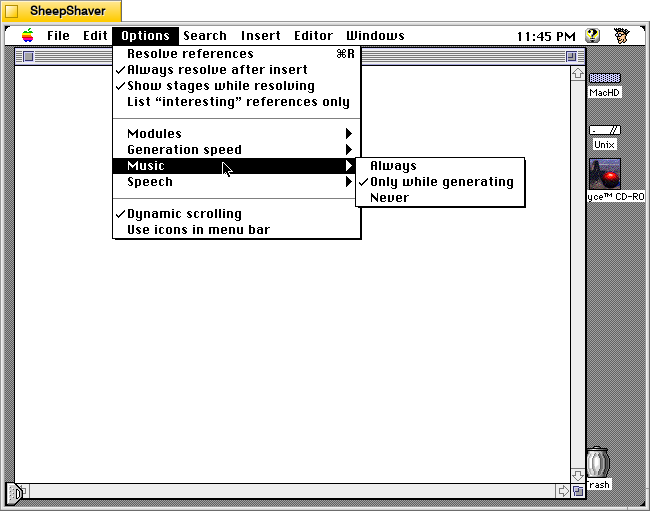
    The Options menu > Music has options for Always, Only while generating, and Never.

    Kant Generator Pro for Macintosh, Options > Speech menu

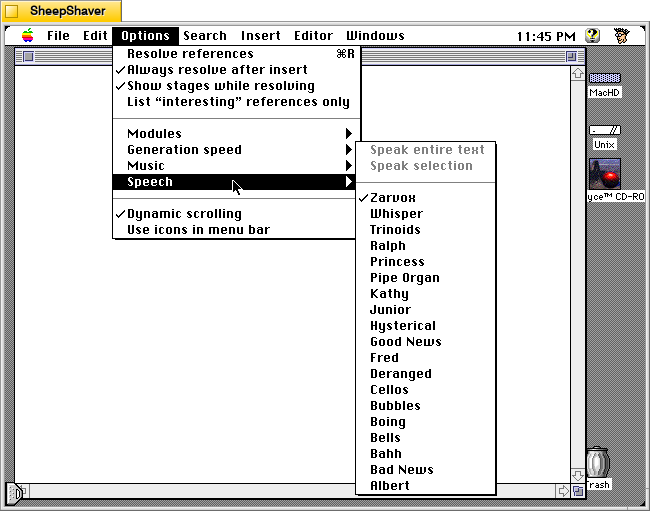
    The Options menu > Speech selection pulls available voices from Apple’s Text-to-Speech (if installed on the Macintosh) to give users an opportunity to have the generated text read aloud.

    Kant Generator Pro for Macintosh, Search menu

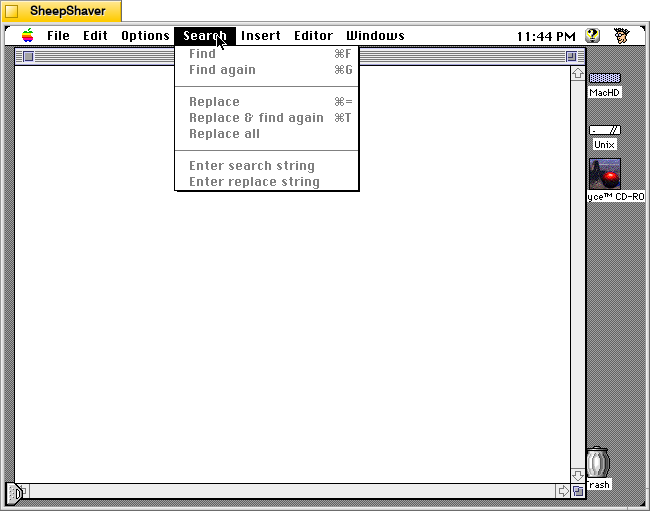
    The Search menu gives users an easy way to find and replace text in the text generation window (but not the Editor window shown further below).

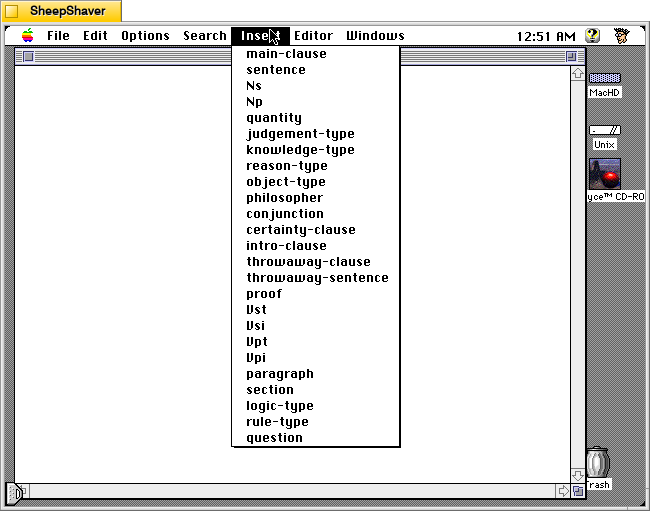
    The Insert menu changes based on which Module the user selects after opening Kant Generator Pro. This menu is what directs Kant Generator Pro to generate text based on the text corpus and engineered relationships in the Module. Kant Generator Pro uses randomness to piece together options within the corpus and those established relationships to string words together into phrases, sentences, paragraphs, and sections. The above options in the Insert menu are for the Kant Module.

    Kant Generator Pro for Macintosh, Insert menu

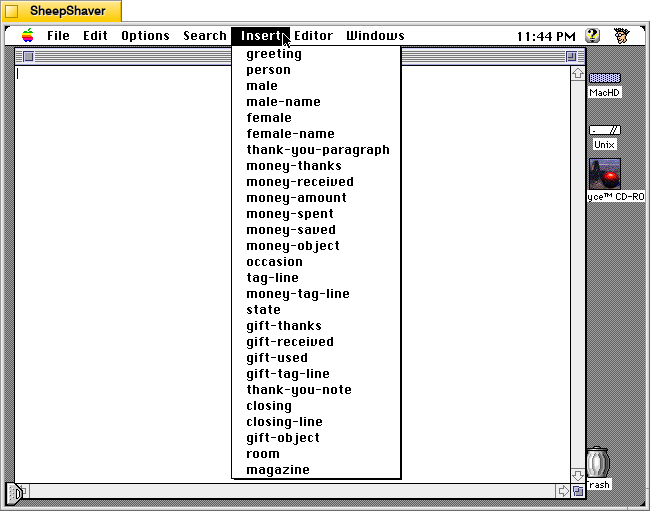
    The Insert menu options shown above are for the Thank You Module.

    Kant Generator Pro for Macintosh, Editor menu

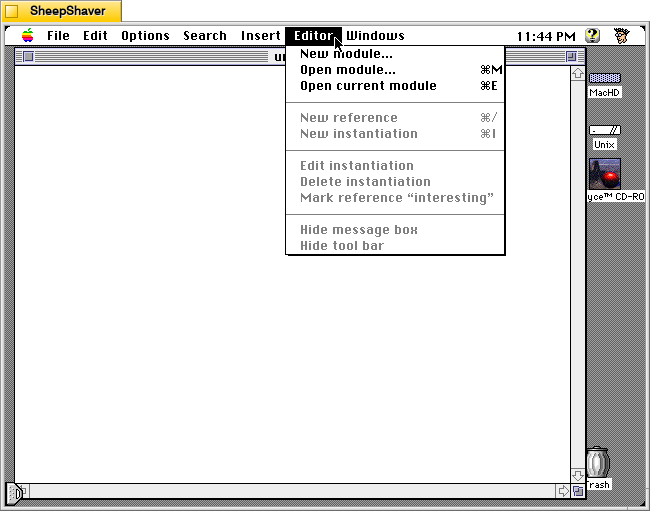
    The Editor menu gives options to create a new module or open a module in the Editor window.

    Kant Generator Pro for Macintosh, Editor window

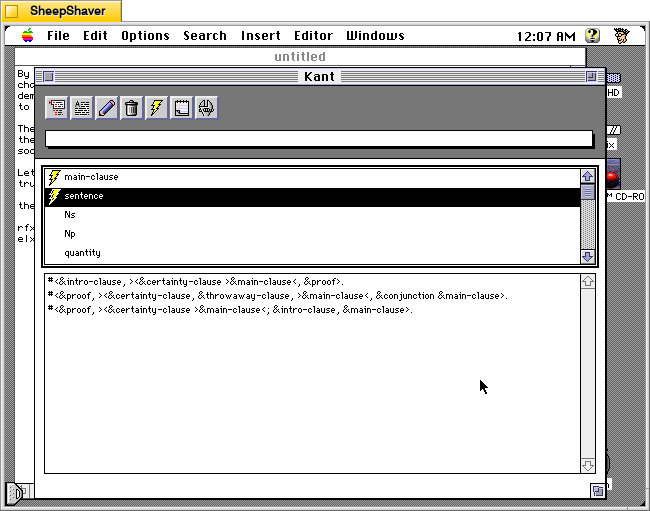
    The Editor window for a Module is where the end user can construct new References (top pane) and Instantiations (lower pane). You can see in the lower pane how References string together other References and Instantiations within References to give the generated text structure.

    Kant Generator Pro for Macintosh, Windows menu

    The Window menu allows the user to switch between multiple open files in different windows.

    Kant Generator Pro for Macintosh, Kant module | Insert > sentence

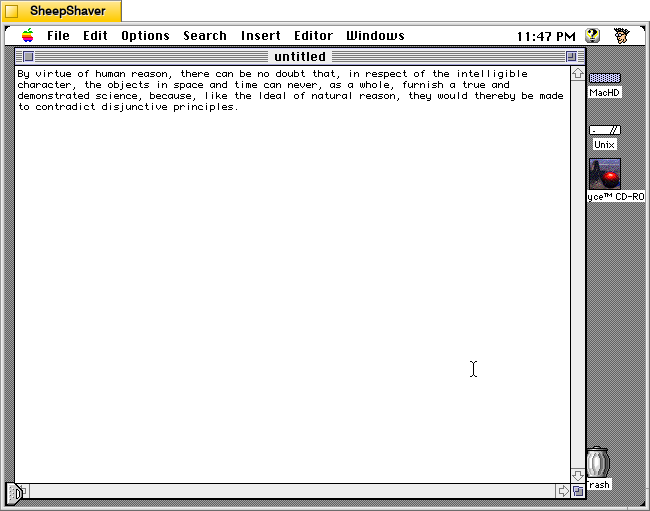
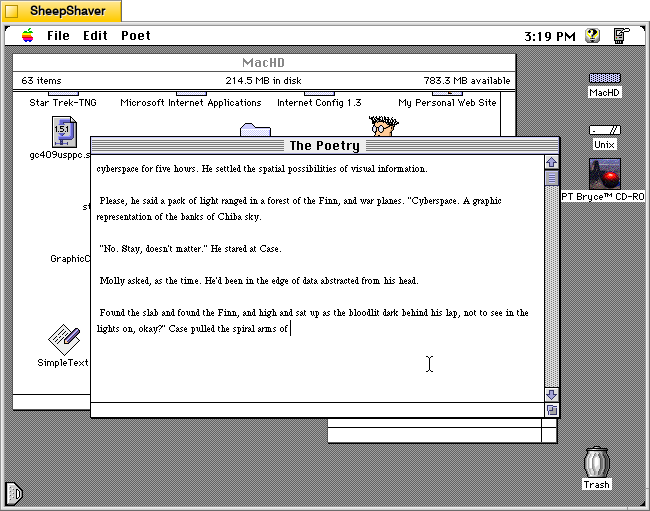
    Using the Kant Module, I used the application to generate the sentence above.

    Kant Generator Pro for Macintosh, Excuses module | Insert > sentence

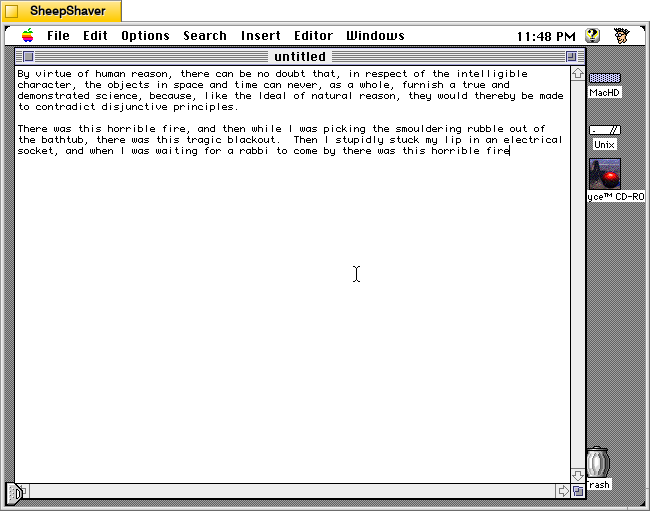
    Using the Excuses, excuses Module, I used the program to generate the above outlandish excuse.

    Kant Generator Pro for Macintosh, Thank You module | Insert > paragraph

    Finally, using the Thank You Module, I generated the rather strange gift thank you.

    Like Electric Poet and large language model (LLM) artificial intelligence today, there is some trial-and-error involved. Electric Poet and Kant Generator Pro rely on a corpus of text, a system of relationships, and randomness to select what word or phrase goes next given a set of rules. In a sense, LLMs aren’t that much different except in scale. Based on a given LLM’s training, the relationships between words (or tokens) are far more complex. The hidden layers of an LLM construct relationships that are not simply 1-to-1. Analogous to neurons in our brains, the connections and weights for each connection between tokens are vast and labyrinthine.

    Nevertheless, I can imagine Electric Poet and Kant Generator Pro being used today–over 25 years after being first developed in the latter’s case–as a tool to help students think about how text generation can work in a very simplified manner. This can be paired with sentence diagramming of some of their own writing, which can be duplicated within Kant Generator Pro as a “Me” Module that can reproduce one’s own writing. Then, students can advance to more complicated topics with how LLMs are trained on big data to create models that are magnitudes more sophisticated than their Library for Electric Poet or Module for Kant Generator Pro. Throughout the process, an important reminded needs to be reinforced–there is no intelligence in these Macintosh programs or LLMs as they currently exist. The old and the new generate text based on rules applied to models–the former being simple and the latter being much more complex, but in both cases not having awareness or self-direction. Though, it seems like we are going in the direction of self-awareness and self-direction far more quickly than seems safe to me.

  • Electric Poet 1.6, a Macintosh Poetry Generator Program

    Electric Poet 1.6 for Macintosh, Icon Group

    Like I’ve written before about image generation software such as KPT Bryce and Evolvotron, which employ fractals instead of artificial intelligence (AI) to generate landscapes and abstract images respectively, there are also text generating programs that use a variety of coding tricks to string words together in a far less complex manner than those used by large language model (LLM) AI systems today. Nevertheless, these precursors to generative AI deserve our attention to explore how they work and what they might have been and still used for.

    One such text generating program is Electric Poet 1.6 by Niklas Frykholm. It is a program that is only 48K in size, uses 600K of RAM, and is built to run on 68K-based Macintosh computers. For testing and creating the screenshots below, I used SheepShaver running System Software 7.5.5.

    In his abstract for the Info-Mac Archive (available in a viewable format here or as a part of the entire Info-Mac archive here), Frykholm writes, “Electric Poet can use an ordinary text file as a mould for creating its own litterary [sic] works. This works best with abstract poetry where it’s sometimes hard to tell real from bogus.”

    On 28 Sept. 1996 on his personal website, he writes, “Electric Poet is a fusion between my interest in computers and my interest in poetry. It is an attempt to write a program, capable of creating its own literary works. The Electric Poet takes the works of a biologic poet (as a TEXT-file) and rearranges them in a random but controlled manner. Heres a poem written by the program:

    often
    and closer to the chasm
    until you still have been squeezed by the mysterious event
    it showed clearly for the trouble
    and the progress
    about my desktop”

    And according to Frykholm’s “Technical Notes” on the program’s About window, “The method the computer uses for generating text is simple and requires little or no intelligence. When the computer converts a text to a library it creates for each word in the text a list of the words that (at different places in the text) follow that word.”

    “When the text is to be created, the computer starts with a certain word. It then chooses a word at random from the list of words that could follow the world. After that it chooses a word at random from the list of words following that word, and so on . . .”

    Essentially, Electric Poet is a clever piece of software that uses word relationships within a given text to create text based on random selections within that set of relationships.

    Electric Poet 1.6 for Macintosh, Program's "The Poetry" window

    After double clicking on Electric Poet 1.6 in the icon group shown at the top of the page, the program presents “The Poetry” window with a blinking cursor. To have the program generate poetry, the user needs to open a Library from the File menu and then choose “Generate Text” from the Poet menu.

    Electric Poet 1.6 for Macintosh, About Window > Credits

    Opening the “About Electric Poet” from the Apple menu gives the user a super helpful set of tabs that gives you information for registering the shareware program, help using the software, an explanation of the menu items, and technical notes about how the program works to generate text.

    Electric Poet 1.6 for Macintosh, About Window > Help

    The About Electric Poet’s Help tab breaks down what the user needs to do so that the program generates text. The first step is to “install” or open a Library. While Electric Poet comes with a sample Library based on the script for the film Star Wars, most users would probably want to create their own Library, which is easy enough to do. Once the Library is created and loaded, Electric Poet can then generate text from the Poet menu.

    Electric Poet 1.6 for Macintosh, About Window > The Menus

    The About Electric Poet’s The Menu tab gives further explanation about what each menu option does in the program.

    Electric Poet 1.6 for Macintosh, About Window > Technical Notes

    The About Electric Poet’s Technical Notes provides details about how it uses lists of words and the words that follow immediately after those words as a corpus of random selections linked to adjacent words. This is the magic that makes this program generate text. It uses lists of adjacent words and random selection to thread together sentences and phrases.

    Electric Poet 1.6 for Macintosh, File menu options

    To get started with Electric Poet, the File menu gives you access to opening a Library or creating a Library from “TEXT to Library.” It’s important to note that you need to have your text file in Teach Text format before attempting to create your own Library. I discovered that when opening a raw text file the program would create a list of words (as it would normally when creating a Library), but then the program would lock up and while I could still move the mouse, I could no longer use the menu, switch programs, or activate the Finder. I would have to kill the SheepShaver process on Debian and relaunch. I observed this same behavior when running Electric Poet on the 68k emulator Basilisk II.

    To avoid this problem, open your raw text file in BBEdit or another full-featured text editor (if it is larger than 32K–the Teach Text limit), copy an excerpt to the Clipboard, and then go into Teach Text, paste the text, and save it as a file. Then, use “TEXT to Library” in Electric Poet to create a Library from that Teach Text-saved file.

    Electric Poet 1.6 for Macintosh, Poet menu options

    Once you’ve opened your Library file, you can now use the Poet menu to “Generate Text.”

    Electric Poet 1.6 for Macintosh, Poet menu > Generate Text window

    The “Generate Text” menu option presents you with these controls before generating some text in “The Poetry” window. It allows you to choose how many words to generate and the option to begin with a random word or a specific word. If you choose a specific word, bear in mind that it is case sensitive. For example, I tried beginning with “Cyberspace,” but the word was not found in the Library. I tried with “cyberspace” and it generated text as shown below.

    Electric Poet 1.6 for Macintosh, Output in The Poetry window

    Above, is a sample of text generated from “The Shopping Expedition,” the third chapter of William Gibson’s Neuromancer (1984). This example is just one run. Subsequent runs will yield very different results. In this regard, it is like using Stable Diffusion or LLaMA in that many iterations are often required to generate an output that is desired by the end user.

    Soon, I’ll post about Kant Generator Pro, another Macintosh text generator program that creates pseudo-sense/technobabble text (writing like the philosopher Kant) as well as form generated writing, such as thank you notes. The form generated writing that Kant Generator Pro can do is aligned with one of the kinds of writing large language models are supposed to be able to help us with–emails, follow-ups, etc.

  • Words to Live By (at the 3rd Ave Home Depot)

    "Stop Being Afraid Ⓐ" tagged on a concrete support column in the Home Depot parking lot on 3rd Avenue in Brooklyn, NY.

    Despite being scrawled with a paint marker by an anonymous tagger on a filthy concrete support column in the Home Depot parking lot on 3rd Avenue in Brooklyn, NY, I paused to ruminate on its written message, “Stop Being Afraid Ⓐ.” Perhaps contemplating this message will be beneficial to you, too.

  • Connecting with Others and Practicing Writing with Postcrossing

    Hand holding 100 postcards in front of a mail drop.

    Y began using Postcrossing in 2013 when we still lived in Atlanta. She liked the concept of connecting with others around the world via mailed postcards.

    The way Postcrossing works is you setup a profile with your mailing address. Then, you request an address of another Postcrossing user for you to send a postcard to. When that person whose address you just got receives and registers your postcard online, then another, different Postcrossing user will be given your address randomly to send a postcard to you. Some users offer to do direct swaps, but most do not. In some cases, you might make a connection with someone that leads to becoming pen pals (Y and I each have different pen pals in Germany).

    I began helping Y with her Postcrossing account before the pandemic began. We share and trade off duties, which include requesting addresses, choosing a postcard that someone might like, selected and affixing the correct postage (in the past, we purchased unused stamps on eBay and at philatelic/stamp collecting shows at significant discounts), and of course, writing a message, the postcard ID, and recipient’s address.

    As you can see below, we’ve had 6,866 sent cards (we’ve sent more than this–this number reflects the number that were successfully registered by their recipients), and 6,869 received cards (this is how many cards we’ve received and registered–as you can imagine that number would be higher if some cards sent to us had not been lost in the mail).

    Postcrossing profile screenshot described in text.

    The picture at the top of this post is our most recent batch of 100 sent postcards. We had let the account go dormant during this past school year. Over the past few days, Y requested 100 addresses, selected cards, and affixed postage. As she would complete a small batch of cards, she handed them to me and I wrote the message to the recipient. For selecting the postcard and writing the message, Y and I would read the recipient’s profile and view their favorite postcards to get a sense of who they are and what we would like to send/say to them.

    Of these 100 postcards, we sent 1 to Bulgaria, 2 to Canada, 13 to China, 1 to Czechia, 1 to Denmark, 1 to Finland, 23 to Germany, 1 to Ireland, 1 to Italy, 3 to Japan, 1 to Kazakhstan, 5 to Netherlands, 2 to Poland, 1 to Portugal, 1 to Spain, 1 to Taiwan, 41 to the United States, and 1 to Ukraine. The distribution depends on how many users there are in a given country and how many have just had cards registered. Postcrossing tries to balance the distribution across its user base. Also, you can select to not send cards to your own country. However, it’s worth noting that the price of sending a postcard overseas is about 3 times the price to send a postcard domestically.

    I encourage my students to try out Postcrossing as a way to connect with others and practice their writing. Also, learning about others’ lived experience and sharing your own with others can serve to break down barriers to understanding and bridge arbitrary divisions between people.

    Anyone can join and the service is free. The only costs are for postcards and postage. If you are interested in Postcrossing, you can get involved in whatever way suits you.

  • How to Build a Cardboard-Box Raspberry Pi 2, Model B Computer with a 7″ Touchscreen LCD Display with Some Thoughts on Pedagogy

    IMG_1049
    My Cardboard Box Raspberry Pi 2, Model B with 7″ Touchscreen Display and wireless keyboard.

    This guide demonstrates how to install Raspbian on a Raspberry Pi 2, Model B, connect the Raspberry Pi to a 7″ Touchscreen LCD, and integrate the computer and touchscreen in a cardboard box (which doubles as a case and storage for battery, keyboard, and cables).

    I got interested in the Raspberry Pi, because it has many capabilities for learning: kitting out a computer, installing a Linux-based operating system, programming interactive software, and building with electronics. In particular, I am interested in how the Raspberry Pi can be used to create interactive software and be a platform for digital storytelling (which figures into one of the upcoming classes that I will be teaching at City Tech–ENG 3760 Digital Storytelling).

    IMG_1013
    My haul from Tinkersphere.

    Instead of buying my kit online, I wanted to shop local to get started. Originally, I considered going to Microcenter, which is near where I live in Brooklyn. Unfortunately, they were sold out of the touchscreen display that I wanted. Instead, Y and I took a train into Manhattan and visited Tinkersphere where one of their helpful staff guided me to the things on my digital grocery list. I purchased Tinkersphere’s pre-made Raspberry Pi 2 kit, a 7″ Touchscreen LCD display, a battery pack (in retrospect, I should have purchased two of these, which I will discuss below), and a mono speaker with 1/8″ plug.

    Tinkersphere's Raspberry Pi 2, Model B kit contents.
    Contents of Tinkersphere’s Raspberry Pi 2, Model B kit.

    Tinkersphere’s Raspberry Pi 2, Model B kit includes all of the basic equipment needed to begin working with this tiny computing platform. The kit is built around the Raspberry Pi 2, Model B computer with a 900MHz quad-core ARM Cortex-A7 CPU, 1GB RAM, 4 USB ports, 40 GPIO pins, HDMI port, ethernet port, combined 3.5mm audio jack and composite video, camera interface (CSI), display interface (DSI), micro SD card slot, and a VideoCore IV 3D graphics core. Additionally, the kit includes a wireless keyboard/trackpad, USB wifi adapter, 8GB micro SD card with NOOBS (the easy to use Raspbian installer), USB micro SD card reader, breadboard, wires, and 5v power supply.

    To begin the setup, we should orient ourselves with the Raspberry Pi. This is the Raspberry Pi 2, Model B computer viewed from the top and the bottom:

    Raspberry Pi 2, Model B, Top View.
    Raspberry Pi 2, Model B, Top View.


    Raspberry Pi 2, Model B, Bottom View.
    Raspberry Pi 2, Model B, Bottom View.

    The first thing that we need to do is insert the micro SD card with a copy of NOOBS pre-copied. If you need a copy of NOOBS for your own micro SD card, you can download it from here and follow the instructions here for formatting and copying the files from a Mac or PC to the micro SD card. The Raspberry Pi’s micro SD card slot is located on the bottom side of its circuit board. A micro SD card goes in only one way which allows you to press it in. If correct, the card should “click” and stay as seen in the photos below.


    Insert the micro SD card like this.
    Insert the micro SD card like this.


    Press the micro SD card in and it will stay in place with a "click."
    Press the micro SD card in and it will stay in place with a “click.”


    The Raspberry Pi connected from left to right: micro USB power input from 5v power supply, HDMI, wireless keyboard/trackpad receiver, and wifi adapter.
    The Raspberry Pi connected from left to right: micro USB power input from 5v power supply, HDMI, wireless keyboard/trackpad receiver, and wifi adapter.

    Next, connect the Raspberry Pi to a display (such as a TV) with HDMI, and plug in the wifi adapter and wireless keyboard into two available USB ports. Alternatively, you can connect the Raspberry Pi to the Internet via ethernet and to a wired keyboard and mouse. Then, connect it to the 5v power supply. As soon as it is plugged in, the Raspberry Pi is turned on and operational. It will begin to boot from the micro SD card’s NOOBS installer, which will guide you through the process of installing Raspbian. See the images below to see what this looks like and what choices you should make for a basic installation.

    NB: While we could have connected the 7″ Touchscreen Display to the Raspberry Pi before beginning the installation, the current version of NOOBS would not detect and use the touchscreen display. It is necessary for Raspbian to be installed and updated before the 7″ Touchscreen Display will be recognized and used as the Raspberry Pi 2’s primary display.


    NOOBS boot screen with the Raspberry Pi logo.
    NOOBS boot screen with the Raspberry Pi logo.


    The NOOBS installer asks what you would like installed. Place a check next to Raspbian.
    The NOOBS installer asks what you would like installed. Place a check next to Raspbian.


    The NOOBS installer will ask that you confirm your choice. If you haven't already done so, choose US keyboard and locationalization at the bottom of the screen before proceeding. Then, confirm.
    The NOOBS installer will ask that you confirm your choice. If you haven’t already done so, choose US keyboard and locationalization at the bottom of the screen before proceeding. Then, confirm.


    The installation will proceed and complete. With the micro SD card that I have and without overclocking the Raspberry Pi, it took about 20-30 minutes for the installation to complete.
    The installation will proceed and complete. With the micro SD card that I have and without overclocking the Raspberry Pi, it took about 20-30 minutes for the installation to complete.

    After rebooting following the installation, the raspi-config tool launches. This program gives the user easy access to many configuration options for the Raspberry Pi including how it should boot (automatically login and load xwindows, or boot to a command prompt login), and if you would like to overclock the Raspberry Pi for additional performance (use this option with caution–you will likely want to add heat sinks and increased ventilation if you overclock the system). I configured my Raspberry Pi to operate at normal speed and to boot to the command line with login.

    After booting into Raspbian, the first thing that you see is the login prompt.
    After booting into Raspbian, the first thing that you see is the login prompt.


    The default login for the Raspberry Pi is username “pi” and password “raspberry”. Type each of these credentials in when asked followed by pressing the Enter key. Then, you will find yourself at the command line interface (CLI).

    Raspbian's CLI.
    Raspbian’s CLI.

    After logging in, you have a Linux command prompt (here is a list of helpful file system commands).

    Before setting up the 7″ Touchscreen Display, we need to update Raspbian. To do this, first type: “sudo apt-get update”. If prompted to install anything because it will take a certain amount of space, simply type “y” and press “Enter”.

    Entering a command at the prompt in Raspbian's CLI.
    Entering a command at the prompt in Raspbian’s CLI.

    To explain what this command means, “sudo” runs a command as superuser, or the user that is all powerful on a linux system. The command that you want to run as superuser is “apt-get,” which is a package manager, or a manager of software packages that run on your Raspberry Pi. “update” is a modifier for “apt-get,” and its purpose is to tell “apt-get” to update its index of available software packages with what is stored on the remote software repository (where your Raspberry Pi is downloading its software from).

    After the update operation completes and you return to the command prompt, type: “sudo apt-get upgrade”. Similarly, agree to the prompts with “y” and “Enter”. The “upgrade” modifier to “apt-get” tells it to upgrade the software based on what it learned when updating its index with the previous command. Thus, when you run these two commands, you should run the update command first (learn) and the upgrade command second (act on what was learned).

    To launch into Raspbian’s X11, type “startx”. Inside X11 or xwindows, you will find many of the GUI-based software that really makes the Raspberry Pi sing: Scratch, Python, Mathematica, and more. If you have never used X11, it works a lot like Windows 95/98 except that the Start Menu bar is at the top of the screen instead of at the bottom and “Start” is replaced by “Menu.” Some quick launch apps are directly available to be launched with a single click from the start bar (such as Terminal, the Epiphany web browser, and Wolfram Mathematica) while all of the installed X11 programs are available from the “Menu.” Below are images of the Raspbian desktop and navigating through some of the default programs available.

    To easily install additional software, you can install the Synaptic Package Manager, which simplifies finding and installing software packages by wrapping package management in an easy-to-use GUI. From inside X11, open Terminal and type “sudo apt-get install synaptic”. This will install Synaptic, which you can open by clicking on Menu > Preferences > Synaptic Package Manager (more info on this and other Raspberry Pi stuff on Neil Black’s website).

    When you done browsing around, you can click on the and choose to shut down. After a few moments, your display should show a blank screen and the activity lights on the back of the Raspberry Pi (red and green) should only be showing a solid red. At that point, unplug the micro USB 5v power adapter. If you are ready to install the 7″ Touchscreen Display, unplug the HDMI cable, too.

    In the images below, I demonstrate how to assemble the 7″ Touchscreen Display and connect it to the Raspberry Pi. I followed the excellent instructions available on the official Raspberry Pi website, which also details how to install the Matchbox virtual keyboard for using the touchscreen without a keyboard.

    To begin connecting the 7" Touchscreen Display to the Raspberry Pi, place the screen facing down.
    To begin connecting the 7″ Touchscreen Display to the Raspberry Pi, place the screen facing down.


    Screw in the standoff posts to hold the display controller card to the display. Connect the display and touchscreen wires as described on the official installation guide.
    Screw in the standoff posts to hold the display controller card to the display. Connect the display and touchscreen wires as described on the official installation guide.


    Insert the display cable to the video input on the controller card.
    Insert the display cable to the video input on the controller card.


    Place the Raspberry Pi above the display controller card and attach with the supplied screws that screw into the top of the standoff posts.
    Place the Raspberry Pi above the display controller card and attach with the supplied screws that screw into the top of the standoff posts.


    Connect the other end of the display cable into the output connector on the Raspberry Pi.
    Connect the other end of the display cable into the output connector on the Raspberry Pi.


    Use the supplied jumper wires to connect connect the power input of the display controller card...
    Use the supplied jumper wires to connect connect the power input of the display controller card…


    ...to the power output leads on the GPIO pins on the Raspberry Pi. This is one of three possible powering configurations--the other two involve USB.
    …to the power output leads on the GPIO pins on the Raspberry Pi. This is one of three possible powering configurations–the other two involve USB.


    This is the rear of the 7" Touchscreen Display assembled with the controller card and Raspberry Pi.
    This is the rear of the 7″ Touchscreen Display assembled with the controller card and Raspberry Pi.


    This is the front of the 7" Touchscreen Display with the power leads sticking out from behind.
    This is the front of the 7″ Touchscreen Display with the power leads sticking out from behind.


    This is the Raspberry Pi powered up again with the 7" Touchscreen Display.
    This is the Raspberry Pi powered up again with the 7″ Touchscreen Display.


    Mose and Miao had lost interest in the project by this point.
    Mose and Miao had lost interest in the project by this point.


    To complete the project, I cut a hole into a Suntory shipping box from Japan that is the exact same size as the 7" Touchscreen Display box, which would work well, too. It is works well for holding up the Raspberry Pi and storing its accessories when I go between home and work.
    To complete the project, I cut a hole into a Suntory shipping box from Japan that is the exact same size as the 7″ Touchscreen Display box, which would work well, too. It is works well for holding up the Raspberry Pi and storing its accessories when I go between home and work.

    Of course, you can use the Raspberry Pi with or without a case depending on your needs. I used the Suntory cardboard box from Japan for practical reasons (thinking: William Gibson: “the street finds its own use for things”–it’s a good size, on-hand, and looks cool) and research reasons (thinking about my work on proto-cyberpunk and the hidden nature of computing, which is an idea explored in my previous blog post about the poster that I created for the 13th annual City Tech Poster Session).

    I have run the computer and touchscreen from the 5v battery that I purchased from Tinkersphere, but I get a graphics warning that the Raspberry Pi is under voltage (a rainbow pattern square persists in the upper right corner of the display whether in the CLI or xwindows). I might get a second battery to run the display alone, which would help me troubleshoot if the battery that I have now is actually outputting enough voltage and amperage needed by the Raspberry Pi alone. In the meantime, I am running everything at my desk with the 5v power adapter, which provides ample power for the Raspberry Pi and 7″ Touchscreen Display.

    In the future, I would like to use the Raspberry Pi in a writing or technical communication course. There are many ways to leverage the technology: problem solving, writing about process, creating technical documents such as reports and instructions, using the Raspberry Pi as a writing/multimodal composing platform, digital storytelling with tools that come with the Raspberry Pi, and more. These ideas are built only around the Raspberry Pi and its software. A whole other universe of possibilities opens up when you begin building circuits and integrating the Raspberry Pi into a larger project.

    The basic cost of entry with the platform is $30 for the Raspberry Pi 2, Model B and a few dollars for an 8GB micro SD card. If you have access to a display with HDMI, a USB keyboard and mouse, and ethernet-based Internet access, you can get started with Raspberry Pi almost immediately. For a future grant application, I am imagining a proposal to purchase the basic needed equipment to use Raspberry Pi in an existing computer lab. I can bring the kits to each class where students can use them on different assignments that meet the outcomes for that course but in an engaging and challenging way that I think they would enjoy and would be beneficial to them in ways beyond the immediate needs of the class.

    On this last point, I am thinking of working with digital technology in an a way many of my students will not have had a chance to before, feeling a sense of accomplishment, learning from one another on team-based projects, experiencing a sense of discovery with a computing platform that they might not have used before, and of course, communicating through the process of discovery in different ways and to different audiences. This might be something that you’re interested in, too. Drop me a line if you are!