Tag: Linux

  • Computer Metamorphosing, or Upgrades as a Way of Life

    Gradient blend of my most recent desktop computer from before (left) to now (right).

    “In nova fert animus mutatas dicere formas / corpora.”
    “It is my design to speak of forms changed into new bodies.”
    –Ovid, Metamorphoses: Translated into English Prose, Published by G. And W.B. Whittaker, London, 1822, p. 1.

    As much as I wish that I had a hoard of computers in a basement or attic, I don’t. It’s not for a lack of want to keep my old computers. It’s always been a financial consideration–sell the old to help finance the new (or used = new to me). While an errant tree limb destroyed my first practical computer–an Amiga 2000HD, I’ve been selling my old computers to help pay for newer ones and upgrades since I was in high school when I sold my 486 DX2/66MHz system before going off to Georgia Tech in 1995.

    For someone who values and enjoys working on vintage computer systems, it’s a bitter pill to swallow that I have to do this. However, it also means that my computers often take on a Frankenstein monster-like existence of becoming–morphing from one system into another via upgrades and reconfigurations.

    I wanted to share some background on my most recent desktop computers from the past 10 years or so as a way to reflect on this practice of tinkering and changing that produces more capable and powerful computer over time. Sometimes, a shift in architecture or new work requirements calls for a change. Sometimes, it’s wanting to try something new.

    2012: Intel i7-2700K in Corsair Case

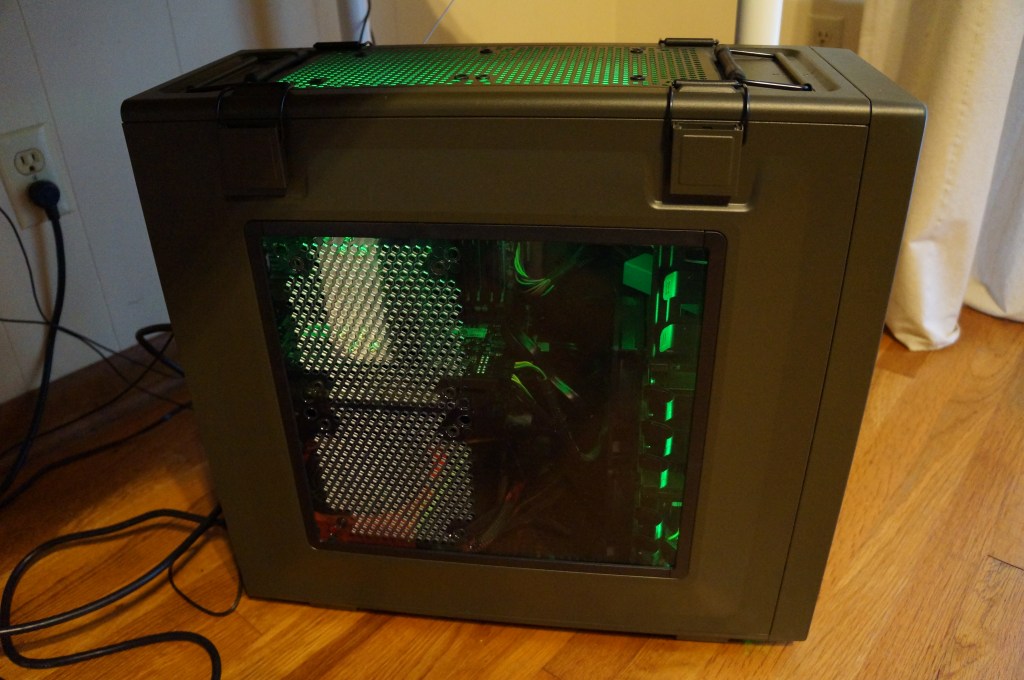
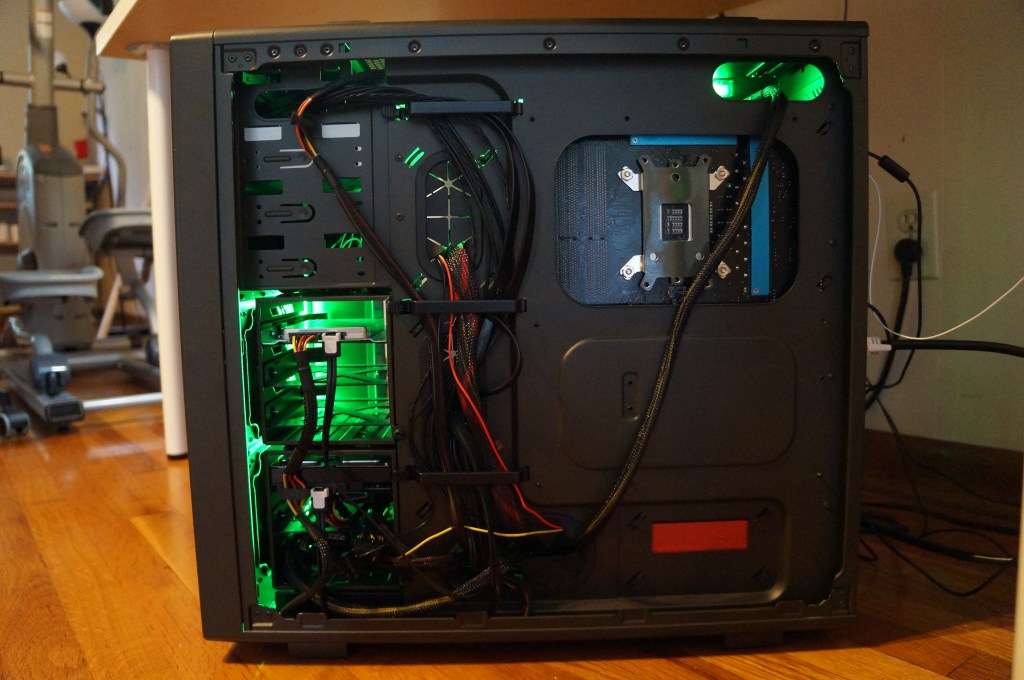
    I wrote about turning this computer, which I had originally intended to use with Windows 7, into a “Customac” or “Hackintosh,” meaning a PC that ran MacOS X, here and here. I built the computer using on sale gear from the Microcenter in Duluth, GA. The 50 cal. ammo box case by Corsair and green cold cathode light tubes were its two extravagances.

    2014: i7-2700K in Retro Sleeper Case

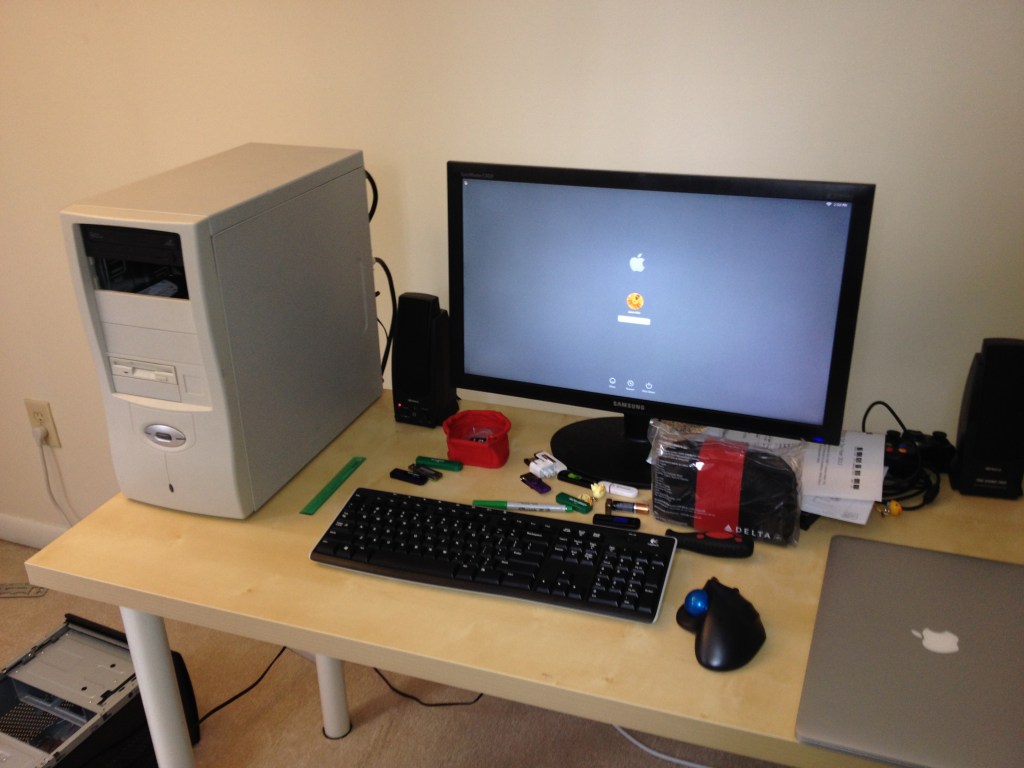
    Before moving to Brooklyn to start my job at City Tech, I asked my friend Mark with help finding a beige ATX case that I could transplant my i7-2700K system into. What the kids call a “sleeper case,” or a retro-styled case but sporting contemporary computing kit. By this point, I had jettisoned the video card and relied on the CPU’s built-in graphics as this simplified using it as a Hackintosh.

    After moving to Brooklyn, I switched from MacOS X, which was becoming more troublesome with Apple ID-connected software with Hacintoshes, to Linux Mint.

    I had a Sapphire video card of some sort, but I can’t recall what it was now.

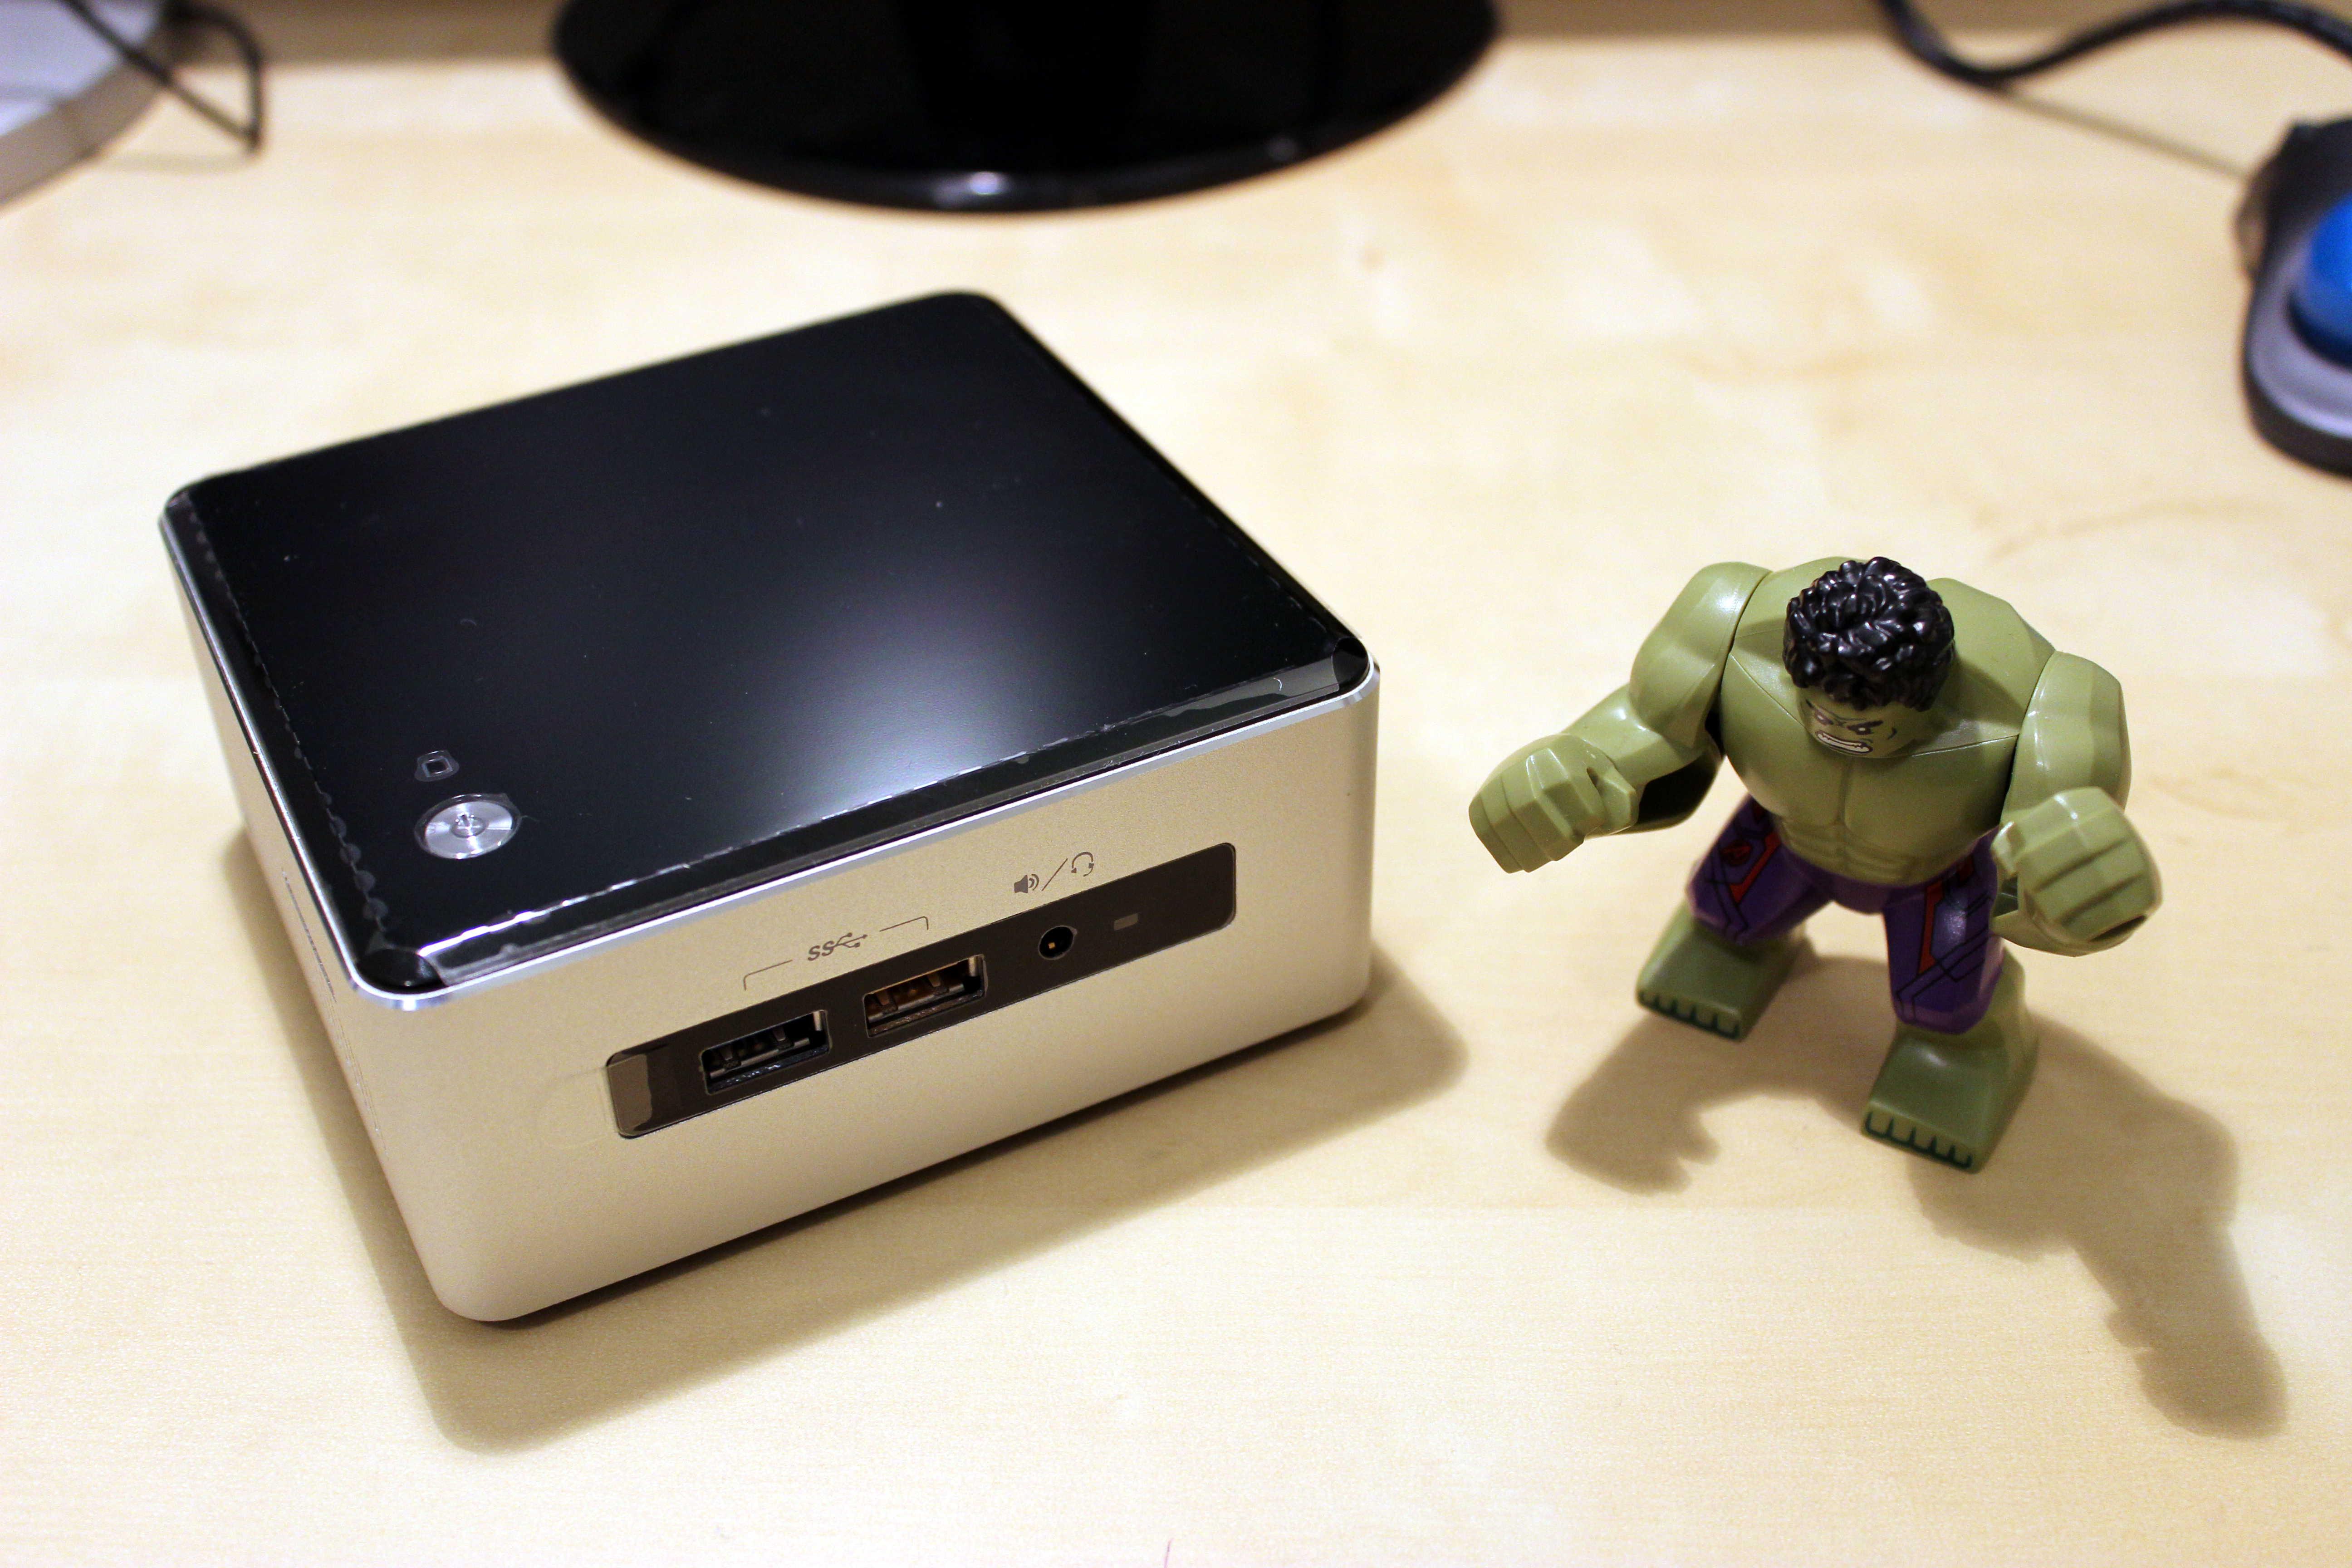
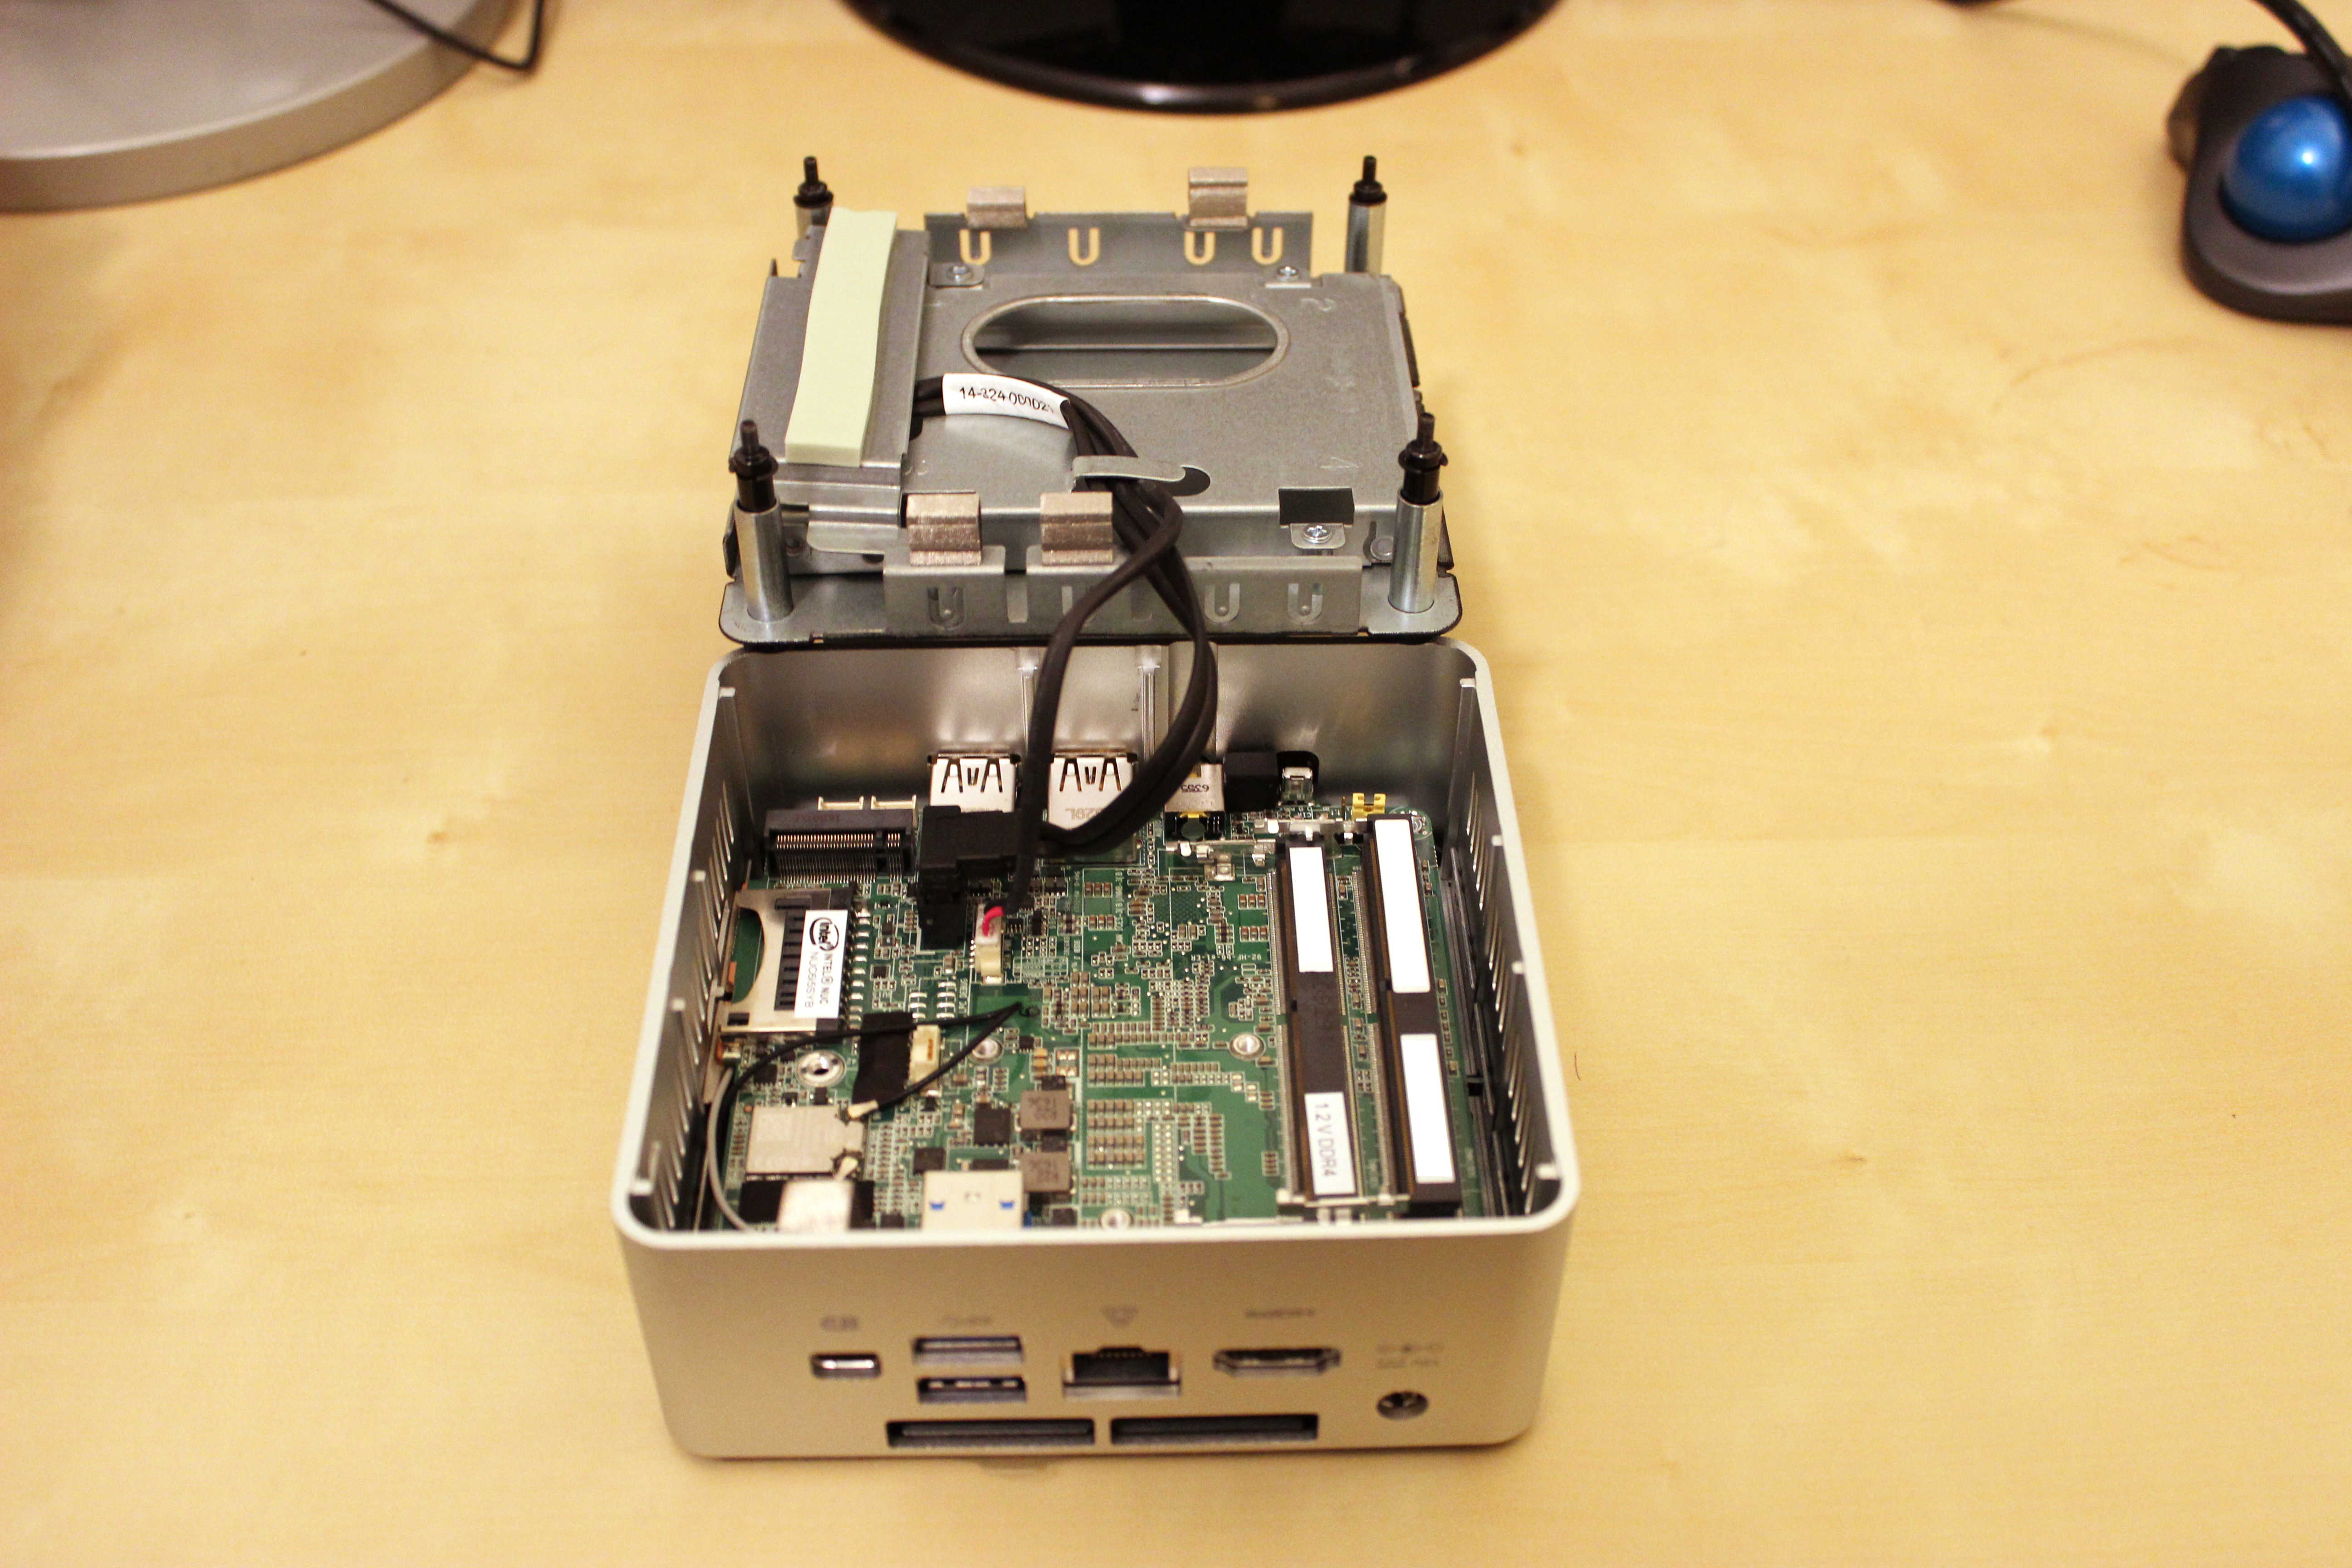
    2016: Intel NUC 6I5SYH with i5-6260U CPU

    I carried the i7-2700K sleeper system to City Tech to use in my office space. This left me with only a MacBook to use at home. When I saw the Brooklyn Microcenter offer an i5-based NUC for sale, I thought that would fulfill my computing needs at home and be a new kind of miniature computing experience for me. I wrote about my initial setup of it here. I was surprised by its capabilities, but new computing needs led me to build a new computer.

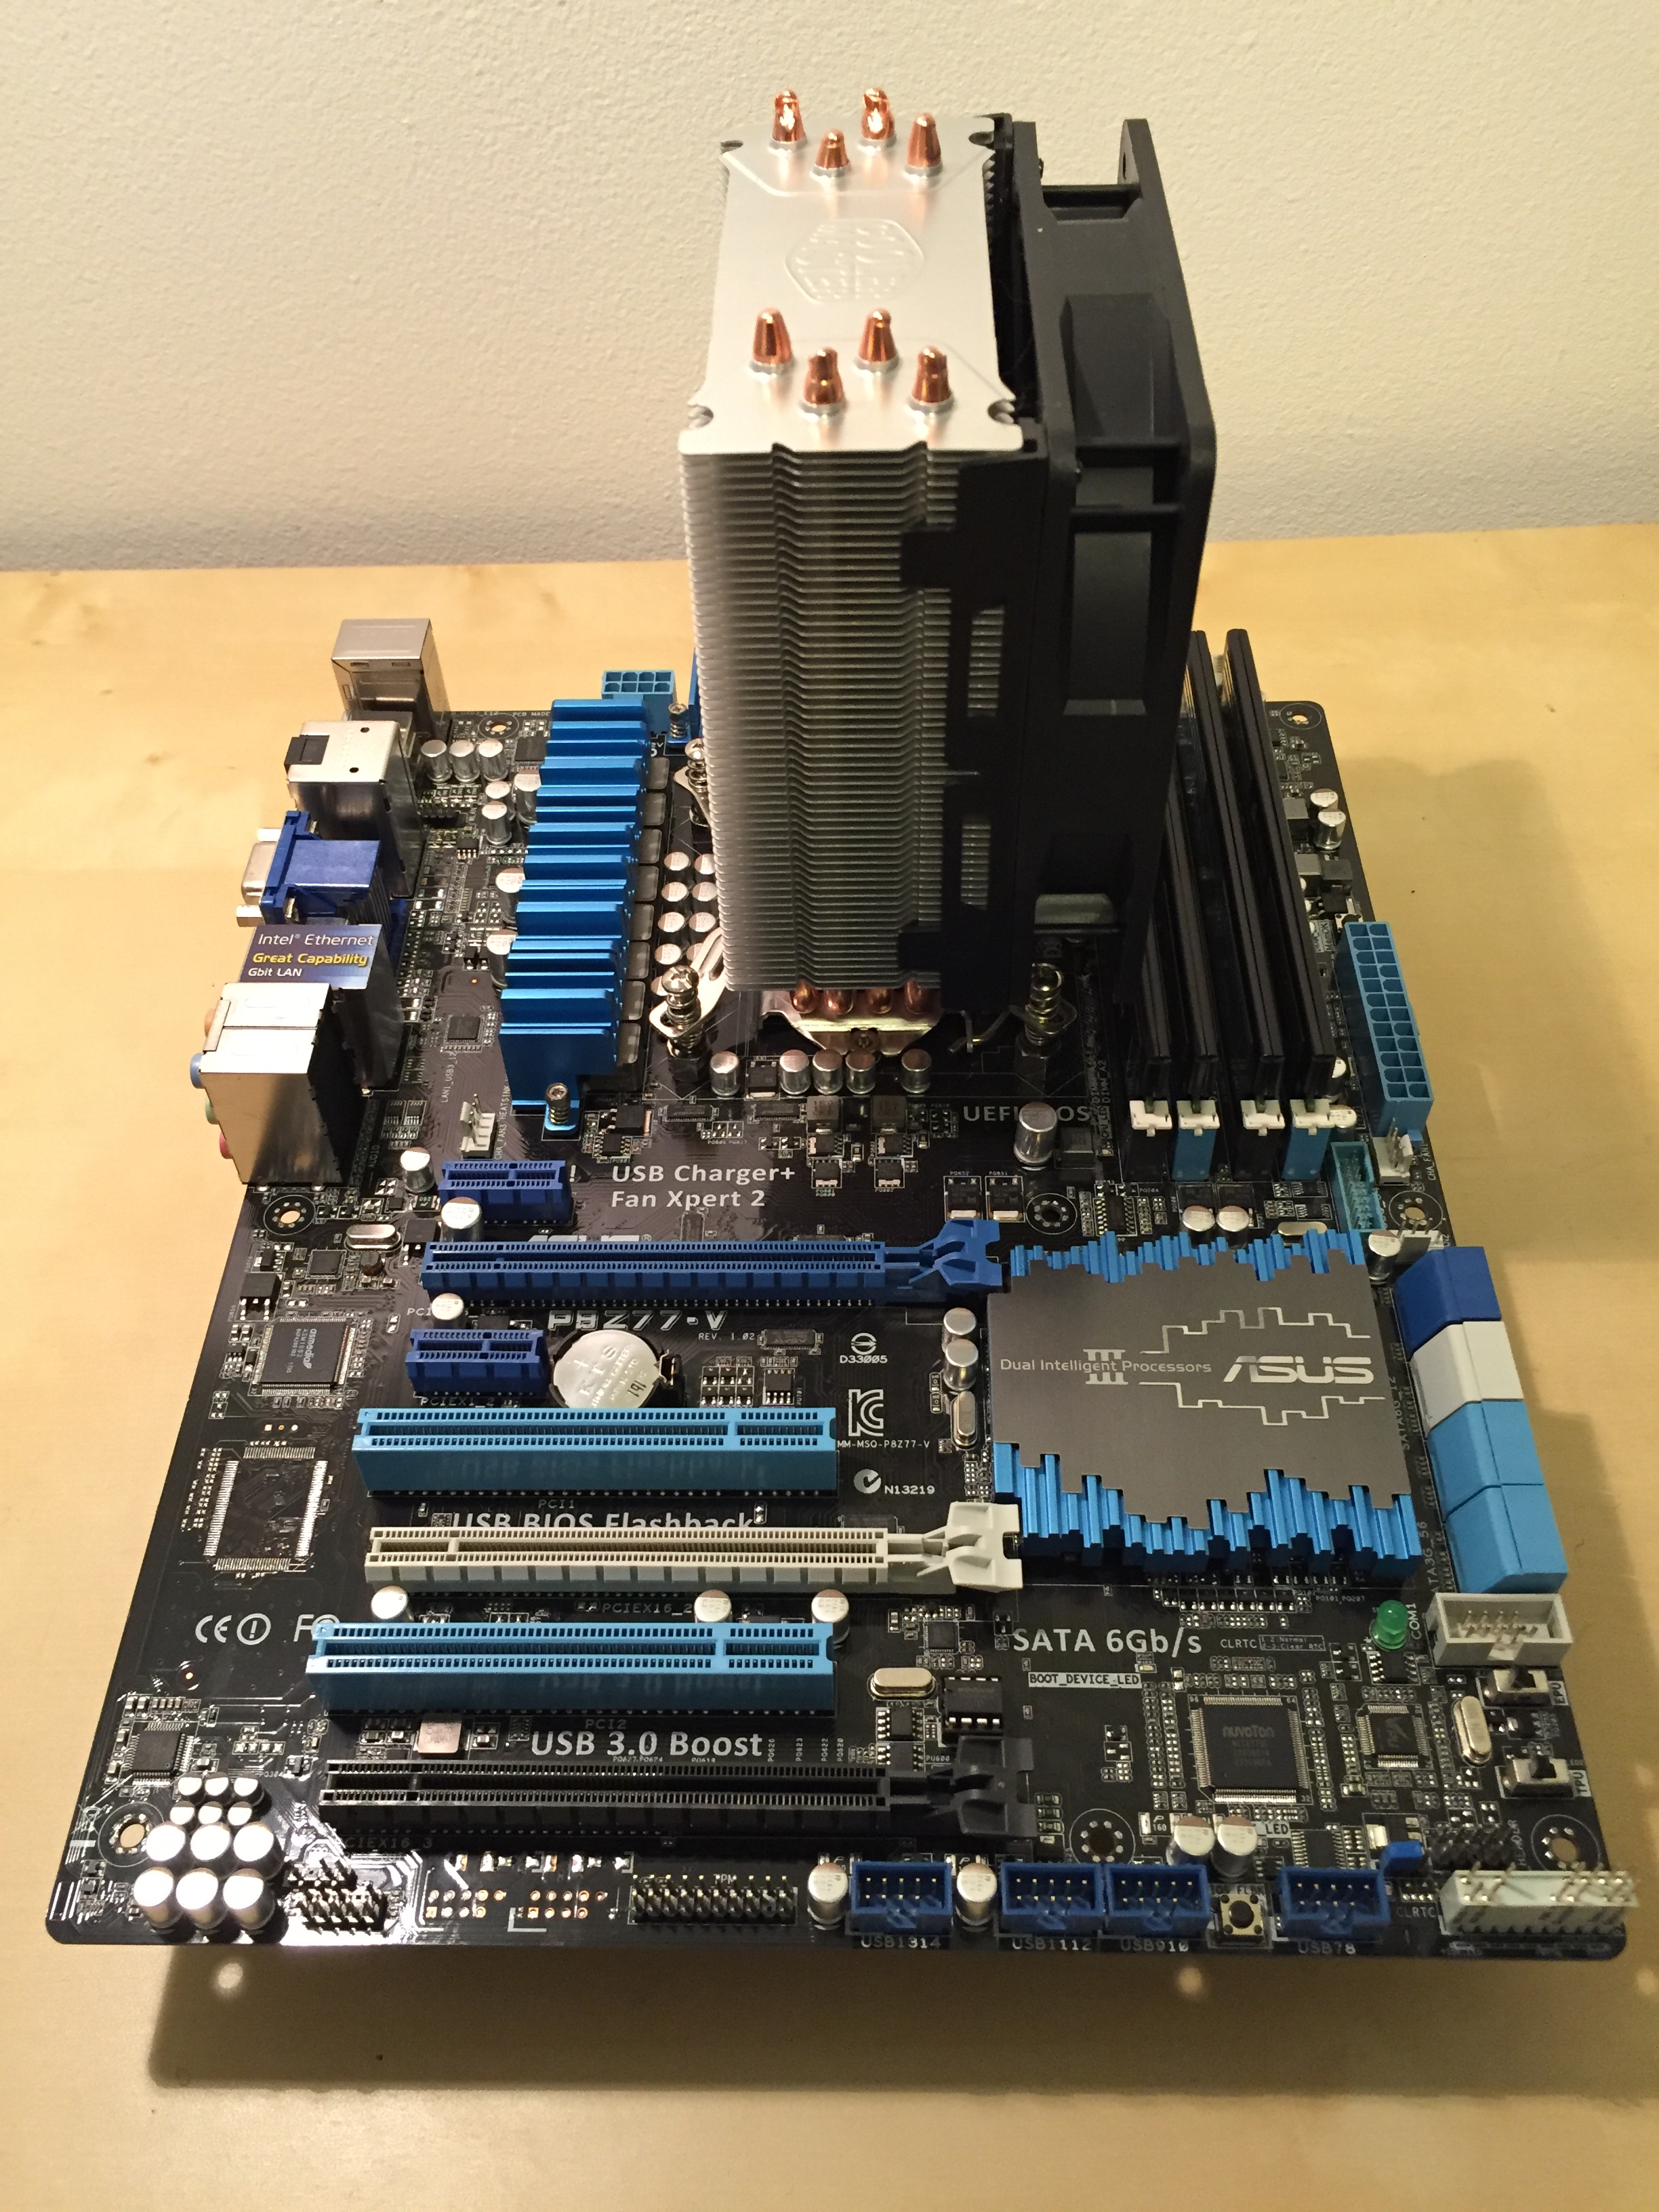
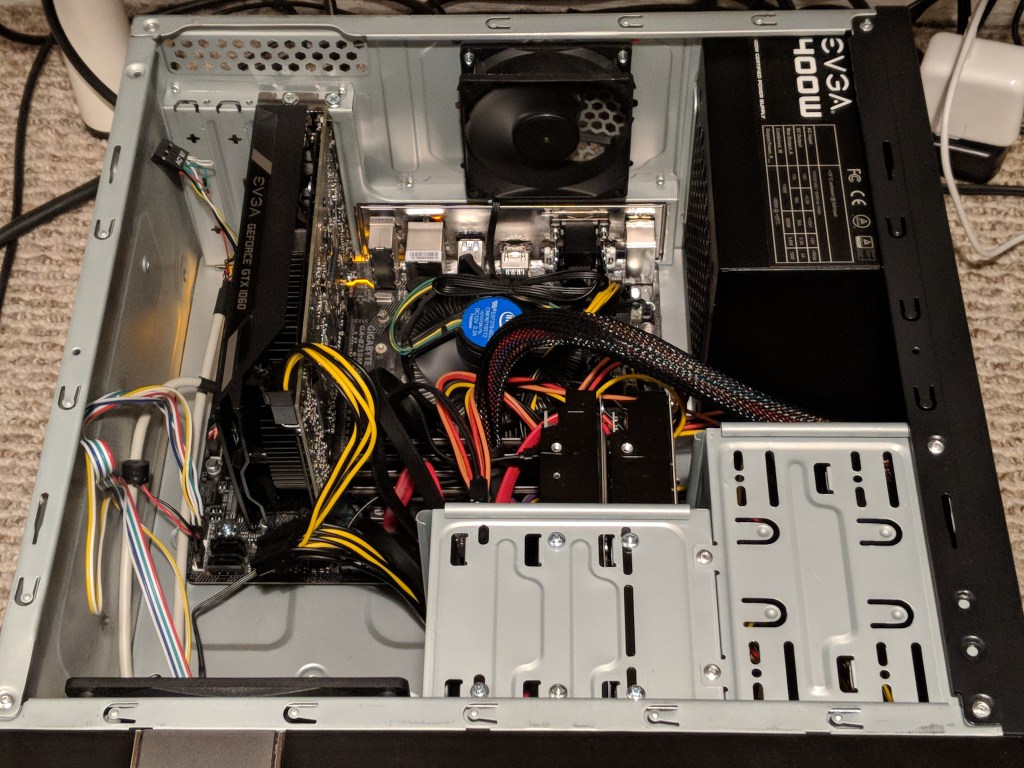
    2017: Homebuilt Computer with i7-7700 CPU

    I wrote about building, pricing, and benchmarking the first iteration of this i7-7700 based computer here. There were several needs that prompted me to build this machine: I run my own self-hosted instance of World of Warcraft Vanilla and experience some fan-built 3D experiences based in the Star Wars and Star Trek universes. The i5 NUC didn’t have the horsepower for this, so I sold it and built this new computer.

    Later, I wanted to try out virtual reality, so when Best Buy had a sale on the Oculus Rift, I purchased a beefier NVIDIA GTX 1060 video card and VR headset (I’ll write about this more soon).

    I wasn’t happy with the Oculus Rift in my small apartment space, so I sold it and the MSI Geforce GTX 1060 video card. Then, when Microcenter ran an insane deal on HP’s Mixed Reality headset, I picked it up and an EVGA Geforce GTX 1060 to try VR again (more on this soon).

    Long story short: I struck out with VR again, so I sold the 1060 video card and HP mixed reality headset and settled on the built-in video graphics, which is fine for most things on a day-to-day basis.

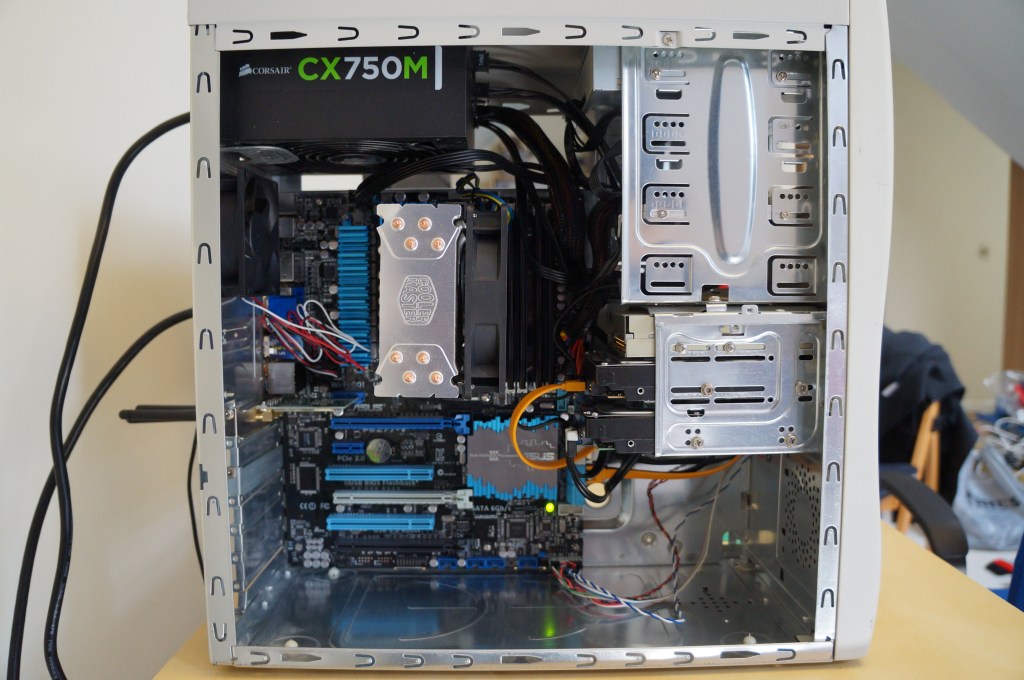
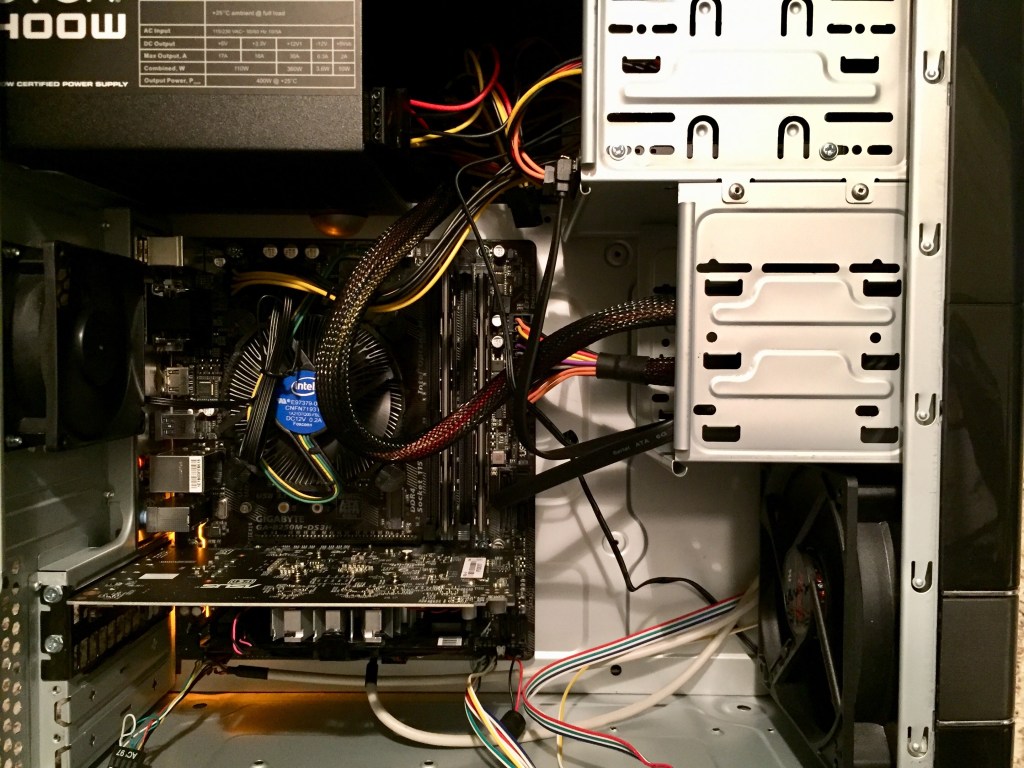
    2020: Pandemic and Upgrades

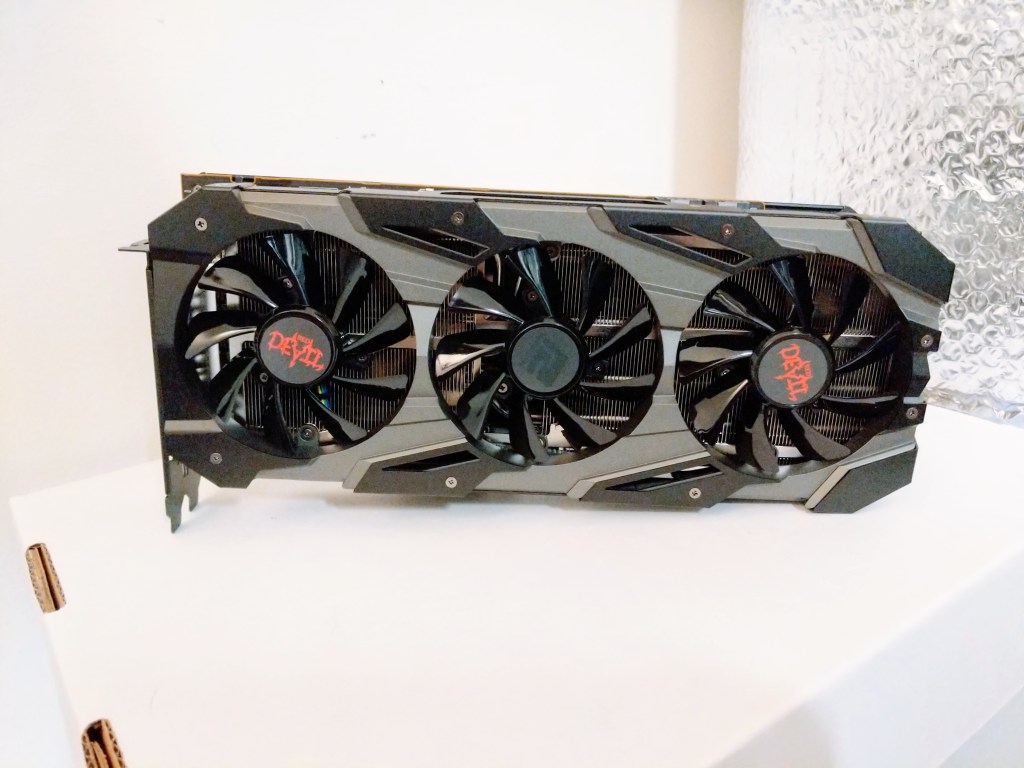
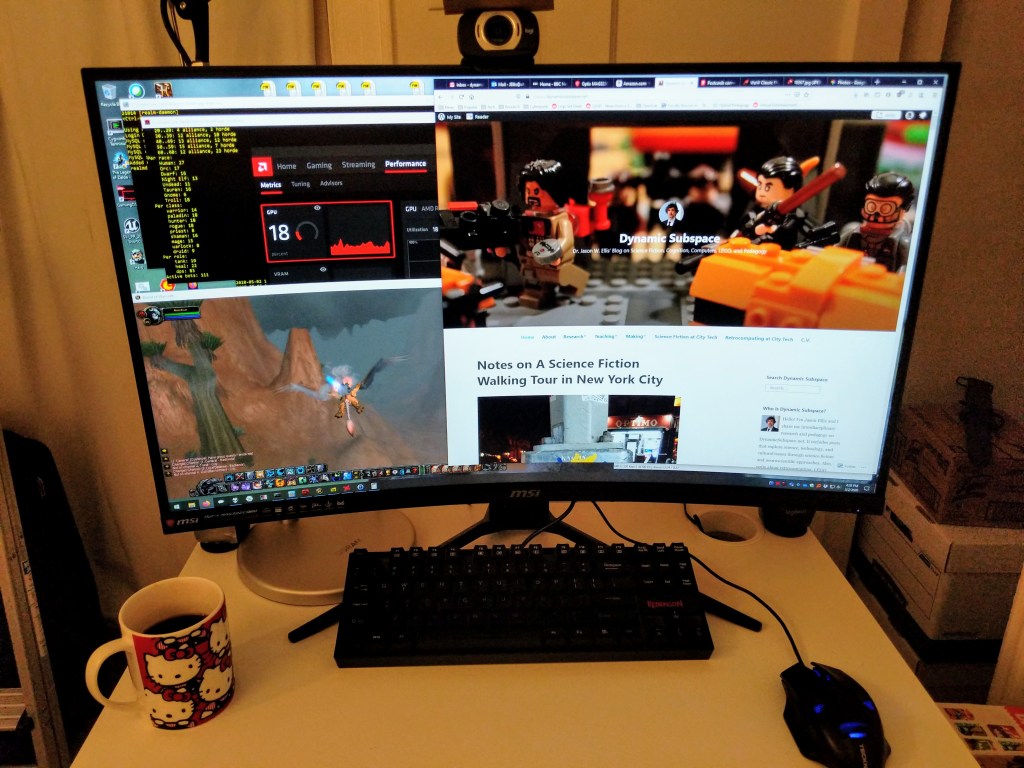
    Then, the pandemic hit in 2020 and I was doing everything with my computer–lecturing, video editing, running online symposia, etc. So, I used my first pandemic Economic Impact Payment to purchase a Powercolor Red Devil AMD RX5700XT video card and an MSI 32″ curved LCD monitor to support my online, video-focused existence at that time.

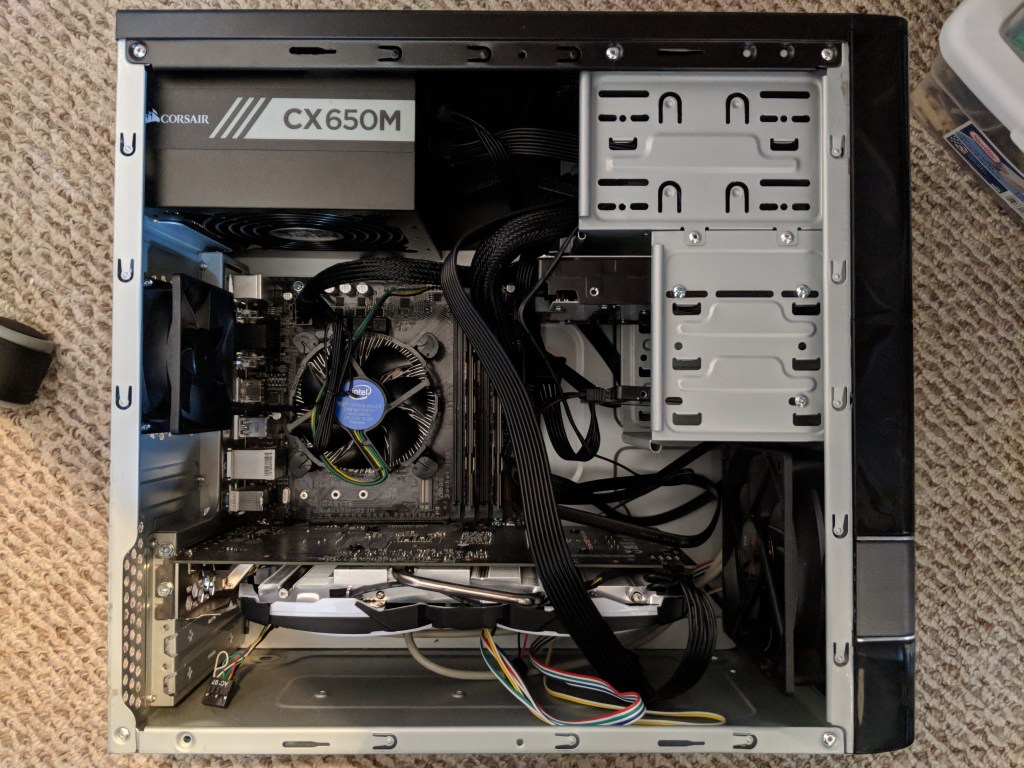
    My small micro ATX case wasn’t an ideal solution for the thermal needs of the RX5700XT video card, so I transplanted the computer into a more spacious Corsair Carbide Series 100R case.

    And, I added a cool 5.25″ drawer insert to keep my flash drives and other on-hand media.

    Before selling it, I had swapped out the RX5700XT video card for an MSI AMD RX550 and sold the RX5700XT for a profit due to the beginnings of the video card shortage during the cryptomining boom during the pandemic.

    2021, early: Lenovo IdeaCentre 5 with Ryzen 4700G

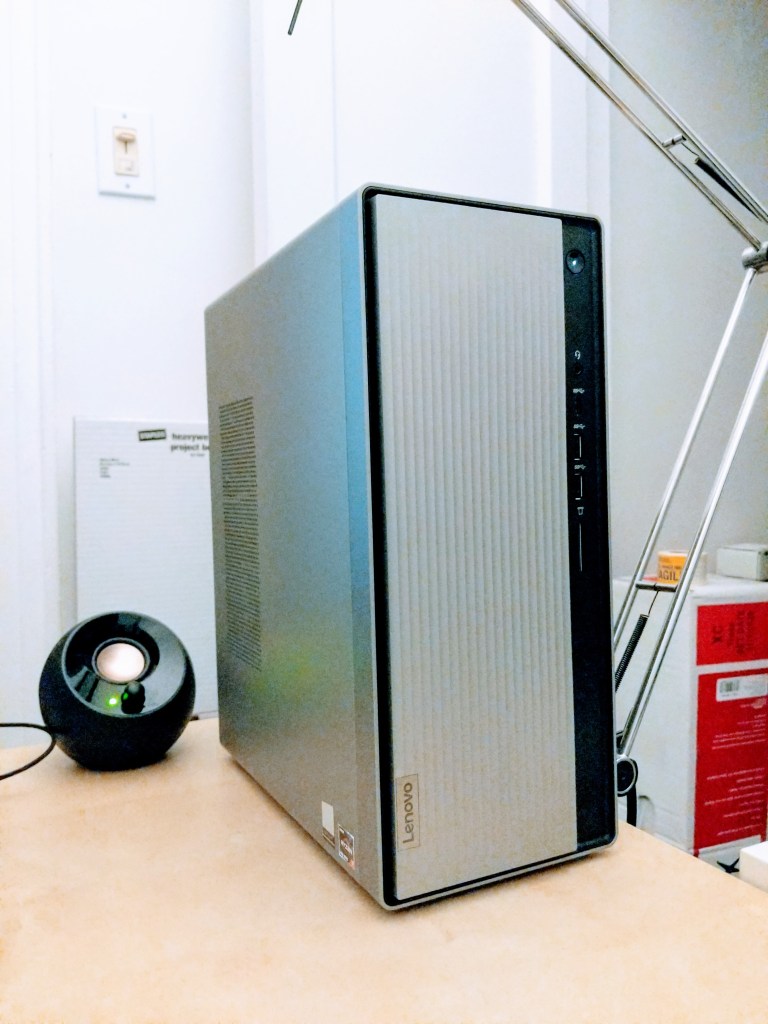
    Even though the RX5700XT video card was great, I ran into some cases where video card processing workflows produced workflows that I wasn’t happy with. I didn’t want to change software, so I figured the easier solution was to shift to tried-and-true CPU-focused workflows on a processor with more horsepower than the i7-7700. I opted for the least expensive Ryzen 7 system that I could find–a Lenovo IdeaCentre 5 with Ryzen 4700G. It was easy to modify and make strategic upgrades to for my needs. I wrote about purchasing this system on sale and upgrading its CPU cooler here and then improving its CPU cooling a few months later here.

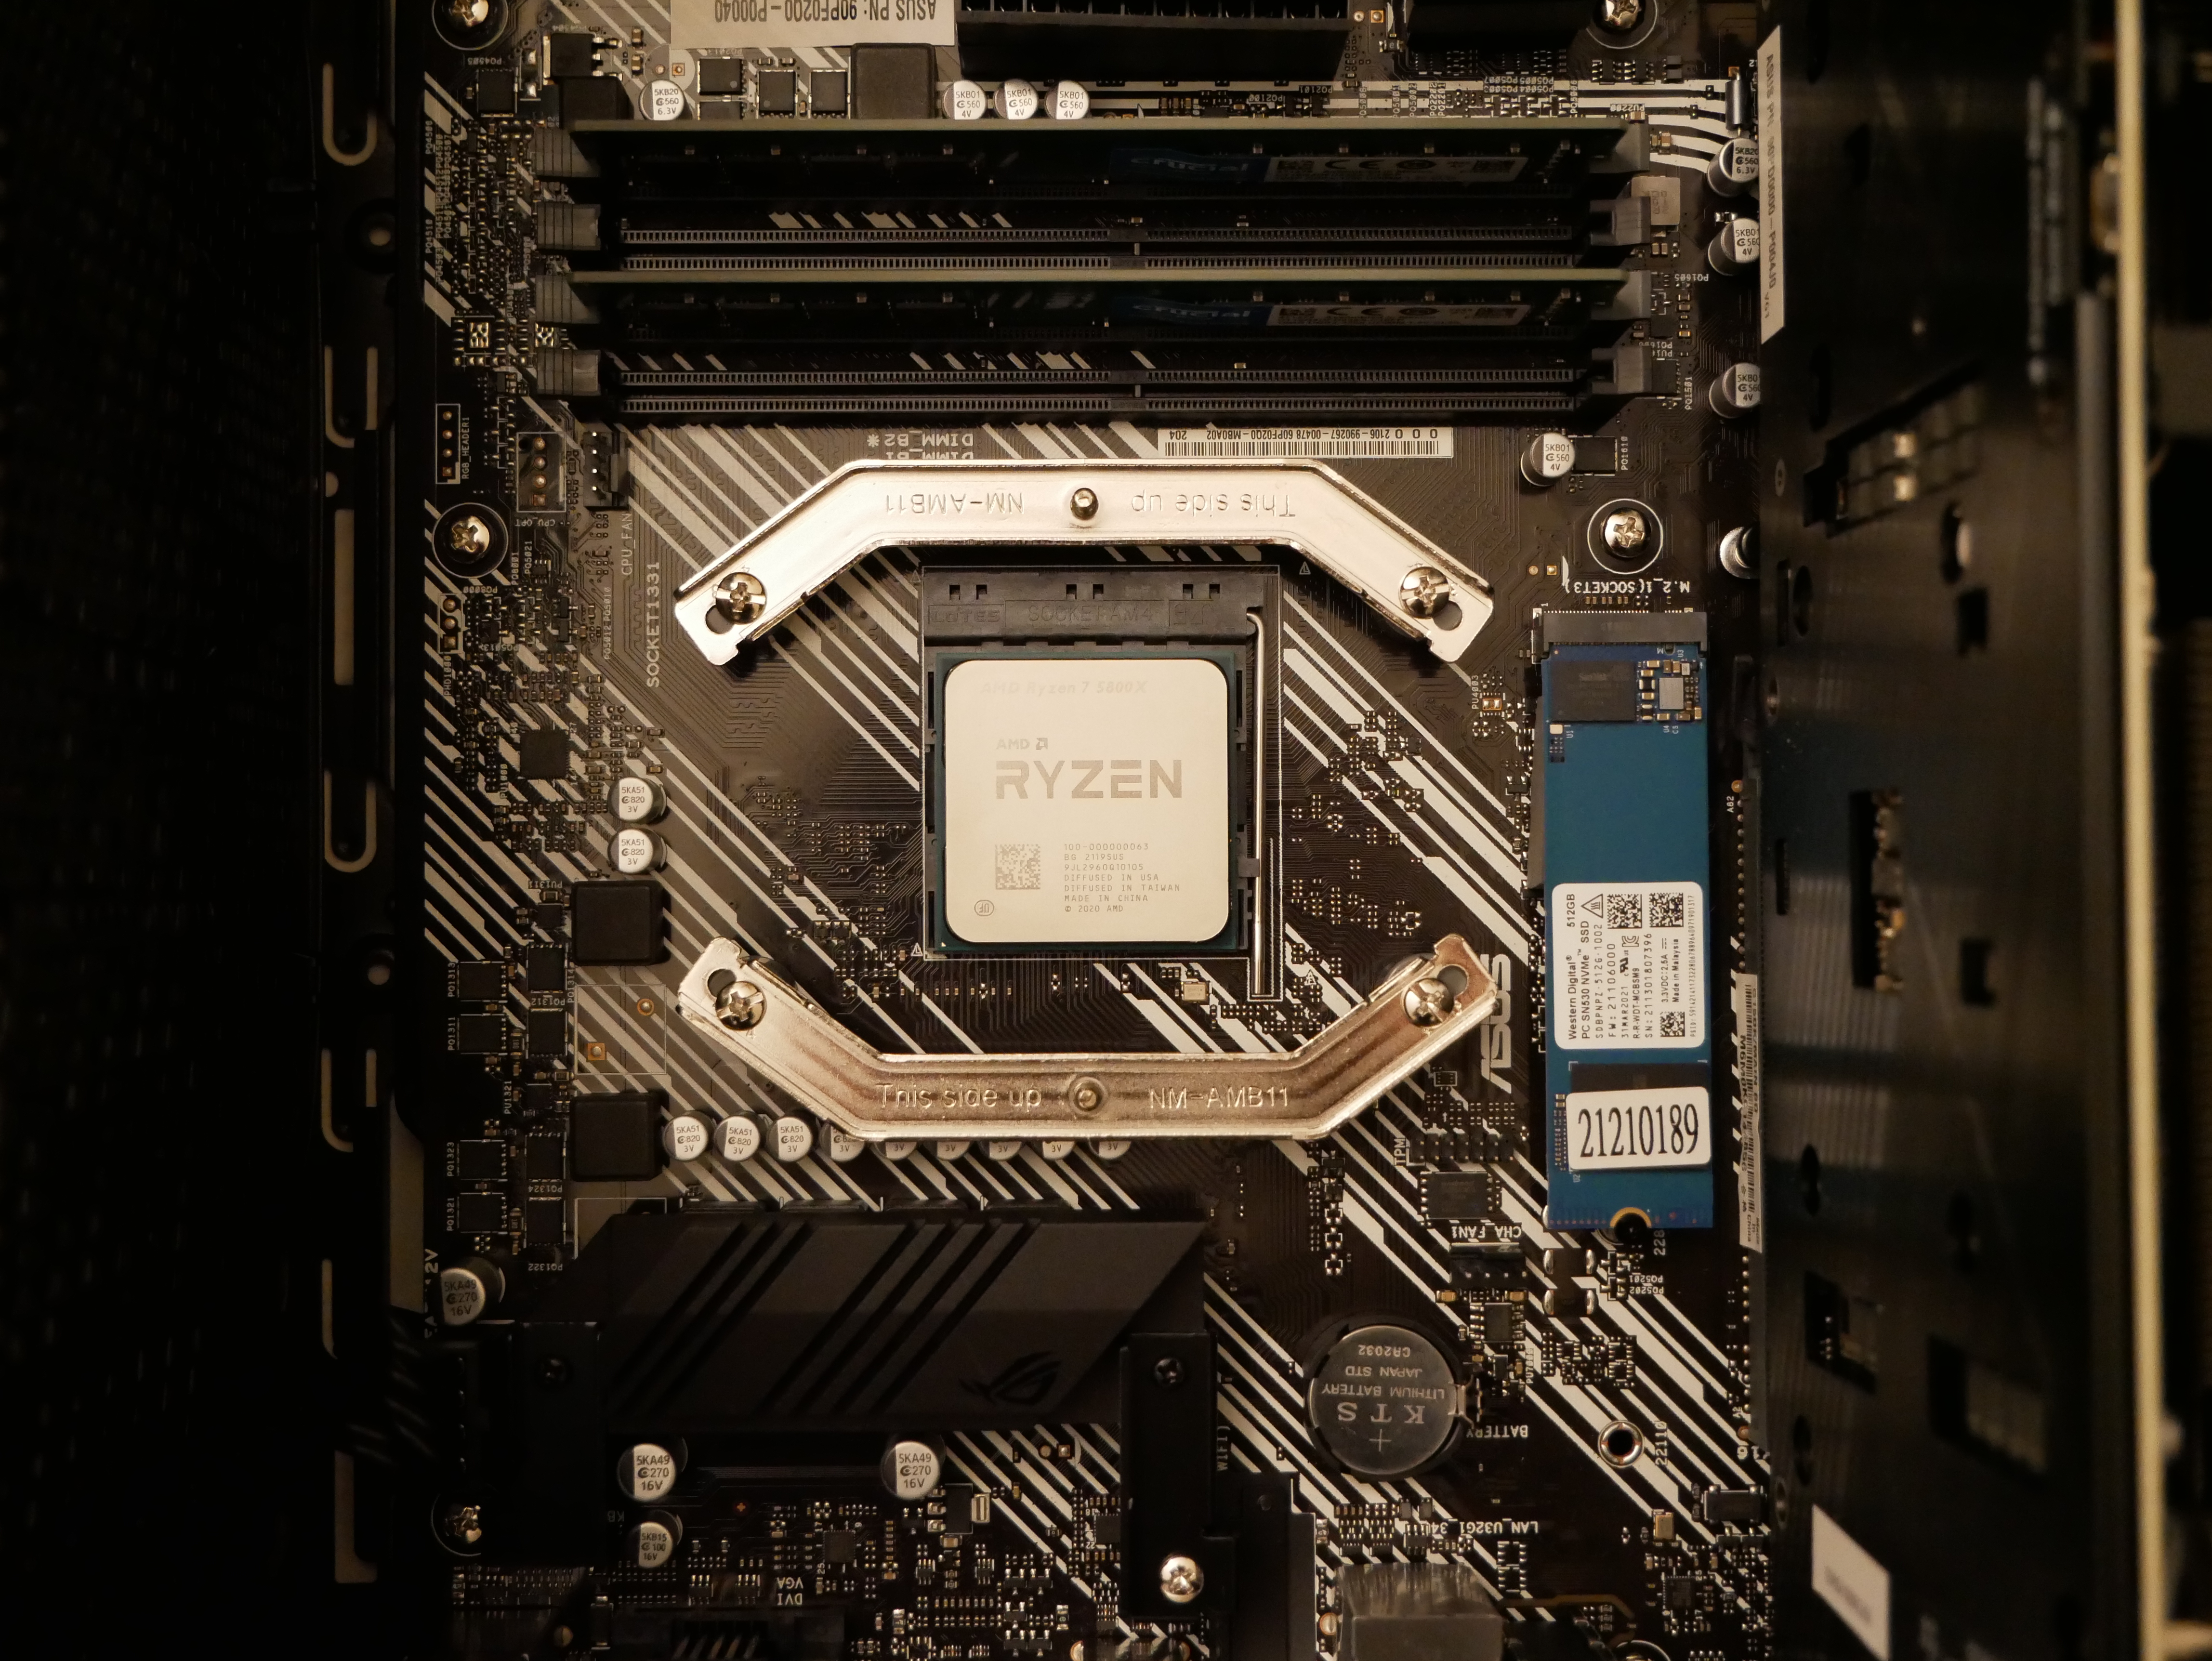
    2021, late: Asus ROG G15DK with Ryzen 7 5800X

    Asus ROG G15DK desktop computer with side window revealing its interior components.

    While I enjoyed the Lenovo IdeaCentre 5, I began seeing new 3D demos and games released that I was interested in checking out. Lenovo’s big shortcoming was its proprietary power supply. If I had been able to swap it for a more powerful one, I could have got a video card and made the upgrade. Unfortunately, there are tales across the Internet of a mismatched PSU or adapter killing someone’s Lenovo desktop. Therefore, I began looking for a good deal on a complete system with a similar 8 core/16 thread system with a beefy video card. Granted, this was at the height of the video card shortage, so I remained patient and studied the market while waiting to pounce on this deal when I saw it.

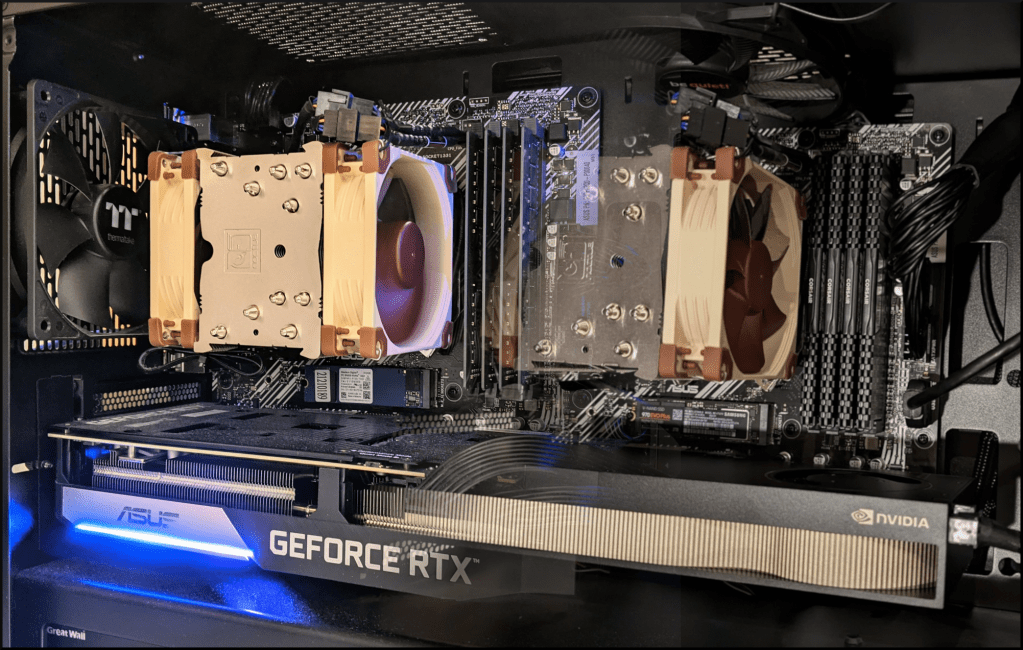
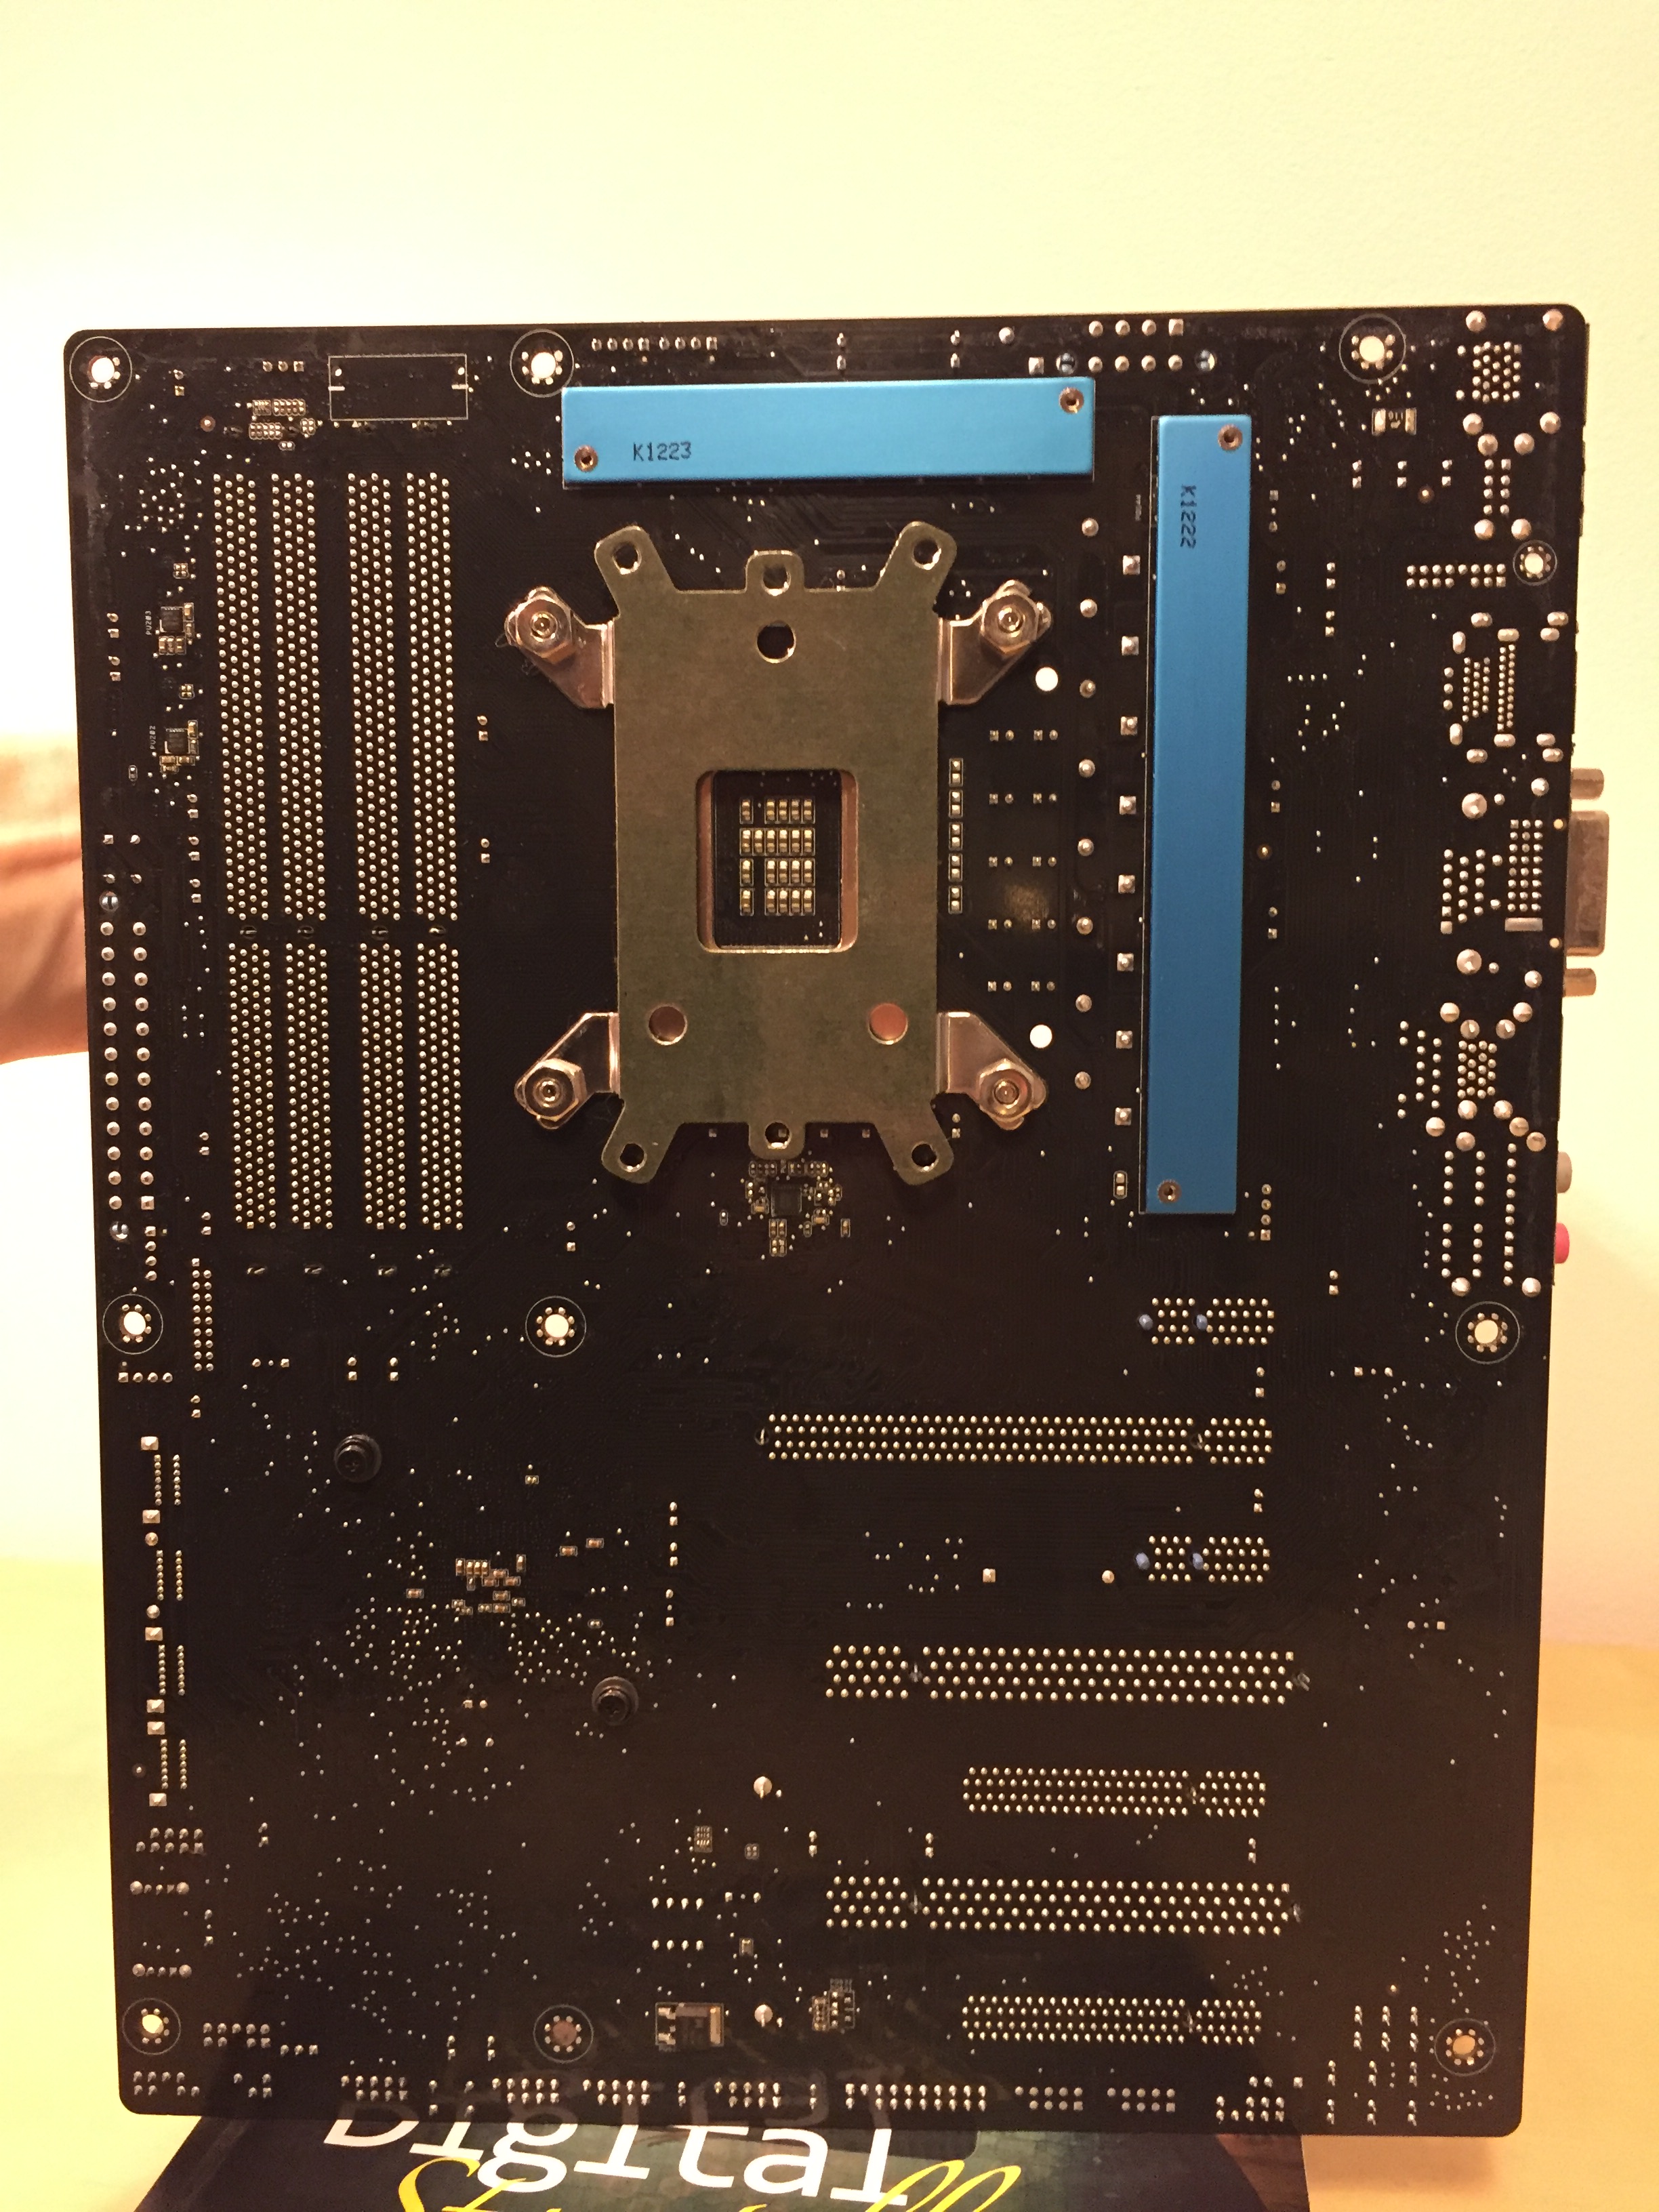
    The Asus ROG G15DK came with a motherboard similarly speced to an Asus PRIME B550M-K with an AMD Ryzen 7 5800X 8-Core/16-Thread CPU, 16GB RAM, 512GB NVMe boot drive, WiFi (occupying second NVMe slot), and NVIDIA RTX 3070 8GB video card. I swapped the 32GB of RAM from the Lenovo with the 16GB of RAM in the Asus, pulled out the WiFi card to free up the second NVMe slot, and ripped out the disco lighting that was pre-installed in the case.

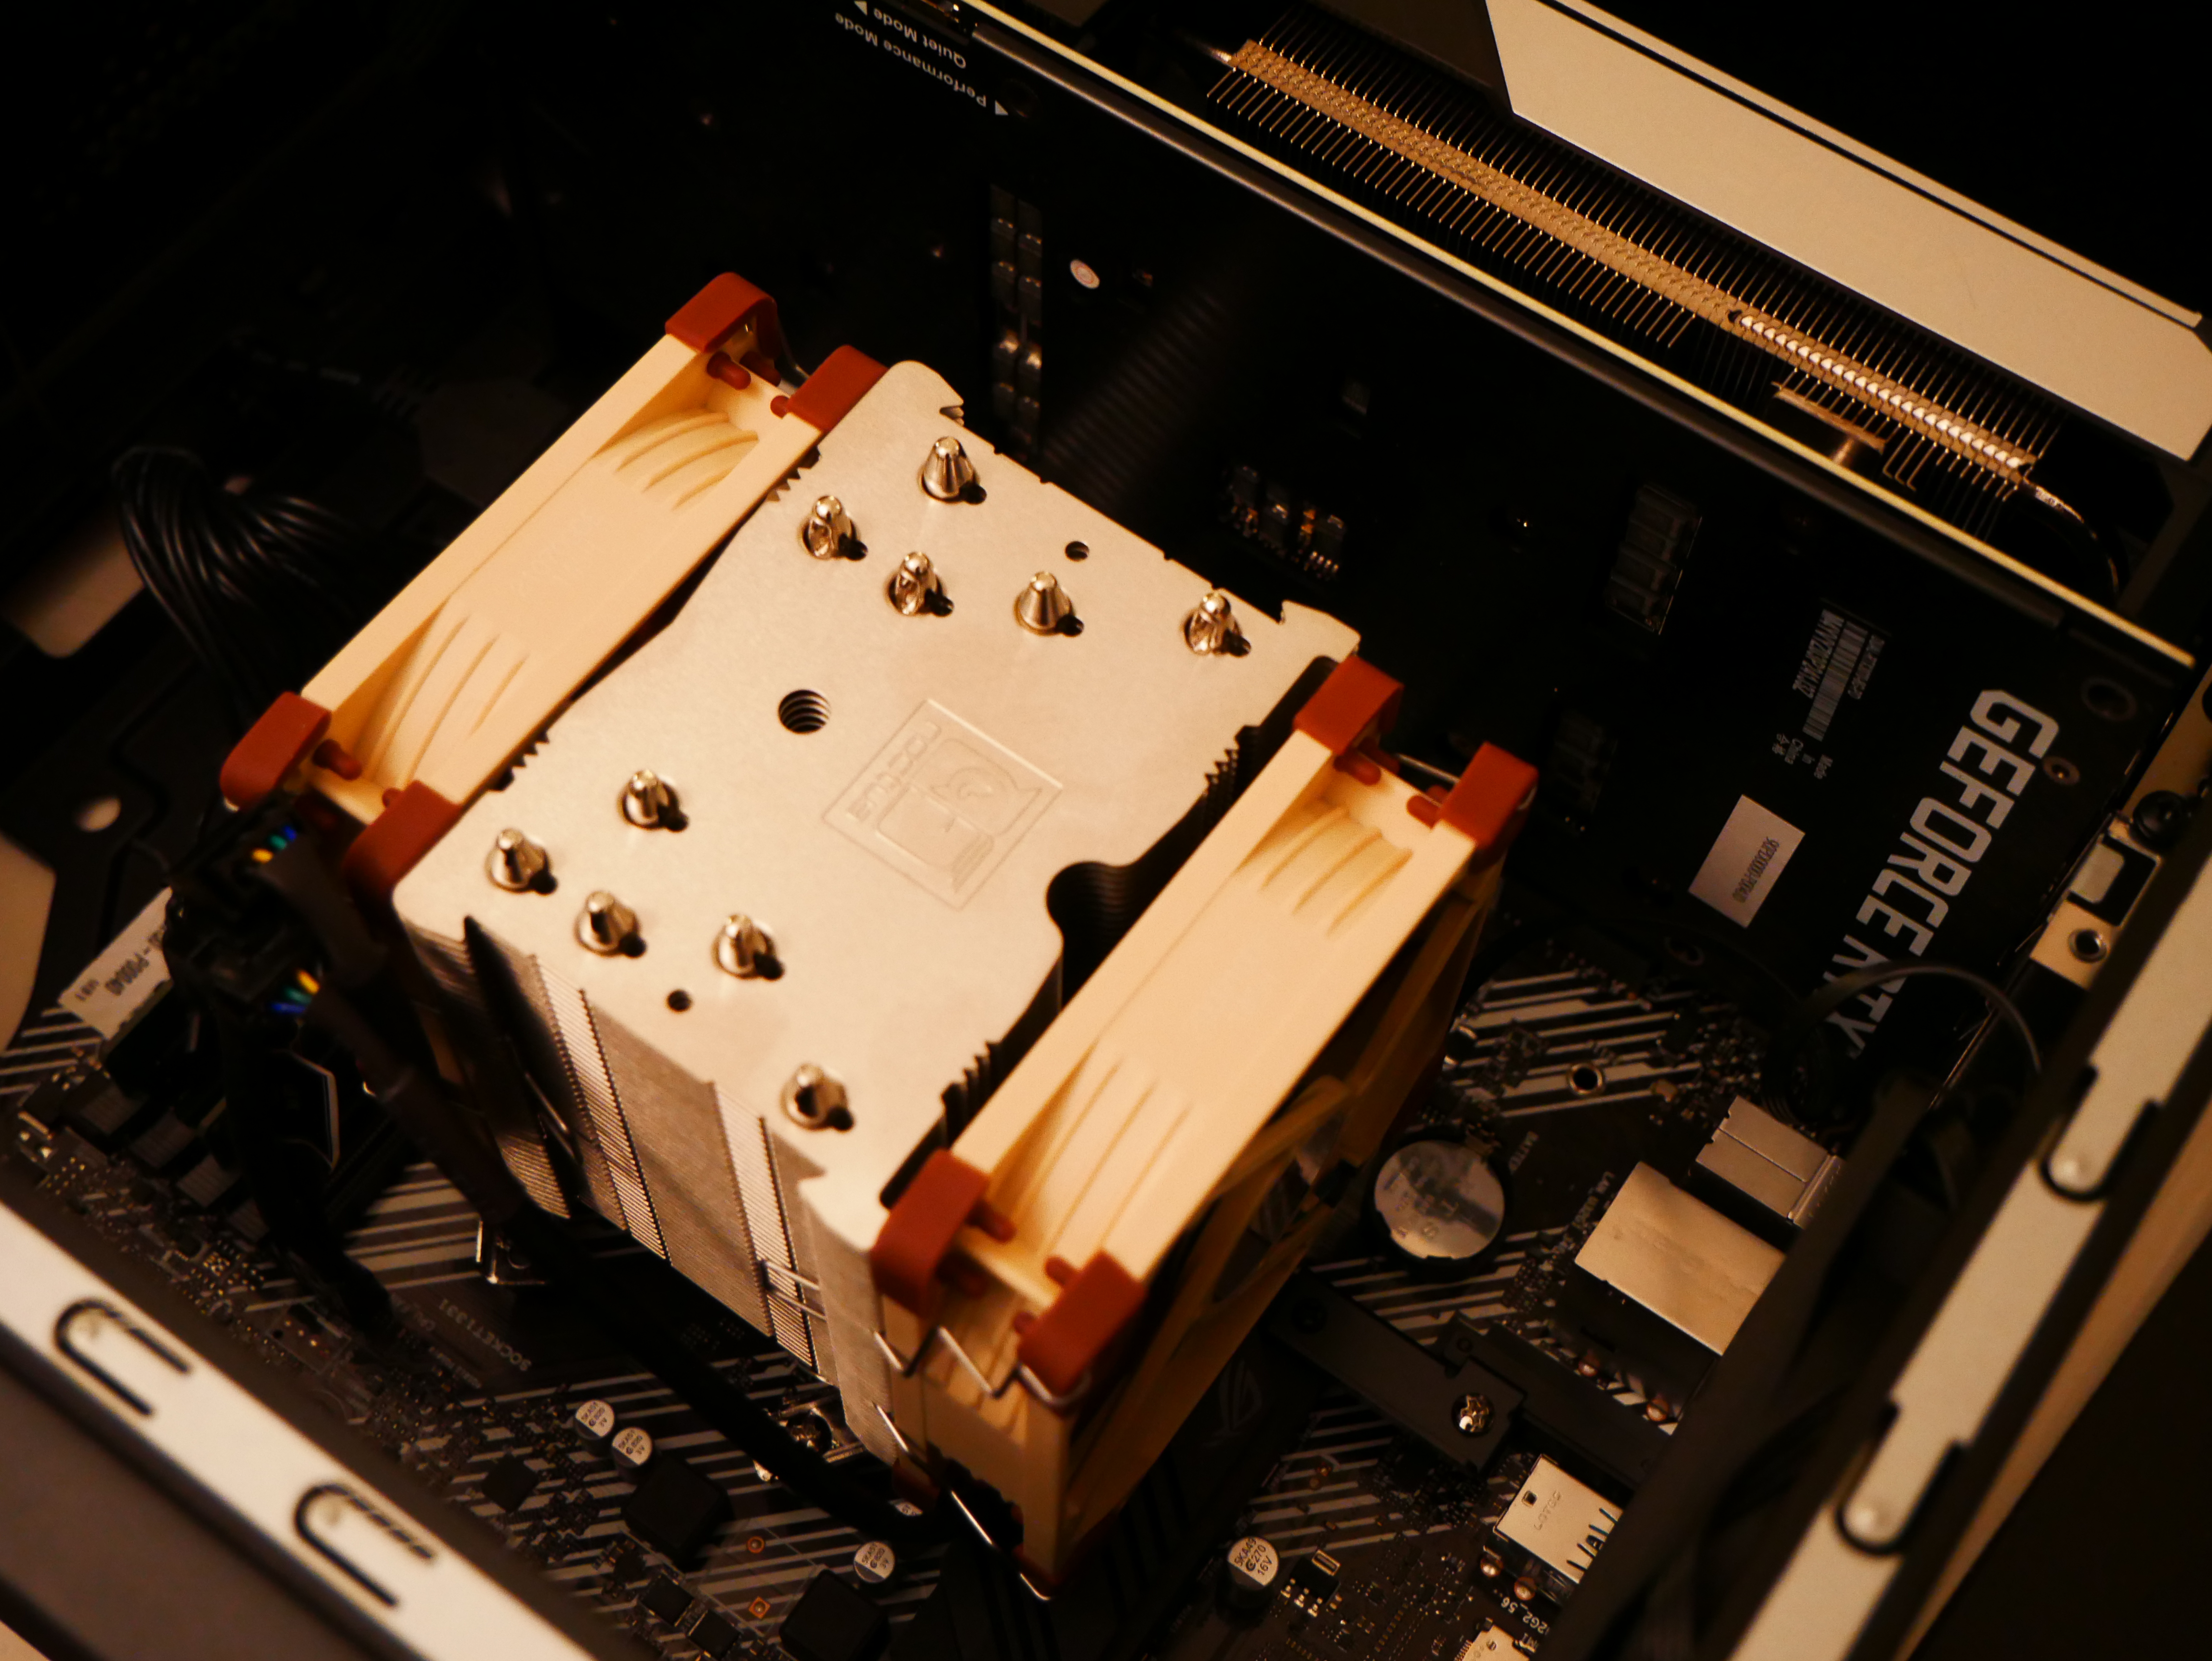
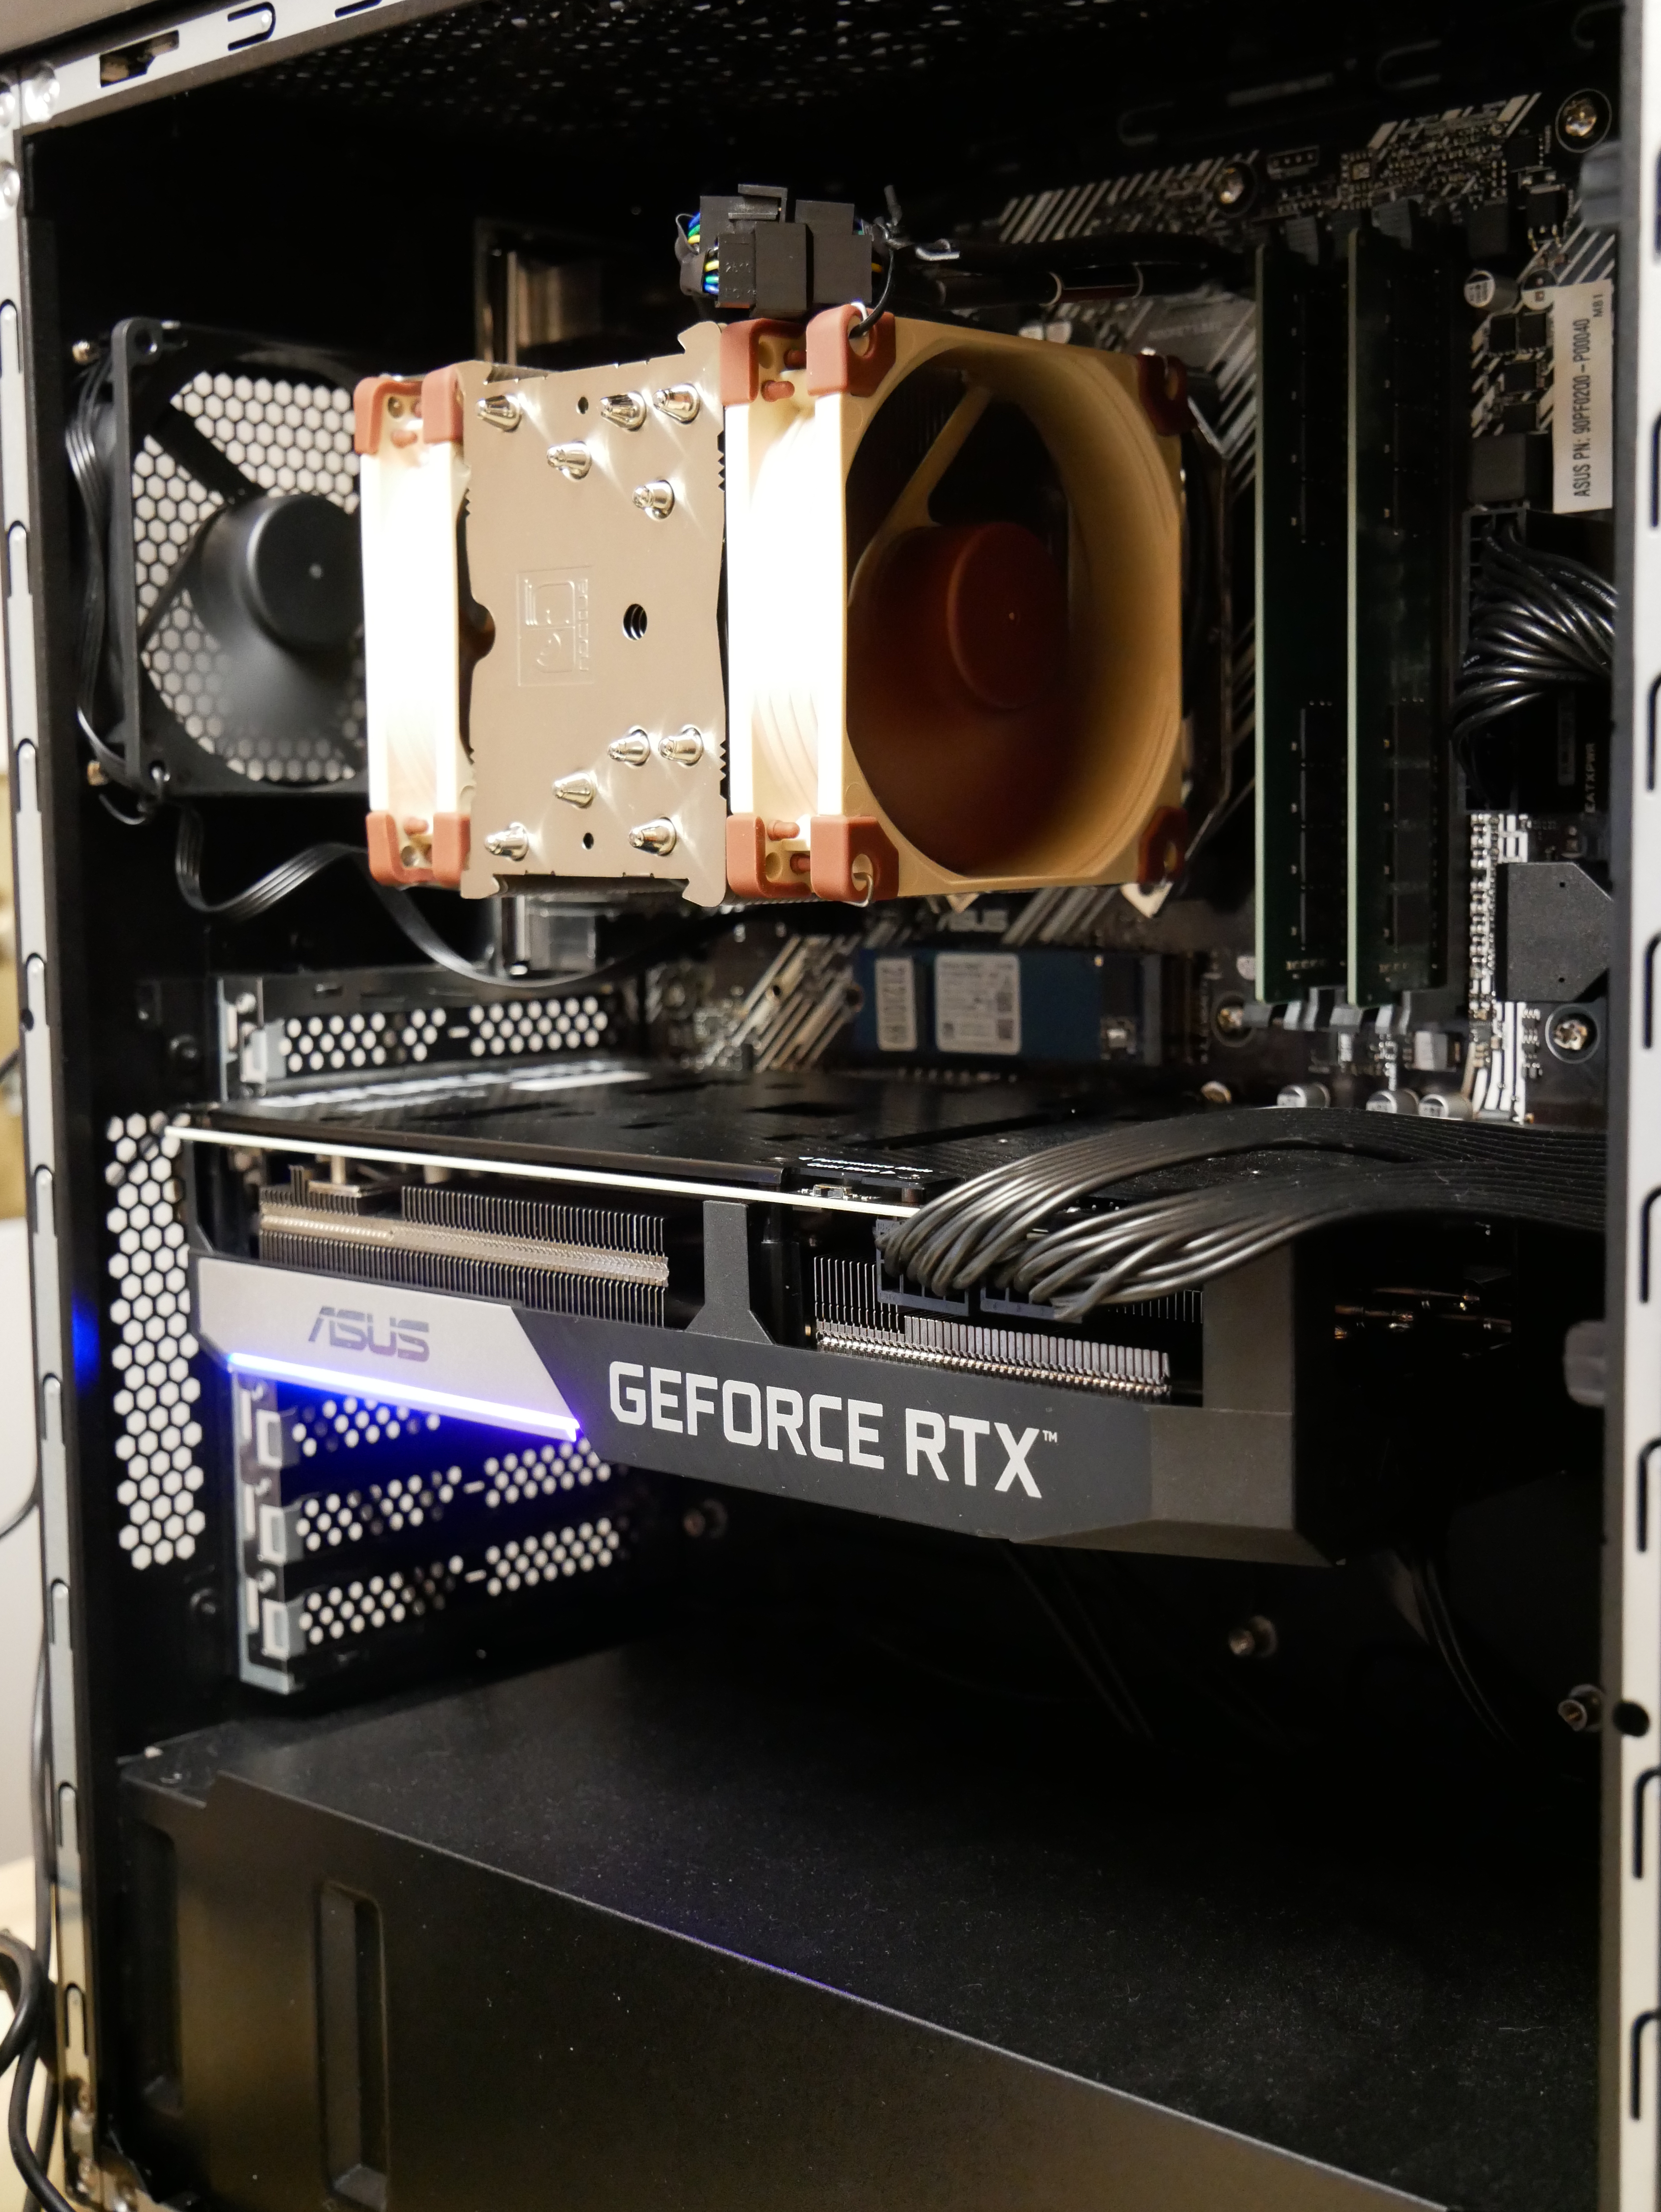
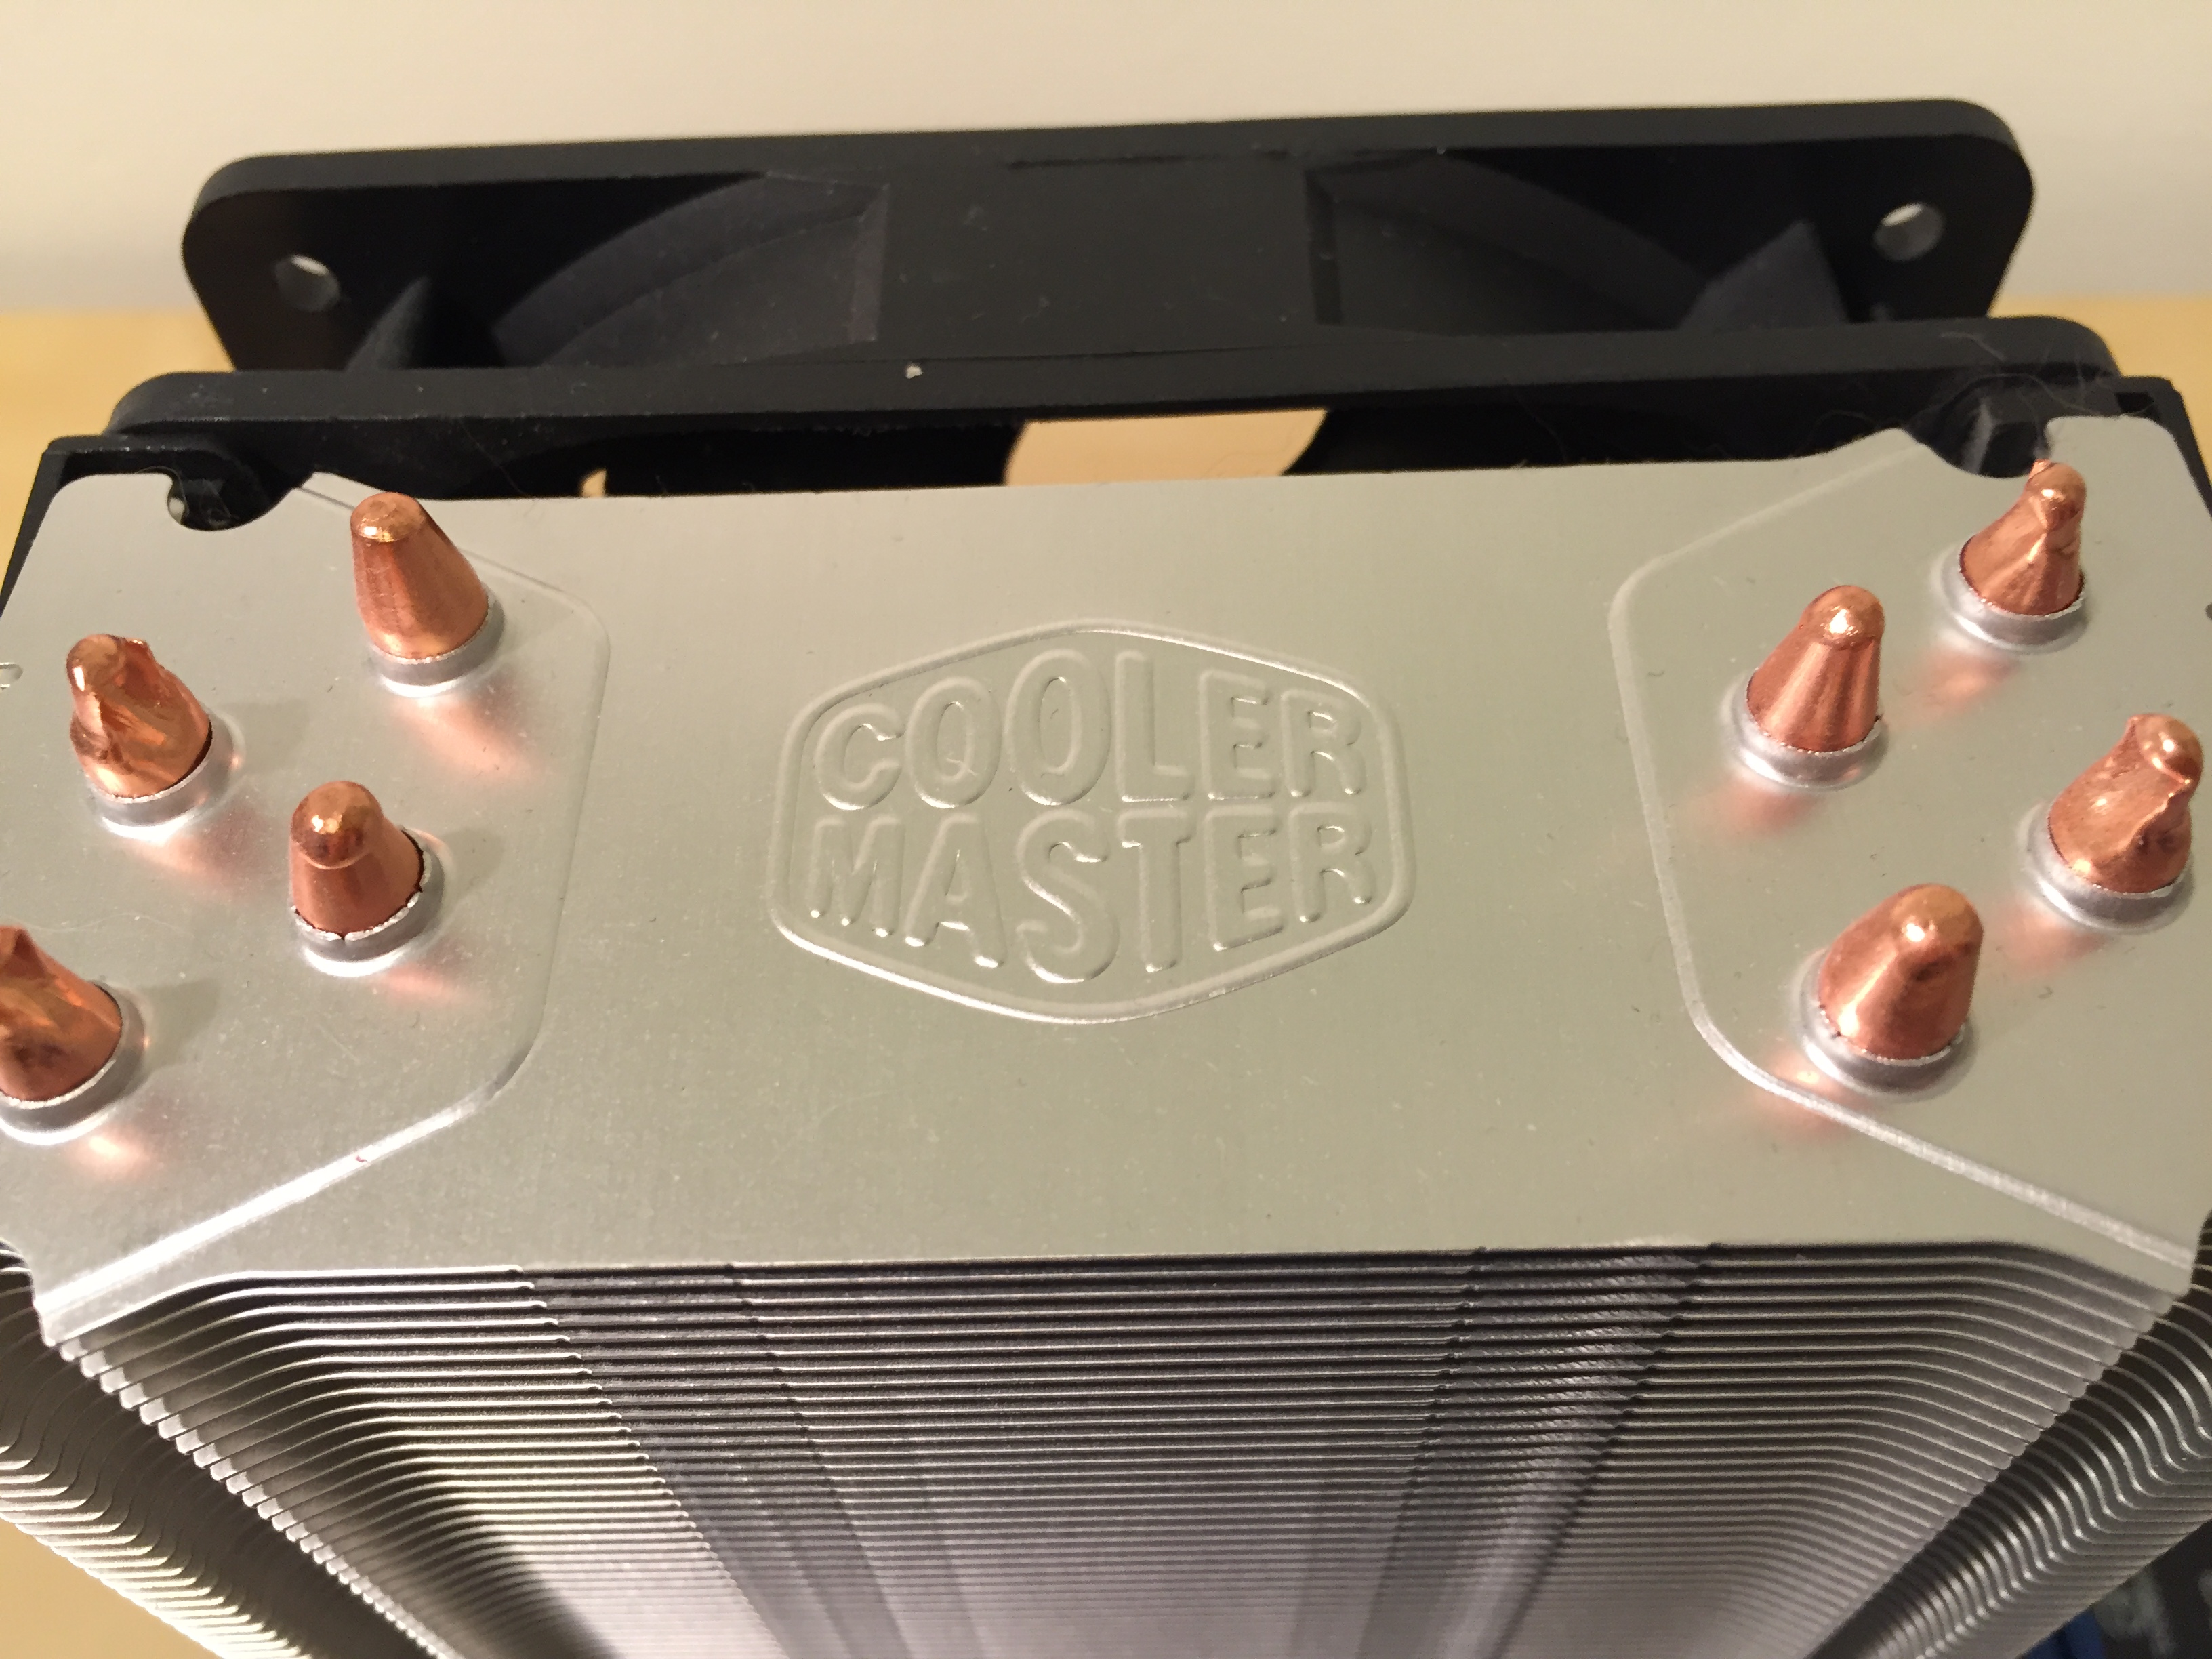
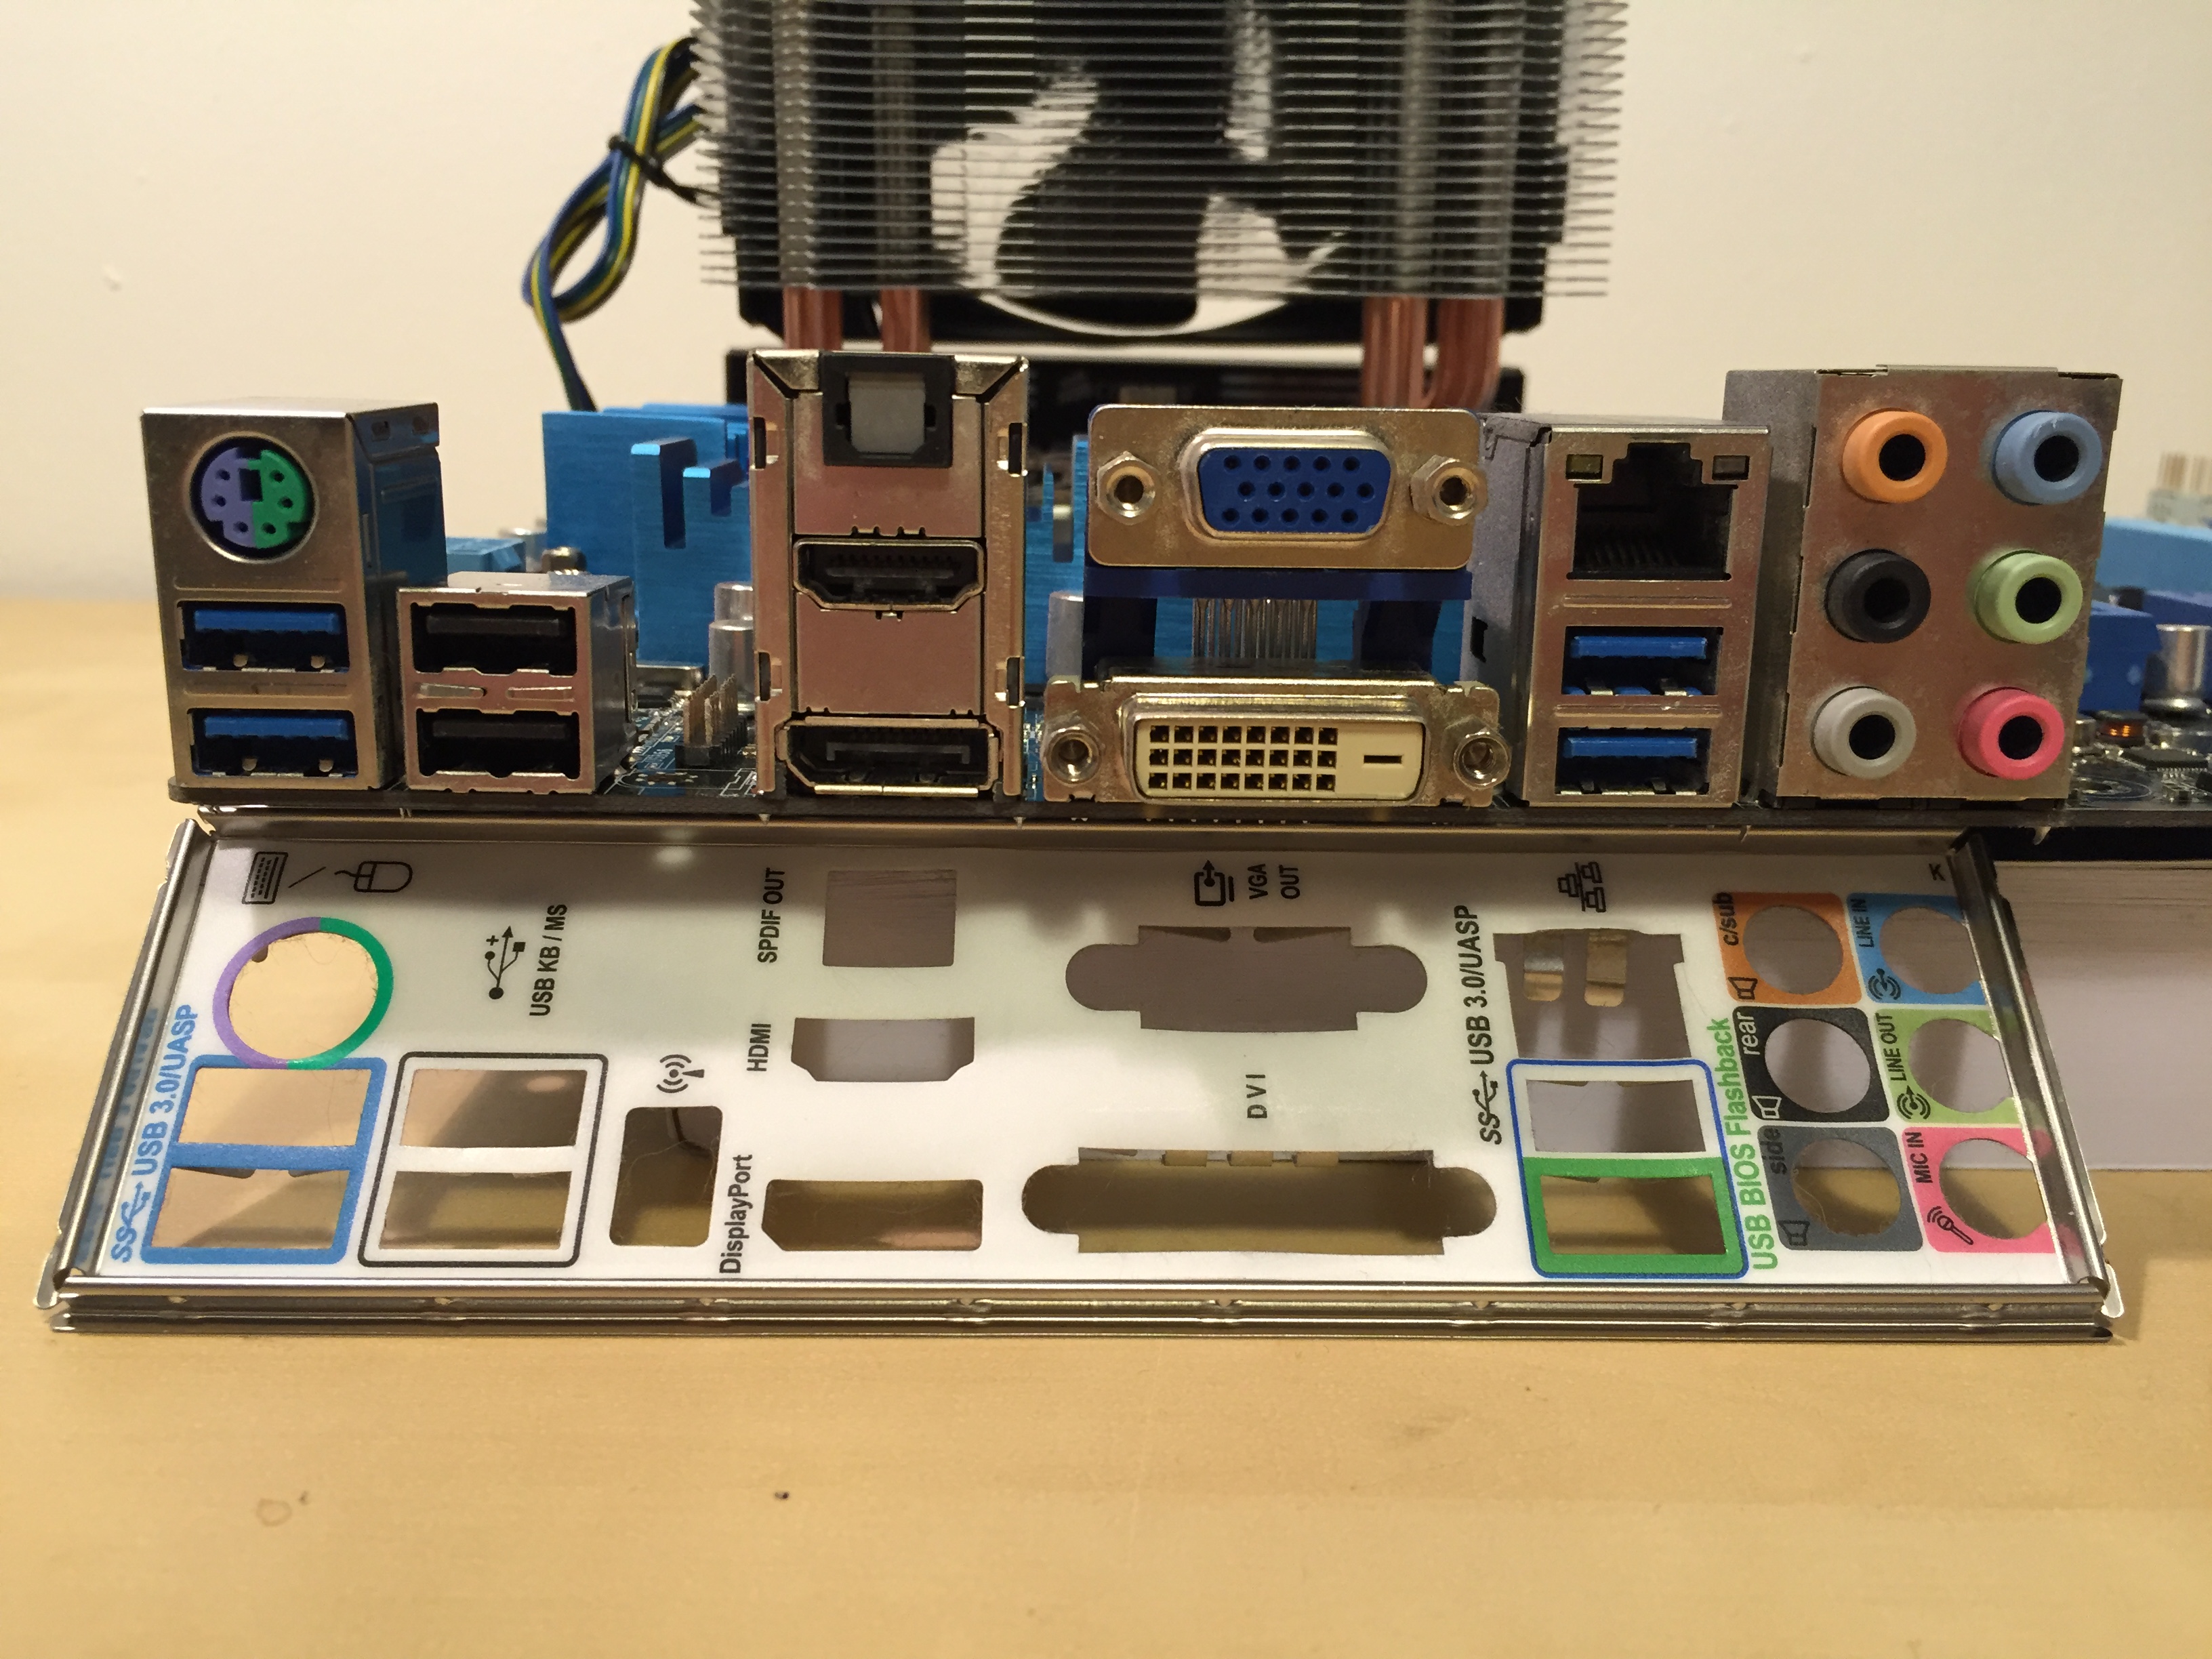
    Then, the next big upgrade that I made was to change out the inadequate 3-heatpipe cooling tower supplied by Asus for a 5-heatpipe Noctua NH-U9S, which I added an additional fan to for a push-pull configuration.

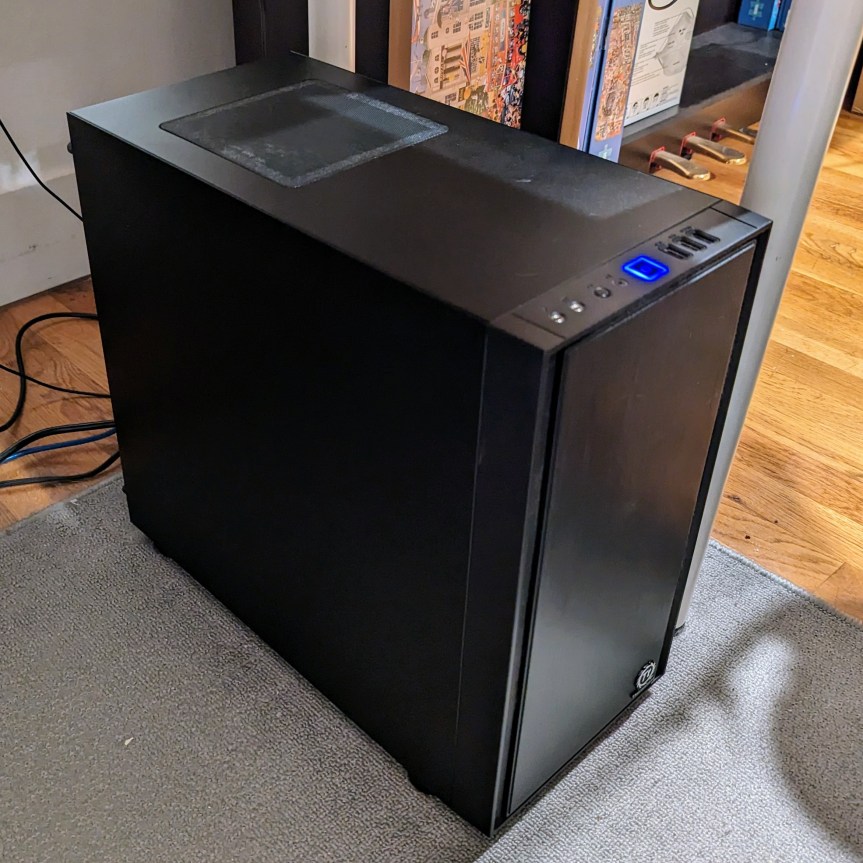
    Later, I transplanted the computer into a less flashy case without a glass side panel–the Thermaltake Versa H17.

    As DDR4 RAM prices improved, I upgraded from 32GB to 64GB to 128GB. And, as SSD prices plummeted, I upgraded the system drive from a 512GB nvme drive to a 2TB Samsung 970 EVO Plus drive as I had described earlier here.

    2023: Current Form with NVIDIA RTX A6000

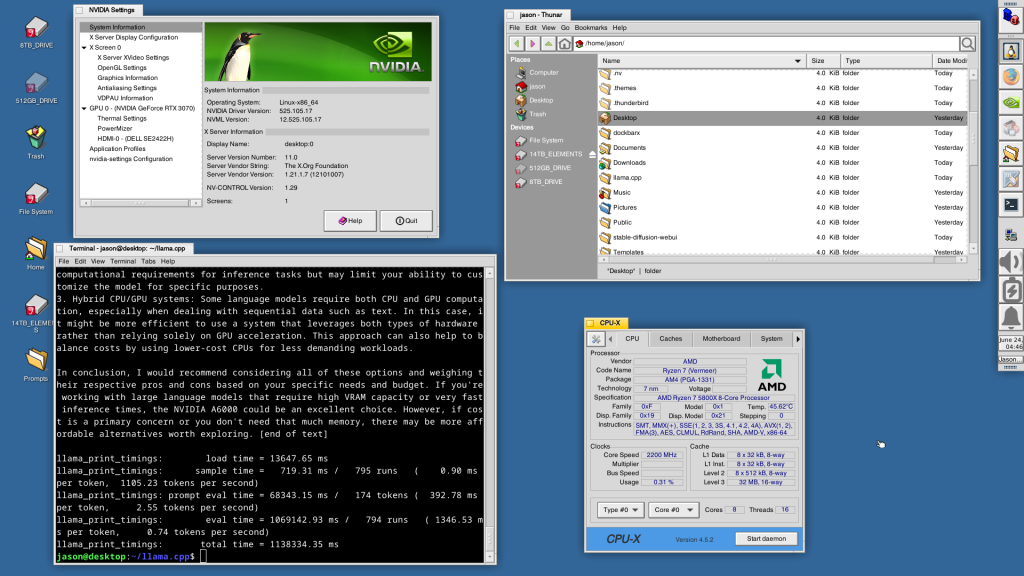
    As I wrote here, the most significant upgrade to my computer–or any computer that I have ever owned for that matter–has been the NVIDIA RTX A6000 video card for AI and machine learning work that I am doing now.

    2023: Free i7-6700K Bonus System

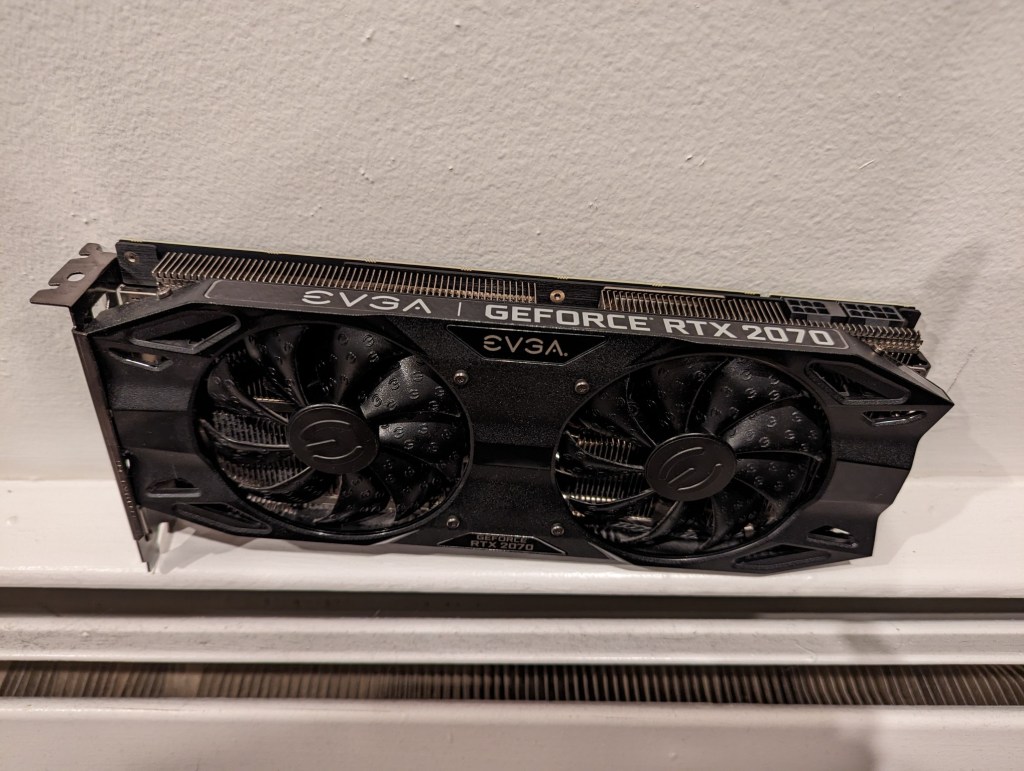
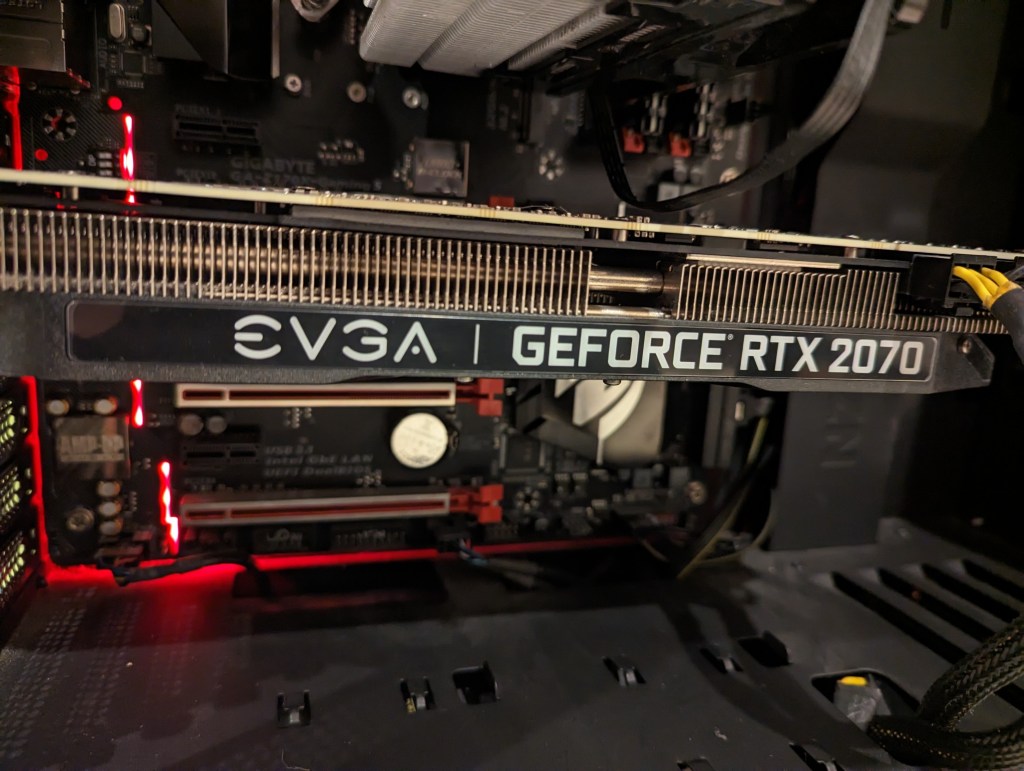
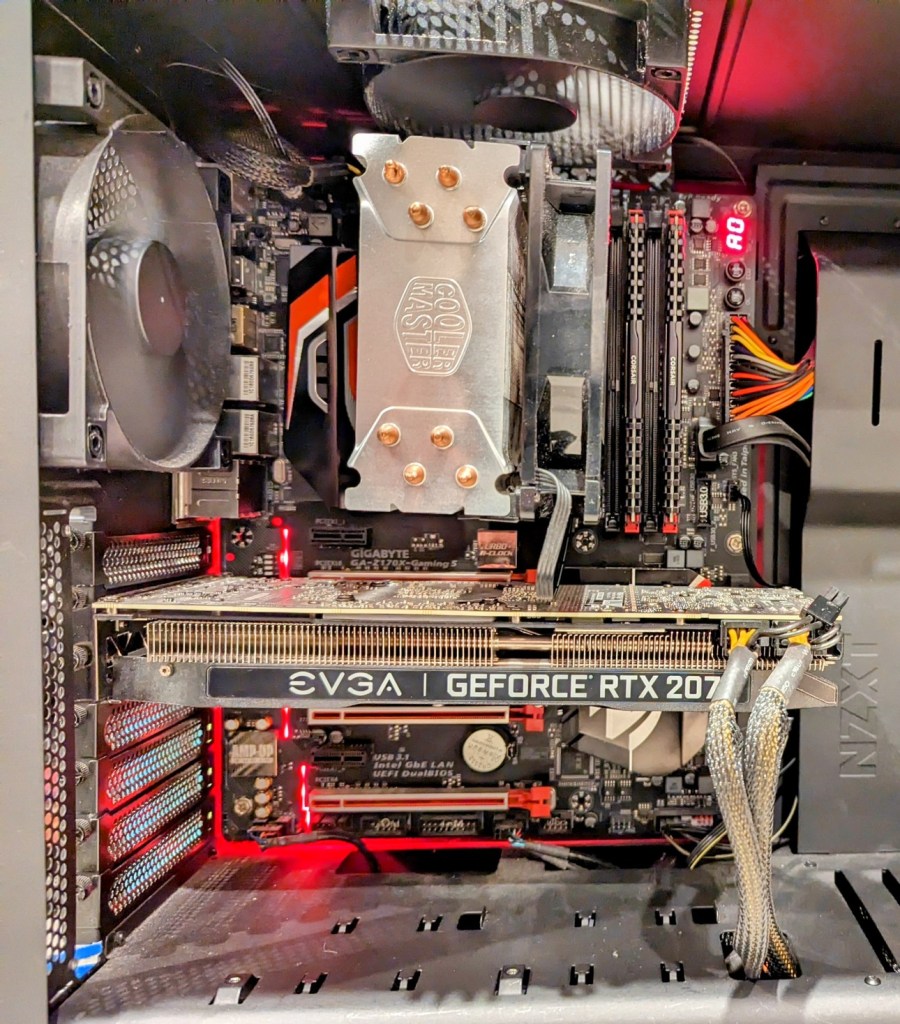
    In early 2023, someone in my apartment building left this computer in the lobby with a post-it note that said, “Works! No HD.” I didn’t look the gift horse in the mouth! I carried it up the 4 flights of stairs and got to work cleaning it up and checking it out. It had an i7-6700K CPU, 16GB of DDR4-3000 XMP RAM, and EVGA Geforce RTX 2070 8GB video card on a Gigabyte GA-Z170X-Gaming 5 motherboard. I installed a spare SSD and HDD in it, ran memtest86+, and stress tested the still impressive EVGA Geforce RTX 2070 8GB video card. Everything checked out! I sold the RTX 2070 on eBay to help pay for the A6000 video card in my primary system. And, I kept this computer to serve as a media center PC (the built-in graphics work great after making the fix for screen tearing found here). Thank you to whoever gave away such a wonderful machine!

    Reflections

    As Ovid shows us, things change form and function and purpose. This is very true in my experience of computers. I would have liked to have held on to my computers longer–changing them further through upgrades and reconfigurations. However, I always thought at the time that I had a good reason to do the things that I did–sell one computer to help pay for a new one, or switch from a larger computer to a smaller one (or vice versa). Nevertheless, I can see that sometimes my reasons might have been motivated more by a desire for change, that perhaps using or learning a new computer might move me forward in my work or curiosity or explorations. I don’t think that’s always been the end result, but it might have played a part in the musical chairs of my computing life.

    Another thing that I’ve noticed looking at these photos is how sloppy I have been with cable management. Perhaps this is a manifestation of other aspects of my life. A hurry to use rather than perfect the tools of my work, and a worry that too much tweaking when something is operational bodes well for future stability. I admit that I am nervous when working on computers because of problems with some of my earliest computers–some problems brought on by me and other problems instigated by others. The money that I put into my computers is a lot for my meager salary in an extremely high cost of living environment. Every metamorphosing change that I’ve documented in this post cost me in dollars and time and energy–the latter two involving studying, considering, weighing options, etc. You can ask Y, I don’t rush into things that I buy for myself. I have to know that I’m making the best possible decision at that moment after crushing days and weeks of self-doubt and second guessing.

    But, as you can see, I’ve had some adventures building, tinkering, and upgrading computers with this post showing the most recent 10 years or so. I’ll work on another post showing some of my earlier computers, but unfortunately, the record is not nearly as complete due to my not taking as many photos back then as I try to do now. When I do, I’ll write about my Amiga 2000HD, 486DX2/66, Powerbook 145B, PowerMacintosh 8500, Blue and White G3, Dual G4, and more. Stay tuned!

  • Buy Used Laptops to Save Money, Obtain Older High Tier Gear, and Reduce Ewaste

    Since Y and I moved to Brooklyn, we’ve focused our XP grind on budgeting, scrounging, and saving.

    At the core of making ends meet is identifying those things that are negotiable and those that are not. For example, coffee is a negotiable for me. I don’t have to have a $4 Starbucks everyday. Instead, I’m happy to get my caffeine fix from discount coffee brewed at home and carried in an efficient Zojirushi thermos. The A6000 video card that I use in my desktop computer is not negotiable. It’s an investment in my work that should pay a dividend in the future.

    While my desktop computer fits into my non-negotiable category, my laptop computer, which I carry to work daily and use for remote work and classroom instruction, is negotiable. My only requirements for a laptop is that it is stable, has a good keyboard and trackpad, and weighs 3 pounds or less. Certainly, there are many new laptops that fit this bill, but there are also many used laptops that also fit this bill. In fact, a used, well-cared for laptop can have a powerful feature set, albeit a few generations old, that can hold its own against today’s computing rigors. This means that a used laptop with high tier features might cost a fraction of what it cost new. Furthermore, getting additional life out of a used laptop will keep it from winding up in ewaste too soon, which is a bonus for the environment and our collective health impacted by ewaste and the industrial impact of processing it.

    My First Used Laptop: ThinkPad X230

    I purchased this ThinkPad X230 on eBay in 2018 (and wrote a review of it here). It looked and worked as if it were brand new. I used it for my remote work, classroom instruction, and travel until early 2020 (just before the pandemic began). By that point, it felt like it was getting long in the tooth for some of my software (e.g., Wolfram Mathematica), so I was thinking about selling it. One day, my colleague Aaron Barlow saw me using it at City Tech and he asked me to let him know if I hear of any similar machines available for sale. I offered him this one, which he bought a week later after I had wiped the drive and reinstalled Windows 10 for him. He got some use out of it for his writing, and his partner continued using it after he passed away.

    My Second Used Laptop: Lenovo ThinkPad X270

    My Lenovo ThinkPad X270 open to the Debian 12 xfce desktop.

    During the long at home time of the pandemic, I didn’t rely on a laptop–I just used my desktop for work and remote instruction, and I read on my Microsoft Surface Go tablet. Then, when it looked like things would be opening up again, I got a Lenovo ThinkPad X270 from a seller on eBay in December 2021. It was slightly lighter and slimmer than the X230 I had before. Also, my computing needs had changed, so I ran Linux Mint on it from the beginning (but I recently switched to Debian 12 Bookworm on it and my desktop). It was also easy to upgrade to a 1TB NVMe drive and 16GB DDR4 RAM.

    NB: After upgrading your computer’s RAM, remember to run a full diagnostic test with memtest86+. Being in a rush, I installed this 16GB RAM module and went directly to work. Unexpectedly, I occasionally experienced random errors and reboots. I should have tested the RAM before using the laptop for work. Once I identified the error, I was able to exchange the RAM for a new module that passed memtest86+ successfully.

    Lenovo Thinkpad X270 disassembled on my desk.

    How to Find Your Own Top-Tier Used Laptop

    • Spend time identifying your non-negotiable and negotiable features on the laptop. Think about how and where you use the laptop. If power outlets are a premium where you are or you simply don’t want to lug around an AC adapter, you will want to prioritize battery capacity. Or, you might need more computing horsepower and have easy access to power outlets, so a speedier model with less battery capacity might be okay for you. Another important consideration is video output (HDMI, mini HDMI, USB-C + dongle/adapter, etc.). I would suggest writing down these lists in two columns so that you can make sure you don’t overlook a non-negotiable feature or miss a negotiable feature that would be nice to have.
    • With your non-negotiable and negotiable lists in hand, look through Wikipedia, Google Searches, and computer seller websites to get a sense of what laptops were available several generations back. With model numbers, you can also search Google, Reddit, and other social media for reviews. You want to be careful to avoid error prone models (e.g., a model that was known to have problem X).
    • While there are deals to be found on Craigslist or Facebook Marketplace, there is more risk purchasing from someone through those services than eBay. The longstanding online auction house has several features built-in to help protect us buyers. First, buyers and sellers rely on the feedback system. You can see what a seller’s feedback is like (switch to their seller feedback to get the best picture of what matters to you as a buyer), and you can see other metrics about what other buyers thought of the seller’s communication, speed to ship, etc. Second, eBay offers buyer protection through their “eBay Money Back Guarantee.” Third, many (but not all) sellers offer returns on the items that they sell. However, you will want to read their terms and conditions carefully before bidding or purchasing an item. And, that is also a general rule: If you have a question about a product, you should message the seller before bidding or purchasing the item.
    • Study listings carefully. While you are looking at all of these listings, spend time studying the photos and descriptions. If a seller is too lazy to write a description of the item for sale, I pass on those. Similarly, if a seller takes too few or blurry photos, I pass on those, too. If a seller says that the item being sold is similar to but not the item pictured, I pass on those. Despite these issues, if you are interested in an item, then that’s the time to message the seller for more details. You can ask for more photos or a description of the item. If the seller responds to your inquiry, that is a good sign, but if they don’t, you should pass.
    • Be patient. Finding a good deal that meets your non-negotiable parameters usually doesn’t happen right away. You need to educate yourself about the currently acceptable prices for the particular hardware that you are looking for. On eBay, you can do this by filtering your searches to “Sold Items.” This will give you an idea about what others are paying for similar items and gives you a metric for a deal that might fall below the currently accepted price for that item.
    • When you get your new, used laptop, feel good about saving some money, getting solidly capable computing equipment, and saving a computer from joining the ewaste environmental catastrophe earlier than its time.
  • Mirrored Moment of Computing Creation: KPT Bryce for Macintosh

    Outer space scene rendered in KPT Bryce on Mac OS 7.5.5.
    Outer space scene rendered in KPT Bryce 1.0.1 on Mac OS 7.5.5.

    A conversation on LinkedIn yesterday with a former Professional and Technical Writing student about user experience (UX) and generative artificial intelligence (AI) technologies reminded me of the UX innovations around an earlier exciting period of potential for computers creating art: KPT Bryce, a three-dimensional fractal landscape ray trace rendering program for Mac OS released in 1994. It was one of the first programs that I purchased for my PowerMacintosh 8500/120 (I wrote about donating a similar machine to the Georgia Tech Library’s RetroTech Lab in 2014 here). Much like today when I think about generative AI, my younger self thought that the future had arrived, because my computer could create art with only a modicum of input from me thanks to this new software that brought together 3D modeling, ray tracing, fractal mathematics, and a killer user interface (UI).

    Besides KPT Bryce’s functionality to render scenes like the one that I made for this post (above), what was great about it was its user interface, which made editing and configuring your scene before rendering in an intuitive and easy-to-conceptualize manner. As you might imagine, 3D rendering software in the mid-1990s was far less intuitive than today (e.g., I remember a college classmate spending hours tweaking a text-based description of a scene that would then take hours to render in POVRay in 1995), so KPT Bryce’s easy of use broke down barriers to using 3D rendering software and it opened new possibilities for average computer users to leverage their computers for visual content creation. It was a functionality and UX revolution.

    Below, I am including some screenshots of KPT Bryce 1.0.1 emulated on an installation of Mac OS 7.5.5 on SheepShaver (N.B. I am not running SheepShaver on BeOS–I’ve modified my Debian 12 Bookworm xfce installation to have the look-and-feel of BeOS/Haiku as I documented here).

    KPT Bryce 1.0 program folder copied to the computer's hard drive from the KPT Bryce CD-ROM.
    KPT Bryce 1.0 program folder copied to the computer’s hard drive from the KPT Bryce CD-ROM.
    KPT Bryce 1.0 launch screen.
    KPT Bryce 1.0 launch screen.
    Basic scene randomizer/chooser. Note the UI elements on the lower window border.
    KPT Bryce initial scene randomizer/chooser. Note the UI elements on the lower window border.
    KPT Bryce's scene editor opens after making initial selections.
    KPT Bryce’s scene editor opens after making initial selections.
    KPT Bryce's rendering screen--note the horizontal dotted yellow line indicating the progression of that iterative ray tracing pass on the scene.
    KPT Bryce’s rendering screen–note the horizontal dotted yellow line indicating the progression of that iterative ray tracing pass on the scene.
    KPT Bryce rendering completed. It can be saved as an image by clicking on File > Save As Pict.
    KPT Bryce rendering completed. It can be saved as an image by clicking on File > Save As Pict.

  • Customize Xfce on Debian 12 Bookworm to Look Like BeOS and Haiku OS

    BeOS desktop image

    This weekend, I installed Debian 12 Bookworm with Xfce desktop environment on my desktop computer, because I wanted a pure Xfce installation on top of a distro running a 6.0 or higher kernel to theme as close to BeOS as I can get.

    As I’ve written about before here, I have fond memories of using BeOS on my old PowerMacintosh 8500/120. When I used it on that hardware, it felt like the future. Many of its features were ahead of its time for a desktop computing environment. It was also incredibly easy to navigate and interact with due to its colors, icons, and textured UI elements.

    I believe that BeOS and Haiku OS have GUIs that are easy to see and interact with, because they aren’t flattened to death like most contemporary operating systems, which have less contrast and textured borders that hinder visual comprehension and interaction.

    I tried installing Xubuntu, but after installation, I was greeted by the login prompt, I entered my credentials, received a black screen (NB: not rebooting–for some reason the DE wouldn’t launch and it would kick me back to the login screen), and was greeted again by the login prompt. Since that was a fresh installation, I was concerned about the long-term stability of it on my computer. Hence, I tried out Debian 12, which installed and booted without a hitch!

    In addition to reinstalling Automatic1111 for Stable Diffusion for AI image generation and Llama.cpp for AI text generation, I set about theming Xfce to look as much like BeOS as possible.

    I describe step-by-step how to make Xfce mimic BeOS in the sections below.

    Window Manager Theme

    Window Manager window

    Perhaps the most notable aspect of BeOS/Haiku’s look-and-feel is the yellow, tabbed window title bar. Some tutorials suggest using the BeOS-r5-XFWM theme, but I opted for the Haiku-Alpha theme, because it only keeps the close window tic box and eliminates the other options such as minimize, maximize, etc., which you can still operate by setting one option to title bar double clicks and others from the drop-down right-click menu.

    Decompress the downloaded file and move the resulting folder into ~/.themes (remember to turn on “show hidden files and folders” in your file manager, and create the .themes folder if it does not already exist). Then, go to Settings > Window Manager > select Haiku-Alpha. Also, set the font to Swis721 BT Bold size 9 (see font section below for more info).

    Appearance Theme

    Appearance window

    To give Xfce the general look-and-feel of BeOS’s relatively high contrast interface (by today’s modern, flat interface standards), I installed the BeOS-r5-GTK theme.

    Decompress the downloaded file and move the resulting folder into ~/.themes. Then, go into Settings > Appearance > Style > select BeOS-r5-GTK-master.

    Next, click on the Fonts tab. For Default Font, select Swis721 BT Regular size 9, and for Default Monospace Font, select Courier 10 Pitch Regular size 10 (see Font section below for more info).

    Fonts

    There are two essential fonts, which can be easily found through Google searches: Swis721 BT Roman and Courier 10 Pitch for Powerline.

    Once downloaded, move the ttf files into ~/.fonts (remember to turn on “show hidden files and folders” in your file manager, and create the .themes folder if it does not already exist).

    There are two main areas where the fonts need to be set. First, go to Settings > Window Manager > Style tab and set the Title font to Swis721 BT Bold size 9. Then, go to Settings > Appearance > Fonts tab and set the Default Font to Swis721 BT Regular size 9 and set the Default Monospace Font to Courier 10 Pitch Regular size 10.

    Mouse Cursors

    Mouse and Trackpad theme window

    The hand mouse cursor is an integral element of BeOS’s look-and-feel. I opted to use HaikuHand reHash.

    Decompress the downloaded file and move its folder into ~/.icons (remember to turn on “show hidden files and folders” in your file manager, and create the .themes folder if it does not already exist). Then, select HaikuHand reHash in Settings > Mouse and Touchpad > Theme.

    Icons

    Appearance Icons tab

    The isometric view icons for BeOS capture that mid-to-late-1990s era of gesturing towards 3D through 2D designs. Vaporware Mac System 8 Copland exemplified this aesthetic, too (but aspects of it found its way into the eventual MacOS 8 and others incorporated its design elements into shareware like Aaron and the Iconfactory’s innovative icon sets. I created some icons in this style, too.

    To make Xfce as BeOS-like as possible, I used the BeOS-r5-Icons pack.

    Decompress the downloaded file and move it into ~/.icons (remember to turn on “show hidden files and folders” in your file manager, and create the .themes folder if it does not already exist). Then, go to Settings > Appearance > Icons tab > select BeOS-r5-Icons.

    Desktop

    Desktop settings window

    There are BeOS desktop wallpaper pictures that you can download and set as your wallpaper. However, I wanted a simpler solid color background. To achieve this, go to Settings > Desktop. Set Style to “None,” and set Color to “Solid color.” Then, click on the color rectangle to the right of Color, and next, click on the “+” under Custom and enter this hex value for the default deep blue BeOS desktop color: #336698.

    Dock

    Dock Preferences window

    After a lot of head-hitting-the-desk, I settled on using the Xfce’s Panel instead of a more visually interesting dock that used a BeOS-inspired theme (e.g., BeOS-dr8-DockbarX). I was able to get DockbarX installed from source eventually, but I couldn’t get the Xfce4 DockbarX plugin to work with the Xfce Panel. It wasn’t from a lack of trying! It’s worth trying to get those installed–you might have better luck. For me, I needed to move on, so I settled on customizing the Xfce panel to meet my needs and fit the BeOS aesthetic well enough. I went to Settings > Panel > Display tabl to set Panel 1 in Deskbar Mode, set the Row size to 48 with 1 row and ticked “Automatically increase the length. On the Appearance tab, I set the Fixed icon size to 48.

    Applications Menu settings within Panel settings

    On the Items tab, I clicked the preferences for the Applications Menu, removed the Button title and changed the Icon to the isometric 3D Be logo (this will be an option after you’ve installed the icons pack as described above in the Icons section).

    It would be easy to configure the panel to be more like the original Deskbar in BeOS, too. The main changes needed would be to increase the Number of rows to 4 or 5, change the Application menu icon to the flat “BeOS” logo icon (included in the icon pack installation in the Icons section above).

    And, it’s important to remember that there was not one, eternal version of BeOS. As with any developed software, it changed over time with its UI and look-and-feel changing with it. For me, the 1996 Developer Release is what I remember most because I ran it on bare metal on my PowerMacintosh 8500/120. It continued to evolve and change after that in ways that I am less familiar with.

    QMMP/Winamp Skin

    If you use QMMP for listening to music on your computer, you’ll need to grab a Winamp skin to give it the BeOS look and title bar. BeAmp Too is my favorite. There are a few others available if you search for “beos” on the Winamp Skin Museum.

    Whichever one you choose, download the zip file for the theme to your Downloads folder. Then, open QMMP, right click on the title bar and choose Settings, click on the Appearances section on the left, click the Skins tab, and then click on “Add…” at the bottom, navigate to your downloaded theme zip file and select it. QMMP will copy the file into the ~/.qmmp/skins directory for you. Select the theme on the Appearances > Skins tab to activate the theme.

    Other Tweaks

    The following are other tweaks to Xfce that I prefer for daily use.

    Disable overlay/auto hiding scrollbars

    Edit /etc/environment and add the line

    GTK_OVERLAY_SCROLLING=0 

    Save the file. Logout and login to see the change take effect.

    White font for desktop items

    Go to ~/.config/gtk-3.0/ and create a file named gtk.css (edit this file if it already exists). Add these lines to it:

    XfdesktopIconView.label {
        color: white;
    }

    Save the file. Logout and login to see the change take effect.

    Consistent Scroll Bar Speed

    In folders with many files, I have noticed that if I begin scrolling but slow down a little, the speed of scrolling after that point for the rest of my mouse-down drag will be EXCEEDINGLY slow. This is by design–a feature called zoom scrolling. Well, I don’t like it. If you don’t like it either, you can tame it by setting the trigger time to longer than the default of 500 milliseconds. To do this, go to ~/.config/gtk-3.0/ and create a file named settings.ini (edit this file if it already exists). Add these lines to it:

    [Settings]
    gtk-long-press-time=5000

    Save the file. Logout and login to see the change take effect.

    Thanks to:

    An unnamed Reddit user (their account has been deleted) posted an excellent write up of their BeOS-r5-XFCE theming of XFCE in r/unixporn that gave me a roadmap for what was possible.

    Metsatron, Roberto21, Retardtonic, and Xu Zhen for their respective work on the components that make this customization possible.

    The Debian community for Bookworm.

    And thanks to the Haiku OS developers who are keeping the BeOS dream alive!

  • Linkages in Making: Assembling a Bandai 1/144 Millennium Falcon Rise of Skywalker Model and Creating a Composite Image of the Falcon Among the Stars

    Introduction

    This week, I created the composite image above of the Millennium Falcon midflight among the stars. This most recent exercise in making was made possible by the Falcon model at the center of the composition that I assembled in June 2021 while healing from a broke toe.

    I like to think about how one project links to another, how one kind of making supports another kind of making. Making and culture go hand-in-hand. One new thing makes possible countless new things given tools, materials, and know-how.

    In this case, I assembled and painted a Bandai 1/144-scale Millennium Falcon plastic model set from Star Wars: The Rise of Skywalker. Proper assembly, though by no means professional, required tools (e.g., sprue cutter, paint brushes, and toothpicks), materials (e.g., plastic model glue, acrylic paints, and tape), and know-how (e.g., cutting, filing, gluing, and mixing paints and washes).

    A year later, I created the science fictional composite image above. Its production required tools (e.g., Linux Mint-running desktop computer, GNU Image Manipulation Program, or aka GIMP, and the Internet), materials (e.g., the assembled model, a photo of the model in an orientation appropriate for the composite image, and a public domain photo of a star field), and know-how (e.g., an idea for what the finished product will look like, a workflow for using GIMP to achieve it, and an understanding of how to use GIMP’s affordances including layers, opacity, and filters for each stage of the workflow).

    Assembling the Model

    The completed Bandai 1/144 Millennium Falcon model is only about 9 1/4″ long. Hence, it and its constituent parts are very tiny. I built and painted the model over the course of a week. Given more time and equipment, I would have liked to have done a more professional job with lots of masking and airbrushed paint. Given my limitations, I decided to have fun and use what I had at hand to assemble and paint the model.

    One example of the assembly process is pictured below. It involves the cockpit. Even though the model is sold as the Falcon from The Rise of Skywalker, it included Han Solo and Chewbacca figures, which I decided to use instead of the other cast miniatures. For these detailed elements of the model, I used a combination of toothpicks, very fine brushes, and dabs of paint to achieve the intended effect.

    The pictures below show the assembled cockpit with shaky, imperfect paint application on the left and remnants of the dark wash that I applied to age and highlight lines on the model’s surface on the right.

    The photos below show the completed model perched on its included, adjustable stand.

    Overall, Bandai’s model was expertly designed, easy to assemble, and highly respectful of its source material.

    Creating the Composite Image in GIMP

    The Bandai 1/144-scale Falcon sits on my desk to the left of my keyboard between LEGO models of The Mandalorian’s N-1 and the Millennium Falcon from The Force Awakens (It’s safe to say that I aspire to have as cluttered and interesting workspace as Ray Bradbury has in the opening to Ray Bradbury Theater shown here). So, I see it everyday.

    Recently, I was thinking wouldn’t it be fun to use it to create an in-flight image using the model. That stray thought picked up the thread from making the model and began creating a linkage to using the model to create something new–a fantastic image of the Falcon flying in outerspace.

    Looking through my photos, I selected the one below due to it’s orientation and composition within the photo’s rectangular frame.

    I cut out the Falcon and added it to its own layer with a translucent background in GIMP. I selected all of the window areas in the cockpit and adjusted the brightness and contrast to make the interior a little more recognizable. Then, I adjusted the shadows and exposure to make the Falcon’s exterior “pop.” Next, I used the clone tool to copy matte colors to hide some of the shinier/mirrored spots (especially in the dish and in the panels directly beneath the dish). And, I used the clone and smudge tools to fill in a gap between top and bottom parts of the cockpit (the black line as seen above).

    To put the Falcon in outer space, I created a base layer and pasted a star field image from NASA (found here).

    On the ventral side of the Falcon, you can see that the sides of the lower mandible are catching light that throws off the image if we’re imagining one light source (e.g., a star–of course, there could be two stars, but most of the ventral side of the Falcon is in shadow, so I wanted to stick to that). So I selected those bright areas and then used the clone tool to copy that coloration from either side–the left side looks redder and the right side more neutral–onto its own layer. I set the clone tool to 50% opacity to control the shade as shown below.

    To make the scene appear more alive, I added layers for the headlights (a center circle of very bright yellow with crossed Block 03 brushes at 45 and 135 degrees for the diffraction spikes with a smidge of Gaussian blur).

    And finally, the Falcon needs its engines, which I created with a large, single brush stroke with neon blue light (##04d9ff) with 95% hardness but only 44% force (not that kind!).

    Conclusion

    A plastic model building project from the past makes another project of science fictional image manipulation possible. Making in the present is linked to making in the past. This is the general work of culture–linkages up and down time, across geographies and nations, circuitous and not always obvious. This blog post is a microcosm of the macrocosmic work of inhabiting and building our culture. I suggest in closing that we should all reflect and chart these linkages. We might not be able to map them all, but those that we do, pays a debt of gratitude perhaps both ways–we in the present rely on that we are given from the past and the past lives on through the work that we do today.

    Download the full size composite Falcon image here.