I wanted to make the most of this year’s Spring Recess. Below are a few things that I accomplished during this late semester respite: a computer storage upgrade, installing Mac OS X Leopard on QEMU, finding Star Wars action figures on eBay, beginning a generative AI and pedagogy bibliography, and spending time with Y.
Upgraded My Desktop Computer’s Boot Drive
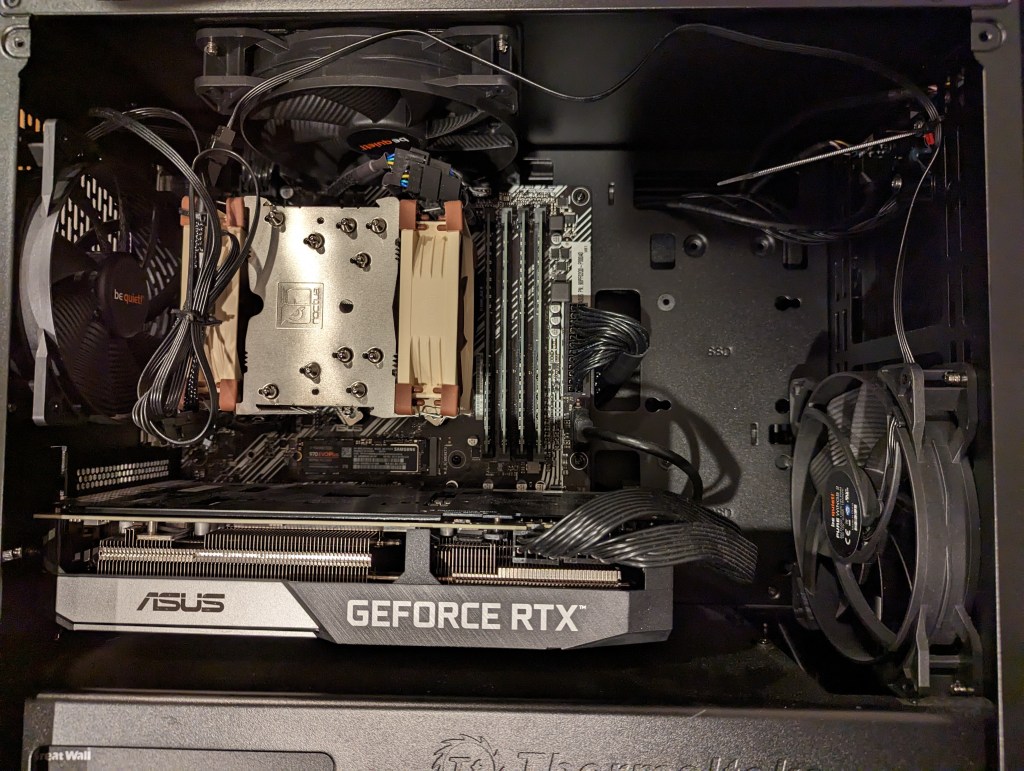
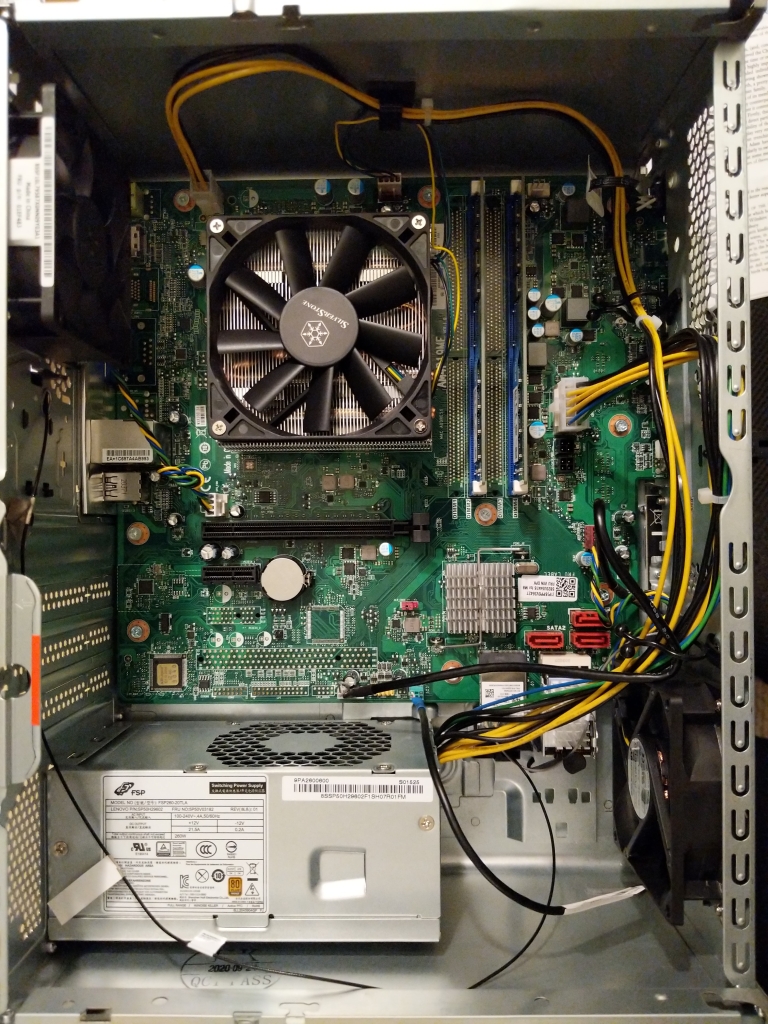
Inside my desktop computer after installing 2TB NVMe SSD.
I took advantage of a BestBuy deal on 2TB Samsung 970 EVO Plus NVMe SSDs to upgrade my desktop computer’s boot drive. Originally, I had a 512GB NVMe drive installed. I had pulled out the wifi card that was in the secondary M.2 slot awhile back. So, I moved the 512GB to that slot (under the video card as pictured above) and installed the 2TB Samsung drive into the primary M.2 slot (just above the video card as pictured above). With the hardware installation done, I reinstalled Linux Mint 21.1, which I run on my desktop and laptop computers.
Installing Mac OS X 10.5 Leopard on QEMU
Mac OS X 10.5 Leopard running in QEMU.
Since I reinstalled Linux Mint, I thought that it was a good opportunity to play around with QEMU. For most of my Macintosh emulation needs (mostly System 7.5.5 for Apple’s HotSauce and Voyager’s Expanded Books but occasionally earlier versions that best support some Hypercard stacks and other older software), I rely on SheepShaver and Basilisk II. QEMU-System-PPC supports Mac OS 9.x through Mac OS X 10.5. After Mac OS X 10.9 Mavericks, Mac OS X 10.5 Leopard was my favorite version of Mac OS X, so I picked it for QEMU. After grabbing an ISO from archive.org, it was a short order to install and use Leopard. I had hoped to use an older version of OsiriX to look at the MRI that I had at the University of Liverpool (contemporary DICOM viewers have trouble opening the files), but I should have read the documentation first and seen that OpenGL was a non-starter on the regular version of QEMU.
Star Wars Action Figures from eBay
Star Wars Vintage Collection and Kenner/Retro Collection action figures.
At the beginning of Spring Recess, I hit eBay and racked up some good deals with bidding and best offers on 3.75″ Hasbro Vintage Collection action figures, Hasbro Retro Collection action figures, and Kenner action figures. I don’t like to collect action figures in their packages. I like to create scenes with them for display. With these new acquisitions, I plan to create some Empire and Return of the Jedi scenes with my 1979 Kenner Millennium Falcon (not pictured) and 2008 Hasbro Legacy Collection Millennium Falcon (pictured above, aka the Big Falcon).
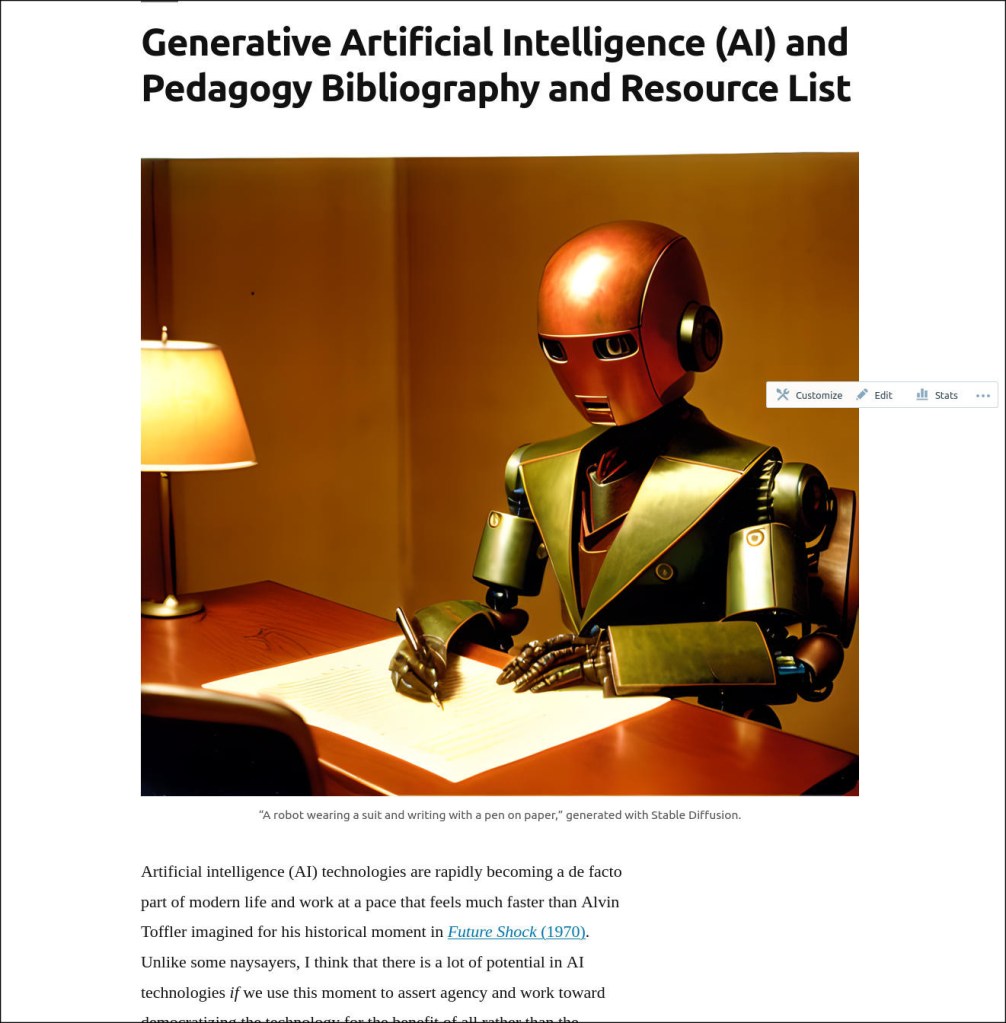
Compiling a Bibliography of Generative AI Technologies and Pedagogy Resources
I compiled all of my current research on Generative AI technologies and how they might be used in teaching on this page. It’s not an exhaustive list, but it has a lot of recent publications. It can help someone get up to speed on what’s going on now with ChatGPT, Stable Diffusion, and other AI tools to create text, images, and music from prompts.
Y and I also got to spend time catching up via video chat with my cousin Angie in Maryland and our graduate school friend Masaya in Japan. We enjoyed a walk in Green-Wood Cemetery just before we were awash in tree pollen. And, we watched a lot of Family Guy, too.
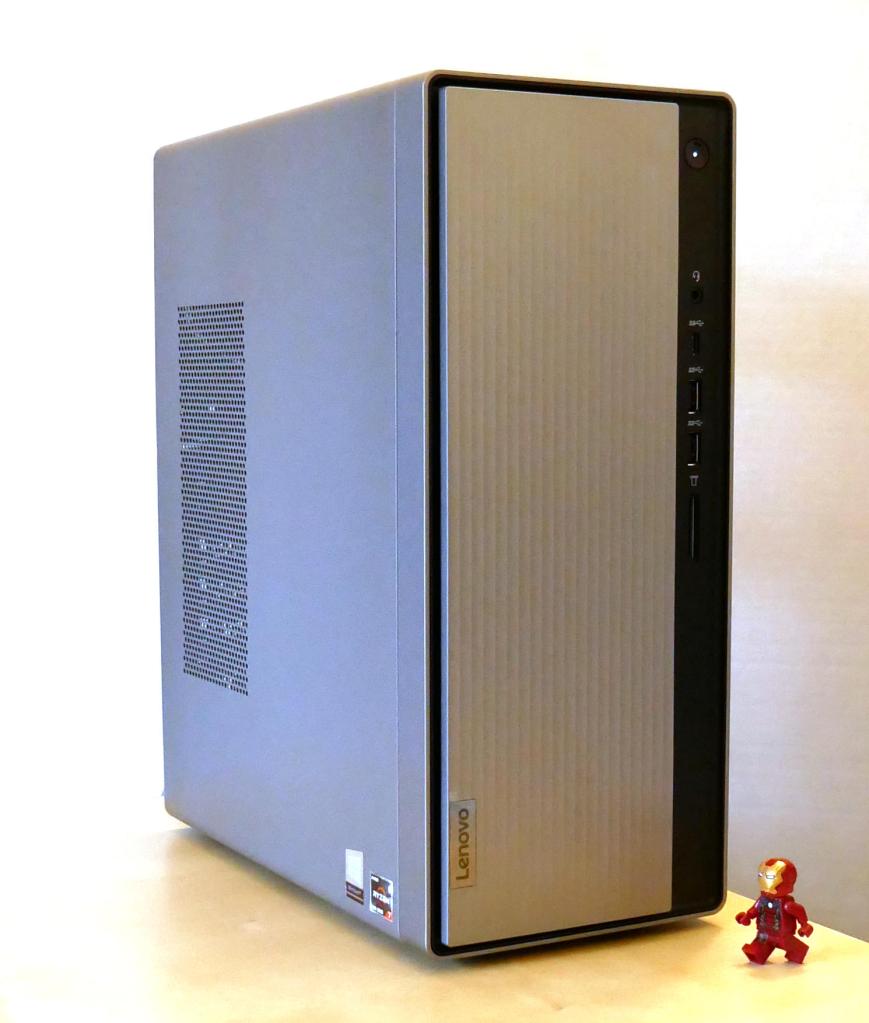
After spending the last year getting to know my i7-7700 PC that I had built several years ago better than I had ever known it before due to the shift to remote work and distance learning, I came to think that I needed a new computer that was better suited to my needs in the current situation. After a lot of research and patience price hunting, I replaced my old computer with the Lenovo IdeaCentre 5 with a Ryzen 7 4700G CPU pictured above.
As an English professor at the New York City College of Technology, CUNY who teaches classes asynchronously with weekly posted video lectures anchoring each class, a lot of my time goes into planning, shooting, and editing these lectures in addition to designing course sites, writing syllabi, adding content and assignments, and corresponding with students via email.
Overall, my i7-based computer supported my work admirably except for the final step of rendering my edited videos into single files before uploading them to my YouTube channel. For a two-hour-long lecture, the rendering time could be as long as 30 minutes. While not excessive, I knew that a newer computer with a CPU with more cores and threads than the 4-core/8-thread CPU that I had built several years ago would render the videos much more quickly.
I didn’t want to reinvest in my desktop setup unless I could afford to double the performance of my current setup (a rule of thumb that I picked up from my friend Mark). As a point of reference, the i7-7700 has an average CPU Mark of 8,617. Considering the price and long-term support of Intel and AMD’s platforms, including the cost of a new CPU, motherboard, and RAM, I focused on AMD’s Ryzen 7 3700X and OEM-only Ryzen 7 4700G, both of which seemed to fit the bill with CPU Mark scores of 22,804 and 19,863 respectively. The lower cost of processors and motherboards combined with higher out-of-the-box RAM speed support and a commitment to supporting multiple CPU generations across motherboard chipsets via the AM4 socket also weighed in AMD’s favor.
While I could reuse my PC’s case, power supply, and drives, I thought about how much room the i7’s Corsair Carbide Series 100R case, which I had purchased earlier in the pandemic to accommodate a large video card, takes in my small closet-sized work area (approximately 18.5″ x 7 7/8″ x 17″ or 2477 cubic square inches). My cramped work environment led me to lean toward a pre-built system using the OEM-only Ryzen 7 4700G, because these systems, primarily made by HP and Lenovo for sale in the USA, are relatively tiny desktop PC systems.
Additionally, the Ryzen 7 4700G’s integrated graphics are nearly as strong as the discrete graphics in the Radeon RX 550 video card that I had in the i7-7700 system. This would mean that I didn’t need to have a discrete video card if I went with a 4700G-based system.
Another plus for the Ryzen 7 4700G is that it supports dual-channel DDR4-3200 RAM out of the box without a need to overclock the RAM (and having a motherboard that supports this function). Having fast RAM is essential for my workloads and it is needed even more so if I am relying on integrated graphics, which would share the RAM with the operating system and applications.
However, I didn’t want to overspend on a pre-built system with a 4700G processor. I knew from tracking computer prices that there had been deep cut sales on HP’s 4700G system (an incredible $450) around Black Friday 2020 and early in 2021. In fact, my friend Mark in Atlanta had worked on such a system for a friend of his family, and he filled me in on his experiences with upgrading its RAM and heat-sink and fan (HSF).
Ultimately, I choose the Lenovo IdeaCentre 5 with Ryzen 7 4700G system, because commenters online seemed to have stronger out-of-the-box experiences with it than that HP Desktop M01-1024. In particular, the Lenovo IdeaCentre 5 with a 4700G CPU included two sticks of DDR4 memory (which enables dual channel, as opposed to a single stick not in a dual channel configuration) and two drives (one SSD and one HDD). Also, I was impressed by my experience with a Lenovo ThinkPad, including its long life and build-quality, which I hoped would carry over with the IdeaCentre-line of desktops.
The Lenovo IdeaCentre 5 came with 16GB (2x8GB) DDR4-3200 RAM, a 256GB M.2 SSD, and a 1TB HDD. Its small footprint (13.5″ tall x 11″ deep x 5.75″ wide or 854 cubic square inches–almost 1/3 the volume of the Corsair 100R case!) saved space in my office, too. As I needed to begin working right away with the new system before making any upgrades, the Lenovo system seemed like the right way to go for me. Though, it took me about a month of price watching on Lenovo’s official eBay store before they lowered the price to an acceptable $560.69 with free shipping.
Below, I’m recording some of my experiences with the Lenovo IdeaCentre 5, including installing Linux Mint, upgrading the RAM, swapping out hard drives, installing an aftermarket heat-sink and fan, accounting of the costs involved, and concluding with a look ahead.
Installing Linux Mint
Since late last year, I’ve been using Linux Mint as my daily driver. My long-term issues with Microsoft Windows 10 and its data collection and forced upgrade regime, and frustration with Apple’s direction immediately before and certainly after Steve Jobs’ passing led me to switch to Linux where I have more control over my computer, my data, and the software that I use. Using Linux, I can get my work done without feeling that my computer isn’t mine, I’m being spied on, or I’m locked into a corporation’s walled garden.
The software that I use on Linux Mint supports my workflow great. For recording my weekly lectures, I use Google Slides (for the background), OBS Studio (to capture part of my screen with my webcam video overlayed), and Shotcut (to edit the video before uploading to YouTube). Also, I use open-source software, including LibreOffice (word processing and spreadsheet use), GIMP (image editing), Audacious (music playback), Firefox (web browsing), Thunderbird (email), Handbrake (trancoding), and SMPlayer (video playback), as well as proprietary software, including Wolfram Mathematica (mathematical modeling) and Zoom (video conferencing and online event management). While I could install Microsoft Office and Adobe Acrobat and run them in Linux via WINE, but I have found that their web-based, online counterparts work remarkably well when it is absolutely necessary that I use them.
Perhaps the biggest reason why I prefer Linux over Mac OS X and Windows 10 is how well the Linux operating system does disk and file system specific things like handling large numbers of files and nested directories. Throughout my career, I have collected copious notes, articles, and other research data that are organized in many nested folders, each potentially containing thousands of files. Mac OS X and Windows 10 would bog down when opening these directories of files. Searching through these files was also an ordeal with Apple and Microsoft’s offerings despite some third-party tools that made things better. Linux file systems and open-source tools give me far more control over my files both in handling and searching them, which helps me do my research more efficiently. Some of the search tools that I use include grep, Catfish, and Recoll.
Installing Linux Mint was a snap on the Lenovo IdeaCentre 5 with a Ryzen 7 4700G CPU. On my old PC, I used balena Etcher to burn a copy of the installation media for Linux Mint 20.1 on a USB drive. Before installing Linux, I backed up the Windows 10 installation media to a separate USB drive in case I needed to reinstall Windows on the Lenovo for some reason. Then, I rebooted the Lenovo, went into the BIOS, changed the boot order so that it would load the USB drive first and disabled SecureBoot, which causes problems with some Linux drivers for the WiFi card and other hardware. Continuing with the bootup process, I directed Linux Mint to launch the desktop so that I could see that everything worked before installing. Everything did work out of the box except for high resolution graphics, which I figured might be due to the older long-term support kernel that might not have drivers for the 4700G’s integrated graphics. So, I erased the m.2 SSD, installed Linux Mint, and after booting in successfully with the 5.4.0 kernel, I updated to the 5.8.0 kernel, which solved the graphics issue and restored 2560×1440 resolution on my 32″ MSI Optix MAG322CQRV monitor.
Maxing Out the RAM and Swapping the HDD
After receiving the Lenovo IdeaCentre 5 and testing out its stock capabilities, which were impressive compared to my i7-7700, I installed its first major upgrades: swapped the 16GB (2x8GB) DDR4-3200 RAM for 32GB (2x16GB) DDR4-3200 RAM, and swapped its included 1TB HDD (a Western Digital Blue) for my 4TB HDD (also a Western Digital Blue).
After taking out two screws on the back of the case, I slid the side panel off, which exposed the computer’s components–motherboard, CPU, RAM, PSU, and drive cage (to the left above). Before opening the drive cage to locate the RAM underneath, there are three plastic tabs on the front panel that need to be lifted to release the panel and then it can be unhooked on the opposite by swinging the panel open-and-out. To open the drive cage, there is a metal tab now exposed after removing the front panel. Press the tab down and the cage slides forward and then up.
The stock Lenovo RAM is a matched pair of SK Hynix 8GB DDR4-3200 RAM (HMA81GU6CJR8N CL22 Single Rank). This is good RAM, but I wanted to max out what this system could use, so I ordered a 32GB Crucial Kit (16GBx2) DDR4-3200 (CT2K16G4DFD832A CL22 Dual Rank x8 Unbuffered). As with any other desktop system, it was easy enough to replace the RAM. First, the tabs on both sides of a stick of RAM are depressed, which lifts the DIMM out of the slot. Pull the stick of RAM out, place the new RAM in the slot–paying attention to the placement of the DIMM’s notch (the RAM goes in only one way)–and press down until the tabs fold in and lock into place.
While I had the case open, I also swapped the stock 1TB HDD with my 4TB HDD from my i7-7700 PC. This involved several steps due to how tight the drive cage assembly is designed. First, the DVD-R drive has to be removed, which exposes the screws underneath holding the HDD in place. After disconnecting the SATA data and power cables, I removed the screws and vibration pads, pulled out the 1TB drive, put in the 4TB drive, replaced the screws and vibration pads, connected the cables, and reinstalled the DVD-R drive. Then, the drive cage can be swung back into place and locked, and the front panel can be notched and snapped into place, and finally, the side panel slid into place and screwed down.
Installing the Silverstone Argon Series AR11 HSF
After using the Lenovo IdeaCentre 5 for a month, I noticed that the video editing software Shotcut would would bog down about halfway through rendering an hour-long video. Using CPU-X as root, I saw the CPU temperature rise to 72C and then the CPU voltage and CPU clock rate would decrease to lower the temperature. When the temperature decreased, the voltage and clock rate would creep up again. This feedback cycle would persist through the rendering process.
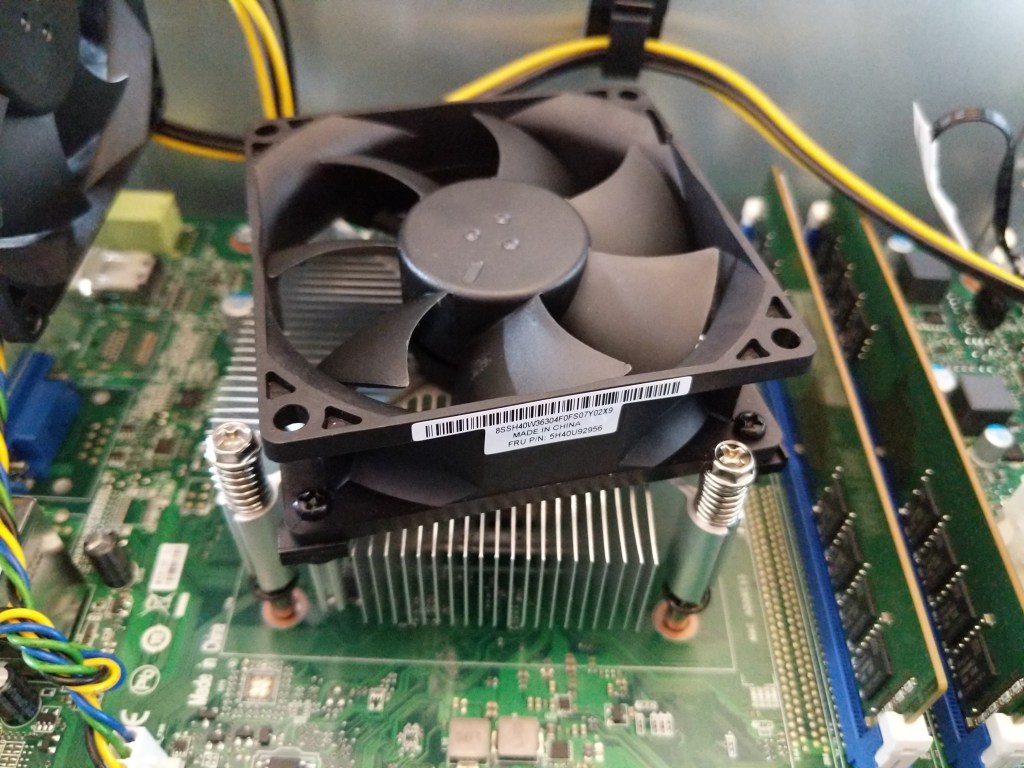
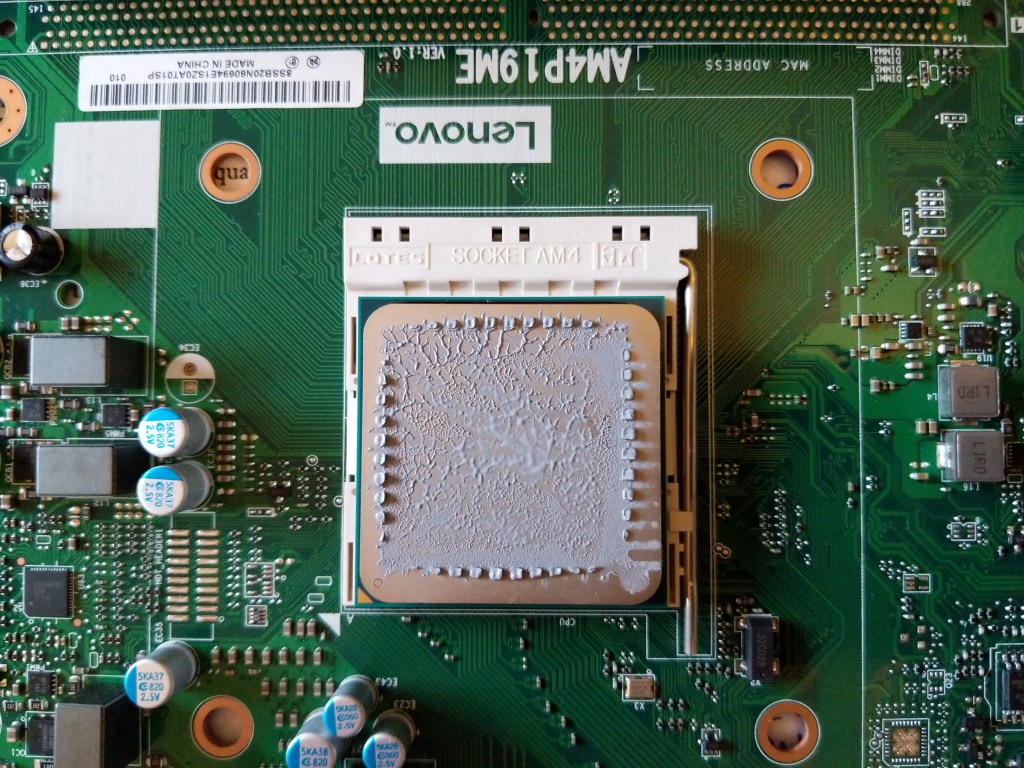
Lenovo, perhaps to cut costs by standardizing heatsink and motherboard designs, uses what they rate as a 65watt TDP (thermal design power) heatsink and fan (HSF). It’s made out of extruded aluminum with an offset 80mm, 4-pin fan mounted on top to blow air through the heatsink’s fins. What’s interesting about this part’s design is that its mounting hardware is for an Intel 1151 socket hole pattern instead of AMD’s AM4 socket, which the Ryzen 7 4700G processor uses.
My guess is that Lenovo sells many more computers with Intel CPUs than AMD CPUs, so even when they design a product that uses AMD parts, they design the motherboard and cooling solution to reuse the same hole pattern and heatsink fan as their Intel-based products.
While Lenovo’s HSF was rated for the 65watt TDP of the 4700G CPU, it didn’t seem capable of displacing the heat generated when the CPU was under a sustained load. This led me to replace Lenovo’s HSF solution with an aftermarket HSF that had a higher TDP.
Unfortunately, there were some constraints that I had to work around. First, as mentioned above, the cooler had to support a 1151 hole pattern. Second, the drive cage in the IdeaCentre 5 case overlaps the CPU area of the motherboard. This limits the height of the cooler to about 55-60mm (this was my best measurement due to taking it with Lenovo’s HSF installed). At the upper end of this range, it would be very tight, and airflow into the HSF might be restricted. Also, if a larger HSF with a wider fan were installed, it might not permit the installation of a 3.5″ HDD in the underside of the drive cage.
Ultimately, I decided to purchase the Silverstone Argon Series AR11 heatsink and fan.
It is only 47mm tall, but it features four heat-pipes that make direct contact with the CPU. Included in its height is the 15mm tall 92mm x 92mm fan, which should supply more air flow at the same rpm as the 80mm fan on the Lenovo-made HSF.
And, it has a 95 watt TDP rating, which means that it should give the 4700G’s 65 watt TDP some cooling headroom.
It included four nuts with spacers and a pouch of thermal compound.
To remove the Lenovo HSF and install the Silverstone AR11, I had to completely remove the motherboard from the case.
I could see that the Lenovo HSF was secured to (what I thought) was a backplate with threaded lugs that the spring-mounted screws on the four corners of the HSF would screw into. Since the Ideacentre 5’s case has the motherboard-side of the case riveted to the chassis, I had to remove the motherboard as I couldn’t see what the underside of the motherboard looked like from the other side (as you can in many aftermarket/hobbyist cases). Before dealing with the motherboard and the HSF, I began disconnecting all of the cables running to the motherboard, removing the drive cage, and removing the front-side frame around the USB connectors and the power button module.
Then, after removing all of the screws holding the motherboard to the chassis, I discovered that the motherboard wouldn’t budge. I had not yet removed the HSF, but it dawned on me that the HSF screws were connected to what I hoped were easily removable stand-offs beneath the motherboard. I would soon learn that this wasn’t the case. But, first, I removed the HSF to expose the 4700G covered in thermal compound underneath, which I cleaned off with a paper towel, a few Q-tips, and alcohol.
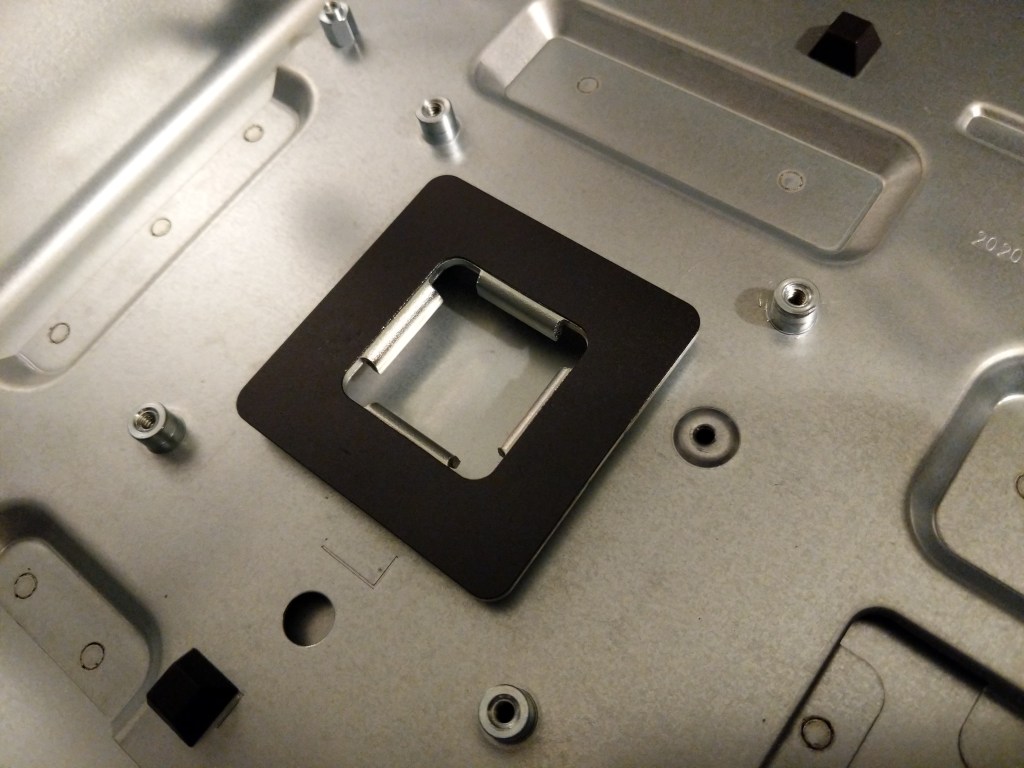
Underneath the motherboard, I found four stand-offs built into the chassis that were used to secure the HSF. I think that this design is a cost-saving measure on Lenovo’s part, because it might reduce a step or simplify the installation of the cooling solution during assembly of the PC.
Nevertheless, these four stand-offs were in the way of the nuts that would hold the SilverStone AR11 to the motherboard, so they had to be removed.
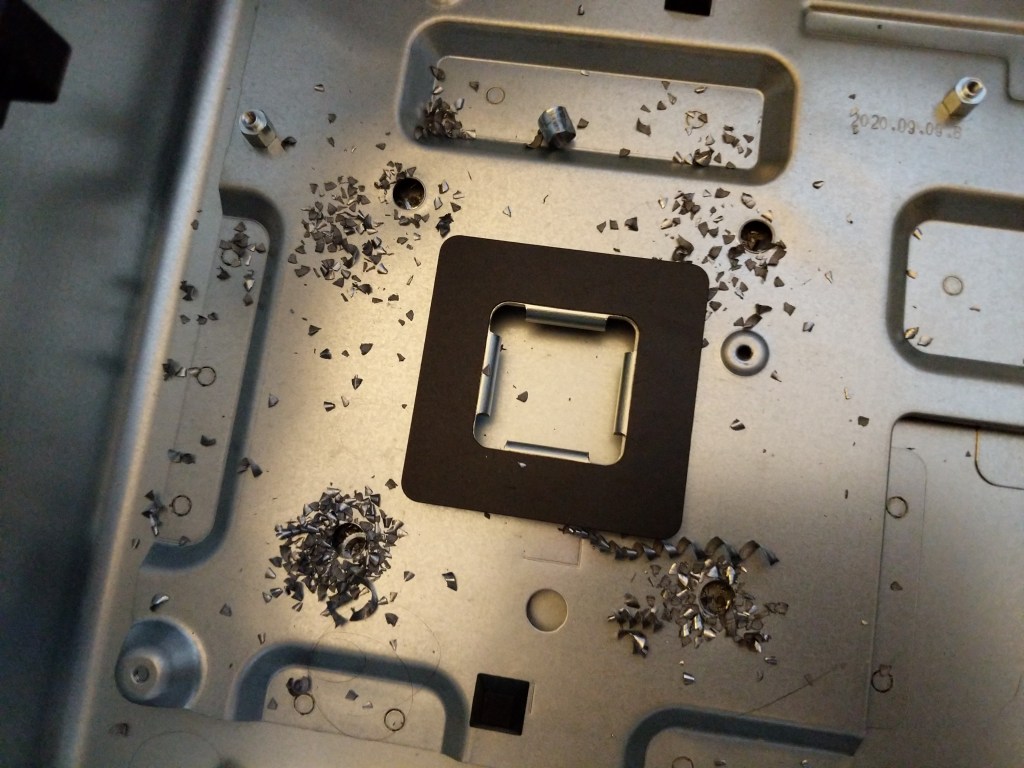
Thankfully, I was able to drill out each of these standoffs with a 1/4″ drill bit. Drilling each out, left a thin-walled bushing and it popped out the rivet underneath.
I was able to vacuum the metal shavings, which left four clean holes in the chassis.
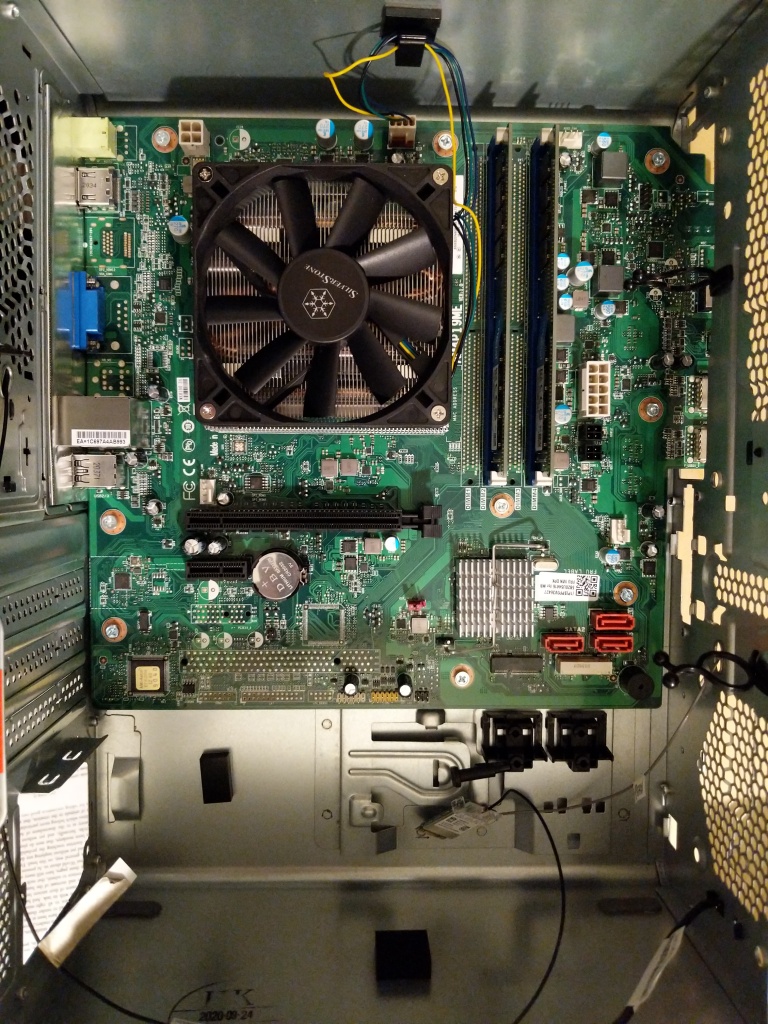
With nothing obstructing my work now, I proceeded to install the AR11 HSF on the 4700G. I applied the included thermal compound to the 4700G and smoothed it with an old credit card. Then, I positioned the AR11 over the 4700G and through the four mounting holes. Carefully holding the AR11 in place with one hand, I used my other hand to flip the motherboard over. Balancing the motherboard on the AR11, I threaded each nut with spacer on the protruding studs from the AR11’s mounting hardware. I tightened the nuts slowly in a four bolt torque pattern until it was secure. Then, I reinstalled the motherboard with the new AR11 mounted into the IdeaCentre 5’s case.
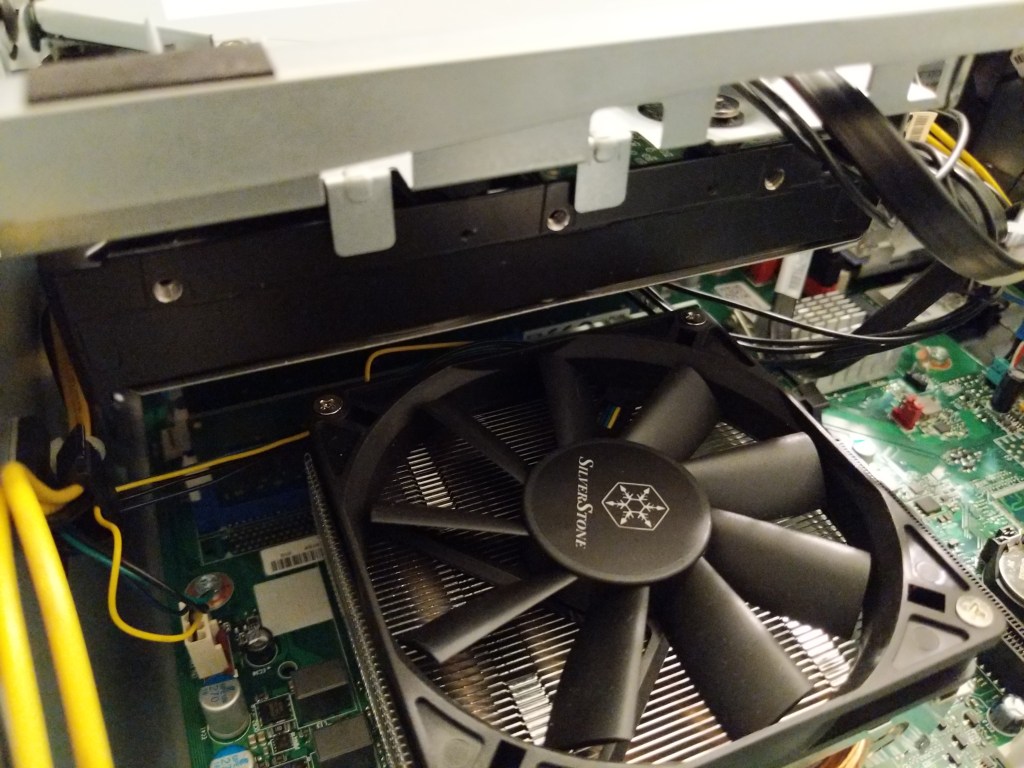
While I had everything exposed inside the IdeaCentre 5 case, I canibalized the 80mm fan from the original Lenovo-supplied HSF and mounted it as an intake fan in the front of the case (lower right above). The exhaust fan (upper left above) came mounted with the computer. Both use 4-pin power connectors. The motherboard supports one 4-pin CPU HSF connector and three 4-pin case fan connectors.
With the drive cage re-installed, there is a safe clearance of about 10mm between the AR11 and the 3.5″ HDD installed above it in the drive cage.
With everything reassembled, the Lenovo fired up without any issues, and psensor reports lower minimum temperatures (24C after, 31C before) and lower maximum temperatures (60C after, 65C before). When I record this coming week’s lectures in Science Fiction and Technical Writing, I will have a better idea about whether the AR11 keeps the temperatures low enough to avoid excessive clock rate throttling during extended load times.
Calculating the Cost
As a computer enthusiast and retrocomputing preservationist, I wish that I could keep all of my old computers.
Unfortunately, the costs of living prohibit my holding on to everything. As such, I needed to sell my i7-7700 PC and its components, and sell/repurpose parts from the Lenovo IdeaCentre to lower the overall cost of switching to a new computer system.
Below, I am including a tally of my costs and profits surrounding the new system. The new components cost $777.67 (excluding tax), but I was able to sell my old PC and some components for $529.00. This makes the final cost for the new computer to be $248.67.
Purchases

Lenovo IdeaCentre 5 Desktop, Ryzen 7 4700G, AMD Radeon Graphics, 16GB
$560.69

Crucial 32GB Kit (16GBx2) DDR4 3200 MT/s (PC4-25600) CL22 DR x8 Unbuffered DIMM 288-Pin Memory - CT2K16G4DFD832A
$168.99

Silverstone Argon Series (AR11-USA) Intel Socket LGA1150/1151/1155/1156 Compatible
$47.99

==========

Total $777.67


-$300 (thanks to Patrick for getting this for his daughter)
i7-7700 PC, 16GB RAM, 480GB SSD, 1TB HDD (the HDD was from Lenovo PC)

-$99
SK Hynix 16GB (2x8GB) DDR4 3200 RAM Kit HMA81GU6CJR8N CL22 Single Rank (from Lenovo PC)

-$110
MSI Radeon RX 550 AERO ITX 2G OC 2GB PCIe Graphics Card (from i7 PC)

-$20
Creative Sound Blaster Audigy FX PCIe 5.1 Sound Card [SB1570] (from i7 PC)

==========

$248.67
Looking Ahead
One of my goals in purchasing a pre-build system with a Ryzen 7 4700G processor was ultimately to get one of these OEM-only CPUs. In the USA, the options are few for purchasing one–either order it online from an overseas seller or buy a pre-built system that comes with one. In a sense, the latter turns into a shucking situation like many people have done for years with Western Digital external USB hard drives and now others are doing with pre-built systems that come with a video card. The market and pricing drive computer hobbyists to do things that save them a buck or land them a hard-to-find component. For me, this system serves this purpose in the long run. For the time being, I plan to run the 4700G in the Lenovo IdeaCentre 5, but if/when component prices return to saner price points, I would like to build a new system with a motherboard that can do more with the 4700G and its system RAM than the extremely limited Lenovo-made AM4 socket motherboard.
My needs change depending on the work that I happen to be doing at any given time. I imagine that I might get a dedicated graphics card again in the future, but I have no interest in dealing with the scarcity and market-inflated prices right now. I realize that there are a number of forces at play that are driving up prices, including the pandemic’s effects on workers, their families, and supply chains, ensuing component part scarcity, high demand among computer users working, learning, and playing remotely from home, and high demand among cryptocurrency miners. As we dig ourselves out of the pandemic, I think the former issues will sort themselves out. However, as we’ve seen before, cryptocurrency’s built-in blockchain inefficiencies and the proof-of-work concept that underlies their systems continues to wreak havoc on the cyclical graphics card market while simultaneously damaging the environment through its outsized and ever increasing energy needs. Crypto-mining doesn’t appear to be going anywhere, so it’s an issue that we need to collectively deal with before it virtually absorbs the graphics card market and inaugurates a new industrial-market revolution with detrimental environmental costs.
I like Syncthing, the continuous file synchronization program. Syncthing helps me pickup and continue my work regardless of the device I happen to be using, because it synchronizes my files across all devices. Think Dropbox but on my own hardware.
Also, I like tiny, low-power computers, like the Raspberry Pi 2. The Raspberry Pi and other lightweight computers demonstrate how even small computers are powerful enough for servers and desktop computing.
When Dropbox became more bloated with the new app design and refusing to offer a lower cost tier for those of us with modestly lower file synchronization needs, I began using Syncthing to create a folder of files synchronized between my desktop computer (at home) and my Surface Go (laptop used at work). I’ve been wanting to add a third node in my personal cloud storage solution, in part as an exercise in Linux and tiny computing and in part as another safe repository of my files. So, it made sense to combine my use of Syncthing with my enthusiasm for tiny computing by adding a third node to my Syncthing setup with a $10 Raspberry Pi Zero W (RPi0).
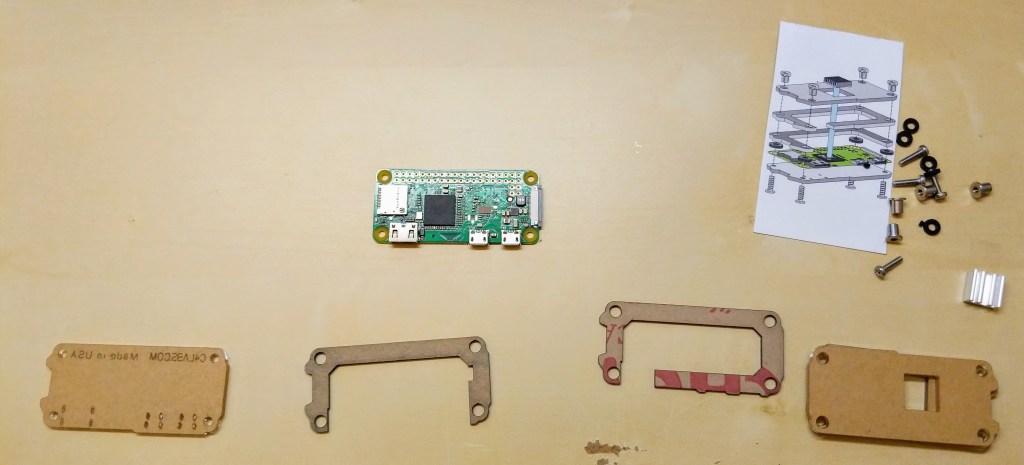
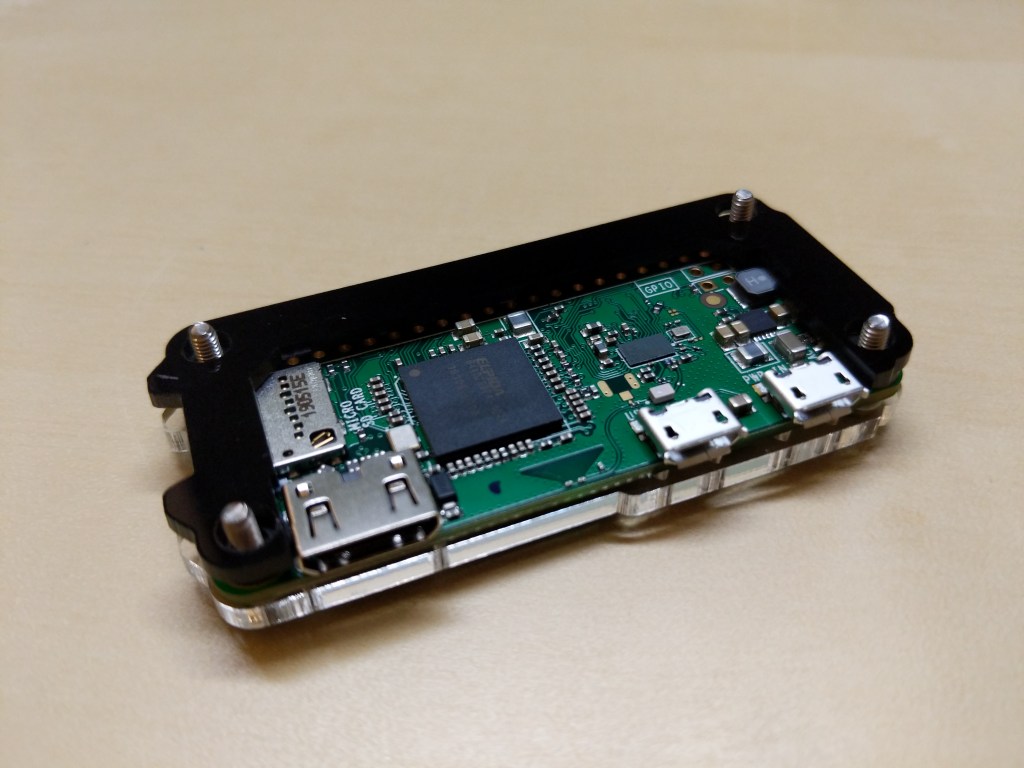
Raspberry Pi Micro USB Power Supply, Raspberry Pi Zero W, and C4 Labs Zebra Zero Black Ice Case
I picked up a RPi0 version 1.1, a C4 Labs Zebra Zero Black Ice Case with heatsink from Microcenter using their curbside pickup, which cost about $26 total.
I setup the RPi0 as a headless computer, meaning that it doesn’t have a monitor or keyboard attached. I will configure and control it remotely over my LAN.
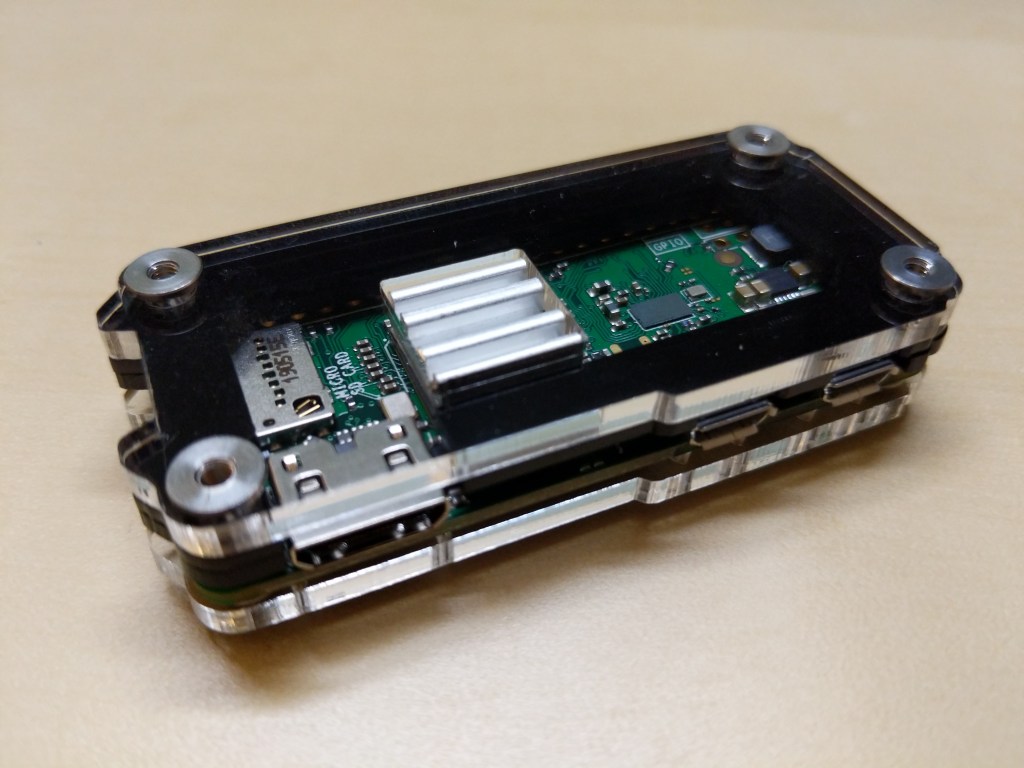
Before turning to the software and preparing the microSD card for the RPi, I assembled the case and installed the heatsink on the CPU. A case for the RPi0 wasn’t necessary, but I thought it prudent to get one for two reasons: 1) I have a cat and a small thing with a wire sticking out might be enticing, and 2) I plan to leave it on all the time, so a heatsink like the one included in this case kit will help dissipate heat produced by the RPi0’s CPU.
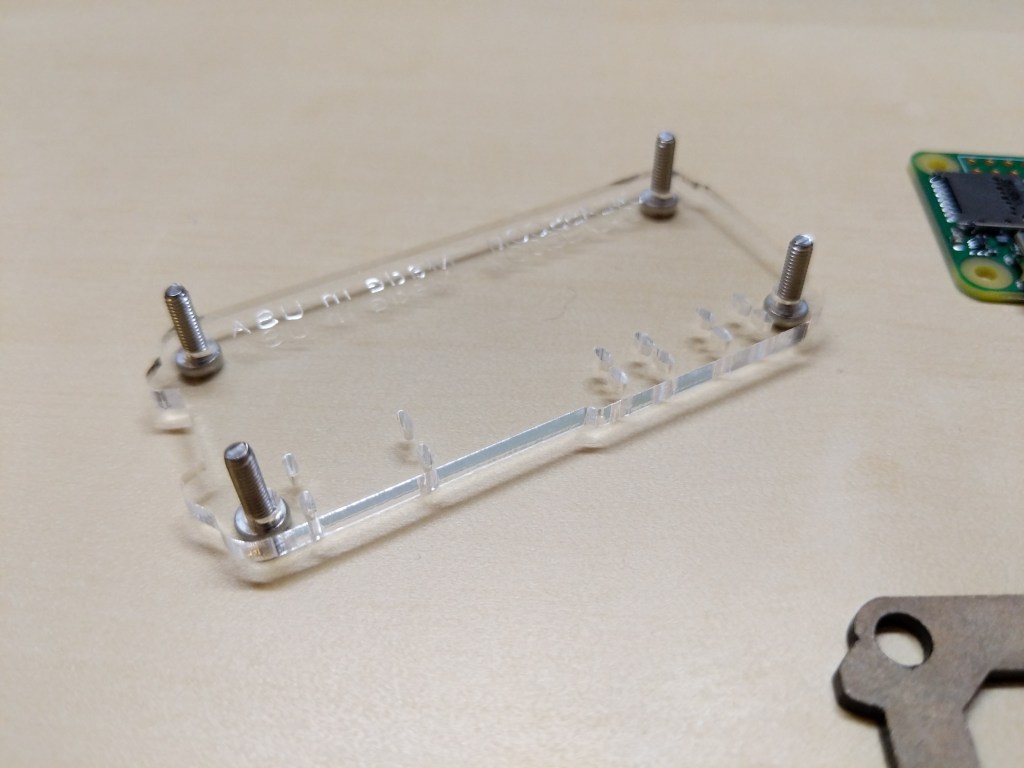
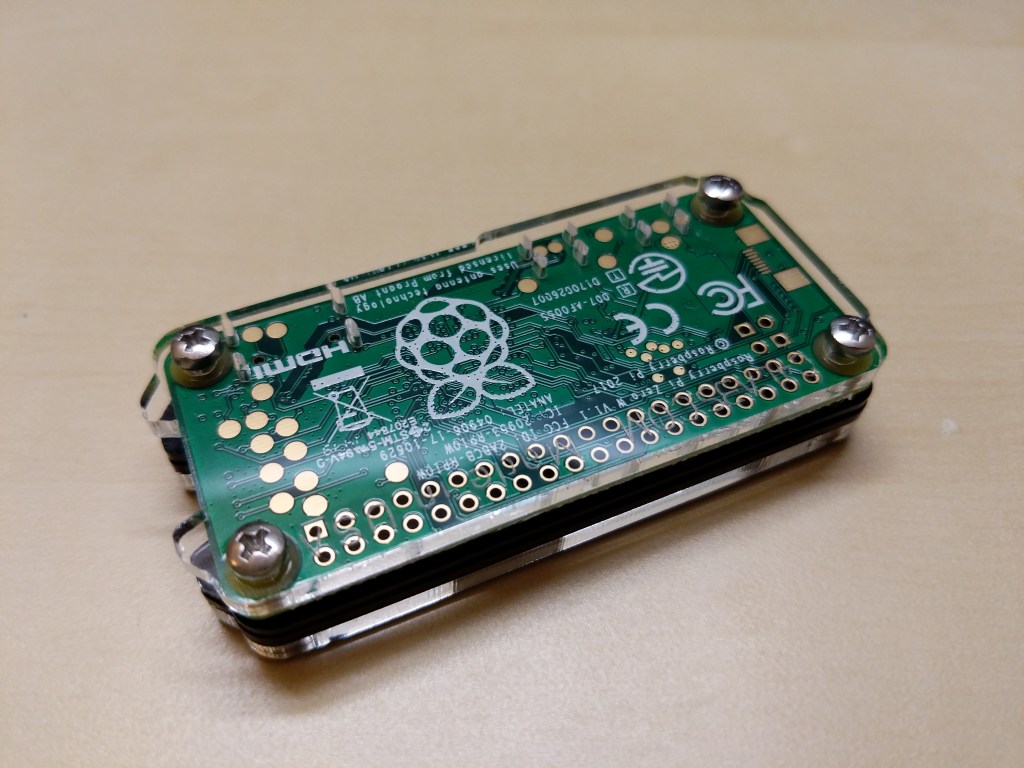
Assembling the Raspberry Pi Zero W in a C4 Labs Zebra Black Ice Case with Heatsink
Before powering up the RPi0, I downloaded Raspbian Lite (a lean version of the Linux-based Raspbian OS for the RPi), balena Etcher (to burn the installer image to my microSD card), PuTTY (to SSH into the RPi0 to configure, administer, and install software), and Apple’s Bonjour network printer software (to easily connect to the .local hostname of the RPi0).
Since I installed Apple’s Bonjour software as part of Mitch Allen’s instructions above, I was able to easily connect to the RPi0’s Syncthing web admin page by going to “raspberrypi.local:8384” on my desktop’s web browser.
Before setting up Syncthing to sync files, I wanted to lockdown the web admin page by going to Actions > Settings > GUI where I checked “Use HTTPS for GUI” and added a “GUI Authentication User” and “GUI Authentication Password”.
As a test, I rebooted the RPi0 and confirmed that Syncthing launched automatically at bootup and confirmed that authentication was required to access the web admin page remotely.
Also, I made sure that I had Syncthing running on the desktop computer and the RPi0. Due to some initial problems with syncing, I unlinked my desktop and Surface Go from syncing, and moved the files and folders out of my default sync folder so that the sync folder is empty to begin with.
Then, I added a remote device to Syncthing on my desktop PC and on the RPi0 (both installations of Syncthing have to have the other device added).
On each Syncthing web admin page click “Add Remote Device” to add the other computers that you want to sync
First, on each computer (in my case, the desktop PC and the RPi0), click “Add Remote Device” on the Syncthing web admin page.
Enter the Device ID generated by Syncthing on the other computer. On my local network, it auto-suggested the ID of the desktop PC on the RPi0 and vice versa.
Second, on the “Add Device” screen that appears, type in the Device ID of the other computer. In my case, Syncthing auto-suggested the Device ID of the desktop PC when I was configuring the RPi0 and vice versa since these devices are on the same local area network.
On the Sharing tab, check all three boxes
Third, click on the “Sharing” tab on the “Add Device” screen, and check all three boxes: Introducer tells connected devices to add devices from the other synced devices, Default Folder is what folder is being shared, and Auto Accept will automatically include new folders created or shared within the default shared path. Finally, click “Save.”
After adding each other device on each Syncthing installation, they should begin syncing the default folder. I added one file back on my desktop PC to test this. After that file synced on both devices, I added my files back and they began syncing with the RPi0.
The final step in my setup was to add the Surface Go as another remote device. After starting Syncthing on the Surface Go, I added it to the desktop PC and I added the desktop PC to the Surface Go’s Syncthing configuration. While the Surface Go began copying files, the RPi0 added the Surface Go as a remote device automatically. Now, all three devices sync my files.
A better configuration would be to have the RPi0 off-site so that my files would be protected from burglary or fire. Therefore, I wouldn’t recommend Syncthing as a foolproof backup solution that gives you the same sense of security as off-site storage unless you can arrange to have your files off-site (then, I would recommend going further than what I did and have your RPi0’s drive encrypted to protect your files should the off-site device be compromised).
For my purposes, using Syncthing on two work-focused devices and one tiny RPi0 computer server gives me some peace of mind through an additional layer of redundancy.
Now, I want to explore what else I can have this RPi0 do as a headless server!
Due to COVID-19, City Tech (and all of CUNY) shifted its in-person classes to online, distance learning instruction. In this post, I reflect on my current class’s transition to distance learning, show how I have configured my office and computer for screencasting and video conferencing, describe some software and services that support distance learning, and give instructions for uploading a video to YouTube.
My Transition to Distance Learning
For my current Science Fiction (ENG2420) class, this was not too much of a disruption, because I was already leveraging online technologies to support student learning and course material accessibility. I designed the course as a zero textbook cost class, meaning I find resources that I can make available to students via PDFs and handouts, and choose readings that are available freely online, such as the unparalleled Archive.org.
Also, I redesigned some of the course assignments to emphasize the importance of note taking by teaching good note taking practices and evaluating students on the quality of their notes. To support this, I recorded each lecture during our earlier in-person classes and posted them on YouTube after class ended, so that students could use the videos to fill in gaps in their notes and allow those students who missed a class to make their own notes based on the video lectures.
I collect student work via email and on OpenLab, “an open-source, digital platform designed to support teaching and learning at City Tech (New York City College of Technology), and to promote student and faculty engagement in the intellectual and social life of the college community.” I joined the OpenLab team as a co-director of the project this year, but I have been using OpenLab in all of my classes since joining City Tech in 2014.
Now with classes meeting asynchronously online, I have tweaked assignments and the schedule to accommodate students accessing materials and completing their assignments. I hold office hours once a week at a regularly scheduled time via Google Hangouts, and I can hold private office hours by appointment with students. I use email to respond to questions and concerns on a daily basis.
Now that I have reconfigured a space in my apartment to support my class and the many other online meeting responsibilities that I have with OpenLab and other projects, I wanted to share some tips and ideas to help others transitioning to facilitating their classes with distance learning.
Office Configuration
I know how easily distracted I am by busy backgrounds, I wanted to provide as neutral a space for my lectures and online meetings. To this end, I appropriated my apartment’s closet as a distance learning and video conferencing studio.
I positioned the Logitech C615 webcam so that I am centered in the frame when video conferencing or recording myself lecture. Above the camera, I positioned a white light to illuminate my face.
I arranged the desk so that my back would be against a solid white wall as pictured above looking from behind my monitor towards where I would be sitting facing the monitor and webcam.
Notice that I taped a small piece of cardboard above the webcam. This blocks glare on the camera lens from the light above that illuminates my face. I was careful to cut and position it so that it is out of frame of the camera lens. Depending on your webcam, be careful not to cover the microphone if you build a similar lens shade.
To the side of my desk, I have a larger lamp that points against the wall and behind me. This reduces my shadow from the desk lamp in front of me.
The end result looks like this:
Software and Online Services for Distance Learning
As mentioned above, I use email and the OpenLab for interacting with students, disseminating materials, and collecting student work. And, I am using Google Hangouts for regular office hours since it is a far easier lift for students than official CUNY supported video platforms like Skype and WebEx.
To create my class lectures, I do the following things.
First, I create a presentation slide deck using Slides in Google Docs.
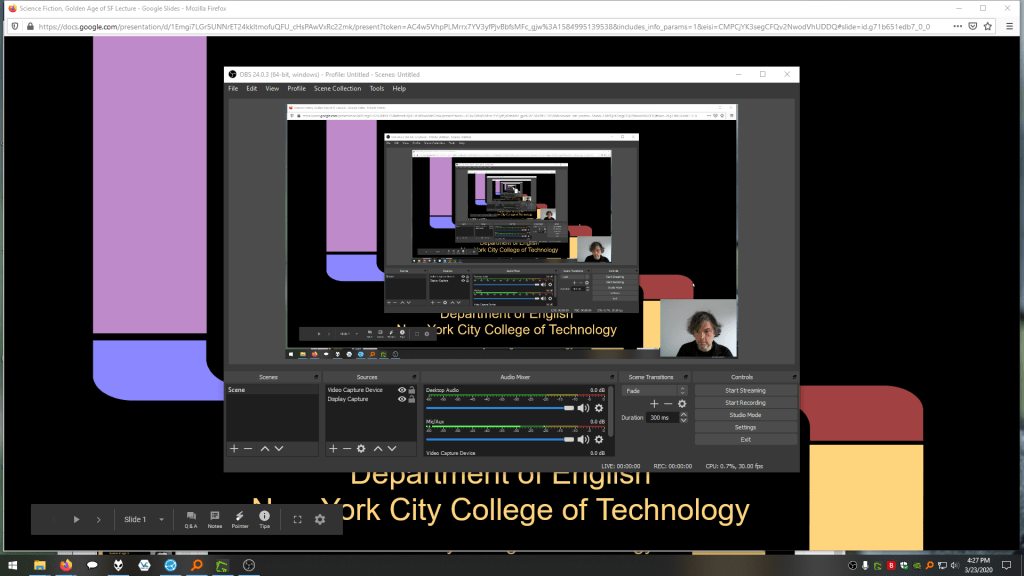
While presenting my slides in full screen mode, I use OBS Studio, a “free and open source software for video recording and live streaming” that supports Windows, Mac, and Linux, to record a video of my desktop (the Slides presentation) and my webcam video and audio in a smaller picture-in-picture that positioned in the lower right corner of the screen, which produces a video like my recent lecture embedded below.
Before I can post the video to YouTube, I like to edit it (though, editing isn’t absolutely necessary). I like to use Shotcut, a “a free, open source, cross-platform video editor.” After trimming the video, I then upload it to YouTube, get the video’s sharable link, and embed the video with the link in my class’ OpenLab site.
OBS Studio and Shotcut have steep learning curves, but each have extensive online documentation and there are communities of users online who share tips and advice about how to setup and use these powerful tools.
In some cases, you might not even need a computer. iPhones with iOS and Android phones can use video recording software that’s built-in or with an app to record and edit video, and there’s a YouTube app for both platforms that you can use for uploading the resulting video.
In the next section, I will show you step-by-step instructions for uploading a video made on a computer to YouTube.
Uploading a Video to YouTube
Once you have a video ready to share with students, the following step-by-step guide for uploading your video to YouTube shows you how to upload and share a link to your video.
First, navigate to YouTube.com and login to your account. Then, click on the camera icon in the upper right corner and then click “Upload Video.”
Second, drag-and-drop your video from your computer into the center of the window that opens, or click on “Select File” to navigate to and select your video file on your computer.
Third, while your video is uploading and processing (updates are shown along the bottom edge of this window shown above), fill out the Title and Description boxes and choose a thumbnail for how the video will initially display before the play button is pressed. Then, scroll down the window.
To comply with the COPPA law, select if your video is for kids or not. Then, click Next in the lower right hand corner.
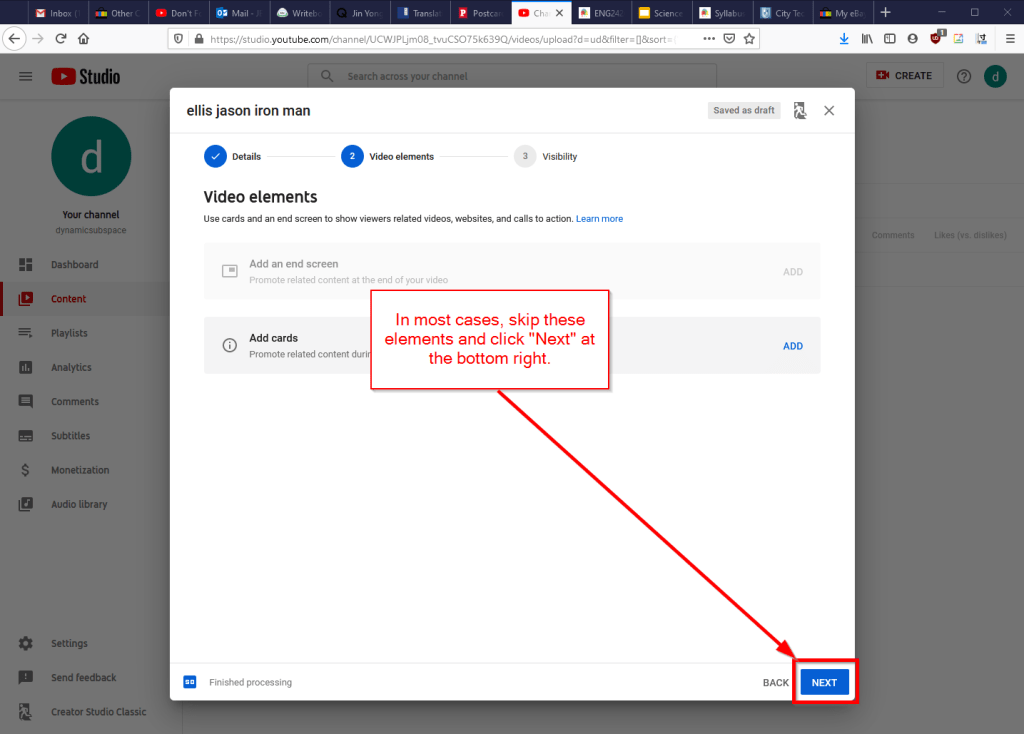
Fourth, you can skip the options on the Video Elements screen and click Next in the lower right corner.
Fifth, select the Visibility option for your video. The most versatile choices are Public (this is what I choose) and Unlisted. In these cases, you will have a sharable video link that you can send via email or easily embed in a webpage. Private is also an option, but you have to choose who is permitted to see the video, which requires students having a Google account and you knowing those accounts to grant permission to each one. After making your selection, click Publish in the lower right corner.
Finally, highlight and copy the video link on the resulting screen, or click on the copy icon on the right to automatically copy the video link to the Clipboard. Click “Close” on the lower right to return to your list of videos on YouTube. With the link on your Clipboard, you can go to email, OpenLab, or another platform to paste and share the video link with your students.
On OpenLab and WordPress-based sites, pasting the link into a post or page will automatically embed the video so that students can simply navigate to your class site and watch the video on the class site instead of going over to YouTube as an additional step.
If you’re working on transitioning your classes to distance learning, it’s okay to feel overwhelmed and frustrated like Miao Miao below. Just don’t give up. We’re doing good work for our students, and it takes time to think through and implement distance learning. Also, it’s okay to let your students know that this is a work-in-progress and things might change based on what works and what doesn’t.
I’ve wanted an IBM ThinkPad since I first saw my boss’ at Netlink in the fall of 1998. But, while I’ve been invested in PCs over the years tangentially, I reserved Macs as my primary desktop or laptop computing platform, which combined with the premium price on IBM and then Lenovo ThinkPads kept me in the Apple premium category. Put another way, I could afford one but not both.
Apple, as I’ve confided with friends, is diverging from my computing interests and needs. While design has been an important part of Apple’s DNA since the Apple II (arguably even earlier if we consider Woz’s design aesthetics for the Apple I motherboard layout), its increasing emphasis on fashion and accessorization and seeming less technological investment and innovation in its desktop and laptop computers have soured my allegiance to the company and its computers.
So, I thought about how to try out a different kind of PC laptop–one that I had wanted but could not afford when it was originally released–and make an investment in extending the life of what some folks might consider an obsolete or recyclable computer.
Within this framework, I wanted a laptop to take the place of the MacBook Pro that I had sold on eBay awhile back while the resell value was still high before rumored price reductions as product refreshes roll in. It needed to be relatively lightweight and have a small footprint. Also, it needed to have good battery life. And of course, it needed to run the software that I use on my home-built desktop PC.
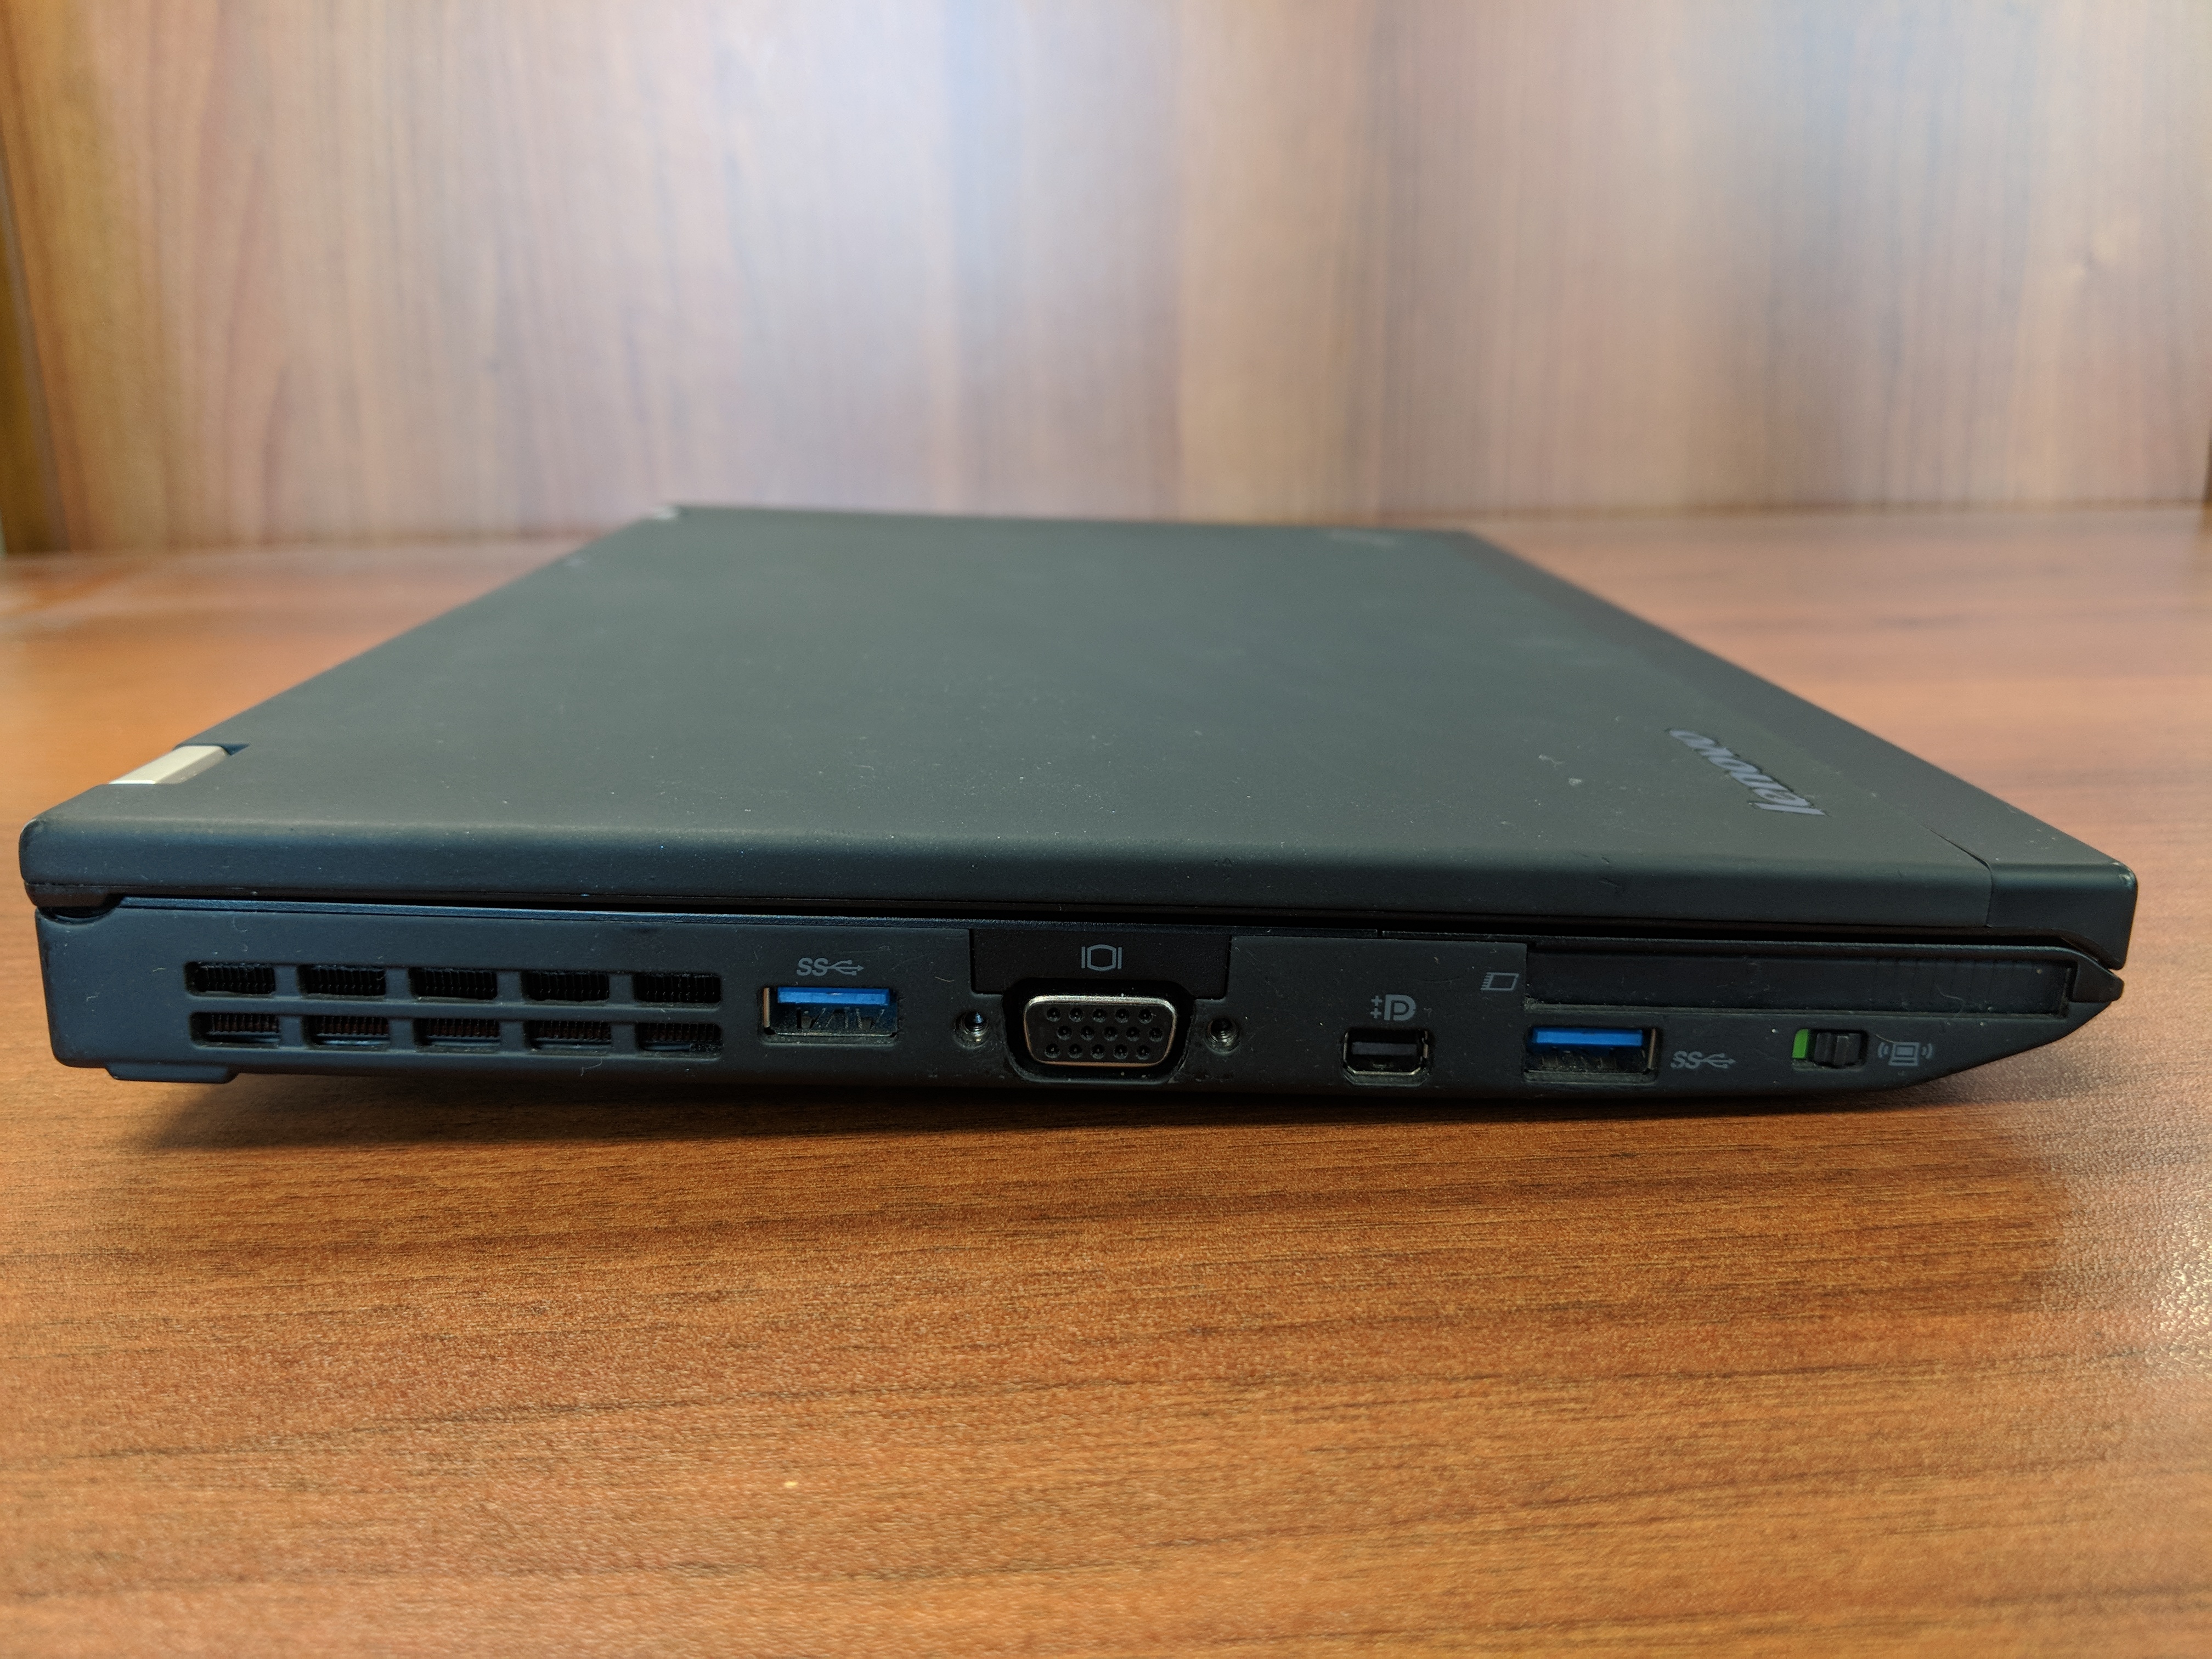
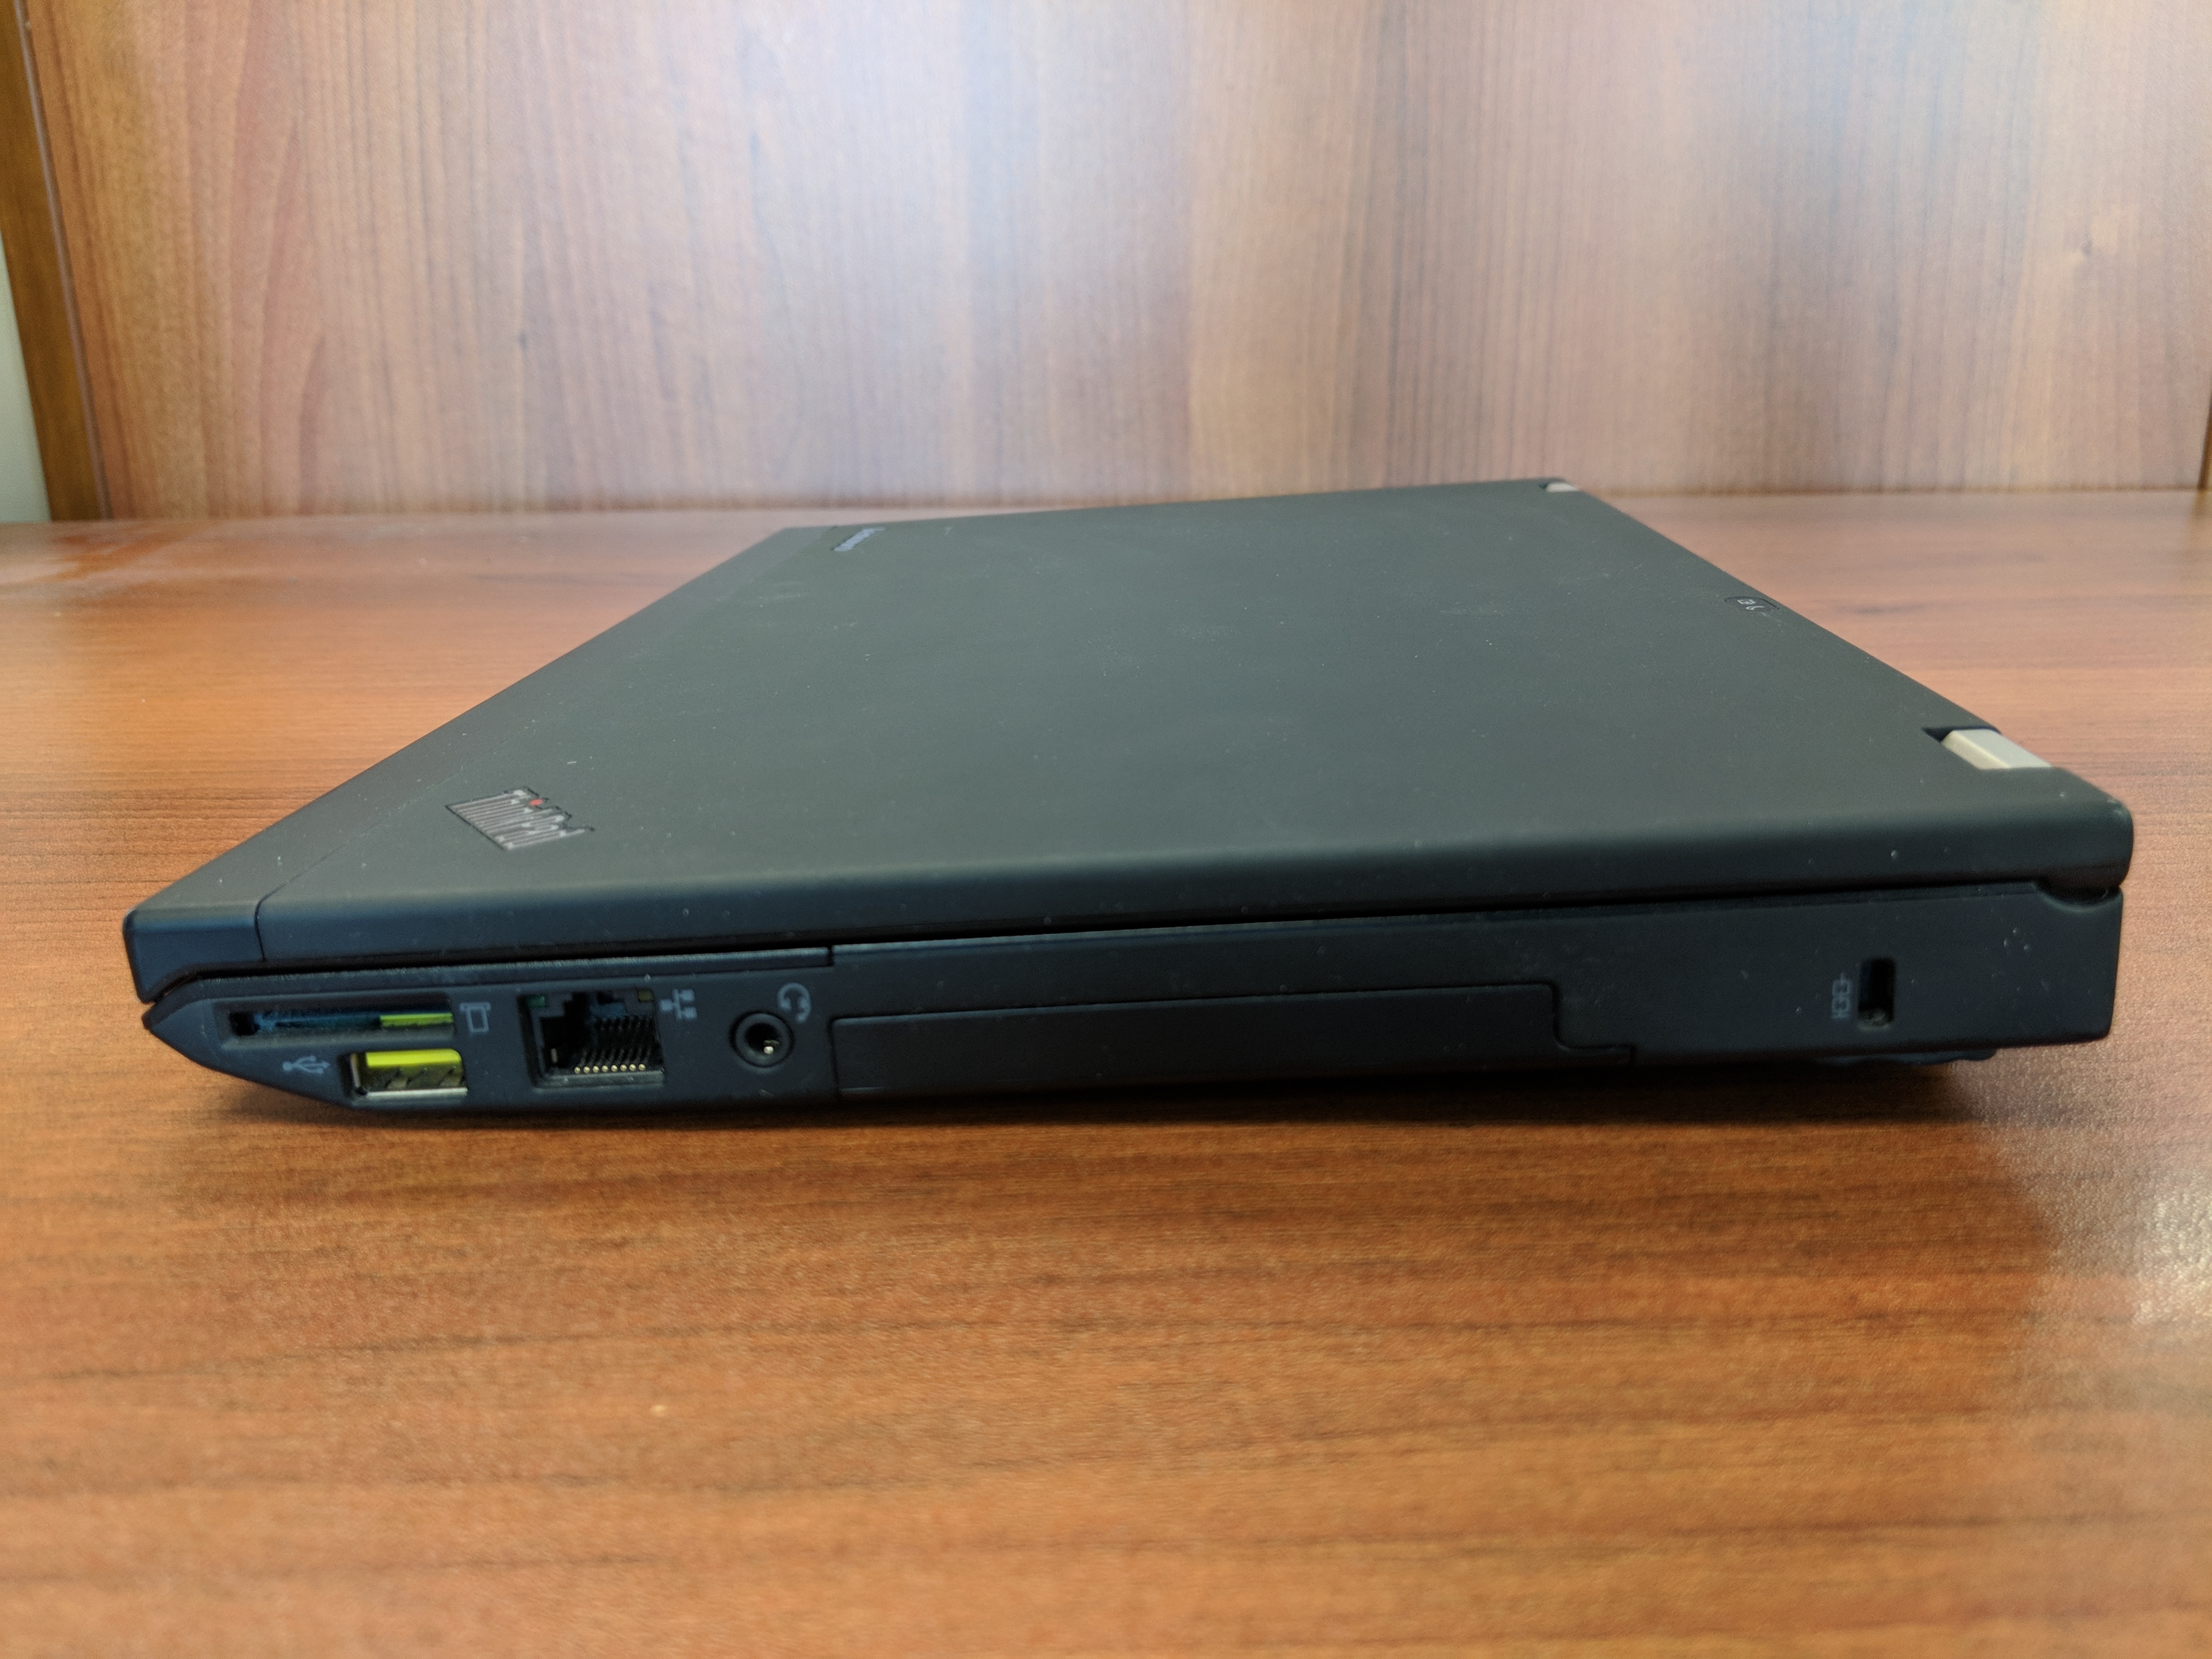
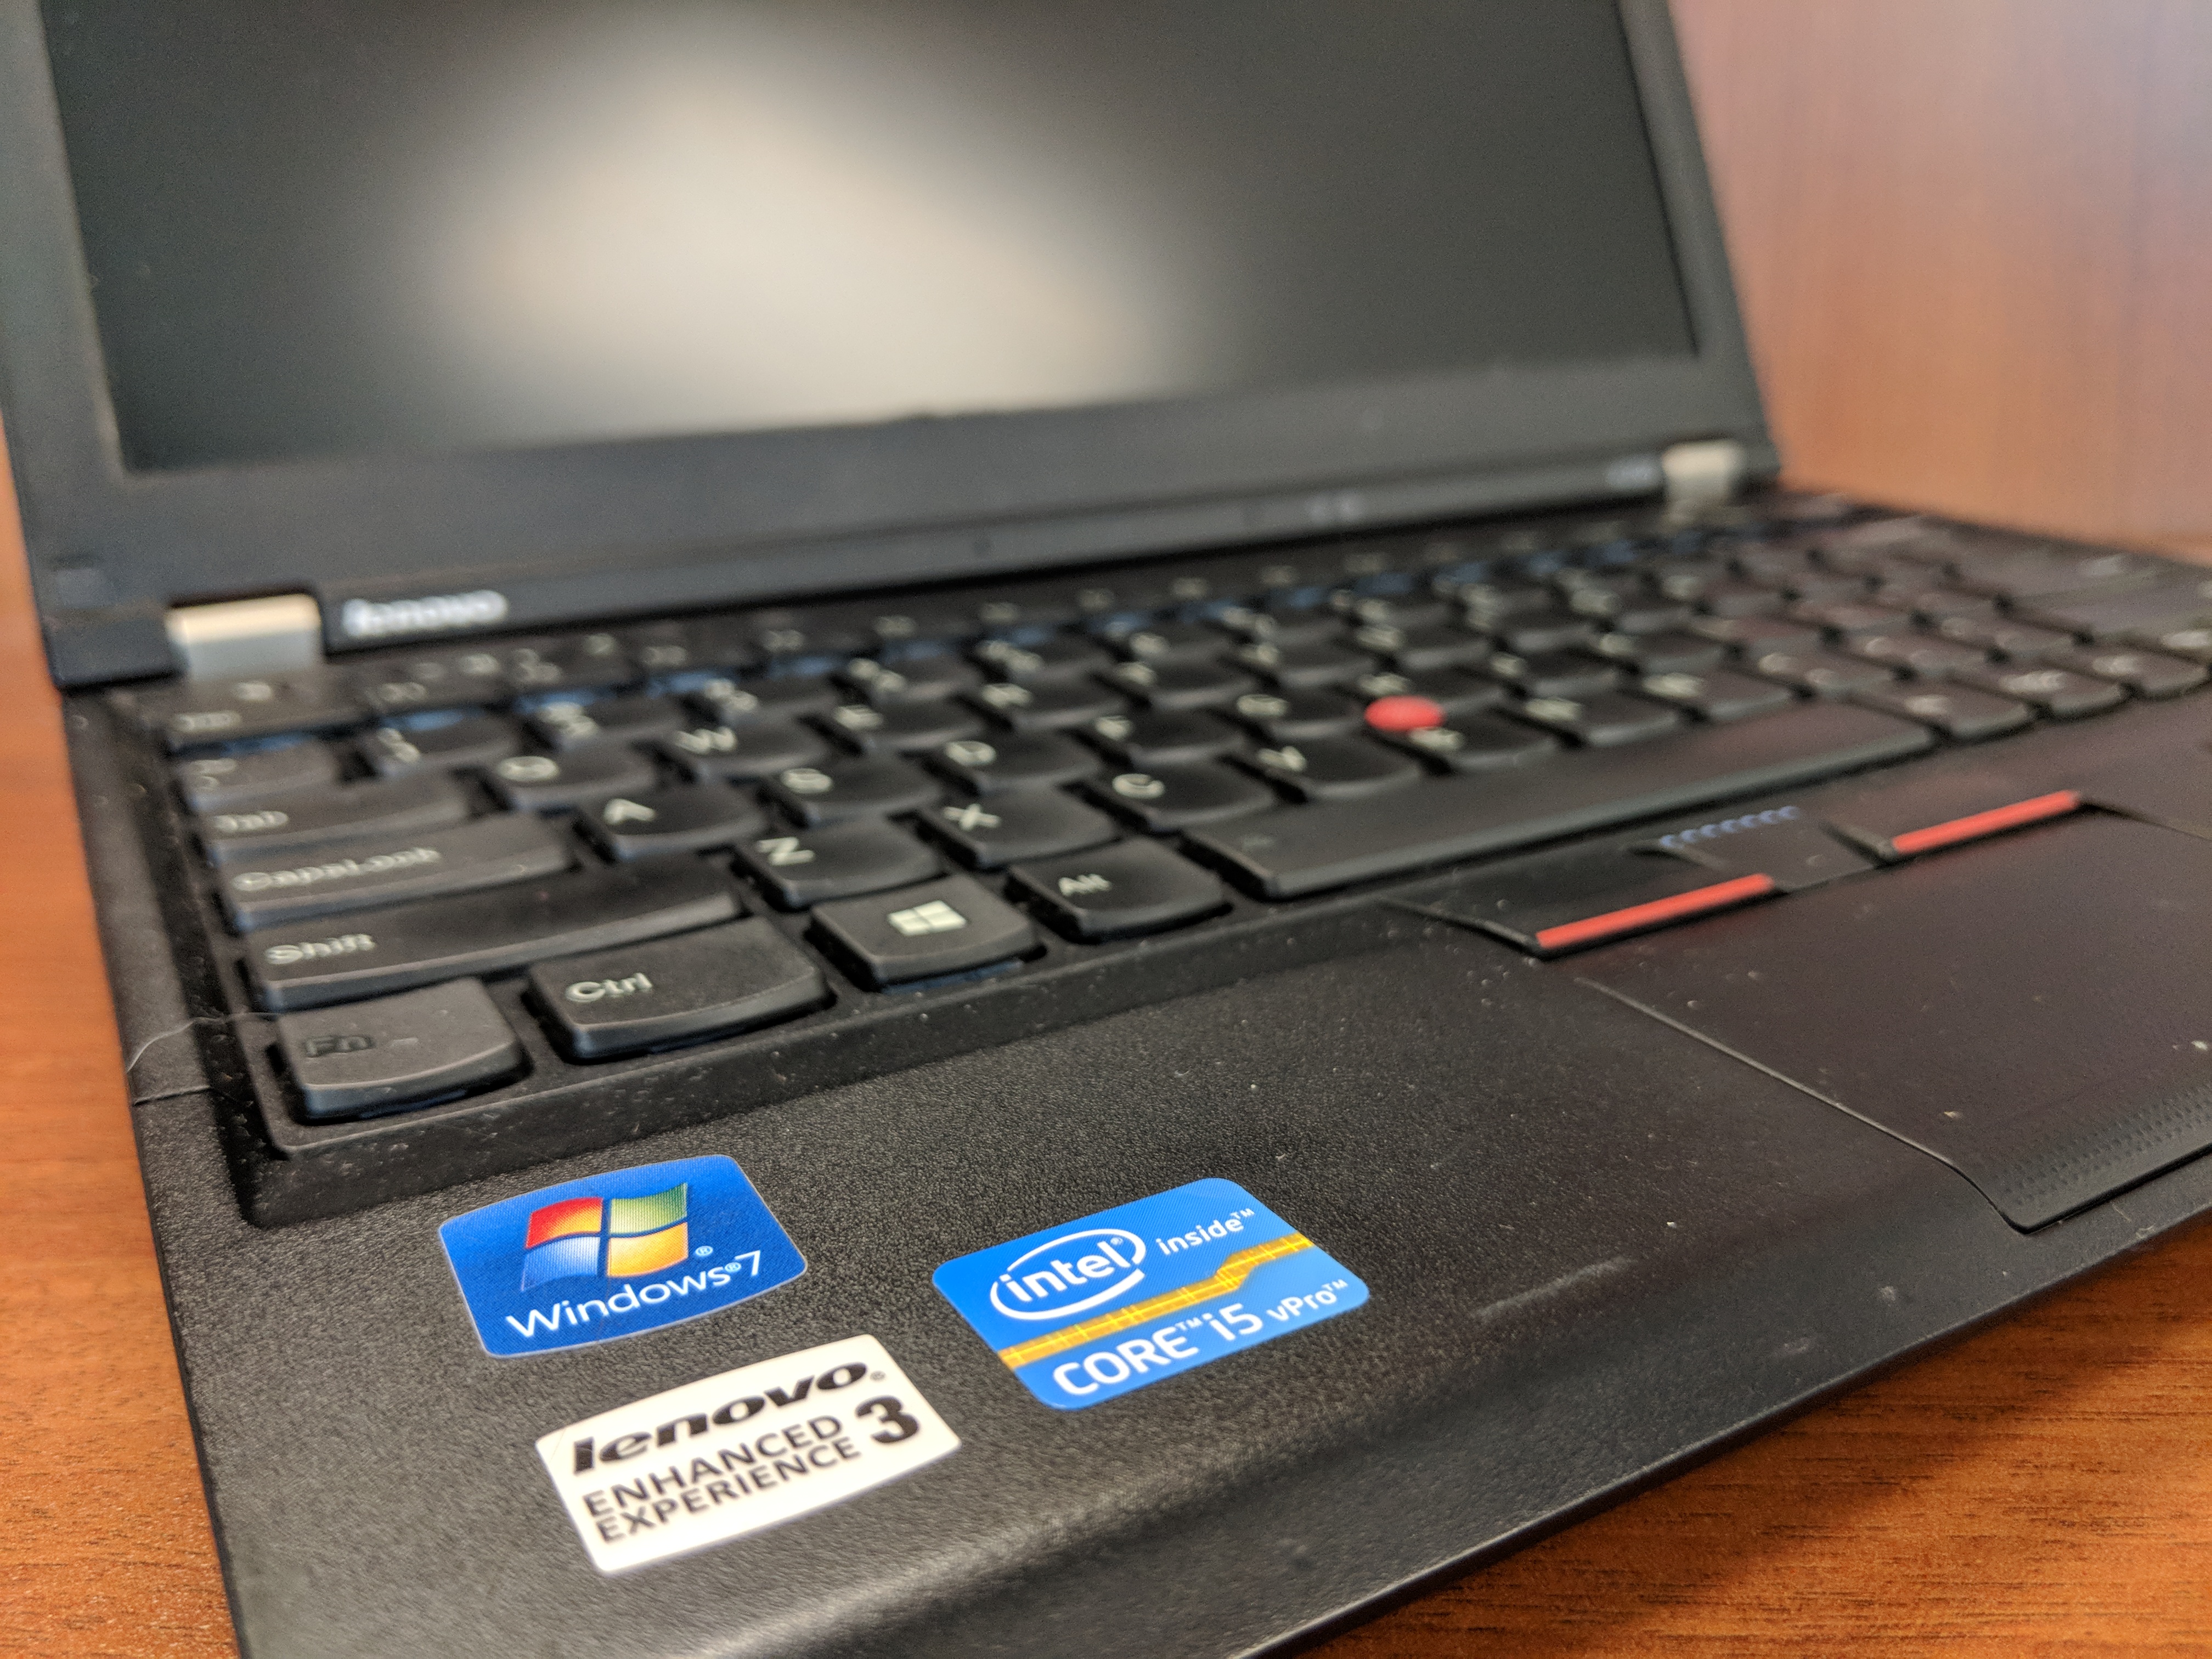
Eventually, I decided to purchase a very well taken care of Lenovo ThinkPad X230 on eBay. Originally released in 2012 for a lot more than what I paid for it, this ThinkPad model features an Intel Core i5 3320M Ivy Bridge CPU running at 2.6GHz with 2 cores and supporting 4 threads. It has 8GB DDR3 RAM and a 180 GB SSD. In addition to built-in WiFi, it has an ethernet port, 3 USB 3.0 connectors, an SD Card reader, VGA and Display port connectors, and a removable battery.
From a user interface perspective, it has a chiclet keyboard which responds well to typing quickly. Its touchpad leaves a little to be desired in terms of responding to some gestures like scrolling, but its red pointing nub and paddle-style mouse buttons at the top of the touchpad are exquisite. It includes some feature buttons like a speaker mute button next to volume keys above the function key row, and on the left side there is a radio on/off switch for the WiFi and Bluetooth.
Initially, I tried out the ThinkPad X230 with Ubuntu, and everything seemed to work out of the box (though, I added TLP for advanced power management). However, I switched back to Windows 10 Professional with a full nuke-and-pave installation, because I have some software that is far easier to run natively in Windows instead of through Wine or virtualization in Linux.
In Windows 10 Professional, the ThinkPad X230 meets all of my productivity needs. I use LibreOffice for most things, but I also rely on Google Docs in Chrome for some tasks (like inventorying the City Tech Science Fiction Collection). The WiFi works well even at City Tech, which has one of the most cantankerous wireless networks I’ve encountered. At home, I use it on my lap to browse while watching TV.
The X230 is snappy and quick despite its age. Of course, the SSD and ample RAM support increased input/output for the older CPU. Chrome, LibreOffice, and Windows Explorer respond without hesitation. It easily plays downloaded Solo: A Star Wars Story 1080p trailers in VLC, too.
With the included 6 cell 45N1022 battery, it runs for several hours (this is a used battery, so its capacity might be lower than one that is brand new). I purchased a 9 cell 45N1175 battery, which I’m testing out now. With the 6 cell battery, it is just shy of 3 pounds, and with the 9 cell battery is a little over 3 pounds. I’m hoping that between the two of them that I can get plenty of work done on the go without being tethered to a power outlet.
Future tests include running World of Warcraft and watching full length movies. The display’s viewing angles could be better, but I’m willing to accept them as they are as I can adjust the brightness and display gamma easily using keyboard shortcuts and the Intel Display Adapter software to minimize its poorer display quality as compared to the latest HiDPI displays available now.
I’m tickled to use the Lenovo ThinkPad X230 as my main laptop. Now, I can say that I’m a proud ThinkPad owner instead of a zealous Apple user.
At the bottom of this post, I’ve included more photos of the X230.
If you’re considering a new computer, I would, based on this and my other vintage computing experiences, suggest that you consider trading up for a used or refurbished machine. Getting a used computer keeps that computer out of a landfill or being destroyed for its rare metals, and it might be an opportunity to try out a computer that you might have missed on its first time around.