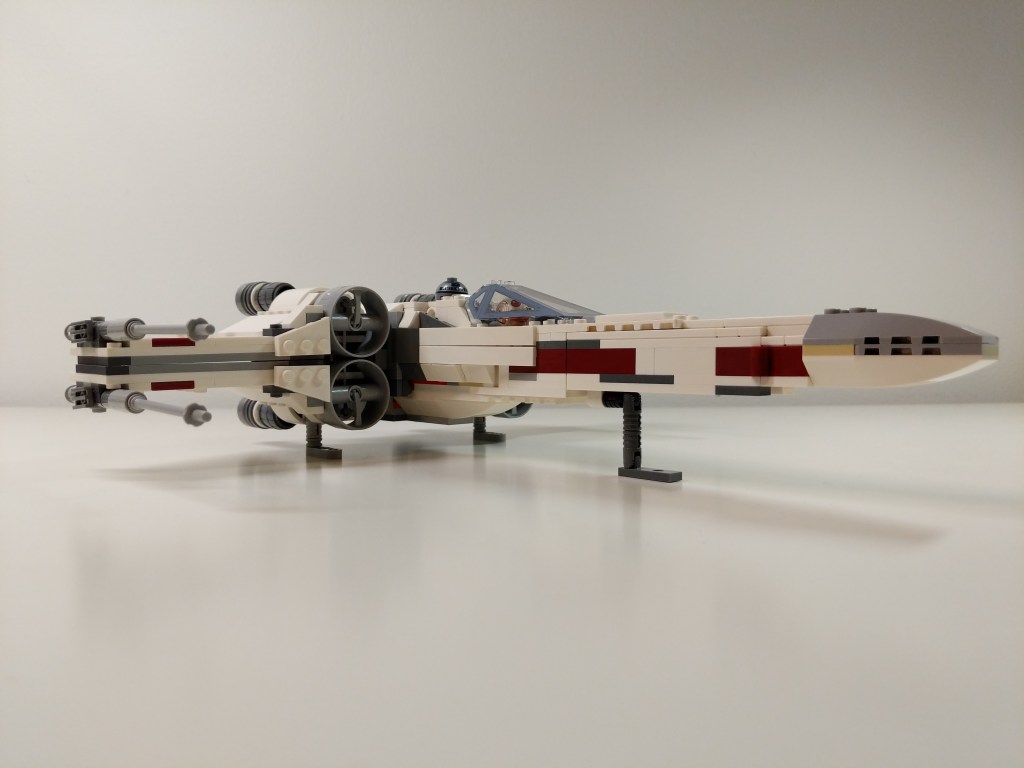
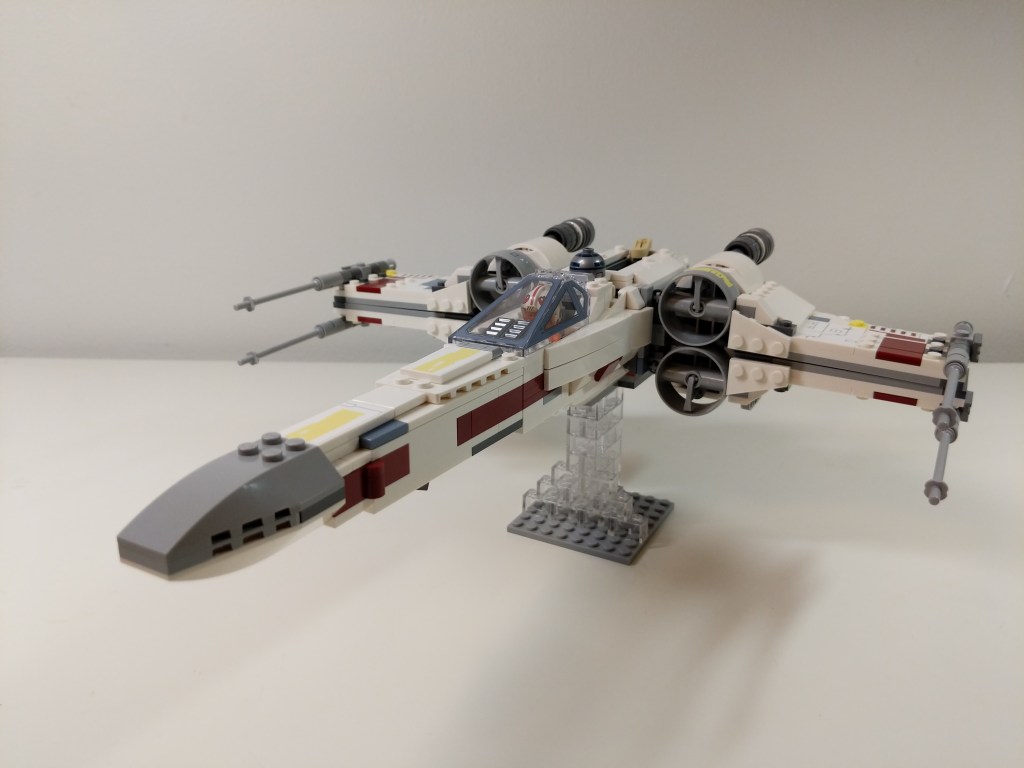
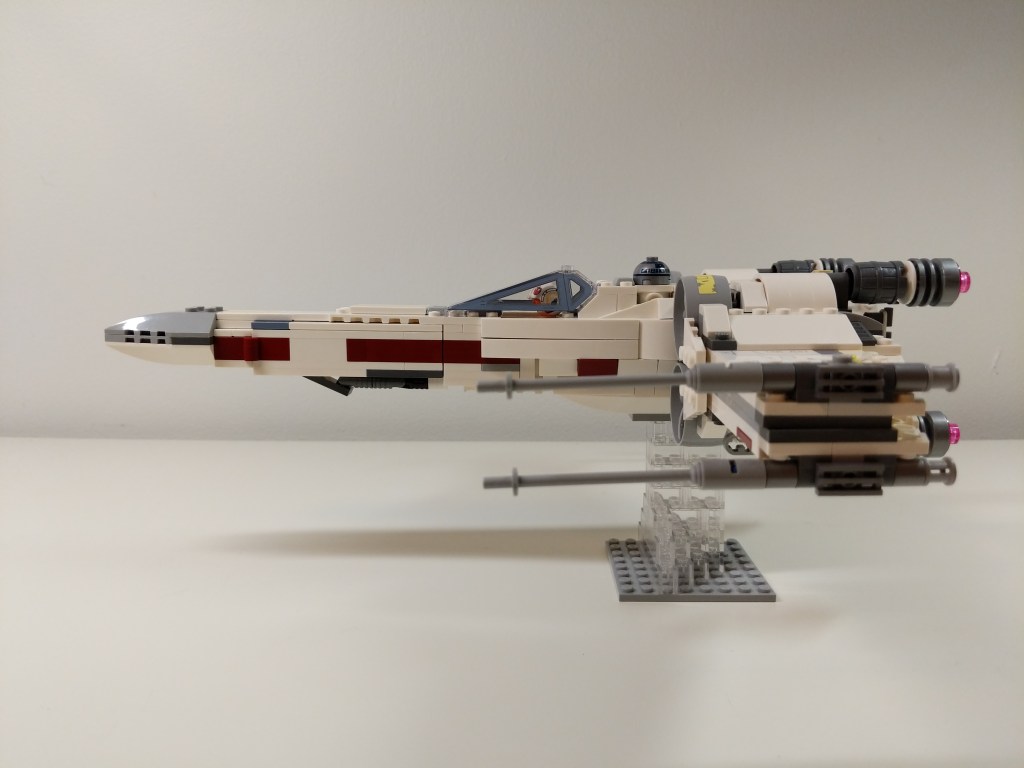
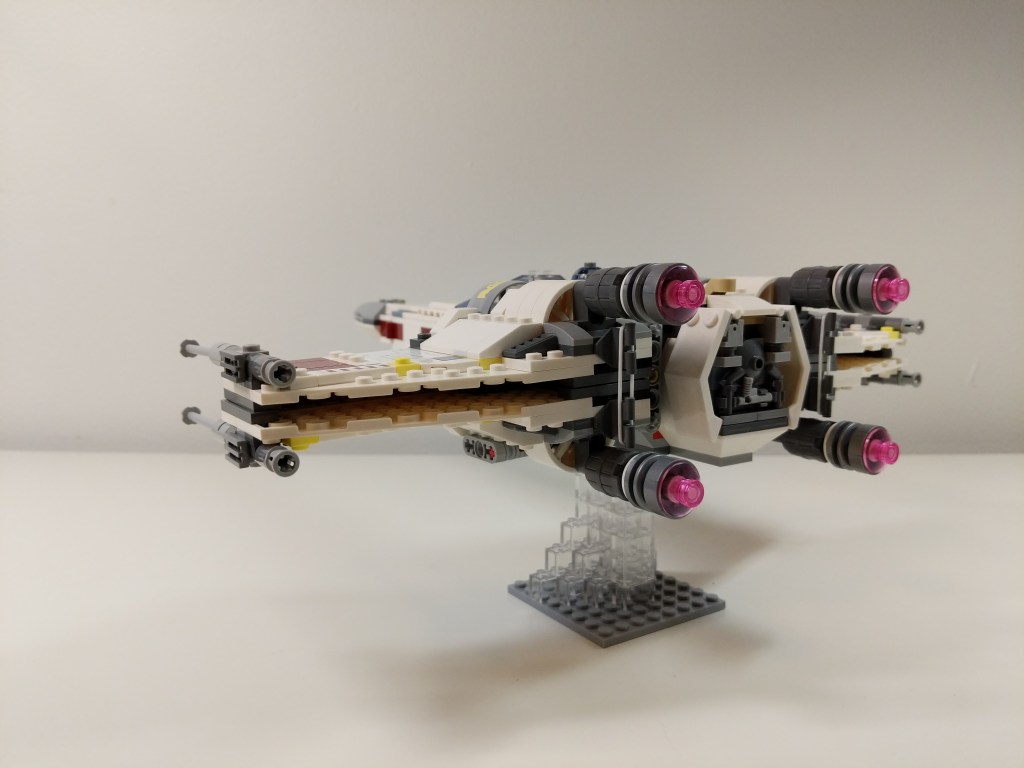
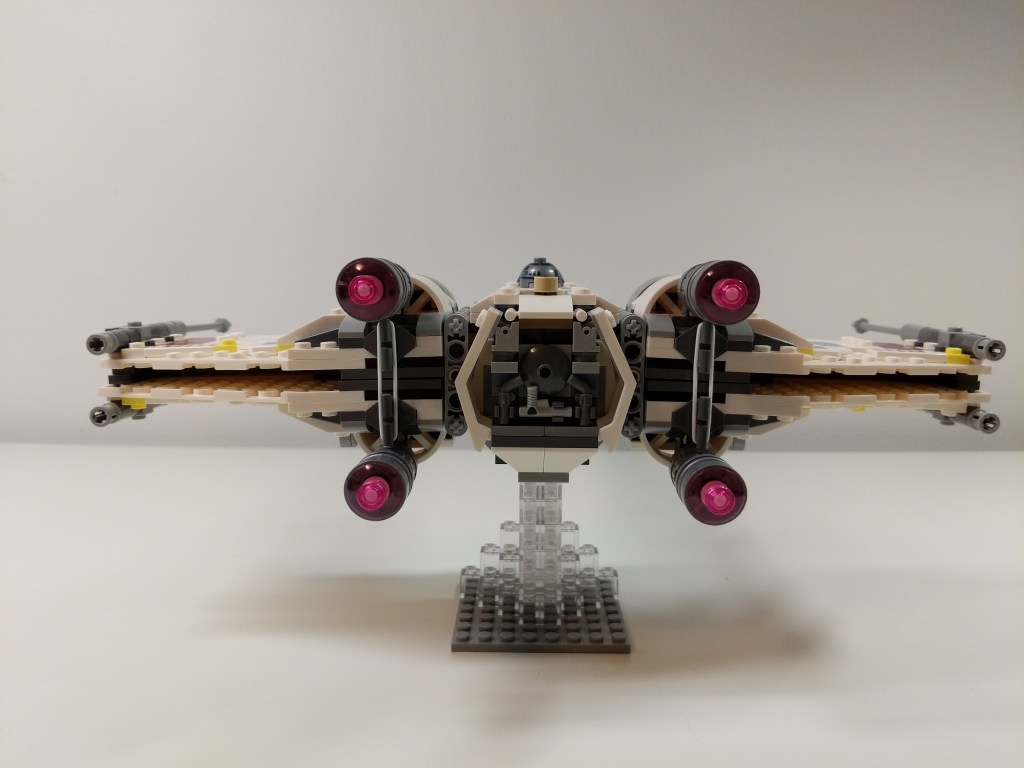
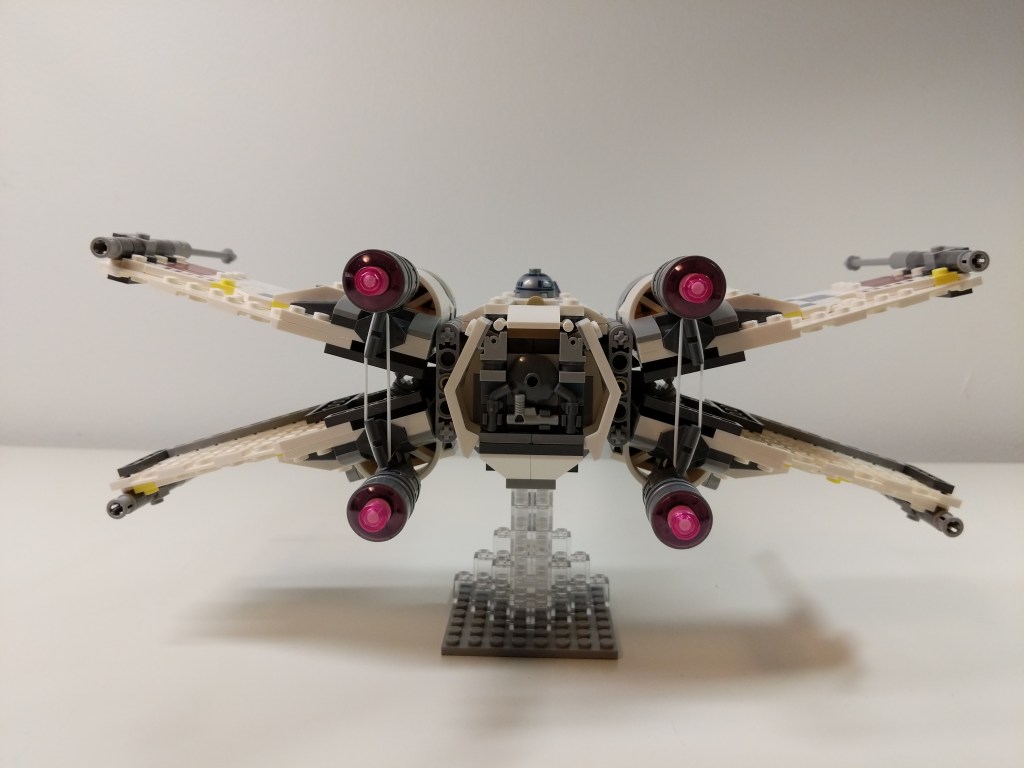
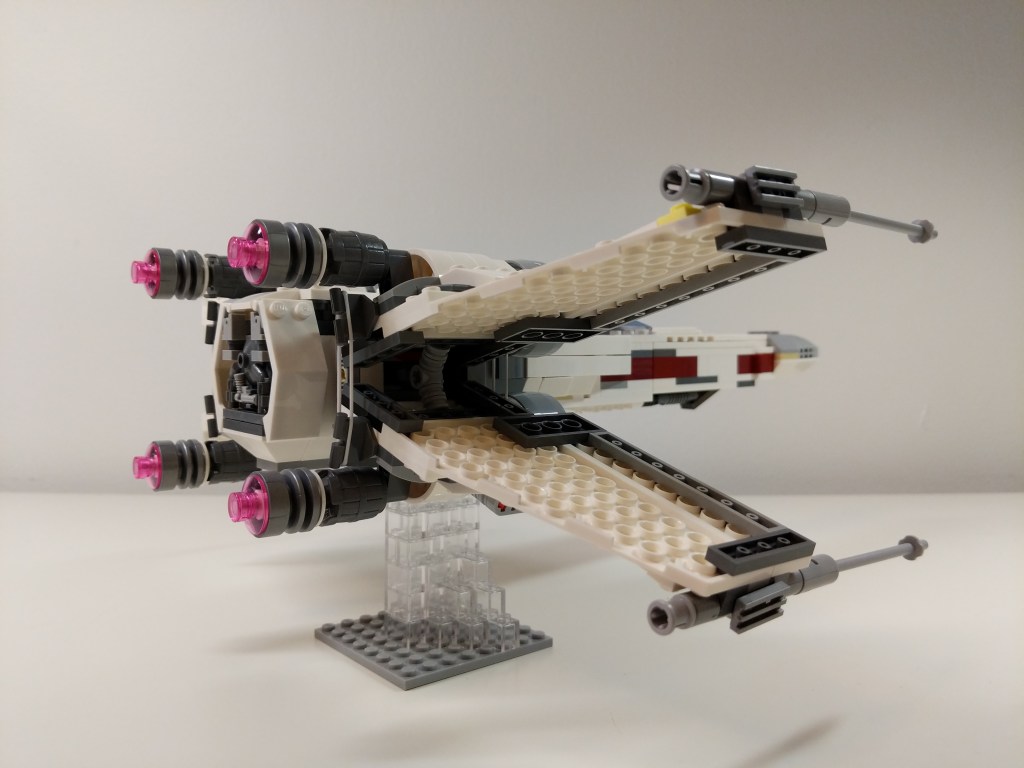
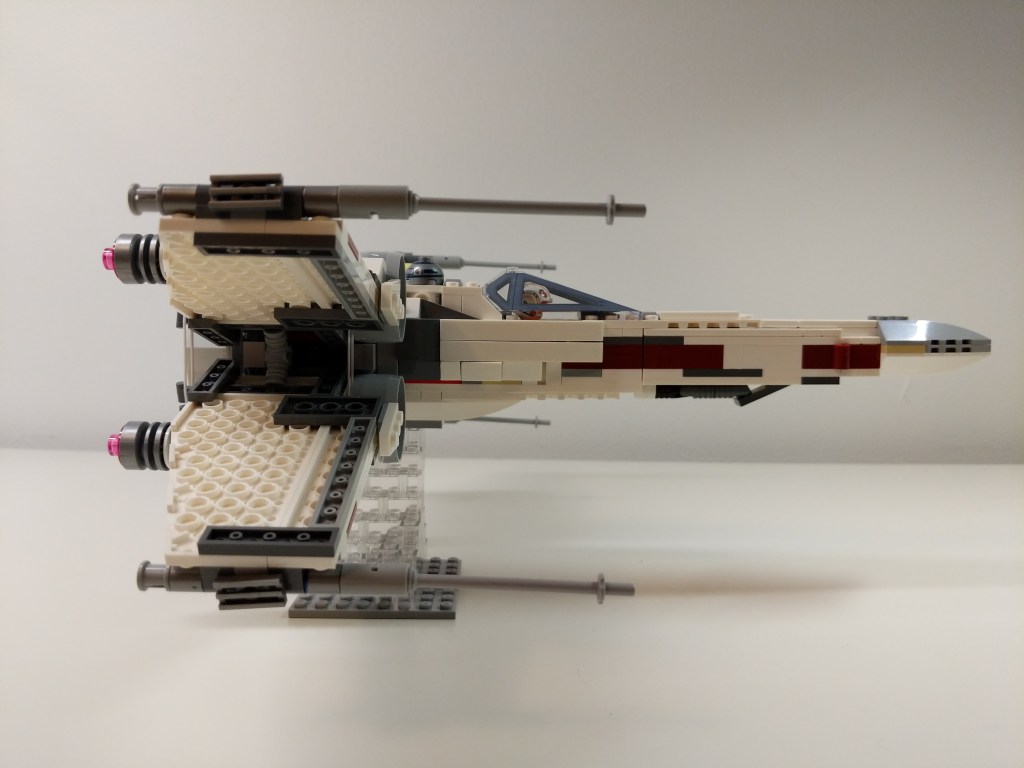
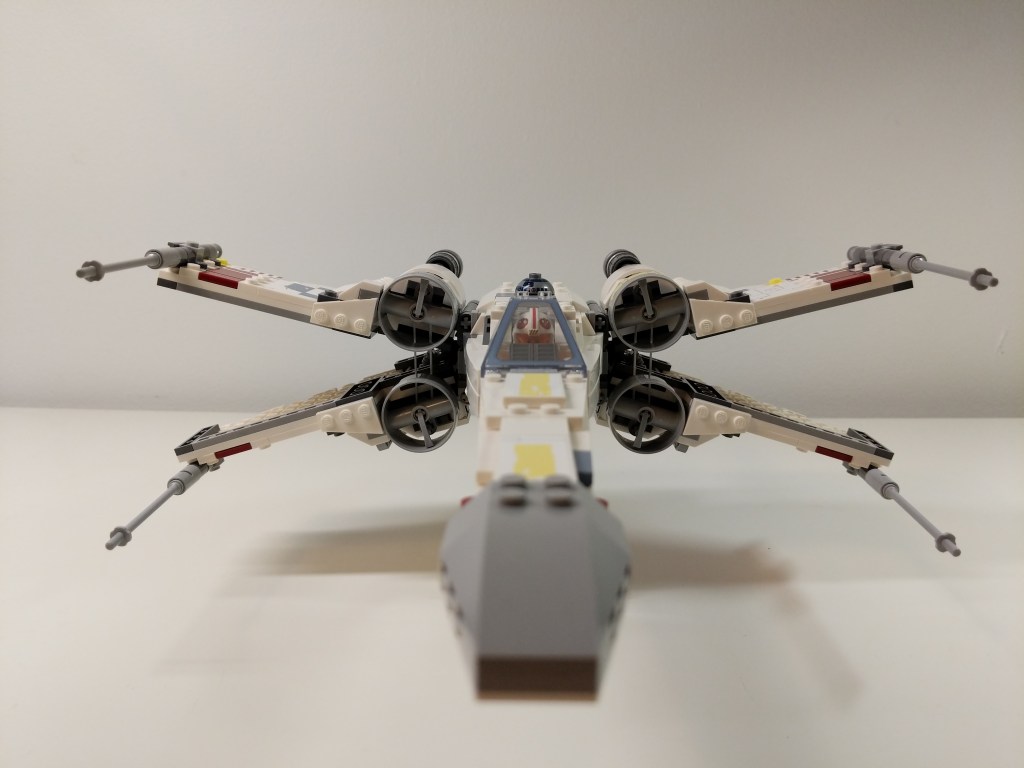
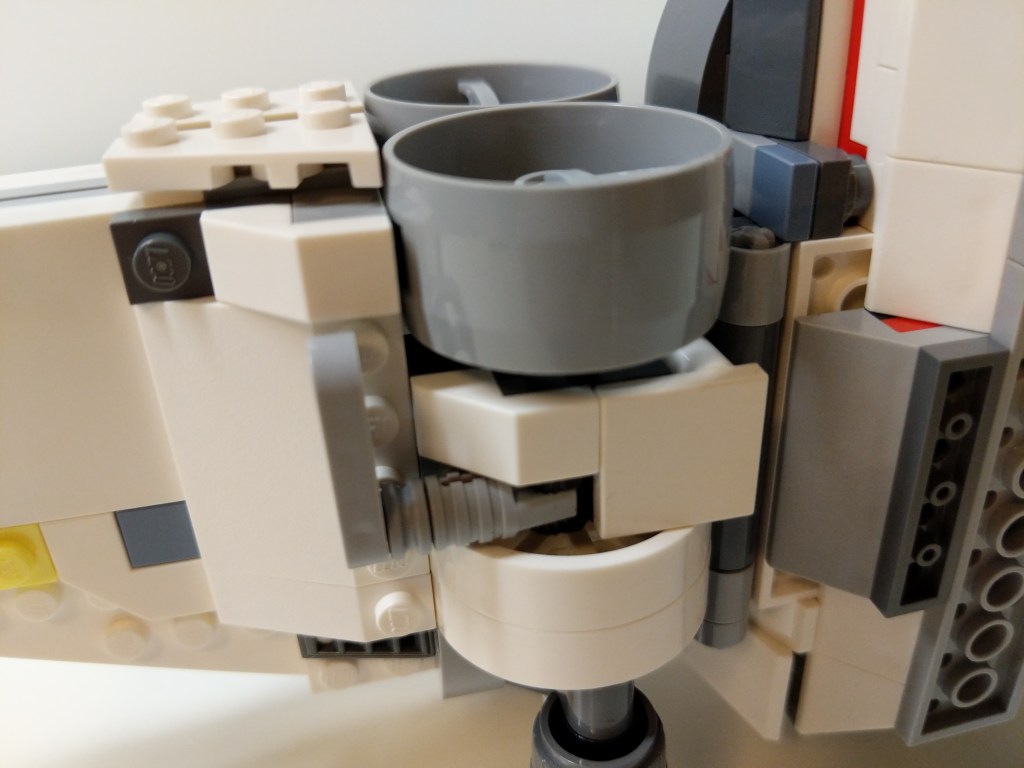
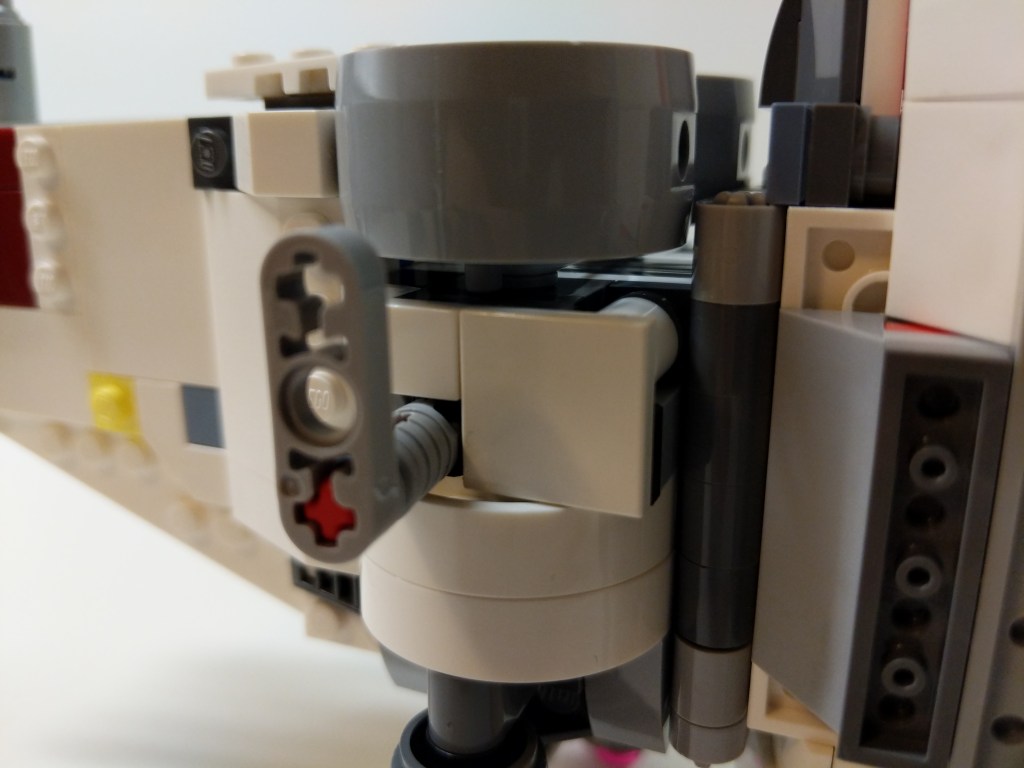
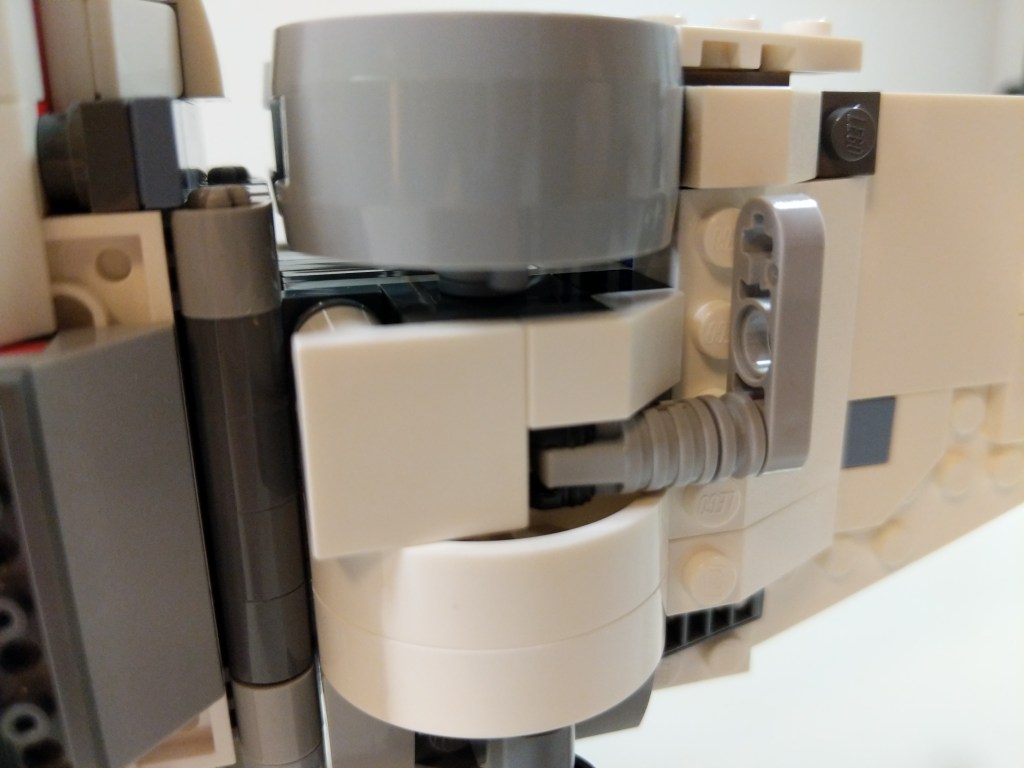
Continuing my backlog of LEGO mods and MOCs posted recently, here’s another mod that I made in 2019. The LEGO Star Wars X-Wing 75218 was designed with wing missile shooters and fixed rear landing gear struts. I modified the X-Wing to remove the missile shooters and give the blasters a little more detail, and I replaced the fixed landing gear struts with retractable landing gear as shown in the photo above. The gallery of images below provides more detail on both modifications that you can implement in your own X-Wing.
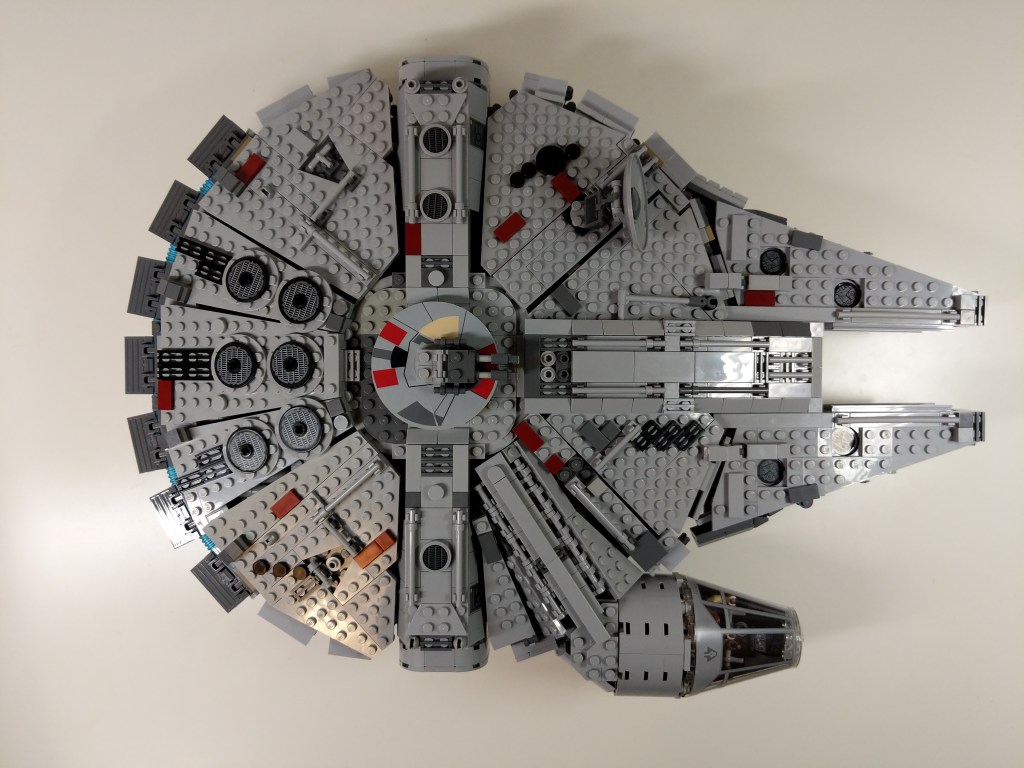
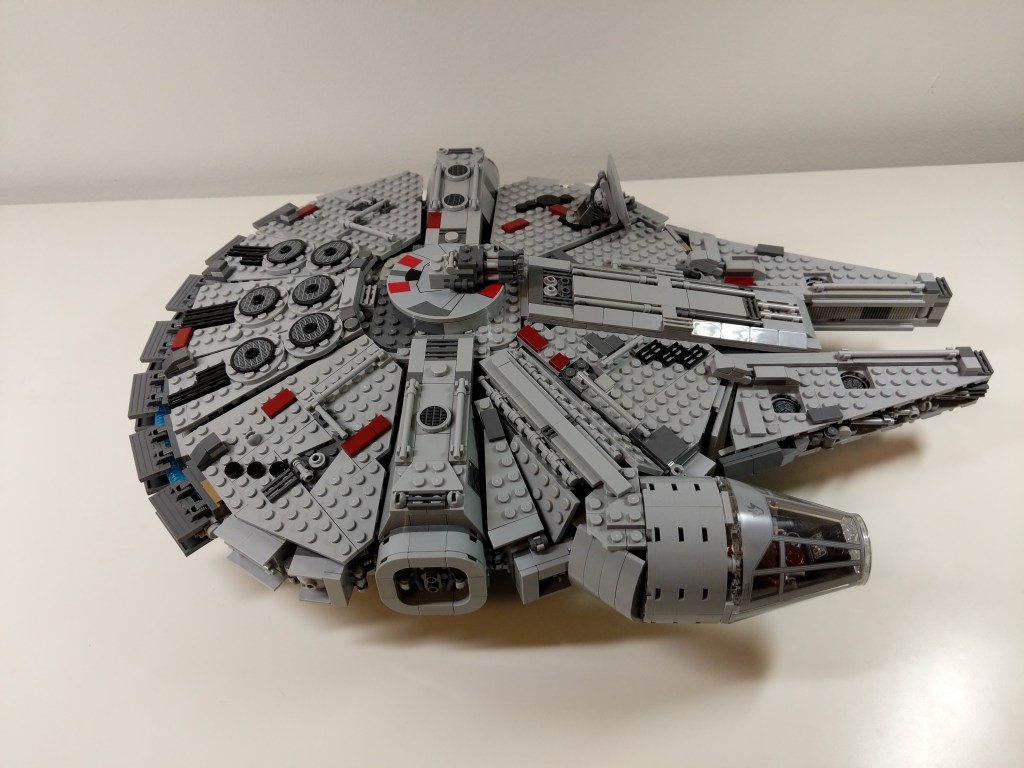
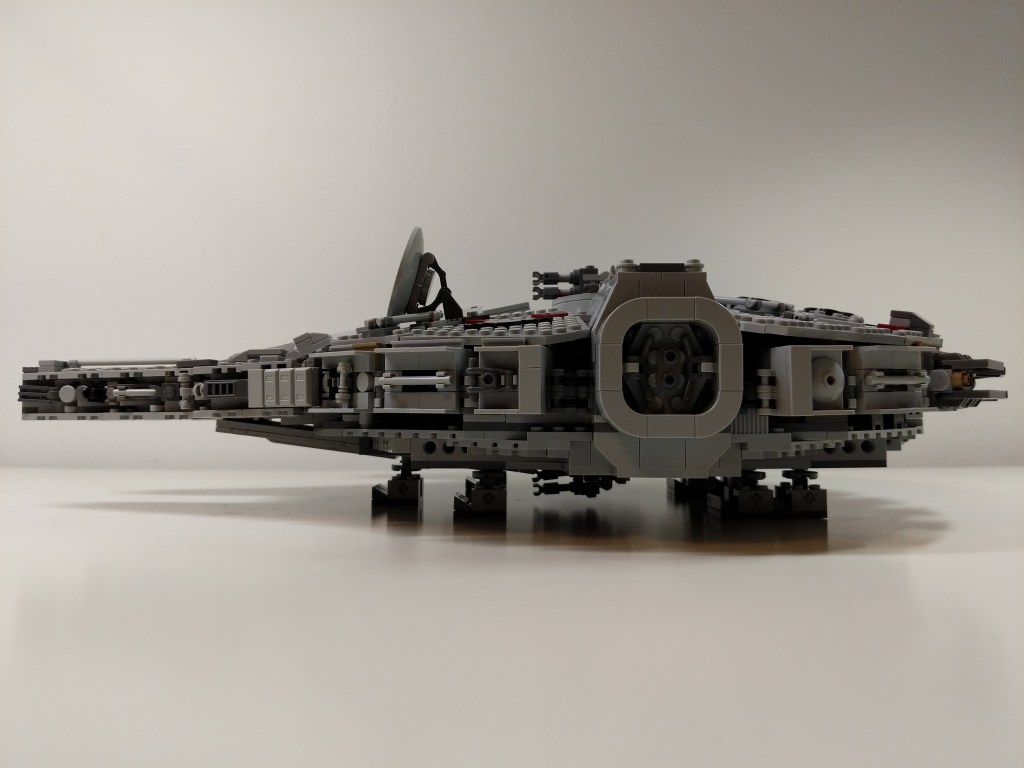
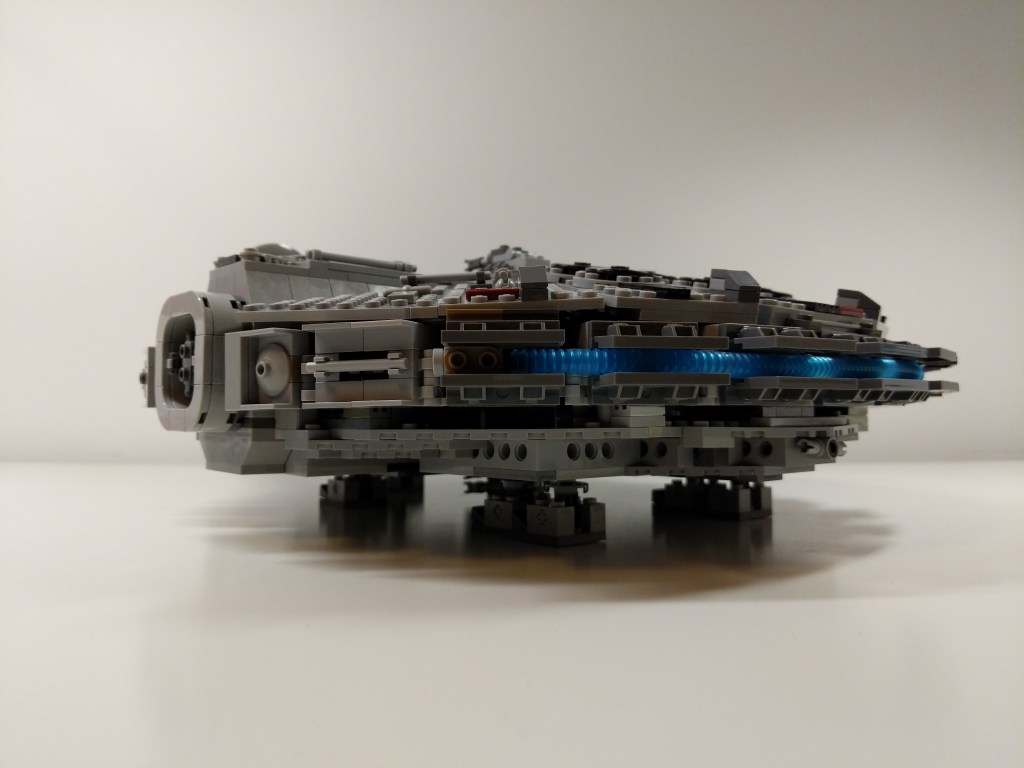
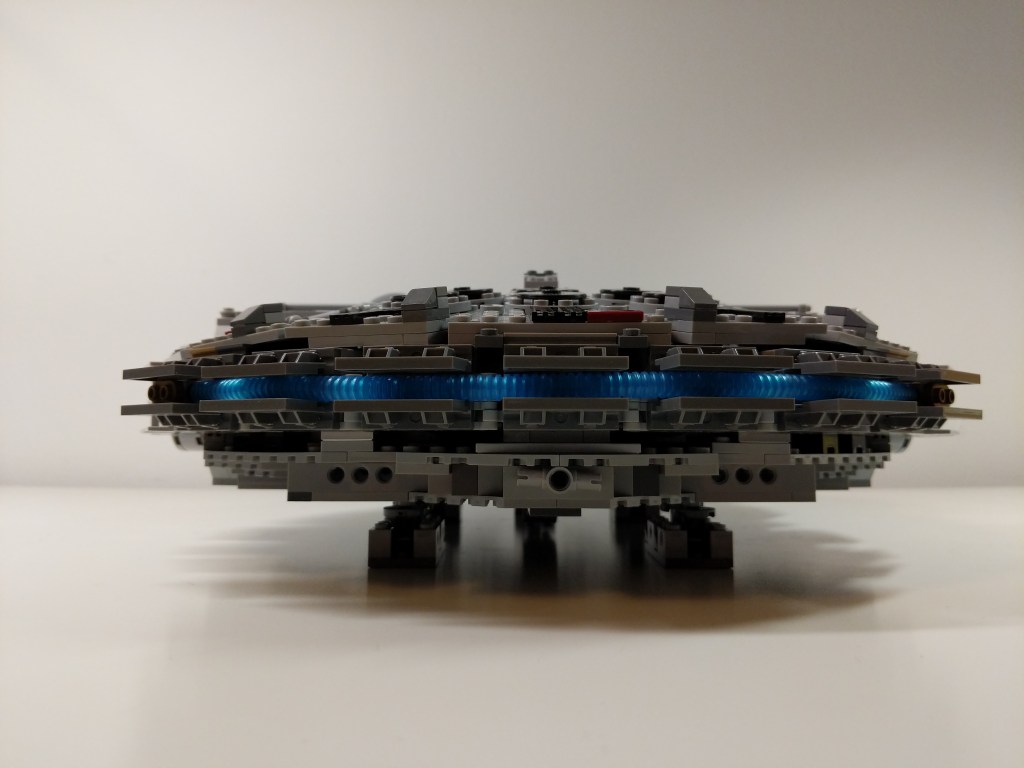
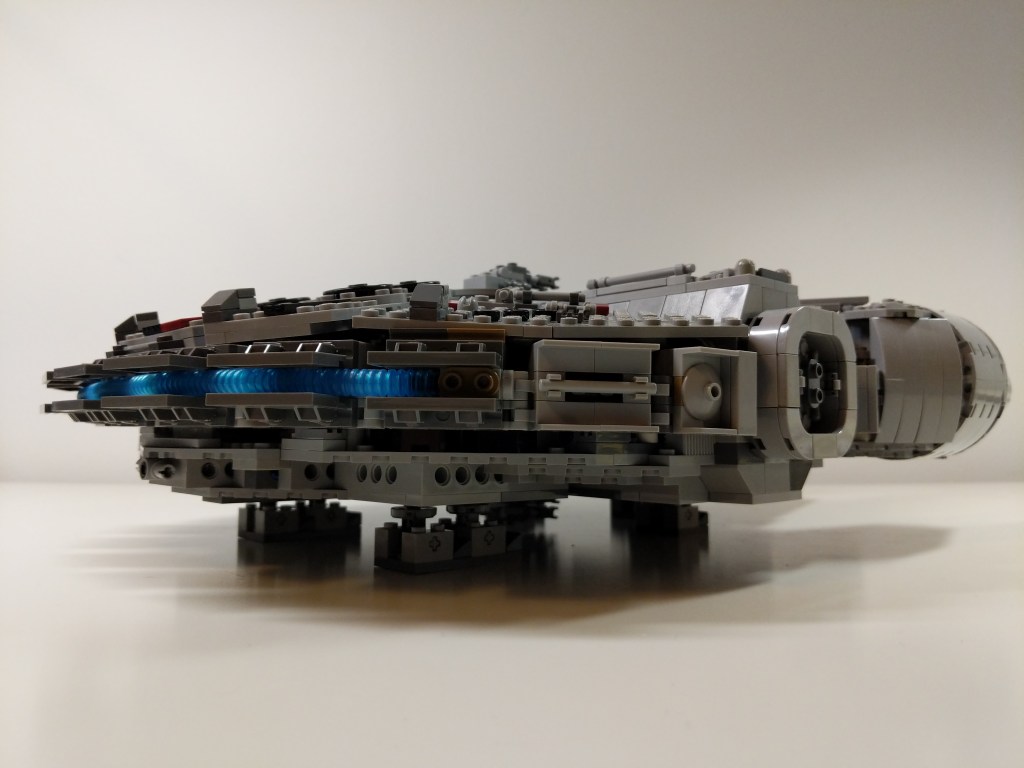
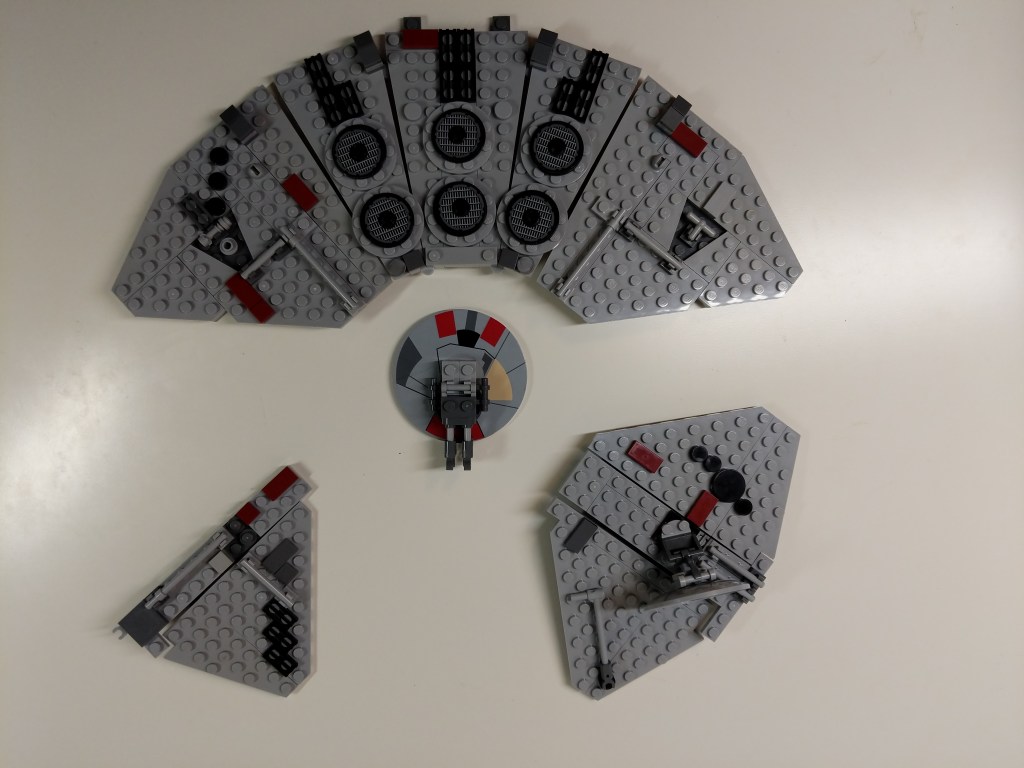
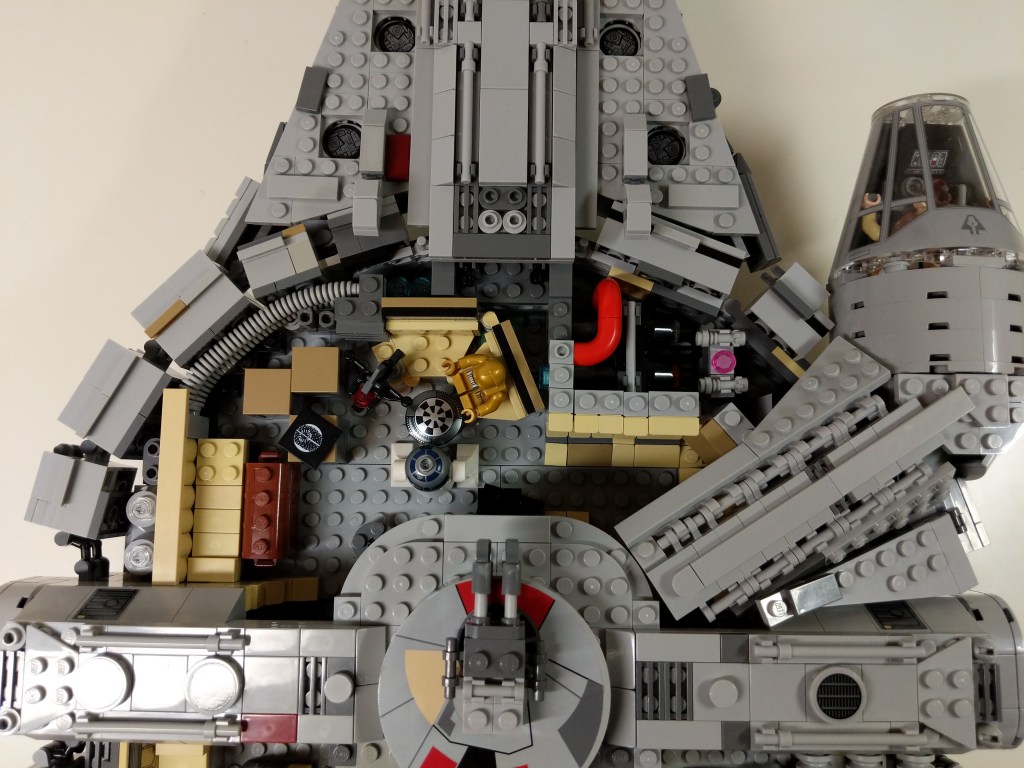
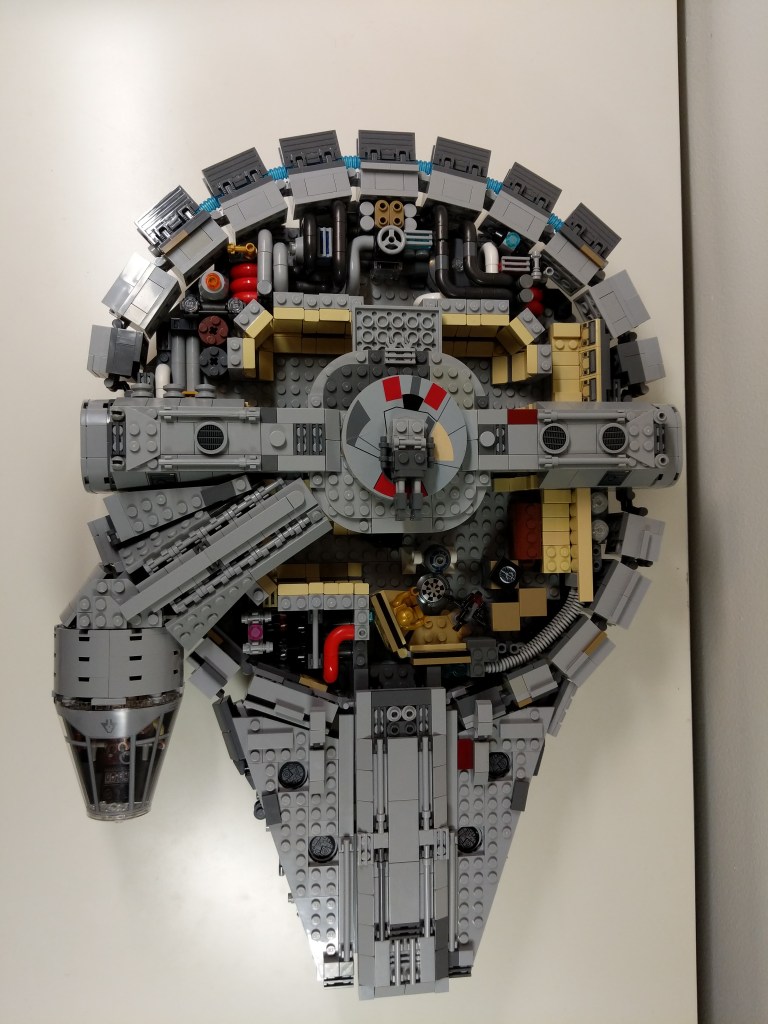
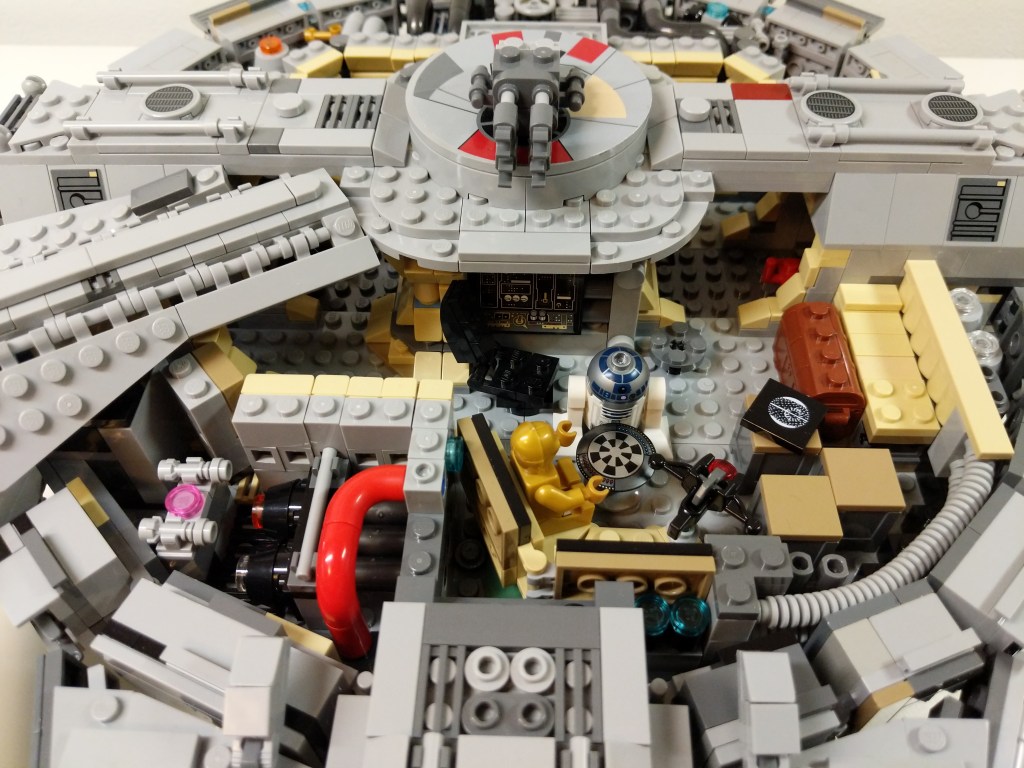
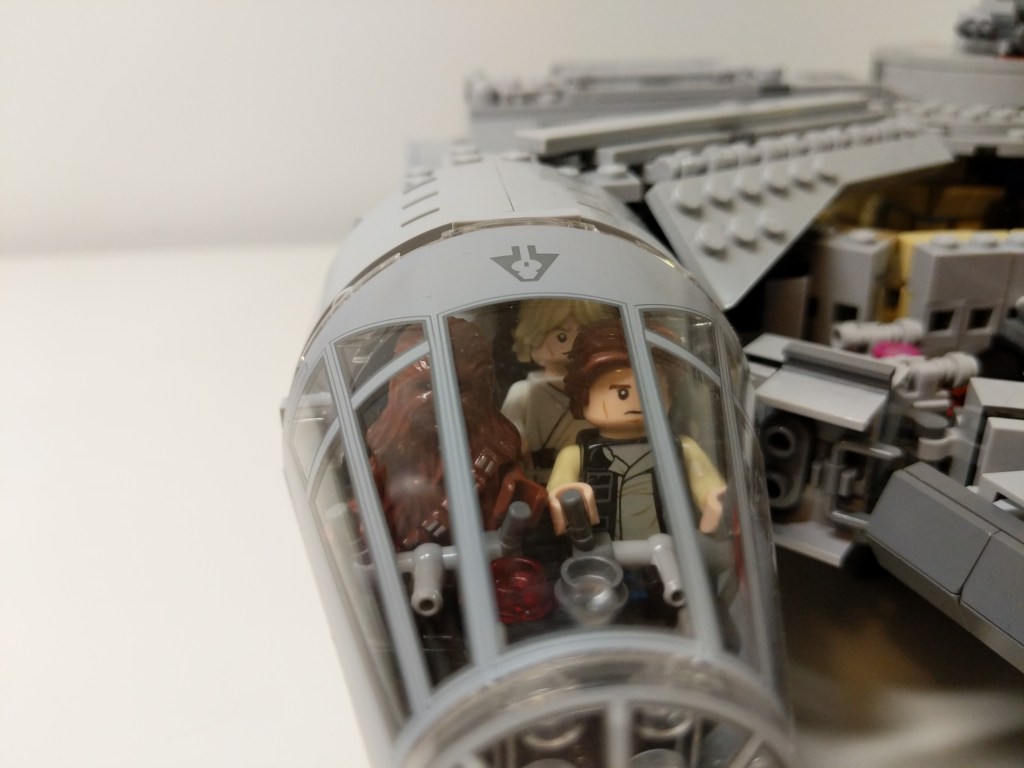
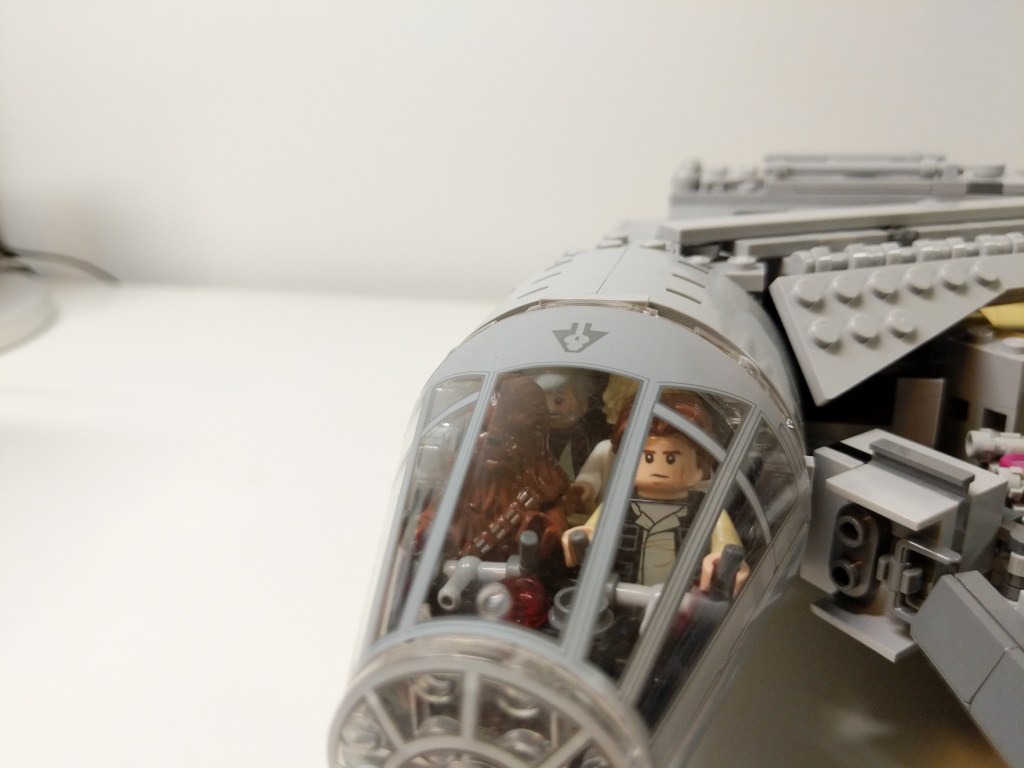
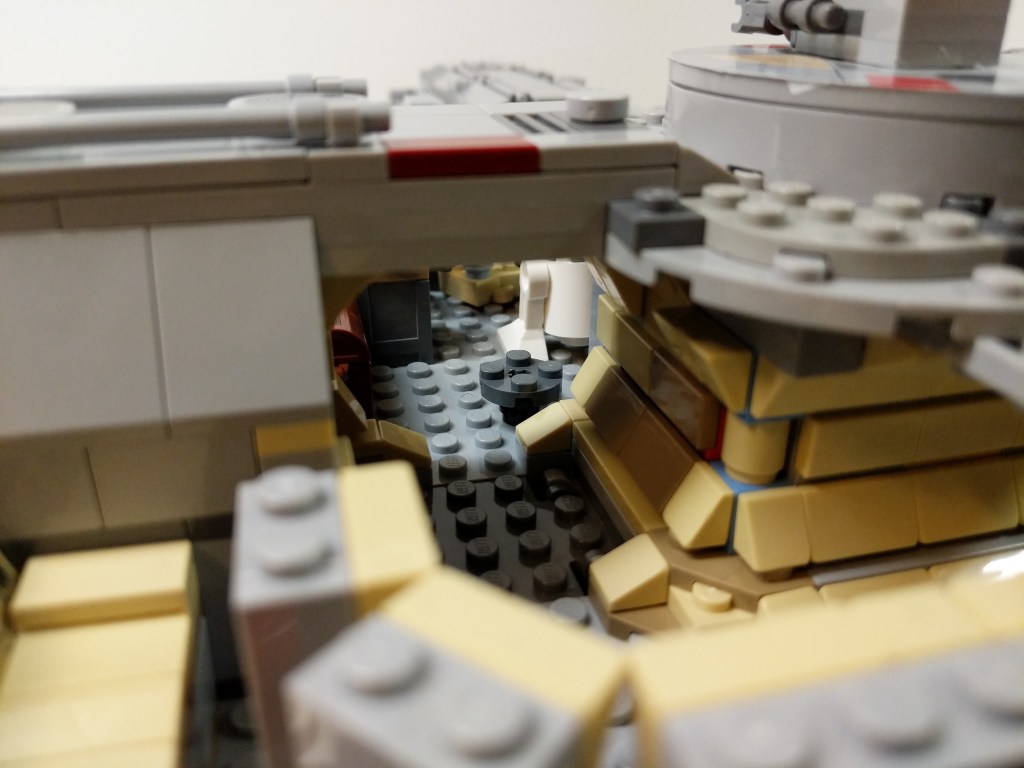
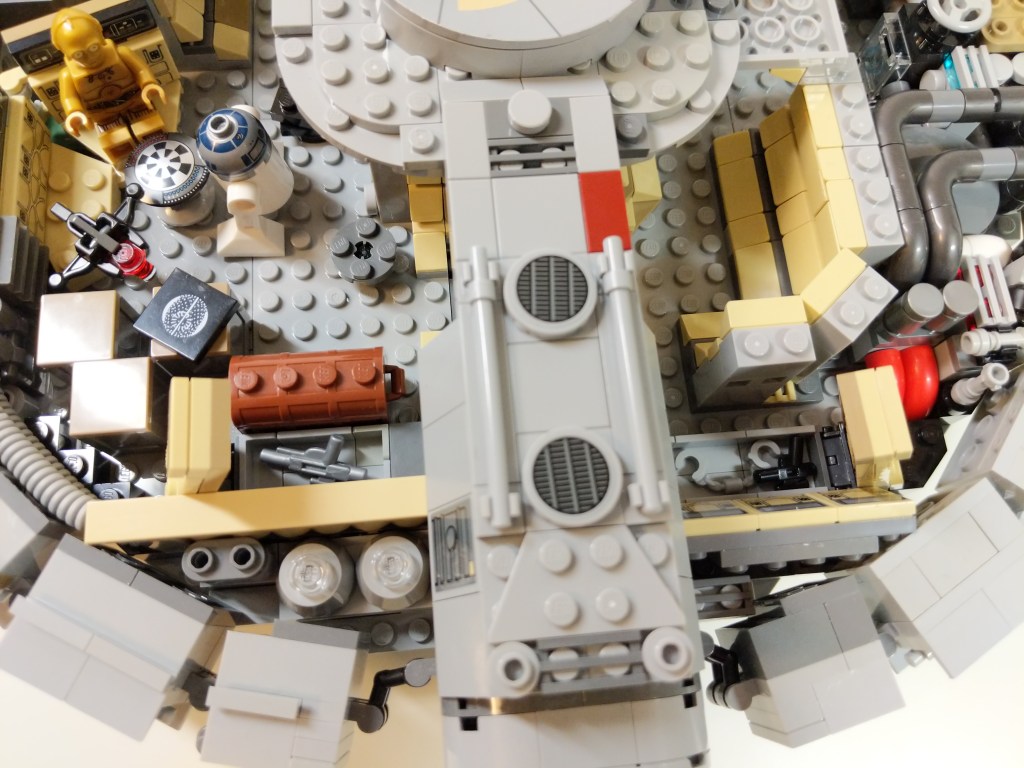
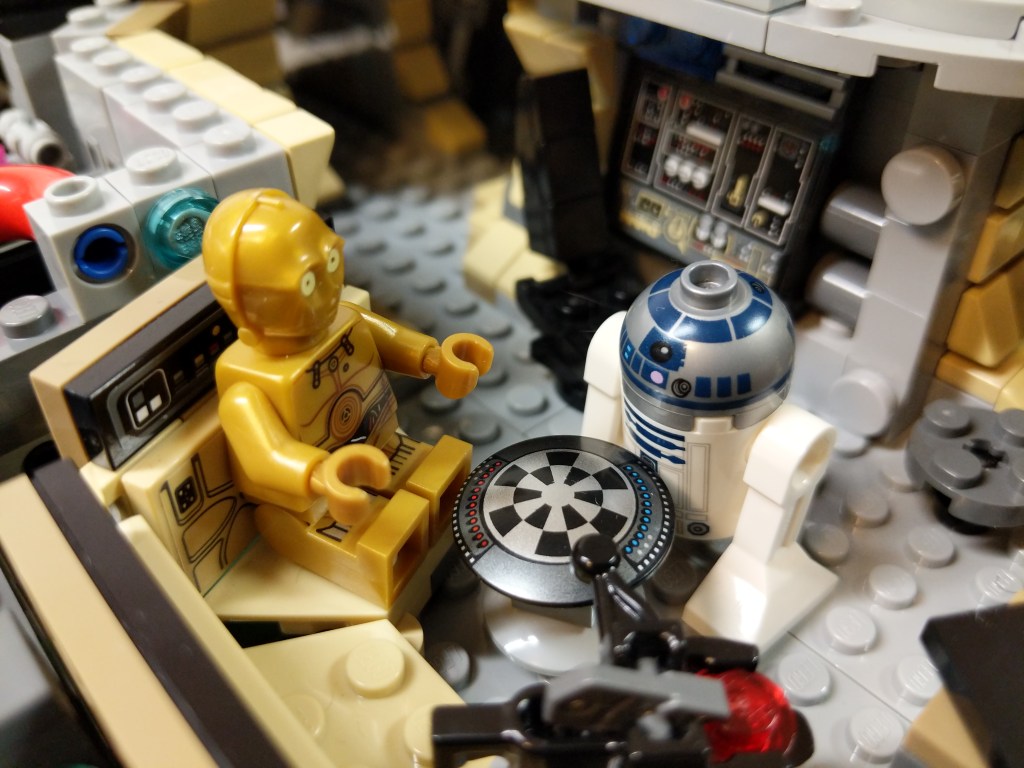
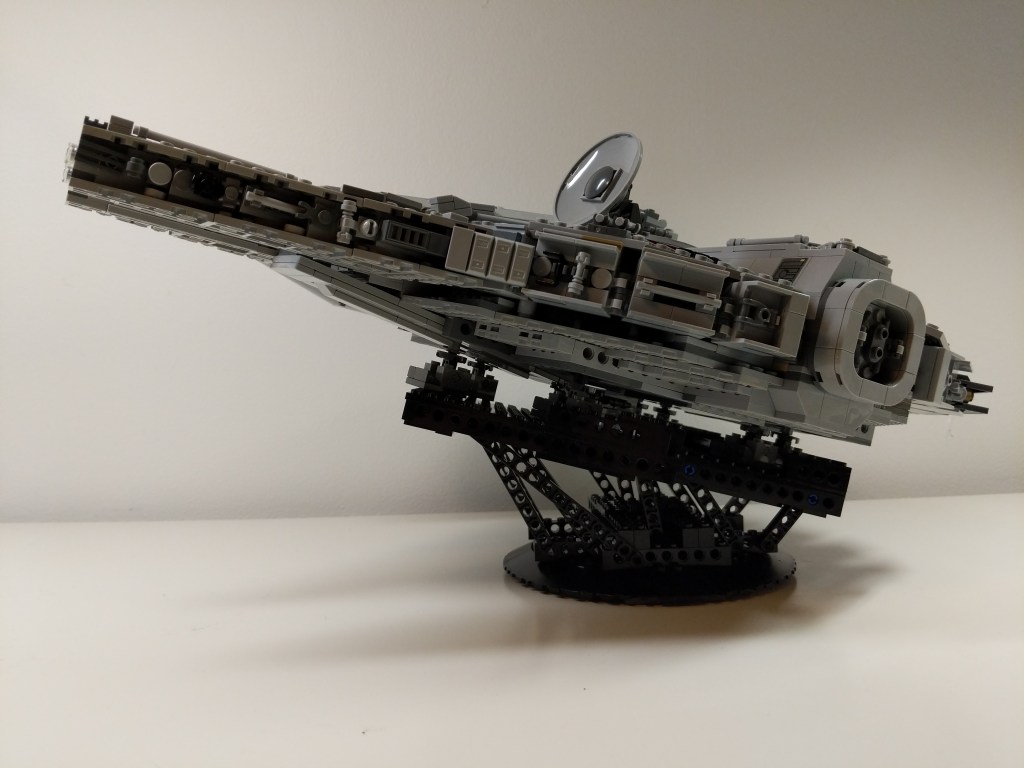
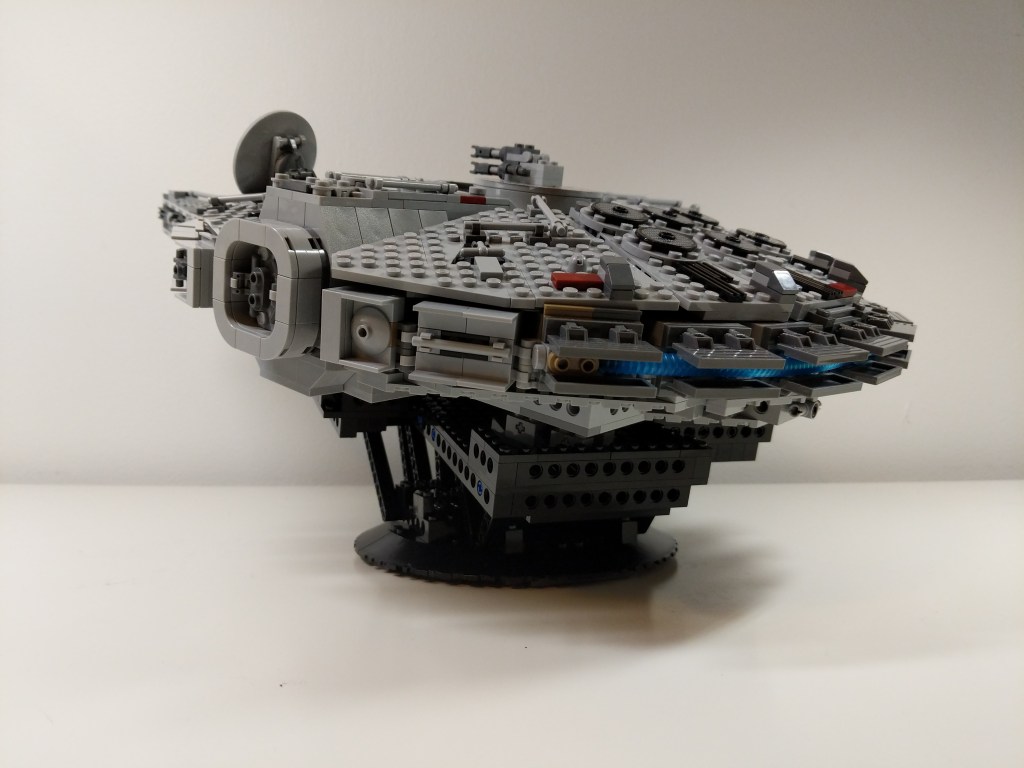
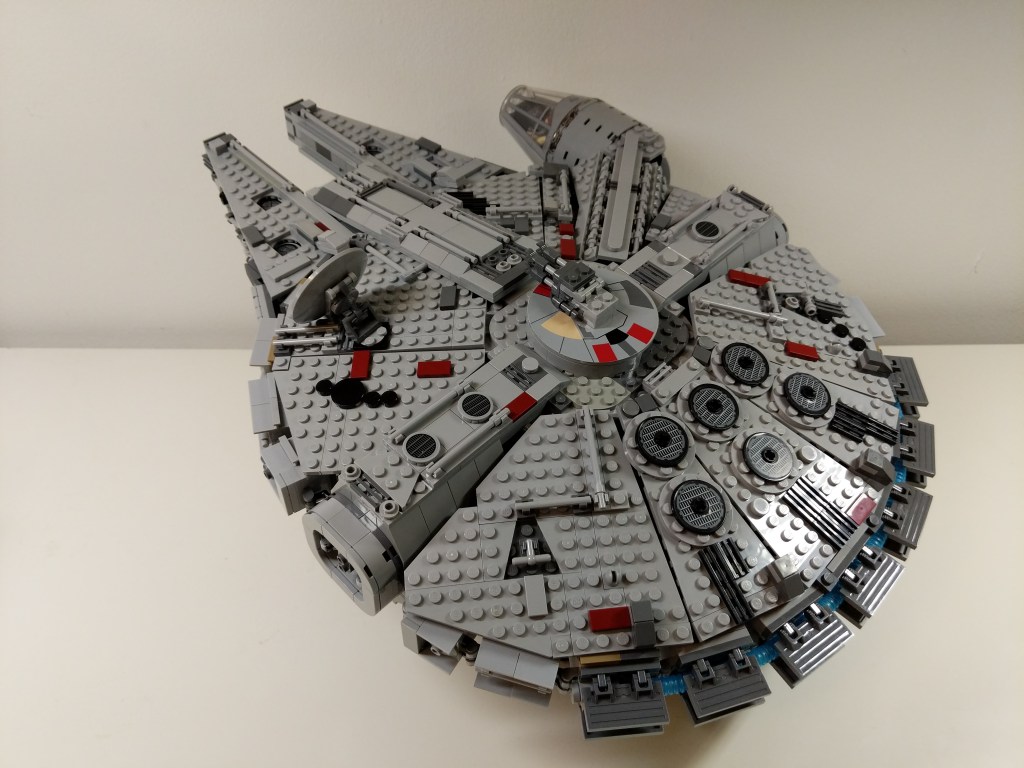
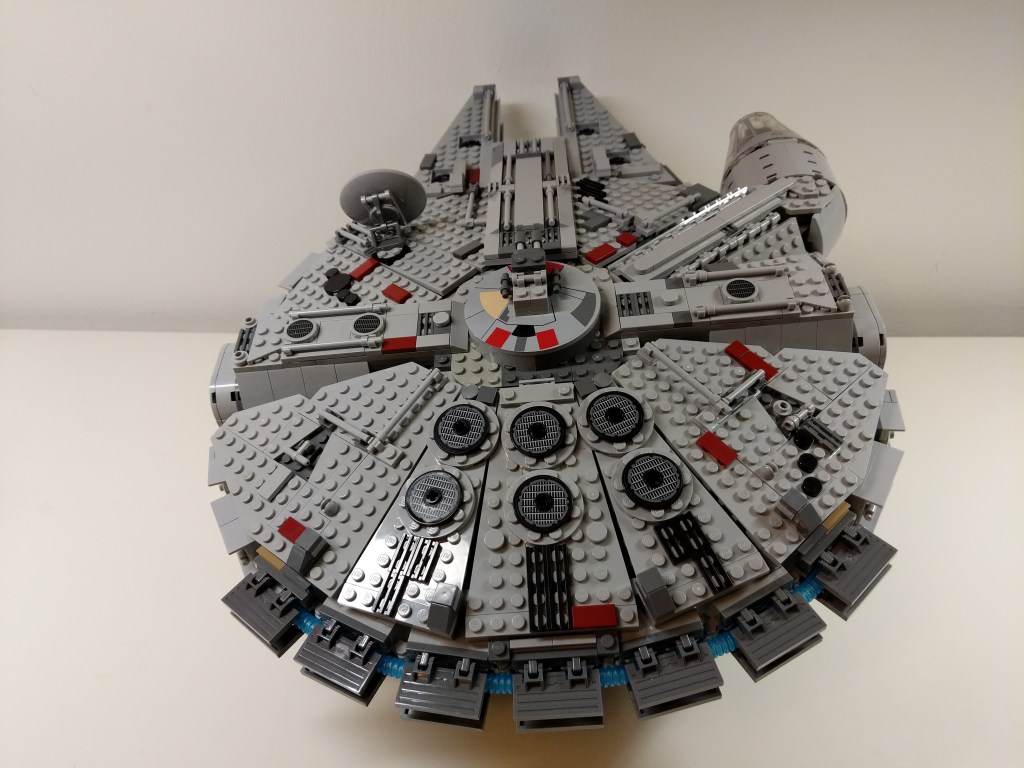
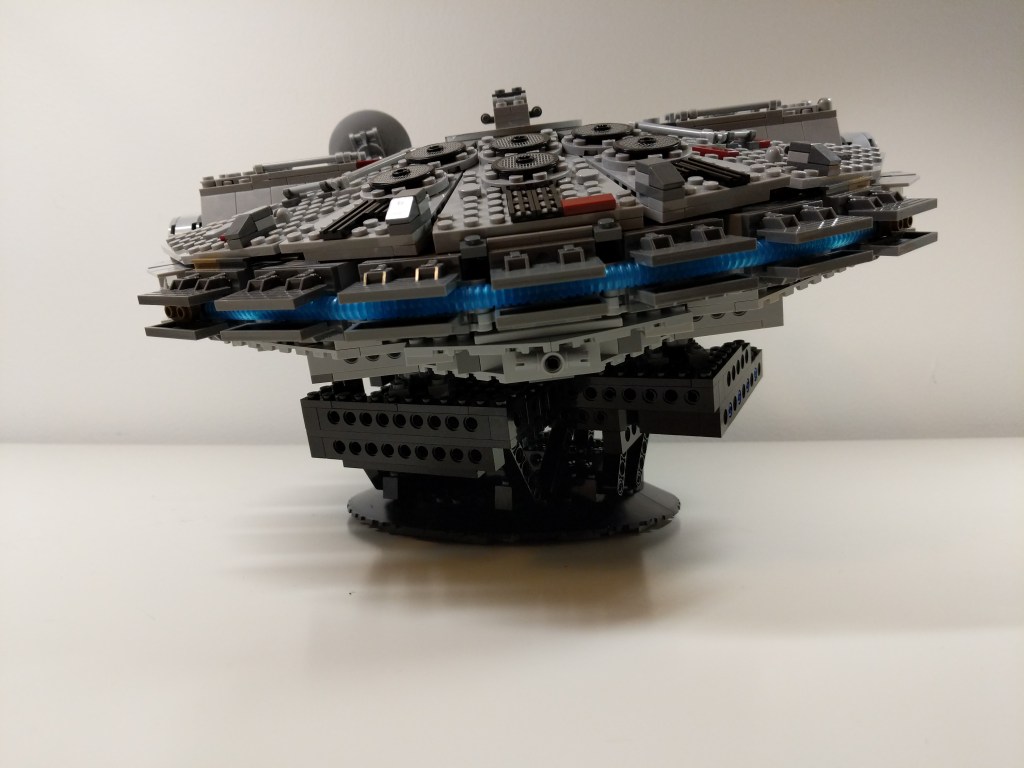
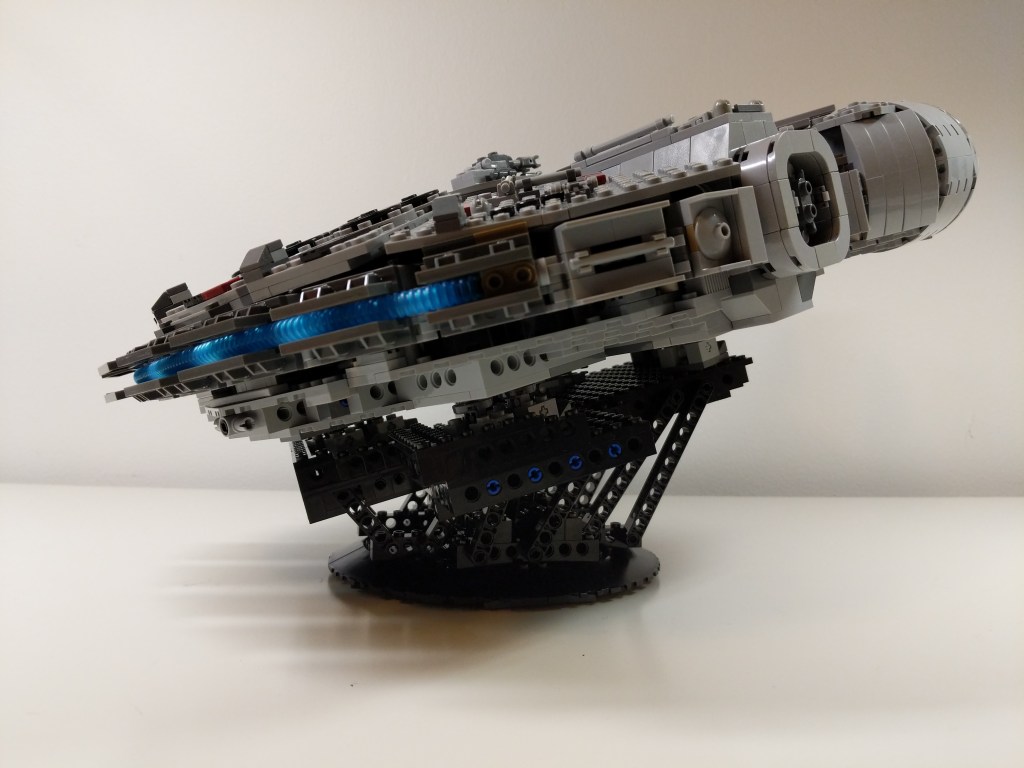
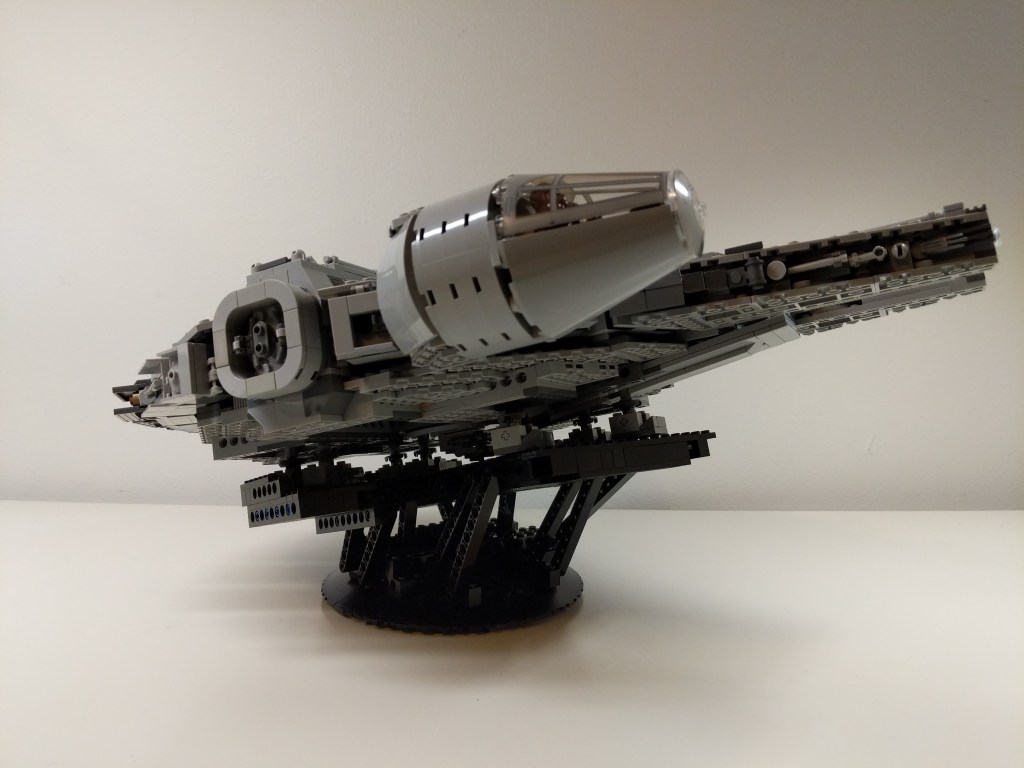
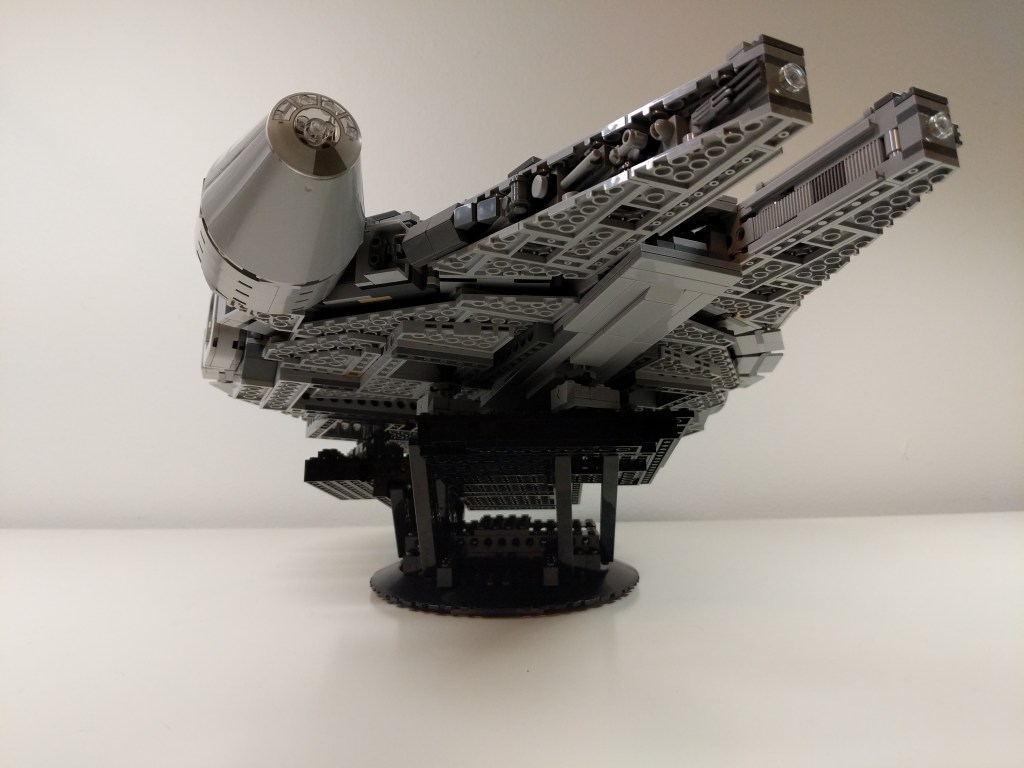
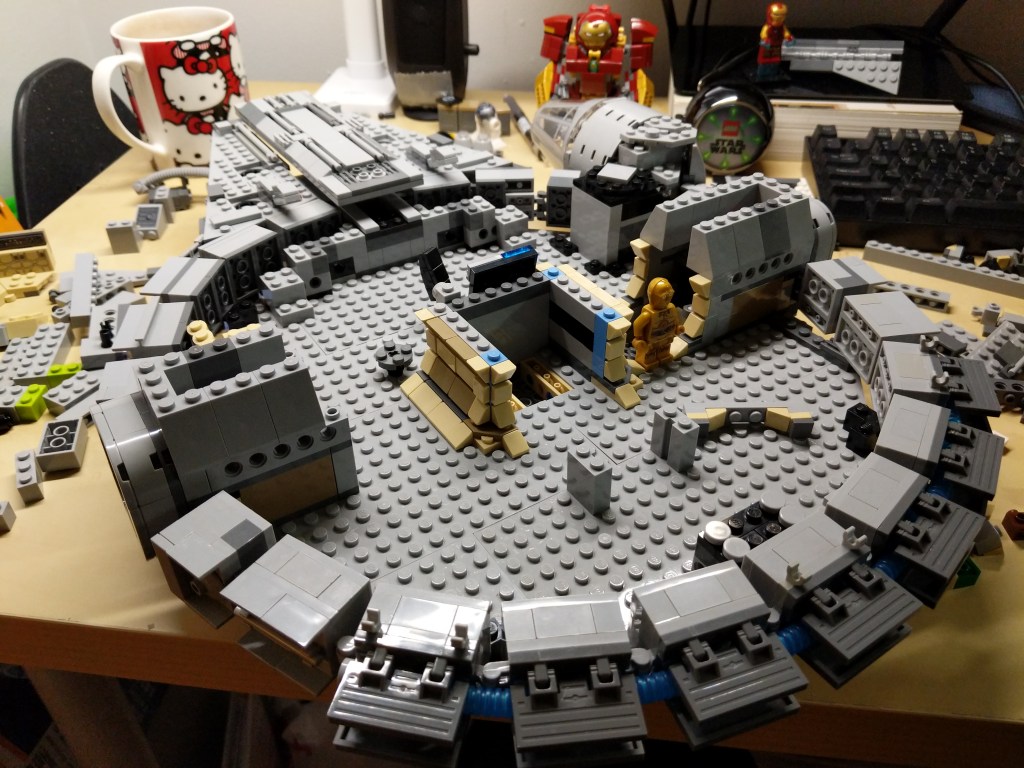
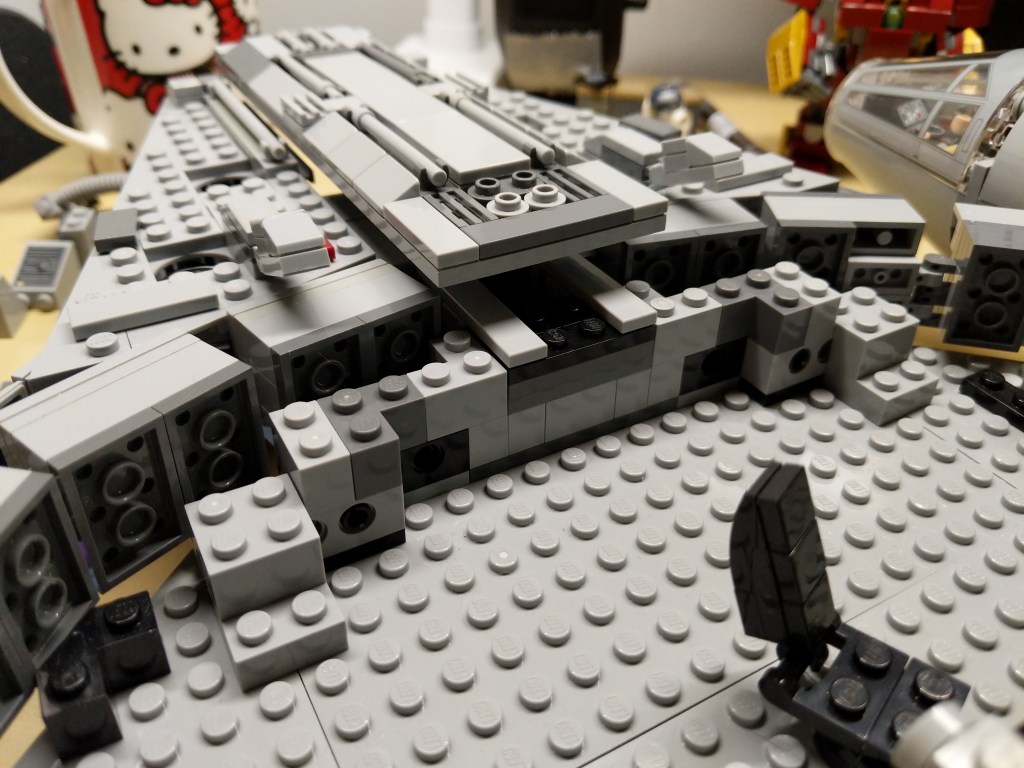
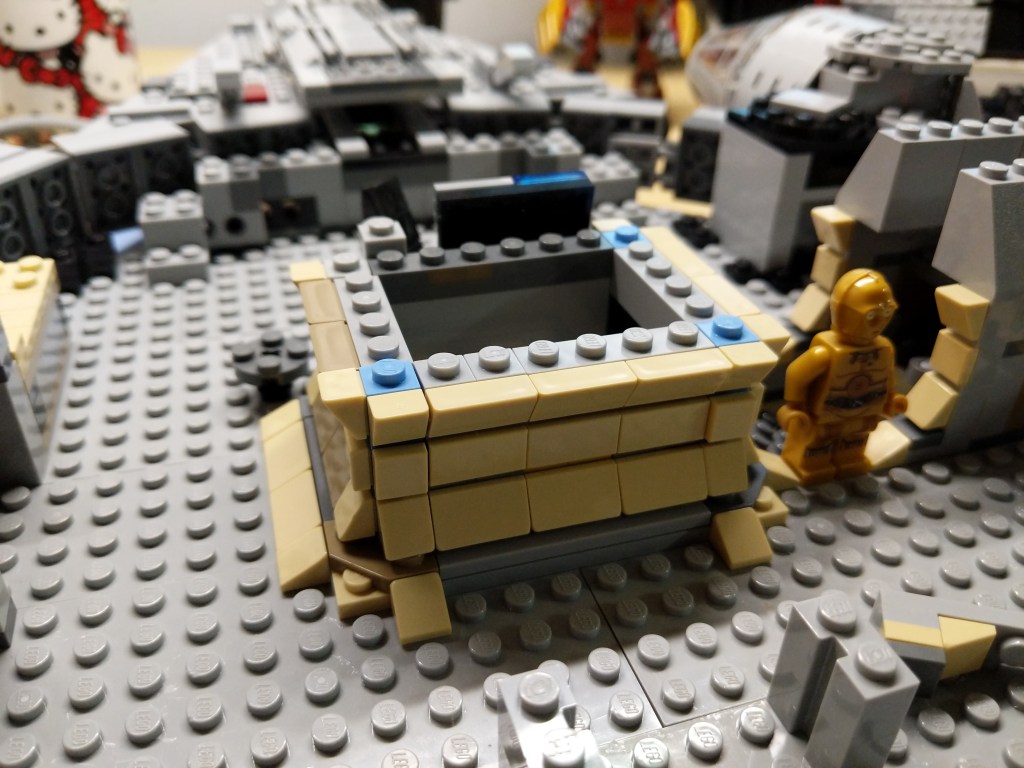
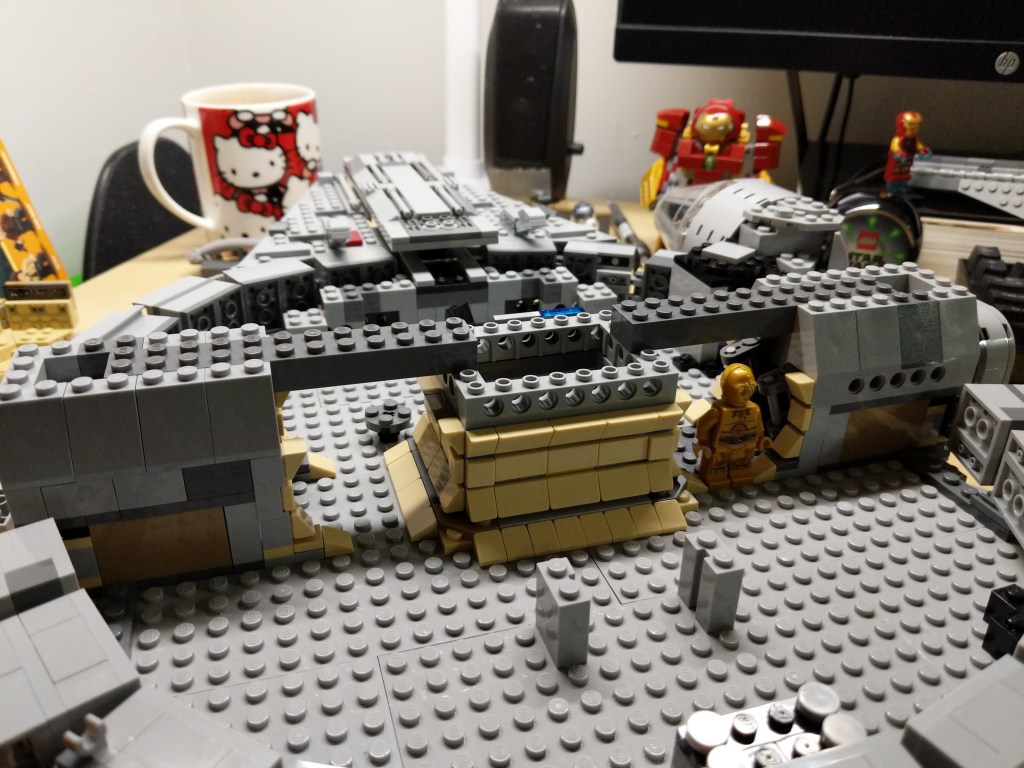
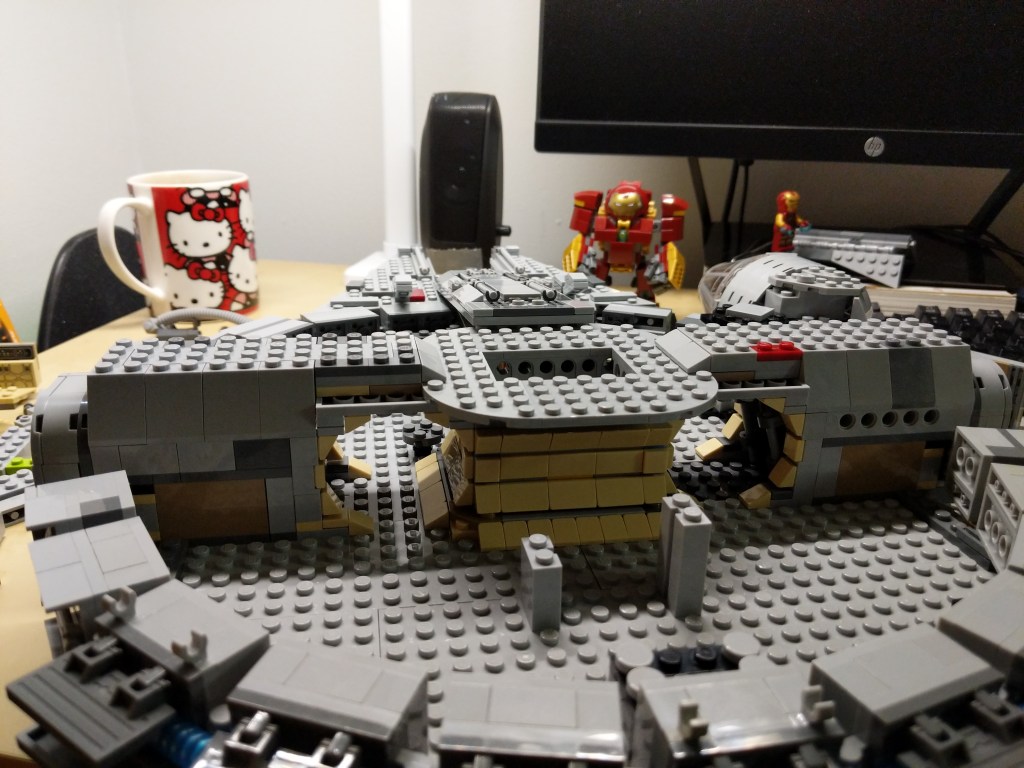
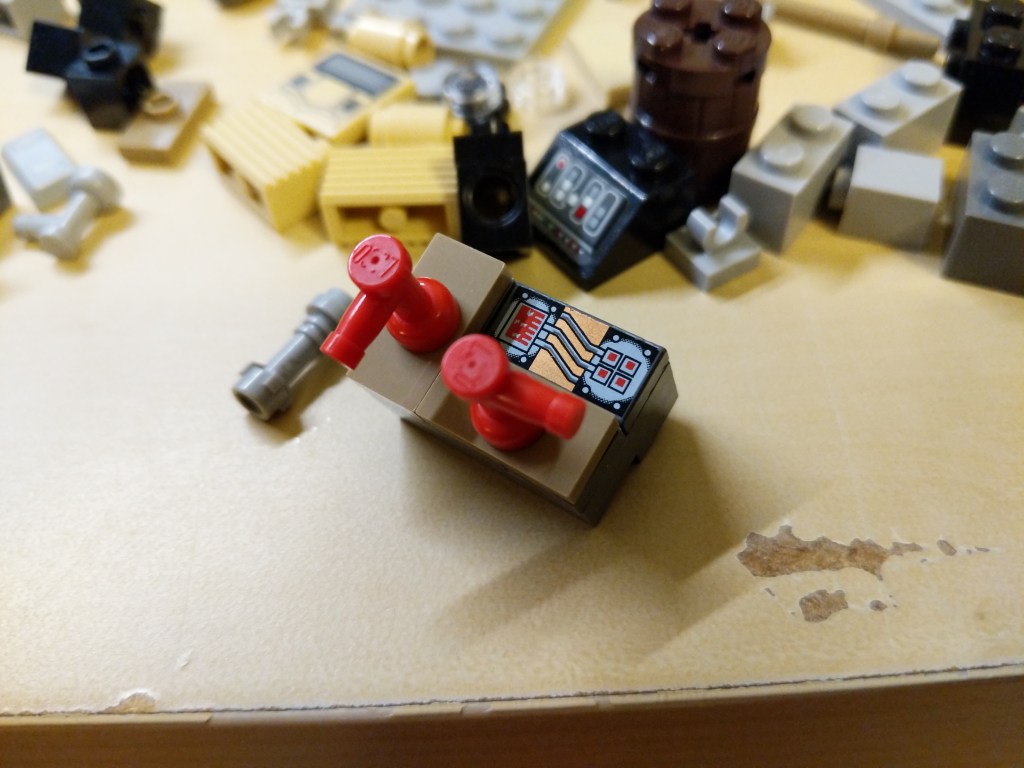
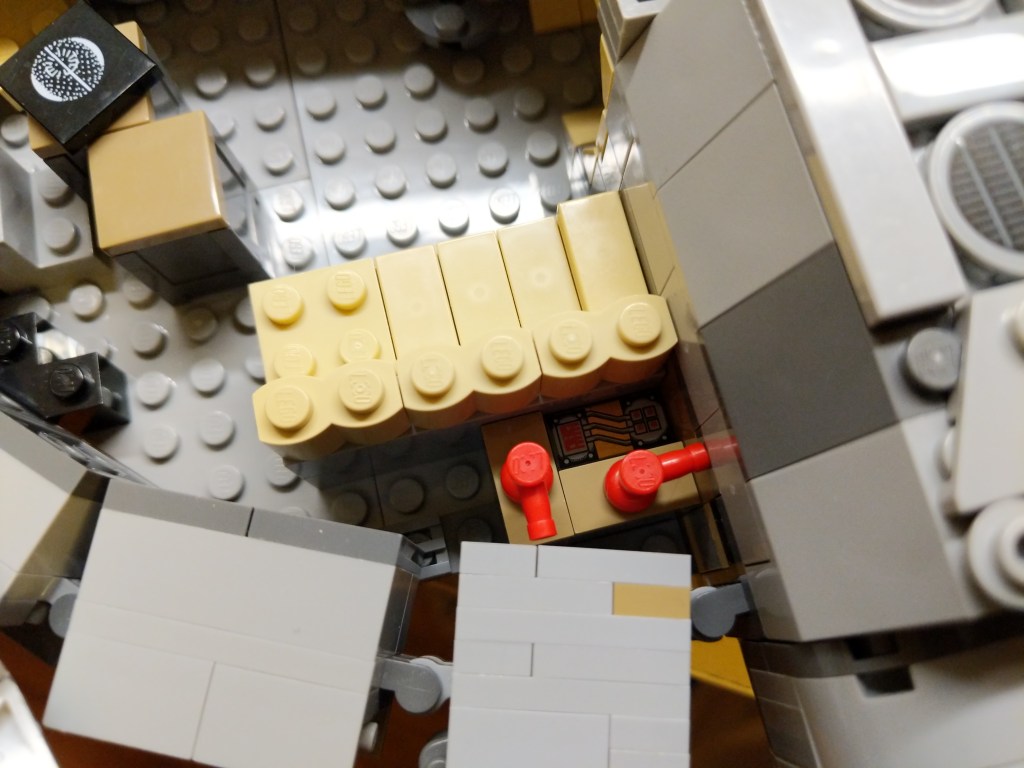
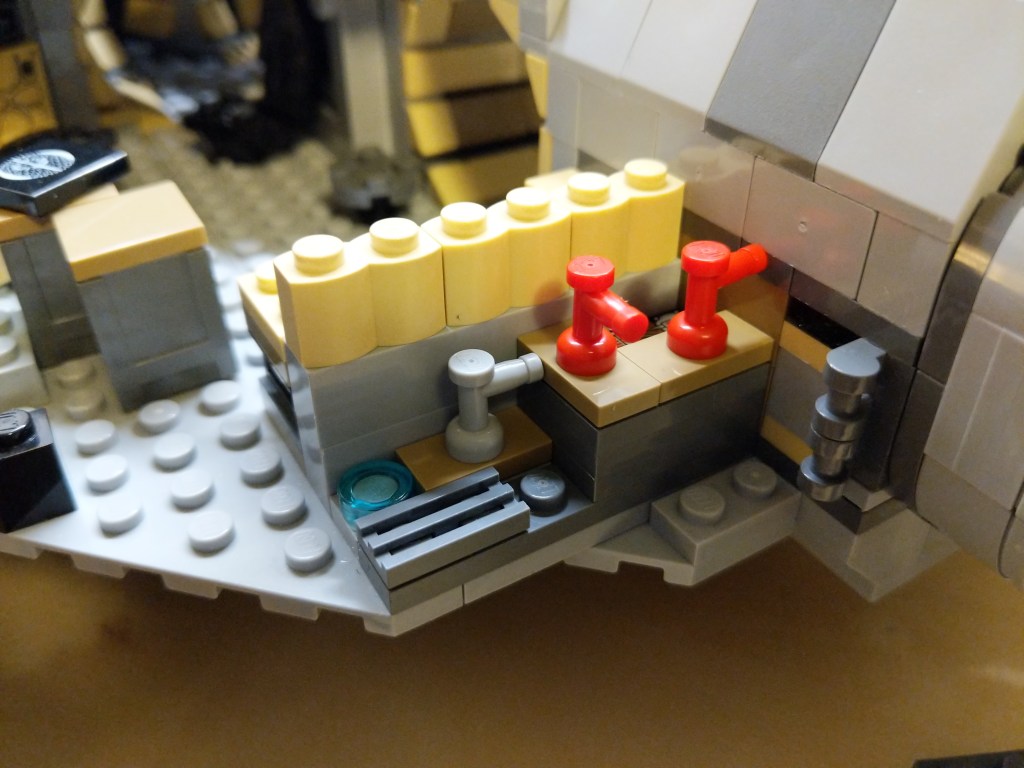
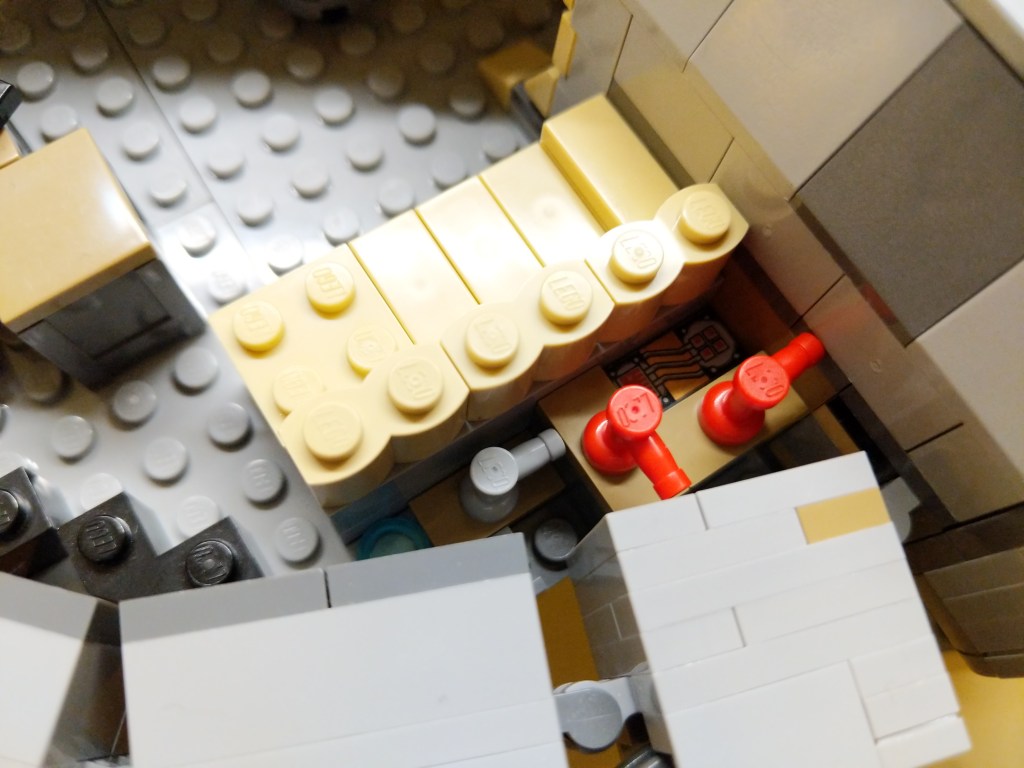
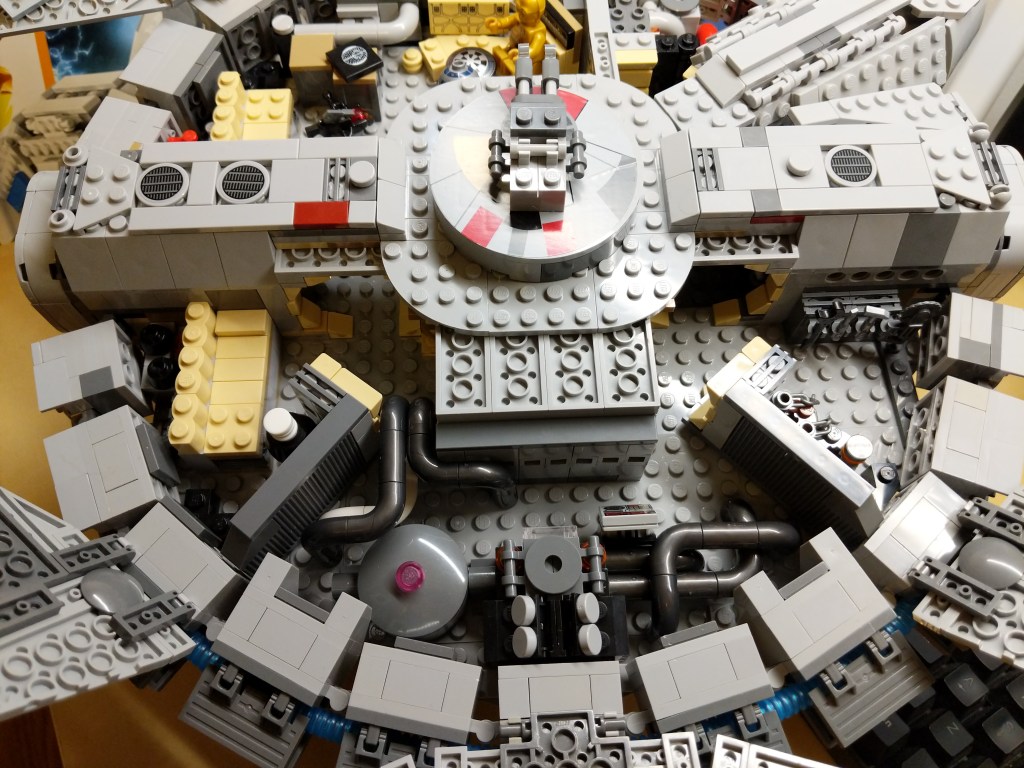
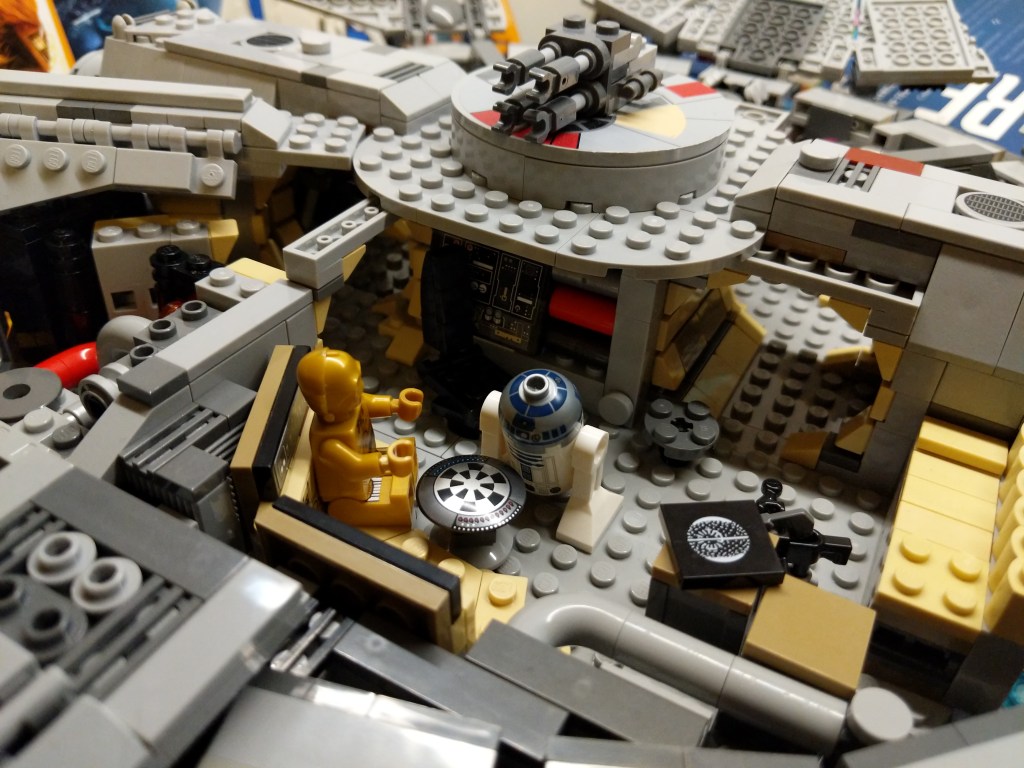
I’ve documented several of my LEGO Millennium Falcon MOCs and mods here (Last Jedi update), here (Force Awakens), here (Midi-Scale display), and here (7190 remodel). This time, I completely overhauled 75257 with a 4-person cockpit, detailed engine compartment, more round hallways, landing gear details, and a SNOT lower mandible slope with opening for center landing gear. There are more details to be found in the photos below.
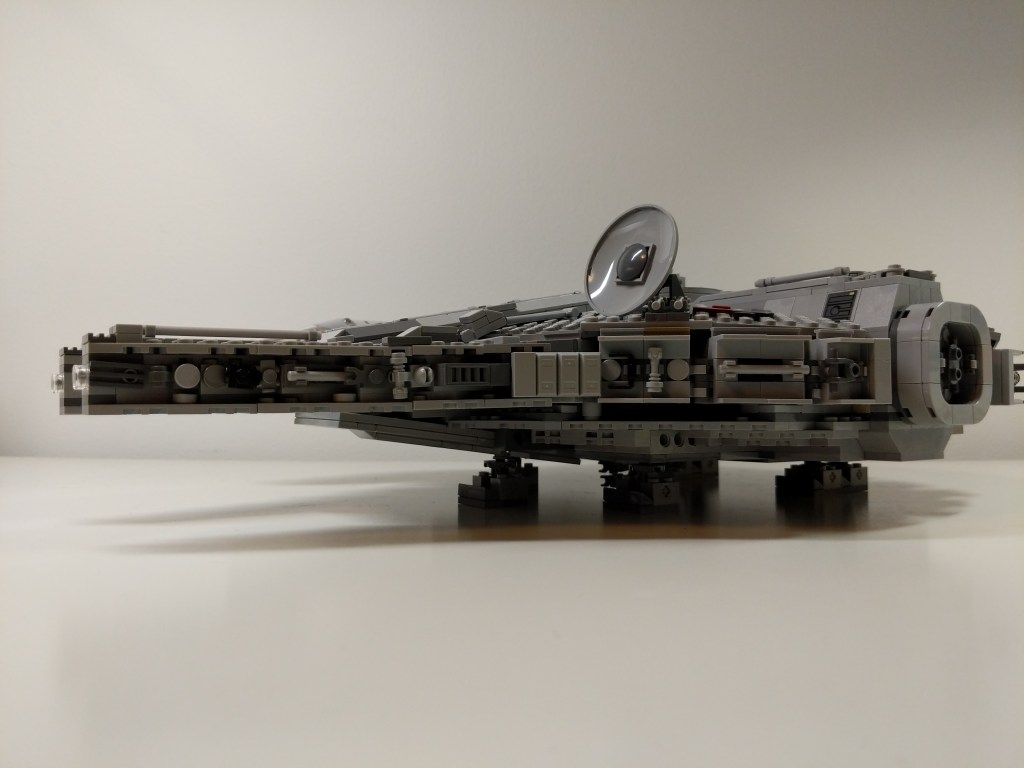
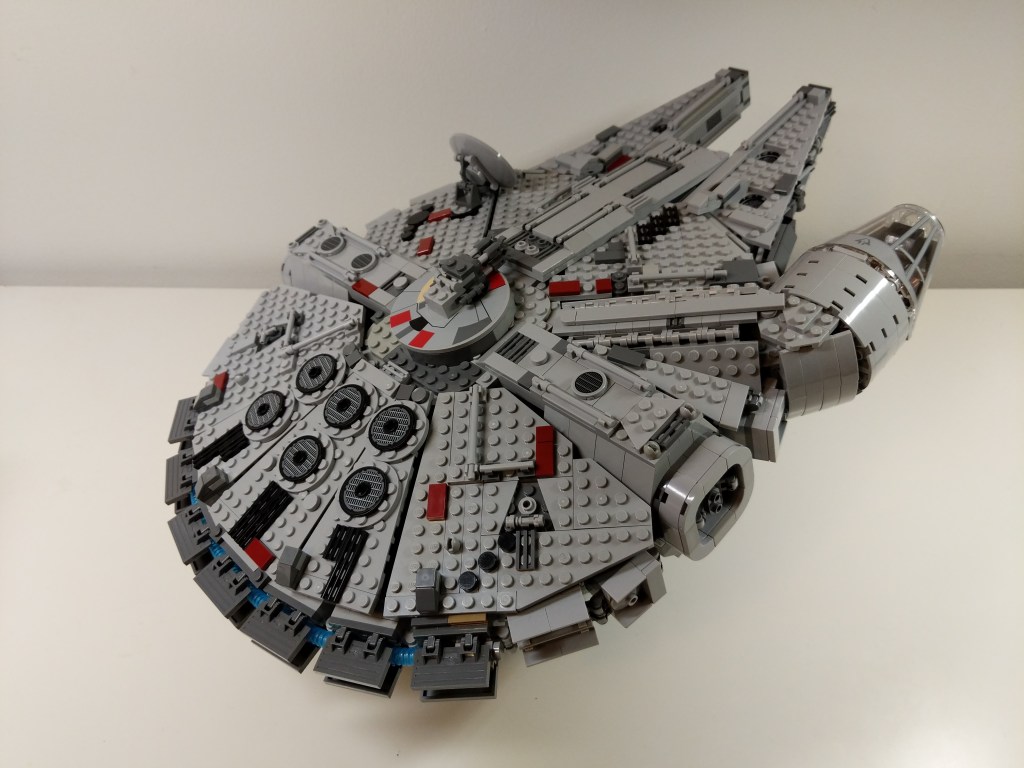
Exterior
I added greebling, blast marks, and other details to make the Falcon appear as close to the cinematic model as I could giving the low fidelity and resolution of LEGO at this scale.
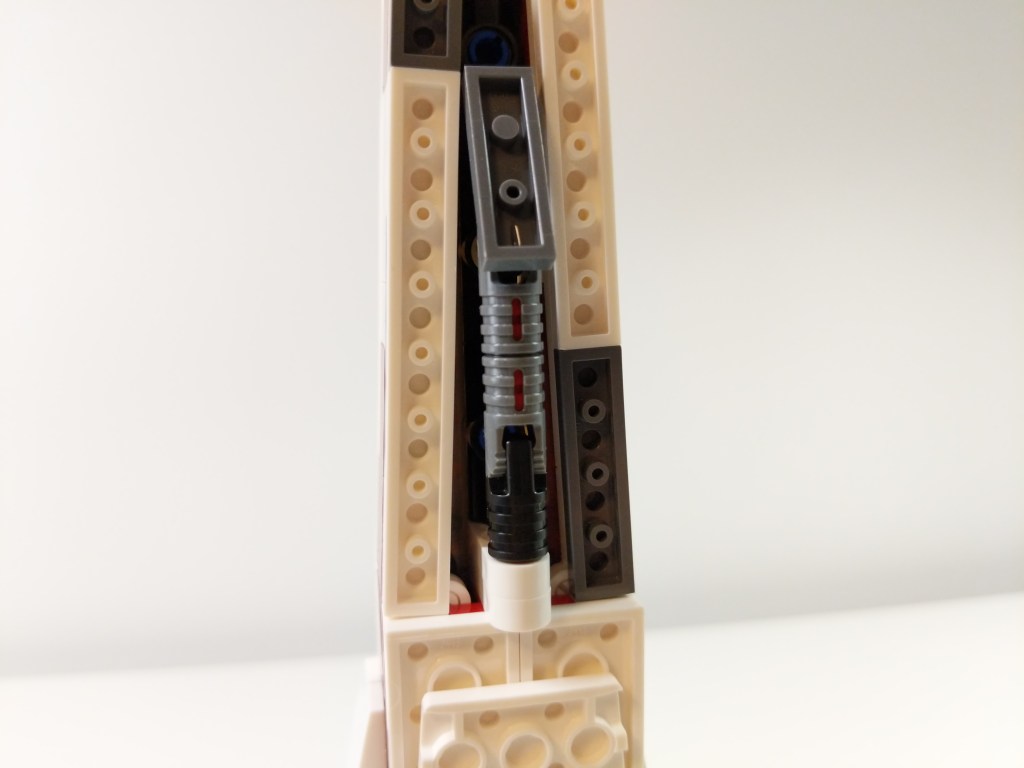
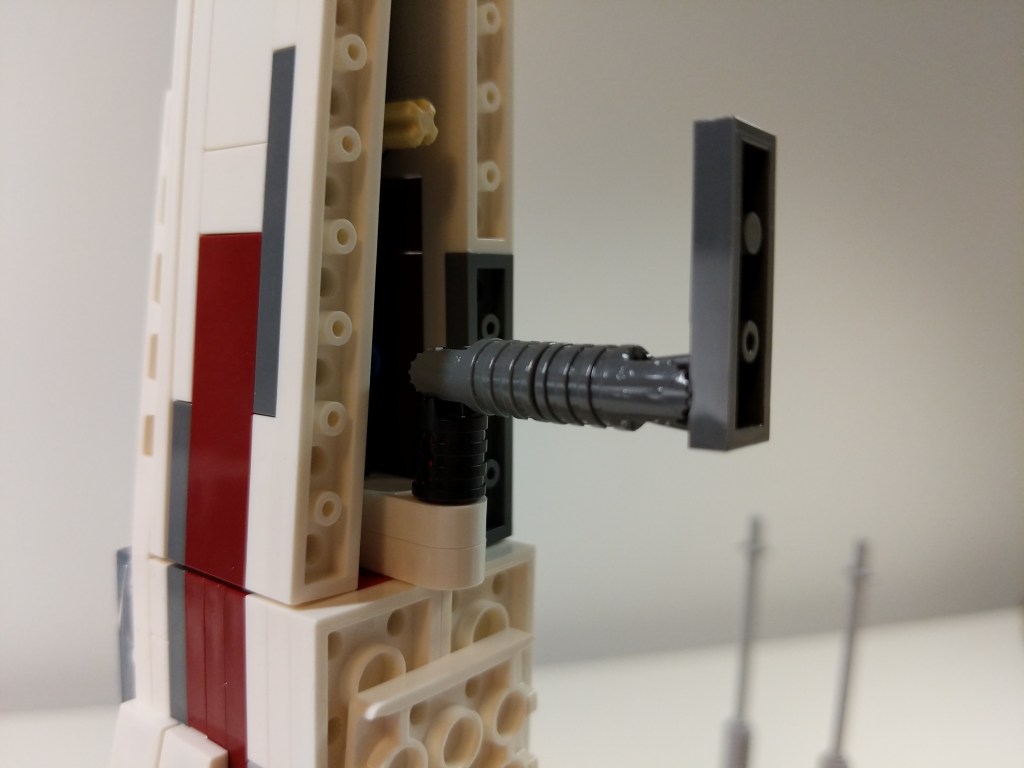
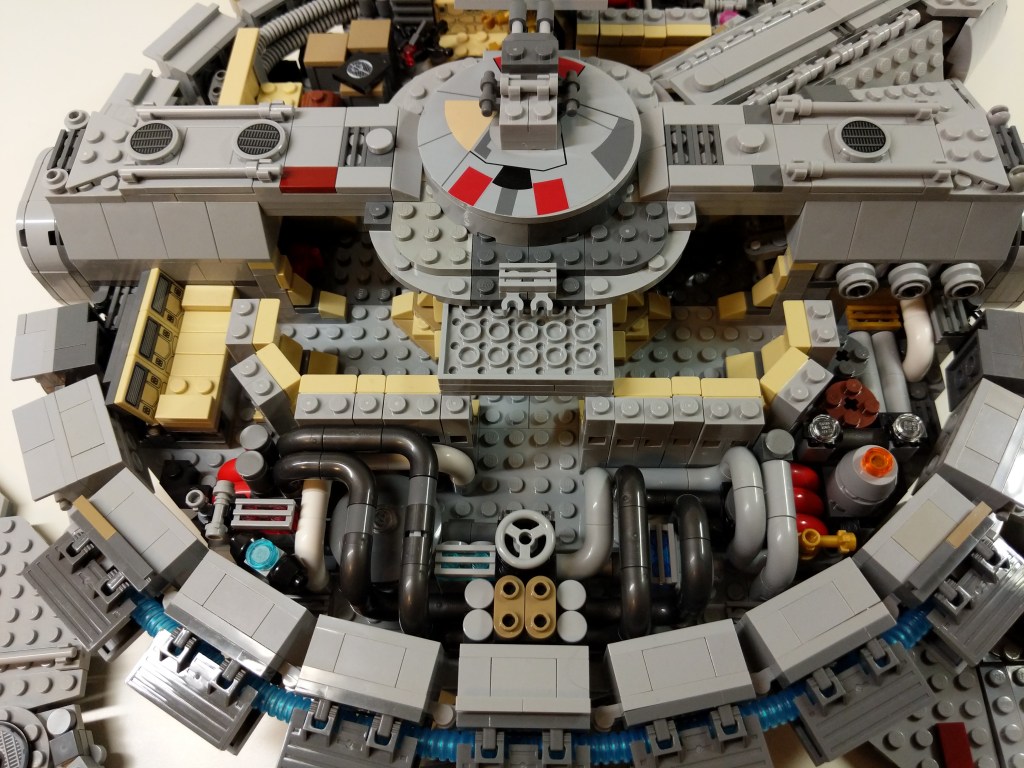
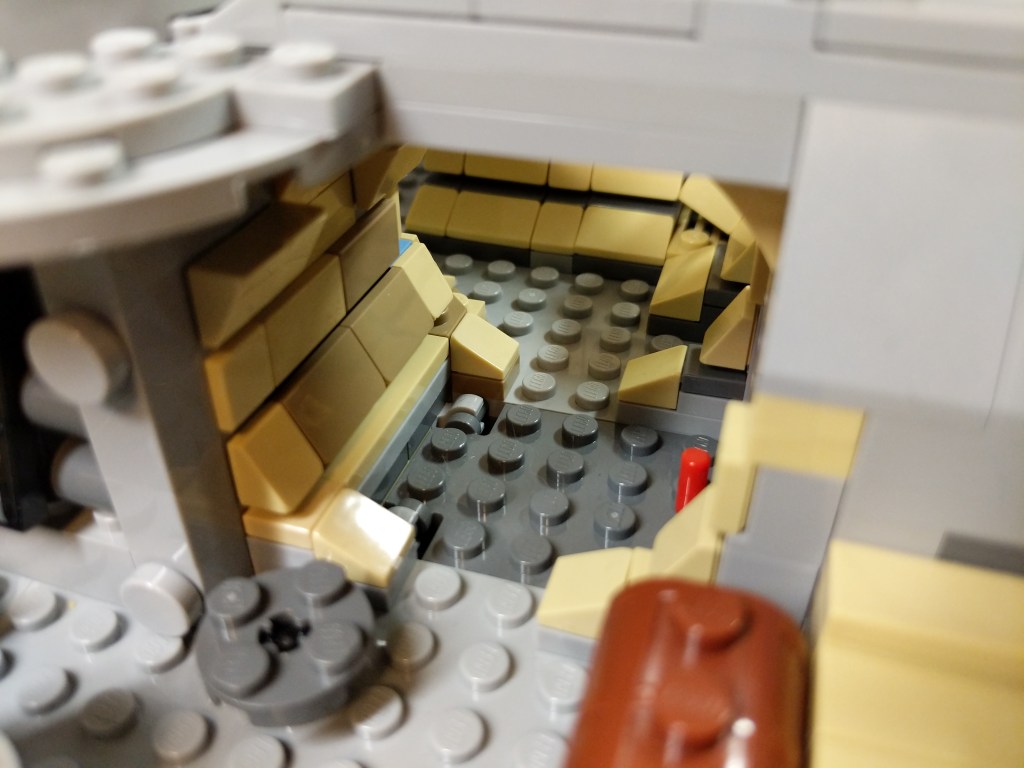
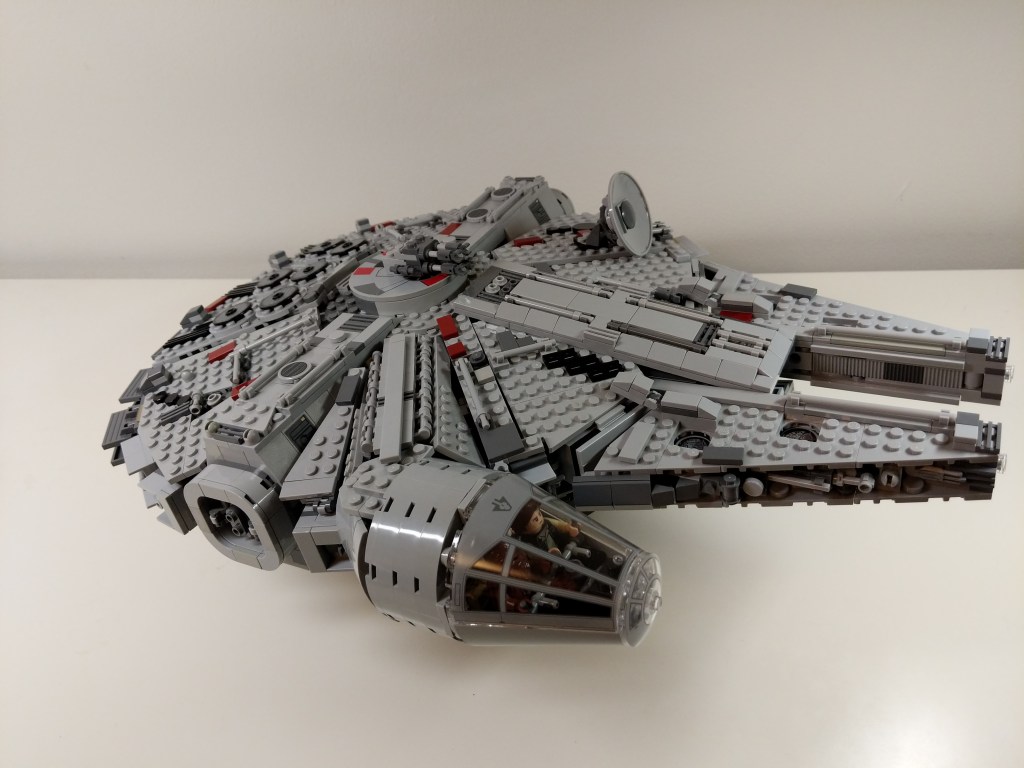
Interior
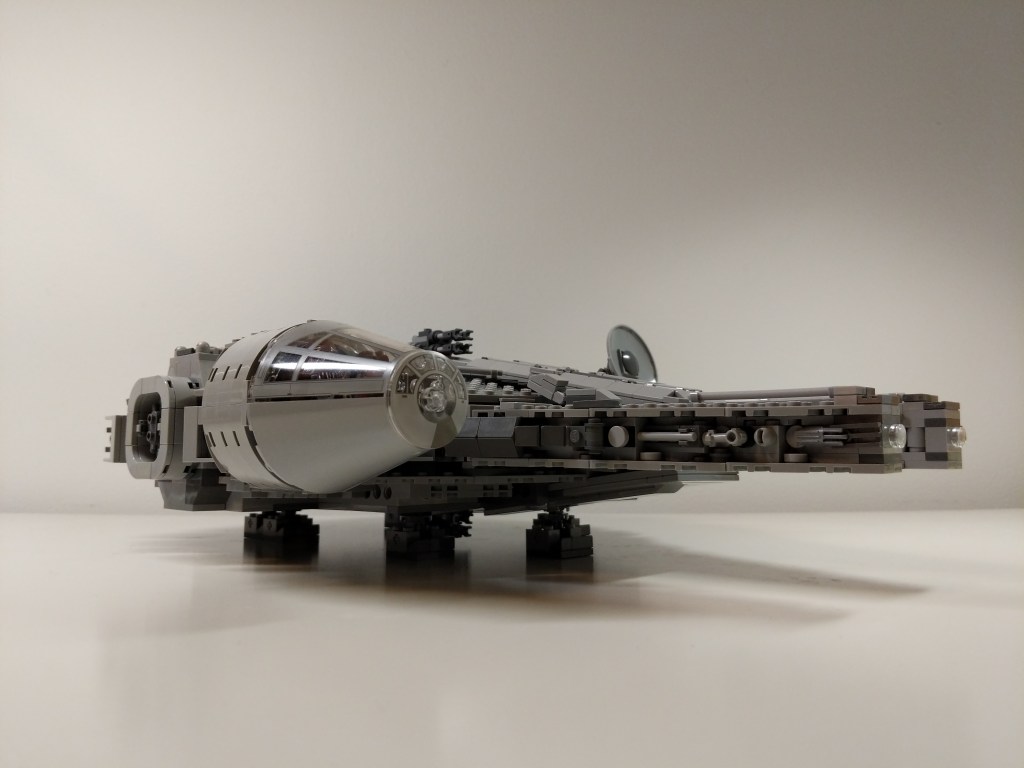
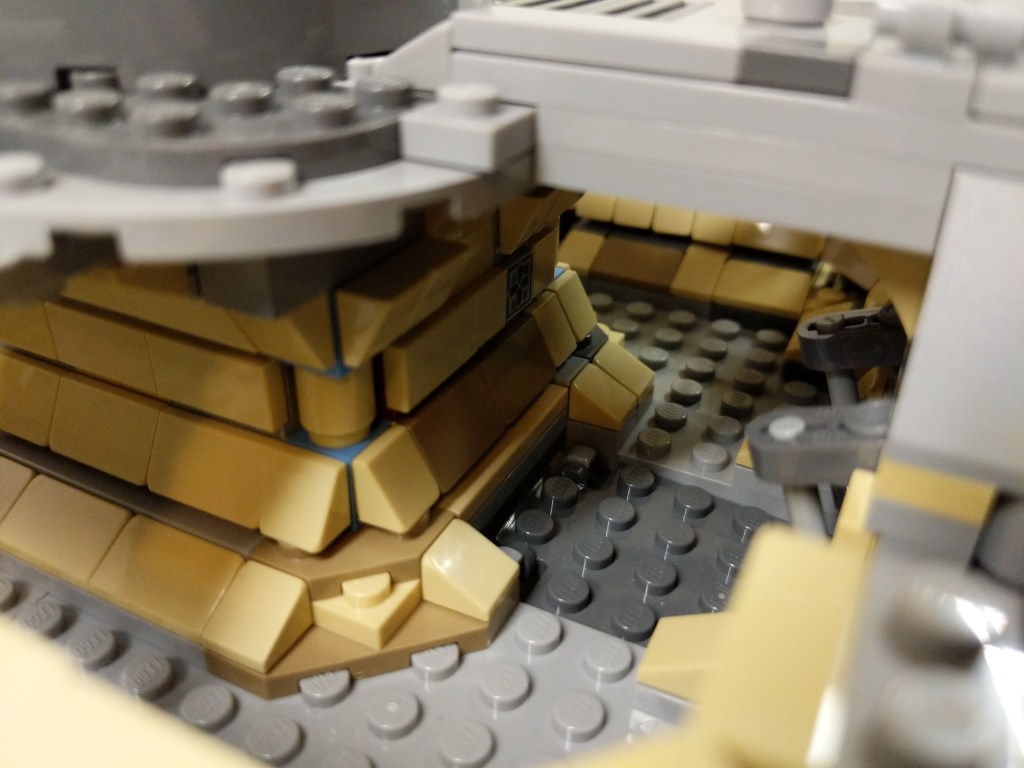
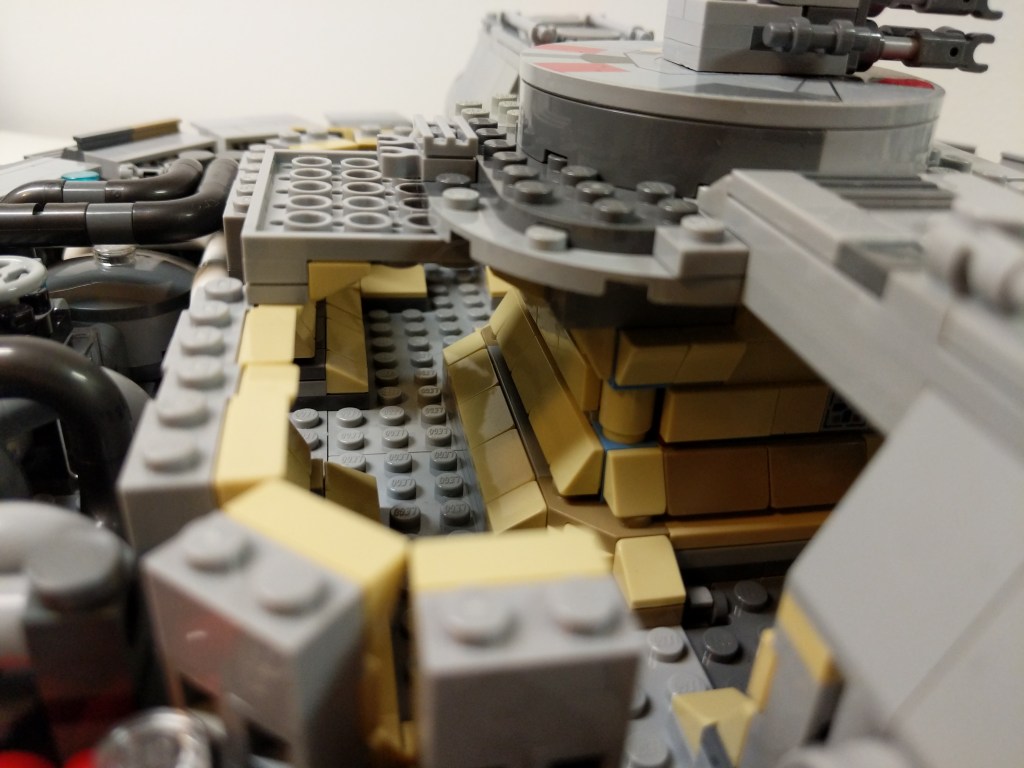
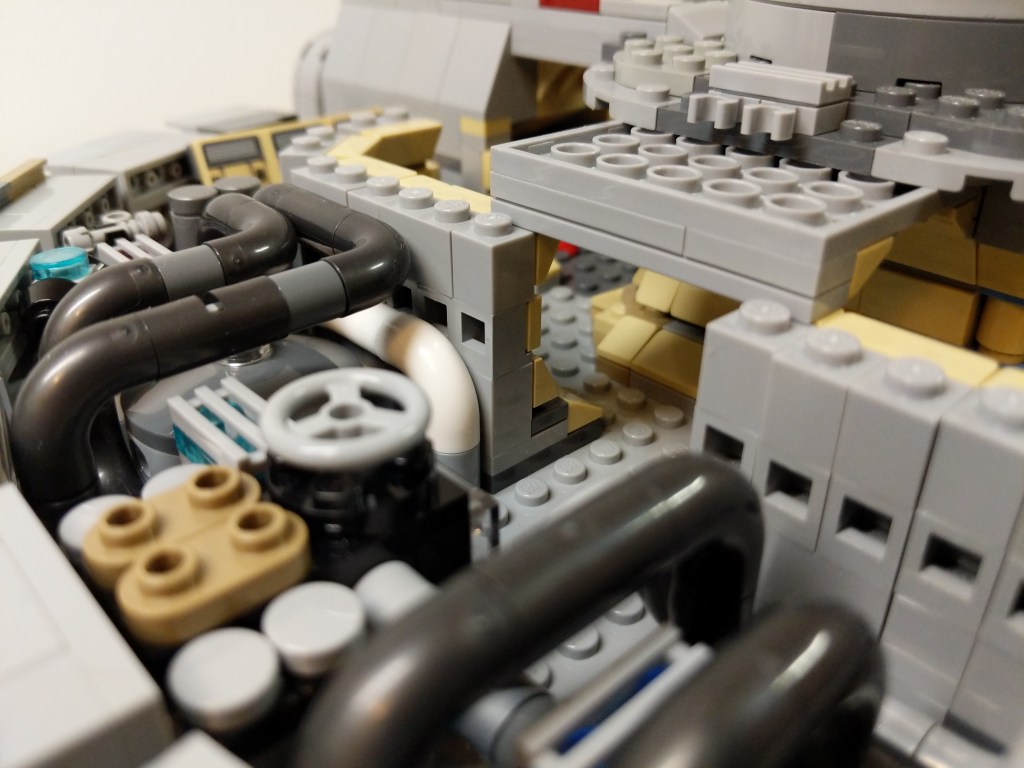
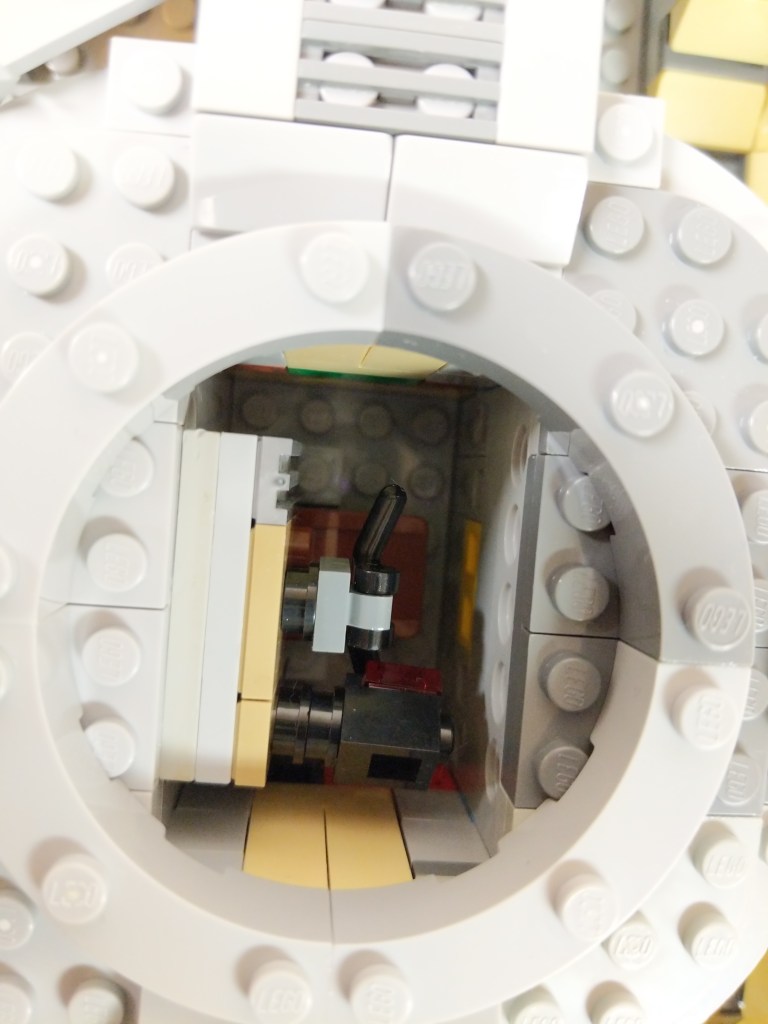
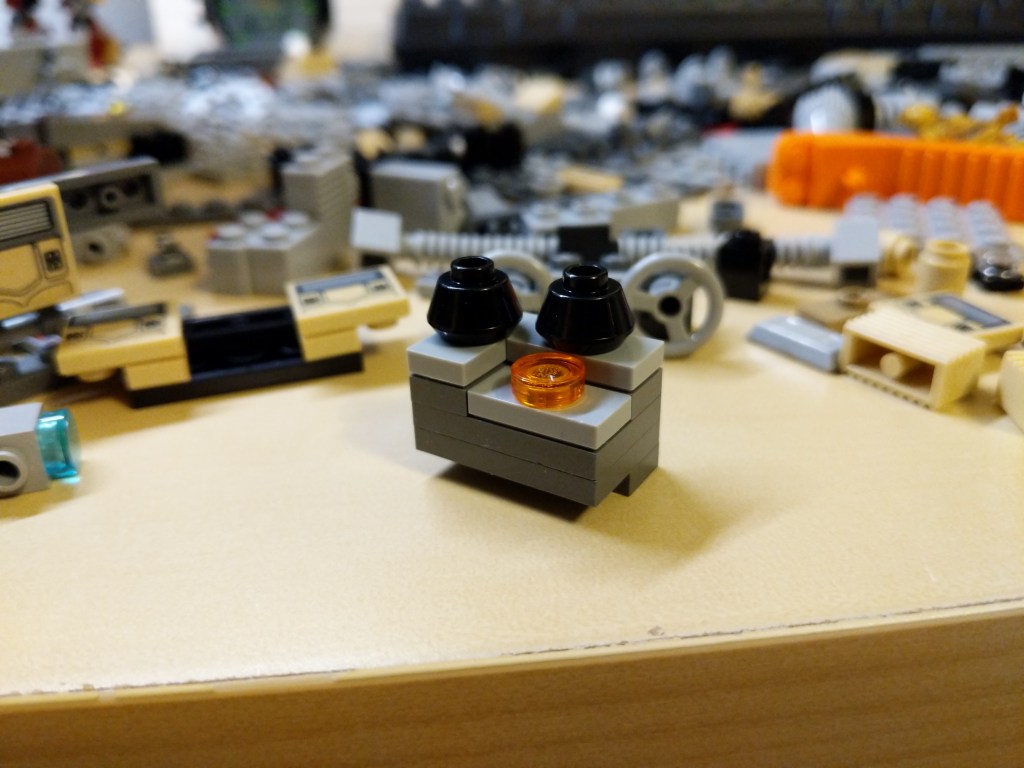
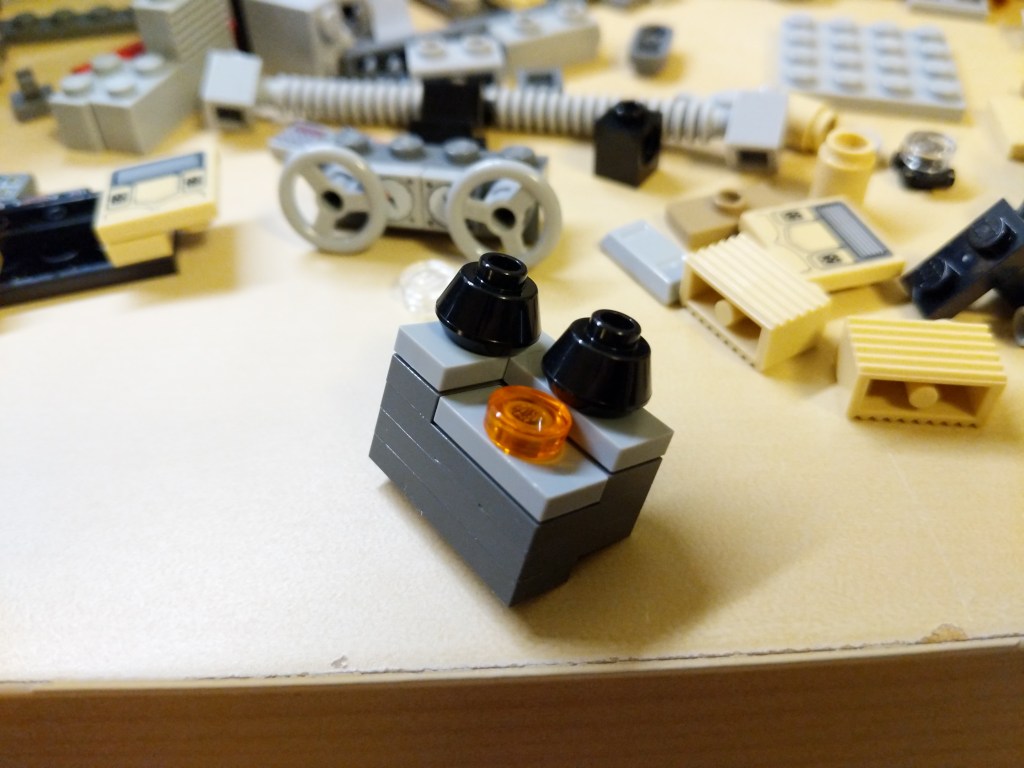
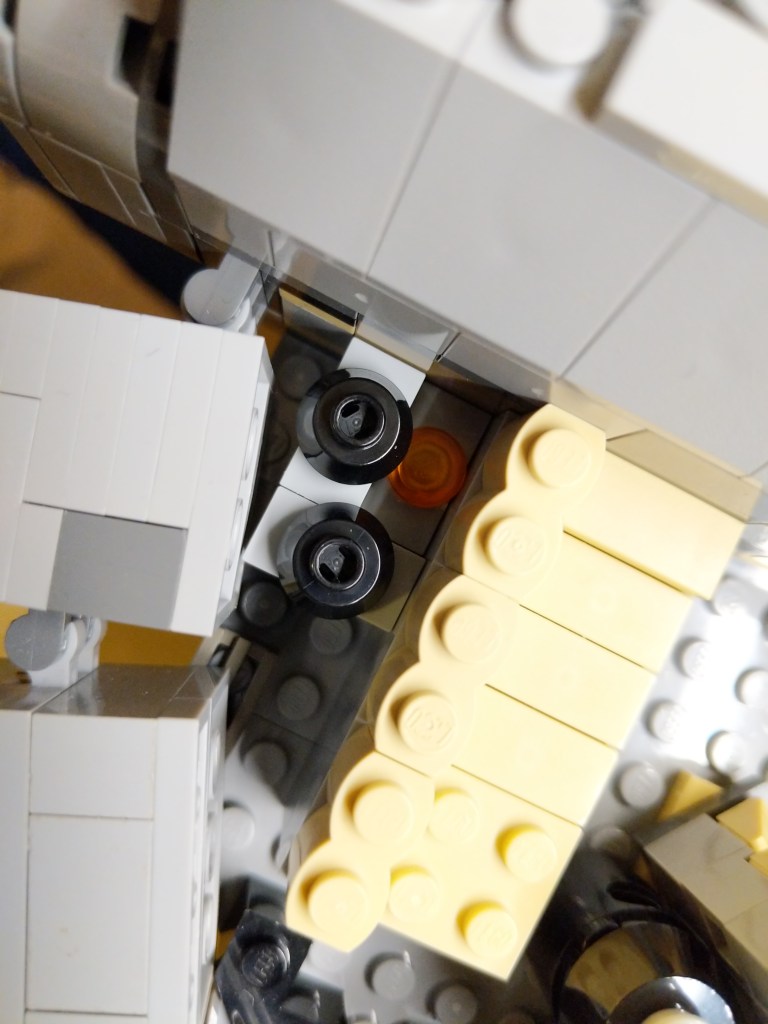
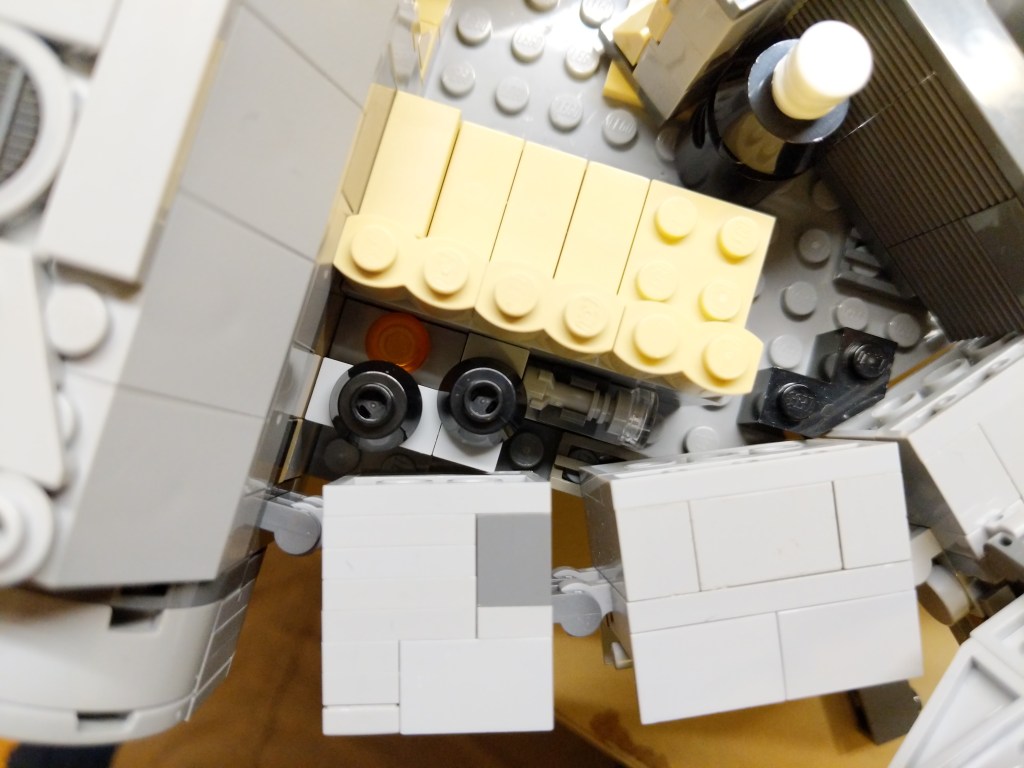
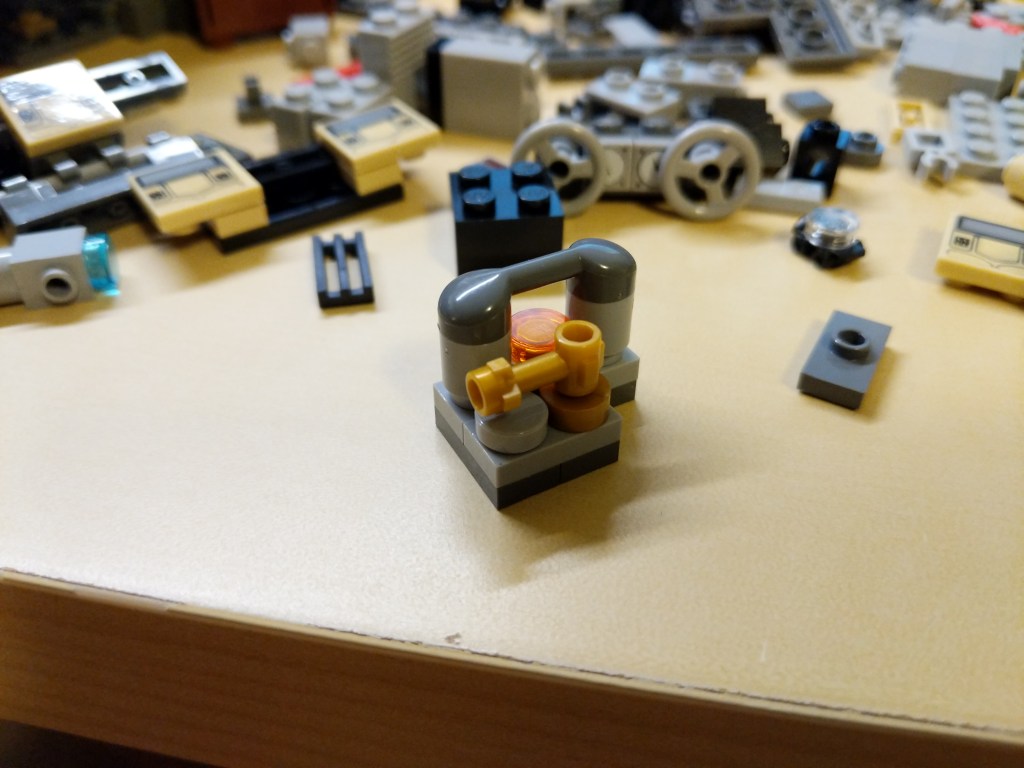
I wanted to include as much detail as possible–including detail hidden from view, like in the AMT/ERTL Cutaway Model of the Falcon. I made use of pipes–especially in the engine comparment–thinking of Han Solo’s repairs to the Falcon during the escape from Hoth in The Empire Strikes Back (1980). The pull-out gunner’s turret has an targeting computer display.
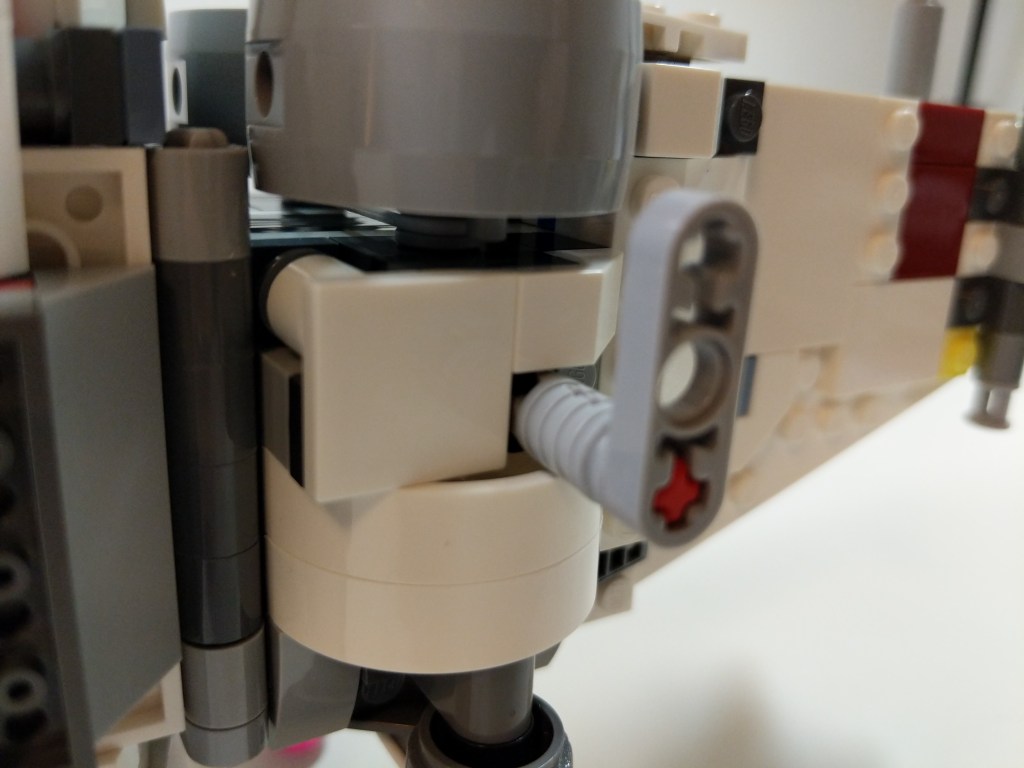
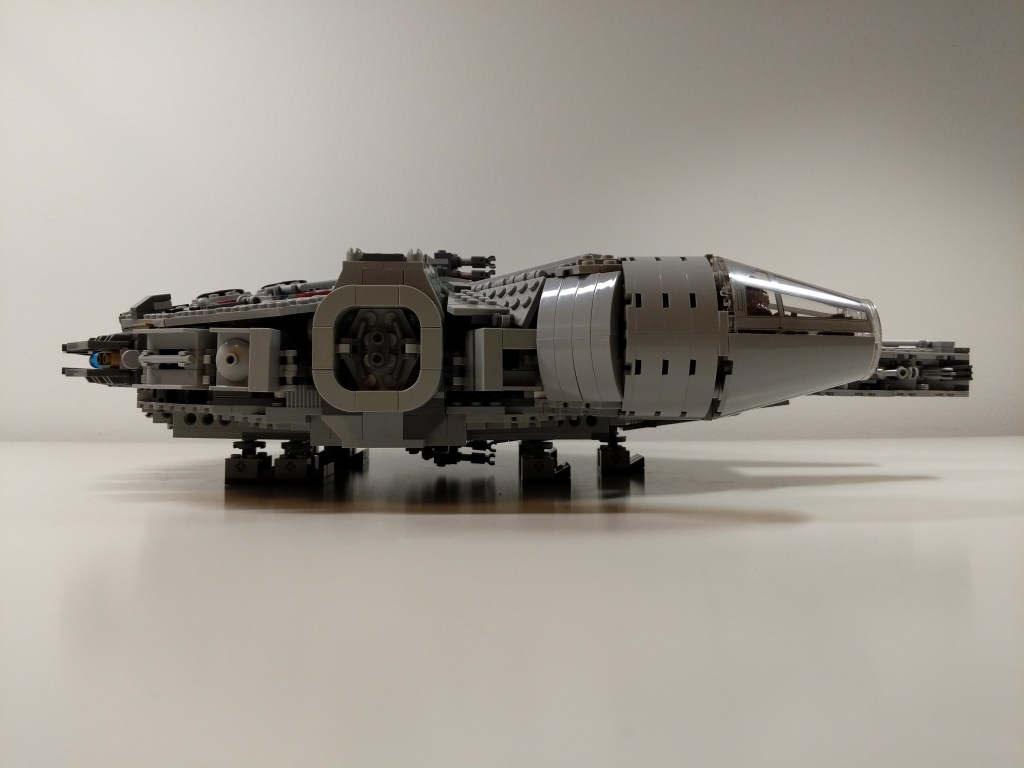
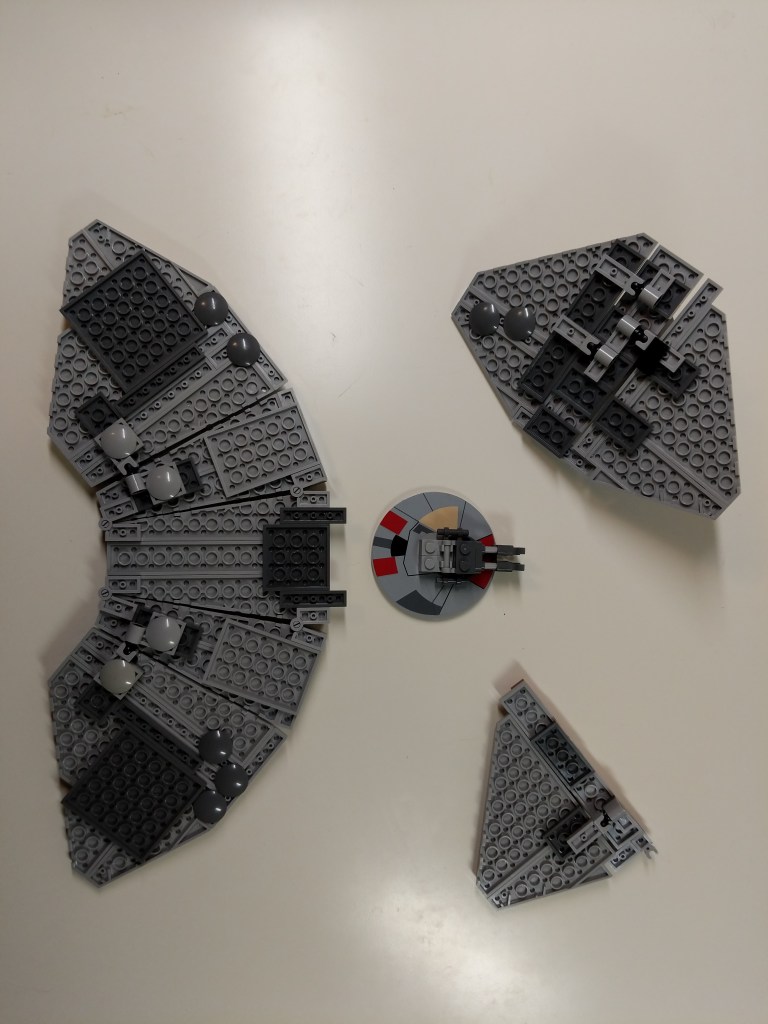
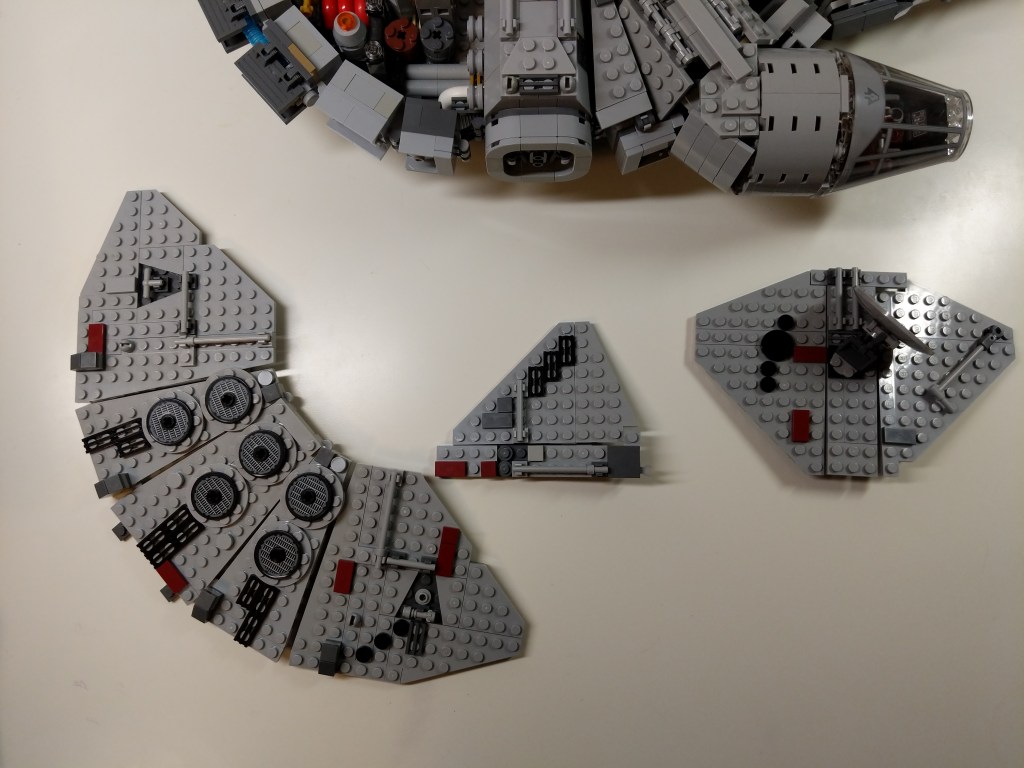
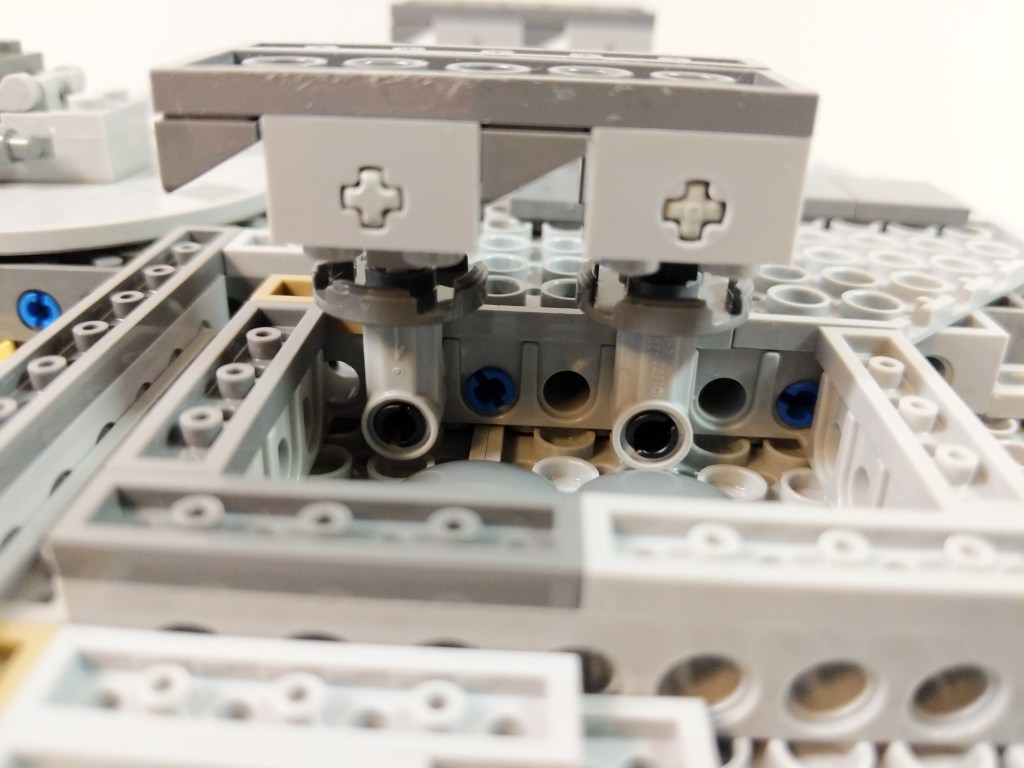
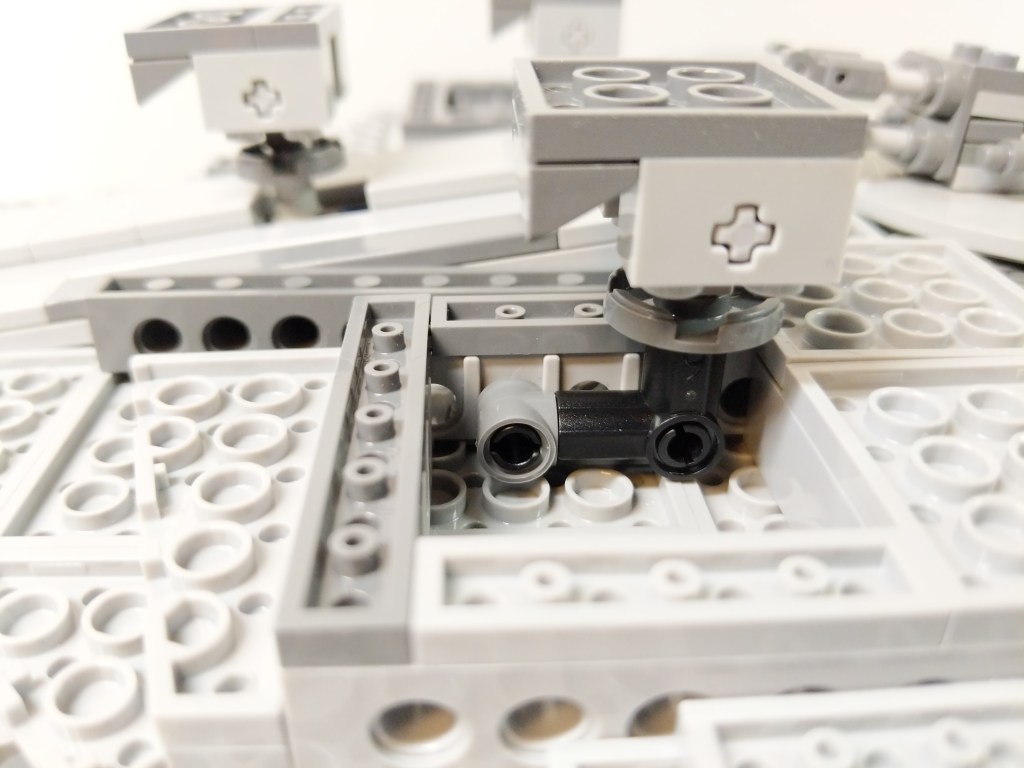
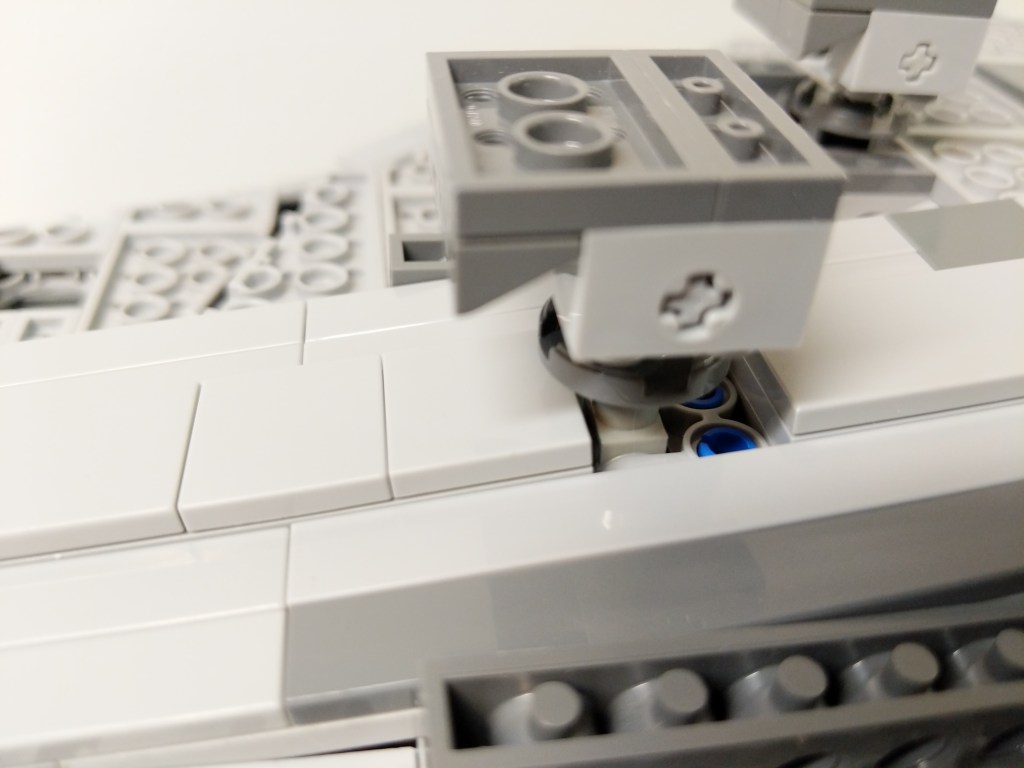
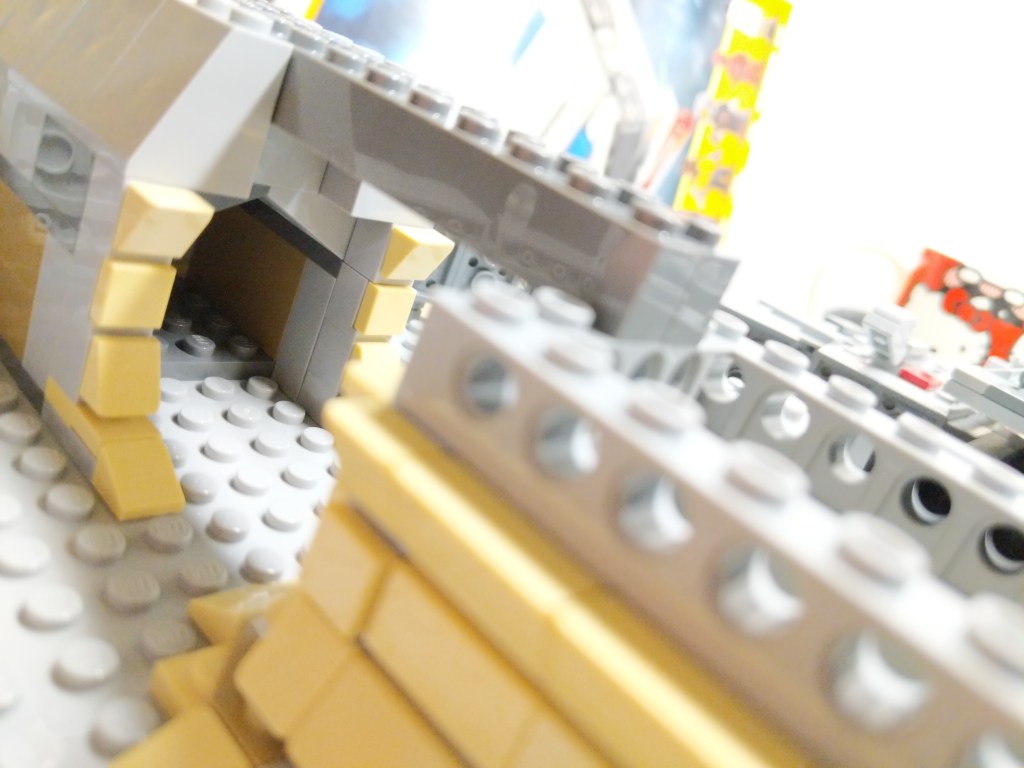
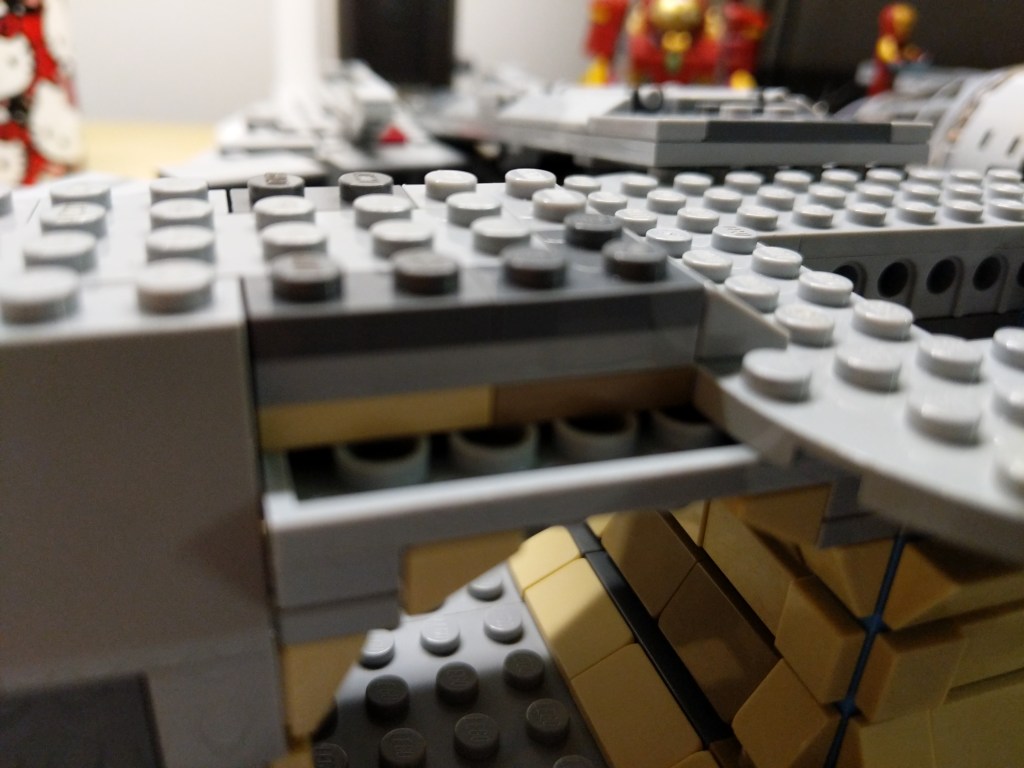
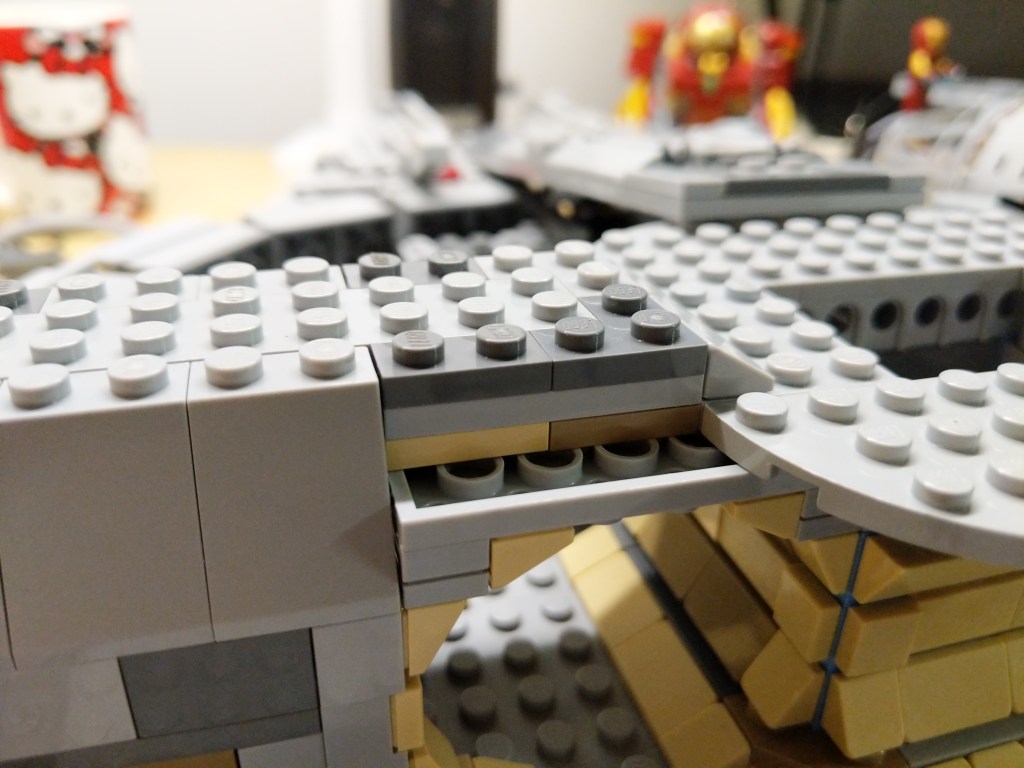
Landing Gear
I wanted the landing gear to look as accurate as possible in this small scale while also providing ample support for this heavier model.
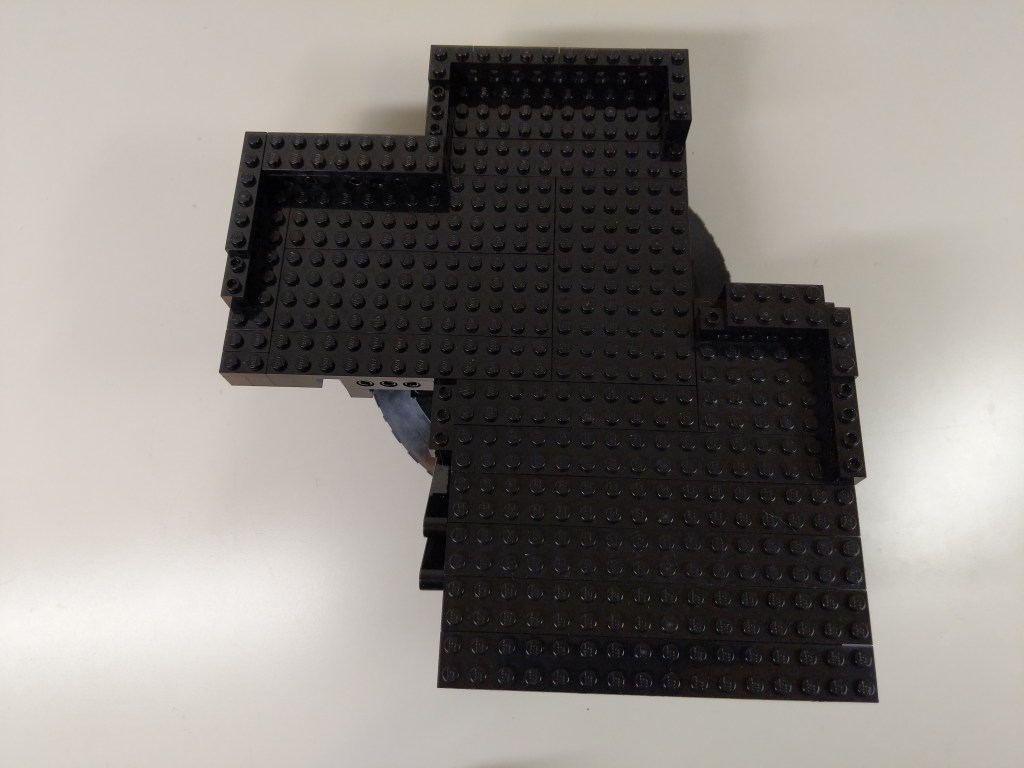
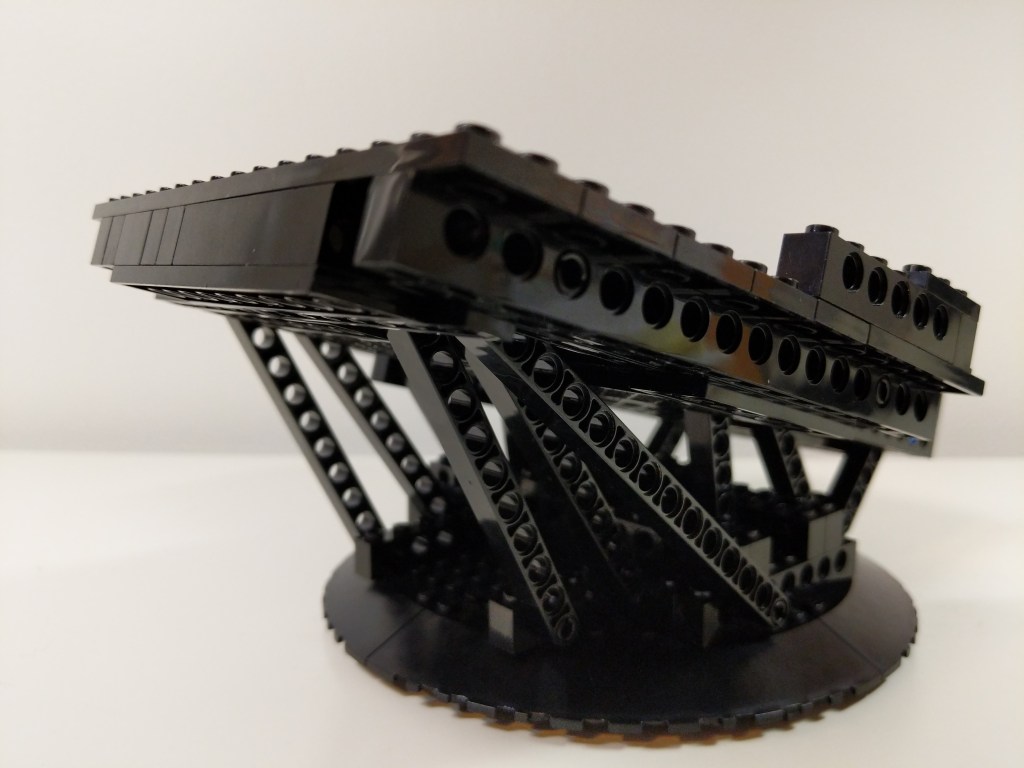
Display Stand
Also, I built an upward sloping display stand for the Falcon shown below. It’s shape combined with gravity locks the Falcon’s landing gear in place so that it can’t move in the display stand. It has a lot of Technic reinforcement due to the weight of the Falcon, which is more than the stock 75257 set.
Yet Another Remodel
A few months later, I took another stab at the Falcon’s interior with an intention of making the rear passage way more circular and making the engine compartment less busy but with thought out detailing. I stripped down the interior and began again. True revision in practice (i.e., throw out your first draft and begin again).
Next Steps
I disassembled this Falcon before Y and I moved to our new apartment in 2022. Since then, I’ve rebuilt 75105 (The Force Awakens) and 75257 (Rise of Skywalker) using the assembly instructions. They sit on either side of my desk at home. I have plans to build a larger Falcon of my own design that fits between the size of these playable sets and the much larger 75192 and 10179 sets. It will have a 2-stud side wall to give it a sleeker look than the chunky playable models. I’ll provide updates when this new build gets underway!
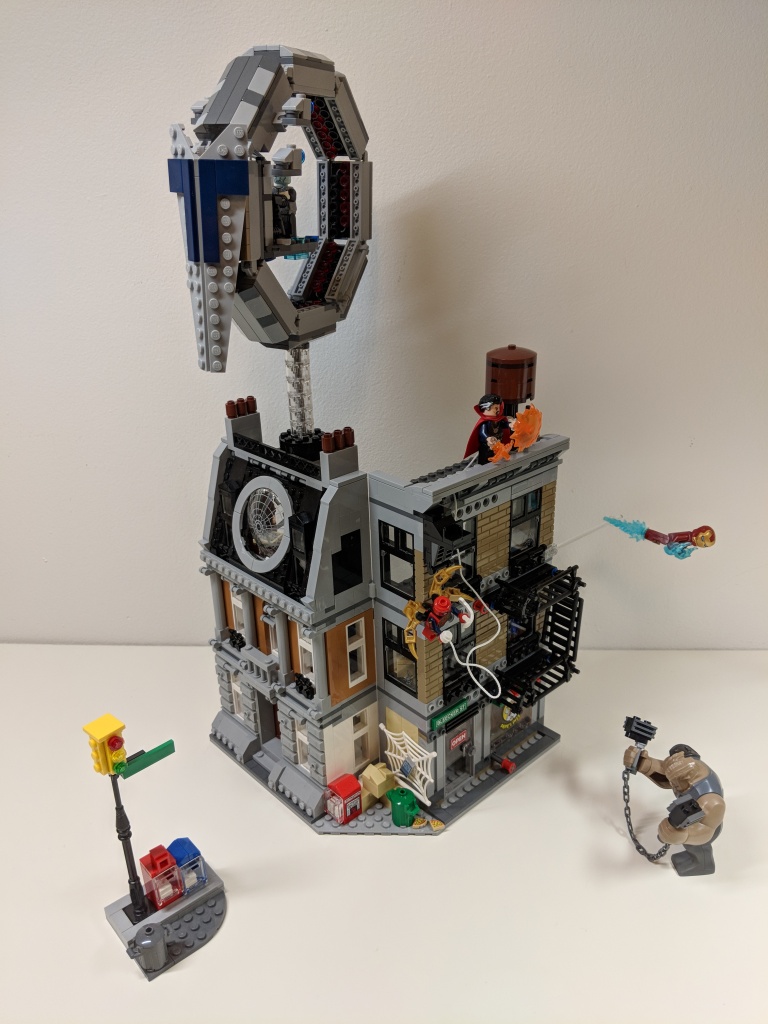
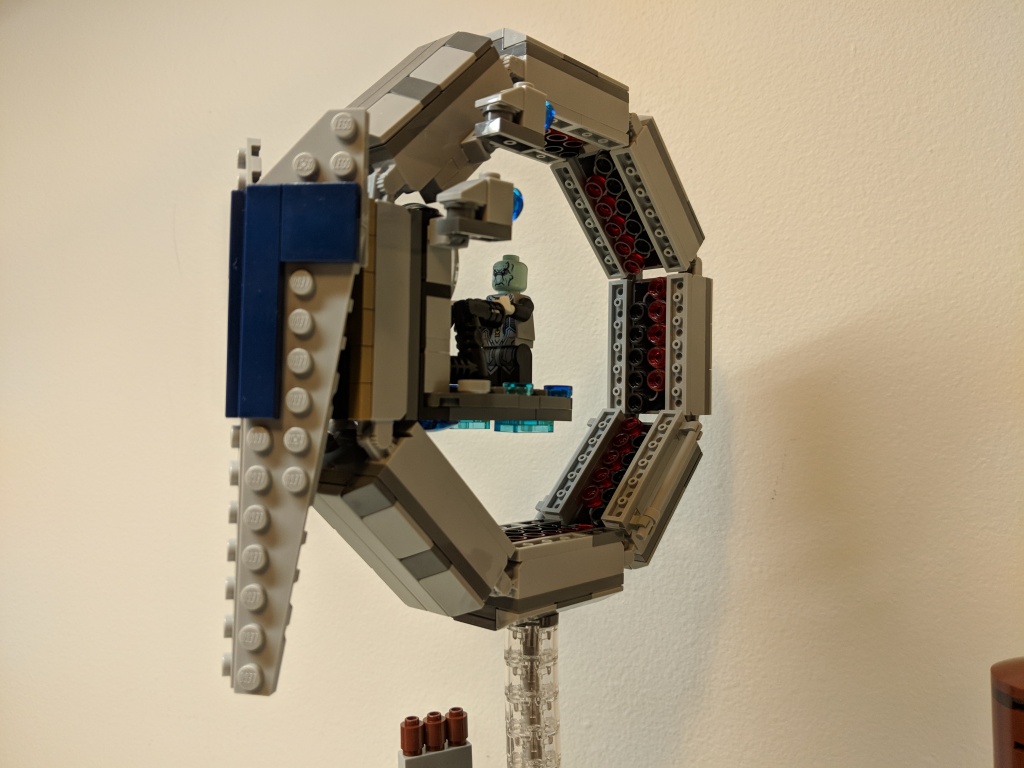
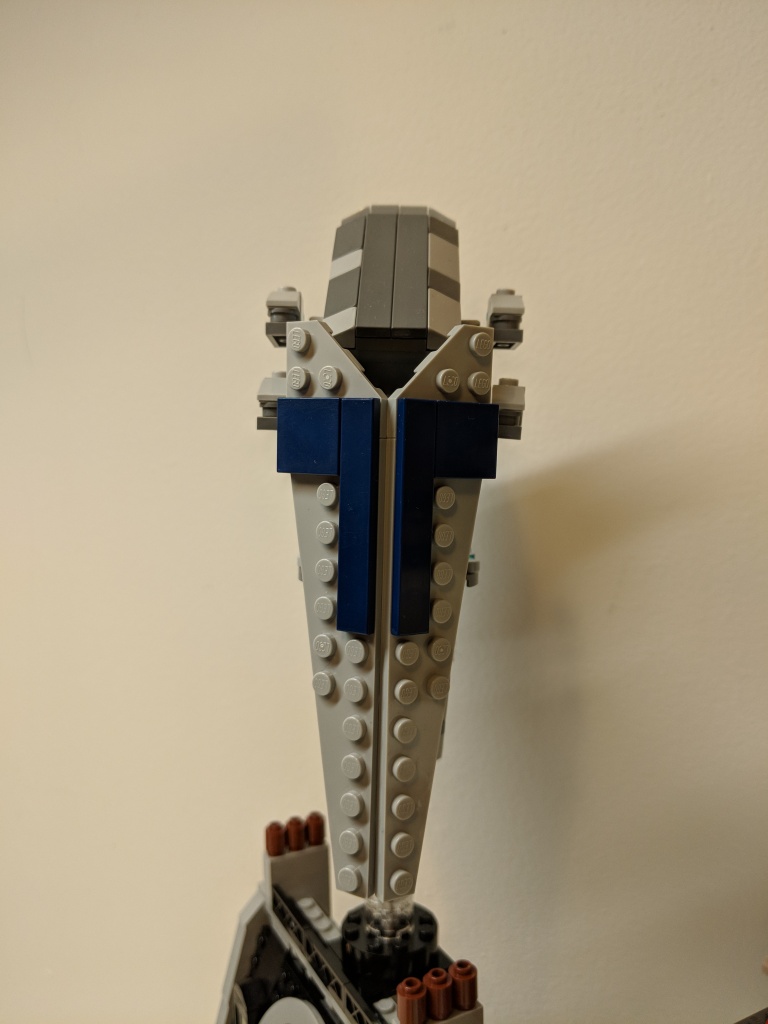
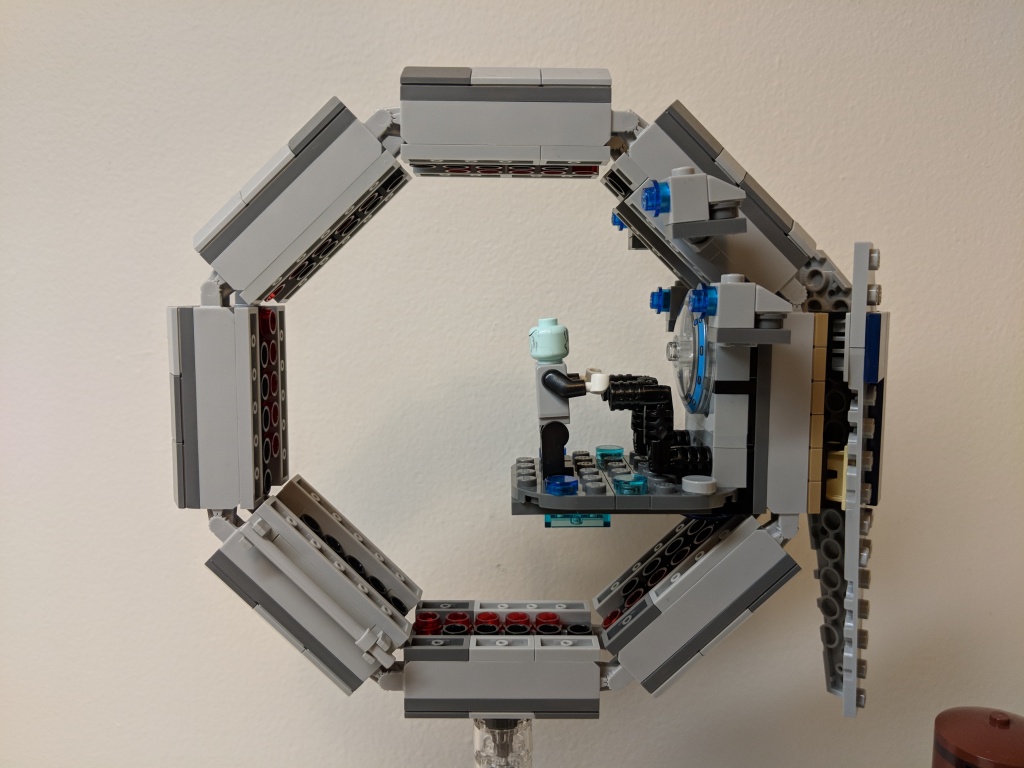
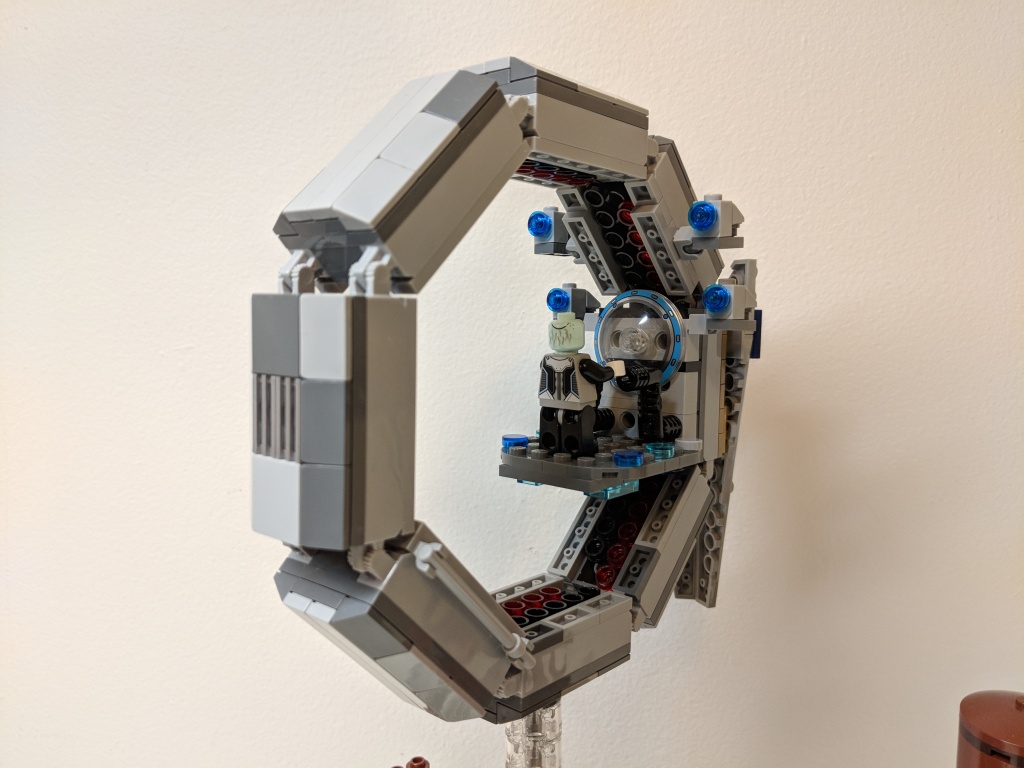
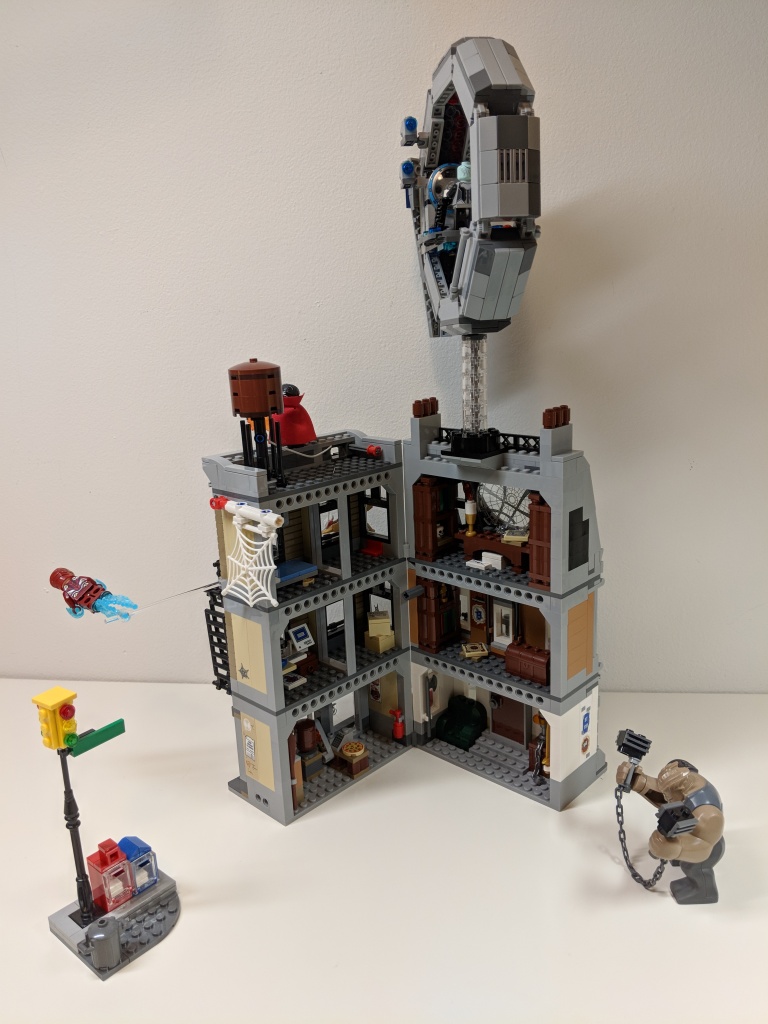
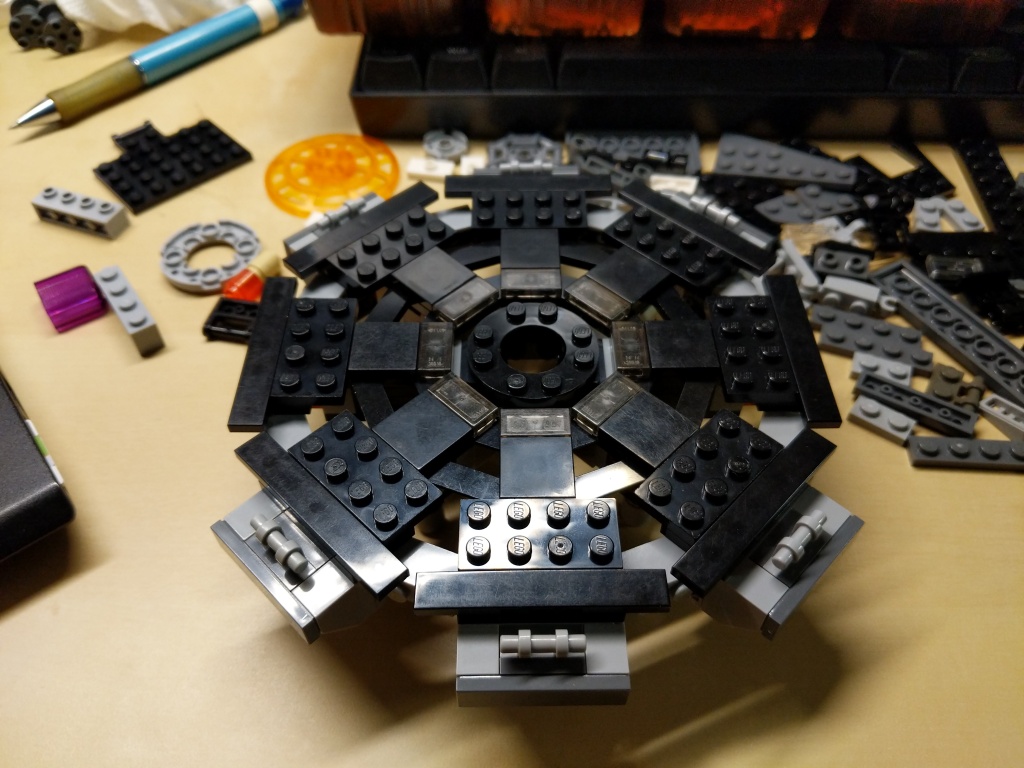
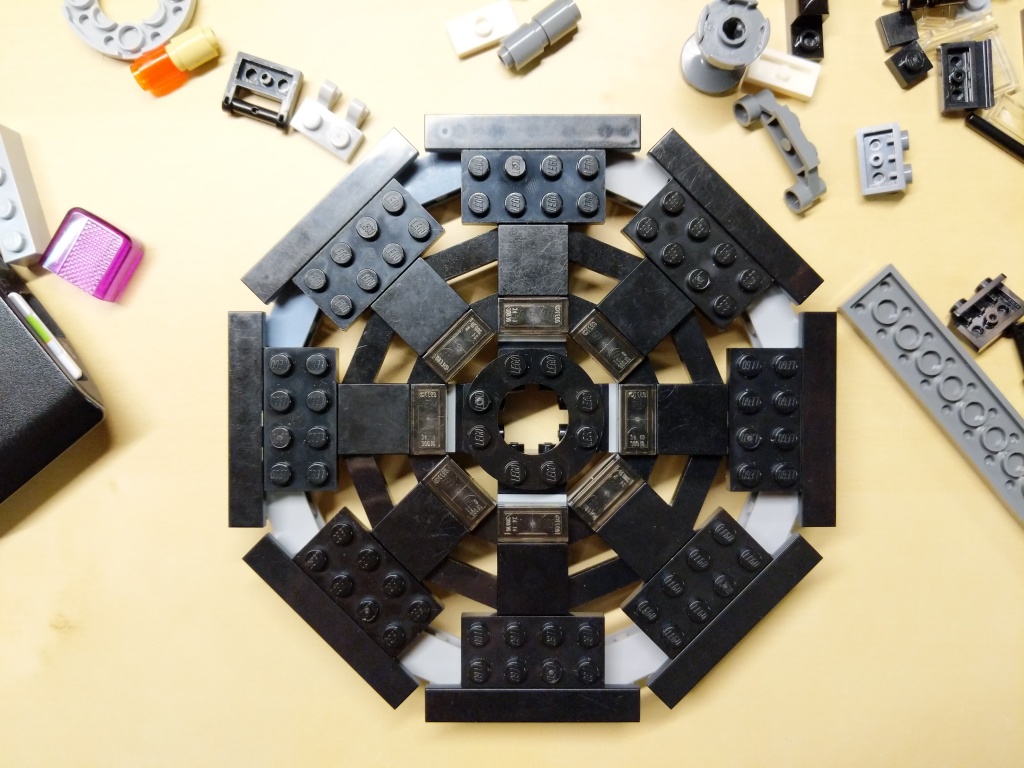
While it would have certainly have been great to build a larger Q-Ship as others have done, I had to work within the constraints of the type and quantity of LEGO bricks and elements that I have on-hand.
I settled on a simple ring structure with interior red accents and a driving platform for Ebony Maw that included a display screen. In the southwest quadrant, I added bars for Iron Man and Spider-Man to grab onto, and I included the Q-Ship’s engines in the northeast quadrant above the driving platform.
Overall, it was a straight forward design that added a sense of drama to the Sanctum Sanctorum Showdown set by having danger approaching from above.
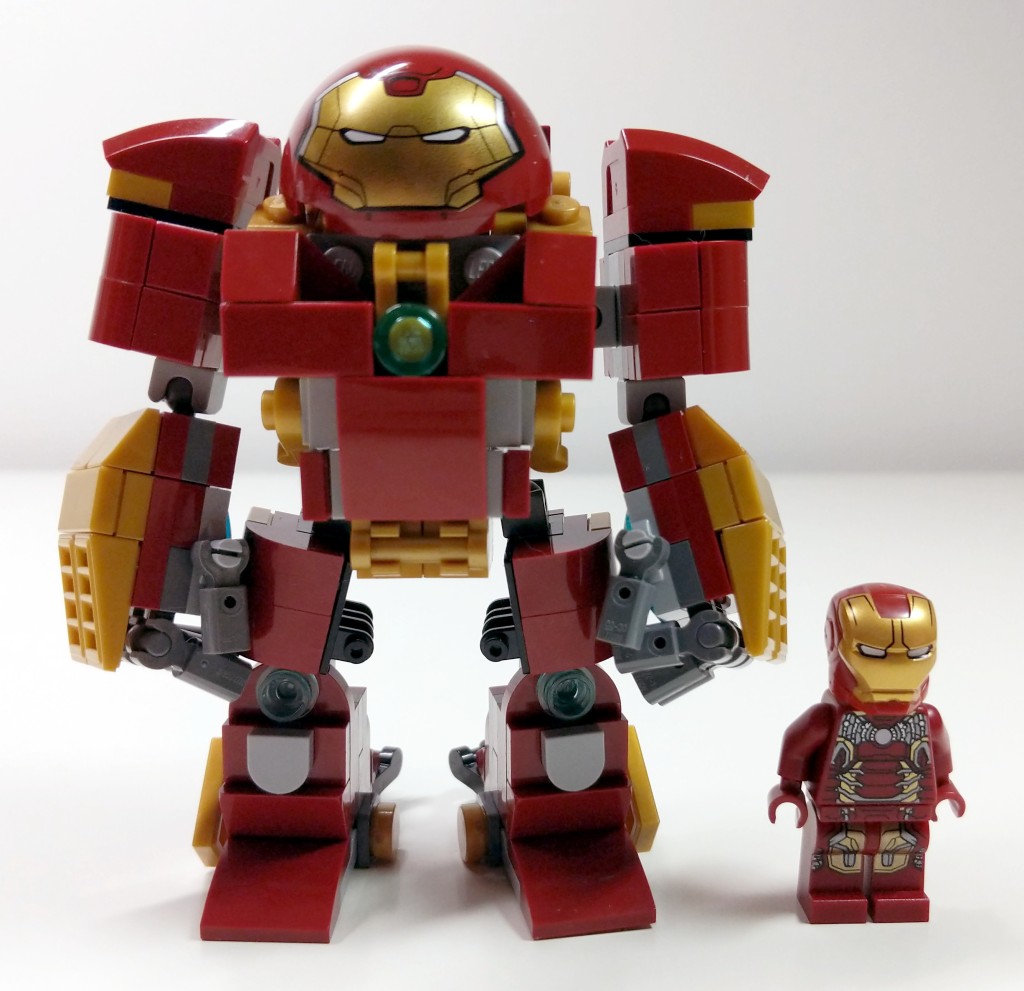
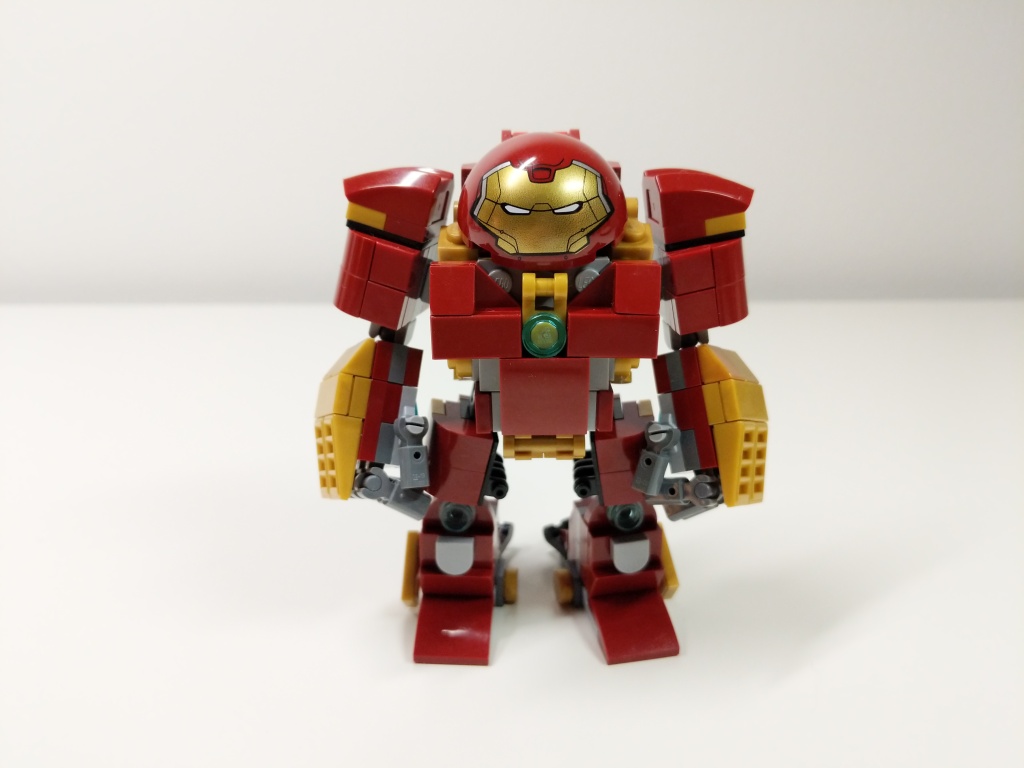
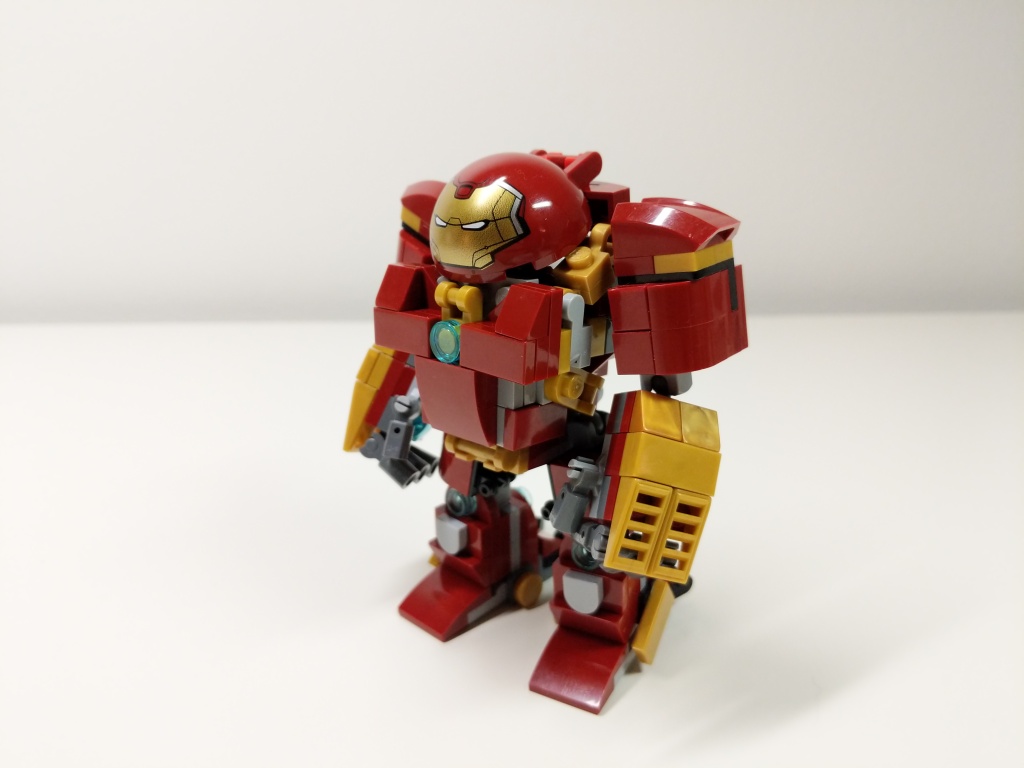
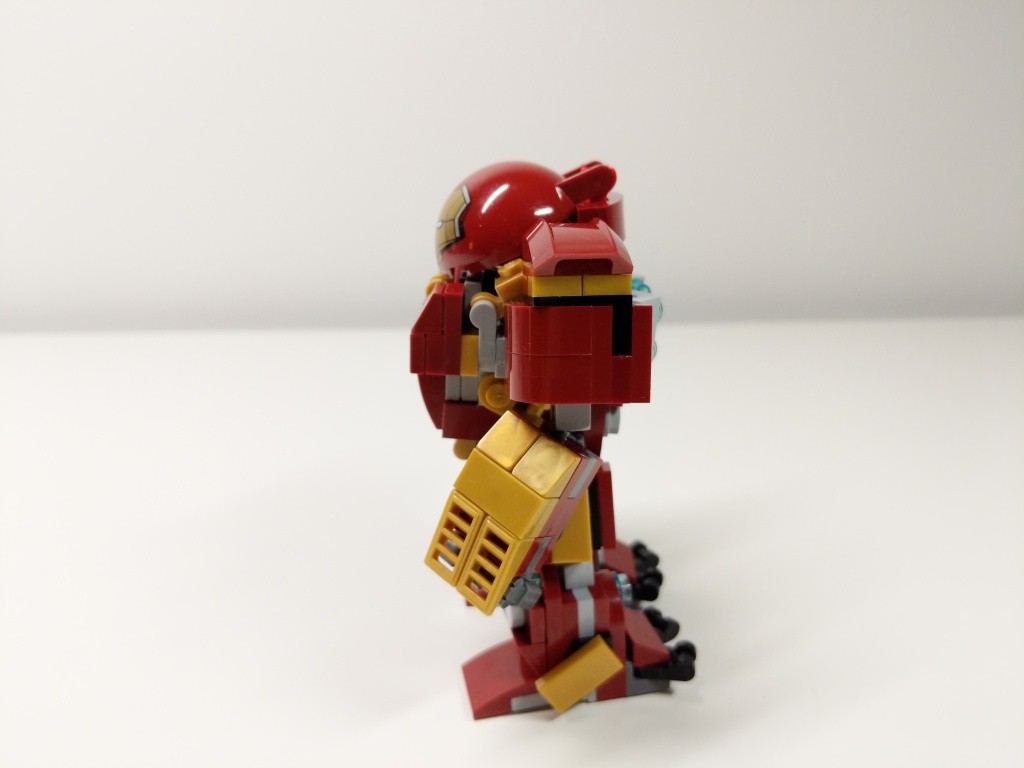
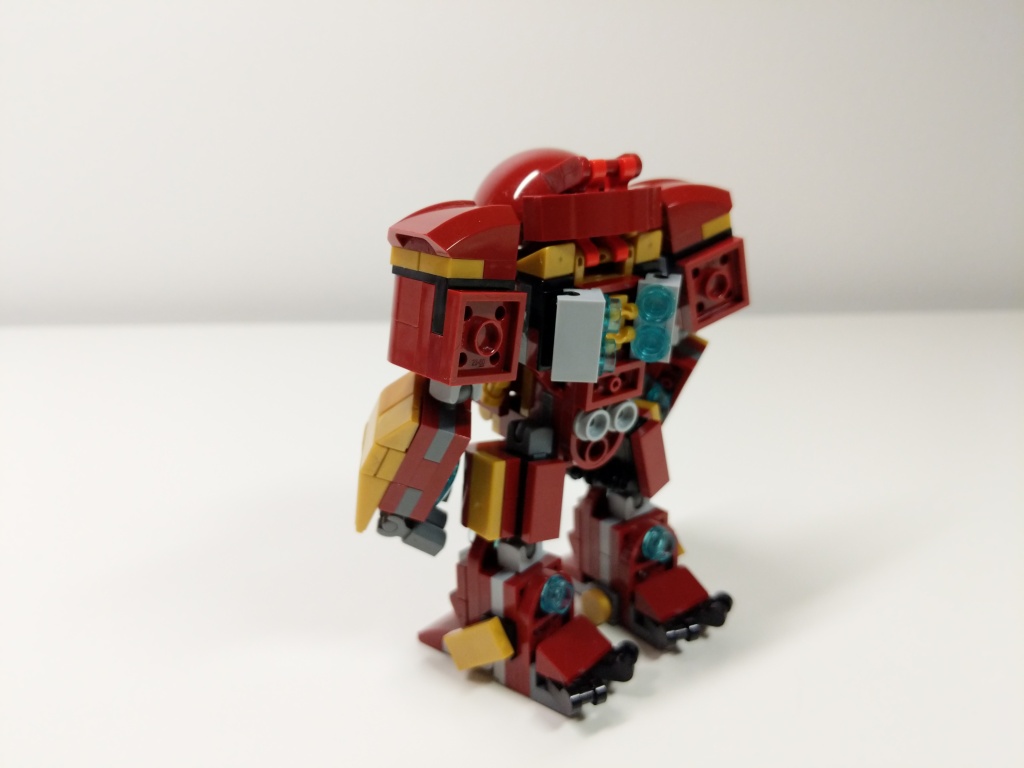
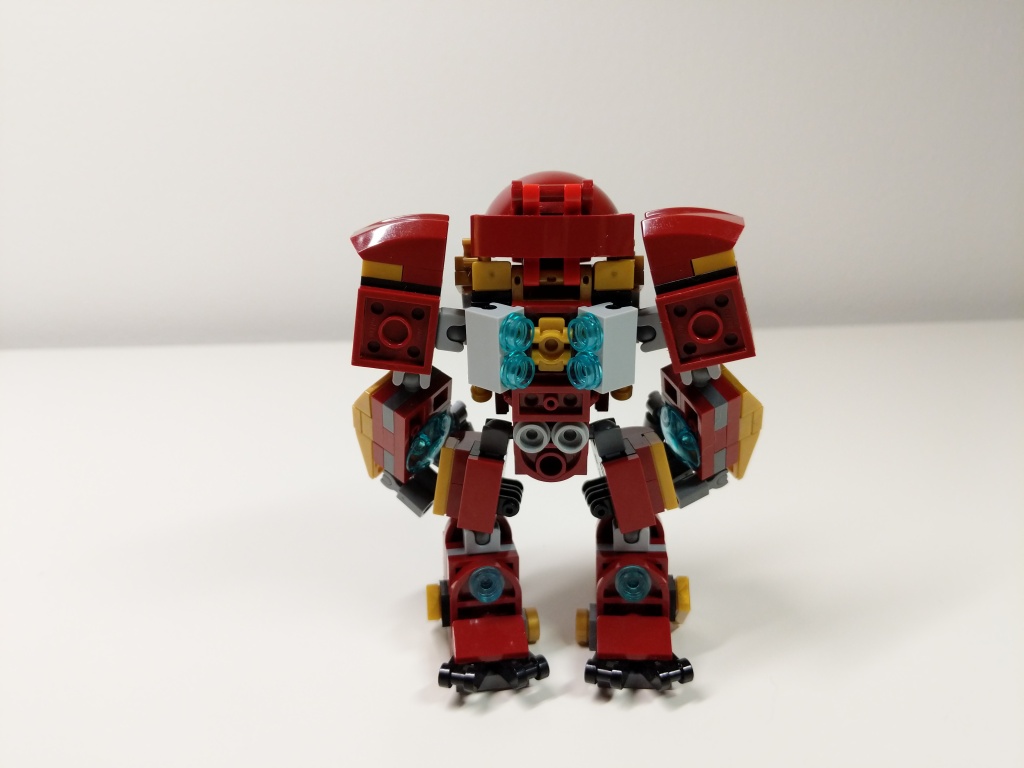
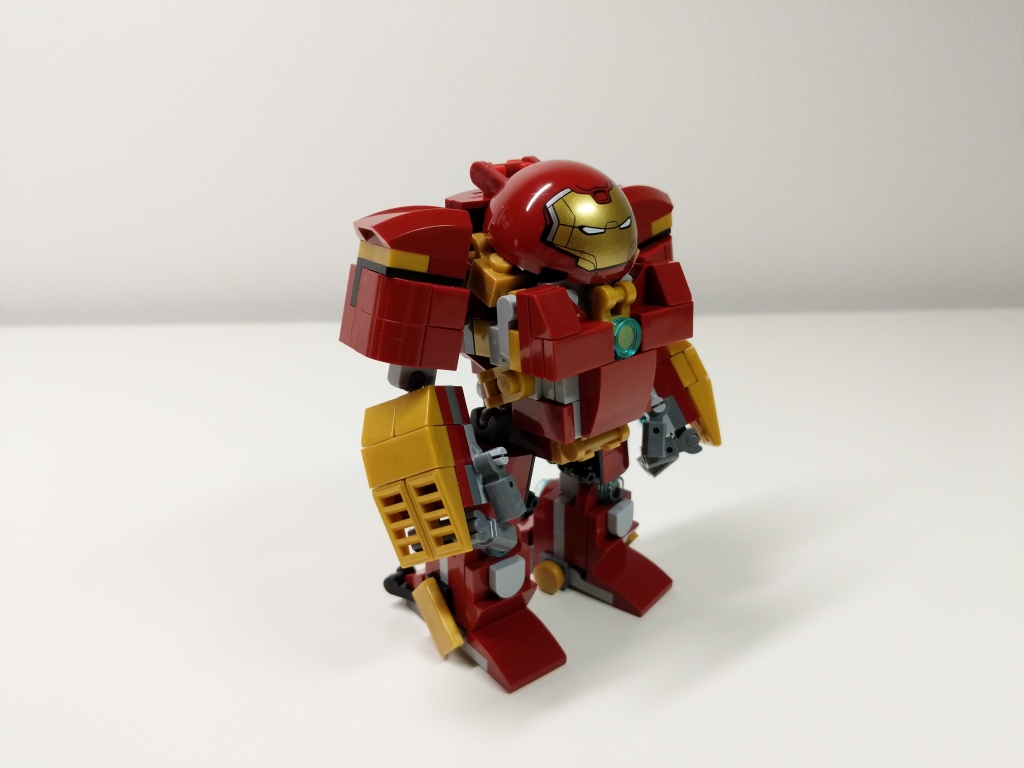
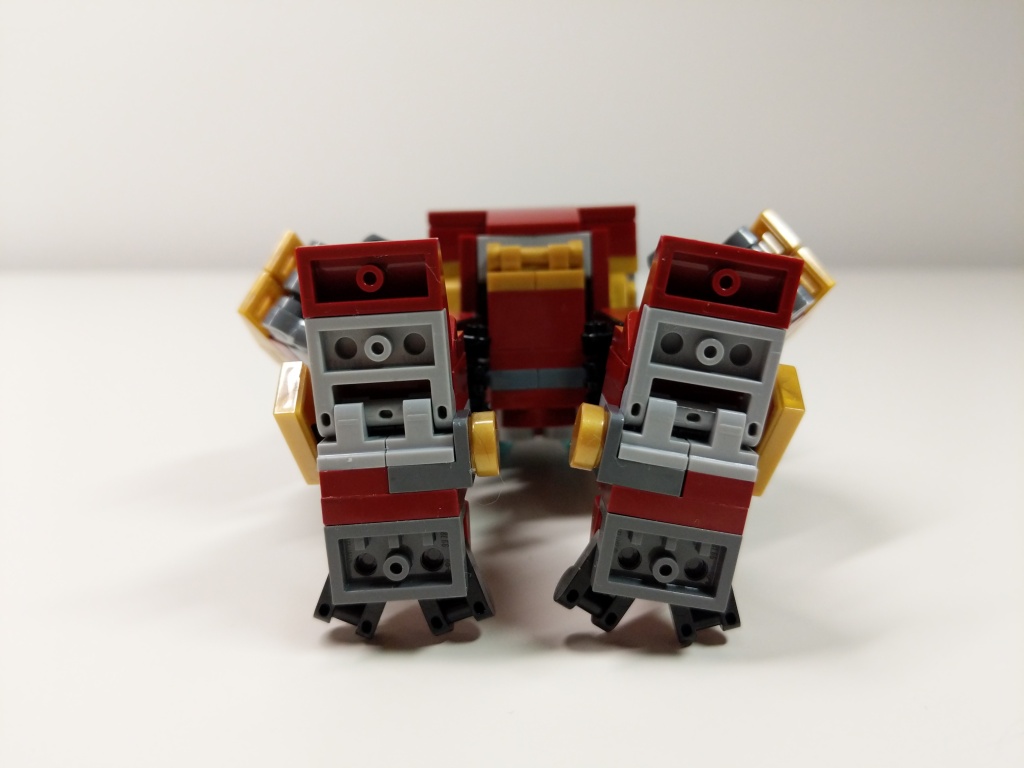
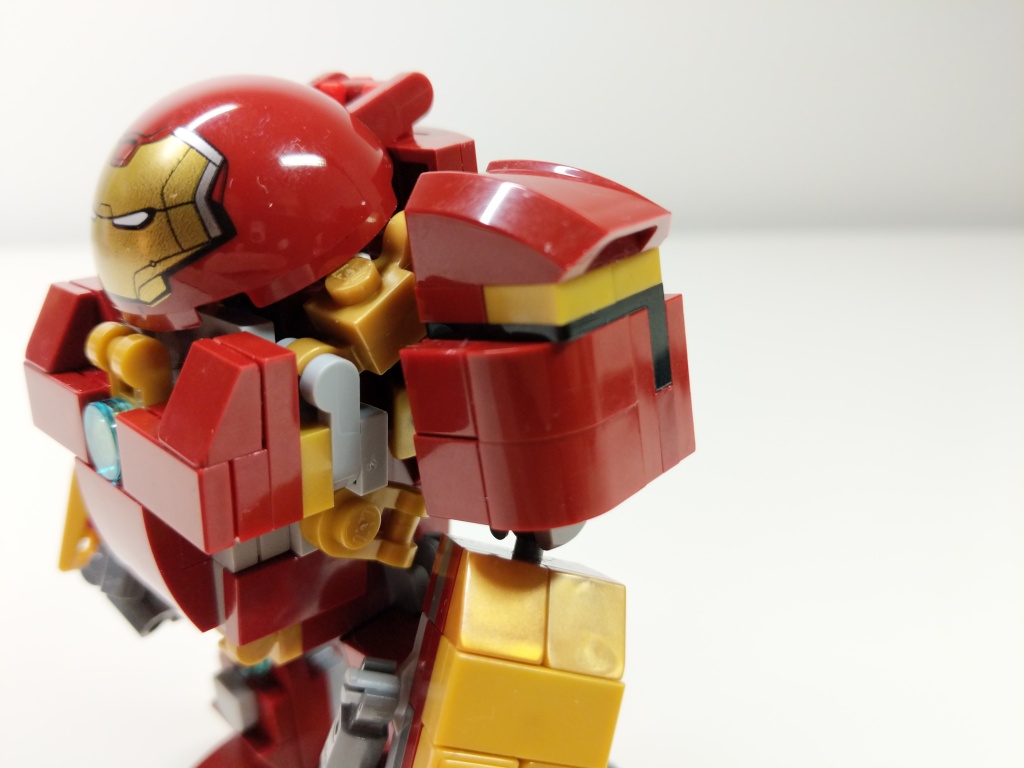
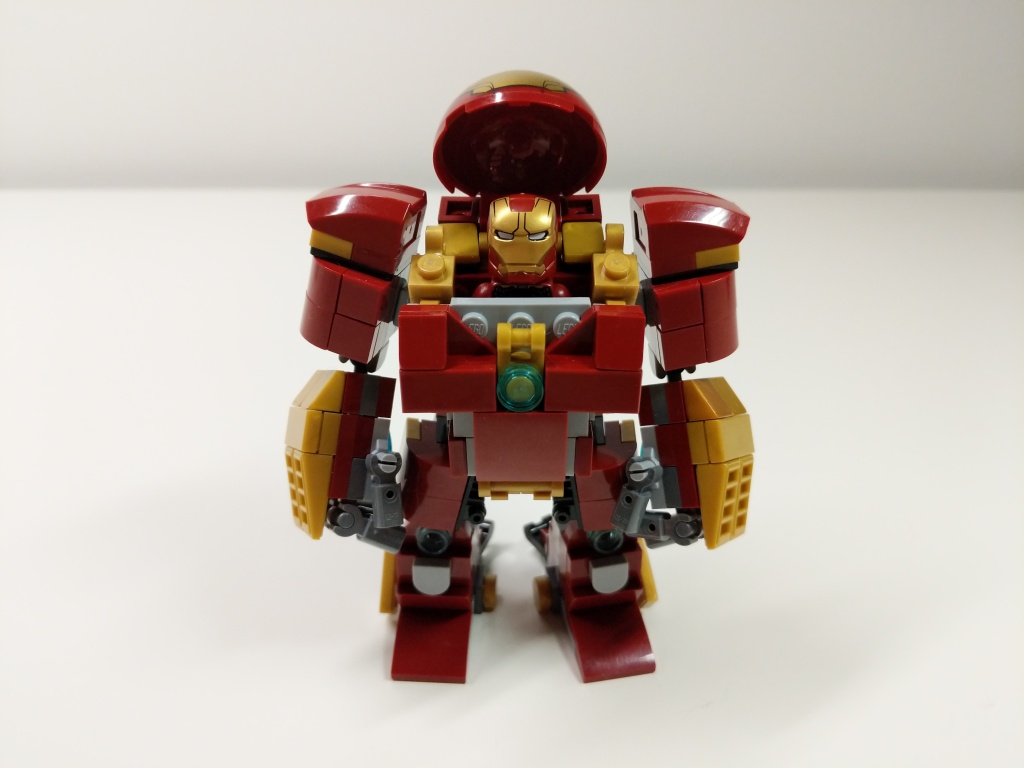
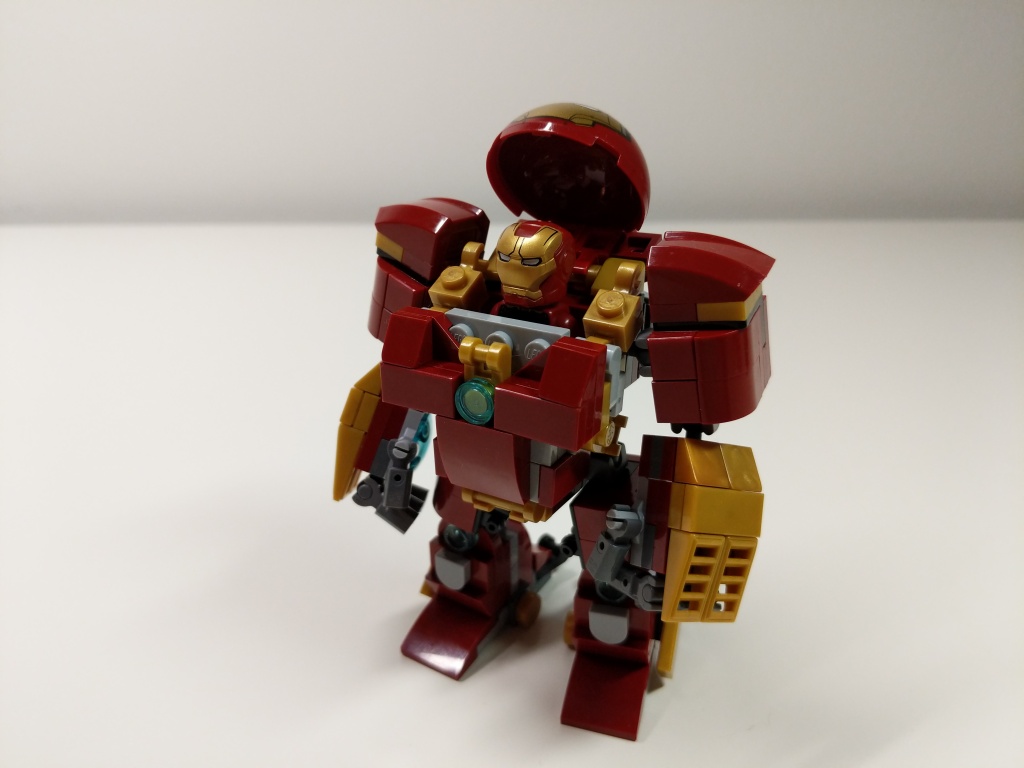
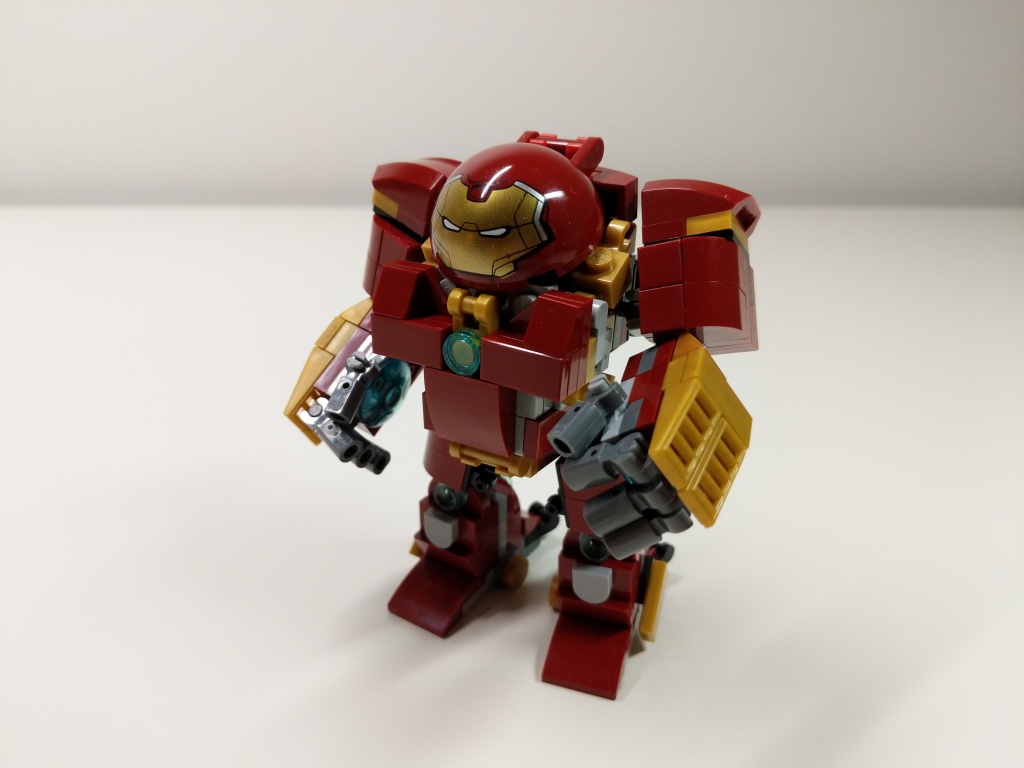
My Iron Man Hulkbuster Mark 44 Armor MOC with Iron Man Mark 43 Armor Minifigure.
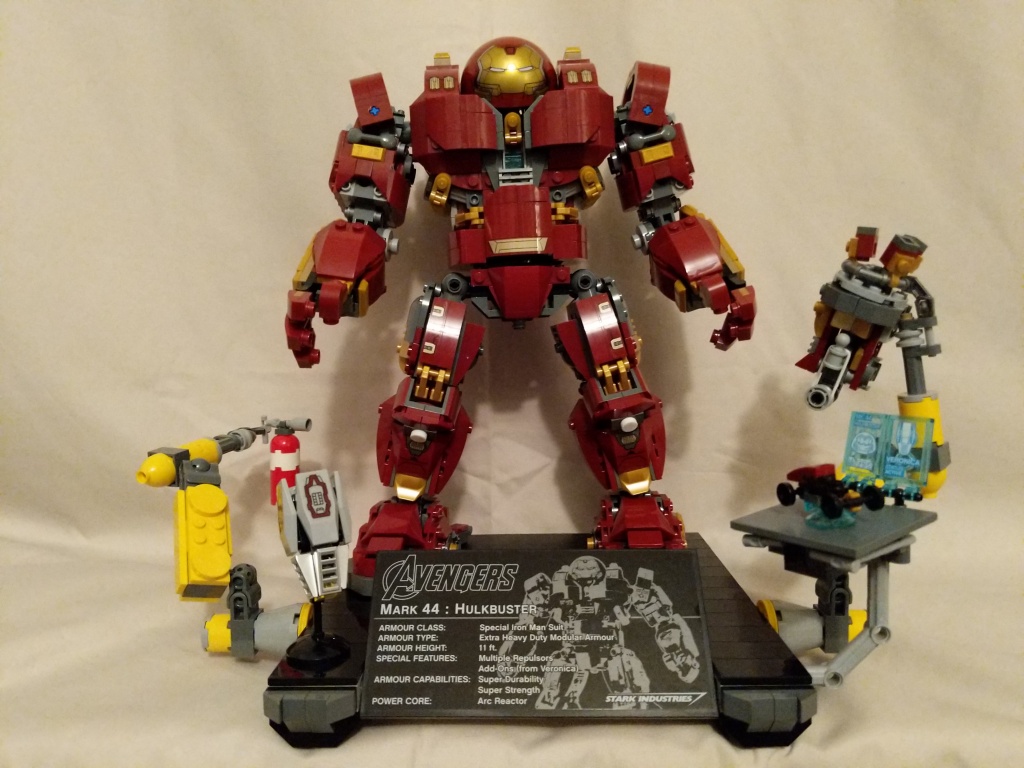
Continuing my recent post of past LEGO MOCs (my own creation), I wanted to share this minifig scale Hulkbuster armor for Iron Man that I built during the summer of 2019 as something more playable and scaled properly than 76105 The Hulkbuster: Ultron Edition pictured below.
Iron Man’s Mark 44 Hulkbuster Armor is meant to put him on par with The Hulk in terms of strength and size. Considering the minifigure at the heart of the 76105 set, it is gargantuan in comparison to The Hulk. Therefore, I set a goal to build Hulkbuster armor that matched the mini-figure scale as closely as possible, encapsulate an Iron Man minifigure, and have more points of articulation than the smaller Hulkbuster armor in 76031 The Hulk Buster Smash (having a swivel waist like the 76105 Hulkbuster in this small size was beyond my skill).
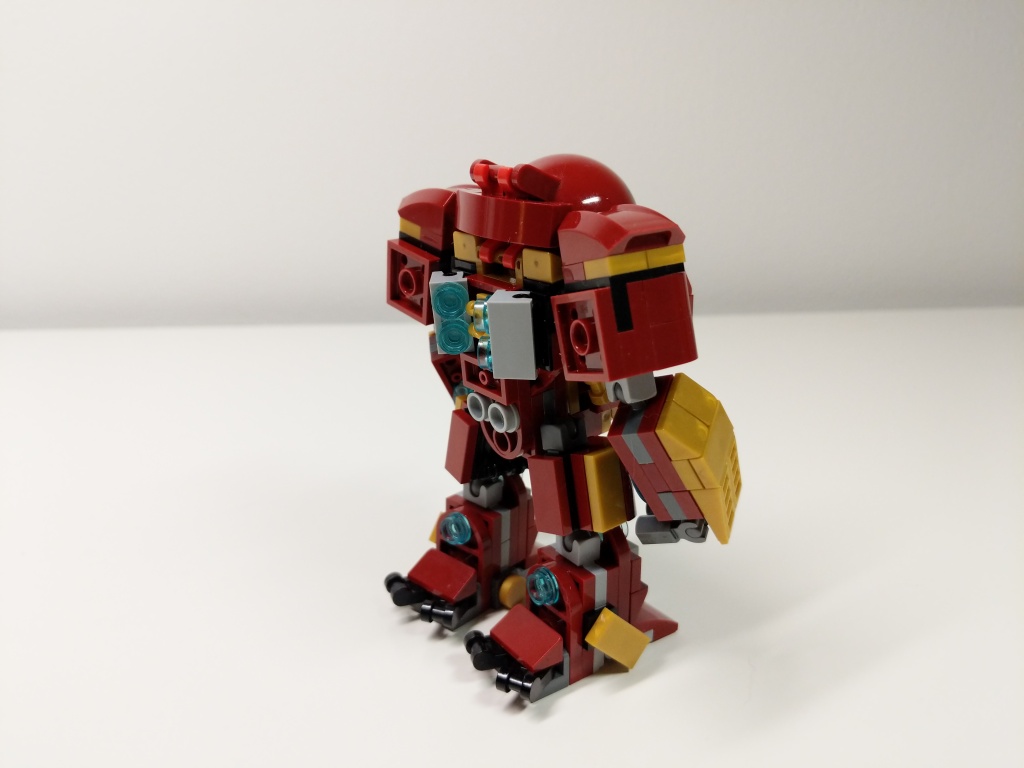
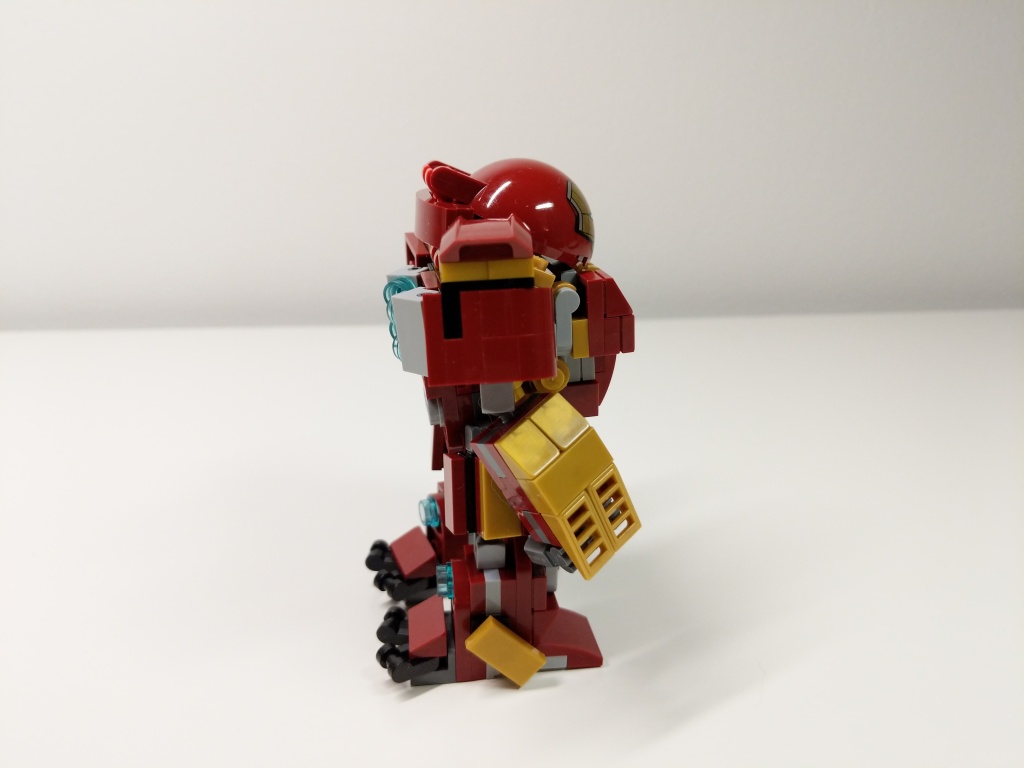
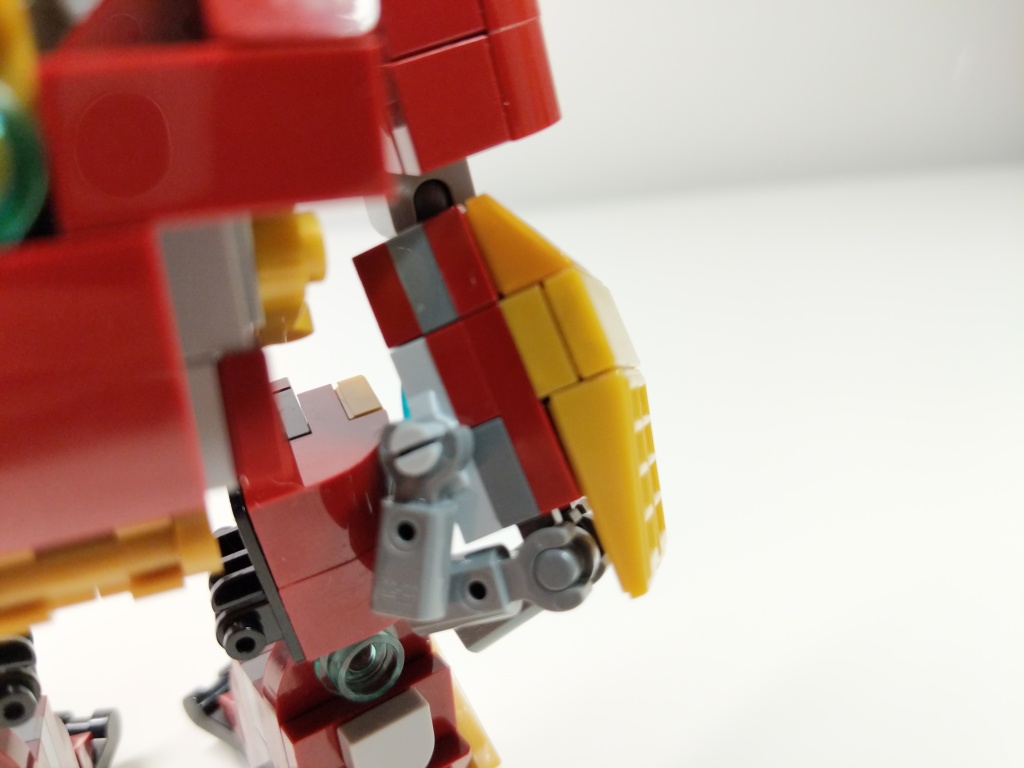
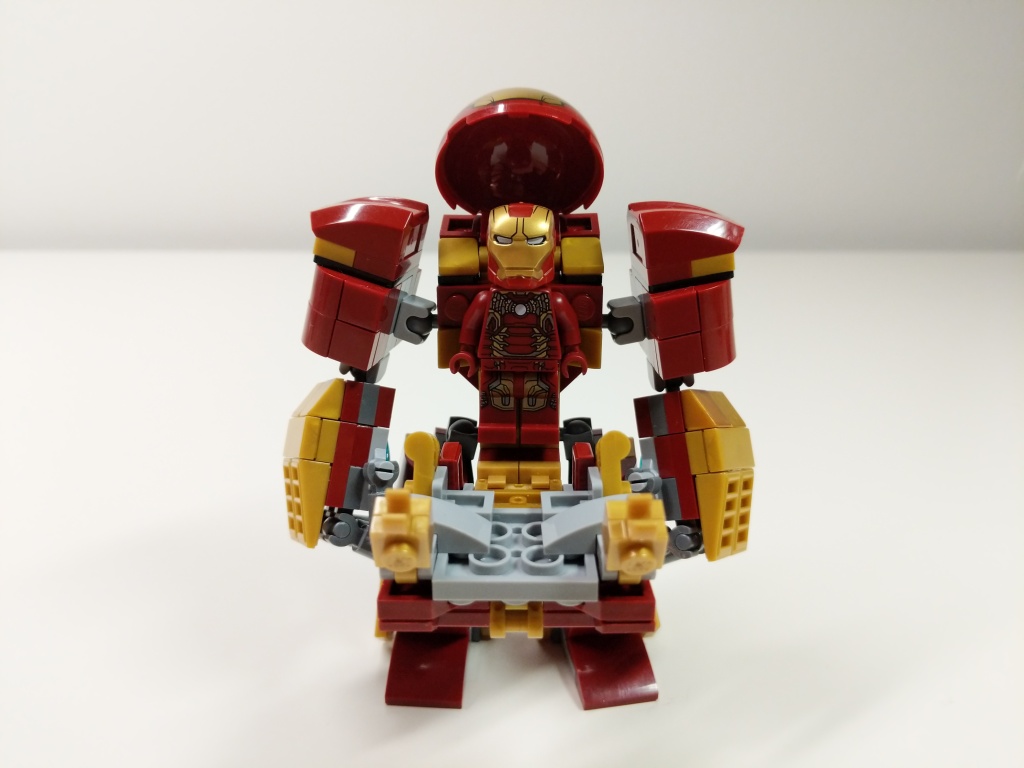
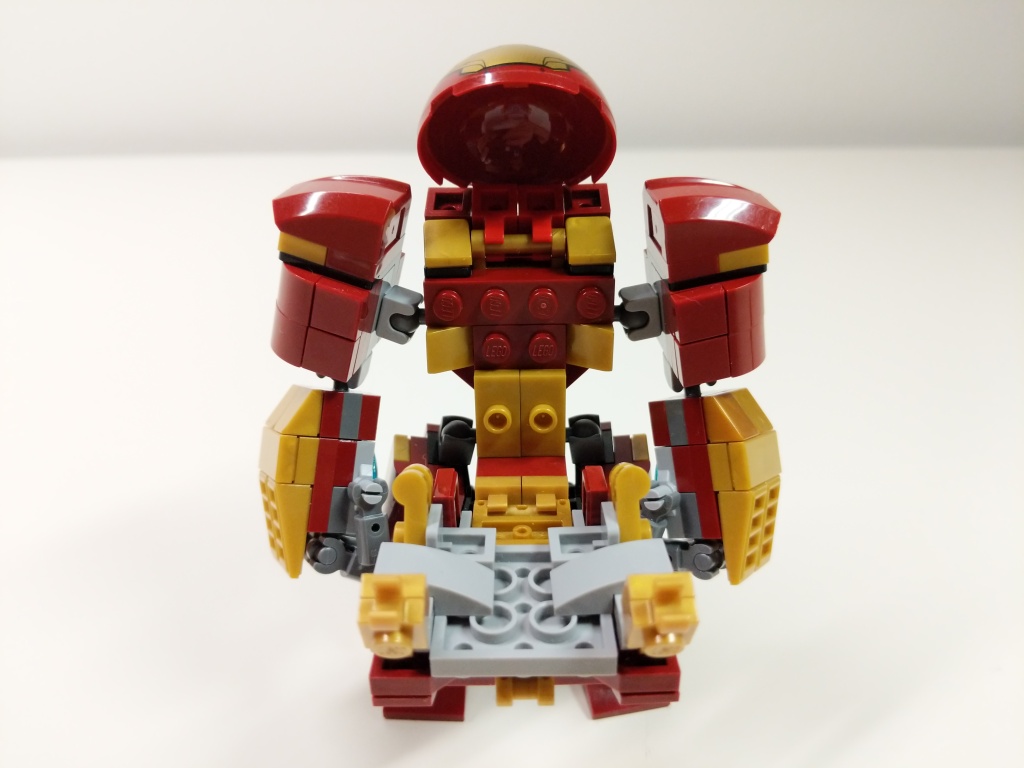
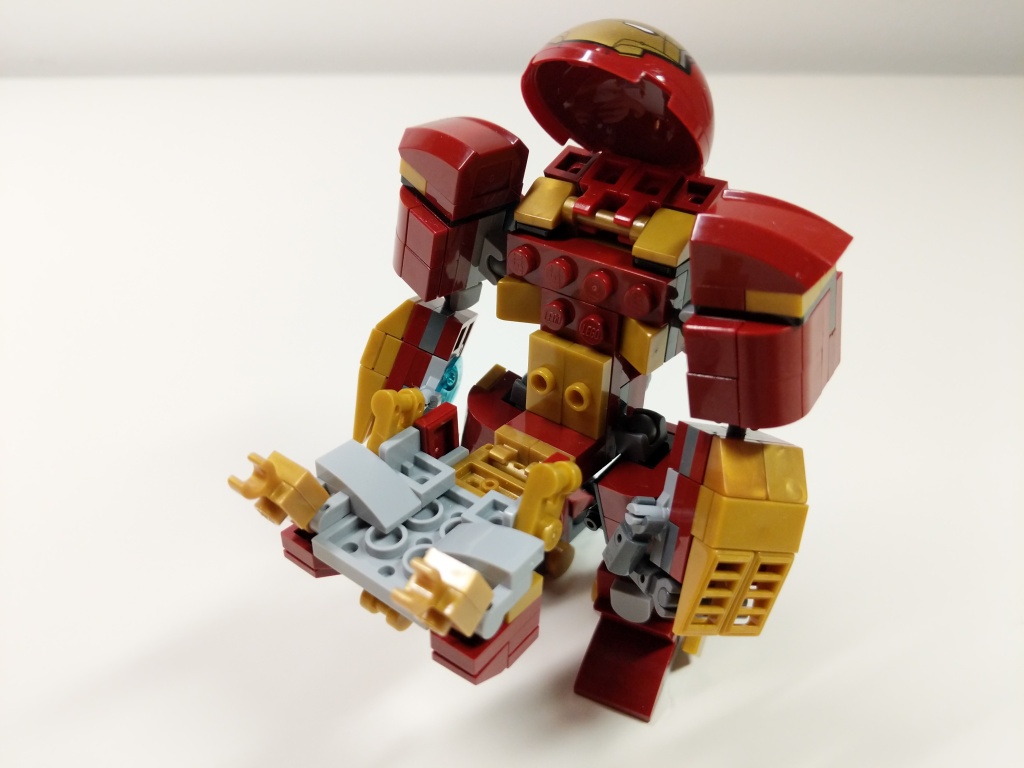
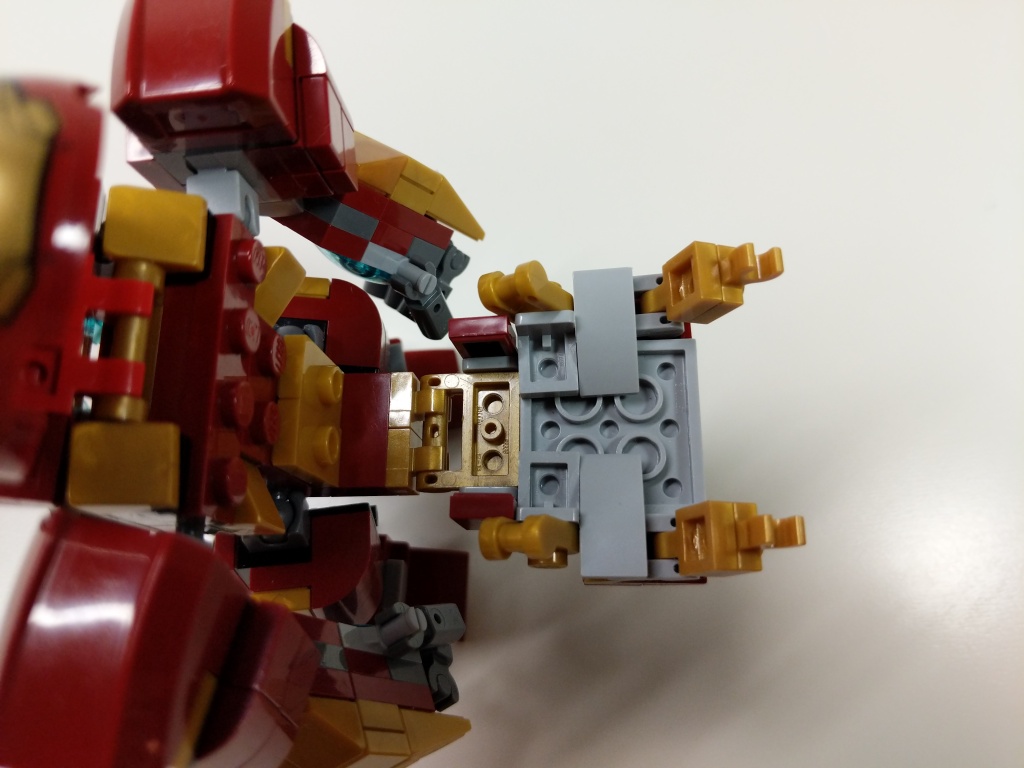
Igor in 76125 Iron Man Hall of Armor inspired the basic layout of Hulkbuster using the ball-joint connectors. The 5-stud wide chest piece with an arc reactor in the center and wrap-around elements is my favorite part of the build. Rotated views with a focus on key details are included below.
Given more specialized elements–especially in dark red and metallic gold–I think that I can continue to refine this model to pack as much detail as possible within its small size in comparison to its larger brethren.
I’ve been a big fan of the Marvel Cinematic Universe (MCU) since Robert Downey, Jr. donned the armor in Iron Man (2008). Following the thread of the story through 22 films that concluded with Iron Man’s ultimate sacrifice in Avengers: Endgame (2019) was staggering.
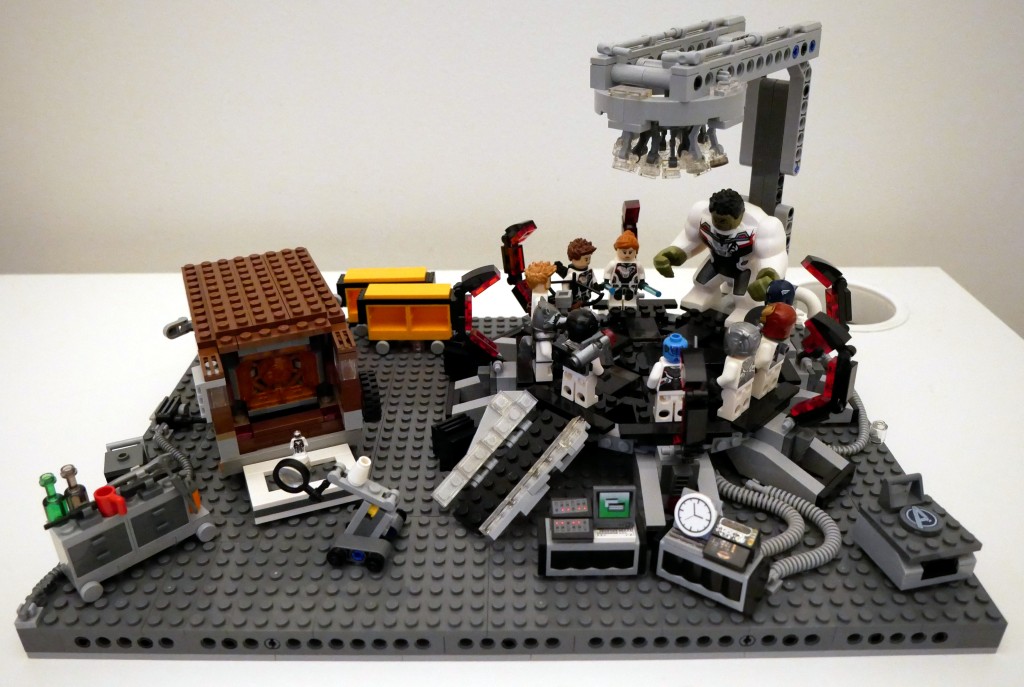
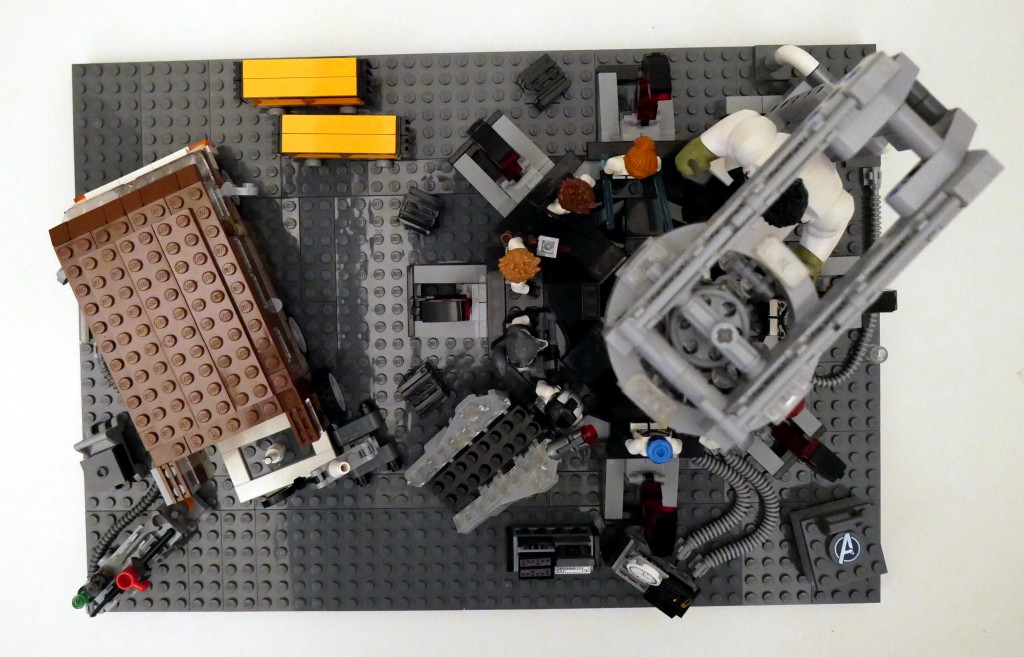
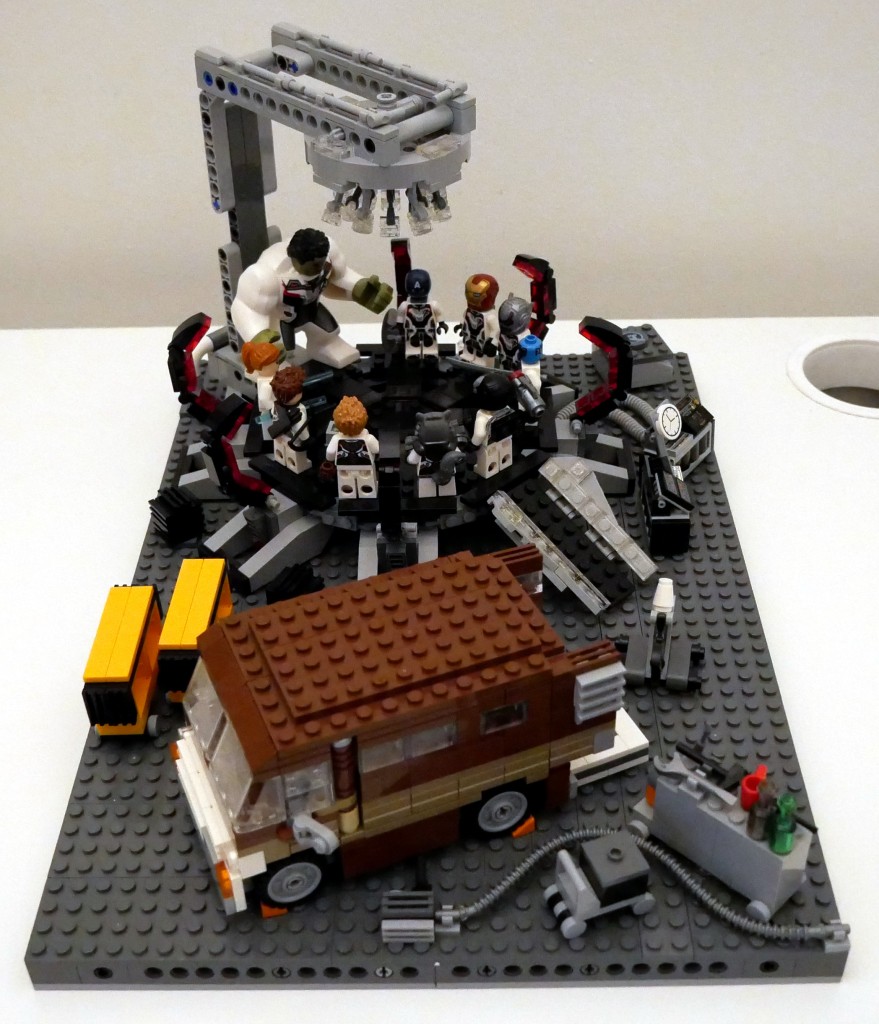
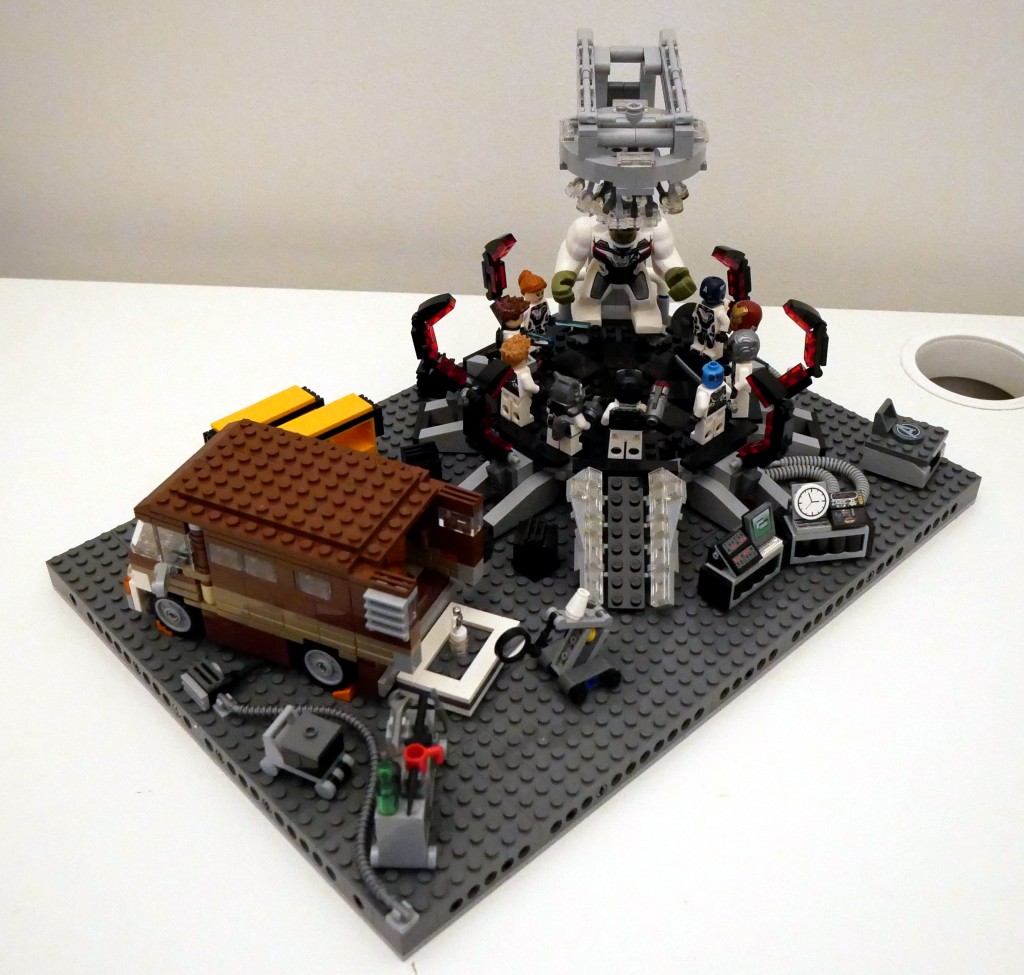
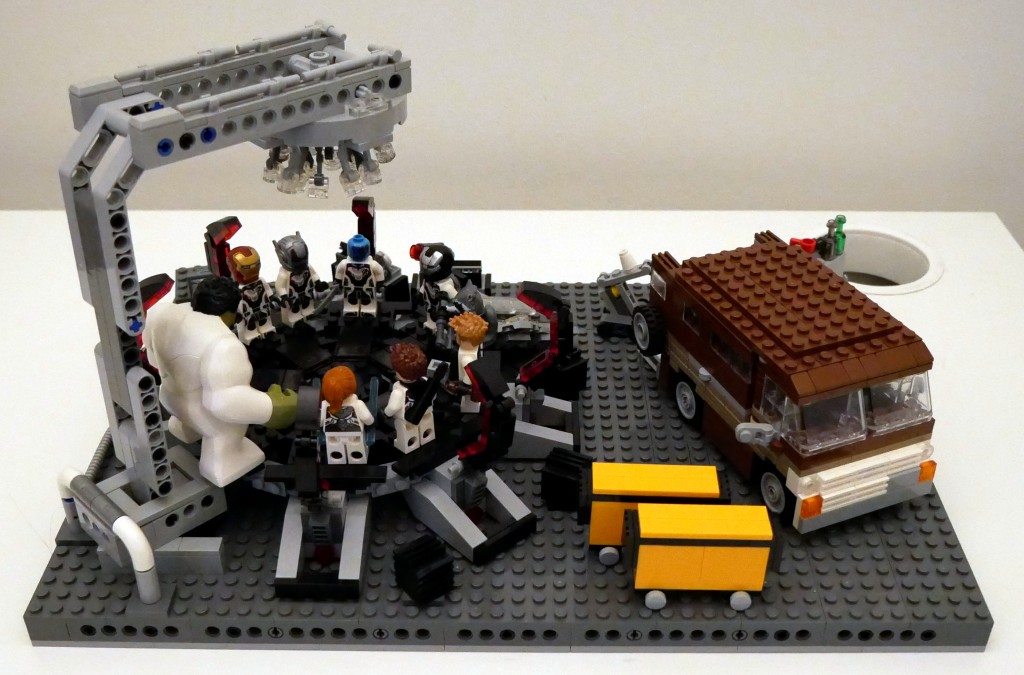
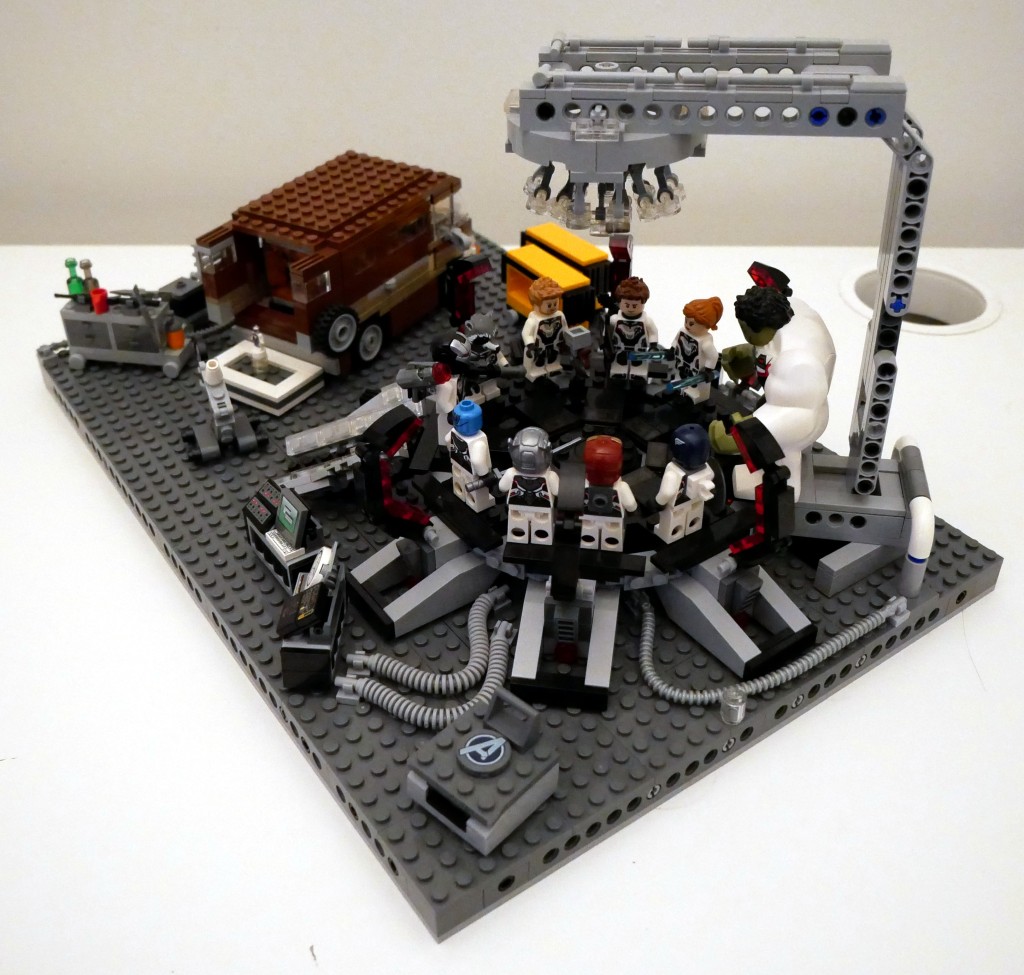
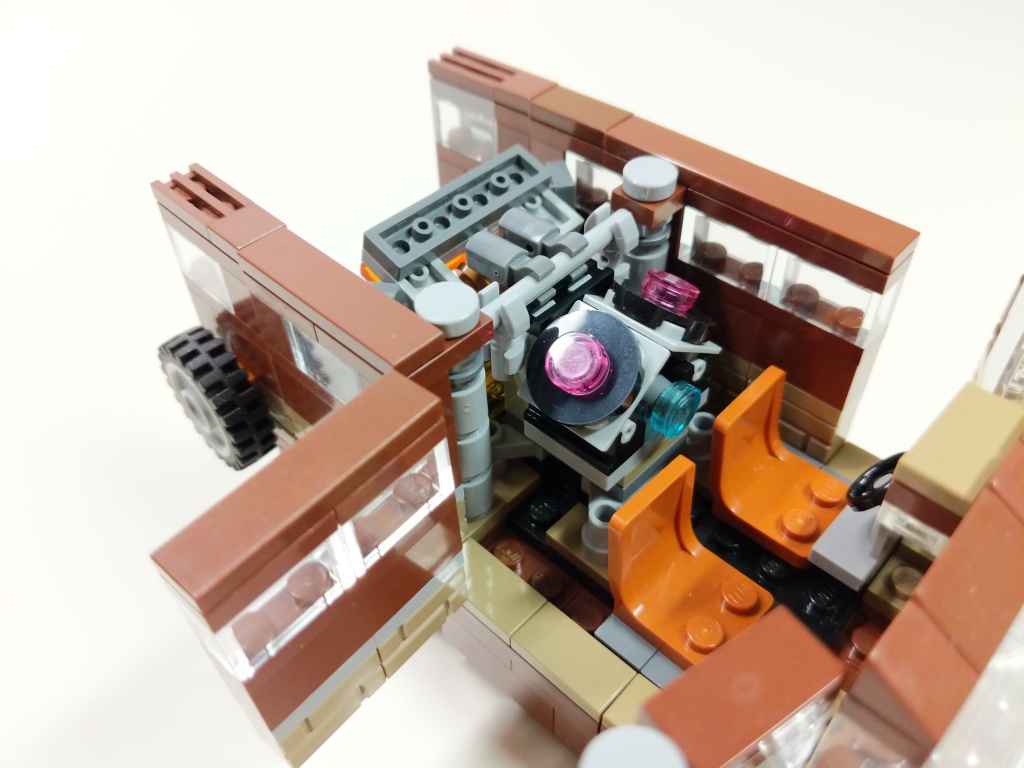
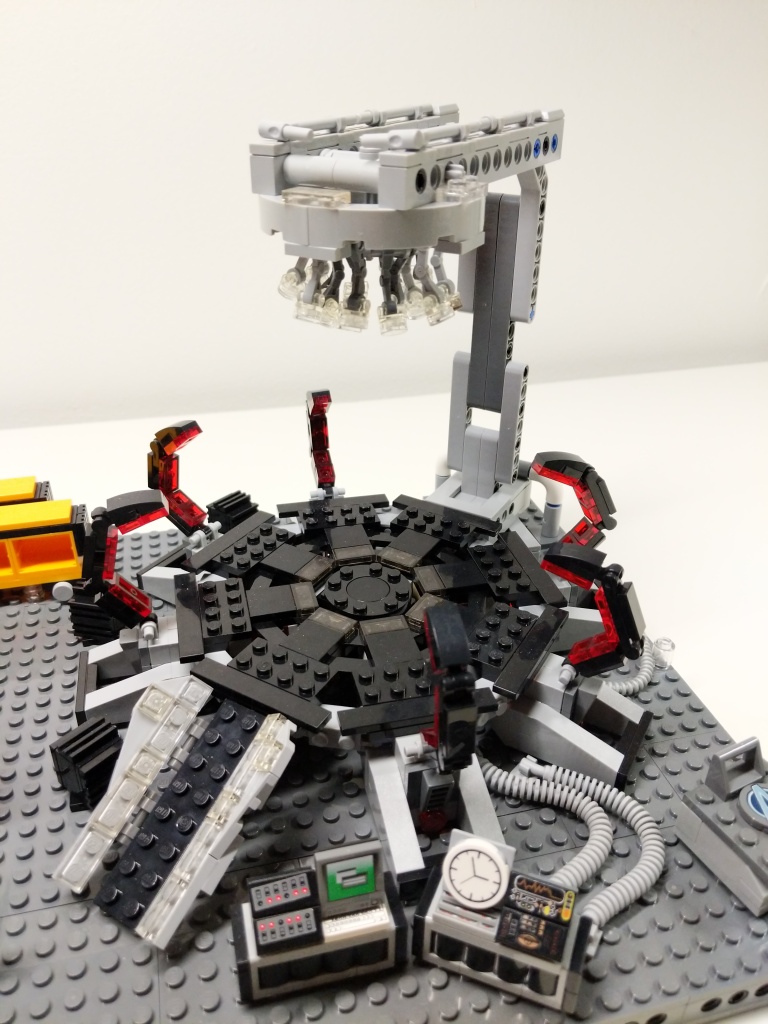
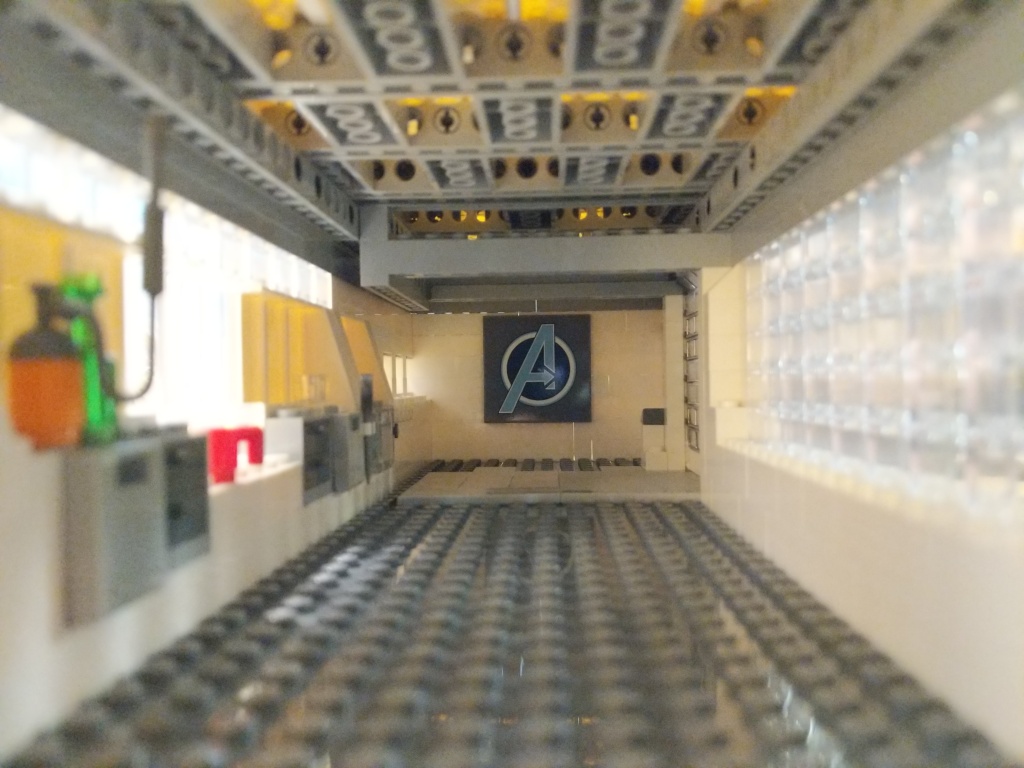
Shortly after watching that last film, I set to work on building this LEGO MOC (my own creation) scene from the Avengers Compound when they launch the “Time Heist” for a set of Infinity Stones. Unfortunately, I didn’t have enough bricks and elements to construct a proper superstructure of the hanger space that they used to build the time machine. Instead, I focused on elements found in the scene and incorporated some playability into the design. Rotated images of the full scene are below.
The key components of the set are the large quantum tunnel/time machine on the right, Luis’ van with the miniaturized quantum tunnel in the back, and a full set of Avengers wearing the Advanced Tech Suit (or Quantum Suit). The latter required purchasing LEGO sets 76124 War Machine Buster (for War Machine and Ant Man), 76144 Avengers Hulk Helicopter (Hulk and Black Widow), 76126 Avengers Ultimate Quinjet (Rocket, Thor, Hawkeye, and Black Widow), 76131 Avengers Compound Battle (mini Ant Man and Nebula), 76123 Captain America: Outriders Attack (Captain America), and 30452 Iron Man and Dum-E (Iron Man).
BTW: LEGO has ensemble film tie-in sets down pat by spreading characters across sets–including sets that don’t appear in the film–to maximize profile. I’ve experienced this before with Star Wars, Harry Potter, Lord of the Rings, and The Hobbit.
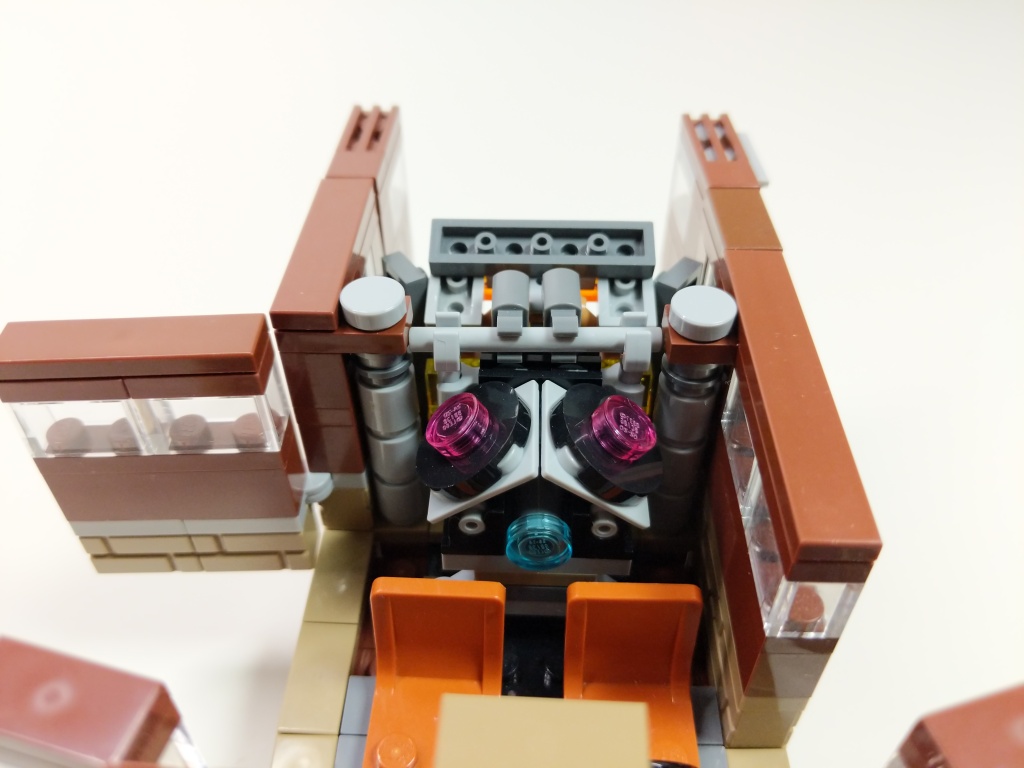
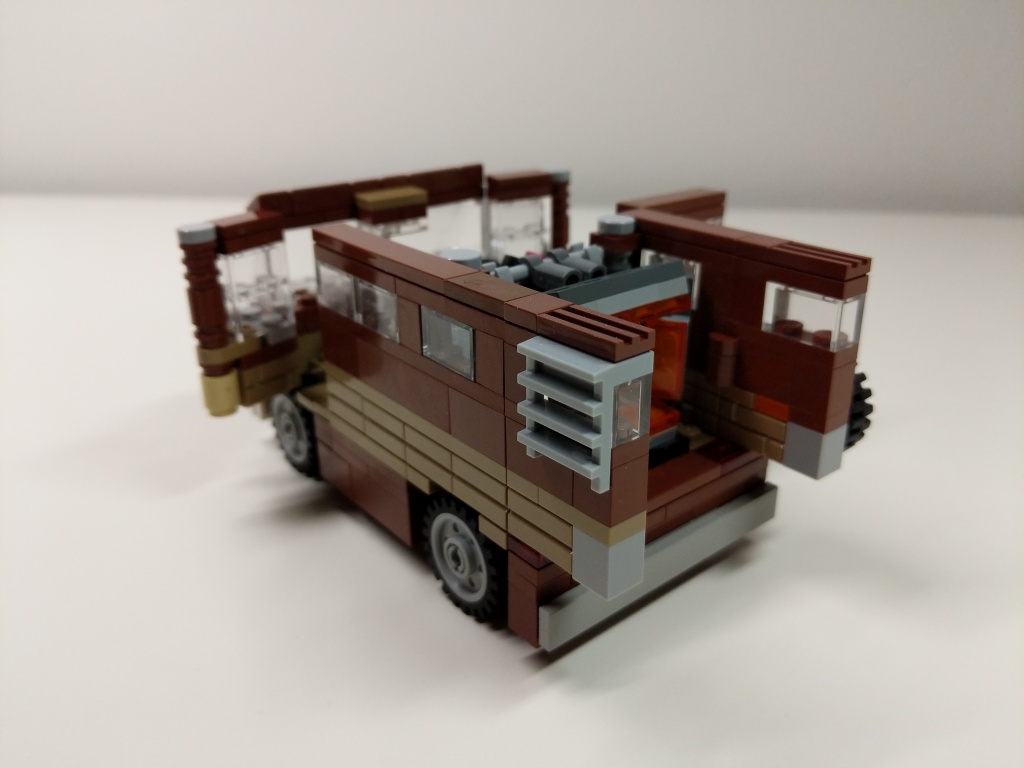
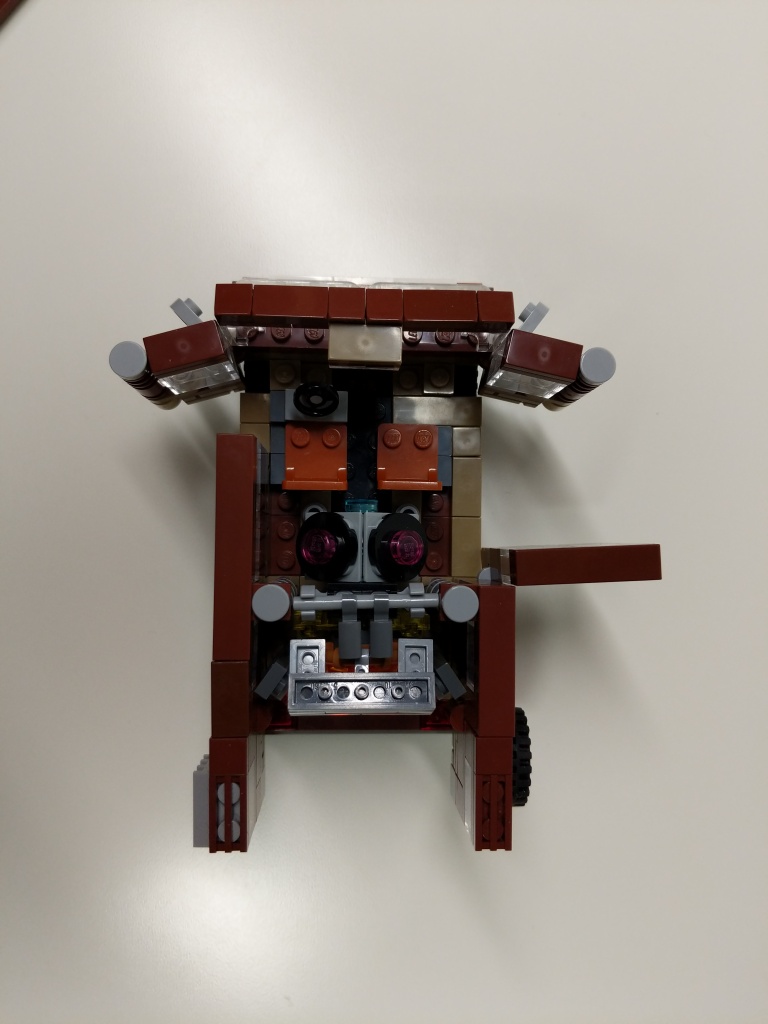
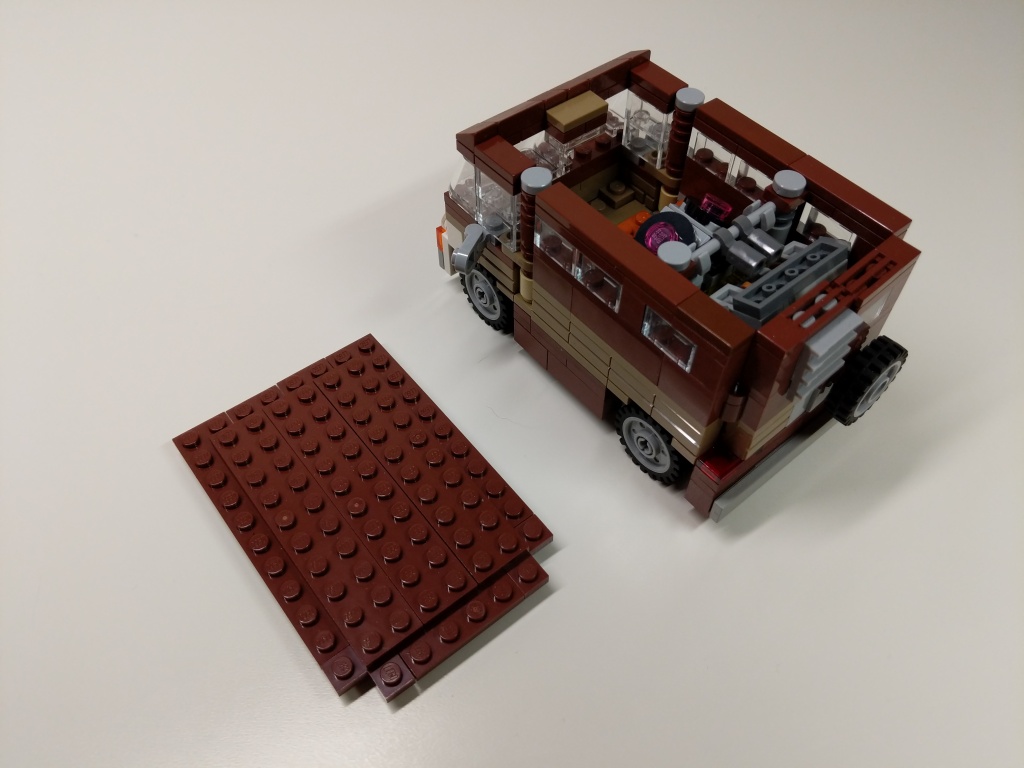
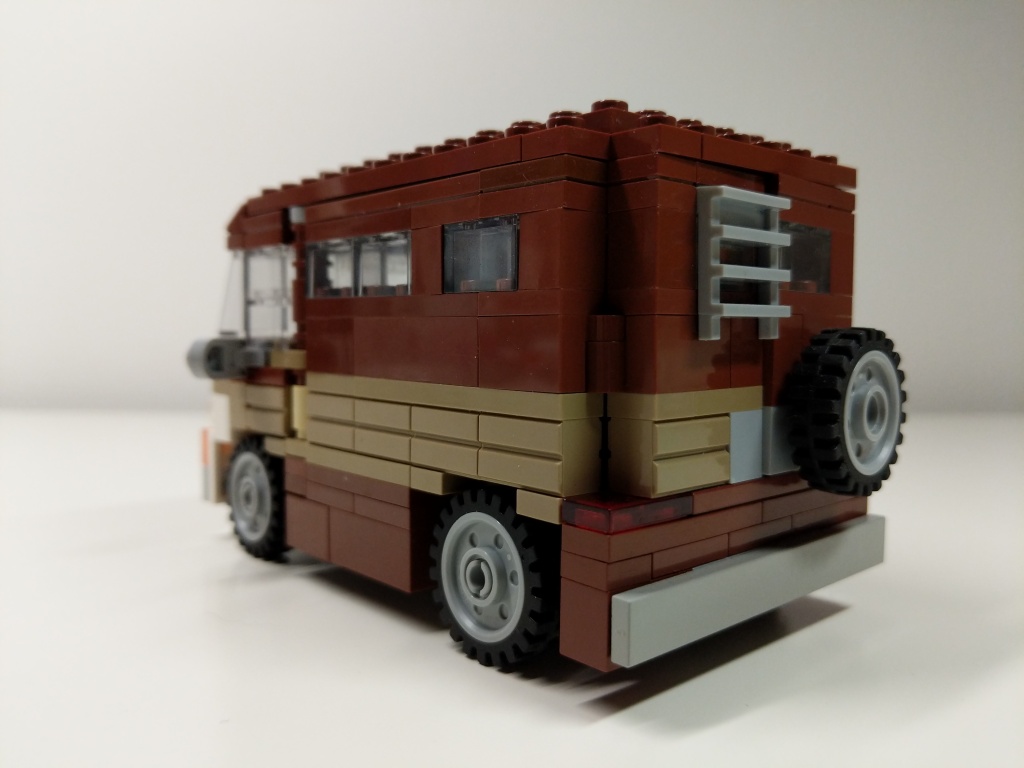
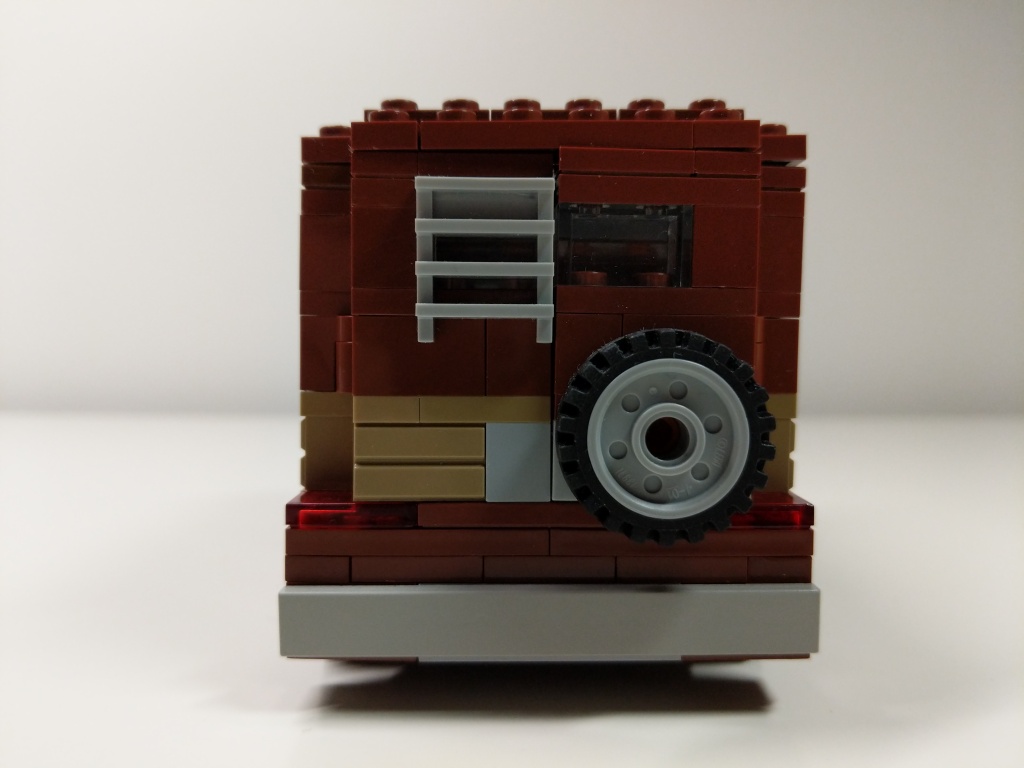
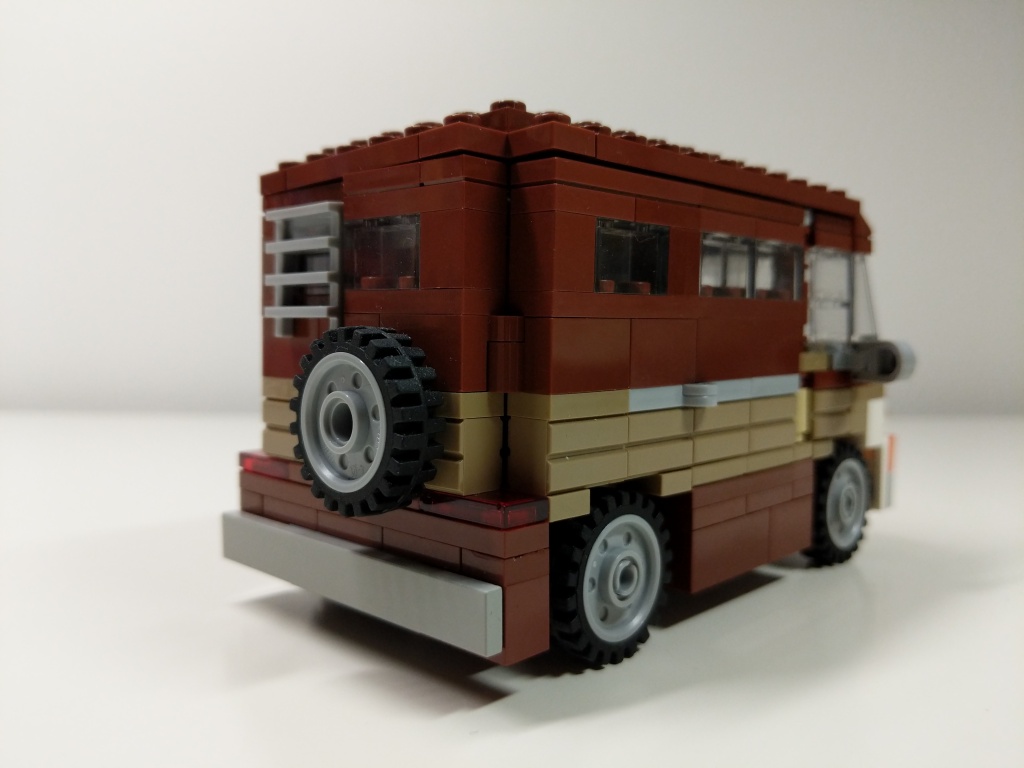
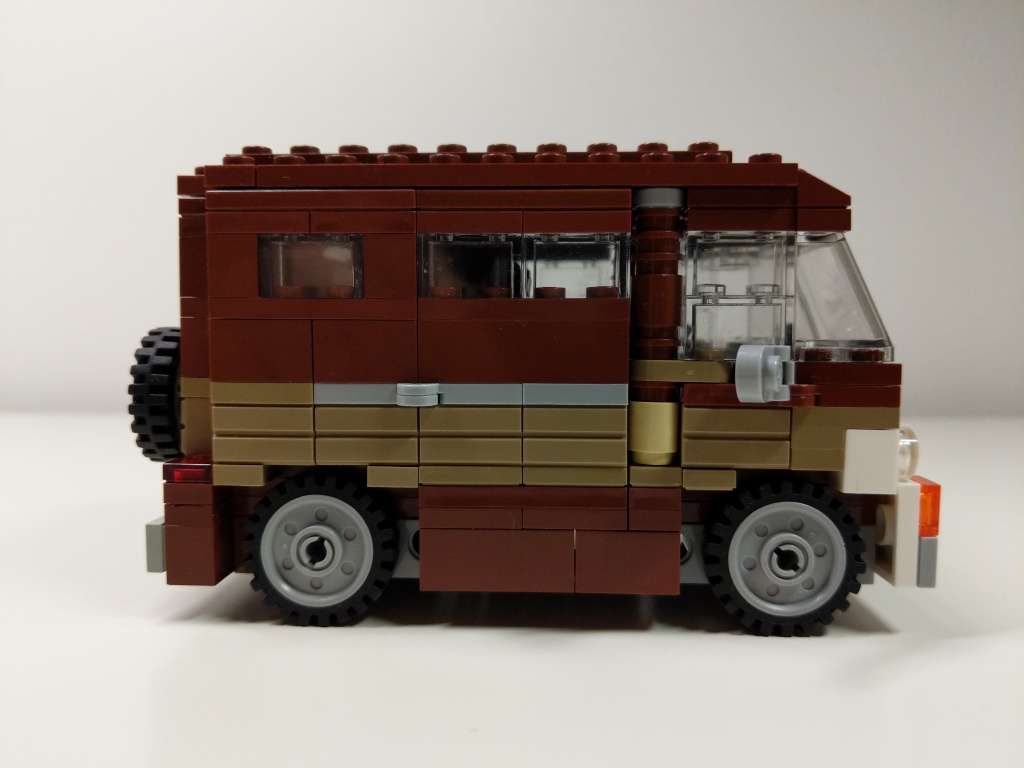
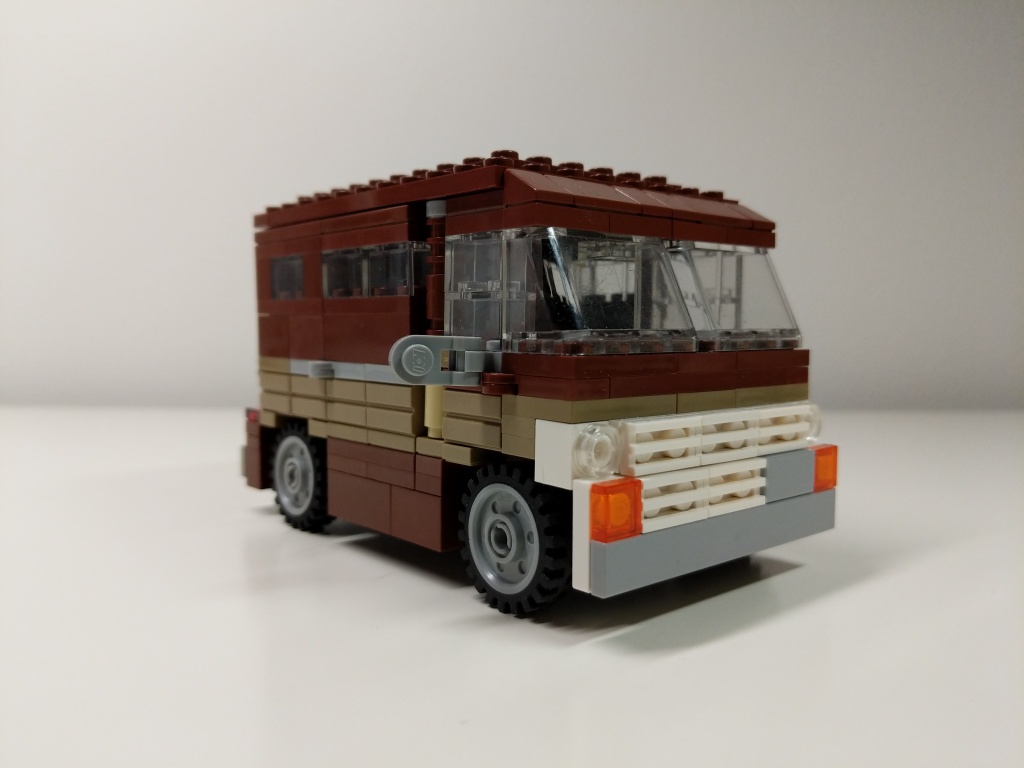
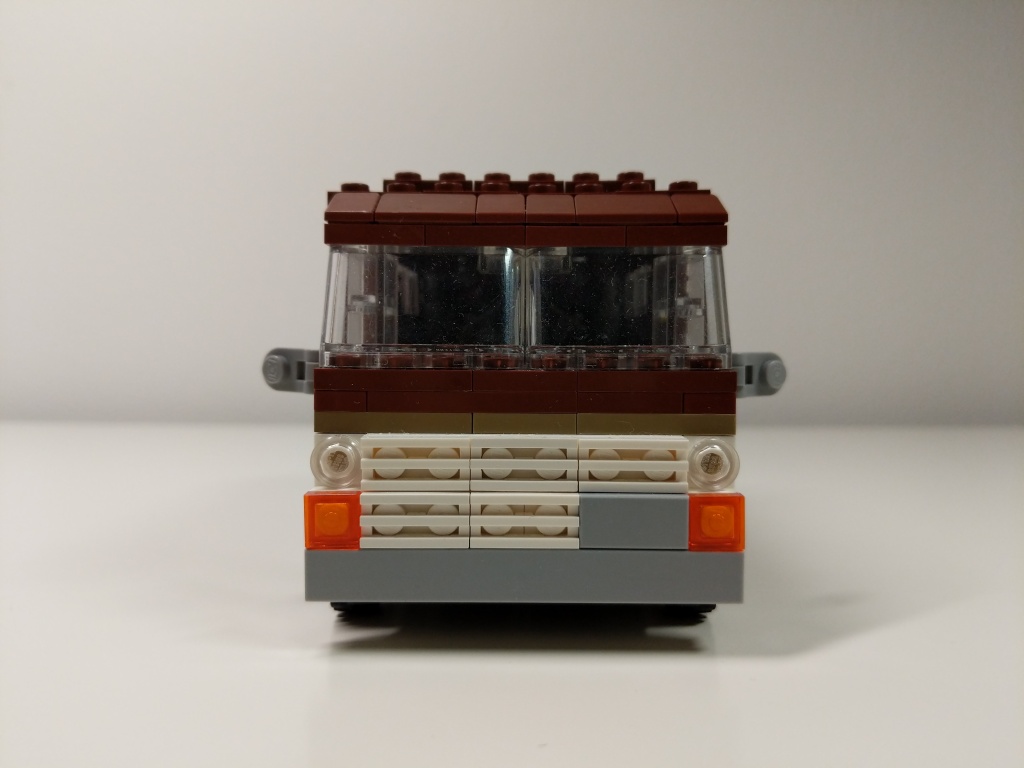
Luis’s Van
Luis’ van from Ant-Man (2015) and Ant-Man and the Wasp (2018) is a 1972 Ford Econoline. It held the miniaturized quantum tunnel that Scott Lang used to retrieve quantum energy to help stabilize Ava Starr/Ghost. After Scott returned from the Quantum Realm five years after Thanos’ snap via the Quantum Tunnel, he drove the van to the Avenger’s Compound where they used it to test Scott’s idea for a “Time Heist.” I designed this model of Luis’ van before LEGO released their 76192 Avengers: Endgame Final Battle set, which includes a 6-stud-wide version of Luis’ van. I wanted my version to be wide enough to sit 2 minifigures side-by-side comfortably, so I went with an 8-stud-wide design.
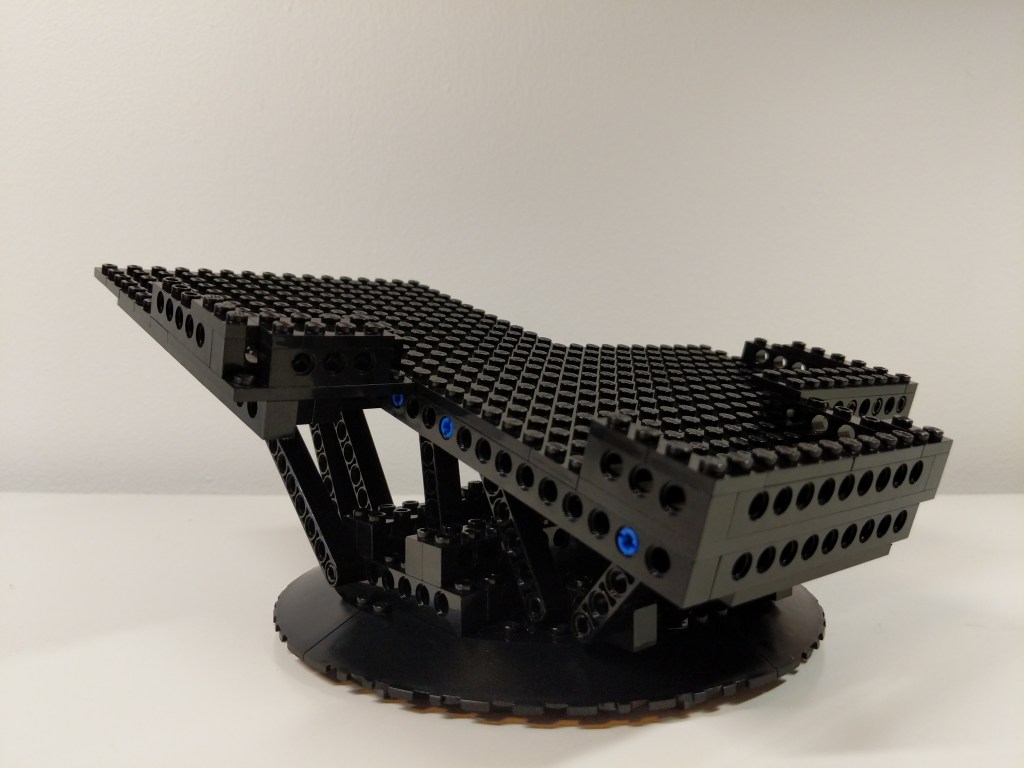
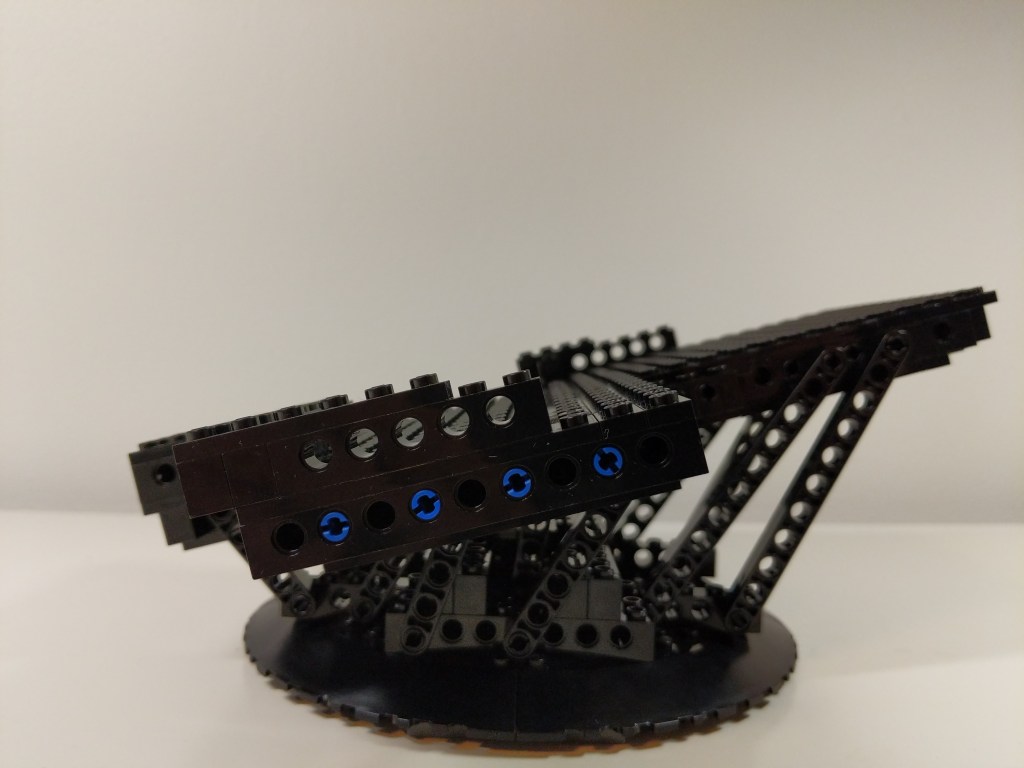
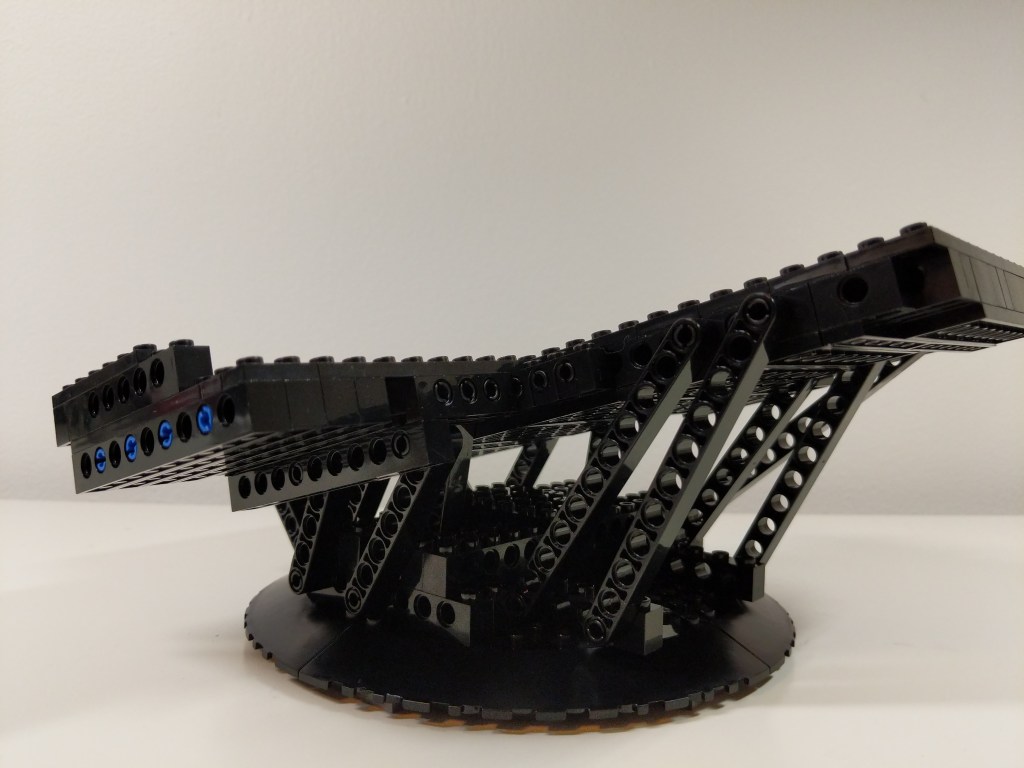
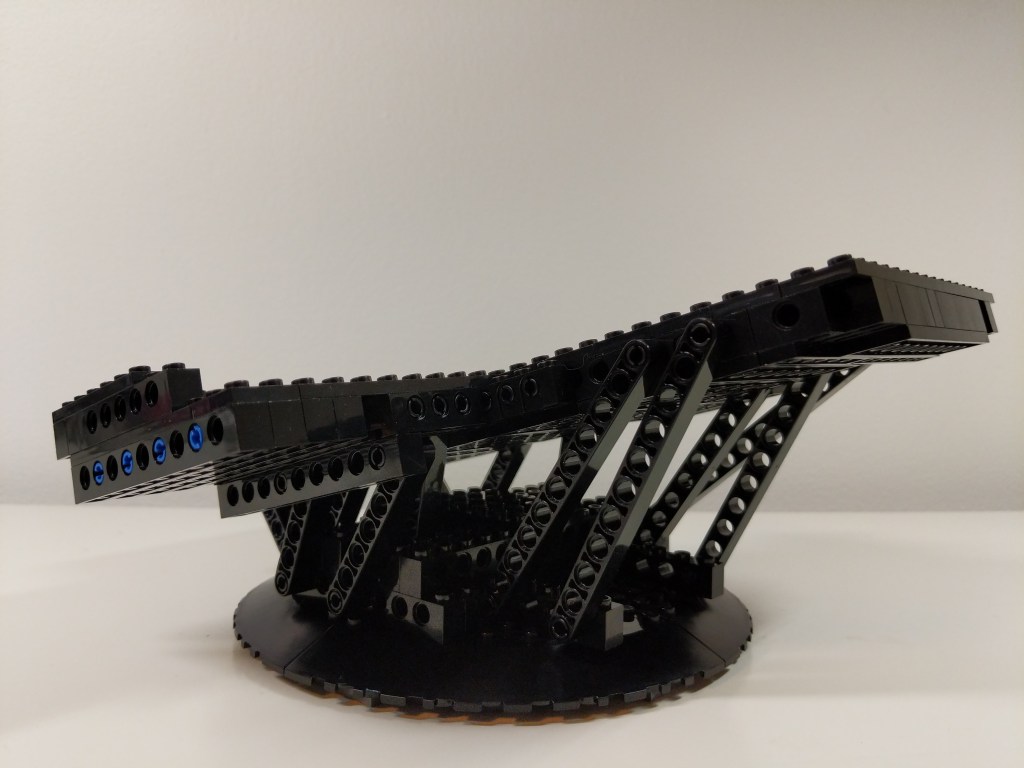
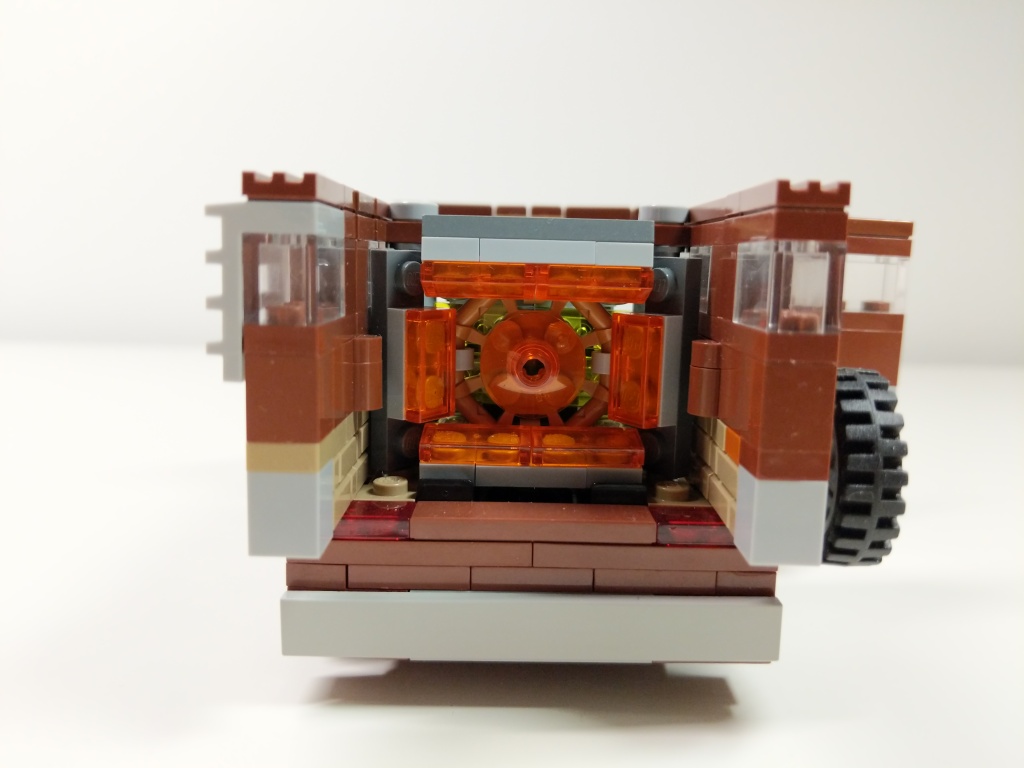
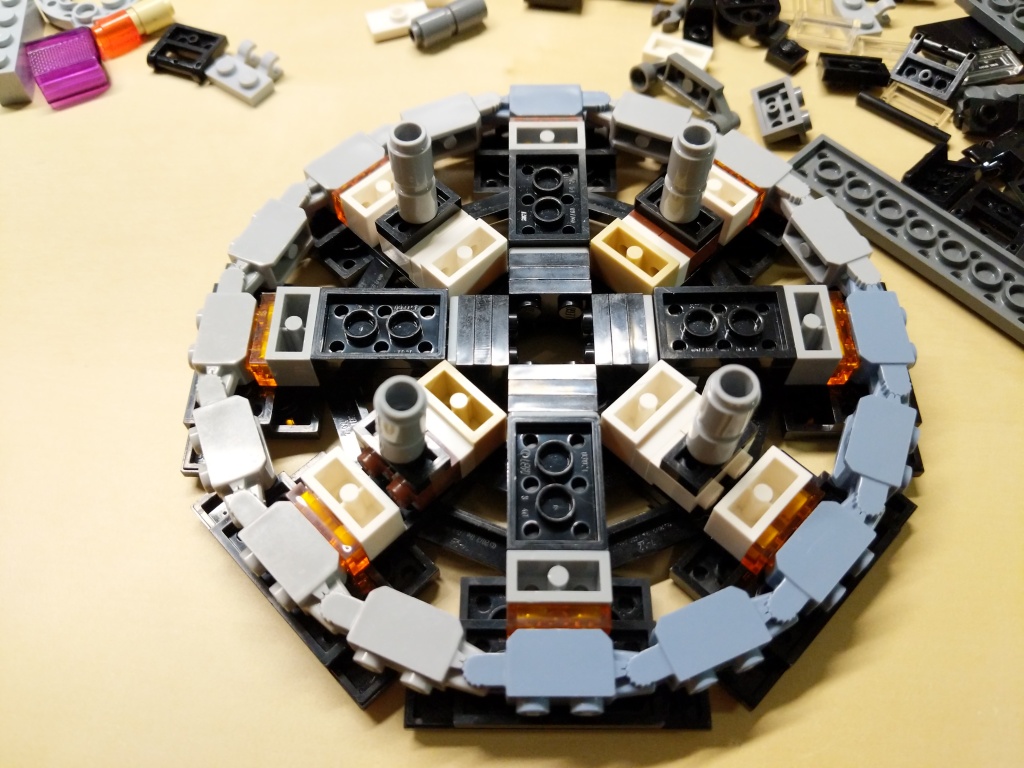
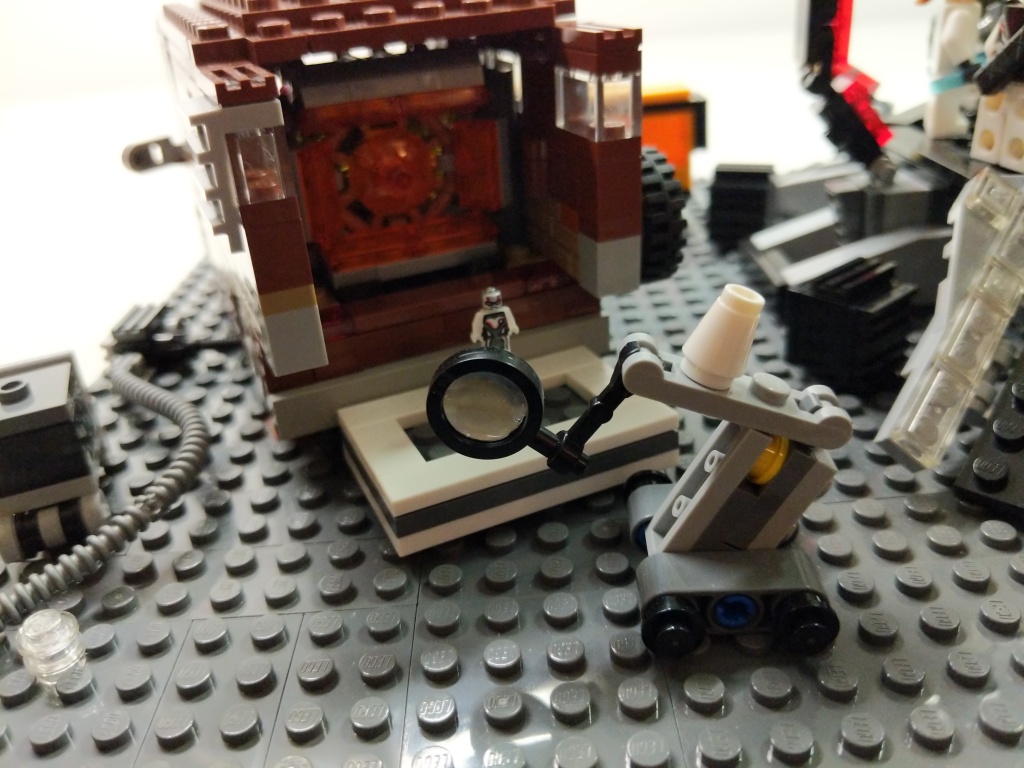
Quantum Tunnel
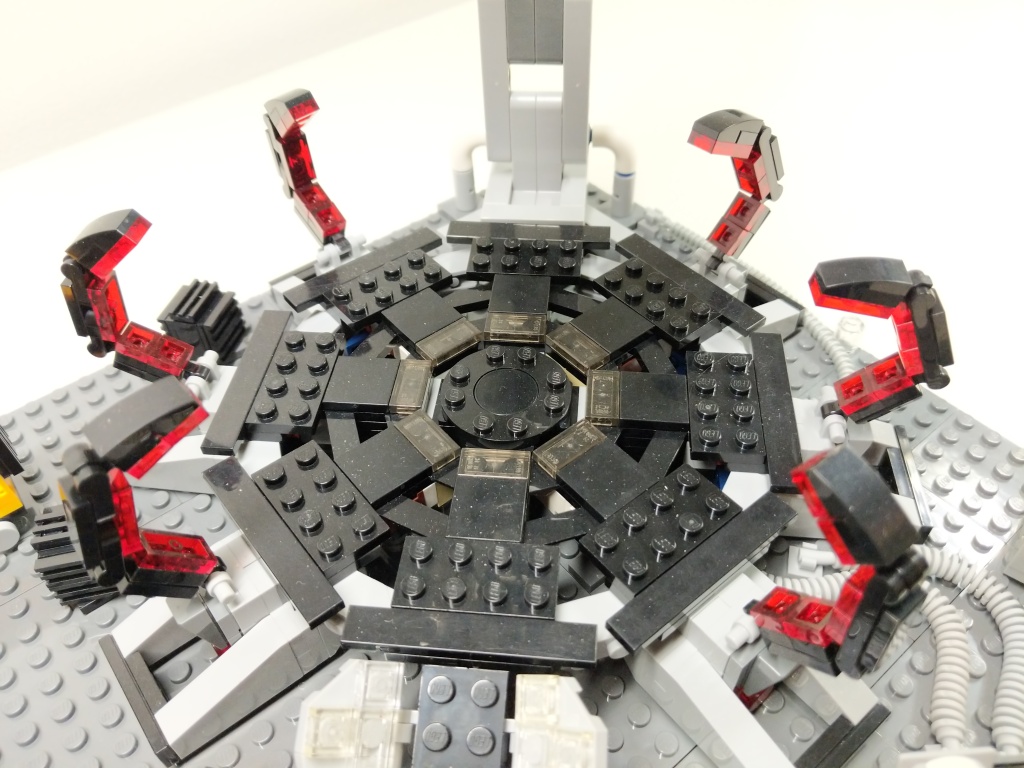
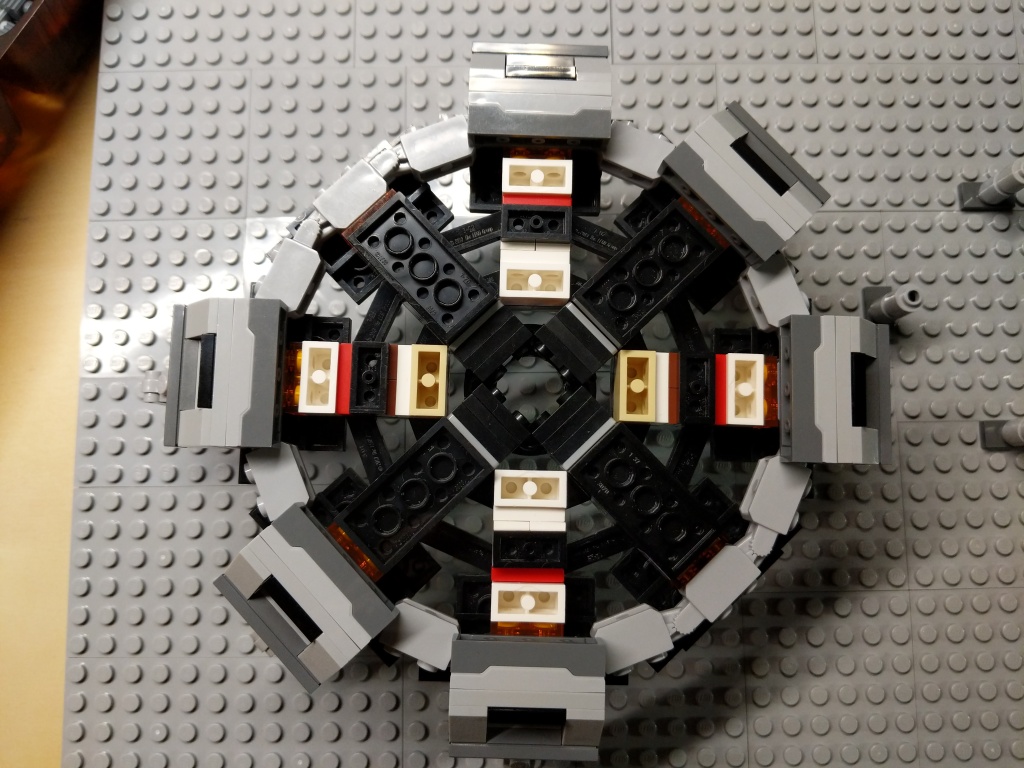
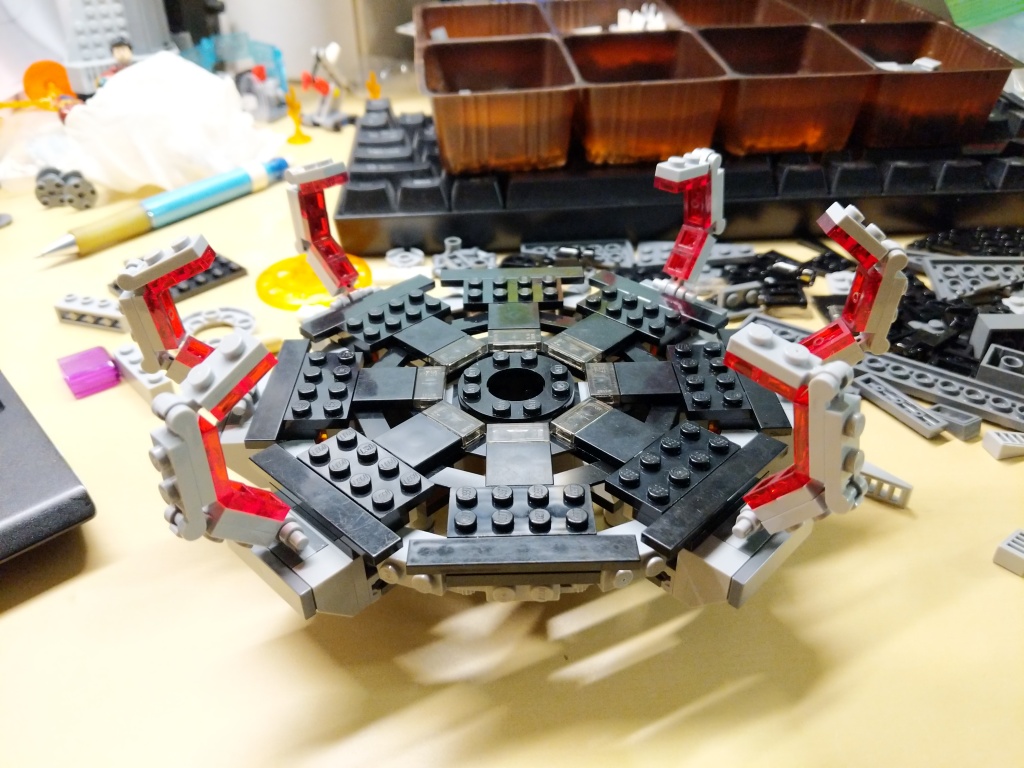
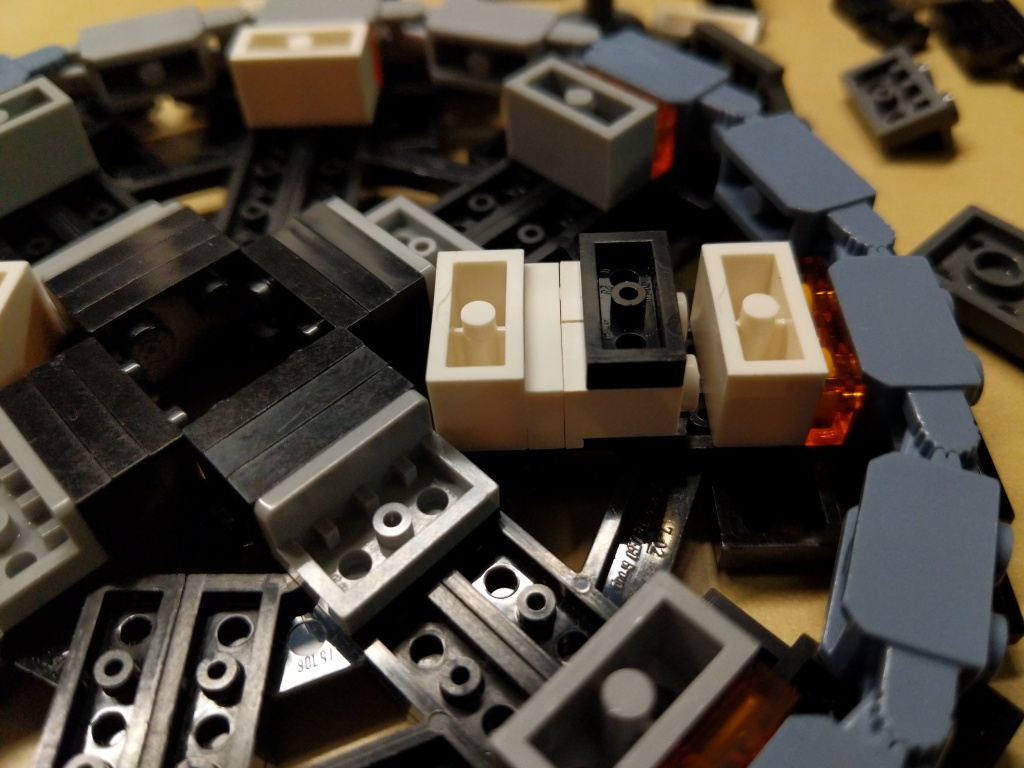
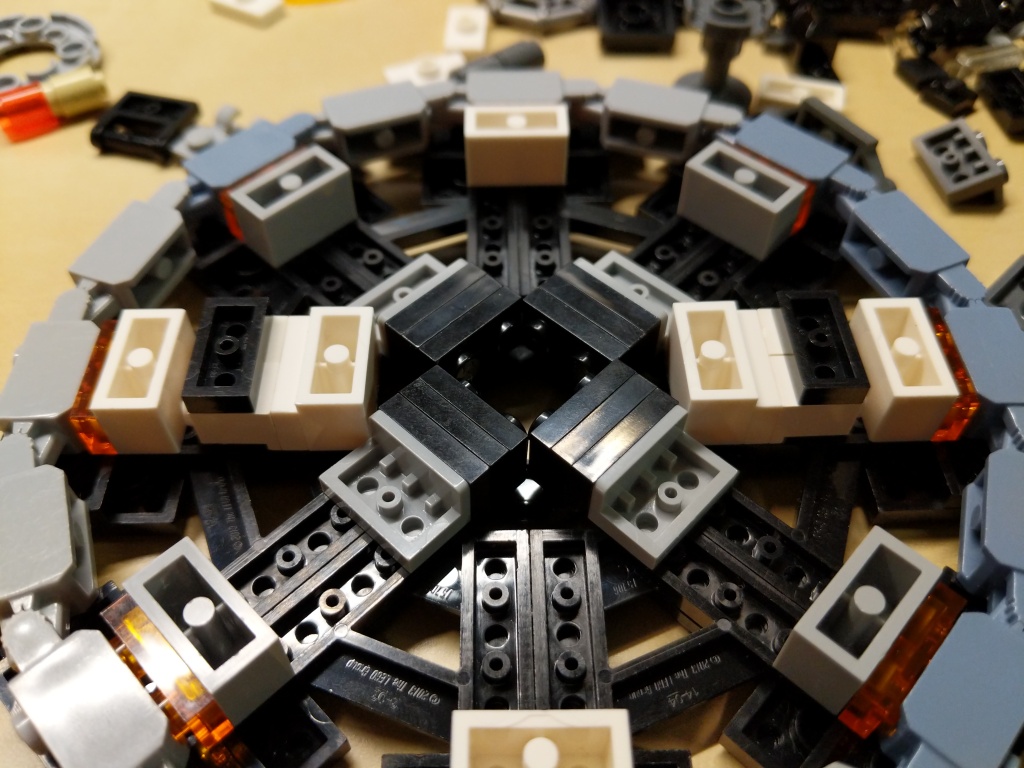
The Quantum Tunnel presented three challenges. First, it needed to be a circular platform. Second, it needed to accommodate all of the Avengers involved in the Time Heist (i.e., Captain America, Iron Man, Thor, Hulk, Hawkeye, Black Widow, War Machine, Rocket, Nebula, and Ant-Man). And third, it needed to resemble the thing in the film despite limitations of the LEGO medium and the number of available LEGO bricks.
Building the Quantum Tunnel made me rethink a lot of standard brick relationships and ratios to find the right combinations to create the round shape and have it line up with the stud pattern on the display base.
In a separate build, I created this interior model for the hanger portion of the Avenger’s Compound. It was wide enough to pull Luis’ van into it, but it wasn’t wide or tall enough to build the Quantum Tunnel. I wished that I had enough Technic elements to have built some kind of superstructure around the Quantum Tunnel model for the lensing component that goes into the ceiling of the Avenger’s Compound hanger. I had to compromise by building an armature to hang the lensing component over the Quantum Tunnel using all of the elements that I could scrounge.
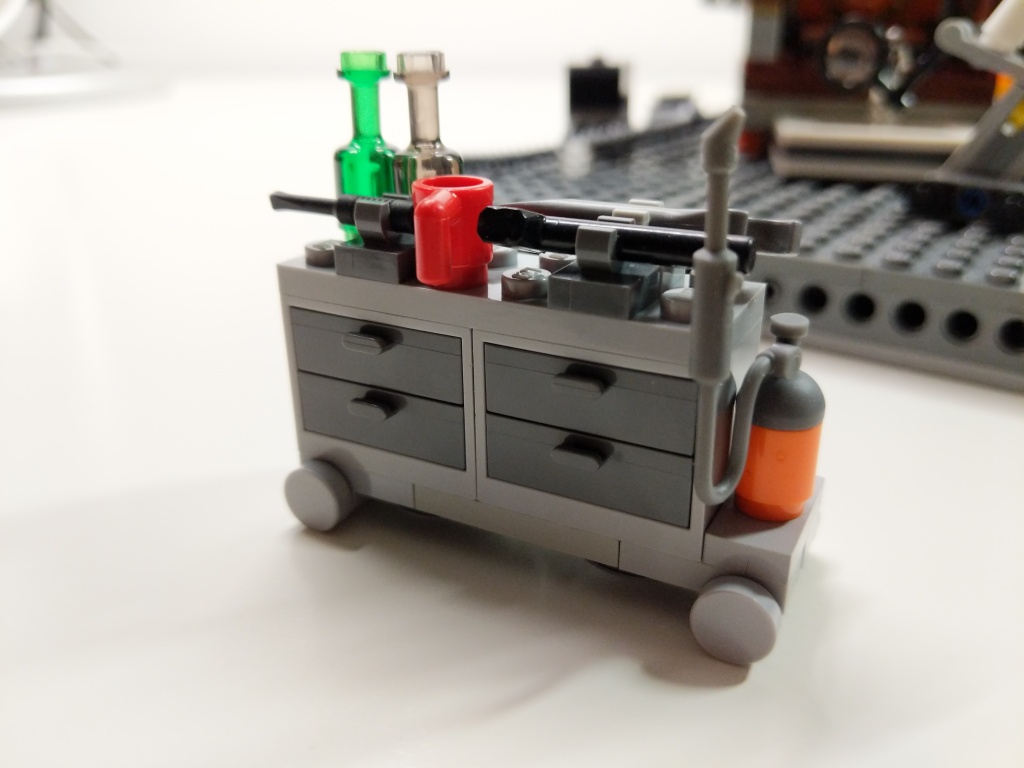
Supporting Components
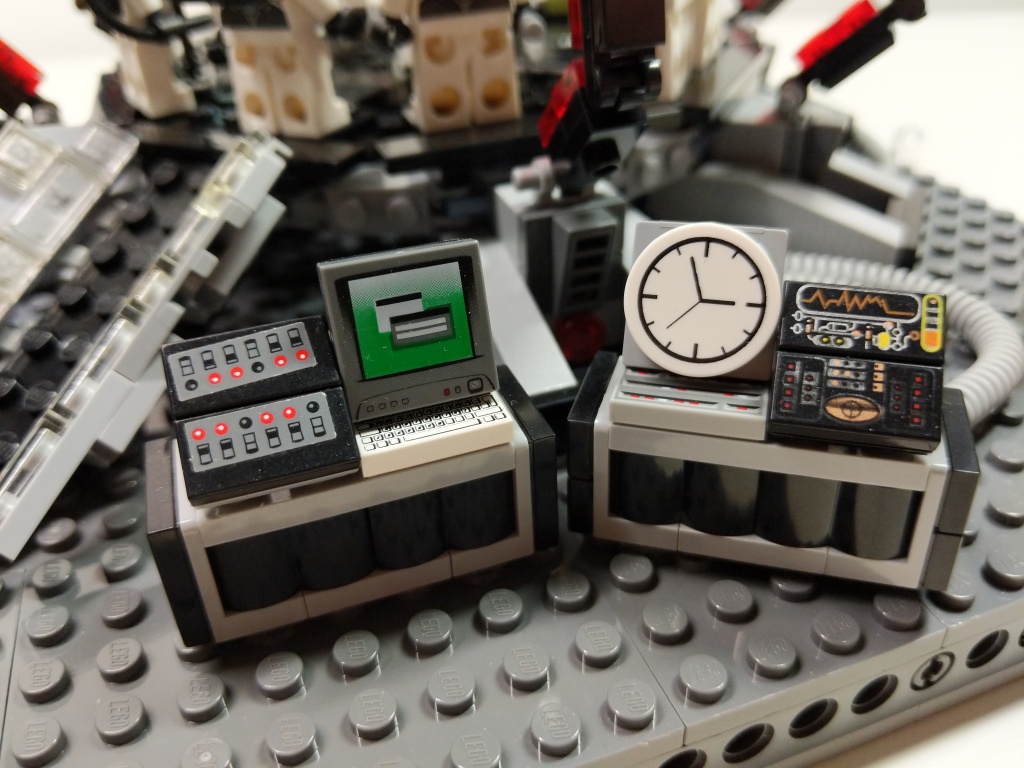
To complete the build, I watched the film closely to see what kinds of equipment the Avengers had laying around while building and using the Quantum Tunnel. I tried to replicate these–Dum-E, computers, power equipment, tool and storage racks, and cabling.
Reflection
It feels like a lifetime ago when I built this model in 2019. I invested hours across many days through iterative building while looking at film screen captures. While I wish that my LEGO building skill was on the artistic or photorealistic building level of elite builders, my building acumen is more in the realm of playability. I think, what can I do with this, how does it work, how can I use this to tell a story? Given more time, few distractions, and greater access to brick variety and quantity, I wonder if I could take my building skill to the next level. Absent those things, I will keep building and see what I can accomplish with what I have. I haven’t built a MOC in the past year due to a lack of time, but I have something in mind that I might build soon, which I will document here. In the meantime, I have some other MOCs from the past that I plan to share here, too. Stay tuned!


