When I asked Dr. Courtney L. Werner, a friend and colleague at Kent State University where we earned our PhDs (find her blog here and connect with her on Twitter here), what I should read that captures the theoretical breadth and historical depth of her discipline of study–Rhetoric and Composition–I dutifully wrote down what she told me: Steven Lynn‘s impressive Rhetoric and Composition: An Introduction. I think that it has been about three or four years since I jotted down her suggestion, but I’m happy to report that I finally got around to reading it over the past few days and I’m certainly the better for it.
For those of you who might be like me–not really knowing anything about Rhetoric and Composition when going into graduate school, but wanting to learn more about this important discipline after learning of its existence–I recommend Lynn’s book as a thorough starting point.
Lynn begins his book with a chapter on the relationship and interconnectedness of Rhetoric and Composition. He guides his reader through seeing them separately and together while peppering his discussion with an exhaustive and concise (what a balancing act throughout the book) theoretical-historical context.
In the chapters that follow, he designs them around the five canons of rhetoric as an art: invention, arrangement, style, memory, and delivery. Each chapter combines discussion of the historically relevant development of the canon, its major contributors, its past and present scholarship, and applications for the classroom. The final chapter on delivery has a lot of helpful material for first time composition instructors, too.
During my time at Kent State, I am glad that I taught in the writing program and I am glad to have had the opportunity to learn from and share ideas with graduate students and faculty in the Rhetoric and Composition Program, including Brian Huot, Pamela Takayoshi, and Derek Van Ittersum. In retrospect, however, I wish that I had made it a point to join a Rhetoric and Composition seminar (for credit or to audit), because I see now how it would have enriched my scholarship and pedagogy in pivotal ways. If you are like me in this regard or still on your path to a terminal degree, I recommend Lynn’s book for learning Rhetoric and Composition’s ideas, debates, and scale as a student, incorporating its ideas into your daily practices as a teacher, and opening up new possibilities in your thinking as a scholar.
Lynn, Steven. Rhetoric and Composition: An Introduction. Cambridge: Cambridge UP, 2010. Print.
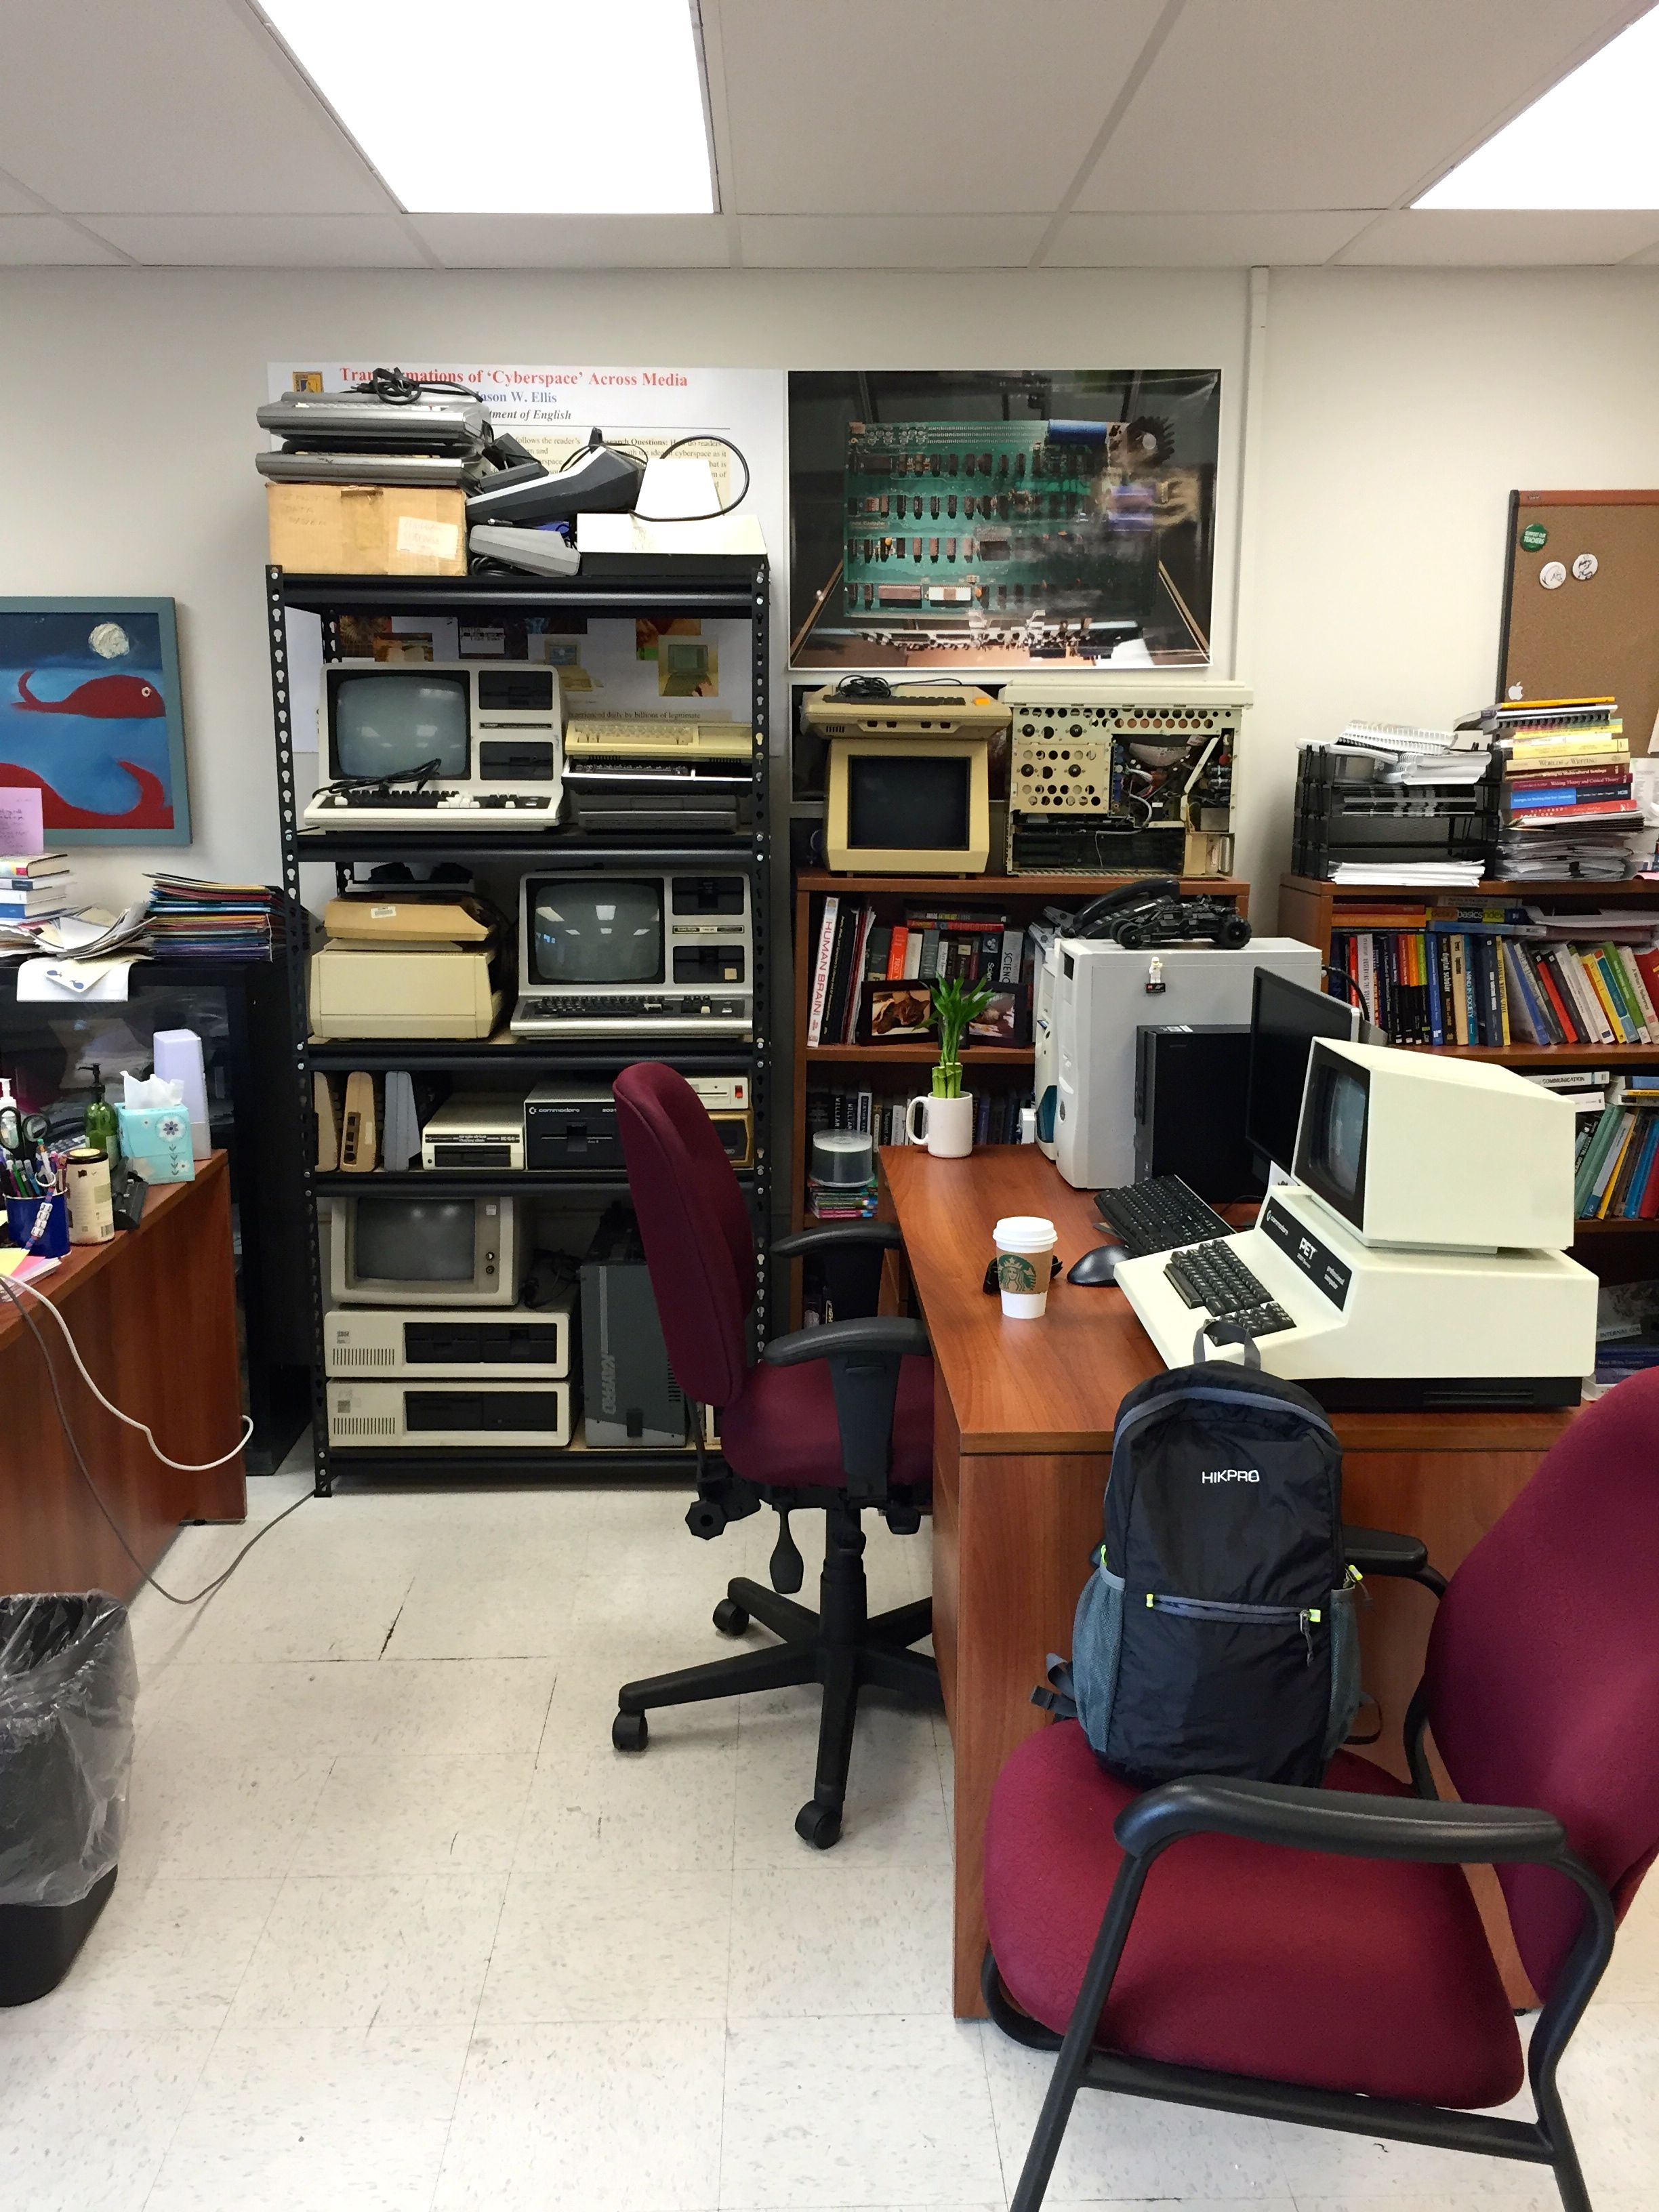
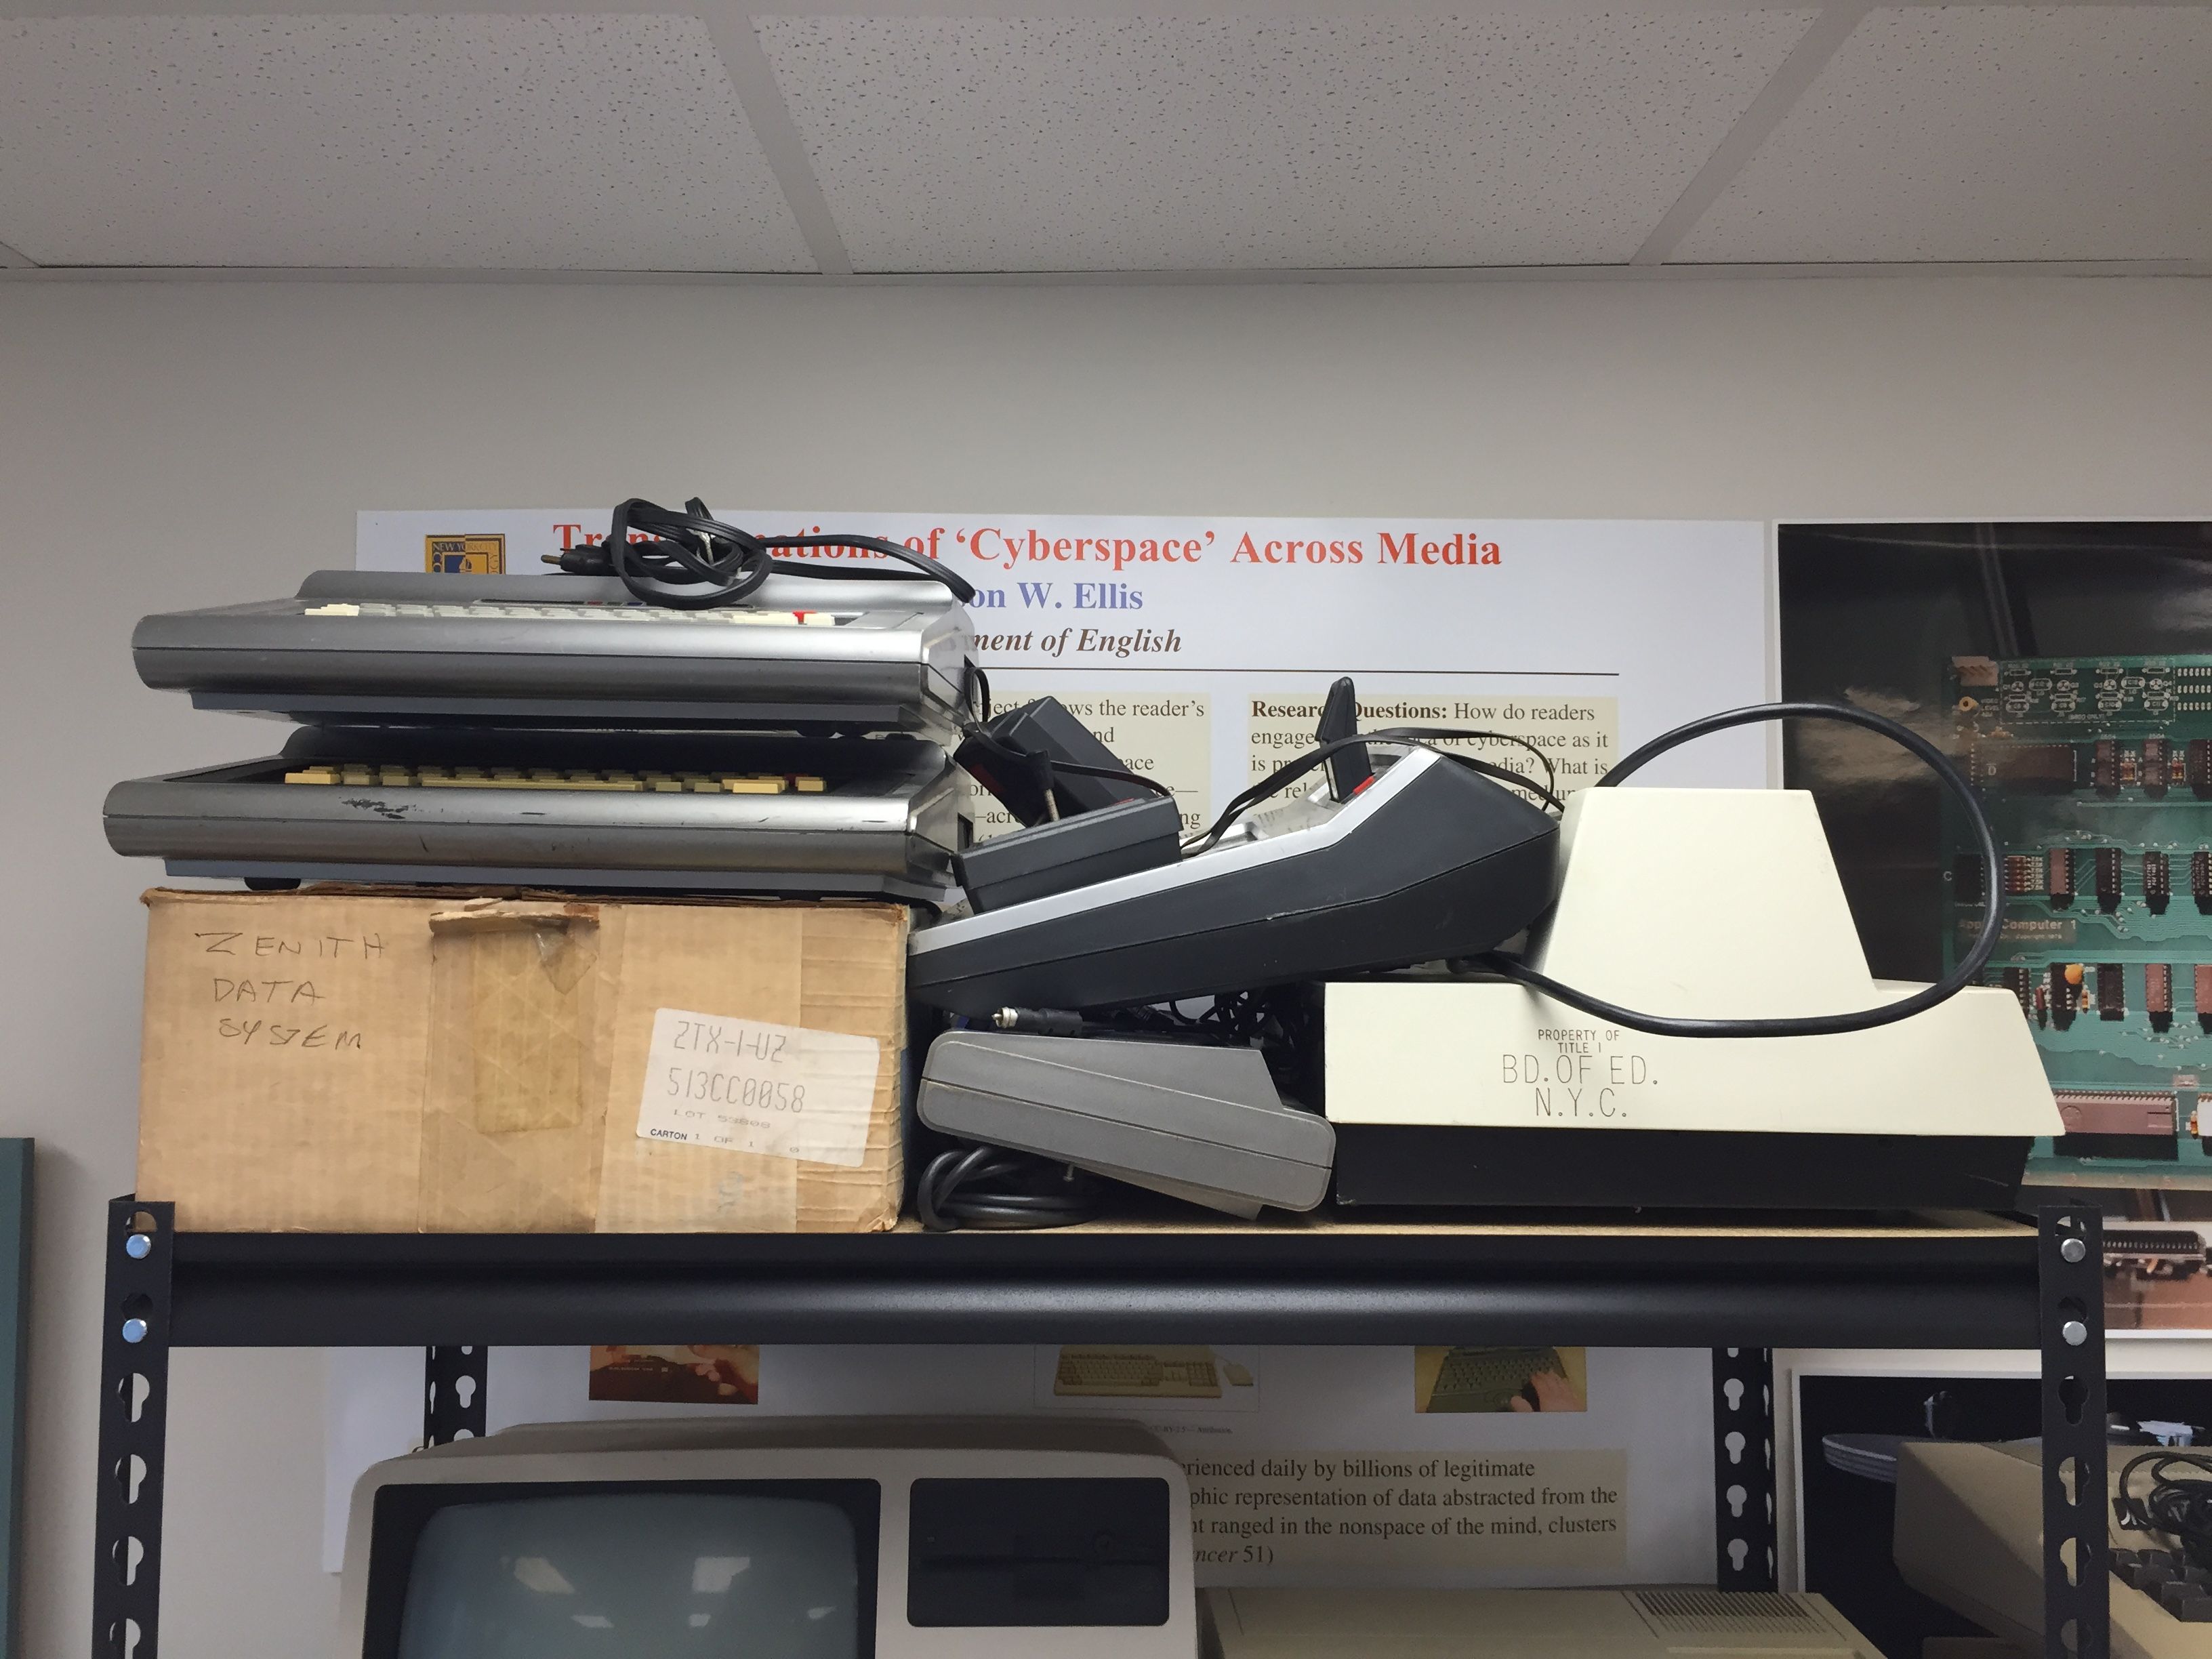
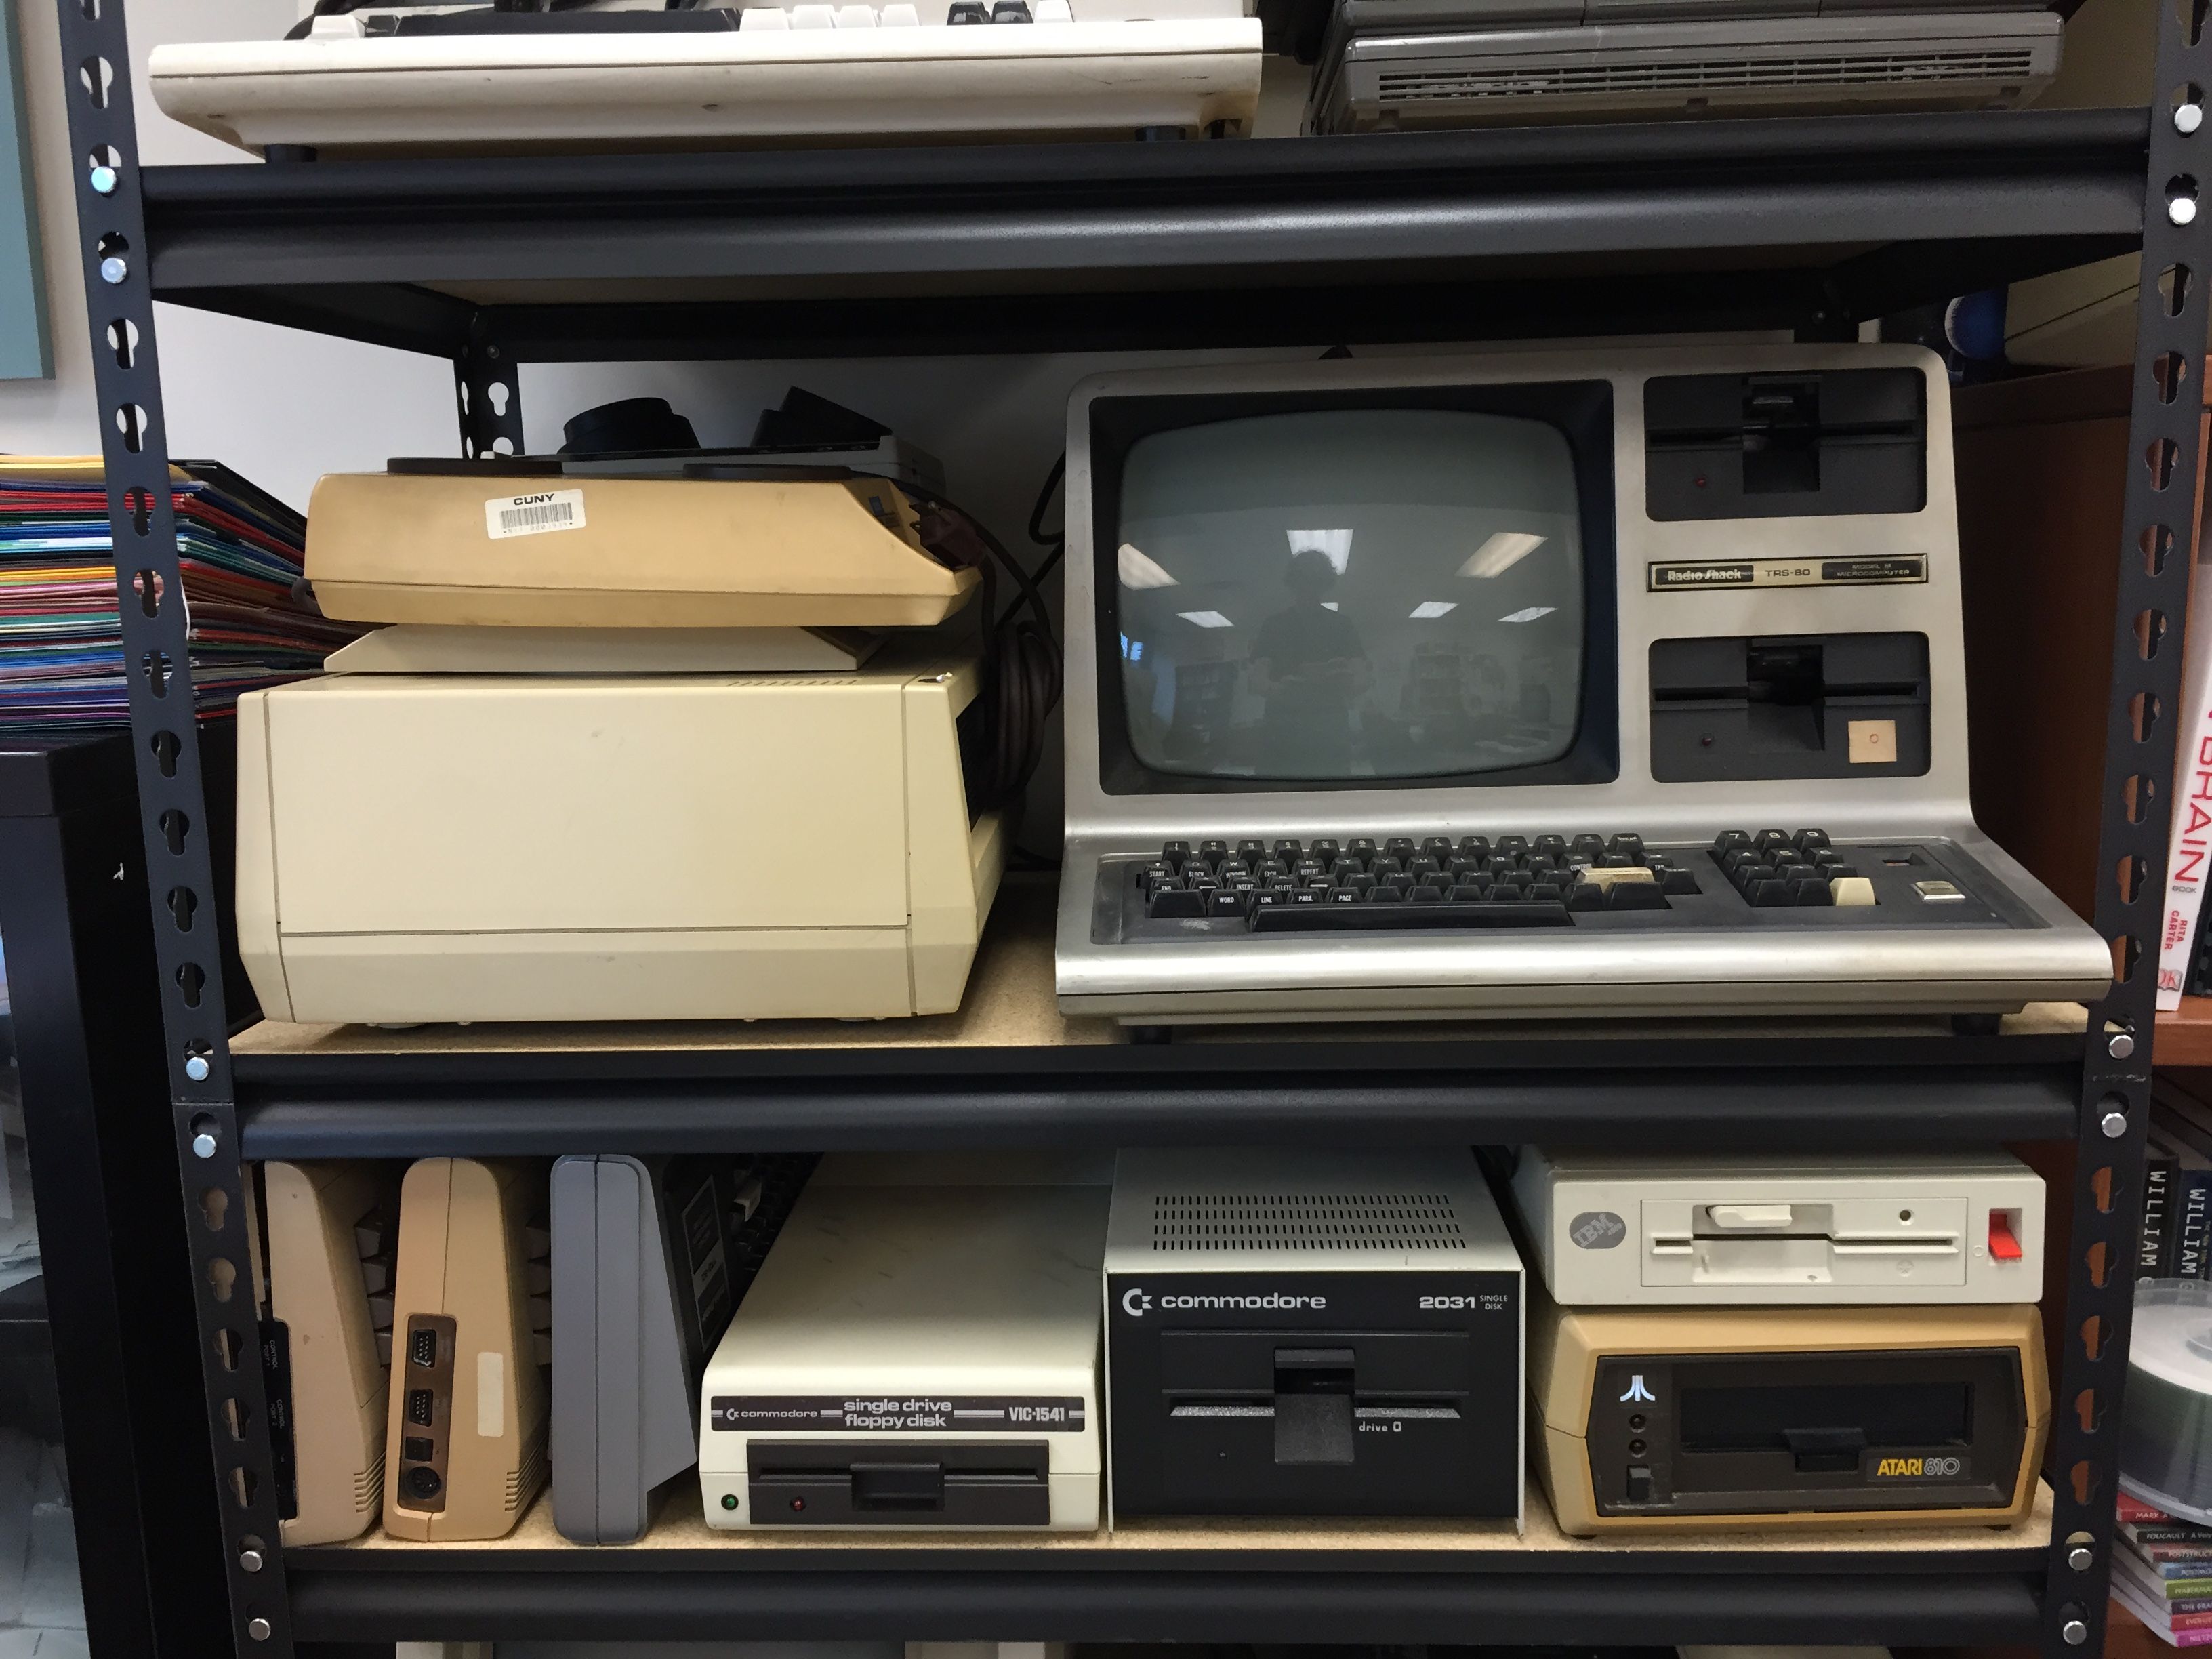
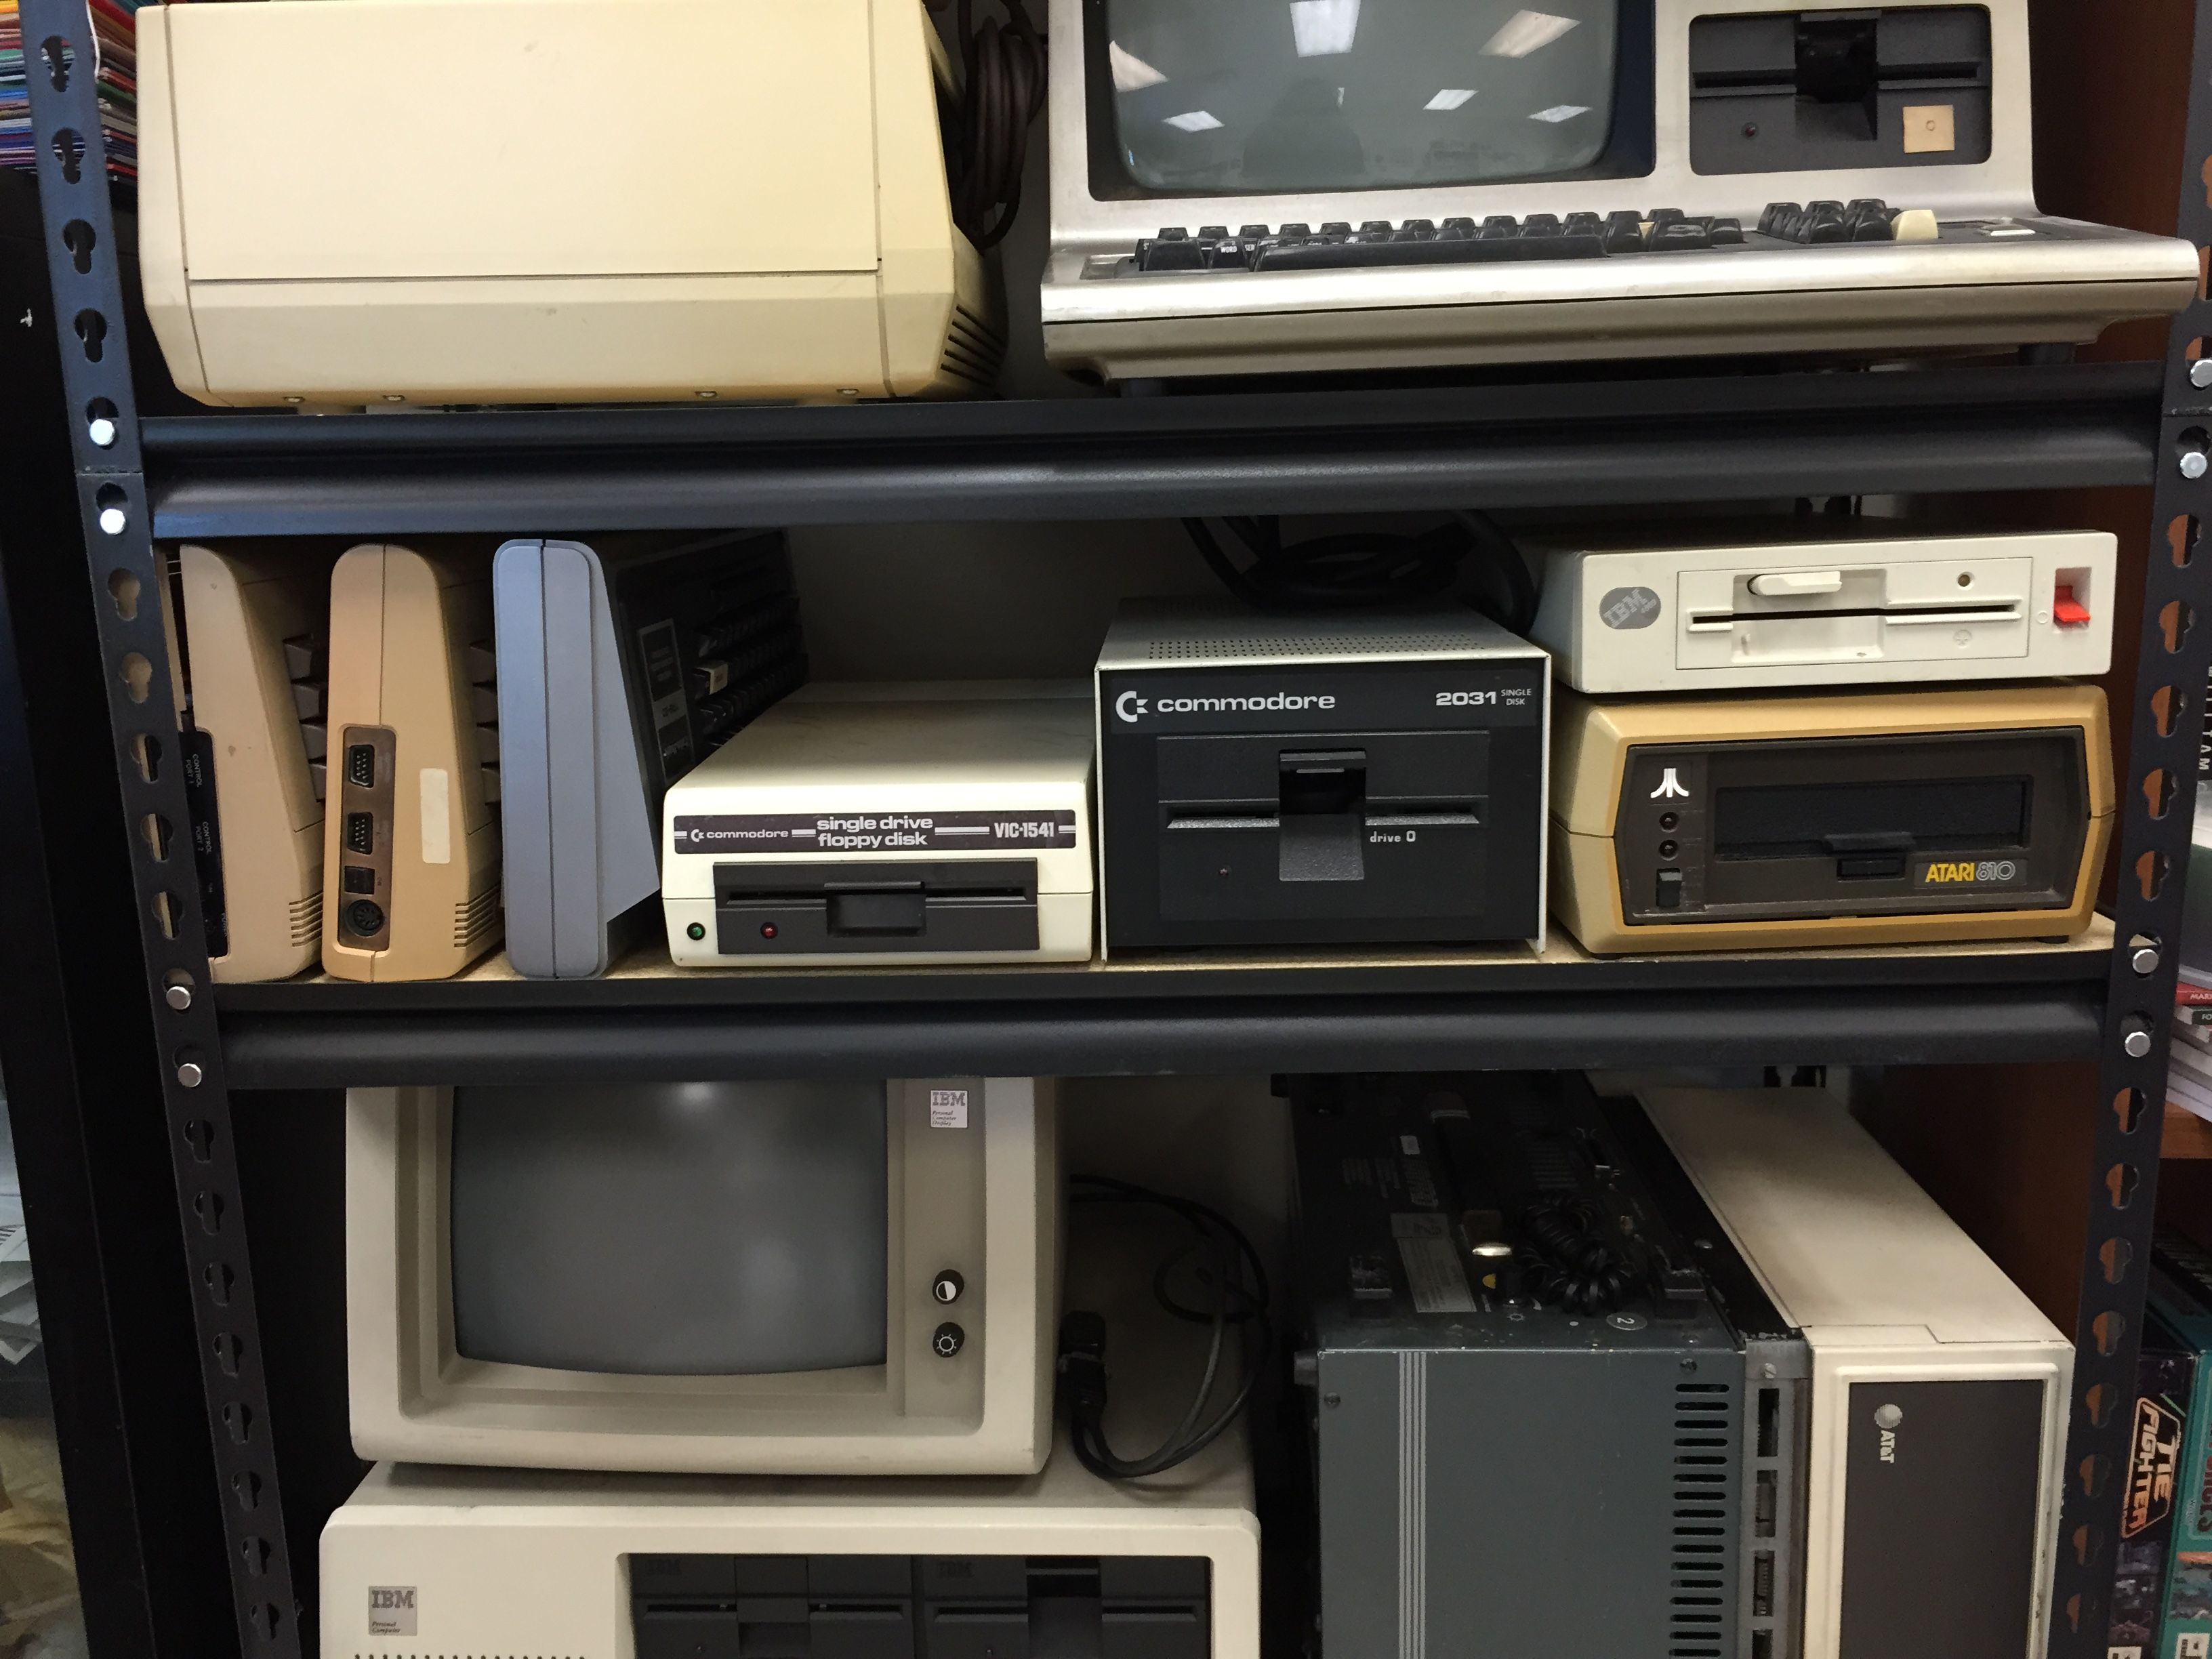
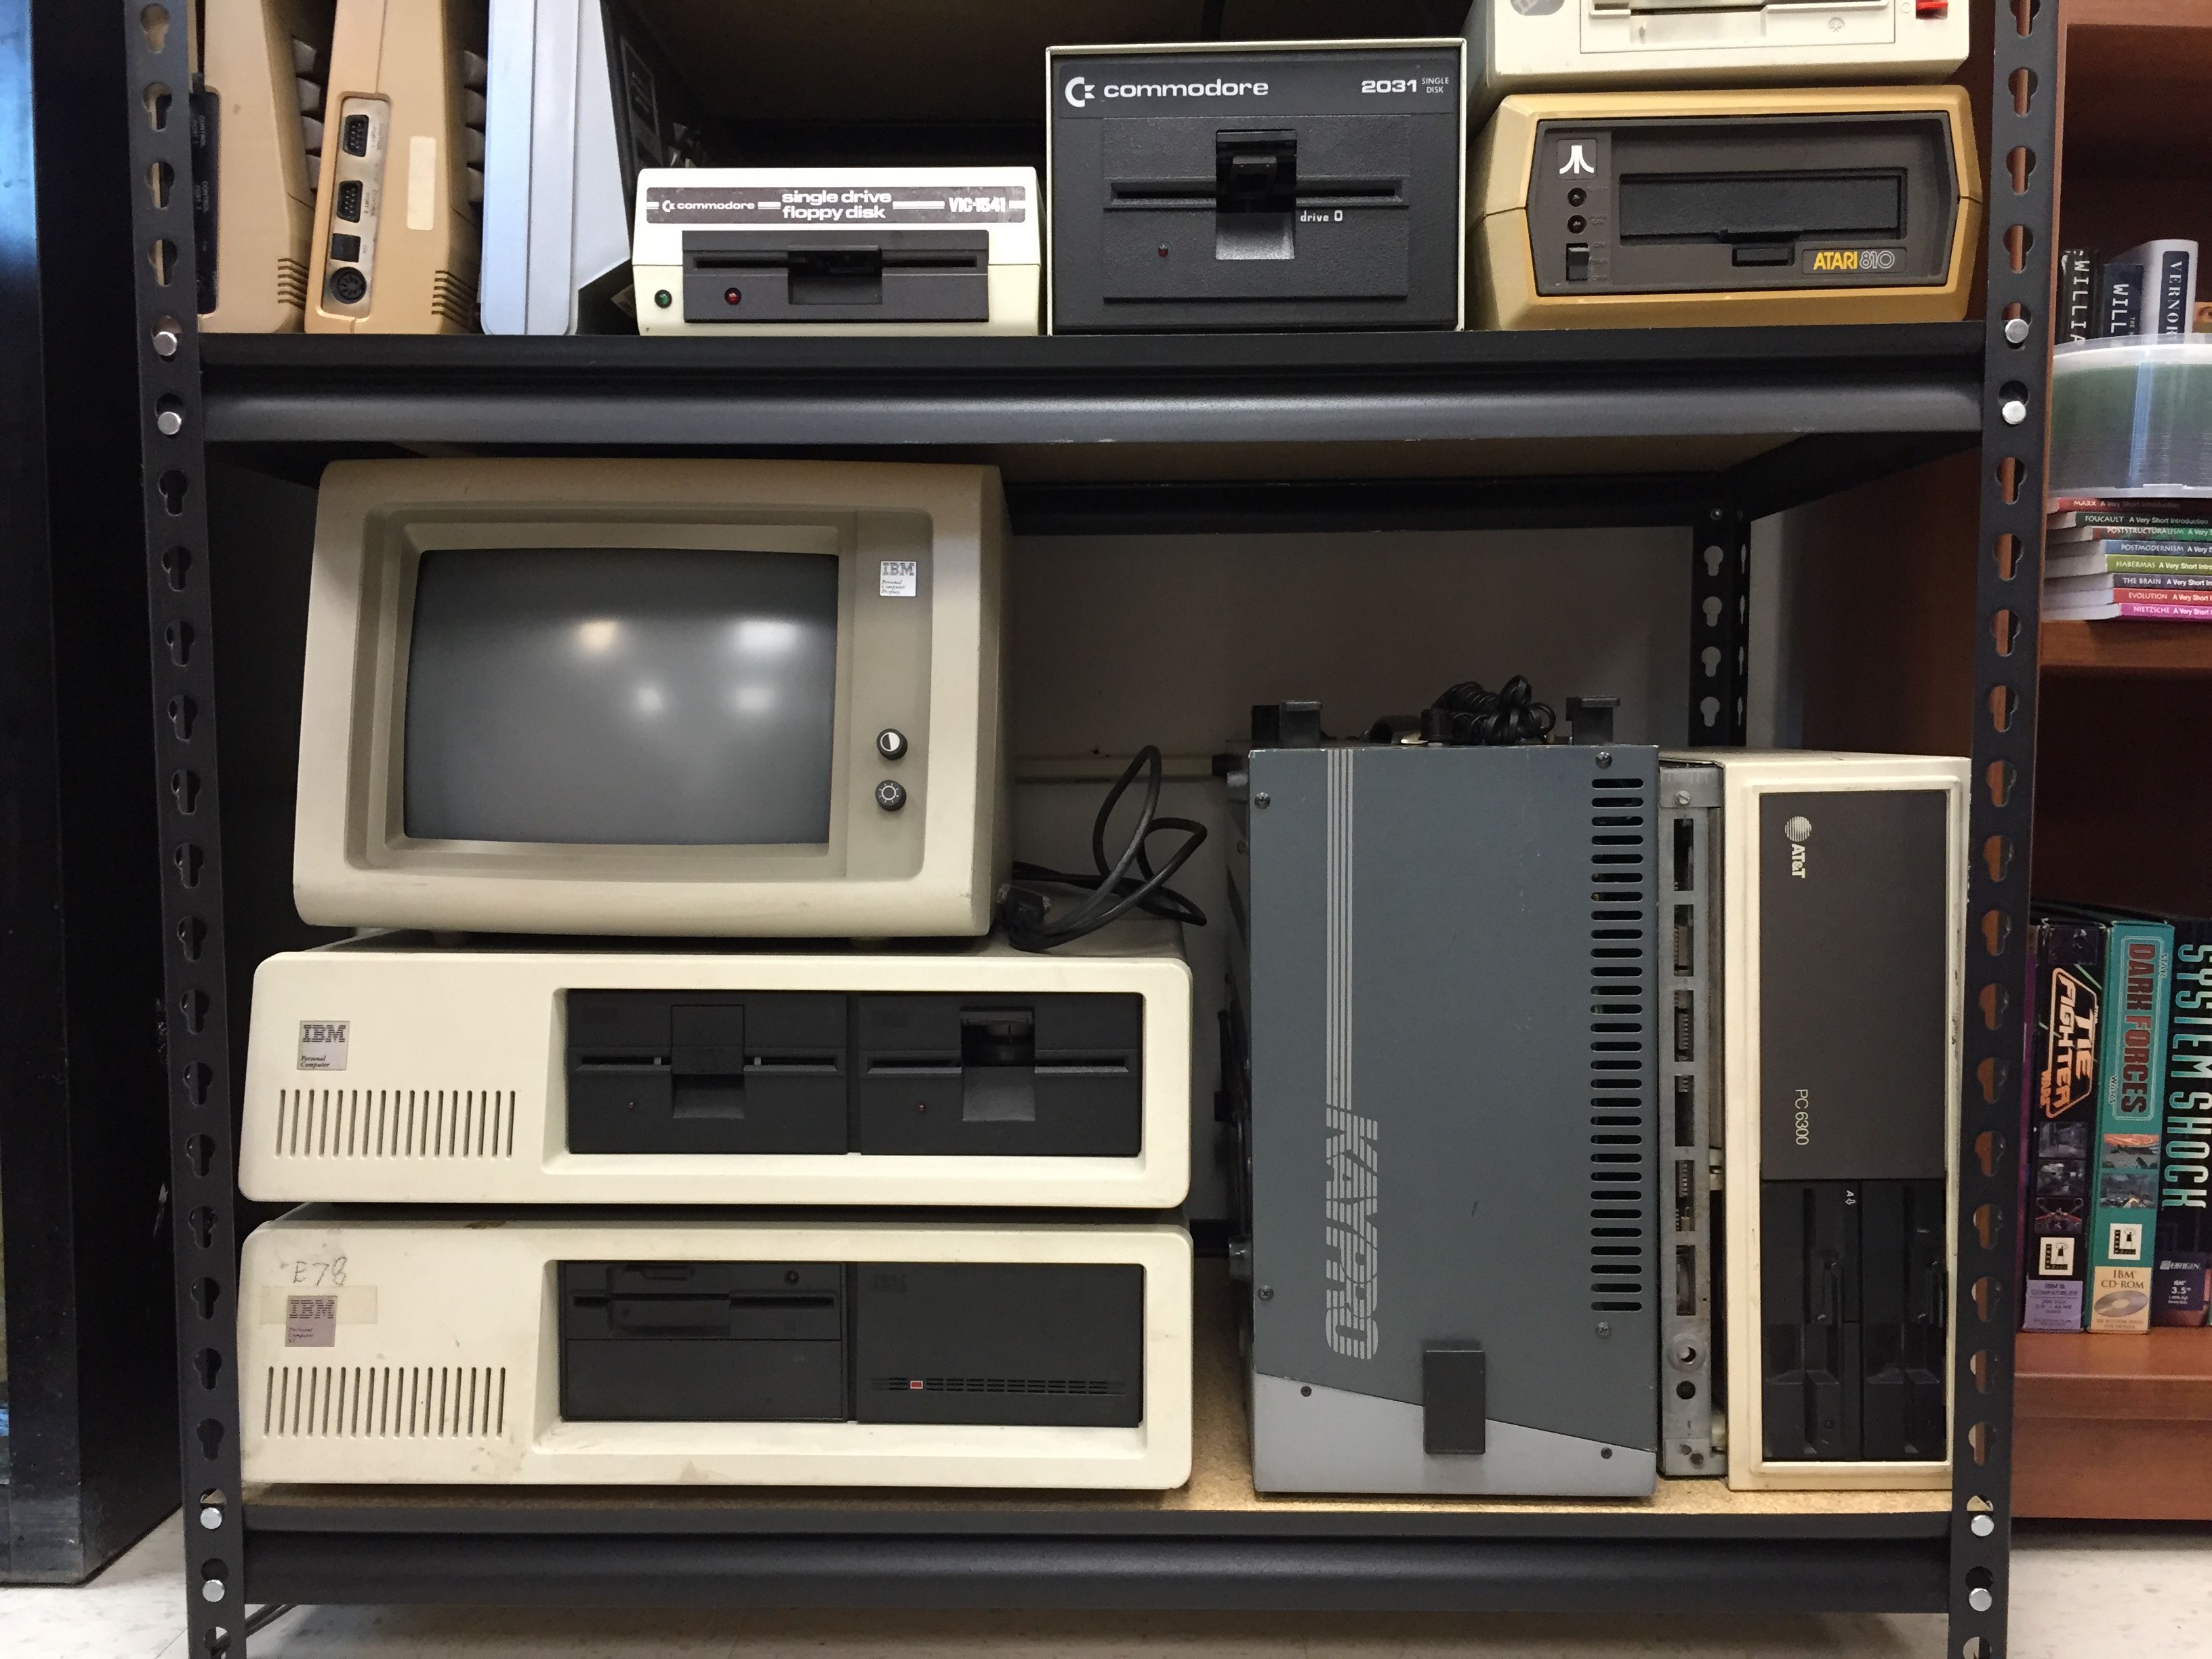
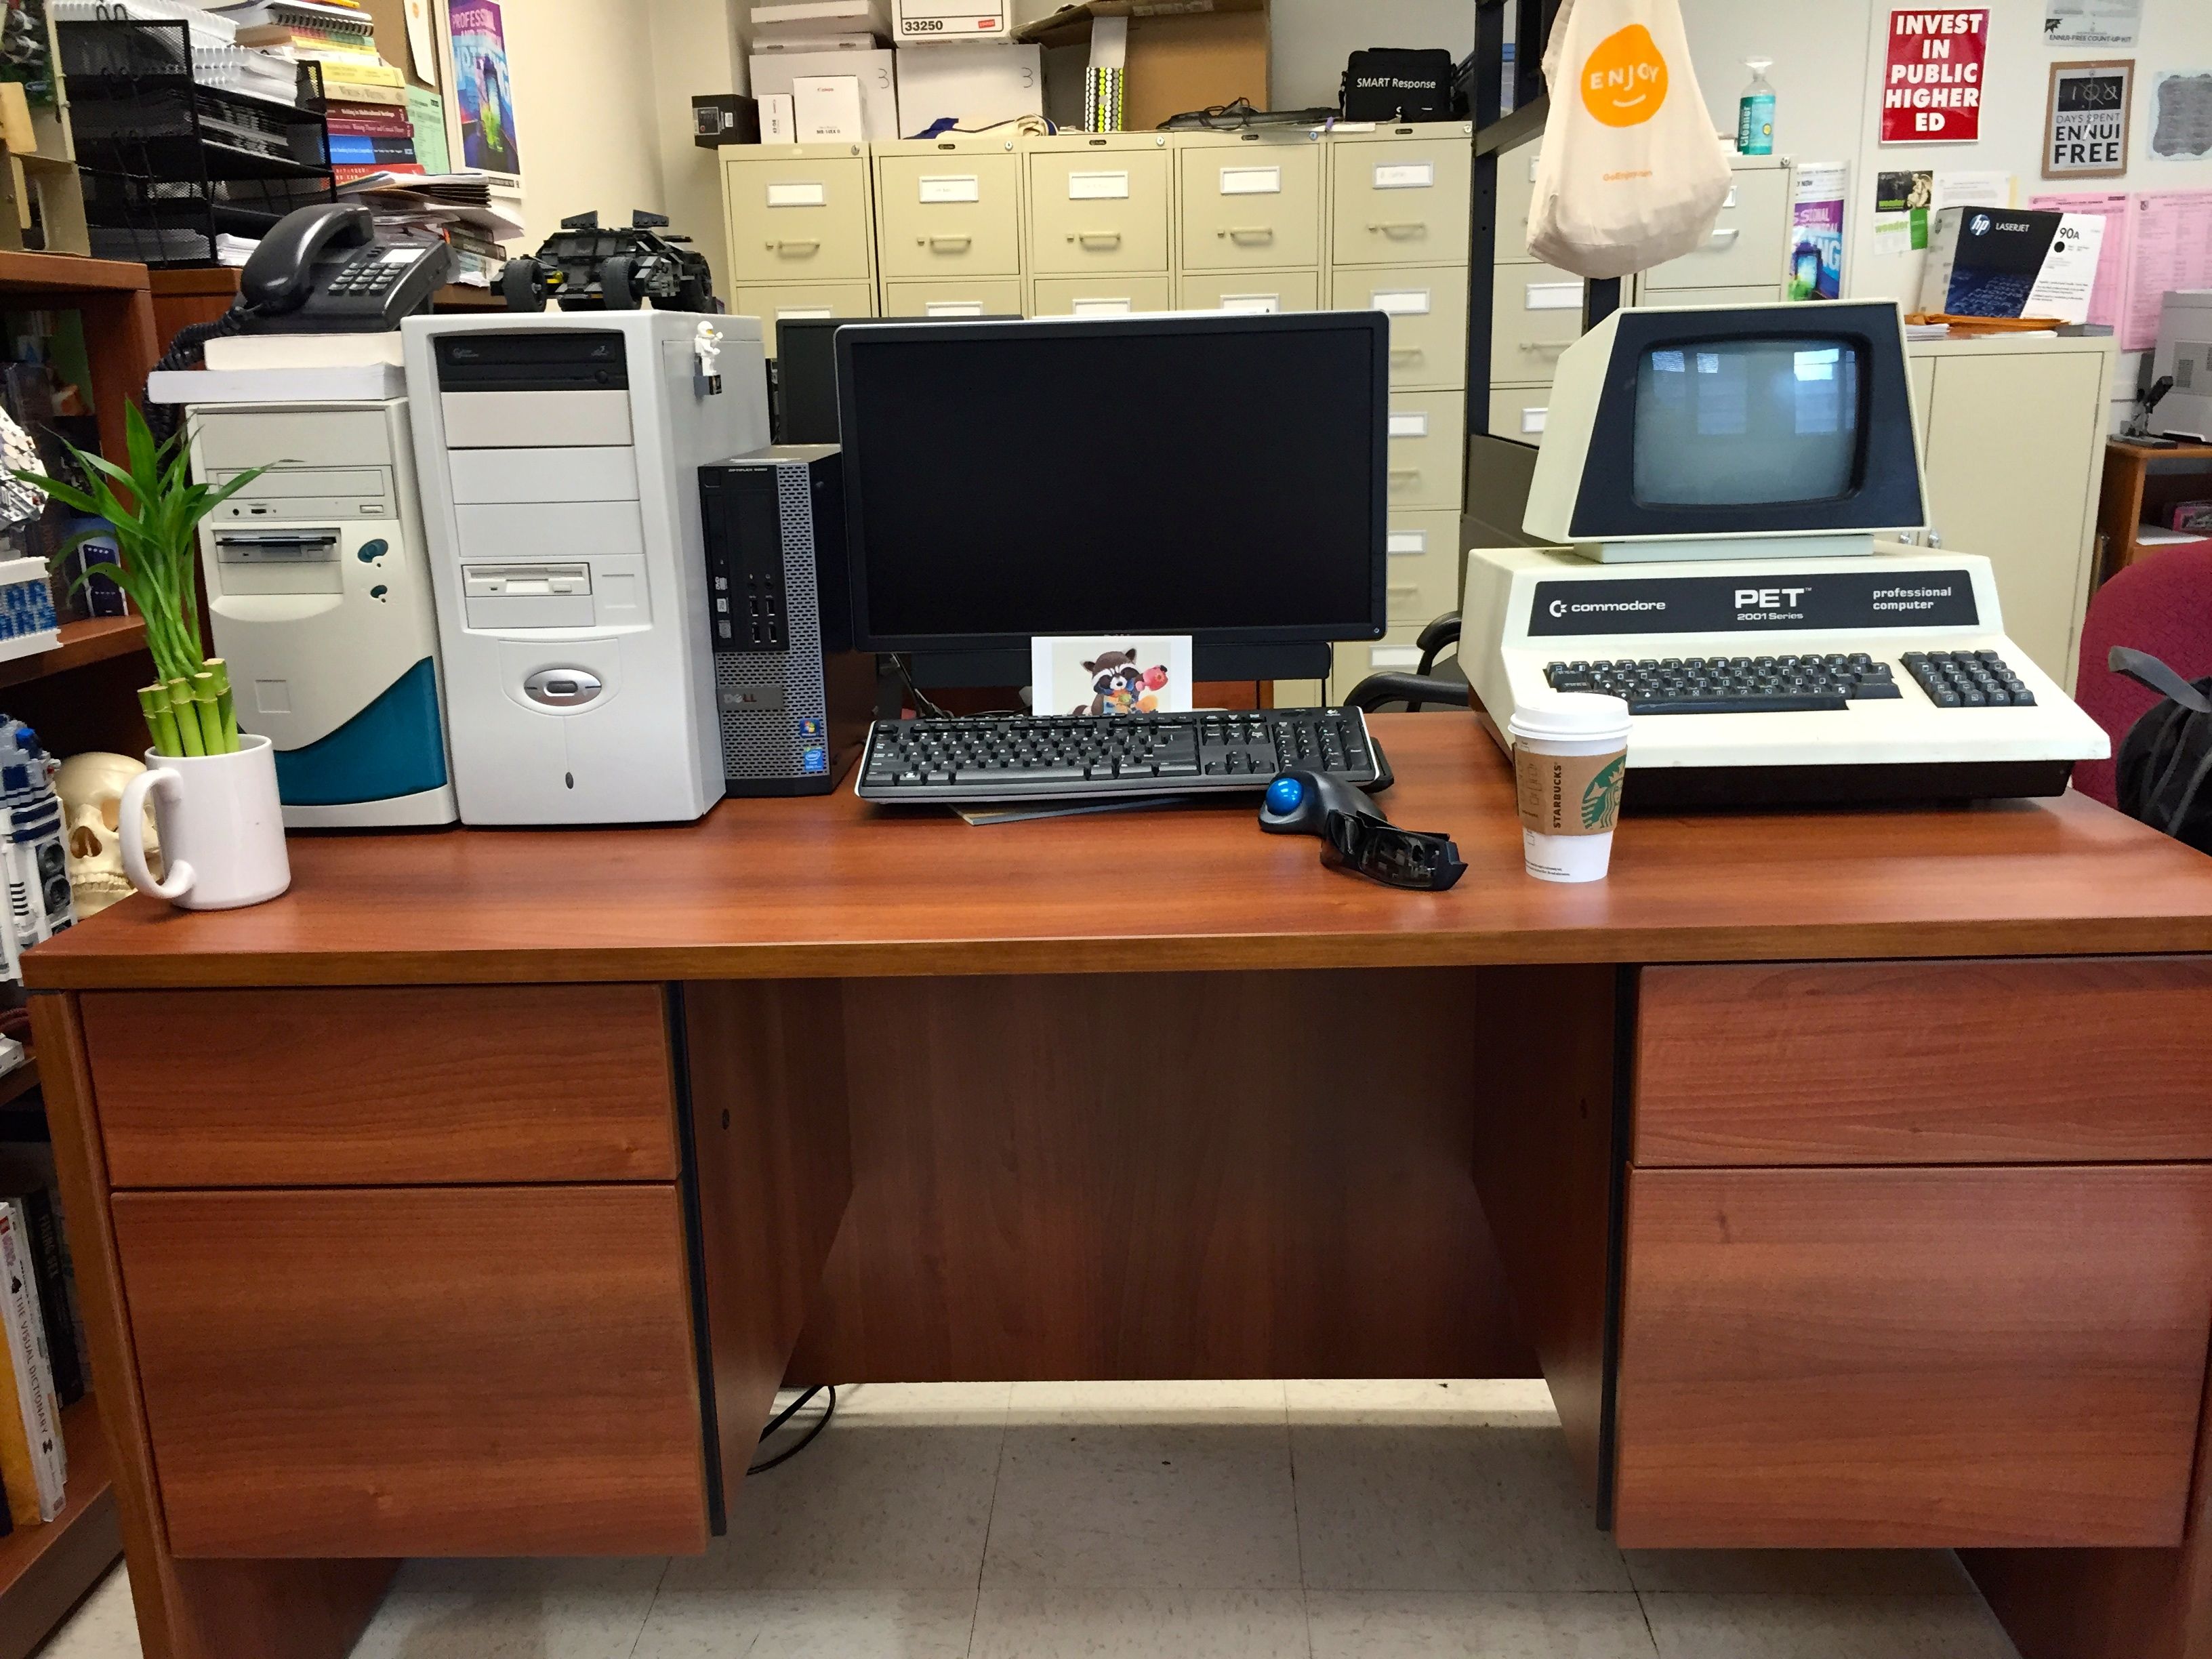
Thanks to City Tech’s Stanley Kaplan, I now have a substantial new collection of early personal computers including IBM PCs, Radio Shack TRS-80s, a Commodore PET, Texas Instruments TI-99s, ATARI 800, and a number of other computers and peripherals in my office in Namm 520. Some of the smaller items are locked in my filing cabinet, but as you can see from the photos included in this post, I have the larger items arranged around my desk and on a new set of Edsal steel shelves that I purchased on Amazon.com. Now, I have to make some additional room for a large, removable magnetic disk from a TRIAD Computer System (c. late-1970s~early-1980s, the drive that reads this disk was about the size of a washing machine) and an Apple Macintosh Centris 650, which I shipped to myself from Brunswick when I recently visited my parents. In the coming months, I will catalog these machines, see what works, and plan how to use them (research, pedagogy, and exhibits). If you have older computers, disks, or user manuals and would like to donate them for use in my research and teaching, please drop me a line at dynamicsubspace at gmail dot com.
Radio Shack Color Computer 3s, Zenith Data System, Odyssey, TRS-80, and PET Printer.TRS-80, Texas Instruments TI-99s, and Toshiba Laptop.Victor Computer and TRS-80.Commodore 64s, TRS-80, and Various Floppy Disk Drives.IBM PC, IBM PCxt, Kaypro, and AT&T Desktop.ATARI 800 and Compaq Portable PC sans case.Pentium 233 MHz PC, i7 PC, i7 Dell (office standard issue), and Commodore PET.
Back in 2007, I made a deal with a friend to participate in his fMRI brain scan study at the University of Liverpool in exchange for a copy of the DICOM data from my scan. He agreed to the trade.
Since then, I occasionally pull my scan data off the shelf and dust off the cobwebs and disk errors, and import it into the DICOM Viewer, OsiriX (e.g., as I did in 2009). With the latest versions, I have had a lot of trouble importing the files as they were given to me into OsiriX. Luckily, I saved the installers for earlier versions including the venerable version 3.5.1, which still runs fine on MacOS X Mavericks and Yosemite.
Using OsiriX’s many features, I created these four videos and an album of images of my 2007 brain. I wonder how it has changed since that time–completing my MA, then PhD, taking a postdoc at Georgia Tech, and now, working at City Tech. Also, I think about the technologies of representation that make it possible for me to see my brain without injury or invasion–OsiriX and unseen software libraries for working with, manipulating, and displaying DICOM data, MacOS X and its technology APIs, my MacBook Pro retina, disk and flash drives, email (how I originally received the scan data), the fMRI machine that I sat in for 30 minutes to an hour, the physical laws behind each technology and the biology of myself, etc. What do you think about when you see my brain represented below?
Since I received my Google Glass last week, I have been learning how to wear and use it. Ultimately, I want to incorporate Glass into my Retrocomputing Lab research workflow. I am interested in the experience of using computer hardware and software (something that I have been interested in for a long time and wrote about as an undergraduate), so Glass will provide a way of capturing some of my phenomenal experience–perspective, vision, and sound. I can provide oral commentary of my haptic and olfactic experiences (yes, computers have unique smells–something that helps store/recall memories and emotions) while also recording thoughts, memories, and asides that enrich my shared video experience. As one component of the digital humanities, I want to create an archive of my raw research of working with computers and their software that others can use, draw inspiration from, or comment on through their own research, writing, and teaching.
For the work that I do in my personal Retrocomputing Lab, I will use Glass as one more tool among a variety of other technologies that enable my research. Glass will add another data layer–itself richly textured and layered with audio/video/Internet/software capabilities–to the research that I do. Due to the ease of sharing images and video in real time, I can immediately make my in-process research available on YouTube, Twitter, and here on dynamicsubspace.net. Furthermore, my research will be useable by others–hobbyists, students, and other researchers in many interdisciplinary fields. Glass will join my non-real time distribution of data on paper, computer written notes (though, I could make these freely viewable in realtime on say, Google Drive), and published research.
Finally, I am interested in the mixing of old and new technologies. Glass meets its ancestors in the IBM PC and Macintosh. Glassware meets DOS, Windows 3.1, and System 7. I want to explore how the intermingling of these technologies leads to new insights, connections, and elaborations. While I am only speculating, I strongly believe that Glass and similar wearable computing technologies will elevate the outcomes and knowledge produced in humanities research–conceptualized as interdisciplinary like mine or not.
The videos included in this post were tests of the manually extended video recording feature. They don’t involve the Retrocomputing Lab, because how I want to use Glass to record my work will involve more and different kinds of planning. I used what I had at hand to test out Glass’ video capabilities included below.
Glass Video from Apr 22, 2014, Lego Build of The Batman Tumbler 30300 Polybag
Glass Video from Apr 24, 2014, Target Exclusive Lego 30215 Legolas Greenleaf Polybag
Mavericks installed on CustoMac. NB: MBPr on desk and PowerMacintosh 8500/120 on right.
Last summer, I wrote about my experiences installing Mac OS X 10.8 Mountain Lion on my Asus P8Z77-V and Intel i7-2700K PC here. What I neglected to say at the time was that an alarming number of creeping instabilities led me to ultimately abandon running Mountain Lion on my PC and return to Windows 7.
I later learned that some of these instabilities were likely linked to a bad PSU and video card–both of which were replaced by the manufacturers under warranty (awesome kudos to Antec and EVGA). With the new PSU and video card, my PC returned to 100% stability under Windows 7. This made me wonder if I could try rolling out a Mavericks installation on my PC.
Also, I wanted to use Mac OS X’s superior file content search technology and other third-party textual analysis tools in my research. I have a MacBook Pro 15″ retina (MBPr), but it lacks the hard drive capacity for my accumulated research files. The comfort that I feel in the MacOS environment and the need for lots of fast storage led me to turn my attention back to turning my PC into a CustoMac (aka “hackintosh”).
This time, I wanted to streamline and simply my setup as much as possible and incorporate components that should work out of the box (OOB). Toward this end, I reduced my hardware configuration from this:
ASUS P8Z77-V LGA 1155 Z77 ATX Intel Motherboard (disabled on-board Intel HD 3000 video and Asus Wi-Fi Go! add-on card)
evga 01G-P3-1561-KR GeForce GTX 560 Ti 1024MB GDDR5 PCIe 2.0 x16 Video Card (removed to simply setup and save power–who has time for gaming?)
Antec High Current Gamer 750W Gamer Power Supply HCG-750
Corsair Vengeance C70 Gaming Mid Tower Case Military Green
Cooler Master Hyper 212 Plus Universal CPU Cooler
Samsung 22X DVD±RW Burner with Dual Layer Support – OEM
Intel 128 GB SATA SSD
Three Western Digital HDDs for file storage and work space.
IoGear GBU521 and TP-Link TL-WDN4800 from Microcenter.
Also, I added two new components that were recommended from the TonyMacx86 Forums:
TP-Link 450Mbpx Wireless N Dual Band PCI Express Adapter (TL-WDN4800). It works in Mavericks OOB.
IoGear Bluetooth 4.0 USB Micro Adapter (GBU521). It works in Mavericks OOB.
ASUS’s Wi-Fi Go! card works great in Windows 7, but it caused problems with my Mavericks installation.
As noted above, I physically removed my 560 Ti video card, because I wanted to simply my setup for installation purposes. Also, I removed the ASUS Wi-Fi Go! add-on card, because despite disabling it in BIOS, the Mavericks installer seemed to hang on a wi-fi device while attempting to set its locale (a setting that determines what radio settings to use based on the country that you happen to be in). After I removed the Wi-Fi Go! card, I had a nearly flawless Mavericks installation process (NB: removing the Wi-Fi Go! card required removing the motherboard, turning it over, removing a screw holding in the Wi-Fi Go! card, turning the motherboard over, and unplugging the Wi-Fi Go! card).
These are the steps that I used to install Mavericks on my PC:
Following installation of Mavericks, boot from your USB drive, select your new Mavericks installation drive, arrive at the desktop, and run Multibeast.
Select these settings in Multibeast:
Quick Start > DSDT Free (I left all pre-selected options as-is. Below are additional selections that I made.)
Drivers > Audio > Realtek > Without DSDT > ALC892
Drivers > Disk > 3rd Party SATA
Drivers > Graphics > Intel Graphics Patch for Mixed Configurations
Drivers > Misc > Fake SMC
Drivers > Misc > Fake SMC Plugins
Drivers > Misc > Fake SMC HWMonitor App
Drivers > Misc > NullCPUPowerManagement (I don’t want my machine to go to sleep)
In order to arrive at the above instructions, I read a lot of first hand experiences and third party suggestions on TonyMac’s forums. I owe a tremendous debt of gratitude to the amazing community of CustoMac builders who take the time to share their thoughts and lessons and equally so to the tool-builders who create amazing software including UniBeast, Multibeast, and Chameleon Wizard!
I would suggest that you remember that there is not always one path to a successful build. I distilled a lot of posts into my successful build. Your experience with similar hardware might take a different path. Reading others experiences and trying their suggestions experimentally can lead to your own successful discoveries. Thus, I took the time to try out different configurations of hardware until settling on the stripped down approach with on-board video and OOB networking gear. I tried several different installations: a failed Mavericks installation with kernel panics (Wi-Fi Go! card installed and wrong Multibeast configuration), a successful Mountain Lion installation (barebones and correct Multibeast configuration), and a successful Mavericks installation (detailed above).
Obviously, MacOS X can run on a wide range of PC hardware given the correct drivers, configuration information, etc. Apple could do great things if only Tim Cook and others would think differently and move beyond the tightly integrated hardware-software experience. Apple’s engineers could do great things with building better operating systems that adapt to a person’s hardware. Given the chance, they could challenge Microsoft and Google with a new MacOS X that is insanely great for everyone–not just those who can afford to buy new hardware.
Now, back to using some of the tools that I use in my research on a computing platform that I enjoy: