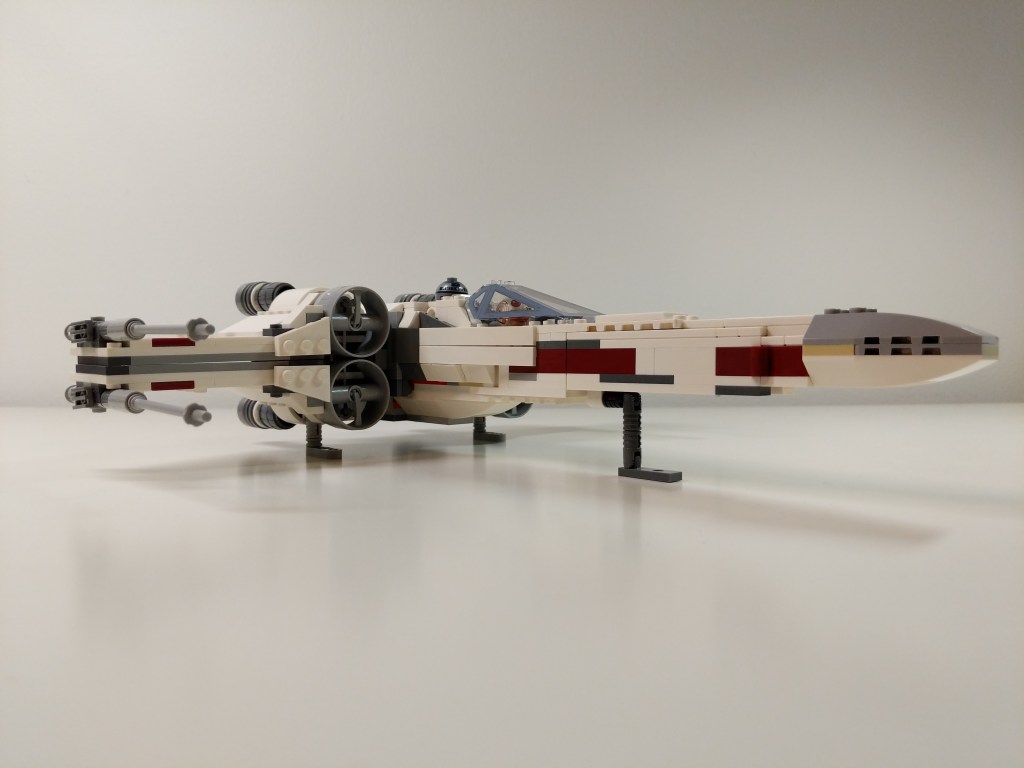
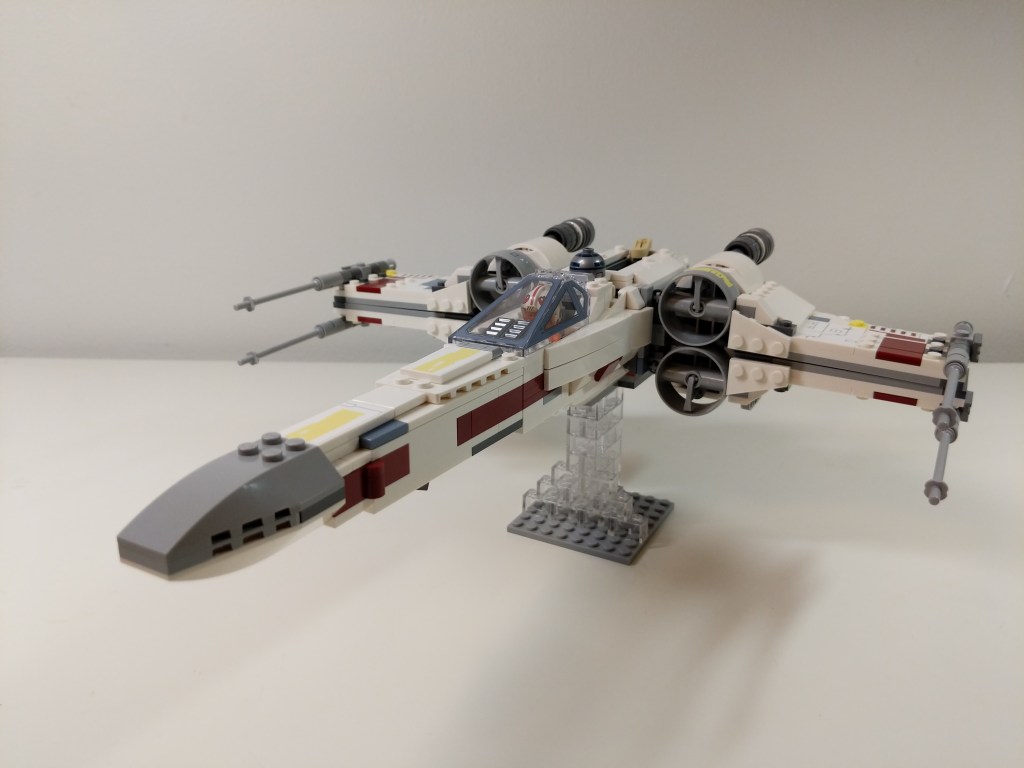
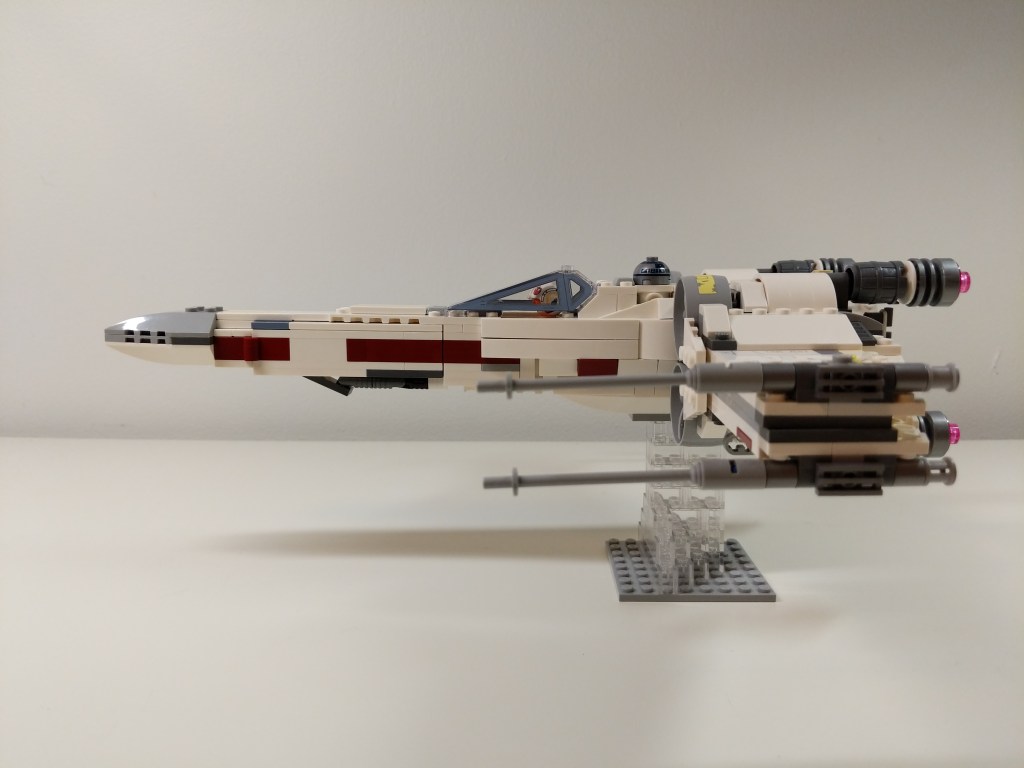
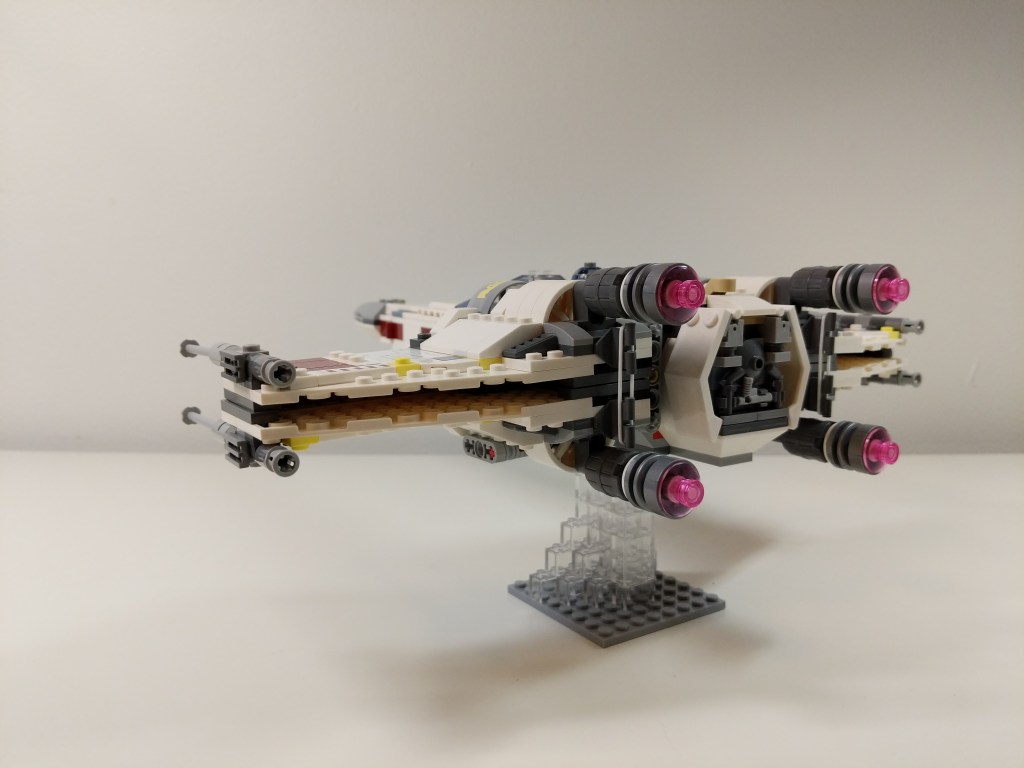
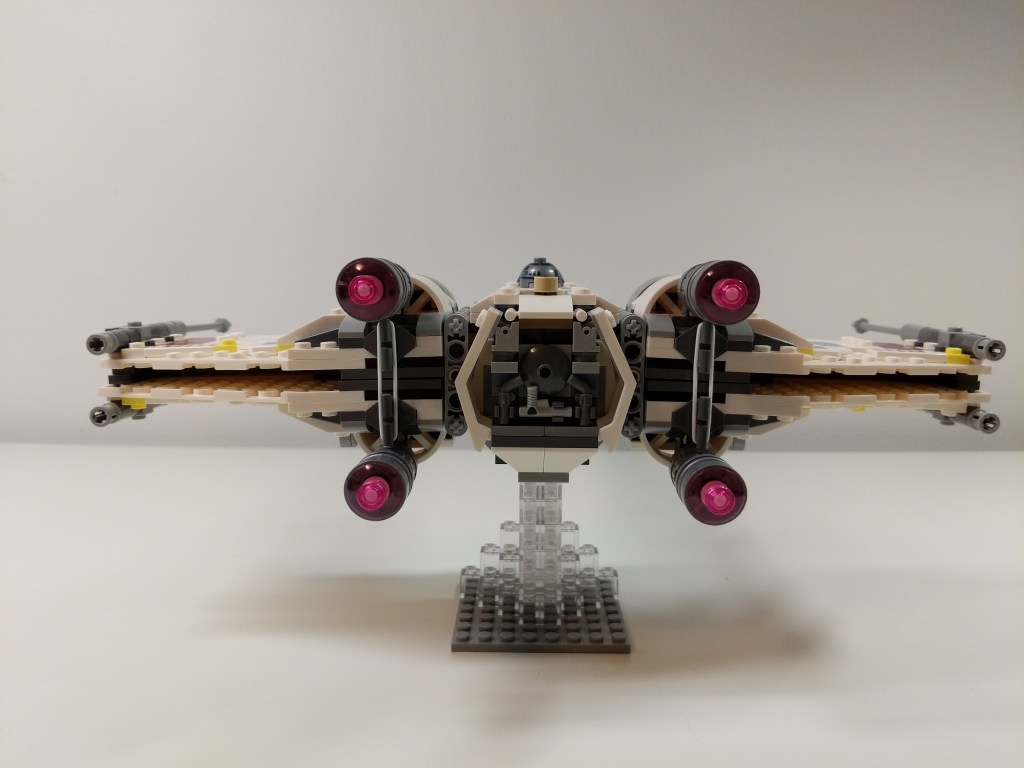
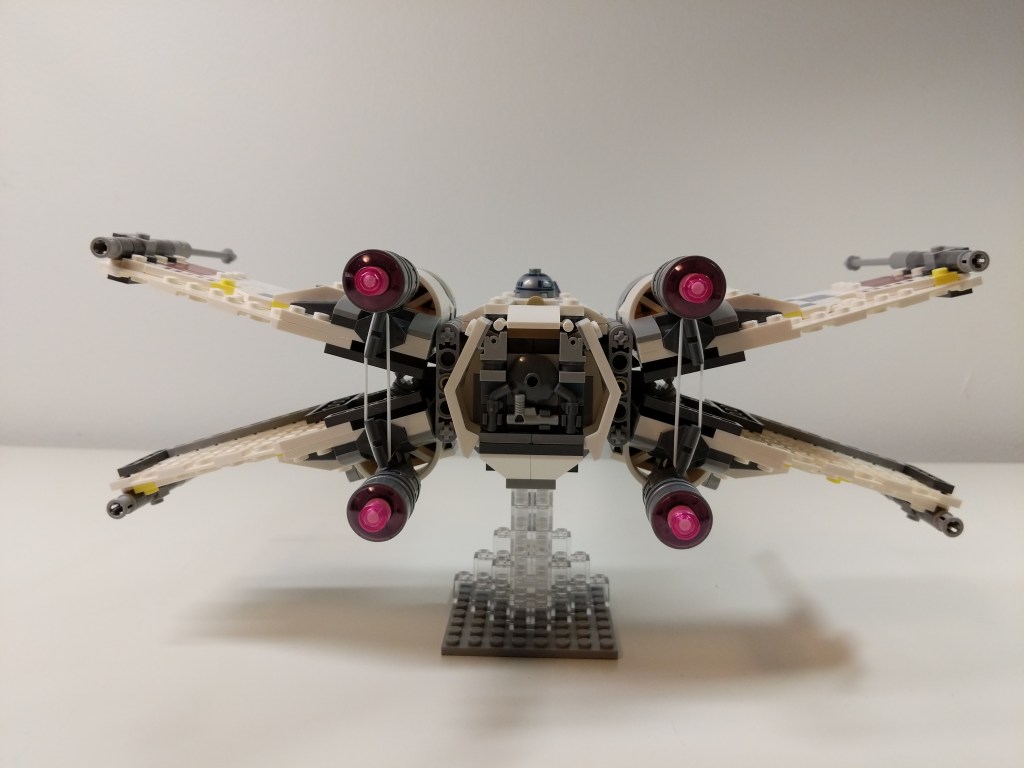
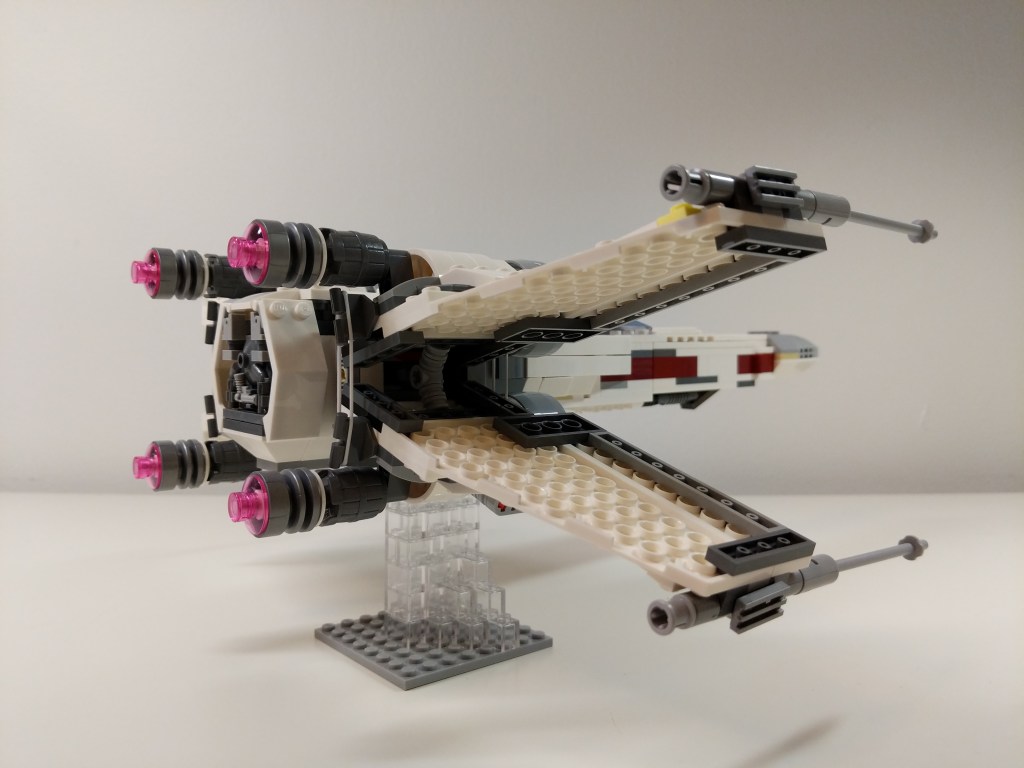
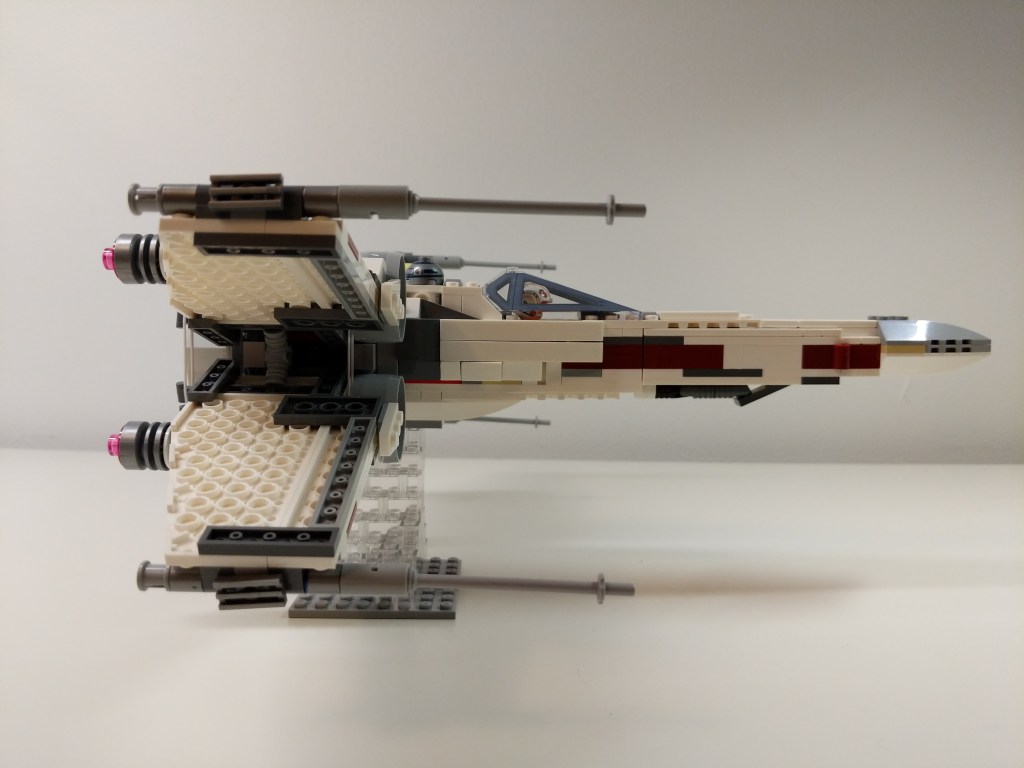
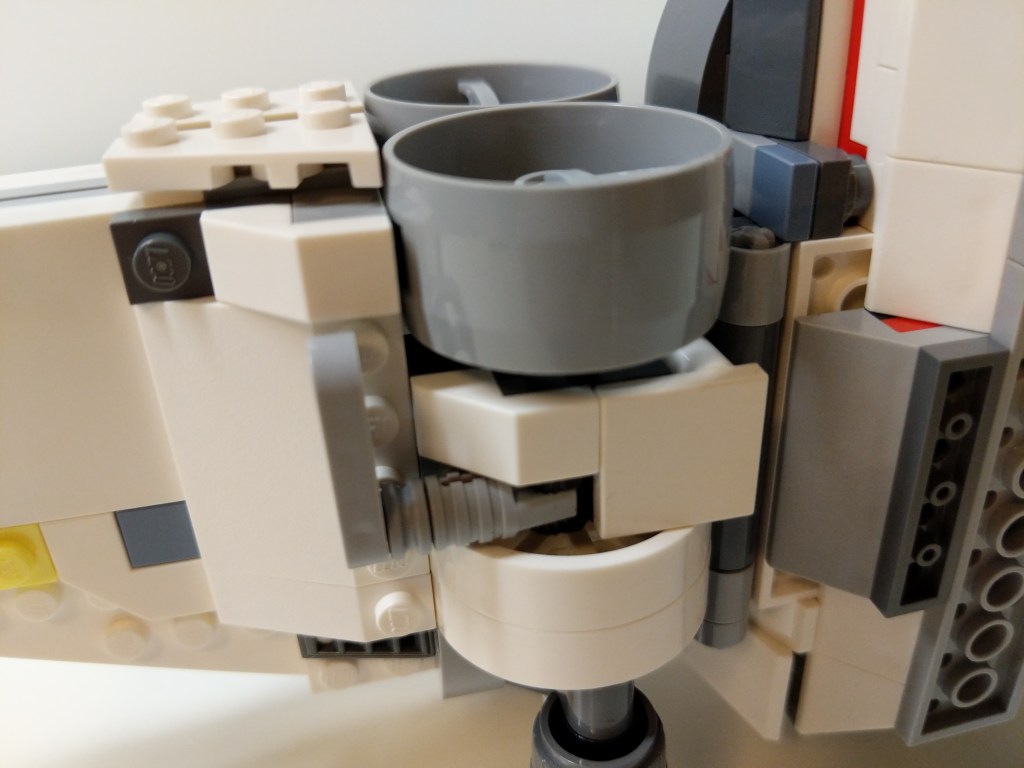
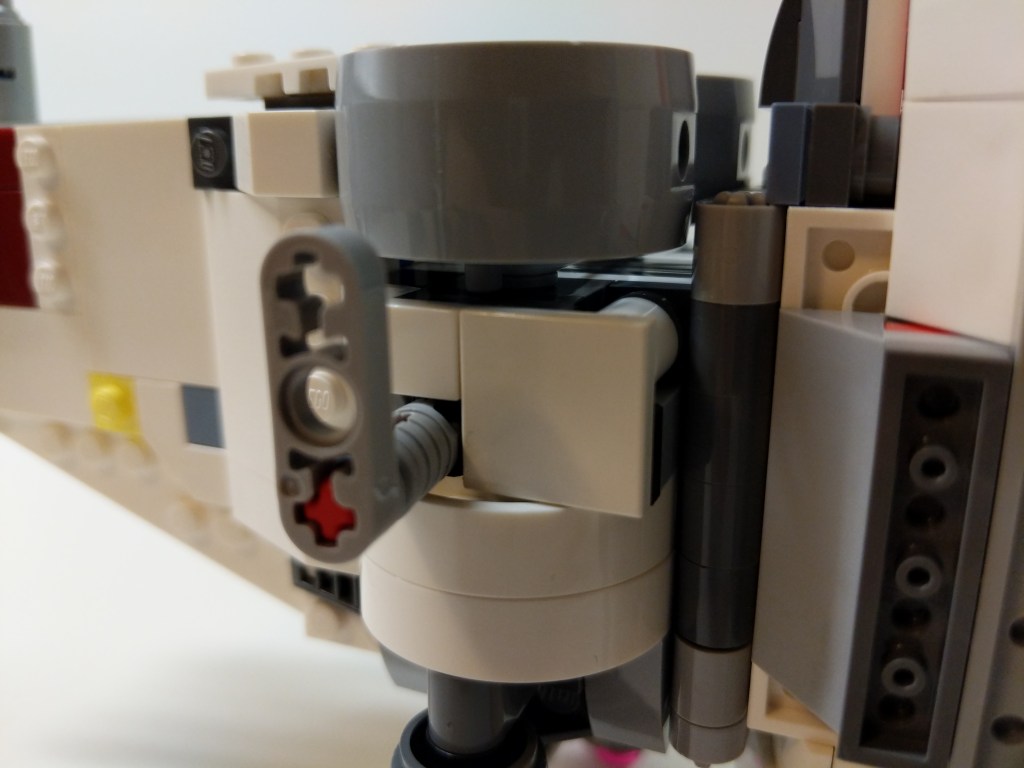
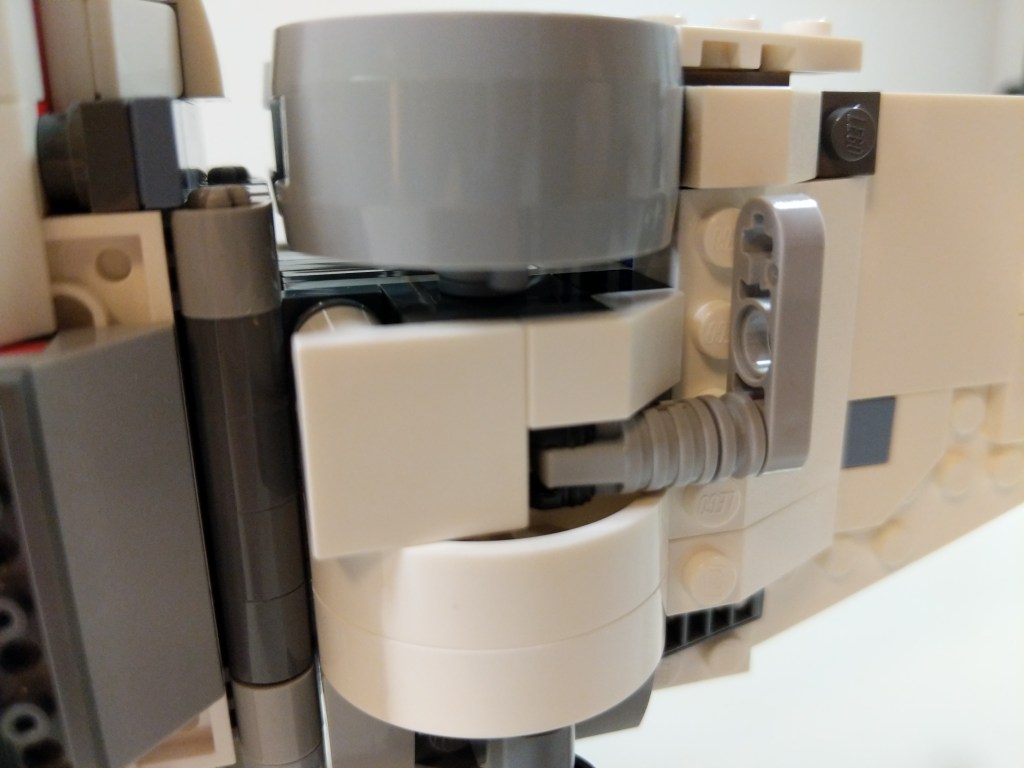
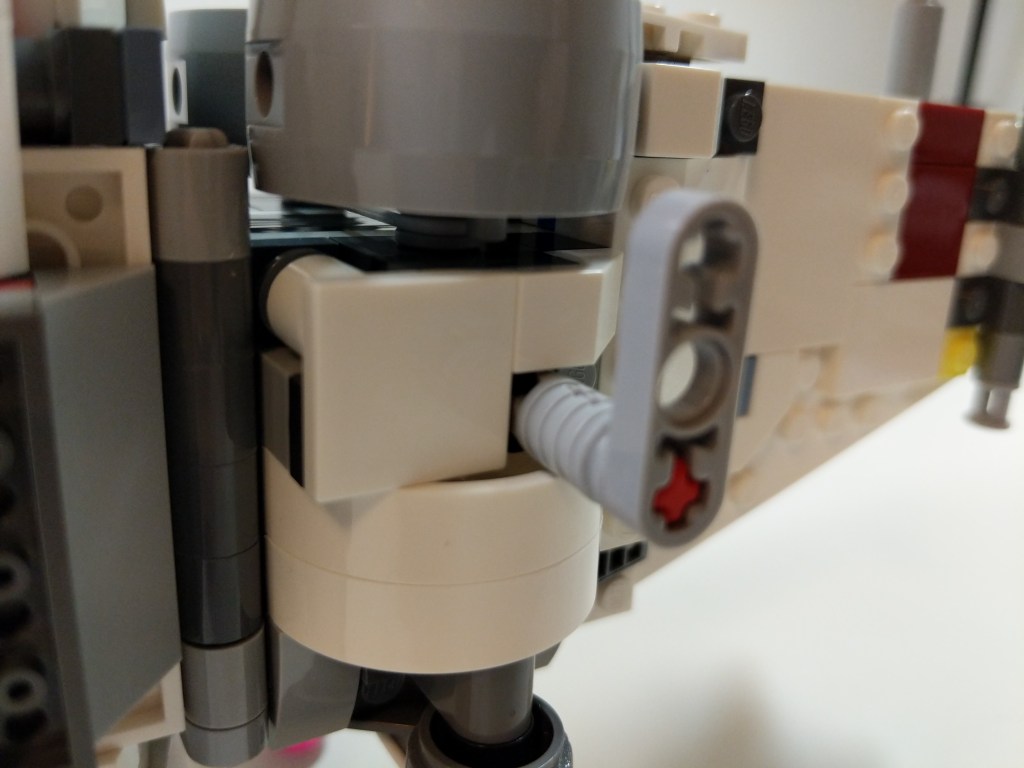
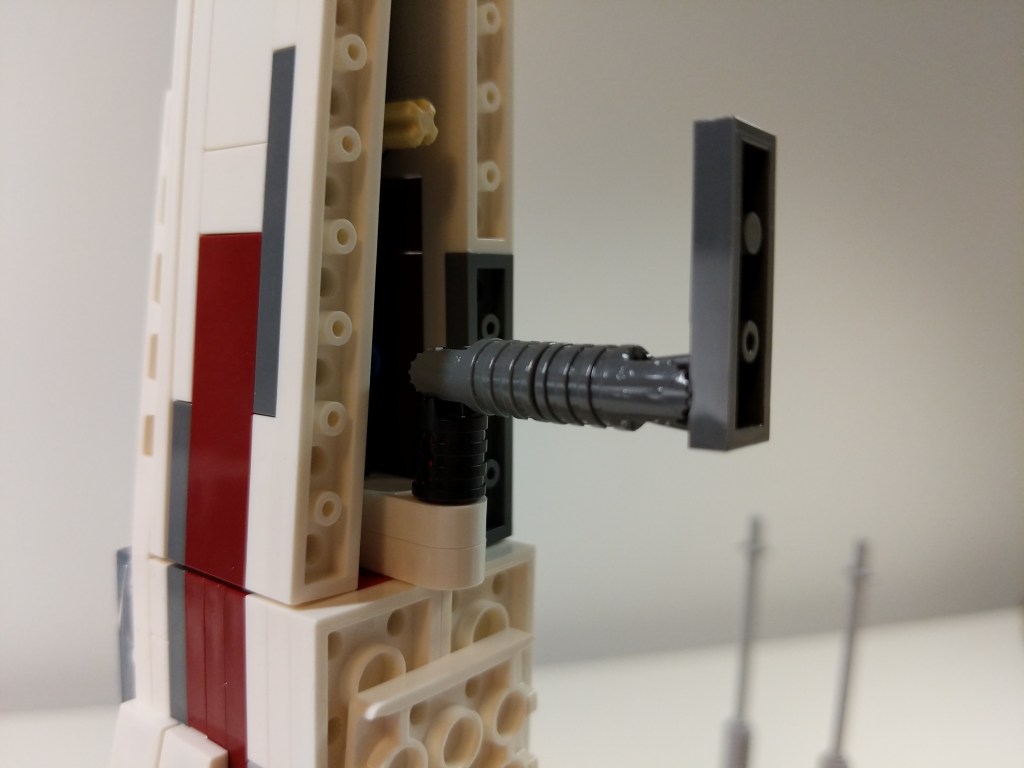
Continuing my backlog of LEGO mods and MOCs posted recently, here’s another mod that I made in 2019. The LEGO Star Wars X-Wing 75218 was designed with wing missile shooters and fixed rear landing gear struts. I modified the X-Wing to remove the missile shooters and give the blasters a little more detail, and I replaced the fixed landing gear struts with retractable landing gear as shown in the photo above. The gallery of images below provides more detail on both modifications that you can implement in your own X-Wing.
Since Y and I moved to Brooklyn, we’ve focused our XP grind on budgeting, scrounging, and saving.
At the core of making ends meet is identifying those things that are negotiable and those that are not. For example, coffee is a negotiable for me. I don’t have to have a $4 Starbucks everyday. Instead, I’m happy to get my caffeine fix from discount coffee brewed at home and carried in an efficient Zojirushi thermos. The A6000 video card that I use in my desktop computer is not negotiable. It’s an investment in my work that should pay a dividend in the future.
While my desktop computer fits into my non-negotiable category, my laptop computer, which I carry to work daily and use for remote work and classroom instruction, is negotiable. My only requirements for a laptop is that it is stable, has a good keyboard and trackpad, and weighs 3 pounds or less. Certainly, there are many new laptops that fit this bill, but there are also many used laptops that also fit this bill. In fact, a used, well-cared for laptop can have a powerful feature set, albeit a few generations old, that can hold its own against today’s computing rigors. This means that a used laptop with high tier features might cost a fraction of what it cost new. Furthermore, getting additional life out of a used laptop will keep it from winding up in ewaste too soon, which is a bonus for the environment and our collective health impacted by ewaste and the industrial impact of processing it.
My First Used Laptop: ThinkPad X230
I purchased this ThinkPad X230 on eBay in 2018 (and wrote a review of it here). It looked and worked as if it were brand new. I used it for my remote work, classroom instruction, and travel until early 2020 (just before the pandemic began). By that point, it felt like it was getting long in the tooth for some of my software (e.g., Wolfram Mathematica), so I was thinking about selling it. One day, my colleague Aaron Barlow saw me using it at City Tech and he asked me to let him know if I hear of any similar machines available for sale. I offered him this one, which he bought a week later after I had wiped the drive and reinstalled Windows 10 for him. He got some use out of it for his writing, and his partner continued using it after he passed away.
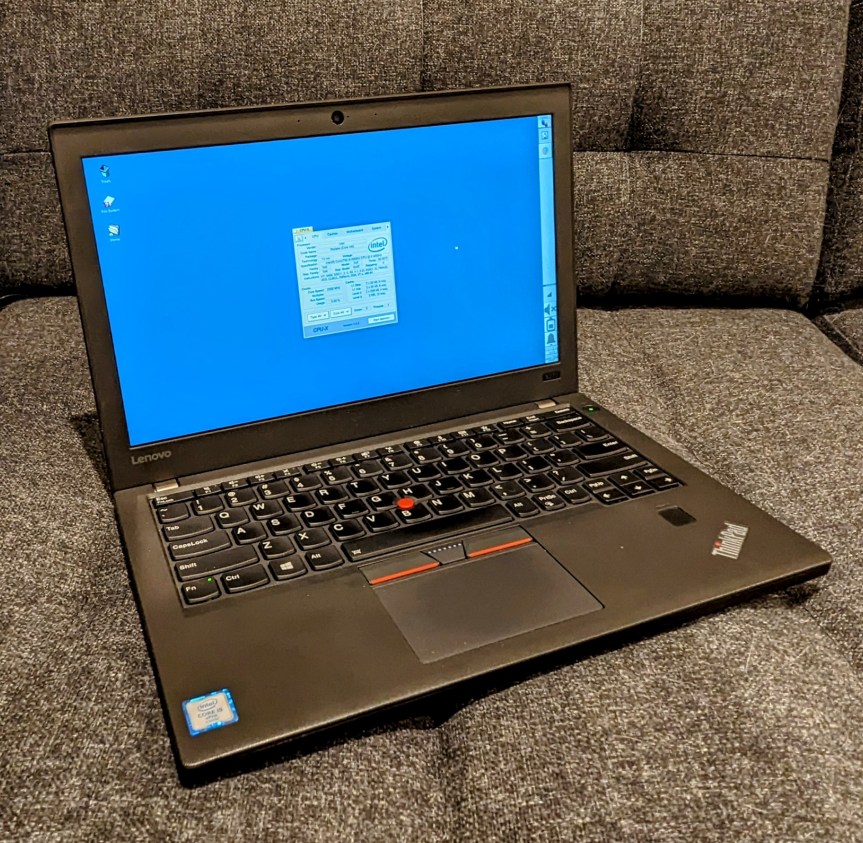
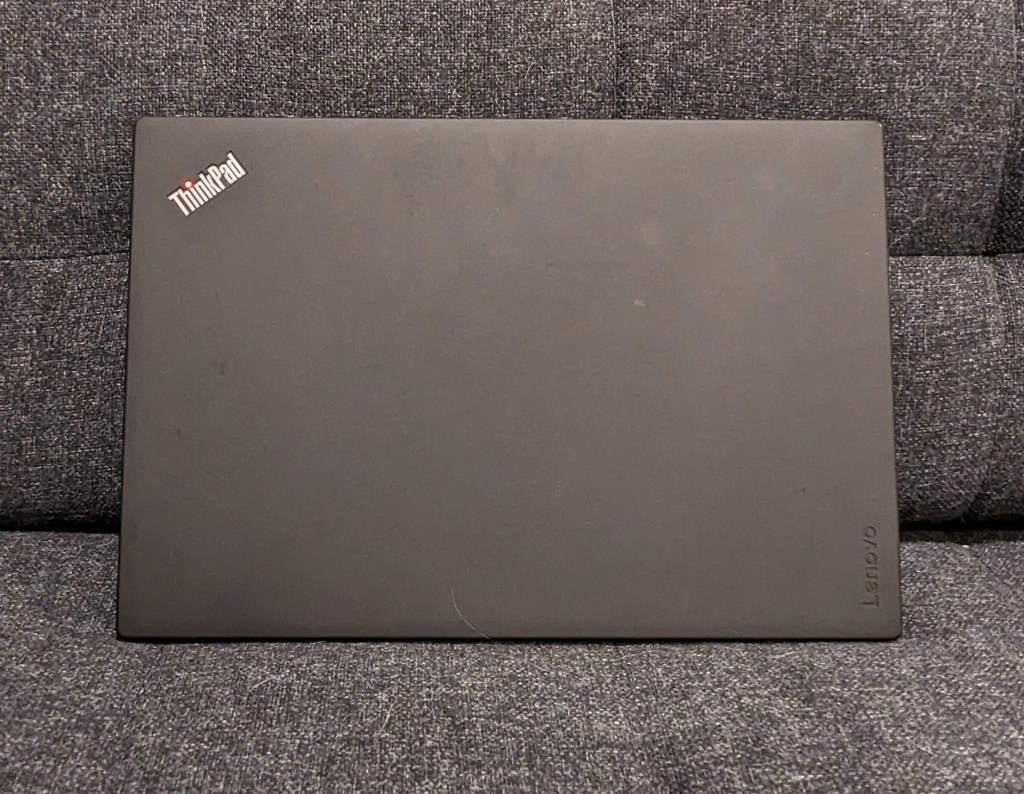
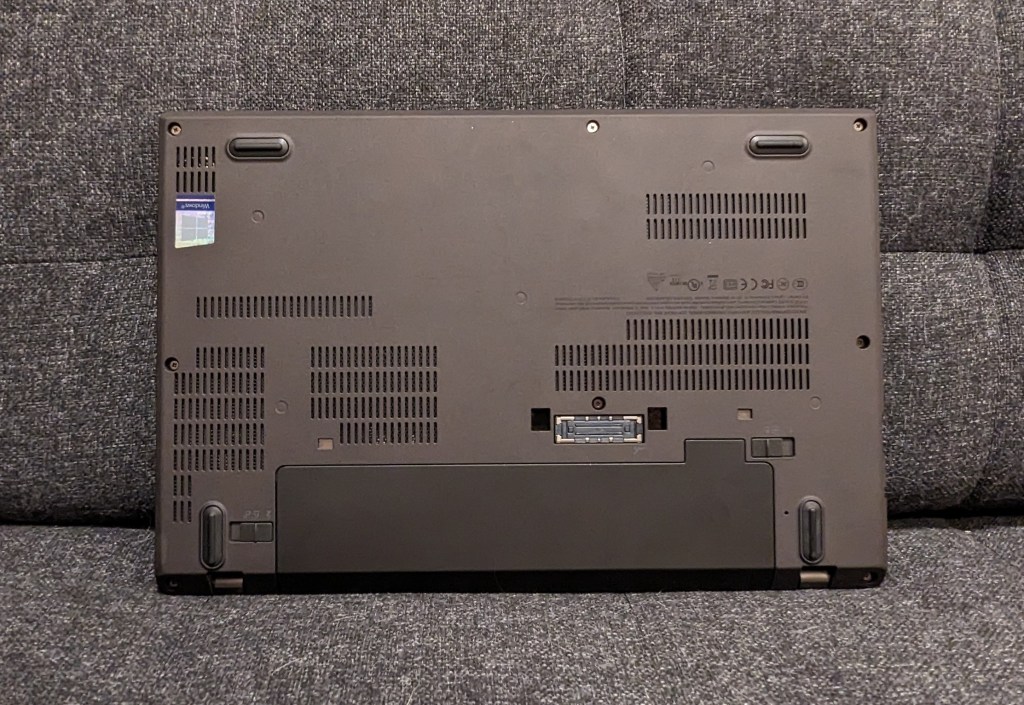
My Second Used Laptop: Lenovo ThinkPad X270
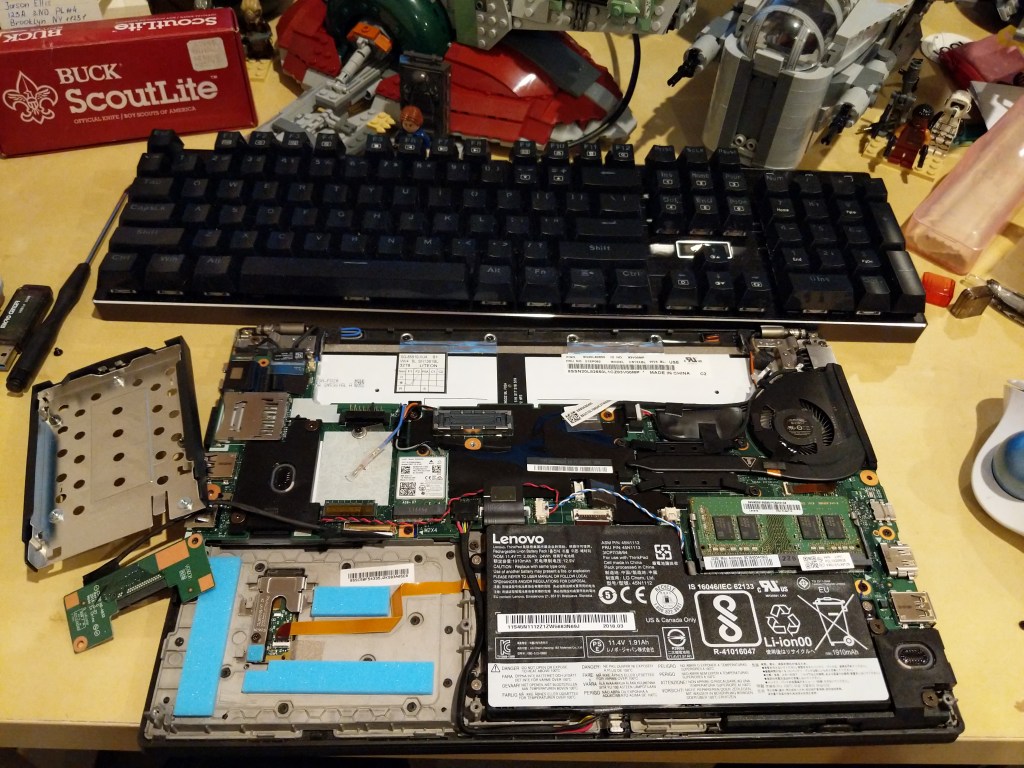
During the long at home time of the pandemic, I didn’t rely on a laptop–I just used my desktop for work and remote instruction, and I read on my Microsoft Surface Go tablet. Then, when it looked like things would be opening up again, I got a Lenovo ThinkPad X270 from a seller on eBay in December 2021. It was slightly lighter and slimmer than the X230 I had before. Also, my computing needs had changed, so I ran Linux Mint on it from the beginning (but I recently switched to Debian 12 Bookworm on it and my desktop). It was also easy to upgrade to a 1TB NVMe drive and 16GB DDR4 RAM.
NB: After upgrading your computer’s RAM, remember to run a full diagnostic test with memtest86+. Being in a rush, I installed this 16GB RAM module and went directly to work. Unexpectedly, I occasionally experienced random errors and reboots. I should have tested the RAM before using the laptop for work. Once I identified the error, I was able to exchange the RAM for a new module that passed memtest86+ successfully.
How to Find Your Own Top-Tier Used Laptop
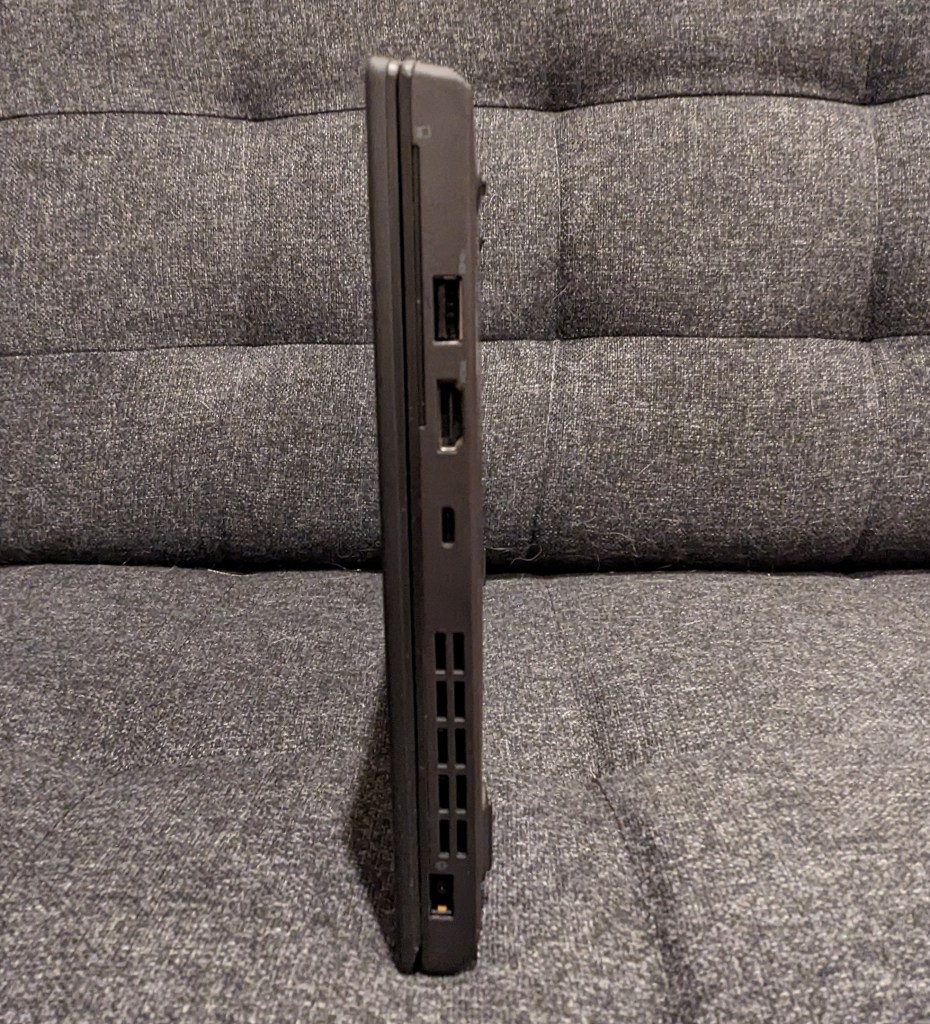
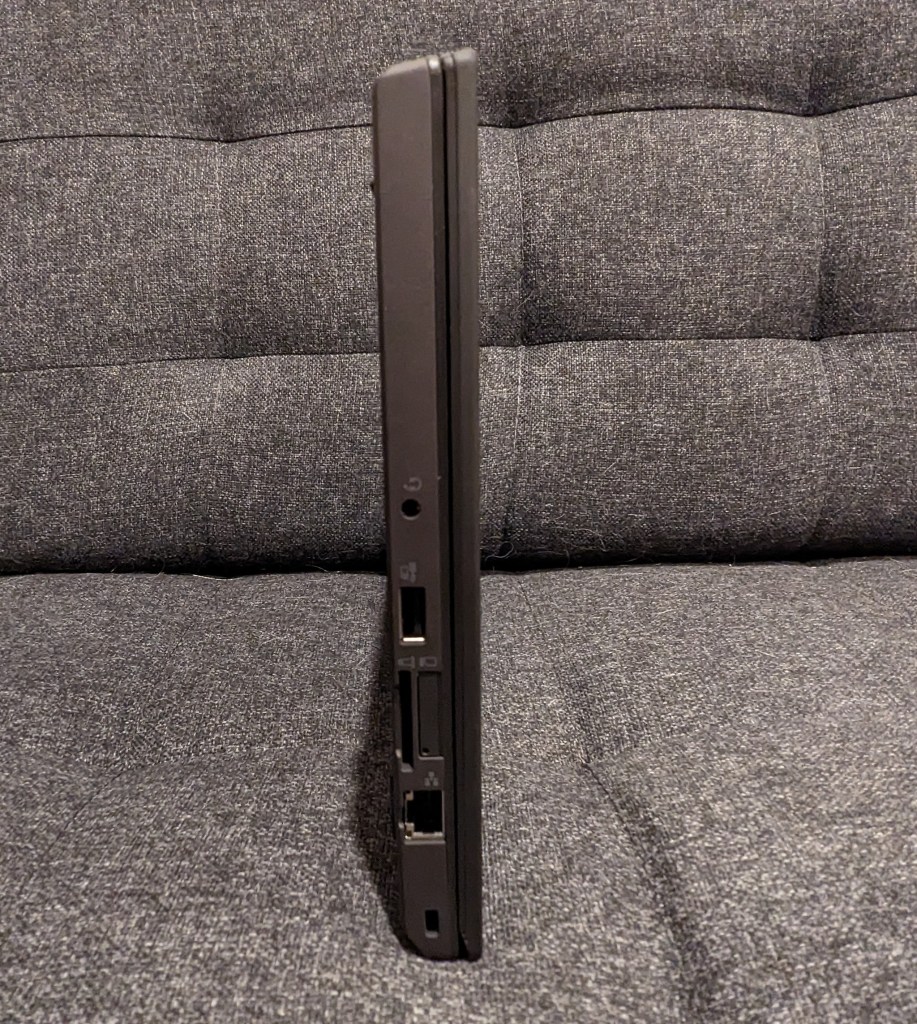
Spend time identifying your non-negotiable and negotiable features on the laptop. Think about how and where you use the laptop. If power outlets are a premium where you are or you simply don’t want to lug around an AC adapter, you will want to prioritize battery capacity. Or, you might need more computing horsepower and have easy access to power outlets, so a speedier model with less battery capacity might be okay for you. Another important consideration is video output (HDMI, mini HDMI, USB-C + dongle/adapter, etc.). I would suggest writing down these lists in two columns so that you can make sure you don’t overlook a non-negotiable feature or miss a negotiable feature that would be nice to have.
With your non-negotiable and negotiable lists in hand, look through Wikipedia, Google Searches, and computer seller websites to get a sense of what laptops were available several generations back. With model numbers, you can also search Google, Reddit, and other social media for reviews. You want to be careful to avoid error prone models (e.g., a model that was known to have problem X).
While there are deals to be found on Craigslist or Facebook Marketplace, there is more risk purchasing from someone through those services than eBay. The longstanding online auction house has several features built-in to help protect us buyers. First, buyers and sellers rely on the feedback system. You can see what a seller’s feedback is like (switch to their seller feedback to get the best picture of what matters to you as a buyer), and you can see other metrics about what other buyers thought of the seller’s communication, speed to ship, etc. Second, eBay offers buyer protection through their “eBay Money Back Guarantee.” Third, many (but not all) sellers offer returns on the items that they sell. However, you will want to read their terms and conditions carefully before bidding or purchasing an item. And, that is also a general rule: If you have a question about a product, you should message the seller before bidding or purchasing the item.
Study listings carefully. While you are looking at all of these listings, spend time studying the photos and descriptions. If a seller is too lazy to write a description of the item for sale, I pass on those. Similarly, if a seller takes too few or blurry photos, I pass on those, too. If a seller says that the item being sold is similar to but not the item pictured, I pass on those. Despite these issues, if you are interested in an item, then that’s the time to message the seller for more details. You can ask for more photos or a description of the item. If the seller responds to your inquiry, that is a good sign, but if they don’t, you should pass.
Be patient. Finding a good deal that meets your non-negotiable parameters usually doesn’t happen right away. You need to educate yourself about the currently acceptable prices for the particular hardware that you are looking for. On eBay, you can do this by filtering your searches to “Sold Items.” This will give you an idea about what others are paying for similar items and gives you a metric for a deal that might fall below the currently accepted price for that item.
When you get your new, used laptop, feel good about saving some money, getting solidly capable computing equipment, and saving a computer from joining the ewaste environmental catastrophe earlier than its time.
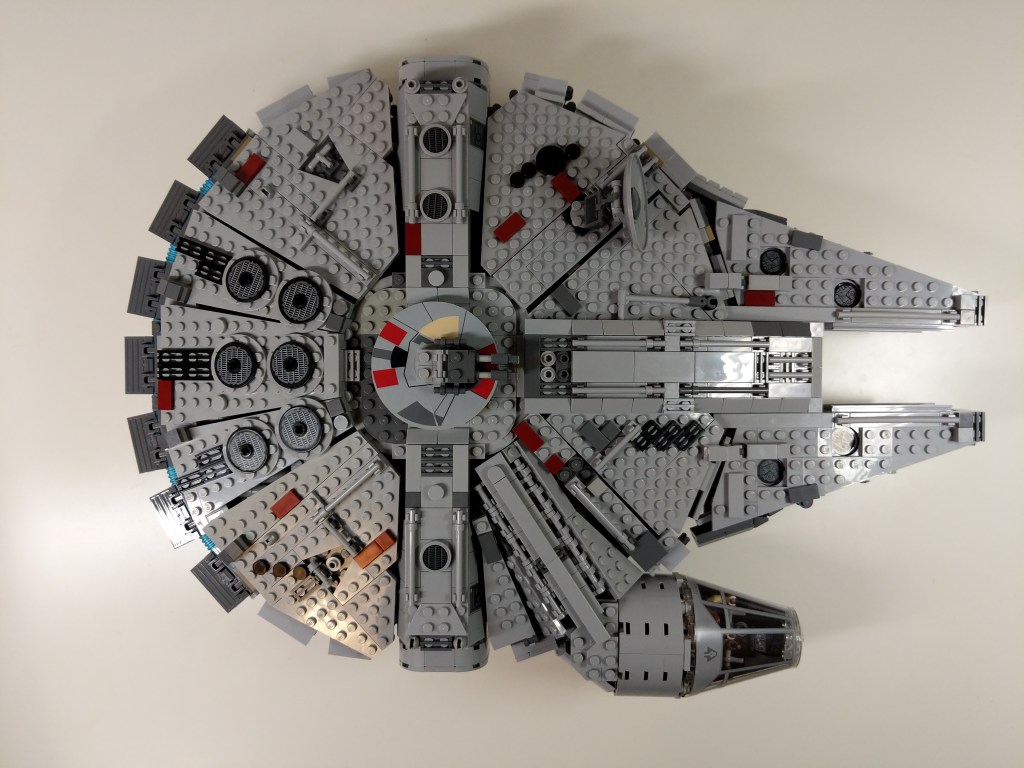
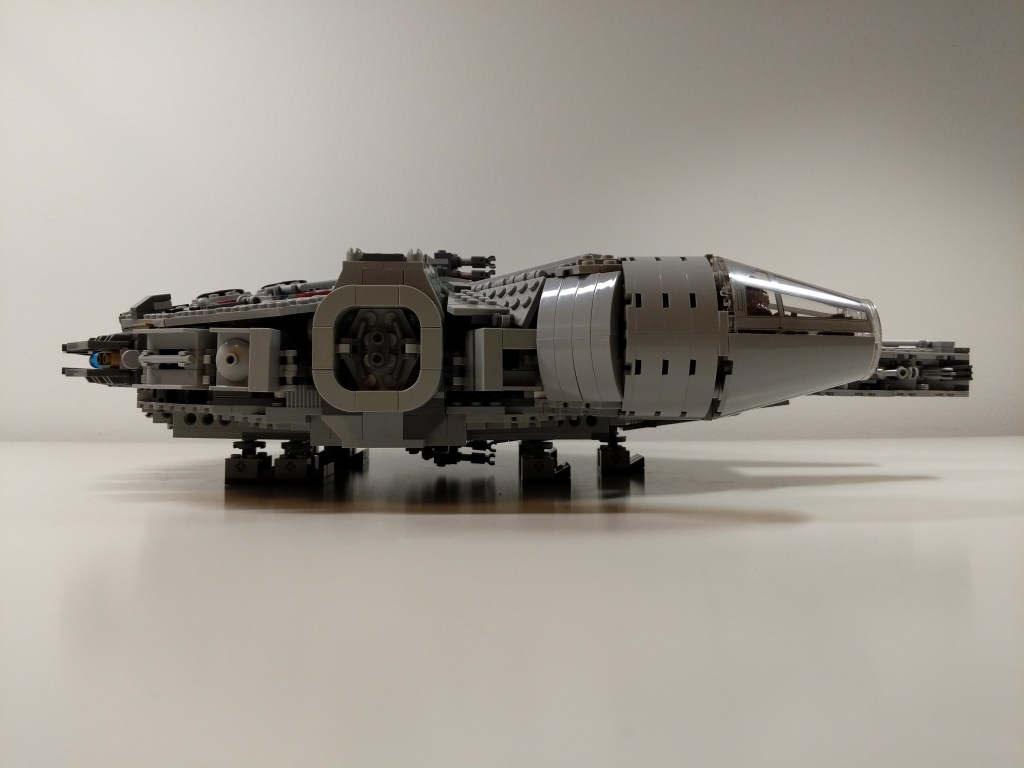
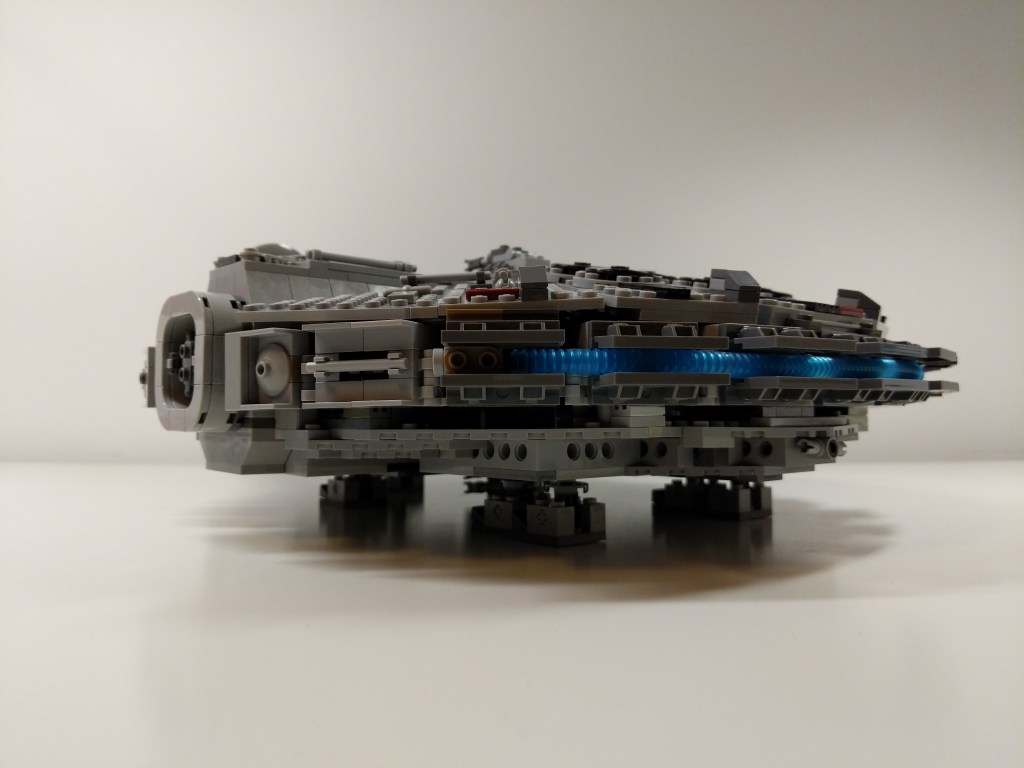
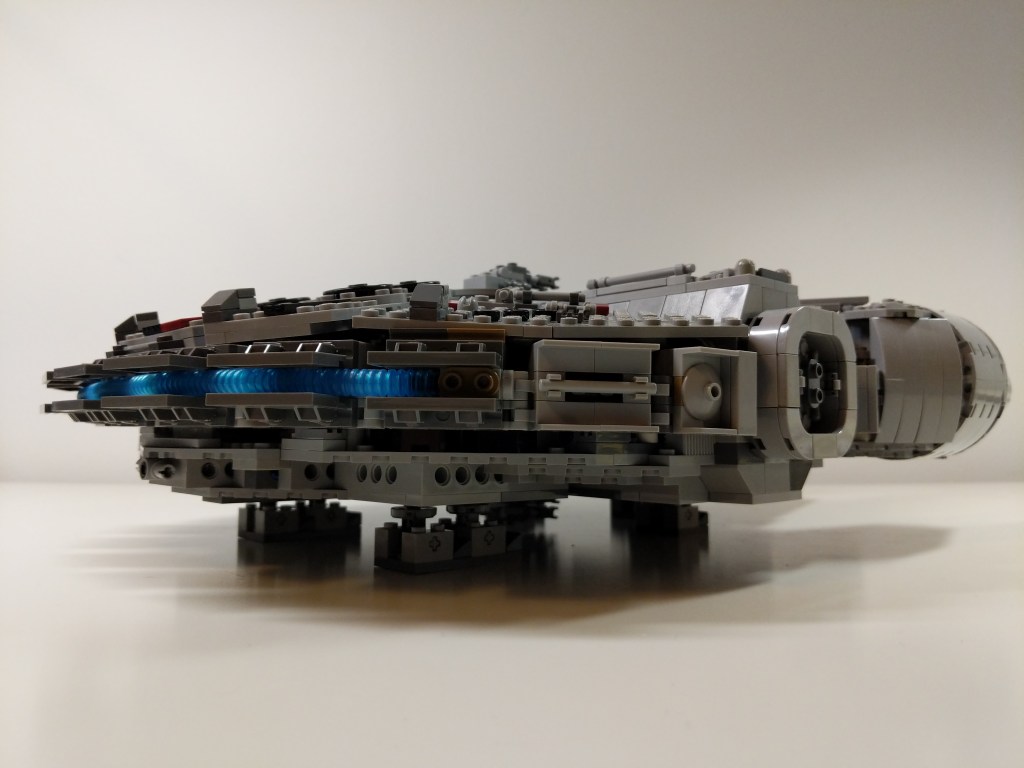
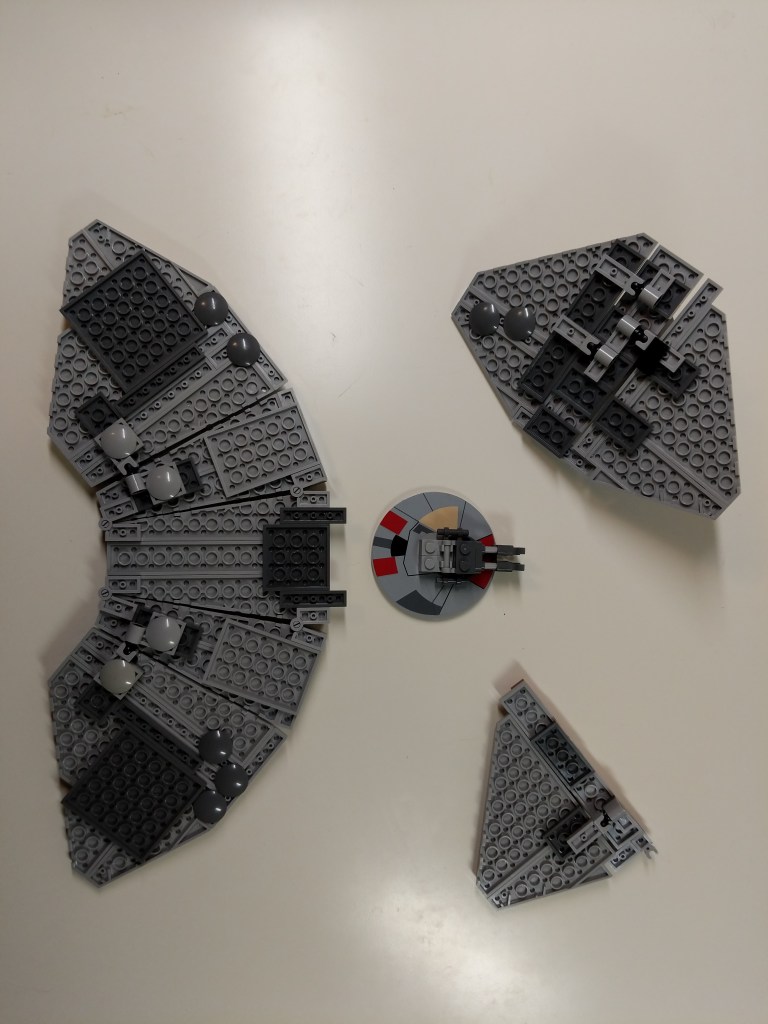
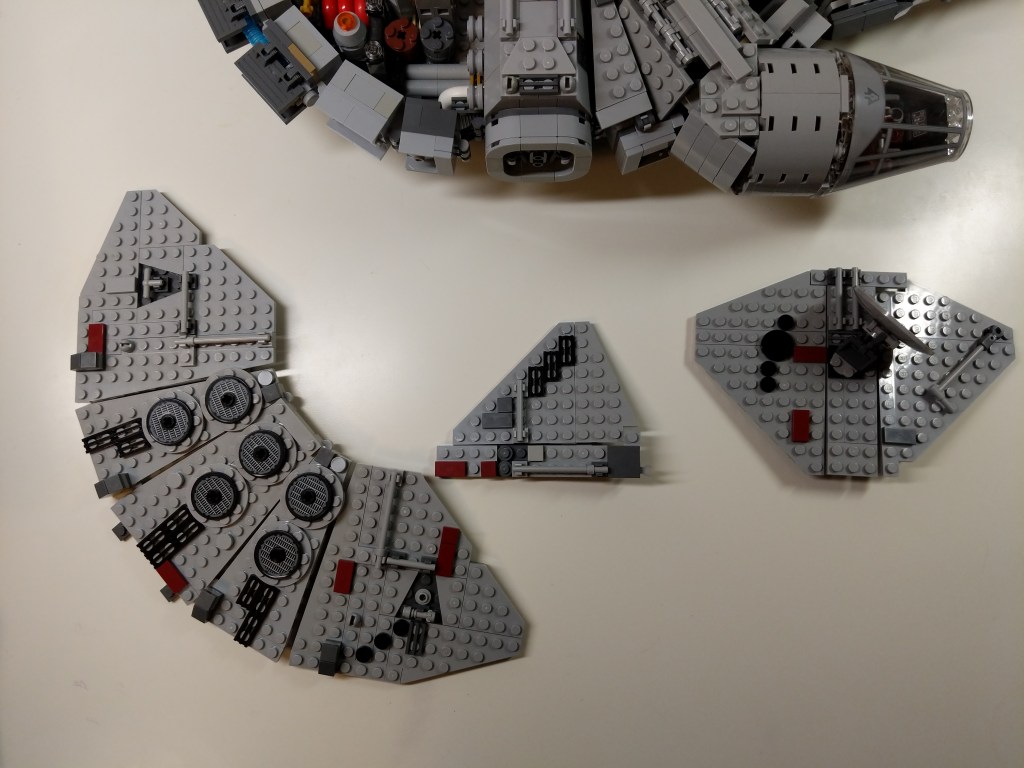
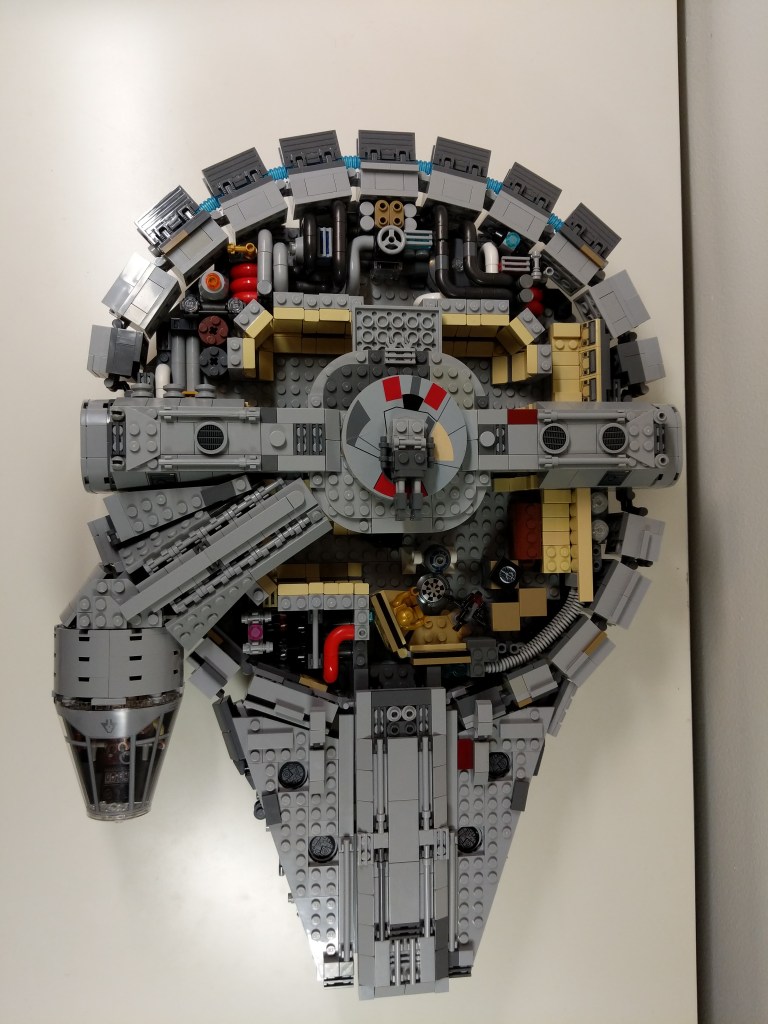
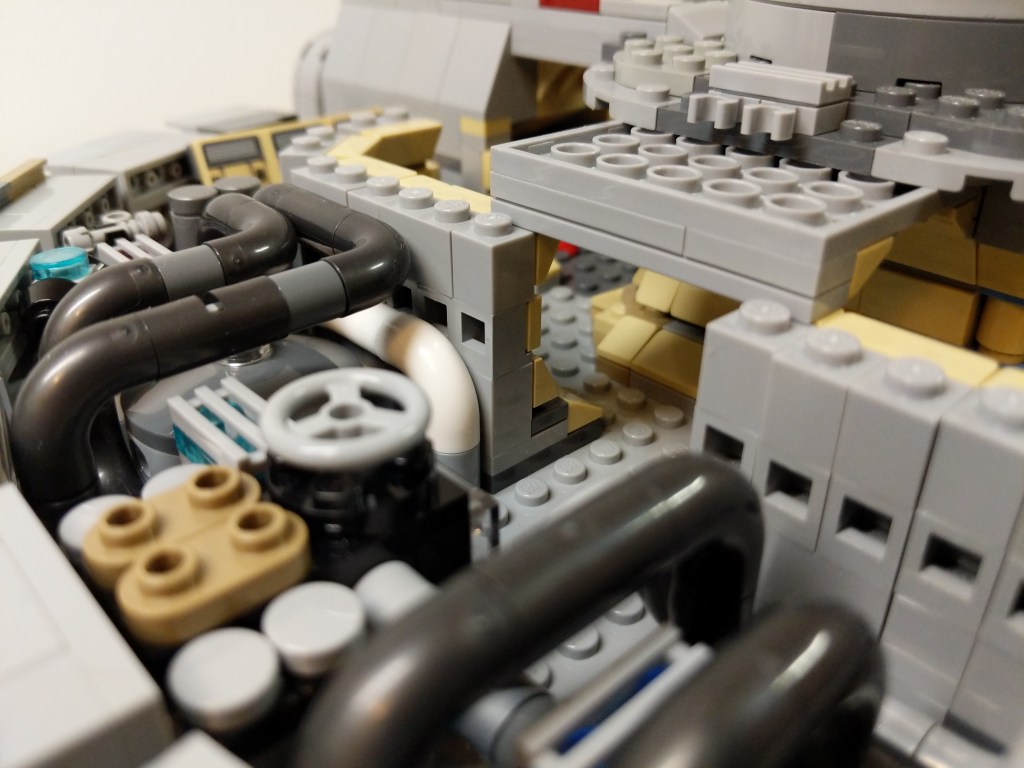
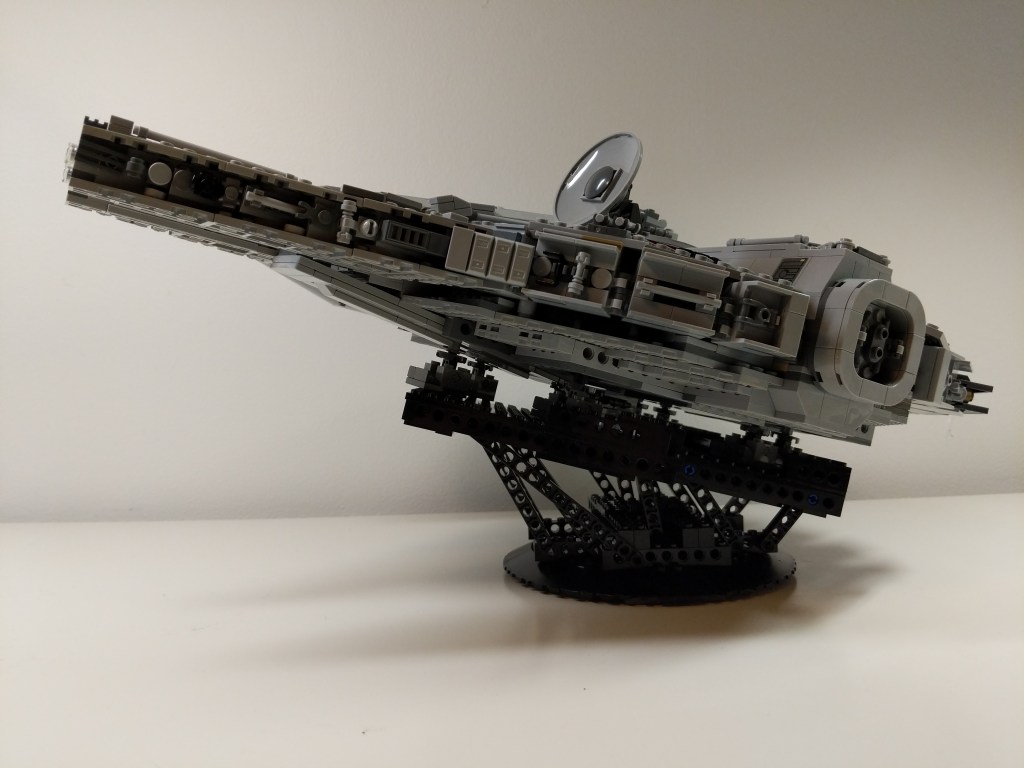
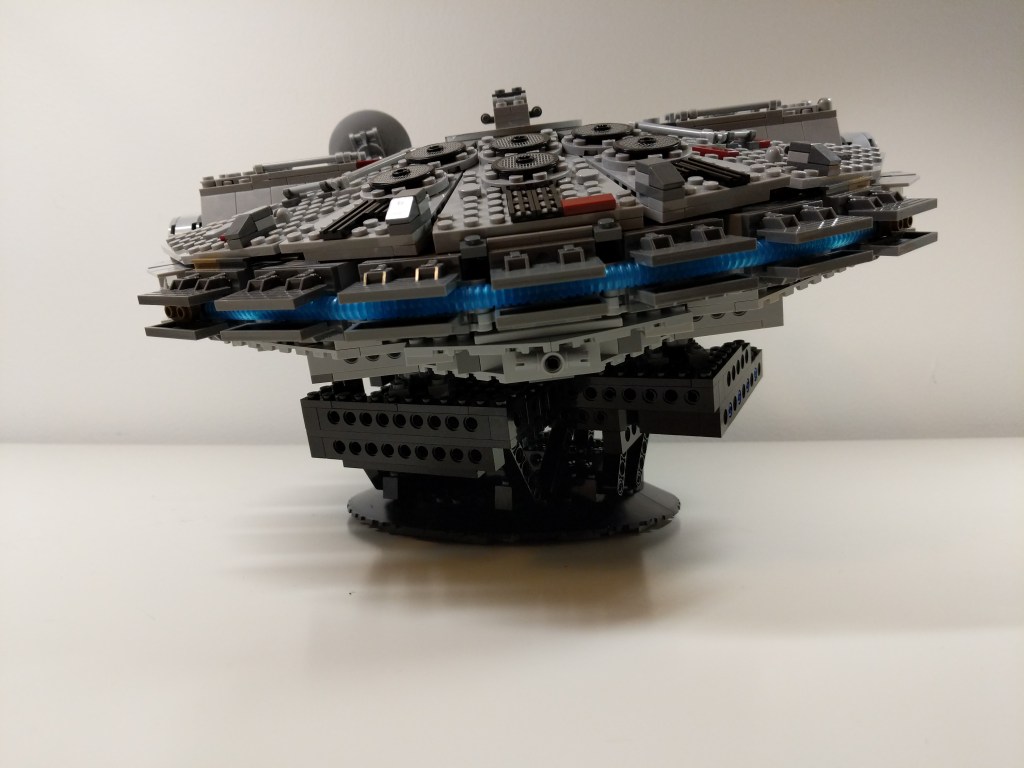
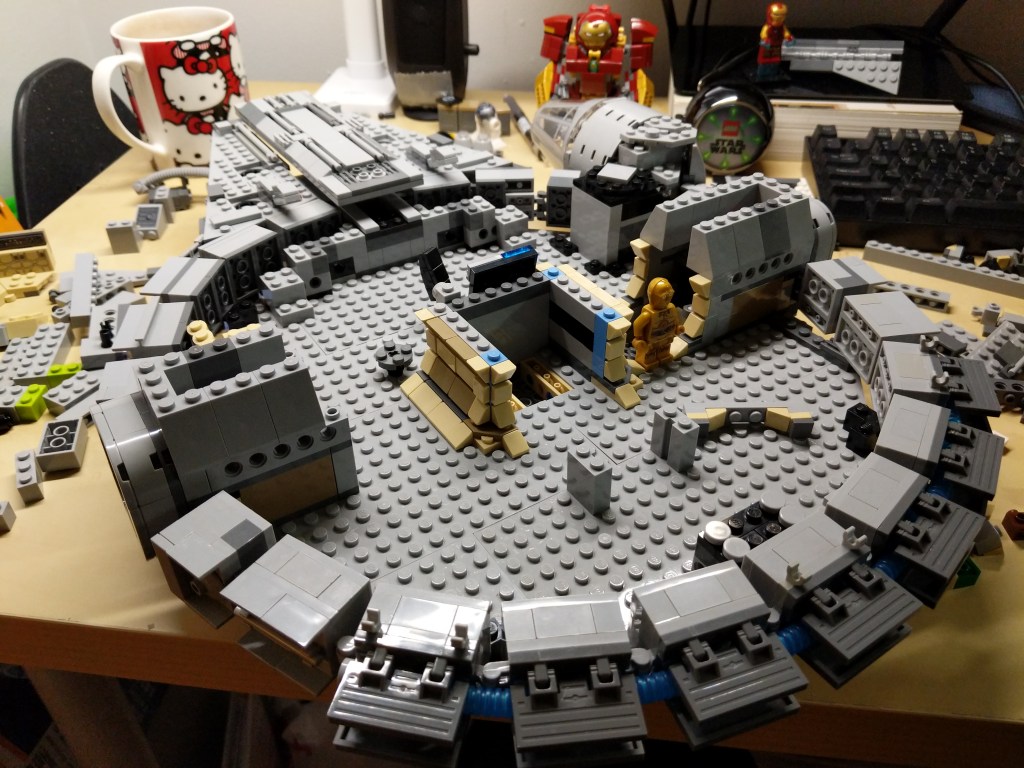
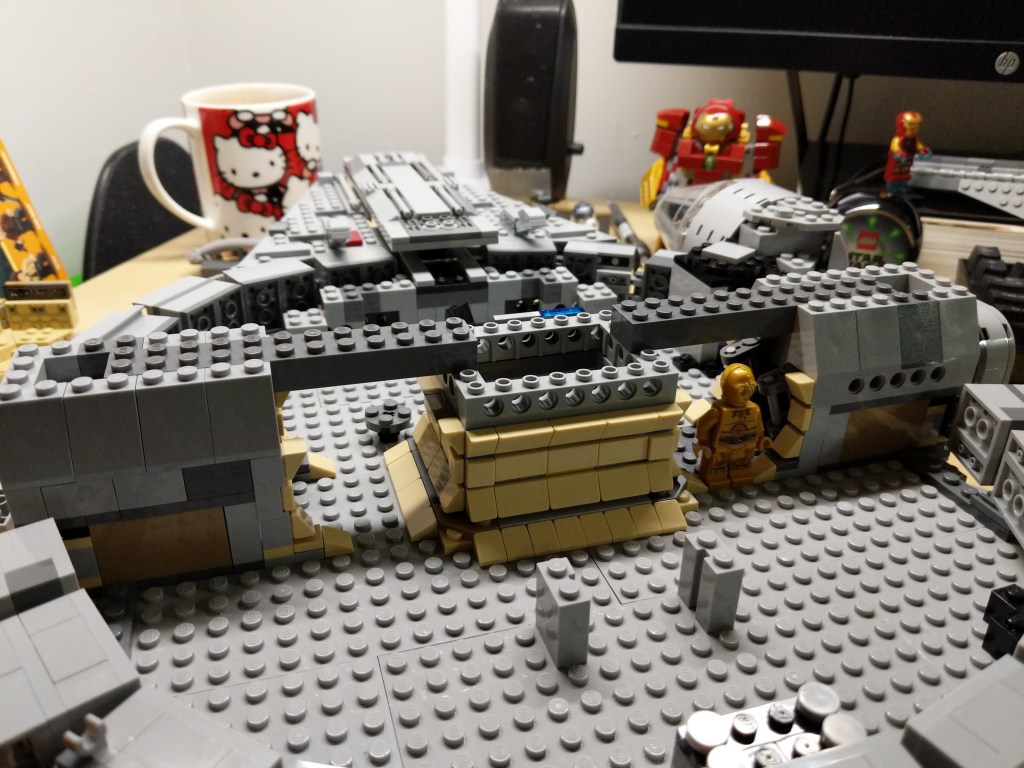
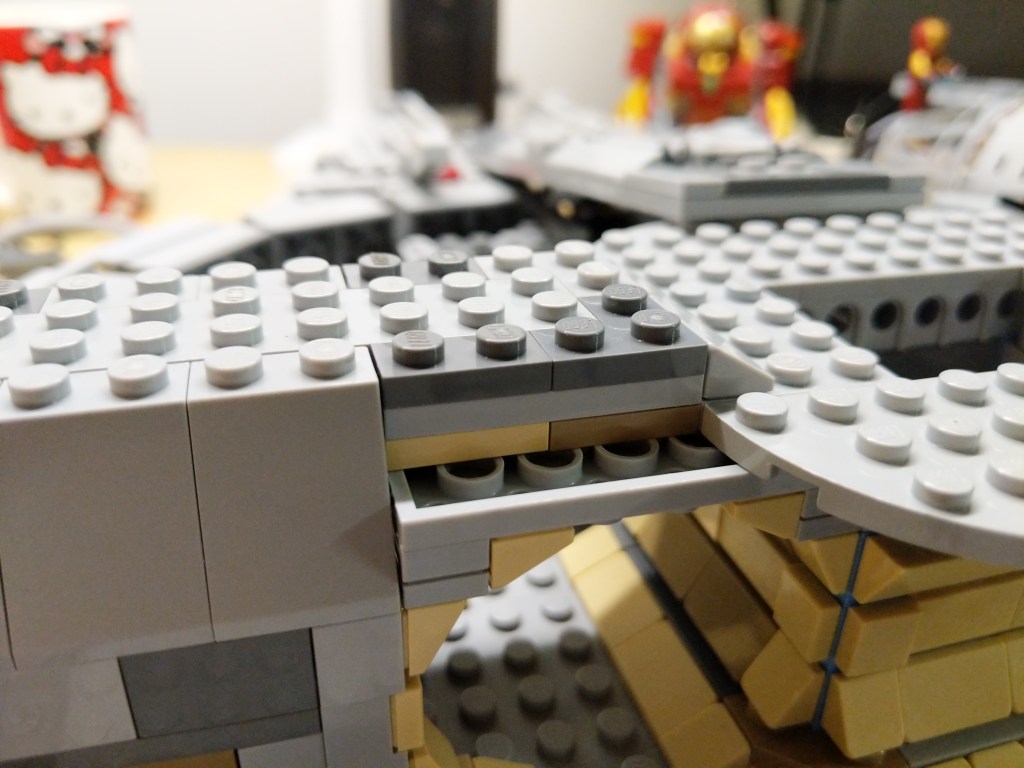
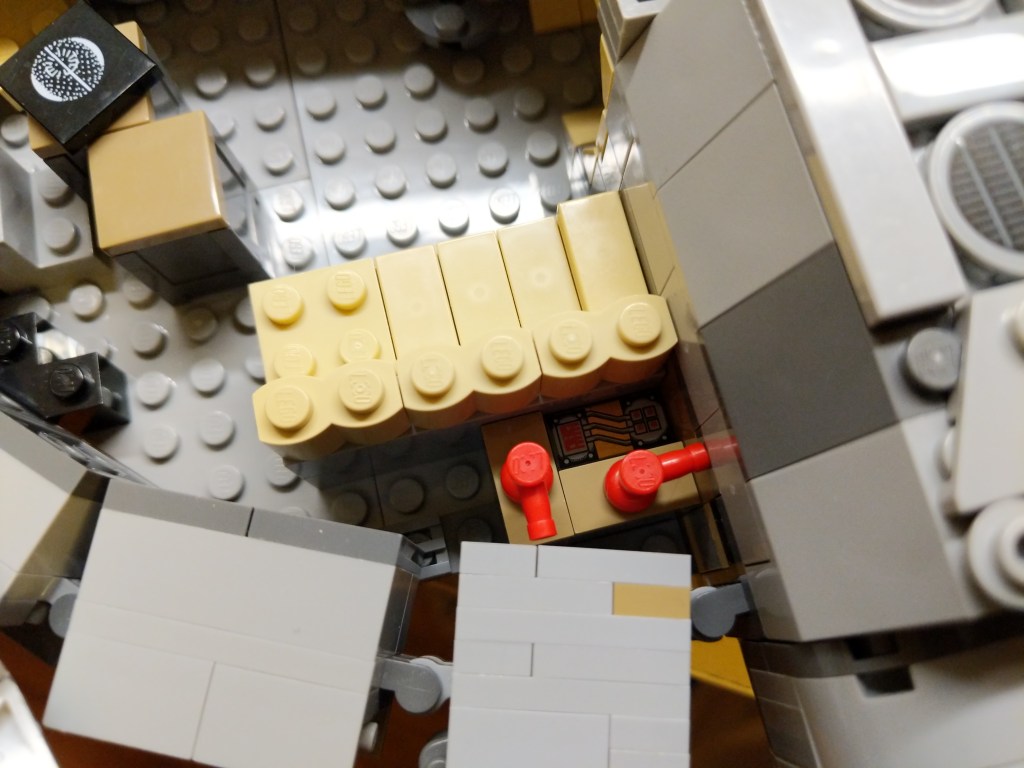
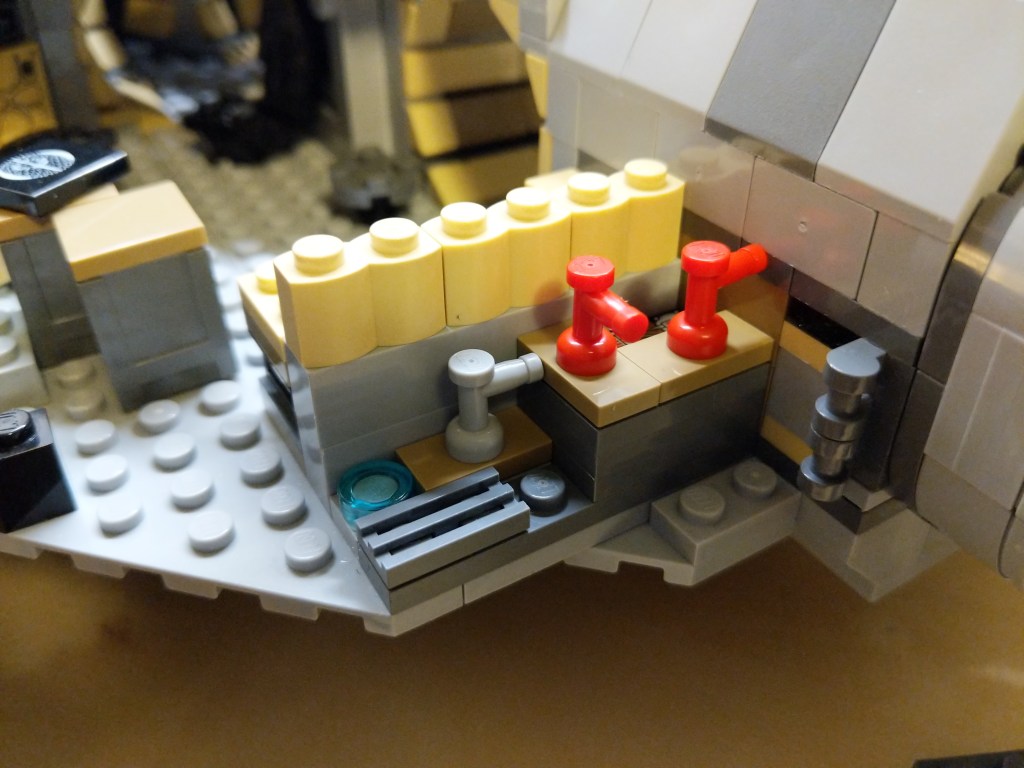
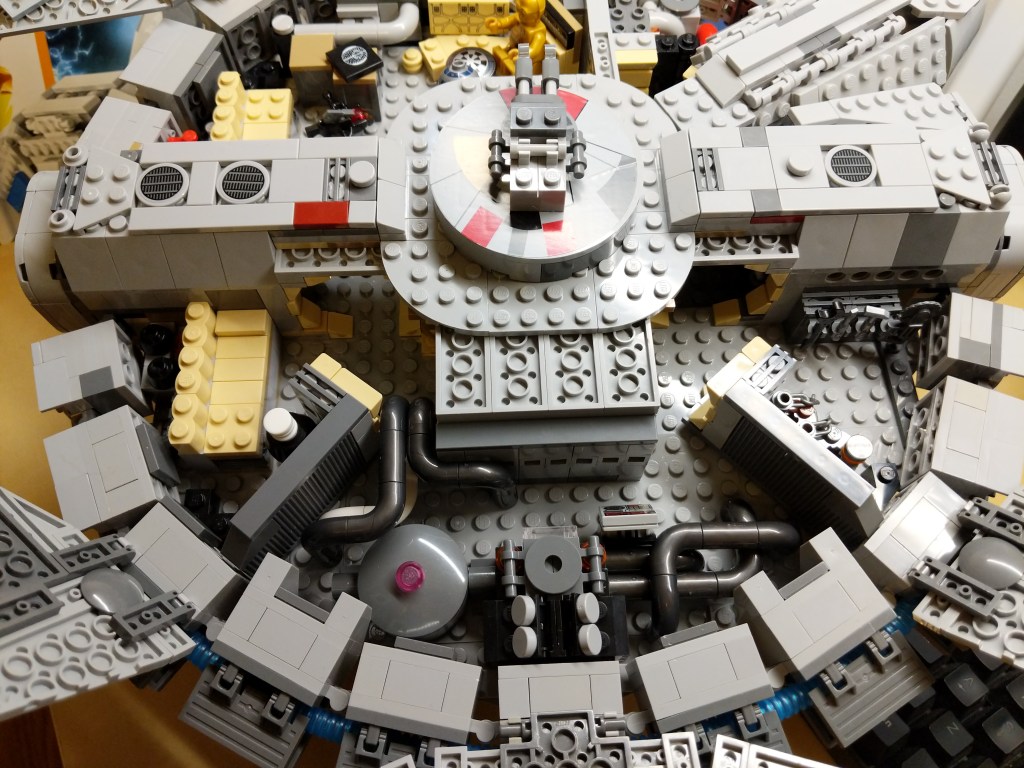
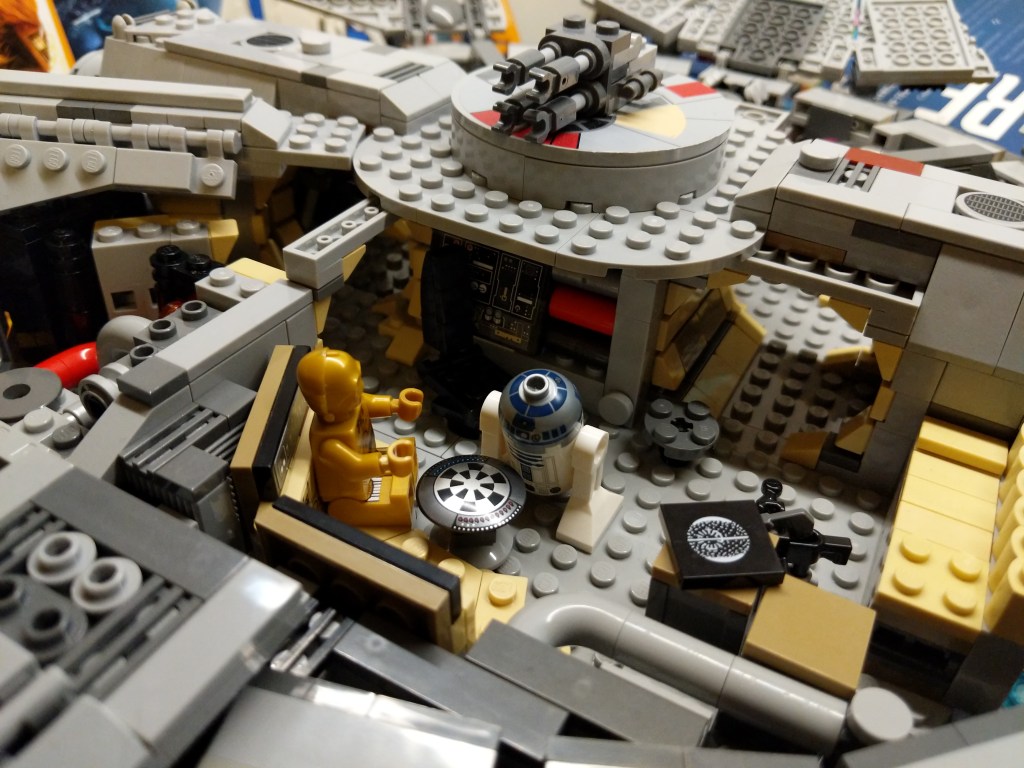
I’ve documented several of my LEGO Millennium Falcon MOCs and mods here (Last Jedi update), here (Force Awakens), here (Midi-Scale display), and here (7190 remodel). This time, I completely overhauled 75257 with a 4-person cockpit, detailed engine compartment, more round hallways, landing gear details, and a SNOT lower mandible slope with opening for center landing gear. There are more details to be found in the photos below.
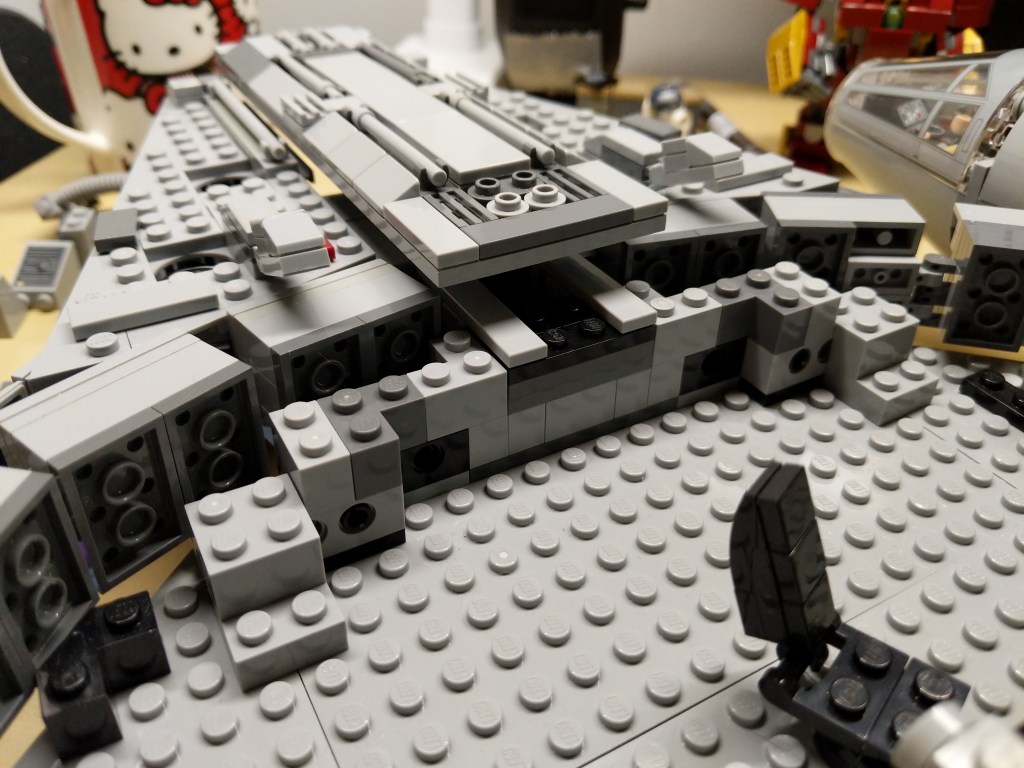
Exterior
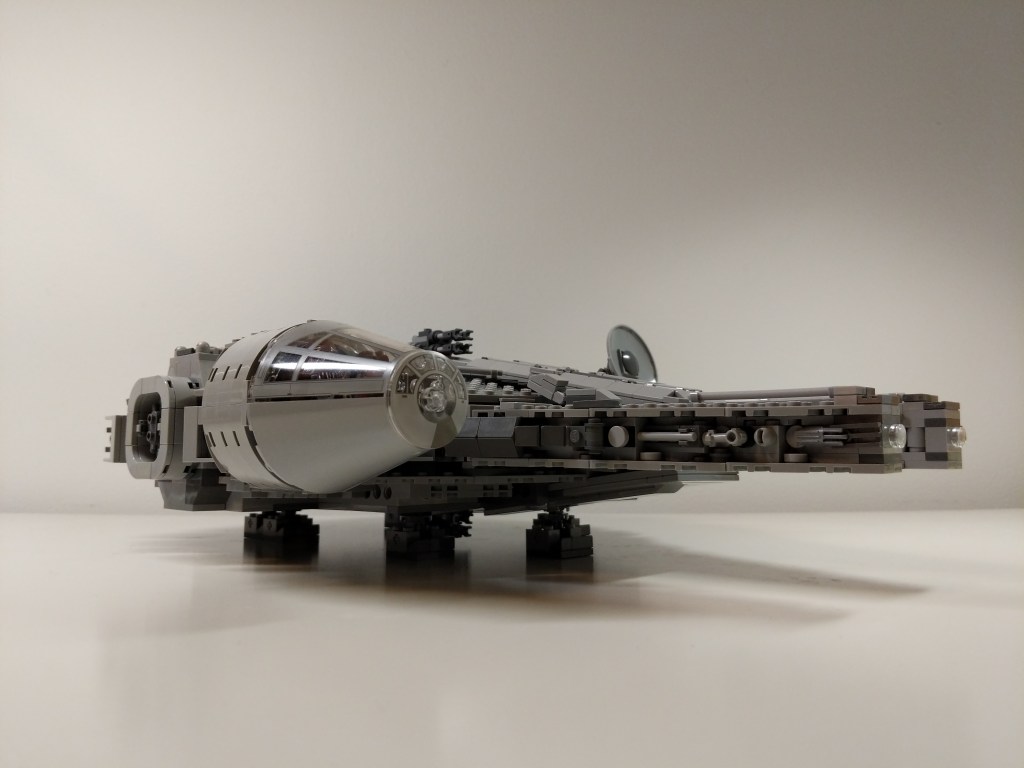
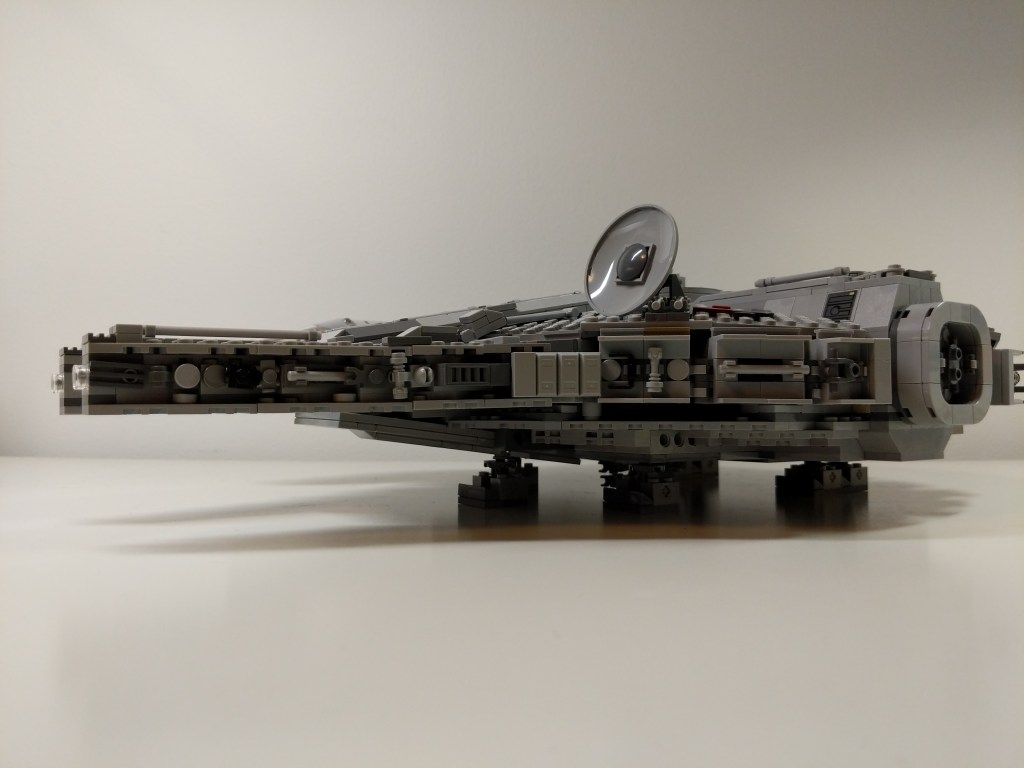
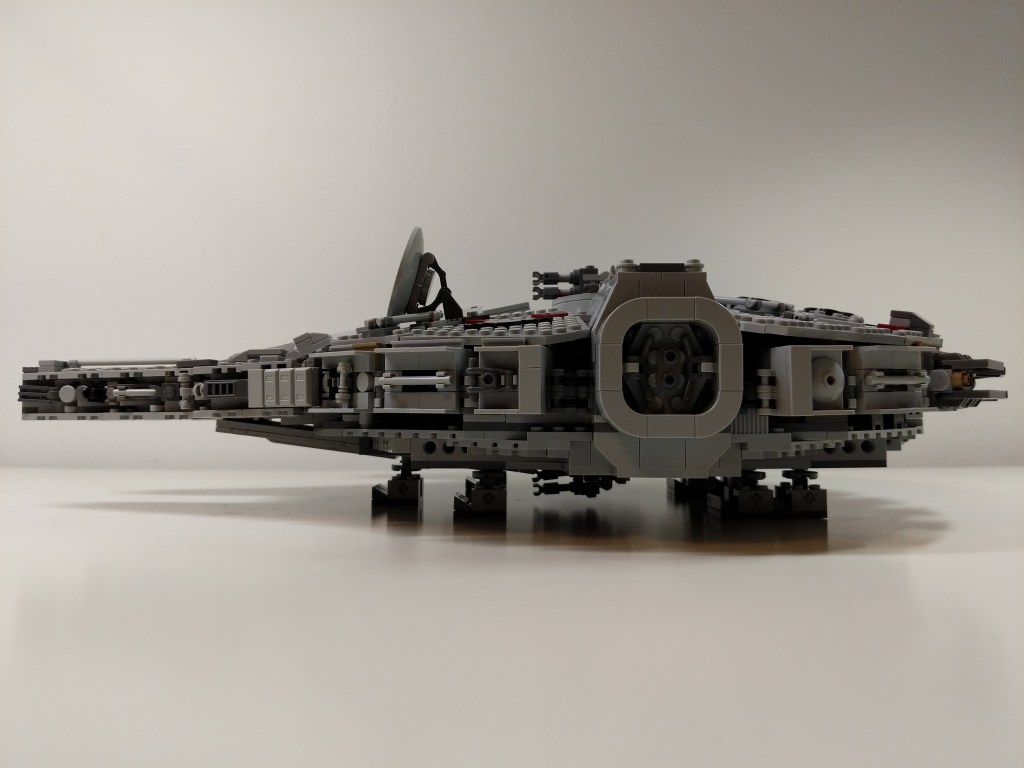
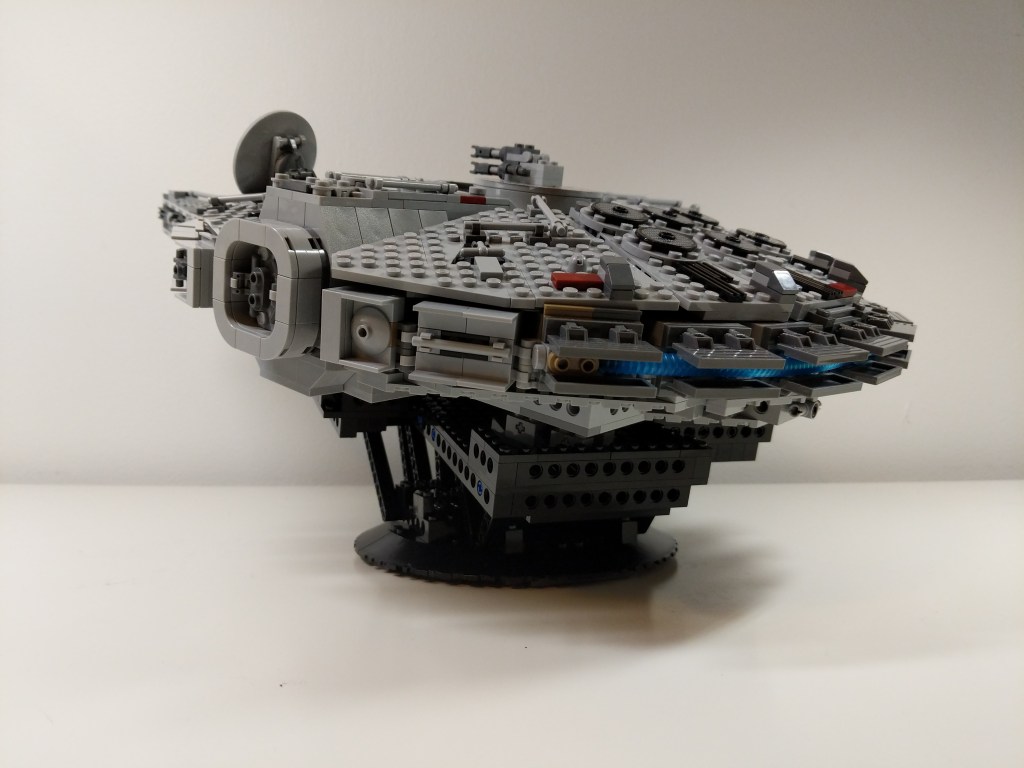
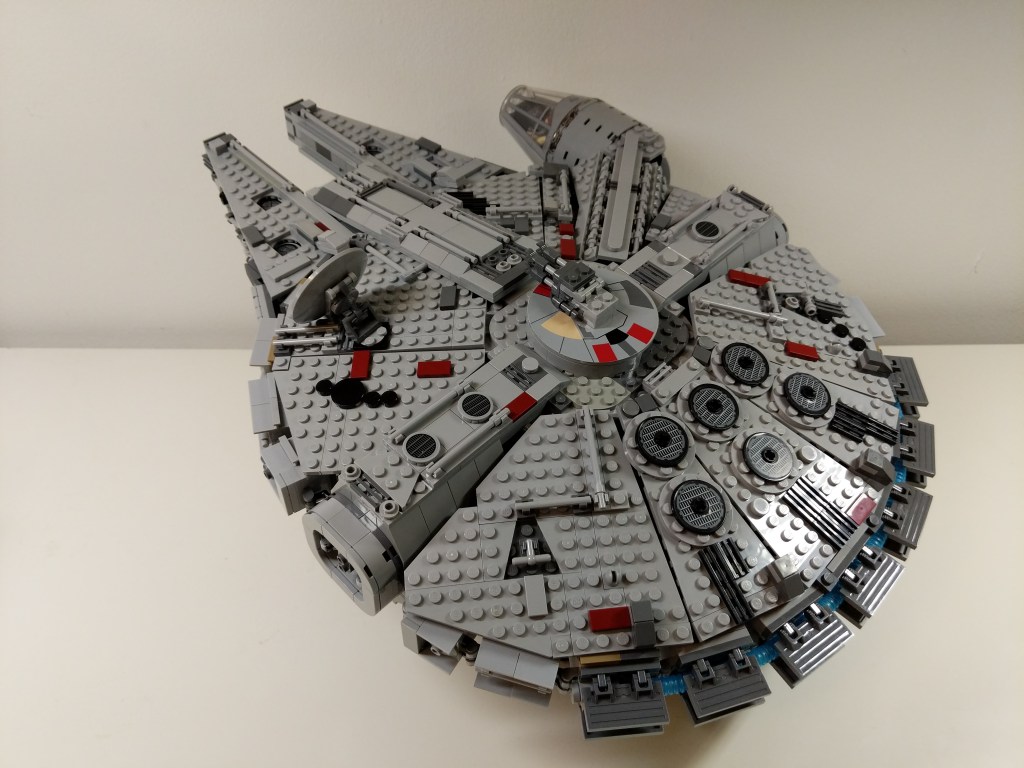
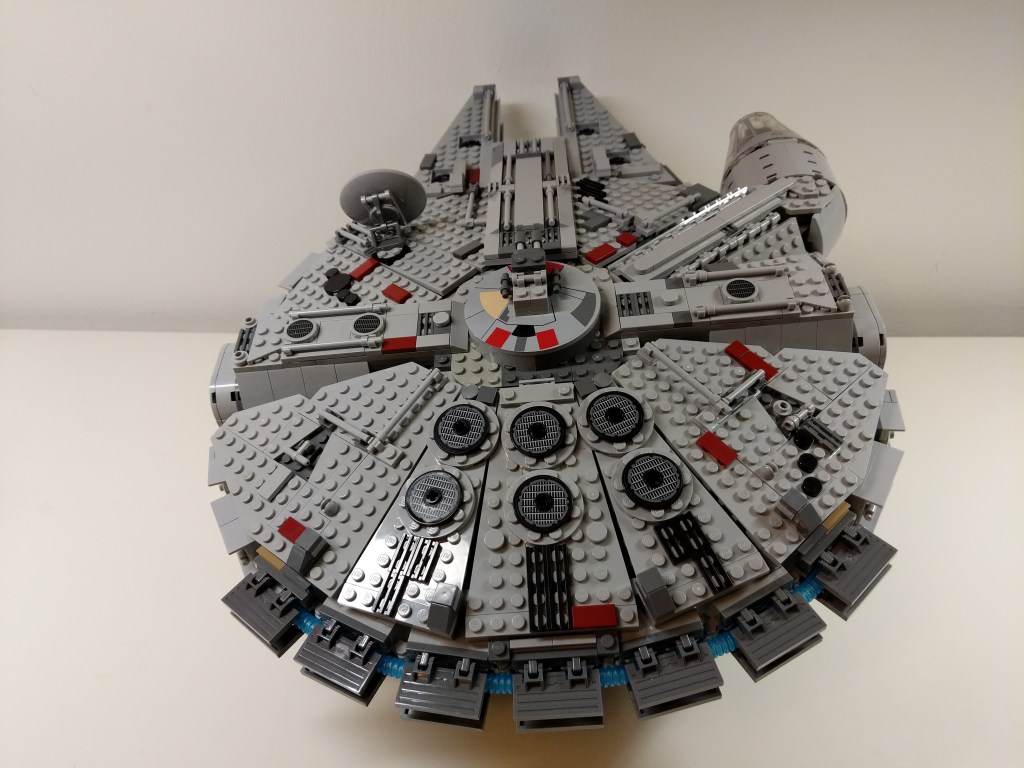
I added greebling, blast marks, and other details to make the Falcon appear as close to the cinematic model as I could giving the low fidelity and resolution of LEGO at this scale.
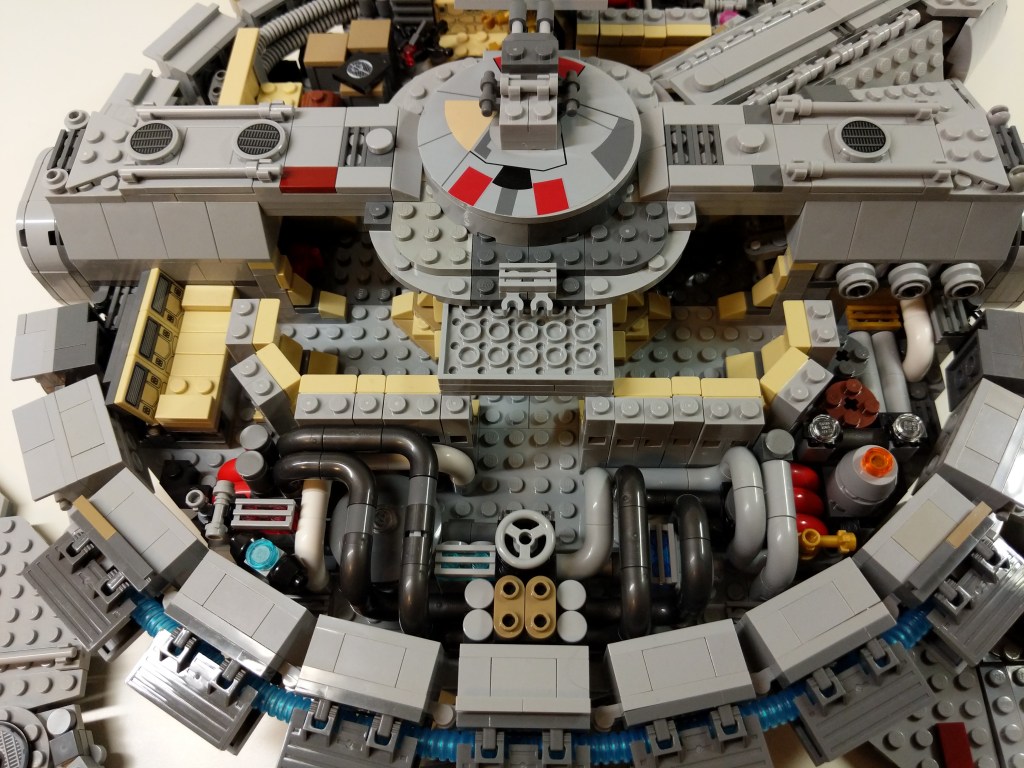
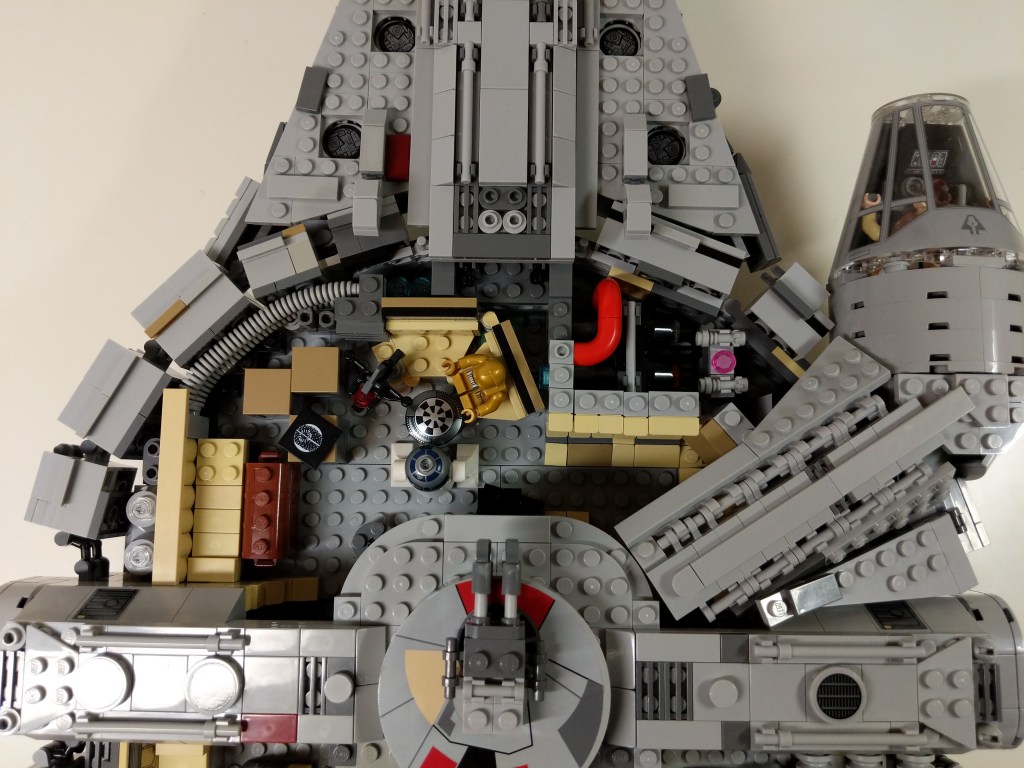
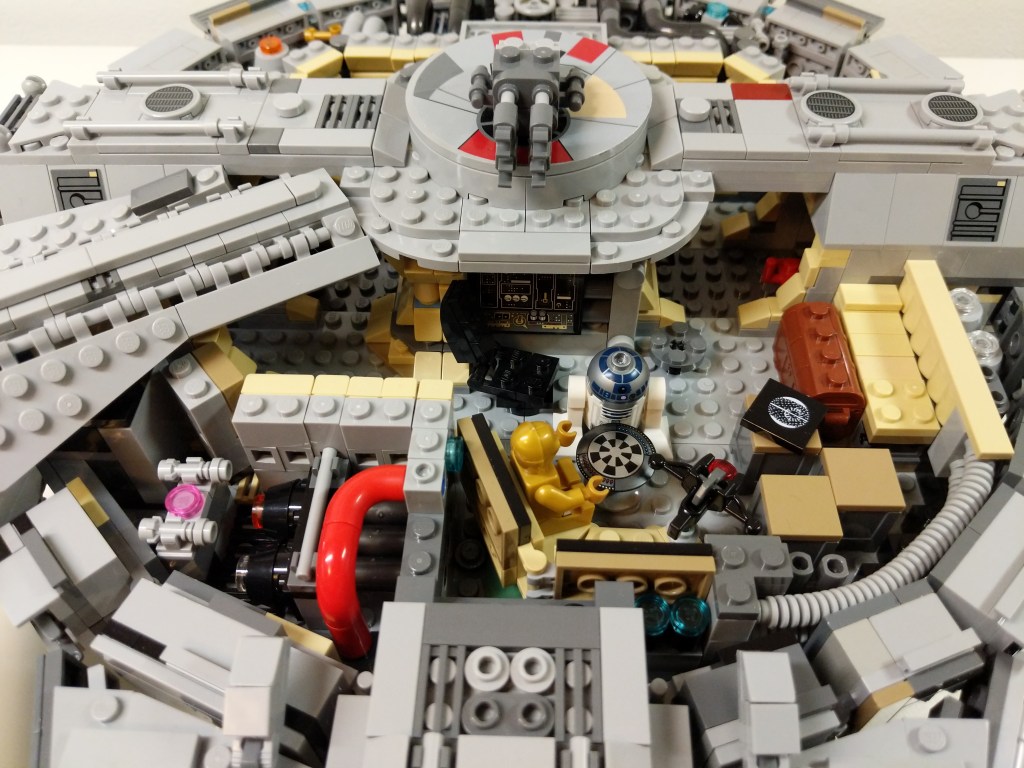
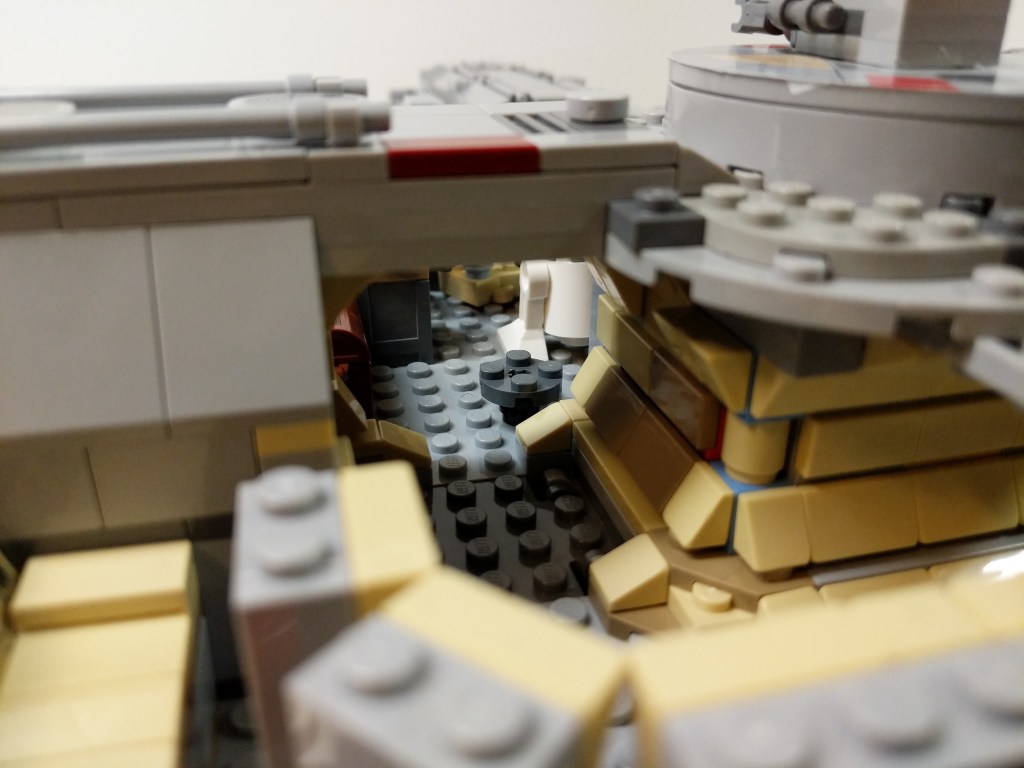
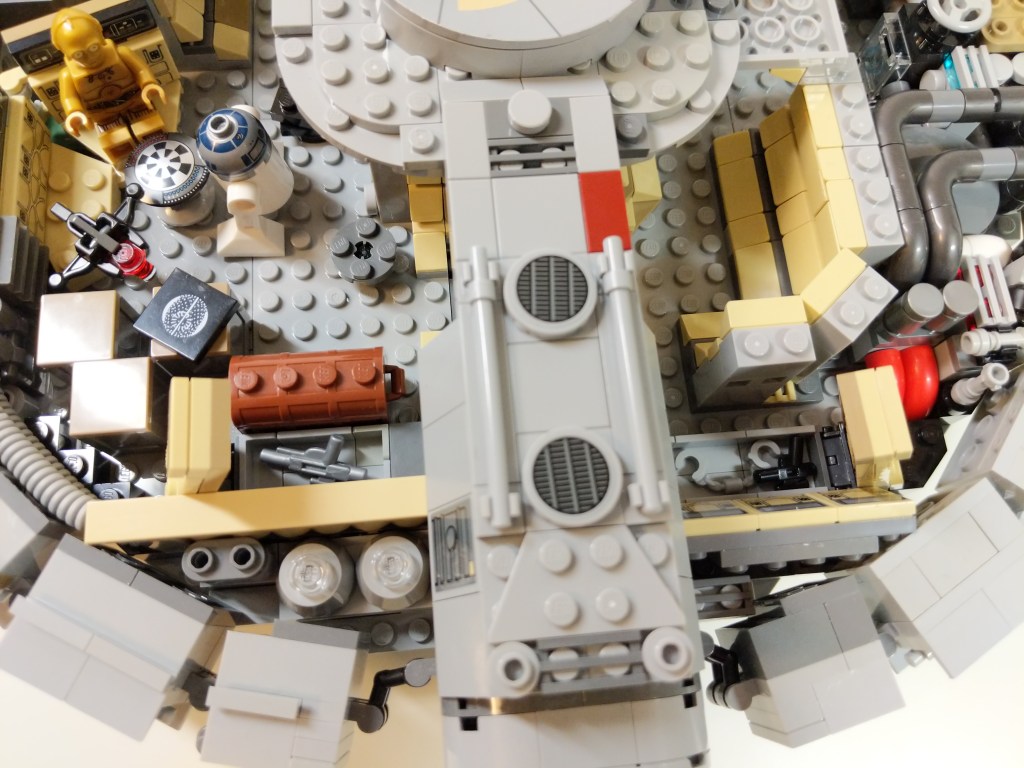
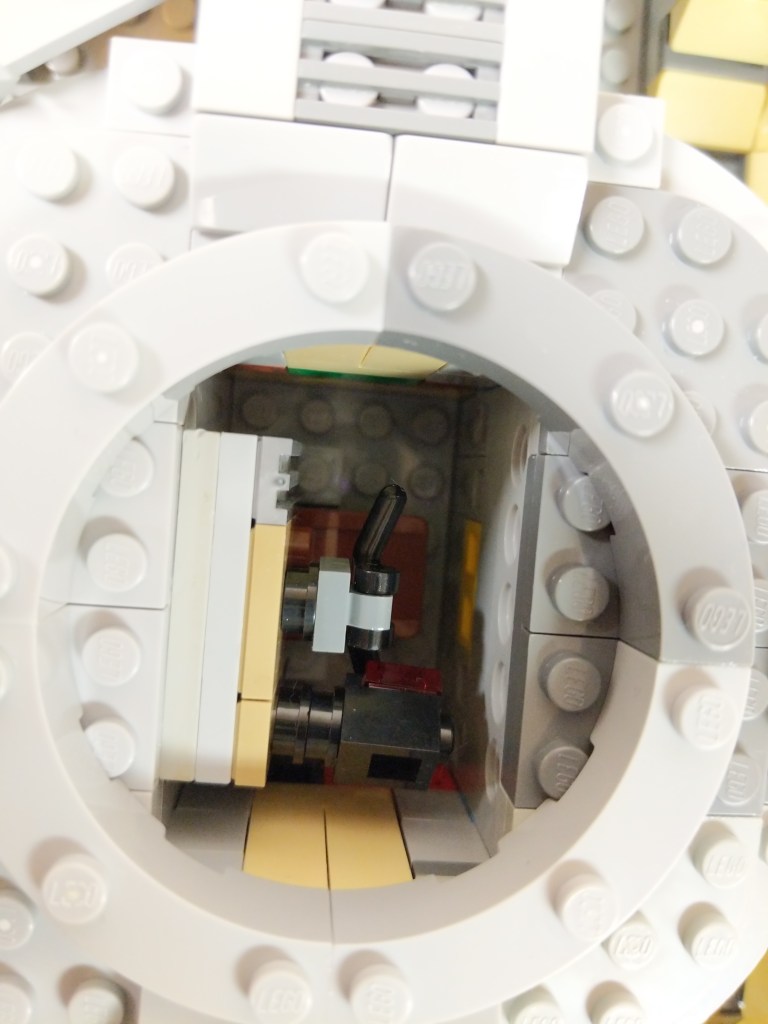
Interior
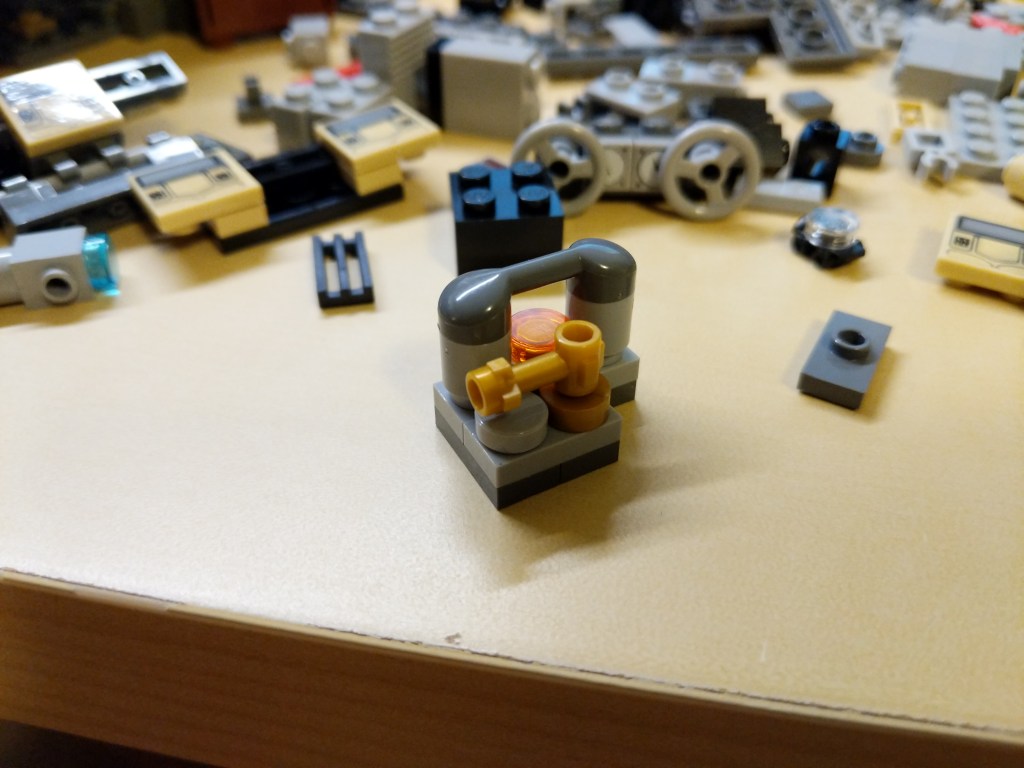
I wanted to include as much detail as possible–including detail hidden from view, like in the AMT/ERTL Cutaway Model of the Falcon. I made use of pipes–especially in the engine comparment–thinking of Han Solo’s repairs to the Falcon during the escape from Hoth in The Empire Strikes Back (1980). The pull-out gunner’s turret has an targeting computer display.
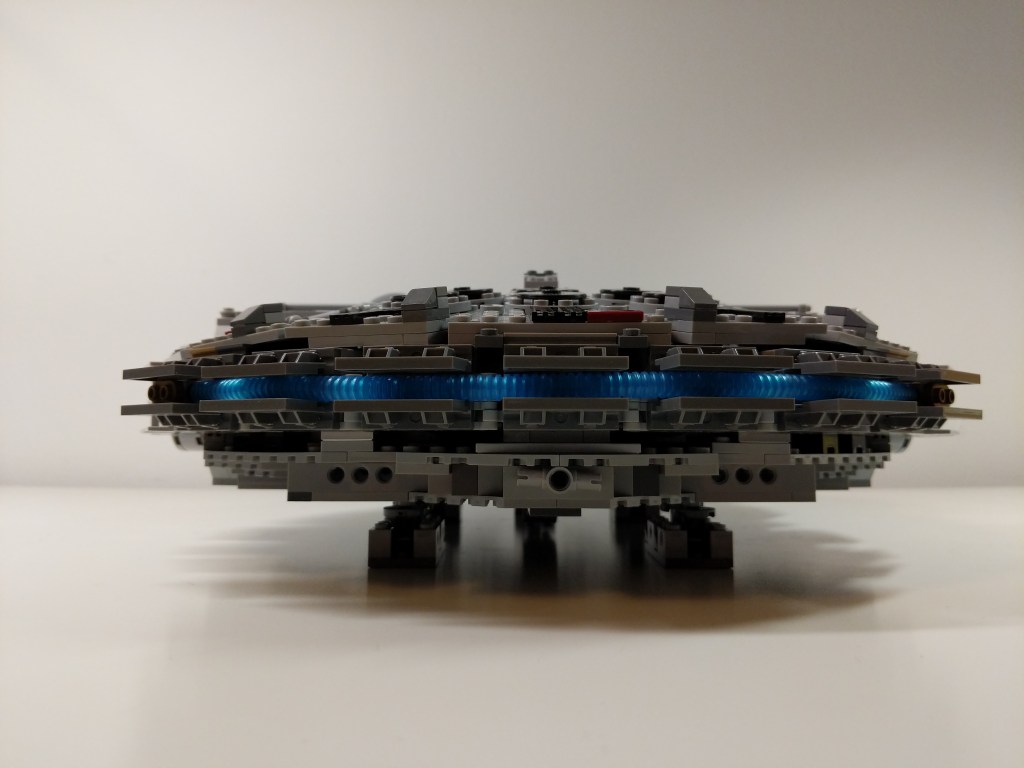
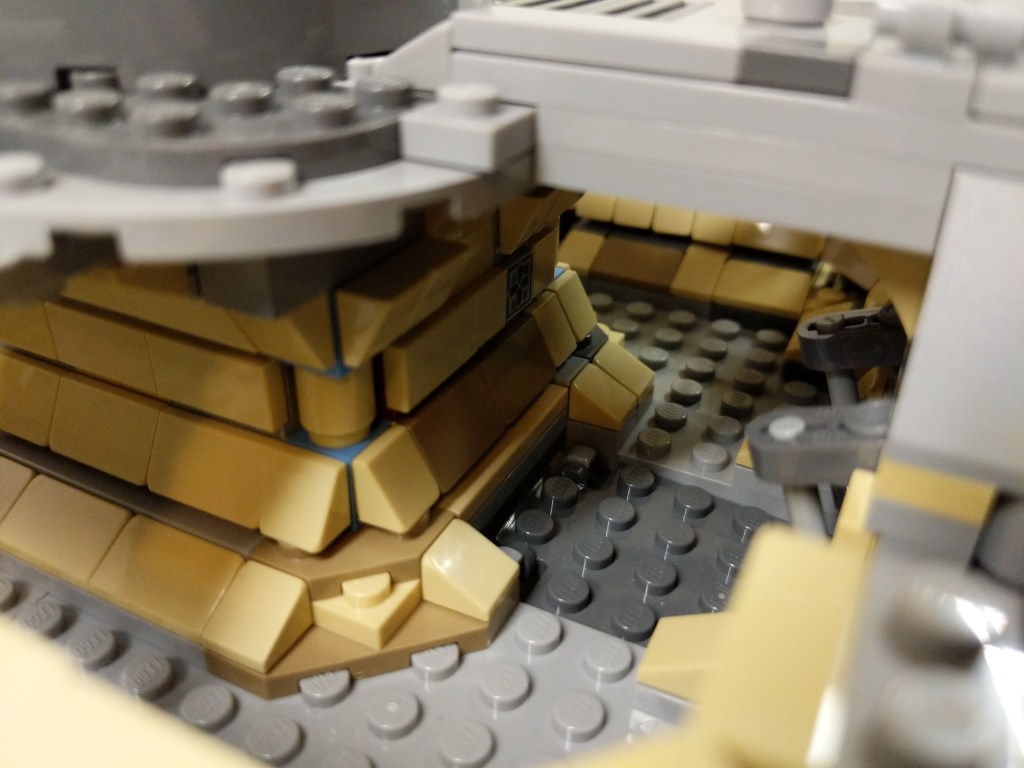
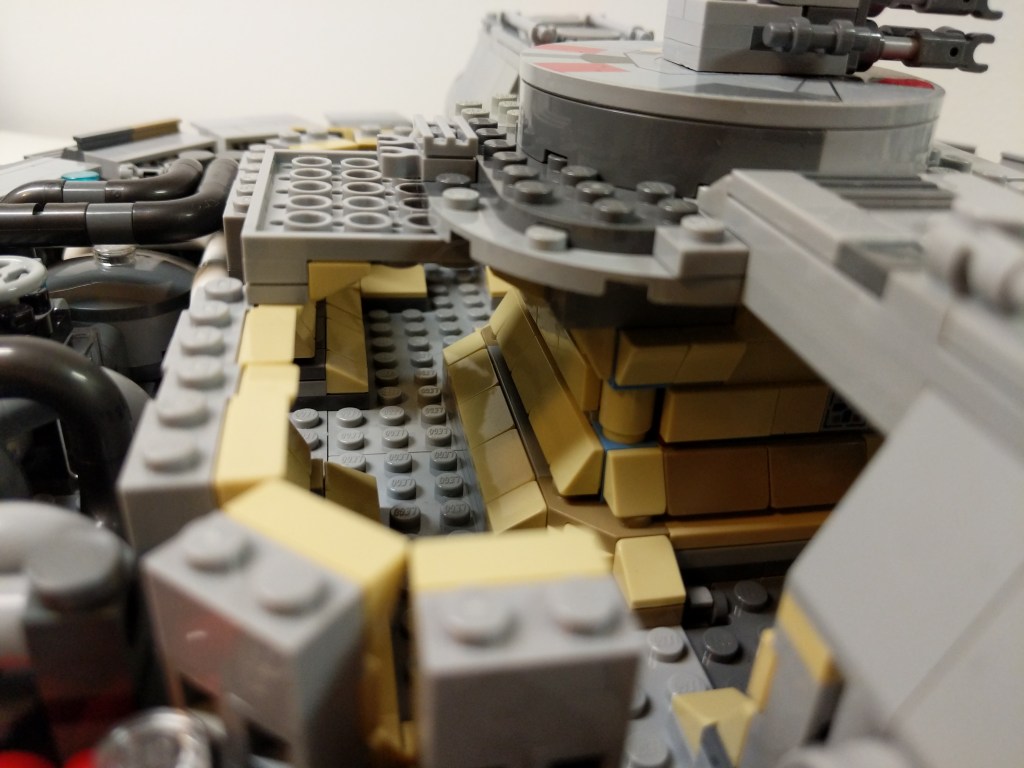
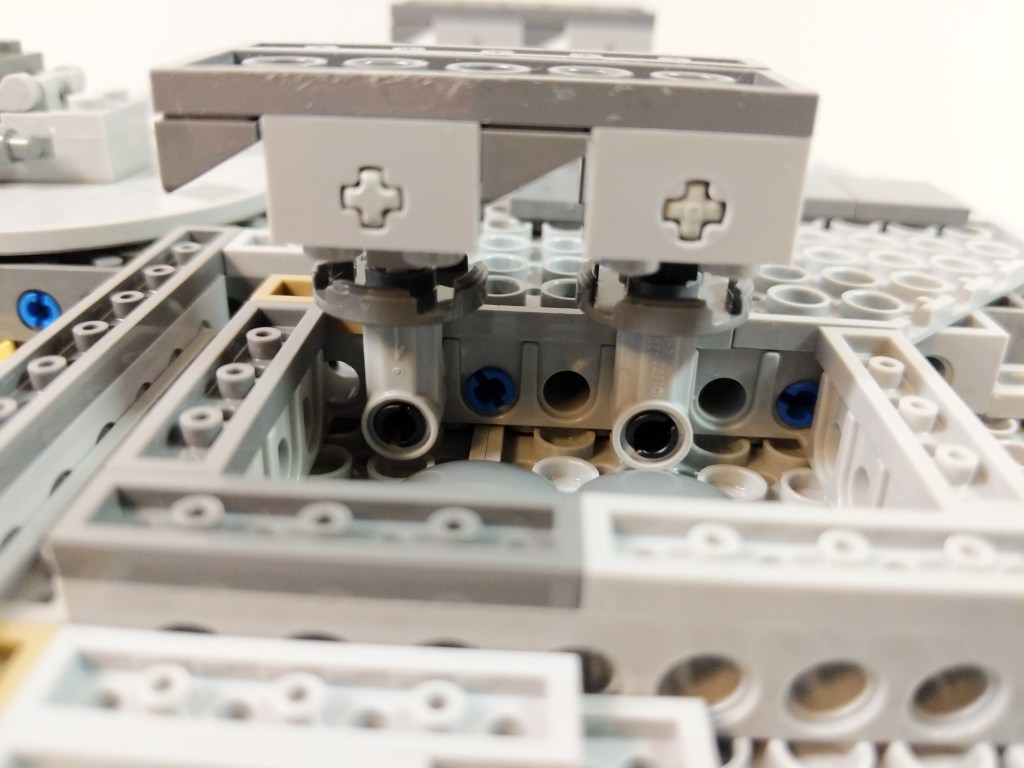
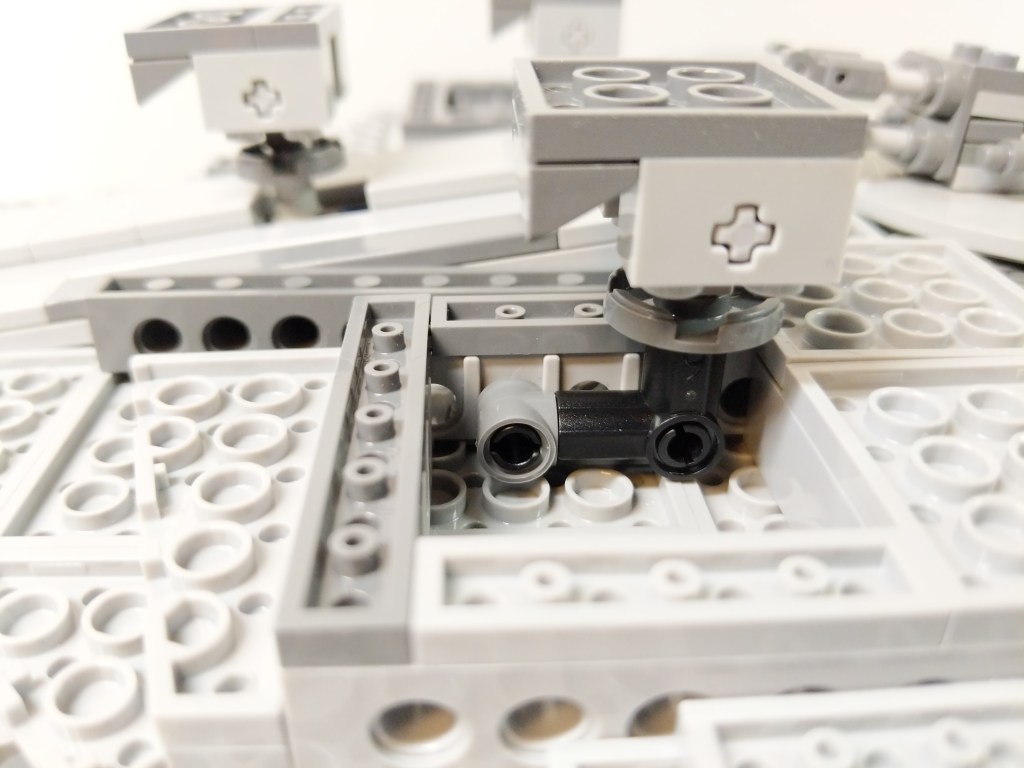
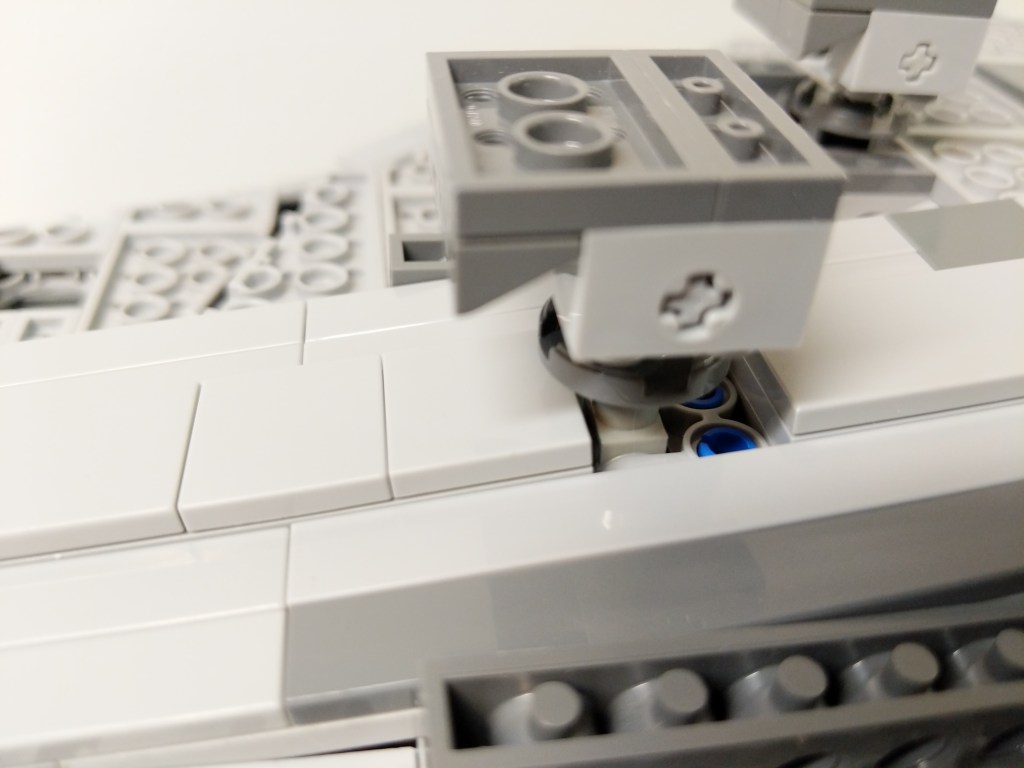
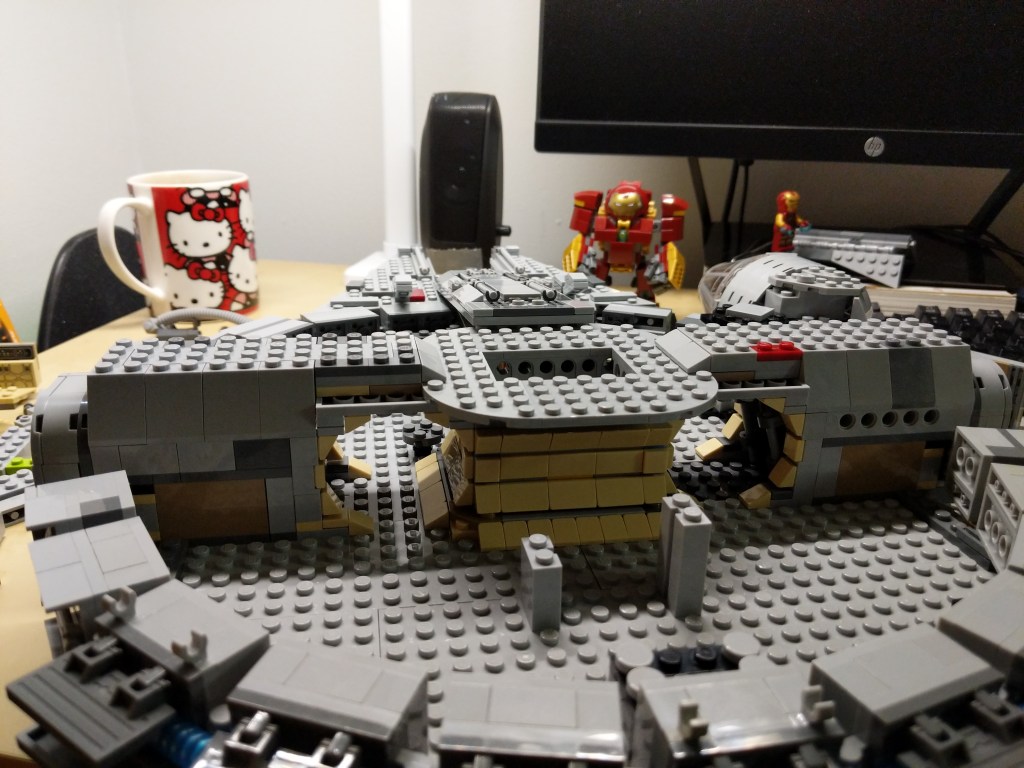
Landing Gear
I wanted the landing gear to look as accurate as possible in this small scale while also providing ample support for this heavier model.
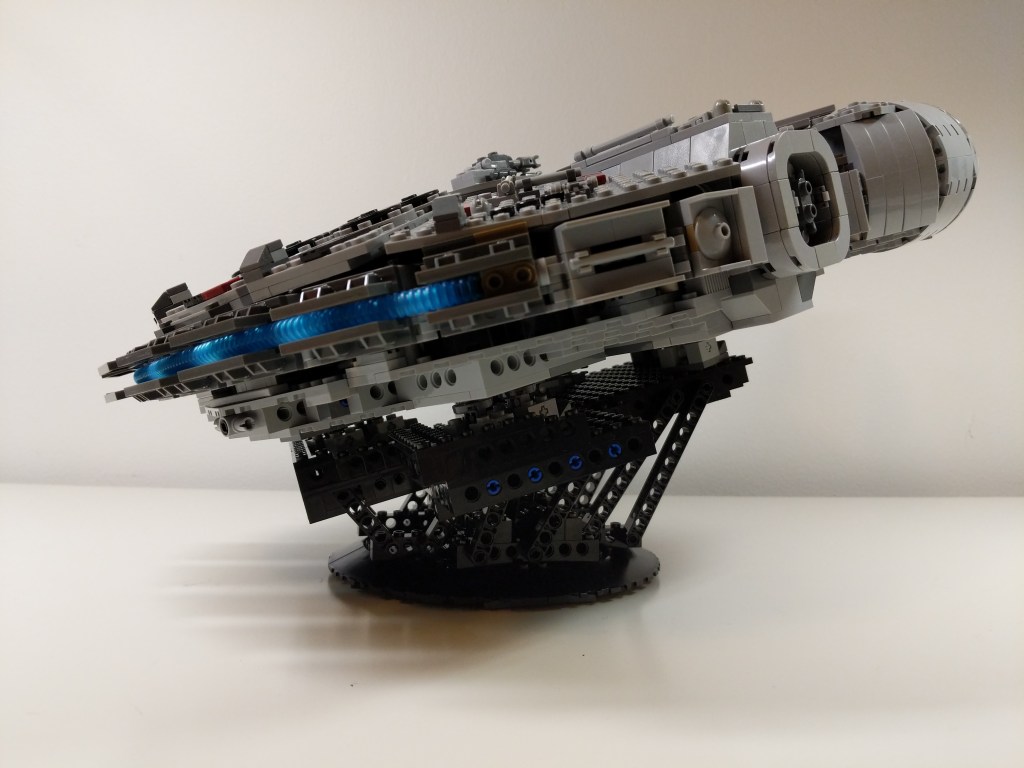
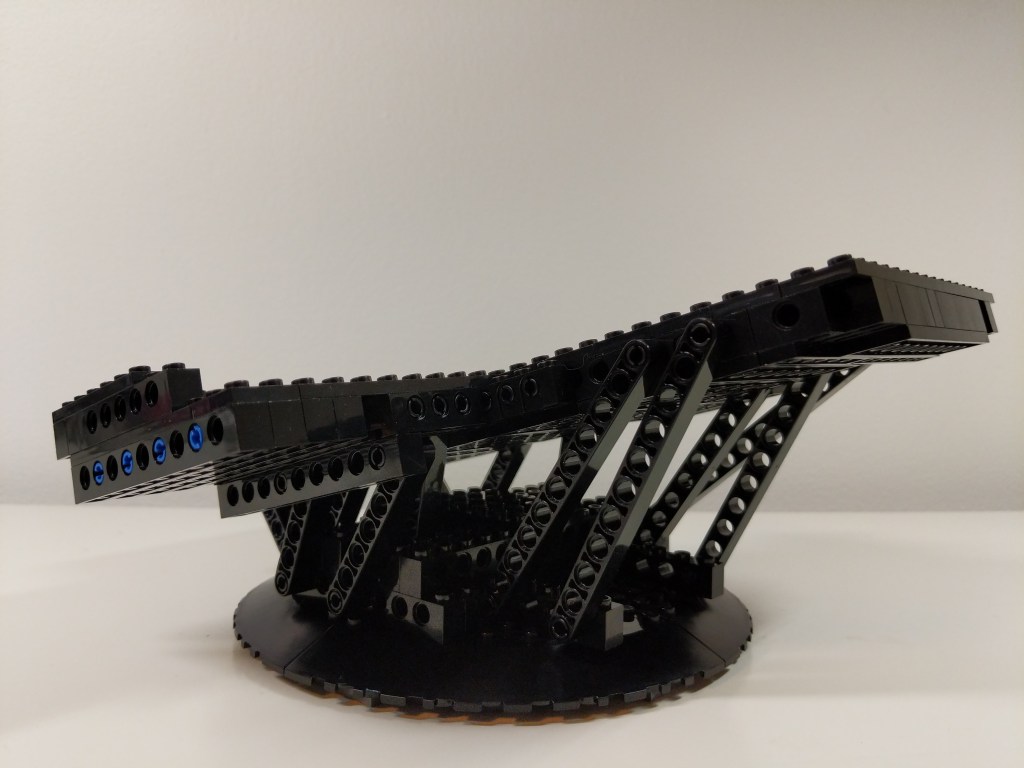
Display Stand
Also, I built an upward sloping display stand for the Falcon shown below. It’s shape combined with gravity locks the Falcon’s landing gear in place so that it can’t move in the display stand. It has a lot of Technic reinforcement due to the weight of the Falcon, which is more than the stock 75257 set.
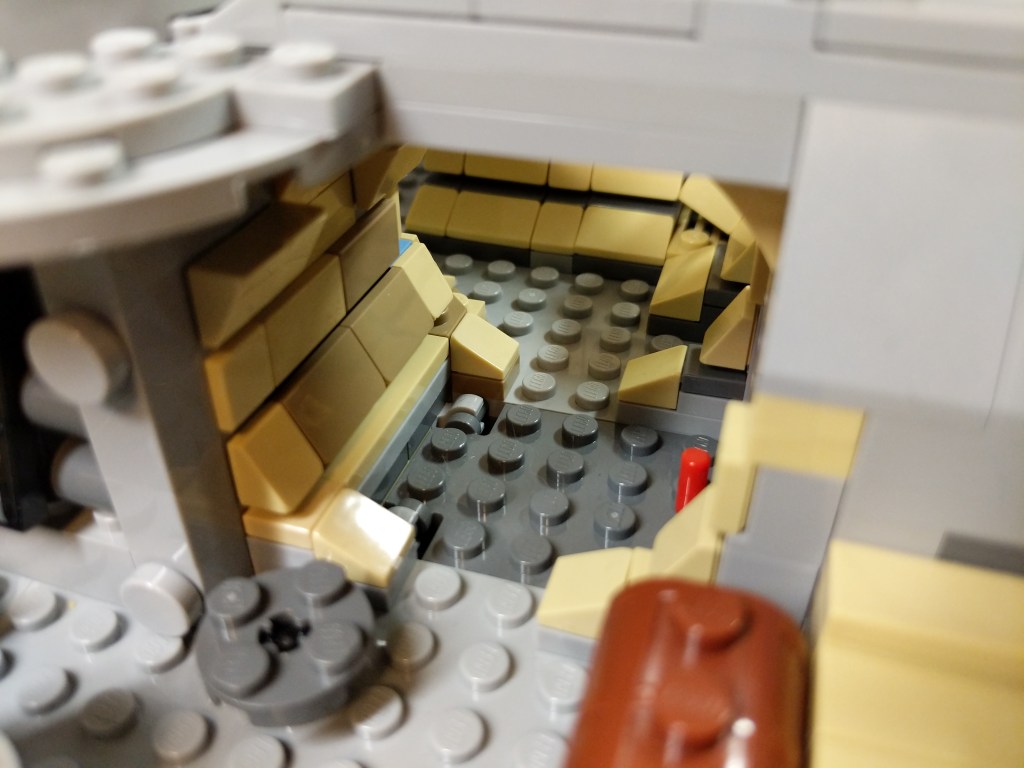
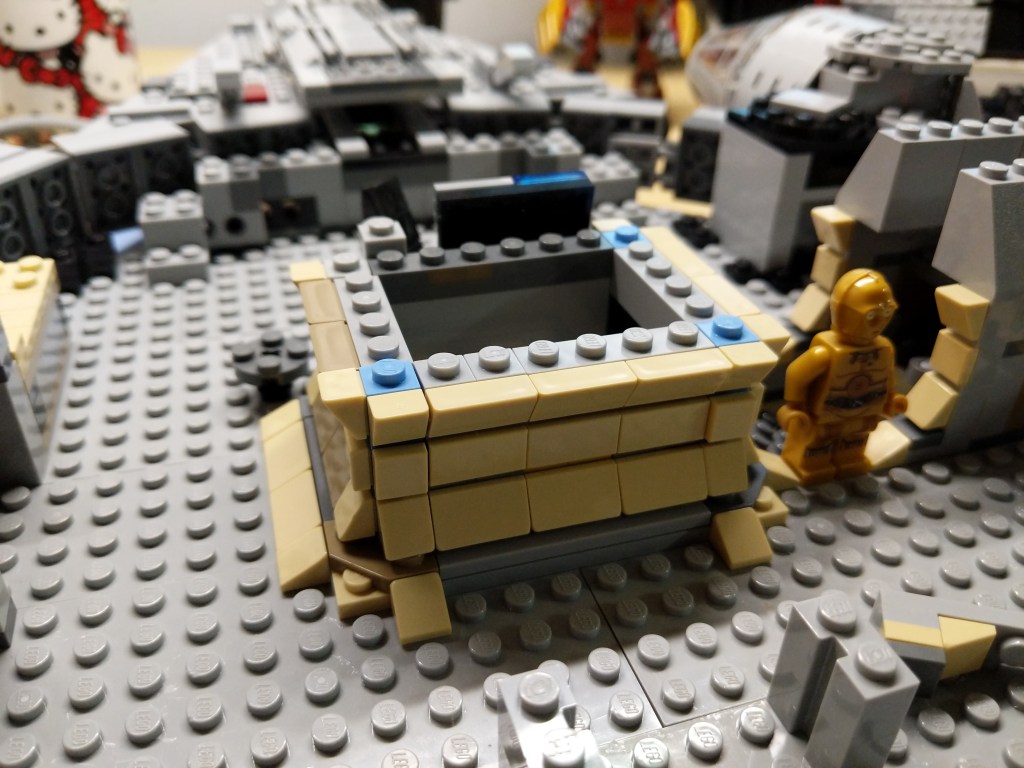
Yet Another Remodel
A few months later, I took another stab at the Falcon’s interior with an intention of making the rear passage way more circular and making the engine compartment less busy but with thought out detailing. I stripped down the interior and began again. True revision in practice (i.e., throw out your first draft and begin again).
Next Steps
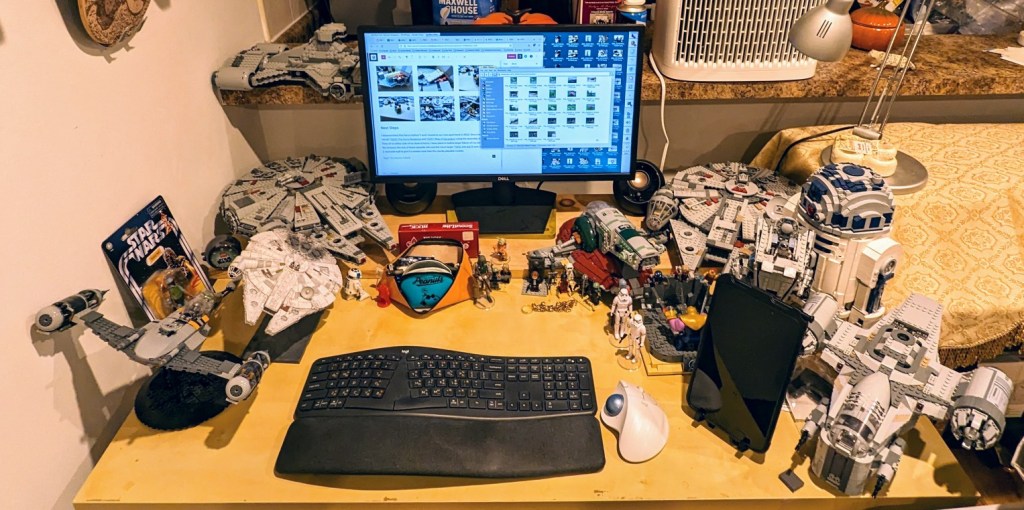
I disassembled this Falcon before Y and I moved to our new apartment in 2022. Since then, I’ve rebuilt 75105 (The Force Awakens) and 75257 (Rise of Skywalker) using the assembly instructions. They sit on either side of my desk at home. I have plans to build a larger Falcon of my own design that fits between the size of these playable sets and the much larger 75192 and 10179 sets. It will have a 2-stud side wall to give it a sleeker look than the chunky playable models. I’ll provide updates when this new build gets underway!
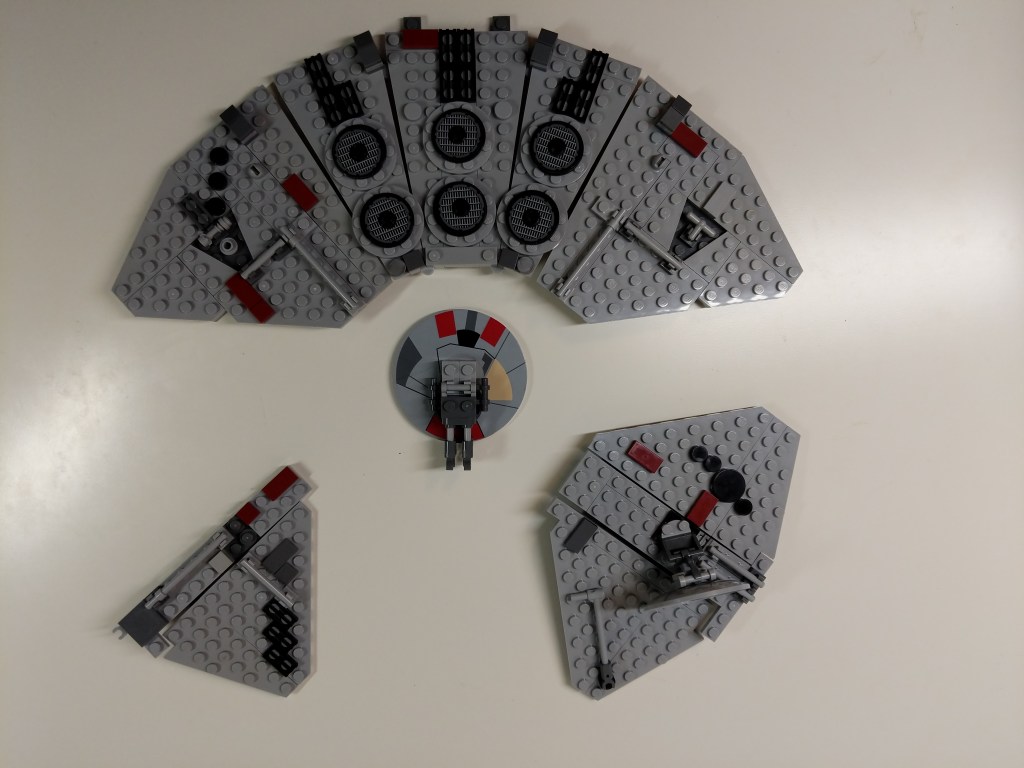
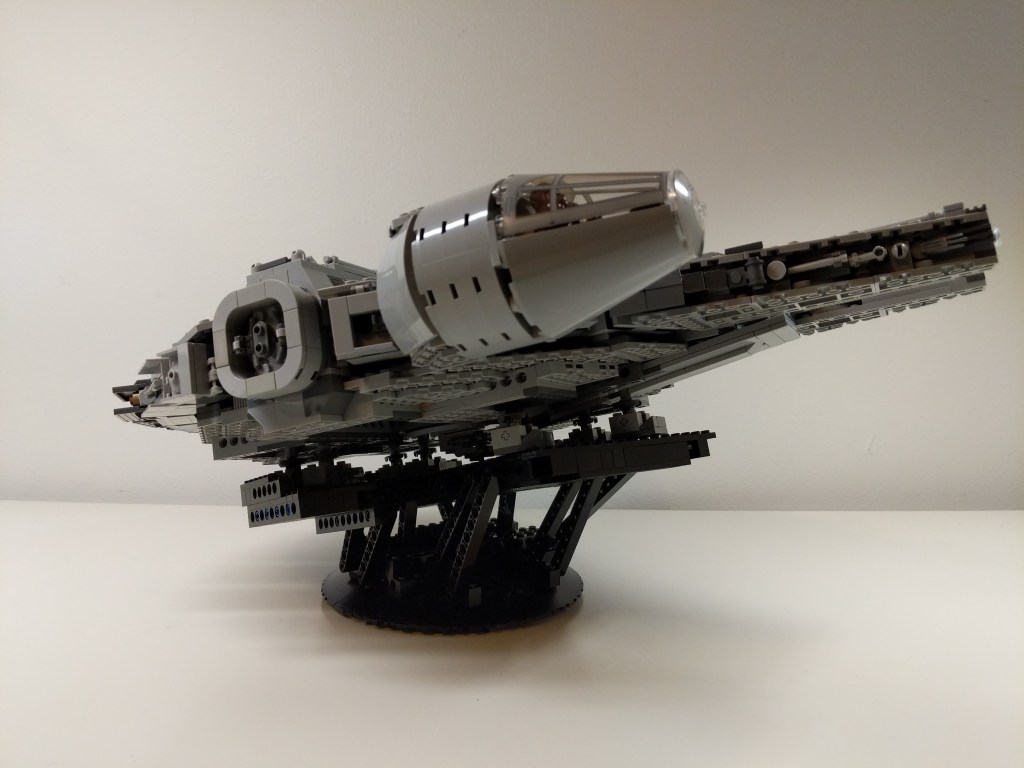
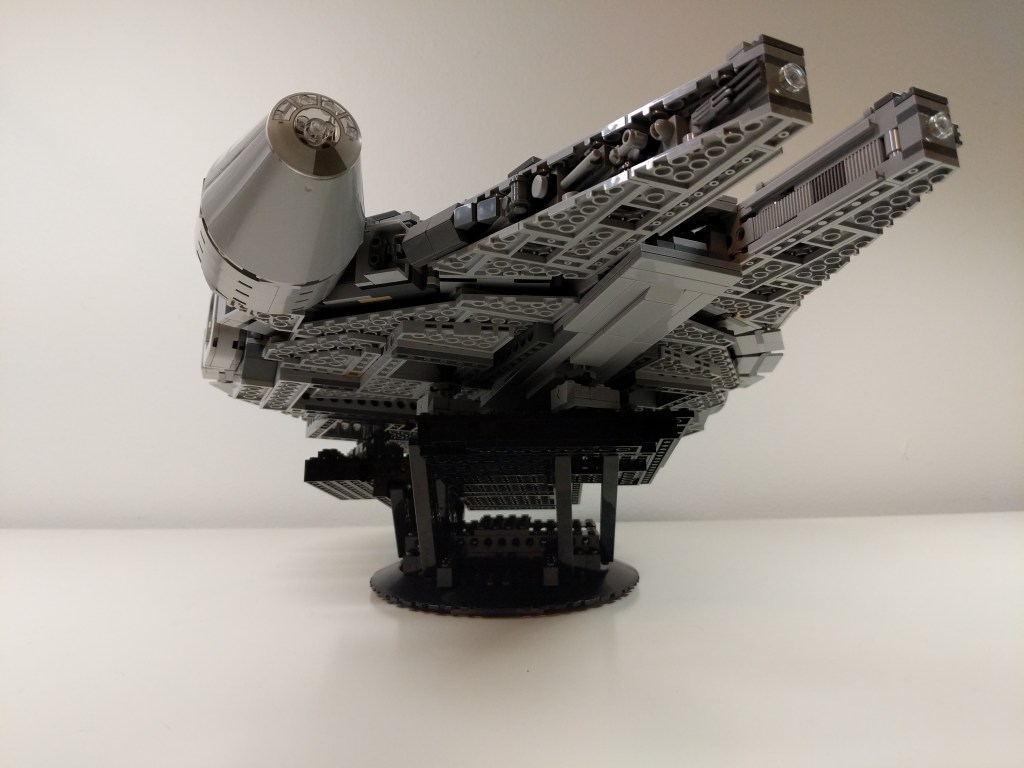
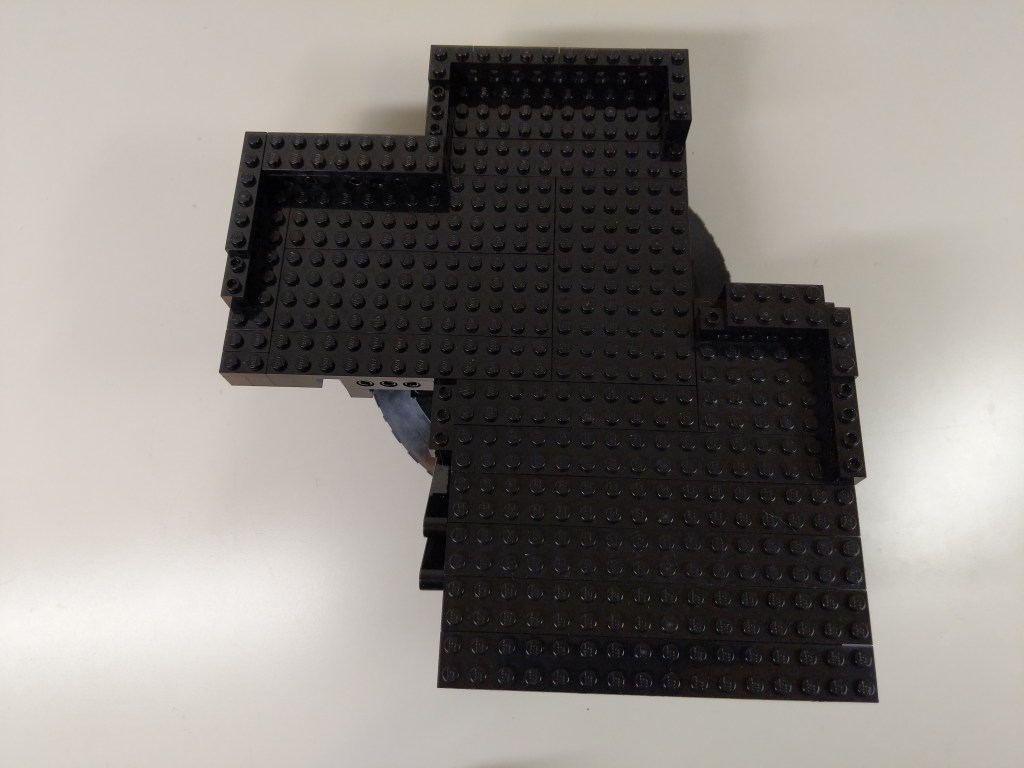
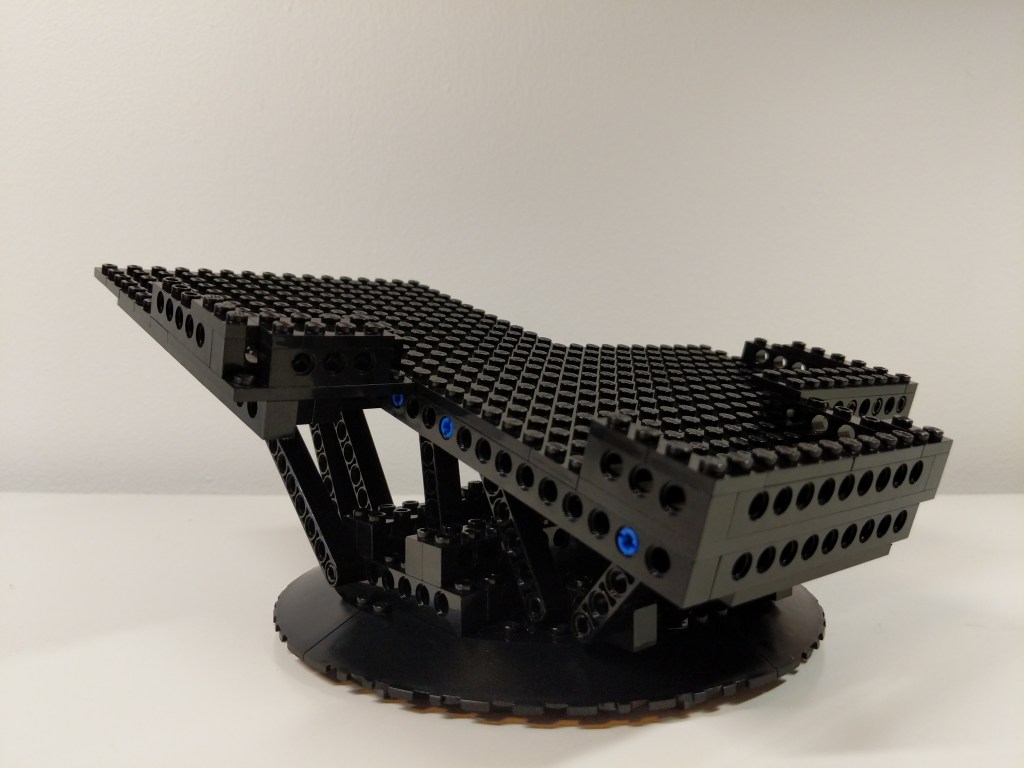
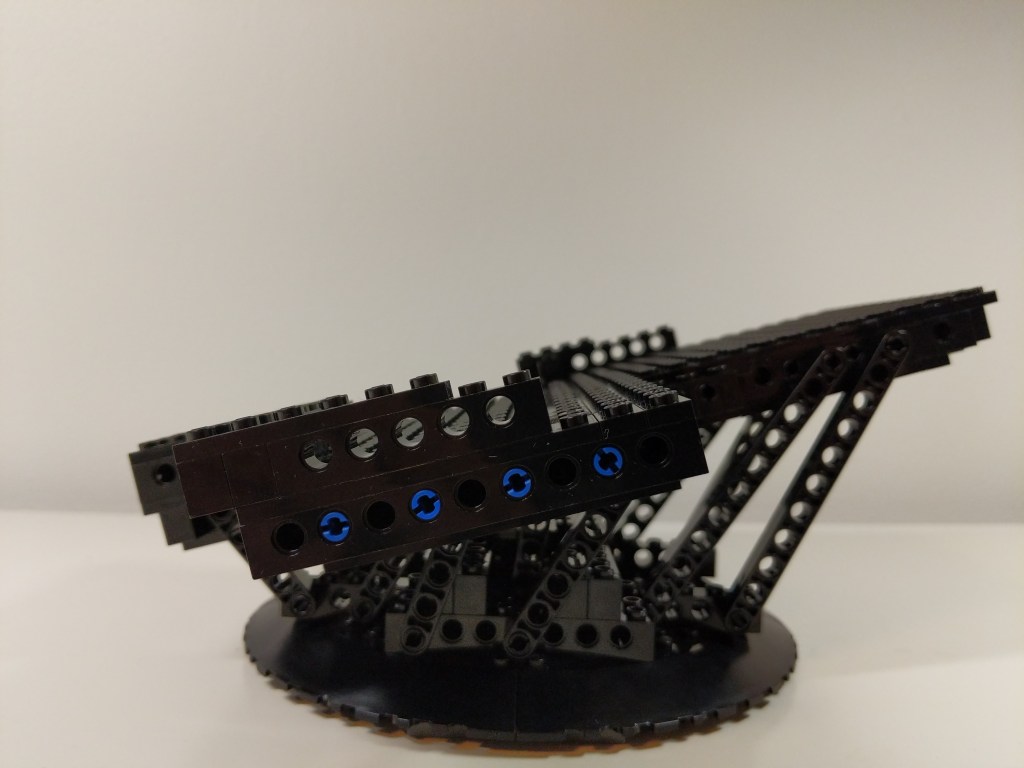
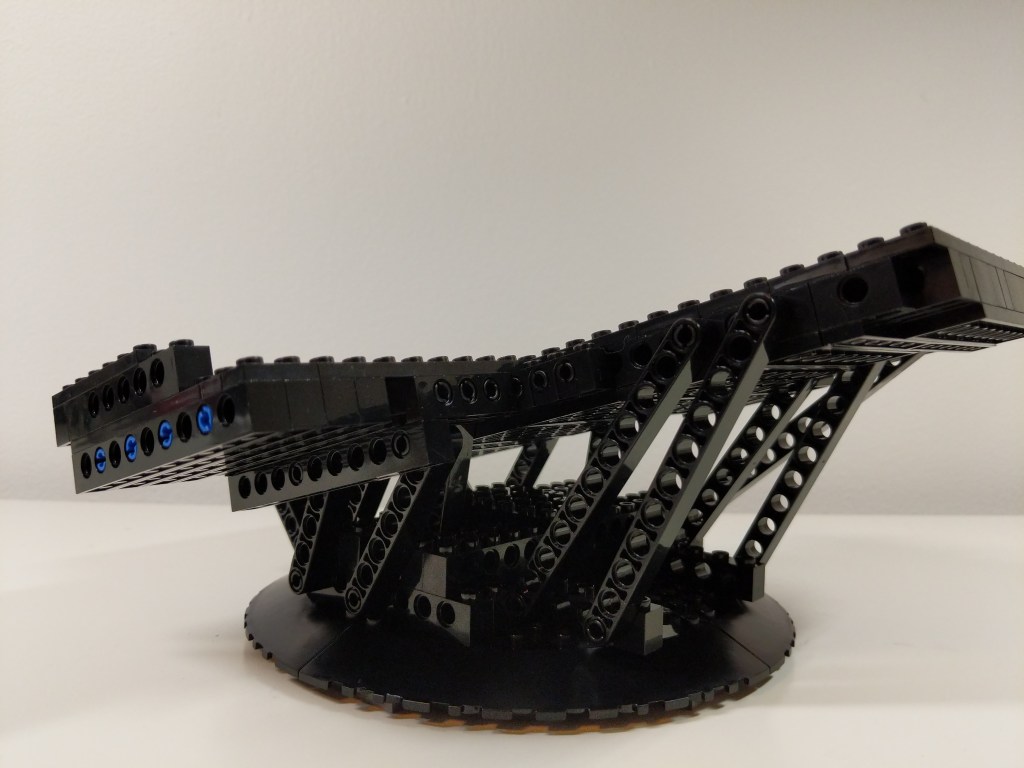
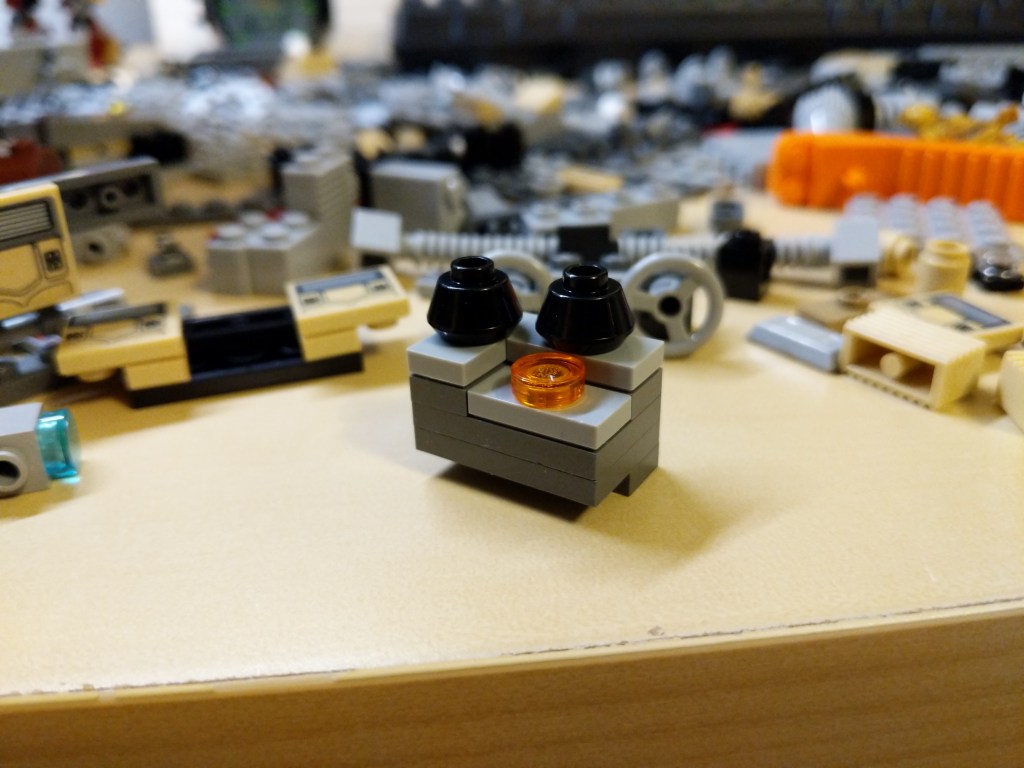
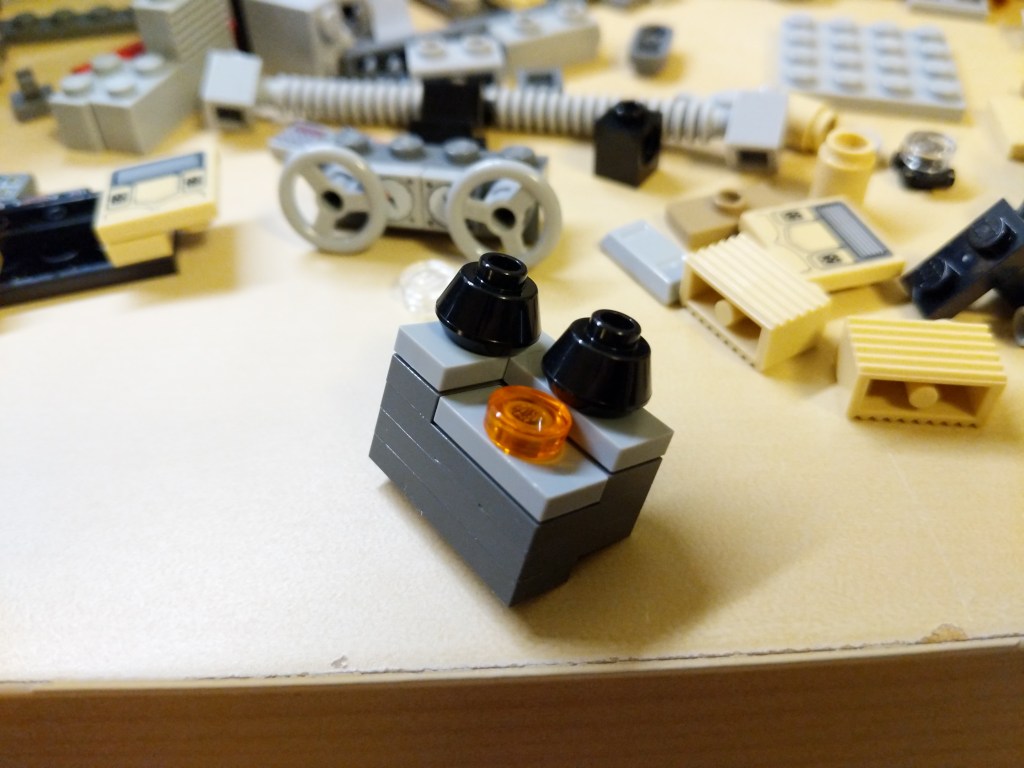
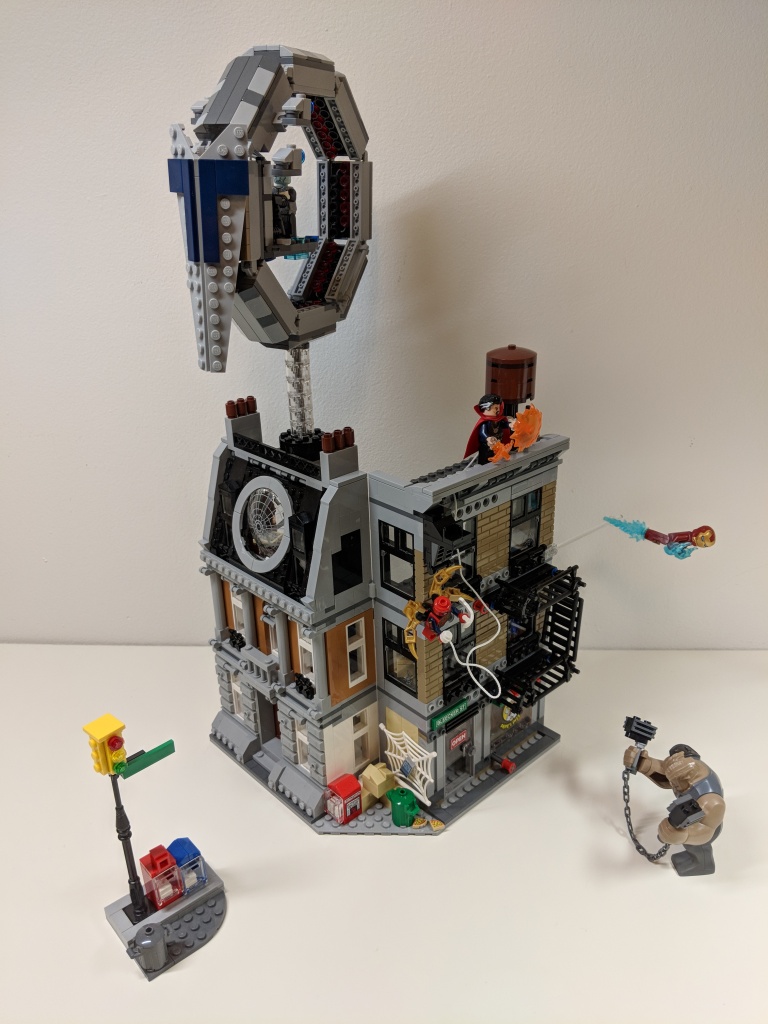
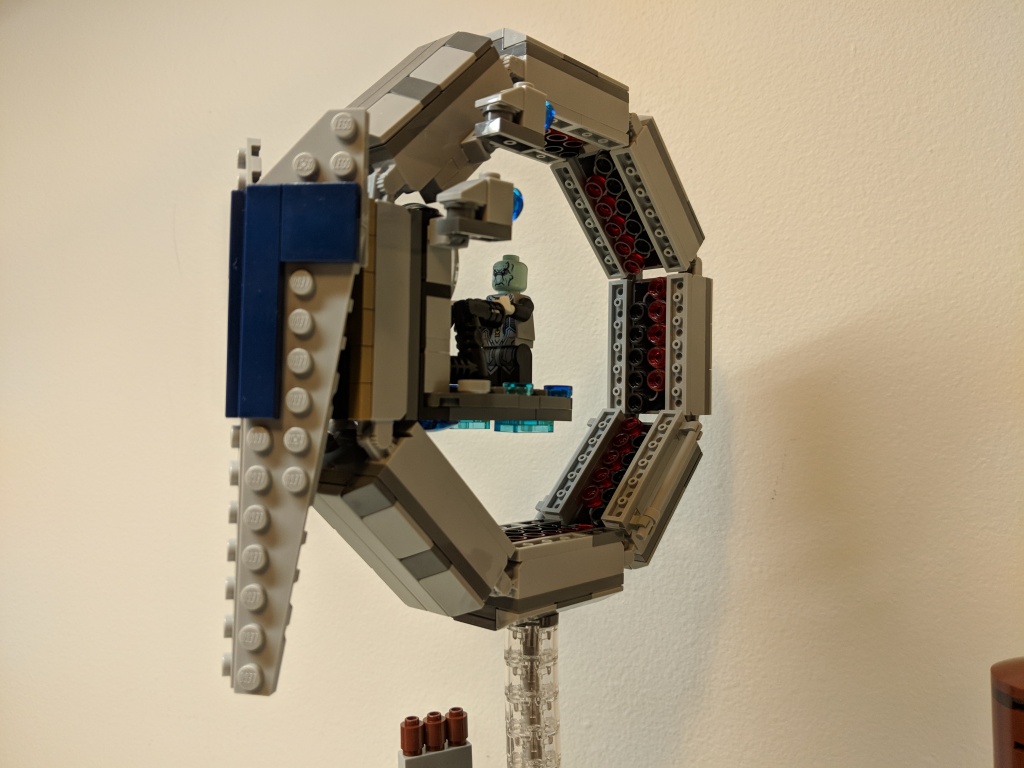
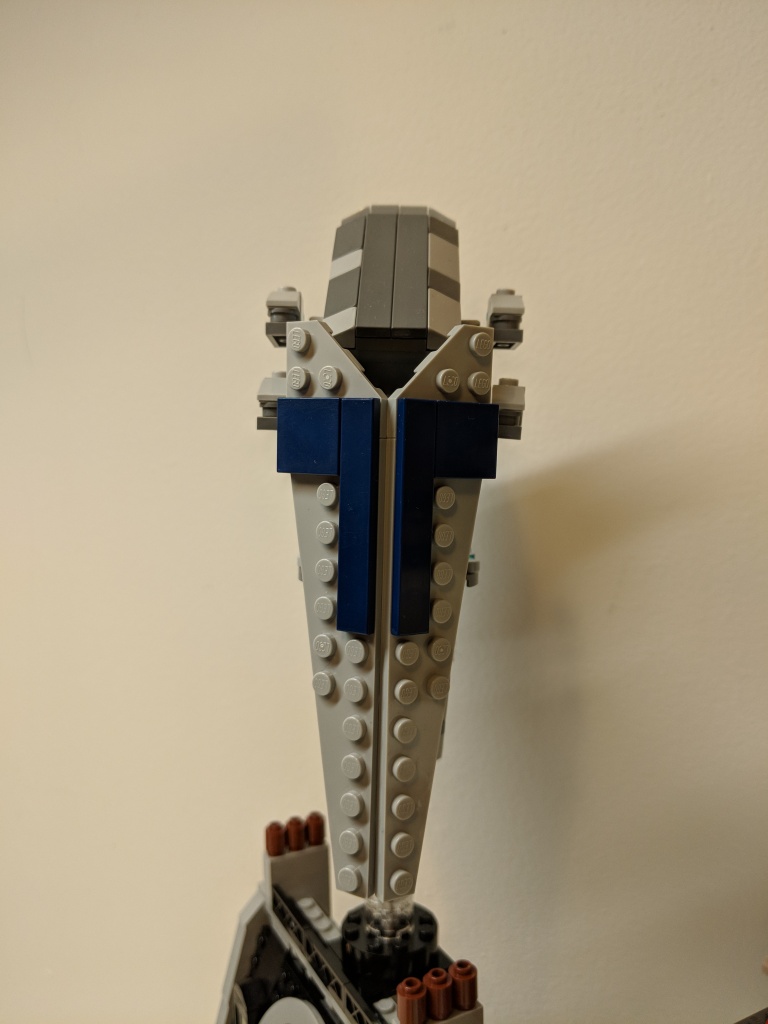
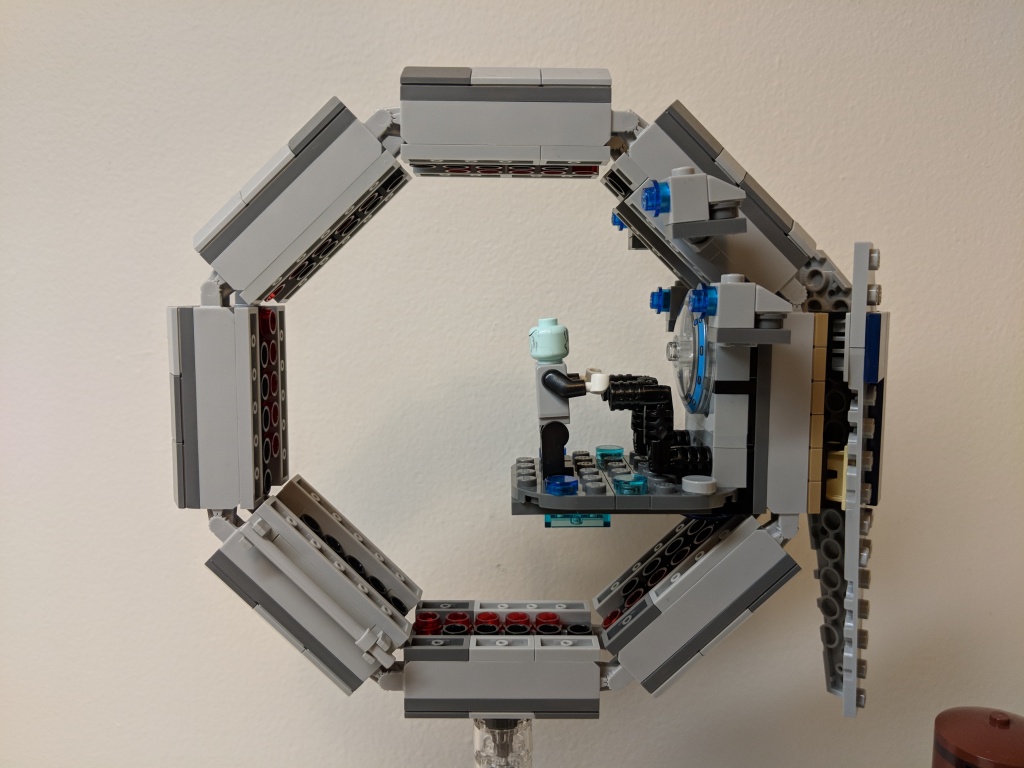
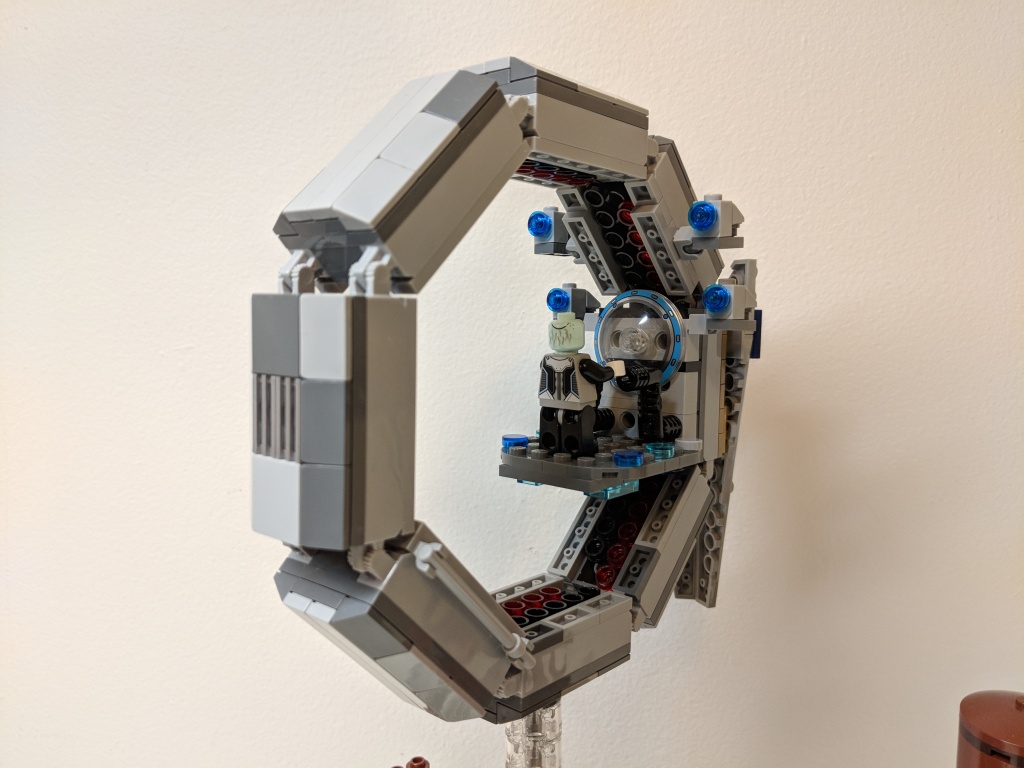
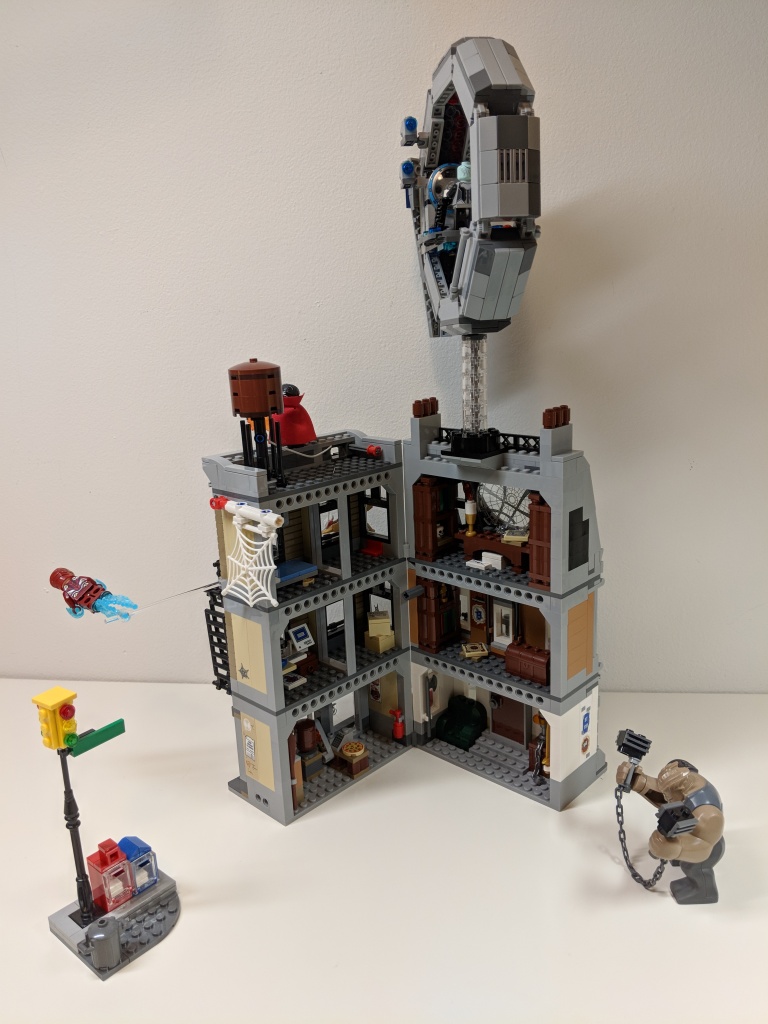
While it would have certainly have been great to build a larger Q-Ship as others have done, I had to work within the constraints of the type and quantity of LEGO bricks and elements that I have on-hand.
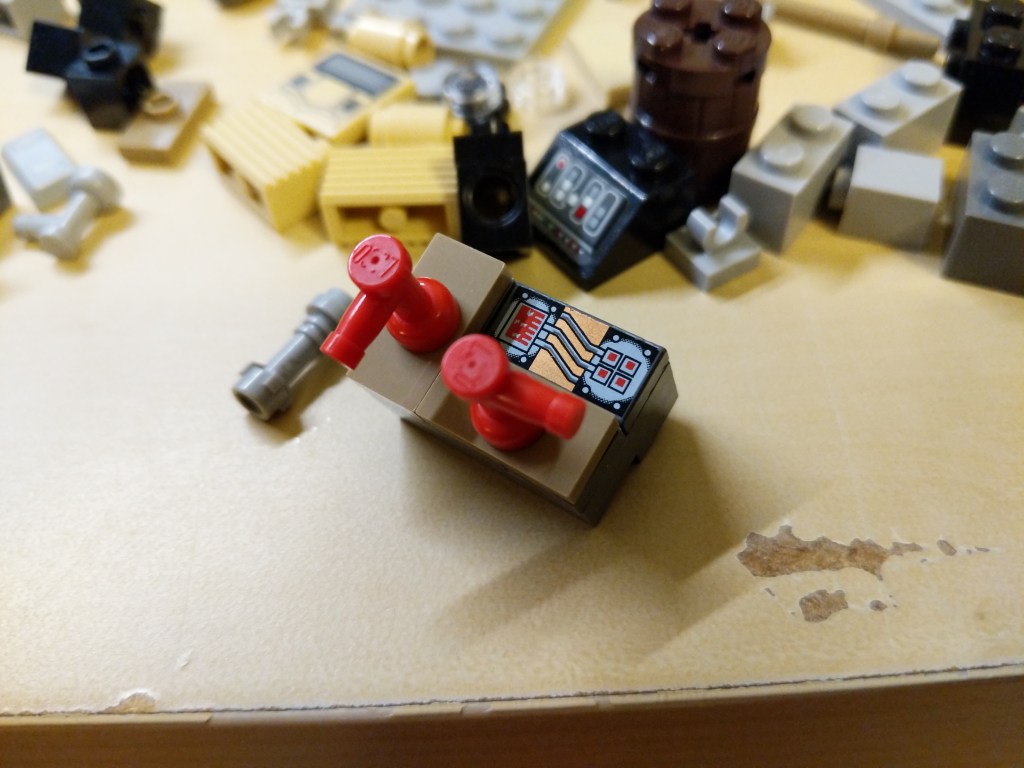
I settled on a simple ring structure with interior red accents and a driving platform for Ebony Maw that included a display screen. In the southwest quadrant, I added bars for Iron Man and Spider-Man to grab onto, and I included the Q-Ship’s engines in the northeast quadrant above the driving platform.
Overall, it was a straight forward design that added a sense of drama to the Sanctum Sanctorum Showdown set by having danger approaching from above.
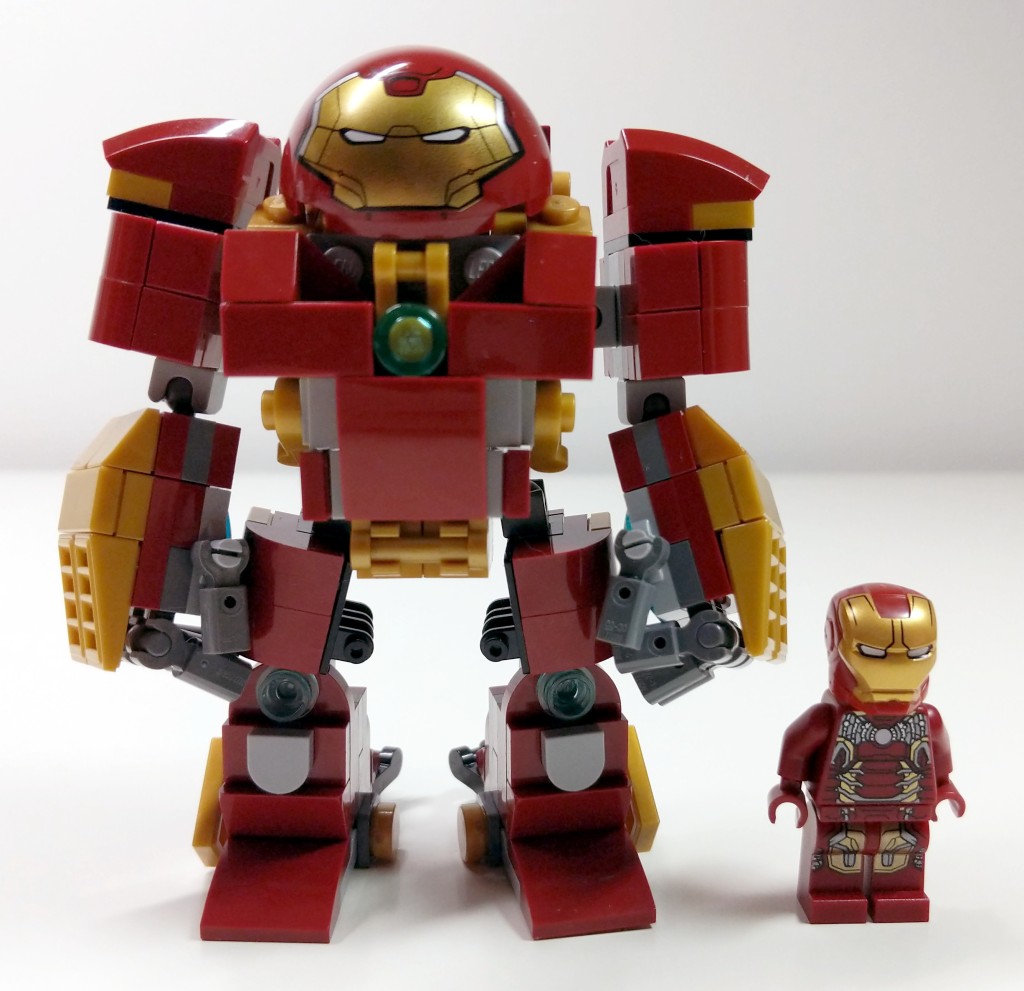
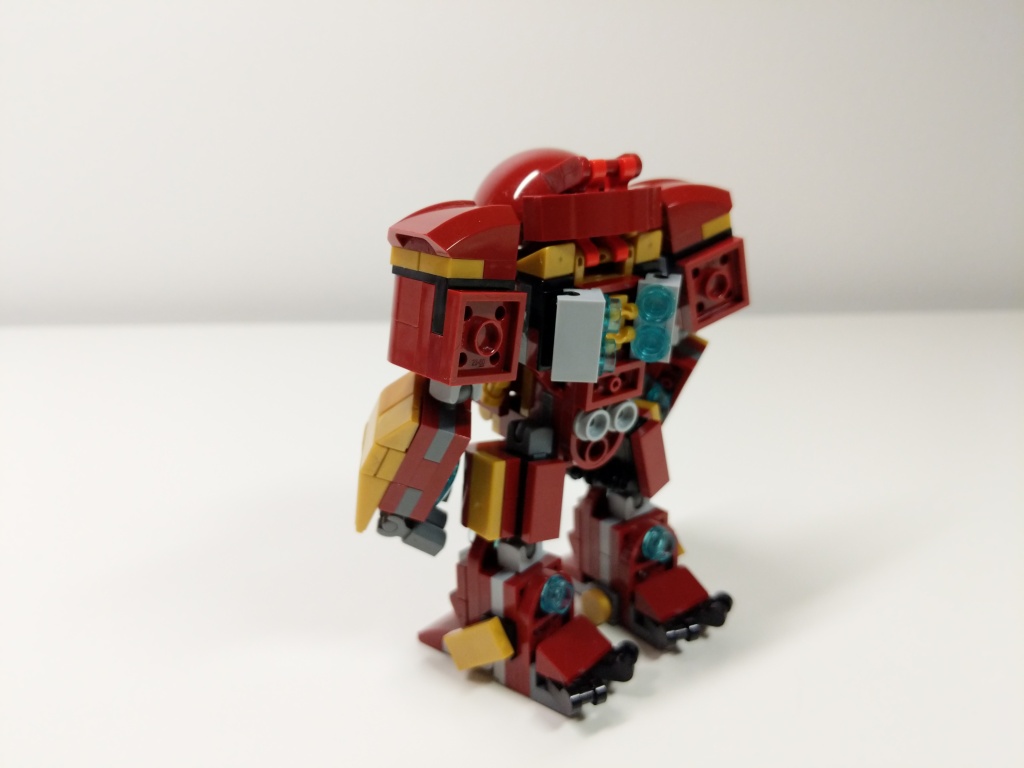
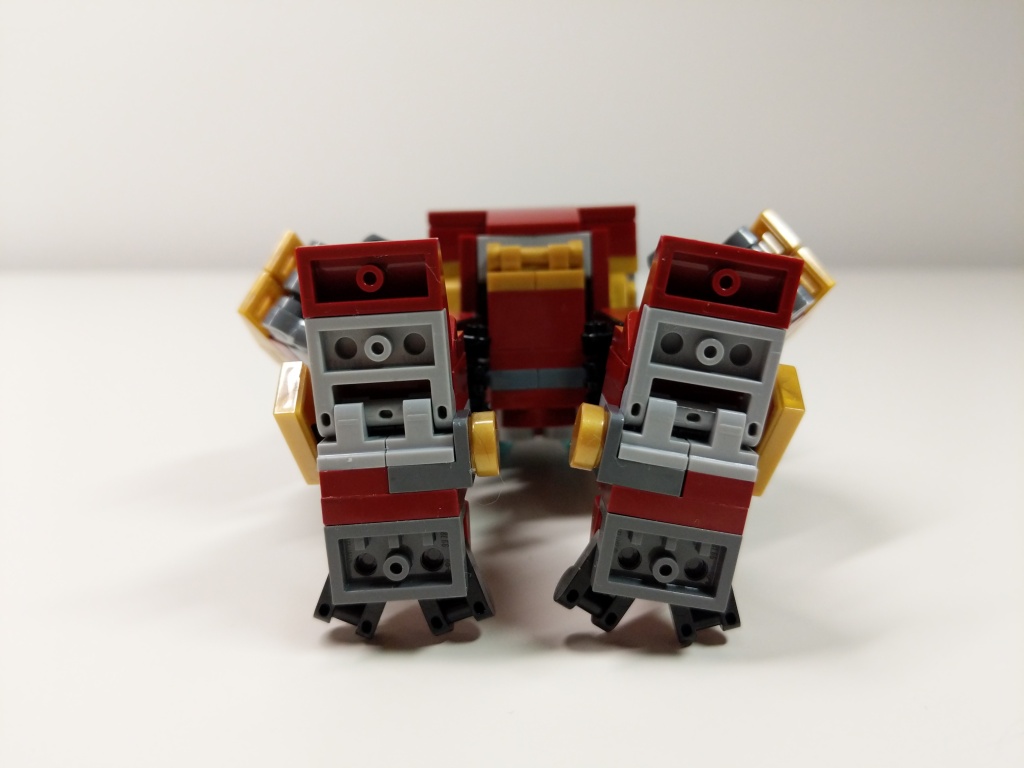
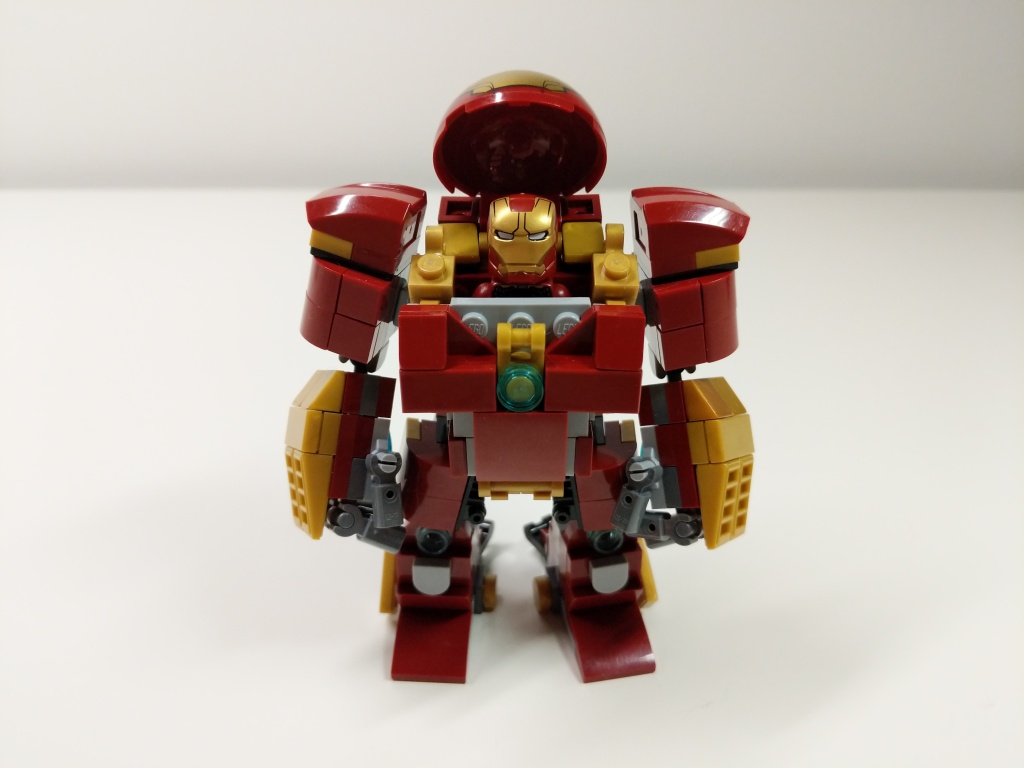
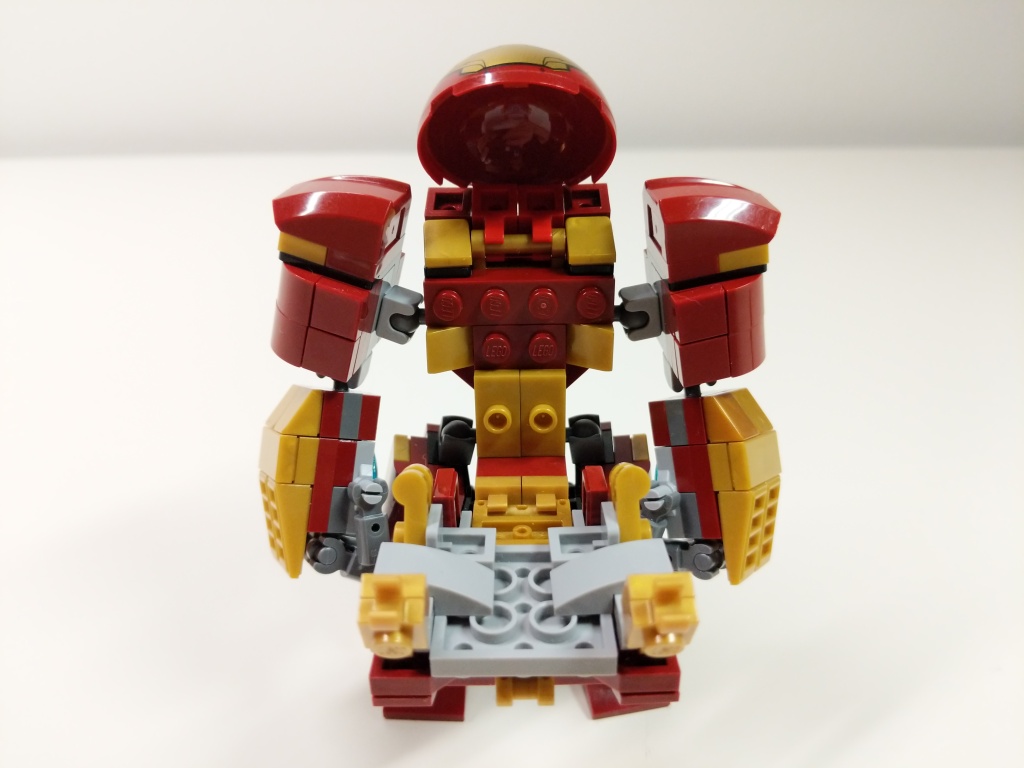
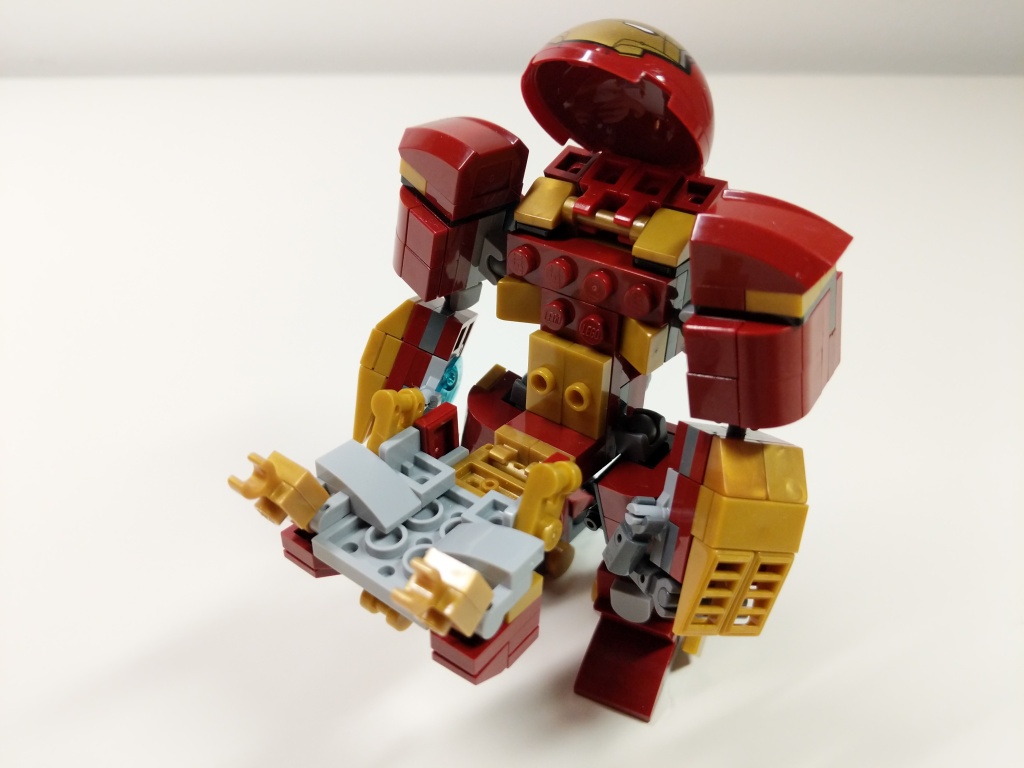
My Iron Man Hulkbuster Mark 44 Armor MOC with Iron Man Mark 43 Armor Minifigure.
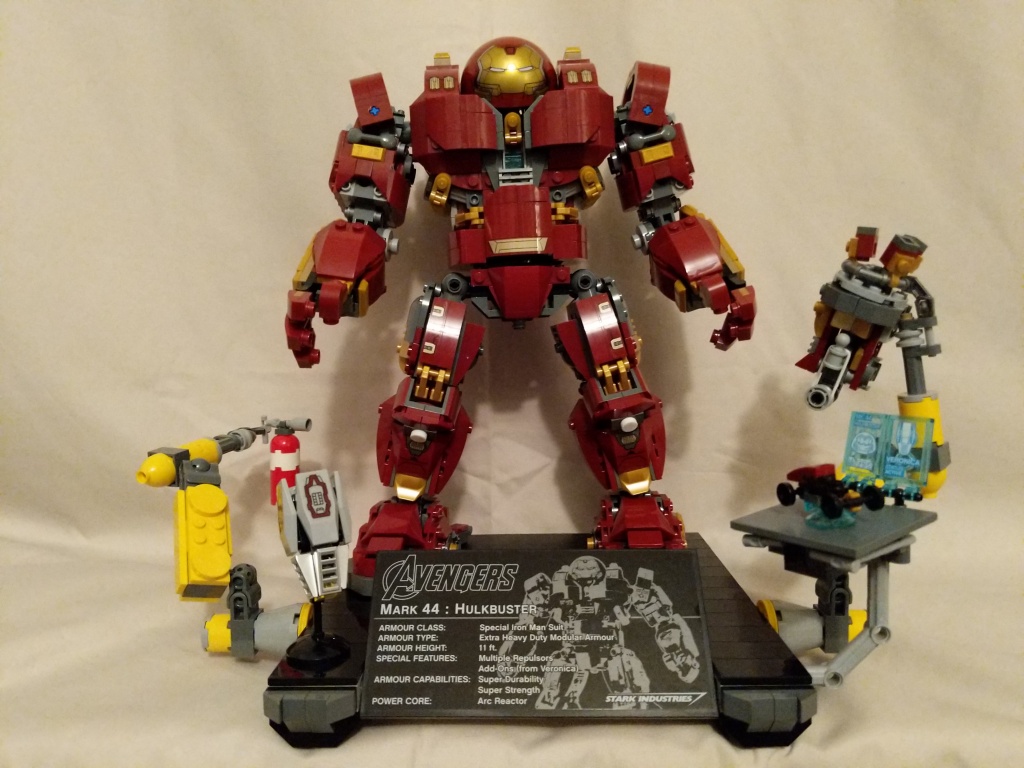
Continuing my recent post of past LEGO MOCs (my own creation), I wanted to share this minifig scale Hulkbuster armor for Iron Man that I built during the summer of 2019 as something more playable and scaled properly than 76105 The Hulkbuster: Ultron Edition pictured below.
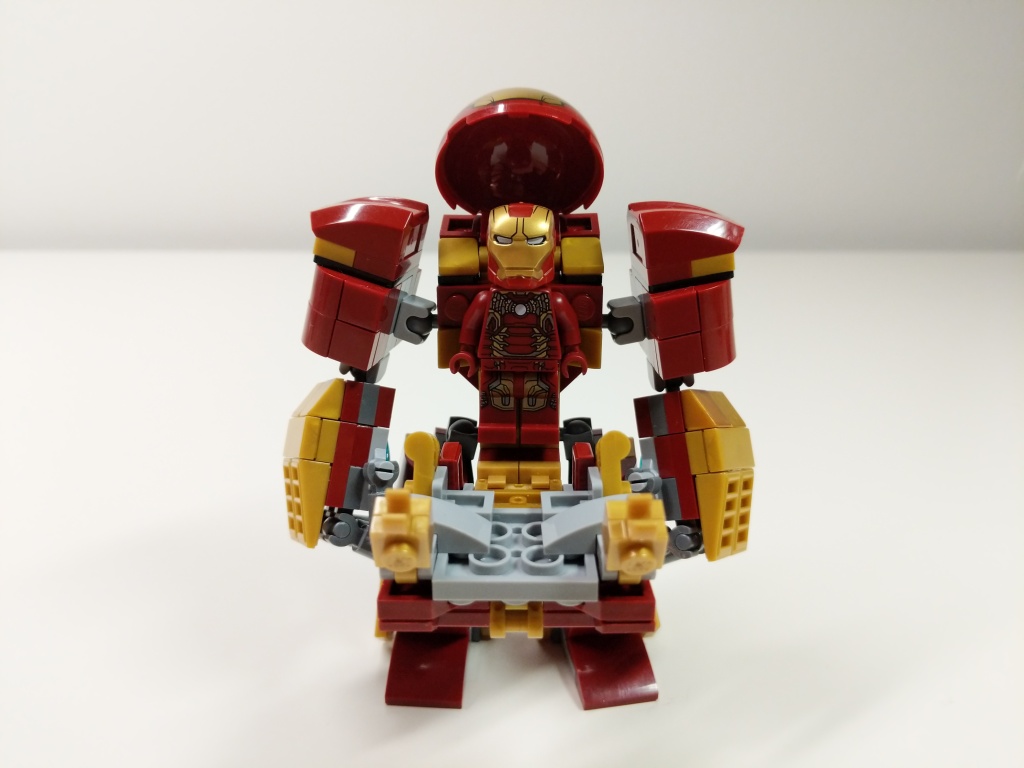
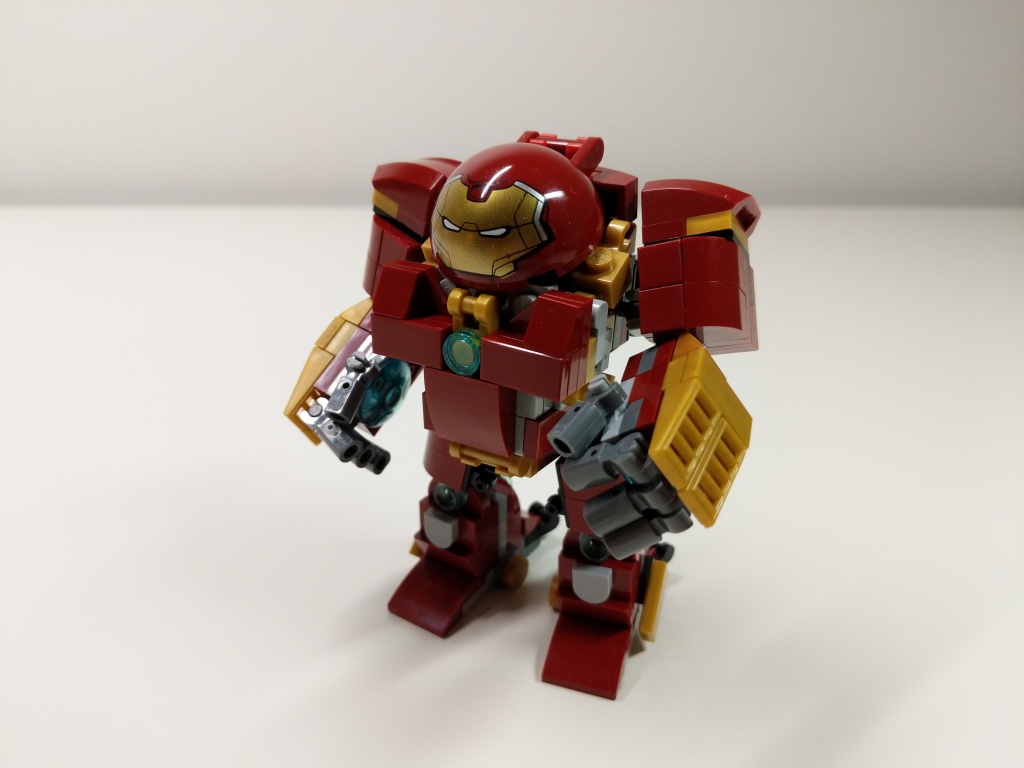
Iron Man’s Mark 44 Hulkbuster Armor is meant to put him on par with The Hulk in terms of strength and size. Considering the minifigure at the heart of the 76105 set, it is gargantuan in comparison to The Hulk. Therefore, I set a goal to build Hulkbuster armor that matched the mini-figure scale as closely as possible, encapsulate an Iron Man minifigure, and have more points of articulation than the smaller Hulkbuster armor in 76031 The Hulk Buster Smash (having a swivel waist like the 76105 Hulkbuster in this small size was beyond my skill).
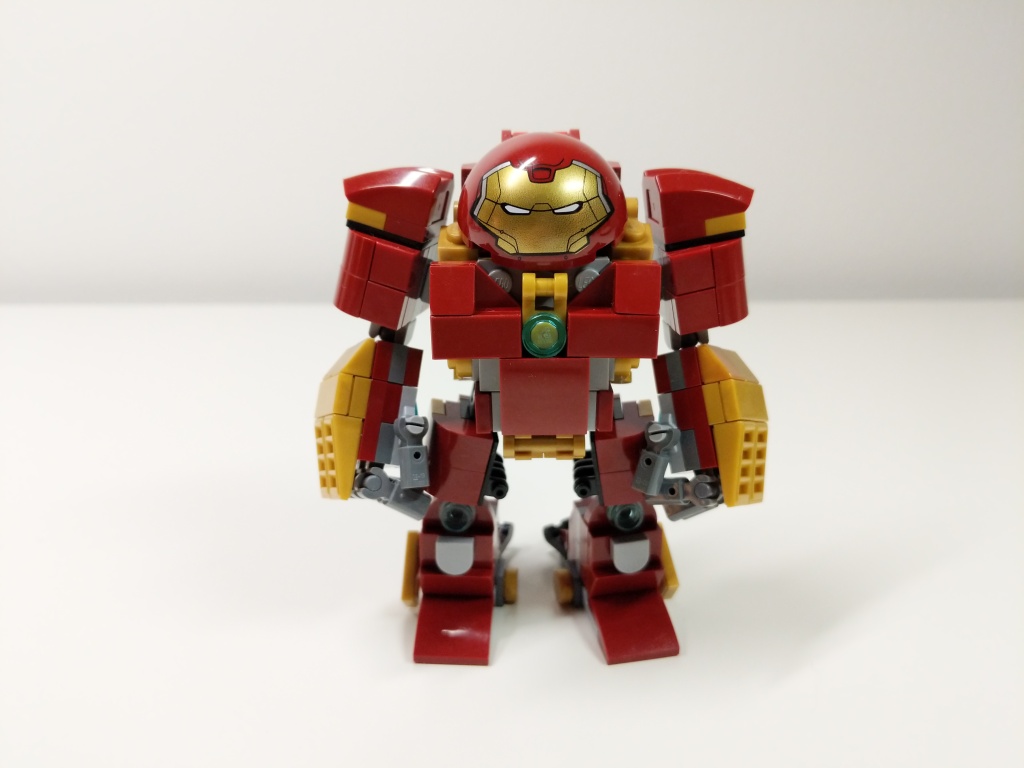
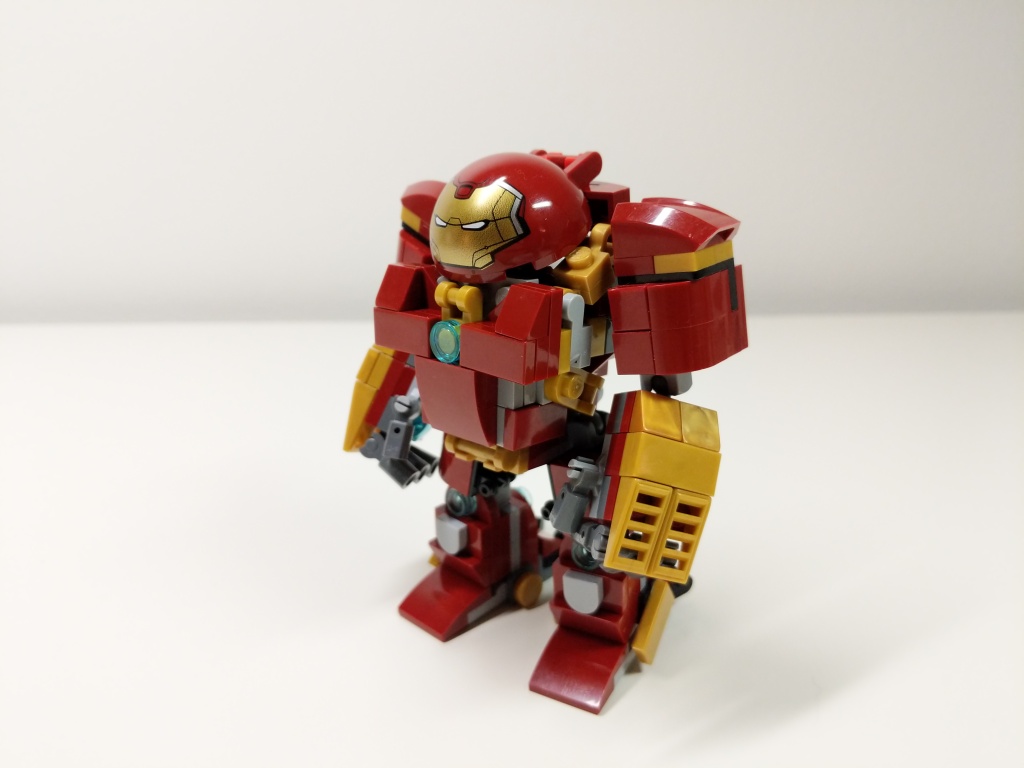
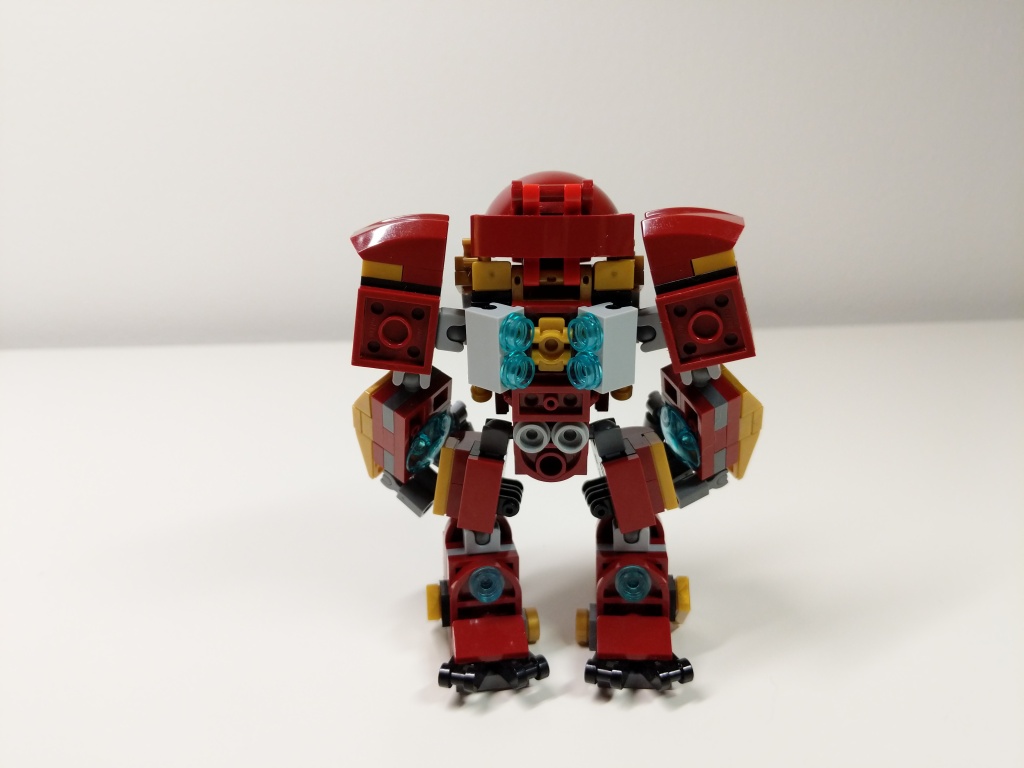
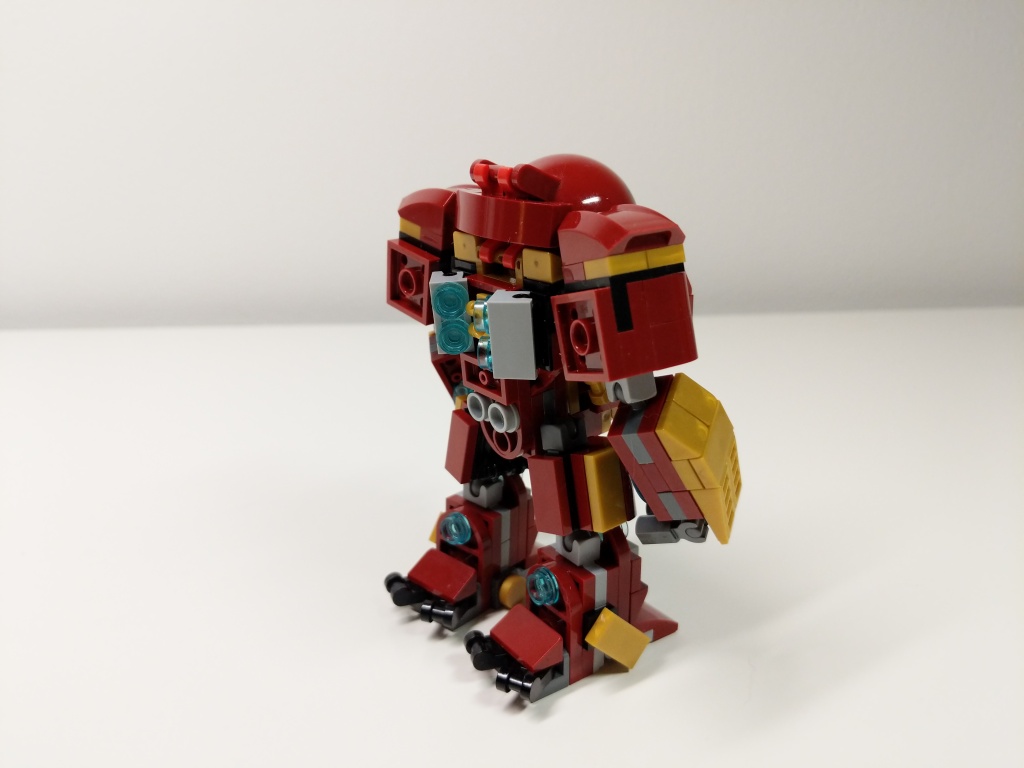
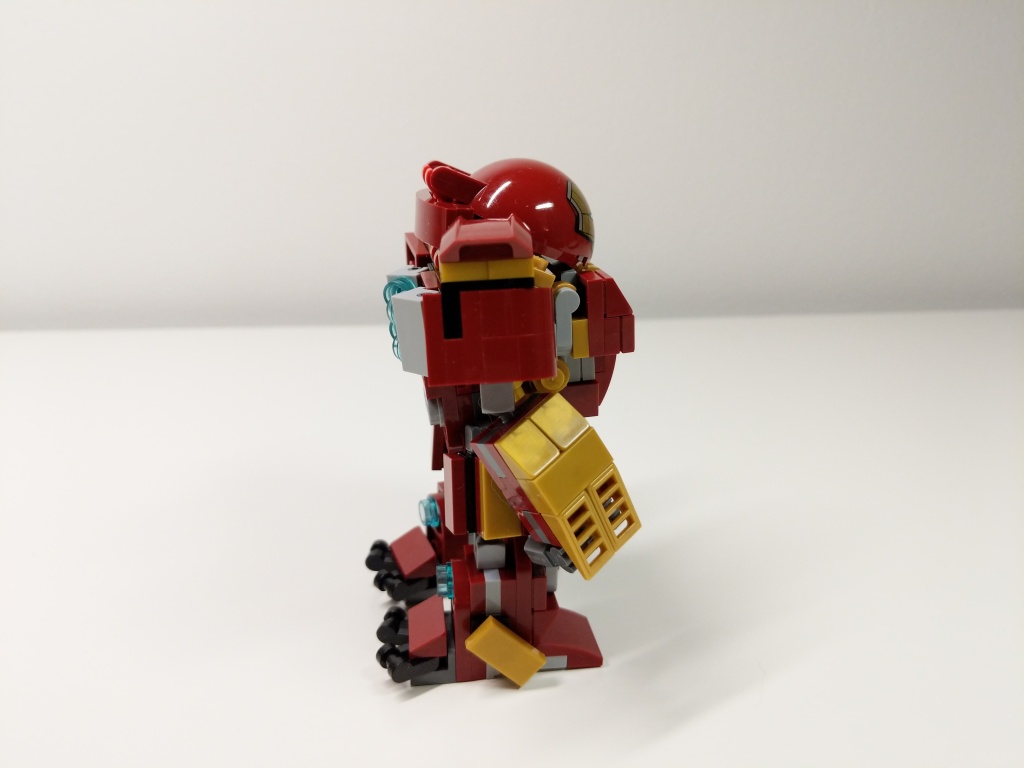
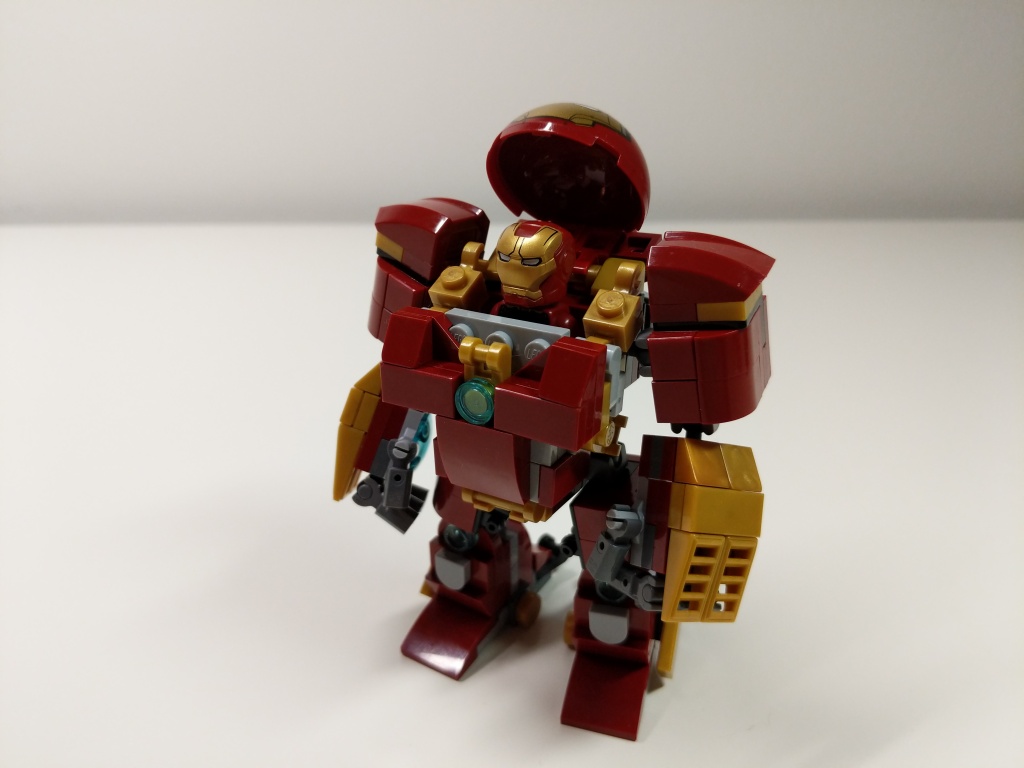
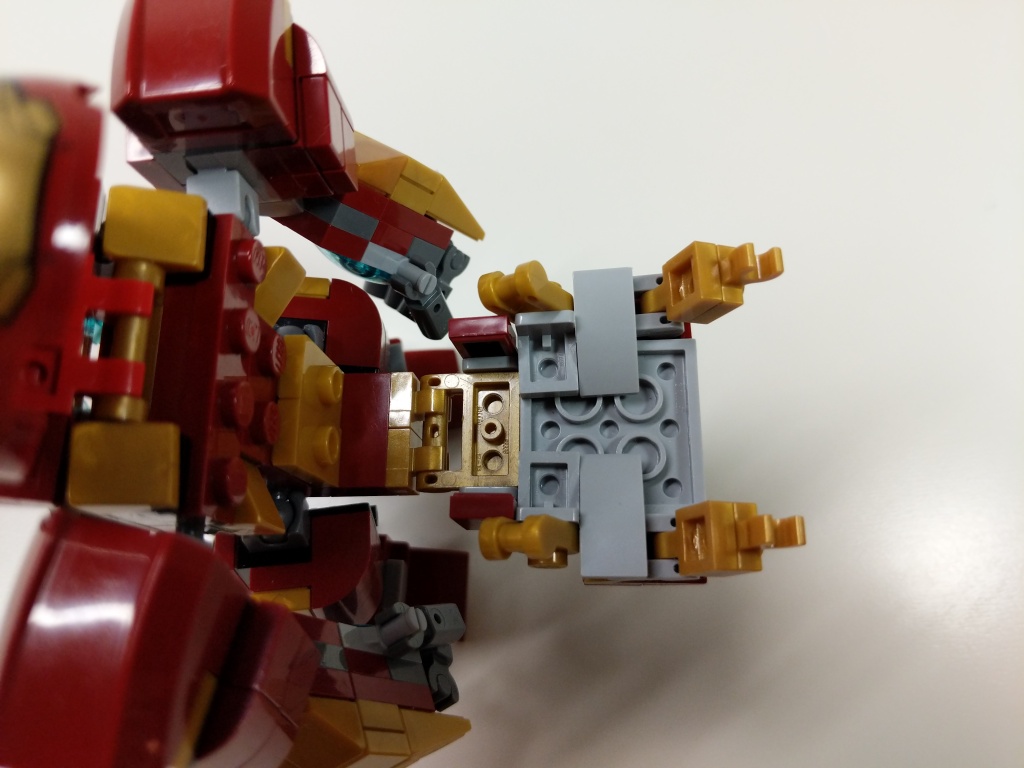
Igor in 76125 Iron Man Hall of Armor inspired the basic layout of Hulkbuster using the ball-joint connectors. The 5-stud wide chest piece with an arc reactor in the center and wrap-around elements is my favorite part of the build. Rotated views with a focus on key details are included below.
Given more specialized elements–especially in dark red and metallic gold–I think that I can continue to refine this model to pack as much detail as possible within its small size in comparison to its larger brethren.