This year’s City Tech Science Fiction Symposium, our fifth event since the inauguration of the City Tech Science Fiction Collection, will be held as a Zoom Webinar on Thursday, Nov. 19 from 9:00am to 5:00pm.
We have an outstanding line up featuring this year’s keynote speaker is Dr. Jonathan W. Gray who will give a talk titled, “Past Tense, Future Perfect: American Atrocities in HBO’s Watchmen and Lovecraft Country;” three roundtable discussions with SF writers, scholars, and City Tech students; and scholarly and pedagogically focused paper presentations.
While the event will take place in realtime on Zoom Webinar and simultaneously on YouTube Live, some supplemental material like author readings and expanded paper presentations are already available as online videos.
This post used to live as a page on DynamicSubspace.net. I’m archiving it as a post. All of the referenced content still lives at the links below.
As a new project for 2014, I am going through my personal archive of undergraduate and graduate school writing, recovering those essays I consider interesting but that I am unlikely to revise for traditional publication, and posting those essays as-is on my blog in the hope of engaging others with these ideas that played a formative role in my development as a scholar and teacher. I am calling this personal exploration and rediscovery of my personal digital archive, “Recovered Writing.” Because this and the other essays in the Recovered Writing series are posted as-is and edited only for web-readability, I hope that readers will accept them for what they are–undergraduate and graduate school essays conveying varying degrees of argumentation, rigor, idea development, and research. Furthermore, I dislike the idea of these essays languishing in a digital tomb, so I offer them here to excite your curiosity and encourage your conversation.
Below, I am including links to my Recovered Writing posts as they are published:
I like Syncthing, the continuous file synchronization program. Syncthing helps me pickup and continue my work regardless of the device I happen to be using, because it synchronizes my files across all devices. Think Dropbox but on my own hardware.
Also, I like tiny, low-power computers, like the Raspberry Pi 2. The Raspberry Pi and other lightweight computers demonstrate how even small computers are powerful enough for servers and desktop computing.
When Dropbox became more bloated with the new app design and refusing to offer a lower cost tier for those of us with modestly lower file synchronization needs, I began using Syncthing to create a folder of files synchronized between my desktop computer (at home) and my Surface Go (laptop used at work). I’ve been wanting to add a third node in my personal cloud storage solution, in part as an exercise in Linux and tiny computing and in part as another safe repository of my files. So, it made sense to combine my use of Syncthing with my enthusiasm for tiny computing by adding a third node to my Syncthing setup with a $10 Raspberry Pi Zero W (RPi0).
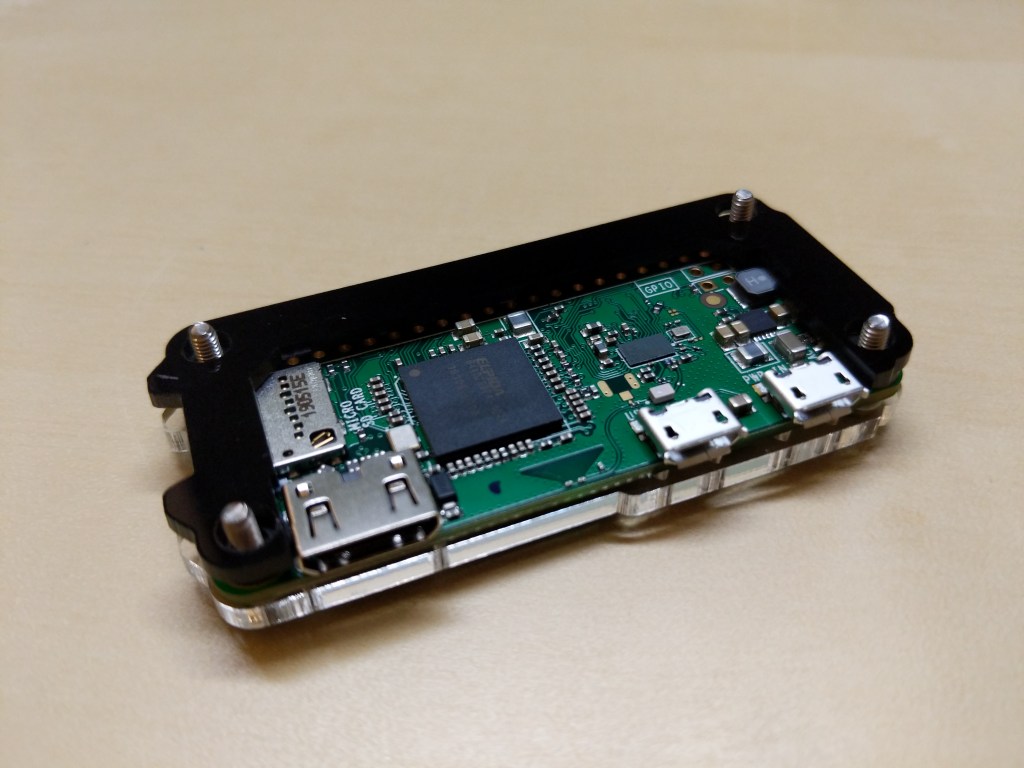
Raspberry Pi Micro USB Power Supply, Raspberry Pi Zero W, and C4 Labs Zebra Zero Black Ice Case
I picked up a RPi0 version 1.1, a C4 Labs Zebra Zero Black Ice Case with heatsink from Microcenter using their curbside pickup, which cost about $26 total.
I setup the RPi0 as a headless computer, meaning that it doesn’t have a monitor or keyboard attached. I will configure and control it remotely over my LAN.
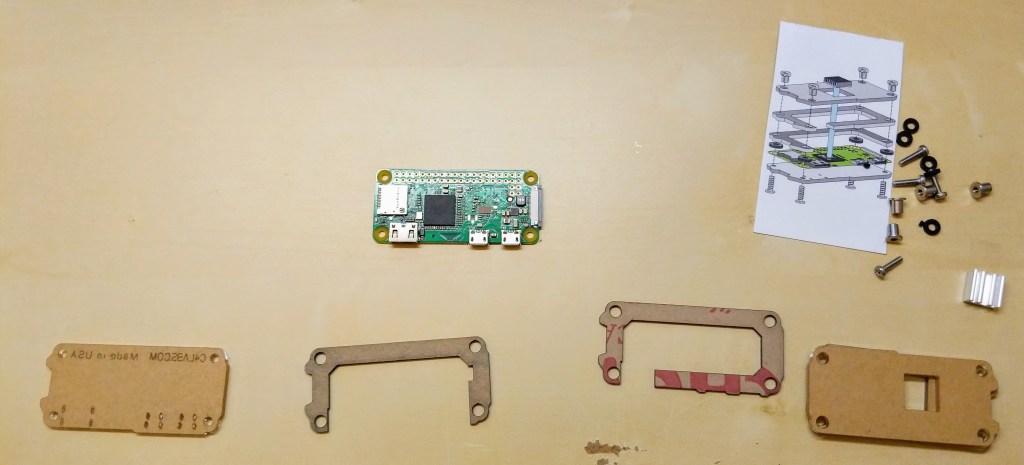
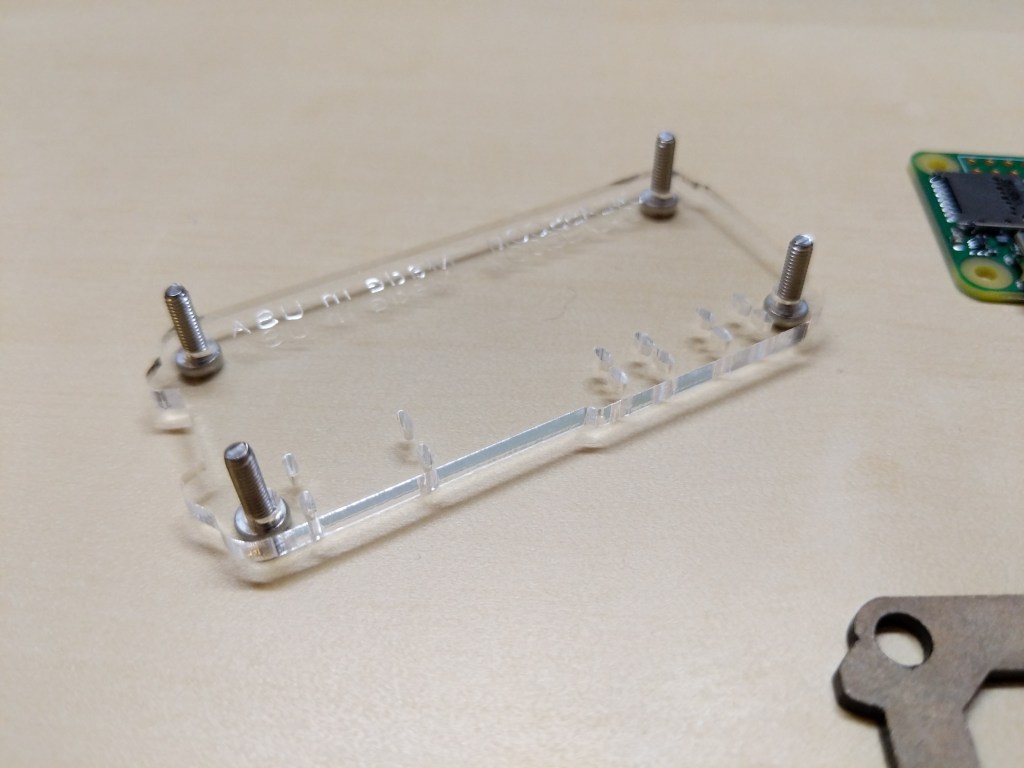
Before turning to the software and preparing the microSD card for the RPi, I assembled the case and installed the heatsink on the CPU. A case for the RPi0 wasn’t necessary, but I thought it prudent to get one for two reasons: 1) I have a cat and a small thing with a wire sticking out might be enticing, and 2) I plan to leave it on all the time, so a heatsink like the one included in this case kit will help dissipate heat produced by the RPi0’s CPU.
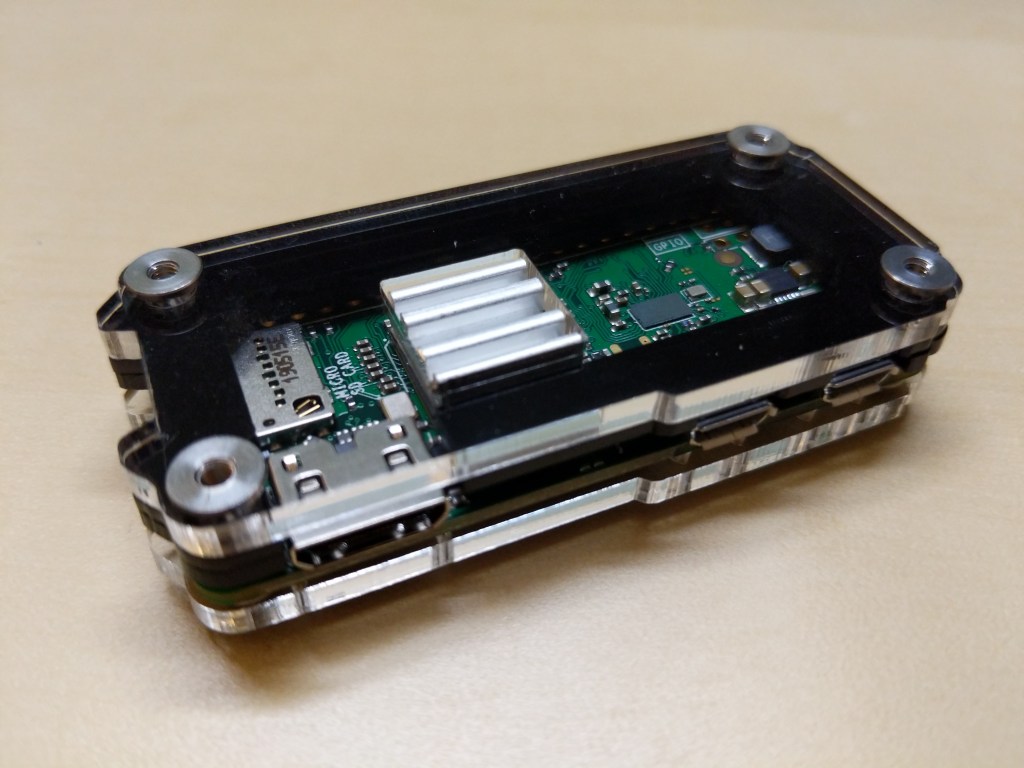
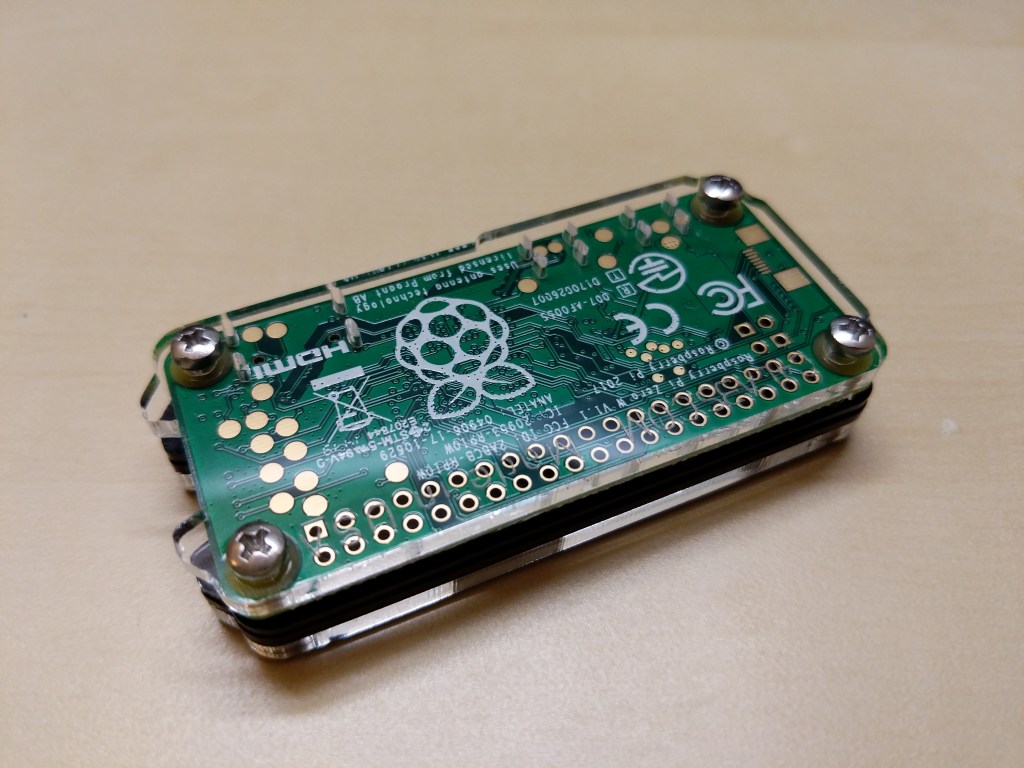
Assembling the Raspberry Pi Zero W in a C4 Labs Zebra Black Ice Case with Heatsink
Before powering up the RPi0, I downloaded Raspbian Lite (a lean version of the Linux-based Raspbian OS for the RPi), balena Etcher (to burn the installer image to my microSD card), PuTTY (to SSH into the RPi0 to configure, administer, and install software), and Apple’s Bonjour network printer software (to easily connect to the .local hostname of the RPi0).
Since I installed Apple’s Bonjour software as part of Mitch Allen’s instructions above, I was able to easily connect to the RPi0’s Syncthing web admin page by going to “raspberrypi.local:8384” on my desktop’s web browser.
Before setting up Syncthing to sync files, I wanted to lockdown the web admin page by going to Actions > Settings > GUI where I checked “Use HTTPS for GUI” and added a “GUI Authentication User” and “GUI Authentication Password”.
As a test, I rebooted the RPi0 and confirmed that Syncthing launched automatically at bootup and confirmed that authentication was required to access the web admin page remotely.
Also, I made sure that I had Syncthing running on the desktop computer and the RPi0. Due to some initial problems with syncing, I unlinked my desktop and Surface Go from syncing, and moved the files and folders out of my default sync folder so that the sync folder is empty to begin with.
Then, I added a remote device to Syncthing on my desktop PC and on the RPi0 (both installations of Syncthing have to have the other device added).
On each Syncthing web admin page click “Add Remote Device” to add the other computers that you want to sync
First, on each computer (in my case, the desktop PC and the RPi0), click “Add Remote Device” on the Syncthing web admin page.
Enter the Device ID generated by Syncthing on the other computer. On my local network, it auto-suggested the ID of the desktop PC on the RPi0 and vice versa.
Second, on the “Add Device” screen that appears, type in the Device ID of the other computer. In my case, Syncthing auto-suggested the Device ID of the desktop PC when I was configuring the RPi0 and vice versa since these devices are on the same local area network.
On the Sharing tab, check all three boxes
Third, click on the “Sharing” tab on the “Add Device” screen, and check all three boxes: Introducer tells connected devices to add devices from the other synced devices, Default Folder is what folder is being shared, and Auto Accept will automatically include new folders created or shared within the default shared path. Finally, click “Save.”
After adding each other device on each Syncthing installation, they should begin syncing the default folder. I added one file back on my desktop PC to test this. After that file synced on both devices, I added my files back and they began syncing with the RPi0.
The final step in my setup was to add the Surface Go as another remote device. After starting Syncthing on the Surface Go, I added it to the desktop PC and I added the desktop PC to the Surface Go’s Syncthing configuration. While the Surface Go began copying files, the RPi0 added the Surface Go as a remote device automatically. Now, all three devices sync my files.
A better configuration would be to have the RPi0 off-site so that my files would be protected from burglary or fire. Therefore, I wouldn’t recommend Syncthing as a foolproof backup solution that gives you the same sense of security as off-site storage unless you can arrange to have your files off-site (then, I would recommend going further than what I did and have your RPi0’s drive encrypted to protect your files should the off-site device be compromised).
For my purposes, using Syncthing on two work-focused devices and one tiny RPi0 computer server gives me some peace of mind through an additional layer of redundancy.
Now, I want to explore what else I can have this RPi0 do as a headless server!
Spaceman graffiti at NE corner of Court St. and Degraw St. in Brooklyn, New York.
Looking ahead to the New York City of Print NEH Summer Institute, I wanted to collect some notes and resources together for Science-Fiction-focused locations around the city, including the original Manhattan-based offices for the magazines Amazing Stories and Astounding Science-Fiction, and home and business locations in Brooklyn of importance to the SF writer Isaac Asimov.
John W. Campbell, Jr., who oversaw the so-called “Golden Age of Science Fiction,” joined Street & Smith Publications as the third editor of Astounding Stories in 1937. Located at 79 7th Avenue, the Street & Smith office building where Campbell made his office for a number of years remains largely unchanged as seen in Google Street View from how it appeared in this photo from 1931 and its 1940 Tax Photo (albeit sans the Street & Smith sign).
Now known as Analog Science Fiction and Fact, it is based out of the 9th floor of 44 Wall Street, which seems largely unchanged today as compared to this 1940 Tax Photo.
When the Asimov family came to the United States in 1923, they moved into their first apartment at 425 Van Siclen Avenue, in the East New York section of Brooklyn. In the summer of 1925 they moved one block away to an apartment at 434 Miller Avenue. They moved half a mile eastward in December 1928 to another apartment at 651 Essex Street, above the second candy store bought by his father. In early 1933, they moved to an apartment on Church Avenue, and after a brief stay there they moved to an apartment above yet another family candy store, at 1312 Decatur Street, in the Ridgewood section of Brooklyn. In December of 1936, Asimov’s father sold his third candy store and bought his fourth, at 174 Windsor Place, in the Park Slope section of Brooklyn, and the family moved to a house across the street.
FAQ for alt.books.isaac-asimov
174 Windsor Pl, Brooklyn, New York on May 30, 2022.
The 174 Windsor Place address is particularly significant. Asimov was a teenager at this point, and he used this address in some of his early SF magazine correspondences, such as his “Feminine-less Issue” letter to Startling Stories (November 1939, p. 115), which he wrote when he was 16 years old. 174 Windsor Place doesn’t have a photo in the 1940 tax photo records, but its right side can be clearly seen as carrying “Stationary” and other goods on the left side of this photo of 172 Windsor Place. Today, the building is home to CNS Construction and Cabinets, which you can see on Google Street View here.
The earlier addresses might be where Asimov first encountered science fiction magazines. These include:
Due to COVID-19, City Tech (and all of CUNY) shifted its in-person classes to online, distance learning instruction. In this post, I reflect on my current class’s transition to distance learning, show how I have configured my office and computer for screencasting and video conferencing, describe some software and services that support distance learning, and give instructions for uploading a video to YouTube.
My Transition to Distance Learning
For my current Science Fiction (ENG2420) class, this was not too much of a disruption, because I was already leveraging online technologies to support student learning and course material accessibility. I designed the course as a zero textbook cost class, meaning I find resources that I can make available to students via PDFs and handouts, and choose readings that are available freely online, such as the unparalleled Archive.org.
Also, I redesigned some of the course assignments to emphasize the importance of note taking by teaching good note taking practices and evaluating students on the quality of their notes. To support this, I recorded each lecture during our earlier in-person classes and posted them on YouTube after class ended, so that students could use the videos to fill in gaps in their notes and allow those students who missed a class to make their own notes based on the video lectures.
I collect student work via email and on OpenLab, “an open-source, digital platform designed to support teaching and learning at City Tech (New York City College of Technology), and to promote student and faculty engagement in the intellectual and social life of the college community.” I joined the OpenLab team as a co-director of the project this year, but I have been using OpenLab in all of my classes since joining City Tech in 2014.
Now with classes meeting asynchronously online, I have tweaked assignments and the schedule to accommodate students accessing materials and completing their assignments. I hold office hours once a week at a regularly scheduled time via Google Hangouts, and I can hold private office hours by appointment with students. I use email to respond to questions and concerns on a daily basis.
Now that I have reconfigured a space in my apartment to support my class and the many other online meeting responsibilities that I have with OpenLab and other projects, I wanted to share some tips and ideas to help others transitioning to facilitating their classes with distance learning.
Office Configuration
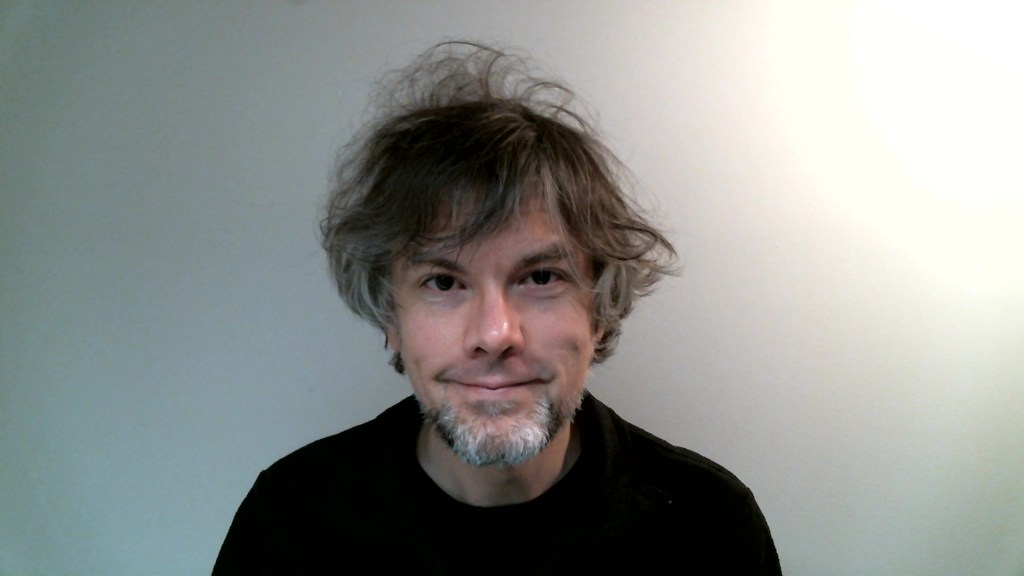
I know how easily distracted I am by busy backgrounds, I wanted to provide as neutral a space for my lectures and online meetings. To this end, I appropriated my apartment’s closet as a distance learning and video conferencing studio.
I positioned the Logitech C615 webcam so that I am centered in the frame when video conferencing or recording myself lecture. Above the camera, I positioned a white light to illuminate my face.
I arranged the desk so that my back would be against a solid white wall as pictured above looking from behind my monitor towards where I would be sitting facing the monitor and webcam.
Notice that I taped a small piece of cardboard above the webcam. This blocks glare on the camera lens from the light above that illuminates my face. I was careful to cut and position it so that it is out of frame of the camera lens. Depending on your webcam, be careful not to cover the microphone if you build a similar lens shade.
To the side of my desk, I have a larger lamp that points against the wall and behind me. This reduces my shadow from the desk lamp in front of me.
The end result looks like this:
Software and Online Services for Distance Learning
As mentioned above, I use email and the OpenLab for interacting with students, disseminating materials, and collecting student work. And, I am using Google Hangouts for regular office hours since it is a far easier lift for students than official CUNY supported video platforms like Skype and WebEx.
To create my class lectures, I do the following things.
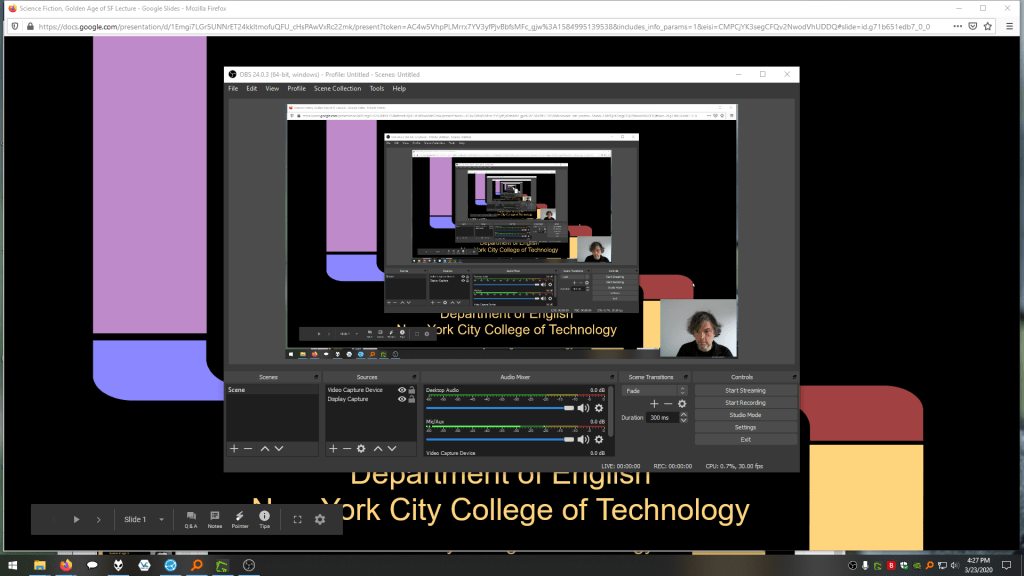
First, I create a presentation slide deck using Slides in Google Docs.
While presenting my slides in full screen mode, I use OBS Studio, a “free and open source software for video recording and live streaming” that supports Windows, Mac, and Linux, to record a video of my desktop (the Slides presentation) and my webcam video and audio in a smaller picture-in-picture that positioned in the lower right corner of the screen, which produces a video like my recent lecture embedded below.
Before I can post the video to YouTube, I like to edit it (though, editing isn’t absolutely necessary). I like to use Shotcut, a “a free, open source, cross-platform video editor.” After trimming the video, I then upload it to YouTube, get the video’s sharable link, and embed the video with the link in my class’ OpenLab site.
OBS Studio and Shotcut have steep learning curves, but each have extensive online documentation and there are communities of users online who share tips and advice about how to setup and use these powerful tools.
In some cases, you might not even need a computer. iPhones with iOS and Android phones can use video recording software that’s built-in or with an app to record and edit video, and there’s a YouTube app for both platforms that you can use for uploading the resulting video.
In the next section, I will show you step-by-step instructions for uploading a video made on a computer to YouTube.
Uploading a Video to YouTube
Once you have a video ready to share with students, the following step-by-step guide for uploading your video to YouTube shows you how to upload and share a link to your video.
First, navigate to YouTube.com and login to your account. Then, click on the camera icon in the upper right corner and then click “Upload Video.”
Second, drag-and-drop your video from your computer into the center of the window that opens, or click on “Select File” to navigate to and select your video file on your computer.
Third, while your video is uploading and processing (updates are shown along the bottom edge of this window shown above), fill out the Title and Description boxes and choose a thumbnail for how the video will initially display before the play button is pressed. Then, scroll down the window.
To comply with the COPPA law, select if your video is for kids or not. Then, click Next in the lower right hand corner.
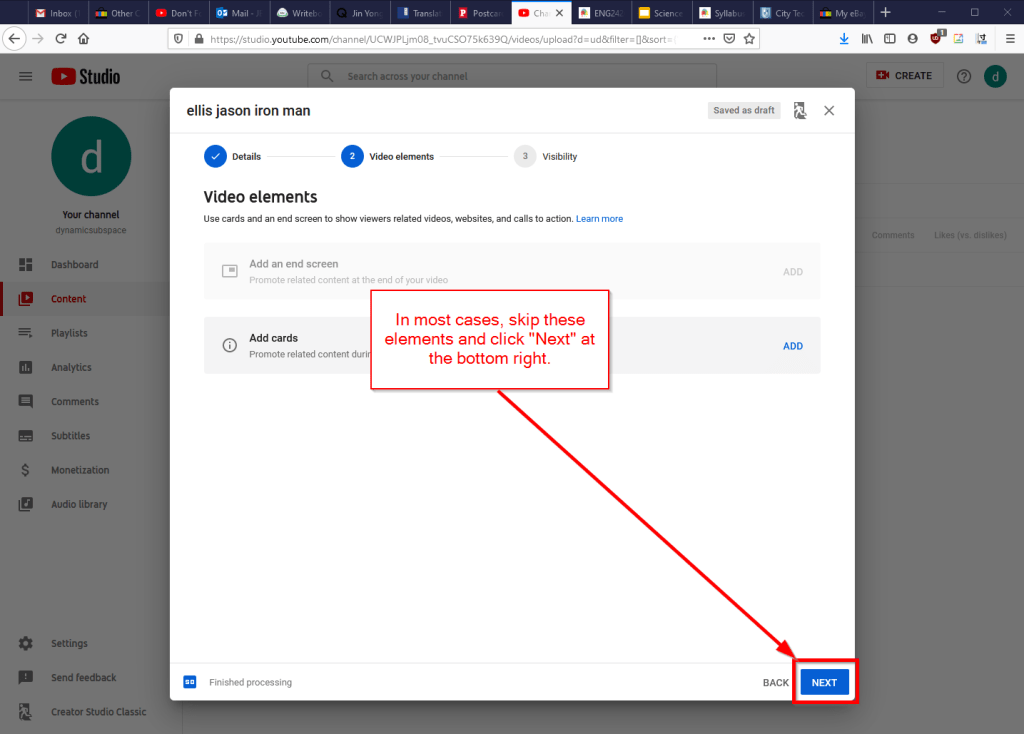
Fourth, you can skip the options on the Video Elements screen and click Next in the lower right corner.
Fifth, select the Visibility option for your video. The most versatile choices are Public (this is what I choose) and Unlisted. In these cases, you will have a sharable video link that you can send via email or easily embed in a webpage. Private is also an option, but you have to choose who is permitted to see the video, which requires students having a Google account and you knowing those accounts to grant permission to each one. After making your selection, click Publish in the lower right corner.
Finally, highlight and copy the video link on the resulting screen, or click on the copy icon on the right to automatically copy the video link to the Clipboard. Click “Close” on the lower right to return to your list of videos on YouTube. With the link on your Clipboard, you can go to email, OpenLab, or another platform to paste and share the video link with your students.
On OpenLab and WordPress-based sites, pasting the link into a post or page will automatically embed the video so that students can simply navigate to your class site and watch the video on the class site instead of going over to YouTube as an additional step.
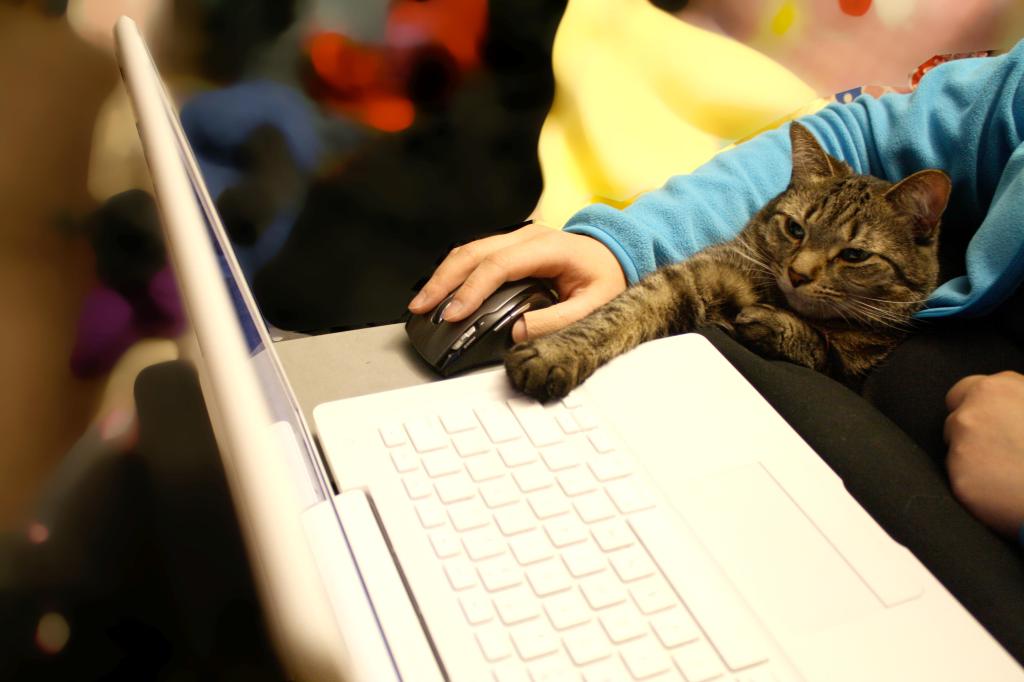
If you’re working on transitioning your classes to distance learning, it’s okay to feel overwhelmed and frustrated like Miao Miao below. Just don’t give up. We’re doing good work for our students, and it takes time to think through and implement distance learning. Also, it’s okay to let your students know that this is a work-in-progress and things might change based on what works and what doesn’t.