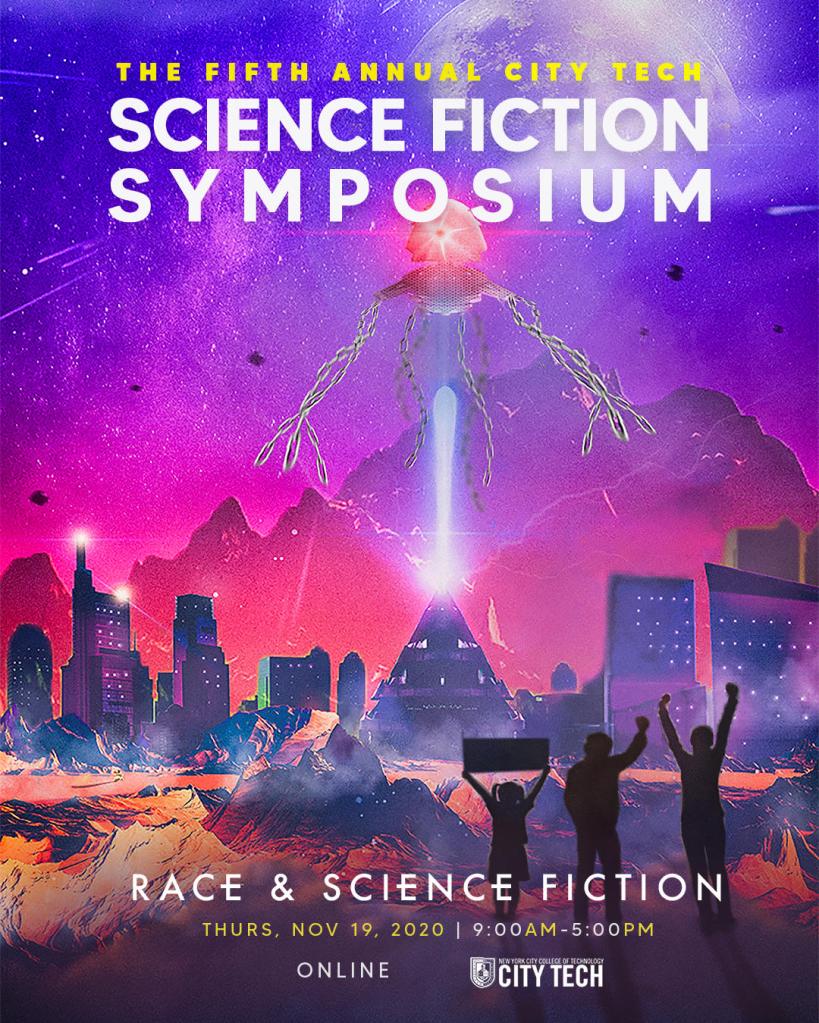
Blog

  • Personal Cloud Storage with Syncthing and a Tiny Raspberry Pi Zero W Computer

    Raspberry Pi Zero W v1.1

    I like Syncthing, the continuous file synchronization program. Syncthing helps me pickup and continue my work regardless of the device I happen to be using, because it synchronizes my files across all devices. Think Dropbox but on my own hardware.

    Also, I like tiny, low-power computers, like the Raspberry Pi 2. The Raspberry Pi and other lightweight computers demonstrate how even small computers are powerful enough for servers and desktop computing.

    When Dropbox became more bloated with the new app design and refusing to offer a lower cost tier for those of us with modestly lower file synchronization needs, I began using Syncthing to create a folder of files synchronized between my desktop computer (at home) and my Surface Go (laptop used at work). I’ve been wanting to add a third node in my personal cloud storage solution, in part as an exercise in Linux and tiny computing and in part as another safe repository of my files. So, it made sense to combine my use of Syncthing with my enthusiasm for tiny computing by adding a third node to my Syncthing setup with a $10 Raspberry Pi Zero W (RPi0).

    Raspberry Pi Micro USB Power Supply, Raspberry Pi Zero W, and C4 Labs Zebra Zero Black Ice Case

    I picked up a RPi0 version 1.1, a C4 Labs Zebra Zero Black Ice Case with heatsink from Microcenter using their curbside pickup, which cost about $26 total.

    I setup the RPi0 as a headless computer, meaning that it doesn’t have a monitor or keyboard attached. I will configure and control it remotely over my LAN.

    Before turning to the software and preparing the microSD card for the RPi, I assembled the case and installed the heatsink on the CPU. A case for the RPi0 wasn’t necessary, but I thought it prudent to get one for two reasons: 1) I have a cat and a small thing with a wire sticking out might be enticing, and 2) I plan to leave it on all the time, so a heatsink like the one included in this case kit will help dissipate heat produced by the RPi0’s CPU.

    Before powering up the RPi0, I downloaded Raspbian Lite (a lean version of the Linux-based Raspbian OS for the RPi), balena Etcher (to burn the installer image to my microSD card), PuTTY (to SSH into the RPi0 to configure, administer, and install software), and Apple’s Bonjour network printer software (to easily connect to the .local hostname of the RPi0).

    Then, I followed Mitch Allen’s excellent directions for setting up a headless RPi0.

    Next, I followed these detailed directions for installing and configuring Syncthing to launch and load automatically when the RPi0 is powered up.

    Since I installed Apple’s Bonjour software as part of Mitch Allen’s instructions above, I was able to easily connect to the RPi0’s Syncthing web admin page by going to “raspberrypi.local:8384” on my desktop’s web browser.

    Before setting up Syncthing to sync files, I wanted to lockdown the web admin page by going to Actions > Settings > GUI where I checked “Use HTTPS for GUI” and added a “GUI Authentication User” and “GUI Authentication Password”.

    As a test, I rebooted the RPi0 and confirmed that Syncthing launched automatically at bootup and confirmed that authentication was required to access the web admin page remotely.

    Also, I made sure that I had Syncthing running on the desktop computer and the RPi0. Due to some initial problems with syncing, I unlinked my desktop and Surface Go from syncing, and moved the files and folders out of my default sync folder so that the sync folder is empty to begin with.

    Then, I added a remote device to Syncthing on my desktop PC and on the RPi0 (both installations of Syncthing have to have the other device added).

    On each Syncthing web admin page click “Add Remote Device” to add the other computers that you want to sync

    First, on each computer (in my case, the desktop PC and the RPi0), click “Add Remote Device” on the Syncthing web admin page.

    Enter the Device ID generated by Syncthing on the other computer. On my local network, it auto-suggested the ID of the desktop PC on the RPi0 and vice versa.

    Second, on the “Add Device” screen that appears, type in the Device ID of the other computer. In my case, Syncthing auto-suggested the Device ID of the desktop PC when I was configuring the RPi0 and vice versa since these devices are on the same local area network.

    On the Sharing tab, check all three boxes

    Third, click on the “Sharing” tab on the “Add Device” screen, and check all three boxes: Introducer tells connected devices to add devices from the other synced devices, Default Folder is what folder is being shared, and Auto Accept will automatically include new folders created or shared within the default shared path. Finally, click “Save.”

    After adding each other device on each Syncthing installation, they should begin syncing the default folder. I added one file back on my desktop PC to test this. After that file synced on both devices, I added my files back and they began syncing with the RPi0.

    The final step in my setup was to add the Surface Go as another remote device. After starting Syncthing on the Surface Go, I added it to the desktop PC and I added the desktop PC to the Surface Go’s Syncthing configuration. While the Surface Go began copying files, the RPi0 added the Surface Go as a remote device automatically. Now, all three devices sync my files.

    A better configuration would be to have the RPi0 off-site so that my files would be protected from burglary or fire. Therefore, I wouldn’t recommend Syncthing as a foolproof backup solution that gives you the same sense of security as off-site storage unless you can arrange to have your files off-site (then, I would recommend going further than what I did and have your RPi0’s drive encrypted to protect your files should the off-site device be compromised).

    For my purposes, using Syncthing on two work-focused devices and one tiny RPi0 computer server gives me some peace of mind through an additional layer of redundancy.

    Now, I want to explore what else I can have this RPi0 do as a headless server!

  • Notes on A Science Fiction Walking Tour in New York City

    Spaceman graffiti in Brooklyn.
    Spaceman graffiti at NE corner of Court St. and Degraw St. in Brooklyn, New York.

    Looking ahead to the New York City of Print NEH Summer Institute, I wanted to collect some notes and resources together for Science-Fiction-focused locations around the city, including the original Manhattan-based offices for the magazines Amazing Stories and Astounding Science-Fiction, and home and business locations in Brooklyn of importance to the SF writer Isaac Asimov.

    Amazing Stories

    Hugo Gernsback launched Amazing Stories in April 1926 as the world’s first magazine devoted to what he called “scientifiction,” a clunky term that would soon evolve into what we now call Science Fiction. Amazing Stories was based out of an office at 53 Park Place, Manhattan. Today, Google Map’s Street View of 53 Park Place reveals that the building looks remarkably unchanged from this early, undated photo held by the NYPL and this 1940 Tax Photo.

    Astounding Science-Fiction

    John W. Campbell, Jr., who oversaw the so-called “Golden Age of Science Fiction,” joined Street & Smith Publications as the third editor of Astounding Stories in 1937. Located at 79 7th Avenue, the Street & Smith office building where Campbell made his office for a number of years remains largely unchanged as seen in Google Street View from how it appeared in this photo from 1931 and its 1940 Tax Photo (albeit sans the Street & Smith sign).

    Now known as Analog Science Fiction and Fact, it is based out of the 9th floor of 44 Wall Street, which seems largely unchanged today as compared to this 1940 Tax Photo.

    Isaac Asimov

    The FAQ for alt.books.isaac-asimov provides a useful list of family residences and storefronts from Asimov’s youth:

    When the Asimov family came to the United States in 1923, they moved into their first apartment at 425 Van Siclen Avenue, in the East New York section of Brooklyn. In the summer of 1925 they moved one block away to an apartment at 434 Miller Avenue. They moved half a mile eastward in December 1928 to another apartment at 651 Essex Street, above the second candy store bought by his father. In early 1933, they moved to an apartment on Church Avenue, and after a brief stay there they moved to an apartment above yet another family candy store, at 1312 Decatur Street, in the Ridgewood section of Brooklyn. In December of 1936, Asimov’s father sold his third candy store and bought his fourth, at 174 Windsor Place, in the Park Slope section of Brooklyn, and the family moved to a house across the street.

    FAQ for alt.books.isaac-asimov
    174 Windsor Pl on May 30, 2022.
    174 Windsor Pl, Brooklyn, New York on May 30, 2022.

    The 174 Windsor Place address is particularly significant. Asimov was a teenager at this point, and he used this address in some of his early SF magazine correspondences, such as his “Feminine-less Issue” letter to Startling Stories (November 1939, p. 115), which he wrote when he was 16 years old. 174 Windsor Place doesn’t have a photo in the 1940 tax photo records, but its right side can be clearly seen as carrying “Stationary” and other goods on the left side of this photo of 172 Windsor Place. Today, the building is home to CNS Construction and Cabinets, which you can see on Google Street View here.

    The earlier addresses might be where Asimov first encountered science fiction magazines. These include:

  • How I Work: Distance Learning Edition

    Due to COVID-19, City Tech (and all of CUNY) shifted its in-person classes to online, distance learning instruction. In this post, I reflect on my current class’s transition to distance learning, show how I have configured my office and computer for screencasting and video conferencing, describe some software and services that support distance learning, and give instructions for uploading a video to YouTube.

    My Transition to Distance Learning

    For my current Science Fiction (ENG2420) class, this was not too much of a disruption, because I was already leveraging online technologies to support student learning and course material accessibility. I designed the course as a zero textbook cost class, meaning I find resources that I can make available to students via PDFs and handouts, and choose readings that are available freely online, such as the unparalleled Archive.org.

    Also, I redesigned some of the course assignments to emphasize the importance of note taking by teaching good note taking practices and evaluating students on the quality of their notes. To support this, I recorded each lecture during our earlier in-person classes and posted them on YouTube after class ended, so that students could use the videos to fill in gaps in their notes and allow those students who missed a class to make their own notes based on the video lectures.

    I collect student work via email and on OpenLab, “an open-source, digital platform designed to support teaching and learning at City Tech (New York City College of Technology), and to promote student and faculty engagement in the intellectual and social life of the college community.” I joined the OpenLab team as a co-director of the project this year, but I have been using OpenLab in all of my classes since joining City Tech in 2014.

    Now with classes meeting asynchronously online, I have tweaked assignments and the schedule to accommodate students accessing materials and completing their assignments. I hold office hours once a week at a regularly scheduled time via Google Hangouts, and I can hold private office hours by appointment with students. I use email to respond to questions and concerns on a daily basis.

    Now that I have reconfigured a space in my apartment to support my class and the many other online meeting responsibilities that I have with OpenLab and other projects, I wanted to share some tips and ideas to help others transitioning to facilitating their classes with distance learning.

    Office Configuration

    I know how easily distracted I am by busy backgrounds, I wanted to provide as neutral a space for my lectures and online meetings. To this end, I appropriated my apartment’s closet as a distance learning and video conferencing studio.

    I positioned the Logitech C615 webcam so that I am centered in the frame when video conferencing or recording myself lecture. Above the camera, I positioned a white light to illuminate my face.

    I arranged the desk so that my back would be against a solid white wall as pictured above looking from behind my monitor towards where I would be sitting facing the monitor and webcam.

    Notice that I taped a small piece of cardboard above the webcam. This blocks glare on the camera lens from the light above that illuminates my face. I was careful to cut and position it so that it is out of frame of the camera lens. Depending on your webcam, be careful not to cover the microphone if you build a similar lens shade.

    To the side of my desk, I have a larger lamp that points against the wall and behind me. This reduces my shadow from the desk lamp in front of me.

    The end result looks like this:

    Software and Online Services for Distance Learning

    As mentioned above, I use email and the OpenLab for interacting with students, disseminating materials, and collecting student work. And, I am using Google Hangouts for regular office hours since it is a far easier lift for students than official CUNY supported video platforms like Skype and WebEx.

    To create my class lectures, I do the following things.

    First, I create a presentation slide deck using Slides in Google Docs.

    While presenting my slides in full screen mode, I use OBS Studio, a “free and open source software for video recording and live streaming” that supports Windows, Mac, and Linux, to record a video of my desktop (the Slides presentation) and my webcam video and audio in a smaller picture-in-picture that positioned in the lower right corner of the screen, which produces a video like my recent lecture embedded below.

    Before I can post the video to YouTube, I like to edit it (though, editing isn’t absolutely necessary). I like to use Shotcut, a “a free, open source, cross-platform video editor.” After trimming the video, I then upload it to YouTube, get the video’s sharable link, and embed the video with the link in my class’ OpenLab site.

    OBS Studio and Shotcut have steep learning curves, but each have extensive online documentation and there are communities of users online who share tips and advice about how to setup and use these powerful tools.

    There are many other options for working with video. On Mac OS X, one can use Quicktime Player to record a screencast or iMovie to create something more advanced. On Windows 10, the built-in Xbox Game Bar can be used for creating a screencast movie. Also, there are commercial solutions, such as Screencast-o-Matic.

    In some cases, you might not even need a computer. iPhones with iOS and Android phones can use video recording software that’s built-in or with an app to record and edit video, and there’s a YouTube app for both platforms that you can use for uploading the resulting video.

    In the next section, I will show you step-by-step instructions for uploading a video made on a computer to YouTube.

    Uploading a Video to YouTube

    Once you have a video ready to share with students, the following step-by-step guide for uploading your video to YouTube shows you how to upload and share a link to your video.

    First, navigate to YouTube.com and login to your account. Then, click on the camera icon in the upper right corner and then click “Upload Video.”

    Second, drag-and-drop your video from your computer into the center of the window that opens, or click on “Select File” to navigate to and select your video file on your computer.

    Third, while your video is uploading and processing (updates are shown along the bottom edge of this window shown above), fill out the Title and Description boxes and choose a thumbnail for how the video will initially display before the play button is pressed. Then, scroll down the window.

    To comply with the COPPA law, select if your video is for kids or not. Then, click Next in the lower right hand corner.

    Fourth, you can skip the options on the Video Elements screen and click Next in the lower right corner.

    Fifth, select the Visibility option for your video. The most versatile choices are Public (this is what I choose) and Unlisted. In these cases, you will have a sharable video link that you can send via email or easily embed in a webpage. Private is also an option, but you have to choose who is permitted to see the video, which requires students having a Google account and you knowing those accounts to grant permission to each one. After making your selection, click Publish in the lower right corner.

    Finally, highlight and copy the video link on the resulting screen, or click on the copy icon on the right to automatically copy the video link to the Clipboard. Click “Close” on the lower right to return to your list of videos on YouTube. With the link on your Clipboard, you can go to email, OpenLab, or another platform to paste and share the video link with your students.

    On OpenLab and WordPress-based sites, pasting the link into a post or page will automatically embed the video so that students can simply navigate to your class site and watch the video on the class site instead of going over to YouTube as an additional step.

    If you’re working on transitioning your classes to distance learning, it’s okay to feel overwhelmed and frustrated like Miao Miao below. Just don’t give up. We’re doing good work for our students, and it takes time to think through and implement distance learning. Also, it’s okay to let your students know that this is a work-in-progress and things might change based on what works and what doesn’t.

    I republished this post on Open Pedagogy on the OpenLab here.

  • Call for Applicants, City of Print: New York and the Periodical Press, Deadline Mar. 1, 2020

    Benjamin Franklin printing press exhibit at City Tech.
    Benjamin Franklin printing press exhibit at City Tech.

    Mark Noonan, my colleague at City Tech, is running an NEH Summer Institute on the topic, “City of Print: New York and the Periodical Press.” I’ll be contributing to the Digital Methods Workshop on Wednesday, June 24 with my experience working on the City Tech Science Fiction Collection and using digital tools to make archival materials available to students and researchers. See the link below for all the sessions and apply to join us in Brooklyn!

    City of Print: New York and the Periodical Press

    (NEH SUMMER INSTITUTE)
    (June 21 – July 3, 2020)

    New York City College of Technology-CUNY will host a two-week NEH Summer Institute for college and university faculty in the summer of 2020 (June 21 – July 3).

    For more information visit:

    http://www.citytech.cuny.edu/cityofprint/

    Applications to participate will be accepted via our online application system until March 1, 2020.

    The Institute will focus on periodicals, place, and the history of publishing in New York.  As an institute participant, you will take part in discussions led by cultural historians, archivists, and experts in the fields of American literature, art and urban history, and periodical studies; participate in hands-on sessions in the periodicals collection of the New-York Historical Society; visit sites important to the rise of New York’s periodical press, such as Newspaper Row, Gramercy Park, the New York Seaport, the East Village, and the Algonquin Hotel; and attend Digital Humanities workshops.

    You will also be asked to read a rich body of scholarship and consider new interdisciplinary approaches for researching and teaching periodicals that take into account the important site of their production, as well as relevant cultural, technological, aesthetic, and historical considerations. Sessions will be held across New York City including New York City College of Technology, the Brooklyn Historical Society, The Schomburg Center for Research in Black Culture, Pace University, and the New-York Historical Society.

    We encourage applicants from any field who are interested in the subject matter. Scholars and teachers specializing in periodical studies, journalism, urban history, art history, American studies, literature, and/or cultural studies will find the Institute especially attractive.

    Independent scholars, scholars engaged in museum work or full-time graduate studies are also urged to apply.

  • Reflections for the Open Pedagogy Event on Access Beyond the ADA, Thursday, 9/19/19

    Jason Ellis' Boy Scouts Merit Badge sash with 40 badges, including Handicap Awareness.
    Jason Ellis’ Boy Scouts Merit Badge sash with 40 badges, including Handicap Awareness.

    On Thursday, 9/19/19, the OpenLab, which I joined as a Co-Director this academic year, is hosting an Open Pedagogy event on “Beyond the ADA” at City Tech in the Faculty Commons at 4:30pm. We will lead a discussion about issues of access, including those related to disabilities, while looking beyond compliance to dynamic, inclusive, and supportive pedagogies that enrich learning for all students. OpenLab’s theme for this academic year is “Access.”

    While reading through the suggested texts informing the background of our discussion, I reflected on my personal, workplace, and classroom experiences relating to access.

    My first memory of disabilities relates to my Uncle Pat. After returning from Vietnam, he started a family in Walnut Grove, Alabama and worked for the railroad. While at work cutting an in-service rail, another truck accidentally bumped his truck, which ran over him and left him a quadriplegic. On visits, I saw first hand how he overcame him disability through mobility with a puffer-controlled electric wheelchair, but the constraints of 24-hour nursing care and accessible buildings were also obviously apparent. Nevertheless, he always trounced me at chess–I just had to setup the board and move the pieces.

    In my hometown, Emory Dawson was another quadriplegic that I knew through Boy Scouts. His injury originated from the Vietnam War and he had some shoulder mobility, which enabled him to drive his own van with the aid of a suicide knob and special controls for brake, throttle, and shifting. In addition to Scouts, Mr. Dawson was involved in many social groups and charities, and he led an active life to support them. I don’t know if it was *the* factor in its construction, but a fellow Scout took on the building of a concrete wheel chair ramp for a rank-level project at Troop 224’s hut in the back of Lakeside United Methodist Church on 341 Highway and Mr. Dawson visited our meetings on occasion.

    It was during that time that I earned my Handicap Awareness merit badge on Feb. 5, 1990, which you can see on the seventh row of the image above of my Boy Scout merit badge sash with the International Symbol of Access surrounded by a green circle. The requirements of the merit badge focused on learning about disabilities and gaining an empathetic awareness of disabilities through simulated impairments of hearing, sight, manual, and mobility. Less visible disabilities were outside the scope of that component of the merit badge’s requirements, but they could be reintroduced through the learning and outreach components (but this was not, as I remember, something that I was cognizant of at that time).

    I wondered how the merit badge might have changed since I earned it, and I’m glad to report that it had changed for the better, I think. In 1993, the merit badge was renamed as Disabilities Awareness, and its requirements shifted from personal simulation of physical impairments to learning first hand from others’ lived experience, identifying accessibility issues in the community, and performing advocacy for better accessibility. There was an advocacy element to Handicap Awareness (publicly sharing what you’ve learned with others), but Disabilities Awareness foregrounds this in a more integrated fashion. It would be interesting to read the merit badge series handbooks for the former and latter versions of this merit badge, but I only have access to the requirements while writing this blog post.

    When I worked in Technical Support at Mindspring Internet in Atlanta, Georgia, I was tasked with working with the Deaf and Hard of Hearing via a telecommunications device for the deaf (TDD). With a single line of LCD text and a running paper tape, I communicated with deaf customers to solve their technical support issues. Unfortunately, many customers had their TDD in a different room, different floor, different part of the house, than their computer. This introduced a tremendous lag between what I wrote questioning or instructing and their response following a result. Also, I was given this extra task to supplement my lower-than-expected phone support numbers (It’s my understanding that Mike McQuary pushed raw number of support calls over the quality of calls and successful resolution of customer issues–valuing quantitative measures over the qualitative effects of those measures on customers and employees). So, I was on the phone with one customer and on the TDD with another customer. Over time, I got better at switching my attention between customers, but more often than not, the customers on the TDD got the short end of the stick as my phone call numbers were given priority by management (QA Brian: “You’ve got to take more calls or you’ll get fired.”). It was an unfair situation for the deaf and hard of hearing customers.

    When I began teaching, I worked with a student on the autistic spectrum. This was a challenging situation for the student as the reported accommodations couldn’t support their success in the classroom, and I took it on myself to provide additional support to help the student progress in the course. I was advised that there was only so much that I could do to support the student, and I should have, in retrospect, dialed back my professional involvement. Nevertheless, this student did help me recognize another side of student needs and the impediments to access that students on the spectrum encounter. I have adjusted my syllabi to be more accommodating to students–self-reporting or not–through multiple activities and assignment adjustments on a one-by-one basis (as long as course learning outcomes are always met).

    Another student had a severe vision impairment and had reported accommodations, including a phone with magnifying app for reading text and a student volunteer note-taker. While the classroom and supporting material could be adjusted to support the student when present, outside life prevented the student from attending some classes. This led to testy encounters between myself and the note taker, who felt their time being wasted, and follow-up conversations between myself and the student to facilitate peace between the student and note taker so that support would be maintained. Of course, life outside of school was creating a different kind of access problem for this student–getting to campus was a hurdle in part due to the student’s vision problem and the issues that can come up in one’s personal life that lead to problems, such as not having someone to help you navigate from home to campus.

    I’ve come to realize that there are things that I can do to help as an instructor–those things that I have control over, such as pedagogy, syllabi, assignments, activities, and one-on-one support, and there are many other things outside the classroom that I don’t have control over. Also, the Open Pedagogy event conversation and the work that we can do together to increase access and lower barriers–in the classroom, online, on campus, and in our lived world–for students and faculty with disabilities is something that we must endeavor to accomplish.

    In addition to the informative readings OpenLab Digital Pedagogy Fellow Jesse Rice-Evans assembled for the Open Pedagogy event, I found these additional readings useful for my thinking:

    Adams, Rachel, Benjamin Reiss, and David Serlin. “Disability.” Keywords for Disability Studies, edited by Rachel Adams, Benjamin Reiss, and David Serlin, NYU Press, 2015, 5-12.

    Campbell, Kumari. “Ability.” Keywords for Disability Studies, edited by Rachel Adams, Benjamin Reiss, and David Serlin, NYU Press, 2015, 12-14.

    Mullaney, Clare. “Disability Studies: Foundations & Key Concepts.” JSTOR Daily, 13 April 2019, https://daily.jstor.org/reading-list-disability-studies/. Accessed 18 Sept. 2019.

    Williamson, Bess. “Access.” Keywords for Disability Studies, edited by Rachel Adams, Benjamin Reiss, and David Serlin, NYU Press, 2015, 14-16.