Thankfully, LEGO provides digital copies of their set instruction books online. This means that if you have the bricks, you can build anything in the LEGO catalog. Of course, it might take time and energy to hunt down each individual brick and element that you might need to assemble a given set if your collection is as disorganized and binned as mine is. Nevertheless, it’s satisfying being able to build something new with what you have instead of having to go out and buy it.
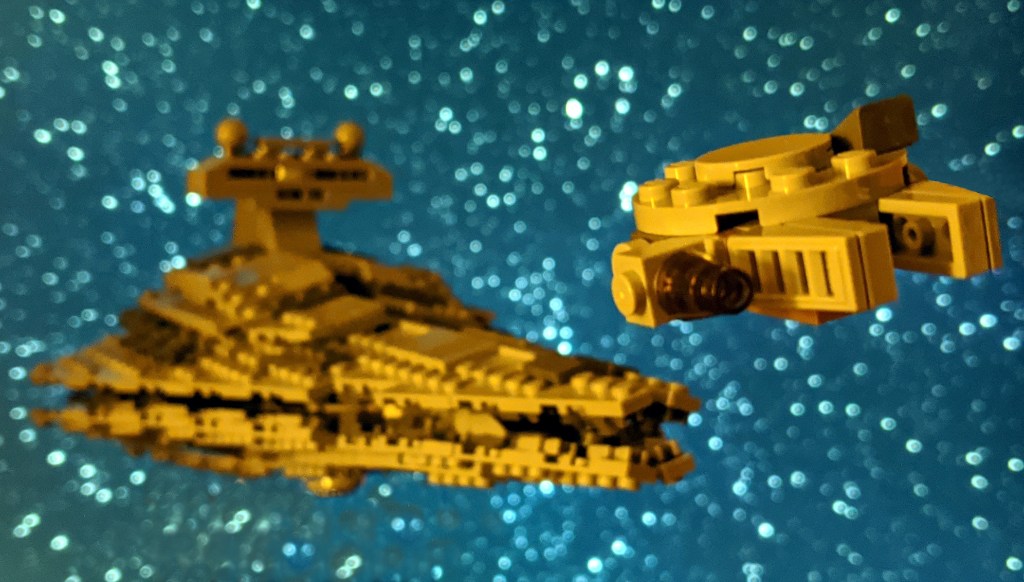
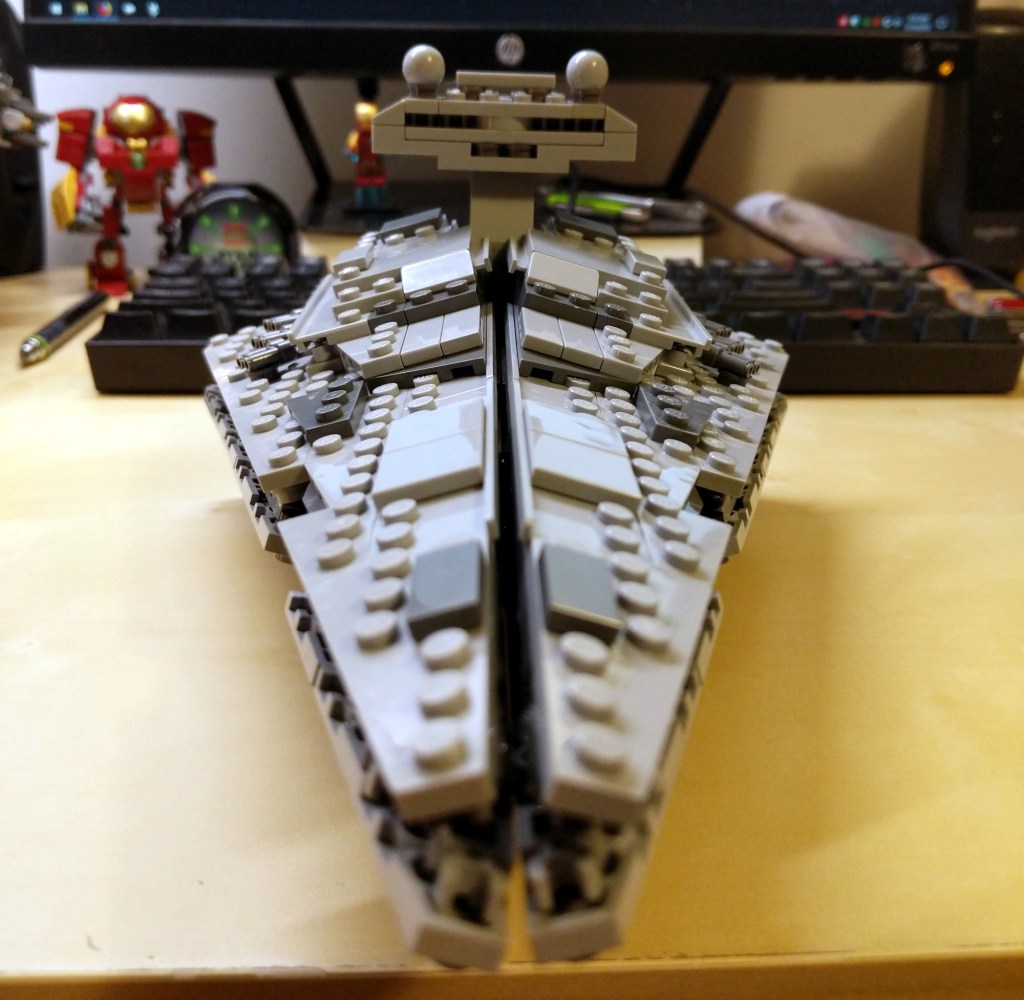
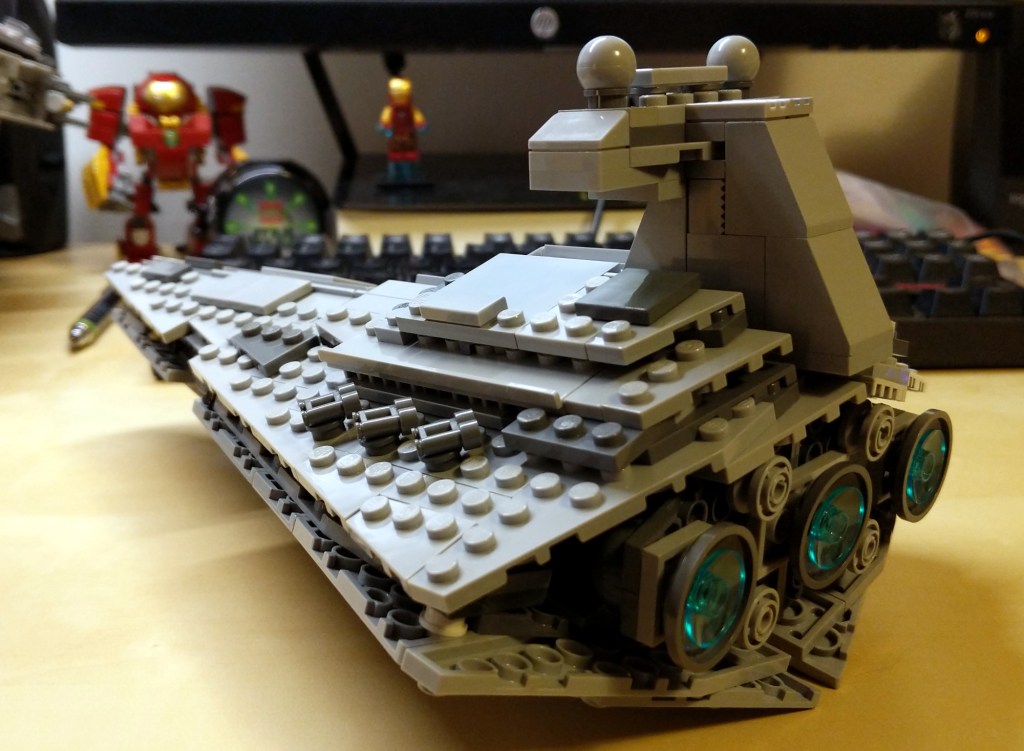
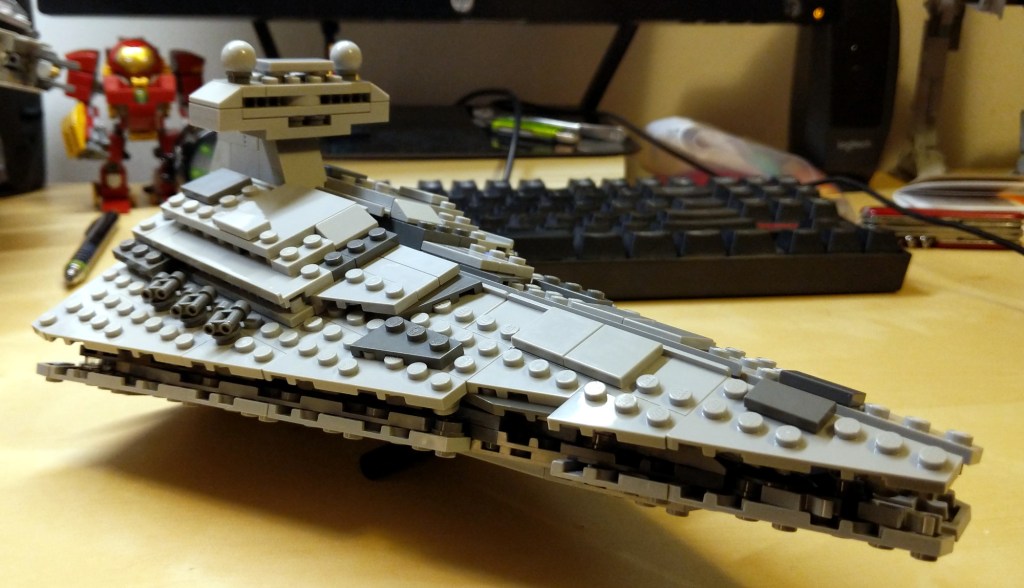
In this case, I assembled a set that didn’t buy when it came out in 2010: 8099 Midi-Scale Imperial Star Destroyer. It took a considerable amount of time to find all of the bricks that I needed to complete it, and I had to cannibalize some other sets to get all of the parts. Eventually, it came together. However, I did have to make one off-color substitution deep within and hidden from external view.
After I returned home, I built this LEGO MOC (my own creation) of the Weezer stage. At that point, I only had some Star Wars LEGO sets, so I had to pick up some additional bricks and minifigures to create this model. Notably, I purchased the cheapest Harry Potter set (for the bespectacled Rivers Cuomo) and a large brick assortment set for the stage base and back.
I based the stage arrangement on Weezer’s stage design at the Key Arena performance. They had a backdrop covered with equally distant squares. Lights behind the black squares illuminated and played lights on the backdrop. In front of the stage back was a large stylized “W” that descended from above when the band began playing.
For the backdrop lights, I used battery-powered Christmas lights.
For the stylized “W,” I cut it out from card stock.
Also, I used card sock to cut out guitar and bass shapes that I taped to rods that the minifigures held.
Apologies for the quality of the photos. I took the photos with my second digital camera. The first was a Sony Mavica with 3.5″ floppy disk. I sold it and purchased a Sony Cyber-Shot DSC-P3 (I think). I’m lucky to have these photos as I think I took them more to experiment with the camera than to memorialize the LEGO model!
I started with these photos that I had taken in 2015:
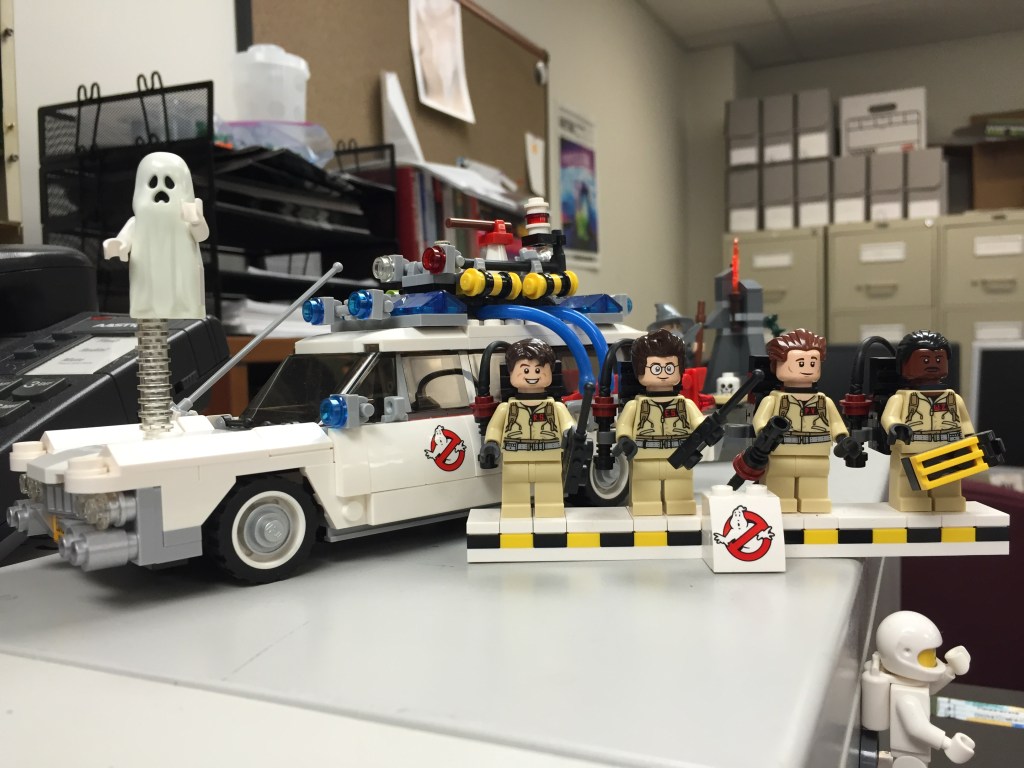
On the left is a photo that I took of the Ghostbusters LEGO 21108 set on my desk at City Tech. All of the elements that I needed are here, but I realized that I would have to break it down into parts to create the composite image–ghost, Ecto-1, Ray, Ego, Peter, and Winston. On the right above is a photo that I took of the Hook and Ladder Company 8 building in Manhattan. Due to the time of day that the photo was taken, the front of the building is in shadow and there are sightseers in front of the firetruck door that need to be removed.
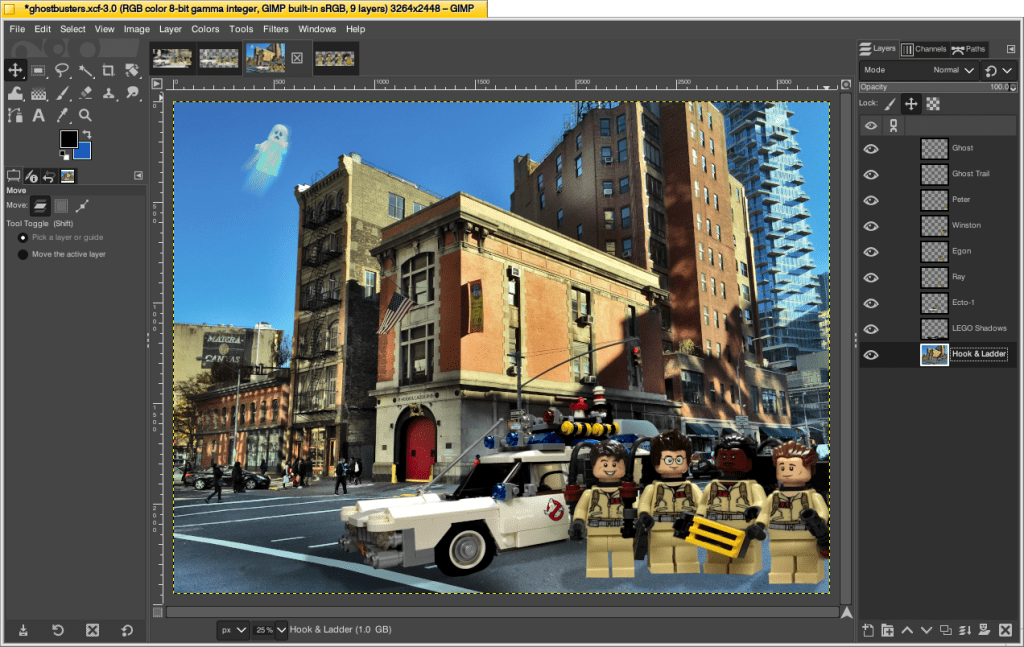
I setup my work document in GIMP in the following way.
First, I pasted the hook and ladder photo as the bottom-most layer. I adjusted the colors and reduced the shadows to help the firehouse pop in the center of the photo. I used the lasso tool (creating irregular shapes instead of squares or circles helps with blending later) and clone tool to copy material over the sightseers in the front of the firehouse and to remove a light reflection on the road surface in front of the pedestrian walking line in the lower left. I smoothed out these fixes with the smudge tool.
Then, I cut out the ghost, Ecto-1, and four Ghostbusters and pasted each into its own independent layer and adjusted colors appropriately. Because the Ghostbusters are obscuring part of Ecto-1 in the original photo, I needed to arrange the composition so that they hid the back of the vehicle. But, I had to use the clone tool to repair some aspects of the car (e.g., the clear 1×1 round studs that had supported the ghost needed to be removed and the white surface of the hood restored), and some of the exterior windows and side panels peeked through gaps between the Ghostbusters (I used the clone tool and lasso tool to create the rear windows and side panels). Also, I wanted to arrange them so that it appeared more like a group shot instead of a line as in the display for the original set. To achieve this, I flipped horizontally Winston and Peter’s images to that they are turned toward Ray and Egon to their right. Unfortunately, this flips their name tags, but maybe no one will notice! Also, I increased their size by 120% to make them appear further away from Ecto-1 and closer to the viewer. I’ll return to the ghost below.
Next, I added a layer between the firehouse image and Ecto-1 (being the lowest layer of the LEGO images). I used the paintbrush with a large brush to paint black “shadow” under Ecto-1 and falling from right to left on each Ghostbuster member. I reduced the opacity of the layer to lighten its appearance so that the shadow wasn’t too harsh.
Finally, I transformed the ghost layer and rotated it to about 60 degrees. I adjusted its colors to give it a neon green hue. I then duplicated the layer. On the lower ghost layer, I applied a linear blur to give it a flowing, streak effect, which I positioned under the ghost to give it implied ethereal movement.
The final product isn’t perfect, but it was fun to make and it helped me learn/reinforce workflow practices in GIMP.
Don’t let perfection hold you back from using tools to make things that bring you joy. Each time you make something, you learn new things and get better at doing the things you’ve learned before. If you have the time, energy, and material, you can always take another stab at the thing you did before to make a better iteration. Though, I recommend starting fresh each time instead of making adjustments to something you’ve already made. The process of building and making from start to finish can yield wildly divergent and better outcomes that can be surprising and unexpected. Tweaking what you’ve already done might yield something interesting, but the constraints of the original project might limit what is ultimately possible.
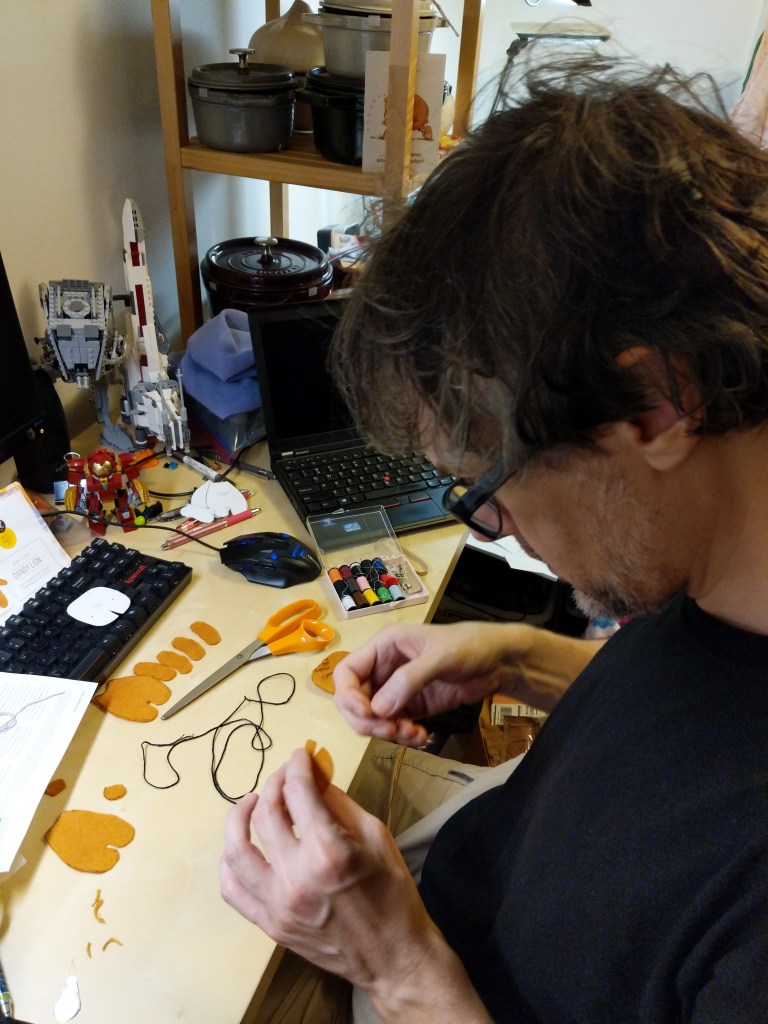
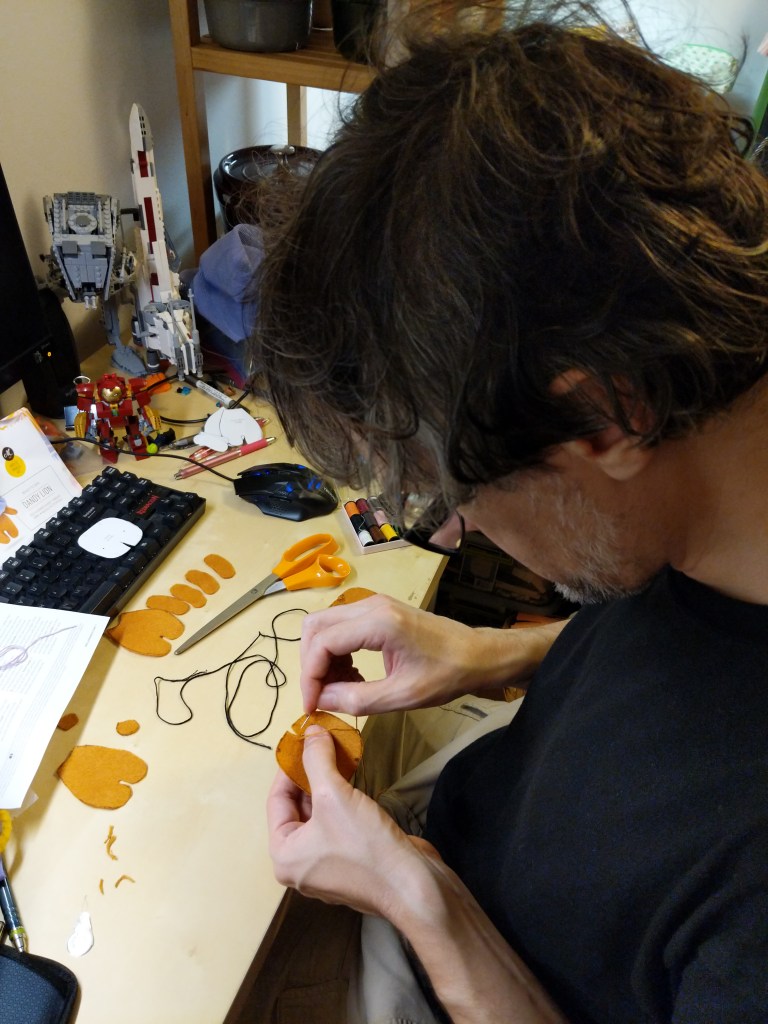
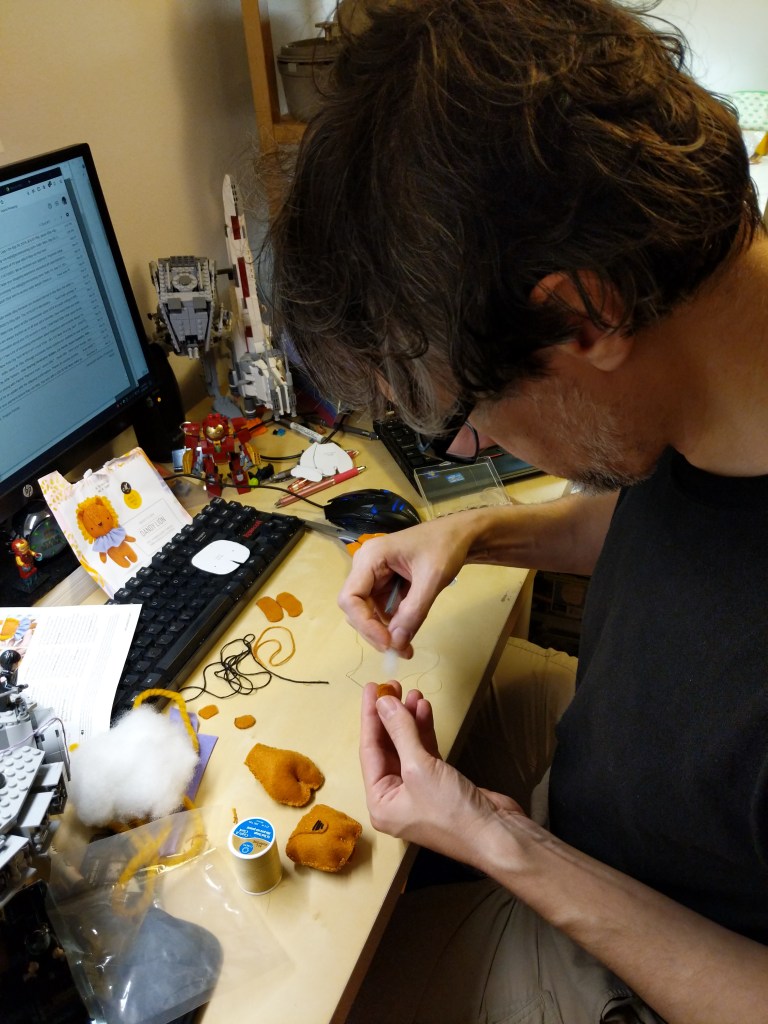
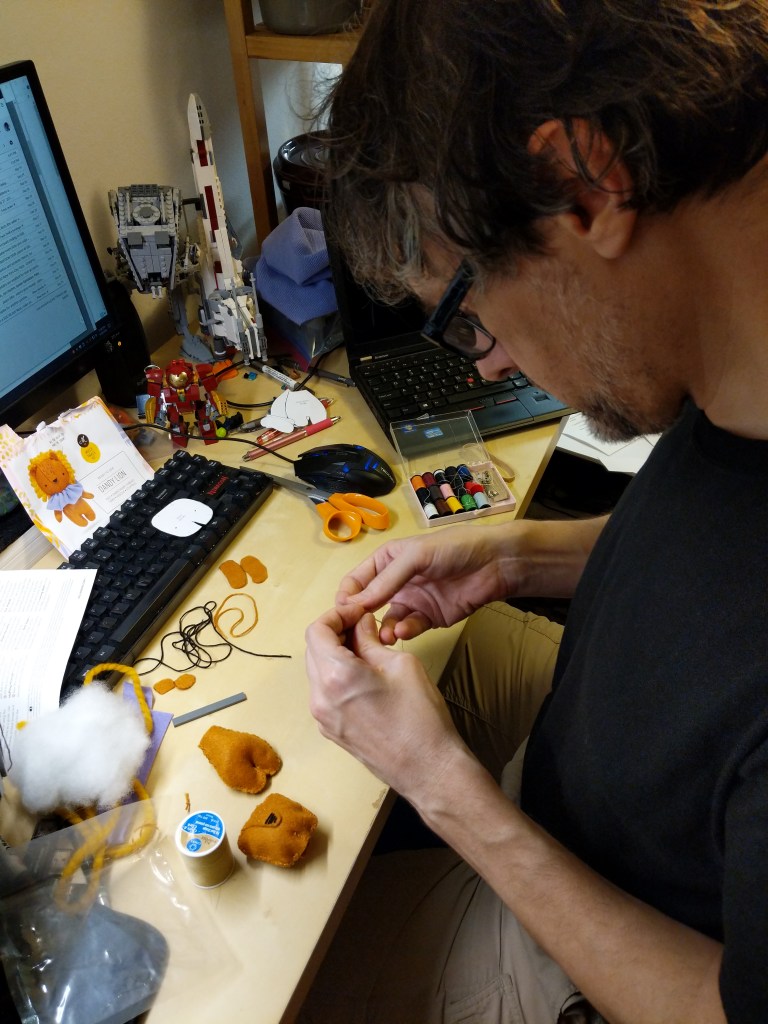
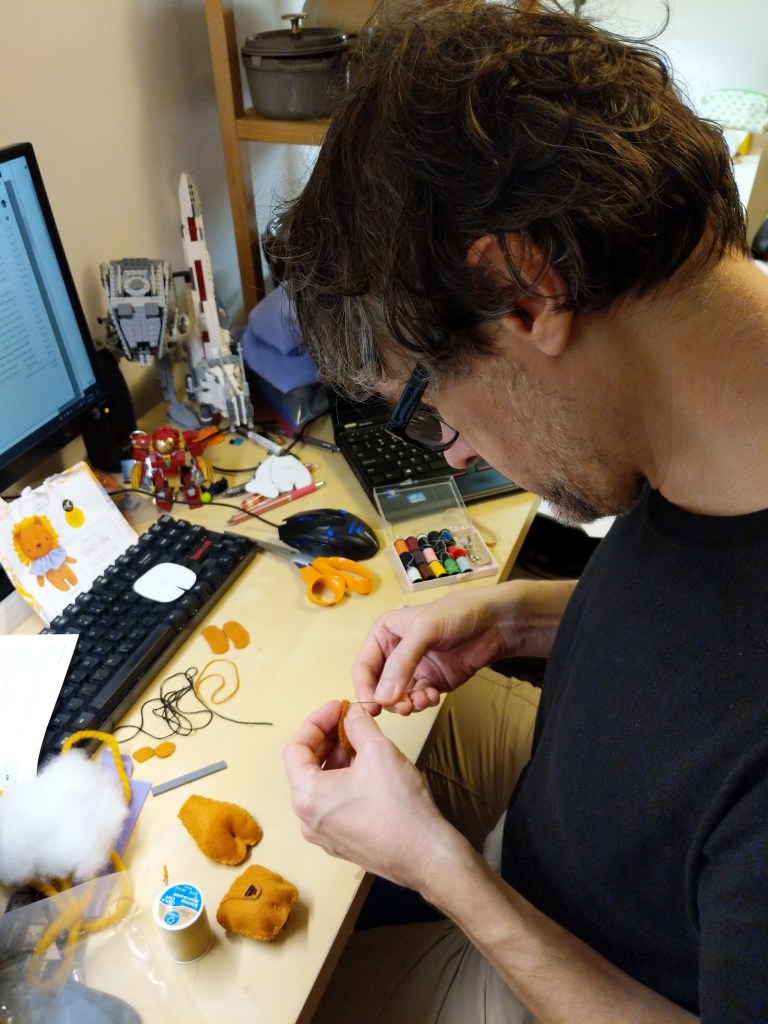
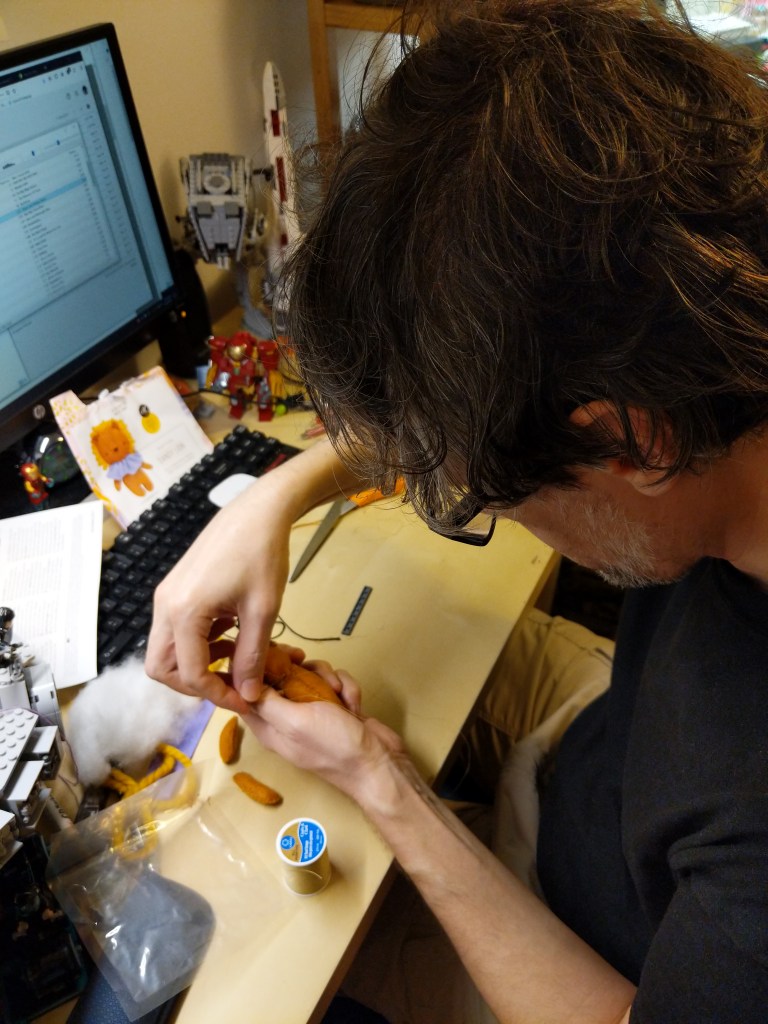
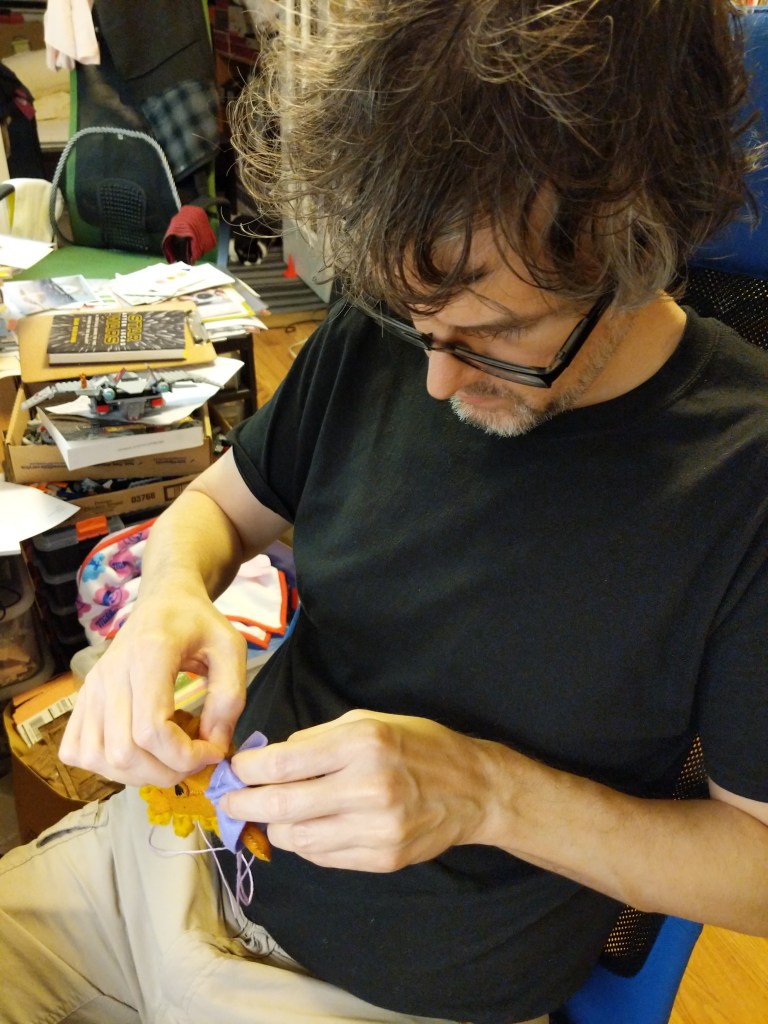
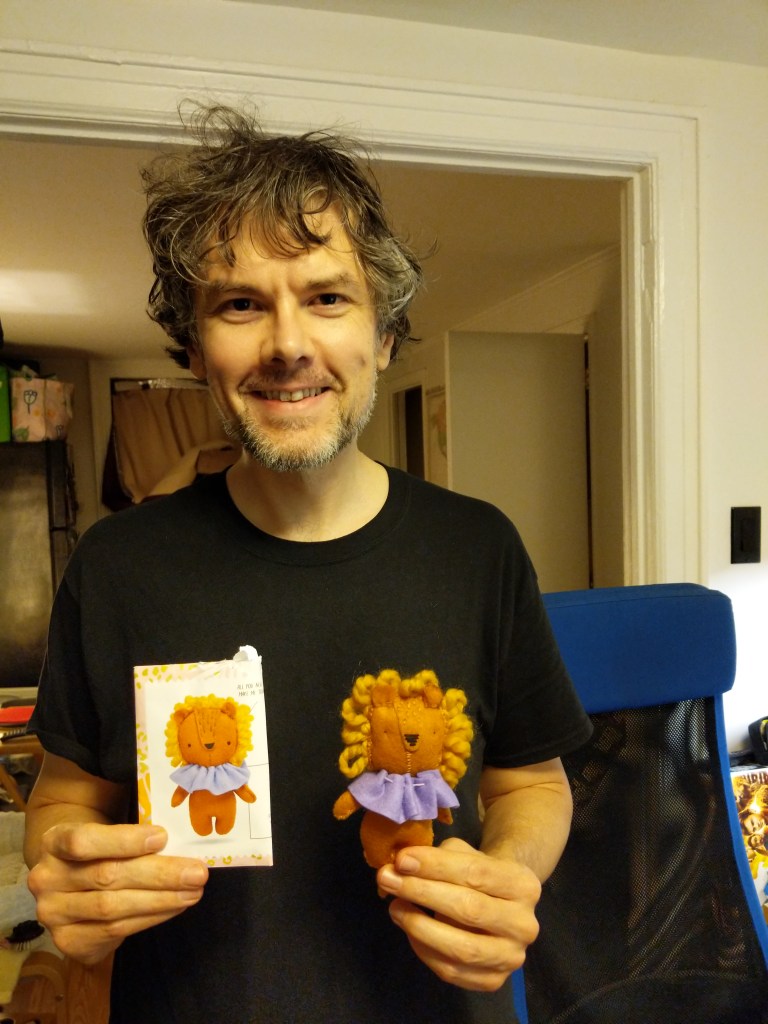
In my classes, I encourage students to visit their local bookstores to browse the magazine section for topics that might interest them. Back in 2019, Y and I were browsing our local Barnes and Noble’s magazine section when a sewing/crafting magazine with a free bonus caught my eye. It included instructions and material for a tiny plush lion. It seemed like it might be a good size for a cat toy, especially if I spiked it with catnip. I bought the issue and got to work sewing the lion for our Mose.
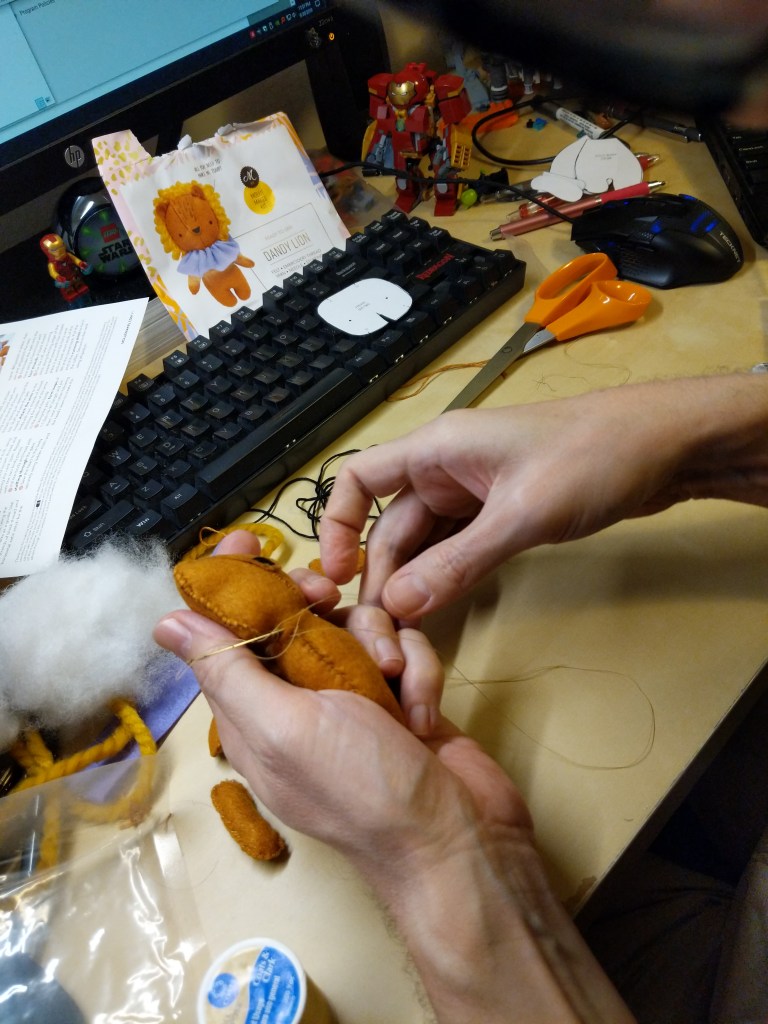
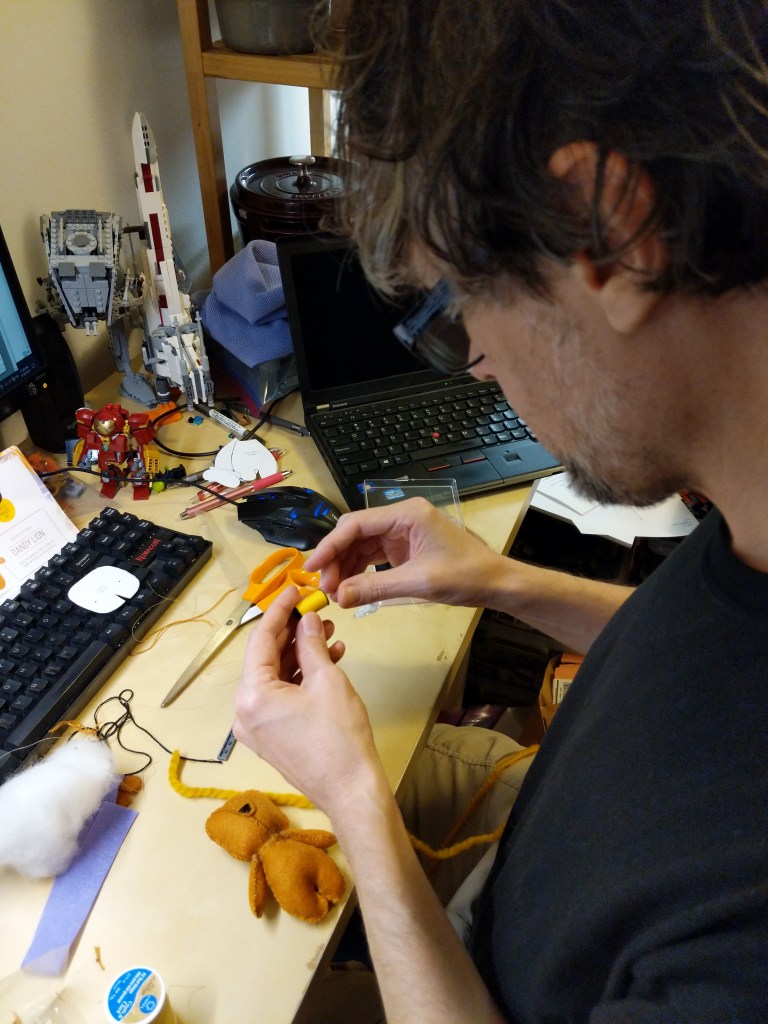
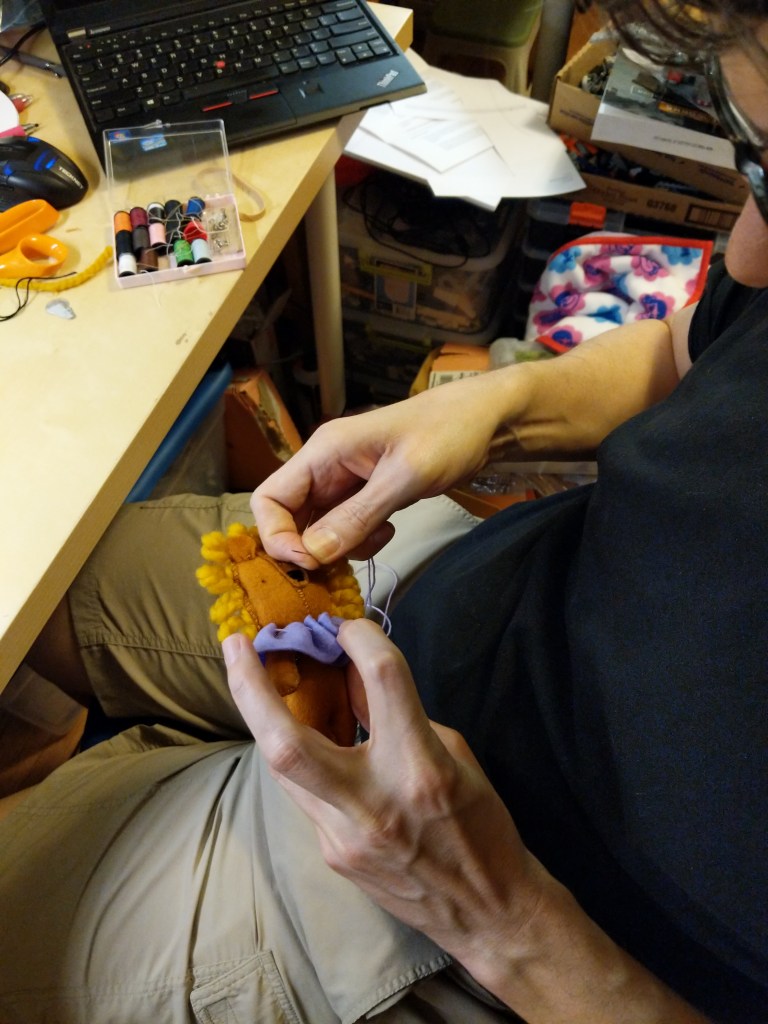
It included pieces of orange felt, purple felt, thick orange cord, and thread (orange, black, and purple). I marked the felt according to the instructions and cut out the pieces to build the lion. I had to Google some of the sewing patterns mentioned in the instructions that I did not know.
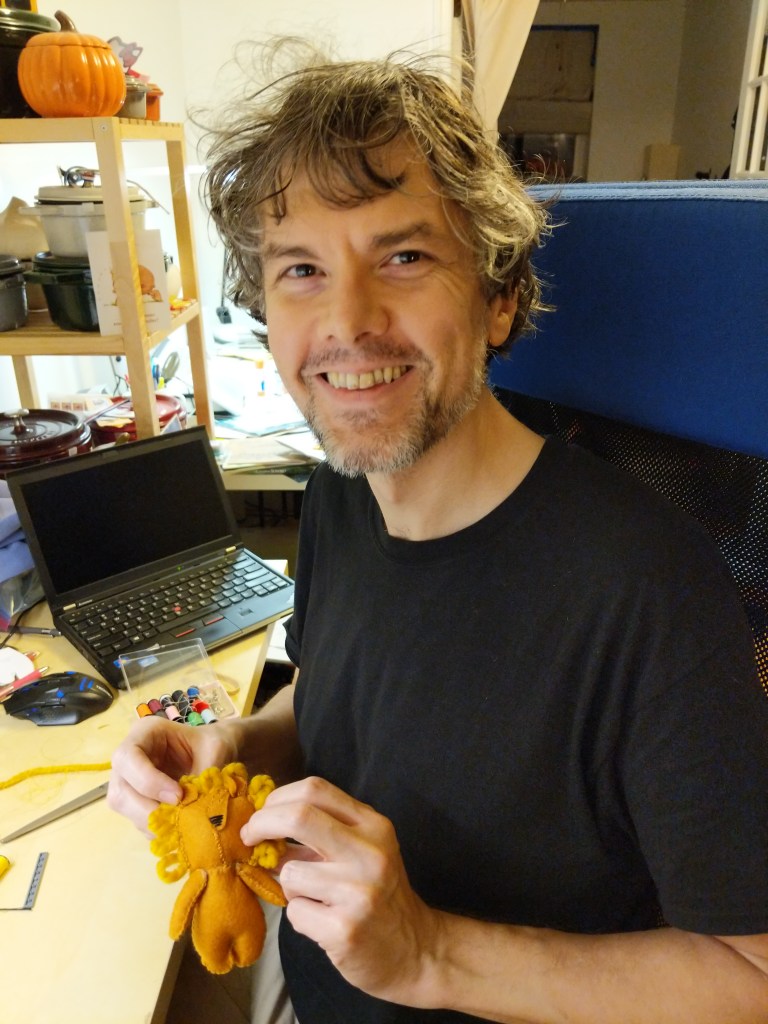
I can’t say that I nailed it, but our Mose seemed happy enough with it, at least until he took a nap. It’s still around here somewhere, but I don’t know where Mose has hidden it!
I enjoy displaying patches that mean something to me. Maybe someone else will see them and get a boost. But for myself, it’s carrying a little morale with me wherever I go.
I cut slightly more hook material than needed, positioned the patch on the opposite side of the hooks, sewed around the border of the patch through the hook material, and finally, trimmed the excess hook material.
Unless you’re planning to tape where you’re sewing patches directly to your bag, using hook-and-loop attachments like this will maintain its waterproof/water-resistance.
Pro Tips:
Verify what you need to attach to your patches (hook or loop backing) before you sew!
Use a sharp needle of size 2, 3, or 4 as patches are generally heavier fabric and some have thermal heat backing.
Absent a thimble to help push the needle through the fabric, use the corner of the table, a LEGO brick, or something else sturdy and not easily damaged by the back of the needle pressing into it.
A cheap travel sewing kit with a few needles (though they might be smaller gauge needles than ideal), different color thread to match the border of your patches, and a needle threader should get you started. But, you can create your own kit with a spool of black thread, a pack of needles, and a thimble.