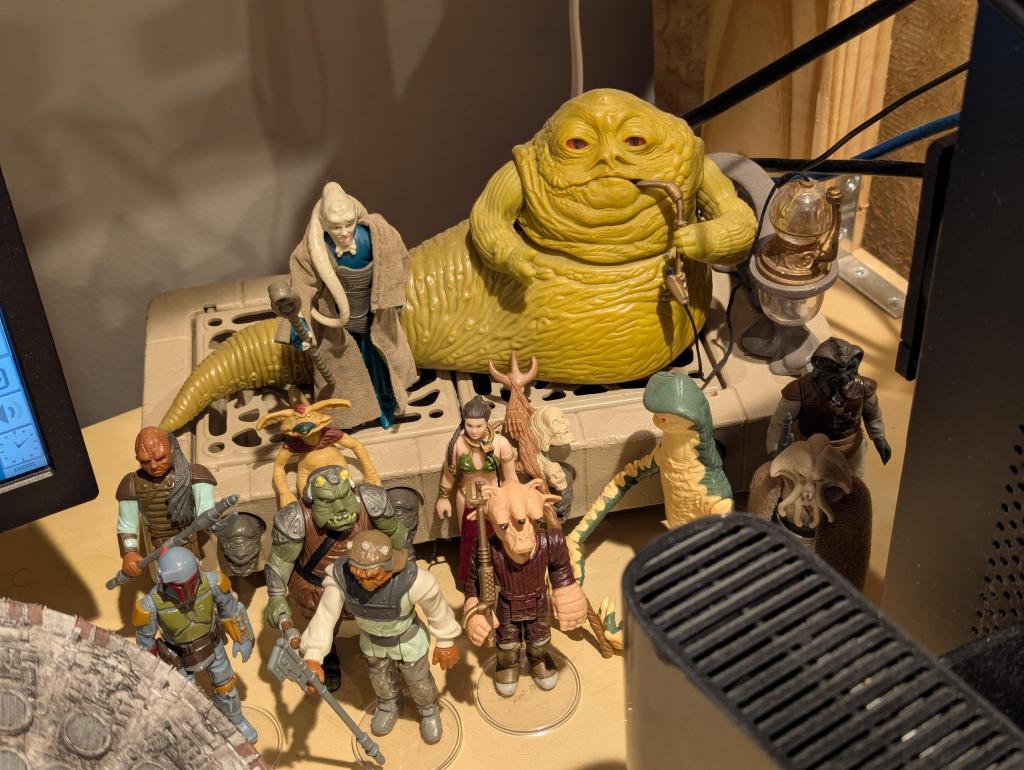
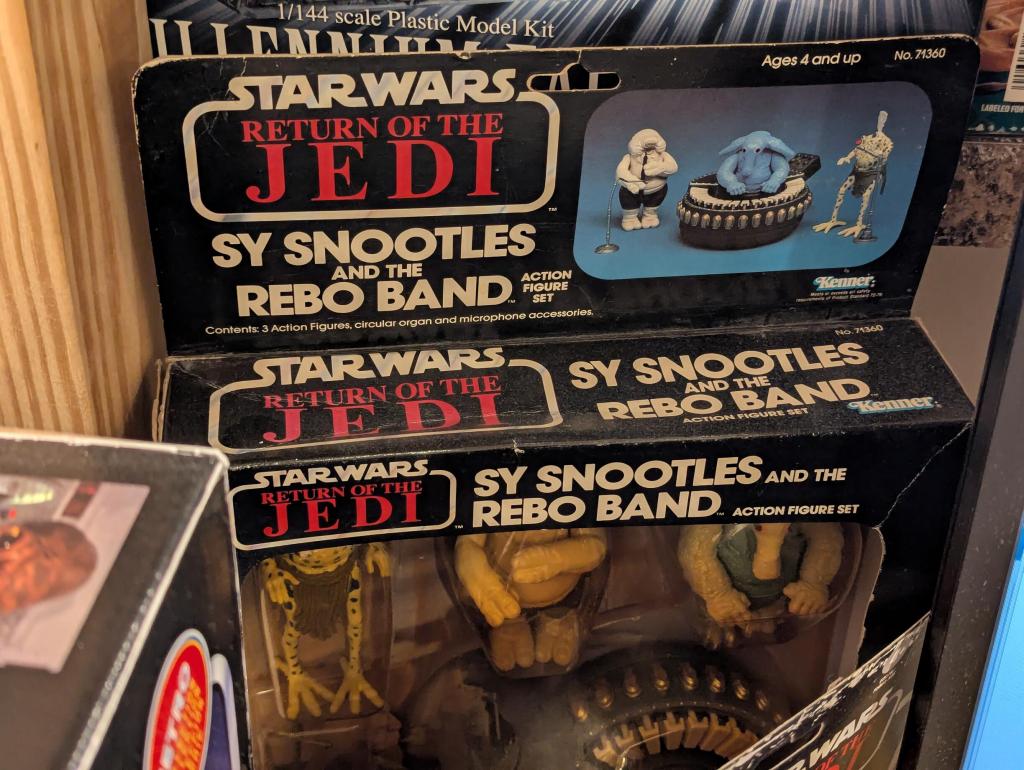
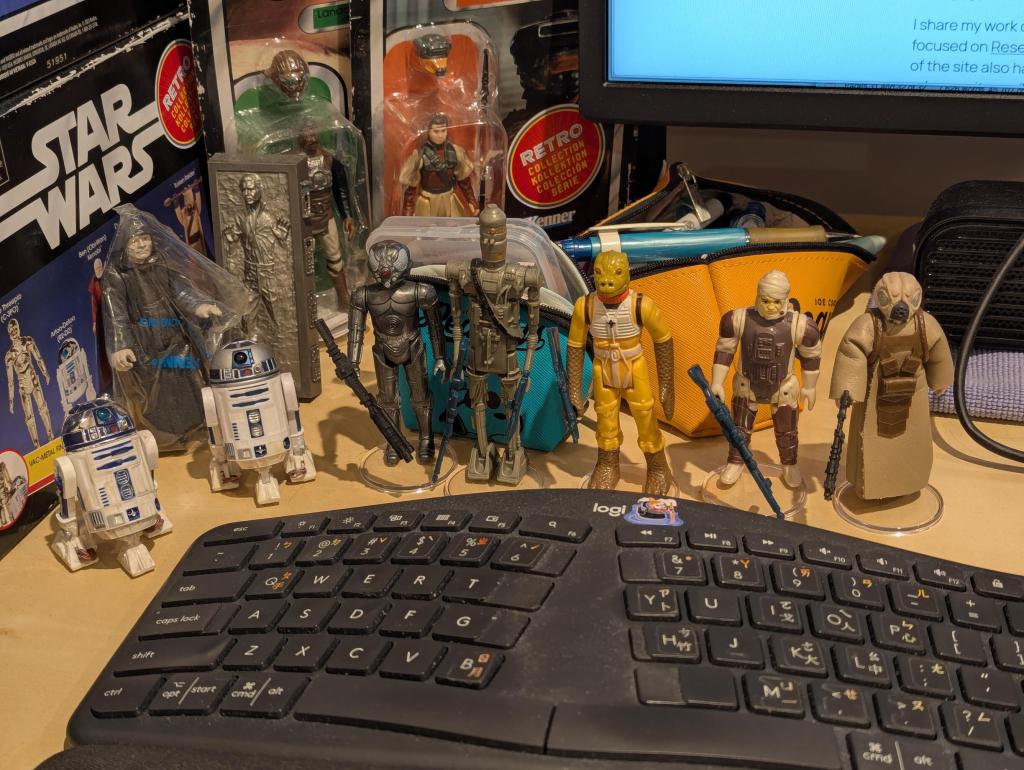
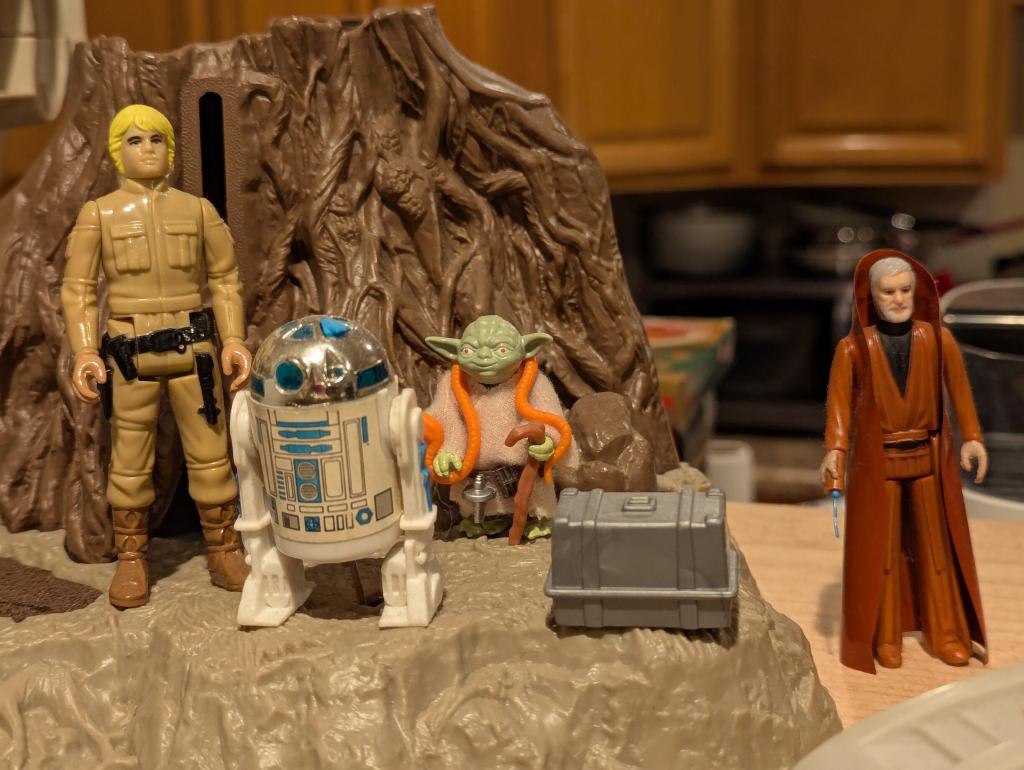
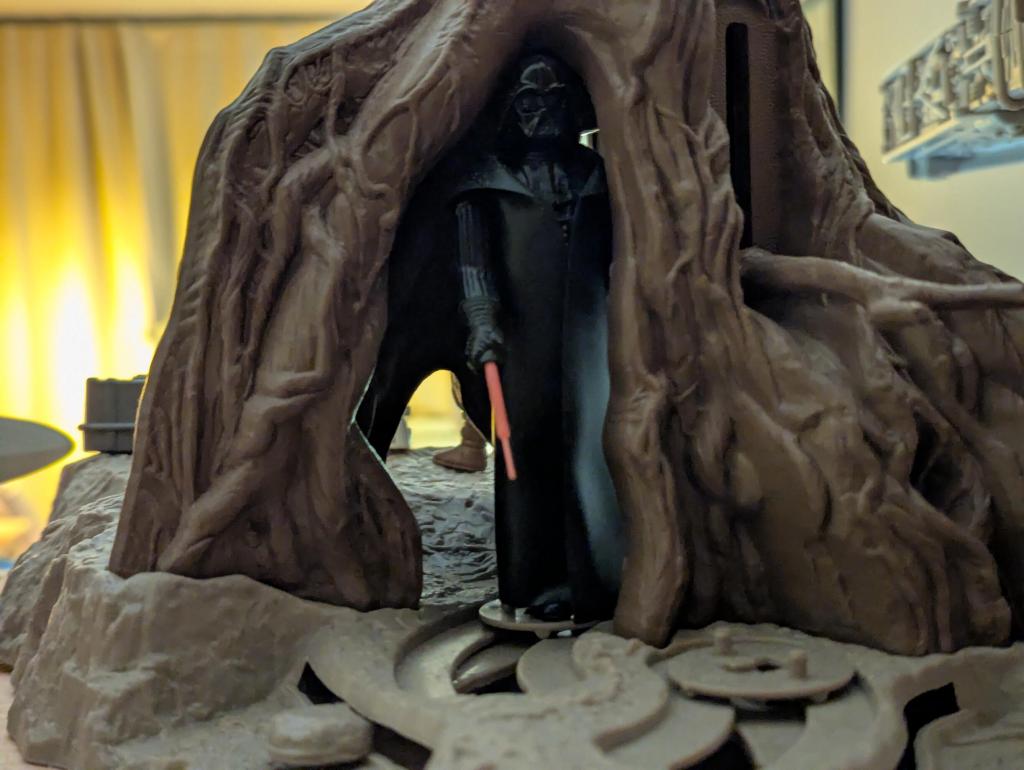
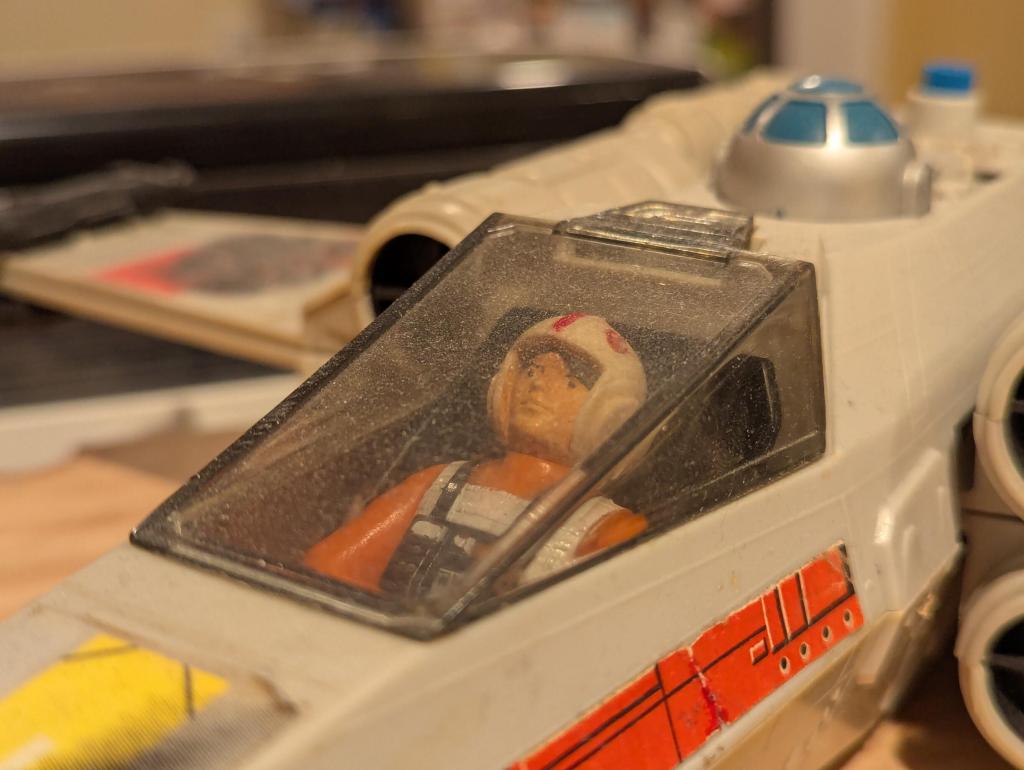
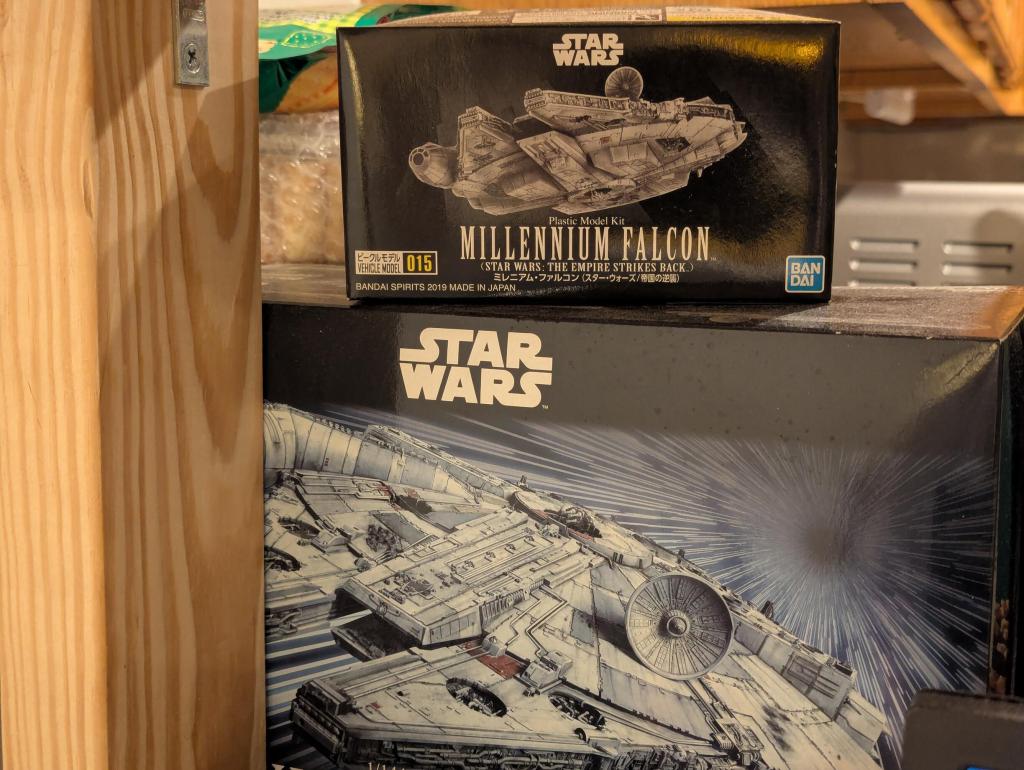
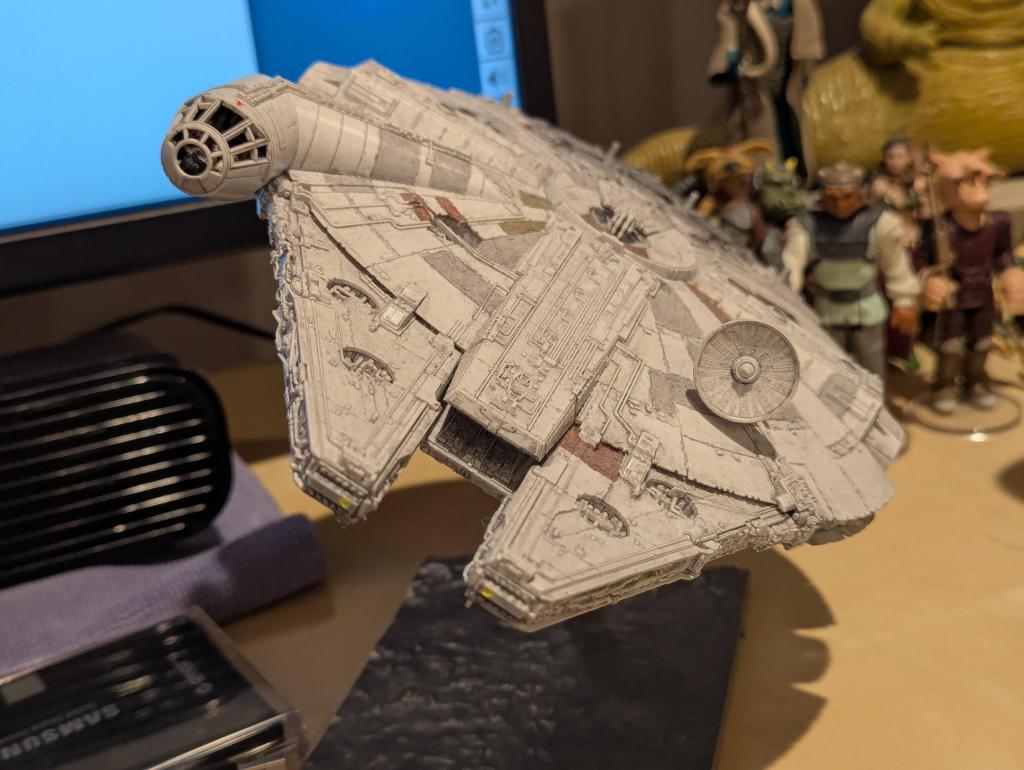
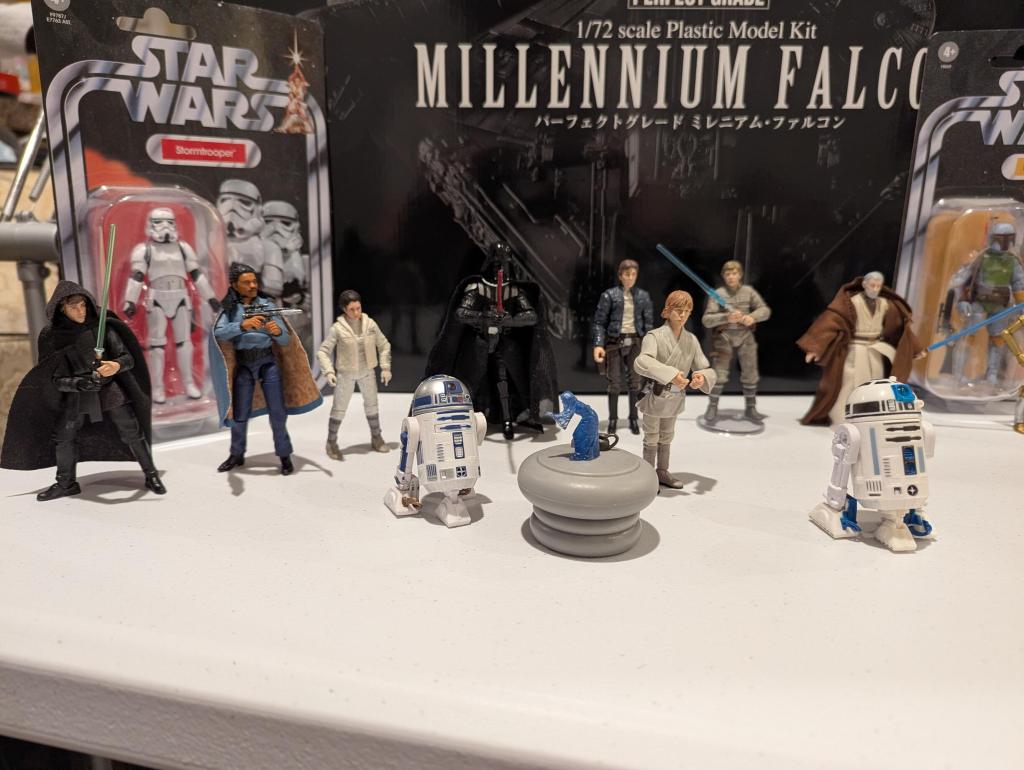
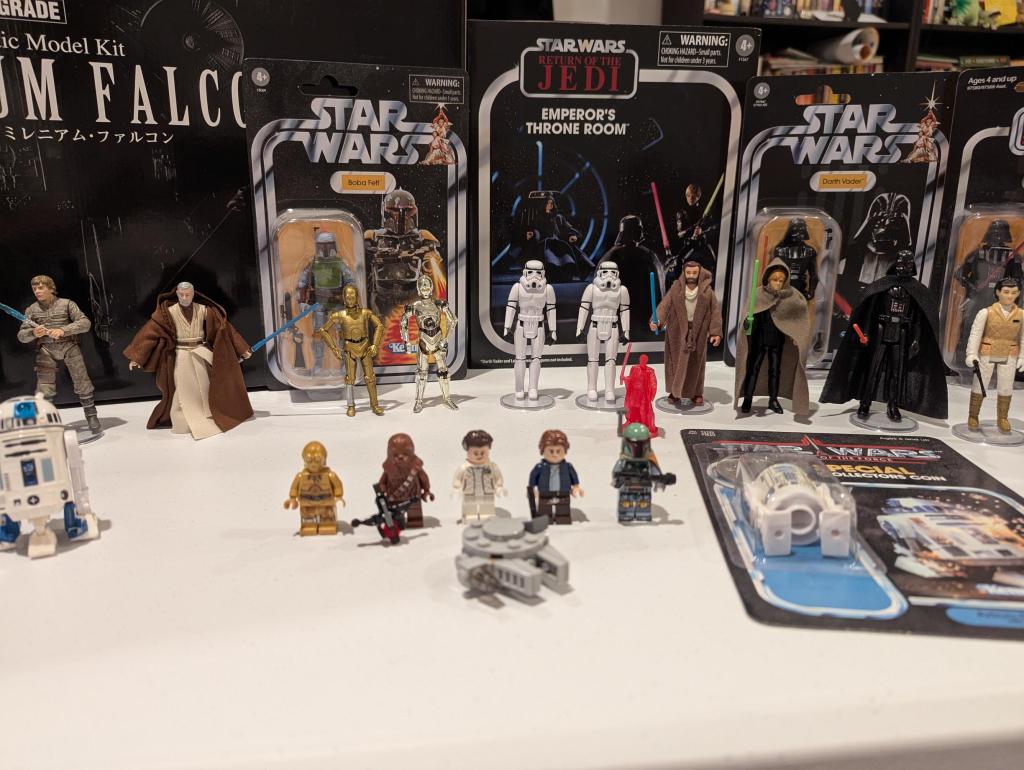
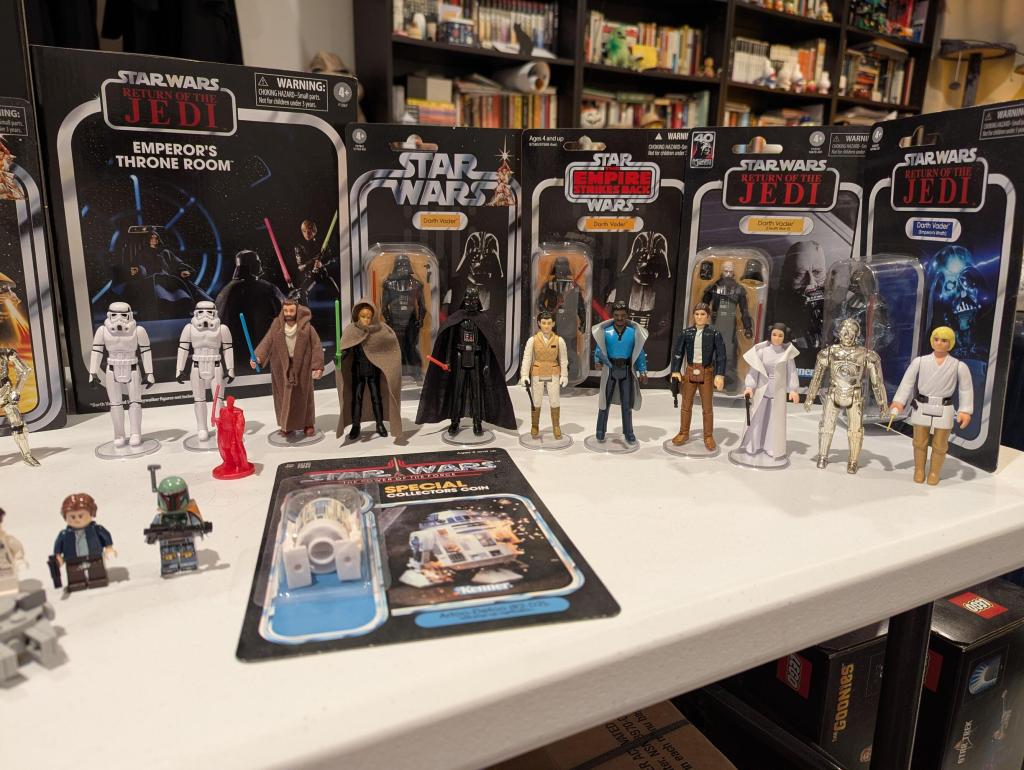
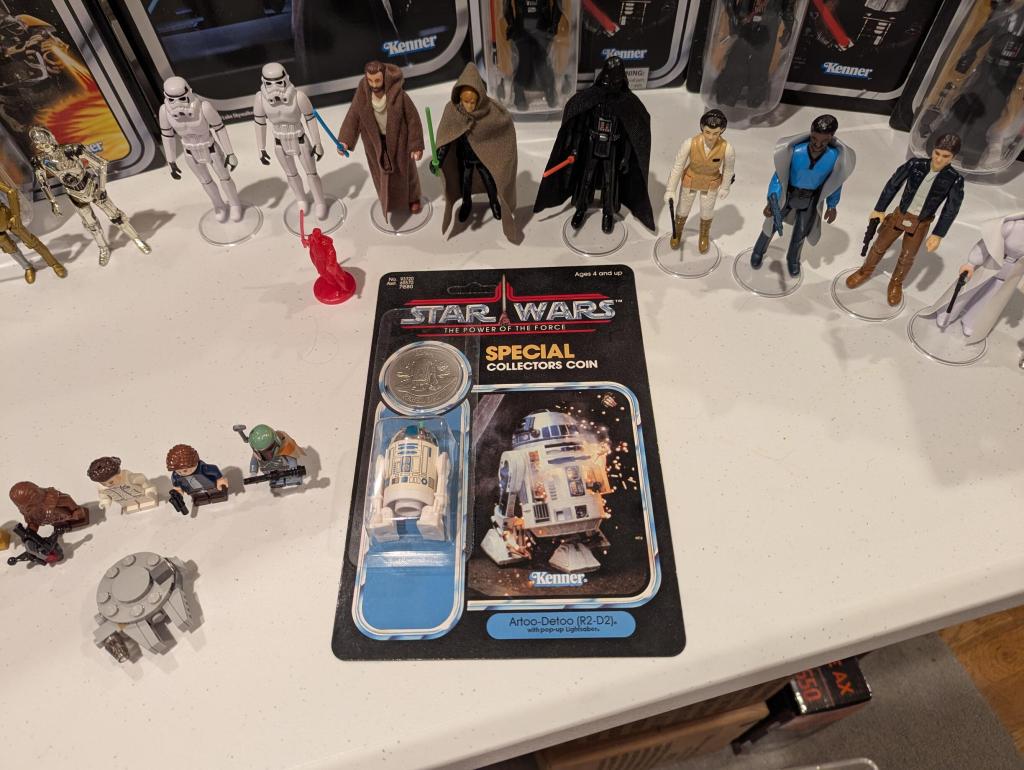
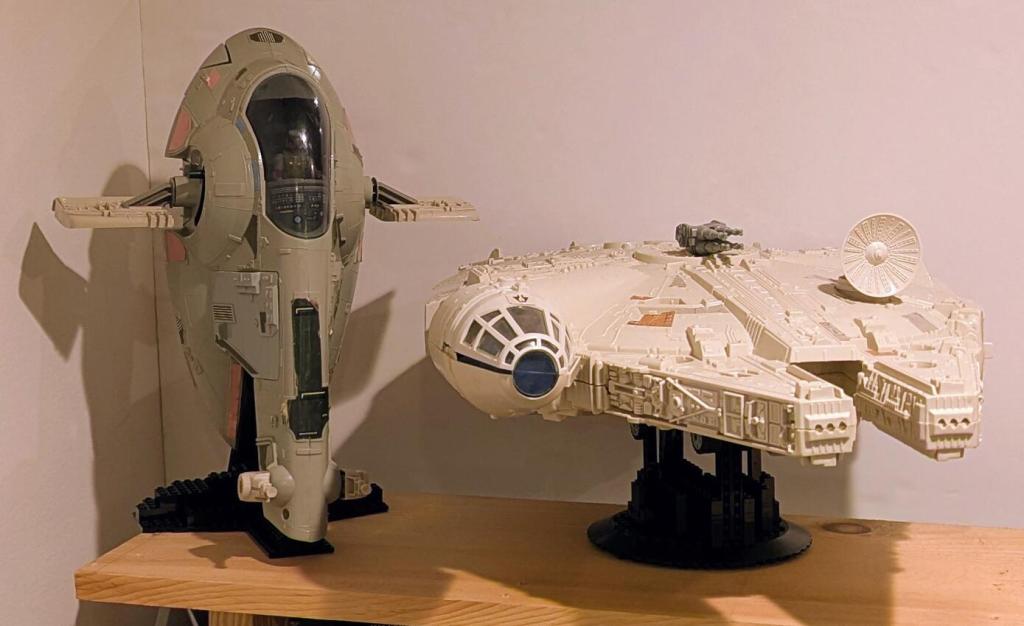
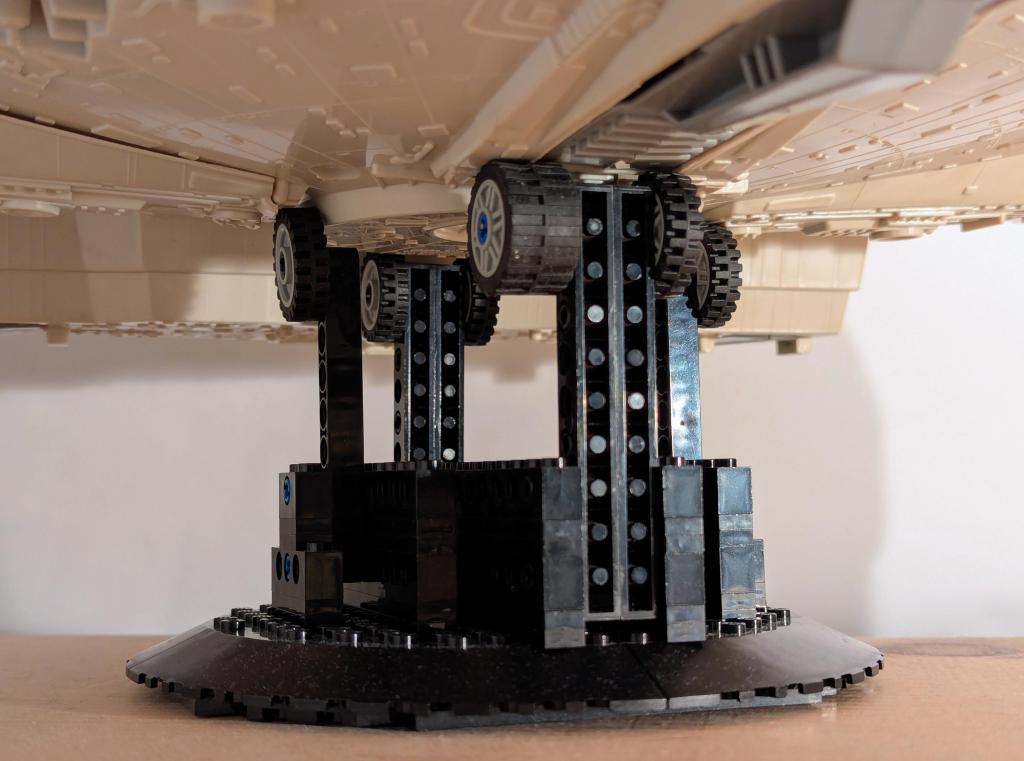
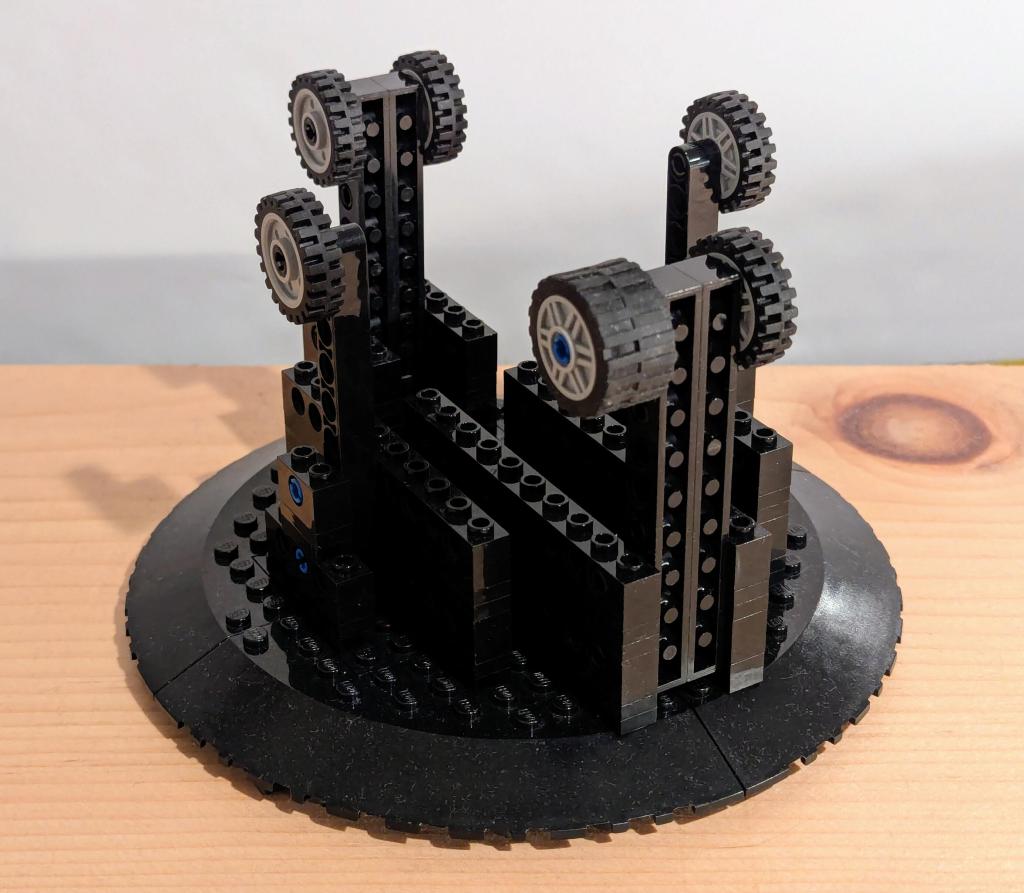
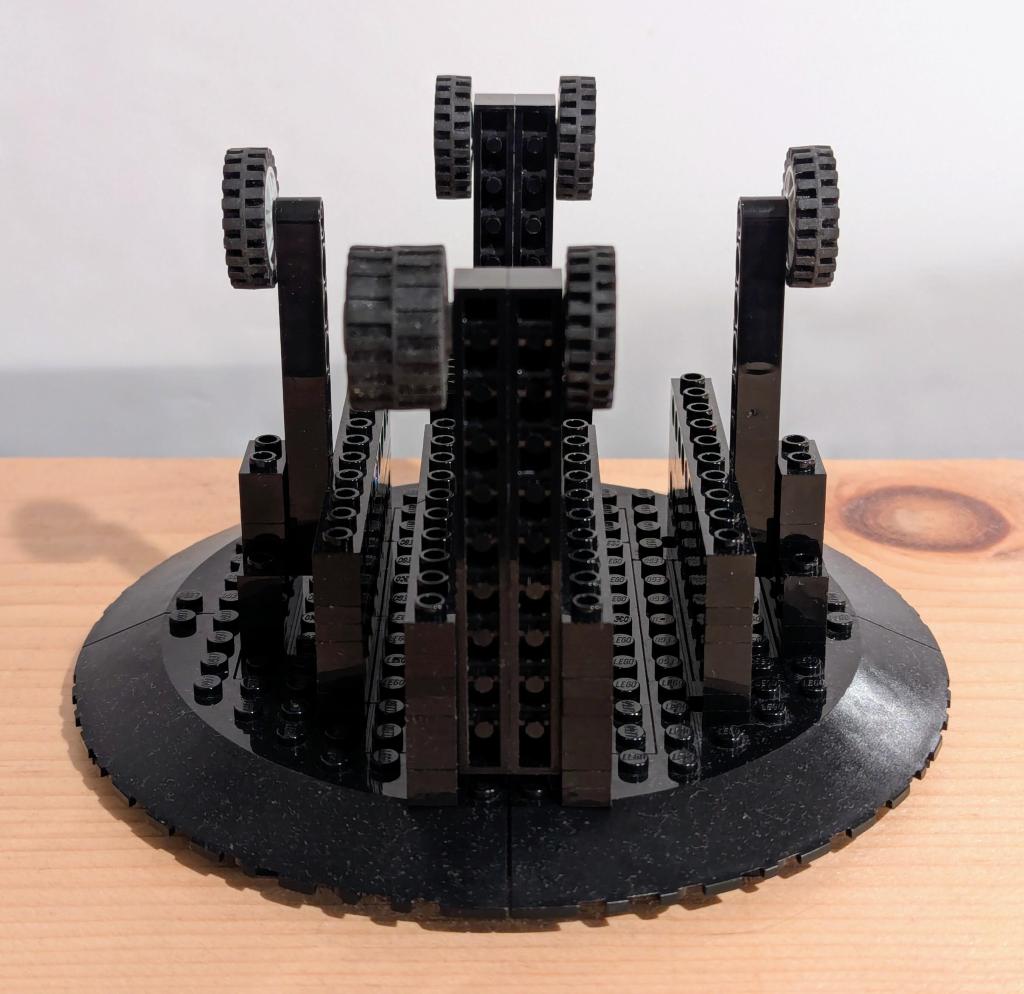
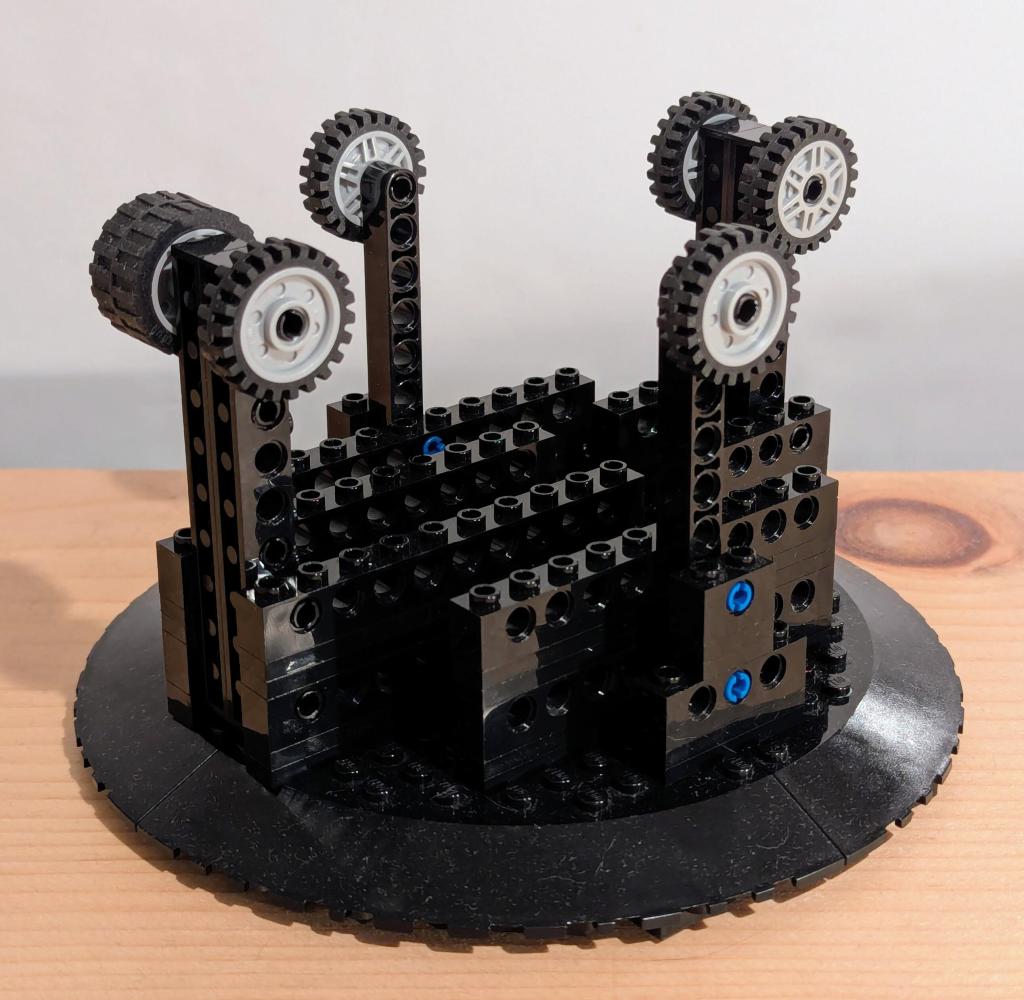
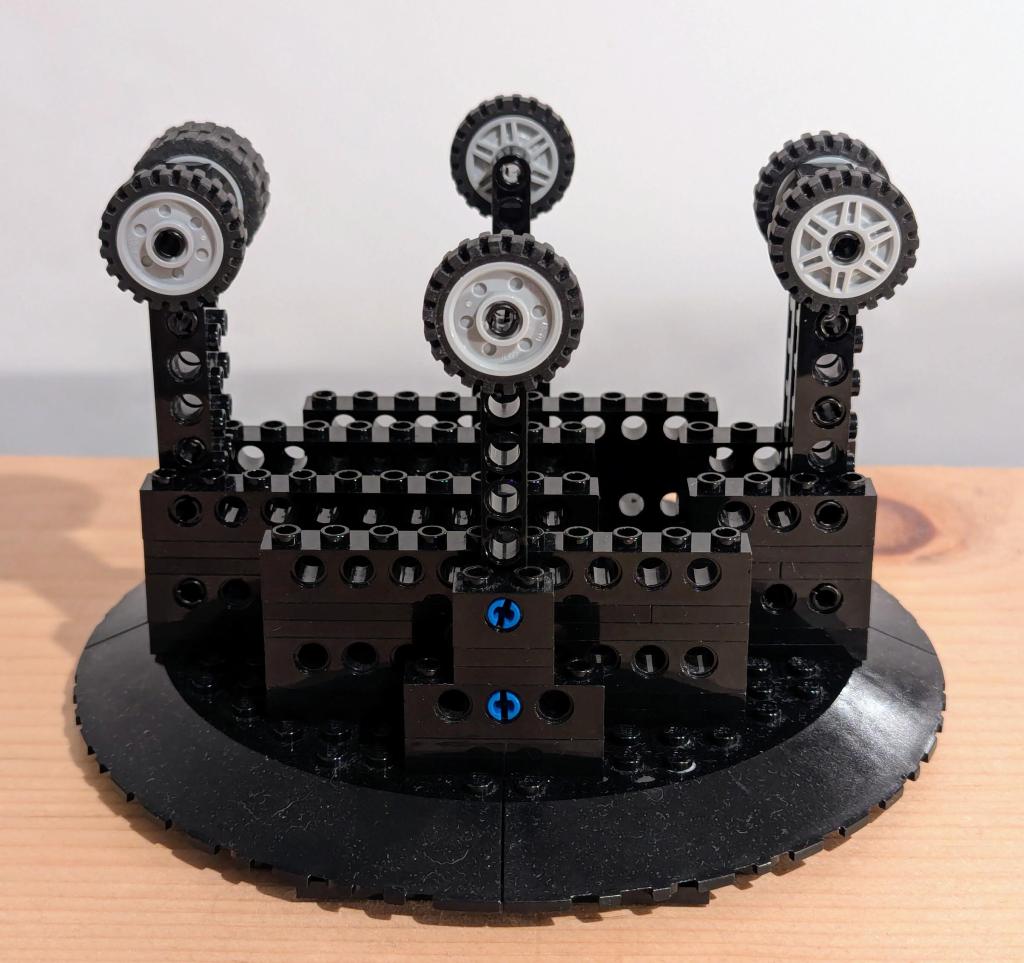
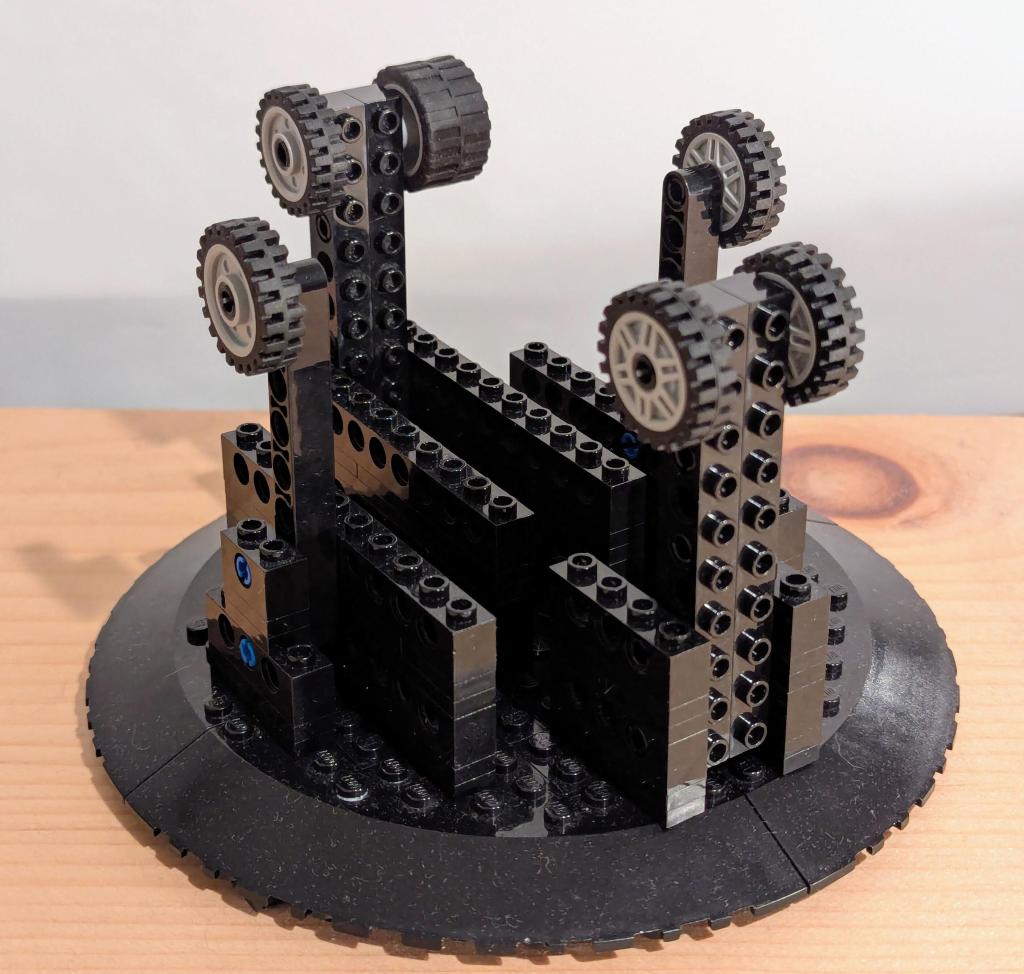
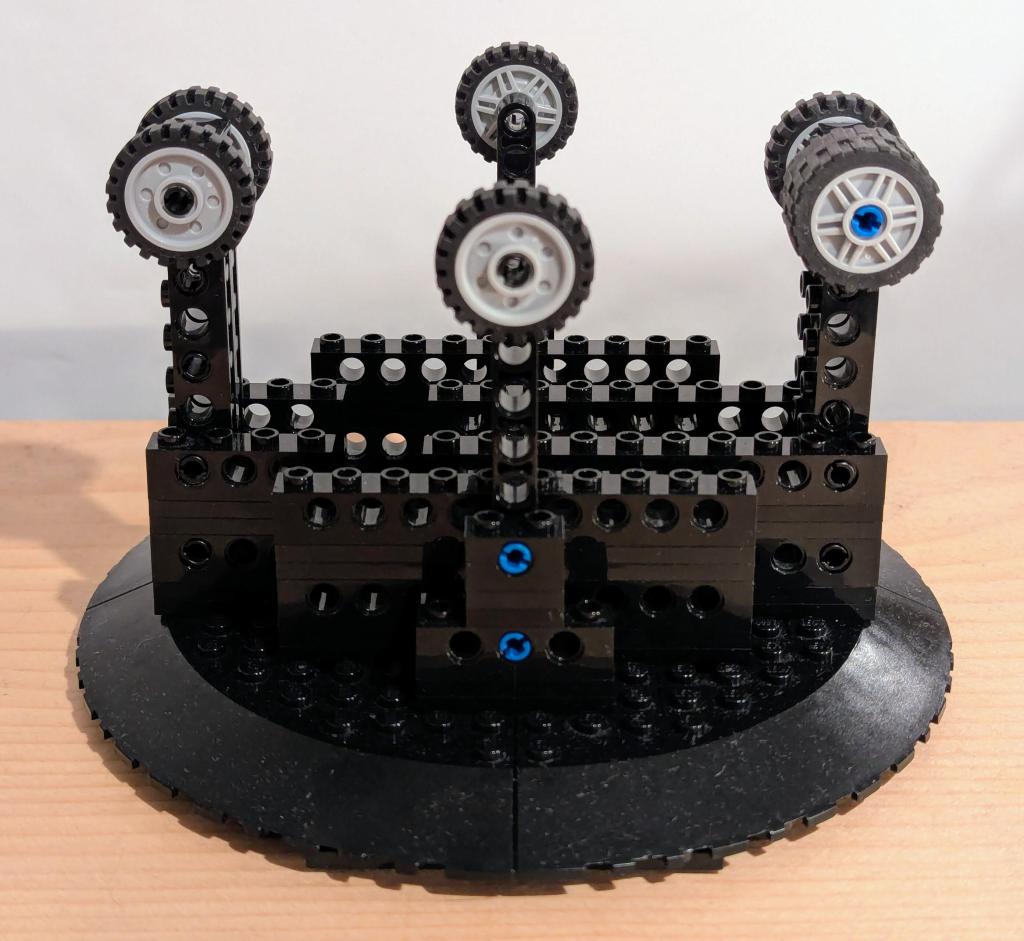
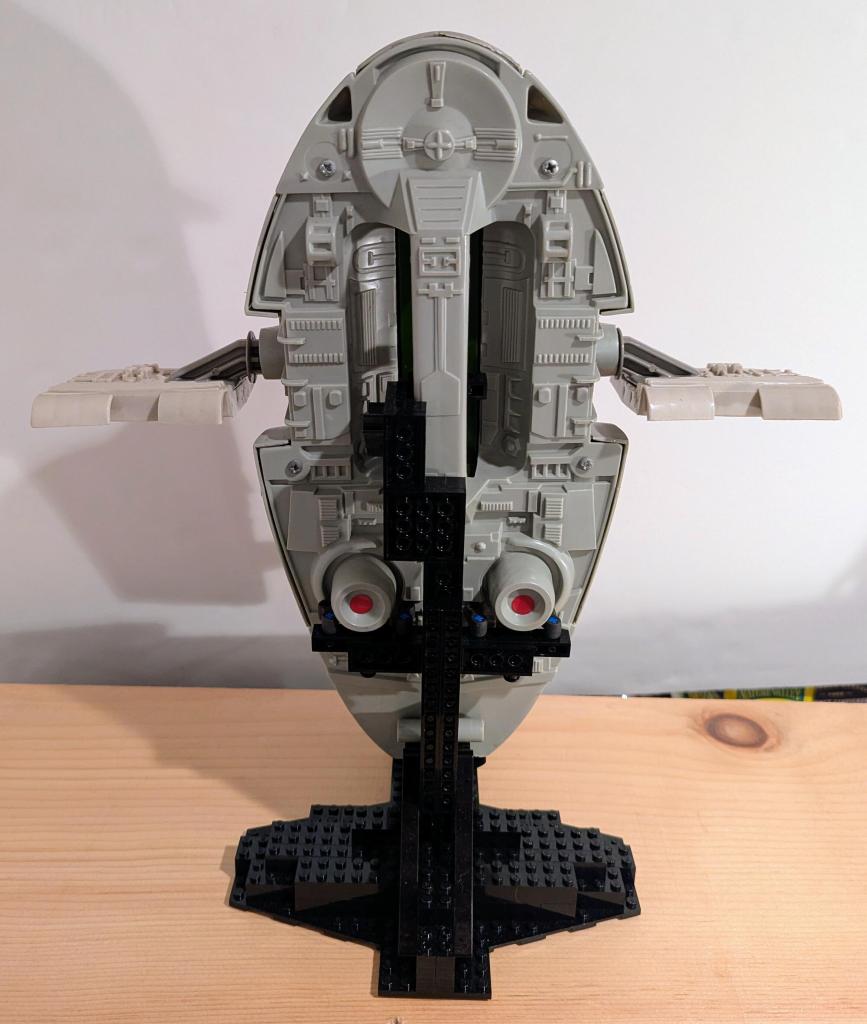
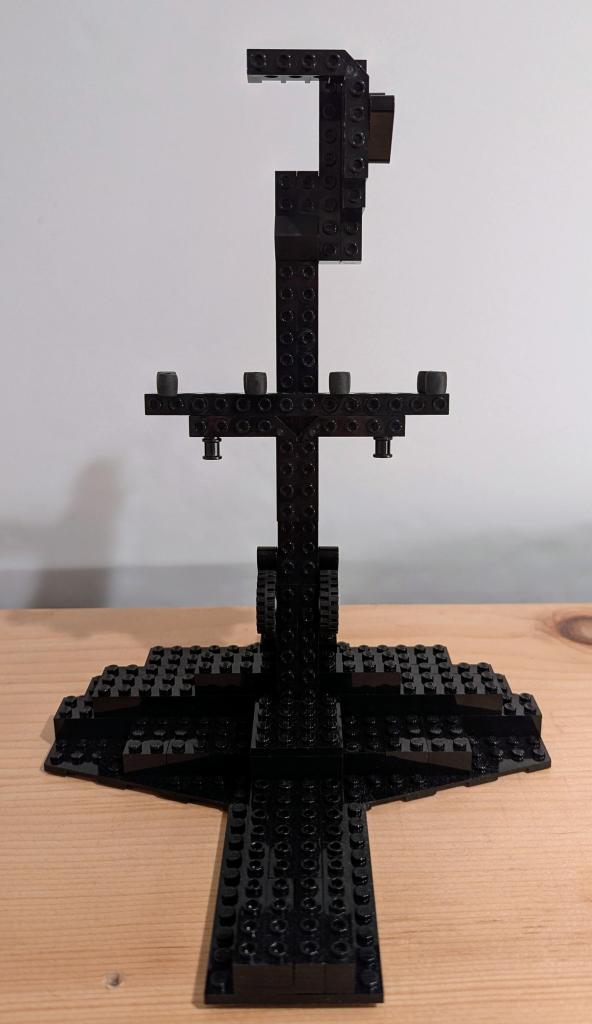
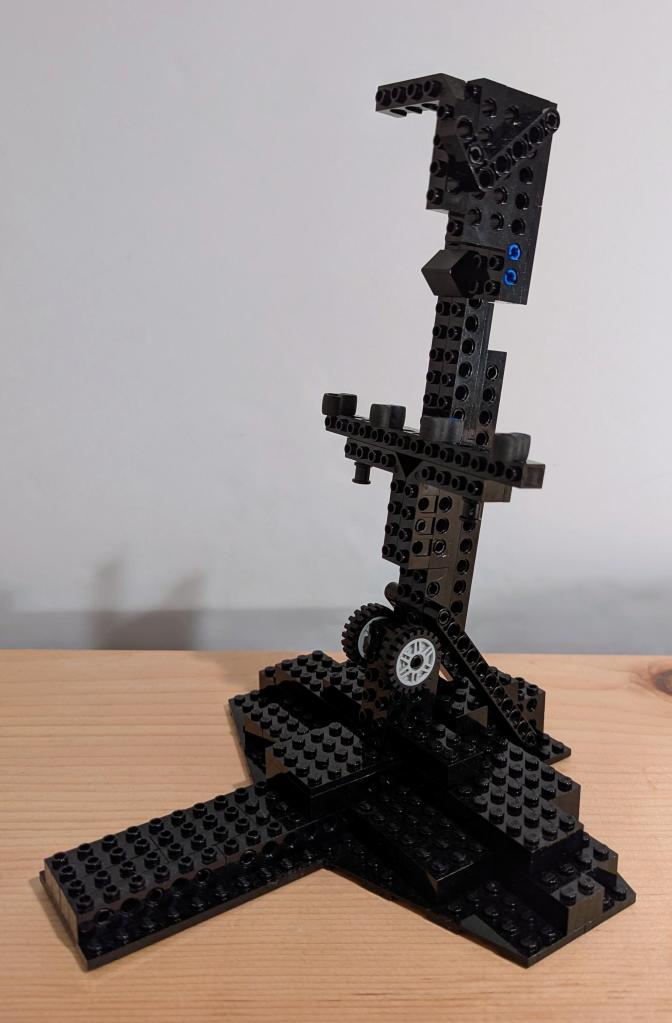
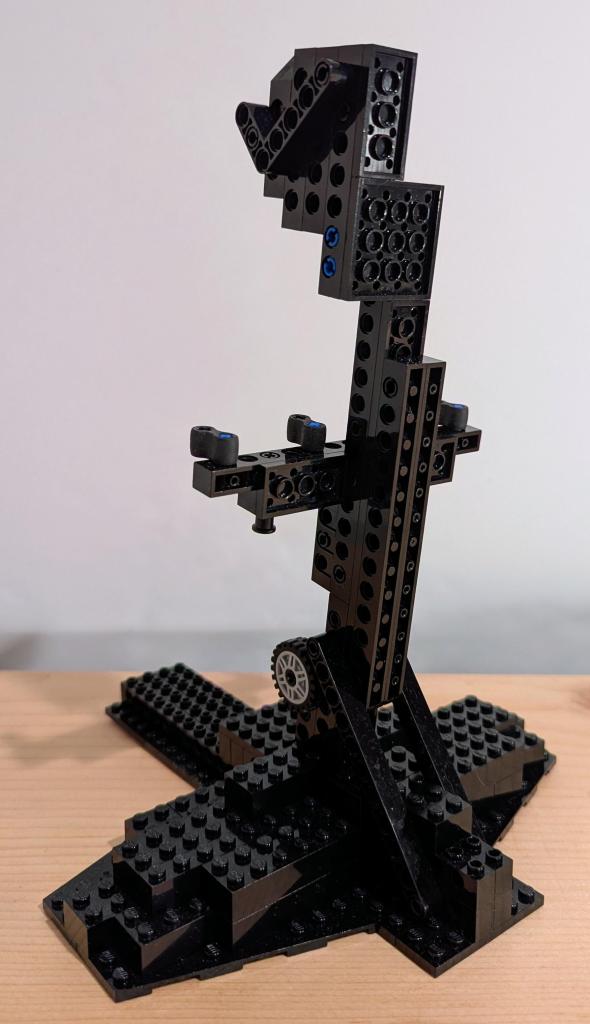
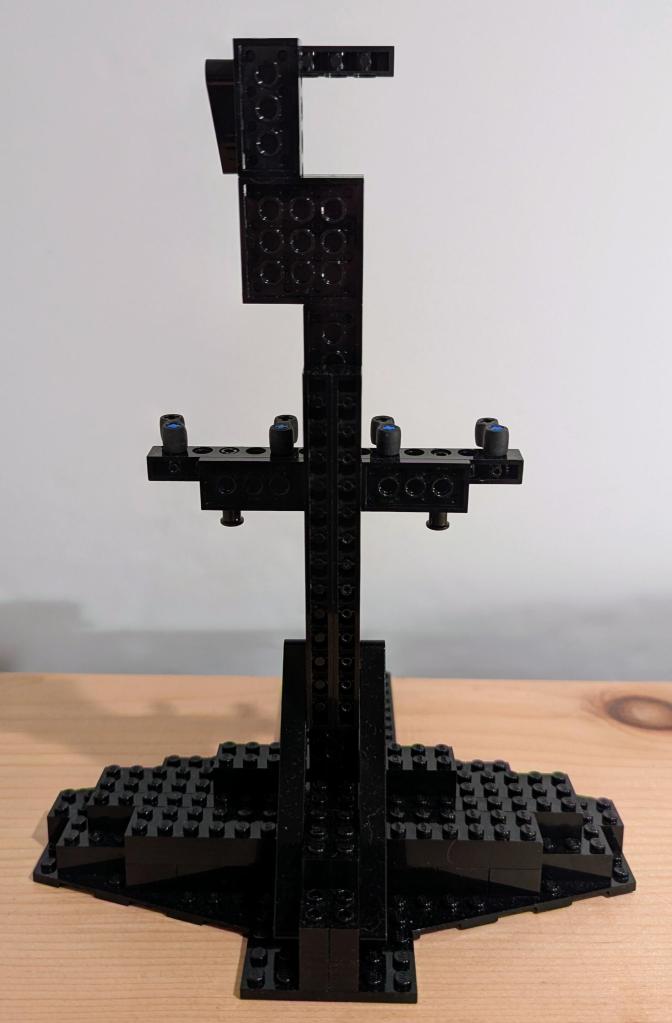
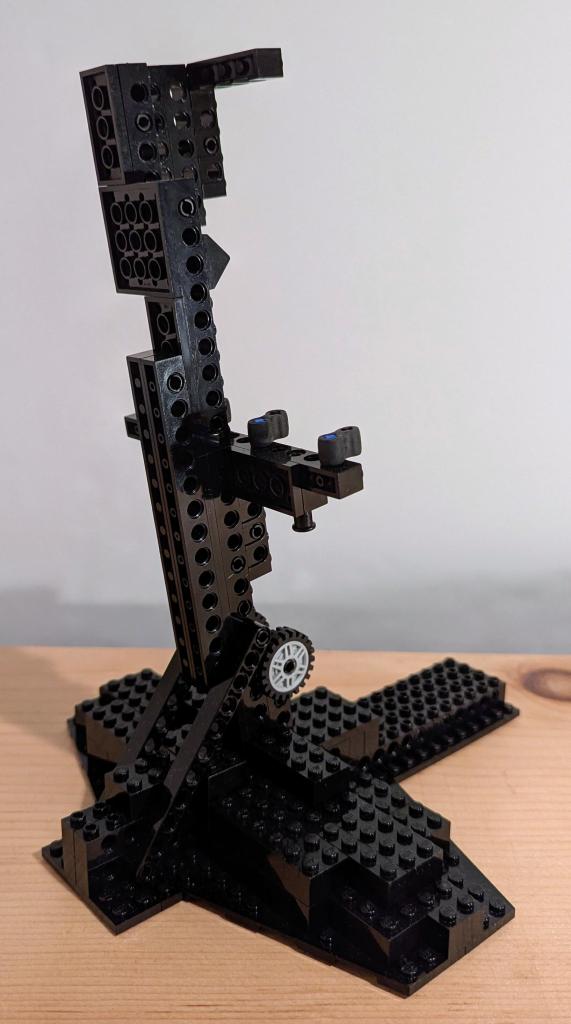
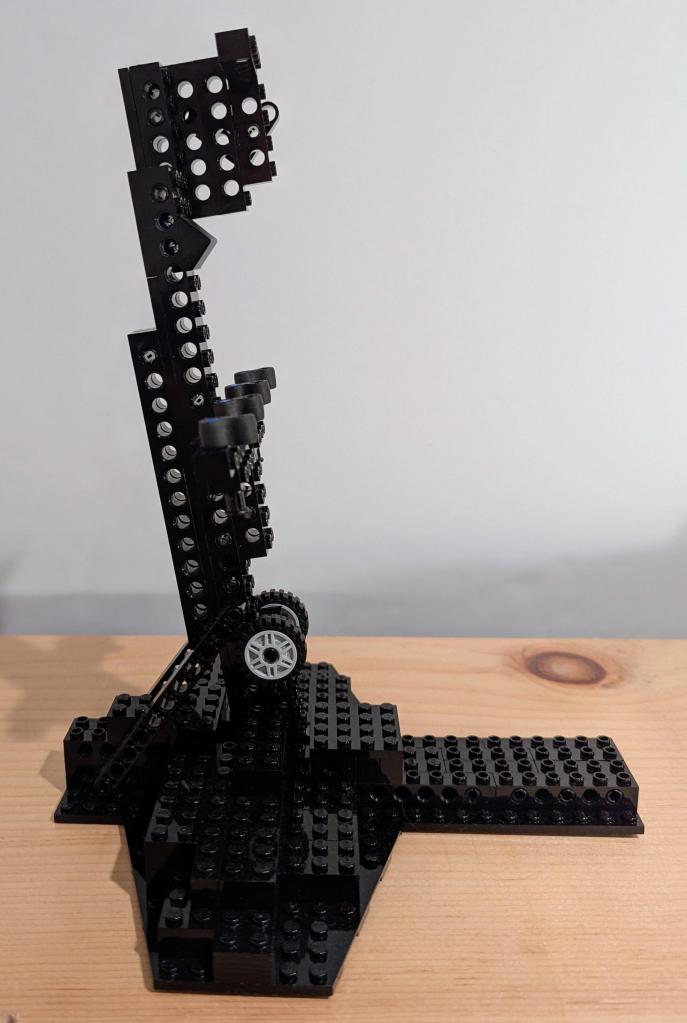
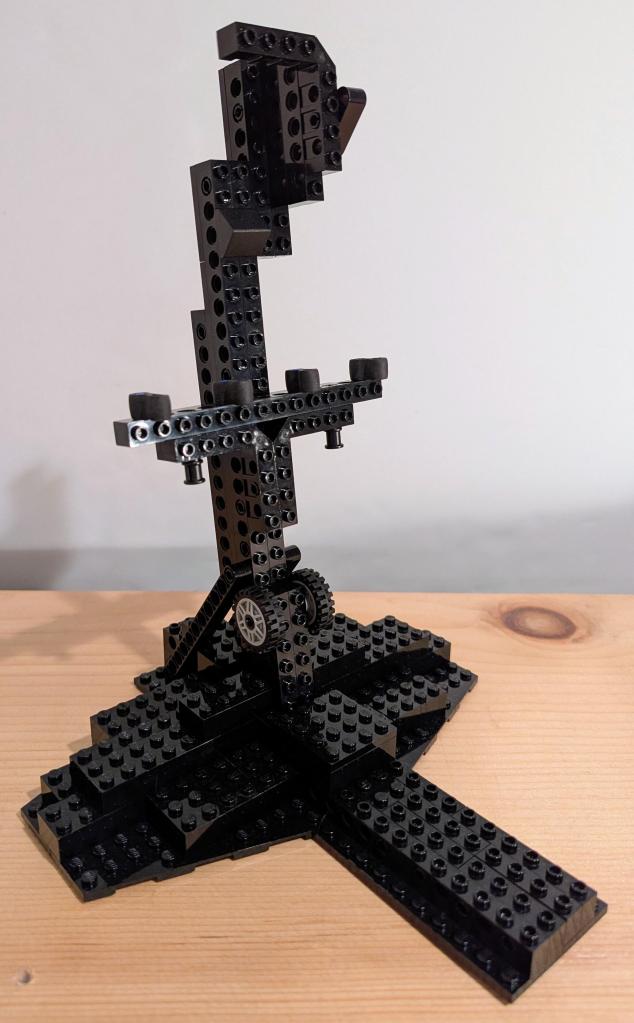
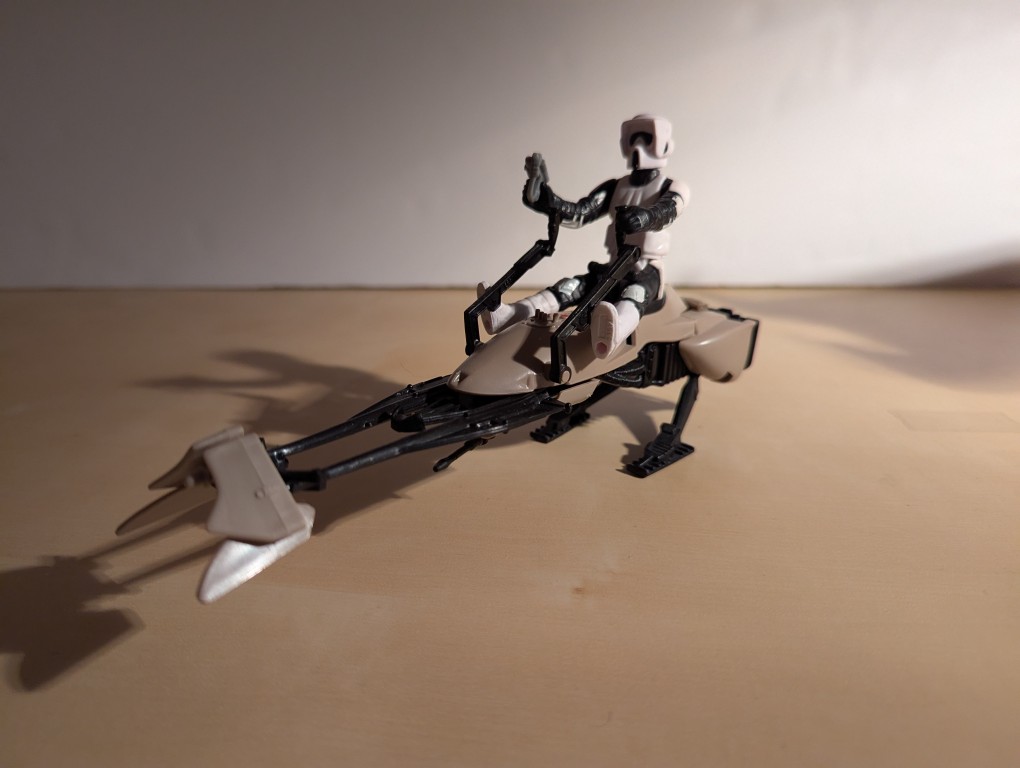
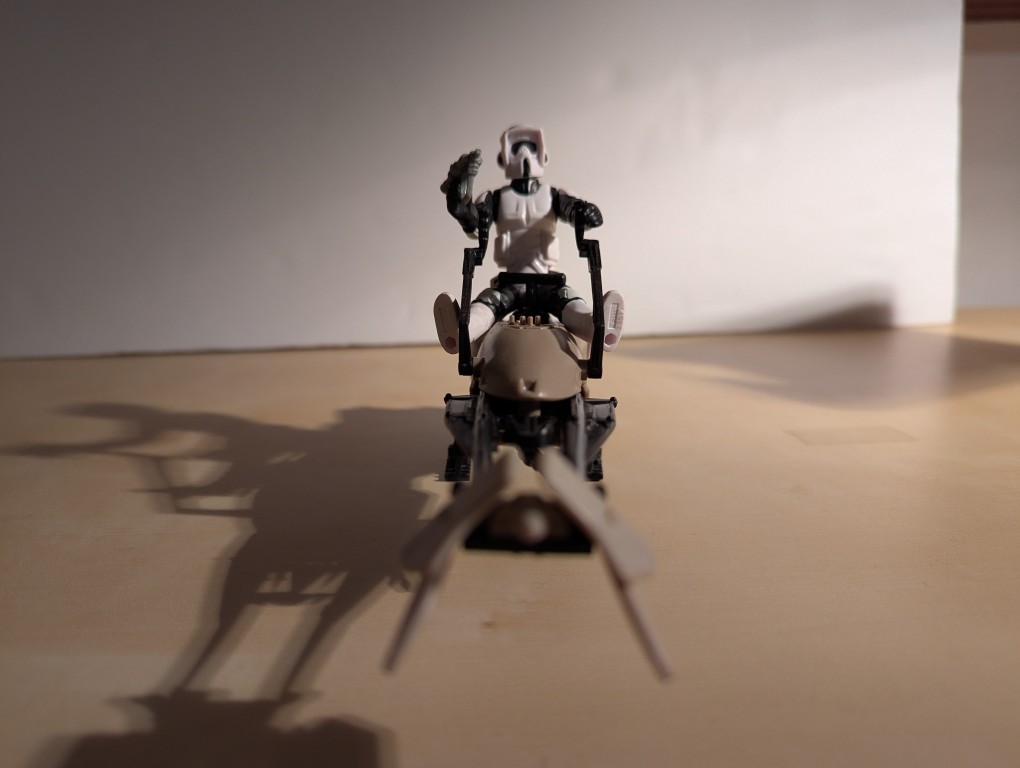
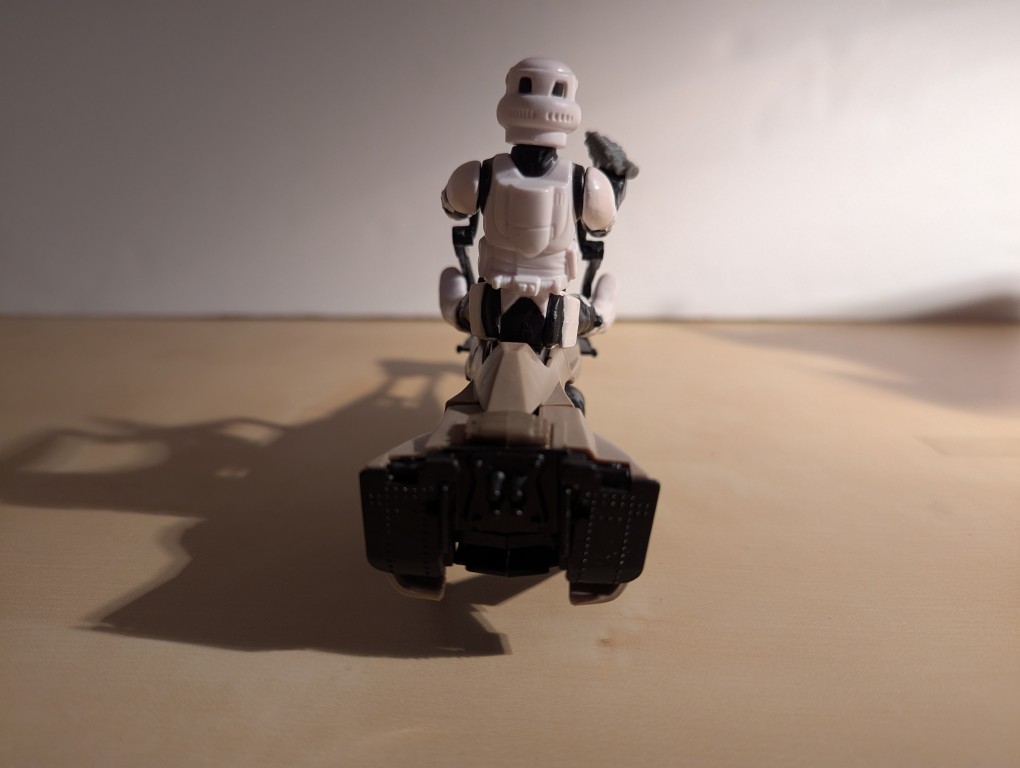
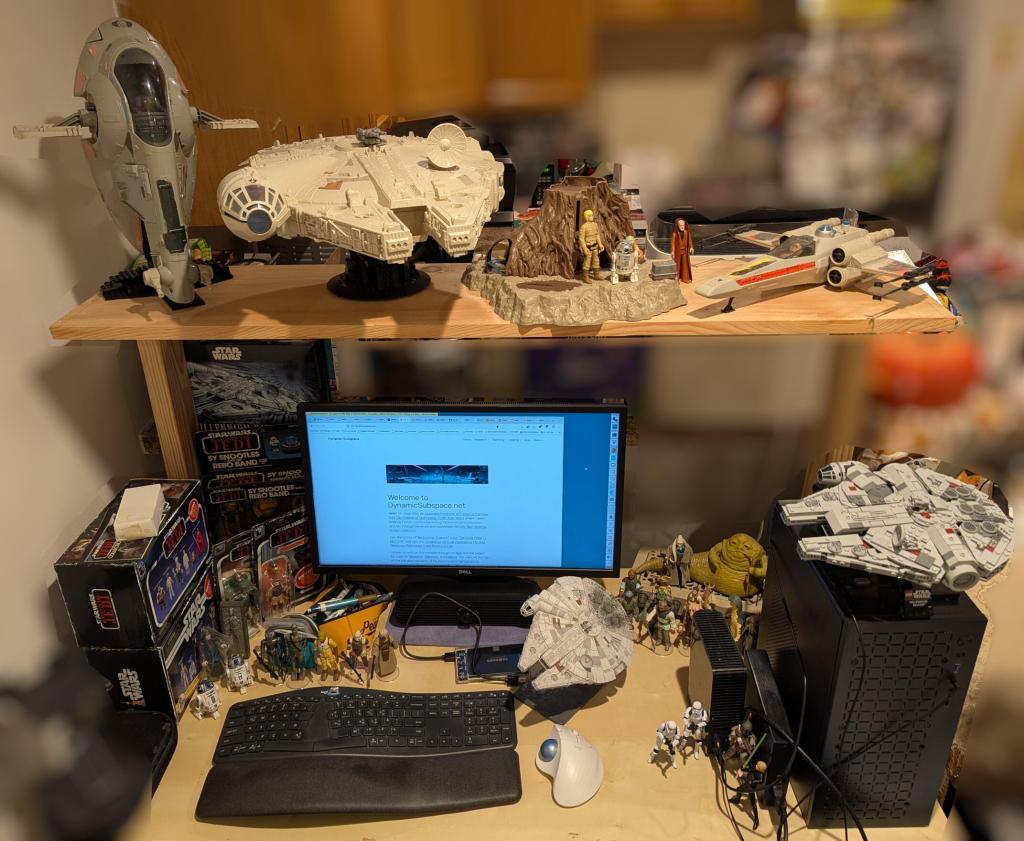
EVGA nVidia GeForce GTX 1060 6GB Video Card Upgrade, Incredible Graphics in Games and Simulations

IMG_20180816_151648

When I built my desktop PC last year, I opted for a low-end video card, because my graphics requirements were modest and it helped keep the cost of computer parts down. Since then, I’ve wanted to experience a better visual experience on my computer in games and graphics simulations, meaning more detail and effects, and higher frame rates at 1080p resolution.

IMG_20180816_152457

Unfortunately, video card prices were outrageously inflated due to high demand from Etherium and other easy-entry cryptocurrency miners. With the welcome crash of electricity-wasting cryptocurrency markets and the anticipated announcement of a new generation of video cards from nVidia, the prices of video cards began to return to lower prices, which prompted me to begin looking for an upgrade.

IMG_20180816_152530

Considering that I have a 400-watt EVGA PSU and my monitor is 1080p, I focused on nVidia’s GeForce GTX 1060, because despite its Pascal architecture’s very modest power requirements (recommended 400 watt PSU and 6-pin PCIe auxiliary power), it pushes very high-quality graphics at 1080p resolution. While the 3GB model was less expensive than the 6GB model, I chose the latter, because it has more CUDA cores (1280 vs. 1152), more texture mapping units/TMU (80 vs. 72), and more streaming multiprocessors/SM (10 vs. 9). These enhancements coupled with twice as much GDDR5 video ram justified its slightly higher price for better performance and hopefully greater use lifespan. I went with EVGA’s single fan version of the 1060, because I have had good experiences with their products and I appreciate their streamlined, unostentatious, and quiet design on this video card.

3dgraphicsmark-1060

After purchasing the GeForce GTX 1060 6GB video card for $280 from Microcenter and installing it in my PC, I stress tested it and ran benchmarks to verify that everything was okay after the upgrade. As you can see above, it scored a 3D Graphics Mark of 10684, which is more than twice as high as the 3,954 scored by my old Radeon RX 550 4GB video card.

ffxiv-heavensward-1060-2

In the Final Fantasy XiV Heavensward benchmark, the GTX 1060 GB scored an 11,797 at 1080p, while the RX 550 4GB scored only 4,416 at the same resolution.

Desktop Screenshot 2018.08.24 - 14.32.17.07

In the Docking Bay 94 Unreal Engine 4 simulation, I get well over 40 fps with the settings maxed out at 1080p. Read about how the simulation was made and find download links on 80 level.

Star Wars Battlefront II (2017) Screenshot 2018.08.24 - 15.28.51.41

And, I get to fly the Millennium Falcon in EA’s Star Wars: Battlefront 2 video game. While the game’s graphics are amazing, I was reticent to purchase it after its launch debacle with in-game purchases and loot crates. Thankfully, EA backtracked on those things after the gaming and Star Wars fan communities collectively denounced these greedy and unethical practices.


Destiny 2 Screenshot 2018.08.24 - 15.39.36.50

Finally, EVGA’s current video game promotion includes a free copy of Destiny 2 with the purchase of a GTX 1060 or higher video card. After redeeming my copy, I’ve played a little of it, and I like it. I’m a big fan of the original Halo by Bungie, and this game reminds me of that game without the story relying on a single archtype hero, such as Master Chief. In Destiny 2, you can create your own character based on class (Titan, Hunter, or Warlock), species, sex, and appearance. For my first experience in the game, I created a Hunter. The GTX 1060 6GB video card makes this game run smooth and look beautiful at 1080p.

Overall, I’m very glad that I made this upgrade to my PC. If you’re considering an upgrade now rather than waiting for nVidia’s recently announced RTX line of video cards, I strongly recommend the GTX 1060 6GB as a lower cost, high performance video card.

LEGO Playset MOC of Temple Island on Ahch-To in Star Wars: The Last Jedi

IMG_20180218_133943.jpg

Inspired by LEGO’s Death Star playset, which is both enormous and scene-focused, I built a 64 x 32 stud MOC of Temple Island on Ahch-To from Star Wars: The Last Jedi. First glimpsed at the end of The Force Awakens and explored in the latest installment, Temple Island is the home of the first Jedi Temple, and it is where Luke Skywalker has been hiding away during the rise of the First Order under the leadership of Snoke and supported by Luke’s former pupil, Ben Solo or Kylo Ren.

As a LEGO playset, it has to balance accuracy, playability, and scale. For accuracy, I based the island’s shoreline on Ireland’s Skellig Michael, which is the location where these scenes were shot for the film. Also, the island’s topography were adhered to as closely as possible by having the north peak slightly lower than the higher south peak, and designing a middle valley between the two peaks, known as Christ’s Saddle on Skellig Michael. Each major scene involving Temple Island has been placed approximately where it would be on the island according to The Art of The Last Jedi and my observations of the film. And, each scene is scaled for play with LEGO minifigures, except where the Millennium Falcon lands along the shoreline, which would otherwise dwarf the island or require building a much larger model! For this element of the MOC, I used the Falcon included in last year’s LEGO Star Wars Advent Calendar (75184).

Including all prep time, this build took me about 40 hours. In addition to studying books and magazines that showed glimpses of Temple Island and its topography, I watched YouTube videos such as these: one, two, and three. I leveraged Gimp’s grid rendering to plan the overall design based on a Google Maps’ satellite image of Michael Skellig. Also, I purchased additional LEGO to supplement what I already had on-hand: two 32 x 32 stud blue base plates to construct the MOC on, one green Creative set (10708), and two LEGO Ahch-To Island Training sets (75200).

Below, I am including highlights from the construction process and the completed model. At the end, there are links to these albums with more photos of the MOC: Google Photos and Imgur.

Designing the Shoreline Using Google Maps, Gimp, and Generated Grid

IMG_20180213_223514.jpg


Top and Side Views of Temple Island

IMG_20180218_134351.jpg

IMG_20180218_142459.jpg

IMG_20180218_143054.jpg


Rey’s First Encounter with Master Skywalker

IMG_20180218_142905.jpg


Luke Skywalker’s Hut and Village

IMG_20180218_160654.jpg


Rey’s Lightsaber Practice (at the Wailing Woman Rock)

IMG_20180218_142523.jpg


The Sacred Jedi Texts Within the Uneti Tree

IMG_20180218_143109.jpg

IMG_20180218_143125.jpg


The Jedi Temple and Meditation Rock

IMG_20180218_134836.jpg

IMG_20180218_134953.jpg


Rey’s Visit to the Mirror Cave

IMG_20180218_143030.jpg

IMG_20180218_134258_1.jpg


Portability of the Model 

IMG_20180218_135109.jpg


View more photos of the model and its development on Google Photos or Imgur.

New LEGO Millennium Falcon 75105 Customization with The Last Jedi Update

millennium-falcon-custom

Over the years, I’ve built several customized LEGO Millennium Falcons (including here and here). I like taking the stock models and making them more screen accurate combined with imaginative embellishment. With this customization of a stock 75105 Millennium Falcon, I initially tried working this model that I had built about a year ago. However, I got really frustrated trying to work out how to implement some of the customizations that I had in mind. So, I disassembled the model and rebuilt it. Doing this helped me remember the logic of its design and construction, and it enabled me to rebuild some of its foundational features more easily than the piecemeal way I first attempted to do. The way that I did this rebuild also jumped around the instruction booklet, because the LEGO process of building is generally height-by-height across the whole model. I needed to focus on the modular aspects of the model, which is helped by building each module (circumferential ring, cockpit, docking ports, etc.). Due to rebuilding it from the ground up, this project took several days. Scroll through this blog post to view detailed photos and descriptions of this customization.

Cockpit and Mandible Details

Taking inspiration from Flail’s Millennium Falcon mods on Brickshelf, I rebuilt the cockpit with chairs and control sticks. This looks really nice, especially with the windows affixed. However, the chairs don’t work with Chewbacca’s minifigure. 75105 includes a Brick 1X4 W. 4 Knobs on either side of the fore mandibles. The side studs invite customization, so I added extra detail to these.

IMG_3027 1.jpgIMG_3028 1.jpgIMG_2997 1.jpgIMG_3029 1.jpgIMG_3030 1.jpg

Gun Turrets, Dorsal Vents, and Ventral Covering

Inspired by Flail’s mods on Brickshelf again, I built these lower profile top and bottom guns. I beefed up the dorsal venting system by putting Plate Round 4X4 With Ø16Mm Hole with a Plate 2X2 Round in its center. The Disk Ø24 with vent sticker connects to the round plate in the center. The bottom of the falcon is buttoned up with plates covering the Technic support system–some of which I modified to remove the arm underneath the cockpit support system and added a staggered rounding to the four corners.

IMG_2994 1.jpg

IMG_3035 1.jpgIMG_3040 1.jpgIMG_3021 1.jpg

IMG_2993 1.jpgIMG_2996 1.jpgIMG_2995 1.jpg

Main Hold Entrance, Nav Computer, and Dejarik Table

Using 1×1 roof tiles and an upside-down technique that I developed for a diorama of the Falcon’s main hold, I built this entrance into the main hold leading from the passage way from the entry ramp. The Dejarik Table and seating is borrowed from 75192. The Nav Computer area is very tight in the size of this model, so I couldn’t fit as large tubes adjacent to it as in the diorama linked above. Instead, I used two short tubes and moved the Nav Computer one stud to the left to accommodate the Falcon’s machinery. The main hold’s med bay is raised to accommodate a drawer, which I detail further at the end of this post to avoid The Last Jedi spoilers for anyone who hasn’t seen it yet.

IMG_3022 1.jpg

Millennium-Falcon-mainhold-entrance.jpgIMG_3018 1.jpgimg_3017-1.jpgIMG_3016 1.jpgIMG_3015 1.jpgIMG_3014 1.jpgMillennium-Falcon-mainhold-tfa.jpg

Port and Starboard Docking Ports

One disappointing aspect of the 75105 model is the docking ports. It sandwiches 1×2 plates between two Plate 6X6 Round With Tube Snap and covers that with two Plate 2X4X18°. The trouble with this design is that it doesn’t really show the cone-like taper of the docking ports. Earlier Millennium Falcon sets 4504 and 7965 did a better job with the docking ports. I decided to keep 75105’s sandwich to give the ports height, and then built up a capped tube circled by 1×2 plates each topped with a Roof Tile 1 X 2 X 2/3, Abs.

IMG_3042 1.jpgIMG_2991 1.jpgIMG_2989 1.jpg

Wall Tile Extensions Around Circumference

The Millennium Falcon dorsal and ventral domed covering extends over the circumferential edge. The 75105 model comes with 1×6 flat plates to demarcate this edge overhang, but it doesn’t really look right. I picked up a lot of Wall Element 1X2X1 on Bricklink to replace these 1×6 flat plates. In addition to showing this circumferential trench around the edge of the Falcon, it gives the model an overall flatter look, which emphasizes the Falcon’s on-screen appearance.

IMG_3033 1.jpgIMG_2992 1.jpgIMG_3040 1.jpg

Engine Compartment

Instead of the Falcon having a monolithic motor, it seems more likely that it would have a segmented, modular aerospike engine. With this in mind, I designed the engine compartment to have a ring of engine modules with supporting hardware, cabling, and pipes. I created a larger, ringed passage way with an entrance way leading into the engine compartment.

IMG_3025 1.jpgIMG_3023 1.jpgIMG_3013 1.jpgIMG_3012 1.jpgIMG_3011 1.jpgMillennium-Falcon-aft-engineroom-entrance.jpgMillennium-Falcon-aft-engineroom-sideview.jpgMillennium-Falcon-aft-passageway.jpgIMG_2999 1.jpg

Entrance Ramp and Other Compartments

I stole the hydraulics from 75103: First Order Transporter and added to the Falcon’s entrance ramp (which makes the ramp look like the Kenner Millennium Falcon vehicle from the original Star Wars action figure line). Also, I shifted the entrance ramp one stud out from the central gunner turret assembly. There are two side compartments–one for storage with weapons in a crate, and one for another bunk (with a copy of the Death Star plans).

Millennium-Falcon-entryramp-interior-down2.jpgMillennium-Falcon-entryway-interior-down.jpgMillennium-Falcon-entryramp-exterior-down.jpgMillennium-Falcon-aft-storeroom.jpgMillennium-Falcon-aft-sleep-compartment.jpg

New Engine Exhaust and a Little Joke

Instead of using the ribbed, transparent blue tube that comes with 75105, I opted for white tile backgrounds covered by transparent blue flat tiles (1×2 and 1×4). As a hidden joke, I included a trailer hitch under the engines (isn’t the Millennium Falcon is a big rig in the stars?).

IMG_3038 1.jpgIMG_3039 1.jpg

The Last Jedi Update

At the end of The Last Jedi, Finn puts Rose in the Millennium Falcon’s med bay in the main hold. The camera focuses on the drawer under the bed when Finn looks for a blanket. The audience realizes that the drawer also contains the Jedi books on Ahch-To. To represent this, I raised the med bay, added a drawer beneath, and included a book (from The Hobbit set #79003: An Unexpected Gathering).

IMG_3024 1.jpgIMG_3020 1.jpgIMG_3019 1.jpg